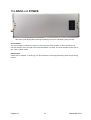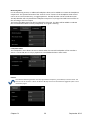
1
REFERENCE MANUAL
AND
OPERATING INSTRUCTIONS
NAGRA Seven
Audio Technology Switzerland SA, Chemin de l’Orio 30A, 1032 Romanel-sur-Lausanne, Switzerland. Tel :+41 21 643 7240
Web : www.nagraaudio.com e-mail: [email protected]
GUARANTEE / WARRANTY
AUDIO TECHNOLOGY SWITZERLAND certifies that this instrument was thoroughly inspected and tested prior to
leaving our factory and is in accordance with the data given in the accompanying test sheet.
We guarantee the Nagra Seven and products of our own manufacture against any defect arising from faulty
manufacture for a period of TWO years from the date of delivery.
This guarantee covers the repair of confirmed defects or, if necessary, the replacement of the faulty parts,
excluding all other indemnities.
All freight costs, as well as customs duty and other possible charges, are at the customer's expense.
Our guarantee remains valid in the event of emergency repairs or modification being made by the user.
However we reserve the right to invoice the customer for any damage caused by an unqualified person or a
false manoeuvre by the operator.
We decline any responsibility for any and all damages resulting, directly or indirectly, from the use of our
products.
Other products sold by AUDIO TECHNOLOGY SWITZERLAND S.A. are covered by the guarantee clauses of their
respective manufacturers. We decline any responsibility for damages resulting from the use of these products.
We reserve the right to modify the product, and / or the specifications without notice.
Chapter I
1
September 2013
ABOUT THIS MANUAL
This instruction manual is broken down into several chapters. Each chapter covers different aspects of the
Nagra Seven recorder, the settings, actual use, eventual problem localisation and technical specifications.
Chapter I
The “POWER”
Chapter II
The “EXTERIOR”
Chapter III
Part 1
The “INTERIOR”
HOME / MENUS
Part 2
The AUDIO
Part 3
The SETTINGS
Part 4
Part 5
The TEMPLATES
The MEDIA
Part 6
The METADATA
Part 7
The TOOLS
Chapter IV
Part 8
Part 9
Part 10
Part 11
Part 12
Chapter V
Chapter VI
The “EXTRAS”
TIME CODE
WiFi / 3G
I.S.D.N.
Compression
Audio Editor
SOLUTIONS
SPECIFICATIONS
ANNEX I
ANNEX II
ANNEX III
GUARANTEE / WARRANTY
ABOUT THIS MANUAL
INTRODUCTION TO THE NAGRA Seven
Battery packs, Fuses, Mains powering, Charging Power
indication, RTC / TC powering, Lithium battery care.
Left side (input) panel, Right side (output) panel
Operational Front side Back and POWER.
THE OPERATIONAL SECTION
Geneal overview of the touchscreen display, Home screens
and menu access.
AUDIO MENU, Input matrix, Analog inputs / selection,
Analog levels, AES, Slate Microphone, Digital filters, ALC /
Limiters, Outputs,Monitoring, Loudspeaker, Reference
generator, Meters, Mic. display scale.
SETTINGS MENU, sampling freq., clock ref., Pre-record,
Auto-skip in playback, Start stop polarity, File format File
type, File name / size, Pot. assignment, Display settings,
Icon selection.
Page 7
Page 14
Page 14
Page 20
Page 27
Page 32
MEDIA MENU, Directory, Folder, Drive, COPY functions, Page 33
Autocopy and copy manager
iXML METADATA, False start, Wild track, Pick-up scene, Page 38
data entry
TOOLS MENU, Re-format, Time / Date (RTC), Misc. Machine Page 41
name, Keyboard Layout, (Auto folders), About.
Hardware and sofware options – Overview
Time code system: Frame rates, Internal generator, TC Page 43
playback, pull up/down, TC display, TC rec, TC menu
TEMPLATE MENU, Data entry
Error messages and problem solving
Full technical specifications
Recording times
ALC / LIMITER detailed explanations
iXML implementation
Alphabetical index
Chapter I
Page 1
Page 2
Page 3
Page 4
2
Page 49
Page 52
Page
Page
Page
Page
September 2013
From the leader and inventor of portable audio recorders,
Audio Technology Switzerland is proud to introduce:
The all new and universal Nagra Seven
The NAGRA Seven is a 2-track, 24-bit digital recorder offering sampling frequencies up to 192kHz,
with analog and digital inputs and outputs on XLR connectors, and AES 42-ready for digital
microphone applications. Standard features include full iXML metadata, USB 2.0 and Ethernet ports,
and a docking battery pack. The principal recording media is an internal 16GB memory backup with
removable standard SD cards. Hardware options include SMPTE/EBU Time Code or I.S.D.N. codec,
WiFi/3G communication and a rechargeable lithium-ion battery pack. Two software options for
audio compression and on-board audio editing are also available.
Our aim is quality, not quantity – adding tracks seems to be easy and inexpensive to
manufacturers. Our concept was to build a portable, high-quality two channel recorder that offers an
intuitive interface with modern features never seen in any other battery operated over-the-shoulder
recorder, and with a modular design allowing it to be a NAGRA Ninja adapting to a multitude of
field applications.
To make it more practical and more reliable – we added a sunlight-readable color touchscreen,
combining the metering and information display with a practical touch control of the operating
system. The main transport functions are still implemented with the familiar rotary Nagra main
function selector, a unique design that is less susceptible to accidental switching than the common
hardware devices.
To clean and simplify the audio path – audio limiters, automatic gain control and equalization are
achieved through a dedicated Digital Signal Processor. The principal advantages are enhanced and
cleaner AGC, to have limiter and filter processing with the possibility of adjusting more
parameters, and due to less electronics in the analog audio signal path – achieve better microphone
preamplifiers !
Software updates will be available, from time to time, through our website
www.nagraaudio.com offering system upgrades and additional new features as they become
available. Please use the contact form from our website for any questions or comments you might
have about the
NAGRA Seven
Versatile – like a Swiss Army Knife
and again – very user-friendly !
AUDIO TECHNOLOGY SWITZERLAND
Chemin de l’Orio, 30A
CH-1032 ROMANEL-SUR-LAUSANNE
SWITZERLAND
Tel : +41 21 643 7240
Fax : +41 21 641 7532
[email protected]
www.nagraaudio.com
Chapter I
3
September 2013
THE POWER
CHAPTER I
YOU NEED POWER FIRST
Introduction
The Nagra Seven is delivered with an empty battery box, into which 8 rechargeable “AA” cells can be
installed. The running time depends upon the type and capacity of the cells used, as well as the
operating mode of the recorder. Some approximate times are shown below:
Battery type
Capacity
NiMh
Lithium Polymer
Dry Cells
2500 mAh
3200 mAh
Approx. Running time (w/o
options)
5h
8h
2h45m
The above trials were made with fully charged cells, with the recorder in continuous Record mode with using
dynamic microphones and time code running and the display set to “dimmer” mode.
The optional 3200 mAh lithium-polymer rechargeable pack is available (Part Number # 70 19166
000) can also be used giving an autonomy of about 8 hours. External DC can also be used by
connecting the supplied, wall-mount charger to the DC connector of the removable battery
compartment. The use of standard “AA” cells is not recommended as their discharge rate will exceed
the specifications of the cells. However, they can be used in an emergency, but will be drained quite
quickly.
Fuses
The power supply board is mounted on the rear panel board and is accessible in the bottom of the
recorder by removing the lower panel. There are 2 fuses F1 and F2 in the external power line and
battery power line respectively. These fuses are of the OMF 63 type and manufactured by Schulter
and do not require soldering. Replacement fuses are available through your Nagra agent.
Replacement fuses part number:
F1 & F2 # 54 82001 500
Mains power unit
The N7-PSU (KSA# 20 19180 020) external mains power unit supplied with the Nagra Seven is a 100 240V 50/60Hz supply with a rated output of 15V 2A.
The Nagra Seven can be operated while the mains power is connected to the battery box on the rear
of the machine without danger, and it will supply enough energy to power the recorder and
recharge the attached pack at the same time.
Chapter I
4
September 2013
Charging of the battery packs
The detachable battery boxes are fitted with an LED to indicate when the battery is being charged.
No harm will be caused to the lithium packs if the external charger is left connected as they cannot
be “Overcharged”.
Removable battery box for “AA” size cells
Charging times
N7-BB1 3.2 Ah Lithium Polymer battery pack is approximately 5 hours
Power indication
The top line of the main display shows a “fuel gauge” type charge indication of a battery at all times.
Different indications show the various status positions of the batteries:
When the background of the fuel display turns RED this indicates that there is approximately 10
minutes of power remaining.
When the curved “flash” is present, this indicates that external DC power is present on the dc
connector of the battery box
- Battery full
- Half-full battery
- Battery pack almost exhausted (Icon will flash)
- External Mains power connected to the battery box (charging)
Note: All times and durations indicated in this section assume that the phantom powering is OFF
and that options such as WiFi are not in use. In addition it is assumed that the battery
elements are in good condition and are fully charged.
Chapter I
5
September 2013
Time Code and Real Time Clock (RTC) powering.
The power supply circuit of the Nagra Seven is equipped with a “super capacitor” which is designed
to maintain the time of the internal RTC and the time code clock (If TC option is fitted) for about 10
minutes if the battery of the recorder is removed. This ensures that the time code will remain
accurate while the battery pack is replaced. If the date and time is lost, then it will automatically be
requested when the next power on is made.
Note: The external DC supply can be connected and disconnected at any time without any
interference even during recording.
Lithium-Polymer battery life and care
Lithium-Polymer battery packs will last for between 500 and 1’000 charge cycles before being
replaced, which if correctly cared for, in the case of a Nagra Seven would represents about 5 years or
so of normal operation. However there are some important points to be made concerning the
“housekeeping” of such packs, to guarantee their best performance.
Contrary to NiCd packs, the most damaging event that can happen to a Lithium pack is for it to
discharge completely. If this happens it is very likely that the pack will be irreparably damaged. In the
Nagra Seven the software will close the recorder down well before the battery pack gets to a critical
charge point thus protecting the cells. In addition, a security circuit inside the pack itself will also cut
in should the pack get too drained, however in any event running the battery flat is strongly
inadvisable.
It should be remembered that even with the recorder turned OFF, the internal real time clock and
Time Code circuit (if fitted) WILL CONTINUE TO DRAW POWER from the pack. The time code circuit
alone will completely drain a fully charged pack in about 1 month.
A Lithium-Polymer pack will have a longer lifetime if it is regularly recharged (even when half full). It
is not possible to “overcharge” the pack. Unlike a NiCd battery, the “memory” effect does not exist
with Lithium-Polymer packs.
A charged battery pack, in good condition, can be stored, disconnected from the recorder, for a
period of 1 year without risk. If one wishes to store a Lithium pack for an extended period at room
temperature (a year or more) then ideally it should be charged to about 50-70% before storage
(suggested by the manufacturer). In such a case, after 1 year the pack will have lost about 4% of its
total capacity, whereas if the pack is charged to 100% before storage, after 1 year it will have lost
nearly 20% of its total capacity. (At lower storage temperatures, this effect is minimized). One should
always verify from time to time that the pack remains at around 50% and recharge a little as
necessary.
So remember:
-
Chapter I
DO NOT store the Nagra Seven for long periods with the battery box attached.
NEVER allow the pack to be drained completely.
ALWAYS keep the battery charged as no harm will occur.
6
September 2013
CHAPTER II
THE EXTERIOR
LEFT INPUT SIDE PANEL
MIC / LINE Input connectors
These transformerless inputs can be used for both dynamic and
condenser microphones or as analog line inputs. The sensitivity for
the different microphone input sources is selectable from 2.8 mV/pa
to 40 mV/pa in the audio settings menu. When used for analog line
inputs, they will accept up to +24 dB.
The pinning of the connectors is the standard 1 = Ground, 2 = High,
3 = Return (Lo)
AES connector
The AES input connector is used for digital AES input signals. This
selection is made in the menus. The AES input is a standard AES 31
stereo audio input. This connector is also used for a digital
microphone according to the AES 42 format. The digital inputs are
fitted with an internal SRC (sample rate convertor) to ensure
accurate synchronization is possible at all times.
SD Flash card Slot
This slot permits the use of removable SD memory cards. The Nagra
Seven will accept SD, SD-HC (4 – 32 GB) and SD-XC (32+ GB) type
cards.To remove the SD card, press directly on the end of the card
and it will eject. Micro SD cards may also be used with the
appropriate adapter.
The LED to the left of the slot will light when the card is being
addressed. It is recommended to format removable cards using the
Nagra rather than a PC, to guarantee optimized performance. The
machine does not need to be powered down to insert or remove an
SD card they can be “hot swapped”.
Chapter III
7
September 2013
Ethernet Connector
The RJ45 Ethernet connector is use to connect the NAGRA Seven to
the internet and allows file download and is planned to permit
streaming of live audio in the future. The yellow led in the connector
will light when an active ethernet cable is connected and the green
led will light when communication data is being transmitted.
Currently this connector is for internal R+D use only.
USB port
The Micro USB connector is of the A/B style, and serves not only as a
slave port, allowing the Seven to be connected to a computer and
appear as an external device, but via the appropriate adapter (Part
number 2070119000) it can be used as a host port and can accept
an external device such as a keyboard, mouse or a USB thumb drive.
Start / Stop connection
This miniature 3.5mm jack is a remote start / stop connection or
“fader start”. It is a simple contact closure and activation is achieved
by making a short-circuit between the terminals. The “polarity” can
be selected in the menus, and if the position “Inverted” is selected,
then the function will be activated when the connection is shorted
out as opposed to “open”. The function depends on the position of
the main function switch. In the record position, it will switch
between record and test modes. If the pre-record function is active
then the start / stop will switch between record and Pre-record. In
playback it will switch between playback and stop.
Chapter III
8
September 2013
RIGHT OUTPUT SIDE PANEL
The right side panel of the recorder is different depending on the version of the recorder. There is
one panel for the standard version without any internal options, another for the time code version
and a third one for the ISDN version, both of the latter two are also available with the 3G / WiFi
option. (version pictured has both Time code and WiFi / 3G installed)
AES Output connector
The 3-pole male XLR AES output connector is a digital output
corresponding to the format of the AES bus used throughout the
professional audio industry. The resolution is of 16 or 24 bits
depending of the current machine settings, and if the machine is in
24-bit mode this output can be redithered to 16 bits to feed a lower
resolution device. This liason allows direct connection to any other
digital equipment fitted with an AES-31 interface.
Line Output Connectors
These two 3-pole XLR connectors are the standard analog audio
transformerless symmetrical floating outputs. The output level on
these connectors is adjustable from -6 to +15 dBu for 0dBFS on the
meters.
Chapter III
9
September 2013
Time Code Lemo Connector
The time code input and output is located on a traditional 5-pole
LEMO connector, the pinning of which corresponds to that of all
previous Nagra TC models.
(QCTCU cable # 70 16909 000 – LEMO to “open-ended” TC cable)
WCK IN / OUT
The two BNC connectors form part of the TC option and are the
standard external word clock refernce connectors for locking the
Nagra to an external reference and for supplying such a reference to
other equipment. Other reference signals such as PAL / NTSC video,
HDTV references are also fed to the recorder through the WCK IN
connector, in video applications.
WiFi / GSM
These are the antennae connections that form part of the WiFi /
GSM option. A pair of antennae is delivered with the option. The
gold antenna is for the WiFi and the steel (Silver) antenna is for the
3G communication.
Replacement GSM antenna: 2019 XXX 000
Replacement WiFi antenna: 2019 XXX 000
I.S.D.N.
The RJ45 connector is part of the I.S.D.N. system and is only
available on machines equipped with this option. This is where the
ISDN line is connected to the NT.
Chapter III
10
September 2013
The OPERATIONAL FRONT PANEL
MAIN DISPLAY SCREEN
The Nagra Seven uses a 3.5” color TFT touchscreen display. Its resolution is of 270 dpi giving precise
definition and excellent resolution (a standard computer screen generally has a resolution of around
70 dpi).
It is a “resistive” touchscreen, meaning that it activates when gently “pressed” or “tapped” using a
finger or pointer stick and can thus be manipulated using gloves which is more difficult with a
“Capacitive” touchscreen (as used on mobile smartphones and tablet devices). The touch feature is
adjusted so that the action is effective when the touch is released rather than at the moment the
screen is touched which gives a more user-friendly feel to the functions. Operation is easier using a
pointer stick if possible to get the best response from the sensors. As the display is the heart of the
communication interface between the user and the recorder, the screens and different functions are
explained in detail in chapter III of this manual.
Main function selector
The 5 position rotary main function selector is used for the principal transport
functions of the recorder, in the traditional Nagra manner. It should be noted that
the transport icons on the main display will change depending on the position of the
main function selector.
The various function positions of the selector are described below.
OFF:
This is the main power OFF position of the Nagra Seven. None of the circuits of the
machine are powered in this position except the real time clock and the time code
generator (if fitted).
When OFF is selected the main display will show “SHUTTING DOWN” while all the
machine settings are being saved. Moving the selector during this phase will prevent
the machine from stopping but will save all the internal settings of the recorder.
Power OFF is completed 3 seconds after selection but will NOT occur while the
machine is copying files, only once the copy procedure is completed.
TEST:
In this position all the circuits are powered allowing recording levels, audio
monitoring adjustments, menu verification and alteration. This can be considered as
a "stand-by before record" position. If the Pre-record function is active the REC led
flashes and some menu alterations are prohibited. In this position the time code to
be recorded will be fed to the time code lemo output if the TC option is installed.
Chapter III
11
September 2013
REC:
This is the standard position used for recording. When recording, the red led beside
REC position of the main function selector will be alight. Record can be selected at
any time and will take priority over any other function. Some menu settings are
prohibited in the REC position. From full power off to RECORD mode takes about 10
seconds – depending on the number of files on the media. Recording will begin
before the entire booting process is completed.
STOP:
In this position the push-button transport keys are active for rewind, fast forward
and skip functions. Access to all menus and machine settings is also enabled.
In this position the time code output will be frozen at the last value read.
In this position the audio inputs are not fed to the outputs.
PLAY:
This is the principal PLAYBACK position. Playback will start either from its current
position, or from the beginning of the last recorded take if the machine had
previously been in record mode.
In this mode the transport icons for search (4x) and skip can be used as well as the
pause fuction.
In this position the time code from the take being played will be fed to the time code
lemo output.
Slate Microphone
Located towards the top center of the front panel is the internal built-in
microphone, commonly called a “Slate” microphone. It is activated by pressing the
SLATE icon on the main display. It can be programmed to toggle ON and OFF on each
consecutive press or to be active only while the icon is pressed. It can be directed to
one or both audio channels in the menu mode. If the Icon is not present on the
screen then it must be added using the Icon selection menu as this is the only way to
activate the slate mic. The slate mic will only operate at 44.1 kHz and 48 kHz.
Level potentiometers
Two potentiometers located on the front panel can be used for various features
according to their programming in the pot. assign menu. Principally, they are used to
adjust the input sensitivity of the microphone inputs or the line input levels. They
can be ganged together when working in stereo or if a fixed offset between the
channels is to be maintained. Pressing a pot will activate the push-button switch and
this will instantly display the current level adjustment setting of the corresponding
channel on the main display, and will also select the corresponding channel in “Solo”
(Mono) on the headphone output. The pots programming to other functions is
covered in the pot. assign menu.
Headphone connector and level control
The headphone output is a 6.35mm stereo jack connector and its level is adjusted
using the pot. The headphone output level can be digitally boosted in the menu
mode if required by 6 or 12 dB. Pressing the headphone volume button will
temporarily set the headphone output to mono monitoring. This can be
programmed to a toggle mode in the monitoring menu. A “Solo” monitoring of
either channel can be achieved by pressing the corresponding level control at any
time.
Chapter III
12
September 2013
The BACK and POWER
Rear view of the Nagra Seven showing the battery connector and battery fixing threads.
Serial number
The serial number, located on a sticker on the rear panel of the recorder is also burned into the
internal memory of the recorder and cannot be altered or erased. The serial number can be seen in
the “Tools / about” menu.
Battery packs
Please refer to Chapter 1 “Powering” for all information concerning the battery packs and powering
options.
Chapter III
13
September 2013
THE INTERIOR
CHAPTER III
Operational section
PART 1 – HOME SCREEN AND MENUS
The screen or display of the Nagra Seven is the main user interface and has the following tasks:
Display operational information to the user
Display and modify the parameters of the recorder (Menus)
Allow control of the unit as well as communication (Short-cuts)
As the display is the heart of the communication interface between the user and the recorder, the
screens and different functions are explained in detail in the following pages.
There are three principal “home” screens, the contents of which will either change automatically
depending on the operating mode of the recorder, position of the main function selector, or
according to the programming choices made by the user:
Main function selector in the STOP / PLAY position:
Data display screen
Shortcut icons screen
Transport control screen
Changing from one display to the next is done by tapping the upper line of the display (Mode / take /
timer). The three screens will scroll consecutively. To move immediately to a particular screen
“Swipe” to the right will show the transport screen, Swipe to the left for the shortcuts screen and
swipe down for the data display screen.
Chapter IV
14
September 2013
Certain important elements are displayed on all three home screens, irrespective of the choices
made by the user. Along the top, the status bar shows the current time, the recording media and
data folder in use, remaining recording time (according to current file format and media size) and
the status of the battery / power source.
On the second line of the display, the current operating mode, take number and counter / Time code
are also shown all the time and touching the
Icon will enter the MENU mode. Along the bottom
of the display the modulometers for audio levels and hold max are shown.
Main function selector in the TEST position:
False Start / delete last take screen allows the user to indicate that the previous recording was a
false start (button will light red when touched) or to delete the last take.
Main function selector in the RECORD position:
False start / New index screen allows the user to create a false start for the previous take or to
create a new index seamlessly during recording without the need to move the main function
selector.
Chapter IV
15
September 2013
DATA DISPLAY SCREEN
The central part of the screen has three different displays. To change from one home screen to the
next, simply touch anywhere in the upper selection “zone” shown in grey on the picture below.
Current time (RTC)
Selected media and folder
Current mode
Remaining time
Power source /
Battery status
Menus
Selection zone
File data
Status
Modulometers
Chapter IV
16
September 2013
Current time:
Shown in HH:MM:SS format. The internal clock is set in the menu
mode. This is independent of time code (if fitted).
Media / folder:
Shows where the recordings will be stored. The media can be either
the internal micro-SD card (INT) or the extractable SD card (SD) or
usb memory (USB). After the “:” the name of the selected folder on
the current media is displayed, and is where the files will actually be
stored.
Remaining time:
Indicates the remaining recording time on the selected media
depending on the current recording file format and media free size.
Power source / Battery status: EXT : External power supply is connected
LiPo: Lithium Polymer pack
NiMH: Rechargeable cells
DryC: Regular alkaline cells
The battery status icon shows the remaining battery reserve.
Menu mode:
Pressing the
will select the MENU mode.
Status section:
Inputs
Source Phantom Phase
Limiter Filter Track
Analog L (AL) M: Mic +48V NORmal LIM FIL
L
Analog R (AR) L: Line
INVerted
R
Digital L (DL)
Digital R (DR)
10V (AES 42 powering)
File Data:
Shows: Scene name and take number, Notes or File format (in
STOP) or Project name in all other positions.
Modulometers:
Standard level metering over a 50 dB range. Touching on the
modulometer display will show the “Highest Level” or “Hold Max.”
peak level reached since the last reset, and touching / pressing for 5
seconds will reset the “Hold” display to -50dB.
Chapter IV
17
September 2013
PLAYBACK / TRANSPORT CONTROL SCREEN
Transport mode
Transport mode / functions:
Indicates the current mode of the recorder. The transport mode
icon will change when one of the transport keys is pressed. Different
functions are available depending on the position of the main
function selector. The icons will change to blue when selected.
Possible transport functions are:
- Normal playback
- Pause at the current point during play
- Search forward at 4x nominal speed while
in playback or Fast Forward at 128x when in
STOP mode. (not active while recording)
- Skip to next take
- Search backwards at 4x nominal speed
while in playback or Fast Rewind at 128x
when in STOP mode. (not active while
recording)
- Skip to previous take
Chapter IV
18
September 2013
SHORTCUT SCREEN
The final home screen is actually a set of “Short-cuts” allowing the user to jump to specific menus
rapidly, or to activate certain features such as ref.gen, slate mic. or loudspeaker. There are 6 shortcuts available. The short-cuts that are displayed are user-definable in the icon selection menu. The
default short-cuts are those shown below.
Audio
Inputs
Media
Reference
Generator
Tools
Settings
Reference
generator:
Audio signal generator activation icon programmable in level and frequency
in the menu mode. This will turn blue when the reference generator is
active.
Audio:
Access to the audio related features menus of the recorder (Inputs, Outputs,
filters, ALC and reference generator).
Inputs:
Access the input related parameters.
Media:
Access the internal micro SD memory card and the extractible SD card, USB
media, copy settings/status as well as the different folders of each media.
Tools:
Access to features not involved with recording and that are considered as
user tools, such as Date & time, formatting, keyboard layout etc.
Settings:
Access to all other settings of the recorder, such as Sample frequency, File
format, display appearance, beep functions etc.
Slate:
Audio signal generator activation icon. Programmable in level and frequency
in the menu mode. This icon will turn blue whenever the internal slate
microphone is active.
Chapter IV
19
September 2013
Loudspeaker:
Loudspeaker activation icon. It will turn blue when the speaker is active.
Filters:
Access internal programmable digital filters.
Alc/Lim:
Access to the Automatic level control and audio limiters programming.
Outputs:
Access to the audio headphone and loudspeaker outputs programming.
Metadata:
Access to iXML metadata programming.
Templates:
Up to 6 user programmable templates (complete machine parameter
settings) can be recalled rapidly using this short-cut.
Time Code:
Access to the internal time code settings of the machine (if TC option #
71 19185 000 is installed).
ISDN:
Access to the internal ISDN programming menu (if ISDN option #71
19186 000 is installed)
WiFi / 3G:
Access to the communication menu settings (if WiFi / 3G option # 71
19187 000 is installed)
Editor:
On-board graphic audio editor (if Editor option # 70 19180 020 is
installed)
Each of the topics shown here is covered in detail in the MENUs chapter of this manual, along with
all the other menu-driven features.
Chapter IV
20
September 2013
Screen lock
The display of the Nagra Seven can be voluntarily locked by the user at any time to avoid accidental
alteration of settings while in operation.
To lock the display, simply press and hold the
for 2 seconds and the message SCREEN LOCKED
will appear on the top of the display. Pressing on the
icon again will open the UNLOCK window,
press OK to unlock the display.
Chapter IV
21
September 2013
MENU MODE
Like other Nagra models the Seven is structured around a system of powerful user-friendly menus.
However, unlike previous models where the structure was based on a “Tree” where each branch was
dedicated to specific areas, the Nagra Seven’s menus take full advantage of the touch screen and
specific features are grouped together in a similar way as in a modern mobile phone.
To enter the menu mode, press on the
icon
on the main display screen.
Each of the different menu items is covered in
detail below:
Clicking on the individual icons will enter the
respective menus, and the reverse arrow
will return to the previous screen. Holding the
reverse arrow will jump all the way back to the
main display screen.
Chapter IV
22
September 2013
PART 2 - The AUDIO
Audio Menu
The Audio menu is used to set the parameters of all audio related aspects of the Nagra
Seven.
Inputs
Will enter the inputs of the audio menu, giving access to all the parameters related to the
analog and digital audio inputs of the recorder. This menu is split into 5 different sections:
Input matrix
The Input Matrix is used to route the audio to the left and/or right channels. By touching the
different boxes, either input can be sent to either or both channels. The selections can be made for
both analog and digital input signals. The analog and digital “Presets” will reset the inputs to their
default mode of standard stereo.
Chapter IV
23
September 2013
Analog inputs
This screen programs the analog inputs. For each input, the type of source signal (Mic. or Line) can
be selected, and +48V Phantom powering, phase inversion, filters and ALC/LIM can also be chosen. If
the limiters are ganged (Linked) then if one limiter is activated due to a strong signal then the other
channel will activate simultaneously as well.
Analog input selection
For both inputs, the LINE input can be selected as well as a choice of three different microphone
sensitivity positions, as shown below. The sensitivity of a particular microphone can be found in the
respective manufacturers’ documentation, but as a guide, dynamic microphones do not require 48V
phantom powering and have a very low sensitivity and therefore require the most amplification.
Condenser microphones DO need +48V powering and provide a much stronger signal, and will use
one of the other sensitivity settings.
Chapter IV
24
September 2013
Analog levels screen
For each input, the current microphone input levels in dBSPL, or Line input level in dBu can be
displayed. If they are assigned to the pots, then the up/down keys are inactive. If they are not
assigned to a pot then the levels can be adjusted using the buttons. In the example below, the Left
input is selected as a microphone input and assigned to the left pot, while the right input is a line
input and is not assigned to a pot. The right input (Line) can be modified with the UP/DN buttons, or
by using the EDIT LEVEL button (right side of the screen) where the exact value can be entered
directly, as shown in the picture below.
The acronym dBSPL means “Decibels of Sound
Pressure Level” If the modulometer shows and
average of -10dBfs (full scale), and the dBSPL
level on the fuel gauge of display scale of the
input potentiometer shows 94dB, then this
means that the acoustic level on the input of
the capsule of the microphone is actually
94-10=84dBSPL
Chapter IV
25
September 2013
AES screen
The AES screen gives the possibility to choose between AES-31 or AES-42. The AES-42 is the AES
format for digital microphones. The Nagra Seven will supply the 10V power for the digital
microphones, but does not run the entire protocol to control the microphones dynamically. The 10V
supply is only available when the inputs or clock reference are selected to digital, and will be cut is
analog inputs or other references are selected.
The SRC Sample Rate Converter can also be activated making sure there are no synchronization
issues between the digital microphones / inputs and the recorder.
Slate microphone
The front panel of the recorder is fitted with a built-in microphone or “Slate mic”. The operational
parameters of the slate mic can be set on this screen. The “mode” can be set to either “Normal”
where the mic is active as long as the icon on the main display is pressed, or “Toggle” which will
toggle ON/OFF upon each press. The slate microphone is only active at 44.1 and 48 kHz sampling
frequencies.
Chapter IV
26
September 2013
Filters
The Nagra Seven is equipped with fully programmable internal digital filters. These filters can
be programmed for each microphone input independently. The frequency of the filter, from
30 Hz to 300 Hz and the slope of either 12 or 24 dB/Octave and the headroom, from 0 to 42
dB can be programmed using the settings window.
The settings window accesses all the specific
parameters of the digital filters.
The headroom can also be used by the filters if necessary, this can be useful when low frequencies
are too loud (wind noise for example) and may saturate the A/D converter; as the filtering is done
next to A/D conversion rather than in the microphone preamplifier, it will not prevent the
saturation.
Chapter IV
27
September 2013
ALC / LIM.
The Nagra Seven is equipped with a very sophisticated, fully programmable internal audio
control system that can be set as an audio limiter or ALC, or any combination between the
two. It is an entirely new approach that allows the user to adjust the parameters exactly as
desired. The different parameters of the system, such as the headroom, target, attack,
release and ratio can all be set with dropdown menus from the settings window. If the
GRAPHIC window is opened then the operating zone can be visualised to give a clearer
understanding of the settings. When the graphic display is shown, turning the left or right
potentiometer will adjust the parameters for the corresponding channel.
If the PRESET button is pressed a drop-down menu will appear allowing the user to choose
between several pre-programmed operational modes for the ALC / LIMITER. This is the
simplest selection for those not wishing to set all the parameters individually.
Preset:
Headroom:
Target:
Input attenuation:
Attack:
Delay:
Release:
Ratio:
Chapter IV
User selectable preset values
The range into which the signal can go before distortion
The upper limit of the operational zone
Analog input attenuation control
The reaction time – ideal to filter against activation by rapid
sounding HF signals
Time before the release is active.
The decay time of the ALC/Lim effect.
How much audio compression will be used (i.e. 6:1 means that 6dB
will be compressed to 1 dB)
28
September 2013
Left channel programmed as a limiter
Left channel programmed as an ALC
Using the Graphic left / right windows, all the parameters of the ALC/Limiter can be adjusted using
the corresponding channel potentiometer. The operating position is indicated in the form of a
graphic display and the values are displayed to the right of the graph.
A detailed explanation of the operational principals of the ALC/LIMITER system of the Nagra Seven is
covered in Annex V found at the end of this manual.
Output Menu
The outputs screen gives access to three different areas concerning the audio outputs for the
line outputs, monitoring – headphone output, and built-in loudspeaker.
For the line outputs, the analog output level can be pre-set from -6 to +15 dBu, and the digital
outputs can be set to either standard 24 bits or to 16 bits re-dithered.
Chapter IV
29
September 2013
Monitoring Menu
For the monitoring section, an additional headphone boost can be added to increase the headphone
output level. The operational mode of the “Push for mono” feature of the headphone level control
can be set to normal momentary, or toggle operation. The M/S decoder can be turned ON or OFF.
The M/S decoder will only decode the headphone output into a L/R signal and will have no effect on
the recording or the line outputs.
The level of the Beep signal can also be adjusted in this menu. The beep will be audible to indicate
that a command has been correctly interpreted, or to signal a warning.
Loudspeaker Menu
The loudspeaker menu allows the user to decide when the internal loudspeaker of the recorder is
active. It can be ON, OFF or only in playback to avoid feedback when in TEST mode.
Ref.Gen.
The internal reference generator can be programmed in frequency, from 500 Hz, 1 kHz and 2 kHz. The
level can also be set from -6 dB to -20 dB in 2 dB steps and it can be selected to toggle ON / OFF or be a
momentary signal.
Chapter IV
30
September 2013
Meters Menu
The meters screen gives access to three different settings concerning the fuel gauge metering
displays.
Modulometers
This menu allows two critical parameters of the bar-graph modulometers to be adjusted. The point
at which the horizontal bar-graph display changes color from green to yellow, and from yellow to red
as well as the overall range of the scales, can be set in this menu.
Range:
Yellow level:
Red level:
Chapter IV
The scale of the modulometers can be set to 30, 40 or 50 dB.
Programmable from -9dB to -24dB in 3 dB steps.
Programmable 0, -1, -2,-3 -6 or -9db.
31
September 2013
Mic left / right display scale
The microphone display scale menu allows adjustment of the scale of the level indication “fuel
gauge” so that it will correspond to the actual dBSPL value according to the specific sensitivity of the
microphone being used. If the sensitivity of the microphone is known (supplied by the manufacturer
in the technical specifications of the microphone), select the corresponding sensitivity for the
microphone. The correct dBSPL indication will now be shown as soon as a potentiometer is touched.
If the microphone sensitivity is unknown, select “Attenuation” so as to see dB rather than dBSPL.
“Not indicated”, can be selected so that the “fuel gauge” will no longer appear when the
potentiometer is touched.
In the Automatic position, the sensitivity selected in the inputs menu will be used as the scale for the
fuel gauge. This setting will have no effect on the input sensitivity only the scale of the level display.
If Attenuation is selected, then the indication will be in dB’s from 0 when the pot is touched.
If a particular potentiometer is assigned to more than one input gain, then when the blue fuel gauge
is indicated it will only show the corresponding level in “dB” rather than “dB SPL” if their sensitivity
settings are different.
Note: This selection will NOT alter the actual sensitivity of the pre-amplifier which is adjusted using
the potentiometer for the corresponding input.
Chapter IV
32
September 2013
Part 3 – THE SETTINGS
Settings Menu
The settings menu accesses various features of the recorder, which will all be stored in the
templates (if used) and is broken into 5 categories: General, File format, Pot. assign, Display
and Icon selection. Each is explained below:
General settings
The “General settings” section is spread over 2 screens, press the UP/DN arrows to alternate
between them.
Sample frequency:
Clock reference:
Sets the internal sampling frequency of the A/D converter for recording. It
can be set to 44.1, 48, 88.2, 96, 176.4 and 192 kHz.
Sets the reference signal to which all the internal clocks of the machine are
to be locked. Generally the machine will be synchronised to its internal high
stability (MASTER position), which will guarantee the correct sampling
frequency.
If an external reference is being used then this signal must be stable. The entire list of possible clock
reference signals is shown in the list below:
Chapter IV
33
September 2013
Selection
Signal explanation
MASTER
Machine is set to be “master”, all clocks are synchronised using the
internal stratum III high stability crystal.
As for master but accelerated by 0.1% for NTSC applications.
(Sampling frequency will be increased by 0.1% i.e. 48’000Hz
becomes 48’048 Hz)
As for master but slowed down by 0.1% for NTSC applications.
(Sampling frequency will be slowed by 0.1% i.e. 48’000Hz becomes
47’952 Hz)
External word clock on the word clock reference connector at 44.1
kHz
External word clock on the word clock connector at 48 kHz
External word clock on the word clock connector at 88.2 kHz
External word clock on the word clock connector at 96 kHz
External word clock on the word clock connector at 176.4 kHz
External word clock on the word clock connector at 192 kHz
External ref on the AES input at 44.1 kHz
External ref on the AES input at 48 kHz
External ref on the AES input at 88.2 kHz
External ref on the AES input at 96 kHz
External ref on the AES input at 176.4 kHz
External ref on the AES input at 192 kHz
External video reference is on the word clock connector in PAL 25fps
External video reference is on the word clock connector in NTSC
29.97fps
External video reference is on the extension connector in NTSC
30fps
High definition digital video 720 progressive at 23.98 frames
High definition digital video 720 progressive at 24 frames
High definition digital video 720 progressive at 25 frames
High definition digital video 720 progressive at 29.97 frames
High definition digital video 720 progressive at 30 frames
High definition digital video 720 progressive at 50 frames
High definition digital video 720 progressive at 59.94 frames
High definition digital video 720 progressive at 60 frames
High definition digital video 1080 progressive at 23.98 frames
High definition digital video 1080 progressive at 24 frames
High definition digital video 1080 progressive at 25 frames
High definition digital video 1080 progressive at 29.97 frames
High definition digital video 1080 progressive at 30 frames
High definition digital video 1080 progressive at 50 frames
High definition digital video 1080 progressive at 59.94 frames
High definition digital video 1080 progressive at 60 frames
MASTER +0.1%*
MASTER -0.1%*
Wclk 44.1*
Wclk 48*
Wclk 88.2*
Wclk 96*
Wclk 176.4*
Wclk 192*
AES 44.1
AES 48
AES 88.2
AES 96
AES 176.4
AES 192
Video PAL*
Video NTSC*
Video NTSC 60 Hz*
HDTV 720p23.98*
HDTV 720p24*
HDTV 720p25*
HDTV 720p29.97*
HDTV 720p30*
HDTV 720p50*
HDTV 720p59.94*
HDTV 720p60*
HDTV 1080p23.98*
HDTV 1080p24*
HDTV 1080p25 *
HDTV 1080p29.97*
HDTV 1080p30 *
HDTV 1080p50 *
HDTV 1080p59.94*
HDTV 1080p60 *
(“*” indicates reference possibilities only available for machines equipped with internal time code
option.)
For interlaced HDTV formats, use half the frame rate. For example, 1080i50 you should select
1080P25
Chapter IV
34
September 2013
Pre-record mode
The pre-record feature will record into a buffer memory while the recorder is in TEST position and
this buffer will be added to the start of the recording once RECORD is selected.
Pre-record time
The length of the buffer is chosen in the PRE-RECORD TIME menu. At higher sampling frequencies
the available pre-record time is limited.
Auto-skip in playback
If set to ON then during playback the recorder will only playback files of the identical format to that
of the current machine settings, and will jump over all other files in a folder.
Start / stop polarity
The Start / Stop connector on the left side of the recorder is used for a remote “fader” start and will
start or stop the recorder in its current mode (according to the position of the main function
selector) when the two contacts are shorted together. This selection allows the polarity to be
inversed so that the opposite function will be activated when the connections are shorted together.
File format Menu
The file format menu determines all the parameters of the audio file that the recorder will make and
record to the media.
Format
This can be either 16 or 24 bits and can be set to make a single mono or stereo file (Polyphonic) or
two individual files (monophonic). The main difference between the monophonic or polyphonic
formats is the addition of the track number in the file name as “_1 or _2” in the file naming.
File name
The file name is the alpha-numeric name given to each recorded file. The file name changes
depending on whether a monophonic or a polyphonic file is being made. The file name format can
be selected from a pre-defined list of “name formats” made up of different combinations of data
and are selected in the ”File Name” menu
When recording monophonic files the name formats will all end with “_#” (# = track number) for
example Tape_XXX_1.wav (for the file corresponding to channel 1) and Tape_XXX_2.wav for the file
of channel 2.
The “MachName” can be programmed by the user in the “Tools” menu. The date and time settings
depend upon the settings of the real time clock and NOT the time code information. The “X” symbols
in the examples correspond to the index number in numeric digits from 0 to 9.
Chapter IV
35
September 2013
Possible automatic file naming selections are:
MachNameXXX.wav
MachNameHHMMSS_XXX.wav
MachNameYYYYMMDDHHMMSS.wav
Tape_XXX.wav
TapeHHMMSS_XXX.wav
TapeYYYYMMDDHHMMSS_XXX.wav
Tape_Scene_Take_XXX.wav
Scene_Take_XXX.wav
YYMMDD_HHMMSS_XXX.wav
Max file size
The Nagra Seven records audio using the standard FAT 32 (File Allocation Table) file format that
allows the audio files to be read by either MAC or PC. The FAT system limits any file to a maximum
size of 4 GB although many computer programs will not accept audio files larger than 2 GB. The
recorder will automatically, and seamlessly, create a new file (or index) up to a maximum of 999,
when the file size reaches 2GB during any recording.
Recording at 2 channels of 24 bits per sample audio at sampling frequency of 192 kHz represents
approximately 1 GB in 15.5 minutes. This means that a new file will be created about every 31
minutes. If a long duration recording is to be made, then it is strongly recommended to use the
monophonic file mode, and this will allow each track to have its own file each of which can go up to
2 GB. This calculates approximately to 1h 02 minutes per track of mono for 2 GB of memory space.
Pot. Assign.
The main potentiometers on the front of the recorder can be assigned to different functions, or even
un-assigned to avoid accidental movement during operation.
The possible parameters that can be set are the assignment, the ganging and their relative offset.
Pot. Assignment:
Left-right link:
Right offset when linked:
Grab:
Chapter IV
Can be set to Mic or Line only, mic AND line or not assigned.
ON or OFF. Both channels will be controlled by turning the left pot
only.
Allows an offset between the two channels to be inserted and
maintained when both inputs are being controlled from the same
pot.
Take the current instantaneous offset and store it.
36
September 2013
Display
The display menu gives access to the operation parameters of the screen, rather than what is
actually displayed.
Brightness:
Dimmer after:
Dimmer level:
Screen intensity 25, 50, 75 and 100%
Delay before the display switches to low power mode. This can be set to 30s,
1min, 3 min, 5 min or never.
The percentage of maximum intensity that will be used when the dimmer
becomes active after the pre-set time.
The dimmer function is only active when no external power supply is connected and the machine is
NOT in record mode.
Icon selection
The Nagra Seven offers 6 programmable shortcuts which will put different icons on the main display
for rapid access to different user definable features of the recorder. Any of the 6 shortcuts can be
set to any of the following list of features:
Loudspeaker On/Off, Reference Generator ON/OFF, Slate mic ON/OFF, Audio settings, Inputs, Filters,
ALC/Lim, Outputs, Settings Templates, Media, Metadata, Timecode (if option installed), Tools or
“Empty”.
Chapter IV
37
September 2013
Part 4 – THE TEMPLATES
Templates Menu Screen
Six internal templates are available for the storage of different machine parameter settings
for rapid access. All settings that affect the recording are stored. Settings that correspond to
the recorder (icon selection, meter programming etc.) are not saved in the templates. Each
template can be given a name up to 16 characters for easy identification.
Recall:
Store:
Rename:
Erase:
Chapter IV
Retrieve a previously saved template and set the recorder accordingly.
Save the current settings of the recorder to a selected template.
Replace the existing template name with a new one.
Erase the highlighted template.
38
September 2013
Part 5 – THE MEDIA
Media Menu
The MEDIA menu gives access to all the file and storage components of the machine. This
section is broken into 5 sub-divisions covering the Directory, Folder, Drive, Copy Status and
Auto copy. Each of which is covered in detail below.
Directory
The directory is the list of files located in the currently selected working folder on the selected drive.
Each file has a certain quantity of data associated with it known as Metadata. This data is shown
next to the highlighted file. (Folder, index, length…. Please refer to the METADATA section for more
detailed explanations). The UP and DOWN keys on the right of the display will move through the list
of files, and their corresponding metadata will be displayed automatically.
Pressing the “Opt.” (Options) button opens a
selection of choices that can be applied to the
current file (highlighted) as shown below.
Play:
Playback the selected file irrespective of the current machine settings. i.e. a file of a
different sampling frequency and bit depth can be played back without changing the
settings of the machine. This can be used when the main function switch is in any
position other than TEST (with pre-record) or REC.
Copy:
Allows the file(s) to be copied from the current folder to another media.
Edit Metadata: This function allows the user to alter previously recorded metadata, after the event.
Delete:
Permanently erase the currently highlighted file.
Renumber:
Renumber the files in the directory, either from zero or starting from a specific
number.
Create Report: Generate a text file listing all the Metadata of all the recordings of the current folder
and save it to the disk.
Chapter IV
39
September 2013
Folder
The “Folder” is the location where the audio files recorded are to be stored. Folders, otherwise
known as “Directories” can be located on either the internal Flash card of the recorder or on the
extractible SD card or USB. Information about the size and number of files within the currently
displayed folder is clearly shown. The drive, upon which the current working folder is located is also
indicated.
Pressing the Opt. (Options) button opens a
selection of choices that can be applied to the
current file (highlighted) as shown below.
Set working:
Create:
Copy to SD:
Copy to USB:
Rename:
Delete:
Note:
Chapter IV
Select the currently highlighted folder as the working folder where recordings are to
be stored.
Create a new folder on the currently selected media (drive)
Copy the current folder and all the files within it from the internal memory to the SD
card.
Copy the current folder and all the files within it from the internal memory to the SD
card.
Rename the folder.
Delete a folder.
The currently selected working folder cannot be renamed or deleted. To do so, first
select another folder as the working folder, then change the name of the original or
delete it as desired.
40
September 2013
Drive
The drive window gives information about the connected media. “INT” refers to the internal 16 GB
micro SD memory card. SD refers to the extractable SD media and USB refers to any external hard
drive or USB memory stick connected to the USB port. The green “check” indicates the currently
selected working drive (media). As shown below, the total size of the media as well as the remaining
unused space is clearly shown for each media.
Copy Manager
The copy manager display shows what the copy process is doing.
This example shows the copy status screen
currently copying file 002 from the internal
Micro SD to the SD. There is only one “item” in
this copy list.
Operational modes of the copy manager
MODE
DESCRIPTION
IDLE:
COPYING:
SUSPENDED:
The copy list is empty, no copies are running, no errors on previous copy.
The copy process is running.
The Nagra Seven is in record mode and the current copy destination is the
same drive as the working folder (copy will always go to the other drive).
The copy is suspended to avoid file fragmentation on the disk and to
guarantee a reliable remaining recording time.
Copy manager commands
When a problem occurs with a copy, pressing the OPT key will provide a selection of related
operations to be performed.
Remove
Abort
Abort all
Chapter IV
Delete an item from the copy list
Remove the current copy list item and continue copying the
next copy list item (if any).
Stop the copy action and remove all additional items from
the copy list.
41
September 2013
Skip
Skip all
Skip this index and continue with the next index.
Skip all indexes of the current item in the list, that pose a problem (such as
those that exist already in the destination folder).
The next two functions are only possible in event of the message “File already exists”
Overwrite
Overwrite this index. The existing index on the destination disk is
deleted before the copy.
Overwrite all Overwrite all indexes of the current item in the list. Any existing index on the
destination disk is deleted before the copy. If another index of the current
list item already exists on the destination drive, it will be automatically
deleted and overwritten without warning.
The next function is available when the power to the Nagra Seven was lost prior to finishing a copy.
This is the only function possible in this case.
Retrieve it Yes/No?
This menu appears in the form of a pop-up when opening the copy
status if an error occurred during the last copy session.
Copy error messages
While a copy is running in the background, you may be alerted by the error message “Copy Error” on
the main display. This tells you that copy process has stopped and needs your intervention. The copy
manager screen will give you an explanation of the reason for the error. Error messages are
displayed as “Error: xxxxxxxx”: on the copy manager screen.
If an error is displayed, go into the copy manager menu screen and the reason behind the error will
be indicated. Press the OPT button or retry.
MESSAGES
Can't create the directory
Can't find the source file
Can't open the destination file
Can't read the source file
Can't write the destination file
The index XXX already exists
Can't delete the file
The disk is full
Power lost during last session
Chapter IV
42
September 2013
Auto Copy
The Auto copy feature can also be considered as an automatic back-up of the current recordings,
and once activated, requires no further user input. This will enable the automatic copying of all
recordings, into a folder bearing the same name as the current working folder on the working drive.
This folder will be automatically created on the destination media.
Note: In the event of a copy error, the auto copy will not be executed until the copy error has been
resolved, as the copy process has been interrupted. A corresponding error message will be
displayed.
If alterations are made to the metadata, or a false start is made, then the metadata will
automatically be corrected on the copy. This may even be done after the event on the
condition that the destination file exists on the drive and that it is of identical size.
Chapter IV
43
September 2013
Part 6 – THE METADATA
Metadata Menu Screen
Metadata is additional user information attached to a BWF file, it has been defined by the
internationally accepted iXML metadata standard, and the NAGRA Seven conforms to this
accepted norm.
Generic metadata screen
Current metadata screen
The “Generic” metadata, is the data that will be recorded on a new file. The “Current” metadata is
the metadata of the currently selected index. Both can be altered using the keyboard as explained
below.
The following information can be stored:
Project:
Alpha-numeric (max 32 characters)
Scene:
Alpha-numeric (max 12 characters)
Take:
Numeric (0 – 999) (Will automatically reset to “1” when the scene information is
changed.
Notes:
Alphanumeric (max 54 characters)
Wild track:
Check / uncheck
False start:
Check / uncheck (Current metadata screen only)
Pick-up:
Check / uncheck (Generic metadata screen only)
Track 1 / 2:
Alpha-numeric (max 8 characters each)
Chapter IV
44
September 2013
False start
A false start of a take in cinema production is unfortunately all too common. If this happens, the
recording needs to start using the previous take number, and this is accomplished on the Nagra
Seven by simply pressing the “False start” button on the display prior to moving the main selector to
the record position. The metadata of the previous take will then have the “-F” indication following
the scene number to indicate that a false start was made. This indication takes priority over the “-W”
wild track information although both bits of information are indeed written into the metadata. A
false start can be used when the main selector is in either the REC or TEST position.
Screen showing False start while RECORDING
Screen showing false start in TEST
If Metadata is altered or a False Start is made while the autocopy is active, the modifications will be
taken into consideration on the copy.
Wild track
A wild track is the term used for a recording that is not linked to any pictures but is generally linked
to the actual scene currently being shot. If “wild track” is checked, the suffix “-W” will be indicated
after the scene number. This cannot be combined with a Pick-up only one OR the other can be
selected. When a wild track recording is made the take number will increase on each new recording
if multiple wild tracks are being made.
Pick-up scene
A pick-up scene is the term used for the recording of a partial segment of a scene. If “pick-up” is
checked then “-P” will be indicated after the scene number. When a pick-up recording is made the
take number will increase as this can be considered as a take except it is only a partial scene.
This cannot be combined with a Wild-track, only one or the other can be selected.
Note: The Pick-up scene tag is not a formal iXML flag and is simply added by the Nagra Seven to the
end of the scene name. If the scene name already consists of 12 characters then the last two
characters will be replaced by “-P” if a pick-up is selected.
Chapter IV
45
September 2013
Data entry
An internal keyboard is provided and will be activated by clicking on any of the fields to be
completed. The keyboard layout can be changed in the tools menu. An external USB keyboard may
also be used for data entry if desired.
If a USB keyboard is connected to the Nagra Seven then this screen does not open, the external
keyboard is automatically active, and can be used for all data entry.
For an external device such as an external keyboard to be connected, an adapter cable part number
# 20 70119 000 is necessary and can be ordered from your local NAGRA dealer.
Chapter IV
46
September 2013
Part 7 - THE TOOLS
Tools Menu
Various features are available that do not directly affect the audio work in progress, but give
access to less critical features of the Nagra Seven.
Reformat
The reformat menu allows the user to reformat either the internal Micro SD memory card or an
external media. It is strongly recommended to format all media to be used with this feature to
ensure that the format on the drive is perfectly compatible with the recorder and does not contain
any unnecessary files from a computer formatting. This cannot be used while the recorder is in
record mode.
Time and Date
This screen allows setting of the internal real time clock (RTC). This is the information that will be
used for the time and date stamps of files. This information has nothing to do with the internal time
code generator (if the unit is equipped with the time code option). The time format is in the 24 hour
format.
Chapter IV
47
September 2013
Miscellaneous
Several additional features, used to adapt the user environment or assist the easier use of the Nagra
Seven can be programmed on this screen.
Machine name
The name chosen in this menu will be used in the file name if one of the “machine name” file naming
options is selected. The factory default name is “Nagra_Seven” but this can be replaced with any
alpha-numeric name of up to 15 characters.
Keyboard layout
Three choices of keyboard layouts are available. This setting corresponds to the layout of the
internal keyboard display as well as any external USB device connected to the recorder. The machine
will need to rebooted if the layout of an external keyboard is altered.
English (US)
French
Swiss-french
Chapter IV
-
QWERTY
AZERTY
QWERTZ
48
September 2013
About
Shows the serial number, which is burned into the memory of the recorder, hardware and software
versions installed in the unit, as well as the different options that are installed. Pressing the DEFAULT
settings button will reset all parameters of the Nagra Seven back to their original factory default
setting and will also erase any templates stored in the recorder, and reset all the settings of the
recorder to the factory default values.
Chapter IV
49
September 2013
CHAPTER IV
The EXTRAS
The Nagra Seven can be equipped with various optional extras. SMPTE/EBU Time Code, I.S.D.N. and
WiFi / 3G require additional hardware circuits in the two slots in the lower part of the machine
whereas the internal audio editor is a Software option and can be activated with a password.
EDITOR (Software option part number 70 19180 020)
The audio editing option allows simple “cut ‘n paste” type editing of audio files. It is a “nondestructive” system meaning that making edits does not affect the original audio recording in any
way. When editing is completed, the newly edited material is saved as a new “take” in the same
format as the original. Audio from different files can be edited together into the final edit assuming
the files are of the same format initially.
The scissors icon is used to open the audio editor. If the icon is not present in the icons
menu then the option is not installed on the recorder. Please contact your nearest Nagra
dealer to install the option.
When the Icon is touched the editor window will open as shown below:
This edit selection screen allows the user
to scroll through all the recordings on the
currently selected media to choose the
track to be edited.
The play button can be used to preview
any track prior to its selection for editing.
In the index list, edited audio files are indicated by an “*” next to the index number. Unedited source
audio files just have the number without the asterisk. Any file can be selected for editing even if it is
not in the same format as the current settings of the recorder.
When OK is selected the main editing screen (below) will be opened.
Chapter IV
50
September 2013
Overall description of the editing screen:
Current take number being edited / time from start of take
Audio to be edited
Time with respect
to start of source
material
Total edit length
Edited portion
All the different areas and operations, as well as the software screen buttons and all editor functions
available are described in detail in the following pages.
Chapter IV
51
September 2013
Edit controls
All features of the editor are controlled either with the touchscreen or by means of the two level
potentiometers. In the edit mode, the left pot is used to advance or reverse the audio up to 1x
nominal speed depending on the angular rotation of the pot. The right pot is a “jog” function and
allows the graphic audio to be moved back and forth in direct relation to the pot position.
Using the touchscreen, the audio can be advanced by “stroking” the graphic displays in either
direction or constant speed advance and rewind can be achieved by “swiping” the graphic display in
the relevant direction. Touching the screen or one of the pots will immediately cancel this feature.
It is recommended to use a stili (part number 2019180010) to manipulate the editor with precision.
The touchscreen also has 5 soft keys permanently located along the bottom of the screen, whose
functions change depending on the mode of the editor, each is explained below.
When active the displacement speed of the audio graphics is increased to the range of ± 8 x
nominal speed in each direction. Effective for the swipe function as well as under
potentiometer control. The button will be red while it is active.
Select / Mark an edit “IN” point
Used to copy the entire source of audio on the upper graphic display track to the lower
“edit” graphic display track.
Escape from current mode, or to remove an “IN” point if placed by in error.
Play audio from the current curser position at nominal speed. Functional for both the upper
(source) and lower (edit) tracks on the display. The button will be red while it is active.
Allows the editor to locate a specified time in an audio file, to avoid scrolling through a large
piece of audio.
Select / Mark and edit “OUT” point
When active the audio can be moved to accurately locate the desired edit point. The button
will be red while active.
Used to delete the current edit point or section of edited audio.
Will mark an edit point in the edited section of audio.
There are also two transport keys which allow different segments to be located easily and their
functions are as follows:
While the source graphic is active this will advance to the end of the current take, then to
the start of the subsequent take. While the EDIT graphic is active this will advance to the
next edit point.
While the source graphic is active this will return to the beginning of the current take, then
to the end of the previous take. While the EDIT graphic is active this will jump to the
previous edit point.
Chapter IV
52
September 2013
General information about editing
Audio editing on the Nagra Seven can be made in two different manners.
The first method involves a complete piece of audio source recording, and portions of sound are to
be removed, such as silent periods, to obtain a shortened yet concise adaptation of the original.
The second method is to build up a new piece of audio by assembling pieces of audio coming from
the initial source or from a variety of different recordings. Naturally, both methods can be used
together, meaning that additional portions of audio can be added to an entire source track, and
portions of audio can be removed from any audio segment.
Although the editing features are similar in both cases, the two methods will be explained below
giving a clear perspective of the different editing features available.
The upper graphic design on the display represents the source material and the lower display
represents the edited portion. Jumping from one to the other is done by touching the relevant
graphic on the screen. The currently selected portion of audio is lit when active to clearly indicte to
the user the operational segment of the editor.
Edit method 1: Removing audio from a source:
This editing method is used, for example, for removing unwanted silent periods in a piece of audio to
create a fluent piece of audio.
Select the desired audio file in the directory of the recorder, and then press on the
the editor. The following screen will be displayed.
icon, to open
The upper graphic display represents the
source audio file containing the parts to be
removed by editing.
The lower “Edit” track is currently empty as no
instructions have been given.
Press the “ALL” button to select the entire
audio take to the lower editing track and the
following display will be shown.
On the lower graphic, the end of the copied
source file can be seen on the left side of the
display. It is now possible to join the next
piece of audio to this if desired, but in this
example, only unwanted parts of audio are to
be removed from the file using the editor.
Currently the upper display is active (White).
Click on the lower display to select the edit
track to be active.
Chapter IV
53
September 2013
Using either the touchscreen, with a stili pointer, or alternatively the two channel potentiometers
move the edit track graphic display to the start of the audio portion to be removed.
Current location
Press the “MARK” button (which will light red) to place the mark or CUT point. Move the audio along
to the second desired mark or “CUT” point and press the MARK button again. The two cut points are
now apparent, as shown in the pictures below.
First edit point
Both edit points are shown and the portion
between them can be deleted. Trimming of
the edit points is possible to accurately
locate the exact cut point. To move to either
point press the appropriate skip key.
Pressing the DEL button will now remove the
portion of audio located between the left
and right edit points.
Chapter IV
54
September 2013
Repeat this operation until all the audio portions that are to be removed have been eliminated.
Once complete press
and the machine will ask whether to save the edit or not. If saved, it will
automatically have the next available index number on the currently selected media.
Edit method 2: Creating a new edit by assembling audio portions:
In this method, a new edited audio track is being created by taking either entire source tracks and
adding the together (end-to-end) or inserting different portions of audio at a specific point in the
edit track.
Start the editor function by pressing the scissors on the main display. Press the SKIP forward /
backwards keys to locate the initial source track where the editing should begin.
Use the display or potentiometers to locate
the first “IN” point, where the new Edit
track should commence and press the “IN”
button. Scroll forwards and press the “OUT”
button.
The portion of audio between the two points
will immediately be copied from the source
track to the edit track as shown below.
The upper source track is the active track
and the next piece of desired audio can now
be located. It will in turn be added to the
edit track thus building up the newly created
track.
The next piece of audio may also come from
a different index if necessary.
Chapter IV
55
September 2013
Each audio portion added will be inserted into the edit track at the point where the cursor on the
edit track is currently located.
Once all the audio segments have been assembled activate the edit track by clicking on it.
All the edit points can now be adjusted or “Trimmed” by selecting the desired point and then using
the trim function.
Trimming of the left edit point
Once editing is completed use the
Trimming of the right edit point
button to leave the editor and save the new track.
The PLAY key can be used to listen to either of the tracks at any time.
The GOTO function can be used to quickly locate a specific section of audio in a long recording.
Simply enter the time of the audio portion
and press OK and the editor will immediately
locate the respective portion of the audio
within the file.
Chapter IV
56
September 2013
TIME CODE (Hardware option part number 70 19185 000)
The Nagra Seven can be equipped with an internal time code system. The time code system in the
Nagra Seven corresponds to all the internationally recognized formats defined by the SMPTE and
EBU. This manual does not cover the generalities of the time code format as this is covered in detail
in many other publications.
This section covers more of the global aspects of the time code system covering the following
subjects:
Time code in digital recorders
Time code frame rates
The internal time code generator
Time code playback / conversion
Displaying time code
Time code recording
Time code in digital recorders
When time code was first introduced to audio recorders in the Nagra IV-STC back in 1984, the time
code signal was longitudinally recorded along the center of the analogue tape, and the official audio
time code format stipulated that the time code value recorded on the tape at any given time was
coincident with the corresponding audio so as to maintain inter-machine compatibility.
Time code in a file based digital recorder is managed in a totally different manner. At the start
moment of a given recording, the time code value at that instant is “calculated” by the time code
system and this value is known as the time code “stamp” and is recorded in the “header” of the
broadcast wave file. This time code value is calculated based on several criteria, namely the
presently selected frame rate, the sampling frequency in use, the duration of the pre-recording
buffer and the time code mode (Time of day or not). During playback, or post production this time
code stamp is read and calculated as if it were a normal longitudinal time code throughout the
recording.
This explanation helps understand why certain common features used in longitudinal tape-based
formats cannot be used in a file based system. For example, the recording of external time code in
the past was relatively simple, the incoming time code was simply re-generated and put on the tape.
Therefore, time code jumps or changes were all copied “blindly”. In a file based format, once the
external time code has been “grabbed” at the instance that the recording starts, the external
incoming time code becomes “irrelevant” until the end of the current recording, because no further
time code is recorded until the next record start on a new file. The time code during playback of the
file is calculated from the time code stamp in the file header.
It is thus technically possible to playback a file and re-create time code at any frame rate irrespective
of the original recorded format. It is important to understand these basic concepts to avoid making
mistakes while using the time code system, and selecting the correct parameters for your
recordings.
Chapter IV
57
September 2013
Frame rates
Time code frame rates that can be internally generated directly by the Nagra Seven are as follows:
23.976 fps:
24 fps:
25 fps:
29.97 fps:
29.97 df:
30 fps:
30 df:
High definition rate, and is most commonly used with high definition video
cameras. At this frame rate, the count is 0.1% slower than real time.
Standard frame rate for film. Also occasionally used for high definition video
production.
PAL Video Frame rate, generally the norm in countries with 50Hz mains
frequency. (Typically European countries)
NTSC color video frame rate. At this frame rate, the count is 0.1% slower
than real time. Used for production in NTSC countries (typically North
America and Japan).
NTSC frame rate with drop frame. Drop frame is the compensation system
used in NTSC to match the standard 29.97 frame rate to real time. Used in
television production in NTSC countries. (typically North America and Japan)
NTSC black and white frame rate (typically countries with 60 Hz mains
supply). It should be used if the audio (and pictures) are to be transferred to
NTSC video for editing purposes.
This frame rate uses the drop frame compensation system at 30 frames per
second. It allows audio to be slowed down by 0.1% and remain compatible
with the NTSC color television system. It is not often used and the count is
0.1% faster than real time.
In Cinema applications always verify with the post production facilities which frame rate should be
used prior to starting the recording.
It is important to know, that inside the Nagra Seven the time code system is locked to the sampling
frequency selected for the digital recording. The sampling frequency depends on the reference
frequency selection (usually “Master” in a stand-alone situation). This means, for example, that if the
sampling frequency is set to 48 kHz and the reference frequency is set to “Master + 0.1%”, and the
time code is set to the 23.976 frame rate then the result will be a file with a sampling frequency of
48’048 kHz and a time code of 24 fps, which is suitable for slow-down from 30 fps to 29.97 to render
a sampling frequency of 48 kHz for NTSC applications.
If the machine is clocked by an external digital clock frequency, then the internal time code
generator will follow this external clock and this guarantees a perfect coherence between the audio
sampling frequency and the time code. The time code system of the Nagra Seven is able to follow
variations in the external clock of up to ±4%
When using an external clock this coherence will remain perfect as long as the machine is still
powered. If the machine is switched off, then when restarted, it will take the time code from the
internal RTC based on its internal reference.
Time code can be recorded in either the “Time of day” mode or can be set to any arbitrary value by
the user. All the time code settings are made in the menu mode.
The internal time code generator
The internal time code generator is clocked by the main master clock of the recorder which runs
from a crystal which is a "Stratum III" TCXO that has been artificially aged in an oven to maintain
stability. This crystal gives a guaranteed overall stability better than ± 4.6ppm over a period of 15
years throughout a temperature range from -20°C to +70°C. The drift due to temperature changes is
Chapter IV
58
September 2013
less than 0.28ppm. This means that the time code generator of the Nagra Seven would only be rejammed about once per day, but this may be more frequent if other equipment is used as a gen lock.
The Time and User portions of the time code can be set either manually, using the main display, or
alternatively from an external time code source, by executing the “Set from External” function (Jam
sync). This operation will instantaneously “grab” the time code on the 5 pin LEMO connector
assuming it is a valid format, and that it is moving (not a stationary time code).
Note: The Stratum III TCXO is precise even if the Nagra Seven is powered down. If upon power up,
the Nagra Seven does NOT ask for the date and time to be set by the user (Not TC date and
time) then this guarantees that the TC is still accurate as both the TC and RTC use the same
crystal.
Time code playback and time code conversion
When a file is played back the time code on the output will be regenerated according to the current
time code settings of the Nagra Seven. Thus a recording originally made with 25 frame TC can be
played back at any time code frame rate by simply changing the settings of the internal generator.
Time code Pull-up / down
The time code system of the Nagra Seven is very powerful and allows a lot of possibilities but should
be used with a lot of care and consideration to avoid unexpected surprises! The notion of “pull-up” is
referred to when talking about the time code in film and television in countries where the NTSC
color television system is used (typically North America and Japan). In these countries, the television
frame rate is 29.97 fps and the film rate is 30 fps. Slowing down a 30 frame film by 0.1% will give a
speed of 29.97 fps compatible with the TV system. This mode of speed alteration implemented in
the Nagra Seven allows many possibilities, some of which if incorrectly used will render the audio
unusable.
In the Nagra Seven, the time code rate is slave to the main audio clock. This means that if audio clock
runs slower, then the time code runs slower too.
As an example, if the clock reference of the Nagra VI is set to master -0.1% and the time code rate of
the internal time code generator set to 30 ND, the resulting time code recorded is 29.97 ND (= 30 0.1%)
Never use master -0.1% and 29.97 frame rate because this will create an unusable frame rate of
29.94 (29.97 - 0.1%)!!!
Some examples: For a playback shoot:
If the audio track to be played back was initially recorded at 95.904 kHz (96 - 0.1%), you should set
the Nagra to master -0.1% and the time code to 30 ND
If the audio track to be played back was initially recorded at 95.904 kHz and the Nagra Seven is
slaved from a 95.904 external clock, you should set the Nagra to “ext. 96” kHz and the time code to
30 ND (the time code will run at the external frequency speed)
If the audio track to be played back was initially recorded at 96 KHz (trans-sampled from 95.904 kHz
to 96.000 kHz) you should set the Nagra to master and the time code to 29.97 ND
Chapter IV
59
September 2013
Displaying time code
Time code is always in the HH.MM.SS.FF format and the user bits correspond to either the “date”
format of DD.MM.YY.xx or the “Free” format of xx.xx.xx.xx
The time code is displayed on the main screen of the Nagra. If the main function selector is in the
TEST (pre-record) position then the time code and user bits which are displayed on the screen are
the values that are to be recorded. This may be the internal generator or an external source
depending on the menu selection.
In the STOP position of the main function selector, the display will show the time code and user bits
of the file current take. If the machine was previously in RECORD then this will correspond to the last
time code value of the last take recorded.
In the PLAYBACK mode, the displayed time code and user bits correspond to the selected take being
played back.
Time code recording
Recording of time code is completely automatic and will record time code according to the settings
of the time code menus. Time code on the Nagra Seven is recorded in the header of the audio file (as
opposed to longitudinally in parallel with the audio as in analogue recorders). This does mean that
for the time code to be read by another device (for example a PC) the program reading the file must
be capable of interpreting the header information, otherwise only the audio will be played back.
At the moment a recording is started the time code to be recorded is corrected according to the prerecord buffer duration setting, thus keeping the time code coincident with the audio start point.
Time code “Assemble” recording can be selected in the menu. If so, the new take recorded will have
a time code stamp corresponding to the consecutive frame number of the last frame from the last
recorded take in the currently selected working directory.
If a new “take” is created during recording by pressing the “New Index” button then the time code
system will always make an assemble edit.
Chapter IV
60
September 2013
TIME CODE MENU
This menu allows the access and setting of all the time code options of the machine. It permits the
setting of the internal time code generator, for both TIME and USER data, as well as frame rate
selection and the time code mode. It also allows the choice of the time code to be recorded and
external references to be used.
THE INTERNAL TIME CODE GENERATOR
Source
This is used to choose which time code is to be used. If an external time code is present on the LEMO
connector, external time code can be selected by using the up or down arrow key.
Chapter IV
Internal Gen:
The Nagra VI will record TC from the internal
generator.
External:
The Nagra VI will record TC from an external source.
Assemble:
If Assemble is selected each time the machine is put into REC mode
a full time code assemble will be performed. This is done by
calculating the time code value of the sample following the last
sample of the previous index. There will be no time code
discontinuity between indexes.
Jam Sync:
In the Jam Sync position, the internal time code generator will
automatically be set as soon as a valid time code is connected to
the time code input connector. If the cable providing the external
time code signal is left connected to the machine, a new jam sync
will be performed automatically as soon as the machine detects a
difference between the internal time code generator and the
external signal of more than 2 ms. In order for the jam sync
function to operate when the cable is connected, certain
conditions are verified before the set is made. The incoming TC
must be at the correct speed (± 1%) for 10 consecutive frames.
Frozen or reverse time code will prevent a jam of the generator
from occurring.
61
September 2013
Time entry
To enter a new time, press on the time portion on the screen and a keypad will appear. Enter the
correct time data in the Hour, Minute and Second windows then press the “OK” key and the time
code starts running.
User bits entry
Entering the user bits and or date is made in the same way as for the time. According to the screen
shot below. Remember that if the machine is in the DATE mode for the user bits then the first 6
digits must conform to a valid date in the DD:MM:YY format. The two right-most digits are always
free to be used as desired.
Format
Selects the frame rate of the internal time code generator. The internal time code generator can
generate all presently used formats i.e. 23.976, 24, 25, 29.97 and 30 (the latter two either with or
without drop frame). The first value indicated is the presently selected choice.
User mode
This menu selects the operating mode of the user bits portion of the time code generator.
In the FREE mode, each digit of the user bits can be any value in hexadecimal (0 to F).
In the Free AutoInc. Mode (Inc = Increment), the last two digits will be increased by "1" each time a
new index is made in record, starting from 00 up to a maximum value of 99.
In the DATE position, the date in the DD.MM.YY.xx format must be used. The date will be
automatically updated at midnight (except when running 29.97 non-drop or 30 drop frame).
In the Date AutoInc. Mode Inc = Increment), the last two digits will be increased by "1" each time a
new index is made in record, starting from 00 up to a maximum value of 99.
Chapter IV
62
September 2013
Set from Ext. / RTC
Selecting set from Ext. and pressing the Ext button sets the internal time code generator of the
Nagra Seven to the external time code signal connected to the LEMO connector. Selecting RTC and
pressing the Ext button will set the time code hours, minutes and seconds from the internal real
time clock of the recorder, allowing a very rapid TC setting. Naturally, it is assumed that the internal
real time clock of the machine is also correctly set.
Reset TC
Pressing the Reset button the time code to 00:00:00:00. This will not reset the user bits of the time
code generator.
In assemble mode this will not set the internal generator, but will set the start time of the next
recording, It is not viewable on this screen but is shown on the main display in text mode.
Chapter IV
63
September 2013
Part 9 – WiFi / 3G
Part 10 – I.S.D.N.
Part 11 – COMPRESSION
Chapter IV
64
September 2013
CHAPTER V
The SOLUTION
ERROR MESSAGES AND PROBLEM SOLVING
Error messages on the Nagra Seven appear on the main display irrespective of the current operating
mode of the recorder. Generally speaking they are self-explanatory and do not need any additional
information. However some additional information on certain messages is listed here:
Message
Reason and solution
“Aborted”
The copy process was requested to stop by the user, cleaning of the partially
copied index.
“AES: no signal”
The AES input has been selected and no signal is present (or is the same as
the recording media).
“AES: slipping”
The AES signal is slipping with respect to the selected reference.
“AES: SRC unlock”
The internal sample rate converter is not synchronized.
“Buffer overflow”
The audio buffer is full due to media problems.
“Copying”
Attempt to DELETE or RENUMBER indexes or SELECT, RENAME or ERASE a
folder while the selected indexes or folder is still in the copy list.
You have put the Nagra Seven in power off and it has not yet finished to
copy, this is not really an error message in this case. (see copy section).
“Copy Error”
A copy was stopped because a copy error occurred.
“Copy Error: List full”
A copy was stopped because too many copy operations have been chosen.
(See Copy section).
“Copying”
The copy process is running.
“Autocopy:
Destination error”
The destination media for the copy manager is not present.
“Copy Destination
Full”
The destination media for the copy manager is full.
“Creating error”
The destination disk is certainly either not present or not formatted.
Insert a formatted compact flash card.
“Deleting Error”
Initially use the RETRY function. If the error re-appears your disk
may be damaged.
Index with file attributes set to read-only can cause this error; this problem
must be resolved with a PC as file attributes cannot be altered using the
Nagra Seven.
“Disk Busy”
Media not ready.
Chapter V
65
September 2013
“Disk full”
Selected working drive is at maximum capacity.
“Directory full”
Will be displayed when the Nagra Seven is set to pre-record / record for the
299th file in the current working folder. Delete unnecessary folders / indexes
on your destination media. (Maximum allowed number of entries is 299)
“Directory nearly full” Will be displayed when the Nagra Seven is set to pre-record / record for the
295th file in the current working folder. Delete unnecessary folders / indexes
on your destination media. (Maximum allowed number of entries is 299)
“Disk nearly full”
Destination media (containing the current working folder) is almost full.
Delete unnecessary folders/indexes on your destination media. Then
execute the RETRY function.
Change the media. Execute the RETRY function. The incomplete copy items
will continue on this new media.
“Disk error”
Media not responding.
“Disk Jam”
Media not responding.
“Error: Used for copy” The copy destination has been selected as the working folder
“Error: Used for
Working folder”
An attempt to delete the working folder has been made
“File already exists”
An index with the same number exists on the destination disk. There are two
solutions. Use the skip function to ignore this index, or Abort to stop the
copy process. Use Overwrite or overwrite all in the copy status menu.
“File open error”
An error occurred when opening the chosen file
“Idle”
The copy list is empty, no copies are running, no errors on previous copy.
“In Use”
The destination folder is in use. Attempt to copy to the working folder has
been requested which is not allowed.
“List Full”
The copy list can contain up to 20 items. This list is full and you can't add
another copy at this time.
“Low battery”
Attached battery pack is almost exhausted.
“Power lost
During last session”
Execute the RETRY function to continue the copy process.
“Reading Error”
Initially use the RETRY function. If the error re-appears your index or your
disk may be damaged.
“Suspended”
The Nagra Seven is in record mode and the current copy destination is the
same drive as the working folder (Copy will always go to the other drive).
Chapter V
66
September 2013
The copy is suspended to avoid file fragmentation on the disk and to
guarantee you a reliable remaining recording time.
“Unlock”
Internal clocks are no longer locked to the selected reference.
“Writing Error”
Initially use the RETRY function. If the error re-appears your disk
may be damaged.
“Waiting for trigger”
Unit is waiting for a remote start signal.
“Writing for ext. TC”
Unit is waiting for a valid external time code signal.
Chapter V
67
September 2013
CHAPTER VI
The SPECIFICATIONS
Technical specifications:
Recording
Data storage medium
Removable media
Disk format
Recording Method
File type
A/D & D/A conversion
Tracks
Sampling Rate
Recording capacity
Mono / polyphonic
Pre-recording buffer
Display
Level meters
Inputs
Digital inputs
Analogue inputs
Microphone input sensitivity
Limiters
Line input sensitivity
THD at 1 kHz
Frequency response
16 GB Internal micro SD card (user expandable)
SD card (Hot Swappable)
FAT 16 / 32
Linear digital PCM (optional MPEG 1 layer II)
16 / 24 bit Broadcast Wave File BWF (WAV) with iXML,
AES 31 compatible
24 Bit Sigma Delta
2 individual
44.1, 48, 88.2, 96, 176.4 and 192 kHz (with 0.1% pull up/down)
1 hr. stereo @ 24 bit 48 kHz per GB of disk / memory
Selectable
Up to 20 seconds @ 48 kHz.
4-inch color LCD touchscreen TFT anti-reflection / sun light readable
On color display
Input noise (condenser mic)
Input noise (dynamic mic)
Signal-to-noise ratio
Input level adj. range
Input filters
Slate microphone
XLR AES-3 / AES 42, SRC (Sample Rate Converter)
2 x symmetrical XLR Microphone (Dynamic, +48V Phantom) / line
2.8, 10 and 40 mV/Pa selectable
User programmable on microphone inputs, individual as a pair.
Adjustable from -6 dBm up to +24 dBm for 0 dBFS recording
<0.2% Mic, <0.01% line (measured on AES out)
Mic, 10Hz – 21.8 kHz @ 48 kHz, 10 Hz – 43.5 kHz @ 96 kHz and 10
Hz – 70 kHz @ 192 kHz ± 0.5 dB, Line ±0.2 dB (measured on AES out)
0.73 µV (10 mV/Pa)
0.55 µV dB (measured ASA "A" loaded 220Ω) 2.8 mV/Pa
>114 dB Line
45 dB Mic and from -6 to +24 dB Line
Fully programmable frequency and slope
Electret behind the front panel
Outputs
Analogue line output
Digital output
Headphones
Internal speaker
XLR 4.4V max (+15 dBm)
XLR AES-3 (24 bit or 16 bit dithered)
Stereo 6.3mm (¼”) Jack 50 Ω
0.5W
Other
USB Port
Time code IN/OUT
M/S Decoder
External reference
Dither
USB 2.0 OTG connector type "A/B"
5 pin LEMO (SMPTE / EBU)
Switchable
Word Clock, TC option, video and HDTV on BNC with TC Option.
Menu selectable 24/16bits on Inputs and/or Outputs
Chapter VI
68
September 2013
General Dimensions
Weight
Power supply
Power Consumption
Charge time
Relative humidity
Operating temperature
Chapter VI
175 x 65 x 185mm (W x H x D) (Incl. battery box)
1.2 kg (3 lbs) (without battery box)
8 X NiMh “AA”, Lithium-Ion, or external dc
Approximately 5W
5 hours (Lithium-Ion pack)
From 10% to 99% (non-condensing)
From -30°C to + 60°C (-22°F to 140°F)
69
September 2013
Annex I
ALC / LIMITER detailed explanations
The analog inputs of the Nagra Seven are managed using a completely new concept. Audio limiters,
automatic gain control (ALC) and digital filters are all achieved digitally through a dedicated DSP
(digital signal processor). The principal advantages are to create a better and cleaner ALC, give
limiter and filter processing with the possibility of adjusting more parameters and thus achieving
better microphone preamplifiers due to less electronics in the analog audio signal path.
Below, we explain various different parameters of the ALC/LIMITER to give a clearer understanding
of the various adjustments.
Ganging:
This setting is used to lock the ALC/lim of both channels together for a stereo pair. When an ALC/LIM
process is active on a particular channel due to a loud sound, the other channel gain will be limited
by the same amount, keeping the gain of the stereo pair correlated.
Preset:
This is a quick way to select predetermined parameters for a standard limiter or a standard ALC,
avoiding the necessity to understand all the parameters of the ALC/LIM programming process. The
preset drop-down will be cleared if any of the Attack, Delay, Release and Ration parameters have
been altered, indicating that non-standard parameter has been chosen.
Headroom:
The ALC/LIM processing uses a principle called “scaling”: where the analog gain of the input is
decreased by a specified factor while the input gain is increase digitally by the same amount,
resulting in a signal of the same level; this scaling factor is called headroom. The DSP uses this
headroom to handle the ALC/LIM processing, by reducing the gain up to headroom factor.
The headroom of the ALC/LIM and the headroom of the filters are same; the Nagra Seven simply
uses the larger of the two. In other words, if the headroom for the limiter is set to 18 dB, and a filter
is subsequently selected with a headroom of 24 dB, then the limiter will be active at 24 dB rather
than 18 dB.
The ALC system and limiters use the same process, they differ only in the parameters used to set
them (open speed factor, close speed factor, delay): a limiter uses very fast speed factor and an ALC
uses a slower factor.
Beware not to specify an unnecessarily large headroom, the disadvantage of the scaling is to
increase to noise floor level by a factor equal to the headroom; larger headroom can noticeably
increase the noise floor.
Target:
The target setting specifies the level (dBFS) not to be overshot. With a flat ratio the ALC/LIM process
will not limit the gain while the level is below this value. With a non-flat ratio the ALC/LIM process
will already start limiting the gain before this value is reached.
With the Attack parameter set to “immediate”, this limit will never be overshot except if the gain
limitation is greater than the headroom.
Input attenuation:
As the ALC/LIM processing is done digitally, the analog input gain is still controlled by the user, but
physically the gain is decrease by the amount of the headroom; with an input attenuation of -12 dB
and a headroom of 24 dB the microphone preamplifier gain is physically -36 dB (-12dB – 24dB). This
is true as long as the microphone preamplifier gain does not reach its maximum attenuation of -45
dB; when reached the microphone preamplifier gain will stay at -45 dB and the “rest” of the
ANNEX I
70
September 2013
attenuation will limit the digital gain that the DSP can use, as a result reducing the headroom and
the output level; with an input attenuation of -30 dB and a headroom of 24 dB the microphone
preamplifier gain is physically -45 dB (max reached) and not -54 dB (-30 dB – 24 dB), the “rest” of the
attenuation is -9 dB (-54 dB - -45 dB), limiting the headroom at -15 dB (-24 dB - -9 dB).
You have the choice whether to control this gain with the potentiometer or by specifying a fixed
value.
When using as limiter, it is probably preferable to use the potentiometer for control. The control will
act on the microphone preamplifier gain as if the limiter were not switched on, except there will be
the headroom offset subtracted. Just be aware that with large attenuations the headroom can be
smaller than specified.
When using as an ALC it is better to use larger headroom, letting the DSP control the gain. With
headroom of 42 dB, you can only have an adjustment of 3 dB for the microphone preamplifier gain:
an input attenuation of 0 dB will set the microphone preamplifier gain to -42 dB and an input
attenuation of -3 dB will set the preamplifier gain to -45 dB which is the maximum. So the input
attenuation will be mostly limiting the digital gain and act as a “threshold” avoiding the gain being
too loud when the ALC is not limiting the gain (during a silence).
When the input attenuation is controlled with the potentiometer, the potentiometer will mainly act
as threshold and allow fade IN/OUT, if a fixed input attenuation is set, the potentiometer is
disconnected from input gain control and no longer does anything.
Attack:
This parameter manages the speed with which the gain is limited. With the “immediate” parameter,
also known as a “brick wall”, the gain limitation will be done immediately avoiding the target
parameter to be overshot. When specifying a time (from 125 microseconds to 2 milliseconds), the
attack parameter will act as a filter on high-pitched / frequency sounds (such as keys being shaken
for example). This avoids closing the gain too much on unwanted sounds, by the way the target level
can be overshot on such sounds. Typically the overshoot can be of 1-2 dB for 125 µS setting; 3-4 dB
for 250 µS setting; 4-5 dB for 500 µS setting; 5-6 dB for 1 mS setting and 6-8 dB for 2 mS setting.
Delay:
This is the time period during which the ALC/LIM process will not increase the gain after having
limited, keeping the gain constant even if the sound is too low. This parameter avoids the gain
“pumping”, that is the gain increase during short silences. This setting should be of the same order
as the release parameter to be consistent and give a pleasant operation of the ALC/lim.
Release:
This is the speed of gain increase when limiting gain is not necessary. The speed is set by specifying
the time that the ALC/LIM process takes to reach the maximum gain starting from minimum gain.
This parameter mainly determines whether the ALC/LIM process works as limiter (set to minimum)
or as an ALC.
Ratio:
This parameter determines the target level function of the input level. With a flat ratio, the ALC/LIM
will only limit the gain when the signal would overshoot the target parameter, giving a signal level
that is independent of the input level. Specifying a ratio other than flat, allows having a more natural
relationship between microphone signal and signal level. A ratio of 6:1, for example, will “compress”
6 dB into 1 dB; That is the ALC/LIM will start limiting when the signal is lower than the target level.
With headroom of 24 dB and a ratio of 6:1, the limiter start limiting when the signal is 4 dB (24 dB /
6) before the target level, if the target level is -2 dB the ALC/lim will start limiting at -6 dB (-2 dB – 4
ANNEX I
71
September 2013
dB); for ALC or limiter, usually a ratio of at least 6:1 is used, lower ratios (3:1, 4:1, …) are for those
who want the limiter to work more like a compressor than a limiter.
Graphic tabs:
On the graphic tabs you can see the effect of headroom, target, input attenuation and slope
parameters for clarity. These graphics show the relationship between the microphone level and
recorded level for a constant input microphone level. Dynamic parameters (Attack, Delay and
Release) cannot be represented on these graphics and are not shown.
ANNEX I
72
September 2013
ANNEX II
RECORDING TIMES
Recording durations of audio files on the Nagra Seven depend on different criteria such as bit depth and
sampling frequency selected for the recording. Below is a small table indicating the recording times available
on the internal Micro SD card, as well as on a 4GB removable SD card, from which you can calculate the
respective times for any other card sizes.
The internal 16 GB Micro SD card will allow the following recording times in PCM linear:
S.Freq
Bits
2 tracks
44.1 kHz
16
33h03m
24
24h47m
48 kHz
16
30h34m
24
22h56m
96 kHz
16
15h17m
24
11h28m
192 kHz
16
7h38m
24
5h44m
An External 4 GB SD flash card will give:
S.Freq
Bits
2 tracks
44.1 kHz
16
4h15m
24
6h11m
48 Khz
16
7h38m
96 Khz
24
5h44m
16
3h49m
24
2h52m
192 kHz
16
1h54m
24
1h26m
DATA TRANSFER RATES
File transfers in the digital domain are of critical importance, and the time taken to make such transfers can be
a fairly costly matter. Many factors influence the transfer speed of digital material from one media to another
so it is very difficult to accurately predict exact times.
It is not sufficient to say “USB-2” and assume that the transfer will be made at 480 Mbits/second because this
will not be the case. The speed is governed by three principal factors, the speed which the source device can
supply the data, and the speed that the receptor can accept the data and the USB link speed between the two
devices.
In recent tests the Nagra Seven transfers data either through USB-2 or from the internal micro SD to the
computer at a rate of approximately 7.5 Mbytes per second. This means that the transfer of 1GB of data will
take approximately 2 minutes 15 seconds. This means that 1 hour of stereo 2 channels 48 kHz will transfer at
approximately 25 times faster than real time. The type of file will not make any difference to the transfer
speed.
ANNEX II
73
September 2013
ANNEX III
iXML Metadata implementation
The Nagra Seven records Broadcast Wave Files which include the iXML metadata in the header
chunk. This information will be ignored by equipment not able to interpret the data. The table below
shows the implementation of the data within the Nagra Seven.
ANNEX III
74
September 2013
INDEX
AES Output connector, 9
AES screen, 26
ALC / LIM, 28
Alc/Lim, 20
Analog input selection, 24
Analog inputs, 24
Analog levels screen, 25
Audio Menu, 23
Auto Copy, 43
Auto-skip in playback, 35
Battery Charging, 5
Battery life and care, 6
Battery packs, 13
Charging, 5
Charging times, 5
Clock reference, 33
Compact flash slot, 7
Copy Manager, 41
Copy manager commands, 41
DATA DISPLAY SCREEN, 16
Data entry, 46
Data Transfer Rates, 72
Digital input connectors, 7
Directory, 39
Display Screen, 11
Drive, 41
Edit controls, 51
Editor, 20
EDITOR, 50
ERROR MESSAGES, 64
Error messages (copy function only), 42
Ethernet Connector, 8
False start, 45
File format Menu, 35
File name, 35
Filters, 20, 27
Folder, 40
Frame rates, 57
Fuses, 4
GUARANTEE, 1
Headphone connector, 12
I.S.D.N., 10
Icon selection, 37
Input Connectors, 7
Input matrix, 23
Inputs, 19
Internal tc generator, 57
ISDN, 20
iXML Metadata implementation, 73
Jam Sync, 60
Keyboard layout, 48
Level potentiometers, 12
Line Output connectors, 9
Lithium-Ion Battery life and care, 6
Loudspeaker, 20
ANNEX III
Loudspeaker Menu, 30
Machine name, 48
Main Display, 11
Main function selector, 11
Mains power, 4
Max file size, 36
Media, 19
Media Menu, 39
MENU MODE, 22
Metadata, 20
Metadata Menu Screen, 44
Meters Menu, 31
Mic left / right display scale, 32
Modulometers, 31
Monitoring Menu, 30
Output Menu, 29
Outputs, 20
Pick-up scene, 45
PLAY, 12
Pot. Assign, 36
Power indication, 5
POWER OFF, 11
Pre-record mode, 35
Pre-record time, 35
REAR PANEL, 13
RECORD, 12
Recording times, 72
Ref.Gen, 30
Reference, 19
Reformat, 47
Sample frequency, 33
Screen lock, 21
Serial number location, 13
Set from Ext / RTC, 62
Settings Menu, 33
Settings:, 19
SHORTCUT SCREEN, 19
Slate, 19
Slate microphone, 26
Slate Microphone, 12
Start / Stop connection, 8
Start / stop polarity, 35
STOP, 12
TC Format, 61
TC Generator, 60
TC reset, 62
TC User bits, 61
TC User Mode, 61
Templates, 20
Templates Menu Screen, 38
TEST position, 11
Time and Date, 47
Time Code, 20
TIME CODE, 56
Time Code and Real Time Clock (RTC) powering, 6
75
September 2013
Time code assemble, 60
Time code displays, 59
Time code external, 60
Time code in digital recorders, 56
Time code jam sync, 60
Time Code Lemo Connector, 10
Time code menu, 60
Time code playback, 58
Time code Pull-up / down, 58
Time code recording, 59
Time code Source, 60
ANNEX III
Time setting, 61
Tools, 19
Tools Menu, 47
USB port, 8
Warranty, 1
WARRANTY, 1
WCK IN / OUT, 10
WiFi / 3G, 20
WiFi / GSM, 10
Wild track, 45
76
September 2013