1
RV 3.10: User Manual
Tweak Software http://www.tweaksoftware.com
14th September 2010
Contents
1 Introduction
1.1 Overview . . . . . . . . . . . . . . . . . . . . . . .
1.2 Getting Started With RV . . . . . . . . . . . . . .
1.2.1 Loading Media and Saving Sessions . . . .
1.2.2 Caching . . . . . . . . . . . . . . . . . . . .
1.2.3 Sources and Layers . . . . . . . . . . . . . .
1.2.4 RV Views . . . . . . . . . . . . . . . . . . .
1.2.5 Marking and Navigating . . . . . . . . . . .
1.2.6 Color . . . . . . . . . . . . . . . . . . . . .
1.2.7 Menus, Help and Hot Keys . . . . . . . . .
1.2.8 Parameter Editing and Virtual Sliders . . .
1.2.9 Preferences and Command Line Parameters
1.2.10 Customizing RV . . . . . . . . . . . . . . .
1.3 Getting Started with RVIO . . . . . . . . . . . . .
1.3.1 Converting Sequences and Audio . . . . . .
1.3.2 Processing RV Session Files . . . . . . . . .
1.3.3 Slates, Mattes, Watermarks, etc. . . . . . .
.
.
.
.
.
.
.
.
.
.
.
.
.
.
.
.
.
.
.
.
.
.
.
.
.
.
.
.
.
.
.
.
.
.
.
.
.
.
.
.
.
.
.
.
.
.
.
.
.
.
.
.
.
.
.
.
.
.
.
.
.
.
.
.
.
.
.
.
.
.
.
.
.
.
.
.
.
.
.
.
.
.
.
.
.
.
.
.
.
.
.
.
.
.
.
.
.
.
.
.
.
.
.
.
.
.
.
.
.
.
.
.
.
.
.
.
.
.
.
.
.
.
.
.
.
.
.
.
.
.
.
.
.
.
.
.
.
.
.
.
.
.
.
.
.
.
.
.
.
.
.
.
.
.
.
.
.
.
.
.
.
.
.
.
.
.
.
.
.
.
.
.
.
.
.
.
.
.
.
.
.
.
.
.
.
.
.
.
.
.
.
.
.
.
.
.
.
.
.
.
.
.
.
.
.
.
.
.
.
.
.
.
.
.
.
.
.
.
.
.
.
.
.
.
.
.
.
.
.
.
.
.
.
.
.
.
.
.
.
.
.
.
.
.
.
.
.
.
.
.
.
.
.
.
.
.
.
.
.
.
.
.
.
.
.
.
.
.
.
.
.
.
.
.
.
.
.
.
.
.
.
.
.
.
.
.
.
.
.
.
.
.
.
.
.
.
.
.
.
.
.
.
.
.
.
.
.
.
.
.
.
.
.
.
.
.
.
.
.
.
.
.
.
.
.
.
.
.
.
.
.
.
.
.
.
.
.
.
.
.
.
.
.
.
.
.
.
.
.
.
.
.
.
.
.
.
.
.
.
.
.
.
.
.
.
.
.
.
.
.
.
.
.
.
.
.
.
.
.
.
.
.
.
.
6
6
6
6
7
7
7
7
7
8
8
9
9
9
9
9
10
2 Installation
2.1 Overview . . . . . . . . . . . . . . .
2.2 Mac OS X . . . . . . . . . . . . . . .
2.2.1 Requirements . . . . . . . . .
2.2.2 Installation and Licensing . .
2.2.3 Structure of RV on OS X . .
2.3 Linux . . . . . . . . . . . . . . . . .
2.3.1 Requirements . . . . . . . . .
2.3.2 Installation and Licensing . .
2.3.3 Structure of RV on Linux . .
2.4 Windows . . . . . . . . . . . . . . .
2.4.1 Requirements . . . . . . . . .
2.4.2 Installation and Licensing . .
2.4.3 Structure of RV on Windows
.
.
.
.
.
.
.
.
.
.
.
.
.
.
.
.
.
.
.
.
.
.
.
.
.
.
.
.
.
.
.
.
.
.
.
.
.
.
.
.
.
.
.
.
.
.
.
.
.
.
.
.
.
.
.
.
.
.
.
.
.
.
.
.
.
.
.
.
.
.
.
.
.
.
.
.
.
.
.
.
.
.
.
.
.
.
.
.
.
.
.
.
.
.
.
.
.
.
.
.
.
.
.
.
.
.
.
.
.
.
.
.
.
.
.
.
.
.
.
.
.
.
.
.
.
.
.
.
.
.
.
.
.
.
.
.
.
.
.
.
.
.
.
.
.
.
.
.
.
.
.
.
.
.
.
.
.
.
.
.
.
.
.
.
.
.
.
.
.
.
.
.
.
.
.
.
.
.
.
.
.
.
.
.
.
.
.
.
.
.
.
.
.
.
.
.
.
.
.
.
.
.
.
.
.
.
.
.
.
.
.
.
.
.
.
.
.
.
.
.
.
.
.
.
.
.
.
.
.
.
.
.
.
.
.
.
.
.
.
.
.
.
.
.
.
.
.
.
.
.
.
.
.
.
.
.
.
.
.
.
.
.
.
.
.
.
.
.
.
.
.
.
.
.
.
.
.
.
.
.
.
.
.
.
.
.
.
.
.
.
.
.
.
.
.
.
.
.
.
.
.
.
.
.
.
.
.
.
.
.
.
.
11
11
11
11
11
12
12
12
12
12
13
13
13
13
3 Command Line Usage
3.1 Image Sequence Notation . . . . . . . . . . . . . . . . . . . . .
3.1.1 Negative Frame Numbers . . . . . . . . . . . . . . . . .
3.2 Source Layers from the Command Line . . . . . . . . . . . . .
3.2.1 Associating Audio with Image Sequences or Movie Files
3.2.2 Dual Image Sequences and/or Movie Files as Stereo . .
3.2.3 Per-Source Arguments . . . . . . . . . . . . . . . . . . .
3.2.4 A note on the -fps per-source argument . . . . . . . .
3.2.5 Source Layer Caveats and Capabilities . . . . . . . . . .
.
.
.
.
.
.
.
.
.
.
.
.
.
.
.
.
.
.
.
.
.
.
.
.
.
.
.
.
.
.
.
.
.
.
.
.
.
.
.
.
.
.
.
.
.
.
.
.
.
.
.
.
.
.
.
.
.
.
.
.
.
.
.
.
.
.
.
.
.
.
.
.
.
.
.
.
.
.
.
.
.
.
.
.
.
.
.
.
.
.
.
.
.
.
.
.
.
.
.
.
.
.
.
.
.
.
.
.
.
.
.
.
.
.
.
.
.
.
.
.
.
.
.
.
.
.
.
.
.
.
.
.
.
.
.
.
15
16
17
17
17
18
18
18
18
.
.
.
.
.
.
.
.
.
.
.
.
.
.
.
.
.
.
.
.
.
.
.
.
.
.
.
.
.
.
.
.
.
.
.
.
.
.
.
.
.
.
.
.
.
.
.
.
.
.
.
.
.
.
.
.
.
.
.
.
.
.
.
.
.
1
.
.
.
.
.
.
.
.
.
.
.
.
.
.
.
.
.
.
.
.
.
.
.
.
.
.
.
.
.
.
.
.
.
.
.
.
.
.
.
CONTENTS
3.3
Directories as Input . . . . . . . . . . . . . . . . . . . . . . . . . . . . . . . . . . . . . . . . .
19
4 User Interface
4.1 Feedback . . . . . . . . . . . . . . . . . . . . . .
4.2 Loading Images, Sequences, Movies and Audio .
4.2.1 Using the File Browser . . . . . . . . . . .
4.2.2 Dragging and Dropping . . . . . . . . . .
4.3 Examining an Image . . . . . . . . . . . . . . . .
4.3.1 Panning, Zooming, and Rotating . . . . .
4.3.2 Inspecting Pixel Values . . . . . . . . . .
4.3.3 Comparing Images with Wipes . . . . . .
4.3.4 Parameter Edit Mode and Virtual Sliders
4.3.5 Image Filtering . . . . . . . . . . . . . . .
4.3.6 Big Images . . . . . . . . . . . . . . . . .
4.3.7 Image Information . . . . . . . . . . . . .
4.4 Playing Image Sequences, Movie Files, and Audio
4.4.1 Timeline . . . . . . . . . . . . . . . . . . .
4.4.2 Timeline Configuration . . . . . . . . . .
4.4.3 Realtime versus Play All Frames . . . . .
4.4.4 In and Out Points . . . . . . . . . . . . .
4.4.5 Marks . . . . . . . . . . . . . . . . . . . .
4.4.6 Timeline Magnifier . . . . . . . . . . . . .
4.5 Audio . . . . . . . . . . . . . . . . . . . . . . . .
4.5.1 Audio Preferences . . . . . . . . . . . . .
4.5.2 Audio on RV for Linux . . . . . . . . . .
4.6 Caching . . . . . . . . . . . . . . . . . . . . . . .
4.7 Color and LUTs . . . . . . . . . . . . . . . . . .
4.8 Stereo . . . . . . . . . . . . . . . . . . . . . . . .
4.9 Key and Mouse Bindings . . . . . . . . . . . . .
4.10 Preferences File . . . . . . . . . . . . . . . . . . .
. . . .
. . . .
. . . .
. . . .
. . . .
. . . .
. . . .
. . . .
. . . .
. . . .
. . . .
. . . .
Files .
. . . .
. . . .
. . . .
. . . .
. . . .
. . . .
. . . .
. . . .
. . . .
. . . .
. . . .
. . . .
. . . .
. . . .
.
.
.
.
.
.
.
.
.
.
.
.
.
.
.
.
.
.
.
.
.
.
.
.
.
.
.
.
.
.
.
.
.
.
.
.
.
.
.
.
.
.
.
.
.
.
.
.
.
.
.
.
.
.
.
.
.
.
.
.
.
.
.
.
.
.
.
.
.
.
.
.
.
.
.
.
.
.
.
.
.
.
.
.
.
.
.
.
.
.
.
.
.
.
.
.
.
.
.
.
.
.
.
.
.
.
.
.
.
.
.
.
.
.
.
.
.
.
.
.
.
.
.
.
.
.
.
.
.
.
.
.
.
.
.
.
.
.
.
.
.
.
.
.
.
.
.
.
.
.
.
.
.
.
.
.
.
.
.
.
.
.
.
.
.
.
.
.
.
.
.
.
.
.
.
.
.
.
.
.
.
.
.
.
.
.
.
.
.
.
.
.
.
.
.
.
.
.
.
.
.
.
.
.
.
.
.
.
.
.
.
.
.
.
.
.
.
.
.
.
.
.
.
.
.
.
.
.
.
.
.
.
.
.
.
.
.
.
.
.
.
.
.
.
.
.
.
.
.
.
.
.
.
.
.
.
.
.
.
.
.
.
.
.
.
.
.
.
.
.
.
.
.
.
.
.
.
.
.
.
.
.
.
.
.
.
.
.
.
.
.
.
.
.
.
.
.
.
.
.
.
.
.
.
.
.
.
.
.
.
.
.
.
.
.
.
.
.
.
.
.
.
.
.
.
.
.
.
.
.
.
.
.
.
.
.
.
.
.
.
.
.
.
.
.
.
.
.
.
.
.
.
.
.
.
.
.
.
.
.
.
.
.
.
.
.
.
.
.
.
.
.
.
.
.
.
.
.
.
.
.
.
.
.
.
.
.
.
.
.
.
.
.
.
.
.
.
.
.
.
.
.
.
.
.
.
.
.
.
.
.
.
.
.
.
.
.
.
.
.
.
.
.
.
.
.
.
.
.
.
.
.
.
.
.
.
.
.
.
.
.
.
.
.
.
.
.
.
.
.
.
.
.
.
.
.
.
.
.
.
.
.
.
.
.
.
.
.
.
.
.
.
.
.
.
.
.
.
.
.
.
.
.
.
.
.
.
.
.
.
.
.
.
.
.
.
.
.
.
.
.
.
.
.
.
.
.
.
.
.
.
.
.
.
.
.
.
.
.
.
.
.
.
.
.
.
.
.
.
.
.
.
.
.
.
.
.
.
.
.
.
.
.
.
.
.
.
.
.
.
.
.
.
.
.
.
.
.
.
.
.
.
.
.
.
.
.
22
22
23
23
25
25
26
26
27
27
28
29
30
30
31
31
32
32
33
33
34
34
35
35
36
37
37
37
5 The Session and the Session Manager
5.1 RV Session . . . . . . . . . . . . . . . . . . . . .
5.1.1 What’s in a Session . . . . . . . . . . . .
5.2 Session Manager . . . . . . . . . . . . . . . . . .
5.3 Creating, Adding to, and Removing from a View
5.4 Navigating Between Views . . . . . . . . . . . . .
5.5 Source Views . . . . . . . . . . . . . . . . . . . .
5.6 Group Views . . . . . . . . . . . . . . . . . . . .
5.6.1 Sequence Views . . . . . . . . . . . . . . .
5.6.2 Stack Views . . . . . . . . . . . . . . . . .
5.6.3 Layout Views . . . . . . . . . . . . . . . .
5.7 Retime View . . . . . . . . . . . . . . . . . . . .
.
.
.
.
.
.
.
.
.
.
.
.
.
.
.
.
.
.
.
.
.
.
.
.
.
.
.
.
.
.
.
.
.
.
.
.
.
.
.
.
.
.
.
.
.
.
.
.
.
.
.
.
.
.
.
.
.
.
.
.
.
.
.
.
.
.
.
.
.
.
.
.
.
.
.
.
.
.
.
.
.
.
.
.
.
.
.
.
.
.
.
.
.
.
.
.
.
.
.
.
.
.
.
.
.
.
.
.
.
.
.
.
.
.
.
.
.
.
.
.
.
.
.
.
.
.
.
.
.
.
.
.
.
.
.
.
.
.
.
.
.
.
.
.
.
.
.
.
.
.
.
.
.
.
.
.
.
.
.
.
.
.
.
.
.
.
.
.
.
.
.
.
.
.
.
.
.
.
.
.
.
.
.
.
.
.
.
.
.
.
.
.
.
.
.
.
.
.
.
.
.
.
.
.
.
.
.
.
.
.
.
.
.
.
.
.
.
.
.
.
.
.
.
.
.
.
.
.
.
.
.
.
.
.
.
.
.
.
.
.
.
.
.
.
.
.
.
.
.
.
.
.
.
.
.
.
.
.
.
.
.
.
.
.
.
.
.
.
.
.
.
.
.
.
.
40
40
40
40
42
42
43
43
46
46
46
46
6 How a Pixel Gets from a File to the Screen
6.1 Image Layers . . . . . . . . . . . . . . . . . .
6.1.1 Stereo Layers . . . . . . . . . . . . . .
6.2 Image Attributes . . . . . . . . . . . . . . . .
6.3 Image Channels . . . . . . . . . . . . . . . . .
6.3.1 Precision . . . . . . . . . . . . . . . .
6.3.2 Channel Remapping . . . . . . . . . .
6.4 Crop and Uncrop . . . . . . . . . . . . . . . .
6.5 Conversion to Linear Color Space . . . . . . .
6.5.1 Non-Rec. 709 Primaries . . . . . . . .
.
.
.
.
.
.
.
.
.
.
.
.
.
.
.
.
.
.
.
.
.
.
.
.
.
.
.
.
.
.
.
.
.
.
.
.
.
.
.
.
.
.
.
.
.
.
.
.
.
.
.
.
.
.
.
.
.
.
.
.
.
.
.
.
.
.
.
.
.
.
.
.
.
.
.
.
.
.
.
.
.
.
.
.
.
.
.
.
.
.
.
.
.
.
.
.
.
.
.
.
.
.
.
.
.
.
.
.
.
.
.
.
.
.
.
.
.
.
.
.
.
.
.
.
.
.
.
.
.
.
.
.
.
.
.
.
.
.
.
.
.
.
.
.
.
.
.
.
.
.
.
.
.
.
.
.
.
.
.
.
.
.
.
.
.
.
.
.
.
.
.
.
.
.
.
.
.
.
.
.
.
.
.
.
.
.
.
.
.
.
.
.
.
.
.
.
.
.
.
.
.
.
.
.
.
.
.
.
.
.
.
.
.
.
.
.
.
.
.
.
.
.
.
.
.
48
48
48
48
51
51
52
52
53
54
2
.
.
.
.
.
.
.
.
.
.
.
.
.
.
.
.
.
.
CONTENTS
.
.
.
.
.
.
.
.
.
.
.
.
.
.
.
.
.
.
.
.
.
.
.
.
.
.
.
.
.
.
.
.
.
.
.
.
.
.
.
.
.
.
.
.
.
.
.
.
.
.
.
.
.
.
.
.
.
.
.
.
.
.
.
.
.
.
.
.
.
.
.
.
.
.
.
.
.
.
.
.
.
.
.
.
.
.
.
.
.
.
.
.
.
.
.
.
.
.
.
.
.
.
.
.
.
.
.
.
.
.
.
.
.
.
.
.
.
.
.
.
.
.
.
.
.
.
.
.
.
.
.
.
.
.
.
.
.
.
.
.
.
.
.
.
.
.
.
.
.
.
.
.
.
.
.
.
.
.
.
.
.
.
.
.
.
.
.
.
.
.
.
.
.
.
.
.
.
.
.
.
.
.
.
.
.
.
.
.
.
.
.
.
.
.
.
.
.
.
.
.
.
.
.
.
.
.
.
.
.
.
.
.
.
.
.
.
.
.
.
.
.
.
.
.
.
.
.
.
.
.
.
.
.
.
.
.
.
.
.
.
.
.
.
.
.
.
.
.
.
.
.
.
.
.
.
.
.
.
.
.
.
.
.
.
.
.
.
.
.
.
.
.
.
.
.
.
.
.
.
.
.
.
.
.
.
.
.
.
.
.
.
.
.
.
.
.
.
.
.
.
.
.
.
.
.
.
.
.
.
.
.
.
.
.
.
.
.
.
.
.
.
.
.
.
.
.
.
.
.
.
.
.
.
.
.
.
.
.
.
.
.
.
.
.
.
.
.
.
.
.
.
.
.
.
.
.
.
.
.
.
.
.
.
.
.
.
.
.
.
.
.
.
.
.
.
.
.
.
.
.
.
.
.
.
.
.
.
.
.
.
.
.
.
.
.
.
.
.
.
.
.
.
.
.
.
.
.
.
.
.
.
.
.
.
.
.
.
.
.
.
.
.
.
.
.
.
.
.
.
.
.
.
.
.
.
.
.
.
.
.
.
.
.
.
.
.
.
.
.
.
.
.
.
.
.
.
54
54
54
55
55
55
55
56
56
56
56
57
57
57
57
58
58
58
59
59
59
59
59
60
.
.
.
.
.
.
.
.
.
.
.
.
.
.
.
.
.
.
.
.
.
.
.
.
.
.
.
.
.
.
.
.
.
.
.
.
.
.
.
.
.
.
.
.
.
.
.
.
.
.
.
.
.
.
.
.
.
.
.
.
.
.
.
.
.
.
.
.
.
.
.
.
.
.
.
.
.
.
.
.
.
.
.
.
.
.
.
.
.
.
.
.
.
.
.
61
61
62
63
63
63
8 Packages
8.1 Package Support Path . . . . . . . . . . . . . . . . . . . . . . . . . . . . . . . . . . . . . . . .
8.2 Installation . . . . . . . . . . . . . . . . . . . . . . . . . . . . . . . . . . . . . . . . . . . . . .
8.3 Package Dependencies . . . . . . . . . . . . . . . . . . . . . . . . . . . . . . . . . . . . . . . .
65
65
66
66
9 Stereo Viewing
9.1 Anaglyph . . . . . . . . . . . .
9.2 Side-by-Side and Mirror . . . .
9.3 DLP Checker and Scanline . .
9.4 Squeezed Stereo Modes . . . .
9.5 Hardware Stereo Support . . .
9.6 Additional Stereo Operations .
9.6.1 Swap eyes . . . . . . . .
9.6.2 Relative Eye Offset . . .
9.6.3 Flip/Flop the Right Eye
6.6
6.7
6.8
6.5.2 Y RY BY Conversion . . . . . . . . . . . . . . . . .
6.5.3 YUV (YCbCr) Conversion . . . . . . . . . . . . . . .
6.5.4 Log to Linear Color Space Conversion . . . . . . . .
6.5.5 File Gamma Correction . . . . . . . . . . . . . . . .
6.5.6 sRGB to Linear Color Space Conversion . . . . . . .
6.5.7 Rec. 709 Transfer to Linear Color Space Conversion
6.5.8 Pre-Cache and File LUTs . . . . . . . . . . . . . . .
Color Correction . . . . . . . . . . . . . . . . . . . . . . . .
6.6.1 Luminance LUTs . . . . . . . . . . . . . . . . . . . .
6.6.2 Relative Exposure . . . . . . . . . . . . . . . . . . .
6.6.3 Hue Rotation . . . . . . . . . . . . . . . . . . . . . .
6.6.4 Relative Saturation . . . . . . . . . . . . . . . . . . .
6.6.5 Contrast . . . . . . . . . . . . . . . . . . . . . . . . .
6.6.6 Inversion . . . . . . . . . . . . . . . . . . . . . . . .
Display Simulation and Correction . . . . . . . . . . . . . .
6.7.1 Display and Look LUTs . . . . . . . . . . . . . . . .
6.7.2 Display Gamma Correction . . . . . . . . . . . . . .
6.7.3 sRGB Display Correction . . . . . . . . . . . . . . .
6.7.4 Rec. 709 Non-Linear Transfer Display Correction . .
6.7.5 Display Brightness . . . . . . . . . . . . . . . . . . .
Final Display Filters . . . . . . . . . . . . . . . . . . . . . .
6.8.1 Channel Reorder . . . . . . . . . . . . . . . . . . . .
6.8.2 Isolating Channels . . . . . . . . . . . . . . . . . . .
6.8.3 Out-of-range Display . . . . . . . . . . . . . . . . . .
7 Using LUTs in RV
7.1 Channel (1D) versus 3D LUTs
7.2 Input Matrix and Pre-LUT . .
7.3 The Pre-Cache LUT . . . . . .
7.4 LUT File Formats . . . . . . .
7.4.1 RSR .csp LUT Format
.
.
.
.
.
.
.
.
.
.
.
.
.
.
.
.
.
.
.
.
.
.
.
.
.
.
.
.
.
.
.
.
.
.
.
.
.
.
.
.
.
.
.
.
.
.
.
.
.
.
.
.
.
.
.
.
.
.
.
.
.
.
.
.
.
.
.
.
.
.
.
.
.
.
.
.
.
.
.
.
. . . .
. . . .
. . . .
. . . .
. . . .
. . . .
. . . .
. . . .
Only .
.
.
.
.
.
.
.
.
.
.
.
.
.
.
.
.
.
.
.
.
.
.
.
.
.
.
.
.
.
.
.
.
.
.
.
.
.
.
.
.
.
.
.
.
.
.
.
.
.
.
.
.
.
.
.
.
.
.
.
.
.
.
.
.
.
.
.
.
.
.
.
.
.
.
.
.
.
.
.
.
.
.
.
.
.
.
.
.
.
.
.
.
.
.
.
.
.
.
.
.
.
.
.
.
.
.
.
.
.
.
.
.
.
.
.
.
.
.
.
.
.
.
.
.
.
.
.
.
.
.
.
.
.
.
.
.
.
.
.
.
.
.
.
.
.
.
.
.
.
.
.
.
.
.
.
.
.
.
.
.
.
.
.
.
.
.
.
.
.
.
.
.
.
.
.
.
.
.
.
.
.
.
.
.
.
.
.
.
.
.
.
.
.
.
.
.
.
.
.
.
.
.
.
.
.
.
.
.
.
.
.
.
.
.
.
.
.
.
.
.
.
.
.
.
.
.
.
.
.
.
.
.
.
.
.
.
.
.
.
.
.
.
.
.
.
.
.
.
.
.
.
.
.
.
.
.
.
.
.
.
.
.
.
.
.
.
.
.
.
.
.
.
.
.
.
.
.
.
.
67
67
69
69
70
70
70
70
70
71
10 Networking
10.1 The Network Dialog . . . . . . . . . .
10.1.1 Configuration . . . . . . . . . .
10.1.2 Starting a Connection . . . . .
10.1.3 Contacts and Permissions . . .
10.1.4 Networking Across the Internet
10.2 Synchronizing Multiple RVs . . . . . .
.
.
.
.
.
.
.
.
.
.
.
.
.
.
.
.
.
.
.
.
.
.
.
.
.
.
.
.
.
.
.
.
.
.
.
.
.
.
.
.
.
.
.
.
.
.
.
.
.
.
.
.
.
.
.
.
.
.
.
.
.
.
.
.
.
.
.
.
.
.
.
.
.
.
.
.
.
.
.
.
.
.
.
.
.
.
.
.
.
.
.
.
.
.
.
.
.
.
.
.
.
.
.
.
.
.
.
.
.
.
.
.
.
.
.
.
.
.
.
.
.
.
.
.
.
.
.
.
.
.
.
.
.
.
.
.
.
.
.
.
.
.
.
.
.
.
.
.
.
.
.
.
.
.
.
.
.
.
.
.
.
.
.
.
.
.
.
.
.
.
.
.
.
.
.
.
.
.
.
.
.
.
.
.
.
.
72
72
73
73
73
74
74
3
CONTENTS
10.2.1 Using Sync . . . . . . . . . . . . . . . . . . . . . . . . . . . . . . . . . . . . . . . . . .
11 Maximizing Performance
11.1 File I/O and Decoding Latency . . . . . . . . . . . . . . . . . . . . . . . . .
11.1.1 EXR, DPX, JPEG, Cineon, TARGA, and Tiff I/O Methods . . . . .
11.1.2 Multiple Reader Threads . . . . . . . . . . . . . . . . . . . . . . . .
11.2 Internal Software Operations . . . . . . . . . . . . . . . . . . . . . . . . . .
11.3 RAM . . . . . . . . . . . . . . . . . . . . . . . . . . . . . . . . . . . . . . . .
11.3.1 Pixel Buffer Objects (PBOs) and Prefetch . . . . . . . . . . . . . . .
11.4 Playback Sweet Spots . . . . . . . . . . . . . . . . . . . . . . . . . . . . . .
11.4.1 24 FPS 2048x1556 10 Bit DPX From Disk . . . . . . . . . . . . . . .
11.4.2 OpenEXR 24 FPS 2048x1556 3 Y-RY-BY 16 bit Floating Point B44
Disk . . . . . . . . . . . . . . . . . . . . . . . . . . . . . . . . . . . .
11.4.3 Individual Desktop Review . . . . . . . . . . . . . . . . . . . . . . .
. . . . . .
. . . . . .
. . . . . .
. . . . . .
. . . . . .
. . . . . .
. . . . . .
. . . . . .
and B44A
. . . . . .
. . . . . .
. . . .
. . . .
. . . .
. . . .
. . . .
. . . .
. . . .
. . . .
From
. . . .
. . . .
12 File Formats
12.1 Movie File Formats . . . . . . . . . . . . . . . .
12.1.1 Stereo Movie Files . . . . . . . . . . . .
12.1.2 Text Tracks . . . . . . . . . . . . . . . .
12.1.3 QuickTime Movie Files (.mov) . . . . .
12.1.4 MPEG-4 Movie Files (.mp4) . . . . . .
12.1.5 Windows AVI Files (.avi) . . . . . . .
12.1.6 Windows Media Files (.wmv) . . . . . .
12.1.7 RV’s movieproc Format (.movieproc)
12.2 Image File Formats . . . . . . . . . . . . . . . .
12.2.1 OpenEXR . . . . . . . . . . . . . . . . .
12.2.2 TIFF . . . . . . . . . . . . . . . . . . .
12.2.3 DPX and Cineon . . . . . . . . . . . . .
12.2.4 IFF (ILBM) . . . . . . . . . . . . . . . .
12.2.5 JPEG . . . . . . . . . . . . . . . . . . .
12.2.6 RAW Camera Formats . . . . . . . . . .
12.3 Audio File Formats . . . . . . . . . . . . . . . .
12.4 Simple ASCII EDL Format . . . . . . . . . . .
75
77
78
78
78
79
80
80
80
81
81
81
.
.
.
.
.
.
.
.
.
.
.
.
.
.
.
.
.
.
.
.
.
.
.
.
.
.
.
.
.
.
.
.
.
.
.
.
.
.
.
.
.
.
.
.
.
.
.
.
.
.
.
.
.
.
.
.
.
.
.
.
.
.
.
.
.
.
.
.
.
.
.
.
.
.
.
.
.
.
.
.
.
.
.
.
.
.
.
.
.
.
.
.
.
.
.
.
.
.
.
.
.
.
.
.
.
.
.
.
.
.
.
.
.
.
.
.
.
.
.
.
.
.
.
.
.
.
.
.
.
.
.
.
.
.
.
.
.
.
.
.
.
.
.
.
.
.
.
.
.
.
.
.
.
.
.
.
.
.
.
.
.
.
.
.
.
.
.
.
.
.
.
.
.
.
.
.
.
.
.
.
.
.
.
.
.
.
.
.
.
.
.
.
.
.
.
.
.
.
.
.
.
.
.
.
.
.
.
.
.
.
.
.
.
.
.
.
.
.
.
.
.
.
.
.
.
.
.
.
.
.
.
.
.
.
.
.
.
.
.
.
.
.
.
.
.
.
.
.
.
.
.
.
.
.
.
.
.
.
.
.
.
.
.
.
.
.
.
.
.
.
.
.
.
.
.
.
.
.
.
.
.
.
.
.
.
.
.
.
.
.
.
.
.
.
.
.
.
.
.
.
.
.
.
.
.
.
.
.
.
.
.
.
.
.
.
.
.
.
.
.
.
.
.
.
.
.
.
.
.
.
.
.
.
.
.
.
.
.
.
.
.
.
.
.
.
.
.
.
.
.
.
.
.
.
.
.
.
.
.
.
.
.
.
.
.
.
.
.
.
.
.
.
.
.
.
.
.
.
.
.
.
.
.
.
.
.
.
.
.
.
.
82
82
82
82
82
84
84
84
84
85
85
86
86
87
87
87
87
87
13 RV File Format
13.1 How RV Uses GTO . . . . . . . . . . . . . . . . . . . .
13.2 Naming . . . . . . . . . . . . . . . . . . . . . . . . . .
13.3 A Simple Example . . . . . . . . . . . . . . . . . . . .
13.4 Per-Source and Display Color Settings and LUT Files
13.5 Information Global to the Session . . . . . . . . . . . .
13.6 The Graph . . . . . . . . . . . . . . . . . . . . . . . .
13.6.1 Default Views . . . . . . . . . . . . . . . . . . .
13.7 Creating a Session File for Custom Review . . . . . .
13.7.1 RVSequence . . . . . . . . . . . . . . . . . . . .
13.7.2 RVLayoutGroup and RVStackGroup . . . . . .
13.8 Limitations on Number of Open Files . . . . . . . . .
13.9 What’s the Best Way to Write a .rv (GTO) File? . .
.
.
.
.
.
.
.
.
.
.
.
.
.
.
.
.
.
.
.
.
.
.
.
.
.
.
.
.
.
.
.
.
.
.
.
.
.
.
.
.
.
.
.
.
.
.
.
.
.
.
.
.
.
.
.
.
.
.
.
.
.
.
.
.
.
.
.
.
.
.
.
.
.
.
.
.
.
.
.
.
.
.
.
.
.
.
.
.
.
.
.
.
.
.
.
.
.
.
.
.
.
.
.
.
.
.
.
.
.
.
.
.
.
.
.
.
.
.
.
.
.
.
.
.
.
.
.
.
.
.
.
.
.
.
.
.
.
.
.
.
.
.
.
.
.
.
.
.
.
.
.
.
.
.
.
.
.
.
.
.
.
.
.
.
.
.
.
.
.
.
.
.
.
.
.
.
.
.
.
.
.
.
.
.
.
.
.
.
.
.
.
.
.
.
.
.
.
.
.
.
.
.
.
.
.
.
.
.
.
.
.
.
.
.
.
.
.
.
.
.
.
.
.
.
.
.
.
.
.
.
.
.
.
.
.
.
.
.
.
.
.
.
.
.
.
.
.
.
.
.
.
.
.
.
.
.
.
.
.
.
.
.
.
.
89
89
90
90
91
93
93
94
94
96
98
98
98
. . . . . . .
. . . . . . .
Conversion
. . . . . . .
. . . . . . .
. . . . . . .
.
.
.
.
.
.
.
.
.
.
.
.
.
.
.
.
.
.
.
.
.
.
.
.
.
.
.
.
.
.
.
.
.
.
.
.
.
.
.
.
.
.
.
.
.
.
.
.
.
.
.
.
.
.
.
.
.
.
.
.
.
.
.
.
.
.
.
.
.
.
.
.
.
.
.
.
.
.
.
.
.
.
.
.
.
.
.
.
.
.
.
.
.
.
.
.
.
.
.
.
.
.
.
.
.
.
.
.
.
.
.
.
.
.
.
.
.
.
.
.
99
. 99
. 99
. 99
. 99
. 99
. 101
14 RVIO
14.1 Basic Usage . . . . . . . . . . . . . . . . . .
14.1.1 Image Sequence Format Conversion
14.1.2 Image sequence to QuickTime Movie
14.1.3 Resizing and Scaling . . . . . . . .
14.1.4 Adding Audio to Movies . . . . . . .
14.2 Advanced Usage . . . . . . . . . . . . . . .
4
.
.
.
.
.
.
.
.
.
.
.
.
.
.
.
.
.
.
.
.
.
.
.
.
.
.
.
.
.
.
.
.
.
.
.
.
.
.
.
.
.
.
.
.
.
.
.
.
.
.
.
CONTENTS
14.2.1
14.2.2
14.2.3
14.2.4
14.2.5
14.2.6
14.2.7
14.2.8
14.2.9
Editing Sequences . . . . . . . . . . . . . . .
Processing RV Session Files . . . . . . . . . .
Advanced Image Conversions . . . . . . . . .
LUTs . . . . . . . . . . . . . . . . . . . . . .
Pixel Storage Formats and Channel Mapping
Advanced QuickTime Movie Conversions . .
Audio Conversions . . . . . . . . . . . . . . .
Stereoscopic and Multiview Conversions . . .
Slates, Mattes, Watermarks, and Burn-ins . .
.
.
.
.
.
.
.
.
.
.
.
.
.
.
.
.
.
.
.
.
.
.
.
.
.
.
.
.
.
.
.
.
.
.
.
.
.
.
.
.
.
.
.
.
.
.
.
.
.
.
.
.
.
.
.
.
.
.
.
.
.
.
.
.
.
.
.
.
.
.
.
.
.
.
.
.
.
.
.
.
.
.
.
.
.
.
.
.
.
.
.
.
.
.
.
.
.
.
.
.
.
.
.
.
.
.
.
.
.
.
.
.
.
.
.
.
.
.
.
.
.
.
.
.
.
.
.
.
.
.
.
.
.
.
.
.
.
.
.
.
.
.
.
.
.
.
.
.
.
.
.
.
.
.
.
.
.
.
.
.
.
.
.
.
.
.
.
.
.
.
.
.
.
.
.
.
.
.
.
.
.
.
.
.
.
.
.
.
.
.
.
.
.
.
.
.
.
.
.
.
.
.
.
.
.
.
.
15 RVLS
101
101
101
101
102
102
102
102
103
105
A Stereo Setup
107
A.1 Linux . . . . . . . . . . . . . . . . . . . . . . . . . . . . . . . . . . . . . . . . . . . . . . . . . 107
A.2 Mac OS X and Windows . . . . . . . . . . . . . . . . . . . . . . . . . . . . . . . . . . . . . . . 108
B The
B.1
B.2
B.3
RVLINK Protocol: Using RV as
Using rvlink URLs . . . . . . . . . .
Installing the Protocol Handler . . .
Testing the Protocol Handler . . . .
a URL
. . . . .
. . . . .
. . . . .
Handler
. . . . . . . . . . . . . . . . . . . . . . . . . . .
. . . . . . . . . . . . . . . . . . . . . . . . . . .
. . . . . . . . . . . . . . . . . . . . . . . . . . .
C Using RV as Nuke’s Flip Book Player
109
109
110
111
112
D Using RV as Shake’s Flip Book Player
115
D.1 Replacing shkv.app on OS X . . . . . . . . . . . . . . . . . . . . . . . . . . . . . . . . . . . 115
E RV Audio on Linux
E.1 Overview . . . . . . . . . . . . . . . .
E.1.1 How RV Handles Linux Audio
E.2 ALSA (Old) . . . . . . . . . . . . . . .
E.3 ALSA (Safe) . . . . . . . . . . . . . .
E.4 PortAudio . . . . . . . . . . . . . . . .
.
.
.
.
.
.
.
.
.
.
.
.
.
.
.
.
.
.
.
.
.
.
.
.
.
.
.
.
.
.
.
.
.
.
.
.
.
.
.
.
.
.
.
.
.
.
.
.
.
.
.
.
.
.
.
.
.
.
.
.
.
.
.
.
.
.
.
.
.
.
.
.
.
.
.
.
.
.
.
.
.
.
.
.
.
.
.
.
.
.
.
.
.
.
.
.
.
.
.
.
.
.
.
.
.
.
.
.
.
.
.
.
.
.
.
.
.
.
.
.
.
.
.
.
.
.
.
.
.
.
.
.
.
.
.
.
.
.
.
.
.
.
.
.
.
.
.
.
.
.
.
.
.
.
.
116
116
116
117
117
117
F Troubleshooting Networking
118
G Rising Sun Research CineSpace .csp File Format
119
H Crash Reporting
122
I
Open Source Components
I.1 GTO . . . . . . . . . . .
I.2 Libquicktime . . . . . .
I.3 FFMPEG . . . . . . . .
I.4 FreeType . . . . . . . .
I.5 Libtiff . . . . . . . . . .
I.6 LibEXIF . . . . . . . . .
I.7 Libjpeg . . . . . . . . .
I.8 OpenJPEG . . . . . . .
I.9 OpenEXR . . . . . . . .
I.10 GraphicsMagick . . . . .
I.11 Minizip . . . . . . . . .
I.12 OpenCV . . . . . . . . .
.
.
.
.
.
.
.
.
.
.
.
.
.
.
.
.
.
.
.
.
.
.
.
.
.
.
.
.
.
.
.
.
.
.
.
.
.
.
.
.
.
.
.
.
.
.
.
.
.
.
.
.
.
.
.
.
.
.
.
.
.
.
.
.
.
.
.
.
.
.
.
.
.
.
.
.
.
.
.
.
.
.
.
.
.
.
.
.
.
.
.
.
.
.
.
.
.
.
.
.
.
.
.
.
.
.
.
.
.
.
.
.
.
.
.
.
.
.
.
.
.
.
.
.
.
.
.
.
.
.
.
.
.
.
.
.
.
.
.
.
.
.
.
.
5
.
.
.
.
.
.
.
.
.
.
.
.
.
.
.
.
.
.
.
.
.
.
.
.
.
.
.
.
.
.
.
.
.
.
.
.
.
.
.
.
.
.
.
.
.
.
.
.
.
.
.
.
.
.
.
.
.
.
.
.
.
.
.
.
.
.
.
.
.
.
.
.
.
.
.
.
.
.
.
.
.
.
.
.
.
.
.
.
.
.
.
.
.
.
.
.
.
.
.
.
.
.
.
.
.
.
.
.
.
.
.
.
.
.
.
.
.
.
.
.
.
.
.
.
.
.
.
.
.
.
.
.
.
.
.
.
.
.
.
.
.
.
.
.
.
.
.
.
.
.
.
.
.
.
.
.
.
.
.
.
.
.
.
.
.
.
.
.
.
.
.
.
.
.
.
.
.
.
.
.
.
.
.
.
.
.
.
.
.
.
.
.
.
.
.
.
.
.
.
.
.
.
.
.
.
.
.
.
.
.
.
.
.
.
.
.
.
.
.
.
.
.
.
.
.
.
.
.
.
.
.
.
.
.
.
.
.
.
.
.
.
.
.
.
.
.
.
.
.
.
.
.
.
.
.
.
.
.
.
.
.
.
.
.
.
.
.
.
.
.
.
.
.
.
.
.
.
.
.
.
.
.
.
.
.
.
.
.
.
.
.
.
.
.
.
.
.
.
.
.
.
.
.
.
.
.
.
.
.
.
.
.
.
.
.
.
.
.
.
.
.
.
.
.
123
123
123
123
123
124
124
124
124
124
124
124
125
Chapter 1
Introduction
1.1
Overview
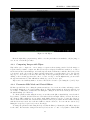
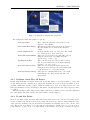
RV and its companion tools, RVIO and RVLS have been created to support digital artists, directors, supervisors, and production crews who need reliable, flexible, high-performance tools to review image sequences,
movie files, and audio. RV is clean and simple in appearance and has been designed to let users load, play,
inspect, navigate and edit image sequences and audio as simply and directly as possible. RV’s advanced
features do not clutter its appearance but are available through a rich command-line interface, extensive hot
keys and key-chords, and smart drag/drop targets. RV can be extensively customized for integration into
proprietary pipelines. The RV Reference Manual has information about RV customization.
This chapter provides quick-start guides to RV and RVIO. If you already have successfully installed RV,
and want to get going right away, this chapter will show you enough to get started.
1.2
1.2.1
Getting Started With RV
Loading Media and Saving Sessions
There are foure basic ways to load media into RV,
1. Command-line,
2. File open dialogs,
3. Drag/Drop, and
4. rvlink: protocol URL
RV can load individual files or multiple files (i.e. a sequence) and it can also read directories and figure out
the sequences they contain; you can pass RV a directory on the command-line or drag and drop a folder
onto RV. RV’s ability to read directories can be particularly useful. If your shots are stored as one take per
directory you can get in the habit of just dropping directories into RV or loading them on the command line.
Or you can quickly load multiple sequences or movies that are stored in a single directory.
Some simple RV command line examples are:
shell>
shell>
shell>
shell>
rv
rv
rv
rv
foo.mov
[ foo.#.exr foo.aiff ]
foo_dir/
.
and of course:
shell> rv -help
6
CHAPTER 1. INTRODUCTION
The output of the -help flag is reproduced in this manual in the chapter on command-line usage, Chapter
3.
RV sessions can be saved out as .rv files using the File->Save menus. Saved sessions contain the default
views, user-defined views, color setup, compositing setup, and other settings. This is useful for reloading and
sharing sessions, and also for setting up image conversion, compositing, or editing operations to be processed
by RVIO.
1.2.2
Caching
If your image sequences are too large to play back at speed directly from disk, you can cache them into
system memory using RV’s region cache. If you are playing compressed movies like large H.264 QuickTime
movies, you can use RV’s lookahead cache to smooth out playback without having to cache the entire movie.
If your IO subsystems can provide the badwidth, RV can be used to stream large uncompressed images from
disk. You can set the RV cache options from the Tools menu, using the hot keys “Shift+C” and “Ctrl-L”
(“Command+L” on Mac) for the region cache and lookahead cache respectively, or from the command line
using “-c” or “-l” flags. Also see the Caching tab of the Preferences dialog.
1.2.3
Sources and Layers
RV gives you the option to load media (image sequences or audio) as a Source or a Layer. A source is a
new sequence or movie that gets added to the end of the default sequence of the RV session. Adding sources
is the simplest way to build an edit in RV. Layers are the way that RV associates related media, e.g. an
audio clip that goes with an EXR sequence can be added as a layer so that it plays back along with the
sequence. Layers make it very simple to string together sequences with associated audio clips–each movie
or image sequence can be added as source with a corresponding audio clip added as a layer (see soundfile
commandline example above). RV’s stereoscopic display features can interpret the first two image layers in
a source as left and right views.
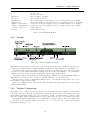
1.2.4
RV Views
RV provides three default views, and the ability to make views of your own. The three that all sessions have
are the Default Sequence, which shows you all your sources in order, the Default Stack, which shows you all
your sources stacked on top of one another, and the Default Layout, which has all the sources arranged in a
grid (or a column, row, or any other custom layout of your own design). In addition to the default views,
you can create any number of Sources, Sequences, Stacks, and Layouts of your own. See 5 for information
about the process of creating and managing your own views.
1.2.5
Marking and Navigating
RV’s timeline (hit TAB or F2 to bring it up) can be marked to make it easy to navigate around an RV
session. RV can mark sequence boundaries automatically, but you can also use the “m” key to place marks
anywhere on the timeline. Once a session is marked you can use hot keys to quickly navigate the timeline,
e.g. “control+right arrow” (“command+right arrow” on Mac) will set the in/out points to the next pair of
marks so you can loop over that part of the timeline. If no marks are set, many of these navigation options
interpret the boundaries between sources as ”virutal marks”, so that even without marking you can easily
step from one source to the next, etc.
1.2.6
Color
RV provides fine grained control over color management. Subsequent sections of this manual describe the
RV color pipeline and options with a fair amount of technical detail. RV supports file LUTs per source and
and overall display LUT as well as a completely customizable ’source setup’ function (described in the RV
Reference Manual). For basic operation, however, you may find that the built in hardware conversions can
do everything you need. A common example is playing a QuickTime movie that has baked-in sRGB together
with an EXR sequence stored as linear floating point. RV can bring the QuickTime into linear space using
7
CHAPTER 1. INTRODUCTION
the menu command Color->sRGB and then the whole session can be displayed to the monitor using the
menu command View->sRGB.
LUTs can be loaded into RV by dragging and dropping them onto the RV window, through the File>Import menus and on the command line using the -flut, -llut, -dlut, and -pclut options.
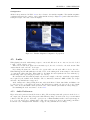
1.2.7
Menus, Help and Hot Keys
RV’s Help menu contains a link to launch the RV Manual (this document), along with links to RV release
notes, the draft Mu Users Manual, and some additional arcane sounding menu commands. Help->Show
Commands will print out all of RV’s current key bindings to the shell or console (these are also included in
chapter X of this manual). RV’s menus can be reached through the menu bar or by using the right mouse
button. Menus items with hot keys will display the hot key on the right side of the menu item. Some hot
keys worth learning right away are:
• Space - Toggle playback
• Tab or F2 - Toggle Show Timeline
• ’i’ - Toggle Show Info Widget
• ’‘’ - (back-tick) Toggle Full Screen
• F1 - Toggle Show Menu
• Shift + Left Click - Open Pixel Inspector at pointer
• ”q” to quit RV (or close the current session)
Also from the Help menu, you can reach all of Tweaks online resources, include the Tweak web site, demo
videos, latest documentation, and the support forums. If you’ve having some problem with RV, you can also
start a support ticket (either from email or the web) directly from the Help menu.
1.2.8
Parameter Editing and Virtual Sliders
Many settings in RV, like exposure, volume, or frame rate, can be changed quickly using Parameter Edit
Mode. This mode lets you use virtual sliders, the mouse wheel or the keyboard to edit RV parameters. Hot
keys and Parameter Editing Mode allow artists to easily and rapidly interact with images in RV. It is worth a
little practice to get comfortable using these tools. For example, to adjust the exposure setting of a sequence
you can use any of the following techniques:
1. Hit the ’e’ key to enter exposure editing mode Then:
2. Click and drag left or right to vary the exposure, and then release the mouse button to leave the mode,
3. OR: Roll the mouse wheel to vary the exposure and then hit return to leave the mode.
4. OR: Hit return, type the new exposure value at the prompt, and hit return again (typing ’.’ or any
digit also starts this text-entry mode)
5. OR: Use the ’+’ and ’-’ keys to vary the exposure and then hit return to leave the mode.
Some parameters in RV don’t use virtual sliders; you can edit these directly by entering the new value, e.g.
to change the playback frames per second:
1. Hit Shift+F
2. Type in the new frame rate at the prompt and hit return
Some other useful parameters,and their hot keys:
• File gamma - ’y’
8
CHAPTER 1. INTRODUCTION
• Hue - ’h’
• Contrast - ’k’
• Audio Volume - ctrl-’v’ (command-’v’ on Mac)
1.2.9
Preferences and Command Line Parameters
RV’s Preferences can be opened with the RV->Preferences menu item. These are worth exploring in some
detail. They give you fine control over how RV loads and displays images, handles color, manages the cache,
handles audio, etc. RV’s preferences map to RV’s command line options, so almost any option available
at the command line can be set to a preferred default value in the Preferences. RV also has a -noPrefs
command line flag so that you can temporarily ignore the preferences, and a -resetPrefs flag that will
reset all preferences to their default values. The quickest way to take a look at all of RV’s command line
options is:
shell> rv -help
1.2.10
Customizing RV
RV is built to be customized. For many users, this may be completely ignored or be limited to sharing
startup scripts and RV Packages created by other users or by Tweak. However, for facilities who need to
integrate RV into pipelines, dailies systems, and other applications, and for technically adventurous artists,
customization may be the most important and coolest aspect of RV. RV customization is discussed in some
detail in the RV Reference Manual. The starting point for customizers (after reading the manuals, of course)
is to look through the Mu source code that comes with RV. The most important file is rvui.mu, which
contains all of the menus, key bindings, control logic, and rendering functions. The RV Reference Manual
and the draft Mu manual can be found under RV’s help menu. Note that almost all varieties of extensions
to RV can be encapsulated in an RV Package, which is a platform-independent unit of functionality that can
be shared between users or facilities, and turned on or off as a unit. RV Packages are discussed in Chapter8.
1.3
1.3.1
Getting Started with RVIO
Converting Sequences and Audio
RVIO is a powerful pipeline tool. Like RV, the basic operation of RVIO is very simple, but advanced
(and complex) operations are possible. RVIO can be used with a command line very similar to RV’s, with
additional arguments for specifying the output. Any number of sources and layers can be given to RVIO
using the same syntax as you would use for RV. Some basic RVIO command line examples are:
shell> rvio foo.exr -o foo.mov
shell> rvio [ foo.#.exr foo.aiff ] -o foo.mov
shell> rvio [ foo_right.#.exr foo_left.#.exr foo.aiff ] \
-outstereo -o foo.mov
And of course:
shell> rvio -help
RVIO usage is more fully described in Chapter14.
1.3.2
Processing RV Session Files
RVIO can also take RV session files (.rv files) as input. RV session files can contain composites, color
corrections, LUTs, edits, and other information that might be easier to specify interactively in RV than by
using the command line. RV session files can be saved from RV and then processed with RVIO. For example
shell> rvio foo.rv -o foo_out.#.exr
9
CHAPTER 1. INTRODUCTION
When rvio operates on a session file, any of the Views defined in the session file can be selected to
provide rvio’s output, so a single session could generate any number of different output sequences or movies,
depending on which of the session’s views you choose.
1.3.3
Slates, Mattes, Watermarks, etc.
RVIO uses Mu scripts to create slates, frame burn-in and other operations that are useful for generating
dailies, client reviews and other outputs. These scripts are usable as is, but they can also be modified or
replaced by users. Some examples are:
shell> rvio foo.#.exr -overlay watermark "For Client Review" 0.5 \
-o foo.mov
shell> rvio foo.#.exr -leader simpleslate \
"Tweak Films" \
"Artist=Jane Doe" \
"Shot=SC101_vfx_01" \
"Notes=Lighter/Darker" \
-o foo.mov
10
Chapter 2
Installation
2.1
Overview
On Windows, RV is packaged with an installer program (32-bit) or as a zip file (64-bit). On Linux RV is
packaged as a tarball. On Mac OS X, RV is packaged as a dmg file. In all cases, RV requires a license file
from Tweak in order too run. The Tweak License Installer will launch if you attempt to run RV without
a license. If you have a license, browse to the license file from Tweak, install, save, and restart RV. If you
don’t have a license, check your HostID, as described below, and email it to Tweak so we can generate your
license.
Please Note: in large installations, where the license is installed and managed by a central authority and
individual users should never be installing licenses, the environment variable TWEAK_NO_LIC_INSTALLER
can be set in the global environment. This will prevent RV from ever launching the license installer, even
when no valid license can be found.
2.2
2.2.1
Mac OS X
Requirements
RV can run on older hardware with older graphics cards, but it may not be fully featured.
RV runs best on NVidia FX or better graphics cards (the ones that have fragment shaders), or on ATI
Radeon 9600 or better. There no requirement to use Quadro NVidia cards. For best speed, a PCIe card is
recommended although RV runs well on AGP 4x or 8x for film work.
When a graphics card without fragment shader support is being used, color correction functions and
LUTs may not work as expected.
You will need at least OS X 10.5 and, for the 32-bit version of RV, QuickTime 7.
2.2.2
Installation and Licensing
Download the latest Mac version of RV onto your Macintosh. This will be a .dmg file. Double click on the
.dmg icon. Once the folder opens, drag the RV application onto the Applications link.
RV requires a license file from Tweak in order to run. If you do not have a valid license file installed, RV
will launch a dialog for installing your license. Use the ’add license’ button on the license manager dialog
to browse to the license file you have received from Tweak. Make sure to save before you close the license
manager. Then restart RV.
If you don’t yet have a license, you will need to get one from Tweak. RV’s licenses are locked to your
computer using the Ethernet ID. Send this ID to Tweak to have a license generated for your computer.
The Ethernet ID looks something like this: 00:19:E3:04:8B:80, and can be found in the OS X network
preferences, under the option Built-in Ethernet in the Ethernet tab. It is easy to accidentally find the ID
for the Airport or other device on your Macintosh, so double check to make sure you have the correct ID. If
you computer has multiple network ports, choose the first one.
11
CHAPTER 2. INSTALLATION
2.2.3
Structure of RV on OS X
In OS X, RV is built as an Application bundle (.app). The bundle contains all of the same types of files found
in the Linux distribution tree, but also contains OS X specific files like icons and user interface elements
(.nib files). The application bundle can be installed at any location in a Mac file system or may be installed
on an NFS mounted file system.
If you wish to use RV command line tools, you will need to add the MacOS directory to your path. The directory is located relative to wherever you have installed RV. For example, if you installed RV in the default location, the /Applications directory, then the path would be /Applications/RV.app/Contents/MacOS.
Or /Applications/RV64.app/Contents/MacOS for the 64-bit version.)
If you wish to use RV as the protocol handler for the rvlink URL protocol (see Appendix B), run RV
once with the -registerHander command-line option. This will register the rvlink protocol handler with
the operating system.
2.3
2.3.1
Linux
Requirements
RV is built to work with NVidia graphics cards on Linux. For best results, a current NVidia driver (which
supports OpenGL 2.0) is recommended. RV can use older drivers and hardware, but many of its features–
namely color correction and display correction–may be disabled. RV is built on Ubuntu 8.04, but will run
on many other linux distributions. RV will only run on i386 or IA32 64 Linux (as reported by uname -a).
2.3.2
Installation and Licensing
RV for Linux is distributed as a gzipped tarball. Un-tar this archive into the directory in which you would
like to install RV with some version of the tar command, like this.
tar -zxf rv-Linux-x86_64-3.5.1.tar.gz
Edit your dot files to include the rv/bin directory in your PATH. You can use the Tweak license installer
to install your license, or can copy it directly in the $RV HOME/etc subdirectory and name it ”license.gto.”
2.3.3
Structure of RV on Linux
On Linux, the directory tree resulting from the above ’untar’ can be installed anywhere. The directory tree
contains the RV binary, start-up script, and runtime support files as well as documentation. In order to use
rv from a shell, you will need to have the bin directory of the RV distribution tree in your path.
RV is split into two programs: rv and rv.bin. rv is a shell script which sets a number of environment
variables including plugin directory locations in the RV tree and search paths for user plugins and scripts.
Currently the shell script makes sure the following environment variables are set properly:
RV HOME The location of the RV distribution tree.
LD LIBRARY PATH inserts $RV_HOME/lib in front of existing directories
MU MODULE PATH sets to $RV_HOME/plugins/Mu
MAGICK CONFIGURE PATH sets to $RV_HOME/etc/config
The rv shell script also contains two optional environment variables related to RV’s audio configuration.
These are commented out, but you may need to or choose to set them to fine tune RV’s audio performance
depending on the vintage and flavor of Linux. See the appendix for an in depth discussion of Linux audio
configuration.
Once it has finished setting up the environment the startup script executes the RV binary rv.bin with
the default UI script. If you have some of these variables set prior to calling the start up script, they will be
modified or augmented to meet RV’s requirements.
12
CHAPTER 2. INSTALLATION
If you wish to use RV as the protocol handler for the rvlink URL protocol (see Appendix B), the protocol
handler must be registered. Unlike Windows and Mac, Linux protocols are registered at the desktop environment level, not the OS level. After you’ve installed RV on your machine, you can run the ”rv.install handler”
script in the install’s bin directory. This script will register RV with both the KDE and Gnome desktop
environments.
Some application-specific notes:
Firefox may or may not respect the gnome settings, in general, we’ve found that if there is enough of
the gnome environmennt installed that gconfd is running (even if you’re using KDE or some other desktop
env), Firefox will pick up the gnome settings. If you can’t get this to work, you can register the rvlink
protocol with Firefox directly as described here: http://support.mozilla.com/en-US/kb/The+protocol+is+
not+associated+with+any+program#Register the protocol in Firefox.
Konqueror sadly seems to munge URLs before giving them to the protocol handler. For example by
swapping upper for lowercase letters. And sometimes it does not pass them on at all. This means some
rvlink URLs will work and some won’t, so we recommend only ”baked” rvlink urls with Konqueror at the
moment. (see Appendix B)
2.4
2.4.1
Windows
Requirements
RV is built to work with NVidia graphics cards on Windows. For best results, a current NVidia driver
(which supports OpenGL 2.0) is recommended. RV can use older drivers and hardware, but many of its
features–namely color correction and display correction–may be disabled. The 32-bit version of RV requires
that QuickTime 7 be installed on Windows.
2.4.2
Installation and Licensing
Download the latest Windows version of RV onto your Windows PC. For 32-bit RV, this will be a windows
installer executable. Double click on the installer icon. Follow the instructions to install RV. For 64-bit
windows, the download will by a zip file that you can unzip into the desired location.
RV requires a license file from Tweak in order to run. If you do not have a valid license file installed, RV
will launch a dialog for installing your license. Use the ’add license’ button on the license manager dialog
to browse to the license file you have received from Tweak. Make sure to save before you close the license
manager.
If you don’t yet have a license, you will need to get one from Tweak. RV’s licenses are locked to your
computer using the HostID. Send this ID to Tweak to have a license generated for your computer. The
Ethernet ID looks something like this: 00:19:E3:04:8B:80. The correct HostID for your computer will be
displayed in the license manager dialog in the HostID field on the left.
2.4.3
Structure of RV on Windows
RV is installed by default into C:\Program Files\Tweak\RV-3.10. A Tweak folder is created by default in
the Windows start menu, and you are given the option of creating a desktop shortcut during installation.
RV and other Tweak executable files (rv.exe, rvio.exe, etc.) are placed in the bin subdirectory.
If you wish to use RV as the protocol handler for the rvlink URL protocol (see Appendix B), the protocol
handler must be registered. If you used the .exe windows installer, RV was registered as the rvlink protocol
handler as part of that process. If you installed from the zip package, you can edit the file rvlink.reg, in
the etc directory, to point to the location where you installed RV. Then run this file (double-click) to edit
the registry to register RV as the rvlink protocol handler.
13
CHAPTER 2. INSTALLATION
Figure 2.1: Tweak License Installer
14
Chapter 3
Command Line Usage
In this chapter, the emphasis will be on using the software from a unix-like shell. On Windows, this can be
done via Cygwin’s bash shell or tcsh. If you choose to use the command.com shell, the command syntax
will be the same, but some features (like pattern matching, etc) which are common with unix shells may not
work.
To use RV from a shell, you will need to have the binary executable in your path. On Linux and Windows
the RV executable is located in the bin directory of the install tree.
On OS X this can be done by including /Applications/RV.app/Contents/MacOS in your path
(assuming you installed RV there). The executable on OS X is called RV; you can either type the name in
as is or create an alias or symbolic link from rv to RV. (Similarly, the 64-bit version of RV is called RV64.)
There are a number of ways to start RV from the command line:
rv options
rv options source1 source2 source3 ...
rv options [ source1 source2 ... ] [ source4 source5 ... ]
rv options [ source-options source1 source2 ... ] [ source-options source4
source5 ... ]
rv file.rv
The command line options are not required and may appear throughout the command line. Sources are
individual images, QuickTime .mov files, .avi files, audio files, image sequences or directory names. When
specifying a .rv file, no other sources should be on the command line. (See Table 3.1)
The third example above uses square brackets around groups of sources. When sources appear between
brackets they are called layers. These will be discussed in more detail below.
If RV is started with no arguments, it will launch a blank window; you can later add source material to
the window via file browser or drag and drop.
Options are all preceded by a dash (minus sign) in the unix tradition, even on windows. Some of them
take arguments and some of them are flags which toggle the associated feature on or off. For example:
shell> rv -fullscreen foo.mov
plays back a movie file in full screen mode. In this case -fullscreen is a toggle which takes no
arguments and foo.mov is one of the source material. If an option takes arguments, you supply them
directly after the option:
shell> rv -fps 23.97 bar.#.exr
Here the -fps option (frames per second) requires a single floating point number1 . With rare exception,
RV’s options are either toggles or take a single argument.gti
The most important option to remember is -help. The help option causes RV to print out all of the
options and command line syntax and can be anywhere in a command line. When unsure of what the next
argument is or whether you can add more options to a long command line, you can always add -help onto
1 A floating point number in this context means a number which may or may not have a decimal point. E.g., 10 and 10.5
are both floating point numbers.
15
CHAPTER 3. COMMAND LINE USAGE
the end of your command and immediately hit enter. At that point, RV will ignore the entire command and
print the help out. You can always use your shell’s history to get the command back, remove the -help
option, and continue typing the rest of the command.
shell> rv -fps 30 -fullscreen -l -lram .5 -help
(rv shows help)
Usage: RV movie and image viewer
...
(hit up arrow in shell, back up over -help and continue typing)
shell> rv -fps 30 -fullscreen -l -lram .5 -play foo.mov
Finally, you can do some simple arithmetic on option arguments. For example if you know you want to
apply an inverse gamma of 2.2 to an image to view it you could do this:
shell> rv -gamma 1/2.2
which is identical to this:
shell> rv -gamma 0.454545454545
3.1
Image Sequence Notation
RV has a special syntax to describe image sequences as source movies. Sequences are assumed to be files with
a common base name followed by a frame number and an image type extension. For example, the filenames
foo.1.tif and foo.0001.tif would be interpreted as frame 1 of the TIFF sequence foo. RV sorts images by
frame numbers in numeric order. It sorts image base names in lexical order. What this means is that RV
will sort images into sequences the way you expect it to. Padding tricks are unnecessary for RV to get the
image order correct; image order will be interpreted correctly.
foo.0001.tif foo.0002.tif foo.0003.tif foo.0004.tif
foo.0005.tif foo.0006.tif foo.0007.tif foo.0008.tif
foo.0009.tif foo.0010.tif
To play this image sequence in RV from the command line, you could start RV like this:
shell> rv foo.*.tif
and RV will automatically attempt to group the files into a logical movie. (Note: this will only work on
Linux or Mac OS, or some other unix-like shell, like cygwin on Windows.)
When you want to play a subset of frames or audio needs to be included, you can specify the sequence
using the “#” or “@” notation (similar to Shake’s) or the printf-like notation using “%” similar to Nuke.
rv
rv
rv
rv
rv
rv
rv
foo.#.tif
foo.2-#.tif
foo.2-8#.tif
foo.2-8.tif
foo.%04d.tif
foo.%04d.tif 2-8
foo.#.tif 2-8
The first example above plays all frames in the foo movie, the second line plays all frames starting at
frame 2, and the third plays only frame 2 through frame 8. The fourth line uses the “@” notation which forces
RV to assume 0 padded frame numbers–in this case, four “@” characters indicate a four character padding.
The final two examples use the printf-like syntax accepted by nuke. In the first case, the entire frame
range is specified with the assumption that the frame numbers will be padded with 0 up to four characters.
In the final two examples, the range is limited to frames 2 through 8.
Sometimes, you will encounter or create an image sequence which is purposefully missing frames. For
example, you may be rendering something that is very expensive to render and only wish to look at every
tenth frame. In this case, you can specify the increment using the “x” character like this:
16
CHAPTER 3. COMMAND LINE USAGE
rv foo.1-100x10#.tif
or alternately like this using the “@” notation for padding to four digits:
rv foo.1-100x10.tif
or if the file was padded to three digits like foo.001.tif:
rv foo.1-100x10.tif
In these examples, RV will play frames 1 through 100 by tens. So it will expect frames 1, 11, 21, 31, 41,
on up to 91.
If there is no obvious increment, but the frames need to be group into a sequence, you can list the frame
numbers with commas:
rv foo.1,3,5,7,8,9#.tif
In many cases, RV can detect file types automatically even if a file extension is not present or is mislabeled.
3.1.1
Negative Frame Numbers
RV can handle negative frames in image sequences. If the frame numbers are zero padded, they should look
like so:
foo.-012.tif
foo.-001.tif
To specify in and out points on the command line in the presence of negative frames, just include the
minus signs:
foo.-10-20#.tif
foo.-10--5#.tif
The first example uses frames -10 to +20. The second example uses frames -10 to -5. Although the use
of the “-” character to specify ranges can make the sequence a bit visually confusing, the interpretation is
not ambiguous.
3.2
Source Layers from the Command Line
You can create source material from multiple audio, image, and movie files from the command line by
enclosing them in square brackets. The typical usage looks something like this:
shell> rv [ foo.#.exr soundtrack.aiff ]
Note that there are spaces around the brackets: they must be completely separated from subsequent
arguments to be interpreted correctly. You cannot nest brackets and the brackets must be matched; for
every begin bracket there must be an end bracket.
3.2.1
Associating Audio with Image Sequences or Movie Files
Frequently a movie file or image sequence needs to be viewed with one or more separate audio files. When
you have multiple layers on the command line and one or more of the layers are audio files, RV will play
back the all of the audio files mixed together along with the images or movies. For example, to play back a
two wav files with an image sequence:
shell> rv [ foo.#.exr first.wav second.wav ]
If you have a movie file which already has audio you can still add additional audio files to be played:
shell> rv [ movie_with_audio.mov more_audio.aiff ]
17
CHAPTER 3. COMMAND LINE USAGE
3.2.2
Dual Image Sequences and/or Movie Files as Stereo
Its not unusual to render left and right eyes separately and want to view them as stereo together. When you
give RV multiple layers of movie files or image sequences, it uses the first two as the left and right eyes.
shell> rv [ left.#.exr right.#.exr ]
Its OK to mix and match formats with layers:
shell> rv [ left.mov right.100-300#.jpg ]
if you want audio too:
shell> rv [ left.#.exr right.#.exr soundtrack.aiff ]
As with the mono case, any number of audio files can be added: they will be played simultaneously.
3.2.3
Per-Source Arguments
There are a few arguments which can be applied with in the square brackets (See Table 3.2). The range
offset is a simple additive offset to the original frame number, so for example to shift the start frame of a
movie file without a time code track so that it starts at frame 101 (instead of 1):
shell> rv [ -ro 100 foo.mov ]
You must use the square brackets to set per-source arguments (and the square brackets must be surrounded by spaces).
The -in and -out per-source arguments are an easy way to create an EDL on the command line, even
when playing movie files.
3.2.4
A note on the -fps per-source argument
The point of the -fps arg is to provide a scaling factor in cases where the frame rate of the media cannot
be determined and you want to play an audio file with it. For example, if you want to play ”[foo.#.dpx
foo.wav]” in the same session with ”[bar.#.dpx bar.wav]” but the ”native frame rate of foo is 24fps
and the native frame rate of bar is 30fps, then you might want to say:
shell> rv [foo.#.dpx foo.wav -fps 24 ] [ bar.#.dpx bar.wav -fps 30 ]
This will ensure that the video and audio are synced properly no matter what frame rate you use for
playback. To clarify further, the per-source -fps flag has no relation to the frame rate that is used for
playback, and in general RV plays media (all loaded media) at whatever single frame rate is currenly in use.
3.2.5
Source Layer Caveats and Capabilities
There are a number of things you should be aware of when using source layers. In most cases, RV will
attempt to do something with what you give it. However, if your input is logically ambiguous the result may
be different than what you expect. Here are some things you should avoid using in layers of a single source:
• Images or movies with differing frame rates
• Images or movies with different image or pixel aspect ratios
• Images or movies which require special color correction for only one eye
• Images or movies stored with differing color spaces (e.g. cineon log images + jpeg)
Here are some things that are OK to do with layers:
• Images with different resolutions but the same image aspect ratio
• Images with different bit depths or number of channels or chroma sampling
18
CHAPTER 3. COMMAND LINE USAGE
• Audio files with different sample rates or bit depths
• Mixing movies with audio and separate audio files
• An image sequence for one eye and a movie for the other
• A movie with audio for one eye and a movie without audio for the other
• Audio files with no imagery
3.3
Directories as Input
If you give RV the name of a directory instead of a single file or an image sequence it will attempt to interpret
the contents of the directory. RV will find any single images, image sequences, or single movie files that it
can and present them as individual source movies. This is especially useful with the directory “.” on Linux
and OS X. If you navigate in a shell to a directory that contains an image sequence for example, you need
only type the following to play it:
rv .
You don’t even need to get a directory listing. If RV finds multiple sequences or a sequence and movie
files, it will sort and organize them into a playlist automatically. RV will attempt to read files without
extensions if they look like image files (for example the file ends in a number). If RV is unable to parse the
contents of a directory correctly, you will need to specify the image sequences directly to force it to read
them.
19
CHAPTER 3. COMMAND LINE USAGE
-c
-l
-s float
-stereo string
-vsync int
-comp string
-layout string
-over
-diff
-tile
-wipe
-view string
-noSequence
-inferSequence
-autoRetime %d
-rthreads int
-renderer string
-fullscreen
-init string
-nofloat
-maxbits int
-gamma float
-sRGB
-rec709
-floatLUT int
-dlut string
Use region frame cache
Use look-ahead cache
Image scale reduction
Stereo mode (hardware, checker, scanline,
anaglyph, left, right, pair, mirror, hsqueezed,
vsqueezed)
Video Sync (1 = on, 0 = off, default = 0)
Composite mode (over, add, difference, replace,
default=replace)
Layout mode (packed, row, column, manual)
Same as -comp over -view defaultStack
Same as -comp difference -view defaultStack
Same as -comp tile -view defaultStack
Same as -over with wipes enabled
Start with a particular view
Don’t contract files into sequences
Infer sequences from one file
Automatically retime conflicting media fps in
sequences and stacks (1 = on, 0 = off, default =
1)
Number of reader threads (default = 1)
Default renderer type (Composite or Direct)
Start in fullscreen mode
Override init script
Turn off floating point by default
Maximum default bit depth (default=32)
Set display gamma (default=1)
Display using linear -> sRGB conversion
Display using linear -> Rec 709 conversion
Use floating point LUTs (requires hardware
support,201=yes, 0=no,
default=platform-dependant)
Apply display LUT
CHAPTER 3. COMMAND LINE USAGE
-pa float
-ro int
-fps float
-ao float
-so float
-volume float
-flut filename
-llut filename
-pclut filename
-cmap channels
-crop x0 y0 x1 y1
-uncrop width height x y
-in int
-out int
-noMovieAudio
Set the Pixel Aspec Ratio
Shifts first and last frames in the source range (range offset)
FPS override
Audio Offset. Shifts audio in seconds (audio offset)
Set the Stereo Eye Relative Offset
Audio volume override (default = 1)
Associate a file LUT with the source
Associate a look LUT with the source
Associate a pre-cache software LUT with the source
Remap color channesl for this source (channel names separated by commas)
Crop image to box (all integer arguments)
Inset image into larger virtual image (all integer arguments)
Cut-in frame for this source in default EDL
Cut-out frame for this source in default EDL
Disable source movie’s baked-in audio (aka ”-nma”)
Table 3.2: Per-Source Command Line Options
21
Chapter 4
User Interface
The goal of RV’s user interface is to be minimal in appearance, but complete in function. By default, RV
starts with no visible interface other than a menu bar and the timeline, and even these can be turned off from
the command line or preferences. While its appearance is minimal, its interaction is not: almost every key
on the keyboard does something and its possible to use key-chords and prefix-keys 1 to extend this further.
The main menu and pop-up menus allow access to most functions and provide hot keys where available.
RV makes one window per session. Each window has two main components: the viewing area—where
images and movies are shown— and the menu bar. On OS X, the menu bar will appear at the top of the
screen (like most native OS X applications). On Linux and Windows, each RV window has its own attached
menu bar. (See Figure 4.1)
A single RV process can control multiple independent sessions on all platforms. On the Mac and Windows,
it is common that there be only a single instance of RV running. On Linux it is common to have multiple
separate RV processes running.
Many of the tools that RV provides are heads up widgets. The widgets live in the image display are or
are connected to the image itself. Aside from uniformity across platforms, the reason we have opted for this
style of interface was primarily to make RV function well when in full screen mode.
4.1
Feedback
RV provides feedback about its current state near the top left corner of the window.
1 Emacs users will find this feature familiar. RV can have prefix-keys that when pressed remap the entire keyboard or mouse
bindings or both.
Figure 4.1: RV on Linux and on OS X.
22
CHAPTER 4. USER INTERFACE
-out
Figure 4.2: Feedback widget indicating full-color display
4.2
4.2.1
Loading Images, Sequences, Movies and Audio
Using the File Browser
There are two options for loading images, sequences, and movies via the file browser: you can add to the
existing session by choosing File→Open (or File→Open into Layer) or you can open images in a new window
by choosing File→Open In New Session.
In the file browser, you may choose multiple files. RV tries to detect image sequences from the names of
image files (movie files are treated as individual sequences). If RV detects a pattern, it will create an image
sequence for each unique pattern. If no pattern is found, each individual image will be its own sequence.
Audio files can be loaded into RV using the file browser. To associate an audio file with its corresponding
image sequence or movie open the audio file as a layer using File→Open into Layer. The first sequence in the
layer will determine the overall length of the source, e.g. a longer audio file loaded as a layer after a sequence
will be truncated to the duration of the sequence. Any number of Audio files can be added as layers to the
same source and they will be mixed together on playback.
The file browser has three file display modes: column view, file details view, and media details view.
Sequences of images appear as virtual directories in the file browser: you can select the entire sequence or
individual files if you open the sequence up. Note: you can multi-select in File Details and Media Details,
but not in Column View. In general the File Details view will be the fastes.
23
CHAPTER 4. USER INTERFACE
Figure 4.3: File Browser Show File Details
Figure 4.4: File Dialog in Column View Mode
24
CHAPTER 4. USER INTERFACE
Figure 4.5: File Dialog Showing Media Details
Favorite locations can be remembered by dragging directores from the main part of the file browser to
the side bar on the left side of the dialog box. Recent items and places can be found under the path combo
box. You can configure the way the browser uses icons from the preferences drop down menu on the upper
right of the brower window.
4.2.2
Dragging and Dropping
On all platforms, you can drag and drop file and folder icons into the RV window. RV will correctly interpret
sequences that are dropped (either as multiple files or inside of a directory folder that is dropped). LUT files
can also be dropped.
RV uses smart drop targets to give you control over how files are loaded into RV. You can drop files as
a source or as a layer. As you drag the icons over the RV window, the drop targets will appear. Just drop
onto the appropriate one.
On Linux RV should be compatible with the KDE and Gnome desktops. It is possible with these desktops
(or any that supports the XDnD protocol) to drag file icons onto an RV window.
If multiple icons are dropped onto RV at the same time, the order in which the sequences are loaded is
undefined.
To associate an audio file with an image sequence or movie, drop the audio file as a layer, rather than as
a source.
4.3
Examining an Image
RV normalizes image geometry to fit into its viewing window. If you load two files containing the same image
but at different resolutions, RV will show you the images with the same apparent “size”. So, for example, if
these images are viewed as a sequence — one after another — the smaller of the two images will be scaled
to fit the larger. Of course, if you zoom in on a high-resolution image, you will see detail compared to a
lower-resolution image. When necessary you can view the image scaled so that one image pixel is mapped
to each display pixel.
On startup, RV will attempt to size the window to map each pixel to a display pixel, but if that is not
possible, it will settle on a smaller size that fits. You can always set the scale to 1:1 with the ’1’ hotkey,
and if it is possible to resize the window to contain the entire image at 1:1 scaling, you can do so via the
Window→Fit or Window→ Center Fit menu items.
25
CHAPTER 4. USER INTERFACE
Figure 4.6: Color Inspector
4.3.1
Figure 4.7: Average Color
Panning, Zooming, and Rotating
You can manipulate the Pan and Zoom of the image using the mouse or the row of number keys (or the
keypad on an extended keyboard if numlock is on). By holding down the control key (apple key on a mac)
and the left mouse button you can zoom the image in or out by moving to the left and right. By holding
down the alt key (or option key on a mac) you can pan the image in any direction. If you are accustomed
to Maya camera bindings, you can use those as well.
Rotating the image is accessible from the Image→Rotation menu. By selecting Image→Rotation→Arbitrary
its possible to use the mouse to scrub the rotation as a parameter.
To frame the image — automatically pan and zoom it to fit the current window dimensions — hit the
’f’ key. If the image has a rotation, it will remain rotated.
To precisely scale the image you can use the menu Image→Scale to apply one of the preset scalings.
Selected 1:1 will draw one image pixel at every display pixel. 2:1 will draw 1 image pixel as 4 display pixels,
etc.
4.3.2
Inspecting Pixel Values
The pixel inspector widget can be accessed from the Toools menu or by holding down Shift and clicking the
left mouse button. The inspector will appear showing you the source pixel value at that point on the image
(see Figure 4.6). If you drag the mouse around over the image while holding down the shift key the inspector
widget will also show you an average value (see Figure 4.7). You can move the widget by clicking on it and
dragging.
To remove inspector widget from the view either movie the mouse to the top left corner of the widget
and click on the close button that appears or toggle the display with the Tools menu item or hot key.
The inspector widget is locked to the image. If you pan, zoom, flip, flop, or rotate the image, the inspector
will continue to point to the last pixel read.
If you play a sequence of images with the inspector active, it will average the pixel values over time. If
you drag the inspector while playback occurs it will average over time and space.
RV shows either the source pixel values or the final rendered values. The source value represents the
value of the pixel just after it is read from the file. No transforms have been done on the pixel value at that
point. You can see the final pixel color (the value after rendering) by changing the pixel view to the final
pixel value from the right-click popup menu.
The value is normalized if the image is stored as non-floating point — so values in these types of images
will be restricted to the [0,1] range. Floating point images pass the value through unchanged so pixels can
take values below zero or above one. Table 6.3 shows the range of each of the channel data types.
26
CHAPTER 4. USER INTERFACE
Figure 4.8: RV Wipes
From the right-click popup menu its possible to view the pixel values as normalized to the [0,1] range or
as 8, 16, 10, or 12 bit integer values.
4.3.3
Comparing Images with Wipes
Wipes allow you to compare two or more images or sequences when viewing a stack. Load the images or
sequences that you wish to compare into RV as sources (not as layers). Put RV into stack mode or create a
stack view from the Session Manager, and enable wipes from the Tools menu or with the ”F6” hot key. Now
you can grab on the edges of the top image and wipe them back to reveal the image below. You can grab
any edge or corner, and you can move the entire wipe around by grabbing it in the exact center. Also, by
clicking on the icon that appears at the center or corner of a wipe or via the Wipes menu, you can enable
the wipe information mode, that will indicate which edge you are about to grab.
Wipes can be used with any number of sources. The stack order can be cycled using the ”(” and ”)” keys.
4.3.4
Parameter Edit Mode and Virtual Sliders
RV has a special UI mode for editing the parameters such as color corrections, volume, and image rotation.
For example, hitting the “y” key enters gamma edit mode. When editing parameters, the mouse and keyboard
are bound to a different set of functions. On exiting the editing mode, the mouse and keyboard revert to
the usual bindings. (See Table 4.1)
To edit the parameter value using the mouse you can either scrub (like a virtual slider) or use the wheel.
If you want to eyeball it, hold the left mouse down and scrub left and right. When you release the button,
the edit mode will be finished, so if you want to make further changes you need to re-enter the edit mode.
The scroll wheel increments and decrements the parameter value by a predefined amount. Unlike scrubbing
with the left mouse button, the scroll wheel will not exit the edit mode. You can exit the edit mode by
hitting the escape key or space bar (or most other keys).
To change the parameter value using the keyboard, hit the Enter (or Return) key; RV will prompt you
for the value. For interactive changes from the keyboard, use the “+” and “-” keys (with or without shift
27
CHAPTER 4. USER INTERFACE
Figure 4.9: Nearest Neighbor and Linear Interpolation Filtering. Nearest neighbor filtering makes pixels into
blocks (helpful in trying to determine an exact pixel value).
held down). The parameter is incremented and decremented. To end the keyboard interactive edit, hit the
Escape or Spacebar keys.
Key/Mouse Sequence
Mouse Button #1 Drag
Mouse Button #1 Up
Wheel
Enter
0 through 9
ESC
+ or =
- or
r
Action
Scrub parameter
Finish parameter edit mode
Increment or decrement parameter
Enter parameter numerically
Enter parameter numerically
Cancel parameter edit mode
Increment parameter value
Decrement parameter value
Reset parameter value
Table 4.1: Parameter Edit Mode Key and Mouse Bindings.
4.3.5
Image Filtering
When image pixels are scaled to be larger or smaller than display pixels, resampling occurs. When the image
is scaled (zoomed) RV provides two resampling methods (filters): nearest neighbor and linear interpolation
(the default).
You can see the effects of the resampling filters by making the scale greater than 1:1. This can be done
with any of the hot keys “2” through “8” or by zooming the image interactively. When the image pixels are
large enough, you can switch the sampling method via View→Linear Filter or by hitting the “n” key. Figure
4.9 shows an example of an image displayed with nearest neighbor and linear filtering.
Digression on Resampling
It’s important to know about image filtering because of the way in which RV uses the graphics hardware.
When an image is resampled—as it is when zoomed in—and the resampling method produces interpolated
pixel values, correct results are really only obtained if the image is in linear space. Because of the way in
which the graphics card operates, image resizing occurs before operations on color. This sequence can lead
to odd results with non-linear space images if the linear filter is used (e.g., cineon files).2
There are two solutions to the problem: use the nearest neighbor filter or convert the image to linear
space before it goes to the graphics card. The only downside with the second method is that the transform
must happen in software which is usually not as fast. Of course this only applies to images that are not
already in linear space.
2 If you want to put a positive spin on it you could say you’re using a non-linear resampling method on purpose. The results
are only incorrect if you meant to do something else!
28
CHAPTER 4. USER INTERFACE
Figure 4.10: Floating point linear, 8 bit linear, and 8 bit nearest neighbor filtering.Graphics hardware does
not always correctly apply linear filtering to floating point images. Filtering can dramatically change the
appearance of certain types of images. In this case, the image is composed of dense lines and is zoomed out
(scaled down).
Why does RV default to the linear filter? Most of the time, images and movies come from file formats
that store pixel values in linear (scene-referred) space so this default is not an issue. It also looks better.
The important thing is to be aware of the issue.
Floating Point Images
If RV is displaying floating point data directly, linear filtering may not occur even though it is enabled. This is
a limitation of some graphics cards that will probably be remedied (via driver update or new hardware) in the
near future. In this case You can make the filter work by disallowing floating point values via Image→Color
Resolution→Allow Floating Point. Many graphics can do filtering on 16 bit floating point images but cannot
do filtering on 32 bit floating point images. RV automatically detects the cards capabilities and will turn off
filtering for images if necessary.
Figure 4.10 shows an example of a floating point image with linear filtering enabled versus equivalent
8-bit images.
4.3.6
Big Images
RV can display any size image as long as it can fit into your computer’s memory. When an image is larger
than the graphics card can handle, RV will tile the image display. This makes it possible to send all the
pixels of the image to the card for display. The downside is that all of the pixels are sent to the display even
though you probably can’t see them all. However, if you zoom in (for example hit “1” for 1:1 scale) when a
large image is loaded, RV will only draw pixels that are visible.
One of the constraints that determines how big an image can be before RV will tile it is the amount of
available memory in your graphics card and limitations of the graphics card driver. On most systems, up to
2k by 2k images can be displayed without tiling (as long as the image has 8-bit integer channels). In some
cases (newer cards) the limit is 4k by 4k. However, there are other factors that may reduce the limit.
If your window system uses the graphics card (like Mac OS X or Linux with the X.org X server)3 or
there are other graphics-intensive applications running, the amount of available memory may be dependent
on these processes as well. Alternately, because RV wants to use as much graphics memory as it can,
RV may cause graphics resource depletion that affects other running applications that should have higher
priority. Because of this, RV has the capability to limit its graphics memory usage. You can specify this in
RV’s Preferences by editing the Maximum VRAM Usage Per Tile or on the command line with the -vram
option.
If you reduce the VRAM usage, RV will tile images of smaller size. For sequences, this may affect playback
speed since tiling is slightly less efficient than not tiling. Tiling also affects interactive speed on single images;
if tiling is not on, RV can keep all of the image pixels on the graphics card. If tiling is on, RV has to send
the pixels every time it redraws the image.
3 Over
time, these problems will go away as drivers and operating systems become smarter about graphics resource allocation.
29
CHAPTER 4. USER INTERFACE
Figure 4.11: Image Information Widget.
You can determine if RV is tiling the image by looking the image info widget under Tools→Image Info.
If tiling is on there will be an entry called “DisplayTiling” showing the number of tiles in X and Y.
4.3.7
Image Information
The image information widget, can be shown or hidden via the Tools→Image Info menu item or using the
hot key: “i”. You can move the widget by clicking and dragging. The widget shows the geometry and data
type of the image as well as associated meta-data (attributes in the file). Figure 4.11 shows an example of
the information widget.
Channel map information—the current mapping of file channels to display channels—is displayed by the
info widget as well as the names of channels available in the image file; this display is especially useful when
viewing an image with non-RGBA channels.
If the image is part of a sequence or movie the widget will show any relevant data about both the current
image as well as the sequence it is a part of. For movie files, the codecs used to compress the movie are also
displayed. If the movie file has associated audio data, information about that will also appear.
To remove the image information widget from the view either move the mouse to the top left corner of
the widget and click on the close button that appears or toggle the display with the Tools menu item or hot
key (’i’).
4.4
Playing Image Sequences, Movie Files, and Audio Files
RV can play multiple images, image sequences and movie files as well as associated audio files. Play controls
are available via the menus, keyboard, and mouse. Timing information and navigation is provided by the
timeline widget which can be toggled via the Tools→Timeline menu item or by hitting the TAB key.
30
CHAPTER 4. USER INTERFACE
[
]
\
right-arrow
left-arrow
alt-right-arrow
alt-left-arrow
ctrl(mac: cmd)-left-arrow
ctrl(mac: cmd)-right-arrow
down-arrow, spacebar
up-arrow
Set in point
Set out point
Clear in/out points
Step one frame to the right.
Step on frame to the left.
Move current frame to next mark (or source boundary, if there are no marks)
Move current frame to previous mark (or source boundary, if there are no marks)
Set in/out to next pair of marks (or source boundaries, if there are no marks)
Set in/out to next pair of marks (or source boundaries, if there are no marks)
Toggle playback
Reverse play direction
Table 4.2: Useful Timeline Hotkeys
4.4.1
Timeline
Figure 4.12: Timeline With Labelled Parts
This timeline shows in and out points, frame count between in and out points, total frames, target fps and
current fps. In addition, if there are frame marks, these will appear on the timeline as seen in Figure 4.4.5.
The current frame appears as a number positioned relative to the start frame of the session. If in and
out points are set, the relative frame number will appear at the left side of the timeline — the total number
of frames between the in and out points is displayed below the relative frame number.
By clicking anywhere on the timeline, the frame will change. Clicking and dragging will scrub frames, as
will rolling the mouse-wheel. Also note that you can shift-click drag to set an in/out range.
The in/out range can also be manipulated witht he mouse. You can grab and drag either end, or grab
in the middle to drage the whole range.
There are two FPS indicators on the timeline. The first indicates the target FPS, the second the actual
measured playback FPS.
4.4.2
Timeline Configuration
The timeline can be configured from its popup menu. Use the right mouse button anywhere on the timeline
to show the menu. If you show the popup menu by pointing directly at any part of the timeline, the popup
menu will show that frame number, the source media there, and the operations will all be relative to that
frame. For example, without changing frames you can set the in and out point or set a mark via the menu.
By default the timeline will show the “source” frame number, the native number of the media. Alternately
you can show the global frame number, global time code, or even the “Footage” common in traditional
animation (16 frames per foot).
31
CHAPTER 4. USER INTERFACE
Figure 4.13: Timeline Configuration Popup Menu
The Configuration menu has a number of options:
Show Play Controls
Draw Timeline Over Imagery
Position Timeline At Top
Show In/Out Frame Numbers
Step Wraps At In/Out
Show Source/Input at Frame
Show Play Direction Indicator
4.4.3
Hide or Show the playback control buttons on the
right side of the timeline
This was the default behavior in previous versions of
RV. The timeline is now drawn in the margin by
default
Draw the timeline at the top of the view. The default
is to draw it at the bottom of the view.
When selected, the in and out points will be labeled
using the curent method for display the frame
(global, source, or time code).
This controls how the arrow keys behave at the in
and out point. When selected, the frame will wrap
from in to out or vice versa.
When selected, the main media file name for the
frame under the pointer (not the current frame) will
be shown just above or below the timeline.
When selected, a small triangle next to the current
frame indicates the direction playback will occur,
when started.
Realtime versus Play All Frames
Control→Play All Frames determines whether RV should skip frames or not if it is unable to render fast
enough during playback. Realtime mode (when play all frames is not selected) uses a realtime clock to
determine which frame should be played. When in realtime mode, audio never skips, but the video can.
When play all frames is active, RV will never skip frames, but will adjust the audio if the target fps cannot
be reached.
When the timeline is visible, skipped frames will be indicated by a small red circle towards the right hand
side of the display. The number in the circle is the number of frames skipped.
4.4.4
In and Out Points
There are two frame ranges associated with each view in an RV Session: the start and end frames and the
in and out frames (also known as in and out points). The in and out points are always within the range
of the start and end frames. RV sets the start and end frames automatically based on the contents of the
view. The in and out points are set to the start and end frames by default. However, you can set these
points using the “[” and “]” keys, or by right-clicking on the timeline. You can also set an in/out range by
32
CHAPTER 4. USER INTERFACE
shift-dragging with the left-button in the Timeline or the Timeline Magnifier. The in/out range displayed
in the timeline can also be changed with the mouse, either by dragging the whole range (click down in the
middle of the range), or by dragging one of the endpoints (click down on the endpoint).To reset the in and
out points, use the “\” key.
If frames have been marked, RV can automatically set the in and out points for you based on them (use
the ctrl-right/left-arrow keys, or command-right/left-arrow on Mac).
4.4.5
Marks
A mark in RV is nothing more than a frame number which can be stored in an RV file for later use. To
toggle a frame as being marked, use Mark→Mark Frame (or use the “m” hotkey). The timeline will show
marks if any are present.
While not very exciting in and of themselves, marks can be used to build more complex actions in RV.
For example, RV has functions to set the in and out points based on marks. By marking shot boundaries in
a movie file, you can quickly loop individual shots without selecting the in and out points for each shot. By
selecting Mark→Next Range From Marks and Mark→Previous Range From Marks or using the associated hot
keys “control+right arrow” or “control+left arrow” the in and out points will shift from one mark region to
the next.
Marking and associated hot keys for navigating marked regions quickly becomes indispensable for many
users. These features make it very easy to navigate around a movie or sequence and loop over part of the
timeline. Producers and coordinators who often work with movie files of complete sequences (for bidding or
for client reviews) find it useful to mark up movie at the shot boundaries to make it easy to step through
and review each shot.
Figure 4.14: Timline with Marks
4.4.6
Timeline Magnifier
The Timeline Magnifier tool (available from the Tools menu, default hotkey F3) brings up a special timeline
that is “zoomed” to the region bounded by the In/Out Points. In addtion to showing only the in/out region,
the timeline magnifier differs from the standard timeline in that it shows frame ticks and numbers on every
frame, if possible. If there is not enough room for frames/ticks on every frame, the magnifier will fall back
to frames/ticks every 5 or 10 frames. The frame numbers of the in/out points are displayed at either end of
the magnified timeline.
Audio Waveform Display
The timeline magnifier can display the audio waveform of any loaded audio. Note that this is the sum of
all audio loaded for the given frame range. To preserve interactive speed, the audio data is not rendered
into the timeline until that section of the frame range is played. You can turn on Scrubbing, in the Audio
menu, to force the entire frame range to be loaded immediately. Also, if Scrubbing is on, audio will play
during scrubbing, and during single frame stepping. See Section 4.5for further details on Audio in RV.
In/Out Range Manipulation
Note that on each end of the timeline magnifer, there are two triangular “arrow” buttons. These are the in/out
nudge buttons, and clicking on them will move the in or out point by one frame in the indicated direction.
The in/out range displayed in the timeline can also be changed with the mouse, either by dragging the
whole range (click down in the middle of the range), or by dragging one of the endpoints (click down on the
endpoint). All these manipulations can be performed during playback. You can also set an in/out range by
shift-dragging with the left-button in timeline magnifier.
33
CHAPTER 4. USER INTERFACE
Configuration
All the hotkeys mentioned in Table 4.2 are also relevant to the timeline magnifier. The timeline magnifier
configuration menu is also a subset of the regular timeline menu (see Figure4.13), with additional items for
setting the height of the audio waveform display.
Figure 4.15: Timeline Magnifier Configuration Popup Menu
4.5
Audio
When playing back audio with an image sequence or movie file, RV can be in one of two modes: video locked
to audio or audio locked to video.
When a movie with audio plays back at its native speed, the video is locked to the audio stream. This
ensures that the audio and video are in sync.
If you change the frame rate of the video, the opposite will occur: the audio will be locked to the video.
When this happens, RV will synthesize new audio based on the existing audio in an attempt to either stretch
or compress the playback in time. When pushed to the limits, the audio synthesis can create artifacts (e.g.
when slowing down or speeding up by a factor of 2 or more).
RV can handle audio files with any sample rate and can re-sample on the fly to match the output sample
rate required by the available audio hardware. The recommended formats are AIFF or WAV. Use of mp3
and audio-only AAC files is not supported.
Audio settings can be changed using the items on the Audio Menu. Volume, time Offset, and Balance can
be edited per source or globally for the session. The RV Preferences Audio tab lets you choose the default
audio device and set the initial volume (as well as some other technical options that are rarely changed).
For visualizing the audio waveform see Section 4.4.1.
4.5.1
Audio Preferences
RV provides audio preferences in the Preferences dialog. The most important audio preference is the choice of
the output device from those listed. In practice this will rarely change. Preferences also let you set the initial
volume for RV. The option to hold audio open is for use on Linux installations where audio system support
is poor (see the next section on Linux Audio.) The other preferences are there for fine tuning performance
in extreme cases of marginal audio hardware or support - they will almost never change.
34
CHAPTER 4. USER INTERFACE
Figure 4.16: Audio Preferences (on Mac)
Version 3.6 and higher have a new Output Module setting in the preferences. On the Mac and Windows
there is only a single entry in this menu. On Linux, however, there may be many. (See Appendix E for
details about Linux Audio).
The Output Device, Output Format, and Output Rate determine the sound quality and speakers to use.
Typical output rates are 44100 or 48000 Hz and 32 bit float or 16 bit integer output format. This produced
Audio CD or DAT quality audio.
The Device Packet Size and Cache Packet Size can be changed, but not all output modules support
arbitrary values. The default values are recommend. The Min/Max Buffer Size determines how much audio
RV will cache ahead of the display frame. Ideally these numbers are low.
Keep Audio Device Open When Not Playing should usually be set to ON. There are very few cicumstances
in which its a good idea to turn this off. When the value is OFF, RV may skip frames and audio when
playback starts and can become unstable. On some linux distributions turning this OFF will result in no
audio at all after the first play.
Hardware Audio and Video Synchronization determines which clock RV will use to sync video and audio.
When on, RV will use the audio hardware clock if one is available otherwise it will use a CPU timer in
software. In most cases this should be left ON. RV can usually detect when the audio clock is unstable or
inaccurate and switch to the CPU timer automatically. However if playback with audio appears jerky (even
when caching is on) it might be worth turning it off.
4.5.2
Audio on RV for Linux
Linux presents special challenges for multimedia applications and audio is perhaps the worst case. RV audio
works well on Linux in many cases, but may be limited in others. RV supports special configuration options
so that users can get the best audio functionality possible within the limitations of the vintage and flavor of
Linux being used. See the Appendix E for complete details.
4.6
Caching
RV has a three state cache: its either off, caching the current in/out range, or being used as a look-ahead
(also known as a ring) buffer.
35
CHAPTER 4. USER INTERFACE
Figure 4.17: Timeline Showing Cache Progress
The region cache reads frames starting at the in point and attempts to fill the cache up to the out point.
If there is not enough room in the cache, RV will stop caching. The region cache can be toggled on or off
from the Tools menu or by using the shift-C hot key.
Figure 4.18: Region Cache Operation With Lots of Memory
Figure 4.19: Region Cache Operation During Caching With Low Memory
Look-ahead caching can be activated from the Tools menu or by using the meta-l hot key. The look-ahead
cache attempts to smooth out playback by pre-caching frames right before they are played. If RV can read
the files from disk at close to the frame rate, this is the best caching mode. If playback catches up to the
look-ahead cache, playback will be paused until the cache is filled or for a length of time specified in the
Caching preferences. At that point playback will resume.
Figure 4.20: Look-Ahead Cache Operation
RV caches frames asynchronously (in the background). If you change frames while RV is caching it will
attempt to load the requested frame as soon as possible.
If the timeline widget is visible, cached regions will appear as a dark green stripe along the length of the
widget. The stripe darkens to blue as the cache fills. The progress of the caching can be monitored using
the timeline. On machines with multiple processors (or cores) the caching is done in one or more completely
separate threads.
Note that there is usually no advantage to setting the lookahead cache size to something large (if playback
does not overtake the caching, a small lookahead cache is sufficient, and if it does, you probably want to use
region caching anyway).
4.7
Color and LUTs
RV provides users with fine grained color management and can support various color management scenarios.
See 6.1 for detailed technical information about RV’s color pipeline. RV supports three LUTs per file and
36
CHAPTER 4. USER INTERFACE
an overall display LUT, and has a number of useful color transforms built-in. You can load LUTs using the
File→Import menu (Display, Look, File, and Pre-Cache items), or you can drag and drop LUT files onto the
RV window. Smart drop targets will allow you determine how the LUT will be applied. See chapter 7 for
more information about using LUTs in RV.
RV’s color transforms are separated into two menus. The Color menu contains transforms that will be
applied to an individual source (whichever source is current in the timeline) and the View menu contains
transforms that will be applied to all of the sources. This provides the opportunity to bring diverse sources
(say Cineon Log files, QuickTime sRGB movies, and linear-light Exr’s) all into a common working color
space (typically linear) and then to apply a common output transform to get the pixels to the display. RV’s
built in hardware conversions can handle Cineon Log, sRGB, Viper Log and other useful transforms.
4.8
Stereo
RV supports playback of stereoscopic source material. RV has two methods for handling stereo source
material: first any source may have multiple layers, and RV will treat the first two video layers of a source
as left and right eyes for the purpose of stereo display. Left and right layers do not need to be the same
resolution or format because RV always conforms media to fit the display window; Second, RV supports
stereo QuickTime movies (taking the first two video tracks as left and right eyes) and multi-view EXR files.
RVIO can author stereo QuickTime movies and multi-view EXR files as well, so a complete stereo publishing
and review pipeline can be built with these tools. See the section on 9 for more information about how stereo
is handled.
4.9
Key and Mouse Bindings
Key and mouse bindings as well as menu bar menus are loaded at run time. You can override and change
virtually any key or mouse binding from a file called ~/.rvrc.mu if you need to. The bindings (and whole
interface) that comes with RV are located at $RV_HOME/plugins/Mu/rvui.mu. Functions in this file can
be called from ~/.rvrc.mu or overridden.
On OS X, the meaning of Alt and Control are reversed.
To override bindings, copy the file $RV_HOME/scripts/rv/rvrc.mu to ~/.rvrc.mu. Start hacking!
Extensive information about customizing RV can be found in the RV Reference Manual.
4.10
Preferences File
RV stores configuration information in a preferences file in the user home directory. Each platform has a
different location and possibly a different format for the file.
OS
Mac OS X
Linux
Windows
File Location
~/Library/Preferences/com.tweaksoftware.RV
~/.config/TweakSoftware/RV.conf
%APPDATA%/TweakSoftware/RV.ini
Table 4.5: Preference File Locations
37
File Format
Property List
Config File
INI File
CHAPTER 4. USER INTERFACE
Key Sequence
Space Bar or Down Arrow
Left Arrow
Right Arrow
Up Arrow
shift+G
0 through 9 (keypad only)
[
]
\
PageUp
PageDown
|
r, g, b, or a
c
l
a
v
commnad+r
command +l
shift+command+r
shift+command+l
shift+T
shift+L
shift+I
f
1 through 8
control+1 through control+8
shift+X
shift+Y
TAB
i
F1
F5
F3
‘ (tick)
shift+A
shift+F
e
shift+S
y
k
h
m
w
q
shift+R
Action
Toggle play
Step backwards one frame
Step forward one frame
Toggle play direction
Go to specific frame
Start entering frame number to go to
Set in point from current frame
Set out point from current frame
Clear in/out points
Next in/out range from marks
Previous in/out range from marks
Set in/out range from marks near current frame
Isolate red, green, blue, or alpha channel
Color display
Luminance display
Isolate alpha channel
Enter Display Gamma Correction
Rotate Image 90 deg to the right (clockwise)
Rotate Image 90 deg to the left (counter-clockwise)
Set Image Rotation to 90 deg
Set Image Rotation to -90 deg
Toggle display look up table (LUT)
Toggle Cineon log to linear transform
Toggle color inversion
Frame image in window
Set image scaling 1:1 through 8:1
Set image scaling 1:1 through 1:8
Flop (scale -1.0 in X)
Flip (scale -1.0 in Y)
Toggle timeline
Toggle image info
Toggle menu bar
Toggle pixel inspector
Toggle VTR buttons
Toggle full screen mode
Toggle realtime / play all frames
Enter FPS
Exposure mode
Saturation mode
Gamma (correction) mode
Constrast mode
Hue mode
Mark (or unmark) current frame
Resize window to fit image
Close window and its session
Force reload of current frame
Table 4.3: Commonly Used Key Bindings.
38
CHAPTER 4. USER INTERFACE
Alt
Ctrl
Shift
1
↓
2
3
Wheel
↓
•
•
•
•
•
•
•
•
•
•
•
↓
↓
Function
Toggle Play
Toggle Play Direction
Scrub Frames
Scrub Frames
Scrub Frames 10x
Scrub Frames 100x
Zoom
Translate
Translate
Translate
Translate (Maya style)
Zoom (Maya style)
Inspect Pixel
Average Pixels
Pop-up Menu
Table 4.4: Basic Mouse Bindings.
• held, drag left and right, ↓ push without drag, drag any direction.
Mouse button 1 is normally the left mouse button and button 3 is normally the right button on two button
mice. Button 2 is either the middle mouse button or activated by pushing the scroll wheel on mice that
have them.
39
Chapter 5
The Session and the Session Manager
5.1
RV Session
Each viewer window represents an RV session. A session is composed of one or more source movies, frame
markers, image transforms, color corrections, and interactive states (like caching and playback speed). The
source movies are combined according to the session type. The default RV session type is “sequence,” which
plays back the source movies one after another.
An RV session can be saved as an .rv file. The .rv file contains the entire state of its image processing
tree—all of the variables that determine how it will work—as well as information about frame ranges, in/out
points, etc. The .rv file stores references to movie files and images; it does not make copies of them. If
you change source material on disk and load an .rv file that references those materials, the changes will be
evident in RV.
The .rv file is a GTO file. Tools that operate on GTO files can be used on .rv files. C++ and Python
source code is available for creating, reading, and manipulating GTO files, including the ASCII GTO files
used by RV. (See 13)
5.1.1
What’s in a Session
A session is represented internally as a Directed Acyclic Graph (DAG) in which images and audio pass from
the leaves to the root where they are rendered. Each node in the DAG can have a number of parameters or
state variables which control its behavior. RV’s user interface is essentially a controller which simply changes
these parameters and state variables. An .rv file contains all of the state variables for the nodes in RV’s
image processing DAG. A description of each of the node types can be found in the Reference Manual.1
The DAG nodes that are visible in the user interface are called Views. RV provides three default views,
and the ability to make views of your own. In addition to any Sources you’ve loaded, the three views that
all sessions have are the Default Sequence, which shows you all your sources in order, the Default Stack,
which shows you all your sources stacked on top of one another, and the Default Layout, which has all the
sources arranged in a grid (or a column, row, or any other custom layout of your own design). In addition
to the default views, you can create any number of Sources, Sequences, Stacks, and Layouts of your own.
Whenever a Source is added to the session, it is automatically added to the inputs of each of the default
views, not to user-defined views.
5.2
Session Manager
RV 3.10 includes a new way to examine and edit the contents of an RV session called the session manager.
The session manager shows an outline of the session contents from which you can create, mofify, and edit
new sequences, stacks, layouts, and more. By default, the Session Manage comes up “docked” at the left
1 You can use the gtoinfo program to view the contents of an .rv file from the command line. Other GTO tools like the
python module can be used to edit .rv files without using RV itself.
40
CHAPTER 5. THE SESSION AND THE SESSION MANAGER
Figure 5.1: Session Manager on the Mac showing Inputs and Sequence Edit Panel, The DefaultSequence is
being viewed.
side of the RV window, but it can be un-docked (by clicking and dragging on the title) and positioned as a
separate window, or docked at another edge of the RV window.
The session manager interface is in two parts: the top panel shows an outline of the session contents, and
the bottom shows either the inputs of the currently viewed object or user interface to edit the current view.
By double clicking on an icon in the top portion of the session manager you can switch to another view. By
default RV will create a default sequence, stack, and layout which includes all of the sources in the session.
When a new source is added, these will be automatically updated to include the new source.
41
CHAPTER 5. THE SESSION AND THE SESSION MANAGER
5.3
Creating, Adding to, and Removing from a View
Figure 5.2: The Add View Menu
A new view can be created via the add view menu. The menu is reachable by either the add view (+) button
or by right clicking with the mouse in the session outline. Anything selected in the session outline becomes
a member (input) of the newly created view. Alternately you can create a view and then add or subtract
from it afterwards.
The top items in the view create new views from existing views. The bottom items create new sources
which can be used in other views.
You can add to an existing view by first selecting it by double clicking on it, then dragging and dropping
items from the session outline into the inputs section of the session manager.
Drag and drop of input items makes it possible to rearrange the ordering of a given view. For example,
in a sequence the items are played in the order the appear in the inputs list. By rearranging the items using
drag and drop or the up and down arrows in the inputs list you can reorder the sequence.
To remove an item from a view select the item(s) in the inputs list and hit the delete (trash can) button
to the right of the inputs list. Similarly, the trashcan button in the upper panel well delete a view from the
session. Please Note: neither of these remove/delete operations is undoable.
5.4
Navigating Between Views
For each RV session, there is always a single “current view”, whose name is displayed at the top of the
Session Manager. As in a web browser, RV remembers the history of views you have “visited” and you can
go backwards and forwards in that history.
To change to a different View you can:
• Double-click on any of the views listed in the top panel of the Session Manager
• Double-click on any input view of the current view (listed in the Inputs tab of the bottom panel of the
Session Manager)
• Double-click on any visible image in the main RV window
42
CHAPTER 5. THE SESSION AND THE SESSION MANAGER
• Click the left (backwards) and right (forwards) buttons at the top of the Session Manager
• For backwards compatibility, the items at the top of the Tools menu navigate to the usual default views
Once you have changed views, you can go backwards and forwards in the view history with the arrow buttons
at the top of the Session Manager, or with the navigation hot keys “Shift-left-arrow” (backwards) and “Shiftright-arrow” (forwards). Note that you can easily navigate between views with out the Session Manager by
double-clicking on the image to “drill-down” and then using “Shift-left-arrow” to go back.
5.5
Source Views
Source Views are the “leaves” of the graph in that they are views with no inputs (since they get their pixels
from some external source, usually files on disk somewhere). The Edit interface for source views is currenly
used only to adjust editorial information (in the future it may provide access to other per-source information
like color corrections, LUTs, etc). In RV, each source has an Cut In/Out information which provide editorial
information to views that use that source (like a Sequence view). These In/Out frame numbers can be set
from the command line, or changed with the Edit panel of the Source View interface.
Figure 5.3: The Source Edit Interface
By default, “Sync GUI In/Out to Source” is checked, and you can manipulate the Cut In/Out numbers
by setting the in/out frames in the timeline in all the usual ways (see Section 4.4.4). You can also type frame
numbers in the given fields, use the up/down nudge keys, or the mouse wheel (after clicking in the relevant
field).
5.6
Group Views
Sequence Views, Stack Views, and Layout Views are all “Group Views” in that they take multiple inputs and
combine them in some way for viewing. A Sequence plays it’s inputs in order, a Stack layers it’s aligned inputs
on top of each other, and a Layout arranges it’s inputs in a grid, row, column or arbitrary user-determined
format.
Some interface is shared by all Group Views:
The Group interface gives you control over the resolution of it’s output. During interactive use, RV’s
resolution invariance means that the aspect ratio is the only important part of the size, but during output
43
CHAPTER 5. THE SESSION AND THE SESSION MANAGER
with RVIO, this size would be the default output resolution. If Size Determined from Inputs’ is checked,
the group take it’s size from the maximum in each dimension of all it’s inputs. If the size is not being
progammatically determined, you can specify any size output in the provided fields.
Similarly, the output frame rate can be specified in the Output FPS field. This is the frame rate that is
used as the default for any RVIO output of this group, and is also passed to any view for which this group
is an input. The output FPS is initialized from the default frame rate of the first input added to the group.
If Retime Inputs to Output FPS is checked, inputs whose native frame rate differs from the group’s output
fps will be retimed so that they play correctly at the output fps. That is, a real-time pull up/down will be
performed on the video, and the audio will be resampled to play at the output fps while preserving pitch.
As long as Use Source Cut Information is checked in the Group interface, the group will adopt the editorial
cut in/out information provided by the sources (see Section 5.5). This is particularly useful in the case of
sequences, but also comes up with stacks and layouts, when, for example, you want to compare a matching
region of movies with different overall frame ranges.
44
CHAPTER 5. THE SESSION AND THE SESSION MANAGER
45
CHAPTER 5. THE SESSION AND THE SESSION MANAGER
5.6.1
Sequence Views
A Sequence view plays back its inputs in the order specified in the Inputs tab of the the Squence interface.
The order can be changed by dragging and dropping in the Inputs, or by selecting and using the arrow keys
to the right of the list of Inputs. An input can be removed (dropped from the sequence) by selecting the
input and then clicking the trashcan button.
In addition to the order of the clips being determined by the order of the inputs, the actual cut in/out
points for each clip can also be specified. At the moment, the easiest way to do this is to specify cut
information for each source that you want to appear in the sequence with the Source view interface described
in Section 5.5. As long as Use Source Cut Information is checked in the Sequence interface, the sequence will
adopt the editorial cut in/out information provided by the sources.
Since the sequence only shows you one input at a time, if Fill View with Content is checked and the sequence
is the current view, the output size of the sequence will be dynamically adjusted so that the “framed” content
always fills the RV window, even if different inputs of the sequence have different aspect ratios.
5.6.2
Stack Views
The Stack View presents it’s inputs “on top” of each other, for comparing or compositing. In this case the
order of the inputs determines the stacking order (first input on top). In addtion the usual ways of reordering
the inputs, you can “cycle” the stack forwards or backwards with items on the Stack menu, or with hotkeys:
’)’ and ’(’.
The compositing operation used to combine the inputs of the stack can be selected in the Edit inteface.
At the moment, you can choose from Over, Replace, Add, Difference, and Inverted Difference.
Because any or all of the inputs to the Stack may have audio, you can select which you want to hear.
Either mix all the audio together (the default), play only the audio from the topmost input in the stack, or
pick a particular input by name.
By default, stack inputs will be displayed so that matching “source” frame numbers are aligned. For
example if you stack foo.121-150#.exr on top of goo.56-200#.exr, you’ll see frame foo.121.exr on top of
goo.121.exr even though the two sequences have completely different frame ranges. If you don’t want this
behavior and you want the start frames of the inputs to be aligned regardless of their frame numbers, check
Align Start Frames.
Also note that the Wipes mode is usful when comparing images in a stack. The use of wipes is explained
in Section 4.3.3.
5.6.3
Layout Views
A Layout is just what it sounds like; the inputs are aranged in a grid, column, row, or arbitrary user-defined
pattern. In many ways, a Layout is similar to a stack (it even has a compositing operation for cases where
you arrange on input “over” another). All the interface actions described in Section 5.6.2 for Stack Views
also apply to Layout Views.
To determine the arrangement of your layout, choose one of five modes. There are three procedural
modes, which will rearrange themselves whenever the inputs are changed or reordered: Packed produces a
tightly packed or tiled pattern, Row arranges all the inputs in a horizontal row, and Column arranges the
inputs in a vertical column. If you want to position your inputs by hand, select the Manual mode. In this
mode hovering over a given input image will show you a manipulater that can be used to reposition the
image (by clicking and dragging near the center) or scale the image (by clicking and dragging the corners).
After you have the inputs arranged to your liking, you may want to switch to the Static mode, which will
no longer draw the manipulators, and will leave the images in your designated arrangement.
5.7
Retime View
The Retime View takes a single input and alters it’s timing, making it faster or slower or offseting the native
frame numbers. For example, to double the length of an input (IE make every frame play twice, which will
46
CHAPTER 5. THE SESSION AND THE SESSION MANAGER
have the effect of slowing the action without changing the frame rate), set the Length Multiplier to 2. Or to
have frame 1 of the input present itself on the output as frame 101, set the Offset to 100.
The Length Multiplier and Offset apply to both the video and audio of the input. If you want to apply an
additional scale or offset to just the audio, you can use the Audio Offset and Audio Scale fields.
Figure 5.5: Retime View Edit Interface
47
Chapter 6
How a Pixel Gets from a File to the
Screen
RV has a well defined image processing pipeline which is implemented as a combination of software and
hardware (using the GPU when possible). Figure 6.1 shows the pixel pipeline.
6.1
Image Layers
Each image source may be composed of one or more layers. Layers may come from multiple files, or a single
file if the file format supports it or a combination of the two. For example a stereo source can be constructed
from a left and right movie file; in that case each file is a layer. Alternately, layers may come from a single
file as would be the case with a stereo QuickTime file or EXR images with left and right layers.
An image source may have any number of layers. By default, only the first layer is visible in RV unless
an operation exposes the additional layers.
6.1.1
Stereo Layers
RV has a number of stereo viewing options which render image layers to a left and right eye image. The
left and right eye images are both layers. RV doesn’t require any specific method of storing stereo images:
you can store them in a single movie file as multiple tracks, as multiple movie files, or as multiple image
sequences. You can even have one eye be a completely different format than the other if necessary. Stereo
viewing is discussed in Chapter 9.
6.2
Image Attributes
RV tries to read as many image attributes as possible from the file. RV may also add attributes to the
image to indicate things like pixel aspect ratio, alpha type, uncrop regions (data and display windows) and
to indicate the color space the pixels are in. The image info window in the user interface shows all of the
relevant image attributes.
Some of the attributes are treated as special cases and can have an effect on rendering. Internally, RV
will recognize and use the ColorSpace/Primary attributes automatically. Other ColorSpace attributes
are used by the default source setup package (See Reference Manual) to set file to linear properties correctly.
For example, if the ColorSpace/Transfer attribute has the value ”Kodak Log”, the default source setup
function will automatically turn on the Kodak log to linear function for that source.
Image attributes can be saved as a text file directly from the UI (File→Export→Image Attributes), viewed
interactively with the Tools→Image Info widget, or using the rvls program from the command line.
48
CHAPTER 6. HOW A PIXEL GETS FROM A FILE TO THE SCREEN
NOTE: not all stages
are active at the same
time. In some cases
pixel data passes through
a stage untouched.
Source
Group
Color Correct
Conversion to Linear
Log -> Linear
Pixel Decoder
Image or Movie File
on Filesystem or
from another process.
The File LUT can go direct to linear
or to sRGB space and then to
linear via the sRGB -> Linear
operation that comes after it.
File LUT
Pre-Cache LUT
sRGB/Rec709
to Linear
The Pre-Cache LUT
differs from File, Look, and
Display LUTs: it is applied
in software prior to caching.
Normalize Range
The File Gamma Correction
can be thought of as either a
conversion to linear space, or
as a color correction.
File Gamma
Pixel Format
Linear Space
Bit depth conversion
and reformatting
(integer or floating point)
Luminance LUT
Channel Map
Invert
Cache
Cached images are
affected by every
stage after this one.
Relative Exposure
2D Transform
By default, RV will use
information from the file
reader to determine if it
needs to unpremult the
incoming data or not.
This behavior can be
overriden.
Contrast
Component
to RGB
Hue Rotation
Unpremult
Saturation
Color Correct
Source
Look Space
Source
Look LUT
Premult
Display Correct
Display LUT
Non-color-modifying
Operations (transform,
retime, compositing)
Out-of-range Disp
Channel Reorder
Display
Group
Channel Isolate
Display Gamma
sRGB or Rec709
Display Brightness
Figure 6.1: RV Pixel Pipeline.
49
Channel Map selects
and reorders image channel
directly from the input file.
Channel Reorder changes
the order of the incoming
R, G, B, and A right before
rasterization. Channel Isolate
constrains the display to
only a single channel.
CHAPTER 6. HOW A PIXEL GETS FROM A FILE TO THE SCREEN
Attribute
ColorSpace/Primaries
ColorSpace/Transfer
ColorSpace/Conversion
ColorSpace/ConversionMatrix
ColorSpace/Gamma
ColorSpace/Black Point
ColorSpace/White Point
ColorSpace/Rolloff
ColorSpace/Red Primary
How Its Used
Documents the name of the primary space if it has one
Contains the name of the transfer function used to convert
non-linear R G B values to linear R G B values
If the image is encoded as a variant of luminance + chroma
this attribute documents the name of the color conversion (or
space) required to convert to non-linear R G B values
If the luminance + chroma conversion matrix is explicitly
given, this attribute will contain it
If the image is gamma encoded the correction gamma is stored
here
Explicit value for Kodak log to linear conversion if it exists or
related functions which require a black/white point
Explicit value for Kodak log to linear conversion
Explicit primary values. These are used directly by the
renderer unless told to ignore them.
ColorSpace/Green Primary
ColorSpace/Blue Primary
ColorSpace/White Primary
ColorSpace/ICC Profile Name
ColorSpace/ICC Profile Data
PixelAspectRatio
DataWindowSize
DataWindowOrigin
DisplayWindowSize
DisplayWindowOrigin
The name and data of an embedded ICC profile
Pixel aspect ratio from file
Uncrop parameters if they appeared in a file
Table 6.1: Basic Special Image Attributes
50
CHAPTER 6. HOW A PIXEL GETS FROM A FILE TO THE SCREEN
6.3
Image Channels
RV potentially does a great deal of data conversion between reading a file and rendering an image on your
display device. In some cases, you will want to have control over this process so it’s important to understand
what’s occurring internally. For example, when RV reads a typical RGB TIFF file, you can assume the
internal representation is a direct mapping from the data in the file. If, on the other hand, RV is reading an
EXR file with A, B, G, T, and Z channels, and you are interested in the contents of the Z channel, you will
need to tell RV specifically how to map the image data to an RGBA pixel.
To see what channels an image has in it and what channels RV has decided to use for display you can
select Tools→Image Info in the menu bar. The first two items displayed tell you the internal image format.
In some cases you will see an additional item called ChannelNamesInFile which may show not only R, G, B
channels, but additional channels in the file that are not being shown.
RV stores images using between one and four channels. The channels are always the same data type
and precision for a given image. If an image file on disk contains channels with differing precision or data
type, the reader will choose the best four channels to map to RGBA (or fewer channels) and a data type and
precision that best conserves the information present in the file. If there is no particular set of channels in
the image that make sense to map to an internal RGBA image, RV will arbitrarily map up to the first four
channels in order. By default, RV will interpret channel data as shown in Table 6.2
# of Channels
1
2
3
4
Names
Y
Y, A
R, G, B
R, G, B, A
RGBA Mapping
YYY1
YYYA
RGB1
RGBA
Table 6.2: Mapping of File Channels to Display Channels
Default interpretation of channels and how they are mapped to display RGBA. “1” means that the display
channel is filled with the value 1.0. “Y” is luminance (a scalar image).
When reading an image type that contains pixel data that is not directly mappable to RGB data (like
YUV data), most of RV’s image readers will automatically convert the data to RGB. This is the case for
JPEG, and related image formats (QuickTime movies with JPEG compression for example). If the pixel
data is not converted from YUV to RGB, RV will convert the pixels to RGB in hardware (if possible).
6.3.1
Precision
RV natively handles both integer and floating point images. When one of RV’s image readers decides a
precision and data type for an image, all of its channels are converted to that type internally.
RV lets you modify how the images are stored internally. This ability is important because different
internal formats can require different amounts of memory (see Table 6.3). In some cases you will want to
reduce or increase that memory requirement to fit more images into a cache or for faster or longer playback.
You can force RV to use a specific precision in the interface Color→Color Resolution menu. There are two
options here: (1) whether or not to allow floating point and (2) the maximum bit depth to use.
In the RV image processing DAG, precision is controlled by the Format node. There are two properties
which determine the behavior: color.maxBitDepth and color.allowFloatingPoint.
Channel Data Type
8 bit int
16 bit int
16 bit float
32 bit float
Display Range
[0.0, 1.0]
[0.0, 1.0]
[− inf, inf]
[− inf, inf]
Relative Memory Consumption
1
2
2
4
Table 6.3: Characteristics of Channel Data Types.
51
CHAPTER 6. HOW A PIXEL GETS FROM A FILE TO THE SCREEN
6.3.2
Channel Remapping
RV provides a few similar functions which allow you to remap image channels to display channels. The most
general method is called Channel Remapping.
When Channel Remapping is active, RV reads all of the channel data in an image. This may result in
images with too many channels internally (five or more), so RV will choose four channels to map to RGBA.
You specify exactly which channels RV will choose and what order they should be in. The easiest way to
accomplish this is in the user interface. By executing Tools→Remap Source Image Channels..., you can type
in the names of the channels you want mapped to RGBA separated by commas. Using the previous example
of an EXR with A, B, G, R, Z channels and you’d like to see Z as alpha, you could type in R,G,B,Z when
prompted. If you’d like to see the value of Z as a greyscale image, you could type in Z or Z,A if you want
to see the alpha along with it.
It is also possible to add channels to incoming images using Channel Remapping. If you specify channel
names that do not exist in the image file, new channels will be created. This is especially useful if you need
to add an alpha channel to a three channel RGB image to increase playback performance1 . (See ??).
Channel Remapping is controlled by the ChannelMap node. The names of the channels and their order
is stored in the format.channels property. Channel Remapping occurs when the image data in the file is
converted into one of the internal image formats.
Note that there is overlapping functionality between Channel Remapping and Channel Reordering (See
6.8.1) and Channel Isolation (See 6.8.2) which are described below. However, Channel Remapping occurs
just after pixels are read from a file. Channel Reordering and Isolation occur just before the pixel is displayed
and typically happen in hardware. Channel Remapping always occurs in software.
6.4
Crop and Uncrop
Cropping an image discards pixels outside of the crop region. The image size is reduced in the process. This
can be beneficial when loading a large number of cached images where only a small portion of the frame is
interesting or useful (e.g. a rendered element). For some formats, RV may be able to reduce I/O bandwidth
by reading and decoding pixels only within the crop region.
Figure 6.2: Cropping Parameters. Note that (x1, y1) are coordinates.
Note that the four crop parameters describe the bottom and top corners not the origin, width, and height.
So a ”crop” of the entire image would be (0, 0) to (w − 1, h − 1) where w is the image width and h is the
image height.
Uncropping (in terms of RV) creates a virtual image which is typically larger than the input image2 . The
input image is usually placed completely inside of the larger virtual image.
1 New channels currently inherit the channel data from the first channel in the image. If the data needs to be 1.0 or 0.0 in
the new channel, use Channel Reorder to insert constant data.
2 Quicktime calls this same functionality ”clean aperture.” The OpenEXR documentation refers to something similar as the
data and display windows.
52
CHAPTER 6. HOW A PIXEL GETS FROM A FILE TO THE SCREEN
Figure 6.3: Uncrop Parameters
It is also possible to uncrop an image to a smaller size (in which case some pixels are beyond the virtual
image border) or partially in and out of the virtual uncrop image. This handles both the cases of a cropped
render and an a render of pixels beyond the final frame for compositing slop.
The OpenEXR format includes a display and data window. These are almost directly translated to uncrop
parameters except that in RV the display window always has an origin of (0, 0). When RV encounters differing
display and data window attributes in an EXR file it will automatically convert these to uncrop values. This
means that a sequence of EXR frames may have unique uncrop values for each frame.
Currently EXR is the only format that supports per-frame uncrop in RV.
Figure 6.4: Uncrop of Oversized Render
RV considers the uncropped image geometry as the principle image geometry. Values reported relating
to the width and height in the user interface will usually refer to the uncropped geometry. Wipes, mattes,
and other user interface will be drawing relative to the uncropped geometry.
6.5
Conversion to Linear Color Space
If an image format stores pixel values in a color space which is non-linear, the values should be converted
to linear before any color correction or display correction is applied. In the ICC and EXR documentation,
linear space is also called Scene Referred Space. The most important characteristic of scene referred space is
that doubling a value results in twice the luminance.
Although any image format can potentially hold pixel data in a non-linear color space, there are few
formats which are designed to do so. Kodak Cineon files, for example, store values in a logarithmic color
53
CHAPTER 6. HOW A PIXEL GETS FROM A FILE TO THE SCREEN
space.3 JPEG images may be stored in “video” space4 which typically has a 2.2 gamma applied to the color
values for better viewing on computer monitors. EXR files on the other hand are typically stored in linear
space so no conversion need be applied.
If values are not in linear space, color correction and display correction transforms can still be applied,
but the results will not be correct and in some cases will be misleading. So it’s important to realize what
color space an image is in and to tell RV to linearize it.
6.5.1
Non-Rec. 709 Primaries
If an image has attributes which provide primaries, RV will use this information to transform the color to
the standard REC 709 primaries RGB space automatically. This is done by concatenating two matrices: a
transform to CIE XYZ space followed by a transform to RGB709 space.
6.5.2
Y RY BY Conversion
OpenEXR files can be in stored as Y RY BY channels. The EXR reader will pass these files to RV as planar
images (three separate images instead of one image with three channels). RV will then recombine the images
in hardware into RGBA.
This is advantageous when one or more of the original image planes are subsampled. Subsampled image
planes have a reduced resolution. Typically the chroma channels (in this case RY and BY) are subsampled.
6.5.3
YUV (YCbCr) Conversion
Some formats may produce YUV or YUVA images to be displayed.
better performance. RV uses the following matrix to transform YUV
1
0
1.402
1 −0.344136 −0.714136
1
1.772
0
RV can decode these in hardware for
to RGB:
Y
U
V
where
0≤Y ≤1
−0.5 ≤ U ≤ 0.5
−0.5 ≤ V ≤ 0.5
In the case of Photo-JPEG, the YUV data coming from a movie file is assumed to use the full gamut for
the given number of bits. For example, an eight bit per channel image would have luminance values of [0,
255]. For Motion-JPEG a reduced color gamut is assumed.
On hardware that cannot support hardware conversion, RV will convert the image in software. You can
tell which method RV is using by looking at the image info. If the display channels are YUVA the image is
being decoded in hardware5 . On Linux, this option must be specified when RV is started using the -yuv
flag. 6
6.5.4
Log to Linear Color Space Conversion
When RV reads a 10 bit Cineon or DPX file, it converts 10 bit integer pixel values into 16 bit integer values
which are typically in a logarithmic color space. In order to correctly view one of these images, it is necessary
to transform the 16 bit values into linear space. RV has two transforms for this conversion. You can access
the function via the Color menu from the menu bar. For standard Cineon/DPX RV uses the default Kodak
3 The values in Cineon files are more complex than stated here. Color channel values are stored as code values which
correspond to printing density – not luminance – as is the case with most other image file formats. Furthermore, the conversion
to linear printing density is parameterized and these parameters can vary depending on the needs of the user. See the Kodak
documentation on the Cineon format for a more detail description.
4 This could mean NTSC color space or something else!
5 Conversion of YUVA to RGBA in hardware is an optimization that can result in faster playback on some platforms.
6 Note that the color inspector will convert these values to normalized RGBA.
54
CHAPTER 6. HOW A PIXEL GETS FROM A FILE TO THE SCREEN
conversion parameters7 . Alternately, if the image was created with a Grass Valley Viper FilmStream camera,
you should use the Viper log conversion.
The Kodak Log conversion can produce values in range [0, ˜13.5]. To see values outside of [0,1] use the
exposure feature to stop down image. A value of -3.72 for relative exposure will show all possible output
values of the Kodak log to linear conversion.
6.5.5
File Gamma Correction
If the image is stored in “video” or “gamma” space, you can convert to linear by applying a gamma correction.
RV has two gamma transforms: one for linearization and one for display correction. The linearization gamma
doubles as a color correction. The gamma color correction can be activated via Color→Gamma. When an
1
image is stored in gamma space, it typically is transformed by the formula c γ where γ is the gamma value
and c is the channel value. When transforming back to linear space it’s necessary to apply the inverse (cγ ).
Both of RV’s gamma functions apply the formula cγ .
6.5.6
sRGB to Linear Color Space Conversion
If an image or movie file was encoded in sRGB space with the intention of making it easy to view with
non-color aware software, RV can convert it to linear on the fly using this transform. In addition, some file
LUTs are created to transform imagery from file space to sRGB space directly. If you apply one of these
LUTs to an incoming image as a file LUT in RV you can then using the sRGB to linear function to linearize
the output pixels.
The sRGB to linear function can be activated via Color→sRGB and is stored per-source like the file
gamma above or log to linear.
RV uses the following equation to go from sRGB space to linear:
csRGB
csRGB ≤ p
12.92
2.4
clinear = c
sRGB +a
csRGB > p
1+a
where
p = 0.04045
a = 0.055
6.5.7
Rec. 709 Transfer to Linear Color Space Conversion
Similar to sRGB, The Rec. 709 non-linear transfer function is a gamma-like transform. High definition
television imagery is often encoded using this color space. In order to view it properly on a computer
monitor, it should be converted to linear and then to sRGB for display. The Rec. 709 to linear function can
be activated via Color→Rec709 and is stored per-source like the file gamma, sRGB, or log to linear.
RV uses the following equation to go from Rec. 709 space to linear:
(
c709
c709 ≤ p
clinear = 4.5
1
c709 +0.099 0.45
c709 > p
1.099
where
p = 0.081
6.5.8
Pre-Cache and File LUTs
RV has four points in its pixel pipeline where LUTs may be used. The first of these is the pre-cache LUT. The
pre-cache LUT is applied in software, and as the name implies, the results go into the cache. The primary
use of the pre-cache LUT is to convert the image colorspace in conjunction with a bit depth reformatting to
maximize cache use.
7 For
Shake users, RV produces the same result as the default parameters for the LogLin node
55
CHAPTER 6. HOW A PIXEL GETS FROM A FILE TO THE SCREEN
The file LUT and all subsequent LUTs are applied in hardware and are intended to be used as a conversion
to the color working space (usually some linear space). However, the file LUT can also be used for as a
transform from file to display color space if desired.
See Chapeter 7 for more information about how LUTs work in RV.
6.6
Color Correction
None of the color corrections affects the Alpha channel. For a good discussion on linear color corrections,
check out Paul Haeberli’s Graphica Obscura website (http://www.sgi.com/misc/grafica/matrix/).
Color corrections are applied independently to each image source in an RV session. For example, if you
have two movies playing in sequence in a session and you change the contrast, it will only affect the movie
that is visible when the contrast is changed. (If you want to apply the same color correction to all sources,
perform the correction in tiled mode: Tools→Stack, Tools→Tile.)
6.6.1
Luminance LUTs
After conversion to linear, pixels may be passed though a luminance look up table. This can be useful when
examining depth images or shadow maps. RV has a few predefined luminance LUTs: HSV, Random, and a
number of contour LUTs. Each of these maps a luminance value to a color.
6.6.2
Relative Exposure
RV’s computes relative exposure like this:
c × 2exposure
where c is the incoming color. So a relative exposure of -1.0 will cause the color to be divided by 2.0.
Relative exposure can alternately be thought of as increasing or decreasing the stop on a camera. So a
relative exposure of -1.0 is equivalent to viewing the image as if the camera was stopped down by 1 when
the picture was taken.
1
where
To map an exact range of values (where 0 is always the low value) set the exposure to log2 max
max is the upper bound.
6.6.3
Hue Rotation
The unit of hue rotation is radians. RV’s hue rotation is luminance preserving. A hue rotation of 2π will
result in no hue change.
The algorithm is as follows:
• Apply a rotation that maps the grey vector to the blue axis.
• Compute the vector L that is perpendicular to the plane of constant luminance.
• Apply a skew transform to map the vector L onto the blue axis.
• Apply a rotation about the blue axis N radians where N is the amount of hue change.
• Apply a rotation that maps the blue axis back to the grey vector.
RV computes luminance using this formula8 :
Rw
Rw
Rw
0
8 This
Gw
Gw
Gw
0
Bw
Bw
Bw
0
is also the formula used for luminance display.
56
0
R
G
0
0 B
1
1
CHAPTER 6. HOW A PIXEL GETS FROM A FILE TO THE SCREEN
where9
Rw = 0.3086
Gw = 0.6094
Bw = 0.0820
6.6.4
Relative Saturation
RV applies the formula:
R
Rw (1 − s) + s
Gw (1 − s)
Bw (1 − s)
0
Rw (1 − s)
G
G
(1
−
s)
+
s
B
(1
−
s)
0
w
w
Rw (1 − s)
Gw (1 − s)
Bw (1 − s) + s 0 B
1
0
0
0
1
where
Rw = 0.3086
Gw = 0.6094
Bw = 0.0820
and s is the saturation value.
6.6.5
Contrast
RV applies the formula:
1+k
0
0
0
0
1+k
0
0
0
0
1+k
0
−k
2
−k
2
−k
2
R
G
B
1
1
where k is the contrast value.
6.6.6
Inversion
RV applies the formula:
−1
0
0
1
6.7
0
−1
0
1
0 0
R
0 0
G
−1 0 B
1 1
1
Display Simulation and Correction
After color corrections have been applied in linear space and before pixels are sent to the display device,
they undergo display transformations. These transforms are intended to simulate the appearance of pixels
on alternate display devices (like film) and to correct for any color transform that will be applied by the
primary display device. In addition, RV provides a few tools to help visualize image pixel values in various
ways.
Unlike color corrections, display color corrections apply to all source material in an RV session.
9 Weight values for R, G, and B are applicable in linear color space. Values used for determining luminance for NTSC video
are not applicable in linear color space.
57
CHAPTER 6. HOW A PIXEL GETS FROM A FILE TO THE SCREEN
6.7.1
Display and Look LUTs
There are times when its necessary to have two separate display LUTs — one which might be per-shot and
one which is global. For example, this can happen when digital intermediate color work is being done on
plates while the un-corrected plates are being worked on; a temporary LUT may be needed to simulate the
“look” of the final result.
There is a unique look LUT per source. There is a single display LUT for an RV session.
RV applies the look LUT just before the display LUT.
See Chapter 7 for a more detailed explaination of usage and how to load a LUT into RV.
6.7.2
Display Gamma Correction
This gamma correction is intended to compensate for monitor gamma. It is not related to File Gamma
Correction, which is discussed in Section 6.5.5.
For a given monitor, there is usually one good value (e.g., 2.2) which when applied corrects the monitor’s
response to be nearly linear. Note that you should not use the Display Gamma Correction if your monitor
has been calibrated with a gamma correction built in.
If you are using the X Window System (Linux/Unix) or Microsoft Windows, the default is not to add a
gamma correction for the monitor.
On X Windows, this can be checked using the xgamma command. For example, in a shell if you type:
shell> xgamma
and you see:
-> Red 1.000, Green 1.000, Blue 1.000
then your display has no gamma correction being applied. In this case you will want RV to correct for
the non-linear response by setting the Display Gamma to correct for the monitor (e.g., 2.2).
On Mac OS X, things are more complex. Typically, a ColorSync profile is created for your monitor and
this includes a gamma correction. However, the monitor may be corrected to achieve a non-linear response.
The best bet on OS X is to calibrate the display in such a way that a linear response is achieved and don’t
use a Display Gamma other than 1.0 in RV.
The Display Gamma can be set from the View menu.
6.7.3
sRGB Display Correction
Most recently made monitors are built to have an sRGB response curve. This is similar to a Gamma 2.2
response curve, but with a more linear function in the blacks. RV supports this function directly for both
input and output without the need to use a LUT. The sRGB display is a better default for most monitors
than the display gamma correction above.
RV’s default rules for color set up use the sRGB display. RV also assumes by default that QuickTime
movies and JPEG files are in sRGB color space unless they specifically indicate otherwise. This behavior
can be overridden (see the Reference Manual).
RV uses the following formula to convert from linear to sRGB:
(
12.92clinear
clinear ≤ q
csRGB =
1/2.4
(1 + a)clinear − a clinear > q
where
q = 0.0031308
a = 0.055
The sRGB Display Correction can be set from the View menu.
58
CHAPTER 6. HOW A PIXEL GETS FROM A FILE TO THE SCREEN
6.7.4
Rec. 709 Non-Linear Transfer Display Correction
If the display device is an HD television or reference monitor it may be naturally calibrated to the Rec. 709
color space. Similar to sRGB, Rec. 709 is a gamma-like curve. RV uses the following formula to convert
from linear to Rec. 709:
(
4.5clinear
clinear ≤ q
c709 =
0.45
1.099clinear
− 0.099 clinear > q
where
q = 0.018
6.7.5
Display Brightness
There is a final multiplier on the color which can be made after the display gamma. This is analogous to
relative exposure discussed above. The Display Brightness will never affect the hue of displayed pixels, but
can be used to increase or decrease the final brightness of the pixel.
This is most useful when a display LUT is being used to simulate an alternate display device (like projected
film). In some cases, the display LUT may scale luminance of the image down in order to represent the entire
dynamic range of the display device. In order to examine dark parts of the frame, you can adjust the display
brightness without worrying about any chromatic changes to the image. Note that bright colors may become
clipped in the process.
The Display Brightness can be set from the View menu.
6.8
Final Display Filters
These operations occur after the display correction has been applied and before the pixel is displayed. Unlike
color corrections, there is only a single instance of each of these for an RV session. So if you isolate the red
channel for example, it will be isolated for all source material.
6.8.1
Channel Reorder
If you have RGBA or fewer channels read into RV and you need to rearrange them for some reason, you can
do so without using the general remapping technique described above. In that case you can use channel
reordering which makes it possible to reorder RGBA channels and set one or more of the channels to 0.0
or 1.0. Channel Reordering can be accessed in the menu bar under View→Channel Order. On supported
machines, this function is implemented in hardware (so it’s very fast).
This function can be useful if the image comes from a format with unnamed RGB channels which are not
in order. Another useful feature of Channel reordering is the ability to flood one or more channels with the
constant value of 1.0 or 0.0. For example to see the red channel as red without green and blue you could set
the order to R000 (R followed by three zeros). To see the red channel as a grey scale image you could use
the order RRR0. (Yes, that is exactly what channel isolation does! See below.)
Channel reordering is controlled by the Display node. The display.channelOrder attribute determines
the order. Channel reordering occurs when the internal image is rendered to the display.
6.8.2
Isolating Channels
Finally, you can isolate the view to any single channel using the interface from the menu View→Channel
Display. Since this is the most common operation when viewing channels, it is mapped to the keys “r”, “g”,
“b”and “a” by default (shows isolated red, green, blue, and alpha) and can be reset with the “c” key (show
all color channels). You can also view luminance as a pseudo-channel with the “l” key.
Channel isolation is controlled by the Display node. The display.channelFlood property controls which
channel (or luminance) is displayed. Channel isolation occurs when the internal image is rendered to the
display.
59
CHAPTER 6. HOW A PIXEL GETS FROM A FILE TO THE SCREEN
6.8.3
Out-of-range Display
The Out-of-Range color transform operates per channel. If channel data is 0.0 or less, the channel value is
clamped to 0.0. If the channel data is greater than 1.0, the channel data is clamped to 1.0. If the channel
data is in the range [0.0, 1.0] the data is clamped to 0.5.
The idea behind the transform is to display colors that are potentially problematic. If the pixels are grey,
then they are “safe” in the [0.0, 1.0] range. If they are brightly colored or dark, they are out-of-range.
0.0 is usually considered an out-of-range color for computer graphics applications when the image is
intended for final output.
Some compositing programs have trouble dealing with negative values.
Note that HDR images will definitely display non-grey (bright) pixels when the out-of-range transform
is applied. However, they probably should not display dark pixels.
You can turn on Out-of-range Display from the View menu.
60
Chapter 7
Using LUTs in RV
Look up tables (LUTs) are useful for approximating complicated color transforms, especially those which
have no known precise mathematical representation. RV provides four points in its color pipeline where
LUTs can be applied: just after reading the file and before caching (pre-cache LUT 7.3) directly after the
cache (file LUT), just before display transforms (look LUT), and as one of the display transforms (display
LUT). The first three are per-source while there is only a single display LUT for each RV session. See 6.1
Each of the LUTs can be either a channel LUT or a 3D LUT (the difference is explained below 7.1. In
the case of a 3D LUT there can also be an additonal channel pre-LUT which can be used to shape the data.
Both types of LUT are preceeded by an input matrix which can scale high dyamic range data into the range
of the LUT input (which is the range [0,1]). The values the LUT produces can be outside of the [0,1] range.
This makes it possible for any of the LUTs to transform colors outside of the typical [0,1] range on both
input and output.
Internally, RV will store the LUT as either half precision floating point or 16 bit integral. Not all
hardware is capable of processing LUTs stored as floating point (esp. the 3D LUTs) so if you notice banding
or noisy output when using floating point LUT storage, you may have better luck with the 16 bit integral
representation. If RV can determine whether the floating point LUTs are usable itself it will default to
whatever is appropriate.
When applied in hardware, the LUTs are interpolated when a value is not exactly represented in the
LUT. This is usually more of an issue with 3D LUTs than channel LUTs since they have fewer samples per
dimension. When interpolating between sample values, RV uses linear interpolation for channel LUTs and
tri-linear interpolation for 3D LUTs.
There are a number of ways to create a LUT. For film look simulation, it’s often necessary to have special
hardware to measure and compare film recorder output. Alternately, you use a lightbox; and assuming you
have a well calibrated neutral monitor, “eyeball” the LUT by comparing the film to the monitor.
RV has two different algorithms for applying the LUTs on the GPU: using floating point or fixed-point
integer textures. Not all cards are equally capable with 3D LUTs and floating point. If RV detects that
the card probably can’t do a good job with the floating point hardware it will switch to a fixed-point
representation using 16 bit integer LUTs. Sometimes eventhough the driver reports that the LUTs can be
floating point, you will see banding in the final images. If that occurs, try forcing the use fixed-point LUTs
by turning off the Floating Point 3D LUTs item on the Rendering tab of the preferences. The fixed point
LUT algorithm will perform just as well as floating point in 99% of normal use cases.
7.1
Channel (1D) versus 3D LUTs
A channel LUT (also called a 1D LUT) has three independent look-up tables: one each for the R G and B
channels. The alpha channel is not affected by the channel LUT. Channel LUTs may be very high resolution
with up to 4096 samples. Each entry in the channel LUT maps an input channel value to an output channel
value. The input values are in the [0,1] range, but the output values are unbounded.
Channel LUTs differ from 3D LUTs in one critical way: they can only modify channel values independently of one another. In other words, e.g., the output value of the red channel can only be a result of the
61
CHAPTER 7. USING LUTS IN RV
Figure 7.1: 3D and Channel LUT Components
incoming red value. In a 3D LUT, this is not the case: the output value of the red channel can be dependent
on any or all of the input red, green, and blue values. This is sometimes called channel cross-talk.
The other important difference between channel and 3D LUTs is the number of samples. Channel LUTs
are one dimensional and therefor consume much less memory than 3D LUTs. Because of this, channel LUTs
can have more samples per-channel than 3D LUTs.
The implication of all this is that channel LUTs are useful for representing functions like gamma or log
to linear which don’t involve cross-talk between channels whereas 3D LUTs are good for representing more
general color transforms and simulating physical output like film.
3D LUTs can be very memory intensive. A 64 × 64 × 64 LUT requires 643 × 4 bytes of data (3Mb). You
can quickly run out of memory for your image on the graphics card by making the 3D LUT too big (e.g.
128 × 128 × 128, this will slow RV down). RV does not require the 3D LUT to have the same resolution in
each dimension. You may find that a particular LUT is smooth or nearly linear in one or more dimensions.
In that case you can use a lower resolution in those dimensions.
Some graphics cards have resolution issues with 3D textures which can cause loss of precision when RV’s
3D LUT feature is enabled. On older NVidia cards and ATI cards in general, 3D textures may be limited to
non-floating point color representations. Precision loss when using a LUT can be exacerbated by applying
display gamma on these cards. To minimize precision loss on those types of cards, bake monitor gamma
and/log-lin conversion directly into the display LUT. With newer GPUs this is not as much of an issue.
7.2
Input Matrix and Pre-LUT
For HDR applications, the incoming data needs to be rescaled and possibly shaped. RV has two separate
components which do this: the LUT input matrix and a channel pre-LUT. The input matrix is a general
4 × 4 matrix. For HDR pixels, the matrix is used to scale the incoming pixel to range [0, 1]. The pre-LUT,
the channel LUT, and the 3D LUT all take inputs in that range. Figure 7.1 shows a diagram of the channel
and 3D LUT components and their input and output ranges.
The pre-LUT is identical to the channel LUT in implementation. It maps single channel values to new
values. Unlike the general channel LUT, the pre-LUT must always map values in the [0, 1] range into the
same range. The purpose of the pre-LUT is to condition the data before its transformed by the 3D LUT.
For example, it may make sense for 3D LUT input values to be in a non-linear space – like log space. If
the incoming pixels are linear they need to be transformed to log before the 3D LUT is applied. By using a
relatively high resolution pre-LUT the data can be transformed into that space without precision loss.
62
CHAPTER 7. USING LUTS IN RV
Extension
Type
1D
3D
PreLUT
Float
Input
Output
csp
rv3dlut
rvchlut
3dl
cube
Rising Sun Research
RV 3D
RV Channel
Lustre
IRIDAS
•
•
•
•
•
•
•
•
[−∞, ∞]
[0, 1]
[0, 1]
[0, 1]
[0, 1]
[−∞, ∞]
[−∞, ∞]
[−∞, ∞]
[0, 1]
[−∞, ∞]
any
Shake
•
•
[0, 1]
[−∞, ∞]
•
•
•
Table 7.1: LUT Formats (as Supported in RV)
7.3
The Pre-Cache LUT
The first LUT that the pixels can be transformed by is the pre-cache LUT. This LUT has the same parameters
and features as the other LUTs, but it is applied before the cache. The pre-cache LUT is currently applied
by the CPU (not on the GPU) whereas the file, look, and display LUTs are all used by the graphics hardware
directly. For this reason the pre-cache LUT is slightly slower than the others.
The pre-cache LUT is useful when a special caching format is desired. For example by using the pre-cache
LUT and the color bit depth formatting, you can have RV convert linear OpenEXR data into 8 bit integer
format in log space. By using RV’s log to linear conversion on the cached 8 bit data you can effectively store
high dynamic range data (albeit limimted range) and get double the number of frames into the cache. Many
encoding schemes are possible by coupling a custom pre-cache LUT, change of bit depth, and the hardware
file LUT to decode on the card.
7.4
LUT File Formats
RV supports several of the common LUT file formats (See Table 7.1). Unfortunately, not all LUT formats
are equally capable and some of them are not terribly well defined. In most cases, you need to know the
intended use of a particular LUT file. For example, its doesn’t make sense to apply a LUT file which expects
the incoming pixels to be in Kodak Log space to pixels from an EXR file (which is typically in a linear space).
Often there is no way to tell the intended usage of a LUT file other than its file name or possibly comments
in the file itself. Most formats do not have a public mechanism to indicate the usage to an application.
To complicate matters, many LUT files are intended to map directly from the pixels in a particular file
format directly to your monitor. When using these types of LUTs in RV you should be aware than making
any changes to the color using RV’s color corrections or display corrections will not produce expected results
(because you are operation on pixels in the color space appropriate for the display, rather than in linear
space).
One of the more common types of LUT files you are likely to come across is one which maps Kodak Log
space to sRGB display space. The file name of that kind of LUT might be log2sRGB or something similar.
A variation on that same type of LUT might include an additonal component that simulates the look of the
pixels when projected from a particular type of film stock. Strictly speaking, you do not need to use log to
sRGB LUTs with RV because it implements these functions itself (and they are exact, not approximated).
So ideally, if you require film output simulation you have a LUT which only does that one transform. Of
course this is often not the case; the world of LUT formats is a complicated one.
7.4.1
RSR .csp LUT Format
Currently, the best LUT format for use with RV is the .csp format. This format handles high dynamic
range input and output as well as non-linear and linear pre-LUTs. It maps most closely to RV’s internal
LUT functions.
There is one type of .csp file which RV does not handle: a channel LUT with a non-linear pre-LUT.
This is probably a very rare beast since an equivalent 1D LUT can be created with a linear pre-LUT. An
error will occur if you attempt to use a channel LUT with a non-linear pre-LUT.
63
CHAPTER 7. USING LUTS IN RV
When RV reads a pre-LUT from this file format and it can determine that the pre-LUT is linear, it
will convert the pre-LUT into a matrix and apply it as the LUT input matrix. In that case the non-linear
channel pre-LUT is not needed. If the pre-LUT is non-linear (in any channel) RV will construct a channel
LUT which is used just before the 3D LUT. Input values in the .csp pre-LUT are normalized and the scaling
is then moved to the input matrix. Using a matrix when possible frees up resources for other LUTs and
images in the GPU. Any pre-LUT in a .csp file with only two values is by definition a linear pre-LUT.
1
2
3
4
5
6
7
8
9
10
11
12
13
14
CSPLUTV100
3D
2
0
0
2
0
0
2
0
0
13.5
1
13.5
1
13.5
1
...
In the above listing, lines 4 to 12 are linear pre-LUT values. In this case the pre-LUT values are mapping
values int the range [0,13.5] down to [0,1] for processing by a 3D LUT (which is not shown). For a summary
of the RSR .csp format see appendix G.
For the most part, its not necessary to know the distinction between a linear and non-linear pre-LUT in
the file. However, the behavior of the pre-LUT outside the bounds of its largest and smallest input values
will be different for linear pre-LUTs. Since the pre-LUT is represented as a matrix, it will not clamp values
outside the specified range. Non-linear pre-LUTs will clamp values.
64
Chapter 8
Packages
There are multiple ways to customize and extend RV, and allmost all these ways can be enscapusulated in an
RV Package. A package is a zip file with source or binary code that extends RV’s feature set. Packages are
constructed so that they can be automatically installed and removed. This makes it much easier for you to
maintain RV than if you modify RV source directly. (Note: although packages are zip files, as of RV version
3.10 they are labeled with a .rvpkg extension to prevent mail programs, etc, from automatically unzipping
them.
Packages can encapsulate a wide variety of features: everything from setting the titile of the window
automatically to implementing a paint annotation package. Some of RV’s internal code is also in package
form prior to shipping: e.g. the entire remote sync feature is initially constructed as a package of Mu source
code (but is permanently installed when shipped).
The package manager can be found in the preferences dialog. There are two sections to the user interface:
the list of packages available and the description of the selected package. Some packages may be ”hidden”
by default; to see those packages toggle the show hidden packages button. To add and remove packages use
the add and remove buttons located at the bottom left.
The reference manual contains detailed information about how to create a package.
This manual does not document any packages. See the Tweak Software website to download and get
more information about particular packages.
8.1
Package Support Path
When a package is added, a list of permissable directories in the support path is presented. At that time
you can choose which support directory to add the package to. When RV starts, these directories are
automatically added to various paths (like image I/O plugins).
By default, RV will include the application directory’s plug-ins directory (which is probably not writable
by the user) and one of the following which is usually writable by the user:
~/Library/Application Support/RV
~/.rv
$APPDATA/RV
Mac OS X
Linux
Windows
You can override the default support path locations by setting the environment variable RV_SUPPORT_PATH.
The variable contents should be the usual colon (Linux and Mac) or semicolon (Windows) separated list of
directories. The user support directory is not included by default if you set the RV_SUPPORT_PATH variable,
so be sure to explicitly include it if you want RV to include that path. Also note that the support path
elements will have subdirectories called Mu, Packages, etc. In particular, when using the support path to
install Packages, you want to include the directory above Packages in the path, not the Packages subdir
itself.
The file system of each directory in the support path contains these directories:
65
CHAPTER 8. PACKAGES
Packages/
ConfigFiles/
ImageFormats/
MovieFormats/
Mu/
SupportFiles/
lib/
Package zip files
Area used by packages to store non-preference configuration information
Image format Plug-Ins
Movie format Plug-Ins
Mu files implementing packages
Additonal files used by packages (icons, etc)
Shared libraries required by packages
RV will create this structure if its not already there the first time you add or install a package.
8.2
Installation
Once a package has been added, to install or uninstall simply click on the check box next to the name. The
package is installed in the same support directory in which it was added.
Figure 8.1: Package Manager
A package can be added, removed, installed, and uninstalled for all users or by a single user. Usually
administrator priviliges are necessary to operate on packages system wide. When a package is added (the
rvpkg file) it is copied into a known location in the support path.
Its best to avoid editing files in these locations because RV tries to manage them itself. When a package
is installed the contents will be installed in directories of the support directory.
When first installed, packages are loaded by default. To prevent a packgae from loading uncheck the load
check box. This is useful for installed packages which are not uninstallable because of permissions. While
the install status of a package is universal to everyone that can see it, the load status is per-user.
Note: a restart of RV is before a change in a packages Installed or Loaded state takes effect.
8.3
Package Dependencies
Packages may be dependent on other packages. If you select a package to be installed but it requires that
other packages be installed as well, RV will ask you if it can install them immediately. A similar situation
can occur when setting the load flag for a package. When uninstalling/unloading the opposite can happen:
a package may be required by another that is ”using” it. In that case RV will ask to uninstall/unload the
dependent packages as well.
Some packages may require a minimum version of RV. If a package requires a newer version, RV will not
allow you to install it.
In some cases, manual editing of the support directory may lead to a partially installed or uninstalled
package. The package manager has a limited ability to recover from that situation and will ask for guidance.
66
Chapter 9
Stereo Viewing
RV can display the first two image layers as stereo. There are several options:
• Anaglyph
• Side-by-Side
• Mirrored Side-by-Side
• DLP Checker
• Scanline Interleaved
• Left or Right eye only
• Hardware Left and Right Buffers
The stereo rendering is designed to work with the other features of RV. In most cases, color corrections,
image geometry manipulations, and display corrections will work in conjunctions with stereo viewing.
When caching is on, all layers are cached (left and right eyes). You will need to reduce the image
resolution to cache as many frames as non-stereo.
The left and right eye images are normalized (i.e. conformed to fit the RV window) so they may have
different resolutions and/or bit depths. However, it is not advisable to have differing aspect ratios.
You can create stereo sources and set individual stereo parameters from the command line. See Section
3.2.2 to see how to do this.
9.1
Anaglyph
The anaglyph mode displays the left eye in the red channel and the right in eye in the green and blue channels
(as cyan). If you were to wear colored red-cyan glasses and the eyes are correctly arranged, you should be
able to see stereo with pseudo-color. Color anaglyph images work best for outdoor scenes (with lots of green)
and in similar cases. They work very poorly with blue or green screen photography.
If the color contrast is too great, the stereo effect will be difficult to see. If you turn on luminance
viewing (hit the ”l” key in the user interface), you can improve the effect (Figure 9.2). A similar solution is
to desaturate the image slightly (hit shift ”S” and scrub); this will reduce the color contrast but keep some
hints of color (Figure 9.3).
Compression artifacts can seriously degrade stereo viewing especially in anaglyph mode. QuickTime
movies, for example, with low quality compression may look fine when viewed one eye at a time, but in
anaglyph mode JPEG or similar artifacts will be greatly amplified by slight color differences. The best way
to view compressed material is with luminance display turned on (no color).
67
CHAPTER 9. STEREO VIEWING
Figure 9.1: Anaglyph Stereo Display
Figure 9.2: Anaglyph Stereo With Luminance Display
Figure 9.3: Anaglyph Display With Desaturation
68
CHAPTER 9. STEREO VIEWING
9.2
Side-by-Side and Mirror
Side-by-Side mode displays the left and right eyes next to each other horizontally in full color. Some people
are comfortable crossing their eyes to see stereo using this mode.
Mirror mode is similar, but the right eye is flopped. If you need the left eye flopped, turn on mirror mode
and select Image->Flop or hit shift-”X” this will have the effect of mirroring the left eye instead. Note that
the same effect can be produced by flopping the right eye only in mirror mode.
Figure 9.4: Side-by-Side Stereo Display
Figure 9.5: Mirror Display Mode
9.3
DLP Checker and Scanline
These modes are designed to work with DLP projectors or LCD displays that directly support stereo display.
In particular RV supports the SpectronIQ HD LCD display and DLP projectors using the Texas Instrument’s
checkerboard 3D DLP input.
69
CHAPTER 9. STEREO VIEWING
Figure 9.6: DLP (left) and LCD Scanline (right) Stereo Display
9.4
Squeezed Stereo Modes
RV also provides Vertical Squeezed mode (left and right eyes scaled to half-height, and right displayed above
left), and Horizontal Squeezed mode (left and right eye scaled to half width, and right displayed to the right
of left). Please note that these modes will likely only look good in full-screen mode, and interface components
that are drawn onscreen and crosee the boundary between the eyes will look pretty confusing on the stereo
monitor. It may help, in Vertical mode, to choose the Draw Timeline Over Imagery option from the timeline’s
config menu.
9.5
Hardware Stereo Support
RV can render into left and right buffers if your graphics card supports hardware stereo. You can tell if this
is the case by seeing if the menu item View→Stereo→Hardware can be selected. If so, RV should be able to
create left and right buffers. There are a number of different ways to view stereo with a standard graphics
card. See Chapter Afor information about how to setup each platform and what options are available at the
hardware level.
Typically, hardware support requires shutter glasses (monitor or projection) or polarized glasses (projection only) in order to be useful. Most hardware requires a CRT monitor (as opposed to an LCD) in order
to use stereo.
9.6
Additional Stereo Operations
These options can be applied per-source as well as part of the global viewing stereo options. The per-source
options can be found under the Image→Stereo menu and the global view options are under View→Stereo.
9.6.1
Swap eyes
Swap eyes changes the order of the left and right eyes (left becomes right and vice versa). If you are looking
at stereo pairs and you just cannot see the stereo, you may want to try swapping the eyes. It is difficult to
view stereo when the eyes are inverted.
9.6.2
Relative Eye Offset
Relative eye offset controls how separated the left and right images are horizontally. In the case of the
anaglyph and hardware left and right buffer modes the offset value determines the fusion depth. Objects at
the fusion depth appear coincident with the screen depth. In other words, they appear to be right on the
screen: not behind it or in front of it. This is most evident in the anaglyph mode where the red and cyan
70
CHAPTER 9. STEREO VIEWING
components of a shape will not be separated if its at the fusion depth. The units of the offset numbers are
a percentage of the image width.
You have a choice to either offset the eye images away from each other (both at the same time) or to
offset the right eye only.
Figure 9.7: Changing stereo relative eye offset. The left is the original image viewed in anaglyph mode. The
right has an additional offset applied.
9.6.3
Flip/Flop the Right Eye Only
If you are projecting stereo and require one eye be flipped (vertical) or flopped (horizontal), you can select Image→Stereo→Flip Right Eye or Image→Stereo→Flop Right Eye. This can further be combined with
Image→Flip and Image→Flop and rotation to move the images into the correct position.
Figure 9.8: Flipping One Eye
71
Chapter 10
Networking
RV implements a simple chat-like network protocol over TCP/IP. Network connections can be between two
RVs or between a custom program and RV. The protocol is documented in the reference manual. This
chapter discusses how to make network connections, how network permissions work, and how to synchronize
two RVs using networking.
Note that just turning on networking and establishing a connection doesn’t actually do anything in RV.
But this step is necessary before any of the features that use the networking can start.
Some of the things you can do with networking include synchronizing to RV sessions across a network,
sending pixels from another program to RV (e.g., a RenderMan display driver), or controlling RV from
another program (remote control). Sync is part of RV, but remote control and sending pixels must be
implemented in another program. RV comes with source code to a program called rvshell which shows you
how to write software that connects with RV and controls playback remotely as well as sending images to
RV over the connection. Some other applications are using special devices to control RV (like apple remote
control for example) or controlling RV as an embedded playback component in a custom application on
Linux.
The reference manual has documentation about the networking protocol and how to create programs
that talk to RV. The inner workings of the rvshell program are also discussed there.
While its possible to create connections across the internet, it’s a little tricky, see 10.1.4.
10.1
The Network Dialog
Before you can use any of RV’s networking features, you have to tell RV to begin listening for connections.
There are two ways to do this: from the command line using the -network flag or interactively using the
the Network dialog via the RV→Networking... menu item.
The network dialog box has three pages: Configuration for setting up your identity and the port on which
RV will communicate, the Contacts page for managing permissions, and the Connections page which shows
a list of the currently active connections. At the bottom of the dialog are buttons for starting and stopping
the networking and for initiating a new connection.
72
CHAPTER 10. NETWORKING
Figure 10.1: RV Network Dialog
10.1.1
Configuration
The configuration requires two pieces of information: your identity (which appears at the other end of the
connection) and a port number. Unless your systems adminitrator requires RV to use a different port you
should leave the default value for the port number. Networking must be stopped in order to change the
configuration.
10.1.2
Starting a Connection
To start networking and have RV accept connection just hit the Start Network button. Once running, the
status indicator in the bottom left-hand corner of the dialog will show you the network status and the number
of active connections (which starts out as 0).
There are two ways to initiate a new connection: by pressing the Connect... button at the bottom of the
dialog or by selecting a known address on the Contacts page.
Using the Connect... button will show another dialog asking for the host name of the machine to connect
to. Using this method, RV will not care which user it finds at the other end of the connection. If RV does
not yet have record of the user it finds it will create one.
Figure 10.2: Network Dialog Starting a Connection
10.1.3
Contacts and Permissions
If networking is on, and a connection is initiated by another party, RV will ask whether or not you want
the connection to occur. At that point you have three choices: accept the connection but ask for permission
next time, always accept connection from the user/program that’s asking, or deny the connection.
Each new contact that RV receives (whether or not you accept) is recorded in the Contacts page. On this
page you delete existing contacts, change permissions for contacts, and initiate connections to contacts. You
73
CHAPTER 10. NETWORKING
can also specify the behavior RV when new contacts try to connect to your RV. This is most useful when
RV is used by multiple people (for example in a common space like a view station). Often instances of RV
running in common spaces should be more conservative about allowing connections without asking.
To change an existing contacts permissions, double click on the current value (where it says, Allow, Ask,
or Reject). You should see a pop-up menu which lets you change the value.
To initiate a connection to an existing contact, double click on the contact name or machine name.
There is also a pop-up menu which lets you delete an existing contact or initiate a connection.
Figure 10.3: Network Contacts Page
10.1.4
Networking Across the Internet
Its possible to connect to a remote RV across the internet in a peer-to-peer fashion, but special care needs
to be taken. We recommend one of two methods: using ssh tunneling or using a VPN.
SSH tunnelling is well known in the IT community. Since there is no standard firewall configuration,
you will need to understand both the way in which ssh tunnelling is set up and the topology of the firewalls
on both ends of the connection. No third party connection is needed to sync across ssh tunnels and the
connection is relatively secure.
Using a VPN is no different than a local area network once it has been established: you need to know the
IP address or name of the host with which you want to connect. If you do not have a VPN in common with
the remote participant, you can create one using Hamachi https://secure.logmein.com/products/hamachi/
vpn.asp. The service is free for non-commercial use. See their website for more details.
10.2
Synchronizing Multiple RVs
Once a connection has been established between two RVs, you can synchronize them.
To start sync select the menu item Tools→Sync With Connected RVs. You should see “Sync ON” in the
feedback area on both RVs and a Sync menu will appear in the menu bar.
Usually its a good idea to have all participants looking at the similar media, but its not enforced.
In particular, note that RV’s auto-conforming features mean that one party can be looking at a high-res
OpenEXR sequence and another at a qucktime movie of the same sequence, and the sync can still be quite
useful.
74
CHAPTER 10. NETWORKING
Figure 10.4: Sync Mode Showing Remote User’s Cursor
10.2.1
Using Sync
You can control which aspects of RV are transmitted to and received from remote RV’s from the Sync menu.
The menu is divided into to two main sections: things you can send and things you have agreed to receive.
By default, sync mode will accept anything it gets, but will only send certain types of operations. So if one
of the participants decides to send more than the default state the remote RVs will automatically use it.
Sync mode will always send frame changes and playback options like the current fps, and the playback
mode.
Figure 10.5: Sync Mode Menu
75
CHAPTER 10. NETWORKING
Event Group
What Gets Sync’ed
Color
Any per-source color changes. E.g., exposure, gamma, hue, saturation and
contrast. The File LUT is currently not synced between RVs.
Any viewing pan and zoom changes. The scales are relative to the window
Pan and Zoom
Stereo Settings
Display Stereo Settings
Display Color Settings
Image Format Settings
Audio Settings
Default
geometry (which is not synced).
Settings that are per-source (e.g., those that are found under the
Image→Stereo menu). Stereo settings from the under View→Stereo menu are
not included.
Stereo settings that affect the entire session (e.g. those found under the
View→Stereo menu). This includes the stereo display mode. Be careful when
using this when any participant is not capable of hardware stereo viewing.
Overall brightness, red, green, blue, channel isolation, display gamma, display
sRGB and Rec709 modes. Most of the items found under the View menu.
The look and display LUTs are currently not synced.
Image resolution, color resolution, rotation, alpha type, pixel aspect ratio
changes.
Soundtrack and per-source audio volume, balance, cross-over, etc. Things
found under the Audio menu.
Frame changes, FPS, realtime and play all frames playback mode settings, in
and out points. These are always sync’ed.
Table 10.1: Sync Mode Sending and Receiving Events
76
Chapter 11
Maximizing Performance
RV is primarily a desktop playback program. As such, there are no guarantees about performance. That
being said, there are a number of methods to tune performance for any particular hardware configuration
and operating system. The most imporant parameters to tune for good performance in RV are:
• The number of CPUs/cores available versus the number of reader threads used in RV
• The specific file format being read (not all are created equal) and possible filesystem requirements like
striping or guaranteed bandwidth constraints
• The I/O method for each file format (if it has multiple methods) versus the type of mass storage (SAN,
RAID, or stripped disks, etc)
• If the file format decoder is threaded, the number of threads used for decoding (and balancing that
with the number of reader threads)
• A fast PCI bus and a recent GPU
Most of these settings are available from either the caching preference pane or the rendering preference pane.
Figure 11.1: Render Preference Pane
77
CHAPTER 11. MAXIMIZING PERFORMANCE
Figure 11.2: Caching Preference Pane
11.1
File I/O and Decoding Latency
When reading frames directly from disk, file I/O is often a huge bottleneck. If your frames live across a
network connection (such as an NFS mount) the latency can be even greater. Ideally, if RV is playing frames
without caching, those frames would be on a local disk drive, RAID, or SAN sitting on a fast bus.
Part of the I/O process is decoding compressed image formats. If the decoding is compute intensive, the
time spent decoding may become a bottleneck. If good playback performance off of disk is a requirement,
you should choose a format that does not require extensive decoding (Cineon or DPX) or one that can be
parallelized (EXR).
As always, there is a tradeoff between file size and decoding time. If you have a very slow network, you
might get better performance by using a format with complex expensive compression. If your computer is
connected to a local high-speed RAID array or an SSD, then storing files that are easy to decompress but
have larger file size may be better.
11.1.1
EXR, DPX, JPEG, Cineon, TARGA, and Tiff I/O Methods
The OpenEXR, DPX, JPEG, Cineon, TARGA, and Tiff file readers all allow you to choose between a few different I/O methods. The best method to use depends on the context RV is being used in. The method can be
selected either from the command line or from the preferences (under each of the file formats). The command
line options -exrIOMethod, -dpxIOMethod, -jpegIOMethod, -cinIOMethod, -tgaIOMethod, and
-tiffIOMethod, require a number which corresponds to the methods listed in Table 11.1 and an optional
I/O chunk size in bytes. Currently only the asynchronous methods use the chunk size.
On Windows, the default is to use the Asynchronous Unbuffered method; this method generally produces
the best results over the network and acceptable performance from a local drive.
Typically, the circumstance in which RV is used will dictate which method is optimal.
When using multiple reader threads, asynchronous methods may not scale as well as the synchronous
ones.
11.1.2
Multiple Reader Threads
When caching to the region or look-ahead cache, multiple threads can be used to read and process the frames.
This can have a profound impact on I/O speed for most formats. You can select the number of threads from
78
CHAPTER 11. MAXIMIZING PERFORMANCE
Method
Standard
Number
0
Buffered
1
Unbuffered
2
Memory Mapped
Asynchronous Buffered
3
4
Asynchronous Unbuffered
5
Description
Use the standard native I/O method on the platform. On
Windows this uses the WIN32 API. On Linux/Mac the
standard C++ I/O streams are used. The file may be
decoded piecemeal.
Use the standard I/O but prefer that the file system cache is
used. Attempt to read the file in the largest chunk possible.
Use the standard I/O but ask the kernel to bypass the file
system cache. Attempt to read the file in the largest chunk
possible.
Memory Map files using the native memory mapping API.
Asynchronous I/O using the native API. The chunk size
may need to be manually tuned.
Asynchronous I/O using the native API and bypassing the
file system cache. The chunk size may need to be manually
tuned.
Table 11.1: I/O Methods
the command line using -rthreads or via the preferences under Preferences→ Caching (requires restarting
RV to take effect).
The optimal number of threads to use varies with file format, hardware, and network or storage. However
a good rule of thumb is to use the number of cores minus one; this leaves one core to handle I/O overhead
and other threads (like audio) which may need to run as well. In some cases using more threads may increase
performance and in others it will decrease performance.
The file format used can also have an impact on the number of threads. OpenEXR in particular has its
own threaded decoder. It may be necessary to leave some cores free to decode only.
With Quicktime movies, the codec becomes important when using multiple threads. For single frame
codecs like Photo-JPEG using many threads is advantagous. For H.264 and similar inter-frame codecs, using
a single thread is usually the best bet.
If your storage hardware has high latency (for instance network storage vs local disk) you may find that
it makes sense to have more reader threads than cores. This is because the high latency means that most
reader threads will sit in IO wait states and not compete for CPU cycles. In general, in network storage
situations, it makes sense to start with a number of reader threads equal to cores-1 or cores-2 and then
increase the number of reader threads until you see a drop in performance. Also note that it is dificult to
test this kind of performance, since a modern operating system will cache pages read from the network or
disk in a RAM filesystem cache. On Linux, you can clear the page cache by typing:
shell> echo 1 > /proc/sys/vm/drop_caches
As root.
11.2
Internal Software Operations
Some operations occur in software in RV. For example, when you read images in at a reduced resolution, the
image has to be resampled in software. When software operations are being performed on incoming images,
it’s a good idea to use caching. If direct from disk playback perforamnce is important than these operations
should be avoided:
• Image resolution changes
• Pre-Cache LUT
• Color resolution changes (e.g. float to 8 bit int color)
• Cropping
79
CHAPTER 11. MAXIMIZING PERFORMANCE
• Channel remapping
The use of cropping can either increase or decrease performance depending on the circumstances.
11.3
RAM
The fastest playback occurs when frames are cached in your computer’s RAM. The more RAM you have,
the more frames that RV can cache and the more interactive it becomes. By default RV will load images at
their full bit depth and size. E.g. a 32 bit RGBA tiff will be loaded, cached and sent to the graphic card at
full resolution and bit depth. This gives artists the ability to inspect images with access to the full range of
color information and dynamic range they contain, and makes it possible to work with high-dynamic range
imagery.
However, for playback and review of sequences at speed users may wish to cache images with different
settings so as to fit more frames into the available RAM. You increase the number of frames that will fit in
the cache by having RV read the frames with reduced resolution. For example, reducing resolution by half
can result in as many as four times the number of frames being cached.
Similarly, reducing the color resolution can squeeze more frames into memory. For example a 1024x1024
4 channel 8-bit integer image requires 4Mb of memory internally while the same image as 16-bit floating
point requires 8Mb and a 32-bit float image requires 16Mb. So by having RV reduce a 32-bit float image to
an 8-bit image, you can pack four times the number of frames into memory without changing the image size.
Not caching the Alpha channel of a 4 channel image will also reduce the memory footprint of the frames.
You can tell RV to remap the image channels to R, G, B before caching (See 6.3.2). This may affect playback
speed for other reasons, depending on your graphics card. You will need to experiment to determine if this
works well on your system.
11.3.1
Pixel Buffer Objects (PBOs) and Prefetch
RV has an optional method of uploading pixels to the graphics card (PBOs). Normally, this is the fast path
for maximum bandwidth to the card. However, some combinations of driver and GPU may result in poor
performance. You can turn off the use of PBOs in the preferences or from the command line if you suspect
PBOs are causing a bottleneck.
Prefetch is only useful in conjunction with PBOs. Prefetch will attempt to asynchronously upload upcoming frames to the card ahead of the display frame. This option can add another 20% to display performance
in some cases and cause a negative impact in others.
If you’re using a particular image format frequently its a good idea to test using PBOs and prefetch to
see how they perform on your hardware. To do so: cache a number of frames using the region cache. Make
sure realtime mode is NOT on (in other words use play-all-frames mode). Set the target FPS to something
impossible like 500 fps. With the preferences render pane open try playing back the frames from cache and
see how fast it can go. Turn on and off PBO and prefetch usage to see what happens.
11.4
Playback Sweet Spots
There are a few combinations of hardware and file formats which lead to overall better performance. A
couple of those are documented here.
80
CHAPTER 11. MAXIMIZING PERFORMANCE
Nvidia Core
Example Cards
G8x, G9x
GT200
NV4x
GeForce 8800 GT(XS)
GeForce GTX 2xx
GeForce 6x 00
10 bit
DPX/Cineon and 8
bit JPEG
Excellent
Excellent
Good
NV3x
GeForce FX
Maybe OK
EXR
B44/A 16
bit float
Excellent
Excellent
No Direct
Playback
No Direct
Playback
Table 11.2: Nvidia GPUs and known sweetspots with RV for direct from disk
11.4.1
24 FPS 2048x1556 10 Bit DPX From Disk
To achieve 24 fps DPX playback from disk at least a two core CPU with a RAID or other device which
can achieve miniumum sustained bandwidth of 300+Mb/sec across the whole array and sufficient latency
and I/O transactions per second. Using two or more reader threads (depending on the number of available
cores) with the look-ahead cache on can result in 24 fps DPX playback. This configuration should be purely
bandwidth limited meaning that more bandwidth would result in higher FPS.
Not all configurations will work. You may need to experiment.
11.4.2
OpenEXR 24 FPS 2048x1556 3 Y-RY-BY 16 bit Floating Point B44 and
B44A From Disk
OpenEXR decoding benefits from more cores. For best results a 4 or 8 core machine is required. B44 2k
full-aperture 4:2:0 sampled files are approximately 4Mb in size so they don’t require as much bandwidth
as DPX files of the same resolution. For 4:4:4 sampled or B44A with an alpha channel more bandwidth
and cores may be required. Generally speaking you should have about as much bandwidth as similar DPX
playback would require.
When decoding EXR files, you have the option of setting both the number of reader threads in RV and
the number of decoder threads used by the EXR libraries. The exact numbers depend on the flavor of B44/A
files being decoded.
11.4.3
Individual Desktop Review
For individual desktop review the best quality and economy is undoubtably the use of quicktime movies
encoded with the Photo-JPEG codec. RV can play these back and create them on all three platforms. The
image quality is good and the interactivity with the file is excellent (unlike H.264 which is slower when
accessed randomly). If large quicktimes are needed, RV can use multiple threads to decode the quicktime
movies efficiently. Many workstations can handle playback of 2k and 1080p Photo-JPEG quicktime movies
from the desktop using RV.
81
Chapter 12
File Formats
Each platform has a different set of file formats which RV can read by default. In addition, its possible to
download or purchase additional file format plug-ins which allow RV to read even more. This chapter is an
overview of the most important formats and how RV uses them.
You can have RV dump out all of the formats and codecs which it understands on the command like by
giving it the -formats option.
shell> rv -formats
If you don’t see a codec or container format in the list, then RV doesn’t support it without installing one
or more plug-ins.
12.1
Movie File Formats
Movie files are single files which contain many images and often audio. These are often called container file
formats because they usually specify how to store data, but not how it should be used. In most cases, that
includes compression methods, play back algorithms, or even what the meaning of the data in the container
is.
Container file formats have additional sub-formats called codecs which determine things like compression
and methods of play back. So even though a program like RV might be able to open a container file and
look inside it, it might not understand one or more of the codecs which are being used in the container. In
some cases the codec might be proprietary or meant to be used with a specific piece of software or hardware.
12.1.1
Stereo Movie Files
Most movie file formats can have multiple tracks. When RV reads a movie file with two or more tracks it
uses the first two tracks as the left and right eye when in stereo mode. You can create these files using the
Apple QuickTime Player or RVIO on OS X and Windows or RVIO on Linux.
12.1.2
Text Tracks
On Linux, RV will read the text track of a movie file if it exists and put the contents in an image attribute
per frame. You can see this with the image info widget. Text tracks can be used to store metadata about
the movie contents in a cross platform manner.
12.1.3
QuickTime Movie Files (.mov)
QuickTime is a wretched hoary beast. RV attempts to support QuickTime via two completely separate
mechanisms: Apple’s QuickTime Framework (on OS X and Windows — the same thing Apple’s QuickTime
Player uses) and the open source libquicktime library on Linux.
82
CHAPTER 12. FILE FORMATS
There are literally hundreds of codecs which can appear in a QuickTime file, but only some of them are
useful in post-production. RV tries to support the most popular and useful ones.
On Windows the Apple Quicktime library has some limitations: it can only be used in 32 bit applications
and cannot be used concurrently by multiple threads.
Photo-JPEG
This codec has qualities which make it popular in film post production. Each frame is stored separately in
the QuickTime file so moving to a random frame is fast. JPEG offers a number of ways to compress the
image data including sub-sampling of color versus luminance and using sophisticated compression techniques.
Color representation can be excellent when using Photo-JPEG. File sizes are moderate.
When using RV on OS X and Windows, the Apple QuickTime framework is used to decode and encode
Photo-JPEG movies. Unfortunately, Apple’s QuickTime modifies incoming and outgoing color depending
on the presence of certain “atoms” in the quicktime file. This can be problematic when using QuickTime
files to review color. The most notorious of the color atoms which typically affects the color of Photo-JPEG
movies is the gama atom. The gama atom causes Apple’s Quicktime to apply two gamma corrections to the
image before it is displayed. To prevent this unwanted change in color, the best thing to do is remove the
atom from the movie file. RVIO automatically removes the gama atom when it creates Photo-JPEG movies
on OS X and Windows using Apple Quicktime.
On Linux, Photo-JPEG is well supported and encoding and decoding make no changes to the color of
pixels – even in the presence of the gama atom. Files encoded on Linux do not include the gama atom and
play back on Windows and Mac will be as expected.
Motion-JPEG
Motion JPEG is similar to Photo-JPEG in that they both use the same compression algorithm. The main
difference is that Motion-JPEG essentially stores a single frame in two parts: all of the even scanlines as
a single JPEG image and all of the odd scanlines as a separate image. The codec interlaces the two parts
together to form the final image. The Motion-JPEG codec suffers the same issues as Photo-JPEG with
Apple’s Quicktime (see above).
Motion-JPEG is supported on all platforms.
JPEG-2000
This codec was originally created as a replacement to Photo-JPEG (and the JPEG format in general).
JPEG-2000 uses wavelet and other sophisticated compression techniques to create good quality images that
are highly compressed. However, when keeping the image quality very high, JPEG-2000 does not necessarily
out-perform Photo-JPEG in size or image quality. The codec is also complex enough to cause very slow
decoding (at least with software decoders).
RV supports JPEG-2000 codec for QuickTime on OS X and Windows but not on Linux.
H.264 (avc1)
This is the latest and greatest codec which is usually associated with MPEG-4. H.264 stores keyframes and
data which helps it generate in-between frames on the fly. Because it doesn’t store every frame individually,
H.264 compressed files can be much smaller than codecs like Photo-JPEG. The image quality for H.264 can
be good depending on how the movie was created. If relatively simple creation software was used (like Apple’s
QuickTime player or RVIO) the results are usually OK, but not nearly as good as Photo or Motion-JPEG.
H.264 is not ideal for reviewing color. Also, scrubbing can be slow because random access to frames
requires finding and decoding multiple frames. This can make H.264 unweildy for scrubbing around animation
or VFX takes.
H.264 encoded Quicktime movies (.mov) and MPEG-4 movies (.mp4) usually have a colr atom which
describes the proper display space of the images. There are a number of settings in this atom which can
create different results.
83
CHAPTER 12. FILE FORMATS
RAW Codecs
There are a number of raw codecs for QuickTime. Some of these store the pixel data as RGB, others as
YUV. The Raw codecs tend to be very fast to read and play back. RV supports a number of raw codecs on
all platforms.
Audio
RV supports all of the raw uncompressed audio codecs across platforms. On Windows and OS X it supports
all of the codecs that the Apple QuickTime framework (and the Apple QuickTime Player) support including
mp3 and aac.
On Linux RV supports only the basic uncompressed codecs by default. However, you can install libquicktime plug-ins to support the same codecs supported by Apple QuickTime.
RV and RVIO handle stereo audio. RV does not currently handle more than two channels of audio.
12.1.4
MPEG-4 Movie Files (.mp4)
The MPEG-4 container file (.mp4) is almost identical to the QuickTime container file (.mov). The same
codecs may be used to store data in either format. However, typically you find files encoded with H.264 or
one of its predecessors.
RV supports the MPEG-4 container on all platforms. The same caveats regarding codec color issues on
OS X and Windows apply to the MPEG-4 container.
12.1.5
Windows AVI Files (.avi)
RV supports AVI files with the same codecs as QuickTime on all platforms.
12.1.6
Windows Media Files (.wmv)
On OS X, you can install the official Microsoft QuickTime Component (Flip4Mac) which allows RV to read
WMV files via QuickTime. Unfortunately we don’t yet support this format on Linux or Windows. (There
is no WMV plug-in for QuickTime on Windows).
12.1.7
RV’s movieproc Format (.movieproc)
The movieproc “format” is not really a file format— all of the information about the pixels is encoded in the
name of the file. So the file doesn’t even need to exist on disk to use it.
You might use a movieproc as a source if you need a procedural movie object like color bars or a hold on
a black or other solid color frame in in a sequence.
The syntax of the file name is a follows:
TYPE,OPTION=VALUE,OPTION=VALUE,OPTION=VALUE.movieproc
where TYPE is one of solid or smptebars, and OPTION and VALUE are one of those listed in 12.1.
For example the following will show color bars with a 1000Hz tone:
smptebars,audio=sine,freq=1000,start=1,end=30,fps=30.movieproc
and to make 100 black HD 1080 frames:
solid,start=1,end=100,fps=24,width=1920,height=1080.movieproc
or for an orange frame:
solid,red=1,green=.5,blue=0,width=1920,height=1080.movieproc
Anywhere you might use a normal file or sequence name in RV or RVIO you can use a movieproc instead.
84
CHAPTER 12. FILE FORMATS
Option
Value
start
end
fps
inc
red, green, blue
alpha
width
height
depth
audio
freq
amp
rate
frame number
frame number
frames-per-second (e.g. 30 or 29.97)
frame increment (default is 1)
floating point value [-inf, inf]
floating point value [0, 1]
Image width in pixels
Image height in pixels
Channel Bit Depth: one of 8i, 16i, 16f, or 32f
Currently only “sine” can be the value
Audio Frequency (pitch), e.g. 440 for concert A
Audio Amplitude [0,1]
Audio Rate in Samples-per-second (e.g, 44100 for CD quality)
Table 12.1: Movieproc Options
12.2
Image File Formats
Each platform which RV runs on has its own selection of image formats. There are few important ones which
are implemented across all platforms. Some of the most important formats are discussed in this chapter.
12.2.1
OpenEXR
OpenEXR (EXR) is a high dynamic range floating point file format developed at ILM. It can store both
32 and 16 bit “half” floating point values with or without compression. RV supports the EXR half float
type natively and when the GPU is capable, will render using type half type directly. RVIO is capable of
converting to and from the half and full float formats.
The EXR format is extremely flexible capable of holding everything from multiple views (for stereo) to
rendered layers like isolated diffuse and specular components as separate images. In addition its possible to
store subsampled chroma images or combinations of all the above.
Multiple Views
Multiple view EXR files as defined by the Weta Multiview Extension are supported by RV. When in stereo
mode, RV will look for views called “left” and “right” by default and can be programmatically told to use
other channels (see the Reference Manual).
You can also select one or more views in the UI to be loaded specifically when not in stereo mode. In
stereo mode if you specify two views those will become the left and right.
RV defaults to loading the default (or first) EXR layer from the view. The EXR views are independent
of EXR layers which are described below — there can be multiple views each of which has multiple layers
(or vice versa if you prefer to think of it that way).
RV will recognize the file extensions “exr”, “sxr” (stereo exr), or “openexr” as being OpenEXR files. Stereo
views may be stored as either “exr” or “sxr”; RV does not distinguish between the two extensions.
Layers
A layer in EXR terminology is a collection of channels which share a common channel name prefix separated
by a dot character. The name of the layer is the prefix.
EXR layers are usually used to store components of images output by a renderer like Pixar’s prman or
Mental Image’s Mental Ray. Often these layers are recombined in compositing software like Nuke which can
handle the internal structure of the EXR file. This makes it easy for a compositor to control render output
at a fine level to match it into a shot. Note that this not how EXR views are used — they are used for
indicating stereo eyes (for examples) and each view may itself contain multiple EXR layers.
85
CHAPTER 12. FILE FORMATS
RV initially will load the default layer (the one that has no name) or the first layer it finds. If this layer
has R, G, B, A, Y, RY, or BY channels, these will be assigned accordingly. If there are no obvious channel
assignments to be made to the red, green, and blue channels, RV will take the first four channels it finds in
the layer. If there are additional channels, you can assign these explicitly using the channel remap function
in the UI under Image→Remap Source Image Channels.
You can load more than one layer at a time by explicitly specifying the layers to load. When more than
one layer is loaded, the EXR layers become RV layers — i.e. there will be two independent simultaneous
images. RV will not mark EXR layers as being left and right eye stereo. Currently there are not many uses
for simultaneous layer display in RV.
Y RY BY Images and Subsampling.
By default, RV will read EXR files as planar images. Normally this distinction does not have any real effect
at the user level, but in the case of Y RY BY images — which can be sub-sampled — it can have a big
impact on playback performance. EXR has two special lossy compression schemes, B44 and B44A, which
allow fast decode of high dynamic range imagery. B44 maintains a fixed size file regardless of the contents
while B44A can potentially make smaller file sizes.
When used with Y RY BY images with sub-sampled chroma (the BY and RY channels) RV will use the
GPU to resample the chroma on the card resulting in faster throughput. When coupled with one or more
multi-core CPUs, RV can get good direct from disk performance for these types of images while keeping the
HDR information in tact1 . At some resolutions, RV can even play back stereo HDR imagery in real-time
from disk when used with the correct hardware.
Chromaticities
EXR files may have chromaticities (primaries) included in the image attributes. If RV sees the Color/Primaries attribute, it will apply the corresponding transform to the Rec 709 primaries by default. You can
turn off this behavior by selecting Color→Ignore File Primaries to disable the transform.
Channel Inheritance
Some programs may assume channels should be ”inherited” in EXR files. For example, a renderer may write
a single alpha channel in the default layer and exclude redundant alpha channels from additional layers in the
file like diffuse and specular. The idea is that these layers will share the default alpha during compositing.
RV can attempt to aggregate channels assumed to be related like this by using either the command line
option -exrInherit or by setting the flag in preferences (under the OpenEXR format).
12.2.2
TIFF
TIFF files come in many flavors some of which are rarely used. RV supports a useful subset of all possible
TIFF files. This includes 32 bit floating point and multiple channels (beyond four) in both tiled and scanline.
RV can read planar and interleaved TIFF files, but currently only reads the first image directory if there are
more than one.
RV will read all TIFF tags including EXIF tags and present them as image attributes.
12.2.3
DPX and Cineon
RV and RVIO currently support 8 and16 bit, and the common 10 and 12 bit DPX and 10 bit Cineon files
reading direct from disk on all platforms. The standard header fields are read and reported if they contain
useful information (e.g., Motion Picture and TV fields). We do not currently support any of the vendor
headers.
RV supports the linear, log, and Rec. 709 transfer functions for DPX natively and others through the
use of LUTs.
1 The OpenEXR file will only use B44 or B44A with half float images currently. 32 bit float images will not typically get as
good performance.
86
CHAPTER 12. FILE FORMATS
RV decodes DPX and Cineon to 8 bit integer per channel by default. However, the reader can be
configured from the command line or preferences to use 16 bit if needed. In addition the reader can use either
planar or interleaved pixel formats. We have found that the combination of OS and hardware determines
which format is fastest for playback, but we currently recommend RGB8_PLANAR on systems that can use
OpenGL Pixel Buffer Objects (PBOs) and RGBA8 on systems that cannot. If you opt for 16 bit pixels, use
the RGB16_PLANAR as the pixel format on PBO equipped hardware for maximum throughput.
For best color fidelity use RV’s built in Cineon Log→Linear option and sRGB display (or a particular
display LUT if available). This option decodes the log space pixels directly to linear without interpolation
inside a hardware shader and results in the full [0, ∼ 13.5] range.
RVIO decodes Cineon and DPX to 16 bit integer by default.
The DPX and Cineon writers are both currently limited to 10 bit output.
12.2.4
IFF (ILBM)
The IFF image format commonly created by Maya or Shake is supported by RV including the 32 bit float
version.
12.2.5
JPEG
RV can read JPEG natively as Y U V or R G B formats. The reader can collect any EXIF tags and pass
them along as image attributes. The reader is limited to 8 bits per channel files. Like OpenEXR, DPX, and
Cineon, JPEG there is a choice of I/O method with JPEG images.
12.2.6
RAW Camera Formats
There are a number of camera vendor specific formats which RV can read on OS X. This is mostly a result
of OS X’s frameworks for image reading. Typically if one of Apple’s products can read the format then so
can RV.
A Linux raw reader is forthcoming.
RV currently does not support raw camera formats on Windows.
12.3
Audio File Formats
RV supports a number of basic uncompressed audio file formats across platforms. On Windows and OS X a
number of compressed formats may be supported. Currently use of Microsoft wave files and Apple’s AIFF
formats are the best bet for cross platform use. RV can use either stereo or mono audio; it does not handle
more than two channel audio output but will mix multi-channel audio to stereo.
12.4
Simple ASCII EDL Format
Each line of the ASCII file is either blank, a comment, or an edit event. A comment starts with a ’#’
character and continues until the end of a line. A comment can appear on the same line as an edit event.
The format of an edit event is:
"SOURCE" START END
where SOURCE is a the path to a logical source movie such as:
"/some/path/to/foo.mov"
"/some/path/to/bar.1-100#.exr"
"/some/other_path/baz.1-100#.exr"
Note that the SOURCE name must always be in double quotes. If the path includes spaces, you do not
need to use special escape characters to make sure they are accepted. So this:
"/some/place with spaces/foo.mov"
87
CHAPTER 12. FILE FORMATS
is OK.
START and END are frame numbers in the movie. Note that START is the first frame to be include in the
clip, and END is the last frame to be included (not, as in some edl formats, the frame after the last frame).
For QuickTime .mov files or .avi files, the first frame of the file is frame 1.
Here’s an example .rvedl file:
#
#
#
4 source movies
"/movies/foo.mov" 1 100
"/movies/bar.mov" 20 50
"/movies/render.1-100#.exr" 25 100
"/movies/with a space.#.exr" 1 25
88
Chapter 13
RV File Format
The RV file format (.rv) is a text GTO file. GTO is an open source file format which stores arbitrary
data — mostly for use in computer graphics applications. The text GTO format is meant to be simple and
human readable. Its helpful to have familiarized yourself with the GTO documentation before reading this
section. The documentation should come with RV, or you can read it on line at the GTO web site: GTO
Documentation http://www.tweaksoftware.com/products/open-source-software/gto
13.1
How RV Uses GTO
RV defines a number of new GTO object protocols (types of objects). The GTO file is made up of objects,
which contain components, which contain properties where the actual data resides. RV’s use of the format
is to store nodes in an image processing graph as GTO objects. How the nodes are connected is determined
by RV and is not currently arbitrary so there are no connections between the objects stored in the file.
Some examples of RV object types include:
• The RVSession object (one per file) which stores information about the session. This includes the full
frame range, currently marked frames, the playback FPS, and whether or not to use real time playback
among other things.
• RVLayoutGroup, RVSourceGroup, RVRetimeGroup, RVStackGroup, RVDisplayGroup
and RVSequenceGroup nodes which form the top-level of the image processing graph.
• One or more RVFileSource objects each within an RVSourceGroup which specify all of the media
(movies, audio files, image sequences) which are available in the session.
• Color correction objects like RVColor nodes which are members of RVSourceGroup objects.
• Image format objects like RVFormat or RVChannelMap which are also members of RVSourceGroup objects.
• An RVDisplayColor object (one per file) which indicates monitor gamma, any display LUT being
used (and possibly the actual LUT data) which is part of the RVDisplayGroup.
• A connections object which contains connections between the top-level group nodes. The file only
stores the top-level connections — connections within group nodes are determined by the group node
at runtime.
Normally, RV will write out all objects to the session file, but it does not require all of them to create a
session from scratch. For example, if you have a file with a single RVFileSource object in it, RV will use that
and create default objects for everything else. So when creating a file without RV, its not a bad idea to only
include information that you need instead of replicating the output of RV itself. (This helps make your code
future proof as well).
The order in which the objects appear in the file is not important. You can also include information that
RV does not know about if you want to use the file for other programs as well.
89
CHAPTER 13. RV FILE FORMAT
13.2
Naming
The names of objects in the session are not visible to the user, however they must follow certain naming
naming conventions. There is a separate user interface name for top level nodes which the user does see.
The user name can be set by creating a string property on a group node called ui.name.
• If the object is a group node type other than a source or display group its name can be anything, but
it must be unique.
• If there is an RVDisplayGroup in the file it must be called displayGroup.
• If the object is a member of a group its name should have the pattern: groupName_nodeName where
groupName is the name of the group the node is a member of. The nodeName can be anything, but
RV will use the type name in lowercase without the ”RV” at the front.
• If the object is a RVFileSourceGroup or RVImageSourceGroup it should be named sourceGroupXXXXXX
where the Xs form a six digit zero padded number. RV will create source groups starting with number
000000 and increment the number for each new source group it creates. If a source group is deleted,
RV may reuse its number when creating a new group.
• The connection object should be named connections.
• The RVSession object can have any name.
13.3
A Simple Example
The simplest RV file you can create is a one which just causes RV to load a single movie file or image. This
example loads a QuickTime file called ”test.mov” from the directory RV was started in:
GTOa (3)
sourceGroup000000_source : RVFileSource (0)
{
media
{
string movie = "test.mov"
}
}
The first line is required for a text GTO file: it indicates the fact that the file is text format and that the
GTO file version is 3. All of the other information (the frame ranges, etc) will be automatically generated
when the file is read. By default RV will play the entire range of the movie just as if you dropped it into a
blank RV session in the UI.
For this version of RV, you should name the first RVFileSource object sourceGroup000000_source
and the second sourceGroup000001_source and the third sourceGroup000002_source, and so on.
Eventually we’ll want to make an EDL which will index the source objects so the names mostly matter (but
not the order in which they appear).
Now suppose we have an image sequence instead of a movie file. We also have an associated audio file
which needs to be played with it. This is a bit more complicated, but we still only need to make a single
RVFileSource object:
GTOa (3)
sourceGroup000000_source : RVFileSource (0)
{
media
{
90
CHAPTER 13. RV FILE FORMAT
string movie = [ "test.#.dpx" "soundtrack.aiff" ]
}
group
{
float fps = 24
float volume = 0.5
float audioOffset =
}
.1
}
Here we’ve got test.#.dpx as an image layer and soundtrack.aiff which is an audio layer.
You can have any number of audio and image sequence/movie files in the movie list. All of them
together create the output of the RVFileSource object. If we were creating a stereo source, we might have
left.#.dpx and right.#.dpx instead of test.#.dpx. When there are multiple image layers the first
two default to the left and right eyes in the order in which they appear. You can change this behavior
per-source if necessary. The format of the various layers do not need to match.
The group component indicates how all of media should be combined. In this case we’ve indicated the
FPS of the image sequence, the volume of all audio for this source and an audio slip of .1 (one tenth) of a
second. Keep in mind that FPS here is for the image sequence(s) in the source it has nothing to do with the
playback FPS!. The playback FPS is independent of the input sources frame rate.
Aside: What is the FPS of an RVFileSource Object Anyway?
If you write out an RV file from RV itself, you’ll notice that the group FPS is often 0! This is a special cookie
value which indicates that the FPS should be taken from the media. Movie file formats like QuickTime or
AVI store this information internally. So RV will use the frame rate from the media file as the FPS for the
source.
However, image sequences typically do not include this information1 . When you start RV from the
command line it will use the playback FPS as a default value for any sources created. If there is no playback
FPS on startup either via the command line or preferences, it will default to 24 fps. So its not a bad idea to
include the group FPS when creating an RV file yourself when you’re using image sequences. If you’re using
a movie file format you should either use 0 for the FPS or not include it and let RV figure it out.
What happens when you get a mismatch between the source FPS and the playback FPS? If there’s no
audio, you won’t notice anything; RV always plays back every frame in the source regardless of the source
FPS. But if you have audio layers along with your image sequence or if the media is a movie file, you will
notice that the audio is either compressed or expanded in order to maintain synchronization with the images.
This is a very important thing to understand about RV: it will always playback every image no matter
what the playback FPS is set to; and it will always change the audio to compensate for that and maintain
synchronization with the images.
So the source FPS is really important when there is audio associated with the images.
13.4
Per-Source and Display Color Settings and LUT Files
If you want to include per-source color information – such as forcing a particular LUT to be applied or converting log to linear – you can include only the additional nodes you need with only the parameters that you
wish to pass in. For example, to apply a file LUT to the first source (e.g. sourceGroup000000_source)
you can create an RVColor node similarily named sourceGroup000000_color.
sourceGroup000000_color : RVColor (1)
{
lut
{
1 OpenEXR
files are a notable exception.
91
CHAPTER 13. RV FILE FORMAT
string file = "/path/to/LUTs/log2sRGB.csp"
int active = 1
}
}
This is a special case in the rv session file: you can refer to a LUT by file. Version 3.6 and earlier will
not write a session file in this manner: a baked version of the LUT will be inlined directly in the session file.
If you have a new-source event bound to a function which modifies incoming color settings based on
the image type, any node properties in your session file override the default values created there. To state
it another way: values you omit in the session file still exist in RV and will take on whatever values the
function bound to new-source made for them. To ensure that you get exactly the color you want you can
specify all of the relevant color properties in the RVColor and RVDisplayColor nodes:
sourceGroup000000_color : RVColor (1)
{
lut
{
string file = "/path/to/LUTs/log2sRGB.csp"
int active = 1
}
color
{
string lut = "default"
int alphaType = 0
int normalize = 0
int logtype = 0
int YIQ = 0
int YUV = 0
int invert = 0
int sRGB2linear = 0
int Rec709ToLinear = 0
float[3] gamma = [ [ 1 1 1 ] ]
float[3] offset = [ [ 0 0 0 ] ]
float[3] scale = [ [ 1 1 1 ] ]
float[3] exposure = [ [ 0 0 0 ] ]
float[3] contrast = [ [ 0 0 0 ] ]
float saturation = 1
float hue = 0
int active = 1
int ignoreChromaticities = 0
}
}
displayGroup_display : RVDisplayColor (1)
{
color
{
float gamma = 1
int sRGB = 0
int Rec709 = 0
float brightness = 0
}
}
92
CHAPTER 13. RV FILE FORMAT
13.5
Information Global to the Session
Now let’s add an RVSession object with in and output points. The session object should be called rv in
this version. There should only be one RVSession object in the file.2
rv : RVSession (1)
{
session
{
string viewNode = "defaultSequence"
int marks = [ 1 20 50 80 100 ]
int[2] range = [ [ 1 100 ] ]
int[2] region = [ [ 20 50 ] ]
float fps = 24
int realtime = 1
int currentFrame = 30
}
}
Assuming this was added to the top of our previous file with the source in it, the session object now
indicates the frame range (1-100) and an in and out region (20-50) which is currently active. Frames 1, 20,
50, 80, and 100 are marked and the default frame is frame 30 when RV starts up. The realtime property
is a flag which indicates that RV should start playback in real time mode. The view node indicates what
will be viewed in the session when the file is opened.
Note that its usually a good idea to skip the frame range boundaries unless an EDL is also specified in
the file (which is not the case here). RV will figure out the correct range information from the source media.
If you force the range information to be different than the source media’s you may get unexpected results.
Starting in version 3.10 the marks and range can also be stored on each viewable top-level object. For
example the defaultLayout and defaultSequence can have different marks and in and out points:
defaultStack : RVStackGroup (1)
{
session
{
float fps = 24
int marks = [ ]
int[2] region = [ [ 100 200 ] ]
int frame = 1
}
}
If a group has a session component than the contents can provide an in/out region, marks, playback
fps and a current frame. When the user views the group node these values will become inherited by the
session.
13.6
The Graph
Internally, RV holds a single image processing graph per session which is represented in the session file. The
graph can have multiple nodes which determine how the sources are combined. These are the top-level nodes
and are always group nodes.
Versions prior to 3.10 did not store graph connectivity in the file because the user was not allowed to
change it. In 3.10, the user can create new top-level nodes (like sequences, stacks, layouts, retimings, etc).
So the inputs for each node need to be stored in order to reproduce what the user created.
2 From now on we’re just going to show fragments of the file and assume that you can put them all together in your text
editor.
93
CHAPTER 13. RV FILE FORMAT
The connections between the top-level group nodes are stored in the connections object. For example,
this is what RV will write out for a session with a single source in it:
connections : connection (1)
{
evaluation
{
string lhs = [ "sourceGroup000000"
"sourceGroup000000"
"sourceGroup000000" ]
string rhs = [ "defaultLayout"
"defaultSequence"
"defaultStack" ]
}
}
The connections should be interpreted as arrows between objects. The lhs (left hand side) is the base
of the arrow. The rhs (right hand side) is the tip. The base and tips are stored in separate properties. So
in the case, the file has three connections3 :
1. sourceGroup000000→defaultLayout
2. sourceGroup000000→defaultSequence
3. sourceGroup000000→defaultStack
13.6.1
Default Views
There are three default views that are always created by RV: the default stack, sequence, and layout.
Whenever a new source is added by the user each of these will automatically connect the new source as an
input. When a new viewing node is created (a new sequence, stack, layout, retime) the default views will
not add those —- only sources are automatically added.
When writing a .rv file you can co-opt these views to rearrange or add inputs or generate a unique EDL
but its probably a better idea to create a new one instead; RV will never automatically edit a sequence,
stack, layout, etc, that is not one of the default views.
13.7
Creating a Session File for Custom Review
One of the major reasons to create session files outside of RV is to automatically generate custom review
workflows. For example, if you want to look at an old version of a sequence and a new version, you might
have your pipeline output a session file with both in the session and have pre-constructed stacked views with
wipes and a side-by-side layout of the two sequences.
To start with lets look at creating a session file which creates a unique sequence (not the default sequence)
with plays back sources in a particular order. In this case, no EDL creation is necessary — we only need to
supply the sequence with the source inputs in the correct order. This is analogous to the user reordering the
inputs on a sequence in the user interface.
This file will have an RVSequenceGroup object as well as the sources. Creating sources is covered above
so we’ll skip to the creation of the RVSequenceGroup. For this example we’ll assume there are three sources
and that they all have the same FPS (so no retiming is necessary). We’ll let RV handle creation of the
underlying RVSequence and its EDL and only create the group:
// define sources ...
3 RV may write out a connection to the display group as well. However, that connection is redundant and may be overriden
by the value of the view node property in the RVSession.
94
CHAPTER 13. RV FILE FORMAT
reviewSequence : RVSequenceGroup (1)
{
ui { string name = "For Review" }
}
connections : connection (1)
{
evaluation
{
string lhs = [ "sourceGroup000002"
"sourceGroup000000"
"sourceGroup000001" ]
string rhs = [ "reviewSequence"
"reviewSequence"
"reviewSequence" ]
}
}
RV will automatically connect up the default views so we can skip their inputs in the connections obejct
for clairity. In this case, the sequence is connected up so that by default it will play sourceGroup000002
followed by sourceGroup000000 followed by sourceGroup000001 because the default EDL of a sequence just
plays back the inputs in order. Note that for basic ordering of playback, no EDL creation is necessary. We
could also create additionl sequence groups with other inputs. Also note the use of the UI name in the
sequence group.
Of course, the above is not typical in a production environment. Usually there are handles which need
to (possibly) be editted out. There are two ways to do this with RV: either set the cut points in each source
and tell the sequence to use them, or create an EDL in the sequence which excludes the handles.
To start with we’ll show the first method: set the cut points. This method is easy to implement and the
sequence interface has a button on it that lets the user toggle the in/out cuts on/off in realtime. If the user
reorders the sequence, the cuts will be maintained. When using this method any sequence in the session can
be made to use the same cut information — it propagates down from the source to the sequence instead of
being stored for each sequence.
Setting the cut in/out points requires adding a property to the RVFileSource objects and specifying the
in and out frames:
sourceGroup000000_source : RVFileSource (1)
{
media { string movie = "shot00.mov" }
cut
{
int in = 8
int out = 55
}
}
sourceGroup000001_source : RVFileSource (1)
{
media { string movie = "shot01.mov" }
cut
{
int in = 5
int out = 102
95
CHAPTER 13. RV FILE FORMAT
}
}
sourceGroup000002_source : RVFileSource (1)
{
media { string movie = "shot02.mov" }
cut
{
int in = 3
int out = 22
}
}
Finally, the most flexibly way to control playback is to create an EDL. The EDL is stored in an RVSequence node which is a member of the RVSequenceGroup. Whenever an RVSequenceGroup is created, it
will create a sequence node to hold the EDL. If you are not changing the default values or behavior of the
sequence node its not necessary to specify it in the file. In this case, however we will be creating a custom
EDL.
13.7.1
RVSequence
The sequence node can be in one of two modes: auto EDL creation or manual EDL creation. This is
controlled by the mode.autoEDL property. If the property is set to 1 then the sequence will behave like so:
• If a new input is connected, the existing EDL is erased and a new EDL is created.
• Each input of the sequence will have a cut created for it in the order that they appear. If mode.useCutInfo
is set, the sequence will use the cut information coming from the input to determine the cut in the
EDL. Otherwise it will use the full range of the input.
• If cut info changes on any input to the sequence, the EDL will be adjusted automatically.
When auto EDL is not on, the sequence node will behave in this manner:
• When an input is deleted, the EDL cut is deleted.
• When an input is added, a new cut is created at the end of the EDL. If use cut info is on then the
source cut info will be used, othewise the full range will be used.
For this next example, we’ll use two movie files: a.mov and b.mov. They have audio so there’s nothing
interesting about their source definitions: just the media property with the name of the movie4 . They are
both 24 fps and the playback will be as well:
sourceGroup000000_source : RVSource (0) { media { string movie =
sourceGroup000001_source : RVSource (0) { media { string movie =
connections : connection (1)
{
evaluation
{
string lhs = [ "sourceGroup000000"
"sourceGroup000001"
"sourceGroup000002" ]
string rhs = [ "sequence"
"sequence"
4 The
example RV file has fewer line breaks than one which RV would write. However, its still valid.
96
"a.mov" } }
"b.mov" } }
CHAPTER 13. RV FILE FORMAT
edit
edit
edit
edit
past
#1
#2
#3
#4
end
global start frame
1
11
21
31
41
source
a.mov
b.mov
a.mov
b.mov
b.mov
in
1
1
11
11
21
out
10
10
21
21
21
Table 13.1: EDL as Matrix
"sequence" ]
}
}
rv : RVSession (1)
{
session
{
int[2] range = [ [ 1 40 ] ]
int marks = [ 1 11 21 31 40 ]
float fps = 24
string viewNode = "sequence"
}
}
sequence : RVSequence (0)
{
edl
{
int frame = [ 1 11 21 31 41 ]
int source = [ 0 1 0 1 1 ]
int in
= [ 1 1 11 11 21 ]
int out
= [ 10 10 21 21 21 ]
}
mode
{
int autoEDL = 0
}
}
The source property indexes the inputs to the sequence node. So index 0 refers to sourceGroup000000
and index 1 refers to sourceGroup000001. This EDL has four edits which are played sequentially as follows:
1. a.mov, frames 1-10
2. b.mov, frames 1-10
3. a.mov, frames 11-21
4. b.mov, frames 11-21
You can think of the properties in the sequence as forming a transposed matrix in which the properties are
columns and edits are rows as in 13.1. The last edit is really just a boundary condition: it indicates how RV
should handle frames past the end of the EDL. To be well formed, an RV EDL needs to include this.
97
CHAPTER 13. RV FILE FORMAT
13.7.2
RVLayoutGroup and RVStackGroup
The stack and layout groups can be made in a similar manner to the above. The important thing to remember
is the inputs for all of these must be specified in the connections object of the file. Each of thes view types
uses the input ordering; in the case of the stack it determines what’s on top and in the case of the layout it
determines how automatic layout will be ordered.
13.8
Limitations on Number of Open Files
RV does not impose any artificial limits on the number of source which can be in an RV session file. However,
the use of some file formats, namely Quicktime .mov, .avi, and .mp4, require that the file remain open
while RV is running.
Each operating system (and even shell on unix systems) has different limits on the number of open files
a process is allowed to have. For example on Linux the default is 1024 files. This means that you cannot
open more than 1000 or so movie files without changing the default. RV checks the limit on startup and sets
it to the maximum allowed by the system.
There are a number of operating system and shell dependent ways to change limits. Your facility may
also have limits imposed by the IT department for accounting reasons.
13.9
What’s the Best Way to Write a .rv (GTO) File?
GTO comes in three types: text (UTF8 or ASCII), binary, and compressed binary. RV can read all three
types. RV normally writes text files unless an RVImageSource is present in the session (because an image
was sent to it from another process instead of a file). In that case it will write a compressed binary GTO to
save space on disk.
If you think you might want to generate binary files in addition to text files you can do so using the GTO
API in C++ or python. However, the text version is simple enough to write using only regular I/O APIs
in any language. We recommend you write out .rv session files from RV and look at them in an editor to
generate templates of the portions that are important to you. You can copy and paste parts of session files
into source code as strings or even shell scripts as templates with variable subsititution.
98
Chapter 14
RVIO
RVIO is a command line (re)mastering tool–it converts image sequence, audio files, and movie files from one
format into another including possible bit depth and image color and size resolution changes. RVIO can
also generate custom slate frames, add per-frame information and matting directly onto output images, and
change color spaces (to a limited extent).
RVIO supports all of the same movie, image, and audio formats that RV does including the .rv session
file. RV session files (.rv) can be used to specify compositing operations, split screens, tiling, color corrections,
pixel aspect ratio changes, etc.
14.1
Basic Usage
14.1.1
Image Sequence Format Conversion
RVIO’s most basic operation is to convert a sequence of images from one format into another. RVIO uses
the same sequence notation as RV to specify input and output sequences. For example:
shell> rvio foo.#.exr -o foo.#.tif
shell> rvio foo.#.exr -o foo.#.jpg
14.1.2
Image sequence to QuickTime Movie Conversion
RVIO can write out QuickTime movies. The default compression codec is PhotoJPEG with a default quality
of 0.9.
shell> rvio foo.#.exr -o foo.mov
14.1.3
Resizing and Scaling
Rvio does high quality filtering when it resizes images. Output resolution can be specified explicitly, in which
case RVIO will conform to the new resolution, padding the image to preserve pixel aspect ratio.
shell> rvio foo.1-100.tga -scale 0.5 -o foo.#.tga
shell> rvio foo.#.exr -outres 640 480
Or you can use the -resize x y option, in which case scaling will occur in either dimension (unless the
number specified for that dimension is 0).
14.1.4
Adding Audio to Movies
RVIO uses the same layer notation as RV to combine audio with image sequences. Multiple audio sources
can be mixed in a single layer.
99
CHAPTER 14. RVIO
-o string
-t string
-tio
-v
-vv
-q
-noRanges
-rthreads int
-formats
-iomethod int [int]
-view string
-leader ...
-leaderframes int
-overlay ...
-inlog
-insrgb
-in709
-ingamma float
-inchannepmap ...
-inpremult
-inunpremult
-exposure float
-scale float
-resize int [int]
-resampleMethod string
-floatLUT int
-flut string
-dlut string
-flip
-flop
-yryby int int int
-yrybya int int int int
Output sequence or image
Output time range (default=input time range)
Output time range from rv session files in/out points
Verbose messages
Really Verbose messages
Best quality for color conversions (slower – mostly unnecessary)
No separate frame ranges (1-10 will be considered a file)
Number of reader/render threads (default=1)
Show all supported image and movie formats
I/O Method (0=standard, 1=buffered, 2=unbuffered,
3=MemoryMap, 4=AsyncBuffered, 5=AsyncUnbuffered,
default=3) and optional chunk size (default=61440)
View to render (default=defaultSequence or current view in rv
file)
Insert leader/slate (can use multiple time)
Number of leader frames (default=1)
Visual overlay(s) (can use multiple times)
Convert input to linear space via Cineon Log->Lin
Convert input to linear space from sRGB space
Convert input to linear space from Rec-709 space
Convert input using gamma correction to linear space
map input channels
premultiply alpha and color
un-premultiply alpha and color
Apply relative exposure change (in stops)
Scale input image geometry
Resize input image geometry to exact size on input (0 =
maintain image aspect)
Resampling method (area, linear, cubic, nearest, default=area)
Use floating point LUTs (1=yes, 0=no, default=1)
Apply file LUT
Apply display LUT
Flip image (flip vertical) (keep orientation flags the same)
100
Flop image (flip horizontal)
(keep orientation flags the same)
Y RY BY sub-sampled planar output
Y RY BY A sub-sampled planar output
CHAPTER 14. RVIO
shell> rvio [ foo.1-300#.tif foo.aiff ] -o foo.mov
shell> rvio [ foo.1-300#.tif foo.aiff bar.aiff ] -o foo.mov
14.2
Advanced Usage
14.2.1
Editing Sequences
RVIO can combine multiple sequences and write out a single output sequence or movie. This allows you to
quickly edit and conform.
shell> rvio foo.25-122#.exr bar.8-78#.exr -o foo.mov
shell> rvio [ foo.#.exr foo.aiff ] [ bar.#.exr bar.aiff ] \
-o foobar.mov
Note that you can cut in and out of movie files as well:
shell> rvio [ foo.mov -in 101 -out 120 ] [ bar.mov -in 58 -out 123 ] -o out.mov
14.2.2
Processing RV Session Files
RV session files can be used as a way to author operations for processing with RVIO. Most operations and
settings in RV can be used by RVIO. For example RV can be used in a compositing mode to do an over or
difference or split-screen comparison. RV can also be used to set up edits with per source color corrections
(e.g. a unique LUT for each sequences, exposure or color adjustments per sequences, an overall output LUT,
etc.).
shell> rvio foo.rv -o foo.mov
Any View in the session file can be used as the source for the RVIO output:
shell> rvio foo.rv -o foo.mov -view "latest shots"
14.2.3
Advanced Image Conversions
RVIO has flags to handle standard colorspace, gamma, and log/lin conversions for both inputs and outputs
shell>
shell>
shell>
shell>
shell>
shell>
14.2.4
rvio foo.#.cin -inlog -o foo.#.exr
rvio foo.#.exr -o foo.#.cin -outlog
rvio foo.#.jpeg -insrgb -o foo.#.exr
rvio foo.#.exr -o foo.#.tiff -outgamma 2.2
rvio foo.#.exr -o foo.#.jpeg -outsrgb
rvio foo.#.cin -inlog -o foo.mov -outsrgb \
-comment "Movie is in sRGB space"
LUTs
RVIO can apply a LUT to input files and an output LUT. RVIO’s command line only supports one file
LUT and one display LUT. The file LUT will be applied to all the input sources before conversion and and
the output LUT will be applied to the entire session on output. If you need to process a sequences with a
different file LUT per sequence, you can do that by creating an RV session file with the desired LUTs and
color settings to use as input to RVIO.
shell> rvio foo.#.cin bar.#.cin -inlog -flut in.cube \
-dlut out.cube -o foobar.mov
101
CHAPTER 14. RVIO
14.2.5
Pixel Storage Formats and Channel Mapping
RVIO provides control over pixel storage (floating point or integer, bit depth, planar subsampling) and channel mapping. The planar subsampling options are particularly used to support OpenExr’s B44 compression,
which is a fixed bandwidth, floating point, high-dynamic range compression scheme.
shell>
shell>
shell>
shell>
shell>
rvio foo.#.exr -outformat 8 int -o foo.#.tif
rvio foo.#.exr -outformat 8 int -o foo.#.tif -outrgb
rvio foo.#.cin -inlog -o foo..#.tiff -outformat 16 float
rvio foo.#.exr -outformat 32 float -o foo.#.tif
rvio foo.#.exr -codec B44A -yrybya 1 2 2 2 -outformat \
16 float
shell> rvio foo.#.exr -codec B44A -yryby 1 2 2 -outformat \
16 float -outchannelmap R G B
14.2.6
Advanced QuickTime Movie Conversions
RVIO uses Apple QuickTime on OS X and Windows platforms. On Linux RVIO relies on libquicktime. The
codecs available vary among the platforms. On OS X and Windows, RVIO will make use of any installed
QuickTime components. For example, if you have Final Cut Pro installed, RVIO will be able to use the
Apple ProRes codec that is shipped with FCP. Many codecs are also available to freely download and install
for Mac and Windows. You can find out what codecs are available for reading and writing by using the
“-formats” flag. This will also tell you the full name and the four letter name of the codec, e.g. H.264 is
referred to as “avc1.” Both names will work with RVIO. RVIO lets you specify the output codec and can
collect parameters for the output key interval (“-outkeyinterval”) and the output data rate (“-outdatarate”).
These are used by Apple QuickTime encoders for formats such as H.264.
shell> rvio foo.#.tga -codec H.264 -outkeyinteval 20 \
-outdatarate 2500000 -o foo.mov -quality 1.0
14.2.7
Audio Conversions
RVIO can operate directly on audio files and can also add or extract audio to/from QuickTime movies.
RVIO provides flags to set the audio codec, sample rate, storage format (8, 16, and 32 bits) storage type
(int, float), and number of output channels. RVIO does high quality resampling using 32 bit floating point
operations. RVIO will mix together multiple audio files specified in a layer.
shell> rvio foo.mov -o foo.aiff
shell> rvio foo.mov -o foo.aiff -audiorate 22050
shell> rvio [ foo.#.exr foo.aiff bar.wav ] -codec H.264 \
-quality 1.0 \
-audiocodec "Apple Lossless" -audiorate 44100 \
-audioquality 1.0 -o foo.mov
14.2.8
Stereoscopic and Multiview Conversions
RV and RVIO support stereoscopic playback and conversions. RVIO can be used to create stereo QuickTime
files or multiview OpenExr files (Weta’s SXR files) by specifying two input layers and using the -outstereo
flag. Stereo QuickTime movies contain multiple video tracks. RV interprets the fist two tracks as left and
right views. RVIO will also render output using stereo modes specified in an RV session file–this allows you
to output anaglyph images from stereo inputs or to render out scanline or alternating pixel stereo material.
shell> rvio [ foo_l.#.exr foo_r.#.exr foo.aiff ] -outstereo \
-o stereo.mov
shell> rvio [ foo_left.#.exr foo_right.#.exr ] -outstereo \
-o stereo.#.exr
102
CHAPTER 14. RVIO
Or you can specify an output stereo format:
shell> rvio [ foo_l.#.exr foo_r.#.exr foo.aiff ] -outstereo hsqueezed \
-o stereo.mov
14.2.9
Slates, Mattes, Watermarks, and Burn-ins
RVIO supports script based creation of slates and overlays. The default scripts that come with RV can be
used as is, or they can be customized to create any kind of overlay or slate that you need. Customization
of these scripts is covered in the RV Reference Manual. RVIO has two command line flags to manage these
scripts, -leader and -overlay. -leader scripts are used to create Slates or other frames that will be added
to the beginning of a sequence or movie. -overlay scripts will draw on top of the image frames. Multiple
overlays can be layered on top of the image, so that you can build up a frame with mattes, frame burn-in,
bugs, etc. The scripts that come with RV include:
• simpleslate
• watermark
• matte
• frameburn
• bug
Simpleslate Leader
Simpleslate allows you to build up a slate from a list of attribute/value pairs. It will automatically scale all
of your text to fit onto the frame. It works like this:
shell> rvio foo.#.exr -leader simpleslate \
"Acme Post" "Show=My Show" "Shot=foo" "Type=comp" \
"Artist=John Doe" "Comments=Lighter and Darker as \
requested by director" -o foo.mov
Watermark Overlay
The watermark overlay burns a text comment onto output images. This makes it easy to generate custom
watermarked movies for clients or vendors. Watermark takes two arguments, the comment in quotes and
the opacity (from 0 to 1).
shell> rvio foo.mov -overlay watermark "For Client X Review" 0.1 \
-o foo_client_x.mov
Matte Overlay
The matte overlay mattes your images to the desired aspect ratio. It takes two arguments, the aspect ratio
and the opacity.
shell> rvio foo.#.exr -overlay matte 2.35 1.0 -o foo.mov
Frameburn Overlay
The frameburn overlay renders the source frame number onto each frame. It takes three arguments, the
opacity, the luminance, and the size.
shell> rvio foo.#.exr -overlay frameburn 0.1 0.1 50 -o foo.mov
103
CHAPTER 14. RVIO
Bug Overlay
The bug overlay lets you render an image o top of each output frame. It takes three arguments, the image
name, the opacity, and the size
shell> rvio foo.#.exr -overlay bug "/path/to/logo.tif" 0.5 48
104
Chapter 15
RVLS
The RVLS provides command line information about images, sequences, movie files and audio files.
By default rvls with no arguments will list the contents of the current directory. Unlike its namesake
ls, rvls will contract image sequences into a single listing. The output image sequences can be used as
arguments to rv or RVIO1 .
For more detailed information about a file or sequence the -l option can be used: this will show each file
or sequence on a separate line with the image width and height, channel bit depth, and number of channels.
For movie files and audio files, additional information about the audio like the sample rate and number of
channels will be displayed.
shell> rvls
w x
623 x
1600 x
1024 x
2048 x
5892 x
64 x
5892 x
640 x
640 x
-l
h
261
1071
680
1556
4800
64
4992
486
480
typ
16i
8i
8i
16f
8i
8i
8i
16i
8i
#ch
3
3
3
3
1
1
1
3
1
file
./16bit.tiff
./2287176218_5514bbc63a_o.jpg
./best-picture.jpg
./sheet.hi.90.exr
./BurialMount.psd
./caust19.bw
./common_sense.psd
./colorWheel.685.cin
./colour-bars-smpte-75-640x480.tiff
or to see certain files in a directory as a sequence:
shell> ls *.iff
render_maya.1.iff
render_maya.10.iff
render_maya.2.iff
render_maya.3.iff
render_maya.4.iff
render_maya.5.iff
render_maya.6.iff
render_maya.7.iff
render_maya.8.iff
render_maya.9.iff
shell> rvls *.iff
render_maya.1-10.iff
1 You can use RVLS to create image sequence completions in bash or tcsh for rv and RVIO. See the reference manual for an
example.
105
CHAPTER 15. RVLS
-a
-s
-l
-x
-b
-nr
-ns
-min int
-formats
-version
Show hidden files
Show sequences only (no non-sequence member files)
Show long listing
Show extended attributes and image structure
Use brute force if no reader found
Do not show frame ranges
Do not infer sequences (list each file separately)
Minimum number of files considered a sequence (default=3)
List image/movie formats
Show rvls version number
Table 15.1: RVLS Options
It is also possible to list the image attributes using RVLS using the -x option. This will display the same
attribute information that is displayed in RV’s Image Info Widget:
shell> rvls -x unnamed_5_channel.exr
unnamed_5_channel.exr:
Resolution
Channels
PixelAspectRatio
EXR/screenWindowWidth
EXR/screenWindowCenter
EXR/pixelAspectRatio
EXR/lineOrder
EXR/displayWindow
EXR/dataWindow
EXR/compression
Colorspace
640 x 480, 5ch, 16 bits/ch floating point
1
1
(0 0)
1
INCREASING_Y
(0 0) - (639 479)
(0 0) - (639 479)
ZIP_COMPRESSION
Linear
Additional command line options can be see in table 15.1
106
Appendix A
Stereo Setup
A.1
Linux
This is taken from an NVIDIA README file. The portions pertaining to stereo modes are reproduced here:
The following driver options are supported by the NVIDIA X driver. They may be specified either in the
Screen or Device sections of the X config file.
Option "Stereo" "integer"
Enable offering of quad-buffered stereo visuals on Quadro. Integer indicates the type of stereo glasses being
used
Value Equipment
1
DDC glasses. The sync signal is sent to the glasses via the DDC signal to the
monitor. These usually involve a passthrough cable between the monitor and
video card
2
”Blueline” glasses. These usually involve a passthrough cable between the monitor
and video card. The glasses know which eye to display based on the length of a
blue line visible at the bottom of the screen. When in this mode, the root window
dimensions are one pixel shorter in the Y dimension than requested. This mode
does not work with virtual root window sizes larger than the visible root window
size (desktop panning).
3
Onboard stereo support. This is usually only found on professional cards. The
glasses connect via a DIN connector on the back of the video card.
4
TwinView clone mode stereo (aka ”passive” stereo). On video cards that support
TwinView, the left eye is displayed on the first display, and the right eye is
displayed on the second display. This is normally used in conjuction with special
projectors to produce 2 polarized images which are then viewed with polarized
glasses. To use this stereo mode, you must also configure TwinView in clone mode
with the same resolution, panning offset, and panning domains on each display.
Stereo is only available on Quadro cards. Stereo options 1, 2, and 3 (aka ”active” stereo) may be used
with TwinView if all modes within each metamode have identical timing values. Please see Appendix J
for suggestions on making sure the modes within your metamodes are identical. The identical modeline
requirement is not necessary for Stereo option 4 (”passive” stereo). Currently, stereo operation may be
”quirky” on the original Quadro (NV10) chip and left-right flipping may be erratic. We are trying to resolve
this issue for a future release. Default: Stereo is not enabled.
UBB must be enabled when stereo is enabled (this is the default behavior).
Stereo options 1, 2, and 3 (aka ”active” stereo) are not supported on digital flat panels.
107
APPENDIX A. STEREO SETUP
Option "AllowDFPStereo" "boolean"
By default, the NVIDIA X driver performs a check which disables active stereo (stereo options 1, 2, and 3)
if the X screen is driving a DFP. The ”AllowDFPStereo” option bypasses this check.
. . . .
ENSURING IDENTICAL MODE TIMINGS
Some functionality, such as Active Stereo with TwinView, requires control over exactly what mode timings
are used. There are several ways to accomplish that:
If you only want to make sure that both display devices use the same modes, you only need to make
sure that both display devices use the same HorizSync and VertRefresh values when performing mode
validation; this would be done by making sure the HorizSync and SecondMonitorHorizSync match, and that
the VertRefresh and the SecondMonitorVertRefresh match.
A more explicit approach is to specify the modeline you wish to use (using one of the modeline generators
available), and using a unique name. For example, if you wanted to use 1024x768 at 120 Hz on each monitor
in TwinView with active stereo, you might add something like: # 1024x768 @ 120.00 Hz (GTF) hsync:
98.76 kHz; pclk: 139.05 MHz Modeline ”1024x768 120” 139.05 1024 1104 1216 1408 768 769 772 823 -HSync
+Vsync In the monitor section of your X config file, and then in the Screen section of your X config file,
specify a MetaMode like this: Option ”MetaModes” ”1024x768 120, 1024x768 120”
Support for GLX in Xinerama
This driver supports GLX when Xinerama is enabled on similar GPUs. The Xinerama extension takes
multiple physical X screens (possibly spanning multiple GPUs), and binds them into one logical X screen.
This allows windows to be dragged between GPUs and to span across multiple GPUs. The NVIDIA driver
supports hardware accelerated OpenGL rendering across all NVIDIA GPUs when Xinerama is enabled.
To configure Xinerama: configure multiple X screens (please refer to the XF86Config(5x) or xorg.conf(5x)
manpages for details). The Xinerama extension can be enabled by adding the line
Option "Xinerama" "True"
to the ”ServerFlags” section of your X config file.
Requirements:
It is recommended to use identical GPUs. Some combinations of non-identical, but similar, GPUs are
supported. If a GPU is incompatible with the rest of a Xinerama desktop then no OpenGL rendering will
appear on the screens driven by that GPU. Rendering will still appear normally on screens connected to
other supported GPUs. In this situation the X log file will include a message of the form:
(WW) NVIDIA(2): The GPU driving screen 2 is incompatible with the rest of (WW) NVIDIA(2): the
GPUs composing the desktop. OpenGL rendering will (WW) NVIDIA(2): be disabled on screen 2.
The NVIDIA X driver must be used for all X screens in the server.
Only the intersection of capabilities across all GPUs will be advertised.
X configuration options that affect GLX operation (e.g.: stereo, overlays) should be set consistently across
all X screens in the X server.
A.2
Mac OS X and Windows
There are no special requirements (other than having a proper GPU that can produce stereo output). If
the OS X or Windows graphical environment can provide RV with a stereo GL context, it will play back in
stereo. If not, the console widget will pop up and you will see GL errors.
If you have trouble with the stereo on the Mac, you might have some luck on one of Apple’s mailing lists.
108
Appendix B
The RVLINK Protocol: Using RV as
a URL Handler
As of RV 3.8.4, RV can act as a protocol handler for URLs using the ”rvlink” protocol. These URLs have
the form:
rvlink://<RV commandline>
for example,
rvlink:// -l -play /path/to/my/movie.mov
Will start RV (or on the mac, create a new session or replace the current session), load movie.mov, turn
on the look-ahead cache, and start playback.
B.1
Using rvlink URLs
You can insert rvlinks into web pages, chat sessions, emails, etc. Of course it is up to each individual
application whether it recognizes the protocol. Some applications can be taught to treat anything of the
form “name://” as a link to the name protocol, but others are hard-coded to only recognize “http://”, “ftp://”,
etc. Some examples of apps that will recognize rvlinks are
• Firefox
• Safari
• Internet Explorer
• Thunderbird
• Mac Mail
• IChat
One example of an app that will only recognize a hard-coded set of protocol types is Pidgin.
To use an rvlink in HTML, this kind of thing should work:
<a href="rvlink: -l -play /path/to/my/movie.mov">play movie</a>
Note the quotation marks.
In other settings (like pasting into an email, for example) you may want a “web-encoded” URL, since an
RV command line can contain arbitrary characters. RV will do the web-encoding for you, if you ask it to do
so on the command line. For example, if you run:
rv -l -play /path/to/my/movie.mov -encodeURL
109
APPENDIX B. THE RVLINK PROTOCOL: USING RV AS A URL HANDLER
RV will print the encoded url to the terminal:
rvlink://%20-l%20-play%20%2Fpath%2Fto%2Fmy%2Fmovie.mov
Some browsers, however, like IE and Konqueror, seem to modify even encoded URLs before they get to
the protocol handler. If the rvlink URL contains interesting characters, even an encoded URL will not work
with these browsers. To address this issue, RV also supports (as of version 3.8.6) “fully-baked” URLs, that
look like this:
rvlink://baked/202d6c202d706c6179202f706174682f746f2f6d792f6d6f7669652e6d6f76
This form of URL has the disadvantage of being totally illegible to humans, but as a last resort, it should
ensure that the URL reaches the protocol handler without interference. As with encoded URLs, baked URLs
can be generated from command-lines by giving RV the ”-bakeURL” command-line option.
A Note on Spaces
In general, RV will treat spaces within the URL as delimiting arguments on the command line. If you want
to include an argument with spaces (a movie name containing a space, for example) that argument must be
enclosed in single quotes (’). For example, if the name of your media is ”my movie.mov”, the encoded rvlink
URL to play it would look like:
rvlink://%20’my%20movie.mov’
B.2
Installing the Protocol Handler
RV itself is the program that handles the rvlink protocol, so all that is necessary is to register RV as the
designated rvlink handler with the OS or desktop environment. This is a different process on each of the
platforms that RV supports.
Windows
On windows the rvlink protocol needs to be added to the registry. If you install RV with the .exe installer,
this should happen automatically. If you just unzip the rv package into an arbitrary location, you’ll have to
edit the ”rvlink.reg” file in the ”etc” directory of the install to point at the install location, then just double
click on this file to edit the registry.
Mac
In RV versions prior to version 3.8.6, RV will register itself as the rvlink protocol handler every time it runs.
So after you run it once, it should pick up rvlink urls.
In RV versions 3.8.6 and later, just run RV once with the “-registerHandler” command-line option in
order to register that executable as the default rvlink protocol handler (this is to prevent confusion between
RV and RV64 when both are installed).
Linux
Unlike windows and mac, linux protocols are registered at the desktop environment level, not the OS level.
After you’ve installed RV on your machine, you can run the ”rv.install handler” script in the install’s bin
directory. This script will register RV with both the KDE and Gnome desktop environments.
Some application-specific notes:
Firefox may or may not respect the gnome settings, in general, I’ve found that if there is enough of the
gnome environmennt installed that gconfd is running (even if you’re using KDE or some other desktop env),
Firefox will pick up the gnome settings. If you can’t get this to work, you can register the rvlink protocol
with Firefox directly as described here.
110
APPENDIX B. THE RVLINK PROTOCOL: USING RV AS A URL HANDLER
Konqueror sadly seems to munge URLs before giving them to the protocol handler. For example by
swapping upper for lowercase letters. And sometimes it does not pass them on at all. This means some
rvlink URLs will work and some won’t, so we recommend only ”baked” rvlink urls with Konqueror at the
moment.
B.3
Testing the Protocol Handler
Once RV is properly registered as the rvlink protocol handler, go to this page to try it out: http://
tweaksoftware.com/rvlink-test-page
111
Appendix C
Using RV as Nuke’s Flip Book Player
Nuke 5.0 can easily be configured to use RV as a flipbook. Nuke can also be setup to render out OpenExr
temp files instead of the default rgb files. In order to configure Nuke to work with RV do the following:
1. Save the script below as a file named: “rv this.py”
2. Copy rv this.py into Nuke’s ”nukescripts” folder. This will be in the Nuke directory under “lib\sitepackages\nukescripts”
3. Open the file named
init .py in the nukescripts folder and add the following line
from rv_this import *
4. Edit the file “menu.py’ in the Nuke “plugins” directory. Find the line that says:
m.addCommand("&Flipbook Selected", "nukescripts.flipbook(
nukescripts.framecycler_this, nuke.selectedNode())", "#F")
And directly below it add the following line:
m.addCommand("Flipbook Selected in &RV", "nukescripts.flipbook(
nukescripts.rv_this, nuke.selectedNode())", "#R")
RV will now appear in the render menu and will be available with the hot key Alt+r.
To change Nuke’s default tmp rendering format to Exr, edit the file “flipbook.py” in Nuke’s “nukescripts”
folder:
1. Find the two lines that specify the output file to be “nuke tmp flip.%04d.rgb” and change them to
“nuke tmp flip.%04d.exr”
2. Edit the rv this.py script from above to specify any rv options you wish to set as your viewing defaults.
For example you could un-comment the script lines that will apply -gamma 2.2 or enable -sRGB, or
you could specify a file or display LUT for RV to use.
112
APPENDIX C. USING RV AS NUKE’S FLIP BOOK PLAYER
# Run RV as flipbook #
#Copyright (c) 2007 The Foundry Visionmongers Ltd. All Rights Reserved.
import
import
import
import
import
import
platform
sys
os.path
re
thread
nuke
rv_path=""
if rv_path == "":
try:
rv_path = os.environ["RV_PATH"]
except:
if platform.system() in (’Windows’, ’Microsoft’):
rv_path = "C:\\Program Files\\Tweak\\RV-3.10\\bin\\rv.exe"
elif platform.system() in (’Darwin’, ’Apple’):
rv_path = "/Applications/RV64.app/Contents/MacOS/RV"
else:
rv_path = "rv"
def rv_this(node, start, end, incr):
global rv_path
if not os.access(rv_path, os.X_OK):
raise RuntimeError("RV cannot be executed (%s)." % (rv_path,) )
filename = nuke.filename(node)
if filename is None or filename == "":
raise RuntimeError("RV cannot be executed on ’%s’, \
expected to find a filename and there was none." % (node.fullName(),) )
sequence_interval = str(start)+"-"+str(end)
os.path.normpath(filename)
isStereo = False
args = []
rv_path = os.path.normpath(rv_path)
if platform.system() in (’Windows’, ’Microsoft’):
args.append( "\"" + rv_path + "\"" )
args.append( "\"" + filename + "\"" )
else:
args.append( rv_path )
if ’%V’ in filename:
isStereo = True
args.append( ’[’ )
filename = re.sub( r’%\d+d’, ’%s#’ % sequence_interval, filename )
args += [filename.replace( ’%V’, v) for v in nuke.views()]
args.append( ’]’)
else:
args.append( filename )
if not isStereo:
args.append( sequence_interval )
else:
113
APPENDIX C. USING RV AS NUKE’S FLIP BOOK PLAYER
args.append( ’-stereo’ )
args.append( ’pair’ ) # or ’anaglyph’, ’scanline’, etc
# un-comment to apply gamma to linear EXRs
# args.append("-gamma")
# args.append("2.2")
args.append("-play") # play on launch
args.append("-c") # region cache
nuke.IrToken()
print args
os.spawnv(os.P_NOWAITO, rv_path, args)
114
Appendix D
Using RV as Shake’s Flip Book Player
RV can be used as a substitute for Shake’s flipbook program for most versions of Shake on OS X and Linux.
For versions 3.5 or greater, you will need to edit the shake include file flipbook.h to include the following:
gui.externalFlipbookPath = "/path/to/RV.app/Contents/MacOS/shkv_rv";
gui.flipbookStdInArg = "-";
gui.flipbookExtraArgs = "-RV /path/to/RV.app/Contents/MacOS/RV";
gui.flipbookZoomArg = "-z";
gui.flipbookTimeArg = "-t";
gui.flipbookFPSArg = "-fps";
If you have an older version of shake, you can still use RV as the flipbook program. However, in this case
you need to replace Shake’s program shkv with RV’s shkv_rv. Make sure you make a back up of shkv
before you attempt this!
D.1
Replacing shkv.app on OS X
1. Find the application shkv.app. This will be right next to shake.app in the Shake folder in
/Applications (if you didn’t move it).
2. In the finder use the contextual menu to Show Package Contents.
3. Open the Contents folder.
4. Open the MacOS folder.
5. Make a copy of shkv
6. Copy RV’s shkv_rv (from RV.app/Contents/MacOS/shkv_rv) to this folder.
7. Rename shkv_rv to shkv.(You made a copy of shkv right?
115
Appendix E
RV Audio on Linux
E.1
Overview
Linux suffers from historically poor support for audio and from a variety of sometimes incompatible audio
frameworks. RV provides multiple audio modules so users can get the most audio functionality available
given the constraints imposed by the Linux kernel version, the available audio frameworks, and the other
audio applications in use.
Potential user issues with audio on Linux are choppy playback (clicking, dead spots, drop-outs), or high
latency (it takes a breath’s worth of time to start playing). Both of these issues are extremely annoying and
it is even worse when they both occur. Ideally latency is nearly 0 for high quality audio and drop-outs never
occur.
To make matters worse, there are two completely different audio drivers for Linux: OSS and ALSA. Only
one of these can be present at a time (but both provide a “compatibility” API for the other). ALSA is the
official Linux audio API and is shipped with almost all distributions. OSS is a cross platform API (for UNIX
based machines).
The Linux desktop projects, KDE and Gnome, both have sound servers build on top of OSS/ALSA.
These are called esd and arts. Both of them have become deprecated in recent releases. If either of these
processes is running you may find it difficult to use audio with RV (or other commercial products).
Most recently, a new desktop sound server PulseAudio has been introduced. PulseAudio ships with most
distributions and is on by default in RHEL, CentOS, and Fedora, and comes with Debian and Ubuntu.
RV can use PulseAudio through the ALSA (Safe) module. We recommend using PulseAudio: it makes it
possible for all applications to use audio at the same time. The PulseAudio server can also run in real-time
mode which makes the audio output good quality.
Finally, there is the JACK sound server. JACK is similar to PulseAudio, but specifically meant for
professional sound applications. JACK can run in real-time mode and provides high quality low-latency
audio. Most professional sound applications on Linux can use JACK. On systems with PulseAudio, the
PulseAudio server can be configured to work with the JACK server thus providing the ultimate Nirvana of
Linux audio.
E.1.1
How RV Handles Linux Audio
As of version 3.6, RV now has multiple native audio back ends for Linux as well as the original PortAudio1
back end. In the case of ALSA, there are two: the old and safe versions. The old version is meant to run
on distributions which shipped with ALSA versions 1.0.13 or earlier and which do not have PulseAudio
installed. The safe version should work well with PulseAudio systems. Unless you know that your system is
using PulseAudio you should try the ALSA Old back end to start with.
On some systems, RV will fail to load one or more of its audio modules. This can occur of the API used
by the module is newer than the one installed on the system. For example neither CentOS 4.6 or Fedora
1 Don’t
get confused by PortAudio versus PulseAudio. They are very different things.
116
APPENDIX E. RV AUDIO ON LINUX
Core 4 can load the ALSA safe module unless the ALSA client library is upgraded. Any Linux system which
uses ALSA 1.0 or newer should function with the ALSA old back end.
E.2
ALSA (Old)
The ALSA (Old) audio back end is new in version 3.6. This back end uses a subset of the ALSA API which
was present on version 1.0 of ALSA’s client library. Without modification, it will make hardware devices
directly accessible. (In ALSA terms these are the hw:x,y devices). You can also add to the list of devices
using an environment variable called RV_ALSA_EXTRA_DEVICES. The syntax is:
visiblename1@alsadevicename1|visiblename2@alsadevicename2|...
So for example to add the ”dmix” device, set the variable to: dmix@dmix.
See the ALSA documentation for the .asoundrc file for more information about devices and how they
can be created. Devices defined in the configuration files will not automatically show up in RV; you’ll need
to add them to the environment variable.
When using the hardware devices other programs will not have access to the audio.
E.3
ALSA (Safe)
The ALSA (Safe)2 audio back end uses a more modern version of the ALSA client API. If the version of
ALSA client library on your system is newer than 1.0.13 this back end might work better on your system.
PulseAudio system should definitely be using this audio module.
The ALSA safe back end can use the RV_ALSA_EXTRA_DEVICES variable (see above). However,
user/system defined devices will typically show up in the device list automatically.
The safe back end does not give you direct access to the hardware devices by default. Typically you will
see devices which look like:
front:CARD=xxxx,DEV=n
The xxxx and n values correspond to the hardware device values used in the ALSA old back end. You can
force the use of the hardware devices by adding them to the environment variable.
For example, the first device on the first card would be hw:0,0 in ALSA parlance. So setting the value
of RV_ALSA_EXTRA_DEVICES to:
First Hardware Device@hw:0,0
would add that to the list.
We recommend that you do not add hardware devices when using the safe ALSA module. The hardware
devices will typically be accessible via the default device list under different names (like front:CARD=xxxx,DEV=n
from above). Unlike the default list of devices, the hardware devices will shut out other software from using
the audio even on systems using the PulseAudio sound server.
E.4
PortAudio
The PortAudio back end is more or less the same one used by versions of RV prior to 3.6. PortAudio supports
most hardware and some plugin devices from ALSA, includes an OSS interface, and can talk to the JACK
server directly. Unfortunately, on some newer systems, the method used by PortAudio when interfacing with
ALSA is not stable. We recommend using the ALSA back ends directly instead of PortAudio.
For OSS, PortAudio is currently the only choice. If your system requires the use of the OSS API you
should be able to access it via the PortAudio back end.
2 The term ”Safe” here refers to the subset of the ALSA API deemed safe to use in the presence of PulseAudio. Programs that
use features that PulseAudio cannot intercept will cause inconsistant audio availability or unstable output. Use of hardware
devices in the presence of PulseAudio can prevent other applications from using the audio driver whether they be ALSA or
OSS based.
117
Appendix F
Troubleshooting Networking
Connections only work from one direction or are always refused
Some operating systems have a firewall on by default that may be blocking the port RV is trying to use.
When you start RV on the machine with the firewall and start networking it appears to be functioning
correctly, but no one can connect to it. Check to see if the port that RV wants to use is available through
the firewall.
This is almost certainly the case when the connection works from one direction but not the other. The
side which can make the connection is usually the one that has the firewall blocking RV (it won’t let other
machines in).
118
Appendix G
Rising Sun Research CineSpace .csp
File Format
This is RSR’s spec of their file format:
The cineSpace LUT format contains three main sections.
Header
This section contains the LUT identifier and the LUT type, 3D or 1D.
It is made up of the first two (2) valid lines in the file. See Notes below for a definition of a valid line.
A 3D LUT:
CSPLUTV100
3D
or a 1D (channel) LUT:
CSPLUTV100
1D
1D preLUT data
This section is designed to allow for unevenly spaced data and also to accommodate input data that maybe
outside the 0.0 <-> 1.0 range. Each primary channel, red, green and blue has each own 3 line entry. The
first line is the number of preLUT data entries for that channel. The second line is the input and the third
line is the mapped output that will then become the input for the LUT data section.
It is made up of the valid lines 3 to 11 in the LUT. See Notes below for a definition of a valid line.
Examples . . .
Map extended input (max. 4.0) into top 10% of LUT
11
0.0
0.0
11
0.0
0.0
11
0.0
0.0
0.1 0.2 0.3 0.4 0.5 0.6 0.7 0.8 0.9 4.0
0.1 0.2 0.3 0.4 0.5 0.6 0.7 0.8 0.9 1.0
0.1 0.2 0.3 0.4 0.5 0.6 0.7 0.8 0.9 4.0
0.1 0.2 0.3 0.4 0.5 0.6 0.7 0.8 0.9 1.0
0.1 0.2 0.3 0.4 0.5 0.6 0.7 0.8 0.9 4.0
0.1 0.2 0.3 0.4 0.5 0.6 0.7 0.8 0.9 1.0
Access LUT data via a gamma lookup Red channel has gamma 2.0 Green channel has gamma 3.0 but
also has fewer points Blue channel has gamma 2.0 but also has fewer points
119
APPENDIX G. RISING SUN RESEARCH CINESPACE .CSP FILE FORMAT
11
0.0
0.0
6
0.0
0.0
6
0.0
0.0
0.1 0.2 0.3 0.4 0.5 0.6 0.7 0.8 0.9 1.0
0.01 0.04 0.09 0.16 0.25 0.36 0.49 0.64 0.81 1.0
0.2 0.4 0.6 0.8 1.0
0.008 0.064 0.216 0.512 1.0
0.2 0.4 0.6 0.8 1.0
0.04 0.16 0.36 0.64 1.0
LUT data
This section contains the LUT data. The input stimuli for the LUT data is evenly spaced and normalized
between 0.0 and 1.0. All data entries are space delimited floats. For 3D LUTs the data is red fastest.
It is made up of the valid lines 12 and onwards in the LUT. See Notes below for a definition of a valid
line.
Examples . . .
Linear LUT with cube sides R,G,B = 2,3,4 (ie. a 2x3x4 data set)
2 3
0.0
1.0
0.0
1.0
0.0
1.0
0.0
1.0
0.0
1.0
0.0
1.0
0.0
1.0
0.0
1.0
0.0
1.0
0.0
1.0
0.0
1.0
0.0
1.0
4
0.0
0.0
0.5
0.5
1.0
1.0
0.0
0.0
0.5
0.5
1.0
1.0
0.0
0.0
0.5
0.5
1.0
1.0
0.0
0.0
0.5
0.5
1.0
1.0
0.0
0.0
0.0
0.0
0.0
0.0
0.33
0.33
0.33
0.33
0.33
0.33
0.66
0.66
0.66
0.66
0.66
0.66
1.0
1.0
1.0
1.0
1.0
1.0
Notes:
All lines starting with white space are considered not valid and are ignored. Lines can be escaped to the
next line with “\”. All values on a single line are space delimited.
“BEGIN METADATA” indicates the start of the meta data section. “END METADATA” indicates the
end of the meta data section. The above two lines and everything in between them are not considered valid
lines are ignored by the parser.
The first line must contain the LUT type and version identifier “CSPLUTV100”
The second line must contain either “3D” or “1D”.
120
APPENDIX G. RISING SUN RESEARCH CINESPACE .CSP FILE FORMAT
The third valid line is the number of entries in the red 1D preLUT. It is an integer.
The fourth valid line contains the input entries for the red 1D preLUT. These are floats and the range is
not limited. The number of entries must be equal to the value on the third valid line.
The fifth valid line contains the output entries for the red 1D preLUT. These are floats and the range is
limited to 0.0 <-> 1.0. The number of entries must be equal to the value on the third valid line.
The sixth valid line is the number of entries in the green 1D preLUT. It is an integer.
The seventh valid line contains the input entries for the green 1D preLUT. These are floats and the range
is not limited. The number of entries must be equal to the value on the sixth valid line.
The eighth valid line contains the output entries for the green 1D preLUT. These are floats and the range
is limited to 0.0 <-> 1.0. The number of entries must be equal to the value on the sixth valid line.
The ninth valid line is the number of entries in the blue 1D preLUT. It is an integer.
The tenth valid line contains the input entries for the blue 1D preLUT. These are floats and the range is
not limited. The number of entries must be equal to the value on the ninth valid line.
The eleventh valid line contains the output entries for the blue 1D preLUT. These are floats and the
range is limited to 0.0 <-> 1.0. The number of entries must be equal to the value on the ninth valid line.
The twelfth valid line in a “3D” LUT contains the axis lengths of the 3D data cube in R G B order.
The twelfth valid line in a “1D” LUT contains the 1D LUT length
The thirteenth valid line and onwards contain the LUT data. For 3D LUTs the order is red fastest. The
data are floats and are not range limited. The data is evenly spaced.
The LUT file should be named with the extension .csp
121
Appendix H
Crash Reporting
RV includes a crash reporting mechanism on linux and OS X.
TWK CRASH LOG
TWK CRASH LOG PROGRAM
TWK CRASH LOG DIRECTORY
122
Appendix I
Open Source Components
RV uses components licensed under the GNU LGPL and other open-source licenses. There is no GPL code
in any of RV’s binaries. LGPL code for which Tweak Software (or Tweak Films) is the copyright holder is
sometimes directly compiled into RV (not as a shared library).
Tweak Software takes open source licensing seriously. Open source software can have huge social benifits
and we ourselves have benefited from the work of open source developers. We have in the past contributed,
time, code and funding to open source projects and will continue to do so in the future.
I.1
GTO
The session file (.rv) is a form of GTO file. The GTO file library is distributed under the terms similar
to the BSD license and is available from our website. The GTO format was invented and is copyrighted by
Tweak Films.
The GTO source distribution includes a handful of tools to edit GTO files independently of any application. Also included is a Python module which makes editing the files extremely easy.
RV ships with prebuilt versions of GTO command line tools.
I.2
Libquicktime
RV currently uses libquicktime which is distributed under the terms of the GNU LGPL to read and write
QuickTime, dv, MP4, and AVI movie files. The libquicktime library can be found in $RV_HOME/lib as a
shared object. Libquicktime is capable of reading codecs not shipped with RV. You can read documentation
at the libquicktime website to find out how to write or install new codecs. Plugin codecs can be found in
$RV_HOME/plugins/lqt in the RV distribution tree. New codecs can be installed in the same location.
Source code for libquicktime and the plugins used by RV is included with the RV distribution.
I.3
FFMPEG
On Linux, RV uses an LGPL-only version of FFMPEG as a libquicktime plugin to decode H.264 video and
AAC audio. Source code for FFMPEG is included with RV on linux. We build FFMPEG with the flags
generated by its configure script, but we do not use its make files. RV (via the ffmpeg libquicktime plugin)
uses only a small portion of FFMPEG. These portions are restricted to the codecs for which Tweak Software
has a license – namely the AVC1 (H.264) video and AAC audio codecs for decoding only (the MPEG4 codecs
generally).
I.4
FreeType
RV uses FreeType for rendering text on the image view.
123
APPENDIX I. OPEN SOURCE COMPONENTS
I.5
Libtiff
RV uses version 3.10.0 of libtiff as to read and write TIFF files and EXIF jpeg metadata. Libtiff is copyrighted
as follows:
Copyright (c) 1988-1997 Sam Leffler
Copyright (c) 1991-1997 Silicon Graphics, Inc.
I.6
LibEXIF
RV uses libexif (LGPL) to decode EXIF tags in JPEG files.
I.7
Libjpeg
RV uses the Independent JPEG Group’s free JPEG software library to decode jpeg.
I.8
OpenJPEG
RV uses OpenJPEG to decode and encode JPEG-2000 files and codecs.
I.9
OpenEXR
RV uses the the OpenEXR library. The source code for the library and tools can be found on the OpenEXR
website. http://www.openexr.com
I.10
GraphicsMagick
RV uses GraphicsMagick as a plug in for reading various file formats on linux. (The RV GM plugin).
Copyright (C) 2003 GraphicsMagick Group, an organization dedicated to making software imaging solutions freely available.
The GraphicsMagick Base64Decode() and Base64Encode() functions are based on source code obtained
from OpenSSH. This source code is distributed under the following license:
Copyright (c) 2000 Markus Friedl. All rights reserved.
Redistribution and use in source and binary forms, with or without modification, are permitted provided
that the following conditions are met. Redistributions of source code must retain the above copyright notice,
this list of conditions and the following disclaimer. Redistributions in binary form must reproduce the above
copyright notice, this list of conditions and the following disclaimer in the documentation and/or other
materials provided with the distribution.
THIS SOFTWARE IS PROVIDED BY THE AUTHOR “AS IS” AND ANY EXPRESS OR IMPLIED
WARRANTIES, INCLUDING, BUT NOT LIMITED TO, THE IMPLIED WARRANTIES OF MERCHANTABILITY AND FITNESS FOR A PARTICULAR PURPOSE ARE DISCLAIMED. IN NO EVENT
SHALL THE AUTHOR BE LIABLE FOR ANY DIRECT, INDIRECT, INCIDENTAL, SPECIAL, EXEMPLARY, OR CONSEQUENTIAL DAMAGES (INCLUDING, BUT NOT LIMITED TO, PROCUREMENT
OF SUBSTITUTE GOODS OR SERVICES; LOSS OF USE, DATA, OR PROFITS; OR BUSINESS INTERRUPTION) HOWEVER CAUSED AND ON ANY THEORY OF LIABILITY, WHETHER IN CONTRACT, STRICT LIABILITY, OR TORT (INCLUDING NEGLIGENCE OR OTHERWISE) ARISING IN
ANY WAY OUT OF THE USE OF THIS SOFTWARE, EVEN IF ADVISED OF THE POSSIBILITY OF
SUCH DAMAGE.
I.11
Minizip
RV uses the minizip package (which comes with the libz source code) Copyright (C) 1998-2005 Gilles Vollant.
124
APPENDIX I. OPEN SOURCE COMPONENTS
I.12
OpenCV
Copyright (C) 2000, Intel Corporation, all rights reserved.
Third party copyrights are property of their respective owners.
Redistribution and use in source and binary forms, with or without modification, are permitted provided
that the following conditions are met:
* Redistribution’s of source code must retain the above copyright notice, this list of conditions and the
following disclaimer.
* Redistribution’s in binary form must reproduce the above copyright notice, this list of conditions and
the following disclaimer in the documentation and/or other materials provided with the distribution.
* The name of Intel Corporation may not be used to endorse or promote products derived from this
software without specific prior written permission.
This software is provided by the copyright holders and contributors ”as is” and any express or implied
warranties, including, but not limited to, the implied warranties of merchantability and fitness for a particular
purpose are disclaimed. In no event shall the Intel Corporation or contributors be liable for any direct,
indirect, incidental, special, exemplary, or consequential damages (including, but not limited to, procurement
of substitute goods or services; loss of use, data, or profits; or business interruption) however caused and on
any theory of liability, whether in contract, strict liability, or tort (including negligence or otherwise) arising
in any way out of the use of this software, even if advised of the possibility of such damage.
125