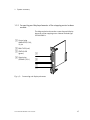
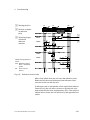
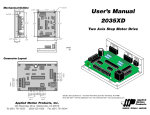
1
SPC200 Smart Positioning Controller
Electronics manual
Stepping motor
indexer module
Type SPC200−SMX−1
Manual
188 895
en 0503b
[693 858]
Contents and general instructions
Author . . . . . . . . . . . . . . . . . . . . . . . . . . . . . . . . . . . P. Mauch
Editor . . . . . . . . . . . . . . . . . . . . . . . . . . . . . . . . . . . M. Holder
Original . . . . . . . . . . . . . . . . . . . . . . . . . . . . . . . . . . . . . . . de
Translation . . . . . . . . . . . . . . . . . . . . . transline Deutschland
Layout . . . . . . . . . . . . . . . . Festo AG & Co. KG, Dept. KG−GD
Type setting . . . . . . . . . . . . . . . . . . . . . . . . . . . . . . . . . . KI−DT
Edition . . . . . . . . . . . . . . . . . . . . . . . . . . . . . . . . . . en 0503b
Designation . . . . . . . . . . . . . . . . . . . P.BE−SPC200−SMX−1−EN
Order no. . . . . . . . . . . . . . . . . . . . . . . . . . . . . . . . . . 188 895
E (Festo AG & Co. KG, D73726 Esslingen, Federal Republic
of Germany, 2003)
Internet: http://www.festo.com
e−mail: [email protected]
The reproduction, distribution and utilization of this docu
ment as well as the communicaton of its contents to others
without express authorization is prohibited. Offenders will
be held liable for the payment of damages. All rights re
served in the event of the grant of a patent, utility module
or design.
Festo P.BE−SPC200−SMX−1−EN en 0503b
I
Contents and general instructions
II
Festo P.BE−SPC200−SMX−1−EN en 0503b
Contents and general instructions
Contents
Designated use . . . . . . . . . . . . . . . . . . . . . . . . . . . . . . . . . . . . . . . . . . . . . . . . . . . . . . . .
Target group . . . . . . . . . . . . . . . . . . . . . . . . . . . . . . . . . . . . . . . . . . . . . . . . . . . . . . . . . .
Service . . . . . . . . . . . . . . . . . . . . . . . . . . . . . . . . . . . . . . . . . . . . . . . . . . . . . . . . . . . . . . .
Important user instructions . . . . . . . . . . . . . . . . . . . . . . . . . . . . . . . . . . . . . . . . . . . . . .
Notes on software version . . . . . . . . . . . . . . . . . . . . . . . . . . . . . . . . . . . . . . . . . . . . . . .
Notes on the use of this manual . . . . . . . . . . . . . . . . . . . . . . . . . . . . . . . . . . . . . . . . . . .
List of abbreviations . . . . . . . . . . . . . . . . . . . . . . . . . . . . . . . . . . . . . . . . . . . . . . . . . . . .
V
VI
VI
VII
IX
X
XII
1.
System summary . . . . . . . . . . . . . . . . . . . . . . . . . . . . . . . . . . . . . . . . . . . . . . .
1−1
1.1
1.2
1.4
1.5
1.6
System structure . . . . . . . . . . . . . . . . . . . . . . . . . . . . . . . . . . . . . . . . . . . . . . . 1−3
Basis structure for operating a stepping motor axis . . . . . . . . . . . . . . . . . . . 1−4
1.2.1
Connecting and display elements
of the stepping motor indexer module . . . . . . . . . . . . . . . . . . . . . . . 1−7
Drive packages . . . . . . . . . . . . . . . . . . . . . . . . . . . . . . . . . . . . . . . . . . . . . . . . . 1−8
1.3.1
Stepping motor controller . . . . . . . . . . . . . . . . . . . . . . . . . . . . . . . . . 1−8
Electromechanical linear drive . . . . . . . . . . . . . . . . . . . . . . . . . . . . . . . . . . . . . 1−11
Accessories . . . . . . . . . . . . . . . . . . . . . . . . . . . . . . . . . . . . . . . . . . . . . . . . . . . . 1−11
EMERGENCY STOP concept . . . . . . . . . . . . . . . . . . . . . . . . . . . . . . . . . . . . . . . 1−12
2.
Fitting . . . . . . . . . . . . . . . . . . . . . . . . . . . . . . . . . . . . . . . . . . . . . . . . . . . . . . . .
2−1
2.1
2.2
Fitting and removing the stepping motor indexer module . . . . . . . . . . . . . . .
Fitting the electric axis and the stepping motor controller . . . . . . . . . . . . . .
2.2.1
Arrangement of the sensors . . . . . . . . . . . . . . . . . . . . . . . . . . . . . . .
2−4
2−7
2−8
3.
Installation . . . . . . . . . . . . . . . . . . . . . . . . . . . . . . . . . . . . . . . . . . . . . . . . . . .
3−1
3.1
General instructions . . . . . . . . . . . . . . . . . . . . . . . . . . . . . . . . . . . . . . . . . . . . .
3.1.1
Overview of electrical installation . . . . . . . . . . . . . . . . . . . . . . . . . . .
Connecting the sensors . . . . . . . . . . . . . . . . . . . . . . . . . . . . . . . . . . . . . . . . . .
Connecting the stepping motor controller and the stepping motor . . . . . . .
Connecting the control cable . . . . . . . . . . . . . . . . . . . . . . . . . . . . . . . . . . . . . .
3−3
3−5
3−6
3−8
3−8
1.3
3.2
3.3
3.4
Festo P.BE−SPC200−SMX−1−EN en 0503b
III
Contents and general instructions
4.
Commissioning . . . . . . . . . . . . . . . . . . . . . . . . . . . . . . . . . . . . . . . . . . . . . . . .
4−1
4.1
4.2
4.3
4−3
4−4
4−7
4−8
4−11
4−12
4.5
4.6
Procedure for commissioning . . . . . . . . . . . . . . . . . . . . . . . . . . . . . . . . . . . . .
Preparations for commissioning . . . . . . . . . . . . . . . . . . . . . . . . . . . . . . . . . . .
Commissioning with WinPISA . . . . . . . . . . . . . . . . . . . . . . . . . . . . . . . . . . . . .
4.3.1
Selecting a specification for the axis . . . . . . . . . . . . . . . . . . . . . . . .
4.3.2
Configuration of the axis parameters . . . . . . . . . . . . . . . . . . . . . . . .
4.3.3
Configuration of the application parameters . . . . . . . . . . . . . . . . . .
4.3.4
Configuration of the settings for analogue reference value
specification . . . . . . . . . . . . . . . . . . . . . . . . . . . . . . . . . . . . . . . . . . . .
4.3.5
Loading the axis configuration into the SPC200 . . . . . . . . . . . . . . .
4.3.6
Functional check of the stepping motor axes . . . . . . . . . . . . . . . . .
Commissioning with the control panel . . . . . . . . . . . . . . . . . . . . . . . . . . . . . .
4.4.1
Setting project−specific parameters . . . . . . . . . . . . . . . . . . . . . . . . .
4.4.2
Functional check of the stepping motor axes . . . . . . . . . . . . . . . . .
Program example . . . . . . . . . . . . . . . . . . . . . . . . . . . . . . . . . . . . . . . . . . . . . . .
Instructions on operation . . . . . . . . . . . . . . . . . . . . . . . . . . . . . . . . . . . . . . . . .
4−22
4−22
4−23
4−27
4−28
4−30
4−34
4−35
5.
Diagnosis and error treatment . . . . . . . . . . . . . . . . . . . . . . . . . . . . . . . . . . . .
5−1
5.1
5.2
5.3
5.4
5.5
5.6
General instructions on diagnosis . . . . . . . . . . . . . . . . . . . . . . . . . . . . . . . . . . 5−3
On−the−spot diagnosis . . . . . . . . . . . . . . . . . . . . . . . . . . . . . . . . . . . . . . . . . . . 5−4
Diagnosis with WinPISA . . . . . . . . . . . . . . . . . . . . . . . . . . . . . . . . . . . . . . . . . . 5−5
Diagnosis on the control panel . . . . . . . . . . . . . . . . . . . . . . . . . . . . . . . . . . . . 5−7
Emergency travel . . . . . . . . . . . . . . . . . . . . . . . . . . . . . . . . . . . . . . . . . . . . . . . 5−8
Notes on judging the positioning behaviour . . . . . . . . . . . . . . . . . . . . . . . . . 5−11
A.
Technical appendix . . . . . . . . . . . . . . . . . . . . . . . . . . . . . . . . . . . . . . . . . . . . .
A−1
A.1
A.2
A.3
Technical specifications . . . . . . . . . . . . . . . . . . . . . . . . . . . . . . . . . . . . . . . . . .
Internal circuitry . . . . . . . . . . . . . . . . . . . . . . . . . . . . . . . . . . . . . . . . . . . . . . . .
Index . . . . . . . . . . . . . . . . . . . . . . . . . . . . . . . . . . . . . . . . . . . . . . . . . . . . . . . . .
A−3
A−4
A−7
4.4
IV
Festo P.BE−SPC200−SMX−1−EN en 0503b
Contents and general instructions
Designated use
The stepping motor indexer module type SPC200−SMX−1 has
been designed for coupling a suitable stepping motor con
troller to the SPC200. With this stepping motor controller the
SPC200 can control a stepping motor axis. Maximum 3 step
ping motor indexer modules can be fitted in a rack.
Basic components and modules for the SPC200 are described
in the user manual type P.BE−SPC200−... . The safety instruc
tions specified in the manuals must always be observed and
the relevant components and modules must only be used as
intended. Please observe also the safety instructions in the
operating instructions for the pneumatic components used.
The SPC200 and the modules and cables to be connected are
only to be used as follows:
As specified in industrial applications.
Without any modifications by the user.
Only the conversions or modifications described in the
documentation supplied with the product are permitted.
iIn faultless technical condition.
When used together with commercially available compo
nents, such as actuators, the specified limits for pressures,
temperatures, electrical data, torques etc. must be observed.
National and local safety regulations must also be observed.
Festo P.BE−SPC200−SMX−1−EN en 0503b
V
Contents and general instructions
Target group
This manual is intended exclusively for technicians trained in
control and automation technology, who have experience in
fitting, installing, commissioning, programming and diagnos
ing stepping motor axes.
Service
Please consult your local Festo repair service if you have any
technical problems.
VI
Festo P.BE−SPC200−SMX−1−EN en 0503b
Contents and general instructions
Important user instructions
Danger categories
This manual contains instructions on the possible dangers
which may occur if the product is not used correctly. These
instructions are marked (Warning, Caution, etc.), printed on a
shaded background and marked additionally with a picto
gram. A distinction is made between the following danger
warnings:
Warning
This means that failure to observe this instruction may
result in serious personal injury or damage to property.
Caution
This means that failure to observe this instruction may
result in personal injury or damage to property.
Please note
This means that failure to observe this instruction may
result in damage to property.
The following pictogram marks passages in the text which
describe activities with electrostatically sensitive compo
nents.
Electrostatically sensitive components may be damaged if
they are not handled correctly.
Festo P.BE−SPC200−SMX−1−EN en 0503b
VII
Contents and general instructions
Marking special information
The following pictograms mark passages in the text contain
ing special information.
Pictograms
Information:
Recommendations, tips and references to other sources of
information.
Accessories:
Information on necessary or sensible accessories for the
Festo product.
Environment:
Information on environment−friendly use of Festo products.
Text markings
S
The bullet indicates activities which may be carried out in
any order.
1. Figures denote activities which must be carried out in the
numerical order specified.
VIII
Hyphens indicate general activities.
Festo P.BE−SPC200−SMX−1−EN en 0503b
Contents and general instructions
Notes on software version
Please note
This manual refers to stepping motor indexer modules
type SPC200−SMX−1 with software version as from 1.42.
Observe the different positioning speeds depending on the
software version of the stepping motor indexer module:
Function
Range
Software version 1)
Axis moves with
Reference
travel
Switching ranges of the
limit switches or the refer
ence switch (depending on
the reference travel mode)
or after a limit switch fault
as from 1.42
Start−Stop frequency
as from 1.0
1/4 Start−Stop frequency
Outside the switching
ranges of the limit or refer
ence switches
all
Reference speed
Switching range of the limit
switches and movement
before reaching the limit
switch
as from 1.43
(in preparation)
Start−Stop frequency
up to 1.42
1/2 Start−Stop frequency
Emergency
travel
1) Determining the software version see section 5.3
Festo P.BE−SPC200−SMX−1−EN en 0503b
IX
Contents and general instructions
Notes on the use of this manual
This manual contains basic general information on fitting,
installing and commissioning the SPC200, as well as a de
scription of its method of operation as a stepping motor con
troller. The manual deals with the SPC200 Smart Positioning
Controller with operating system version as from 4.6 and
fitted stepping motor indexer module with firmware version
as from 1.42 (see section 5.3, Status display) as well as
WinPISA as from version 4.3.
Manuals on the SPC200 Smart Positioning Controller
Type
Title
Contents
System manual
SPC200 Smart Positioning Controller,
user manual
type P.BE−SPC200−...
Installation, commissioning and
diagnosis with SPC200; standard
components and modules
Software manual
WinPISA software package
type P.SW−WIN−PISA−..
Functions of the WinPISA software
package
Help system
Help system for WinPISA (contained
in WinPISA)
WinPISA help system
Manuals
Field bus module
type P.BE−SPC200−COM−...
Installation, commissioning and
diagnosis of the relevant field bus
module
Stepping motor indexer module
type P.BE−SPC200−SMX−1−...
Installation, commissioning and
diagnosis with a stepping motor
Electric positioning system
type P.BE−ATP−...
Further information on electric
positioning systems
Special information on commissioning, programming and
diagnosing the SPC200 with the WinPISA software package
can be found in the appropriate manual for WinPISA.
X
Festo P.BE−SPC200−SMX−1−EN en 0503b
Contents and general instructions
Information on the electric axes, drive packages with step
ping motors and stepping motor controllers as well as sen
sors can be found in the documentation supplied with the
product.
Caution
If the permitted operating conditions of the components
used are not observed, faults may occur during operation.
Consider in particular the specifications for the permitted
operating conditions of the motors and drives used in the
documentation enclosed (manufacturer data), e.g. for the
permitted start−stop frequency or the minimum positioning
speeds.
Festo P.BE−SPC200−SMX−1−EN en 0503b
XI
Contents and general instructions
List of abbreviations
The following product−specific terms and abbreviations are
used in this manual:
Term/abbreviation
Meaning
Drive package
Stepping motor controller, in some cases with gear
Electric axis
Combination of motor, coupling (coupling housing with coupling and
flange), electromechanical linear axis, as well as the necessary
cables and sensors.
Electromechanical
Linear drive
Linear guide with spindle or toothed−belt drive
I
Digital input
I/Os
Digital inputs and outputs
Modules
Function cards which can be plugged into the rack of the SPC200.
Q
Digital output
Record Select mode
Operating mode of the SPC200 which supports close coupling with a
higher−order PLC/IPC.
Resolution
Steps per mm positioning path, depends on the motor used, the
drive as well from the configured step mode (see section 4.3.3).
Start−stop frequency
Frequency with which the stepping motor can start and stop reliably
at the required rotational speed (without loss of step).
Start/Stop mode
Operating mode of the SPC200 which supports both autonomous
operation and control by a higher−order PLC/IPC.
Step mode
The step mode defines the step width (rotary angle of the motor per
impulse). Therefore the steps per turn are defined too.
XII
Festo P.BE−SPC200−SMX−1−EN en 0503b
System summary
Chapter 1
Festo P.BE−SPC200−SMX−1−EN en 0503b
1−1
1. System summary
Contents
1.
System summary . . . . . . . . . . . . . . . . . . . . . . . . . . . . . . . . . . . . . . . . . . . . . . .
1.1
1.2
1.4
1.5
1.6
System structure . . . . . . . . . . . . . . . . . . . . . . . . . . . . . . . . . . . . . . . . . . . . . . . 1−3
Basis structure for operating a stepping motor axis . . . . . . . . . . . . . . . . . . . 1−4
1.2.1
Connecting and display elements of the
stepping motor indexer module . . . . . . . . . . . . . . . . . . . . . . . . . . . . 1−7
Drive packages . . . . . . . . . . . . . . . . . . . . . . . . . . . . . . . . . . . . . . . . . . . . . . . . . 1−8
1.3.1
Stepping motor controller . . . . . . . . . . . . . . . . . . . . . . . . . . . . . . . . . 1−8
Electromechanical linear drive . . . . . . . . . . . . . . . . . . . . . . . . . . . . . . . . . . . . . 1−11
Accessories . . . . . . . . . . . . . . . . . . . . . . . . . . . . . . . . . . . . . . . . . . . . . . . . . . . . 1−11
EMERGENCY STOP concept . . . . . . . . . . . . . . . . . . . . . . . . . . . . . . . . . . . . . . . 1−12
1−2
Festo P.BE−SPC200−SMX−1−EN en 0503b
1.3
1−1
1. System summary
1.1
System structure
Stepping motor drives must be connected to the SPC200 by
means of special stepping motor indexer modules. Each step
ping motor indexer module type SPC200−SMX−1 enables a
stepping motor axis to be coupled on.
1
......
2
9
3
8
4
7
5
6
1 Programmer/PC for commissioning
5 Electromechanical linear drive
2 SPC200 with stepping motor indexer
6 Reference/limit switches
module
3 Stepping motor controller
4 Control cabinet
7 Coupling and flange
8 Motor, in some cases with gear
9 Pneumatic axis (optional)
Fig.1/1: System overview
Festo P.BE−SPC200−SMX−1−EN en 0503b
1−3
1. System summary
1.2
Basis structure for operating a stepping motor axis
With just the following modules the SPC200 can control a
stepping motor controller:
1
2
3
4
1 Power supply module
2 Diagnostic module
3 I/O module (optional field bus module)
4 Stepping motor indexer module
Fig.1/2: Basis structure for a stepping motor controller
1−4
Festo P.BE−SPC200−SMX−1−EN en 0503b
1. System summary
Module
Description
Power supply module
Enables the power supply and the axis
interface designed as a field device to be
connected.
Diagnostic module
Enables the control panel to be fitted
and a PC to be connected.
I/O or field bus module
Enables control of the I/Os or
communication via the field bus.
Stepping motor indexer
module
Enables a stepping motor controller to
be controlled.
A system structure with the modules shown above offers the
following facilities:
One or two pneumatic axes can be controlled
Control of one stepping motor axis
Programming and diagnosis via a PC or a control panel
Coordination via I/Os or via the field bus
Providing a sufficient number of unused locations are avail
able, up to 3 stepping motor indexer modules can be fitted in
the SPC200 for controlling 3 electric axes.
The SPC200 can be controlled via I/Os or via the field bus in
the operating mode Start/Stop or in the Record Select mode.
The address range required for this is provided by the I/O
module or the field bus module.
Festo P.BE−SPC200−SMX−1−EN en 0503b
1−5
1. System summary
For setting up a stepping motor axis with the SPC200 you will
require the following components:
The SPC200 Smart Positioning Controller with stepping
motor module type SPC200−SMX−1
The control cable from the SPC200 to the stepping motor
controller (see manual for stepping motor controller)
A stepping motor drive package from Festo, consisting of
a stepping motor controller, a stepping motor and, in
some cases, also gears. Other stepping motor controllers
are possible, providing they have compatible connections.
Mains filter, fuses etc. for the stepping motor controller
Motor cable for connecting the stepping motor controller
and the stepping motor
Motor flange and coupling
Linear drive (e.g. DGE(L)−...), with accessories
Suitable sensors for reference and limit switches
When selecting the sensors, note that the accuracy of the
switchover point of the sensors determines the accuracy of
the reference point.
You must make sure that the switchover point always lies
within a step resolution.
1−6
Festo P.BE−SPC200−SMX−1−EN en 0503b
1. System summary
1.2.1 Connecting and display elements of the stepping motor indexer
module
The diagram below shows the connecting and display
elements of the stepping motor indexer module type
SPC200−SMX−1.
1 Control plug
(AMPLIFIER, X30),
15−pin
2 FAULT LED (red)
3 STATUS LED
(green)
1
4 Signal plug
(SIGNALS, X31)
2
3
4
Fig.1/3: Connecting and display elements
Festo P.BE−SPC200−SMX−1−EN en 0503b
1−7
1. System summary
1.3
Drive packages
Festo offers drive packages for electric axes. These consist of:
stepping motor controller
stepping motor (in some cases with brake)
gears (if necessary).
The drive package must be suited to the requirements of the
positioning system (moveable mass, positioning time, etc.) as
well as to the electromechanical linear axis used.
A stepping motor controller with a 5 V signal level must be
used for operating the SPC200 (see Technical specifica
tions").
1.3.1 Stepping motor controller
The stepping motor controller forms the link between the
SPC200 as positioning controller and a stepping motor.
The signals from the positioning controller are converted by
the stepping motor controller in accordance with the motor−
dependent and drive−dependent settings (e.g. phase current).
1−8
Festo P.BE−SPC200−SMX−1−EN en 0503b
1. System summary
1 Power unit
1
2 Stepping motor
Control signals
controller
3 Stepping motor
2
4 SPC200
(positioning
controller)
3
4
Fig.1/4: Control connection of the stepping motor controller
The control connection of the stepping motor indexer module
type SPC200−SMX−1 has been optimized for the stepping
motor controllers offered with the Festo drive packages.
Other stepping motor controllers can only be used providing
the necessary inputs and outputs are compatible with the
control output of the stepping motor indexer module
(AMPLIFIER connection, see Technical specifications").
Festo P.BE−SPC200−SMX−1−EN en 0503b
1−9
1. System summary
The control connection of the stepping motor indexer module
possesses the following inputs and outputs for connecting a
stepping motor controller:
Outputs (push−pull control, electric as per RS 485):
Pulse
Direction
Enable
Full/half step (not used with SEC−ST)
Input (relay contact in the stepping motor controller):
1−10
Ready (bridged in the connecting cable for the SEC−ST)
Festo P.BE−SPC200−SMX−1−EN en 0503b
1. System summary
1.4
Electromechanical linear drive
Linear drives are used for the electric axes. These drives con
vert the rotary movement of the stepping motor into a linear
movement of the slide. If the linear drives do not have an inte
grated guide, an additional guide must be provided.
Two different types of guides are available:
axes with spindle drive, e.g. DGE(L)−...−SP
axes with toothed−belt drive, e.g. DGE(L)−...−ZR
Please note
The maximum length of the linear drives is determined by
technical reasons. As from a certain length, spindle drives
may only be operated at limited speed and toothed−belt
drives may only be operated with limited drive torque.
1.5
Accessories
For the positioning systems Festo offers accessories suited to
the drive packages and linear drives (see Festo delivery pro
gram or catalogue).
Festo P.BE−SPC200−SMX−1−EN en 0503b
1−11
1. System summary
1.6
EMERGENCY STOP concept
Please note
Check within the framework of your EMERGENCY STOP
concept, to ascertain the measures necessary for putting
your machine/system into a safe state in the event of an
EMERGENCY STOP (e.g. switching off the load supply,
operating voltage for the stepping motor controller,
switching off the compressed air).
The status of the limit switches connected to the sensor plug
is evaluated by the operating system of the SPC200.
Warning
The limit switches connected to the sensor plug are not
suitable for implementing an EMERGENCY STOP function.
Use additional separate safety limit switches if an ap
propriate EMERGENCY STOP circuit is required for your
application.
1−12
Festo P.BE−SPC200−SMX−1−EN en 0503b
Fitting
Chapter 2
Festo P.BE−SPC200−SMX−1−EN en 0503b
2−1
2. Fitting
Contents
2.
Fitting . . . . . . . . . . . . . . . . . . . . . . . . . . . . . . . . . . . . . . . . . . . . . . . . . . . . . . . .
2−1
2.1
2.2
Fitting and removing the stepping motor indexer module . . . . . . . . . . . . . . .
Fitting the electric axis and the stepping motor controller . . . . . . . . . . . . . .
2.2.1
Arrangement of the sensors . . . . . . . . . . . . . . . . . . . . . . . . . . . . . . .
2−4
2−7
2−8
2−2
Festo P.BE−SPC200−SMX−1−EN en 0503b
2. Fitting
Warning
Before carrying out installation and/or maintenance work,
switch off the following in the sequence specified:
1. the compressed air supply
2. all load and operating voltage supplies on the SPC200
and the connected components of the positioning
system.
You can thereby avoid:
unexpected movements of the connected actuators
uncontrolled movements of loose tubing
undefined switching states.
Festo P.BE−SPC200−SMX−1−EN en 0503b
2−3
2. Fitting
2.1
Fitting and removing the stepping motor indexer module
Caution
Modules may be damaged if they are not handled cor
rectly.
S Do not therefore touch the contacts of the components.
S Observe the regulations for handling electrostatically
sensitive components.
Discharge yourself electrostatically before fitting or removing
components in order to protect the components against dis
charges of static electricity.
Note the following when fitting the module:
The stepping motor indexer module can be fitted as de
sired into any of the slots 2 to 6. Individual identification
of all fitted modules takes place automatically.
The axis identifiers are assigned to the modules or the
connected axes in ascending order from left to right with
out gaps.
Maximum 3 stepping motor indexer modules can be
fitted.
If a stepping motor indexer module is fitted next to the
diagnostic module, a control panel cannot be connected
because of the plug for the cable to the stepping motor
controller.
The modules are fastened on the rack with the aid of a lock
ing lever. A tool is not therefore required for fitting or remov
ing a module.
2−4
Festo P.BE−SPC200−SMX−1−EN en 0503b
2. Fitting
Warning
Actuators may make sudden unexpected movements and
the SPC200 will be damaged if modules are added or re
moved whilst the power supply is switched on. Before
carrying out installation and/or maintenance work, switch
off the following power supplies in the sequence specified:
1. the compressed air supply
2. all load and operating voltage supplies on the SPC200
and the connected components of the positioning
system.
Fitting modules
Proceed as follows when fitting a module into the rack:
1. Switch off the compressed air supply and the operating
voltage supply.
2. If necessary, remove blanking plate.
3. Hold the module by the front plate and push it into the
guide rail. Make sure that the modules are not tilted when
they are pushed in and that no components on the
printed circuit board are damaged.
4. Make sure that the plugs of the terminal strips are cor
rectly aligned. Then gently push the module in as far as
possible. The retaining levers will then lock automatically
(see diagram).
Festo P.BE−SPC200−SMX−1−EN en 0503b
2−5
2. Fitting
1 Direction for
unlocking
2 Locks
automatically
3 Retaining lever
1
4 Front plate of the
2
module
5 Terminal strip
6 Guide rail
3
4
1
5
6
Fig.2/1: Installing the modules
Removing modules
Proceed as follows when removing a module:
1. Switch off the operating voltage and the compressed air
supply.
2. Loosen and pull off the connecting cable on the front of
the module.
3. Unlock both locking levers (see diagram) and carefully
pull out the module.
4. If necessary, seal the unused slots with blanking plates.
2−6
Festo P.BE−SPC200−SMX−1−EN en 0503b
2. Fitting
2.2
Fitting the electric axis and the stepping motor controller
Notes on fitting the electric axis and the stepping motor
controller can be found in the following documentation:
the documentation supplied with the stepping motor
controller,
the pneumatics manual for the positioning system type
P.BE−ATP−...,
the operating instructions for the electric linear axis used,
the instructions for the components used.
Please note
By the arrangement of the limit switches and by additional
appropriate mechanical stops, make sure that the axis
always lies within the positioning range limited by the
hardware limit switches.
Use the correct type of switch for the necessary reference and
limit switches:
Festo P.BE−SPC200−SMX−1−EN en 0503b
Sensor
Contact
Reference switch
N.O. = normally open
Limit switches
N.C. = normally closed
2−7
2. Fitting
2.2.1 Arrangement of the sensors
Please note
Please note that:
the axis must be in the positioning range in order to
carry out reference travel.
the complete ranges outside the permitted positioning
range are covered by limit switches (the slide must
never stand between the switching range of the hard
ware limit switch and the mechanical limit stop).
the switching range of the hardware limit switch, e.g. in
the event of programming faults, must permit destruc
tive−free braking (stroke reserve).
The usual arrangement of the sensors on an electric axis with
safety limit switches is shown in the following diagram.
2−8
Festo P.BE−SPC200−SMX−1−EN en 0503b
2. Fitting
1
LIM−
REF
LIM+
2
3
4
Strokereser ve
Brakingrange
1 Sensor connections for control
2 Sensor connections for the
EMERGENCY STOP circuit
3 Positioning range
Strokereser ve
Brakingrange
5
6
4 Switching range of the reference
switch
5 Switching ranges of the hardware limit
switch (braking range < stroke reserve)
6 Switching ranges of the safety limit
switch (EMERGENCY STOP range)
Fig.2/2: Arrangement of the sensors
Festo P.BE−SPC200−SMX−1−EN en 0503b
2−9
Installation
Chapter 3
Festo P.BE−SPC200−SMX−1−EN en 0503b
3−1
3. Installation
Contents
3.
Installation . . . . . . . . . . . . . . . . . . . . . . . . . . . . . . . . . . . . . . . . . . . . . . . . . . .
3−1
3.1
General instructions . . . . . . . . . . . . . . . . . . . . . . . . . . . . . . . . . . . . . . . . . . . . .
3.1.1
Overview of electrical installation . . . . . . . . . . . . . . . . . . . . . . . . . . .
Connecting the sensors . . . . . . . . . . . . . . . . . . . . . . . . . . . . . . . . . . . . . . . . . .
Connecting the stepping motor controller and the stepping motor . . . . . . .
Connecting the control cable . . . . . . . . . . . . . . . . . . . . . . . . . . . . . . . . . . . . . .
3−3
3−5
3−6
3−8
3−8
3.2
3.3
3.4
3−2
Festo P.BE−SPC200−SMX−1−EN en 0503b
3. Installation
3.1
General instructions
Warning
Before carrying out installation and/or maintenance work,
switch off the following in the sequence specified:
1. the compressed air supply
2. all load and operating voltage supplies on the SPC200
and the connected components of the positioning
system.
Load and operating voltage supplies:
The load voltage supply for field devices and proportional
directional control valves (plug X2, pin 1)
The load voltage supply for the outputs (plug X6/X8,
pin8)
If applicable, the load voltage supply on the axis interface
string
The operating voltage supply for the internal electronics
of the SPC200 and field devices (plug X2, pin 2)
The sensor supply on the stepping motor indexer module
(connection SIGNALS, pin 4)
The operating voltage supply on the stepping motor con
troller
You can thereby avoid:
undesired movements of the connected actuators
uncontrolled movements of loose tubing
undefined switching states
damage to the electronic components.
Festo P.BE−SPC200−SMX−1−EN en 0503b
3−3
3. Installation
Please note
Connection to the main power supply and the fitting of
mains switches, transformers, fuses and mains filters may
only be carried out by a qualified electronics engineer.
Caution
Place motor cables and control cables at a distance from
each other where possible, e.g. in cable channels with in
termediate walls. Use only screened cables for connection
to the motor. Twist the control cables in pairs.
In this way you can avoid electromagnetic interference which
might impair reliable operation of the system.
Please note
Lay all moveable motor and sensor cables free of bends
and free of mechanical stress, if necessary, in a drag chain.
3−4
Festo P.BE−SPC200−SMX−1−EN en 0503b
3. Installation
3.1.1 Overview of electrical installation
1
2
aJ
9
8
7
3
6
4
5
1 Motor
2 Electromechanical linear drive
3 Motor cable
4 Sensor cable
(reference and limit switches)
5 Control cabinet
6 SPC200 with stepping motor indexer
module
7 Control cable (e.g. KSPC−SECST−...)
8 Stepping motor controller
(e.g. SEC−ST)
9 Main switch
aJ Power unit
Fig.3/1: Overview of electrical installation
Festo P.BE−SPC200−SMX−1−EN en 0503b
3−5
3. Installation
3.2
Connecting the sensors
Warning
S Use only PELV circuits as per IEC/DIN EN 60204−1 (Pro
tective Extra−Low Voltage, PELV) for the electrical supply.
Consider also the general requirements for PELV circuits
in accordance with IEC/DIN EN 60204−1.
S Use power supplies which guarantee reliable electrical
isolation of the operating voltage as per IEC/DIN EN
60204−1.
By the use of PELV circuits, protection against electric shock
(protection against direct and indirect contact) is guaranteed
in accordance with IEC/EN 60204−1 (Electrical equipment for
machines, General requirements).
Please note
Check within the framework of your EMERGENCY STOP
circuit to ascertain the measures necessary for putting
your machine/system into a safe state in the event of an
EMERGENCY STOP (e.g. switching off the operating volt
age, switching off the compressed air).
3−6
Festo P.BE−SPC200−SMX−1−EN en 0503b
3. Installation
1 LIM+: Positive
6
limit switch
1
2 REF: Reference
2
switch
3 LIM−: Negative
3
limit switch
4
4 24 V: Supply
5
5 0 V: Supply
6 Earth/ground
6
connection
Fig.3/2: Pin assignment of sensor plug (SIGNALS, X31)
Use the correct type of switch for the necessary limit and
reference switches (see section Fitting").
When selecting the sensors, note that the accuracy of the
switchover point of the sensors determines the accuracy of
the reference point.
You must make sure that the switchover point always lies
within a step resolution.
The following diagram shows as an example the connection of
the sensors.
LIM+
REF
LIM−
24V
0V
24V
0V
DC
AC
Fig.3/3: Connection diagram for the sensors
Festo P.BE−SPC200−SMX−1−EN en 0503b
3−7
3. Installation
3.3
Connecting the stepping motor controller and the stepping motor
Fit the stepping motor controller and the motor cable in
accordance with the accompanying description.
Please note
In order to comply with EMC, a mains filter may have to be
installed between the mains supply cable and the stepping
motor controller.
3.4
Connecting the control cable
There is a sub−D plug on the stepping motor indexer module
for connecting the SPC200 to the stepping motor controller
(AMPLIFIER, X30).
This plug has been designed for stepping motor controllers
with 5 V control signals.
Use the special cables from the Festo range for connecting
the stepping motor controller.
If you use a stepping motor controller from a different manu
facturer, you must prepare a cable in accordance with the
manufacturer’s instructions.
In this case, connect the cable screening on both sides with
the plug housing.
3−8
Festo P.BE−SPC200−SMX−1−EN en 0503b
3. Installation
1
15
.
.
.
9
8
.
.
.
2
1
1 AMPLIFIER connection
Fig.3/4: Control plug (AMPLIFIER, X30)
Pin assignment of control plug (AMPLIFIER, X30)
Pin
Signal
SEC−ST
Pin
Signal
SEC−ST
1
+ PULSE
Clk + 5
9
− PULSE
Clk −
2
+ DIRECTION
Dir + 5
10
− DIRECTION
Dir −
3
+ ENABLE
En + 5
11
− ENABLE
En −
4
Not connected
12
Not connected
5
+ F/H STEP (full/half step)
1)
13
Not connected
6
− F/H STEP (full/half step)
1)
14
Not connected
7
Not connected
15
− READY
1) 2)
8
+ READY
1) 2)
1)
2)
Not used with stepper motor controller SEC−ST
Connections bridged in the connecting cable
Festo P.BE−SPC200−SMX−1−EN en 0503b
3−9
3. Installation
Meaning of the signals on the control plug:
Signal
Meaning
+/− READY
Input:
Readiness of the stepping motor controller via
relay contact.
+/− PULSE
Output:
Step control for the motor; each rising signal edge
corresponds to a step.
+/− DIRECTION Output:
Determines the direction of rotation of the motor.
3−10
+/− ENABLE
Output:
Enable signal for the stepping motor controller.
+/− F/H STEP
Output:
Defines whether the motor is controlled for full or
half step.
Festo P.BE−SPC200−SMX−1−EN en 0503b
Commissioning
Chapter 4
Festo P.BE−SPC200−SMX−1−EN en 0503b
4−1
4. Commissioning
Contents
4.
Commissioning . . . . . . . . . . . . . . . . . . . . . . . . . . . . . . . . . . . . . . . . . . . . . . . .
4−1
4.1
4.2
4.3
Procedure for commissioning . . . . . . . . . . . . . . . . . . . . . . . . . . . . . . . . . . . . .
Preparations for commissioning . . . . . . . . . . . . . . . . . . . . . . . . . . . . . . . . . . .
Commissioning with WinPISA . . . . . . . . . . . . . . . . . . . . . . . . . . . . . . . . . . . . .
4.3.1
Selecting a specification for the axis . . . . . . . . . . . . . . . . . . . . . . . .
4.3.2
Configuration of the axis parameters . . . . . . . . . . . . . . . . . . . . . . . .
4.3.3
Configuration of the application parameters . . . . . . . . . . . . . . . . . .
4.3.4
Configuration of the settings for analogue reference value
specification . . . . . . . . . . . . . . . . . . . . . . . . . . . . . . . . . . . . . . . . . . . .
4.3.5
Loading the axis configuration into the SPC200 . . . . . . . . . . . . . . .
4.3.6
Functional check of the stepping motor axes . . . . . . . . . . . . . . . . .
Commissioning with the control panel . . . . . . . . . . . . . . . . . . . . . . . . . . . . . .
4.4.1
Setting project−specific parameters . . . . . . . . . . . . . . . . . . . . . . . . .
4.4.2
Functional check of the stepping motor axes . . . . . . . . . . . . . . . . .
Program example . . . . . . . . . . . . . . . . . . . . . . . . . . . . . . . . . . . . . . . . . . . . . . .
Instructions on operation . . . . . . . . . . . . . . . . . . . . . . . . . . . . . . . . . . . . . . . . .
4−3
4−4
4−7
4−8
4−11
4−12
4.4
4.5
4.6
4−2
4−22
4−22
4−23
4−27
4−28
4−30
4−34
4−35
Festo P.BE−SPC200−SMX−1−EN en 0503b
4. Commissioning
4.1
Procedure for commissioning
For user−friendly commissioning and programming of an
SPC200 with stepping motor indexermodule, you will require
the WinPISA software package as from version 4.3.
However, commissioning can also be carrried out by means of
the control panel.
The following list provides an overview of the steps required
for commissioning:
1. Check the stepping motor controller. Set the necessary
parameters on the stepping motor controller. Check the
function and arrangement of the limit switches.
Provide the necessary system inputs on the SPC200
(seePreparingcommissioning).
General commissioning of the SPC200:
2. First check and save the hardware configuration of the
SPC200 (see WinPISA or SPC200 manual).
Commissioning the stepping motor axes:
3. Set the axis and application parameters for the stepping
motor axes to be used.
4. Check the function of the stepping motor axes:
Inputs (reference and limit switches)
Rotational direction of the stepping motor
Positioning the axis
Reference travel
5. Check that each axis has been correctly commissioned by
means of a simple test program.
Festo P.BE−SPC200−SMX−1−EN en 0503b
4−3
4. Commissioning
4.2
Preparations for commissioning
Check the connection to the mains power supply
S
Make sure that the stepping motor controller and the
SPC200 are disconnected from the power supply.
Check the voltage for the stepping motor controller and the
24 V power supply.
Check that the stepping motor controller is correctly
installed
S
Check the installation of the stepping motor controller in
accordance with the accompanying documentation.
Set the parameters of the stepping motor controller
Caution
The stepping motor and the stepping motor controller may
be damaged when under tension if the pre−settings are
incorrect.
Leave the main switch switched off until all the parameters
have been set correctly.
S
4−4
Check the settings on the stepping motor controller
(see manual for the stepping motor controller), e.g.:
the phase current
the step size
the step mode (or Micro/Half step)
the direction of rotation
the current reduction.
Festo P.BE−SPC200−SMX−1−EN en 0503b
4. Commissioning
The settings of the maximum phase current depend on the
stepping motor connected. The maximum permitted phase
current is specified on the type plate of the stepping motor.
Caution
Excessive currents can damage the motor.
Do not set a current higher than that specified for the
motor, as otherwise the motor will be overloaded.
Select the next lower value if the specified current cannot be
set.
Please refer to the documentation on the stepping motor con
troller for the correct pre−settings and for instructions on opti
mizing the settings.
Switching on the power supply on the SPC200
Please note
Make sure that the axis is always within the positioning
range defined by the limit switches when it is switched on
and before the start of reference travel.
When you have checked the installation and parametrizing of
the stepping motor controller, switch on the power supply for
the SPC200.
Festo P.BE−SPC200−SMX−1−EN en 0503b
4−5
4. Commissioning
Electric linear axis
Proceed as described in the operating instructions for the
electric linear axis.
Check especially the position and functioning of the limit
switches.
Carry out the first tests as follows:
with the compressed air switched off (providing pneu
matic axes are connected to the SPC200)
without work load
with disconnected coupling.
If the motor continues to run when the power supply for the
stepping motor controller is switched on, switch off the power
supply immediately and check the signal connections as well
as the earth and power cables.
System inputs for commissioning
With some commissioning steps, e.g. the signals ENABLE,
START and STOP are required for controlling the axes. For
commissioning stepping motor axes e.g. with the steps:
Move to reference point
In some cases emergency movement (diagnosis and fault
treatment)
Test and start program
Instructions on providing the signals can also be found in the
SPC200 or WinPISA manuals, in some cases also in the man
ual for the field bus module.
4−6
Festo P.BE−SPC200−SMX−1−EN en 0503b
4. Commissioning
4.3
Commissioning with WinPISA
For commissioning with WinPISA you must simulate the
existing hardware configuration in WinPISA. Refer here to the
WinPISA manual for the necessary steps.
With the existing stepping motor indexer module there are
one or several stepping motor interfaces in the project win
dow under the SPC200. A stepping motor axis is assigned to
each stepping motor interface.
Fig.4/1: Stepping motor interface
Configuring the axis
In order to configure a stepping motor axis, select the icon of
the axis in the project window. With the command [Edit]
[Configure] or with a double click on the axis icon, you can
open the relevant dialogue window Parameter set for the
..axis."
Caution
Incorrectly set parameters can lead to uncontrolled reac
tions of the connected axes during operation.
Festo P.BE−SPC200−SMX−1−EN en 0503b
4−7
4. Commissioning
Fig.4/2: Parameter set for the .. axis, register card
Axisparameters"
4.3.1 Selecting a specification for the axis
A large number of settings and parameters must be defined
for an electric axis.
Specifications for drive packages can be selected for this pur
pose. The specifications are saved in planning files (*.pta). A
series of typical specifications can be found in the delivery
scope of WinPISA. You can create these specifications your
self with the aid of the Planning Tool (PtTool).
Information on further necessary entries can be found in the
following sections.
4−8
Festo P.BE−SPC200−SMX−1−EN en 0503b
4. Commissioning
Please note
The SPC200 with stepping motor indexer module can be
used with various stepping motor controllers.
By selecting an appropriate specification for the axis, you
determine the following:
the calculation of the resulting resolution,
the support of the control output F/H−STEP of the step
ping motor indexer module.
Select the specification for the axis as follows:
1. Press the button Select" in the dialogue window Para
meter set for the .. axis," in order to select a specification.
2. In the dialogue window Axis selection" under Projected
axes," all the electric axes are displayed which exist in the
standard directory for planned axes.
With Search" you can also display axes from a different
directory.
Fig.4/3: Axis selection (stepping motor controller SEC−ST)
Festo P.BE−SPC200−SMX−1−EN en 0503b
4−9
4. Commissioning
3. Select from the list Projected axes" the axis which corre
sponds to the actual axis of your positioning system (see
following table). Accept the specification with Ok."
Controller
Motor
Effects in WinPISA and in the SPC200
New drive package
from Festo with
stepping motor
controller SEC−ST.
MTR−ST−...
New drive package
from Festo with inte
grated stepping motor
controller MTRE−ST.
MTRE−ST−...
The stepping motor controller supports the step modes
1/1, 1/2, 1/4, 1/5, 1/8 and 1/10 step. The stepping mode
is set by means of the DIP switch on the controller.
The step mode set on the stepping motor controller must
be set in WinPISA.
WinPISA WinPISA calculates from this the resul
resul
ting resolution which is saved in the SPC200 (see section
4.3.3). 1)
Output F/H−STEP of the stepping motor indexer module is
not used.
Old drive package from
Festo with stepping
motor controller
MRC−...
VRDM−... (or
MTR−VRDM−...)
1)
The stepping motor controller supports Full/Half step
modes.
With the setting Half step," output F/H STEP of the
stepping motor indexer module will be set when the
stepping motor controller is actuated.
WinPISA supports for the MTRE−ST−... only the step modes 1/1 and 1/2.
Please note
The new drive packages with stepping motor controller
SEC−ST are supported only with WinPISA as from version
4.3 and SPC200 as operating system version 4.6.
Check and, if necessary, correct the settings in the register
cards Axis parameters" and Application parameters" as
described in the following sections.
The specifications for the axes in the delivery scope of
WinPISA are usually preset on the step mode 1/2 as well as
on a start−stop frequency of 400 Hz.
4−10
Festo P.BE−SPC200−SMX−1−EN en 0503b
4. Commissioning
4.3.2 Configuration of the axis parameters
Check and, if necessary, correct the settings in the register
card Axis parameters" in accordance with your system.
Description of the parameters under
Axisparameters"
The axis parameters are configuration data which describe
the composition, the properties and the components of the
axis used.
When an axis is inserted from the Planning Tool, the appropri
ate information on the linear drive is shown in the display
fields. After an upload these fields appear empty, as this in
formation is not saved in the SPC200.
Designation
The designation of the linear drive used for the electric axis
(display field).
Length
The length of the linear drive used for the electric axis
(see type plate).
Permitted: 50 ... 10.000 [mm]
Diameter
The size of the linear drive used for the electric axis
(see type plate, parameter only for information).
Permitted: 8 ... 320 [mm]
Motor
The designation of the stepping motor used for the electric
axis (display field).
Steps/turn
The number of steps per turn of the stepping motor used for
the electric axis (display field).
Gear
The designation of the gear used for the electric axis (display
field).
Festo P.BE−SPC200−SMX−1−EN en 0503b
4−11
4. Commissioning
4.3.3 Configuration of the application parameters
Check and, if necessary, correct the settings in the register
card Application parameters" in accordance with your
system.
Fig.4/4: Parameter set for the .. axis, register card
Application parameters"
Description of the parameters under Application
parameters"
The application parameters are configuration data which de
scribe the conditions of use specified by the application.
4−12
Festo P.BE−SPC200−SMX−1−EN en 0503b
4. Commissioning
Resolution with full step
Steps per mm positioning path with step mode Full step"
(1/1):
Resolutionwithfullstep +
stepsńturn
feedconstant < transmissionratio
Permitted: 0.01000 ... 9999.99999 [1/mm]
Description of the parameters:
Parameters
Description
Steps/turn
Number of steps per revolution of the stepping
motor:
stepsńturn + 360°
stepangle
(step angle see type plate)
Feed constant
Feed in mm per turn of the input shaft (linear
axis)
Transmission ratio
Transmission ratio i of the gear (see type plate)
Example:
Steps/turn (step angle = 1.8°) = 200 1/turn
Feed constant = 32 mm/turn
Transmission ratio = 1 (no gears)
200Stepsńturn
32mmńturn < 1
+ 6.25000Stepsńmm
Resolutionwithfullstep +
Please note
The parameter Resolution with full step" us only used to
determine the final resolution, but not saved in the
SPC200.
Only the parameters Resolution" and "Step mode" are
saved.
Festo P.BE−SPC200−SMX−1−EN en 0503b
4−13
4. Commissioning
Stepper mode
(MICRO/HALF STEP)
New as from WINPISA 4.3:
Step mode of the stepping motor controller.
The parameter "Stepper mode" replaces the parameter
Micro/half step (control panel: MICRO/HALF STEP) of previ
ous WinPISA and operating system versions.
Function and setting possibilities of the parameter depend on
the selected axis and on the stepping motor controller (see
following table and section 4.3.1).
Selected
motor
Stepping motor Step
controller
mode
Output
Meaning
F/H STEP
MTR−ST−...
SEC−ST
1/1
1/2
1/4
1/5
1/8
1/10
0
0
0
0
0
0
MTRE−ST−...
Motor with
integrated
controller
1/1
1/2
0
0
VRDM−...
(or MTR−
VRDM−...)
MRC−WS...
Full step
Half step
0
1
The setting of the step mode must
correspond to the DIL switch settings
on the controller.
The resulting resolution will be
calculated as per formula (see
Resolution").
The output F/H STEP on the stepping
motor indexer module of the SPC200
is not supported, it remains at 0"
irrespective of mode.
The control panel always shows 0"
(see section 4.4.1).
With half step the output F/H STEP
will be set on the stepping motor
indexer module of the SPC200.
New as from WinPISA 4.3:
The resulting resolution will be
calculated automatically as per
formula (see "Resolution").
With the control panel the step mode
can be modified (0 or 1, see section
4.4.1).
Please note
The parameter Stepper mode" will be saved together with
the resulting Resolution" in the SPC200.
4−14
Festo P.BE−SPC200−SMX−1−EN en 0503b
4. Commissioning
The specifications for the axes in the delivery scope of
WinPISA are usually preset on the step mode 1/2 as well as
on a start−stop frequency of 400 Hz.
Recommendation:
In order to achieve smaller susceptibility for resonance ef
fects, operate 2−phase stepping motors with step mode 1/2.
Note that the torque of the motor is thereby reduced.
Resolution
Steps per mm positioning path resulting from the resolution
with full step" (1/1) and the selected step mode.
The following applies:
1/1
ȡ12
ȡ
1/2
4
1/4
ȧ
ȧ
Resolution + resolutionwithfullstep < ȥ5 withstepmodeȥ 1/5
1/8
8
ȧ
ȧ
Ȣ1/10
Ȣ10
Accuracy: 0.01000 ..9999.99999 [1/mm]
Start−stop frequency
Frequency with which the stepping motor can start and stop
reliably at the required rotational speed (without loss of
step).
Permitted: 80 ... 5000 [Hz]
Caution
By unfavorable choice of the start−stop frequency reson
ance effects can occur with positioning the axis, which can
lead to step losses.
Consider the manufacturer data for the permitted operat
ing conditions of the used motors and drives, e.g. for the
permitted start−stop frequency.
Festo P.BE−SPC200−SMX−1−EN en 0503b
4−15
4. Commissioning
With the following parameters 3 to 6 (see Fig.4/5) you
can specify the reference points of your positioning system.
The machine zero point is defined by the coordinate of the
reference point. All further positions refer to the thus defined
machine zero point.
1 Machine zero
point
2 Reference and
1
2
LIM−
2
REF
2
LIM+
limit switches
3 Reference
3
position
4
4 Lower software
end position
5
5 Upper software
6
end position
6 Project zero point
Fig.4/5: Reference points
Project zero point
Point related to the machine zero point. All positions in posi
tion registers and programs refer to the project zero point.
Permitted: 0.0 ... 10.0000 [mm]
Lower software end
position
Defined end position on the side of the machine zero point
which is monitored by the SPC200 and which must not be
overrun. The lower software end position refers to the ma
chine zero point and represents the lower limit of the posi
tioning range.
Permitted: 0.0 ... 10.0000 [mm]
4−16
Festo P.BE−SPC200−SMX−1−EN en 0503b
4. Commissioning
Upper software end
position
Defined end position on the side opposite the machine zero
point which is monitored by the SPC200 and which must not
be overrun. The upper software end position refers to the
machine zero point and represents the upper limit of the
positioning range.
Permitted: 0.0 ... 10.0000 [mm]
If both software end positions are set to 0," their function
will have no effect.
Reference position
Coordinate of the reference point related to the machine zero
point. The machine zero point is defined by this value based
on the switching point of the reference switch.
Permitted: 0.0 .. 10.0000 [mm]
The exact position of the switching point of the reference
switch depends on the selected reference travel mode.
Reference speed factor
With this factor the positioning speed VRef of the reference
travel, related to the configured maximum speed, is deter
mined (see Fig.4/6).
Permitted: 0.01 ... 1.00
Caution
By unfavorable choice of the reference speed factor reson
ance effects can occur with the reference travel of the axis.
Consider the manufacturer data for the permitted operat
ing conditions of the used motors and drives, e.g. for the
permitted speeds.
Recommendation:
Do not set the reference speed less than the start−stop fre
quency.
Festo P.BE−SPC200−SMX−1−EN en 0503b
4−17
4. Commissioning
Please note
When specifying the maximum speed and maximum accel
eration, take into account the limits of the linear axis used
(maximum permitted speed and feed force).
Maximum speed
Speed for positioning with command G00 or maximum speed
for positioning with command G01. The speed factor speci
fied with command G01 refers to the maximum speed defined
here.
Permitted: 0.1 ... 10.0 [m/s]
Note that the maximum permitted step frequency (position
ing frequency) with the SPC200 is 40 kHz. The maximum step
frequency is calculated from the product of the resolution
and the maximum speed:
Stepfrequency + resolution < speed
Maximum acceleration
Maximum acceleration for positioning with the commands
G00 and G01. The acceleration factor specified with the com
mand G08 refers to the maximum acceleration defined here.
Permitted: 0.1 ... 100.0 [m/s2]
Note that due to too small accelerations resonance effects
can occur.
4−18
Festo P.BE−SPC200−SMX−1−EN en 0503b
4. Commissioning
Determined number of revolutions and run−up
period
From the set application data the maximum number of revol
utions as well as the run−up period are determined and indi
cated:
Value
Description
Revolution
Number of revolutions with the configured maximum speed and resolution:
Resolutionwithfullstep < Maximumacceleration
Revolution +
Stepsńturn
Example: Revolution +
Run−up period
1
m
s
6.25 mm
< 1000 mm
m < 0.2 s < 60 min
200 U1
+ 375 turns
min
Time, in which the drive with the max. acceleration configured reaches the maxi
mum speed:
Run * upperiod +
Example: Run * upperiod +
Maximumvelocity
Maximumacceleration
0.2 ms
2.0 m2
+ 0.1s
s
Reference travel mode
Mode with which reference travel is to be carried out. This
pre−setting applies to reference travel which has been
started:
in the dialogue window Commissioning the stepping
motor" (Command [Online] [Commission] [Stepping
motor]),
or with the control panel.
Permitted: 0 ... 4
With command G74 the reference travel mode in the NC pro
gram will be defined individually.
Festo P.BE−SPC200−SMX−1−EN en 0503b
4−19
4. Commissioning
Reference travel modes (see also Fig.4/6):
Mode
Description
0
Accepting the current axis position as reference point
1
Reference travel in negative direction to reference switch
(REF) with acceptance as reference point
2
Reference travel in negative direction to negative limit
switch (LIM−) with acceptance as reference point
3
Reference travel in positive direction to reference switch
(REF) with acceptance as reference point
4
Reference travel in positive direction to positive limit
switch (LIM+) with acceptance as reference point
Note that reference travel with modes 1 and 3 will result in
different reference points.
During reference travel the axis moves according to Fig.4/6.
The mechanical arrangement of the reference or limit
switches clearly determines the reference point of an axis. In
each case, the position accepted as reference point is that at
which the slide leaves the switching range of the sensor.
Caution
If an incorrect reference travel mode is set, this can lead to
collisions, as all positions of the axis refer to the reference
point.
When carrying out reference travel, make sure that the
correct mode is used.
4−20
Festo P.BE−SPC200−SMX−1−EN en 0503b
4. Commissioning
1 Starting position
LIM−
LIM+
REF
2 Position accepted
as reference
point
Mode0:
3 Switching ranges
Mode1:
Casea:
of end and
reference
switches
Caseb:
SS
SS
VRef
2
SS
Mode2:
SS
VRef
SS
VRef
Mode3:
Casea:
SS
VRef
Caseb:
Speeds during reference
travel:
VRef: Reference speed
factor * maximum
speed
SS: Start−stop fre
quency
1
VRef
SS
Mode4:
VRef
3
SS
SS
3
SS
3
Fig.4/6: Reference travel modes
After a limit switch fault, the axis loses the reference point.
When the fault has been eliminated, new reference travel
must be carried out with the axis.
If reference travel is started after a limit switch fault (without
Power off/on), the axis will try to leave or find the last actu
ated switch with the start−stop frequency (SS). If the switch is
neither left nor found, the axis will move to the opposite limit
switch.
Festo P.BE−SPC200−SMX−1−EN en 0503b
4−21
4. Commissioning
4.3.4 Configuration of the settings for analogue reference value
specification
The settings for analogue reference value specification in the
register card Analogue reference value" are identical to the
settings for pneumatic axes.
Information on the settings can be found in the WinPISA
manual.
4.3.5 Loading the axis configuration into the SPC200
Providing the hardware configuration of the SPC200 corre
sponds to the project, you can load the configured values into
the SPC200 in the dialogue window Parameter set for the
..axis."
The online mode must be active for this purpose. If necessary,
close the dialogue window Parameter set for the .. axis" and
activate the online mode.
While the online mode is active, load the relevant data in the
individual register cards into the SPC200 with the button
Download."
4−22
Festo P.BE−SPC200−SMX−1−EN en 0503b
4. Commissioning
4.3.6 Functional check of the stepping motor axes
When the axis and application parameters have been set,
check that the axes function correctly.
Preparations for the functional check:
S
Check to see if the coupling between the motor and the
linear axis has been loosened. If this is not the case,
loosen the coupling.
S
Leave the stepping motor controller switched off. If
necessary, switch this off.
S
When the axis moves in accordance with the functions in
the dialogue window Commission stepping motor," it
moves in each case at the set reference speed.
If necessary, set a lower reference speed factor during the
functional check of the axes.
Proceed with the functional check as follows:
1. Select the command [Stepping motor] in the menu
[Online] [Commissioning] in active online mode. The
dialogue window Commission stepping motor" will be
displayed.
Festo P.BE−SPC200−SMX−1−EN en 0503b
4−23
4. Commissioning
Fig.4/7: Dialogue window Commission stepping motor"
Checking the inputs
2. Make sure that the end and reference switches function
correctly. In order to do this, you can move the axis by
hand when the stepping motor controller is switched off.
Select the desired stepping motor axis under Axis
selection." Check the checkboxes of the relevant inputs
under Status of the inputs."
Note the different designs of sensors:
4−24
Limit switches (end switches): N.C., normally closed
Reference switch: N.O., normally open
Festo P.BE−SPC200−SMX−1−EN en 0503b
4. Commissioning
3. Make sure that the axis is always within the positioning
range defined by the limit switches when it is switched on
and before the start of reference travel.
Now switch on the stepping motor controller. Under
Status of the inputs," the checkbox Servo ready" shows
that the stepping motor controller is ready to operate.
Checking the direction
of rotation
4. By actuating the arrow buttons under Procedure," you
can determine the direction in which the motor is to ro
tate.
The motor should only rotate when the relevant button is
actuated.
Check the direction of rotation with regard to the result
ing direction of movement of the axis. If necessary,
switch off the stepping motor controller again and adjust
the direction of rotation.
Positioning the axis
5. If the steps up till now have been carried out without any
faults, you can now connect the coupling and move the
axis with the arrow buttons under Procedure." The axis
will then move at the configured reference speed.
Check that the limit switches function correctly. In order to
do this, move the axis up to the limit switches: the posi
tive limit switch switches when moving in the positive
direction; the negative limit switch switches when moving
in the negative direction.
Festo P.BE−SPC200−SMX−1−EN en 0503b
4−25
4. Commissioning
With the function Emergency travel," you can move into
the positioning range again after a limit switch has been
actuated. Select here the option Emergency travel"
under Activity" and start this with Start."
The axis moves in the reverse direction (towards the posi
tioning range providing the limit switch is connected cor
rectly), until the limit switch is left. Travel is interrupted if
the limit switch is not left within 2 seconds or if the button
Stop" is actuated.
Reference travel
6. Select the option Reference travel" under Activity."
Check the mode displayed for reference travel.
Start reference travel with the button Start." During
reference travel the button Start" changes to Stop."
With Stop" you can interrupt the current reference
travel.
The relevant position of the axis, related to the position
of the machine zero point, is shown under Procedure."
After successful reference travel the functional check of the
axis is completed.
4−26
Festo P.BE−SPC200−SMX−1−EN en 0503b
4. Commissioning
4.4
Commissioning with the control panel
If you wish to carry out commissioning with the control panel
type SPC200−MMI−1, you should be familiar with the functions
of the control panel. Leave the power supply for the stepping
motor controller (if necessary, also the compressed air sup
ply) switched off. An overview of the menu system on the
control panel can be found in the user manual for the
SPC200.
Please note
The control panel type SPC200−MMI−.. does not support all
new or extended functions of the SPC200 with firmware as
from version 4.6.
The prerequisite for commissioning a stepping motor axis is
that the current hardware configuration of the SPC200 is
saved (see user manual for the SPC200).
Proceed here as described in the following sections.
Festo P.BE−SPC200−SMX−1−EN en 0503b
4−27
4. Commissioning
4.4.1 Setting project−specific parameters
Cautio
Incorrectly set parameters can lead to uncontrolled reac
tions of the connected axes during operation.
The SPC200 must know the conditions of use in your project
and the type of components used in your positioning system.
Undertake the necessary settings in the following menus:
Menu
Description
SPC200 READY
AXIS PARAM. >
Axis parameters;
Specifications on the axes used
SPC200 READY
APPLIC. PARAM.>
Application parameters;
Specifications on the conditions of use
When you have selected a menu, use the arrow buttons to set
the axis identifiers of the stepping motor axis to be confi
gured and confirm this with the ENTER key:
AXIS PARAM.
X:
>>
You can then set the parameters described below.
4−28
Festo P.BE−SPC200−SMX−1−EN en 0503b
4. Commissioning
Axis parameters
Menu AXIS PARAM
Set the following parameters (description of the parameters
see section Commissioning with WinPISA"):
Menu AXIS PARAM (axis parameters)
CYL. LENGTH
Length of drive
Application parameters
Menu APPLIC PARAM
Set the following parameters (description of the parameters
see section Commissioning with WinPISA"):
Menu APPLIC PARAM (application parameters)
Festo P.BE−SPC200−SMX−1−EN en 0503b
RESOLUTION
Resolution
START/STOP FREQ
Start−stop frequency
POS. BASEPOINT
Project zero point
LOWER END POS.
Lower software end position
UPPER END POS.
Upper software end position
REFER. POSIT.
Reference position
REFER. SPEED
Reference speed factor
MAX. SPEED
Maximum speed
MAX. ACCELER.
Maximum acceleration
MODE OF REFER.
Reference travel mode
MICRO/HALF STEP
Step mode (Micro/Half step)
with SEC−ST−...: always 0
with MRC−...: 0 or 1
(see following sections)
4−29
4. Commissioning
On the control panel display the parameter MICRO/HALF
STEP corresponds to the step mode (see section 4.3.3).
If stepping motors type MTR−ST with the corresponding
power unit type SEC−ST are used or the integrated motor
unit MTRE−ST, the value 0" will always be shown. It must
not be modified with the control panel.
If stepping motors type "VRDM" are used and with the
corresponding power unit type "WS5", the stepper mode
can be modified with the control panel (0 or 1).
With the parameter RESOLUTION the resulting resolution will
be displayed and can be modified.
4.4.2 Functional check of the stepping motor axes
When the axis and application parameters have been set,
check that the axes function correctly.
1. Preparations for the functional check:
4−30
S
Check to see if the coupling between the motor and
the linear axis has been loosened. If this is not the
case, loosen the coupling.
S
Leave the stepping motor controller switched off. If
necessary, switch this off.
S
When the axis moves in accordance with the functions
in the dialogue window Commission stepping motor,"
it moves in each case at the set reference speed.
If necessary, set a lower reference speed factor during
the functional check of the axes.
Festo P.BE−SPC200−SMX−1−EN en 0503b
4. Commissioning
Check the inputs
2. Make sure that the end and reference switches function
correctly. In order to do this, you can move the axis by
hand when the stepping motor controller is switched off.
Select the command STEP MOTOR INPUT in the menu
DISPLAY and press the Enter key.
The cursor is positioned on the axis identifier. Select the
desired axis with v or V and position the cursor on the
entry LIM+ with }.
STEP MOTOR INPUT
Y: LIM+ = 1
With v or V switch between the inputs. The state of the
individual input is shown with 0" or 1."
When checking the sensors, note their different designs:
LIM+, LIM−:
Limit switches (end switches): N.C., normally closed
REF:
Reference switch: N.O., normally open
3. Make sure that the axis is always within the positioning
range defined by the limit switches when it is switched
on and before the start of reference travel.
Now switch on the stepping motor controller. The input
Servo ready" (SRDY) shows with a 1−signal that the
stepping motor controller is ready to operate.
Festo P.BE−SPC200−SMX−1−EN en 0503b
4−31
4. Commissioning
Checking the direction
of rotation
4. Select the command AXIS in the menu TEST/DIAG and
press the Enter key. With v or V select the identifier of
the stepping motor axis and confirm the selection with
the Enter key.
You are now in the menu TEST/DIAG AXIS.
Accept the command JOG AXIS with the Enter key. The
cursor is positioned on the sign +" after the coordinate
specification.
JOG AXIS
Y:+0000.00 +
With v or V you can switch between +" for positive
direction and −" for negative direction.
By pressing the Enter key, you can determine the direc
tion in which the motor is to rotate.
The motor should only rotate when the Enter key is
pressed.
Check the direction of rotation with regard to the resulting
direction of movement of the axis. If necessary, switch off
the stepping motor controller again and adjust the direc
tion of rotation.
Positioning the axis
5. If the steps up till now have been carried out without any
faults, you can now connect the coupling and move the
axis in the relevant set direction with the Enter key.
Check that the limit switches function correctly. In order to
do this, move the axis up to the limit switches: the posi
tive limit switch switches when moving in the positive
direction; the negative limit switch switches when moving
in the negative direction.
If necessary, check the status of the limit switches on the
control panel (command STEPMOTOR INPUT, see Step 2).
4−32
Festo P.BE−SPC200−SMX−1−EN en 0503b
4. Commissioning
With the function Emergency travel," you can move into
the positioning range again after a limit switch has been
actuated. In order to do this, select the command EXIT
FROM LIMIT in the menu TEST/DIAG AXIS with } and
confirm this with the Enter key.
EXIT FROM LIMIT
Y:+0326.88
?
Start emergency travel with the Enter key.
The axis moves in the reverse direction (towards the posi
tioning range providing the limit switch is connected cor
rectly), until the limit switch is left. Travel is interrupted if
the limit switch is not left within 2 seconds or if the Esc or
Enter key is pressed during reference travel.
Reference travel
6. If necessary, check again the configured mode for refer
ence travel.
Select the command REFERENCE TRAV in the menu
TEST/DIAG AXIS with }.
Start reference travel with the Enter key.
The relevant position of the axis, related to the position
of the machine zero point, is displayed:
REFERENCE TRAV.
Y:+0100.00
The current reference travel can be interrupted with the
Esc key or with the Enter key.
After successful reference travel the functional check of the
axis is completed.
Festo P.BE−SPC200−SMX−1−EN en 0503b
4−33
4. Commissioning
4.5
Program example
Enter a simple test program in order to check the configur
ation and the axis set−up.
Program some positioning movements.
Proceed as described in the section Commissioning ..." in
the SPC200 manual or in the WinPISA manual.
The test program for a stepping motor axis can contain e.g.
the following records:
NC record
Description
N000 G74 Y1 1) 2)
Reference travel in negative direction to
reference switch (REF)
N001 G04 100
Dwell time of 1 s
N002 G01 Y100 FY10 1)
Move at 10 % of the defined maximum
speed to Y = 100 mm
N003 G01 Y500 FY50 1)
Move at 50 % of the defined maximum
speed to Y = 500 mm
N004 G04 100
Dwell time of 1 s
N005 M30
Program end with repeat
1)
2)
Use the axis identifier of the stepping motor axis
Reference travel mode appropriate for the axis
Then check the program sequence as described in the
SPC200 manual or in the WinPISA manual.
4−34
Festo P.BE−SPC200−SMX−1−EN en 0503b
4. Commissioning
4.6
Instructions on operation
Take the following instructions and recommendations into
account when programming positioning systems with electric
axes:
Please note
Make sure that all stepping motor axes:
always lie within the positioning range defined by the
limit switches when they are switched on and before the
start of reference travel.
carry out reference travel when the SPC200 or the step
ping motor controller is switched on or, if applicable,
after faults.
Stepping motor axes are operated in an open control loop.
Modifications to the position of the axis when the holding
torque is switched off (e.g. stepping motor controller
switched off by EMERGENCY STOP), or lost steps" (e.g.
collision, overload) cannot therefore be taken into account.
Please note
Take into account any functions implemented within the
framework of the EMERGENCY STOP concept in the NC
programs.
Note that not all programming commands of the SPC200 are
valid for electric axes, and that individual programming com
mands for electric and pneumatic axes differ from each other
in their function (see SPC200 manual or WinPISA manual).
Follow the maintenance instructions for the components
used.
Festo P.BE−SPC200−SMX−1−EN en 0503b
4−35
4. Commissioning
Caution
By positioning the axis with unfavorable positioning
speeds resonance effects can occur, which can lead to step
losses.
Consider the manufacturer data for the permitted operat
ing conditions of the used motors and drives, e.g. for the
permitted start−stop frequency or for the permitted posi
tioning speeds.
Factors of influence for the positioning speeds:
Factors of influence
Observe with
Parametrizing
(Commissioning)
Start−Stop frequency
Reference speed factor
Maximum speed
Maximum acceleration
Speed factor (FX...) during positioning
with G01
Acceleration factor (G08) during posi
tioning with G01
Operation
Recommendation:
Make sure during operation that the minimum positioning
speed is never less than the start−stop frequency set (see
manufacturer data of the components used).
Note that due to too small accelerations resonance effects
can occur.
The resonant frequency is for drives with 2−phase stepping
motors usually between 50 and 250 Hz.
4−36
Festo P.BE−SPC200−SMX−1−EN en 0503b
Diagnosis and error treatment
Chapter 5
Festo P.BE−SPC200−SMX−1−EN en 0503b
5−1
5. Diagnosis and error treatment
Contents
5.
Diagnosis and error treatment . . . . . . . . . . . . . . . . . . . . . . . . . . . . . . . . . . . .
5−1
5.1
5.2
5.3
5.4
5.5
5.6
General instructions on diagnosis . . . . . . . . . . . . . . . . . . . . . . . . . . . . . . . . . . 5−3
On−the−spot diagnosis . . . . . . . . . . . . . . . . . . . . . . . . . . . . . . . . . . . . . . . . . . . 5−4
Diagnosis with WinPISA . . . . . . . . . . . . . . . . . . . . . . . . . . . . . . . . . . . . . . . . . . 5−5
Diagnosis on the control panel . . . . . . . . . . . . . . . . . . . . . . . . . . . . . . . . . . . . 5−7
Emergency travel . . . . . . . . . . . . . . . . . . . . . . . . . . . . . . . . . . . . . . . . . . . . . . . 5−8
Notes on judging the positioning behaviour . . . . . . . . . . . . . . . . . . . . . . . . . 5−11
5−2
Festo P.BE−SPC200−SMX−1−EN en 0503b
5. Diagnosis and error treatment
5.1
General instructions on diagnosis
Information on general diagnosis and fault treatment can be
found in the manual for the SPC200 type P.BE−SPC200−... or in
the WinPISA manual.
This chapter contains special information on diagnosing the
stepping motor indexer module.
General diagnostic possibilities
The SPC200 offers extensive and user−friendly possibilities of
diagnosis and fault treatment. The following possibilities are
available:
The LEDs on the stepping motor module display informa
tion on the operating status of the connected stepping
motor axis.
The LEDs on the SPC200 and on the connected field de
vices show directly configuration faults, hardware faults,
string faults, bus faults, etc.
The control panel shows detailed fault messages coded in
the form of an 8−figure hexadecimal number.
In online mode WinPISA shows the 8−figure fault message
as well as a description of the fault in clear text.
The output bit READY of the SPC200 shows the basic
readiness of the system to operate.
Festo P.BE−SPC200−SMX−1−EN en 0503b
5−3
5. Diagnosis and error treatment
5.2
On−the−spot diagnosis
The two LEDs on the stepping motor indexer module enable a
speedy on−the−spot diagnosis to be made:
FAULT LED (red)
STATUS LED (green)
FAULT LED
(red)
STATUS LED
(green)
Operating status
is off
is off
Operating voltage not applied
lights up
is off
Function card has not started; SPC200 defective or function card
defective; servicing required
lights up
flashes for a
long time
Limit switch actuated, short circuit or incorrect polarity at sensor
input or internal fault
is off
flashes briefly
Initialization phase Reference travel not carried out or reference
travel no longer valid (Servo Ready interrupted)
is off
flashes for a
long time
Operating status normal no axis movement/positioning task
is off
lights up
Axis moves
Description of the LED signals
Signal
Description
Signal
Description
ON
is off
ON
flashes for a long
time
OFF
ON
OFF
5−4
OFF
lights up
ON
flashes briefly
OFF
Festo P.BE−SPC200−SMX−1−EN en 0503b
5. Diagnosis and error treatment
5.3
Diagnosis with WinPISA
In online mode WinPISA offers the following possibilities of
diagnosing stepping motor axes:
Status display
Display of the inputs of the stepping motor indexer
module
Further notes and diagnostic possibilities can be found in the
WinPISA manual or in the online help.
Status display
In order to display the status, select the command [Status
display] in the menu [Online] [Diagnosis].
Select the axis identifier of the desired stepping motor axis in
the register card System."
Under Software version" the software version of the step
ping motor indexer module is displayed.
Whether or not reference travel has been carried out is shown
after the entry Reference travel."
Fig.5/1: Status display, register card System
The other entries correspond to the display for a selected
pneumatic axis (see WinPISA manual).
Festo P.BE−SPC200−SMX−1−EN en 0503b
5−5
5. Diagnosis and error treatment
Display inputs
In order to display the status of the inputs, select the
command [Stepping motor module] in the menu [Online]
[Observe].
Fig.5/2: Observe stepping motor module
The inputs are shown by means of checkboxes as follows:
Checkboxes
Input
Description
Remedy
End switch positive
(Limit switch
positive)
LIM+
When the checkbox is
deactivated, the positive limit
switch (N.C.) is actuated.
Push the axis into the
positioning range (if
necessary emergency travel)
End switch negative
(Limit switch
negative)
LIM−
When the checkbox is
deactivated, the negative limit
switch (N.C.) is actuated.
Push the axis into the
positioning range (if
necessary emergency travel)
Reference switch
REF
When the checkbox is
activated, the reference
switch (N.O.) is actuated.
Servo ready
SRDY
When the checkbox is
deactivated, the stepping
motor controller does not
indicate readiness to operate.
Check the stepping motor
controller or cabling (bridged
in the cable for the SEC−ST)
5−6
Festo P.BE−SPC200−SMX−1−EN en 0503b
5. Diagnosis and error treatment
5.4
Diagnosis on the control panel
The control panel offers the following possibility of diagnos
ing stepping motor axes:
Display of the inputs of the stepping motor indexer
module.
Further notes and diagnostic possibilities can be found in the
SPC200 manual.
Display inputs
1. Select the command STEPMOTORINPUT in the menu
DISPLAY.
2. Then select the axis identifier of the stepping motor axis
with v or V. Accept this with the Enter key.
3. Position the cursor on LIM+ with }. You can switch from
one input to another with v or V. The status of the indi
vidual input is shown as 1" for 1−signal or 0" for 0−sig
nal.
STEPMOTOR INPUT
Y: LIM+ :1
Meaning of the inputs (description see section Diagnosis
with WinPISA"):
Festo P.BE−SPC200−SMX−1−EN en 0503b
Input
Meaning
LIM+
0−signal: Positive limit switch actuated
REF
1−signal: Reference switch actuated
LIM−
0−signal: Negative limit switch actuated
SRDY
1−signal: Stepping motor controller sends message
Ready to operate
5−7
5. Diagnosis and error treatment
5.5
Emergency travel
If a limit switch is actuated, the axis can be pushed manually
into the positioning range again when the stepping motor
controller is switched off.
Alternatively, an axis can be moved into the positioning range
again with the function Emergency travel."
Caution
Movement outside the limit switches may result in a
collision.
When the device is switched on, the axis must lie within
the limit switches.
The function Emergency travel" may only be used if a limit
switch has been actuated as a result of manual positioning
or due to a program fault during the commissioning phase.
Emergency travel procedure
When the function Emergency travel" is started, the axis
moves out of the range of the actuated limit switch in the
direction of the positioning range of the axis. The axis moves
until the switching range of the limit switch is left, however for
max. 2 s (e.g. in the event of cable fracture in the limit switch
cable).
Please note
Before starting emergency travel, make sure you under
stand the function of the limit switches.
Note that the limit switch opposite cannot be recognized
during emergency travel.
5−8
Festo P.BE−SPC200−SMX−1−EN en 0503b
5. Diagnosis and error treatment
Carry out emergency travel with WinPISA as follows:
1. Select the command [Stepping motor] in the menu
[Online] [Commission].
2. Select the axis identifier of the stepping motor axis in the
dialogue window Commission stepping motor."
If necessary, check the displayed status of the relevant
inputs.
Fig.5/3: Commissioning the stepping motor
3. In order to carry out reference travel, select the option
Emergency travel" under Activity." Start emergency
travel with Start." The axis moves from the limit switch
into the positioning range.
During emergency travel the button Start" changes to
Stop." With Stop" you can interrupt the current
emergency travel.
Festo P.BE−SPC200−SMX−1−EN en 0503b
5−9
5. Diagnosis and error treatment
Carry out emergency travel with the control panel as follows:
1. In order to carry out emergency travel, select the com
mand AXIS in the menu TEST/DIAG.
2. Then select the axis identifier of the stepping motor axis
with v or V. Accept this with the Enter key.
3. Now select the command EXIT FROM LIMIT with }.
Start emergency travel with the Enter key.
The current emergency travel can be interrupted with the
Esc key or with the Enter key.
5−10
Festo P.BE−SPC200−SMX−1−EN en 0503b
5. Diagnosis and error treatment
5.6
Notes on judging the positioning behaviour
Resonance effects can lead with stepping motor axes to step
losses and/or uncontrolled positioning behaviour. Deter
mined by their principle 2−phase stepping motors are more
susceptible to resonance effects than 3− or 5−phase stepping
motors.
The following table contains notes on judging the positioning
behaviour as well as on the possible remedy.
Effect
Possible cause
Possible remedy
Actual position moves" with
positioning in both directions
Loss of steps by resonance ef
fects
Motor runs "roughly" and/or
produces untypical noises
Drive operates in the range of
the resonance
S Increase acceleration
S Increase start−stop frequency
S Speed FX.. (FY.., FZ.., FU..) on
positioning with G01 is set too
low, increase
S Reduce motor current
S Increase maximum speed or ref
erence speed factor
S With 2−phase stepping motors:
increase resolution, that means
operate the motor with step
mode 1/2 or 1/4 instead of 1/1
(note that torque will be re
duced)
Festo P.BE−SPC200−SMX−1−EN en 0503b
5−11
5. Diagnosis and error treatment
5−12
Festo P.BE−SPC200−SMX−1−EN en 0503b
Technical appendix
Appendix A
Festo P.BE−SPC200−SMX−1−EN en 0503b
A−1
A. Technical appendix
Contents
A.
Technical appendix . . . . . . . . . . . . . . . . . . . . . . . . . . . . . . . . . . . . . . . . . . . . .
A−1
A.1
A.2
A.3
Technical specifications . . . . . . . . . . . . . . . . . . . . . . . . . . . . . . . . . . . . . . . . . .
Internal circuitry . . . . . . . . . . . . . . . . . . . . . . . . . . . . . . . . . . . . . . . . . . . . . . . .
Index . . . . . . . . . . . . . . . . . . . . . . . . . . . . . . . . . . . . . . . . . . . . . . . . . . . . . . . . .
A−3
A−4
A−7
A−2
Festo P.BE−SPC200−SMX−1−EN en 0503b
A. Technical appendix
A.1
Technical specifications
Type
SPC200−SMX−1
Temperature range
Operation
Storage/transport
− 5 ... + 50 °C
− 20 ... + 70 °C
Weight
69 g
Relative humidity
95 %, non−condensing
Connection SIGNALS (X31)
External supply (pin 4, pin 5)
Sensor inputs (pin 1 ... 3)
Current consumption (at 24 V)
Reference potential
Connection AMPLIFIER (X30) 2)
Input (+/− READY)
Outputs (+/− DIRECT, +/− PULSE,
+/− ENABLE, +/− F/H STEP)
Step frequency
Frequency ramp
Positioning range
Resolution
Electromagnetic compatibility
Interference emitted
Resistance to interference
Vibration and shock
Vibration
Shock
24 V DC, ± 15 % 1)
Inputs based on IEC 1131−2 type 2
24 V DC, positive−switching (PNP)
Typ. 8 mA
0V
+ 24 V (connected internally with pin 4 of the SIGNALS
plug) via relay contact
Push−pull control (electric as per RS 485)
80 Hz ... 40 kHz
Max. 500 kHz/sec
0.00 ... 9999.99 mm
0.01000 ... 9999.99999 steps/mm
Tested as per DIN EN 61000−6−4 (industry) 3)
Tested as per DIN EN 61000−6−2 (industry)
Tested as per DIN/IEC 68 part 2−6;
(0.15 mm path at 10 ... 58 Hz,
2 g acceleration at 58...150 Hz)
Tested as per DIN/IEC 68 part 2−27;
(± 30 g at 11ms duration; 15 cycles)
1)
2)
Note the tolerance of the connected sensors.
Pin−compatible with the stepping motor controllers of the Festo drive package for 5 V control
signals.
3) The SPC200 is intended for industrial usage.
Festo P.BE−SPC200−SMX−1−EN en 0503b
A−3
A. Technical appendix
A.2
Internal circuitry
Circuitry of control connection (AMPLIFIER, X30)
Circuitry of the outputs (+/− DIRECT, +/− PULSE,
+/− ENABLE, +/− F/H STEP):
SPC200
Steppingmotorcontroller
+...
−...
Fig.A/1: Principle RS 485 / RS 422
Circuitry of the inputs (+/− READY):
SPC200
Steppingmotorcontroller
+READY
(+24Vfrom
sensorplug)
−READY
Fig.A/2: Relay contact
On the connecting cable for the SEC−ST the input READY is
bridged.
A−4
Festo P.BE−SPC200−SMX−1−EN en 0503b
A. Technical appendix
Circuitry of sensor connection (SIGNALS, X31)
Circuitry of the inputs (LIM+, REF, LIM−):
SPC200
4k7
LIM+
24V
0V
Sensors
24V
0V
(supply)
Fig.A/3: Sensor inputs
Festo P.BE−SPC200−SMX−1−EN en 0503b
A−5
A. Technical appendix
A−6
Festo P.BE−SPC200−SMX−1−EN en 0503b
A. Technical appendix
A.3
Index
A
Abbreviations . . . . . . . . . . . . . . . . . . . . . . . . . . . . . . . . . . . . XII
AMPLIFIER connection . . . . . . . . . . . . . . . . . . . . . . . . . . . . . 3−9
Analogue reference value . . . . . . . . . . . . . . . . . . . . . . . . 4−22
Application parameters . . . . . . . . . . . . . . . . . . . . . . 4−12, 4−29
Axis parameters . . . . . . . . . . . . . . . . . . . . . . . . . . . . 4−11, 4−29
B
Basis structure . . . . . . . . . . . . . . . . . . . . . . . . . . . . . . . . . . 1−4
C
Commissioning . . . . . . . . . . . . . . . . . . . . . . . . . . . . . . . . . . 4−3
Connecting elements . . . . . . . . . . . . . . . . . . . . . . . . . . . . . . 1−7
Control panel . . . . . . . . . . . . . . . . . . . . . . . . . . . . . . . 4−27, 5−7
Control plug . . . . . . . . . . . . . . . . . . . . . . . . . . . . . . . . . . . . . 3−9
D
Designated use . . . . . . . . . . . . . . . . . . . . . . . . . . . . . . . . . . . V
Diagnosis
Diagnosis on the control panel . . . . . . . . . . . . . . . . . . . .
Diagnosis with WinPISA . . . . . . . . . . . . . . . . . . . . . . . . . .
General instructions . . . . . . . . . . . . . . . . . . . . . . . . . . . . .
On−the−spot diagnosis . . . . . . . . . . . . . . . . . . . . . . . . . .
5−7
5−5
5−3
5−4
Diameter of drive . . . . . . . . . . . . . . . . . . . . . . . . . . . . . . . 4−11
Display elements . . . . . . . . . . . . . . . . . . . . . . . . . . . . . . . . . 1−7
Drive packages . . . . . . . . . . . . . . . . . . . . . . . . . . . . . . . . . . . 1−8
Festo P.BE−SPC200−SMX−1−EN en 0503b
A−7
A. Technical appendix
E
Electromechanical linear drive . . . . . . . . . . . . . . . . . . . . 1−11
EMERGENCY STOP concept . . . . . . . . . . . . . . . . . . . . . . . 1−12
Emergency travel . . . . . . . . . . . . . . . . . . . . . . . . . . . . . . . . . 5−8
End switches . . . . . . . . . . . . . . . . . . . . . . . . . . . . . . . . . . . . . 5−6
F
FAULT LED . . . . . . . . . . . . . . . . . . . . . . . . . . . . . . . . . . . . . . 5−4
Functional check of the stepping motor axes . . . . . 4−23, 4−30
H
Half step . . . . . . . . . . . . . . . . . . . . . . . . . . . . . . . . . . 4−14, 4−29
I
Important user instructions . . . . . . . . . . . . . . . . . . . . . . . . . VII
Instructions on operation . . . . . . . . . . . . . . . . . . . . . . . . 4−35
Internal circuitry . . . . . . . . . . . . . . . . . . . . . . . . . . . . . . . . . A−4
J
Judging the positioning behaviour . . . . . . . . . . . . . . . . . 5−11
L
LEDs . . . . . . . . . . . . . . . . . . . . . . . . . . . . . . . . . . . . . . . . . . 5−4
Length of drive . . . . . . . . . . . . . . . . . . . . . . . . . . . . . 4−11, 4−29
Limit switches . . . . . . . . . . . . . . . . . . . . . . . . 2−7, 2−8, 5−6, 5−8
Lower software end position . . . . . . . . . . . . . . . . . . 4−16, 4−29
A−8
Festo P.BE−SPC200−SMX−1−EN en 0503b
A. Technical appendix
M
Maximum acceleration . . . . . . . . . . . . . . . . . . . . . . . 4−18, 4−29
Maximum speed . . . . . . . . . . . . . . . . . . . . . . . . . . . . 4−18, 4−29
Micro step . . . . . . . . . . . . . . . . . . . . . . . . . . . . . . . . . 4−14, 4−29
P
Pictograms . . . . . . . . . . . . . . . . . . . . . . . . . . . . . . . . . . . . . VIII
Positioning behaviour . . . . . . . . . . . . . . . . . . . . . . . . . . . 5−11
Program example . . . . . . . . . . . . . . . . . . . . . . . . . . . . . . . 4−34
Project zero point . . . . . . . . . . . . . . . . . . . . . . . . . . . 4−16, 4−29
R
Reference points of the positioning system . . . . . . . . . . 4−16
Reference position . . . . . . . . . . . . . . . . . . . . . . . . . . 4−17, 4−29
Reference speed factor . . . . . . . . . . . . . . . . . . . . . . 4−17, 4−29
Reference switch . . . . . . . . . . . . . . . . . . . . . . . . . . . . . 2−7, 2−8
Reference travel . . . . . . . . . . . . . . . . . . . . . . . . . . . . . . . . 4−19
Reference travel mode . . . . . . . . . . . . . . . . . . . . . . . 4−19, 4−29
Resolution . . . . . . . . . . . . . . . . . . . . . . . . . . . 4−13, 4−15, 4−29
S
Sensor plug . . . . . . . . . . . . . . . . . . . . . . . . . . . . . . . . . . . . . 3−7
Sensors . . . . . . . . . . . . . . . . . . . . . . . . . . . . . . . . . . . . . 1−6, 3−6
Service . . . . . . . . . . . . . . . . . . . . . . . . . . . . . . . . . . . . . . . . . . VI
SIGNALS connection . . . . . . . . . . . . . . . . . . . . . . . . . . . . . . 3−7
Size of drive . . . . . . . . . . . . . . . . . . . . . . . . . . . . . . . . . . . 4−11
Software end position . . . . . . . . . . . . . . . . . . 4−16, 4−17, 4−29
Software version . . . . . . . . . . . . . . . . . . . . . . . . . . . . . . . . . . IX
Start−stop frequency . . . . . . . . . . . . . . . . . . . . . . . . 4−15, 4−29
Festo P.BE−SPC200−SMX−1−EN en 0503b
A−9
A. Technical appendix
STATUS LED . . . . . . . . . . . . . . . . . . . . . . . . . . . . . . . . . . . . 5−4
Step mode . . . . . . . . . . . . . . . . . . . . . . . . . . . . . . . . . . . . 4−14
Stepping motor controller . . . . . . . . . . . . . . . . . . . . . . 1−8, 4−4
System structure . . . . . . . . . . . . . . . . . . . . . . . . . . . . . . . . . 1−3
T
Target group . . . . . . . . . . . . . . . . . . . . . . . . . . . . . . . . . . . . . . VI
Technical specifications . . . . . . . . . . . . . . . . . . . . . . . . . . . A−3
Text markings . . . . . . . . . . . . . . . . . . . . . . . . . . . . . . . . . . . VIII
U
Upper software end position . . . . . . . . . . . . . . . . . . 4−17, 4−29
W
WinPISA . . . . . . . . . . . . . . . . . . . . . . . . . . . . . . . . . . . . 4−7, 5−5
A−10
Festo P.BE−SPC200−SMX−1−EN en 0503b