1
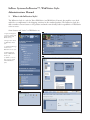
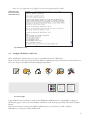
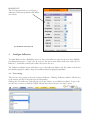
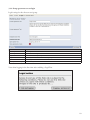
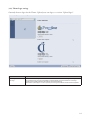
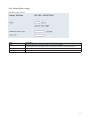
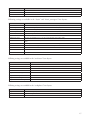
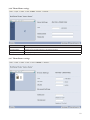
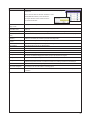
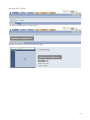
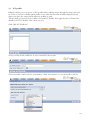
Tracker
InPressive
Administration Manual
Version 2.7
December 8, 2008
Contents
1
2
3
What is the InPressive Style?. . . . . . . . . . . . . . . . . . . . . . . . . . . . . . . . . . . . . . . . . . . . . . . 4
Installation. . . . . . . . . . . . . . . . . . . . . . . . . . . . . . . . . . . . . . . . . . . . . . . . . . . . . . . . . . . . 5
2.1 Where do I get the software. . . . . . . . . . . . . . . . . . . . . . . . . . . . . . . . . . . . . . . . . . . . . . 5
2.2 Prerequisites . . . . . . . . . . . . . . . . . . . . . . . . . . . . . . . . . . . . . . . . . . . . . . . . . . . . . . . . . 5
2.3 Installing the software. . . . . . . . . . . . . . . . . . . . . . . . . . . . . . . . . . . . . . . . . . . . . . . . . . 5
2.4 Configure WebNative and license. . . . . . . . . . . . . . . . . . . . . . . . . . . . . . . . . . . . . . . . . 6
Configure InPressive. . . . . . . . . . . . . . . . . . . . . . . . . . . . . . . . . . . . . . . . . . . . . . . . . . . . . 7
3.1 User settings . . . . . . . . . . . . . . . . . . . . . . . . . . . . . . . . . . . . . . . . . . . . . . . . . . . . . . . . . 7
3.1.1 Creating links. . . . . . . . . . . . . . . . . . . . . . . . . . . . . . . . . . . . . . . . . . . . . . . . . . . . . . . . . . . . . . . . . 9
3.1.2 Setup agreement text on login . . . . . . . . . . . . . . . . . . . . . . . . . . . . . . . . . . . . . . . . . . . . . . . . . . . . 10
3.2 Themes. . . . . . . . . . . . . . . . . . . . . . . . . . . . . . . . . . . . . . . . . . . . . . . . . . . . . . . . . . . . 11
3.2.1
3.2.2
3.2.3
3.2.4
3.2.5
3.2.6
3.2.7
3.2.8
3.2.9
3.3
3.5
3.6
3.7
3.8
3.9
Create/Edit a Theme . . . . . . . . . . . . . . . . . . . . . . . . . . . . . . . . . . . . . . . . . . . . . . . . . . . . . . . . . . 11
Theme Base settings. . . . . . . . . . . . . . . . . . . . . . . . . . . . . . . . . . . . . . . . . . . . . . . . . . . . . . . . . . . 13
Theme Logo settings . . . . . . . . . . . . . . . . . . . . . . . . . . . . . . . . . . . . . . . . . . . . . . . . . . . . . . . . . . 14
Theme Header settings. . . . . . . . . . . . . . . . . . . . . . . . . . . . . . . . . . . . . . . . . . . . . . . . . . . . . . . . . 15
Theme Menu settings. . . . . . . . . . . . . . . . . . . . . . . . . . . . . . . . . . . . . . . . . . . . . . . . . . . . . . . . . . 16
Theme Home settings . . . . . . . . . . . . . . . . . . . . . . . . . . . . . . . . . . . . . . . . . . . . . . . . . . . . . . . . . 18
Theme Browse settings. . . . . . . . . . . . . . . . . . . . . . . . . . . . . . . . . . . . . . . . . . . . . . . . . . . . . . . . . 18
Theme Trailer setting. . . . . . . . . . . . . . . . . . . . . . . . . . . . . . . . . . . . . . . . . . . . . . . . . . . . . . . . . . 19
Theme Advanced settings. . . . . . . . . . . . . . . . . . . . . . . . . . . . . . . . . . . . . . . . . . . . . . . . . . . . . . . 20
Upload logos. . . . . . . . . . . . . . . . . . . . . . . . . . . . . . . . . . . . . . . . . . . . . . . . . . . . . . . . 22
ICC-profiles . . . . . . . . . . . . . . . . . . . . . . . . . . . . . . . . . . . . . . . . . . . . . . . . . . . . . . . . 24
Changing the name of the basket plugins . . . . . . . . . . . . . . . . . . . . . . . . . . . . . . . . . . 25
Filters . . . . . . . . . . . . . . . . . . . . . . . . . . . . . . . . . . . . . . . . . . . . . . . . . . . . . . . . . . . . . 26
Sort volumes in Toplevel. . . . . . . . . . . . . . . . . . . . . . . . . . . . . . . . . . . . . . . . . . . . . . . 28
Customized Header, Trailer, Main html files and CSS files . . . . . . . . . . . . . . . . . . . . . 28
3.9.1 Header, trailer, main or CSS file as a user setting . . . . . . . . . . . . . . . . . . . . . . . . . . . . . . . . . . . . . 28
3.9.2 Header, trailer, main or CSS file on a theme. . . . . . . . . . . . . . . . . . . . . . . . . . . . . . . . . . . . . . . . . 28
3.9.3 Header, trailer, main or CSS file on a baselayout . . . . . . . . . . . . . . . . . . . . . . . . . . . . . . . . . . . . . 29
4
5
3.10 Bookmark/Home . . . . . . . . . . . . . . . . . . . . . . . . . . . . . . . . . . . . . . . . . . . . . . . . . . . . 30
3.11 Navigation. . . . . . . . . . . . . . . . . . . . . . . . . . . . . . . . . . . . . . . . . . . . . . . . . . . . . . . . . . 31
3.12 Print contact sheet of basket contents . . . . . . . . . . . . . . . . . . . . . . . . . . . . . . . . . . . . . 31
3.13 Display files. . . . . . . . . . . . . . . . . . . . . . . . . . . . . . . . . . . . . . . . . . . . . . . . . . . . . . . . . 32
3.14 InPressive and Dialogue. . . . . . . . . . . . . . . . . . . . . . . . . . . . . . . . . . . . . . . . . . . . . . . . 33
InPressive 2.7 news. . . . . . . . . . . . . . . . . . . . . . . . . . . . . . . . . . . . . . . . . . . . . . . . . . . . . 33
4.1 Supported browsers. . . . . . . . . . . . . . . . . . . . . . . . . . . . . . . . . . . . . . . . . . . . . . . . . . . 33
4.2 Global value for number of files . . . . . . . . . . . . . . . . . . . . . . . . . . . . . . . . . . . . . . . . . 34
4.3 Loading panel. . . . . . . . . . . . . . . . . . . . . . . . . . . . . . . . . . . . . . . . . . . . . . . . . . . . . . . 34
4.4 Dynamic Fields. . . . . . . . . . . . . . . . . . . . . . . . . . . . . . . . . . . . . . . . . . . . . . . . . . . . . . 35
Advanced customization. . . . . . . . . . . . . . . . . . . . . . . . . . . . . . . . . . . . . . . . . . . . . . . . . 36
5.1 user.js . . . . . . . . . . . . . . . . . . . . . . . . . . . . . . . . . . . . . . . . . . . . . . . . . . . . . . . . . . . . . 36
5.2 InPressive Stylesheet guide. . . . . . . . . . . . . . . . . . . . . . . . . . . . . . . . . . . . . . . . . . . . . . 36
5.2.1 Common Classes. . . . . . . . . . . . . . . . . . . . . . . . . . . . . . . . . . . . . . . . . . . . . . . . . . . . . . . . . . . . . 36
5.2.2 CSS Faq. . . . . . . . . . . . . . . . . . . . . . . . . . . . . . . . . . . . . . . . . . . . . . . . . . . . . . . . . . . . . . . . . . . . 37
5.3 Advanced features. . . . . . . . . . . . . . . . . . . . . . . . . . . . . . . . . . . . . . . . . . . . . . . . . . . . 38
5.3.1
5.3.2
5.3.3
5.3.4
5.3.5
5.3.6
Advanced search in navigation area.. . . . . . . . . . . . . . . . . . . . . . . . . . . . . . . . . . . . . . . . . . . . . . . 38
Split keywords into tabs in Imageinfo. . . . . . . . . . . . . . . . . . . . . . . . . . . . . . . . . . . . . . . . . . . . . . 38
Changing “Max. files per page“ popup values and default value. . . . . . . . . . . . . . . . . . . . . . . . . . 38
Open Imageinfo in a popup window. . . . . . . . . . . . . . . . . . . . . . . . . . . . . . . . . . . . . . . . . . . . . . 38
Filter keywords per path. . . . . . . . . . . . . . . . . . . . . . . . . . . . . . . . . . . . . . . . . . . . . . . . . . . . . . . . 39
Fileinfo in shortdisplay. . . . . . . . . . . . . . . . . . . . . . . . . . . . . . . . . . . . . . . . . . . . . . . . . . . . . . . . . 39
Appendix A, InPress Systems Software License. . . . . . . . . . . . . . . . . . . . . . . . . . . . . . . . . . . . 40
1. Grant of License. . . . . . . . . . . . . . . . . . . . . . . . . . . . . . . . . . . . . . . . . . . . . . . . . . . . . . . 40
2. Proprietary Rights . . . . . . . . . . . . . . . . . . . . . . . . . . . . . . . . . . . . . . . . . . . . . . . . . . . . . 40
4. No Other Rights. . . . . . . . . . . . . . . . . . . . . . . . . . . . . . . . . . . . . . . . . . . . . . . . . . . . . . . 40
5. Term. . . . . . . . . . . . . . . . . . . . . . . . . . . . . . . . . . . . . . . . . . . . . . . . . . . . . . . . . . . . . . . . 40
6. LIMITED WARRANTY . . . . . . . . . . . . . . . . . . . . . . . . . . . . . . . . . . . . . . . . . . . . . . . . 40
a. LIMIT OF LIABILITY. . . . . . . . . . . . . . . . . . . . . . . . . . . . . . . . . . . . . . . . . . . . . . . . 41
b. Integration. . . . . . . . . . . . . . . . . . . . . . . . . . . . . . . . . . . . . . . . . . . . . . . . . . . . . . . . . 41
7. Governing Law. . . . . . . . . . . . . . . . . . . . . . . . . . . . . . . . . . . . . . . . . . . . . . . . . . . . . . 41
8. Arbitration. . . . . . . . . . . . . . . . . . . . . . . . . . . . . . . . . . . . . . . . . . . . . . . . . . . . . . . . . . . 41
3
InPress Systems InPressive™, WebNative Style
Administration Manual
1
What is the InPressive Style?
The InPressive Style is a style for Xinet WebNative (and WebNative Venture) that enables a new look
and feel as a complement to the shipping variations in the standard product. The InPressive Style also
adds a number of new features to the product and make some already built in capabilities of WebNative
easier to access.
Some features and “twists” to WebNative are;
1. Toplevel Navigation
to browse volumes and
folders (Finder and
Windows tree).
2. Imageorder is based
on WebNative house
style.
3. Quarkview/InDesign
view based on
WebNative house style.
4. Filemanagement
based on WebNative
house style.
5. Admin tool for setting up the look and
feel of WebNative
styles.
4
2
Installation
2.1 Where do I get the software
To get the latest InPressive software, login using your user and password at www.inpress.se, select
InPressive at the top and download the distribution for the right platform. As an alternative, it can be
provided to you from your InPress Systems reseller.
The installation package is a compressed unix tar file named “inpr” followed by the version and platform and ending in “tar.Z”, for example inpr.2.5.macosx.tar.Z.
Installation file in
compressed unix tar
format
fig 1. InPressive installation files
2.2 Prerequisites
•
WebNative or WebNative Venture 5.0
The installation procedures below assumes the Xinet software above is installed.
InPressive is available for MacOSX (v 10.3 and 10.4, client or server), MacOSX Intel, Irix (6.5.X),
Linux RedHat (ES 3 or 4), Windows 2000 - 2003 and Solaris (7+).
2.3 Installing the software
For UNIX and MacOSX: Login as root, place the software in an appropriate installation directory.
Uncompress and unpack the package from commandline. You should now have an installation script,
installstyle, and a directory structure, inprinst. The install is made using the installation script and is
started by typing ./installstyle from command line.
On Windows 2000, you just run the exe file and you will be presented with an installation shield.
5
Note: It is very important to be logged in as root when performing the install.
Unpack and untar
the file and run the
installinalias script
fig 2. Installation script
2.4 Configure WebNative and license
After installing the software the next step is to install the license for InPressive.
From version 2.0, this can be done from the InPressive Admin gui that can be found at this location on
the server; http://your.address/webnative/plugins/inpradmin
fig 3. License page
Login with the same username as used for the WebNative administration, “nativeadmin”, and go to
the License page to enter your serial number and license code in the proper fields. Then click “Update
license”.
If you need a license, contact your Authorized Integrator to get a license or send a email to
[email protected], stating your Xinet hardware id.
6
IMPORTANT!
The CSS option must be set to inpressive,
otherwise it will cause problems with InPressive colours.
3
fig 3. WebNative admin styles tab
Configure InPressive
To enable InPressive for a WebNative user is to choose the InPressive styles for the user in the WebNative administration gui -> “Styles” tab. In version 2, this can be done with a click in the Styles tab “Use
InPressive”, and all the needed styles will be choosen for the user.
The “InPressive Admin” button will redirect you to the InPressive Admin tool. The admin tool can also
be found by typing the address; http://your.address/webnative/plugins/inpradmin
3.1 User settings
There are two ways getting to the user settings in InPressive. Clicking “InPressive Admin” will take you
to the current user that is selected in the user dropdown.
Clicking the “Use InPressive” link will take you to the “Home” area of InPressive admin. To get to the
user this way, you have to click the USERS tab and then choose the user you wish to setup.
7
When clicking modify, you will be taken to a screen to either choose a user setting to copy and apply
on the new user, or just start with the default settings. Click the “Configure” button to confirm your
choice.
Base settings for the choosen user/group.
Name
Explanation
Theme
Tells you which Theme that is choosen for the user. Click Edit to edit the choosen theme, or click “Add
New Theme...” in the dropdown to add a new theme that will apply to current user.
Quicksearch headline text
Definition of the text above the Quicksearch area. Default is “Search All Venture Volumes”, if value is
empty. Set value to “none” to remove the headline completely.
Volume headline text
Definition of the text above the volumes. Default is “Available Volumes for [user]”, if value is empty.
Set value to “none” to remove the headline completely.
Bookmark headline text
Definition of the text above the bookmarks. Default is “Bookmarks for [user]”, if value is empty.
Set value to “none” to remove the headline completely.
Basket headline text
Definition of the text above the basket. Default is “Basket for [user]”, if value is empty.
Set value to “none” to remove the headline completely.
Header File URL
Tells you which Header file the user will use. Can be baselayout, theme, user or group setting.
Trailer File URL
Tells you which Trailer file the user will use. Can be baselayout, theme, user or group setting.
Main File URL
Tells you which Main file the user will use. Can be baselayout, theme, user or group setting.
Stylesheet File
Tells you which stylesheet file the user will use. Can be baselayout, theme, user or group setting.
8
3.1.1Creating links
Create custom links that appear below the volumes in the
navigation area. Two different kind of links can be created.
- Link to internal or extarnal webpage.
- Smart link that performs a search on selected creteria.
Links settings for the choosen user/group.
Name
Explanation
Title
Name of the link that will be displayed in the navigate frame
URL
HTML file / Page to be displayed. Explanation how to create “Smart Links” see below.
Target
Where to display the HTML file / Page. _blank will open a popup window. main will display the page in
the main area of InPressive.
Text
Tooltip text when doing “mouseover“ the link
Features
Features if using popup window. Eg. “toolbar=no,resizable=yes,scrollbars=yes,width=540,height=380”.
Creating a “smart” link.
A smart link is basicly a way to show a special collection of files when clicking the link.
Which files should be visible is descided by the SQL query you specify in the URL field.
Here is a couple of examples:
Showing files based on filename pattern. Will show files starting with “_MG_”.
Showing files based on keyword value.
Press “Add new Link“ to add it to the list.
9
3.1.2 Setup agreement text on login
Legal settings for the choosen user/group.
Name
Explanation
License agreement Title
Title of Agreement
License agreement Text
Text to be used as Legal text
Disagree button Text
Text on button to Disagree login
Disagree button URL
URL that you will be redirected to if clicking Disagree button
Agree button Text
Text on Agree button
Show Agreement at Login
Controls if Legal text should be used at all
View when logging in the first time after enabling a Legal Text.
10
Override Theme settings for the choosen user/group.
“
Name
Explanation
Header logo
Changing this logo will affect the user/group you are editing. The logo can also be disabled by clicking
the “Disable header logotype“ checkbox.
Main logo
Changing this logo will affect the user/group you are editing. The logo can also be disabled by clicking
the “Disable main logotype“ checkbox.
Title
Will change the “title“ of the site to whatever you enter.
3.2 Themes
Themes can be used for multiple users or groups. Themes can be created based on existing Themes.
For each Theme you will choose a base layout. The differences in the base layouts are basically the
frameset, and how files are displayed. For version 2.5, InPressive contains 6 different base layouts. The
different base layouts will be described later on. (see chapter xx)
Almost everything is customizable from the THEME tab in InPressive admin.
Colours for fonts and backgrounds, upload new logos, choose height/width for frames, create welcome
and download messages, and choose icc, plugin and filter lists for the Theme.
3.2.1Create/Edit a Theme
To add a theme, click the “Add theme” link on the THEMES tab, or click the “Add New Theme...” in
the Theme dropdown on the Users base settings page. See figures below.
11
Add theme from Themes tab.
Add theme from the Users tab.
Supply a name for the Theme you are creating, and choose to copy a existing theme if you want. A
default setting will be used if you choose to not copy a existing theme. Click “Add Theme” to create the
theme with the name you supplied.
Add a new theme based on defaults or choose a Theme in the “Copy Theme” dropdown.
12
3.2.2Theme Base settings
The first tab you will be taken to after clicking Modify or creating a new Theme, is the “1. Base” tab.
This tab controls the Title of the page, and the base layout of the page. As mentioned in step 3.2, 6 different base layouts comes with InPressive 2.5. Below is a summary of the 6.
Name
Explanation
accelerator
Customized to work as a “storefront” style for Accelerator aBiz. Fully integrated with the Accelerator
“ecommerce” style. This base layout have options that enables “Buy” and “Download file” buttons on
files . If setting the volume options inside WebNative admin to allow “Download All Files”, a download
button will appear on all image files (not Accelerator templates). If turning on “Custom Image Order”, a
“Buy” button will appear on all image files. Accelerator templates will get the “Buy” button automatically.
browse
Classic frameset with the navigate function shipped with InPressive 2.0.
browse_morespace
Identical to “browse” except from that in this one the header appears above the navigate frame(small
header), the trailer is removed to save some space.
classic
Original InPressive v1.3 look and feel.
classic_morespace
Identical to “browse_morespace” except from that this one uses the v1.3 volumes, bookmarks and
basket.
stockphoto
Designed for image ordering. Dropdown menus displaying the volumes and folders.
Edit the Base settings
Name
Explanation
Title
Site title. In most browsers this appears in the top of the browser window. This setting can be overridden by the user/group setting
Base Layout
The basic layout of the site. See descriptions above.
13
3.2.3Theme Logo settings
Currently choosen logos for the Theme. Upload your own logos, see section “Upload logos”.
Name
Explanation
Header logo
Main logo
These are the current logos for this Theme. You can see if it is the default setting or if it is logos that
are uploaded for this Theme. Image Width and Image Height shows the dimensions of the logo.
Checking the “Disable checkbox” will hide the logos from displaying.
See section “Upload logos” on how to upload your own logos and which formats that are supported.
14
3.2.4Theme Header settings
Edit the header settings
Name
Explanation
Height
Set the Header height in pixels. Use value “0” to remove it completely.
Logotype Height shows the height of the current logo that is choosen in the “Logos” settings.
Header(and Trailer) color
Header and Trailer background color. Color codes as “#FFFF00”, color names as “green” can be used.
Trailer color
If set, this will be used for Trailer color instead of “Header(and Trailer) color“.
15
3.2.5Theme Menu settings
The menu settings may differ between base layouts. Below is a listing on the different menu options for
the base layouts.
Following settings are available in the “browse” and “browse_morespace” base layouts.
Name
Explanation
Width
Set the Menu width in pixels. Use value “0” to remove it completely.
Color
Set menu background color.
Font Color
Font color in menu. Available in all base layouts.
Headline Font Color
Font color for headlines, If this is not set, it will inherit the “Font Color” value.
List Color
Background color for volumes, bookmarks and basket files. If this is not set, it will inherit the “Color”
value.
Mouse Over Color
Row background in volumes, bookmarks, basket files when moving the mouse over the name.
Enable Classic Volumes
Will turn off the “tree-navigation”. Available in all base layouts.
16
Name
Explanation
Enable Quicksearch
Adds a search field in the left frame. Will search all database fields, filenames and the comment field.
Hide Bookmarks
Hides the bookmark feature in the left frame, and it will also hide the “home” icon in the browse style.
Hide Search Icon
Hides the search icon behind the volume and foldernames.
Following settings are available in the “classic” and “classic_morespace” base layouts.
Name
Explanation
Width
Set the Menu width in pixels. Use value “0” to remove it completely.
Volume Height
Set the Volume height in pixels. Use value “0” to remove it completely.
Bookmark Height
Set the Bookmark height in pixels. Use value “0” to remove it completely.
Basket Height
Set the Basket height in pixels. Use value “0” to remove it completely.
Color
Set menu background color.
Font Color
Font color in menu. Available in all base layouts.
Headline Font Color
Font color for headlines, If this is not set, it will inherit the “Font Color” value.
List Color
Background color for volumes, bookmarks and basket files. If this is not set, it will inherit the “Color”
value.
Mouse Over Color
Row background in volumes, bookmarks, basket files when moving the mouse over the name.
Enable Classic Volumes
Will turn off the “tree-navigation”. Available in all base layouts.
Enable Quicksearch
Adds a search field in the left frame. Will search all database fields, filenames and the comment field.
Hide Bookmarks
Hides the bookmark feature in the left frame, and it will also hide the “home” icon in the browse style.
Hide Search Icon
Hides the search icon behind the volume and foldernames.
Follwing settings are available in the “accelerator” base layout.
Name
Explanation
Width
Set the Menu width in pixels. Use value “0” to remove it completely.
Color
Set menu background color.
Font Color
Font color in menu. Available in all base layouts.
Headline Font Color
Font color for headlines, If this is not set, it will inherit the “Font Color” value.
Navigate headline background
Navigate links background
Navigate sublinks background
Navigate selected links background
Follwing settings are available in the “stockphoto” base layout.
Name
Explanation
Height
Set the Menu Height in pixels.
Color
Set menu background color.
Enable Quicksearch
Adds a search field in the left frame. Will search all database fields, filenames and the comment field.
17
3.2.6Theme Home settings
Name
Explanation
Color
Desktop background color.
Message Headline
Headline text for message appearing in the default home page.
Message Text
Message appearing in the default home page.
3.2.7Theme Browse settings
18
Name
Explanation
Color
Desktop background color.
Font Color
Desktop font color.
File Color
Background color of the box that surrounding file, fileinfo etc.
Desktop Color
Background color of the table surrounding files, folders etc.
File Stripe Color
Filename, icons background color.
3.2.8Theme Trailer setting
Name
Explanation
Height
Set the Trailer height in pixels. Use value “0” to remove it completely.
Header and Trailer Color
Header and Trailer background color. Color codes as “#FFFF00”, color names as “green” can be used.
19
3.2.9Theme Advanced settings
Name
Explanation
Max number of chars in
filenames
If a filename is longer than this value, it will be cut of. “...” will be added at the end.
Max number of chars in
directory names
If a directory name is longer than this value, it will be cut of. “...” will be added at the end.
20
Name
Explanation
Filename database ID
ID of Venture database field that you want to use instead of displaying
the filename.
NB! You need to check the “Browse“ checkbox in users
permset(Webnative Admin) if this should work.
The original filename will be visible if hover the
icon becide the filename.
Max number of chars in
Plugin names
If a plugin name is longer than this value, it will be cut of. “...” will be added at the end.
Volumes, bookmarks,
basket Max chars
If names in Volumes, Bookmark and Basket are longer than this value, it will be cut of. “...” will be added
at the end.
Login alert message
This message appears when a user has logged in and InPressive is loading.
Login popup window
(URL)
A URL to a website e.g. “http://www.inpress.se”, or a local adress as “/webnativedoc/user/MyPage.html”
Login popup window
(features)
Features for this window. Use this as a template:
“toolbar=no,resizable=yes,scrollbars=yes,width=540,height=380”.
Confirm Download Highres Text
Text in confirm dialog when downloading highres.
Confirm Order text
Text in confirm dialog when downloading file from imageorder.
ICC Profile list
Select ICC Profile list to use for selected theme.
Plugin list
Select Plugin list to use for selected theme.
Filter list
Select Filter list to use for selected theme.
Enable Realtime Image
Enable Realtime Image for selected Theme.
Dialogue connection
Connection string to Dialogue. See section 3.14 for details. This is an example:
http://server.com:8080/Dialog/jsp/externView.jsp?login=john&password=mypass
Dialogue Base path
Base path depending on Dialogue “Document Root Folder” setup. See section 3.14 for details.
Dialogue window features
Features for this window. See section 3.14 for details. Use this as a template:
width=640,height=480,menubar=no,toolbar=no,location=no,scrolling=no,status=no,resizable=yes
Hide Color Palette
Hide Color Palette when viewing image preview.
Let user add popup values to DB in Imageinfo
A user that have access to database fields that are POPUP fields, and the Venture permset for the user is
NOT locked, a user can add values to a existing popup.
Thumbnail Size
Size of the largest side on the thumbnail in Browse, Search etc. Only documents with a large preview will
be affected.
21
3.3 Upload logos
In Themes, Users and Groups, it´s possible to upload your own logos. Make sure
they are either jpeg or gif formatted.
Click “Choose File”...
...choose a logo from your computer...
22
And then click “Upload”...
...to choose the file, click “Use this image”.
And now you will see your logo in the Logos page.
23
3.5 ICC-profiles
InPressive allows you to set up use of ICC-profiles when ordering images through the image order utility. To do so you have to define which profiles to use, what the selections should be displayed as and
what color spaces the output will be when the profiles are used.
The first thing you need to do is to define a list with ICC Profiles, then apply this list to Themes that
should use this ICC Profiles. This is how you do it.
Click “Add ICC Profile list”
Choose a name for the profile list, or copy a existing list if you want.
Choose a profile to add to the list, and rename it. Click “Save changes” to save the profile to the list.
24
3.6 Changing the name of the basket plugins
Click “Add Plugin List” to add a new list. Click “Modify” to edit a existing list.
Choose a name for the Plugin list, and click “Add Plugins List”.
Choose a plugin to rename...
25
...rename it and click “Save changes” to add the Plugin to the Plugin list.
3.7 Filters
Click “Add Filter list” to create a new list, or click “Modify” to edit a existing list.
Choose a name for the Filter list, or copy a existing if you want. Click “Add Filter List” to create it.
26
Enter a pattern e.g. “•”. All files and folders that have a “•” in the filename will be hidden.
...click “Save changes” to save the pattern to your Filter list.
Choose a filetype to hide...
27
...click “Save changes” to add it to your Filter list.
ATTENTION! The way IPS filters the files is not a totally safe solution. Someone with knowledge of
html and javascript could by looking at the javascript source figure out how to get to the filtered files.
3.8 Sort volumes in Toplevel
Volumes named with a number will create a sorted volume list. If a volume is created without a number,
it will be hidden if the others are numbered. The number will be filtered away when displaying it in the
list.
3.9 Customized Header, Trailer, Main html files and CSS files
To make customized Header, Trailer and Main html files, you need to name them correct, and put them
at the correct place on the server. This customization can be done on the User, Theme or the Baselayout.
3.9.1Header, trailer, main or CSS file as a user setting
The header file must be called “inpr_header.html” and lives in the users WebNative folder on the server.
The trailer file must be called “inpr_trailer.html” and lives in the users WebNative folder on the server.
The main file must be called “inpr_main.html” and lives in the users WebNative folder on the server.
The CSS file must be called “inpr_styles.css” and lives in the users WebNative folder on the server.
User directories on your server:
SGI, Solaris, Linux and MacOSX: /var/adm/webnative/USERNAME
NT/Win2000 C:/Program Files/Xinet/WebNative/Admin/USERNAME
3.9.2Header, trailer, main or CSS file on a theme
28
The header file must be called “inpr_header.html” and be added to directory below.
The trailer file must be called “inpr_trailer.html” and be added to directory below.
The main file must be called “inpr_main.html” and be added to directory below.
The CSS file must be called “inpr_styles.css” and be added to the directory below.
SGI, Solaris, Linux and MacOSX: /var/adm/webnative/inprstyle/themes/THEMENAME
NT/Win2000 C:/Program Files/Xinet/WebNative/Admin/inprstyle/themes/THEMENAME
3.9.3Header, trailer, main or CSS file on a baselayout
The header file must be called “inpr_header.html” and be added to directory below.
The trailer file must be called “inpr_trailer.html” and be added to directory below.
The main file must be called “inpr_main.html” and be added to directory below.
The CSS file must be called “inpr_styles.css” and be added to the directory below.
SGI, Solaris, Linux and MacOSX: /var/adm/webnative/inprstyle/base/BASELAYOUTNAME
NT/Win2000 C:/Program Files/Xinet/WebNative/Admin/inprstyle/base/BASELAYOUTNAME
Name
Explanation
Header File URL
Indicates that the user have a header file in the base layout folder.
Trailer File URL
Indicates that the user have a trailer file in the theme folder.
Main File URL
Indicates that the user have a customized main file in the home directory of WebNative.
Stylesheet File
Indicates that the theme CSS file will be used.
29
3.10 Bookmark/Home
Bookmark
You can set bookmarks to folders for easy access with one click.
1. Click the bookmark icon.
2. Enter a name of the bookmark and an optional comment, click “OK”...
3. The bookmark appears in the bookmarklist. Click the name to display. Click the
“x” icon to delete. Click the comment icon to display the comment.
Home
You can setup a home folder that will load when the user accesses the account.
Click the Home icon to autoload the current folder upon next login.
30
3.11 Navigation
New for version 2.0 was the Navigation tool. The base layouts “browse” and “browse_morespace” contain a Navigation frame which lets you navigate through Volumes and folders as you can do in Finder
and Windows Explorer.
This is how it works;
Click the volume/foldername to browse it, or, click the arrow to the left of the volume/foldername to...
Volume/Folder
click
Arrow click
...see its content in a list view.
3.12 Print contact sheet of basket contents
New for version 2.01 is the Contact sheet option. It will put the contents from the basket into a A4.
Useable for quick preview of the basket contents, or use it for print.
31
3.13 Display files
Additional to WebNative, InPressive have one extra way to display files when browsing through
folders(it´s replacing the icon view). It´s called Textview, and the files will be displayed without a preview. This option is connected to the icon view in WebNative admin. If disabling icon view, the Textview will be hidden.
These are the 3 current ways to display files in WebNative;
ShortView
LongView
TextView
32
3.14 InPressive and Dialogue
Dialogue setup
When setting up Dialogue after installation, a “base path” can be defined.
/docs/
When creating a Dialogue User sub directories can be created for this user.
/john/ (relative)
Absolute/Real path at this point is /docs/john/
InPressive and Dialogue
A working path to a Dialogue server could look like this:
If NO base is defined:
http://server.com:8080/Dialog/jsp/externView.jsp?login=sandra&password=screen&doc=/docs/john/
IMAGES/4156AR4_FPO.jpg
If base path IS defined:
http://server.com:8080/Dialog/jsp/externView.jsp?login=sandra&password=screen&doc=/IMAGES/
4156AR4_FPO.jpg
“/docs/john” needs to be removed from the document path.
Administrator needs to define which Base paths all USERS have. An example of this could be:
function dialogueUser(u,b) {
this.user = u;
this.base = b;
}
var Users = new Array();
Users[0] = new dialogueUser(“john”,”/docs/johan”)
Users[1] = new dialogueUser(“andy”,”/docs/andy”)
Users[2] = new dialogueUser(“bob”,”/docs/bob”)
When login as “andy”, “/docs/andy” will be removed from the files[N].path when building the path to
Dialogue.
This can be defined in local.js or in display.js for current Baselayout. Important is that this will be defined for all InPressive user that should use Dialogue links.
4
InPressive 2.7 news
4.1 Supported browsers
When using not supported Firefox 2 based browsers(Firefox 1-2, Camino) you will get a message that
this browser is not supported. This text can be changed by adding following to user.js, display.js etc.
var browserNotSupportedTxt = “This browser does not work...”;
33
4.2 Global value for number of files
When installing InPressive 2.7 you will notice that the popups where to change how many files to show
per page are gone. This setting is now global and will be found under the “Preferences“ window.
If check “Enable popups in style“ the popups will immediately be visible. They will also be visible next time you login.
Changing the “Max. files per page“ or “Enable popups in
style“ will update automatically. Additional reload will not be
needed.
For more info how to change “Max. files per page“ values and default value. See chapter 5.3.3.
4.3 Loading panel
Loading panel will be visible in Browse, Search. Some tweaking can be done to it.
Changing text “Loading N items, please wait...“. Number of files will be inserted where the “[N]” is.
var loadingPanelText = “Loading [N] files... Hold on...”;
Changing animation image.
var loadingPanelAnim = “/my/url/to/animation.gif”;
Change width of loading panel.
var loadingPanelWidth = 400;
Control when the loading panel should be visible. Number that tells how many files should be written
before showing the panel. 5 means that if it’s 5 or more files the panel will be visible. -1 means never.
var loadingPanelControl = 5; // If its less than 5 files the panel will NOT be visible.
34
4.4 Dynamic Fields
Dynamic Fields is a layer that lies on top of database fields in InPressive.
It’s purpose is to show values depending in previous choice. Dynamic Fields will work in Imageinfo and
Search. It will also apply on “NavSearch“ form in Navigate(Chapter 4.2.4).
Setup should be made in user.js for the user. See chapter 5.1. for details about the user.js file.
Sample code for Dynamic Fields - Setting up 3 popups that relies to the content of the previous popups.
var dynamicFields = new Array();
dynamicFields[0] = new Object();
dynamicFields[0].name = “keyword153”;
dynamicFields[0].getmode = “popups_hier”;
dynamicFields[0].dispmode = “popup”;
dynamicFields[0].defaultVal = new addArgument(“”,””);
dynamicFields[0].locked = false;
dynamicFields[0].debug = false;
dynamicFields[0].edit = true;
dynamicFields[0].currentVal = “”;
dynamicFields[0].isWritten = false;
dynamicFields[0].staticArguments = new Array();
dynamicFields[0].staticArguments[0] = new addArgument(“hierType”,”sqlite”);
dynamicFields[0].staticArguments[1] = new addArgument(“DB”,”company”);
dynamicFields[0].dynamicArguments = new Array();
dynamicFields[1] = new Object();
dynamicFields[1].name = “keyword154”;
dynamicFields[1].getmode = “popups_hier”;
dynamicFields[1].dispmode = “popup”;
dynamicFields[1].defaultVal = new addArgument(“”,””);
dynamicFields[1].locked = false;
dynamicFields[1].debug = false;
dynamicFields[1].edit = true;
dynamicFields[1].currentVal = “”;
dynamicFields[1].isWritten = false;
dynamicFields[1].staticArguments = new Array();
dynamicFields[1].staticArguments[0] = new addArgument(“hierType”,”sqlite”);
dynamicFields[1].staticArguments[1] = new addArgument(“DB”,”company”);
dynamicFields[1].dynamicArguments = new Array();
dynamicFields[1].dynamicArguments[0] = new addArgument(“level0”,”keyword153”);
dynamicFields[2] = new Object();
dynamicFields[2].name = “keyword155”;
dynamicFields[2].getmode = “popups_hier”;
dynamicFields[2].dispmode = “popup”;
dynamicFields[2].defaultVal = new addArgument(“”,””);
dynamicFields[2].locked = false;
dynamicFields[2].debug = false;
dynamicFields[2].edit = true;
dynamicFields[2].currentVal = “”;
dynamicFields[2].isWritten = false;
dynamicFields[2].staticArguments = new Array();
35
dynamicFields[2].staticArguments[0] = new addArgument(“hierType”,”sqlite”);
dynamicFields[2].staticArguments[1] = new addArgument(“DB”,”company”);
dynamicFields[2].dynamicArguments = new Array();
dynamicFields[2].dynamicArguments[0] = new addArgument(“level0”,”keyword153”);
dynamicFields[2].dynamicArguments[1] = new addArgument(“level1”,”keyword154”);
For details about this setup see user.js.sample file.
/var/adm/webnative/inprstyle/userjs_samples/user.js.sample
5
Advanced customization
5.1 user.js
There is a lot of functions and possibilities with InPressive that are not described in this manual.
In v2.7 we added a sample library that contains sample functions for all the functions that are not documented here. The content of this file could be copied to your own user.js.
Sample files lives here: “/var/adm/webnative/inprstyle/userjs_samples”
“user.js” is a file used for setting up advanced features in InPressive.
It should live under the user folder /var/adm/webnative/USER/.
If you do not fint it there, create it!
NB! This file has to start and end with SCRIPT tags.
<SCRIPT LANGUAGE=”JavaScript”>
// Code goes here...
</SCRIPT>
5.2 InPressive Stylesheet guide
NB! Be aware of that changing colors etc. with stylesheet will override the settings in InPressive Admin.
5.2.1Common Classes
In the body classes you can change the background color of the document or even add an background
image. Also change margins, padding.
Class name
headerBody
navigateBody
mainBody
trailerBody
*toplevelBody
*bookmarkBody
*basketBody
Explanation
Class set in <BODY> of “inpr_header.html”
Class set in <BODY> of “navigate.html”
Class set in <BODY> of main frame content. Browse, Search, Imageinfo etc.
Class set in <BODY> of “inpr_trailer.html”
Class set in <BODY> of Classic Toplevel frame
Class set in <BODY> of Classic Bookmark frame
Class set in <BODY> of Classic Basket frame
36
bookmarkcommentBody
Class set in <BODY> of popup window for Bookmark comments
slideshowBody
Class set in <BODY> of slideshow window(Image preview)
*Used only in Classic baselayout
Change colors, border, font etc. on common form elements.
Class name
formButton
formButton_plug
formJump
textField
textField#quicksearch
textArea
Explanation
Form buttons used in InPressive.
When using one single plugin. This Class is used for that button.
Class used for popup menus.
Class for regular textfield.
Specific for the Quicksearch input field.
Class for multirow textareas.
Change font on common text elements.
Class name
tableHeadlineFont
listFont
treeFont
treeInfo
fileNameFont
fileInfoFont
folderNameFont
infoTableHeadlineFont
infoTableTextFont
mainFont
dirrefFont
Explanation
Class applied on text above Volumes, Bookmarks, Basket.
Applied on all listitems in navigate except Volumes. See below.
Applied to Volumes and sublevels.
Applied to info becide Volumes and sublevels. “(10)“ etc.
Applied to the filename for each file. In Browse, Search, Imageinfo
etc.
Applied to fileinfo for each file. Filetype, Creator, DB-Fields etc.
Applied to the foldernames in Browse, Search.
Applied to the headline in inpr_main.html. Default main file if no
Home is set.
Applied to the text in inpr_main.html. Default main file if no Home
is set.
Default Class for fonts. Use everywhere where no specific Class exist.
Directory reference in Browse, Search.
5.2.2CSS Faq
Q: How do I remove the margin in the header arround the logo so it fits to the edge?
A: Use the headerBody Class and set margin to 0.
.headerBody { margin: 0px; }
Q: Can I use background images instead of colors?
A: Yes. Use body Classes for this purpose.
.mainBody { background-image: url(/webnativedoc/USER/mybg.jpg); }
Q: How do I change size on file table surrounding each file?
37
A: Use fileTable to redefine the size of the files container.
.fileTable { width: 250px; height: 250px; }
5.3 Advanced features
5.3.1Advanced search in navigation area.
If you are not satisfied with the Quicksearch you can make your own searchform in the navigate area.
This is done in the user.js file.
top.Display.NavSearch = new Object();
top.Display.NavSearch = { show:true , title: “Advanced Search” , displayMode: 1 }
top.Display.NavSearch.Keywords = [153,154,155];
top.Display.NavSearchStatics.selectedvol = { show:false , title: [lang.so,lang.archives]};
For details about this setup see DisplayObject file.
/var/adm/webnative/inprstyle/userjs_samples/DisplayObject
5.3.2Split keywords into tabs in Imageinfo
Keywords can be divided into tabs in Imageinfo. All keywords that are not defined
in the setup will be visible under the default
“Keywords“ tab.
Display.Imageinfo.CustomTabs[0] = new addImageinfoCustTab(TRUE,“Txt1”,“key2”,[153,154]);
Display.Imageinfo.CustomTabs[1] = new addImageinfoCustTab(TRUE,“Txt2”,“key3”,[156]);
For details about this setup see DisplayObject file.
/var/adm/webnative/inprstyle/userjs_samples/DisplayObject
5.3.3Changing “Max. files per page“ popup values and default value
NB! When changing these values a conflict with old cookies can appear. If this
happens the clients cookies needs to be removed.
var maxmatchesValues = [4,8,12,24,48,96,256,512];
It is possible to change the default value. The default value is the number of files
will be visible per page of user has not choose a value in the useradmin area.
This will have no effect when user has changed the “Max. files per page“ value.
var maxmatchesDefault = 48;
5.3.4Open Imageinfo in a popup window
This opens Imageinfo in a new window(Javascript window).
var imageinfoNewWin = false;
To set the window features. Use the following variable.
var imageinfoNewWinOpts = “width=820, height=620, resizable=no”;
38
5.3.5Filter keywords per path
NB! Keep in mind that “Browse” has to be checked in the users permission set if the keywords should
be visible in browse or search.
This is a filter, which means that the keywords will be hidden in the browser, but keyword values could
be found in the page source.
var accumulate = false;
var keywordFilter = new Array();
keywordFilter[0] = new Object();
keywordFilter[0].path = “/FP_vol/Photobusiness/Cams/Minolta”;
keywordFilter[0].IDs = [143];
keywordFilter[1] = new Object();
keywordFilter[1].path = “/FP_vol/Photobusiness/Cams/Canon”;
keywordFilter[1].IDs = [139,141];
For details about this setup see keywordFilter file.
/var/adm/webnative/inprstyle/userjs_samples/keywordFilter
5.3.6Fileinfo in shortdisplay
A couple of things can be done with the fileinfo in shortdisplay(Browse,
Search and Imageinfo).
Such things as removing all or any of the fileinfo labels on each file(Type,
Creator, Resolution, Colorspace, Filesize, Dimension, Comment).
It’s also possible to add keyword info to the shortdisplay info.
For details about this setup see DisplayObject file.
/var/adm/webnative/inprstyle/userjs_samples/DisplayObject
39
Appendix A, InPress Systems Software License
Our software license is included here so you can read it before using the software. DO NOT install the software from this distribution digitaly delievered or by CD media until you have carefully read this Agreement.
BY INSTALLING THIS SOFTWARE YOU ACCEPT ALL THE TERMS AND CONDITIONS OF THIS
AGREEMENT. If you do not agree with the terms and conditions of this Agreement, return the software package within a reasonable time to your supplier for a full refund.
In return for acquiring a license to use the software and related documentation (“Software”), you agree to the
following terms and conditions:
1. Grant of License
InPress Systems grants to you a nonexclusive, nontransferable license to use the Software on one computer
system and to make one copy of the software solely for backup purposes. You must place the same copyright and
other proprietary rights notices on any copy of the Software as appears on the original. You must not transfer,
sell, assign, rent or distribute any copies of the Software to others. InPress Systems reserves all rights not expressly
granted to you.
2. Proprietary Rights
As a licensee, you own the media on which the Software is originally recorded. The Software is copyrighted by
and proprietary to InPress Systems and its suppliers. InPress Systems and its suppliers retain title and ownership
of all copies of the Software. The nonexclusive license set forth in this Agreement is not a sale of the Software
or any copy. You agree that you will not assign, sublicense, transfer, pledge, lease or share your rights under this
Agreement and agree to take all reasonable steps to prevent unauthorized use. You agree you may not reverse assemble, reverse compile, or otherwise translate the software.
3.
License Maintenance and Support
One year of support is included when purchasing InPress Systems products.
The year of support is calculated from the product licensing date or 30 days after the InPress Systems
invoice is issued, whichever occurs first. Additional support is purchased at yearly intervals for 15% of the retail
price of the software. (Please Note: Product modules that are added to the primary license after the original purchase, will be added to the existing support contract of the primary product license and therefore a full year of
support will not be included in such cases).
4. No Other Rights
Except as stated above, this Agreement does not grant you any rights to patents, copyrights, trade secrets, trade
names, trademarks (whether registered or unregistered), or any other rights, franchises, or license in respect of the
Software. You MAY NOT MODIFY TRANSLATE, DISASSEMBLE, OR DECOMPILE THE SOFTWARE
OR ANY COPY, IN WHOLE OR IN PART.
5. Term
The license is effective until terminated. You may terminate the license at any time by destroying the Software
(including the related documentation) together with all copies or modifications in any form. InPress Systems
will have the right to terminate your license immediately if you fail to comply with any term or condition of the
Agreement. Upon any termination you must destroy the Software together with all copies or modifications in
any form.
6. LIMITED WARRANTY
InPress Systems warrants to you that the Software will perform substantially in accordance with the user’s manual
for a period of thirty (30) days after delivery to you (“Warranty Period”). If the Software fails to comply with
this limited warranty, InPress Systems will at its option and at no cost to you, correct errors you discover which
40
you report during the Warranty Period, or replace the Software, or refund the license fee paid for the Software
provided you return the Software. INPRESS SYSTEMS AND ITS SUPPLIERS DO NOT AND CANNOT
WARRANT THE PERFORMANCE OR RESULTS YOU MAY OBTAIN BY USING THE SOFTWARE OR
DOCUMENTATION. THE FOREGOING STATES THE SOLE AND EXCLUSIVE REMEDIES INPRESS
SYSTEMS WILL PROVIDE FOR BREACH OF WARRANTY. YOU UNDERSTAND THAT, EXCEPT
FOR THE FOREGOING 30-DAY LIMITED WARRANTY, INPRESS SYSTEMS AND ITS SUPPLIERS
MAKE NO WARRANTIES EXPRESS OR IMPLIED, AS TO PERFORMANCE, OR NON-INFRINGEMENT OF THIRD PARTY RIGHTS, MERCHANTABILITY, OR FITNESS FOR ANY PARTICULAR
PURPOSE. Some states do not allow the exclusion of implied warranties or limitations on how long an implied
warranty may last, so the above limitations may not apply to you. This warranty gives you specific legal rights
and you may also have other rights which vary from state to state.
a. LIMIT OF LIABILITY
IN NO EVENT WILL INPRESS SYSTEMS OR ITS SUPPLIER BE LIABLE TO YOU FOR ANY SPECIAL DAMAGES, INCLUDING ANY LOST PROFITS, LOST SAVINGS OR OTHER INCIDENTAL
OR CONSEQUENTIAL DAMAGES, EVEN IF INPRESS SYSTEMS OR ANY INPRESS SYSTEMS REPRESENTATIVE HAS BEEN ADVISED OF THE POSSIBILITY OF SUCH DAMAGES, OR FOR ANY
CLAIM BY ANY OTHER PARTY. Some states do not allow the exclusion or limitation of incidental or consequential damages, so the above limitation or exclusion may not apply to you.
b. Integration.
You acknowledge that you have read this Agreement, understand it, and that by installing the software you agree
to be bound by its terms and conditions. You further agree that it is the complete and exclusive statement of the
agreement between InPress Systems and you which supersedes any proposal or prior agreement, oral or written,
and any other communications between InPress Systems and you relating to the subject matter of this Agreement. No variation of the terms of the Agreement or any different terms will be enforceable against InPress Systems unless InPress Systems gives its express consent, including an express waiver of the terms of this Agreement,
in writing signed by an officer of InPress Systems.
7. Governing Law
This Agreement shall be governed by and construed in accordance with the laws of Sweden without giving effect
to the choice of law principles thereof.
8. Arbitration
Any dispute, controversy or claim araising out of or in connection with this Agreement, or the breach, termination or invalidity thereof, shall be settled by arbitration in accordance with Göteborgsklausulerna om skiljeförfarande (simplified rules of arbitation). The arbital tribunal shall be composed of one arbitrator.
41