1
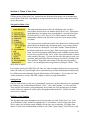
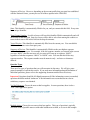
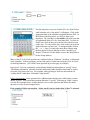
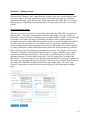
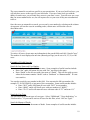
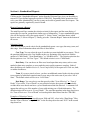
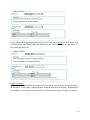
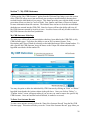
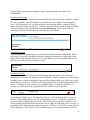
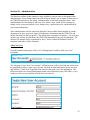
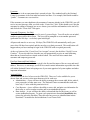
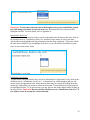
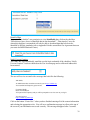
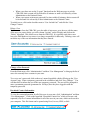
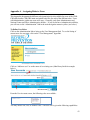
Understanding How
and Why Children Die
& Taking Actions to
Prevent Child Deaths
Child Death Review
Case Reporting System
INTERNET DATABASE
User’s Manual
Version 3.0
©October, 2013
National Center for Review & Prevention of Child Deaths
Table of Contents
1. Terminology
4
2. Getting In, Out, and Around the Website
Accessing the Website
Login to the Website
The Welcome Page and Website Navigation
Exiting the Website
6
6
6
7
8
3. Your Account
Edit Your Contact Information
Change Your Password
Assigned Roles
9
9
9
9
4. Enter New Case
Navigation and Saving Data
Defining a Case Number
Question Types
Ensuring Data Quality
11
11
11
12
15
5. Manage Cases
How to Search for a Case
Case Actions
Import Vital Records
18
18
21
22
6. Standardized Reports
How to Generate a Report
25
25
7. My CDR Outcomes
28
8. Download Data
Downloading Data
Working with the Download
30
30
32
9. Help
Supporting Documentation
34
34
10. Administrative Functions
Add a New User
Search for an Existing User
Change a User Password
Download Contact Information
36
36
39
41
41
11. Appendix A – Assigning Roles to Users
42
Section 1 – Terminology
Becoming familiar with these common Internet terms will help you to understand the
instructions provided in this guide. The following page has illustrated examples of these terms.
1.
Internet browser: A program that provides a way to look at and interact with all the
information on the Internet. Common browsers include Microsoft Internet Explorer,
Chrome, Foxfire and Safari.
2.
Window: The boxed area on the monitor that the browser’s information opens in.
3.
Web page: The collection of information that displays in the window of the Internet
browser at one time. Often simply referred to as a “page”.
4.
Website: A collection of related web pages. You can think of a web site as a book
that arrives a page at a time as you request each one.
5.
Menu bar: The strip of the window, usually at the top of the screen, containing words
the user can point to and click on to access browser functions.
6.
Toolbar: The strip of the window containing icons the user can point to and click on
that are shortcuts to access browser functions.
7.
Address bar: The strip of the window that the user can type in the address for a
website or view the address for the web page that is being displayed.
8.
Navigation menu: The area on the left side of the screen that allows a user to access a
particular part of the web site.
9.
Scroll bar: The strip at the right side of the window that allows the user to access
more information than can be displayed on the monitor at a given time. Click above
or below the box to see additional information, or use the arrows for more control of
movement. Scroll bars are not displayed in windows where all of the information for
that page fits within the window.
10.
Field: Fields are places where information is stored. When you answer a question,
you type information into a field.
11.
Value: Values are the individual choices available for a given field. “Yes” and “No”
are examples of values.
12.
Help icon: An icon with a question mark. When you click on this icon, information
about the question from the data dictionary will appear.
13.
Mouse pointer: The moving arrow or “I” icon seen on the window that allows users
to see where to point and click.
14.
Login Status: Displays the current user name and team that you are logged in under.
By clicking on the underlined team name, you are able to switch to different teams (if
applicable).
4
Examples of Internet terms:
7. Address bar
5. Menu bar
6. Toolbar
11. Value
8. Navigation menu
14. Login Status
10. Field
12. Help Icon
9. Scroll bar
5
Section 2 – Getting In, Out, and Around the Website
Accessing the Website
Users must have Internet Explorer, Version 8.0 or higher, in order to use the Child Death Review
Case Reporting System (CDR-CRS). (Microsoft Internet Explorer 8.0 can be downloaded for
free at http://windows.microsoft.com/en-US/internet-explorer/downloads/ie. Please check with
your technology staff before downloading and installing any new software.) Earlier versions of
Internet Explorer are not supported by the new software. (To check which version of Internet
Explorer you currently have select Help from the Menu Bar and then About Internet
Explorer.) Other internet browsers, such as Firefox and Chrome, will also work but have not
been thoroughly tested. Safari is not supported by the CDR-CRS.
Open your Internet browser, and type https://www.cdrdata.org into the address bar of the
browser. It is important to include the ‘s’ after ‘http’ otherwise the secure server may not
recognize your contact attempt.
You may want to create a bookmark for this website so that you can easily access it in the future
without having to remember the text you would need to type in the address bar. To create a
bookmark:
1) Click on “Favorites” in the menu bar. This will initiate a drop-down list of options.
2) The first option on this list is “Add to Favorites...”; click on this.
3) A window will launch, in which you have the option of changing the bookmark name
and placing it in a folder with other bookmarks. If you are unsure which settings you
prefer, simply click on the “OK” button.
4) When you next click on “Favorites,” this website will be included in the drop-down list
of options (or in a folder in the drop-down list if you placed it there).
Login to the Website
The first page of the website is a general information page that is available to everyone on the
Internet. Type your username and password in the appropriate places and click on the “Login”
button.
In order to login to the website, you
must be a registered user of the CDRCRS. To become a registered user,
contact your designated State
Administrator or the National Center for
the Review & Prevention of Child
Deaths at 1-800-656-2434.
If you have forgotten your password,
click on the “I Forgot My Password” hyperlink below the “Login” button. You will then be
prompted to enter an email address to which a new, temporary password will be sent (For
security reasons, usernames will not be included in the email). This email address must already
6
exist in the CDR-CRS. You will then have twenty-four hours to enter the temporary password
into the CDR-CRS before it expires. (If you wait more than twenty-four hours, click on the “I
Forgot My Password” hyperlink again to re-set another temporary password.) Once you have
successfully logged in with the temporary password, you will then be prompted to set a
permanent password. If you have forgotten your username, please contact the National Center,
as there is no automatic way to recover usernames.
Important! Effective with Version 3.0 of the CDR-CRS, all usernames and passwords are
case sensitive. Passwords must be at least 8 characters in length, include one uppercase
letter, one lowercase letter, and one number. You will be prompted to change your
password every 180 days.
If an incorrect password is entered five times in ten minutes, the CDR-CRS will lock your
account for security reasons. Should this occur, contact your State Administrator or the National
Center to have your account unlocked.
If you are ever unable to log into the CDR-CRS, please do not hesitate to contact the National
Center at 1-800-656-2434 or email us at [email protected] for assistance.
The Welcome Page and Website Navigation
After you successfully login, you will be directed to your Welcome Page. This page gives
specific information about your state’s child death review program and who to contact for more
information in your state.
On the left side of the Welcome Page is the navigation menu for
the website. The roles (permissions) given to you by your State
Administrator determine what you can and cannot access in the
CDR-CRS; therefore, the navigation menu you see may appear
slightly different than the example given here.
Each menu option on the Welcome Page represents a different
function you can perform. To use any navigation menu in the
CDR-CRS, simply move your mouse pointer to an option, such as
“Standardized Reports,” and the option will become underlined.
When you click your mouse, the option that is underlined will be
selected and the appropriate web page will automatically load.
The navigation menu will then change to a navigation menu that is
specific to the function that you selected when the new page loads. These other navigation
menus will be discussed in later sections.
Important! Please refrain from using the “Back” button located in the toolbar of your browser
while you are in a data entry page. You may lose data that has been entered unless “Save and
Continue” or “Save and Exit” was clicked prior to hitting the “Back” button.
7
Exiting the Website
Important! Use the “Logout” option on the Welcome Page navigation menu to exit the website
before closing your Internet browser.
The reason for this has to do with the nature of web programming. If you simply close your
Internet browser without using the “Logout” hyperlink, the CDR-CRS cannot detect your exit
and thinks that you are still in the System.
8
Section 3 – Your Account
Clicking on the “Your Account” option from the Welcome Page brings you to the section of the
CDR-CRS where you can modify your contact information, review your password expiration
date, update your password, and review your assigned role (permission) levels for the CDR-CRS.
Each of these features is discussed in more detail below.
Edit Your Contact Information
Your State Administrator has the ability to download the contact information for all of the users
in your state. The National Center can download the contact information for all of the users of
the CDR-CRS. This information may be used for mass mailings/emailings to keep you apprised
of CDR-CRS updates and other important information or to contact you directly if you report a
problem. Your information will not be used by the National Center for any other purposes.
Please periodically review your contact information to keep it current.
Once you have entered or edited any information on the “Your Account” page, click on the
“Update Account” button at the bottom of the screen. Once “Update Account” has been clicked,
you will see the message “Account Updated” at the top of screen (in a yellow bar) confirming
the changes have been saved. This message will appear for approximately 5 seconds before it
disappears from the screen.
Change Your Password
All passwords must be re-set every 180 days. The CDR-CRS will automatically notify you when
180 days has expired when you attempt to login. You will then need to re-set your password.
(The CDR-CRS will prompt you to enter your old password and then ask you to enter a new
password. You will need to enter the new password again for confirmation purposes.) All
passwords are case sensitive and must be at least eight characters in length, including one
uppercase letter, one lowercase letter, and one number.
You are able to re-set your password at any time by clicking on the hyperlink “Click to change
your password” located to the right of the word “Password” on “Your Account” page. Once this
hyperlink has been clicked, you will be prompted to enter your old password, your new password
(which must meet password requirements listed above), and the new password again. Next click
the “Set Password” button. You will then be brought back to the login screen and asked to enter
your username and new password information.
Assigned Roles
Near the bottom of the “Your Account” page you can view the roles (permission levels) that
have been granted to you from your State Administrator. You are not able to alter these settings.
Please contact your State Administrator if you have any questions about your permission levels.
9
Below is a brief explanation of the different available roles in the CDR-CRS:
Administrator – A user with this role will have the ability to manage CDR-CRS accounts
(add, delete, unlock, reset passwords) of other state users. The National Center
recommends that each state has only 1-2 users with this permission level.
Case Reporter – A user with this role will have the ability to enter, edit, and print case
information for their team, as well as conduct searches and create standardized reports.
Data Analyst – A user with this role will have the ability to download data (identified or
de-identified) for their team, as well as create standardized reports.
Users may have more than one role assigned to them.
Please see Appendix A for more detailed information about roles.
10
Section 4 – Enter a New Case
Clicking on the “Enter New Case” option from the Welcome Page brings you to the data entry
section of the CDR-CRS. Depending on your permission levels, you may or may not be able to
access this section.
Navigation within a Case
The main navigation menu on the left will change once you have
successfully created a new case number (Enter New Case). Each option
on the data entry navigation menu corresponds to a section of the paper
Child Death Review Case Report Form. Menu options will become
underlined to indicate your selection as you move your mouse pointer
over them.
You can proceed to a particular section of the data tool by clicking on the
desired option in the data entry navigation menu, or you can proceed to
the next section by clicking the “Save and Continue” button located at
the bottom right corner of every page. Data on each page will be saved
when you use the navigation menu and proceed to another section of the
tool or when you click on the “Save” or the “Save and Continue” buttons
at the bottom of the page. You can also leave the data entry section, save
your data, and return to the Welcome Page at any time by clicking on the
“Save and Exit” hyperlink at the bottom of the data entry navigation
menu. You can navigate between questions by using the “Enter,” “Tab,”
arrow keys or mouse.
For security reasons, the CDR-CRS will “time out” after 60 minutes if there has been no activity
(Note: the “time out” period length can be customized by your State Administrator and thus may
be a different increment than the System default setting of 60 minutes). If you “time out” and
wish to continue to use the CDR-CRS, simply re-enter your login information.
Saving a Case
Data for each section of your case is permanently saved once you have initiated a save command
by clicking on one of the following buttons: “Save,” “Save and Continue,” or “Save and Exit.”
Your data for each section is also permanently saved when you click (and navigate) to another
section of the case report tool via the yellow navigation menu on the left. Data is also autosaved every 5 minutes.
Defining a Case Number
The first data entry page that appears on your screen after you click “Enter New Case” is the
“Case Definition” page, which corresponds to the “Case Number” section of the paper form.
This is where you create the unique identifier for the case you are entering. The paper form
allows for four levels of information to define a case: State, Team/County, Year of Review, and
11
Sequence of Review. However, depending on the account profile that your state has established
with the National Center, you may not see all of these options in the CDR-CRS.
State: This identifier is automatically filled in for you, and you cannot edit this field. Every state
has a unique identifier.
Team/County Number: Local-level users will have this identifier filled in automatically and will
not be able to edit this field. State-level users will be able to select from among the counties or
teams in their state to fill in this field via the drop down menu.
Year of Review: This identifier is automatically filled in to the current year. You can edit this
field in order to enter cases from past years.
Sequence of Review: This identifier is automatically filled in to the next highest sequence
number for the current year. For example, if the last sequence number you entered in the current
year was “00021” then the next new case you enter will come up as sequence “00022,”
regardless of whether sequences “00019” or “00020” exist. You can edit this field to any
sequence number. The sequence number must be numeric only – no letters or characters
allowed.
Question Types
There are five types of questions that you will encounter in data entry. We will give some
general examples of each in this section. If you need more information about the definition of
individual questions, please refer to the supporting document entitled Data Dictionary.
Important! Questions should be left blank (unanswered) if the information was not researched;
questions should be marked “unknown” if the information was researched but no clear or
satisfactory response was obtained.
Yes/No/Unknown: Choose the answer that best applies. In some questions, there is also a
“N/A” (Not Applicable) option.
Multiple choice: Choose the one answer that best applies. This type of question is typically
viewed as a list of possible answers with radio buttons next to them, as is seen in the example
12
below. The CDR-CRS will not let you select more than one answer to a multiple choice
question.
Check all that apply: Choose the answer (s) that best applies. (Only questions that have a square
box next to a list of possible answers (instead of a radio button) are check all that apply).
Approach each checkbox as if it is a yes/no question. If the answer is “Yes,” check the box. If
the answer is “No,” leave the box blank.
Fill in the blank: These are questions with simple boxes in which you can answer with text,
numbers, or a date. See below for examples of each.
13
For date questions, once you click the fill in the blank field, a
small calendar (a.k.a.“date picker”) will appear. Click on the
appropriate date in the calendar to populate the date field. At
the bottom of the date picker, you will see three years
displayed. The year that is in the middle will be the year that
gets populated in the fill in the blank date field. To select an
earlier year, click on the year to the far left to advance to an
earlier year. To select a later year, click on the year to the far
right to advance to a later year. To change months, click on
the – or + signs. You may also enter dates without using
the date picker as long as the date is in the “mm/dd/yyyy”
format. (Click twice on the field to remove the date picker or
hit the Escape button.)
Many of the fill in the blank questions are combined with an “Unknown” checkbox, as illustrated
in the examples. In these questions, you have the option of either answering the fill in the blank
or checking unknown. (See Child’s name question on previous page as example.)
Important! Users are cautioned to avoid entering identifying information in “specify” boxes.
“Identifying information” primarily includes names and county identifiers that could be used to
recognize your team or the case. For example, when referring to local law enforcement use
“county sheriff” rather than “Columbia County sheriff.”
Follow-up questions: Some questions have additional parts that become visible when a certain
answer is given. This can include questions that have a “specify” following an “Other” answer,
as in the first example below, or those that have one or more questions that follow the initial
question, as in the second example below.
First example of follow up question – Other specify text box loads when “Other” is selected.
14
Second example of follow up question – follow up questions load when “Yes” is selected.
Ensuring Data Quality
Data Dictionary
Detailed information about each individual question is readily available and accessible when
doing data entry of cases. Click on the question mark that is located in the upper right hand
corner of every question to display further definitional information.
15
To make the data dictionary text disappear, double-click on the question mark and the screen will
return to its original state. A .pdf file of the entire Data Dictionary can also be downloaded from
the Help page of the CDR-CRS.
Skip Patterns
While the paper Child Death Review Case Report Form appears daunting, there are on average
six pages of questions for each case that will not be applicable and therefore do not need to be
completed. For example, if a child has died in a house fire, the questions about drowning, motor
vehicle deaths, etc., will not be needed, and so the system will “skip” them. The skip patterns
written into the paper form are translated to the Internet by hiding all of the questions that are
skipped according to the answers that are entered. So, you will never see a question on the CDRCRS that does not apply to the case being entered. Some sections are more complex and require
further explanation of how the skip patterns are translated to the CDR-CRS (see below).
In Section F: Primary Cause of Death, you are asked to choose only one cause of death. In
many cases that have two causes of death, one cause is more likely to contribute information for
prevention efforts than the other. For example, in a death where a car went off the road into a
pond, the cause of death could potentially be both motor vehicle and drowning. However,
information about flotation devices and whether the child could swim could be irrelevant for
prevention, but information about the incident that caused the car to end up in the pond could be
more relevant.
Section G: Detailed Information by Cause of Death is dependent on the primary cause of death
selected in Section F. If the primary cause of death is “Drowning,” then only the questions from
G3: Drowning on the paper form are available when the Section G page loads. In turn, if the
primary cause of death is “Cancer,” then only the questions from G11: Medical Condition on the
paper form are available when the Section G page loads. There are a few special conditions for
infants where you are asked to fill out more than one section. In these cases, the CDR-CRS will
automatically load both sections you need.
Question Validation
Certain questions will simply not allow you to enter a response that would lead to conflicting
answers in the data. The most common examples of this are check all that apply questions or fill
in the blank questions with an “Unknown” checkbox. In the following example, it would not
make sense to answer both “Yes, as victim” and “Unknown”. Therefore, if you have already
answered “Yes, as victim” and then click on “Unknown,” your first response in “Yes, as victim”
will be cleared and “Unknown” will stay checked.
16
When a question asks for a number response, there is a check to make sure you entered a
numeric entry, rather than text. There is also a check to be sure that dates are entered in a
“mm/dd/yyyy” format. In the following example, immediately after an invalid answer is entered,
a yellow triangle with an exclamation point will appear in the box, followed by a message in
gray that says “Not a valid number.” This yellow triangle indicates that the answer is not valid
and should be corrected.
No responses on a page will be saved if there is a single error message returned. The CDR-CRS
cannot submit the correct answers while holding back the incorrect one. It is an all or nothing
process. Therefore, if you receive an error message, you will not be allowed to leave the page
until you have addressed all of the inconsistencies. No data will be lost as long as you correct
the errors and save the page using either “Save, “Save and Continue,” or the navigation menu.
Making Changes to Data Entered
Changes can be made to any question in both the “Enter New Case” mode and the “Manage
Cases” mode (to be discussed in Section 5). As previously mentioned, data is saved
permanently as you move from page to page. If you return to a page that you have completed,
you can change an answer you had previously saved. On your next page save, these changes will
be saved with the new answer. Any previous answers to that question, including previous
answers in follow-up questions, will be deleted. To de-select a response to a radio button,
simply click on the radio button again. If you have made changes to a page prior to saving it
and have made a mistake that you wish to undo, you can use the “Undo Changes” hyperlink
located at the bottom, left corner of every data entry page. Unlike the familiar undo function in
Windows that will undo the last single change, clicking on this hyperlink will remove all changes
made to the current page since the last save. Data that was previously saved remains unchanged.
17
Section 5 – Manage Cases
Clicking on the “Manage Cases” option from the Welcome Page gives you the ability to enter
new cases, import cases from other databases (this works only if your state is set up/able to
perform this function), and search for cases already entered into the CDR-CRS for viewing or
editing purposes. Depending on your permissions, you may or may not be able to access this
section.
How to Search for a Case
There are several ways to search for cases already entered into the CDR-CRS via a number of
different filters. The major search parameters include: name/number, case type, manner of
death, date of entry (Section N), team name, cause of death, and date of death. You are also able
to search for cases where data entry is incomplete (Section N), where quality assurance is
incomplete (Section N), where additional prevention initiatives need to be updated (Section K),
as well as search for cases that were reviewed by teams for out of state residents and out of
county residents (this last search parameter only works for child death review teams organized
by county jurisdictions). More detailed information about each search parameter is presented
below. You may enter more than one search parameter at a time. For example, you can select
“Homicide” in Manner of Death and “External-Weapon” in Cause of Death to retrieve those
cases that meet both those search filters. If you leave a search field blank (i.e. do not select
anything in the box), it will not filter on that field. Click on “Search Cases” to display the
filtered cases. The total number of cases that have been entered is listed at the top, regardless of
how many cases are displayed on the current page. If there are a large number of cases returned
in a search, the CDR-CRS will split the list of cases into multiple pages. The “Next” and
“Previous” hyperlinks are available at the bottom of the page to move through the multiple
pages.
18
The cases returned in a search are specific to your permissions. If you are a local-level user, you
will only have access to the cases for your local team. If you are a state-level user with the
ability to search cases, you will only have access to your state’s cases. You will never see a case
that you are not authorized to see, nor will anyone else see your cases if they are not authorized
to do so.
Once the cases are returned in a search, you can sort by case number by selecting on the column.
An up arrow will sort the cases in ascending order; a down arrow will sort the cases in
descending order.
To retrieve all cases, do not enter any information in the search fields and click “Search Cases.”
The number of cases displayed at one time (Records per Page) can be set to 10, 25, 50, or 100
cases.
Examples of Useful Searches
Search for Last Name and Case Number
You can search for cases by the child’s last name. Some examples of useful searches include:
Enter “Sm” and it will return all cases with “Sm” anywhere in the name.
Enter “Smith” to list all cases with a last name of “Smith”. This will also pick up cases
where the last name contains “Smith” such as “Smithson” or “Hammersmith.” It is not
case sensitive.
You can also search by case number in this field. You can enter the full case number (for
example, 23-10-2012-00015) or just parts of the case number. Some useful searches include:
Enter “2012” and it will return all cases with “2012” in case number.
Enter “00005” and it will list all cases with case numbers of “00005.”
Enter “23-01” and it will return all cases with state code of “23” and team “01.”
Search for Case Type
You can search for different types of case types. Select “Child death,” “Near death injury” or
“Not born alive.” If you want to retrieve all cases for this filter, select “All Case Types.”
Search for Manner of Death
You can search for cases by the manner of death. Some examples of useful searches include:
19
Select “Unknown” to retrieve all cases where the manner of death was listed as
“Unknown.”
Select “Not set” to find all cases where the manner of death was not answered.
Search for Date of Entry Complete (Section N)
You can search for all cases by the date entered in the field “Date of Entry Complete (Section
N).” Cases that do not have this date completed will not be included in the search results. Some
examples of useful searches include:
Select “01/01/2012” in the “From” date and “12/31/2012” in the “To” date to find all
cases that were entered in calendar year 2012.
Select the same date in both fields to retrieve all deaths that were entered on a particular
day.
Select just the start date in the “From” field to list all cases that were entered on that date
and after.
Enter just the end date in the “To” field to list all cases that were entered on that date and
before.
Search for Team Name
If you are a state level user with the ability to search cases, you will be able to filter by cases for
specific teams by using the drop down box and selecting the team of interest. Only one team
selection may be made per search request.
Search for Cause of Death
You can search for cases by the cause of death but can only search for one cause of death at a
time. Some examples of useful searches include:
Select “Unknown” to return all cases where the cause of death was listed as “Unknown.”
Select “no response” to return all cases where the cause of death was left blank.
Select a specific type of injury or medical cause to return cases due to that particular
cause.
Select “Undetermined if injury or medical cause” to return all cases where the cause of
death was not classified as an injury or medical cause.
Search for Date of Death
You can search for all cases where the date of death occurred within a particular time period.
Some examples of useful searches include:
Select “01/01/2012” in the “From” date and “12/31/2012” in the “To” date to find all
cases that were entered in calendar year 2012.
Select the same date in both fields to retrieve all deaths that were entered on a particular
day.
Select just the start date in the “From” field to list all cases that were entered on that date
and after.
Enter just the end date in the “To” field to list all cases that were entered on that date and
before.
20
Search for Data Entry Incomplete
This search retrieves all cases that do not have the check box selected in “Data Entry Completed”
in Section N, Form Completed By.
Search for Quality Assurance Incomplete
This search feature finds all cases that do not have the check box selected in “Data Quality
Assurance Completed for this Case” in Section N, Form Completed By.
Search for Prevention Updates
This search retrieves all cases that have the check box selected in “Mark this case to edit/add
prevention actions at a later date” in Section K, Prevention Initiatives Resulting from the Review.
Search for Out of State Resident Review
This search feature finds all out of state cases that were reviewed by your state or local level
team (whether you can access this search depends on your user role (permission levels)). Out of
state residency is determined by the information entered into Section A, Child Information,
question A8 (Residence Address).
Search for Out of County Resident Review
This search retrieves all out of county resident cases that were reviewed by your local level team.
Out of county residency is determined by the information entered into Section A, Child
Information, question A8 (Residence Address). For state level users, this search parameter will be
disabled.
Case Search Results: Case Actions
After you have located the case that you are searching for, you have three action options that you
can perform: edit/view, print, and delete. Click on the hyperlink of the action in the same row as
the case that you are interested in. The example below illustrates that the edit action will be
selected for the first case.
Edit/View Case
To retrieve a case that has already been created in the CDR-CRS, click on the hyperlink for the
Case Number (first column in search results field). This action will open the selected case such
21
that you may continue to perform data entry or to check the information that has already been
entered.
Print Case
Clicking on the “Print” hyperlink will cause a pop up box to appear in which you will need to
click “Save” in order to download the file. (You will also be directed to “Please Wait” while the
PDF is being generated. This may take a few minutes. Just click on the Manage Cases screen
again to remove the “Please Wait” message once the PDF has been created.) Next, specify the
filename and select the pathway where you would like the PDF of the Print Case to download.
You will need to have Adobe Acrobat Reader or Adobe Acrobat Professional to use Print Case.
Once you have opened the PDF, you will note that all the information that you have entered and
saved for that case is filled in the PDF. Due to space constraints, some of the “Specify”
information may be truncated for printing, but all of the information you entered has been saved.
Delete Case
Clicking “Delete” will remove an existing case from the CDR-CRS. You will see a “Confirm
Action” screen asking if you are sure that you want to delete the selected case. If you wish to
proceed with deleting the case, click “Okay.” If you wish to keep the case intact, click “Cancel.”
If a case is mistakenly deleted, contact the National Center for the Review & Prevention of Child
Deaths to recover the case.
Import Vital Records Data into Case Record (State Administrators Only)
State Administrators have the ability to populate a limited number of CDR-CRS fields from Vital
Statistics data. A local user can then create a new case and have the data prepopulated in the
CDR-CRS, which results in fewer data entry errors and less time to complete data entry.
Because this process can be rather technical, State Administrators are strongly encouraged to
contact the National Center for more information about this feature and to refer to the How to
Import Vital Stats document available on the Help page in the System. The steps outlined below
provide just a brief summary of this process.
Complete Import Template with Vital Statistics Data
In order to import Vital Records data into the CDR-CRS, states will need to complete an
electronic template (“Download External Source Linkage Template” is found by clicking on the
“Import Vital Records” hyperlink from the Manage Cases screen). The template contains up to
79 fields available in Vital Statistics records that can be imported into the CDR-CRS. The
following fields must be populated in the template in order for the import process to work: CDRCRS State ID, Death Certificate number, Child’s first name, Child’s last name, and Child’s full
date of death (month, day, year). State Administrators should click the “Submit” button once the
template has been completed and added to the CDR-CRS via the “Browse” button.
22
The CDR-CRS will then generate a message indicating how many records were successfully
added to the CDR-CRS.
Reminder: Only users with administrative rights (State Administrators) have the ability to
import Vital Records from the Manage Cases screen. The “Import Vital Records” hyperlink will
not be visible for other users.
Upload the Vital Stats Data to Populate a New Case
Once the Vital Stats data have been successfully imported into the CDR-CRS by a State
Administrator, a local user can then use the uploaded data to populate a new case by clicking on
the “Create Case from Import” hyperlink from the Manage Cases screen.
The local user will need to enter the Date of Death, Last Name and First Name and click on the
“Search Imports” button on the Create New Case from Import screen. If the record is found in
the uploaded data, then the name will appear in the grid (see example below). Click on the
“create” hyperlink to finish case creation. The local user will then be directed to the Case
Definition page to continue data entry. (The Vital Statistics information from the template will
have automatically been imported into the case.) If a case record is not found, then the user will
need to return to the Manage Cases screen and click on “Enter New Case” to proceed with data
entry or contact their State Administrator for assistance in determining why the child’s record is
not available for import.
23
24
Section 6 –Standardized Reports
Clicking on the “Standardized Reports” option from the Welcome Page gives you the ability to
run one of 32 pre-defined aggregate reports for CDR-CRS. Depending on the permission level
set by your State Administrator, you may or may not be able to generate state-level reports. The
reports are generally organized by cause of death.
How to Generate a Report
The main Reports Page contains the selection criteria for the reports and the menu listing of
reports that you can run, grouped into similar types of information. To run a standardized report,
you will first need to select your report criteria (“1. Select Criteria”) and then choose which
report to run (“2. Select A Report”). Finally, press the “Generate Report” button at the bottom of
the screen.
Selection Criteria
There are four major search criteria for the standardized reports: case type, data entry, team, and
date range. More information about each filter is listed below.
Case Type: You can select the type of case that you want included in your report. This is
the question found next to the Case Number at the very beginning of the report tool with the
options of “Child Death,” “Near Death Injury,” or “Not Born Alive.” The selection criterion also
has the option to view “All Case Types.” The default criteria is set to “Child Death.”
Data Entry: You can choose to filter cases based upon data entry status, such as cases
marked as data entry complete or cases marked as state quality assurance complete. Both of
these checkboxes are found in Section N, Form Completed By of the report tool. Click one, both,
or neither checkboxes.
Team: If you are a state-level user, you have an additional control in the selection criteria
to run reports by individual counties/teams in your state or the entire state if you select “All of
State.” The default criteria will be set to “All of State.”
Date Range: You can select to run the report by either “Year of Review” or “Year of
Death.” If you select “Year of Death” as your selection criteria, the reports will automatically
exclude those cases that do not have a year of death entered into the data tool. A statement will
appear that advises you of the number of cases with missing year of death information. The
default criteria will be to set to “Year of Death.” The years that populate in the drop down boxes
for “Year of Review or “Year of Death” are based upon the data entered into the CDR-CRS.
Examples of Selection Criteria
To run a report for all cases reviewed between 2004 and 2012, select in the “Data Range” filter
box the “Year of Review” and pick “2004” in the first drop down box and “2012” in the second
drop down box.
25
If you want to run a report that includes all cases where the year of death was 2010, select “Year
of Death” in the “Date Range” filter box and then choose “2010” in the first box and “2010” in
the second drop down box.
Report Generation
After you have verified the selection criteria for your reports, find the report you wish to run in
the list below. Click on the “Generate Report” button at the bottom of the page. Depending on
the complexity of the report, it may take up to several minutes to generate so please be patient.
26
Every report has a header that displays information about the report generated including the
following: the report title; the start and end review year or start and end death year selected in the
criteria; your state; your local team, if a local-level report selected in the criteria; the case type
selected in the criteria; and whether or not the cases have been completed for data entry and/or
quality assurance completed by state
Many reports also have a footer on the last page that provides more information about the data
displayed in the body of the report.
Save a Report
After you have generated a standardized report, you will have the option to save your report by
clicking on the “Download PDF” hyperlink in the top right-hand corner of the screen. This
action will launch a File Download pop up window where you should click “Save” to complete
this action.
Print a Report
You can print a standardized report in one of two ways: 1.) Click on the “Print Report” hyperlink
in the top right-hand corner of the screen. This action will launch a new Print window; click
“Print” to complete this action. 2) Click on the “Download PDF” hyperlink in the top right-hand
corner of the screen. As stated above, this action will launch a File Download window. Once the
file is saved as a PDF, you will be able to print the report in Adobe.
Export Report to Excel
You can download the standardized report by clicking on the “Download XLS” hyperlink in the
top right-hand corner of the screen. This action will launch a File Download pop up window
where you should click “Save” to complete this action. Your report will automatically be saved
in Microsoft Excel format where you can further customize the report output.
27
Section 7 – My CDR Outcomes
Clicking on the “My CDR Outcomes” option from the Welcome Page brings you to the section
of the CDR-CRS where users (state and local) can record prevention initiatives that may have
resulted from the child death review process. This feature provides users with the ability to track
prevention efforts over time by Cause of Death, Year, Quarter, and Name of Person to contact
for more information about the outcome. The initiative does not have to be tied to an individual
death that was entered into the CDR-CRS. State level users will have the ability edit/view all
My CDR Outcomes entered by local-level users. Local-level users will only be able to edit/view
My CDR Outcomes for their local jurisdiction.
My CDR Outcomes Main Page
The main page will list all prevention initiatives that have been added to the CDR-CRS via My
CDR Outcomes page. Users have the ability to sort on ID, Last name, Quarter, Year,
Description, and Cause of Death by selecting on the individual arrows in the column headers. To
edit a specific My CDR Outcome, move the mouse to the Unique ID column and select the
hyperlink associated with the number ID.
You may also print or delete the individual My CDR Outcome by clicking on “Print” or “Delete”
hyperlink located under the Actions column in the grid above. Once you click on “Delete,” a
“Confirm Action” screen will appear asking if you are sure you want to remove the specific My
CDR Outcome. Once an Outcome has been deleted, it cannot be recovered.
To Enter New Outcome Records
To enter a new outcome record, click on the “Enter New Outcome Record” from the My CDR
Outcomes page. This action will take you to the “Create New Outcome Record” page where you
28
may enter a short description of the prevention initiative; when the outcome was implemented;
the lead person to contact for more information; and the associated cause of death. Click on the
“Create New” button located at the bottom of the screen when done.
Exporting/Printing My CDR Outcomes
To download all of your My CDR Outcomes, click on the “Download My CDR Outcomes”
hyperlink located at the top of the page. This will launch a pop up window where you will have
the option to save the file as a tab-delimited text file (.txt). This can then be imported easily into
other software (such as Excel) for further editing/formatting.
You can also click on the “Print Results” hyperlink to readily print My CDR Outcomes. This is
located at the top right hand corner of the My CDR Outcomes page.
29
Section 8 – Data Download
Clicking on the “Data Download” option from the Welcome Page gives you the ability to
download all of the cases you have entered into the CDR-CRS. Depending on your role
(permission level) set by your State Administrator, you may or may not be able to perform this
function, and even if you have been granted Data Download permission, you may only have
access to de-identified data.
Local-level users will only be able to download data for their team. State-level users will be able
to download data for individual or multiple teams in their state. For state/local users with access
to only de-identified data, data download will not include the following HIPAA identifiable
information:
Case number
Team of review
Birth certificate number
Death certificate number
ME/Coroner number
Child’s name
Date of birth (month, day, year are removed)
Date of death (only month and day of death removed)
Residential address (street, apartment, city, county and zip)
Date and time of incident
Incident county
Narrative
Form completed by
Important! Users are strongly cautioned not to enter any identifying information in the
Narrative (Section M) and “specify” boxes for other questions. This primarily includes names
and county identifiers that could be used to recognize your team or the case. For example, when
referring to local law enforcement use “county sheriff” rather than “Columbia County sheriff.”
Downloading Data
When you download data from the CDR-CRS, it is a “snapshot” of all the data you have entered
up until that point in time. Any corrections/changes you make to the files after they are
downloaded will not be reflected in the System. You will need to login and make
corrections/changes directly to the data entry pages if you want updates saved in the CDR-CRS.
If you want to track when you downloaded the data or you have made multiple downloads, it is
helpful to store all of the files from a single download in a folder with the date in the title.
Due to the confidential nature of the data, the National Center for Review & Prevention of Child
Deaths recommends that all data downloaded from the CDR-CRS be stored in a folder on your
computer or server that has restricted access, so that only authorized personnel can view or use it.
30
Adequate firewall protection of computers used to download and/or enter data is also
recommended.
Download All Sections
At the top of the page is a hyperlink to download all of the tables at one time (All Data – click on
the “zip” hyperlink). Once downloaded, save the file to a secure folder on your computer or
server. This download is in a .zip format, and you need an unzip utility to extract the files to
make each table available for your use. Common extraction utilities include WinZip and PKZip.
A free unzip utility can be downloaded from www.quickzip.org. Please check with your
technology staff before downloading and installing any new software.
Download a Section
If you do not have an unzip utility, you will need to download each table individually. This is
also useful if you wish to download a table after making an alteration to a single page of data.
Simply click on the hyperlink (click on “txt”) for the table you want to download and save the
file to a secure folder on your computer or server.
Download a Flatfile
You also have the ability to download a tab delimited file that contains some of the most
commonly used variables for analysis from the CDR-CRS. This file contains over 220 variables,
including some re-coding of frequently requested fields (such as child’s age, child’s race, child’s
health insurance status, etc). The file can be exported into Excel for further analysis (directions
below). No linking of the id variable (see explanation below in “Working with Data”) is
necessary, as all the data for the approximately 220 variables reside in one table.
To download the flatfile, go to “Download All Sections,” click on the hyperlink “txt” next to
Flatfile – Selected Data and save the file when prompted to do so. To open the saved file in
Excel, first open a blank workbook in Excel. Then, while in Excel, open the saved file. (You
will be prompted to find where the file has been saved. Make sure that under “Files of Type:” at
the bottom of the “Open” pop-up window you specify “All files” or “Text files” so that your file
will be displayed.) Click “Open.” Excel will then bring up a Text Import Wizard (in order to
31
read in the tab delimited file). You do not have to change any of the default settings. Click
“Finish.” You will then see all your data imported into an Excel worksheet. The first row
contains the variable names. Please be sure to use the Data Download Codebook for Flat File
(available from the Help page) in order to understand what each value means.
Important! Note that the Data Download Codebook for Flat File is different from the Data
Download Codebook for All Tables.
Download Custom Data
If your State Administrator, through the National Center, has elected to add some additional
customized questions to the CDR-CRS, the data associated with those extra questions are
available by clicking on the hyperlink “txt” under State Custom Data, located at the bottom of
the Data Download page. Like the hyperlinks for the “Flatfile” and individual data tables, once
you click on the hyperlink, you will be prompted to save the file. You can then bring the file up
in Excel for further analysis. To open the file in Excel, first open a blank workbook in Excel.
Then while in Excel, open the saved file. (You will be prompted to find where the file has been
saved. Make sure that under “Files of Type:” at the bottom of the “Open” pop-up screen, you
specify All files or Text files so that your file will be displayed.) Click “Open.” Excel will then
bring up a Text Import Wizard (in order to read in the tab delimited file). You do not have to
change any of the default settings. Click “Finish.” You will then see all your data imported into
an Excel worksheet. The first row contains the variable names. The first few characters of every
variable name indicate the section of the report tool where the question was added. You will
need to contact your State Administrator in order to obtain a codebook for the custom data.
Working with the Download
Each page of the report tool (Sections A-N) is a separate table in the database. A table is simply
a container that stores the information you have entered for that section. Some tables (tCAU,
tPRV and tREV) hold data from more than one page. Two tables (tINF and tACT) are so large
that they needed to be split into two tables for the download. Each table is stored as a tab
delimited file. Data from the same case will have the same number in the id variable across
tables. This is the “key” you will use to link all data from a single case together.
Some variables have been added to the table INF in order to make data analysis more
straightforward (child’s age, race, height, birth weight and weight at death). For example, the
variable INFageinf (Age - Infant) has been added to data download to more easily identify
children under the age of one. Additionally, if you enter a full date of birth (mm/dd/yyyy) and a
full date of death for a child (mm/dd/yyyy), the System automatically computes the number of
days lived (INFdaylive). This is particularly helpful when doing analysis on infants. Because
more than one race may be selected in the report tool, the variable INFracemulti automatically
notes those children who are multi-racial. The child’s birth weight and weight at death are also
automatically converted to grams in data download (INFbirthgrams and INFweightgrams).
Finally, the child’s height at death is also automatically converted to centimeters in data
32
download (INFheightcm). Note that these new variables are not replacing the original
information entered into the data tool by you. For example, if child’s birth weight was entered as
9 pounds and 4 ounces, the information is still stored as 9 pounds in the field INFbirthwt and 4
ounces in the field INFbirthwtounc.
Please note that effective with Version 3.0, analyses on the demographics of Supervisor, Person
Responsible and Date of Incident have been simplified and no longer require the use of linking
multiple tables if the same individual is listed in more than one section. For example, all
demographic information about the Supervisor will now be stored in the Supervisor table (tSUP)
even if the Caregiver was the child’s Supervisor. Please contact the National Center if you need
further information about this change.
Data Resources
There are several resources available to you as you work with the data. These resources can be
found on the Help page in the CDR-CRS. More detail about each document is listed below:
Data Download Codebook for All Tables
This document provides the information needed to understand the data in the downloaded tables,
including the variable names for the questions and the values for the answers. This is a pivotal
guide to help you understand your data. The codebook also indicates when questions and
variables were added to the System.
Data Download Codebook for Flatfile
This resource is the guide to understanding data contained in the Flatfile, including the variable
names for the questions and values.
Macro to Import Data into Microsoft Access
This Access database file will open to a screen asking where you have saved the downloaded
tables. Click on the “Select Folder” button to open a window where you can browse for the
folder in which your Data Download files are located. Click “OK” when you have highlighted
the folder. Access will then proceed to import all 24 downloaded tables into that database. A
message will tell you if all of the tables were successfully imported. If there is an error, a
message will tell you which file it had problems importing. Please contact the National Center to
report any problems with importing or downloading data.
33
Section 9 – Help
Contact Information for the National Center
If you have any questions or need to report any problems, contact information for the National
Center for the Review & Prevention of Child Deaths is listed at the top of the Help page in the
CDR-CRS. The National Center is open Monday through Friday from 8am to 5pm, Eastern
Time and can be reached at 1-800-656-2434. Email sent to [email protected] will
receive a response within 24 business hours.
Supporting Documentation
There are several documents that have been made available to aid you in child death review or to
help you use the case report form and the Internet system. Several of these documents are in .pdf
format and can be saved, opened and printed using Adobe Acrobat Reader or Adobe Acrobat
Professional.
Data Download Codebook for All Tables: This document provides the information needed to
understand the data in the downloaded tables, including the variable names for the questions and
the values for the answers. The codebook also indicates when questions and variables were
added to the CDR-CRS.
Data Download Codebook for Flatfile: This resource is the guide to understanding data
contained in the Flatfile, including the variable names for the questions and values.
Guides for Effective Child Death Reviews: A tool for review teams that presents guidelines on
reviewing different causes of death. Information includes type of records to bring to the
meeting, risk factors, and suggested services and prevention activities.
Child Death Review Program Manual: This is a guide for local and state team members on how
to implement and maintain a Child Death Review program. We recommend the use of a color
printer for printing.
Child Death Review Case Report Form: This is a copy of the paper Child Death Review Report
Form. We recommend the use of a color printer for printing.
User Manual: A copy of this document.
Data Dictionary: This is the document that provides more information about the definitions of
individual questions. It is also the source of information for the help icons embedded within
each individual question of the case report tool when doing data entry.
34
Macro to Import Data into Microsoft Access: This macro will automatically import all 24
downloaded data tables into an Access database.
External Source Linkage Template: In order to import records from other external sources (for
example, Vital Statistics) into the CDR-CRS, this Excel template must be populated by your
State. For additional information about this process, contact the National Center.
How to Import Vital Statistics: This guide provides further information about how Vital
Statistics data may be imported into the CDR-CRS by your State Administrator. Please contact
the National Center for more information about this process.
35
Section 10 – Administration
The functions outlined in this chapter are only available to persons who are designated State
Administrators. State Administrators have the ability to manage user accounts for their state in
the CDR-CRS and will see the option “Administration” in the main navigation menu. State
Administrators have the ability to add a new user, delete a user, search for an existing user,
change a user’s password, unlock a user, change a user’s permission levels, and download all
user contact information.
State Administrators can also contact the National Center to add a limited number of custom
questions to the case report tool, import Vital Statistics information into the CDR-CRS, and
modify the inactivity time out period. (The default time out period is 60 minutes – if a user does
not have any activity for 60 minutes, the CDR-CRS automatically logs out the individual. The
default of 60 minutes can be customized by state). Please contact the National Center for
assistance with either of these functions.
Add a New User
From the Administration page, click on “User Management” and then “Add a new User”
hyperlinks.
The web page “Create New User Account” will load and you will see the fields that will need to
be completed in order to create a new account. Enter the account information for the new user
and click the “Create New” hyperlink at the bottom of the page to save the information. The
fields listed below are required information (noted with red asterisks in the CDR-CRS), so you
cannot save the new user until these fields have been entered:
36
Username
The username is the account name that is entered at login. The standard used by the National
Center for usernames is the first initial and entire last name. For example, John Smith would be
“jsmith.” Usernames are case sensitive.
If the username you enter duplicates the username of someone already in the CDR-CRS, you will
receive an error message when you click on the “Create New” link. If this should occur, alter the
username by adding or changing one or two letters (you could also add numbers to the end of it)
and click on the “Create New” link again.
Password (Temporary, Set Only)
Coupled with the username, a password is part of a secured login. You will need to set an initial,
temporary password for the account. The user will be prompted to create another password
(permanent for 180 days – see below) upon initial login.
All passwords must be re-set every 180 days (The CDR-CRS will automatically notify your
users when 180 days has expired, and they need to re-set their passwords. This notification will
happen when your users attempt to login to the CDR-CRS with an expired password.)
At the very bottom of the “Create New User Account” screen is the checkbox “Notify User on
Creation.” If you select this box, then the user will automatically receive an email informing
them that an account has been created on their behalf. The email will also contain their
username and temporary password.
First/Last Name and Email Address
The only contact information that is required is the first and last name of the new user and email
address. However, we encourage you to fill in as much contact information as possible since this
will aid the National Center in keeping users of your state appraised of system updates and other
important information.
Assigned Roles
Role determines the level of access to the CDR-CRS. There are 3 roles available for you to
choose from and you may select more than one role for each user:
Administrator – A user will have the ability to manage the accounts (add, delete, unlock,
reset passwords) of other state users. The National Center recommends that each state
have only 1-2 users with this permission level.
Case Reporter – A user will have the ability to enter, edit, and print case information for
their team, as well as conduct searches and create standardized reports.
Data Analyst – A user will have the ability to download data for their team, as well as
create standardized reports. To grant a user permission to download identifiable data,
please also select the checkbox “Does this user have access to identified data in data
download?” located below the Jurisdictions: Local Teams field.
37
Important! To select more than one role in the drop down box, press and hold the control
key while using your mouse to select the next role. Roles that have been selected will be
highlighted in blue. For more detail, refer to Appendix A.
Jurisdiction: State User
To create a user with permission to have access to information for all teams in the state, click on
the checkbox next to “Jurisdiction: State User” and then use the mouse to select your state,
which will become highlighted in blue when this action has been completed. (Your state will be
the only state available to you to highlight in the box, as you will not have the ability to grant
users access to other states’ data).
Jurisdiction: Local User
To grant a user with permission to have access to information for local team(s) only, click on the
checkbox next to “Jurisdiction: Local User.” A drop down box will then appear and you will
need to select the appropriate team. More than one team may be selected by holding down the
control key while using your mouse to select the next team. Teams that have been selected will
be highlighted in blue. To de-select teams, you may also use the control button while clicking on
the team in blue. Important! Do not select the checkbox next to “Jurisdiction: State User” if
you wish to create an account for a local team only.
38
Identified Data
To grant a “Data Analyst” user permission to view identifiable data, click on the checkbox
“Does this user have access to identified data in data download?” “Data Analyst” users for
whom this checkbox is not marked will only be able to download data that have been deidentified by HIPAA standards (refer to Appendix B in the current Data Use Agreement between
your state and MPHI/National Center).
Notify User on Creation
The CDR-CRS will automatically email the user the login credentials if the checkbox “Notify
User on Creation?” has been checked on the User Account page and a valid email address has
been entered.
The user will receive an email with a message that looks like the following:
John Smith,
An administrator has created an account for you at https://cdrdata.org.
Your username and temporary password are:
Username: JSmith
Password: TuesDay25
Your password is temporary and you will be prompted to reset it as soon as you log in.
You may log in at:
https://cdrdata.org/auth/login.
Click on the button “Create New” when you have finished entering all of the contact information
and selecting the appropriate roles. You will see a confirmation message in yellow at the top of
the screen if your information was saved correctly. This message disappears after 5 seconds.
39
Search for an Existing User
From the Main menu, click “Administration” and then “User Management” to bring up the list of
users who currently have accounts in your state.
You are able to sort (ascending or descending) any column with a triangular arrow next to the
column heading. Additionally, you can use the Search box to further filter the list of users. For
example, if you enter “John” in the Search Box and click the “Filter” button, the System will
retrieve any user with “John” in any of the columns. The Search field is not case sensitive.
Change User Permissions or Contact Information
You can edit the roles (permission levels) or contact information for a user by clicking on the
person’s name (will appear as a hyperlink) under the first column “Name.” The person’s “User
Account” page will load and you will have the ability to update contact information, change
roles, and re-set passwords (temporary only). If you make any changes to the user’s profile, you
will need to click on the “Save Changes” button at the bottom of the page.
From the “User Account” page, you will also have the ability to “unlock” a user. There are two
conditions in which a user can lock themselves out of the CDR-CRS:
40
When a user does not use the “Logout” function from the Welcome page to exit the
CDR-CRS, their account will be locked for 60 minutes or until it is released by a State
Administrator or the National Center.
When a user enters an incorrect password five times within 10 minutes, their account will
be locked until it is released by a State Administrator or the National Center.
To unlock a user, click on the checkbox next to “User Locked Out?” and click the “Save
Changes” button.
Delete a User
To delete a user from the CDR-CRS, go to the table of state users; go to the row with the name
of the user you want to delete, go to the column “Actions” on the far right, and click on the
“Delete” hyperlink. This deletes a user from the CDR-CRS. It is typically used when a user
leaves the child death review team or is no longer responsible for data entry. Deleting a user will
not delete any of the case information that they have entered.
Change a User Password
From the Main menu, click “Administration” and then “User Management” to bring up the list of
users who currently have accounts in your state.
To re-set a user’s password, click on the user’s name (hyperlink) which will bring up the “User
Account” page. Enter a temporary password in the second box and click “Save Changes.” You
will then need to inform the user of the new temporary password. The user will be prompted to
enter a permanent password (permanent for 180 days) once they have logged in with the
temporary password.
Download Contact Information
To view the contact information for all of the users in your state, click “Administration” and then
“User Management.” Click on the hyperlink “Download Contact List” which will create a tab
separated (.txt) file of contact information for all of the users in your state, which can be saved to
your computer. This file format can be opened using Excel, Access, SPSS, or SAS.
41
42
Appendix A – Assigning Roles to Users
This Appendix documents the different roles/permission levels available for users of the CDRCRS and what the CDR-CRS main navigation looks like for each of the different roles. Users
with Administrative rights can create new users. Generally, only State Administrators and
National Center staff have Administrative abilities. If you do not have Administrative abilities,
you will not see the “Administration” link in the main navigation menu in yellow (see below).
To Define User Roles:
Click on the Administration link to bring up the User Management link. To see the listing of
current users for your state, click on the “User Management” hyperlink.
Click on “Add new user” or on the name of an existing user (John Henry Smith in example
below).
From the User Account screen, the following roles are available:
You may choose one, two, or all three roles.* The user will be given the following capabilities:
43
Roles
Administrator
Case Reporter
Data Analyst
Administration Enter New
Case
X
X
Manage
Existing Cases
Standardized
Reports
Data
Download
X
X
X
X
*To choose two or more roles, hold the Control key down while you click on the second or third role.
The following menus demonstrate the options that your newly created user will see depending on
the roles you assign them. The exception is that you can assign the administrative role to a user
with local jurisdiction, but the administrative functions will be ignored.
Choose Administrator Role Only:
Choose Case Reporter Role Only:
Choose Data Analyst Role Only:
Choose Administrator and Data Analyst Roles:
44
Choose Case Reporter and Data Analyst Roles:
Choose All Roles:
45
NOTES:
www.childdeathreview.org
Email: [email protected]
1-800-656-2434
1
National Center for the Review & Prevention Child Deaths