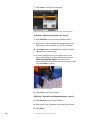
1
autoMACS® Pro Separator
Germany/Austria/
Switzerland
Miltenyi Biotec GmbH
Friedrich-Ebert-Straße 68
51429 Bergisch Gladbach
Germany
Phone +49 2204 8306-0
Fax +49 2204 85197
[email protected]
Australia
Miltenyi Biotec
Australia Pty. Ltd.
Unit 16A , 2 Eden Park Drive
North Ryde, NSW 2113
Australia
Phone +61 2 8877 7400
Fax +61 2 9889 5044
[email protected]
USA/Canada
Miltenyi Biotec Inc.
2303 Lindbergh Street
Auburn, CA 95602, USA
Phone 800 FOR MACS
Phone +1 530 888 8871
Fax +1 530 888 8925
[email protected]
Benelux
Miltenyi Biotec B.V.
Postbus 85183, 3508 AD Utrecht
The Netherlands
[email protected]
www.miltenyibiotec.com
Customer service Netherlands
Phone 0800 4020120
Fax 0800 4020100
Customer service Belgium
Phone 0800 94016
Fax 0800 99626
Customer service Luxembourg
Phone 800 24971
Fax 800 24984
China
Miltenyi Biotec Trading
(Shanghai) Co., Ltd.
Shanghai Office
Fareast International Plaza A
Rm. 2301, No. 319 Xianxia Rd.
Shanghai 200051, P.R. China
Phone +86 21 62351005
Fax +86 21 62350953
[email protected]
France
Miltenyi Biotec SAS
10 rue Mercoeur
75011 Paris, France
Phone +33 1 56 98 16 16
Fax +33 1 56 98 16 17
[email protected]
Japan
Miltenyi Biotec K.K.
Nittsu-Eitai Building 5F
16-10 Fuyuki, Koto-ku, Tokyo
135-0041, Japan
Phone +81 3 5646 8910
Fax +81 3 5646 8911
[email protected]
Singapore
Miltenyi Biotec
Asia Pacific Pte Ltd.
100 Beach Road
#28-06 to 28-08 Shaw Tower
Singapore 189702
Phone +65 6238 8183
Fax +65 6238 0302
[email protected]
Spain
Miltenyi Biotec S.L.
C/Luis Buñuel 2
Ciudad de la Imagen
28223 Pozuelo de Alarcón
(Madrid), Spain
Phone +34 91 512 12 90
Fax +34 91 512 12 91
[email protected]
140-002-016.04
User manual
United Kingdom
Miltenyi Biotec Ltd.
Almac House, Church Lane
Bisley
Surrey GU24 9DR, UK
Phone +44 1483 799 800
Fax +44 1483 799 811
[email protected]
Italy
Miltenyi Biotec S.r.l.
Via Persicetana, 2/D
40012 Calderara di Reno (BO)
Italy
Phone +39 051 6 460 411
Fax +39 051 6 460 499
[email protected]
Miltenyi Biotec provides products and services worldwide. Visit www.miltenyibiotec.com/local to find your nearest Miltenyi Biotec contact.
Unless otherwise specifically indicated, Miltenyi Biotec products and services are for research use only and not for therapeutic or diagnostic use.
MACS is a registered trademark of Miltenyi Biotec GmbH. Copyright © 2010 Miltenyi Biotec GmbH. All rights reserved.
Version 02
Copyright © 2010 Miltenyi Biotec. All rights reserved.
No part of this user manual may be reproduced, stored in a retrieval system, transmitted, published, or distributed in any
form or by any means, electronically, mechanically, by photocopying, microfilming, recording, or otherwise, without the
prior written consent of Miltenyi Biotec; however, notwithstanding the foregoing, the owners of the autoMACS Pro
Separator may make copies solely for purposes of training personnel in the use and servicing of the unit within their
business or organization.
Maximal care has been taken by Miltenyi Biotec in the preparation of this user manual. However, Miltenyi Biotec shall not
be liable for any technical or editorial errors or omissions contained herein or for incidental or consequential damages in
connection with the furnishing, performance, or use of this document. The information in this document is provided “as
is” without warranty of any kind, and is subject to change without notice.
autoMACS, MACS, and the MACS logo are registered trademarks or trademarks of Miltenyi Biotec GmbH or its affiliates in
Germany, the United States and/or other countries. Ficoll and Ficoll-Paque are trademarks of GE Healthcare companies.
BD and BD Falcon are trademarks of Becton, Dickinson and Company. All other trademarks mentioned in this document
are the property of their respective owners and are used for identification purposes only.
Unless otherwise specifically indicated, Miltenyi Biotec products and services are for research use only and not for
therapeutic or diagnostic use.
autoMACS® Pro Separator
User manual
Manufacturer
Miltenyi Biotec GmbH
Friedrich-Ebert-Straße 68
51429 Bergisch Gladbach
Germany
Technical Support
Phone +49-2204-8306-0
Fax +49-2204-85197
[email protected]
www.miltenyibiotec.com
Version 02
4
Content
5
Content
Chapter 1
15
1
15
1.1
15
16
17
1.2
17
1.3
17
1.3.1
18 1.3.2
19 1.3.3
19 1.3.4
20
1.4
21
1.4.1
21 1.4.2
21 1.4.3
21
1.4.4
21 1.4.5
22 1.4.6
22
1.4.7
22
1.5
22
1.5.1
22 1.5.2
23 1.5.3
23 1.5.4
24 1.5.5
24 1.5.6
24
1.5.7
Important information
Symbols and hazard levels
Setup of safety notices
Symbols and hazard levels
Warnings and precautions
General precautions
Hazard of electric shock and
spread of fire
Strong magnetic field
Hazard of crushing and shearing
Laser radiation
Secure installation
Mounting accessories
Air circulation
Water and moisture
Grounded (earthed) product
Power sources
Accessibility
Peripheral devices
Secure operation, maintenance,
transport, and disposal
Secure operation
Servicing
Cleaning
Hazardous material
Transport
Instrument disposal
Electromagnetic compatibility
27
1
27
1.1
27
28
29
1.2
29
1.3
30
1.3.1
30 1.3.2
Informations importantes
Symboles et niveaux de danger
Mise en place des consignes de
sécurité
Symboles et niveaux de danger
Avertissements et précautions
Précautions d’ordre général
Risque d’électrocution et de
propagation de feu
Champ magnétique puissant
Content
5
6
31 1.3.3
32 1.3.4
33
1.4
33
1.4.1
34 1.4.2
34 1.4.3
34
1.4.4
34 1.4.5
34 1.4.6
34
1.4.7
35
1.5
35
1.5.1
35 1.5.2
36 1.5.3
36 1.5.4
37 1.5.5
37 1.5.6
37
1.5.7
Risque d’écrasement et de
cisaillement
Rayonnement laser
Sécurité de l’installation
Accessoires de montage
Circulation de l’air
Eau et humidité
Produit relié à la terre
Sources électriques
Accessibilité
Appareils périphériques
Sécurité d’utilisation,
maintenance,
transport et élimination
Sécurité d’utilisation
Entretien et réparation
Nettoyage
Matières dangereuses
Transport
Élimination de l’appareil
Compatibilité électromagnétique
39
39
1.1
39
40
41
1.2
41
1.3
42
1.3.1
42 1.3.2
43 1.3.3
43 1.3.4
45
1.4
45
1.4.1
45 1.4.2
45 1.4.3
45
1.4.4
46 1.4.5
46 1.4.6
46
1.4.7
47
1.5
47
1.5.1
47 1.5.2
48 1.5.3
48 1.5.4
49 1.5.5
49 1.5.5
Wichtige Information
Symbole und Gefahrenstufen
Warnhinweis
Symbole und Gefahrenebenen
Warn- und Sicherheitshinweise
Allgemeine Sicherheitshinweise
Gefahr eines Stromschlags und der Ausbreitung von Feuer
Starkes Magnetfeld
Quetsch- und Schergefahr
Laserstrahlung
Sichere Geräteinstallation
Montagezubehör
Belüftung
Wassereintritt und Nässe
Geerdetes Produkt
Stromquellen
Zugänglichkeit der
Stromverbindungen
Peripheriegeräte
Sicherer Betrieb, Wartung,
Transport und Entsorgung
Sicherer Betrieb des Gerätes
Wartung
Reinigung
Gefährliches Material
Transport
Geräteentsorgung
Content
51
51
1.1
51
52
53
1.2
53
1.3
54
1.3.1
54 1.3.2
55 1.3.3
56 1.3.4
57
1.4
57
1.4.1
58 1.4.2
58 1.4.3
58
1.4.4
58 1.4.5
58 1.4.6
59
1.4.7
59
1.5
58
1.5.1
59 1.5.2
60 1.5.3
60 1.5.4
61 1.5.5
61 1.5.6
61
1.5.7
Informazioni importanti
Simboli e livelli di pericolo
Indicazioni di sicurezza
Simboli e livelli di pericolo
Avvertenze e precauzioni
Precauzioni generali
Pericolo di scossa elettrica e di
incendio
Forte campo magnetico
Pericolo di schiacciamento e di
taglio
Radiazioni laser
Installazione sicura
Accessori di montaggio
Circolazione dell’aria
Acqua e umidità
Prodotto con messa terra
Fonti di alimentazione
Accessibilità
Periferiche
Funzionamento,
manutenzione, trasporto e
smaltimento sicuri
Funzionamento sicuro
Manutenzione
Pulizia
Materiale pericoloso
Trasporto
Smaltimento
Compatibilità elettromagnetica
63
63
1.1
63
64
65
1.2
65
1.3
66
1.3.1
66 1.3.2
67 1.3.3
67 1.3.4
69
1.4
69
1.4.1
69 1.4.2
70 1.4.3
70
1.4.4
70 1.4.5
Información importante
Símbolos y niveles de peligro
Disposición de advertencias de
seguridad
Símbolos y niveles de peligro
Advertencias y precauciones
Precauciones generales
Peligro de descarga eléctrica y
propagación de fuego
Campo magnético intenso
Peligro de aplastamiento y
corte
Radiación láser
Instalación segura
Accesorios de montaje
Circulación de aire
Agua y humedad
Producto conectado a tierra
Fuentes eléctricas
Content
7
8
70 1.4.6
70
1.4.7
71
1.5
71
1.5.1
71 1.5.2
72 1.5.3
72 1.5.4
72 1.5.5
73 1.5.6
73
1.5.7
Accesibilidad
Aparatos periféricos
Manejo, mantenimiento,
transporte y eliminación
seguros
Manejo seguro
Revisión técnica
Limpieza
Sustancias peligrosas
Transport
Eliminación del instrumento/
equipo
Compatibilidad
electromagnética
Chapter 2
75
2
75
2.1
75
2.2
76
2.3
75
2.4
Introduction
MACS® Technology—the gold
standard in cell separation
Super-paramagnetic
MACS® MicroBeads
A column-based, high-gradient
magnetic cell separation
The autoMACS® Pro Separator
Chapter 3
79
3
79
3.1
85
3.2
87
3.3
87 3.3.1
87 3.3.2
88 3.3.3
90 3.3.4
92 3.3.5
93 3.3.6
94 3.3.7
Assembly and installation
Unpacking and installing the
autoMACS® Pro Separator
Replacing fluid containers and
the connection of fluid sensor
cables
Running the autoMACS® Pro
Separator for the first time:
performing a test calibration
Switch on the autoMACS® Pro
Separator
Check the date and time
Perform a test calibration
Installation of the autoMACS®
Columns
Priming the autoMACS® Pro
Separator
Checking the fluid levels
Test of barcode scanner
Chapter 4
95
4
95
4.1
An overview of the
autoMACS® Pro touchscreen
user interface
Working with the lower menu bar
Content
95
96
97
98
99
99
99
106
106
108
109
109
4.2
4.3
4.3.1
4.3.2
4.3.3
4.3.4
4.4
4.5
4.6
4.7
4.7.1
4.7.2
The main menu screen
Status menu
Status of fluid containers
Column status
Tube rack status
MACS® MiniSampler status
Separation menu
Reagent menu
Log list menu
Option menu
Special
User settings
Chapter 5
113
5
113
5.1
113
5.1.1
114
5.1.2
114
5.2
114 5.2.1
115 5.2.2
Materials required
Materials required for operation
Solutions
Hardware
Materials required for
maintenance
Solutions
Hardware
Chapter 6
117
6
118
6.1
118
6.2
118 6.2.1
119 6.2.2
120
6.3
120
6.3.1
122 6.3.2
130 6.3.3
132 6.3.4
133
6.4
135
6.5
136
6.6
Cell separation using the
autoMACS® Pro Separator
Select a cell labeling strategy
Prepare cell samples
Prepare single-cell suspensions
Reagent volumes and labeling
volumes must be adjusted to
the total cell number
Select a cell separation strategy
and a suitable magnetic
labeling strategy
Choosing a cell separation
strategy
Choose a magnetic labeling
strategy
autoMACS® Pro Cell Separation
programs
autoMACS® Pro Separator wash
programs and maintenance
programs
Select appropriate tube rack
Prime the autoMACS® Pro
Separator
Define autoMACS® Pro
Separation program sequence or template
Content
9
10
137
6.6.1
140
6.7
140
6.7.1
141
6.7.2
143
6.8
143
6.8.1
143 6.8.2
143 6.8.3
Entering sample separation
instructions: a workthrough
example
Monitoring the autoMACS® Pro
Separator during cell separation
Status menu before separation
Status menu during cell
separation
Shut down the autoMACS® Pro
Separator
Sleep as the final wash program
Store: the program for
long-term storage
Shutdown button
Chapter 7
145
7
145
7.1
146
7.2
146
7.2.1
146 7.2.2
147 7.2.3
149
7.3
149
7.3.1
149
7.3.2
153
7.3.3
152
7.3.4
153
7.3.5
154
7.4
154
7.4.1
157
7.4.2
160
7.4.3
160
7.4.4
161
7.4.5
161
7.4.6
161
7.5
162
7.6
162
7.7
163
7.7.1
163
7.7.2
164
7.8
166
7.9
Maintenance
General considerations
Daily maintenance
Instrument priming
Clean uptake/outlet ports
Instrument shutdown
Periodic maintenance
Column exchange
Clean the pump syringe
Clean the washing station
Instrument decontamination
Instrument long-term storage
Planned maintenance
Valve exchange
Exchange of dilutor valve
Exchange of pump syringe
Exchange of the peristaltic
pump head
Exchange of hydrophobic air
filter
Exchange of autoMACS®
Columns
Exchange of the tubing system
Exchange of fuses
Rescue procedure
Rescue procedure A
Rescue procedure B
Spare parts and accessories list
Accessories list
Chapter 8
Protocols
Direct magnetic labeling
Indirect magnetic labeling
167
167
168
1 Important information
8
8.1
8.2
169
8.3
Direct magnetic labeling of
human cells using MACS® Whole
Blood MicroBeads
Chapter 9
171
9
171
9.1
171
9.2
172
9.3
Quality control of separations
performed with the
autoMACS® Pro Separator
Recovery of cells
Purity of isolated cell population
Viability of the cells
Chapter 10
173
10
173
10.1
173 10.1.1
174 10.1.2
174 10.1.3
175 10.1.4
175 10.1.5
176 10.1.6
176 10.1.7
176 10.1.8
176 10.1.9
177
10.2
177 10.2.1
177 10.2.2
178 10.2.3
179 10.2.4
179 10.2.5
180 10.2.6
180
10.3
180 10.3.1
183 10.3.2
184 10.3.3
185
10.4
185 10.4.1
186 10.4.2
186
10.5
Troubleshooting
Hardware problems not
indicated by a warning or error
screen
Column leakage
Tubing leakage
Pump syringe leakage
Pump syringe is filled with air
during operation
Washing station overflow
Outlet port is clogged
MACS® MiniSampler does not
move properly
Touchscreen remains dark
Disruption of power supply
during cell separation
Performance errors not
indicated by a warning or error
screen
Output volumes are not correct
Low cell viability in final fraction
Low purity of isolated cell
population
Low recovery of isolated cells
Sample not or only partly taken
up
Reagent vial runs dry
Magnetic labeling and
separation
Positive selection
Depletion
Indirect MACS® MicroBeads
Fluorescent staining
Cells are poorly stained
Cells are excessively stained
Contamination of tubing
system
1 Important information
1
11
12
186
10.6
Problems indicated by error or
warning screens
Chapter 11
193
11
193
11.1
197
11.2
199
11.3
Technical data and
specifications
Labeled schematics of the
autoMACS® Pro Separator
Technical data and specifications
of the autoMACS® Pro Separator
Technical data and specifications
of the MACS® MiniSampler
Chapter 12
201
12
201
12.1
201 12.1.1
201
12.2
208
12.3
Hardware and software
installation
Installation of new software
Exchanging the software cards
Calibration of the
autoMACS® Pro Separator
Installation of the 2D code
reader (barcode reader)
Chapter 13
213
13
Technical support
Chapter 14
215
14
Limited warranty
Chapter 15
217
15
Glossary
1 Important information
1
1 Important information
13
Thank you for choosing a Miltenyi Biotec product.
The autoMACS® Pro Separator is an innovative instrument for
automated sensor-controlled multisample labeling and separation
of various cells types. At the touch of a button, target cells are
magnetically labeled, separated, and eluted in a fully automated
fashion.
Purify and progress.
14
Important information
Please read before use!
Please read all information contained in this user manual before
use. Failure to read and follow these guidelines could lead to
improper or incorrect use, handling or care of your instrument
and could cause hazards to users, unpredictable results,
instrument malfunction or damage, premature wear and
reduced life time of the instrument, and may void your warranty.
Keep this user manual in a safe place, accessible for anyone using the
autoMACS Pro Separator.
This chapter describes the safety instructions and site requirements
for your autoMACS Pro Separator. The following warnings and
cautions are provided to help you prevent injury to yourself or
damage to the instrument.
1
1.1 Symbols and hazard levels
Setup of safety notices
Example
CAUTION
Moving parts – stay clear. Hazard of puncturing
or crushing fingers. Operate only with attached
needle guard.
The safety notices inform the user about potential risks if warnings
and precautions outlined below are not followed. The icon on the
left side specifies the risk. The hazard level at the top classifies the
hazard, as mentioned above. The level, type, and source of the
hazard as well as potential consequences, prohibitions, and
measures are pointed as follows.
1 Important information
15
Symbols and hazard levels
The following chart is an illustrated glossary depicting the symbols
that are used in this user manual and on the AutoMACS Pro
Separator.
CAUTION
Indicates a hazard situation, which if not avoided, could result in
minor or moderate injury.
WARNING
Indicates a hazardous situation which, if not avoided, could result in
death or serious injury.
Attention, consult the User Manual for further instructions and
proceed with caution.
Warnings include the risk of damage to the equipment, severe
personal injury, or loss of life
Hazard of crushing and shearing.
Risk of crushing and shearing of bodily parts due to mechanical
hazards.
Laser radiation
Risk of serious eye and skin injuries.
Strong magnetic field
The magnetic field can interfere with magnetizable objects and
electronic devices or damage magnetic information carriers. Risk of
severe personal injury to persons carrying pacemakers or electronic
medical implants.
Risk of contamination if biohazardous material is used. Indicates the
risk of loss of life, severe injury to the instrument operator, or
equipment damage due to potentially dangerous biological material.
Indicates the risk of loss of life or severe injury to the instrument
operator due to hazardous voltage.
Protective conductor terminal
Symbol is attached on the inside of the instrument. Warning for
service personnel.
On (supply)
Off (supply)
Documentation needs to be consulted before proceeding with
installation and operation of the system.
16
1 Important information
1.2 Warnings and precautions
The autoMACS Pro Separator employs state-of-the-art technology.
It is a computer-controlled instrument for the automated separation
of magnetically labeled cells using MACS Technology. The MACS
MiniSampler connects to the autoMACS Pro Separator and thus
represents a part of the cell separation instrument. The autoMACS
Pro Separator and the MACS MiniSampler are designed to operate
safely after installation and when used by trained personnel
according to general safety practices and the instructions set forth in
this user manual. The guidelines in this section explain the potential
risks associated with the operation of the instrument and provide
important safety information in order to minimize these risks.
By carefully following the instructions, you can protect yourself and
the equipment from potential hazards and create a safe work
environment. If this instrument is used in a manner not specified by
the manufacturer, protection may be impaired.
1
IMPORTANT: Please read and follow all operating instructions in this
user manual and pay attention to all warnings displayed on the
instrument. Retain this user manual and any other safety and
operating instructions provided with the instrument in a place
accessible to all users for future reference.
IMPORTANT: The autoMACS Pro Separator is intended for indoor use
only. Do not use the instrument in areas classified as hazardous
locations such as oxygen-laden environments.
Contact your local authority governing electrical power supply,
building constructions, maintenance, or safety for more information
regarding the installation of the equipment.
1.3 General precautions
To reduce potential risks associated with operating the autoMACS Pro
Separator, please observe the following general precautions. Failure
to observe these precautions could result in fire, bodily harm, and/or
damage to the instrument.
1.3.1 Hazard of electric shock and spread of fire
WARNING
Hazardous voltages. Risk of loss of live severe personal
injury. Unplug before cleaning. Do not use
- if device is opened or damaged,
- if liquids have been spilled into device,
- if objects device through ventilation slots.
WARNING: Electrical devices pose the risk of an electric shock.
To reduce the risk of an electric shock, do not open any cover other
than the front access covers of the autoMACS Pro Separator nor any
other accessory hardware supplied by Miltenyi Biotec.
1 Important information
17
All other covers of the instrument and accessory hardware are to be
removed by authorized personnel only. Special care must be taken
while handling fluids. Clean up spillages immediately.
Do not allow fluids to enter the interior of the instrument.
Unplug the power cord before manually cleaning the autoMACS Pro
Separator.
WARNING: A potential risk exists if an opened, dropped or damaged
autoMACS Pro Separator is used, if liquids are spilled into the
instrument, if an object has entered the instrument through the
ventilation slots, or if an object has been dropped into the instrument.
If flames or smoke appear immediately switch off the the autoMACS
Pro Separator, unplug the instrument from the electrical outlet, and
contact an authorized Miltenyi Biotec service provider or the Miltenyi
Biotec Customer Support team. Use of a damaged instrument or an
instrument with a damaged power cable is expressly prohibited.
1.3.2 Strong magnetic field
WARNING
Extremely strong magnetic fields. Risk of severe
personal injury to persons carrying pacemakers or
electronical medical implants – stay clear. Keep all
magnetically sensitive objects away from device.
WARNING: The autoMACS Pro Separator is equipped with an extremely
powerful magnet. Keep any magnetic information carriers (such as
credit cards, magnetic tapes and floppy disks), any electronic
equipment (such as hearing aids, pacemakers, measuring and control
instruments, computers, and watches) and magnetizable tools and
objects at a distance of at least 20 cm from the magnet cover. These
items may be affected or damaged by the magnetic field.
18
Figure 1.1 Location of warning sign for strong permanent magnet.
1 Important information
1.3.3 Hazard of crushing and shearing
CAUTION
1
Moving parts – stay clear. Hazard of puncturing
or crushing fingers. Operate only with attached
needle guard.
CAUTION: Do not open the front access covers while the instrument is
in operation. Do not obstruct the movement of the automated arm
and accessory hardware during operation. Keep fingers etc. away
from all moving parts of the autoMACS Pro Separator and accessory
hardware, to avoid crushing or shearing injuries, or damage to the
instrument. Do not touch fluid pumps or adjust the tubing, while the
instrument is in operation. Always switch off the instrument before
adjusting any part of the fluidic system. Always stop or abort a
procedure before handling accessory hardware, e.g. MACS
MiniSampler, or loading/removing tubes from the tube rack placed
on the sampler. Do not circumvent any safety measures or devices.
Figure 1.2 Open circle shows warning sign for ‘hazard of crushing and
shearing’.
1.3.4 Laser radiation
Warning: The instrument is equipped with four vertical cavity surface
emitting lasers (VCSELs) for automated rack detection (Class 1M). The
radiation is not visible. Do not view directly with optical instruments
(e.g. lenses, magnifying glasses, and microscopes). Viewing the VCSEL
port within 100 mm distance with optical instruments could be
hazardous to the eye.
The instrument is also equipped with a 2D Code Reader which uses a
visible semiconductor laser as a target pointer for adjusting the
reading position and powerful light emitting diodes (LEDs) for
illuminating the reading area.
Do not look directly at laser or LED radiation or reflected laser or LED
radiation from a mirrored surface. Otherwise, eye injury may result.
Do not intentionally direct the laser beam at others.
1 Important information
19
Do not disassemble, modify or remove the installed laser or LED
radiation sources or their mounting rackets. The laser or LED radiation
sources do not automatically stop emitting when disassembled.
Radiation of disassembled units may lead to eye injuries.
Be careful of the path of the laser beam or reflection from a mirrored
surface. Take care during installation of the autoMACS Pro Separator
that the path of the laser beam is not at the same height as that of
the human eye during operation.
Do not allow water, oil, dust, or other foreign substances to stick to
2D Code Reader aperture window. This may cause read errors. Be sure
to stop the laser emission before cleaning the scanner. Otherwise,
exposure to the laser may cause eye injury. Use a soft, dry cloth to
wipe any substances from the scanner. Do not use alcohol or other
cleaning substance.
The autoMACS Pro Separator is classified as a Class 1M laser product
per standard IEC 60825-1:1993+A1:1997+A2:2001.
CAUTION: Use of controls or adjustments or performance of procedures
other than those specified herein may result in hazardous radiation
exposure.
Figure 1.3 Position of lasers. Invisible rack detection lasers are located within
the rectangle area. The 2D code reader (visible) is located within the open
circle.
1.4 Secure installation
20
This section describes the requirements your site must meet for safe
installation and operation of your autoMACS Pro Separator. Read the
instructions in this section and ensure that your site is properly
prepared before you connect the instrument to its power source.
1 Important information
When planning your site layout and equipment locations, keep in
mind the precautions described in this section to help avoid
instrument failures and reduce the possibility of environmentally
caused shutdowns.
1
IMPORTANT: At all times, local working area safety instructions,
laboratory policies, and standards regarding laboratory health and
safety and prevention of accidents must be adhered to.
1.4.1 Mounting accessories
Do not place the autoMACS Pro Separator on an unstable table,
cart, stand, tripod, or bracket. As a consequence, the instrument
might fall down. This may cause serious bodily harm and/or serious
damage to the instrument. Use only on a table, cart, stand, tripod,
or bracket recommended by Miltenyi Biotec or sold with the
instrument. Do not place the autoMACS Pro Separator within a
built-in apparatus or a confined space such as a shelf rack unless
the apparatus has been specifically designed to accommodate the
instrument, proper ventilation is provided, and the mounting
instructions for the instrument have been followed.
1.4.2 Air circulation
The instrument should not be placed next to radiators, heat registers,
stoves, or other pieces of equipment (including amplifiers) that
produce heat. Allow sufficient air circulation around the autoMACS
Pro Separator—at least 15 cm on all sides—during operation to
ensure adequate cooling of the instrument. Prevent direct exposure
of the instrument to sunlight. Slots and openings of the instrument
are provided for ventilation and should never be blocked or covered,
as these ensure reliable operation of the autoMACS Pro Separator and
protect the instrument from overheating. Never push a foreign object
through an opening into the instrument.
1.4.3 Water and moisture
Do not use the instrument in a wet or damp location. Avoid high
humidity or condensation and protect the machine against water
splashes.
1.4.4 Grounded (earthed) product
The instrument is equipped with a three-wire electrical groundingtype plug that has a third pin for grounding. This plug only fits into a
grounded power outlet. This is a safety feature. Do not try to insert
the plug into a non-grounded power outlet. If you cannot insert the
plug into the outlet, contact your local electrician to replace the
outlet.
1.4.5 Power sources
The instrument should only be operated from a power source
indicated on the product’s electrical ratings label. If you have
questions about the type of power source to use, contact your
authorized Miltenyi Biotec service provider or local power company.
1 Important information
21
Do not use extension cords or power strips. Do not overload an
electrical outlet. The overall system load must not exceed 80% of the
branch circuit rating.
1.4.6 Accessibility
Make sure that the main switch as well as the connector for the power
cable are easily accessible and located as close to the operator of the
instrument as possible. If it is necessary to disconnect the power
supply, unplug the cable from the power outlet.
1.4.7 Peripheral devices
Only peripheral devices that comply to UL 60950 are allowed to be
connected to the RS232 connector labeled “COM”. The connector
labeled “RS232/AUX” is not in use. In addition, only original autoMACS
Pro Equipment should be attached to the connectors labeled
“External CAN”, “CAN1”, and “CAN2”. The voltage levels on these
connectors shall not exceed hazardous voltage levels of 30 V rms. and
42.4 V peak or 60 Vdc. Only the autoMACS Pro Bottle Sensor Cable
should be attached to the “Bottle Sensor” connector.
Only a 2D code reader recommended by Miltenyi Biotec should be
connected to the “RS232/BCR” connector. External laser devices
connected to the connector labeled “RS232/BCR” have to comply
with the standard IEC 60825-1. Only use connector cables less than
3 m in length.
1.5 Secure operation, maintenance,
transport and disposal
Observe the following instructions to ensure secure operation,
maintenance, transport, and disposal of your autoMACS Pro
Separator.
IMPORTANT: At all times, local working area safety instructions,
laboratory policies, and standards regarding laboratory health and
safety and prevention of accidents must be adhered to.
1.5.1 Safe operation
If the instrument is not working properly and instructions or
messages on the display screen advise to contact technical service,
secure operation is no longer possible. Immediately switch off the
autoMACS Pro Separator, unplug the instrument from the electrical
outlet, and contact an authorized Miltenyi Biotec service provider or
the Miltenyi Biotec Customer Support team.
1.5.2 Servicing
IMPORTANT: Unless otherwise specifically noted in this User Manual or
other Miltenyi Biotec documentation, do not service the autoMACS
Pro Separator yourself. Servicing and repair must be performed by
qualified service personnel. Improper or incorrect servicing or repair
22
1 Important information
of your autoMACS Pro Separator can cause hazards to users, lead to
unpredictable results, instrument malfunction or damage, premature
wear and reduced life time of the instrument, and may void your
warranty.
1
Inquire with your local Miltenyi Biotec representative about
Miltenyi Biotec’s extensive instrument service and support
arrangements, or refer to www.miltenyibiotec.com/support.
IMPORTANT: When replacement or spare parts are required, make sure
that the service provider uses only genuine Miltenyi Biotec parts or
third-party parts specified and recommended by Miltenyi Biotec.
Using unauthorized replacement or spare parts can cause
malfunction of the instrument and impair cell separation results.
Miltenyi Biotec does not honor any warranty or accept any
responsibility for instrument failure or damages resulting from the
use of inappropriate replacement or spare parts. After completing
any service or repair work, have your authorized Miltenyi Biotec
service provider perform all safety checks required by the repair
procedure to ensure that the instrument is in proper operational
condition.
Only use options and upgrades recommended by Miltenyi Biotec.
1.5.3 Cleaning
Unplug the autoMACS Pro Separator from the outlet before cleaning.
Do not use liquid or aerosol cleaning agents; always use a damp cloth.
1.5.4 Hazardous material
WARNING
Risk of loss of life if biohazardous material is used.
Wear protective gloves, protective clothing, and
safety glasses to prevent contact with skin and eyes.
Operate device in a safety hood. Decontaminate
device after spilling of biohazardous material.
If biohazardous material have been used, the operator shall choose
and wear personal safety equipment in accordance with warnings
and precautions for the used substances. Wear protective gloves,
protective clothing, and safety glasses to prevent contact with skin
and eyes. Also protect mouth and nose as aerosols might leak from
the system (e.g. Washing Station). Defective or inadequate safety
equipment might endanger the operator. The autoMACS Pro
separator shall be operated in a safety hood if hazardous or
unknown materials are processed. If hazardous material has been
used or spilled, care must been taken to thoroughly decontaminate
the system. For details, refer to section 7.3.4.
Always inspect the fluidics system (complete tubing set, bottles and
their closures, valves, columns, diluter and needles) before switching
on the instrument. If leakage has been detected, replace all damaged
1 Important information
23
parts before switching on the instrument. If damaged parts cannot
be replaced, unplug and do not use the instrument. Failure of parts
containing biohazardous material or liquids that have been in contact
with such material could cause a hazard.
Columns, tubes, and any other consumables that were in contact
with biohazardous samples shall be autoclaved prior to disposal.
Liquid waste shall be autoclaved or decontaminated using a
disinfectant that is appropriate for the specific pathogen,
e.g. 10% bleach, isopropyl alcohol, or 70% ethanol.
Waste disposal must be in accordance with any local regulations.
Figure 1.4 Warning signs for biohazard located on lower facing panel of the
autoMACS Pro Separator (left) and top of autoMACS Pro Separator fluid
bottle (right).
Flammable
70% ethanol is used in Sleep and Store programs. The solvent is
flammable. Therefore, keep the instrument away from fire.
1.5.5 Transport
The autoMACS Pro Separator should be transported with care in
packaging specified by Miltenyi Biotec. Internal damage can occur,
if it is subjected to excessive vibration or if it is dropped. If the
instrument needs to be shipped back to the manufacturer for service,
decontaminate the instrument from any hazardous material prior to
shipment. If you have questions regarding proper decontamination
or shipment, please contact Technical Support for assistance.
Refer to section 7.3.4 for further information on instrument
decontamination.
1.5.6 Instrument disposal
Please contact Technical Support for assistance if you wish to dispose
of your instrument.
1.5.7 Electromagnetic compatibility
24
Changes or modifications of the equipment unless expressly
approved by Miltenyi Biotec may void your authority to operate the
equipment pursuant to 47 CFR §15.
1 Important information
1
Note: This equipment has
been tested and found to
comply with the limits for
a Class B digital device,
pursuant to Part 15 of the
FCC Rules. These limits
are designed to provide
reasonable protection
against harmful interference in a residential
installation. This equipment generates, uses
and can radiate radio
frequency energy and,
if not installed and used
in accordance with the
instructions, may cause
harmful interference to
radio communications.
However, there is no
guarantee that interference will not occur in a
particular installation.
If this equipment does
cause harmful interference to radio or television reception, which
can be determined by
turning the equipment
off and on, the user is
encouraged to try to
correct the interference
by one or more of the
following measures:
• Reorient or relocate the
receiving antenna.
• Increase the separation
between the equipment
and receiver.
• Connect the equipment
into an outlet on a circuit
different from that to
which the receiver is connected.
• Consult the dealer or an
experienced radio/TV
technician for help.
1 Important information
25
26
1 Important information
Informations importantes
À lire avant utilisation.
Veuillez impérativement lire toutes les informations fournies
dans ce mode d’emploi avant d’utiliser l’appareil. Le nonrespect de ces consignes peut donner lieu à une utilisation, une
manipulation et une maintenance inappropriée ou incorrecte de
votre appareil, ce qui pourrait mettre en danger les utilisateurs,
fournir des résultats non attendus, entraîner le dysfonctionnement ou la détérioration de l’appareil, son usure prématurée
et réduire la durée de vie de l’appareil, ainsi qu’annuler votre
garantie.
Conservez ce mode d’emploi dans un endroit sûr et accessible aux
utilisateurs de l’unité de séparation autoMACS Pro® (séparateur
autoMACS Pro).
Ce chapitre décrit les consignes de sécurité et les exigences
d’installation s’appliquant à votre séparateur autoMACS Pro. Les
avertissements et les mesures de précaution suivantes ont pour
objectif de vous aider à éviter toute blessure corporelle ainsi que
toute détérioration de l’appareil.
1
1.1 Symboles et niveaux de danger
Mise en place des consignes de sécurité
Example
CAUTION
Moving parts – stay clear. Hazard of puncturing
or crushing fingers. Operate only with attached
needle guard.
Les consignes de sécurité informent l’utilisateur des risques potentiels pouvant survenir si les avertissements et les mesures de
précaution décrits ci-dessous ne sont pas respectés. Le pictogramme
visible à gauche définit le risque. En haut, le danger mentionné
précédemment est affecté à un niveau de danger. Le niveau, le type
et la source du danger ainsi que les éventuelles conséquences, les
interdictions et les mesures à prendre sont mentionnés conformément au tableau ci-dessous.
1 Important information
27
Symboles et niveaux de danger
CAUTION
WARNING
Le tableau suivant est un glossaire illustré expliquant les symboles
utilisés dans ce mode d’emploi et sur le séparateur autoMACS Pro
Separator.
Indique une situation dangereuse qui, si elle n’est pas évitée, peut
entraîner des blessures mineures ou modérées.
Indique une situation dangereuse qui, si elle n’est pas évitée, peut
entraîner la mort ou des blessures graves.
Attention, consultez le mode d’emploi pour obtenir plus de consignes et agissez avec prudence.
Les avertissements incluent le risque de détérioration de
l’équipement, de blessure corporelle grave et le danger de mort.
28
Risque d’écrasement et de cisaillement.
Risque d’écrasement et de cisaillement des membres corporels dû à
des dangers mécaniques.
Rayonnement laser
Danger de graves lésions oculaires et cutanées.
Champ magnétique puissant
Le champ magnétique interfère avec les objets magnétisables et les
appareils électroniques ou endommage les supports d’information
magnétiques. Risque de grave blessure corporelle pour les personnes portant un pacemaker ou des implants médicaux électroniques.
Risque de contamination en cas d’utilisation de matières nocives
pour l’organisme. Indique le danger de mort, le risque de blessure
grave pour l’opérateur de l’appareil ou le risque de détérioration de
l’équipement dû à des matières biologiques potentiellement
dangereuses.
Indique le danger de mort, le risque de blessure grave pour
l’opérateur de l’appareil en raison de la tension dangereuse.
Borne pour conducteur de protection
Le symbole est apposé à l’intérieur de l'équipement. Avertissement
destiné au personnel de maintenance.
Alimentation électrique activée
Alimentation électrique désactivée
La notice d’utilisation doit être consultée avant de procéder à
l’installation et à l’utilisation du système
1 Important information
1.2 Avertissements et précautions
Le séparateur autoMACS Pro fonctionne avec une technologie de
pointe. Il s’agit d’un appareil commandé par ordinateur conçu pour la
séparation automatique des cellules à marquage magnétique à l’aide
de la technologie MACS. Le mini-échantillonneur MACS est branché
au séparateur autoMACS Pro et fait donc partie du dispositif de
séparation des cellules. Le séparateur autoMACS Pro et le miniéchantillonneur MACS sont conçus pour fonctionner en toute
sécurité après leur installation s’ils sont utilisés par des personnes
qualifiées selon les pratiques de sécurité générales et les consignes
mentionnées dans ce mode d’emploi. Les instructions de ce chapitre
expliquent les risques potentiels liés à l’utilisation de l’appareil et
fournissent des informations de sécurité importantes afin de réduire
ces risques. Respectez strictement ces consignes pour protéger
l’équipement et vous-même des risques potentiels et créer un
environnement de travail sûr. La protection n’est pas garantie si cet
appareil n’est pas utilisé conformément aux instructions données par
le fabricant.
1
Important: Veuillez lire et respecter toutes les instructions d’utilisation
fournies dans ce mode d’emploi et observez tous les avertissements
affichés sur l’appareil. Conservez ce mode d’emploi et les autres
consignes de sécurité et d’utilisation fournies avec l’appareil à un
endroit accessible pour tous les utilisateurs en vue de les consulter
ultérieurement.
Important: Le séparateur autoMACS Pro Separator est destiné à une
utilisation intérieure uniquement. N’utilisez pas l’appareil dans des
zones classées dangereuses telles que des environnements à teneur
élevée en oxygène.
Pour de plus amples d’informations concernant l’installation de
l’équipement, veuillez vous adresser à votre organisme local responsable de l’approvisionnement en électricité, des travaux de bâtiment,
de la maintenance et de la sécurité.
Si vous avez un doute sérieux quant à la sécurité d’utilisation de votre
appareil, veuillez contacter votre prestataire de services Miltenyi
Biotec agréé ou appelez le service après-vente de Miltenyi Biotec.
1.3 Précautions d’ordre général
Afin de réduire les risques potentiels liés à l’utilisation du séparateur
autoMACS Pro Separator, veuillez observer les précautions générales
1 Important information
29
suivantes. La non-observation de ces précautions peut provoquer un
incendie, des dommages corporels, et/ou détériorer l’appareil.
1.3.1 Risque d’électrocution et de propagation de feu
WARNING
Hazardous voltages. Risk of loss of live severe personal
injury. Unplug before cleaning. Do not use
- if device is opened or damaged,
- if liquids have been spilled into device,
- if objects device through ventilation slots.
Avertissement: Les appareils électriques présentent un risque
d’électrocution. Afin de réduire le risque d’électrocution, n’ouvrez
aucun cache du séparateur autoMACS Pro Separator, ni d’autres
équipements accessoires fournis par Miltenyi Biotec. Tous les caches
de l’appareil et des équipements accessoires doivent être démontés
par le personnel agréé uniquement. Soyez particulièrement prudent
pendant la manipulation de fluides. Nettoyez immédiatement si des
liquides se sont déversés. Veillez à ce que les fluides ne s’infiltrent pas
à l’intérieur de l’appareil. Débranchez le câble électrique avant de
nettoyer manuellement le séparateur autoMACS Pro Separator.
Un risque potentiel existe si le séparateur autoMACS Pro Separator
utilisé est ouvert, déformé ou endommagé, si des liquides se
déversent dans l’appareil, si un objet est entré dans l’appareil par les
fentes de ventilation ou si un objet a chuté dans l’appareil. En cas
d’apparition de flammes ou de fumée, déconnectez immédiatement
le séparateur autoMACS Pro Separator, débranchez l’appareil et
contactez un prestataire de services Miltenyi Biotec agréé ou l’équipe
de support technique de Miltenyi Biotec. Il est formellement interdit
d’utiliser un appareil endommagé ou un appareil dont le câble
électrique est endommagé.
1.3.2 Champ magnétique puissant
WARNING
Extremely strong magnetic fields. Risk of severe
personal injury to persons carrying pacemakers or
electronical medical implants – stay clear. Keep all
magnetically sensitive objects away from device.
Avertissement: Le séparateur autoMACS Pro est équipé d’un aimant
extrêmement puissant. Veillez à laisser un espace d’au moins 20 cm
entre le cache de l’aimant et les supports ’information magnétiques
(cartes de crédit, bandes magnétiques et supports de données) ainsi
que l’équipement électronique (appareils auditifs, pacemakers,
dispositifs de mesure et de contrôle, ordinateurs et montres). Ces
éléments peuvent être affectés ou endommagés par le champ
magnétique.distance d’au moins 30 cm par rapport au matériel
magnétique mentionné ci-dessus. Plus ils sont proches l’un de l’autre,
plus la force attractive entre les deux aimants ou entre un aimant et
30
1 Important information
une matière magnétisable augmente. Par conséquent, n’approchez
aucune matière magnétique – y compris tout autre aimant ou écran.
1
Figure 1.1 Symbole d’avertissement pour aimant puissant permanent.
1.3.3 Risque d’écrasement et de cisaillement
CAUTION
Moving parts – stay clear. Hazard of puncturing
or crushing fingers. Operate only with attached
needle guard.
Avertissement: N’ouvrez pas les capots frontaux pendant le fonctionnement de l’appareil. Ne bloquez pas le mouvement du bras automatique ni des pièces correspondantes pendant le fonctionnement.
N’approchez pas vos doigts, etc. des pièces mobiles du séparateur
autoMACS Pro et des pièces correspondantes afin d’éviter toute
blessure ainsi que toute détérioration de l’appareil due à
l’écrasement et au cisaillement. Ne touchez pas les pompes à liquide
et ne modifiez pas les tuyaux pendant le fonctionnement de
l’appareil. Déconnectez toujours l’appareil avant de modifier une
partie du système fluidique. Stoppez ou annulez toujours le processus avant de manipuler les appareils supplémentaires comme le
mini-échantillonneur MACS ou de charger/retirer les éprouvettes du
râtelier à éprouvettes placé sur l’échantillonneur. Ne bloquez pas les
dispositifs de sécurité et respectez les mesures de sécurité.
Figure 1.2 Le symbole d’avertissement entouré d’un cercle blanc indique un «
risque d’écrasement et de cisaillement.
1 Important information
31
1.3.4 Rayonnement laser
Avertissement:L'appareil est équipé pour la détection automatique
de porte-éprouvettes (classe 1M) par quatre diodes laser à émission
par la surface à cavité verticale (VCSEL). Le rayonnement est invisible.
Ne pas regarder directement dans ce rayon au travers d'instruments
optiques (p. ex. lentilles, verres grossissants et microscopes).
Regarder dans l'ouverture du VCSEL à une distance inférieure à 100
mm au travers d'instruments optiques peut endommager les yeux.
L'appareil est également équipé d'un lecteur de code 2D utilisant un
laser à semi-conducteur visible comme pointeur pour le réglage de
la position de lecture ainsi que de diodes électroluminescentes (DEL)
haute puissance pour l'éclairage du champ de lecture.
Ne diriger le regard ni dans le rayon laser ou DEL direct, ni le rayon
laser ou DEL réfléchi sur une surface de miroir. Sinon, des lésions
oculaires peuvent en résulter. Ne pas diriger intentionnellement le
rayon laser sur d'autres personnes.
Ne pas démonter, échanger ni retirer des sources de rayon laser ou
DEL encastrées ni leur support. Les sources de rayon laser ou DEL ne
cessent pas forcément d'émettre un rayonnement une fois démontées.
Le rayonnement d'appareils démontés peut entraîner des lésions
oculaires.
Prendre garde au chemin optique du rayon laser ou de sa réflexion
sur une surface de miroir. Veiller lors de l'installation de l'autoMACS
Pro Separator à ce que le chemin optique rayon laser ne se trouve
pas à hauteur des yeux de personnes pendant le service.
Eviter que de l'eau, de l'huile, de la poussière ou d'autres corps
étranger adhèrent sur la fenêtre de lecture du lecteur de code 2D,
comme ceci risque d'entraîner des erreurs de lecture. S'assurer avant
le nettoyage du scanner qu'aucun rayon laser n'est plus émis. La
manipulation du laser risque sinon de provoquer des lésions
oculaires. Utiliser un chiffon doux pour essuyer des substances sur le
scanner. Ne pas utiliser d'alcool ou d'autres produits de nettoyage.
.
L'autoMACS Pro Separator est désigné comme produit laser de la
classe 1M selon la norme CEI 60825-1: 1993 + A1: 1997 + A2: 2001.
Avertissement: l'utilisation d'organes de commande autres que ceux
mentionnés dans ce document ainsi que toute adaptation ou
utilisation d'autres procédés que ceux mentionnés dans ce document peuvent dégager des rayonnements dangereux.
32
Rayonnement laser
Danger de graves lésions oculaires et cutanées.
1 Important information
1
Figure 1.3 Position des lasers. Les lasers invisibles de détection de râteliers
sont situés dans la zone rectangulaire. Le lecteur de code 2D (visible) est
entouré d’un cercle blanc.
1.4 Sécurité de l’installation
Ce paragraphe décrit les exigences auxquelles votre site doit
répondre pour garantir l’installation et la sécurité d’utilisation de
votre séparateur autoMACS Pro Separator. Lisez les consignes de ce
paragraphe et assurez-vous que votre site a été aménagé en
conséquence avant de brancher l’appareil à sa source électrique.
Lors de la planification de l’aménagement de votre site et de
l’emplacement de l’équipement, tenez compte des précautions
décrites dans ce paragraphe afin d’éviter que l’appareil ne tombe en
panne et de réduire le nombre d’arrêts pouvant être causés par
l’environnement de l’appareil.
Important: Les consignes de sécurité concernant la zone de travail
locale, les bonnes pratiques de laboratoire, ainsi que les directives
relatives à la santé, à la sécurité et à la prévention des accidents en
laboratoire doivent être observées en permanence.
1.4.1 Accessoires de montage
Ne placez pas le séparateur autoMACS Pro Separator sur une table,
un chariot, un pied, un trépied ou un support. L’appareil pourrait
sinon chuter, provoquant des blessures corporelles graves et/ou la
détérioration considérable l’appareil. Utilisez le séparateur uniquement sur une table, un chariot, un pied, un trépied ou un support
recommandé par Miltenyi Biotec ou vendu avec l’appareil. Ne placez
pas le séparateur autoMACS Pro Separator dans un appareil intégré
ou un espace restreint comme un casier, sauf si le dispositif a été
1 Important information
33
spécialement conçu pour accueillir l’appareil, qu’une ventilation
appropriée est garantie et que les instructions de montage relatives
à l’appareil ont été respectées.
1.4.2 Circulation de l’air
Ne placez pas l’appareil à proximité de radiateurs, de registres de
chaleur, de fours ou d’autres pièces d’équipement (amplificateurs)
qui produisent de la chaleur. Veillez à ce que suffisamment d’air
puisse circuler autour du séparateur autoMACS Pro Separator — au
moins 15 cm de chaque côté — pendant le fonctionnement afin de
garantir le refroidissement adéquat de l’appareil. Évitez d’exposer
l’appareil à un ensoleillement direct. Les encoches et les fentes de
l’appareil sont prévues pour la ventilation et ne doivent jamais être
bloquées ou recouvertes, car elles assurent le fonctionnement fiable
du séparateur autoMACS Pro Separator et protègent l’appareil de la
surchauffe. N’introduisez jamais d’objet étranger dans l’appareil par
l’une des fentes.
1.4.3 Eau et humidité
N’utilisez pas l’appareil dans un endroit humide ou mouillé. Évitez
l’humidité et la condensation et protégez la machine des éclaboussures.
1.4.4 Produit relié à la terre
L’appareil est équipé d’une fiche électrique trifilaire avec mise à la
terre dont la troisième borne est prévue pour relier l’appareil à la
terre. Cette fiche fonctionne uniquement dans une prise de courant
avec contact de mise à la terre. Il s’agit d’un dispositif de sécurité.
N’essayez pas d’insérer la fiche dans une prise de courant sans
contact de mise à la terre. Si vous ne pouvez pas insérer la fiche dans
la prise de courant, veuillez vous adresser à votre électricien local qui
remplacera la prise de courant.
1.4.5 Sources électriques
Ne faites fonctionner l’appareil qu’à partir d’une source électrique
indiquée sur la plaque signalétique du produit. Si vous avez des
questions sur le type de courant électrique que vous pouvez utiliser,
contactez votre prestataire de services Miltenyi Biotec agréé ou votre
fournisseur d’électricité local. N’utilisez pas de rallonges ni de
barrettes de connexion. Ne surchargez pas la prise électrique. La
charge totale du système ne doit pas dépasser 80 % de la valeur
nominale du circuit de dérivation.
1.4.6 Accessibilité
Assurez-vous que l’interrupteur principal et le connecteur du câble
électrique soient facilement accessibles et placés aussi près que
possible de l’opérateur de l’appareil. S’il s’avère nécessaire de
déconnecter l’alimentation électrique, débranchez le câble.
1.4.7 Appareils périphériques
34
Seuls les appareils périphériques conformes à la norme UL 60950
1 Important information
peuvent être branchés au connecteur RS232 étiqueté « COM ». Le
connecteur étiqueté « RS232/AUX » n’est pas utilisé. De plus, seuls
des appareils autoMACS Pro originaux doivent être raccordés aux
connecteurs étiquetés « External CAN », « CAN1 » et « CAN2 ». Le
niveau de tension mesuré sur ces connecteurs ne doit pas dépasser
le niveau de tension dangereux de 30 Veff ainsi qu’un pic de 42,4 V
ou 60 V DC. Seul le câble de capteur de flacon autoMACS Pro peut
être raccordé au connecteur étiqueté « Bottle Sensor ». Seul un
lecteur de code 2D recommandé par Miltenyi Biotec peut être
branché au connecteur « RS232/BCR ». Les appareils laser externes
raccordés au connecteur étiqueté « RS232/BCR » doivent répondre à
la norme IEC 60825-1. Utilisez uniquement des câbles de connexion
de 3 mètres de longueur maximum.
1
1.5 Sécurité d’utilisation, maintenance,
transport et élimination
Respectez les consignes suivantes afin de garantir la sécurité
d’utilisation, la maintenance, le transport et l’élimination de votre
séparateur autoMACS Pro Separator.
Important: Les consignes de sécurité concernant la zone de travail
locale, les bonnes pratiques de laboratoire, ainsi que les directives
relatives à la santé, à la sécurité et à la prévention des accidents en
laboratoire doivent être observées en permanence.
1.5.1 Sécurité d’utilisation
Si l’appareil ne fonctionne pas correctement et que les instructions
ou les messages sur l’écran d’affichage conseillent de contacter le
service technique, la sécurité d’utilisation de l’appareil n’est plus
garantie. Déconnectez immédiatement le séparateur autoMACS Pro
Separator, débranchez l’appareil et contactez un prestataire de
services Miltenyi Biotec agréé ou l’équipe du service après-vente de
Miltenyi Biotec.
1.5.2 Entretien et réparation
Important: N’effectuez pas vous-même l’entretien du séparateur
autoMACS Pro Separator, sauf autre consigne spécifique donnée dans
ce mode d’emploi ou dans un autre document de Miltenyi Biotec.
L’entretien et la réparation doivent être effectués par des réparateurs
qualifiés. Tout entretien ou toute réparation inappropriée ou
incorrecte de votre séparateur autoMACS Pro Separator peut mettre
en danger les utilisateurs, fournir des résultats imprévisibles, entraîner
le dysfonctionnement ou la détérioration de l’appareil, son usure
prématurée et réduire la durée de vie de l’appareil, ainsi qu’annuler
1 Important information
35
votre garantie.
Renseignez-vous auprès de votre représentant Miltenyi Biotec
local sur les conditions d’entretien et de support complémentaires proposées par Miltenyi Biotec ou consultez le site www.
miltenyibiotec.com/support.
Important: Si des pièces de remplacement ou de rechange sont
requises, assurez-vous que le prestataire de services utilise exclusivement des pièces Miltenyi Biotec d’origine ou des pièces de fabricants
tiers spécifiées et recommandées par Miltenyi Biotec. L’utilisation de
pièces de remplacement ou de rechange non autorisées peut
entraîner le dysfonctionnement de l’appareil et fausser les résultats
de la séparation des cellules. Miltenyi Biotec n’accorde pas de
prestation de garantie ou décline toute responsabilité pour les
pannes et les dommages de l’appareil résultant de l’utilisation de
pièces de remplacement ou de rechange inappropriées. Une fois les
travaux d’entretien ou de réparation achevés, demandez à votre
prestataire de services Miltenyi Biotec agréé d’effectuer tous les
contrôles de sécurité requis par la procédure de réparation afin de
garantir que l’appareil est parfaitement opérationnel.
Utilisez uniquement les options et les mises à jour recommandées par
Miltenyi Biotec.
1.5.3 Nettoyage
Débranchez le séparateur autoMACS Pro Separator avant le nettoyage. N’utilisez pas d’agents nettoyants liquides ou en aérosol ; utilisez
toujours un chiffon humide.
1.5.4 Matières dangereuses
WARNING
Risk of loss of life if biohazardous material is used.
Wear protective gloves, protective clothing, and
safety glasses to prevent contact with skin and eyes.
Operate device in a safety hood. Decontaminate
device after spilling of biohazardous material.
36
Si une matière nocive pour l’organisme est ou a été utilisée,
l’opérateur doit choisir et porter un équipement de protection
individuelle conforme aux avertissements et aux précautions pour
les substances utilisées. Portez des gants de protection, des vêtements de protection et des lunettes de sécurité afin d’éviter tout
contact avec la peau et les yeux. Un équipement de sécurité
défectueux ou inadéquat peut mettre l’opérateur en danger. Le
séparateur autoMACS Pro Separator doit être manipulé dans un
couvercle de protection si des matières dangereuses ou inconnues
sont traitées. Si une matière dangereuse a été utilisée ou s’est
déversée, prenez les précautions appropriées pour décontaminer
soigneusement le système.
1 Important information
Les colonnes, les plaques, les tubes et tous les autres consommables
qui ont été en contact avec des échantillons nocifs pour l’organisme
doivent être traités à l’autoclave avant l’élimination. Les déchets
liquides doivent être traités à l’autoclave ou décontaminés à l’aide
d’un désinfectant adapté à l’agent pathogène spécifique, par ex. 10
% eau de Javel, alcool isopropylique ou 70 % d’éthanol.
Figure 1.4 L’élimination des déchets doit être effectuée conformément
aux réglementations locales.
1
1.5.5 Transport
Le séparateur autoMACS Pro Separator doit être transporté avec soin
dans un emballage spécifié par Miltenyi Biotec. Un dommage interne
peut survenir si l’appareil est soumis à des vibrations excessives ou
s’il chute. Si l’appareil doit être réexpédié pour être remis en état,
décontaminez l’appareil afin d’éliminer toute matière dangereuse
avant le transport. Si vous avez des questions concernant la propre
décontamination ou l’expédition, n’hésitez pas à contacter notre
service technique assistance.
1.5.6 Élimination de l’appareil
Si vous souhaitez éliminer votre appareil, veuillez contacter notre
service technique qui vous aidera.
1.5.7 Compatibilité électromagnétique
Pour les États-Unis uniquement. Toute modification et toute
transformation de l’équipement, sauf si elle a été formellement
autorisée par Miltenyi Biotec, peut annuler votre droit d’utilisation de
l’équipement conformément à la norme 47 CFR, art. 15.
1 Important information
37
38
1 Important information
Wichtige Information
Bitte lesen vor Inbetriebnahme!
Bitte lesen Sie vor Inbetriebnahme sorgfältig alle in diesem
Benutzerhandbuch enthaltenen Informationen. Werden die
folgenden Anleitungen nicht gelesen und beachtet, so
könnte dies zu unsachgemäßer oder unvorschriftsmäßiger
Anwendung, Bedienung oder Wartung des Gerätes führen.
Auf diese Weise könnten Anwender gefährdet, Ihr Gerät
beschädigt oder dessen Betrieb beeinträchtigt werden. Auch
könnte sich vorzeitiger Verschleiß einstellen und somit die
Lebensdauer des Gerätes verkürzen. Hierdurch könnten Ihre
Garantieansprüche verfallen.
Bewahren Sie dieses Benutzerhandbuch an einem sicheren Ort
auf, zugänglich für jeden Anwender der autoMACS® Pro Separator.
Dieses Kapitel beschreibt die Sicherheitsvorschriften und die
Anforderungen an den Gerätestandort ihres autoMACS Pro
Separator. Die folgenden Warnhinweise und Vorsichtsmaßregeln
sollen Ihnen dabei behilflich sein, Verletzungen für sich oder
Schäden am Gerät zu vermeiden.
1
1.1 Symbole und Gefahrenstufen
Warnhinweis
Beispiel
CAUTION
Moving parts – stay clear. Hazard of puncturing
or crushing fingers. Operate only with attached
needle guard.
Die Gefahrenhinweise informieren den Anwender über Gefahren,
die bei Missachtung der nachstehend beschriebenen Warnungen
und Vorsichtsmaßnahmen bestehen können. Das Gefahrensymbol links versinnbildlicht die Gefahr. Die Gefahrenwarnung oben
bezeichnet die Schwere der vorliegenden Gefahr, wie vorstehend
beschrieben. Schwere, Art und Ursprung der Gefahr sowie
1 Important information
39
mögliche Folgen, Verbote und Vorsichtsmaßnahmen werden im
Anschluss beschrieben.
Symbole und Gefahrenebenen
CAUTION
WARNING
Im folgenden tabellarischen Glossar werden alle in diesem Benutzerhandbuch oder auf dem autoMACS Pro Separator verwandten
Symbole bildlich dargestellt und erklärt.
Bezeichnet eine Gefahrensituation, die, falls sie nicht vermieden wird,
zu leichteren oder mittelschweren Verletzungen führen kann.
Achtung, schlagen Sie im Benutzerhandbuch für weitere Anweisungen nach und gehen Sie umsichtig vor.
40
Warnhinweise deuten auf das Risiko von Beschädigungen des
Gerätes bzw. der Ausrüstung, die Gefahr von schweren
Verletzungen oder Lebensgefahr hin.
Quetsch- und Schergefahr.
Durch mechanische Gefährdungen können Brüche oder Quetschungen von Körperteilen verursacht werden.
Laserstrahlung
Gefahr von schweren Augen- und Hautverletzungen.
Starkes Magnetfeld
Das Magnetfeld kann auf andere, magnetisch aufladbare Gegenstände und elektronische Geräte störend einwirken oder magnetische Datenträger beschädigen. Für die Träger eines
Herzschrittmachers oder von eletronischen Implantaten besteht die
Gefahr schwerer Verletzungen.
Gefahr der Kontaminierung bei Verwendung von biologischen
Gefahrenstoffen. Dieses Symbol weist auf Lebensgefahr, das Risiko
schwerer Verletzungen für den Bediener des Gerätes oder Schäden
am Gerät selbst hin, die durch Arbeit mit möglicherweise gefährlichen biologischen Substanzen entstehen können.
Weist auf Lebensgefahr oder das Risiko schwerer Verletzungen für
den Benutzer des Gerätes aufgrund gefährlicher Stromspannung hin.
Gleichstrom
Mit diesem Symbol ist auf dem Gerät die Art der Energieversorgung
gekennzeichnet: Gleichstrom.
Stromversorgung : AN.
Stromversorgung: AUS.
Vor Inbetriebnahme und Betrieb des Geräts ist die Dokumentation zu
beachten.
1 Important information
1.2 Warn- und Sicherheitshinweise
Der autoMACS Pro Separator ist ein hochmodernes, computergesteuertes Gerät zur automatischen Separation magnetisch markierter
Zellen mittels MACS-Technologie. Der MACS MiniSampler ist an den
autoMACS Pro Separator angeschlossen und damit Teil der Zellseparationsvorrichtung. autoMACS Pro Separator und MACS MiniSampler
gelten bei Einbau und Bedienung durch fachkundiges Personal und
Beachtung der allgemein üblichen Sicherheitspraktiken und
Hinweise in dieser Bedienungsanleitung als sicher. Dieses Kapitel
erklärt die im Umgang mit dem Gerät möglichen Gefahren und gibt
wichtige Sicherheitshinweise zur Vermeidung dieser Gefahren.
Halten Sie sich genau an diese Hinweise, um sich selbst und das
Gerät vor möglichen Gefahren zu schützen und ein sicheres Arbeitsumfeld zu garantieren. Bei Verwendung des Geräts unter Missachtung der Herstelleranweisungen ist die Sicherheit nicht
gewährleistet.
1
Achtung: Bitte lesen und befolgen Sie alle in diesem Benutzerhandbuch gegebenen Hinweise zum Betrieb des Gerätes. Beachten Sie
auch alle auf dem Display erscheinenden Warnhinweise. Bewahren
Sie dieses Benutzerhandbuch sowie alle weiteren, mit diesem Gerät
erhaltenen Sicherheits- und Betriebsanleitungen an einem für alle
Nutzer des Geräts zugänglichen Ort auf, so dass diese künftig
jederzeit darauf zurückgreifen können.
Achtung: Der autoMACS Pro Separator ist ausschließlich ausgelegt für
den Betrieb in Innenräumen. Bitte benutzen Sie das Gerät nicht in
ausgewiesenen Gefahrenzonen wie etwa sauerstoffangereicherten
Arbeitsumgebungen.
Wenden Sie sich an die örtlichen Behörden und Ihren Stromversorger
für weitere Informationen zur Stromversorgung, Gebäudeinstallationen, Wartung und Sicherheit für die Installation dieses Gerätes.
Wenn Sie Sicherheitsbedenken in Bezug auf die Gerätenutzung
haben, setzen Sie sich bitte mit Ihrem autorisierten Miltenyi Biotec
Service Provider in Verbindung oder kontaktieren den Miltenyi Biotec
Customer Support.
1.3 Allgemeine Sicherheitshinweise
Um mögliche, mit dem Betrieb des autoMACS Pro Separators verbundene Sicherheitsrisiken zu verringern, beachten Sie bitte die
folgenden allgemeinen Sicherheitshinweise. Eine Nichteinhaltung
dieser Vorsichtsmaßnahmen könnte Feuer, Gesundheitsschäden,
und/oder Schäden am Gerät verursachen.
1 Important information
41
1.3.1 Gefahr des Stromschlags und der Ausbreitung
von Feuer
WARNING
Hazardous voltages. Risk of loss of live severe personal
injury. Unplug before cleaning. Do not use
- if device is opened or damaged,
- if liquids have been spilled into device,
- if objects device through ventilation slots.
Warnung: Der Umgang mit elektrischen Geräten birgt das Risiko eines
Stromschlags. Um diese Gefahr zu minimieren, öffnen Sie weder das
Gehäuse des autoMACS Pro Separators noch anderes Zubehör. Alle
Abdeckungen sowie das Geräte-Zubehör dürfen nur von geschultem
Personal entfernt werden. Besondere Vorsicht ist geboten beim
Umgang mit Flüssigkeiten. Beseitigen Sie ausgetretene oder
verschüttete Flüssigkeit sofort. Es darf unter keinen Umständen
Flüssigkeit in das Innere des Gerätes eindringen. Ziehen Sie den
Netzstecker vor manueller Reinigung des autoMACS Pro Separators.
Eine potentielle Gefahrenquelle liegt auch im Betrieb eines geöffneten, zu Boden gefallenen oder beschädigten Gerätes. Ebenfalls
sollte unbedingt vermieden werden, dass Flüssigkeit in das Gerät
gelangt, Fremdkörper durch die Belüftungsöffnungen eindringen
oder von außen in das Instrument hinein gelangen. Bei Auftreten von
Flammen oder Rauchentwicklung schalten Sie das Gerät sofort aus,
trennen es von der Stromzufuhr und kontaktieren einen autorisierten
Miltenyi Biotec Service Provider oder das Miltenyi Biotec CustomerSupport -Team. Der Betrieb eines beschädigten Gerätes oder eines
Gerätes mit schadhaftem Stromkabel ist ausdrücklich verboten.
1.3.2 Starkes Magnetfeld
WARNING
Extremely strong magnetic fields. Risk of severe
personal injury to persons carrying pacemakers or
electronical medical implants – stay clear. Keep all
magnetically sensitive objects away from device.
Warnung: Der autoMACS Pro Separator enthält einen extrem starken
Magneten. Halten Sie mit magnetischen Datenträgern (Kreditkarten,
Magnetbänder, Speichermedien und dergleichen) und elektronischen Geräten (wie Hörgeräte, Herzschrittmacher, Mess- und Steuergeräte, PCs, Uhren) mindestens 20 cm Abstand zur Magnetabdeckung,
da diese durch das Magnetfeld gestört und geschädigt werden
können.
42
1 Important information
1
Figure 1.1 Warnsymbol für starken Dauermagnet.
1.3.3 Quetsch- und Schergefahr
CAUTION
Moving parts – stay clear. Hazard of puncturing
or crushing fingers. Operate only with attached
needle guard.
Warnung: Frontabdeckungen nicht öffnen, wenn das Gerät läuft.
Bewegung des Automatikarms und der zugehörigen Komponenten
im Betrieb nicht behindern. Finger usw. von allen bewegten Teilen
des autoMACS Pro Separator und zugehörigen Komponenten
fernhalten, es besteht sonst Gefahr von Quetsch- und Scherverletzungen und Schäden am Gerät. Flüssigkeitspumpen nicht berühren und
Leitungen nicht verändern, wenn das Gerät läuft. Gerät immer
ausschalten, bevor Arbeiten am Flüssigkeitssystem vorgenommen
werden. Laufenden Vorgang immer anhalten oder abbrechen, bevor
Arbeiten an Zusatzgeräten wie dem MACS MiniSampler ausgeführt
oder Reagenzgläser aus dem Reagenzglasgestell im Sampler
entnommen oder dort eingesetzt werden. Sicherheitsmaßnahmen
und –vorrichtungen niemals umgehen oder manipulieren.
Figure 1.2 Der Kreis zeigt das Warnsymbol für Quetsch- und Schergefahr.
1.3.4 Laserstrahlung
Warnung: Das Gerät ist zur automatischen Reagenzglasgestellerkennung (Klasse 1M) mit vier oberflächenemittierenden Lasern mit
vertikalem Resonator (VSCLs) ausgestattet. Die Strahlung ist nicht
sichtbar. Schauen Sie nicht direkt mit optischen Instrumenten (z. B.
1 Important information
43
Objektiven, Vergrößerungsgläsern und Mikroskopen) hinein. Das
Hineinschauen mit optischen Instrumenten in die VSCL-Öffnung
innerhalb eines Abstandes von 100 mm kann Ihre Augen schädigen
Das Gerät ist auch mit einem 2D-Code-Leser ausgestattet, der einen
sichtbaren Halbleiterlaser als Target-Pointer (Zeiger) zur Einstellung
der Leseposition sowie leistungsstarken Leuchtdioden (LEDs) zur
Ausleuchtung des Lesefeldes verwendet.
Schauen Sie weder direkt in die Laser- oder LED-Strahlung noch in
eine durch eine Spiegelfläche reflektierte Laser- oder LED-Strahlung.
Dies kann sonst zu Augenverletzungen führen. Richten Sie den
Laserstrahl nicht absichtlich auf andere Personen.
Demontieren, wechseln oder entfernen Sie nicht eingebaute Laseroder LED-Strahlungsquellen oder deren Halterung. Die Laser- oder
LED-Strahlungsquellen hören bei Demontage nicht automatisch auf,
Strahlung zu emittieren.
Strahlung von demontierten Geräten kann zu Augenverletzungen
führen.
Achten Sie auf den optischen Weg des Laserstrahls oder der Reflektion durch eine Spiegeloberfläche. Achten Sie bei der Einrichtung des
autoMACS Pro Separator darauf, dass sich der optische Weg des
Laserstrahls beim Betrieb nicht auf gleicher Höhe mit dem menschlichen Auge befindet.
Vermeiden Sie, dass Wasser, Öl, Staub oder andere Fremdkörper dem
Öffnungsfenster des 2D- Code-Lesers anhaften. Dies kann zu
Lesefehlern führen. Stellen Sie vor der Reinigung des Scanners sicher,
dass keine Laserstrahlen mehr emittiert werden. Der Umgang mit
dem Laser kann sonst zu Augenverletzungen führen. Verwenden Sie
zum Abwischen von Substanzen auf dem Scanner ein weiches,
trockenes Tuch. Verwenden Sie keinen Alkohol oder andere Reinigungssubstanzen.
Der autoMACS Pro Separator ist nach Norm IEC 60825-1: 1993 + A1:
1997 + A2: 2001 als Klasse 1M-Laserprodukt eingestuft.
Warnung: Die Verwendung von anderen als hierin genannten
Bedienungselementen sowie die Anpassung oder Durchführung von
anderen als hier genannten Verfahren kann gefährliche Strahlung
freisetzen.
44
1 Important information
1
Figure 1.3 Position von Lasern. Im Bereich des Rechtecks befinden sich
verdeckt montierte Laser zur Erkennung von Gestellen. Der (sichtbare)
2D-Barcodeleser ist hier mit einem Kreis gekennzeichnet.
1.4 Sichere Geräteinstallation
In diesem Abschnitt werden die Anforderungen an einen betriebssicheren Standort für Ihren autoMACS Pro Separator beschrieben.
Lesen Sie die Anleitungen in diesem Abschnitt und stellen Sie sicher,
dass der Gerätestandort entsprechend vorbereitet ist, bevor Sie das
Gerät in Betrieb nehmen.
Berücksichtigen Sie bei der Aufstellungsplanung die in diesem
Abschnitt beschriebenen Vorkehrungen, um Gerätestörungen zu
vermeiden und die Wahrscheinlichkeit umgebungsbedinget
Geräteausfälle zu verringern.
Wichtig: Örtliche Arbeitsschutzbestimmungen, Laborrichtlinien,
Sicherheitsnormen und Unfallverhütungsvorschriften müssen auf
jeden Fall beachtet werden.
1.4.1 Montagezubehör
Stellen Sie den autoMACS Pro Separator niemals auf einen instabilen
Labortisch, Laborwagen, Untersatz, Laborstativ, oder Laborkonsole.
Als Folge davon könnte das Instrument zu Boden fallen, dadurch
könnten schwere Verletzungen und/oder Schäden am Gerät
verursacht werden. Benutzen Sie daher nur von Miltenyi Biotec
empfohlenes oder direkt mit dem Gerät erhältliches Labormobiliar.
Versuchen Sie nicht, den autoMACS Pro Separator in eine Einbaukonstruktion zu integrieren oder auf begrenztem Raum, z.B. in einem
Laborregal, unterzubringen, es sei denn, es wurde eine spezielle
Vorrichtung dafür entwickelt, es ist für ausreichende Belüftung
gesorgt und die Montageanleitung für das Gerät wurde befolgt.
1 Important information
45
1.4.2 Belüftung
Das Instrument sollte nicht in der Nähe von Radiatoren, Heißlüfter,
Öfen, oder anderen, Wärme erzeugenden Geräten stehen (Verstärker
eingeschlossen). Ermöglichen Sie im Betrieb eine ausreichende
Luftzirkulation im Abstand von mindestens 15 cm in allen Richtungen um den autoMACS Pro Separator, um eine ausreichende
Kühlung zu gewährleisten. Vermeiden Sie, das Gerät direkter
Sonneneinstrahlung auszusetzen. Öffnungen und Schlitze am Gerät
sind zur Belüftung gedacht und sollten niemals bedeckt oder
blockiert werden, da sie das Gerät vor Überhitzung schützen und
sicheren Betrieb ermöglichen. Führen Sie niemals Fremdkörper durch
Öffnungen in das Gerät ein.
1.4.3 Wassereintritt und Nässe
Setzen Sie das Instrument niemals in einer feuchten oder nasskalten
Umgebung ein. Setzen Sie das Gerät nie hoher Feuchtigkeit oder
Kondensation aus und schützen Sie es gegen Spritzwasser.
1.4.4 Geerdetes Produkt
Das Gerät ist ausgestattet mit einem Schutzkontaktstecker und einer
dreiadrigen Anschlussleitung. Führen Sie den Stecker nicht in eine
Steckdose ohne Schutzkontakt ein. Wenn Ihre Steckdose keinen
Schutzkontakt aufweist, bitten Sie einen ortsansässigen Elektriker,
diese zu ersetzen.
1.4.5 Stromquellen
Das Gerät sollte nur von einer Stromquelle aus betrieben werden, die
den elektrischen Angaben auf dem Typschild entsprechen. Sollten
Sie Fragen zur Art der Stromversorgung haben, wenden Sie sich an
einen autorisierten Miltenyi Biotec Service Provider oder Ihren
lokalen Stromversorger. Benutzen Sie keine Verlängerungskabel oder
Steckdosenleiste. Überladen Sie eine Steckdose nicht. Die Gesamtlast
darf 80 % der Zweigstromkreisbemessung nicht überschreiten.
1.4.6 Zugänglichkeit der Stromverbindungen
Der Hauptstromschalter ebenso wie der Netzstecker für das Stromkabel sollten leicht zugänglich sein und sich in möglichst unmittelbarer
Nähe zum Bediener des Gerätes befinden. Sollte es erforderlich sein,
die Stromzufuhr zu unterbrechen, ziehen Sie den Netzstecker.
1.4.7 Peripheriegeräte
46
An die mit „COM“ beschriftete RS-232-Buchse dürfen nur Peripheriegeräte angeschlossen werden, die UL 60950 erfüllen. Die mit
„RS232/AUX“ beschriftete Buchse ist nicht belegt. An die mit
„External CAN“, „CAN1“ und „CAN2“ beschrifteten Buchsen dürfen
nur Original autoMACS Pro-Geräte angeschlossen werden. Die
Spannung an diesen Buchsen darf die gefährlichen Werte von 30 Veff
und 42,4 V Spitze bzw. 60 V DC nicht übersteigen. An die mit „Bottle
Sensor“ beschriftete Buchse darf nur das autoMACS Pro Flaschensen-
1 Important information
sorkabel angeschlossen werden. An die mit „RS232/BCR“ beschriftete
Buchse darf nur ein von Miltenyi Biotec empfohlener 2D-Barcodeleser angeschlossen werden. Externe Lasergeräte, die an die mit
„RS232/BCR“ beschriftete Buchse angeschlossen werden, müssen IEC
60825-1 erfüllen. Es dürfen nur Anschlusskabel mit einer Länge von
max. 3 Metern verwendet werden.
1
1.5 Sicherer Betrieb, Wartung, Transport
und Entsorgung
Beachten Sie die folgenden die folgenden Hinweise bezüglich
Betriebssicherheit, Wartung, Transport und Entsorgung Ihres
autoMACS Pro Separators.
Wichtig: Örtliche Arbeitsschutzbestimmungen, Laborrichtlinien,
Sicherheitsnormen und Unfallverhütungsvorschriften müssen auf
jeden Fall beachtet werden.
1.5.1 Sicherer Betrieb des Gerätes
Falls Ihr Gerät nicht einwandfrei arbeitet und Anzeigen auf dem
Display Sie dazu auffordern, den technischen Kundendienst zu
kontaktieren, ist die Betriebssicherheit nicht mehr länger
gewährleistet. Schalten Sie das Gerät sofort aus, unterbrechen die
Stromzufuhr und kontaktieren einen autorisierten Miltenyi Biotec
Service Provider oder das Miltenyi Biotec Customer Support Team.
1.5.2 Wartung
Wichtig: Versuchen Sie nicht, den autoMACS Pro Separator selbst zu
warten oder zu reparieren — es sei denn, es ist in diesem Benutzerhandbuch oder anderen technischen Unterlagen der Miltenyi Biotec
GmbH ausdrücklich vermerkt. Wartung und Reparaturen müssen
durch geschulte Fachkräfte ausgeführt werden. Falsche oder
unsachgemäße Wartung oder Reparatur an Ihrem Gerät kann zur
Gefährdung des Anwenders, unvorhersehbaren Resultaten, Fehlfunktionen, Geräteschäden, vorzeitigem Verschleiß und verringerter
Lebensdauer führen und kann den Verlust Ihrer Garantieansprüche
zur Folge haben.
Fragen Sie Ihren örtlichen Miltenyi Biotec Vertriebsmitarbeiter
nach unseren weit reichenden Vereinbarungen zum Geräteservice und Kundendienst, oder besuchen unsere Website: www.
miltenyibiotec.com/support.
Wichtig: Wenn Ersatzteile benötigt werden, stellen Sie sicher, dass Ihr
Service Provider nur Originalteile der Miltenyi Biotec GmbH oder Teile
von Drittanbietern verwendet, die von der Miltenyi Biotec GmbH
spezifiziert und empfohlen werden. Die Verwendung unautorisierter
Ersatzteile kann Fehlfunktionen des Gerätes verursachen und die
Ergebnisse von Zellseparationen beieinträchtigen. Die Miltenyi Biotec
1 Important information
47
GmbH akzeptiert keinerlei Garantieansprüche und haftet nicht für
Fehlfunktionen oder Schäden am Gerät, die auf Verwendung
ungeeigneter Verschleiß- oder Ersatzteile zurückzuführen sind. Nach
jedweder erfolgter Wartungs- oder Reparaturleistung lassen Sie Ihren
autorisierten Miltenyi Biotec Service Provider alle notwendigen
Sicherheitsprüfungen durchführen, um sicherzustellen, dass das
Gerät sich in vorschriftsmäßigem Zustand befindet.
Nutzen Sie nur von Miltenyi Biotec empfohlenes Zusatzgerät und von
uns empfohlene Upgrades zu Ihrem Gerät.
1.5.3 Reinigung
Ziehen Sie den Netzstecker vor Reinigung des Gerätes. Verwenden
Sie keine Flüssig- oder Sprühreinigungsmittel, sondern nur ein
feuchtes Tuch.
1.5.4 Gefährliches Material
WARNING
Risk of loss of life if biohazardous material is used.
Wear protective gloves, protective clothing, and
safety glasses to prevent contact with skin and eyes.
Operate device in a safety hood. Decontaminate
device after spilling of biohazardous material.
48
Wird oder wurde mit biologischen Gefahrenstoffen gearbeitet, muss
der Bediener des Gerätes entsprechend den für die verwendeten
Substanzen geltenden Warnhinweisen und Schutzbestimmungen
eine persönliche Schutzausrüstung tragen. Tragen Sie Schutzhandschuhe, Schutzkleidung, und Schutzbrille, um Berührung der
Gefahrenstoffe mit Haut und Augen zu vermeiden. Mangelhafte oder
unzureichende Schutzausrüstung kann den Bediener des Instrumentes gefährden. Werden biologische Gefahrenstoffe oder
unbekannte Substanzen eingesetzt, sollten Sie mit dem AutoMACS
Pro Separator in einer Sterilbank arbeiten. Falls Gefahrstoffe verwendet wurden oder ausgetreten sind, achten Sie auf eine sorgfältige
Dekontaminierung des Gerätes.
Säulen, Auffanggefäße und alle weiteren Verbrauchsmaterialien, die
in Kontakt mit biologischen Gefahrenstoffen gelangt sind, sollten vor
Entsorgung autoklaviert werden. Flüssigabfall sollte autoklaviert
oder unter Verwendung eines für das jeweilige spezifische Pathogen
geeigneten Desinfektionsmittels dekontaminiert werden, z.B. 10%
Bleichmittel, Isopropylalkohol, oder 70% Ethanol.
1 Important information
1
Figure 1.4 Die Entsorgung der Verbrauchsmaterialien muss gemäß
lokal geltender Bestimmungen erfolgen.
1.5.5 Transport
Der autoMACS Pro Separator sollte vorsichtig gehandhabt in der von
Miltenyi Biotec bereit gestellten Verpackung transportiert werden.
Im Gerät können innere Schäden auftreten, falls es großer Erschütterung ausgesetzt oder fallengelassen wird. Sollte wegen Reparaturoder Wartungsleistungen ein Rücktransport zum Hersteller
notwendig werden, dekontaminieren Sie das Gerät vor Versand von
jeglichen biologischen Gefahrenstoffen. Wenn Sie Fragen zur
vorschriftsmäßigen Dekontaminierung oder zum Versand des
Gerätes haben, wenden Sie sich bitte direkt an unseren Technical
Support.
1.5.5 Geräteentsorgung
Setzen Sie sich bitte direkt mit unserem Technical Support in
Verbindung, falls Sie Ihr Gerät entsorgen möchten.
1 Important information
49
50
1 Important information
Informazioni importanti
Leggere prima dell’uso!
Si prega di leggere tutte le informazioni riportate nel presente
manuale d’uso prima dell’utilizzo. La mancata lettura e
l’inosservanza delle istruzioni possono condurre ad un impiego
improprio o scorretto dello strumento, a manipolazione e
manutenzione inadeguate o errate e potrebbero rappresentare
un pericolo per l’operatore, avere conseguenze imprevedibili,
causare il malfunzionamento o danni allo strumento, condurre
ad un’usura prematura e ad una minore durata di esercizio dello
strumento, nonché invalidarne la garanzia.
Conservare il presente manuale in un luogo sicuro, accessibile a tutti
gi addetti che utilizzano l’unità di separazione autoMACS® Pro
(autoMACS® Pro Separator).
Il presente capitolo illustra le istruzioni di sicurezza e i requisiti
ambientali per l’installazione dello strumento autoMACS Pro
Separator. I seguenti simboli di avvertenza e attenzione servono
quale ausilio alla prevenzione di lesioni personali e danni al
dispositivo.
1
1.1 Simboli e livelli di pericolo
Indicazioni di sicurezza
Esempio
CAUTION
Moving parts – stay clear. Hazard of puncturing
or crushing fingers. Operate only with attached
needle guard.
Le indicazioni di sicurezza informano l'operatore dei rischi potenziali
derivanti dal mancato rispetto delle avvertenze e precauzioni
descritte di seguito. L'icona sul lato sinistro specifica il tipo di rischio.
Il livello di rischio in alto classifica il tipo di pericolo, come indicato in
precedenza. Il livello, il tipo e la fonte del pericolo, nonché le possibili
conseguenze, i divieti e le misure da adottare vengono indicati come
segue.
1 Important information
51
Simboli e livelli di pericolo
CAUTION
WARNING
Di seguito viene presentato un glossario illustrato che descrive i
simboli utilizzati nel presente manuale d’uso e sul autoMACS Pro
Separator.
Indica una situazione pericolosa che potrebbe comportare lesioni di
grado lieve o moderato, qualora non venga evitata.
Indica una situazione pericolosa che potrebbe comportare lesioni
gravi o morte, qualora non venga evitata.
Attenzione: consultare il Manuale d’uso per ulteriori istruzioni e
procedere con cautela.
Le avvertenze includono il rischio di danni alle attrezzature, gravi
lesioni personali o morte.
52
Pericolo di schiacciamento o di taglio.
Rischio di schiacciamento o di taglio di parti del corpo a causa di
componenti meccanici.
Forte campo magnetico
Il campo magnetico può interferire con oggetti magnetizzati e
dispositivi elettronici o danneggiare i supporti magnetici per le
informazioni. Rischio di lesioni personali gravi per soggetti portatori
di pacemaker o impianti medici elettronici.
Rischio di contaminazione in caso di utilizzo di materiale a rischio
biologico. Indica il rischio di morte, lesioni gravi a danno
dell’operatore o danni alle attrezzature a causa di materiale biologico
potenzialmente pericoloso.
Indica il rischio di morte o di lesioni gravi a danno dell’operatore a
causa di un livello pericoloso di tensione.
Terminale per conduttore di protezione
Il simbolo è affisso all'interno dello strumento. Avvertenza per il
personale di assistenza tecnica
On - acceso (alimentazione)
Off - spento (alimentazione)
E’ necessario consultare la documentazione prima di procedere con
l’installazione e l’utilizzo dell’apparecchio
1 Important information
1.2 Avvertenze e precauzioni
Il separatore autoMACS Pro Separator utilizza tecnologie
all'avanguardia. Si tratta di un dispositivo gestito mediante computer
per la separazione automatica delle cellule marcate magneticamente
mediante la tecnologia MACS. Il campionatore MACS MiniSampler è
collegato al separatore autoMACS Pro Separator e rappresenta
pertanto un componente del dispositivo di separazione delle cellule.
Il separatore autoMACS Pro Separator e il campionatore MACS
MiniSampler sono concepiti in modo da garantire un funzionamento
sicuro dopo l'installazione, se utilizzati da personale addestrato
secondo le norme generali di sicurezza e le istruzioni fornite nel
presente manuale d'uso. Le linee guida riportate nella presente
sezione illustrano i potenziali rischi associati al funzionamento dello
strumento e forniscono importanti informazioni in materia di
sicurezza atte a ridurre al minimo detti rischi. Seguendo
scrupolosamente le istruzioni, è possibile proteggere se stessi e le
attrezzature dai possibili pericoli e garantire un ambiente di lavoro
sicuro. Qualora lo strumento venga impiegato in modo non
conforme alle istruzioni fornite dal fabbricante, la sicurezza potrebbe
risultare compromessa.
1
Importante: leggere e seguire tutte le istruzioni operative contenute
nel presente manuale e prestare particolare attenzione alle
avvertenze indicate sullo strumento. Conservare il presente manuale
d’uso e tutte le altre istruzioni operative e di sicurezza fornite insieme
alla strumento in un luogo accessibile a tutti gli operatori, per future
consultazioni.
Importante: autoMACS Pro Separator sono destinati unicamente
all’impiego interno. Non utilizzare lo strumento in ambienti classificati
come luoghi pericolosi, quali gli ambienti con forte concentrazione di
ossigeno.
Per ulteriori informazioni relative all’installazione della
strumentazione, contattare le autorità locali competenti per la
fornitura di energia elettrica, in materia di edilizia, manutenzione o
sicurezza.
Qualora abbiate serie preoccupazioni in merito all’impiego sicuro
dello strumento, contattare il rivenditore Miltenyi Biotec autorizzato o
chiamare il servizio di assistenza clienti Miltenyi Biotec.
1.3 Precauzioni generali
Per ridurre i potenziali rischi associati all’utilizzo di autoMACS Pro
Separator, osservare le precauzioni generali di seguito elencate. Il
mancato rispetto di tali precauzioni può comportare il rischio di
incendi, lesioni personali e/o danni allo strumento.
1 Important information
53
1.3.1 Pericolo di scossa elettrica e di incendio
WARNING
Hazardous voltages. Risk of loss of live severe personal
injury. Unplug before cleaning. Do not use
- if device is opened or damaged,
- if liquids have been spilled into device,
- if objects device through ventilation slots.
ATTENZIONE: I dispositivi elettrici presentano il rischio di scosse
elettriche. Per ridurre i rischi di scossa elettrica, non aprire alcun
coperchio, tranne i coperchi di accesso anteriore di autoMACS Pro
Separator, né altri accessori hardware forniti da Miltenyi Biotec. Tutti
gli altri coperchi dello strumento e gli accessori hardware possono
essere rimossi esclusivamente da personale autorizzato. Prestare
particolare attenzione quando si manipolano liquidi. Pulire
immediatamente eventuali schizzi. Non lasciare che i liquidi
penetrino all’interno del dispositivo. Staccare il cavo
dell’alimentazione prima di pulire manualmente lo strumento
autoMACS Pro Separator.
Esistono potenziali rischi in caso di utilizzo di uno strumento
AutoMACS Pro Separator aperto, caduto o danneggiato, in caso di
infiltrazione di liquidi all’interno dello strumento, in caso di
penetrazione di oggetti nello strumento attraverso le fessure di
ventilazione o in caso di inserimento accidentale di oggetti nello
strumento. In caso di presenza di fiamme o fumo, spegnere
immediatamente il autoMACS Pro Separator, staccare lo strumento
dalla presa di corrente e contattare un rivenditore Miltenyi Biotec
autorizzato o il servizio di assistenza clienti Miltenyi Biotec. È
severamente vietato utilizzare uno strumento danneggiato o
provvisto di cavo dell’alimentazione danneggiato.
1.3.2 Forte campo magnetico
WARNING
Extremely strong magnetic fields. Risk of severe
personal injury to persons carrying pacemakers or
electronical medical implants – stay clear. Keep all
magnetically sensitive objects away from device.
ATTENZIONE: autoMACS Pro Separator è provvisto di un magnete
estremamente potente. Tenere i supporti magnetici (come carte di
credito, nastri magnetici e supporti di memorizzazione) e i dispositivi
elettronici (come apparecchi acustici, pacemaker, strumenti di
misurazione e controllo, computer e orologi) ad una distanza minima
di 20 cm dal coperchio del magnete. Questi oggetti potrebbero
essere danneggiati o il loro funzionamento essere compromesso dal
campo magnetico.
54
1 Important information
1
Figura 1.1 Segnale di avvertenza per forte magnete permanente
1.3.3 Pericolo di schiacciamento e di taglio
CAUTION
Moving parts – stay clear. Hazard of puncturing
or crushing fingers. Operate only with attached
needle guard.
ATTENZIONE: Non aprire i coperchi di accesso anteriore mentre il
dispositivo è in funzionamento. Non impedire il movimento del
braccio automatizzato e degli accessori hardware durante il
funzionamento. Tenere le dita, ecc., lontano da tutte le parti in
movimento del dispositivo autoMACS Pro Separator e degli accessori
hardware, per evitare lesioni da schiacciamento e ferite da taglio o
danni al dispositivo. Non toccare le pompe dei liquidi e non spostare i
tubi mentre il dispositivo è in funzione. Spegnere sempre il
dispositivo prima di regolare eventuali parti del sistema della fluidica.
Interrompere o sospendere sempre una procedura prima di
maneggiare gli accessori hardware, ad es. il campionatore MACS
MiniSampler, o prima di caricare/rimuovere le provette dal
portaprovette collocato sul campionatore. Non bypassare alcun
dispositivo o misura di sicurezza.
Figura 1.2 Il cerchio indica il segnale di avvertenza per il “pericolo di
schiacciamento e di taglio”
1 Important information
55
1.3.4 Radiazioni laser
L’apparecchio è dotato di quattro laser a emissione superficiale a
cavità verticale (VSCL) per il rilevamento automatizzato (classe 1M).
La radiazione non è visibile. Non osservare direttamente il laser con
strumenti ottici (p. es. lenti, lenti di ingrandimento e microscopi).
Osservando la porta VSCL a una distanza inferiore a 100 mm con uno
strumento ottico si potrebbero danneggiare i propri occhi.
L’apparecchio è dotato anche di un lettore di codici 2D dotato di un
laser a semiconduttore visibile come puntatore per regolare la
posizione di lettura e di potenti diodi luminosi (LED) per illuminare la
zona di lettura.
Non guardare direttamente le radiazioni di diodi laser o LED o le
radiazioni di diodi laser o LED riflesse da una superficie a specchio. In
caso contrario si potrebbero danneggiare i propri occhi. Non
rivolgere intenzionalmente il raggio laser verso altre persone.
Non smontare, modificare o rimuovere le sorgenti di radiazioni laser
o LED installate o le loro staffe di montaggio. Le sorgenti di radiazioni
laser o LED non cessano automaticamente di emettere radiazioni una
volta smontate.
Le radiazioni di unità smontate possono essere causa di lesioni agli
occhi.
Fare attenzione al percorso del raggio laser o a riflessi da una
superficie a specchio. Durante l’installazione del separatore
autoMACS Pro accertarsi che il percorso del raggio laser non si trovi
alla stessa altezza degli occhi di chi esegue il lavoro.
Evitare che acqua, grasso, polvere o altre sostanze estranee si
depositino sulla finestra di lettura del lettore di codici a barre 2D. Ciò
potrebbe comportare errori di lettura. Accertarsi di aver arrestato
l’emissione laser prima di pulire il lettore. Un’esposizione al raggio
laser potrebbe danneggiare i propri occhi. Utilizzare un panno
morbido e asciutto per rimuovere qualsiasi sostanza dal lettore di
codici a barre. Non utilizzare alcol o altre sostanze detergenti.
Il separatore autoMACS Pro è classificato come prodotto laser della
classe 1M secondo lo standard IEC 60825-1: 1993 + A1: 1997 + A2:
2001.
ATTENZIONE: L’utilizzo di comandi o regolazioni o l’esecuzione di
procedure diverse da quanto qui specificato può essere causa di
esposizione a radiazioni pericolose.
56
1 Important information
1
Figura 1.3 Posizione dei laser.
Laser invisibili per il rilevamento dei portacampioni/portareagenti sono
collocati nell'area indicata dal rettangolo. Il lettore per codice 2D (visibile) è
collocato all'interno del cerchio
1.4
Installazione sicura
Questa sezione descrive i requisiti che deve soddisfare il luogo in cui
viene collocato il autoMACS Pro Separator onde garantirne
un’installazione sicura e il funzionamento corretto. Leggere le
istruzioni fornite nella presente sezione e accertarsi che il luogo
prescelto sia adeguatamente predisposto, prima di collegare lo
strumento alla presa di alimentazione.
Nel predisporre l’ambiente di installazione e nell’organizzare la
disposizione delle attrezzature, tenere in considerazione le
precauzioni descritte nella presente sezione, in modo da evitare
guasti allo strumento e ridurre la possibilità di spegnimenti causati
dall’ambiente.
Importante: vanno sempre osservate le istruzioni di sicurezza sul
luogo di lavoro, le procedure di laboratorio e le norme relative alla
salute e alla sicurezza del laboratorio, nonché alla prevenzione degli
infortuni.
1.4.1 Accessori di montaggio
Non collocare il autoMACS Pro Separator su un piano, un carrello, un
supporto, un treppiede o una staffa poco stabile, che potrebbe
provocare la caduta dello strumento, con la possibile conseguenza di
lesioni personali gravi o di gravi danni allo strumento. Utilizzare
unicamente piani, carrelli, supporti, treppiedi o staffe raccomandati
da Miltenyi Biotec o venduti insieme allo strumento. Non collocare il
autoMACS Pro Separator su sistemi incassati o in spazi angusti, come
uno scaffale, a meno che non siano stati concepiti specificamente
1 Important information
57
per accogliere lo strumento e a condizione che vi sia una ventilazione
adeguata e che siano state seguite le istruzioni di montaggio dello
strumento.
1.4.2 Circolazione dell’aria
Lo strumento non deve essere collocato in prossimità di radiatori,
stufe o altri dispositivi (inclusi gli amplificatori) che producono calore.
Accertarsi che via sia un’adeguata circolazione d’aria attorno al
autoMACS Pro Separator, mantenendo uno spazio libero di almeno
15 centimetri su ogni lato durante il funzionamento, onde assicurare
un adeguato raffreddamento dello strumento. Evitare l’esposizione
diretta ai raggi solari. Le fessure e le aperture dello strumento sono
necessarie per la ventilazione e non devono essere in alcun caso
ostruite o coperte, poiché garantiscono il funzionamento corretto del
autoMACS Pro Separator e proteggono il dispositivo dal
surriscaldamento. Non inserire mai corpi estranei nelle aperture dello
strumento.
1.4.3 Acqua e umidità
Non utilizzare lo strumento in ambienti bagnati o umidi. Evitare
ambienti ad elevata umidità o condizioni di condensa e proteggere lo
strumento dagli schizzi d’acqua.
1.4.4 Prodotto con messa terra
Lo strumento è dotato di un sistema di alimentazione a tre fili ed è
provvisto di spina con un terzo polo per la messa a terra. La spina può
essere inserita unicamente in una presa di corrente con messa a terra,
per ragioni di sicurezza. Non cercare di inserire la spina in una presa
sprovvista di messa a terra. Qualora non riusciate ad inserire la spina
nella presa, vi consigliamo di contattare il vostro elettricista di fiducia
per sostituire la presa.
1.4.5 Fonti di alimentazione
Lo strumento deve essere alimentato unicamente dalla fonte indicata
sulla targa relativa alle caratteristiche di alimentazione del prodotto.
In caso di domande sul tipo di alimentazione da usare, contattare il
rivenditore Miltenyi Biotec autorizzato o la società elettrica locale.
Non utilizzare prolunghe o ciabatte multi-presa. Non sovraccaricare la
presa di corrente. Il carico complessivo del sistema non deve superare
l’80% della potenza del circuito.
1.4.6 Accessibilità
Accertarsi che l’interruttore principale e l’attacco del cavo
dell’alimentazione siano facilmente accessibili e posti quanto più
vicino possibile all’operatore dello strumento. Qualora si renda
necessario interrompere l’alimentazione, staccare il cavo dalla presa
di corrente.
1.4.7 Periferiche
58
Soltanto le periferiche conformi a UL 60950 possono essere collegate
al connettore RS232 contrassegnato con “COM”. Il connettore
1 Important information
contrassegnato come “RS232/AUX” non è in uso. È inoltre possibile
collegare soltanto apparecchi autoMACS Pro originali ai connettori
contrassegnati con “External CAN”, “CAN1” e “CAN2”. I livelli di tensione
su questi connettori non devono superare i livelli di tensione ammessi
pari a 30 V rms. e 42,4 V di picco o 60 V cc. Al connettore del "sensore
flacone" può essere esclusivamente collegato il cavo del sensore del
flacone autoMACS Pro. Al connettore “RS232/BCR” può essere
collegato soltanto un lettore per codice 2D raccomandato da Miltenyi
Biotec. I dispositivi laser esterni collegati al connettore
contrassegnato come “RS232/BCR” devono essere conformi alla
norma IEC 60825-1. Utilizzare unicamente cavi di connessione
inferiori ai 3 metri di lunghezza.
1
1.5 Funzionamento, manutenzione,
trasporto e smaltimento sicuri
Seguire le istruzioni di seguito riportate onde assicurare che il
funzionamento, la manutenzione, il trasporto e lo smaltimento del
vostro autoMACS Pro Separator avvengano in modo corretto e sicuro.
Importante: vanno sempre osservate le istruzioni di sicurezza sul
luogo di lavoro, le procedure di laboratorio e le norme relative alla
salute e alla sicurezza del laboratorio, nonché alla prevenzione degli
infortuni.
1.5.1 Funzionamento sicuro
Qualora lo strumento non funzioni correttamente e le istruzioni o i
messaggi visualizzati sullo schermo invitino a contattare l’assistenza
tecnica, la sicurezza di impiego non è più garantita. Spegnere
immediatamente il autoMACS Pro Separator, staccare lo strumento
dalla presa dell’alimentazione e contattare un rivenditore Miltenyi
Biotec autorizzato o il servizio di assistenza clienti Miltenyi Biotec.
1.5.2 Manutenzione
Importante: se non diversamente indicato nel presente manuale
d’uso o in altri documenti forniti da Miltenyi Biotec, non eseguire
autonomamente la manutenzione del vostro autoMACS Pro
Separator. Gli interventi di manutenzione e riparazione devono essere
eseguiti da personale qualificato. Interventi di manutenzione e
riparazione scorretti o impropri del autoMACS Pro Separator possono
rappresentare un pericolo per l’incolumità degli operatori, avere
conseguenze imprevedibili, causare malfunzionamenti o danni,
provocare l’usura prematura e una minore durata di esercizio dello
strumento, nonché invalidare la garanzia.
1 Important information
59
Per i contratti di assistenza e manutenzione offerti da Miltenyi
Biotec contattare il rappresentante Miltenyi Biotec locale o
consultare il sito www.miltenyibiotec.com/support.
Importante: qualora si rendano necessari la sostituzione o l’impiego
di pezzi di ricambio, accertarsi che il tecnico utilizzi unicamente pezzi
di ricambio originali Miltenyi Biotec o ricambi di altri fabbricanti
specificati e raccomandati da Miltenyi Biotec. L’impiego di pezzi di
ricambio non autorizzati può causare il malfunzionamento del
dispositivo e compromettere il risultato della separazione cellulare.
Miltenyi Biotec non fornisce alcuna garanzia né si assume la
responsabilità per eventuali guasti o danni derivanti dall’impiego di
pezzi di ricambio inappropriati. Al termine dell’intervento di
assistenza o di riparazione, chiedere al tecnico Miltenyi Biotec
autorizzato di eseguire tutti i controlli di sicurezza previsti dalla
procedura di riparazione, onde assicurarsi che lo strumento funzioni
correttamente.
Utilizzare esclusivamente le funzioni opzionali e gli aggiornamenti
raccomandati da Miltenyi Biotec.
1.5.3 Pulizia
Staccare il autoMACS Pro Separator dalla presa di corrente prima di
eseguire la pulizia. Non utilizzare detergenti liquidi o aerosol;
utilizzare sempre un panno umido.
1.5.4 Materiale pericoloso
WARNING
Risk of loss of life if biohazardous material is used.
Wear protective gloves, protective clothing, and
safety glasses to prevent contact with skin and eyes.
Operate device in a safety hood. Decontaminate
device after spilling of biohazardous material.
60
Qualora si utilizzi o sia stato usato del materiale a rischio biologico,
l’operatore deve indossare dispositivi di protezione personale
conformi alle avvertenze e alle precauzioni relative alle sostanze
impiegate. Indossare guanti protettivi, indumenti e occhiali di
protezione per prevenire il contatto con la pelle e gli occhi. L’impiego
di dispositivi di protezione difettosi o inadeguati rappresenta un
rischio per l’incolumità dell’operatore. Lo strumento autoMACS Pro
Separator va utilizzato con uno schermo protettivo in caso di
trattamento di materiali sconosciuti o pericolosi. Qualora sia stato
usato o versato del materiale pericoloso, il sistema deve essere
accuratamente decontaminato.
Le colonne, le piastre, le provette e tutti gli altri materiali di consumo
entrati in contatto con campioni a rischio biologico vanno sterilizzati
in autoclave prima di essere smaltiti. I rifiuti liquidi vanno autoclavati
o decontaminati utilizzando un disinfettante idoneo per il patogeno
1 Important information
specifico, ed es. candeggina al 10%, alcol isopropilico o etanolo al
70%.
1
Figura 1.4 Lo smaltimento dei rifiuti deve avvenire in conformità alle
disposizioni locali vigenti.
1.5.5 Trasporto
Lo strumento autoMACS Pro Separator va trasportato con cautela in
imballaggi specificati da Miltenyi Biotec. In caso di cadute o di
vibrazioni eccessive, lo strumento può subire dei danni interni.
Qualora si renda necessario rispedire lo strumento al produttore per
interventi di manutenzione, decontaminare lo strumento da eventuali
materiali pericolosi prima della spedizione. In caso di domande circa
la decontaminazione o il trasporto adeguati, contattare l’assistenza
tecnica.
1.5.6 Smaltimento
Contattare il servizio di assistenza tecnica per lo smaltimento dello
strumento.
1.5.7 Compatibilità elettromagnetica
Soltanto per gli USA. Eventuali cambiamenti o modifiche dello
strumento non approvati espressamente da Miltenyi Biotec possono
inficiare il diritto all’uso dello strumento in conformità all’ art. 15 47 CFR.
1 Important information
61
62
1 Important information
Información importante
Lea la siguiente información antes de usar el instrumento/
equipo
Por favor, lea íntegramente la información contenida en este
manual de usuario antes de utilizar el instrumento/equipo. La
lectura y/o seguimiento incorrectos de estas directrices pueden
llevar a un uso, manejo o mantenimiento incorrectos del equipo,
lo cual puede poner en peligro a sus usuarios, producir
resultados impredecibles, derivar en un mal funcionamiento del
aparato o que éste sufra daños así como causar un desgaste
prematuro y reducir el tiempo de vida del instrumento,
pudiendo anular su garantía.
Mantenga este manual de usuario en un lugar seguro, al alcance de
todo aquel que esté usando la Unidad de Separación autoMACS® Pro
(separador autoMACS Pro).
El presente capítulo describe las instrucciones de seguridad y los
requisitos de emplazamiento de su separador autoMACS Pro. Las
siguientes advertencias y precauciones tienen como objetivo evitar
daños personales o materiales.
1
1.1 Símbolos y niveles de peligro
Disposición de advertencias de seguridad
Ejemplo
CAUTION
Moving parts – stay clear. Hazard of puncturing
or crushing fingers. Operate only with attached
needle guard.
Las advertencias de seguridad informan al usuario sobre riesgos
potenciales en caso de que no se sigan las advertencias y
precauciones resumidas a continuación. El símbolo que aparece a la
izquierda especifica el riesgo de que se trate. El nivel de peligro que
encabeza la advertencia clasifica el peligro de que se trate tal y como
se mencionó más arriba. El nivel, tipo y fuente del peligro así como
las posibles consecuencias, prohibiciones y remedios se indican tal y
como aparece a continuación.
1 Important information
63
Símbolos y niveles de peligro
CAUTION
WARNING
El siguiente recuadro recoge un glosario ilustrado que describe los
símbolos usados en el presente manual de usuario y en el separador
autoMACS Pro.
Indica una situación de peligro que si no se impide puede producir
lesiones leves o moderadas.
Indica una situación de peligro que si no se impide puede producir la
muerte o lesiones graves.
Atención, consulte el manual de usuario para obtener más información y proceda con precaución.
Las advertencias incluyen el riesgo de dañar el equipo, las lesiones
personales graves o la muerte.
64
Peligro de aplastamiento o corte.
Riesgo de que se aplaste o corte alguna parte del cuerpo debido a
peligros mecánicos.
Radiación láser
Riesgo de graves lesiones oculares y de piel.
Campo magnético intenso
El campo magnético puede interferir en objetos magnetizables e
instrumentos electrónicos o dañar portadores magnéticos de
información. Riesgo de producir lesiones personales graves a personas
que lleven un marcapasos o implantes médicos electrónicos.
Riesgo de contaminación si se usan sustancias peligrosas biológicamente. Indica el riesgo de muerte, lesiones graves al operario del
aparato o daños al equipo debido a sustancias biológicas potencialmente peligrosas.
Indica el riesgo de muerte o lesiones graves al operario del aparato
debido a un voltaje peligroso.
Corriente continua
El equipo está marcado con el tipo de suministro: corriente continua.
Encendido (suministro)
Apagado (suministro)
La documentación del equipo debe ser consultada antes de
proceder con la instalación y operación del sistema
1 Important information
1.2 Advertencias y precauciones
El separador autoMACS Pro emplea tecnología puntera. Se trata de
un dispositivo controlado por ordenador desarrollado para la
separación de células magnéticamente rotuladas con la tecnología
MACS. El MACS MiniSampler conecta el separador autoMACS Pro y
forma de esta manera parte del dispositivo de separación de célula.
El separador autoMACS Pro y el MiniSampler están diseñados para
funcionar con seguridad una vez instalados y siempre que sean
manejados por personal cualificado de conformidad con las normas
generales de seguridad y las instrucciones contenidas en este
manual del usuario. Las directrices del presente capítulo explican los
potenciales riesgos asociados al manejo del instrumento y suministran información importante a fin de reducir dichos riesgos al
mínimo. Si sigue cuidadosamente las instrucciones, se protegerá a sí
mismo y al equipo de posibles peligros y creará un ambiente de
trabajo seguro. Si este instrumento es manejado de un modo no
previsto por su fabricante la seguridad se verá mermada.
1
Importante: Por favor, lea y siga todas las instrucciones de uso
recogidas en el presente manual de usuario y preste atención a todas
las advertencias que aparecen en el instrumento. Guarde para futuras
consultas este manual y todas las demás instrucciones de seguridad o
de funcionamiento recibidas junto con el instrumento en un lugar
accesible para todos sus usuarios.
Importante: El separador autoMACS Pro está diseñado para ser usado
exclusivamente en interior. No utilice el equipo en áreas clasificadas
como peligrosas como ambientes con alta concentración de oxígeno.
Póngase en contacto con la autoridad local competente para el
suministro de electricidad, construcción de edificios, mantenimiento
o seguridad para obtener más información sobre la instalación del
equipo.
Si tiene serias dudas sobre el manejo seguro del equipo, póngase en
contacto con su proveedor de servicios de Miltenyi Biotec autorizado
o llame al servicio de atención al cliente de Miltenyi Biotec.
1.3 Precauciones generales
Para reducir los potenciales riesgos asociados al manejo del separador autoMACS Pro, por favor observe las siguientes precauciones
generales. En caso de no seguir estas precauciones, puede producirse un incendio o causar daños corporales o al equipo.
1 Important information
65
1.3.1 Peligro de descarga eléctrica y propagación de
fuego
WARNING
Hazardous voltages. Risk of loss of live severe personal
injury. Unplug before cleaning. Do not use
- if device is opened or damaged,
- if liquids have been spilled into device,
- if objects device through ventilation slots.
Warning: Los aparatos eléctricos pueden producir una descarga
eléctrica. Para reducir este riesgo, no abra ninguna cubierta ni abra
tampoco ningún otro accesorio de harware suministrado por Miltenyi
Biotec. Cualquier cubierta asi como hardware accesorios deberán ser
retirados únicamente por personal autorizado. Se debe tener especial
cuidado cuando se manejen líquidos. Limpie inmediatamente los
líquidos vertidos. Impida que éstos accedan al interior del aparato.
Desenchufe el cable de electricidad antes de proceder a limpiar
manualmente el separador autoMACS Pro.
Existe un riesgo potencial en caso de usar separador autoMACS Pro
abierto, que se haya caído o que esté averiado, si se han derramado
líquidos en el equipo, si se ha colado algún objeto por las ranuras de
ventilación o si ha caído algo dentro del equipo. Si salen llamas o
humo, apague inmediatamente el separador autoMACS Pro, desenchúfelo y póngase en contacto con un proveedor de servicios de
Miltenyi Biotec autorizado o con el servicio técnico de Miltenyi Biotec.
Está expresamente prohibido utilizar un instrumento estropeado o
cuyo cable de corriente esté dañado.
1.3.2 Campo magnético intenso
WARNING
Extremely strong magnetic fields. Risk of severe
personal injury to persons carrying pacemakers or
electronical medical implants – stay clear. Keep all
magnetically sensitive objects away from device.
Warning: El separador autoMACS Pro Separator está equipado con un
imán extremadamente potente. Mantenga todos los portadores de
información magnética (tarjetas de crédito, cintas magnéticas y
medios de almacenamiento) y todos los equipos electrónicos
(audífonos, marcapasos, instrumentos de medición y control,
ordenadores y relojes) a una distancia mínima de 20 cm de la cubierta
magnética. El campo magnético puede alterar o dañar dichos
objetos.
66
1 Important information
1
Figura 1.1 Señal de advertencia para imán permanente potente.
1.3.3 Peligro de aplastamiento y corte
CAUTION
Moving parts – stay clear. Hazard of puncturing
or crushing fingers. Operate only with attached
needle guard.
Warning: No abrir las cubiertas de acceso frontal durante el servicio
del dispositivo. No obstruir el movimiento del brazo automatizado y
de los accesorios durante la operación. Mantener los dedos etc. lejos
de todas las piezas móviles del separador autoMACS Pro y de los
accesorios, para evitar aplastamientos, lesiones de corte o daños en el
dispositivo. No tocar las bombas de fluido ni ajustar la tubería durante
la operación del dispositivo. Desactivar siempre el dispositivo antes
de ajustar cualquier parte del sistema de fluidos. El procedimiento
debe pararse o interrumpirse antes de maniobrar los accesorios, p. ej.
el MACS MiniSampler, o antes de colocar o retirar los tubos del
soporte de tubo colocado en el sampler. No omitir ninguna de las
medidas o los dispositivos de seguridad.
Figura 1.2 El círculo abierto muestra la señal de advertencia para el peligro de
aplastamiento o corte.
1.3.4 Radiación láser
Warning: El dispositivo está equipado de cuatro unidades láser de
emisión superficial de cavidad vertical (VSCLs) para la detección
automatizada de reactivos (clase 1M). La radiación no es visible. No
1 Important information
67
mire directamente con instrumentos ópticos (por ejemplo, gafas,
lupas y microscopios). Puede ser peligroso para el ojo mirar el puerto
VSCL con instrumentos ópticos a una distancia de 100 milímetros.
El dispositivo también está equipado de un lector de código 2D que
utiliza un láser semiconductor visible como indicador de blanco para
ajustar la posición de lectura y diodos electroluminosos de gran
alcance (LED) para iluminar el área de la lectura.
No mirar directamente el láser, radiación LED, láser reflejado o
radiación del LED de una superficie reflejada. De otra manera, podría
ocasionarse una lesión ocular. No dirigir intencionalmente el rayo
láser a otras personas.
No desmontar, modificar ni quitar el láser o la fuente de radiación
LED o sus soportes de montaje. El láser o las fuentes de radiación
LED no interrumpen la emisión cuando están desmontados.
La radiación de unidades desmontadas puede ocasionar lesiones
oculares.
Tener cuidado con la trayectoria del rayo o la reflexión láser de una
superficie reflejada. Durante la instalación del autoMACS Pro
Separator, tener cuidado de que durante la operación la trayectoria
del rayo láser no esté a la misma altura que el ojo humano.
No permitir que agua, aceite, polvo u otras sustancias ajenas se
peguen a la ventana de abertura del lector 2D Code. Esto puede
causar errores de lectura. Asegúrese de parar la emisión del láser
antes de limpiar el escáner. De no ser así, la exposición al láser puede
ocasionar lesiones oculares. Utilizar un paño suave y seco para
limpiar cualquier sustancia del escáner. No utilizar alcohol u otra
sustancia de limpieza.
El autoMACS Pro Separator está clasificado como producto láser 1M
de estándar IEC 60825-1: 1993 + A1: 1997 + A2: 2001.
ATENCIÓN: El uso de controles, el ajuste o la realización de procedimientos con excepción de los aquí especificados puede dar lugar a una
peligrosa exposición de radiación.
68
1 Important information
1
1.4 Instalación segura
El presente capítulo describe los requisitos que debe reunir el lugar
donde desea instalar y operar el separador autoMACS Pro. Lea las
instrucciones de este capítulo y asegúrese de que el emplazamiento
está correctamente preparado antes de conectar el instrumento a la
corriente eléctrica.
Cuando planee la distribución del emplazamiento y la ubicación del
equipo tenga en cuenta las precauciones recogidas en este capítulo
para evitar averías del instrumento y reducir la posibilidad del cierre
de la empresa por razones medioambientales.
Importante: En todo momento se debe observar la normativa
nacional de seguridad en el trabajo, las normas del laboratorio, y los
estándares de salud y seguridad en el laboratorio y de prevención de
accidentes.
1.4.1 Accesorios de montaje
No coloque el separador autoMACS Pro sobre una mesa, carrito,
estante, trípode o soporte inestable puesto que podría caerse,
causando lesiones corporales graves y/o daños graves al equipo.
Utilice exclusivamente una mesa, carrito, estante, trípode o soporte
recomendado por Miltenyi Biotec o vendido junto con el instrumento. No coloque el separador autoMACS Pro en un mueble
empotrado o un espacio reducido como por ejemplo una estantería,
a menos que el mismo haya sido diseñado específicamente para dar
cabida al instrumento, que provea una ventilación adecuada y que se
hayan seguido las instrucciones de montaje del equipo.
1.4.2 Circulación de aire
El instrumento no debería ser colocado cerca de radiadores, rejillas
de calor, estufas o cualquier otra pieza de equipamiento (incluidos
1 Important information
69
los amplificadores) que produzca calor. Permita que circule suficiente
aire alrededor del separador autoMACS Pro -deje al menos 15 cm de
separación en todas direcciones- mientras está en funcionamiento
para garantizar que el instrumento se enfríe adecuadamente. Evite la
exposición directa a la luz solar. Las ranuras y aberturas del instrumento sirven para que se ventile y no deben ser bloqueadas o
cubiertas, puesto que contribuyen a un funcionamiento seguro del
separador autoMACS Pro, evitando que se recaliente. No introduzca
ningún cuerpo extraño por las aberturas del instrumento.
1.4.3 Agua y humedad
No use el instrumento en un lugar húmedo. Evite la elevada humedad o la condensación y proteja a la máquina de salpicaduras.
1.4.4 Producto conectado a tierra
El instrumento está equipado con un tipo de enchufe de tres varillas
que tiene un tercer contacto para toma de tierra. Este enchufe sólo
encaja en una toma conectada a tierra. Se trata de una medida de
seguridad. No intente enchufarlo en una toma de electricidad no
conectada a tierra. Si el enchufe no encaja, póngase en contacto con
un electricista para que reemplace la toma de corriente.
1.4.5 Fuentes eléctricas
Sólo se debería maniobrar el instrumento utilizando la fuente
eléctrica indicada en la etiqueta con los valores eléctricos del
producto. Si tiene alguna pregunta sobre qué tipo de fuente eléctrica
utilizar, póngase en contacto con su proveedor de servicios de
Miltenyi Biotec autorizado o con su compañía eléctrica. No utilice
alargadores o regletas. No sobrecargue la toma de corriente. La carga
total del sistema no debe sobrepasar el 80% de la rama del circuito.
1.4.6 Accesibilidad
Asegúrese de poder acceder fácilmente tanto al interruptor principal
como al conector para el cable de corriente eléctrica y de que éstos
estén situados tan cerca del operario como sea posible. Si es
necesario desconectar el suministro eléctrico, desenchufe el cable de
la toma de corriente.
1.4.7 Aparatos periféricos
70
Solamente los dispositivos periféricos que cumplen con la UL 60950
pueden ser conectados con el conector RS232 rotulado con “COM”.
No se utiliza el conector rotulado con “RS232/AUX”. Adicionalmente
deben conectarse exclusivamente equipos originales de autoMACS
Pro con los conectores rotulados con “External CAN”, “CAN1” y
“CAN2”. Los niveles de voltaje de estos conectores no debe sobrepasar los niveles de voltaje peligroso de 30 V CA y 42.4 V punta o 60 V
CC. Se debe conectar solamente el cable de sensor de botella MACS
Pro con el conector del sensor de botella. Con el conector“RS232/
BCR” debe conectarse solamente un lector de código 2D recomendado por Miltenyi Biotec. Los dispositivos de láser externos conecta-
1 Important information
dos con el conector rotulado con “RS232/BCR” deben cumplir con la
norma IEC 60825-1. Utilice exclusivamente cables de conexión con un
largo menor a 3 m.
1
1.5 Manejo, mantenimiento, transporte
y eliminación seguros
Observe las siguientes instrucciones para asegurar un manejo,
mantenimiento, transporte y eliminación de su separador autoMACS
Pro seguros.
Importante: En todo momento se debe observar la normativa
nacional de seguridad en el trabajo, las normas del laboratorio, y los
estándares de salud y seguridad en el laboratorio y de prevención de
accidentes.
1.5.1 Manejo seguro
Si el instrumento no funciona correctamente y las instrucciones o
mensajes que aparecen en la pantalla aconsejan ponerse en contacto
con el servicio técnico, el uso del instrumento ya no es seguro.
Apague inmediatamente el separador autoMACS Pro, desenchúfelo y
póngase en contacto con el proveedor de servicios de Miltenyi
Biotec autorizado o con el servicio de atención al cliente de Miltenyi
Biotec.
1.5.2 Revisión técnica
Importante: Salvo que el presente manual de usuario u otra documentación de Miltenyi Biotec especifique lo contrario, no revise usted
mismo el separador autoMACS Pro. Las revisiones y reparaciones
deben ser llevadas a cabo por personal cualificado. Las revisiones y
reparaciones del separador autoMACS Pro incorrectamente realizadas
pueden poner en peligro a sus usuarios, producir resultados impredecibles, derivar en un mal funcionamiento del aparato o que éste
sufra daños así como causar un desgaste prematuro y reducir el
tiempo de vida del instrumento pudiendo anular su garantía.
Pregunte a su representante de Miltenyi Biotec por los contratos
de servicios de asistencia técnica de Miltenyi Biotec o consulte
www.miltenyibiotec.com/support.
Importante: Cuando se necesiten piezas de recambio o de repuesto,
asegúrese de que el proveedor de servicios utiliza exclusivamente
piezas originales de Miltenyi Biotec o de otros fabricantes especificados y recomendados por Miltenyi Biotec. El uso de piezas de recambio o de repuesto no autorizadas puede producir un mal
funcionamiento del aparato y alterar los resultados de la separación
celular. Miltenyi Biotec no cubrirá la garantía ni aceptará ninguna
responsabilidad por la avería de aparatos o por los daños resultantes
del uso de piezas de recambio o de repuesto inapropiadas. Una vez
1 Important information
71
completado el servicio o la reparación, haga que su proveedor de
servicios autorizado por Miltenyi Biotec realice todos los controles de
seguridad requeridos por el proceso de reparación para asegurarse
de que el instrumento está en buenas condiciones de funcionamiento.
Utilice exclusivamente las opciones y actualizaciones recomendadas
por Miltenyi Biotec.
1.5.3 Limpieza
Desenchufe el separador autoMACS Pro de la toma de corriente
antes de proceder a su limpieza. No emplee productos de limpieza
líquidos ni aerosoles y use siempre un trapo húmedo.
1.5.4Sustancias peligrosas
WARNING
Risk of loss of life if biohazardous material is used.
Wear protective gloves, protective clothing, and
safety glasses to prevent contact with skin and eyes.
Operate device in a safety hood. Decontaminate
device after spilling of biohazardous material.
72
Si se utilizan o se han utilizado sustancias biológicamente peligrosas,
el operario debería utilizar el equipo de seguridad que aparece en las
señales de aviso de las sustancias empleadas. Póngase guantes, ropa
y gafas de seguridad para evitar el contacto con la piel y con los ojos.
Un equipo de seguridad defectuoso o inadecuado puede poner en
peligro al operario. El separador autoMACS Pro deberá ser manejado
dentro de una campana de seguridad si se procesan sustancias
peligrosas o desconocidas. Si se han utilizado sustancias peligrosas o
éstas se han derramado, se debe velar por una desinfección meticulosa del sistema.
Las columnas, placas, tubos de ensayo y cualquier otro objeto que
haya estado en contacto con las muestras peligrosas deberán ser
autoclavados antes de poder volver a ser utilizados. Los residuos
líquidos deberán ser autoclavados o descontaminados usando un
desinfectante industrial apropiado para el patógeno específico, por
ejemplo, hipoclorito de sodio al 10%, alcohol isopropílico o etanol al
70%.
2 Introduction
1
Figura 1.4 La eliminación de los residuos debe cumplir la normativa
nacional.
1.5.5 Transporte
El separador autoMACS Pro debe ser transportado con cuidado en el
embalaje especificado por Miltenyi Biotec. Se pueden producir daños
internos si es expuesto a vibraciones excesivas o si se cae. En caso de
que sea necesario devolver el instrumento a su fabricante para su
revisión, límpielo y desinféctelo de cualquier sustancia peligrosa
antes de realizar el envío. Si tiene preguntas relativas a la descontaminación o el envío, póngase en contacto con el servicio de asistencia
técnica.
1.5.6 Eliminación del instrumento/ equipo
Póngase en contacto con el servicio de asistencia técnica si desea
desprenderse de su instrumento.
1.5.7 Compatibilidad electromagnética
Sólo para EE°UU. Los cambios y modificaciones del equipo que no
estén expresamente aprobados por Miltenyi Biotec pueden invalidar
su autorización para operarlo conforme a la parte 15 del título 47 del
Código de Regulaciones Federales (CFR).
1 Important information
73
74
1 Important information
2
Introduction
2.1 MACS® Technology—the gold
standard in cell separation
MACS® Technology has become the standard method in cell
separation. It is based on the use of MACS MicroBeads, MACS
Columns, and MACS Separators—strong permanent magnets. In a
first step, surface antigens are magnetically labeled in a highly
specific manner with monoclonal antibodies coupled to MACS
MicroBeads.
After magnetic labeling, the cells are passed over a MACS Column
placed in a MACS Separator. Non-labeled cells flow through and can
be collected as fractions; labeled cells are retained in the column and
can be released after removing the column from the magnet.
Thus, both labeled and non-labeled target cells can efficiently be
isolated with MACS Technology. The entire procedure is fast, easy to
handle, and gentle to cells, leading to the purification of viable and
functionally active cells that can immediately be used for further
experiments.
2.2 Super-paramagnetic
MACS® MicroBeads
MACS® MicroBeads are super-paramagnetic particles of
approximately 50 nanometers in diameter, being comparable to the
size of a virus. MicroBeads do not change the scatter properties of the
cell in the flow cytometer or influence the light-microscopic
appearance of the cell. They form a stable colloidal suspension and
do not precipitate or aggregate in magnetic fields. MACS MicroBeads
are composed of a biodegradable matrix made of iron oxide and
polysaccharide. Hence, it is not necessary to detach cell-bound beads
after the separation process, saving hands-on time. Usually, MACS
MicroBeads do not alter structure, function, or activity status of
labeled cells, and they are not known to interfere with subsequent
experiments.
The isolated cells can be used directly for subsequent studies or cell
culture.
MACS Cell Separation Reagents are highly specific. Thus, it is possible
to label, for example, B cells and T cells as well as rare target cells with
frequencies as low as 10-8. MACS Technology allows to isolate viable
antigen-specific T cells, CD133+ hematopoietic stem and progenitor
2 Introduction
75
cells, subpopulations of CD34+ hematopoietic progenitor cells, and
disseminated carcinoma cells circulating in the peripheral blood.
Finally, MACS MicroBeads offer an extremely flexible tool to isolate
many cell types from many species. Several hundreds of reagents for
the isolation of human, mouse, rat, and non-human primate cells as
well as reagents for indirect labeling of many other cell types are
available.
2.3 A column-based, high-gradient
magnetic cell separation
The MACS Separation Unit consists of a powerful permanent magnet.
If a MACS Column is placed into the magnetic field of the Separation
Unit, the small ferromagnetic structures of the column matrix disturb
this homogenous magnetic field and, thereby, produce high magnetic
gradients. In their immediate neighborhood, the ferromagnetic
structures generate magnetic forces, allowing to retain target cells
labeled with minimal amounts of MACS MicroBeads. Additionally,
when the columns are removed from the separator this strong
magnetic field is significantly reduced, making the recovery of the
retained cells easy and gentle. This method allows separation of
viable cells from samples containing a few hundred cells up to 1011
total cells. Within approximately 15 minutes, the cells are labeled with
MACS MicroBeads—nano-sized superparamagnetic particles coupled
to specific antibodies. The actual separation of cells over
the column is completed within minutes.
2.4 The autoMACS® Pro Separator
The autoMACS® Pro Separator is a benchtop magnetic cell sorter that
allows gentle sorting of more than 10 million cells per second from a
sample of up to 4×10⁹ total cells. The instrument is designed for use
with any MACS Cell Separation Reagent for research applications.
Thus, it is possible to choose between different cell separation
strategies according to the respective experimental design—from
positive selection of abundant or rare cells to the isolation of
untouched cells by depletion of non-target cells. 12 preset separation
programs simplify and standardize the application.
IMPORTANT: The autoMACS Pro Separator is intended for research
applications only and not for diagnostic or therapeutic use.
76
The autoMACS Pro Separator features automated sample labeling
(autolabeling), sample loading, elution of the negative, non-labeled
as well as the positive, labeled cell fractions. Up to six samples can be
processed in one programming step. Furthermore, automated
procedures for maintenance of the system are included. Different
wash programs are available to rinse the columns before a new
separation is performed. One pair of columns can be used for up to
2 Introduction
100 cell separations or for two weeks, whichever comes first. The
thin-film transistor (TFT) color touchscreen with intuitive screen
menus makes operation and monitoring of the instrument intuitive
and easy. Finally, standard MACS Fluid Containers, which are directly
attached to the instrument, and ready-to-use sterile MACS Buffers are
available for maximum convenience.
The autoMACS Pro Separator is supplied with the MACS MiniSampler
and therefore offers an additional sampling option. This new feature
allows the sequential processing of multiple samples without further
manual handling. The sampler is supplied with three different tube
racks and an additional reagent rack. The sampler and tube racks are
automatically detected by the autoMACS Pro Separator adding to its
operational efficiency.
The user manual aims at explaining the principles of cell sorting with
the autoMACS Pro Separator and to assist you by providing step-bystep protocols for cell labeling, separation, and quality control. Tips
and hints in the troubleshooting section as well as general protocols
and special separation protocols are intended to help optimize your
magnetic cell separations.
Figure 2.1: Front image of the autoMACS Pro Separator – the access cover and
bottom cover were made transparent for the purpose of illustration.
2 Introduction
2
77
autoMACS® Pro Starting Kit contains
autoMACS Pro Separator, MACS MiniSampler,
MACS Reagent Rack 4, 1 MACS Cooling Tube Rack,
Chill 5 (for 5 mL tubes), 1 MACS Cooling Tube Rack, Chill 15
(for 15 mL tubes), 1 MACS Cooling Tube Rack, Chill 50
(for 50 mL tubes), Software, Barcode reader, 5×2
autoMACS® Columns, 2×2 column substitutes, autoMACS
Pro Buffer Combination, user manual and short instructions, one-year warranty.
130-092-545
Technical specifications of the MACS® Cooling Tube Racks and
Reagent Racks
MACS
Cooling
Tube Racks
Slots
Max. number Max. sample
of samples
volume per
tube
Max. number
of cells per
tube
Chill 5
24×5 mL
6 (5 mL
tubes)
2.5 mL
5×10⁸
Chill 15
15×15 mL,
5×5 mL
5 (15 mL
tubes)
12.5 mL
2.5×10⁹
Chill 50
6×50 mL,
3×15 mL,
3×5 mL
3 (50 mL
tubes)
50 mL
4×10⁹
MACS Reagent Rack
Reagent
Rack 4
4 reagent
vials
Technical specifications of the autoMACS® Pro Separator (the
instrument is UL-listed and CE-marked)
Programs
12 pre-set
Protocol
Single- and double-column
enrichment, positive selection, and
untouched isolation of target cells
Column capacity
4×10⁹ cells / sample; 2×10⁸
magnetically labeled cells / sample
(up to 15 mL of whole blood or bone
marrow)
Processing volumes
0.2–50 mL (input) / 0.5–52 mL
(output)
Footprint *
605 mm × 353 mm (w×d)
Footprint with MACS MiniSampler *
605 mm × 455 mm (w×d)
Height
392–460 mm (adjustable
touchscreen)
Weight
25 kg
Input voltage
100–240 VAC, 50–60 Hz
Power consumption
200 VA
* Depending on the type of power plug chosen, the depth increases by
27 mm or 62 mm.
78
2 Introduction
Assembly and installation
The autoMACS Pro Separator is a benchtop instrument that fits in
laminar flow hoods or safety cabinets. If the instrument is placed
in a laminar flow hood, the following accessories might be required:
autoMACS Pro Laminar Hood Plate (# 130-093-246) and, optionally,
autoMACS Pro Angle Connector Kit (# 130-093-245). The Laminar
Hood Plate provides a stable and even surface, even on potentially
bending surfaces. The angle connectors reduce the depth of the
instrument to 455 mm (including MACS MiniSampler) for placement
in a location with limited space.
The operating environment should be stable and vibration-free,
dust-free, sufficiently ventilated, and free from sources of
electromagnetic radiation.
Before operating the autoMACS Pro Separator for the first time,
carefully read the user manual and contact your local Miltenyi Biotec
representative for assistance.
3
3.1 Unpacking and installing the
autoMACS® Pro Separator
Read through the following instructions carefully before commencing
the installation procedure. Before opening the transportation box,
check for any visible external damage to the box. Check also to see if
the shock and position indicators (if present) suggest incorrect
transportation of the instrument. If there is apparent damage please
contact Technical Support for assistance (refer to section 13).
3 Assembly and installation
79
1 Open the box and remove the top compartment of the
packaging to reveal the instrument and associated packaging.
Note: The top compartment
holds the autoMACS
Pro user manual, the
short instructions, and
various bags containing
accessories. Carefully
remove these parts.
Figure 3.1: Top compartment of the autoMACS Pro Separator box.
2 Remove boxes containing the MACS MiniSampler and cover, and
the MACS Cooling Tube Racks.
Note: Two persons are
required to lift the
autoMACS Pro Separator.
The instrument must
be gripped at the base
of the orange bottle
baskets located at both
sides of the instrument.
Note that the instrument
is heavier at the front.
Ensure the front of the
instrument is stabilized
while lifting it.
Remove the foam packaging from both sides of the autoMACS Pro
Separator.
Figure 3.2: Packing format of the autoMACS Pro Separator and accessories.
3 Place the instrument onto a stable worktop surface, e.g.,
laboratory bench. Remove the plastic bag surrounding the
instrument.
Due care must be
taken while lifting the
autoMACS Pro Separator.
Miltenyi Biotec accepts
no liability for potential
injuries and damages
sustained during lifting
and/or movement of the
instrument.
80
Figure 3.3: Positioning the autoMACS Pro Separator securely onto a
laboratory bench.
3 Assembly and installation
4 Note the positions of the MACS MiniSampler guiding (2) and its
corresponding slot (1) located at the front of the instrument. Tilt
the MiniSampler and slide the guiding into the receiving slot
until resistance is met; lower the rack to a horizontal position, i.e.,
the rack is locked in the position illustrated by the figure below.
3
Figure 3.4: Location of the MiniSampler guide (2) and receiving slot (1) for the
MACS MiniSampler.
5 Ensure that the MiniSampler is completely inserted and secure
the connection by fastening the MiniSampler screw as shown in
the figure below.
Figure 3.5: Securing the MiniSampler by fastening the MiniSampler screw.
6 Attach the sensor cables to the cable guide at the back of the
autoMACS Pro Separator.
Figure 3.6: Sensor cables are attached to the back of the instrument as shown
above.
3 Assembly and installation
81
7 Place the MiniSampler cable underneath the autoMACS Pro
Separator and connect it to the socket labeled “External CAN” at
the rear panel of the instrument. Use the screw driver to fasten
the screws of the connecter.
8 Guide the 2D code reader cable underneath the instrument.
Connect the 2D code reader plug with the corresponding outlet
at the back of the instrument labeled “RS232/BCR”. Use the screw
driver to fasten the screws of the connecter.
9 Attach the sensor cable plug to the socket for sensor cables at
the back of the autoMACS Pro Separator labeled “Bottle Sensor“
and fasten securely. Use the screw driver to fasten the screws of
the connecter.
Sensor cable plug
Code reader plug
MACS MiniSampler plug
Power socket
Figure 3.7: Location of the MACS MiniSampler, Sensor Cable, Code Reader,
and power sockets at the back of the instrument.
10 Carefully remove the uptake port needle from the foam
packaging.
82
Figure 3.8: Close-up of the autoMACS Pro Separator - the needle arm and
underside of the touch screen are supported by foam.
3 Assembly and installation
11 Place the uptake port needle into its guiding at the needle arm.
Note: Ensure that the
tubing connected to the
uptake port needle can
move freely when the
needle arm extends, or
when the needle moves
into the sample uptake
position.
3
Figure 3.9: The needle port is positioned as illustrated above.
13 Note the position of the power socket on the rear panel of the
autoMACS Pro Separator (figure 3.7). Ensure that the main power
switch is in position “0”.
14 Connect the power cord.
15 Elevate the touchscreen and insert the memory card as shown
below.
3 Assembly and installation
83
Figure 3.10: Inserting the software memory card.
16 Replace the fluid containers. Refer to section 3.2 for full details.
17 Switch on the autoMACS Pro Separator.
18 Secure the MACS Reagent Rack 4 onto the MiniSampler into the
left recess. The engagement hook has to snap into the undercut.
84
Figure 3.11: Securing the MACS Reagent Rack 4 onto the MACS MiniSampler.
3 Assembly and installation
19 Set a cool tube rack (e.g. Chill Rack 5) onto the MiniSampler into
the right recess ensuring that the rack barcode is facing the
autoMACS Pro Separator.
Note: Racks can be
pre‑cooled for 3–4 hours
at 2–8 °C. Do not cool
below 0 °C since samples
may freeze. If recognition
of the tube rack fails, the
instrument will display
a screen for manual
selection of the tube
rack. Before confirming
the choice, ensure
that the rack is placed
correctly into the recess
– the MACS Triangle
should face towards the
user.
3
Figure 3.12: Positioning the Chill Rack 5 adjacent to a MACS Reagent Rack 4
on the MACS MiniSampler.
20 Perform a system calibration test: refer to section 3.3 for more
details.
3.2 Replacing fluid containers and the
connection of fluid sensor cables
Operating the autoMACS Pro Separator requires Running Buffer,
Washing Solution, and storage solution (absolute ethanol diluted to
70% with double-distilled water). It is recommended to operate the
instrument with ready-to-use MACS Buffers. The autoMACS Pro
Separator is delivered with four empty fluid containers which are
connected to the instrument with specifically designed bottle
closures. The bottle closures consist of a fluid uptake port or a fluid
outlet port (waste container) as well as a sensor for measuring
electrolyte conductivity. The fluid containers, bottle closures, and
fluid sensor cables are color-coded for easy handling (refer to table
3.1 below).
Container
Note: The 70% ethanol does
not contain electrolytes.
Therefore, the filling
status of the ethanol
container cannot be
determined.
Symbol
Container
Running
Buffer
(blue)
Storage
solution
(black)
Washing
Solution
green
Waste
(red)
Symbol
Table 3.1: Symbols and color-coding of fluid containers.
1 Install one fluid at a time. Please note the corresponding
color‑coding (refer to table 3.1).
3 Assembly and installation
85
Note: When removing the
waste container, unscrew
the bottle closure and
then fasten a standard lid
(i.e. without sensor
cables) onto the bottle
before removing the
waster container from
the basket. This is to
ensure that the contents
of waste container are
not accidentally split
over the autoMACS
Pro Separator during
removal from the basket.
2 Unscrew bottle closures counter-clockwise and remove the
empty container. Do not disconnect the color-coded tubing.
3 Do not open a fresh bottle until it is placed in the basket! Place
the bottle in its appropriate position, remove the cap, and fasten
the bottle closure. Note the color-coding and connect each
sensor cable to the respective bottle closure.
4 Attach the sensor cable plug to the socket for sensor cables at
the back of the autoMACS Pro Separator labeled “Bottle Sensor“
and fasten securely.
Connect the hydrophobic air filters (0.2 μm) to the appropriate
connectors on the bottle closures.
Note: The correct
positioning of each
solution container—
recognizable by the color
code and the symbols—
is crucial in order to
perform successful
procedures using the
autoMACS Pro Separator.
86
To keep buffers sterile,
each bottle closure
should be equipped
with a hydrophobic air
filter. Avoid any contact
of hydrophobic air filters
with fluids as this may
cause clogging of the
filter.
When working with
biohazardous samples,
it is recommended to fill
the waste container with
100 mL of disinfectant
before use (e.g. MACS
Bleach Solution,
# 130-093-663).
For proper disposal,
please follow local
regulations and carefully
read the chapter 1.
3 Assembly and installation
3.3 Running the autoMACS® Pro
Separator for the first time:
performing a test calibration
3
3.3.1 Switch on the autoMACS® Pro Separator
Note: Ensure that the
autoMACS Pro Separator
has been correctly
installed (section 3.1)
and that the empty
fluid containers used for
transport purposes have
been replaced by fresh
fluid containers
(section 3.2).
The main power switch is located on the right side of the instrument
in front of the container baskets (“I” indicates “on”, “O” indicates “off”).
Switch on the autoMACS® Pro Separator.
on/off switch
Figure 3.13: Location of the on/off switch.
3.3.2 Check the date and time
1 To set the time and date perform the following steps:
Select Option, User settings, and Set_time. Select Run.
Highlight either the time or date fields by touching the display.
Use the keypad to change the date or time accordingly.
Figure 3.14: Select the desired field and use the numeric keypad to modify
the date and/or time.
Select OK to return to the Option menu. The procedure can be
cancelled at anytime by selecting Cancel.
3 Assembly and installation
87
3.3.3 Perform a test calibration
1 On the touchscreen click: Option, Calibr_1, Run, and Test.
Figure 3.15: Instructing the instrument to perform a test calibration.
2 Test calibration: Chill Rack
Ensure that a Chill Rack 5 is placed on the MACS MiniSampler.
Click Done to continue test calibration.
3 Test calibration: Reagent Rack
Ensure that a Reagent Rack 4 is placed on the MACS MiniSampler.
Click Done to continue test calibration.
4 Test calibration: Control position of needle in the washing
station
The instrument will automatically position the needle arm in the
washing station. If the needle is not correctly positioned, click Move
Up or Move Down to adjust the needle position accordingly.
Click Done to continue the test calibration sequence.
Figure 3.16: Test calibration of the needle arm position in the washing station.
5 Test calibration: Control position of needle in tube
The instrument will insert the needle arm into tubes located in
rack positions A1, B1, C1. Click Move up or Move down to adjust
the position of the needle in the tube. The needle arm should
almost touch the bottom of the middle point of a standard 5 mL
plastic sample tube. If the needle is correctly positioned, click
Done.
88
3 Assembly and installation
3
Note: After test completion
the instrument will
proceed to the next test
calibration step: control
position of needle in vial.
Figure 3.17: Click “Done” if the needle is correctly positioned; click “Move up“
and “Move down“ to adjust the position.
6 Test calibration: Control position of needle in vial
The instrument will insert the needle arm into the MACS Reagent
Rack vial positions R1, R2, R3, and R4. Click Move up or Move
down to adjust the position of the needle in the vial. The needle
arm should almost touch the bottom of a MACS Reagent vial.
If the needle is correctly positioned, click Done.
3 Assembly and installation
89
Note: If test calibration
1 fails, perform a
calibration 1. Refer to
section 12.2 for details.
Figure 3.18: Test calibration: Control position of needle in vial.
7 Test calibration is completed.
3.3.4 Installation of the autoMACS® Columns
1 Open the front door and note the position of the tubing and
autoMACS Column slots in the magnet cover (column 1 to the
left, column 2 to the right).
Note: When delivered, the
autoMACS Pro fluidic
system is filled with
double-distilled water.
The autoMACS Columns
are reusable for two
weeks or up to 100
separations, whichever
comes first.
Column 1
The instrument
automatically records
the date of the column
exchange and can
display the due date
for the next column
replacement if the
program Column
exchange (Col_ex) has
been used for column
installation.
Column 2
2 Ensure that the fluid containers are filled with solutions.
3 Using the touch screen, select Option and Special from the
“Main” panel.
4 Select Col_ex (column exchange) from the “Detail” panel.
Columns do not have
a top or bottom and
do not require special
orientation in the column
holder.
90
Remove the column substitutes and install the autoMACS® Columns
according to the following instructions:
Figure 3.20: Selecting column exchange from the “Option“ tab.
3 Assembly and installation
5 Select Run to start program Col_ex. A popup dialog offers four
options:
Remove to remove columns;
Install to remove and install new columns;
Sep count to inform the software how many separations have
been performed;
Exit to cancel this process.
Note: Only install one
column at a time.
3
Figure 3.21: Select column action dialog box.
6 Select Install from the popup dialog box.
7 Wait until the instrument prompts you to exchange the
autoMACS Columns before proceeding. Select Done.
8 Using both hands take the top and bottom of the column one
substitute and pull gently but firmly to remove it from its slot.
9 Place a wide mouth container under the column substitute.
Hold the column substitute in one hand and gently unscrew the
bottom column connector counter-clockwise. Unscrew the top
column connector while holding the column over the container to
catch any fluids. Store the column substitute in the autoMACS Pro
Starting Kit box.
3 Assembly and installation
91
Figure 3.22: Unscrewing the top column connector for column removal.
10 Insert one end of a fresh column into the bottom column
connector and gently screw in the column by turning it clockwise
until you feel a resistance. Point the column towards the top of
the instrument and screw in the top column connector.
Note: The program will then
proceed to wash the
columns with autoMACS
Running Buffer. Check
that the column is
securely fastened to the
column connectors and
that no buffer is leaking.
11 Align the column with the top column connector sitting on the
guiding of the magnet cover. Press the column into the slot until
you feel the guides click. Verify that the column is placed in the
center of the magnet cover.
12 Repeat steps 8 through 11 to install the second column.
13 Ensure that the tubes are securely fastened to the columns and
that the tubing is neither pinched nor obstructed.
14 Press Done.
15 Close the front door. The unit is now ready to perform cell
separations.
3.3.5 Priming the autoMACS® Pro Separator
Note: Read the warnings
and precautions section
before priming the
autoMACS Pro Separator
for the first time.
Priming implicates the initial cleaning and filling of the autoMACS®
Pro Separator tubing system before cell separations are performed.
The autoMACS Pro Separator must be primed each time the
instrument is switched on.
1 Fill all bottles with the appropriate solutions and empty the
waste bottle.
2 Switch on the instrument. After initialization is completed,
the Status menu will be displayed. Verify that the touchscreen
symbols for all fluid containers are green. If this is not the case,
check if the fluid sensor cables are connected to the correct fluid
containers. The symbol for the ethanol container remains gray
(fluid level not checked by system). At this point, the bottle
illumination is yellow.
92
3 Assembly and installation
Note: When working with
biohazardous samples,
it is recommended to fill
the waste container with
100 mL of disinfectant
before use (e.g. MACS
Bleach Solution). For
proper disposal, please
follow local regulations
and carefully read the
chapter 1.
3
Figure 3.23: The status menu. The fluid level status and column are green for
“go“. A wash or instrument prime has not yet been performed.
3 Select menu Separation and Wash Now from the lower menu.
You now have the option to perform a quick rinse (Qrinse) or full
rinse (Rinse).
Figure 3.24: Select “Rinse“ to prime the autoMACS Pro Separator.
4 Select Rinse and Run to start the priming process. The progress
will be displayed at the bottom of the touchscreen menu.
5 When priming is finished, the instrument will display Ready for
separation in the Status menu. The bottles are illuminated
green.
Figure 3.25: The instrument has been primed (rinsed).
3.3.6 Checking the fluid levels
The autoMACS Pro Separator automatically ensures that the uptake
port is filled with buffer, that fluid containers carry enough fluid for
3 Assembly and installation
93
Note: A cell separation
template can already
be programmed or
reloaded during the
priming procedure. By
selecting Run the user
will asked to confirm that
enough running buffer
is available; thereafter
priming will begin.
The autoMACS Pro
Separator will display
a warning screen if the
buffer supply is low or if
the waste bottle is full.
If no wash program has
been performed before
the first separation, a
warning screen will ask
to rinse the system.
You may interrupt any
program by selecting
Stop. The Stop button
is located at the bottom
left hand corner in all
menus.
one separation, and that the waste container can collect fluid from at
least one separation. If more than one separation is performed,
ensure that the containers contain sufficient fluid for all the
separations and that the waste container is empty.
To verify the status of the bottles, select the menu Status from the
upper navigation bar. On the left hand side of the menu, four
symbols display the solution containers and their filling status. If the
fluid containers are full and the waste container is empty, the
symbols are green. If the solution containers are empty or the waste
container is full, the respective symbols are red. The symbol for the
ethanol container remains gray. It is recommended to select the
menu Status when the autoMACS Pro Separator is in operation.
Figure 3.26 Status of the fluid containers is green for ready.
3.3.7 Test of barcode scanner
1 Select Reagent.
2 Press Read Reagent.
94
When priming the
instrument for the
first time or when the
instrument was not
serviced for a long
period of time, it is
recommended to visually
inspect the fluidic
system for potential
leaks. Open the front
door after priming the
instrument. If there is
any sign of leakage (e.g.
salt deposits), tighten
the respective tubing
connection. Close the
front door and proceed
with the separation.
3 Place barcode (figure 1.3) in front of barcode scanner
4 “CD4 MicroBeads, human” will appear as scanned reagent.
3 Assembly and installation
An overview of the autoMACS® Pro
touchscreen user interface
The autoMACS® Pro Separator is operated through a TFT color
touchscreen. After switching on the instrument, the startup screen
will appear.
Figure 4.1: The autoMACS Pro Separator startup screen.
4
4.1 Working with the lower menu bar
Figure 4.2: The lower menu bar of the “Separation“ menu.
A lower menu bar is accessible from all Menu screens. Depending on
the status of the instrument and the selected upper tabbed menu
option, the lower menu buttons switches between an inactive (grey
background) and active state (white background) state. For example,
Stop can only be selected when the instrument is actively performing
a process such as cell separation.
Figure 4.3: Left: Stop button is active and can be selected. Right: Stop button
is inactive and cannot be selected.
4.2 The main menu screen
Five main menus allow easy interaction with the instrument.
They are accessed through the upper tabbed menu:
4 An overview of the autoMACS® Pro touchscreen user interface
95
Tab
Function
Reagent:
To define the position of MACS Reagents on the MACS
Reagent Rack 4.
Separation:
To define an autolabeling and/or cell separation strategy
for up to six samples. In addition, cell processing
procedures can be saved as templates for regular use.
Status:
The instrument status is displayed at a glance.
Log list:
The log list details completed actions and errors.
Option:
Users can perform special procedures such as exchange
of MACS Columns, instrument calibration, and service
steps.
Table 4.1: Feature overview of the upper tabbed menu.
After instrument initialization the screen automatically displays the
Status menu, which helps to monitor the instrument during
installation and operation. Color-coded symbols indicate the status
of the hardware components. Further information on a particular
component can be obtained by touching the symbol.
Figure 4.4: The main “root“ menu screen displays instrument “Status“ at
startup.
4.3 Status menu
The autoMACS Pro Separator is a sensor-controlled instrument that
allows easy monitoring during operation. At a glance the instrument
status can be determined by viewing the Status menu at any time.
1
2
3
4
5
96
Sample status
Fluid container
filling status
Column status
Tube rack status
MiniSampler status
Figure 4.5: Overview of the instrument status panels.
4 An overview of the autoMACS® Pro touchscreen user interface
A description of how to monitor the instrument’s status using the
Status menu follows.
4
4.3.1 Status of fluid containers
Figure 4.6: Fluid container status symbols. Left: Fluid containers are ready.
Right: Fluid containers need replaced.
The status of fluid containers is indicated by color-coded graphic
symbols and by a text table.
Container
Symbol
Symbol color and user
action
Running Buffer
Green: no action required
Red: refill container
Gray: connect bottle sensor
Washing Solution
Gray: connect bottle sensor
Storage solution
Gray: no liquid detection;
visually check volume
Waste
Green: no action required
Red: empty waste
Gray: connect bottle sensor
Table 4.2: Status of fluid containers displayed in the “Status“ menu
In addition to color-coded graphic symbols of the fluid containers,
a popup text table also reports fluid container status. Touch any fluid
bottle symbol to activate the popup textbox. To close the popup
table, select . Moreover, the symbols are also red, when the sensor
cables are connected to a wrong bottle closure.
4 An overview of the autoMACS® Pro touchscreen user interface
97
Figure 4.7: Fluid container status. By touching any fluid container symbol a
popup box displays a text report of the fluid container status.
4.3.2 Column status
98
Figure 4.8: The column status graphic. Left: The column is ready.
Right: The column must be changed.
If the column symbol is green, no action is required. If the symbol is
red, the columns must be exchanged. The level of the green fill on
the column symbol indicates the remaining operation-life of the
autoMACS Columns. Touch the column symbol to activate the
column status popup textbox.
Figure 4.9: Column status. By touching the column symbol a pop-up box
displays a text report of the column status.
4 An overview of the autoMACS® Pro touchscreen user interface
4.3.3 Tube rack status
Figure 4.10: Tube rack status graphic: a 5 mL tube rack was detected. If no
tube rack is detected no graphic is displayed.
Rack detection occurs prior to starting the separation process.
Before cell labeling and/or cell separation is performed the instrument
will not attempt to detect the rack. Touch the position of the rack
status graphic in order to view the tube rack popup text table.
Figure 4.11: Tube rack status text box: No rack is detected until cell separation
is performed.
4
4.3.4 MACS® MiniSampler status
Figure 4.12: MACS MiniSampler status graphic. Left: The MiniSampler was
successfully installed. Right: No MiniSampler was detected.
If the MACS® MiniSampler has been detected correctly a rectangular
symbol is displayed. If it has not been detected a hand symbol will
be displayed in the same field.
4.4 Separation menu
The Separation menu schematically represents a sample rack and
allows definition of sample processing strategies for each sample
rack position. For each sample rack position it is possible to define
cell labeling, cell separation, and washing programs.
4 An overview of the autoMACS® Pro touchscreen user interface
99
A single wash program can be performed by selecting Wash Now
from the lower navigation bar.
Figure 4.13: The separation menu.
An overview of the separation menu follows:
1
2
3
4
5
Sample rack template
Sample labeling options
Sample processing volume
Separation program
Wash procedure
Sample rack template
The positions in the programming field ( 1 ) correspond to the sample
positions in the tube rack. Positions 1–6 are used in combination
with tube rack Chill 5, positions 1–5 with rack Chill 15, and positions
1–3 with rack Chill 50.
1 To select/deselect a sample position touch to highlight the
desired position 1–6.
2 Select/deselect a sample position by touching the display.
100
Figure 4.14: Sample positions 1, 3, and 4 were selected.
4 An overview of the autoMACS® Pro touchscreen user interface
Sample labeling options
The Labeling submenu ( 2 ) is used to instruct the instrument:
• if autolabeling is to be performed on a sample.
The default setting is “/“, which indicates that NO autolabeling
will be performed.
• the type of autolabeling that will be performed.
A list of product options is only visible if reagents have already
been assigned to positions on the reagent rack using the
Reagent menu.
Figure 4.15: “Labeling“ submenu. Using the MACS Reagent Rack 4, a total of
four reagents may be used at any given time.
Assigning sample volumes
The Volume submenu ( 3 ) is used to inform the instrument about
the available sample volume. To enter or modify a volume:
4
1 Ensure that the appropriate sample template position is
highlighted.
2 Select the Volume submenu.
3 Using the numeric keypad enter the sample volume.
For autolabeling enter the sample volume for the first labeling
step as outlined in the corresponding data sheet (e.g. 160 µL /
2×10⁷ cells for labeling with CD4+ MicroBeads, human or 120 µL /
4×10⁷ cells for labeling with Monocyte Isolation Kit II, human).
Figure 4.16: Entering the sample volume in microliters (µL) for Monocyte
Isolation Kit II, human.
4 Note that the minimum incubation volume after the addition of
the first reagents may not be less than 200 µL.
5 Select Enter.
4 An overview of the autoMACS® Pro touchscreen user interface
101
Assigning a cell separation program
The Separation submenu ( 4 ) is used to instruct the autoMACS Pro
Separator which cell separation program should be applied to each
sample. Several sample positions can be highlighted to assign a
separation condition for multiple samples. Refer to section 6.3.1 for a
detailed explanation of the various cell separation strategies.
To assign or modify a cell separation program:
1 Highlight the appropriate sample(s) using the sample template.
2 Scroll through the Separation submenu using the arrows
/
.
3 Select and highlight a Separation program.
Figure 4.17: Positive cell separation-sensitive mode was selected.
Assigning a wash program
The Wash submenu ( 5 ) is used to instruct the autoMACS Pro
Separator which wash program should be applied to each sample.
Three wash programs are available to choose from:
Qrinse (quick rinse) - : Recommended to save time between
sample separation steps. The tubing and column receive a quick rinse.
Rinse - : The system is ‘primed’, receiving an extensive wash. Rinse
is recommended between rare cell, whole blood, cord blood, and
bone marrow separations.
Sleep - : A rinse is performed before the system is shutdown.
To assign or modify a wash program:
1 Highlight the appropriate sample(s) using the sample template.
2 Scroll through the Wash submenu using the arrows
3 Select (highlight) a Wash program.
102
4 An overview of the autoMACS® Pro touchscreen user interface
/
.
4
Figure 4.18: A rinse program was selected.
Working with separation templates
For convenience it is possible to load and save separation templates.
Separation templates can be used in combination with Reagent
templates (refer to above).
To save a separation template:
1 Configure the sample template, an example follows.
Figure 4.19: A sample template was setup to process two samples.
Sample 1: Isolation of untouched human monocytes using the Monocyte
Isolation Kit II, human (# 130-091-153); autolabeling program MO.IK.h;
separation program “Deplete“.
Sample 2: Direct labeling and positive cell enrichment of CD4+ cells using
CD4 MicroBeads, human (# 130-045-101); autolabeling program CD4.h;
separation program “Possel“.
2 Select Save Template.
3 Allocate a name to the template. In this example the template
was saved as “EXPT_2A” (experiment 2a).
4 An overview of the autoMACS® Pro touchscreen user interface
103
Figure 4.20: Using the alphanumeric keypad assign a name to the template.
4 Select Ok.
To load a reagent template:
1 Select Load Template from the lower navigation bar. To scroll
through the list of saved templates use the navigation arrows
/ . The corresponding template is displayed on the sample
template panel.
Figure 4.21: Selecting a separation template. “Expt_2a“ was selected.
2 Select and highlight the desired template; in this case Expt_2a.
3 Select Ok.
Note: The sample
separation template was
loaded; however, the
reagent rack has not yet
been configured. It is
necessary to configure
the reagent rack before
starting the run.
104
Figure 4.22: The template “Expt_2a“ was successfully loaded.
4 An overview of the autoMACS® Pro touchscreen user interface
4
To delete a separation template:
1 Select Load Template from the lower navigation bar.
2 Scroll through the list of saved templates use the navigation
arrows
/
.
3 Select the template for deletion.
Figure 4.23: “Expt_3“ template was selected for deletion.
4 Select Delete Template.
4 An overview of the autoMACS® Pro touchscreen user interface
105
4.5 Reagent menu
The reagent menu is used to program any reagent vials that are
required for automated magnetic labeling and subsequent cell
sorting. Reagents can be entered using the 2D code reader or
manually using the Enter Reagent input panel. For convenience it is
possible to load and save reagent templates.
Figure 4.24: The reagent menu.
4.6 Log list menu
106
Figure 4.25: The “Log list“ display.
The Log list records a complete log of actions performed by the
autoMACS Pro Separator. An overview of the log list table follows:
4 An overview of the autoMACS® Pro touchscreen user interface
Name
Definition
Name
Definition
Date
Indicates the date
the action was
performed.
Program
Name of program, for
example:
Deplete: Cell
depletion
Possel: Positive cell
selection
Qrinse: Quick rinse
performed
Type
Description of the
action, for example:
Rack: Action
involving rack
Init: Initiation of
instrument
Wash only: Wash
only performed
Service: Service step
performed
Special wash:
Special wash
performed
Protocol
If a protocol is
associated with the
log, its name will be
listed under this
heading, for
example:
CD4.h: CD4
MicroBeads, human
were used for
autolabeling and cell
separation.
Pos
Corresponding
position on sample
tube rack.
Status
The status of the log
is depicted as
follows:
successfully
completed
action failed
4
To display further details about an individual log:
1 Select Log list tab and highlight a log from the log list.
2 Select Details. A detailed view of the program status is shown.
3 Select Ok to return to the log list screen or select Log Details to
view a detailed log of performed actions.
4 An overview of the autoMACS® Pro touchscreen user interface
107
Figure 4.26: Viewing log details.
A: A CD4 MicroBead positive cell selection was performed on March,
26th 2009.
B: An overview of program actions and corresponding times are
displayed.
C: Details of each instrument action are listed.
4.7 Option menu
108
Figure 4.27: The “Option“ display.
The Option menu allows maintenance procedures, such as exchange
of autoMACS Columns or decontamination of the system. The menu
is divided into two main categories, Special and User settings.
An overview of the functions available under each category are given
below.
4 An overview of the autoMACS® Pro touchscreen user interface
4.7.1 Special
Special options comprise three special programs for column
exchange (Col_ex), instrument decontamination (Safe), and cleaning
of the instrument for long-term storage (Store).
4
Safe
This is a disinfectant procedure which uses MACS Bleach Solution for
cleaning and decontamination of the autoMACS Pro Separator.
Depending on the level of use and general instrument maintenance,
it is recommended to decontaminate the fluidic system every 3 to 6
months using the Safe program.
Store
The program Store should be applied to prepare the instrument for
long-term storage. Upon completion of the Store program, the
fluidic system contains 70% ethanol.
To store the autoMACS Pro Separator for a period longer than two
weeks, the tubing system should be cleaned and the columns should
be replaced with column substitutes. The Store program
automatically performs the cleaning procedure and prompts the
user to install column substitutes.
4.7.2 User settings
The User settings are for maintenance and setup of the autoMACS
Pro Separator. Each program is briefly discussed below.
About
About informs the user about the software version, serial number of
the instrument, and other hardware information.
Calibr_1: Performing “calibration 1” of the needle arm
positioning
This program is used for the calibration of the needle arm to the
washing station and tube racks. Refer to section 12.2 for more
information.
Calibr_2: Performing “calibration 2” of the instrument
tubing
This program is used for the calibration of the instrument tubing.
Refer to section 3.2.7 for more information.
Check_up: Performing a system check-up
The Check_up program allows the user to perform a system
check-up. It is recommended to use the program if hardware errors
occur. The program starts after highlighting check_up and pressing
Run.
4 An overview of the autoMACS® Pro touchscreen user interface
109
O_bcr: 2D code reader setup, configuration, and
initialization
The O_bcr program allows the user to setup, configure, and initialize
a recently installed autoMACS Pro Separator 2D code reader.
O_init: Optional priming of the instrument at startup
Note: In case of malfunction during cell separation
this feature must be
disabled in order to
perform a cell rescue
procedure.
By default, the autoMACS Pro Separator does not perform a wash
program after initialization. The option O_init allows the user to add
an initial rinse program that will be performed automatically after
each initialization to prime the instrument.
O_led: Activating/deactivating bottle illumination
The autoMACS Pro Separator has a bottle illumination designed to
facilitate monitoring the instrument’s status. The bottle illumination
can be switched ON or OFF
O_progs: Enabling/disabling special separation protocols
The O_progs are used to enable or disable special separation
programs. To enable or disable these protocols, perform the
following steps:
1 Select Option, User settings, and O_progs.
2 Select Run. A dialog box will report the current status.
Figure 4.28: O_progs: Enabling or disabling special separation protocols.
Select “Disable“ to disable special separation programs.
3 Select OK if the current reported status should not be changed.
Alternatively, select Disable (or Enable) to change the status.
Sepcount: Displaying the number of performed column
separations
The Sepcount or Sep. counter program is used to display the
number of column separations that have been on the autoMACS Pro
Separator. To view this statistic, perform the follows steps:
1 Select Option, User settings, and Sepcount.
2 Select Run. A dialog box will report the number of separations.
110
4 An overview of the autoMACS® Pro touchscreen user interface
4
Figure 4.29: Sepcount: viewing the number of performed separations. In
this example, no separations have been performed using this instrument.
3 Select OK to return to the option menu.
Set_time: Setting the time and date
To set the time and date perform the following steps:
1 Select Option, User settings, and Set_time. Select Run.
2 Highlight either the time or date fields by touching the display.
3 Use the keypad to change the date or time accordingly.
4 Select OK to return to the option menu. The procedure can be
cancelled at anytime by selecting Cancel.
Valve_ex: Exchanging the instrument values
This program is used for valve exchange. Use of this program
turns the valve to the exchange position for removal. Valves may
require periodical exchange. Refer to section 7.4 for more details.
4 An overview of the autoMACS® Pro touchscreen user interface
111
112
4 An overview of the autoMACS® Pro touchscreen user interface
5
Materials required
This chapter describes the consumables and accessories required for
the operation of your autoMACS Pro Separator.
IMPORTANT: Please be advised that the autoMACS Pro Separator is
specified for use with MACS MicroBeads, autoMACS Columns, and
other genuine Miltenyi Biotec consumables and accessories only.
Please only use consumables and accessories recommended by
Miltenyi Biotec. Failure to use recommended consumables and
accessories may result in inaccurate results, instrument malfunction
or damage, premature wear, and reduced life time of the instrument.
Miltenyi Biotec does not honor any warranty or accept any
responsibility for damages resulting from the use of inappropriate
consumables or accessories.
5.1 Materials required for operation
5.1.1 Solutions
For daily operation, the following solutions are required: Running
Buffer, Washing Solution, and ethanol.
Solution Description
Color
code
Capacity
Order no.
Running
Buffer
Blue
6×1.5 L for 6×15
separations and
rinsing cycles
130-091-221
autoMACS
Running Buffer or
MACS Separation
Buffer
Washing autoMACS Pro
Solution Washing Solution
Green 6×1.5 L for 6×15
130-092-987
rinsing cycles
(Rinse, Sleep, Store,
Safe)
Storage
solution
Black
70% v/v ethanol in
distilled water
(prepared from
absolute ethanol)
Not available
Table 5.1: Solutions required for daily operation.
Solution bottles can be identified by color code and symbols
(table 3.1, Symbols and color-coding of fluid containers).
For proper operation of the autoMACS Pro Separator, solution
containers must be filled with a minimum volume of 150–200 mL.
It is recommended to use ready-to-use MACS Buffers or fresh,
5 Materials required
113
Note: MACS Running
Buffer contains azide
preservative. A solution
without preservative may
be prepared by diluting
MACS BSA Stock Solution (# 130-091-376) 1:20
with autoMACS Rinsing
Solution (# 130-091-222)
Note: Do not use denatured
ethanol (technical
ethanol), as the
autoMACS Columns are
not resistant to oxidative compounds. Use 100%
ethanol, analytical
reagent grade, without
additive.
filter-sterilized solutions to prevent potential contamination of the
tubing system.
The autoMACS Pro Washing Solution is a filter-sterilized and
ready-to-use solution to rinse the fluidic system after any
autoMACS Pro Cell Separation. It contains a detergent that dissolves
cell aggregates. The autoMACS Pro Washing Solution was developed
for optimal cleaning of the autoMACS Pro Tubing System.
70% ethanol: This solvent should be prepared by diluting absolute
ethanol with distilled water.
5.1.2 Hardware
MACS MiniSampler
The MACS Mini Sampler can be equipped with three different tube
racks (for details, refer to table below). To attach the MiniSampler and
the tube racks, refer to section 3. The autoMACS Pro Separator will
automatically detect the MiniSampler and the type of tube rack.
Tube racks, tubes and reagent racks
Three tube racks, Chill 5, Chill 15, and Chill 50, designed for 5 mL,
15 mL, and 50 mL tubes, respectively, and are available for use with
the autoMACS Pro Separator. All three racks contain a coolant.
To cool the racks, keep them in a refrigerator for 3–4 hours. Do not
cool below 0 °C to avoid freezing of the samples. Use 5 mL, 15 mL, or
50 mL tubes. The process has been optimized using BD Falcon™
tubes.
Rack type
Tubes
Maximum number
of samples
Maximum sample
volume
Chill 5
5 mL
6
2.5 mL
Chill 15
15 mL
5
12.5 mL
Chill 50
50 mL
3
Up to 50 mL
Reagent Rack 4
4 vials
Not applicable
Not applicable
Table 5.2: Cooling tube and reagent racks.
5.2 Materials required for maintenance
5.2.1 Solutions
Note: Program Safe
can also be used for
decontaminating the
autoMACS Pro fluidic
system. For special
decontamination
procedures contact the
technical support team
for further advice.
114
MACS Bleach Solution
MACS Bleach solution (# 130-093-663) is used in combination with
the Safe program. Depending on the level of use, it is recommended
to run a Safe program at least every 3 to 6 months. If material like
whole blood or tissue is primarily used it is recommended to run
program Safe once a month.
Disinfectant solution
It is recommended to clean the ports of the automated arm and the
5 Materials required
surface of the instrument of spilled fluid with 70% ethanol or
isopropyl alcohol on damp tissue. Alternatively, use alcohol swabs.
5
Distilled water
It is recommended to use distilled water on tissue to remove any salt
crusts from the instrument.
5.2.2 Hardware
autoMACS Columns
Order no. 130-021-101 (5×2 columns)
Capacity of 2×10⁸ magnetically labeled cells from up to 4×10⁹ total
cells.
Column substitutes
Order no. 130-090-835 (2 pieces)
For installation prior to storage of the autoMACS Pro Separator for
longer than two weeks. The instrument is delivered with installed
column substitutes.
Hydrophobic 0.2 μm air filters
Order no. 130-090-385
Hydrophobic air filters are used to vent fluid containers and to
prevent aerosols. Do not use hydrophilic filters, since they are easily
blocked upon contact with liquid and thus may cause errors.
autoMACS Pump Syringe
Order no. 130-090-339
(1–2 required per year)
Wrench
Order no. 130-090-378
For tightening tube connections. Included in the autoMACS Pro
Starting Kit.
autoMACS Pro Laminar Hood Plate
Order no. 130-093-246
The metal plate has been developed for stable placement of the
autoMACS Pro Separator on potentially bending surfaces; for
example, the surface in a laminar flow hood or safety cabinet. The
thick metal plate is designed to stabilize the instrument and maintain
optimal alignment with the MACS MiniSampler.
autoMACS Pro Angle Connector Set
Order no. 130-093-245
The autoMACS Pro Angle Connector Set has been designed for
placement of the autoMACS Pro Separator in a location with limited
space. Cables that connect the back of the instrument, i.e., the fluid
sensor cable, the MACS MiniSampler cable, and the 2D code reader
cable are connected at a 90o angle to reduce the total depth of the
instrument. The set contains three Sub-D-pin adaptors.
5 Materials required
115
116
5 Materials required
Cell separation using the
autoMACS® Pro Separator
6
The following chapter describes how to perform cell separations
using the autoMACS® Pro Separator.
IMPORTANT: The autoMACS Pro Separator is intended for research
applications only and not for diagnostic or therapeutic use.
The procedure of cell separation has been categorized into eight
steps.
1 Select a cell labeling strategy: Choose if autolabeling, manual
labeling, or a combination of both strategies should is needed.
2 Prepare cell samples: A single-cell suspension devoid of dead
cells, aggregates, and cell debris is the prerequisite for efficient
cell separation.
3 Select a cell separation strategy and a suitable magnetic
labeling strategy: Prior to cell separation samples are labeled by
magnetic MicroBeads. This can be performed manually or
automatically using the autoMACS Pro Separator. Cell separation
strategies are classified as:
• positive selection or depletion,
• direct or indirect magnetic labeling,
• cell sorting based on one or more marker(s).
4 Determine number of samples: Select an appropriate tube rack
for the number of samples and also take the sample volume into
account.
5 Prime the autoMACS Pro Separator: Before performing a cell
separation, the autoMACS Columns must be filled with Running
Buffer by running the Rinse program.
6 Define autoMACS Pro Separation Programs on the sample
rack template: Select a separation and a washing program for
every cell sample or, labeling separation wash program
Separation programs
• Positive selection or depletion
• Standard mode or sensitive mode
• Single or double column selection
6 Cell separation using the autoMACS® Pro Separator
117
•
•
•
Special programs for efficient depletion of unwanted cells or cells
that are only dimly labeled
Special programs for cell separation directly from whole blood
Special programs for the sequential depletion of up to 14×108
cells
Washing programs
• Quick Rinse (Qrinse) or Rinse are washing steps between
separations
• Sleep—to follow the last program before the instrument is
switched off
7 Run the autoMACS Pro Cell Separation: The autoMACS Pro
Separator automatically isolates target cells from up to six
independent samples in a sensor-controlled manner.
8 Shutdown the autoMACS Pro Separator: A sleep or store
program is used for overnight storage or long-term storage,
respectively. Sleep or store must be performed before shutting
down the autoMACS Pro Separator.
6.1 Select a cell labeling strategy
The autoMACS Pro Separator is capable of performing autolabeling,
manual labeling, and a combination of both strategies. Up to six
samples can be processed at one time. Autolabeling protocols are
being continually developed and optimized by Miltenyi Biotec. For a
current list of MACS Reagents and Kits that are optimized for cell
separations with the autoMACS Pro Separator autolabeling feature,
please visit: www.automacspro.com.
6.2 Prepare cell samples
Note: Use Pre-Separation
Filters (# 130-041-407)
when cell clumping is
suspected, especially
when working with
previously frozen
material, cord blood,
dissociated tissue,
or whole blood. Cell
pre-filtration removes
aggregates, dead cells,
and debris.
118
In order to obtain optimal separation results, some crucial points
must be considered:
6.2.1 Prepare single-cell suspensions
Cell aggregates may contain mixtures of target and non-target cells
and therefore can impair the separation results. To minimize the risk
of cell aggregation MACS Separation Buffer/MACS Running Buffer
should be used during sample handling steps. Resuspend cells
carefully after centrifugation. For specific recommendations, please
refer to the general protocol section of the user manual or to the
respective MACS Cell Separation Reagent data sheet.
Large cell aggregates may interfere with the separation process and
may cause pressure variations in the autoMACS Pro fluidic system. It
is recommended to use Pre-Separation Filters (# 130-041-407) to
remove cell clumps that may clog the column.
6 Cell separation using the autoMACS® Pro Separator
Dead cells and cell debris may bind non-specifically to MACS
MicroBeads, antibodies, and antibody conjugates. To remove dead
cells, it is recommended to use density gradient centrifugation or the
Dead Cell Removal Kit (# 130-090-101).
For specific recommendations, please refer to the general protocols
in the corresponding section of this user manual or to the respective
MACS Cell Separation Reagent data sheet.
6
6.2.2 Reagent volumes and labeling volumes must be
adjusted to the total cell number
Typically, 107 cells are labeled in a total volume of 100 μL. When
working with higher cell numbers, scale-up all reagent volumes and
total volumes accordingly. For example, for 2×10⁷ total cells use twice
the volume of all indicated reagent volumes and total volumes
indicated in the respective data sheet. When working with fewer
than 107 cells, do NOT scale down the volume, use the same volume
as indicated. For specific recommendations, please refer to the
respective MACS Cell Separation Reagent data sheet.
For details concerning sample volumes required for the first
autolabeling step refer to table 6.1 below.
MACS Product
Strategy
Reagents
Cell
concentration
Minimal
volume*
Minimal
absolute
cell
number
Direct MicroBeads
- human
- rat
- non-human primate
Positive selection
or depletion
1
107 cells per
80 µL
160 µL
2.0×10⁷
Direct MicroBeads
- mouse
Positive selection
or depletion
1
107 cells per
90 µL
180 µL
2.0×10⁷
Whole Blood
MicroBeads
Whole blood or
bone marrow
1
Original
volume
0.25 mL –
8 mL
Cell Isolation Kits
Untouched
selection
2
107 cells per
40 µL
160 µL
4.0×10⁷
Cell Isolation Kits
Untouched
selection
3
107 cells per
30 µL
120 µL
4.0×10⁷
MicroBead Kits
Positive selection
or depletion
2
107 cells per
60 µL
120 µL
2.0×10⁷
* When working with fewer cells than the necessary minimal volume,
resuspend cells in the stipulated minimal volume
Table 6.1: Table shows dilution volumes required for the first autolabeling
step.
6 Cell separation using the autoMACS® Pro Separator
119
6.3 Select a cell separation strategy and
a suitable magnetic labeling
strategy
The autoMACS Pro Separator can perform fully automated sample
processing, i.e., sample autolabeling, labeled cell incubation, cell
separation, and target cell elution. The software also offers the
choice to perform cell separation on manually labeled cells. Thus, it is
possible to perform automated cell separation with autolabeling,
automated cell separation without autolabeling, or automated cell
separation using a combination of both strategies.
6.3.1 Choosing a cell separation strategy
There are two basic strategies for separating specific cell
populations: positive selection and depletion. Using the positive
selection strategy, the target cells are magnetically labeled and
collected as the positive fraction. Using the depletion strategy, the
unwanted cells are labeled, separated from the target cells, and
eluted as a positive cell fraction, i.e., cells labeled with MicroBeads.
The target cells will be collected in the negative fraction. Both
strategies can be combined for multiparameter sorting.
Positive selection
Positive selection allows up to 10,000-fold enrichment of the
magnetically labeled target cells. Positive selection takes advantage
of the high specificity of monoclonal antibodies to isolate highly
pure cell populations that specifically express the corresponding
antigen. The positively selected cells are virtually unaffected by the
separation procedure and can be used immediately for culturing or
other applications. There is no need to remove the MACS MicroBeads
from the cells. The small size and the composition of the MACS
MicroBeads (iron oxide and polysaccharide) make them
biodegradable. Typically, MACS MicroBeads do not activate cells or
influence function or viability.
Positive selection is recommended:
• for highly specific labeling
• for excellent purity and recovery
• for the isolation of rare cells
• if no subsequent separation step is needed.
120
Depletion
For some experiments it may be desirable to deplete certain cell
types from the cell sample in order to isolate the target cells. The
depletion strategy allows, for example, to isolate a target cell for
which no specific antibody is available or to isolate “untouched” cells.
With a depletion strategy all unwanted cells are magnetically
labeled. During magnetic separation, the labeled cells are retained
on the column, while the target cells pass through and form the
negative, non-labeled fraction.
6 Cell separation using the autoMACS® Pro Separator
A depletion strategy is recommended:
• for the removal of unwanted (non-target) cells
• if no specific antibody is available for the target cells
• if binding of minimal amounts of antibody to surface molecules
can interfere with downstream applications
• if isolated cells are to be sorted subsequently utilizing a second
marker.
Multiparameter sorting : depletion followed by positive
selection
Cells can also be isolated by first depleting the non-target cells, followed
by magnetic labeling and positive selection of the target cells.
This strategy is useful if unwanted cells in the cell suspension express
the same antigen that was chosen as the marker for positive
selection.
It can also be used to deplete non-target cells from the initial cell
suspension before isolating extremely rare cell types by positive
selection.
6
MACS MultiSort strategy
With MACS MultiSort Kits, high numbers of cells characterized by
multiple cell surface markers can be sorted easily and quickly.
Even rare cells can be enriched efficiently.
Multiparameter sorting with MACS MultiSort Kits allows sequential
positive selections of cells. The target cells are first labeled with MACS
MultiSort MicroBeads and positively selected for the first parameter.
Subsequently, the cells are incubated with the MultiSort Release
Reagent, which enzymatically removes the MicroBeads from the
antibodies. In the next step, these cells are magnetically labeled with
MicroBeads conjugated with an antibody directed against a second
marker. After labeling, the cells are again magnetically separated.
Magnetic labeling strategies
There are two basic approaches to magnetic labeling: direct labeling
with MACS MicroBeads and indirect labeling with MACS MicroBeads
against primary antibodies, other specific ligands or their conjugates.
Both approaches can also be used for a MACS MultiSort strategy.
Direct magnetic labeling
Direct magnetic labeling is the fastest way of magnetic labeling.
It requires only one labeling step as the specific antibody is directly
coupled to the magnetic particle. Direct labeling minimizes the
number of washing steps and, therefore, avoids cell loss. Highly
specific monoclonal antibodies have been selected by Miltenyi
Biotec to produce a large variety of antibody-conjugated MicroBeads
targeting many human, mouse, rat, and non-human primate cell
surface markers. The high specificity of the antibodies allows low
background and easy optimization of the separation. Fluorescent
staining using fluorochrome-conjugated antibodies can
simultaneously be performed for subsequent analysis of the
separated fractions by flow cytometry or fluorescence microscopy.
6 Cell separation using the autoMACS® Pro Separator
121
Indirect magnetic labeling
Indirect labeling is recommended when no direct MicroBeads for a
particular cell surface marker are available. Almost any monoclonal
or polyclonal antibody or other specific ligand targeting any cell type
from any species can be used for indirect labeling. Cells are first
incubated with a primary antibody ligand that is unconjugated,
biotinylated, or fluorochrome-conjugated. In a second step, magnetic
labeling is performed by using Anti-Immunoglobulin, Anti-Biotin,
Streptavidin, or Anti-Fluorochrome MicroBeads, respectively.
A cocktail of antibodies or other ligands can also be used to
concurrently isolate or deplete a number of cell types. As it results in
an amplification of the magnetic label, indirect labeling may be the
method of choice if weakly expressed markers are targeted for
magnetic separation. When using a fluorochrome-conjugated
antibody or other ligand in combination with the corresponding
Anti-Fluorochrome MicroBeads, the fluorescent staining can be used
for flow cytometric analysis.
Cell isolation directly from whole blood or bone marrow
samples
MACS Whole Blood MicroBeads are specially developed to isolate
human cell subsets directly from human whole blood using the
autoMACS Separator or the autoMACS Pro Separator. This reagent
can also be applied to bone marrow. Note that in this case fat must
be removed prior to labeling.
6.3.2 Choose a magnetic labeling strategy
Note: Titration and manual
incubation with the
primary antibody
or other ligand is
recommended to
be done manually. If
there is no wash step
between incubation
of the sample with
an unknown primary
antibody or other ligand
followed by application
of indirect MicroBeads,
the procedure cannot be
optimized. Results may
be impaired.
122
Autolabeling may be performed prior to cell separation. For a list of
MACS Products optimized for autolabeling please visit: www.
automacspro.com
Installing reagents for use with autolabeling
The reagent menu is used to program any reagent vials that are
required for automated magnetic labeling and subsequent cell
sorting. Reagents can be entered using the 2D code reader or
manually using the Enter Reagent input panel.
Figure 6.1: The reagent menu.
6 Cell separation using the autoMACS® Pro Separator
Entering reagent information for autolabeling
Reagents vials can be directly scanned and recognized by the
autoMACS Pro Separator 2D code reader.
Scanning reagents with the 2D code reader
1 Select Reagent tab and highlight the position where the vial will
be placed on the reagent rack. Four positions are available: R1,
R2, R3, and R4.
Figure 6.2: Position “R1“ was selected for the reagent vial.
6
2 Activate the reader by selecting Read Reagent and present a
reagent vial in front of the 2D code reader. Ensure the 2D code is
facing the blinking code reader–light. The optimal reading
distance is 0.5–2.5 cm from the code reader-cover, tilt the vial as
depicted in figure 6.3.
Figure 6.3: Scanning a reagent vial using the 2D code reader. In this example,
the vial “CD4 Microbeads, human” was scanned.
3 The vial is automatically recognized by the software. The next
reagent rack position will be automatically highlighted (R2).
6 Cell separation using the autoMACS® Pro Separator
123
Note: If the reagent vial
cannot be identified
by the 2D code reader
please enter the reagent
information manually;
refer to “Entering
reagents manually”
below.
Figure 6.4: CD4 MicroBeads, human (# 130-045-101) was identified by the 2D
code reader software and assigned to the reagent rack position “R1“.
4 Using the same procedure another reagent vial can be scanned
using the 2D code reader. The reagent rack position R3 is
automatically assigned. Having entered the desired reagent(s),
click the Separation tab to proceed with programming a cell
separation.
Entering reagents manually
1 Select Reagent tab and highlight the position where the vial will
be placed on the reagent rack. Four positions are available: R1,
R2, R3, and R4.
Figure 6.5: Position “R2“ was selected for the reagent vial.
2 Select Enter Reagent from the lower navigation bar. Enter the
reagent-specific product order number. The order number is
located on the product data sheet. In the event that the data
sheet is misplaced, visit www.miltenyibiotec.com to download a
printable PDF of the document.
124
6 Cell separation using the autoMACS® Pro Separator
6
Figure 6.6: Reagent information is manually entered using the reagent order
number.
3
Select OK.
4 If a correct number is inserted the software will immediately
recognize the reagent or kit. To confirm, select the reagent from
the list by using the touch screen.
Figure 6.7: CD4 MicroBeads, human (# 130-045-101) was manually entered.
5 Select OK to confirm the identified reagent and reagent vial
position “R2“.
6 Cell separation using the autoMACS® Pro Separator
125
Figure 6.8: Reagent vial “CD4 MicroBeads, human” was assigned to the
reagent rack position “R2“.
Deleting reagents or reagent lists
In this example the following reagents were scanned into the
following reagent rack positions:
• R1: FcR Blocking Reagent, human (component 1/3 of product
Monocyte Isolation Kit II, human; # 130-091-153)
• R2: Monocyte Antibody Cocktail , human (component 2/3 of
product Monocyte Isolation Kit II, human; # 130-091-153)
• R3: Anti-Biotin MicroBeads (component 3/3 of product Monocyte
Isolation Kit II, human; # 130-091-153)
•
R4: CD4 MicroBeads, human; # 130-045-101
To delete an individual reagent from the reagent rack list:
1 Select the reagent name that must be deleted. In this example
CD4 MicroBeads, human on position R4 must be removed.
2 Select Delete Selected to remove the highlighted reagent.
126
Figure 6.9: CD4 MicroBeads, human was assigned to reagent rack position R4,
which was subsequently selected for deletion.
To delete the entire reagent list:
1 Select an unassigned position on the reagent rack. In this
example position R4 was selected. (If there are no unassigned
positions, delete an individual reagent as described above).
6 Cell separation using the autoMACS® Pro Separator
6
Figure 6.10: To delete all reagents from the reagent rack, an unassigned
position on the reagent rack must be highlighted. In this example the only
unassigned position “R4“ was selected.
2 Select Delete All.
Working with reagent templates
For convenience it is possible to load and save reagent templates. In
this example the following reagents were scanned into the following
reagent rack positions:
R1: CD4 MicroBeads, human (# 130-045-101)
R2: CD8a (Ly-2) MicroBeads, mouse (# 130-049-401)
R3: No reagent
R4: No reagent
To save a reagent template:
1 Assign reagent vials to reagent rack positions as outlined above
(refer to section: Entering reagent information for autolabeling).
Figure 6.11: Using the 2D code reader, two reagent vials were assigned to the
reagent rack positions “R1“ and “R2“.
2 Select Save Template.
3 Allocate a name to the template. In this example the template
was saved as “EXPT_2” (experiment 2).
6 Cell separation using the autoMACS® Pro Separator
127
Figure 6.12: Using the alphanumeric keypad assign a name to the template.
4 Select Ok.
To load a reagent template:
1 Select Load Template from the lower navigation bar. To scroll
through the list of saved templates use the navigation arrows
/
. The corresponding template is displayed in the adjacent
panel.
Figure 6.13: Selecting a reagent template. Expt_2 was selected which
comprises of CD4.h and CD8.m on positions R1 and R2, respectively.
2 Select and highlight the desired template; in this case “Expt_2”.
3 Select Ok.
128
Figure 6.14: The template “Expt_2“ was successfully loaded.
To delete a reagent template:
1 Select Load Template from the lower navigation bar.
6 Cell separation using the autoMACS® Pro Separator
2 Scroll through the list of saved templates using the navigation
arrows
/
.
6
3 Select the template for deletion.
4 Select Delete Template.
Cell separation at a glance
1 Assign MicroBead reagent vials to positions on the MACS
Reagent Rack. It is recommended to use the 2D code reader.
Alternatively, the product order number may be manually
programmed.
Figure 6.15: CD4 MicroBeads, human vial was placed onto the MACS Reagent
Rack position “R1“.
Note: For a detailed
introduction to the
separation menu refer to
section 4.4.
2 On the Separation tab the recommended separation strategy
and wash program are pre-selected for the chosen autolabeling
reagents.
3 Program the cell separation protocol using the Separation tab
menu. For full details refer to section 4.4.
Note: “/“ option under
Labeling denotes that
NO autolabeling will be
performed.
Only a cell separation will
be performed; manual
magnetic labeling must
be performed prior to
placing the sample on
the Chill Rack.
6 Cell separation using the autoMACS® Pro Separator
129
Note: Refer to the
respective product data
sheet for more detailing
on sample magnetic
labeling volumes.
Figure 6.16: Performing MicroBead CD4+ cell separation with autolabeling
(left) and without autolabeling (right). The cell separation (Possel) and wash
conditions (Qrinse) for both processes are identical. Disabling autolabeling
(“/“) influences the initial sample volume. For manual labeling it is
recommended to dilute cells to a volume of 500 µL/108 total cells (refer to
corresponding data sheet for further information).
4 Select Run.
Manual labeling at a glance
Cells are labeled with MACS MicroBeads according to the MACS Cell
Separation Reagent data sheet. For general immunomagnetic cell
separation protocols, please refer to section 8.1. The specific MACS
Cell Separation Reagent data sheets can be found at
www.miltenyibiotec.com.
6.3.3 autoMACS® Pro Cell Separation programs
The autoMACS® Pro Cell Separation programs are based on different
cell separation strategies. There are ten pre-set separation programs
to choose from depending on the cell isolation strategy, the
frequency of target cells, and the level of antigen expression.
Positive selection programs:
Possel—Positive selection in standard mode: isolation of cells with
normal antigen expression and frequencies higher than 5%; select
Possel if purity is the highest priority.
Possel_s—Positive selection in sensitive mode: isolation of cells
with low antigen expression and frequencies higher than 5%; select
Possel_s if yield is the highest priority.
Posseld—Positive selection in standard mode I, double-column
program: for isolation of rare cells in low elution volume.
Posselds—Positive selection in sensitive mode, double-column
program: for isolation of rare cells with low antigen expression.
Posseld2—Positive selection in standard mode II, double-column
program: for isolation of rare cells if purity is the highest priority.
Posselwb—Special positive selection in special mode, doublecolumn program: for isolation of cell subsets from whole blood. Cell
samples are automatically diluted with Running Buffer.
130
6 Cell separation using the autoMACS® Pro Separator
Depletion programs:
Deplete—Depletion in standard mode: for removal of cells with
normal to high antigen expression and results in better target cell
yield.
Depletes—Depletion in sensitive mode I: removal of cells with low
antigen expression and results in better target cell purity.
Depl05—Depletion in sensitive mode II: removal of cells with low
antigen expression and results in stringent depletion of cells.
Depl025—Depletion in sensitive mode III: removal of cells with low
antigen expression and results in stringent depletion of cells.
A_Depl07—Depletion in standard mode via loading of sample in
separate 1 mL stages: removal of cells with normal to high antigen
expression and results in a better target cell yield. This special
program is disabled by default. To enable select Option, User
settings, and O_progs.
A_Depls7—Depletion in sensitive mode via loading of sample in
separate 1 mL stages: removal of cells with low antigen expression
and results in a better target cell purity. This special program is
disabled by default. To enable select Option, User settings, and
O_progs.
6
Positive selection programs:
In programs Possel and Possels, the magnetically labeled target
cells are retained in the autoMACS Column 1. The unlabeled cells are
released into the negative fraction collection tube (row “B” of the
tube rack). After automated retraction of the magnet, the
magnetically labeled cells are eluted into the positive fraction
collection tube (row “C” of the tube rack).
In the double-positive selection programs Posseld, Posselds,
Posseld2, and Posselwb, the magnetically labeled target cells are
first retained in the autoMACS Column 1. The negative fraction
containing the non-labeled cells is retrieved in the negative fraction
collection tube (row “B” of the tube rack). Then, the magnetically
labeled cells are held in a reservoir and loaded onto the autoMACS
Column 2. Finally, the magnetically labeled cells are eluted into the
positive fraction collection tube (row “C” of the tube rack).
Depletion programs:
When running any depletion program, the magnetically labeled
non-target cells are retained in the autoMACS Column 1.
The non-labeled target cells pass through the column and are
released into the negative fraction collection tube (row “B” of the
tube rack). The magnetically labeled fraction, containing the
unwanted cells, is eluted into the positive fraction collection tube
(row “C” of the tube rack).
6 Cell separation using the autoMACS® Pro Separator
131
Program
Volume of nonlabeled fraction
(i.e. negative
fraction)
Deplete
Depletes
Depl05
Depl025
A_Depl07*
2 mL + sample volume
2 mL + sample volume
2 mL + sample volume
2 mL + sample volume
3 mL per 1 mL sample
volume
A_Depls7*
3 mL per 1 mL sample
volume
Possel
Possel_s
Posseld
2 mL + sample volume
2 mL + sample volume
2 mL + sample volume
Volume of
labeled
fraction
(i.e. positive
fraction)
2 mL
2 mL
2 mL
2 mL
2 mL per 1
mL sample
volume
2 mL per 1
mL sample
volume
2 mL
2 mL
0.5 mL
Posseld2
2 mL + sample volume
2 mL
Posselds
2 mL + sample volume
2 mL
Posselwb
2 mL + sample volume
+ predilution volume
2 mL
Loading
rate
4 mL/min
1 mL/min
0.5 mL/min
0.25 mL/min
4 mL/min
1 mL/min
4 mL/min
1 mL/min
4 mL/min (column 1)
1 mL/min (column 2)
4 mL/min
(columns 1 and 2)
1 mL/min
(columns 1 and 2)
4 mL/min
(columns 1 and 2)
*This program must be used with manual labeling only.
Table 6.2: Output volumes and loading rates of separation programs.
6.3.4 autoMACS® Pro Separator wash programs and
maintenance programs
Wash programs for daily operation
The autoMACS® Pro Separator is equipped with reusable autoMACS
Columns. After each cell separation, a thorough washing procedure
rinses the columns of the autoMACS Pro Separator. After the wash
program is completed, columns and tubing system are filled with
Running Buffer.
Program
Washing
Solution
Running
Buffer
Storage
solution
Qrinse
---
48 mL
---
MACS
Bleach
Solution
---
Rinse
96 mL
48 mL
---
---
Time
1.5 min
4 min
Sleep
96 mL
---
48 mL
---
5 min
Store
96 mL
---
96 mL
---
8 min*
Col_ex
96 mL
96 mL
---
---
6 min*
Safe
96 mL
96 mL
---
40 mL
21 min*§
* Not including the time required for column exchange.
§ Not including the time required for disconnecting and reconnecting bottle tubing.
Table 6.3: Liquid usage and time of wash and maintenance programs.
132
6 Cell separation using the autoMACS® Pro Separator
Qrinse is the standard short wash program that only uses Running
Buffer. It is recommended to use this program between separations
of cells with normal frequency.
Rinse is an extensive rinsing program that uses Washing Solution
and Running Buffer. It is recommended to use this program between
separations of rare cells, e.g., stem cells, the separation of cells from
different species, and is mandatory between whole blood
separations.
Sleep—it is mandatory to use Sleep as the last wash program before
overnight storage. Upon completion of the Sleep program, the
fluidic system contains 70% ethanol.
Maintenance programs
The program Safe is designed for decontamination of the fluidic
system. For details, refer to section 7. Upon completion of the Safe
program, the fluidic system contains Running Buffer. The program
includes an exchange of autoMACS columns.
The program Store should be applied to prepare the instrument for
long-term storage. Upon completion of the Store program, the
fluidic system contains 70% ethanol. For details, refer to section 7.
The program Col_ex is used for column exchange. Upon completion
of the Col_ex program, the fluidic system contains Running Buffer.
Note: The autoMACS Pro
Separator will not start
a separation program
before a wash program
has been completed.
6
6.4 Select appropriate tube rack
Three different tube racks are available for processing sample
volumes between 0.2 mL and 50 mL. Unless otherwise specifically
indicated in the MACS Cell Separation Reagent data sheet, the
magnetically labeled cell samples are suspended at 10⁸ total cells per
500 µL when using manual labeling. The cell number and volumes
for autolabeling are slightly different; refer to table 6.4 and table 6.5
below for further details.
1 Select the appropriate tube rack according to table 6.4 and
table 6.5.
2 (Recommended) Cool down the tube rack for 3–4 hours in a
refrigerator (2–8 °C) or until the coolant becomes solid. Do not
cool below 0 °C as samples may freeze.
3 Equip the tube rack with sample tubes and fraction collection
tubes.
6 Cell separation using the autoMACS® Pro Separator
133
Note: Row “A” of the tube
rack holds sample tubes;
row “B”: tubes for nonlabeled fractions; row
“C”: tubes for labeled
fractions.
Rack type &
symbol
Slots
Maximum
number of
samples
Minimum
first
incubation
volume
Maximum
final
labeling
volume
Maximum number of cells
per tube*
Chill 5
24×5 mL
6
(5 mL tubes)
0.2 mL
2.0 mL
2.0–4×10⁸
depends on cell labeling
concentration and column
capacity
0.25 mL
1 mL
Whole blood only
Chill 15
15×15 mL
5×5 mL
5
(15 mL
tubes)
0.2 mL
6.5 mL
6.5×10⁸–1.3×10⁹
depends on cell labeling
concentration and column
capacity
1 mL
4 mL
Whole blood only
Chill 50
6×50 mL
3×15 mL
3×5 mL
3
(50 mL
tubes)
4 mL
8 mL
Whole blood only
Table 6.4: MACS Cooling Tube Racks specifications for autolabeling.
Rack type &
symbol
Slots
Maximum
number of
samples
Maximum
sample
volume
Maximum number
of total cells per tube
Chill 5
24×5 mL
6
(5 mL tubes)
2.5 mL
5.0×10⁸
Chill 15
15×15 mL
5×5 mL
5
(15 mL tubes)
12.5 mL
2.5×10⁹
Chill 50
6×50 mL
3×15 mL
3×5 mL
3
(50 mL tubes)
50 mL
4.0×10⁹
134
Table 6.5: MACS Cooling Tube Racks specifications for manual labeling.
6 Cell separation using the autoMACS® Pro Separator
6
6.5 Prime the autoMACS® Pro Separator
1 Switch on the autoMACS® Pro Separator and wait for the
instrument to complete initialization.
Note: It is assumed that the
MACS MiniSampler has
been already installed,
the waste container is
empty, and that all fluid
containers are filled with
recommended solutions
(refer to section 3 for
more details).
Figure 6.17: The initialization screen.
2 After initialization, the autoMAC Pro Separator will display the
menu Status. Verify the status of the instrument as outlined in
section 4.3.
3 Ensure that the symbols for the fluid containers are colored
green. If they are red, check whether the fluid containers are
filled, the waste container is empty, and the color-coded bottle
sensors are connected to the appropriate container. If symbols
are gray, check the bottle sensors for proper connection.
Note: 70% ethanol does
not contain electrolytes.
Therefore, the fluid level
cannot be determined
and the symbol for this
bottle is always gray.
Please ensure that the
volume of each solution
is sufficient for the
number of separation
and washing programs
to be performed.
Note: The autoMACS Pro
Separator automatically
records the date of the
last column exchange
and displays the date
for column replacement
only if the program
Column exchange has
been used for column
installation.
Figure 6.18: Fluid container status symbols.
Left: Fluid containers are ready. Right: Fluid containers need replaced.
4 Ensure that the symbol for the columns is colored green. For
more details refer to section 4.3.2: Column status. If the symbol
for the columns is red, the columns must be exchanged. The fill
level on the symbol is an indicator for the remaining
operation‑life of the columns.
Figure 6.19: The column status graphic.
Left: The columns are ready. Right: The columns must be changed.
6 Cell separation using the autoMACS® Pro Separator
135
5 Ensure that the MACS MiniSampler is installed correctly. For more
details concerning correct installation of the MACS MiniSampler
refer to section 3.
Note: The touchscreen
displays the type of tube
rack upon starting the
separation.
Figure 6.20: MACS MiniSampler status graphic.
Left: The MiniSampler was successfully installed. Right: No MiniSampler was
detected.
6 The autoMACS Pro Separator is now ready for priming. Select
Separation and Wash Now from the lower navigation bar.
Note: If priming of the
instrument has not
been performed, the
autoMACS Pro Separator
will automatically ask
to run a Rinse program
before starting the
separation. The process
can be monitored in the
menu Status. At this
point, the bottles are
illuminated yellow.
136
It is possible to include
an initial Rinse program
that will be performed
automatically upon
switching on the
instrument. The
setting of this option is
described in section 4.7.
O_init: Optional priming
of the instrument at
startup.
Figure 6.21: “Wash Now“ command displays two options: “Qrinse“ (quick
rinse) and “Rinse“. A full rinse is required for instrument priming.
7 Select Rinse and Run.
6.6 Define autoMACS® Pro Separation
program sequence or template
After completing the priming process or if a wash program has been
completed, the autoMACS Pro Separator is ready for separation.
The status of the instrument is displayed in the menu status.
The bottles are illuminated green. Select the Separation menu.
1 Select the desired position(s) in the sample separation template
field by touching it.
2 Select an autolabeling program and the sample volume, a
separation program, and a washing program for each sample
position. The selected programs will be displayed in the
programming field.
6 Cell separation using the autoMACS® Pro Separator
Note: Refer to sections 4.4
and 4.5 for an overview
of the separation and
reagent tabbed menus,
respectively.
3 (Optional) Templates can be saved by selecting Save template
from the lower navigation bar. Follow the prompt to enter a
template name.
4 Select Ok and Run.
To select a particular sample position in the programming field,
touch it once. To deselect it, touch it once again.
If the same combination of separation program and washing
program is required for more than one sample, highlight all the
desired sample positions first and then select the programs.
Alternatively, define the program combination for one position and
then highlight the other desired positions to adopt the program
combination.
To erase selected program combinations from the programming
field, first mark the respective positions and choose Delete selected
from the lower navigation bar. If positions are not marked, the button
can be used to delete the entire template. In this case, the option
Delete selected will switch to Delete all.
Alternatively, start the separation from a previously saved separation
template.
Note: For autolabeling
the Reagent Rack
configuration must be
programmed using the
Reagent tab menu. Refer
to section 4.5 or 6.3.2 for
further details.
To obtain brief
information on the
separation and wash
programs, highlight the
program of interest and
press the information
button located
between the arrows. A
pop-up window will be
displayed. Alternatively,
refer to section 6.3.3 for
more information on
separation programs.
6
1 Select Load template from the lower navigation bar.
2 Select the desired template by using the arrows.
3 Select OK.
4 Select Run to start the separation. Check that there is enough
buffer for the number of programmed separations.
5 Select Continue.
The autoMACS Pro Separator automatically detects the type of tube
rack in use and allows the user to utilize only the number of samples
and sample positions the tube rack can handle. If the tube rack does
not match the template definition, a warning screen will be displayed
upon starting the separation.
6.6.1 Entering sample separation instructions:
a workthrough example
In the following example two samples were placed on positions
1 and 2 of a Chill Rack 15. Sample 1 was already manually labeled
using CD4 MicroBeads, human. Sample 2 has not yet been labeled;
the autoMACS Pro Separator will perform autolabeling using CD4
MicroBeads, human.
1 Highlight sample positions 1 and 2 on the sample template.
6 Cell separation using the autoMACS® Pro Separator
137
Note: The MACS Reagent
CD4 MicroBeads, human
was identified by the 2D
code reader (barcode
reader). The vial was
placed on position 1 of
the MACS Reagent Rack.
Refer to section 4.5 for
full details on using the
Reagent menu.
138
Figure 6.22: Sample positions 1 and 2 were selected. The purpose of this
example is to demonstrate how sample processing conditions can be easily
modified and to clarify the differences between autolabeling and manual
labeling. Alternatively, each sample could be programmed individually.
2 Select CD4_MB.human under the submenu Labeling.
By default the software selects a Possel (positive cell/target cell
enrichment) separation strategy and a Qrinse (quick rinse) wash
protocol.
Figure 6.23: The current display indicates that autolabeling will be performed
on both samples.
3 Select the Volume submenu to enter the required sample
volume. Select Enter.
For this experiment a minimal starting volume of 160 μL is required
for autolabeling (for CD4 autolabeling 40 µL MicroBeads is added to
the entire 160 µL sample volume). Refer to the data sheet if this
information is unknown.
Figure 6.24: A volume of 160 μL was entered for both sample positions.
6 Cell separation using the autoMACS® Pro Separator
4 Highlight the wash mode to be performed before cell separation.
In this case a quick rinse (Qrinse; ) was selected.
6
5 Deselect sample position 2 by touching the display at this
position.
Sample position 1 must be setup to perform cell separation on a
sample that was previously manually labeled with CD4
MicroBeads.
Note: Both samples
positions have been
setup for autolabeling.
Note: Sleep, , can only
selected as the last
step in the program
sequence.
Figure 6.25: Only sample position 1 is selected.
6 Deselect autolabeling for sample 1 by selecting “/“ in the
Labeling submenu. Change the sample volume as recommended
in the data sheet. For manual labeling it is recommended to dilute
cells to a volume of 500 µl / 108 total cells (refer to corresponding
data sheet for further information).
Figure 6.26: Only a positive cell separation will be performed on sample 1.
7 View and recheck the sample setup.
8 Select Run to start.
9 Check buffer levels as instructed by a popup dialog box.
Click Continue to proceed.
6 Cell separation using the autoMACS® Pro Separator
139
10 It is recommended to monitor the process from the Status menu.
Click the Status menu.
Figure 6.27: Sample processing is underway as instructed.
6.7 Monitoring the autoMACS® Pro
Separator during cell separation
The autoMACS® Pro Separator is a sensor-controlled instrument that
allows easy monitoring during operation.
6.7.1
Note: Refer to section 4.3
for more information for clarification of the Status
menu.
140
Status menu before separation
Refer to section 4.3 for an overview of how to monitor the instrument
status using the Status menu prior to performing a cell separation.
Nevertheless, a brief summary is included below.
Status of fluid containers
The status of fluid containers is indicated by color-coded graphic
symbols and by a text table.
Container
Symbol
Symbol color and user action
Running Buffer
Green: no action required
Red: refill container
Gray: connect bottle sensor
Washing Solution
Green: no action required
Red: refill container
Gray: connect bottle sensor
Storage solution
Gray: no liquid detection;
visually check volume
Waste
Green: no action required
Red: empty waste
Gray: connect bottle sensor
Table 6.6: Status of fluid containers displayed in the “Status“ menu.
6 Cell separation using the autoMACS® Pro Separator
Column status
If the column symbol is green, no action is required. If the symbol is
red, the columns must be exchanged. The level of the green fill on
the column symbol indicates the remaining service-life of the
autoMACS Columns.
Rack detection
Rack detection only occurs upon starting the separation process.
MACS MiniSampler detection
If the MACS MiniSampler has been detected correctly a rectangular
symbol is displayed. If it has not been detected a hand symbol will be
displayed in the same field.
6
6.7.2 Status menu during cell separation
It is recommended to monitor the instrument’s status during cell
separation using the Status menu. Programs yet to be processed
appear in yellow fields. Programs currently undergoing autolabeling
appear in lilac. Programs in progress in which no autolabeling is
being performed switch to orange; completed programs switch to
white. The current action is always displayed in the status bar located
below the lower navigation bar. The status bar also displays the
overall progress in minutes (min).
Figure 6.28: Monitoring the status during cell separation. Sample processing
at position 1 is completed (white color). Sample at position 2 has finished the
separation and is now performing a Rinse.
Interrupting cell separation
The cell separation process can be paused at any time from all menu
screens by selecting Stop.
1 From any menu screen, select Stop. The autoMACS Pro Separator
will then immediately stop operation and will display a pop-up
warning screen from which the current program can be continued
or canceled.
6 Cell separation using the autoMACS® Pro Separator
141
Figure 6.29: Select “Stop“ to pause cell separation. To continue cell separation
select “Continue“. To cancel the entire procedure, select “Cancel“.
2 Select Cancel to cancel the procedure. Alternatively, select
Continue to carry on with cell separation.
Figure 6.30: The process has been cancelled.
Bottle illumination
The autoMACS Pro Separator has a bottle illumination that facilitates
monitoring of the instrument’s status. The table below summarizes
the color code of the bottle illumination and the respective user
action required.
Note: Interrupting the
process after labeling will
prolong the incubation
period.
142
Code
Status
User action
Green
Ready for separation
No action required
Blue
Instrument operating
No action required
Yellow
Not ready for separation
Run wash program (Rinse or
Qrinse) before starting a
separation
Red
Error
Check screen for error
detection
Purple
Program Sleep is completed Switch off autoMACS Pro
Separator
Blinking
Action required
Check screen for required
action
Table 6.7: Various bottle illumination statuses.
6 Cell separation using the autoMACS® Pro Separator
The bottle illumination can be switched ON/OFF.
1 Select the Option menu and User settings.
6
2 Highlight O_led and press Run. The bottle illumination can now
be enabled or disabled.
6.8 Shut down the autoMACS® Pro
Separator
6.8.1 Sleep as the final wash program
1 Combine a separation program and the program Sleep for the
last position in the programming field.
2 Upon completion of the Sleep program, switch off the
autoMACS® Pro Separator using the main power switch.
Note: If Sleep is chosen
as a wash program, the
autoMACS Pro Separator
will not allow definition
of any programs beyond
this position.
6.8.2 Store: the program for long-term storage
The autoMACS Pro
Separator automatically
performs a Sleep
program if the device is
inactive for more than six
hours.
To store the autoMACS Pro Separator for a period longer than two
weeks, the tubing system should be cleaned and the columns should
be replaced with column substitutes. The Store program
automatically performs the cleaning procedure and prompts the
user to install column substitutes.
1 Select Option and Special.
2 Select Store and press Run. The system will be rinsed
automatically.
Ensure that enough
Storage Solution is in the
bottle.
Figure 6.31: Running the “Store“ program.
3 Install the column substitutes (refer to section 3.3.4 for details on
column exchange).
4 Select Done.
5 Switch off the autoMACS Pro Separator using the main power
switch.
6.8.3 Shutdown button
1 Press the shutdown button on the upper right hand corner of the
screen ( ).
6 Cell separation using the autoMACS® Pro Separator
143
2 Select Yes from the popup dialog box.
Figure 6.32: Shutting down the autoMACS Pro Separator.
3 The autoMACS Pro Separator will automatically perform a Sleep
program.
4 Upon completion of the Sleep program, you will be prompted to
shut down the instrument. The bottle illumination is purple at
this point. Switch off the autoMACS Pro Separator by using the
main power switch. Note: Ensure enough storage solution is
available.
144
6 Cell separation using the autoMACS® Pro Separator
7
Maintenance
Appropriate maintenance of the autoMACS Pro Separator helps to
maintain excellent reproducibility of the cell separation results.
The following section gives you an overview on the procedures
required for efficient maintenance of the instrument.
IMPORTANT: Insufficient or improper maintenance of your autoMACS
Pro Separator can cause unpredictable results, avoidable malfunction
and premature failure of the instrument, and may void your warranty.
IMPORTANT: Please do not perform any maintenance procedures other
than specifically described in this user manual. Any other
maintenance procedures must be performed by qualified service
personnel.
Inquire with your local Miltenyi Biotec representative about
Miltenyi Biotec’s extensive instrument service and support
arrangements, or refer to www.miltenyibiotec.com/support.
IMPORTANT: When replacement or spare parts are required for
maintenance, only use genuine Miltenyi Biotec parts or third-party
parts specified and recommended by Miltenyi Biotec. Using
unauthorized replacement or spare parts can cause malfunction of
the instrument and impair cell separation results. Miltenyi Biotec does
not honor any warranty or accept any responsibility for instrument
failure or damages resulting from the use of inappropriate
replacement or spare parts.
Caution: During a maintenance procedure, potentially contaminated
liquid may spill out of the orifice of the washing station and the
tubing. Therefore, wear protective gloves, protective clothing, and
safety glasses to avoid contact with skin and eyes. Dispose used
gloves and clothing appropriately.
7.1 General considerations
Please consider that the sample quality has a significant influence on
the system’s performance. It is crucial to use single-cell suspensions
for cell separation. Furthermore, dead cells and other small particles
potentially derived from the sample preparation should be removed
prior to cell separation. For further information on sample
preparation, refer to section 6.1.
7 Maintenance
145
Note: Do not use a
dishwasher to clean
and do not autoclave
any of the removable
parts unless indicated
otherwise.
7.2 Daily maintenance
The following maintenance procedures must be performed on a
daily basis. If the instrument is not to be used for an extended period
of time the store procedure must be performed; refer to 7.2.3 for
further details.
7.2.1 Instrument priming
A Rinse program must be performed before performing the first cell
separation after the instrument has been switched on.
Performing an instrument rinse
1 Click the Separation menu and Wash Now from lower menu bar.
2 Select Rinse ( ).
3 Click Run.
2 Follow the prompt on the screen to enable or disable the initial
wash.
Note: In case of malfunction
during cell separation
this feature must be
disabled in order to
perform a cell rescue
procedure.
The instrument
automatically prompts
the user to perform a
rinse before performing
a cell separation.
O_init: Optional priming of the instrument at startup
By using the O_init program, the instrument can be instructed to
perform an automated rinse sequence at startup. The Rinse program
is used for efficient washing and equilibration of the fluidic system.
1 Select Option, User settings, and O_init. Press Run.
Figure 7.1 Initial wash program is used to activate or deactivate an
automatic instrument prime on instrument startup.
7.2.2 Clean uptake/outlet ports
It is recommended to clean uptake and outlets daily. This should be
performed before running the Sleep program (shutdown).
1 Switch the instrument OFF.
2 The ports can be wiped with tissue soaked with 70% ethanol,
isopropyl alcohol, or MACS Bleach Solution followed by distilled
or deionized water.
146
7 Maintenance
3 Remove the finger-guard that is attached underneath the outlet
port holder by pulling gently. Clean the finger-guard as
described for the ports.
7
Figure 7.2: Removing the finger guard for cleaning.
4 Wipe the outlet port for the negative fraction as indicated above.
The port can be flushed by using a syringe.
5 To clean the uptake port, ensure the instrument is switched OFF.
Move the needle holder up and down to get access to the entire
surface of the needle.
6 Push the finger-guard back into position.
7 Switch the instrument ON.
8 Run the Sleep program
Note: To prevent the
formation of salt
deposits, wipe the
outlet ports with a tissue
soaked with distilled (or
deionized) water before
each Sleep program.
7.2.3 Instrument shutdown
Make sure to run a Sleep program prior to switching the instrument
OFF. This program ensures most efficient preservation of the fluidic
system by rinsing with storage solution.
Shutdown button
1 Press the shutdown button on the upper right hand corner of the
screen ( ).
2 Select Yes from the popup dialog box.
7 Maintenance
147
Figure 7.3: Shutting down the autoMACS Pro Separator.
3 The autoMACS Pro Separator will automatically perform a Sleep
program.
4 Upon completion of the Sleep program, you will be prompted to
shut down the instrument. The bottle illumination is purple at
this point. Switch OFF the autoMACS Pro Separator by using the
main power switch.
Note: Ensure enough
storage solution is
available.
Store: the program for long-term storage
To store the autoMACS Pro Separator for a period longer than two
weeks, the tubing system should be cleaned and the columns should
be replaced with column substitutes. The Store program
automatically performs the cleaning procedure and prompts the
user to install column substitutes.
1 Select Option and Special.
2 Select Store and press Run. The system will be rinsed
automatically.
Figure 7.4: Running the “Store“ program.
3 Install the column substitutes (refer to section 3.3.4 for details on
column exchange).
4 Select Done.
5 Switch OFF the autoMACS Pro Separator using the main power
switch.
148
7 Maintenance
7.3 Periodic maintenance
7.3.1 Column exchange
7
autoMACS Pro Seperator Columns must be exchanged every two
weeks or after 100 separations, whichever comes first. Refer to
section 3.3.4 for more details.
7.3.2 Clean the pump syringe
Clean pump syringe must be cleaned every 1–3 months.
1 Run a Sleep Program (refer to section 7.2.3), switch OFF the
power, and unplug the autoMACS Pro Separator from the electric
supply. Open the front access cover. The syringe pump plunger
should be at the top-right position.
2 Loosen the plunger lock screw by turning it counter-clockwise.
Figure 7.5: Unscrewing the plunger lock screw.
3 Lower the plunger holder by firmly pressing the plunger lock
screw downward.
Figure 7.6: The plunger was gently lowered.
4 Unscrew the syringe from the dilutor valve housing.
7 Maintenance
149
Figure 7.7: To remove the pump syringe the top screw must be turned anticlockwise.
5 Carefully remove the plunger from the syringe.
6 Remove salt crusts with distilled or deionized water.
Note: If symptoms of wear
such as leakage persist,
contact Technical
Support.
Figure 7.8: Washing the pump syringe with distilled water.
7 Gently push the plunger back into the syringe and dry the
plunger lock screw before proceeding with installation of the
syringe.
8 To reinstall the syringe, carefully insert the syringe into the
plunger holder.
9 Push the plunger holder up until the syringe reaches the dilutor
valve.
150
7 Maintenance
10 Fasten the syringe at the dilutor valve by turning it until a
resistance can be felt.
7
11 Push the plunger holder up once again and tighten the plunger
lock screw.
12 Prime the autoMACS Pro Separator as described in section 7.2.1.
13 Run the program Calibr_2 to calibrate the fluidic volume control
of the instrument. Refer to section 12.2 for details.
7.3.3 Clean the washing station
The washing station is designed for the automated rinsing of the
outlet and uptake ports as well as surface cleaning of the uptake port
needle. The washing station should be cleaned as necessary to
remove spills and salt crusts.
1 Switch OFF and unplug the instrument.
2 Make sure that the needle arm is in the uppermost position.
3 Swivel the front cover to the right side; swivel the cover of the
washing station to the left side. The cover can be removed by
lifting it.
Figure 7.9: Removing the washing station.
4 Press the tubing clamp on the right hand side of the washing
station and pull to remove the tubing.
Note: Potentially
contaminated liquid may
spill out of the orifice of
the washing station and
the tubing. Therefore,
wear protective gloves,
protective clothing, and
safety glasses to avoid
contact with skin and
eyes.
Figure 7.10: Remove the peristaltic pump tube from the washing station.
7 Maintenance
151
5 Unscrew the thumb screw that attaches the washing station to
the instrument.
Note: Do not autoclave the
washing station or wash
using a dish washer.
Figure 7.11: Unscrew the thumb screw.
6 Pull out the washing station.
Note: Run the Store
program and exchange
the autoMACS Columns
with substitute columns
if you intend to store the
instrument for a period
longer than two weeks
(refer to section 6.8.2).
Note: If sample tubes and
fraction collection tubes
have been in contact
with biohazardous
material, they should be
autoclaved after use.
7 Clean the washing station by soaking it in 10% bleach and 70%
ethanol for 15 min each. Optionally, sonicate it in water.
Rinse with distilled water.
8 Reassemble the unit in reverse order.
9 Run a Safe program.
7.3.4 Instrument decontamination
The Safe program is a disinfectant procedure which uses MACS Bleach
Solution for cleaning and decontamination of the autoMACS Pro
Separator. Depending on the level of use and general instrument
maintenance, it is recommended to decontaminate the fluidic system
every 3 to 6 months using the Safe program. If predominantly whole
blood, bone marrow, or tissue samples are separated the Safe
procedure can be performed more often without harming the
instrument, e.g., every four weeks instead of performing a column
exchange.
Perform instrument decontamination according to the following
instructions:
1 Select menu Option, Special, and the program Safe.
Bottle closures can be
autoclaved.
152
Figure 7.12: “Safe“ program is underway.
7 Maintenance
2 Press Run. Follow the screen prompts.
3 Disconnect the tubings from all buffer bottles. Select OK.
7
4 Place the end of each tubings into a bottle of MACS Bleach
Solution.
5 The decontamination procedure is performed automatically.
Note: In case of spillage, it is
recommended to use a
disinfectant that is
appropriate for the
potential pathogen, e.g.,
bleach, isopropyl alcohol,
or 70% ethanol, to
decontaminate surfaces
with tissue or swabs.
6 (Optional) Wash fluid containers and bottle closures using
detergent, 1% hypochlorite, or 70% ethanol. Rinse thoroughly
using deionized water.
7 Upon completion of the process, replace fluid containers, and
reconnect all tubings.
8 Select OK. The system is rinsed automatically.
9 Wipe down the ports of the automated arm and the surface of
the instrument using 70% alcohol swaps.
Note: Dispose tissues and
swabs appropriately. It is
recommended to wear
protective gloves,
protective clothing, and
safety glasses to prevent
contact with skin and
eyes. Switch off and
unplug the instrument
beforehand.
7.3.5 Instrument long-term storage
The program Store should be applied to prepare the instrument for
long-term storage. Upon completion of the Store program, the
fluidic system contains 70% ethanol.
To store the autoMACS Pro Separator for a period longer than two
weeks, the tubing system should be cleaned and the columns should
be replaced with column substitutes. The Store program
automatically performs the cleaning procedure and prompts the
user to install column substitutes.
1 Select the Option, Special, and Store. Select Run. The system
will be rinsed automatically.
Figure 7.13: “Store“ program is underway.
2 Install the column substitutes as described by the section 3.3.4.
3 Select Done.
7 Maintenance
153
4 Switch OFF the autoMACS Pro Separator using the main power
switch.
7.4 Planned maintenance
Note: It is recommended to
exchange valves once a
year.
7.4.1 Valve exchange
The fluidic system of the autoMACS Pro Separator is regulated by six
valves. The valve that is connected with the pump syringe is referred
to as dilutor valve. If a valve of the autoMACS Pro Separator starts to
leak, an exchange of the valve should be performed.
Exchange one valve at a time according to the following instructions:
1 Select User settings from the Options menu. Highlight Valve_
ex and press Run to start the program. Select valves which have
to be exchanged. Valves will automatically be turned to exchange
position.
Note: If wear of a valve is
suspected, use the
Check_up program to
analyze functionality.
2 Switch OFF and unplug the autoMACS Pro Separator. Open the
front cover. For exchange of the lower valves, remove the bottom
cover by pulling firmly.
Figure 7.14: The bottom cover must be removed for access to the lower
valves.
3 Using the supplied wrench, unscrew the valve cover-screw which
releases the tubing.
4 Detach all tubing and valve port locks or blind screws from the
respective valve.
154
7 Maintenance
7
5 Loosen the two valve screws using the screwdriver from the
autoMACS Pro Separator Starting Kit and pull out the valve.
6 Check if the groove in the valve drive is positioned horizontally
and in the lower half of the axis.
Figure 7.15: Valve plate driving section.
1 = groove
2 = hole for adjustment pins
7 Maintenance
155
7 Make sure that the bracket of the new valve is positioned
horizontally.
Figure 7.16: Rear view of the autoMACS Pro Separator valve.
1 = bracket
2 = adjustment pins
8 Carefully insert the new valve allowing the bracket to find the
groove in the drive. At first, the bracket will slide in only halfway.
Figure 7.17: Inserting the new valve.
9 Gently rotate the valve. The two adjustment pins will slide into
their corresponding holes in the valve plate.
10 Make sure that the valve is fully inserted into the driving station.
Fasten valve screws using the screwdriver.
Note: In case the valve
exchange program
Valve_ex cannot be
performed (e.g. valve
does not turn any more)
switch off instrument
and turn the valve
bracket manually to the
position corresponding
to the groove in the valve
drive.
11 Connect the tubing with the installed new valve and fasten
tubing by hand until finger tight.
12 Plug in and switch ON the autoMACS Pro Separator.
13 Perform a Rinse program and check the valves visually for
leakage and air inlet.
14 Refasten tubing connectors using caution. If leakage persists call
Technical Support.
15 Take care not to pinch the tubings at the bottom left of the
instrument when closing the bottom cover.
156
7 Maintenance
7.4.2 Exchange of dilutor valve
1 Switch OFF and unplug the instrument.
7
2 Remove the pump syringe as described in section 7.3.2.
3 Unscrew the tubing.
Note: The profile of the
valve shaft is shaped
asymmetrically, similar
to a trapezoid (refer to
figure 7.19)
Figure 7.18: Unscrewing tubing connected to the dilutor valve.
4 Unscrew the two hexagonal socket screws using the key that was
delivered with the new or exchange valve. Take care to note the
orientation of the valve shaft as shown below.
5 Pull the valve out of the coupling.
6 When inserting the new valve into the coupling, make sure that
the short side of the trapezoid-shaped valve shaft points towards
the triangle in the coupling.
Figure 7.19: Inserting a new valve: take care to note the orientation of the
valve.
7 Maintenance
157
7 When the valve is properly inserted, mount the hexagonal socket
screws.
8 Connect the tubing according to the positioning of the diluter
valve.
Figure 7.20: Connect tubing to the value as shown above.
9 Guide the draining tube towards the washing station as shown
below.
Figure 7.21: Red dashed line indicates the positioning of the draining tube.
The draining tube connects the valve to the washing station.
10 Remove the washing station. Take care to clean spilled fluids with
ethanol or disinfectant.
158
7 Maintenance
7
11 Carefully remove the waste distributor from its position by
pulling in an upward direction and remove the draining tube
from the old diluter valve.
Figure 7.22: The waste distributor.
12 Mount the new draining tube and finger tighten. Take care to
clean spilled fluids with ethanol or disinfectant.
Figure 7.23: The draining tube is attached.
13 Install the waste distributor back to its former position and
reinstall the washing station.
14 Install the syringe.
15 Switch ON the autoMACS Pro Separator.
16 Check for correct function by running the program Rinse.
7 Maintenance
159
17 Run the program Calibr_2 to calibrate the fluidic volume control
of the instrument.
Note: The pump syringe
should be exchanged
once a year.
7.4.3 Exchange of the peristaltic pump head
1 Switch OFF and unplug the instrument.
2 Remove the washing station as described in section 7.3.3, steps
1–6.
3 Press the tubing clamp on the left hand side of the waste
distributor and remove the tubing.
Note: The peristaltic
pump head should be
exchanged once a year.
4 Pull out the bottom cover as depicted above.
5 Press clamps on both sides of the pump and pull out the pump
head.
6 This will uncover a pin that protrudes from the instrument. Clean
the pin using 70% ethanol but do not attempt to pull it out. The
pin drives the pump during operation.
7 Replace pump head with the spare part.
8 Reassemble in reverse order. Take care not to pinch the tubing at
the bottom left when pushing the bottom cover back into place.
7.4.4 Exchange of hydrophobic air filter
160
Hydrophobic air filters (0.2 μM) are attached to the bottle closures to
vent the liquid bottles and to prevent release of aerosols. To avoid
7 Maintenance
clogging of the filters and to prevent contamination of liquids, air
filters should be exchanged if they come into direct contact with any
liquid, i.e., become wet. They also should be exchanged once a year
to avoid clogging through dust deposits.
7
1 Hydrophobic air filters are attached to all fluid containers.
Note: The hydrophobic
air filters should be
exchanged once a year.
Figure 7.24: Hydophobic air filter attached to a fluid container.
2 Unscrew the hydrophobic air filter from the fluid container.
Replace the new filter in a similar manner.
7.4.5 Exchange of autoMACS® Columns
The autoMACS® Columns should be exchanged after 100 separations
or two weeks after the last column exchange, whichever comes first.
The procedure is described in detail in section 3.3.4.
7.5 Exchange of the tubing system
If there is any leakage in the tubing system, the affected tubing part
should be exchanged. Please note that each tubing has a specific
length and should be exchanged exclusively with the corresponding
spare part.
1 Switch OFF and unplug the instrument.
2 Remove the affected tubing by loosening the tube connectors
using the black wrenches.
3 Replace the tubing with the correct part.
4 Pull back the connector from the tubing, so that the tubing can
be easily inserted into the appropriate port.
5 Insert the connector cautiously and precisely and fasten it by
hand. Make sure not to overwind the screw.
7 Maintenance
161
6 Plug in and switch ON the instrument. Run the program Rinse
and check for leakages.
7 Run the program Calibr_2 to calibrate the volume control of the
instrument. For details, refer to section 12.2.
8 If there are any leakages, refer to to section 10.1.2 for advice on
how to improve the tubing connection.
7.6 Exchange of fuses
If the instrument fails to start upon switching it on or if operation
suddenly stops and the screen is dark, an exchange of the fuses
might be required.
CAUTION: Replace fuses only with those of the same type and rating.
1 Switch OFF the instrument.
2 Unplug the main power cord from the power outlet as well as
from the instrument. The fuse holder is located below the main
power connector on the rear panel of the instrument.
3 Pull out the fuse holder from the housing and exchange fuses.
Figure 7.25: Removing the fuse holder.
4 Push the fuse holder back into the housing and reconnect the
main power cord.
Note: Fuse specifications
are given in section 11.2
and on the marking
plate on the rear of the
instrument close to
the fuse holder. Do not
use other fuses than
specified.
7.7 Rescue procedure
Should the separation be interrupted before target cells are eluted, it
is possible to perform a cell rescue procedure to recover the sample.
If the instrument can be restarted, follow procedure A; if the
instrument cannot be restarted, follow procedure B.
7.7.1 Rescue procedure A
1 Restart the instrument by switching it OFF and ON again.
162
7 Maintenance
2 Undo the tubing connector at the negative port and place into a
50 mL tube.
7
3 Take out the uptake port needle from the needle holder and
place it into a 50 mL tube.
4 Undo the tubing connector of the waste tube at the waste bottle
and place it into a 50 mL tube; place a second 50mL tube beside
this one.
5 Run the program Qrinse. This will rinse the complete fluidic
system with autoMACS Pro Running Buffer eluting the cells into
the 50 mL tubes. Depending on which step of the separation
program that the interruption occurred the cells will be found in
any one of the vials.
6 Combine all fractions and centrifuge at 350×g for 10 minutes.
Note: Depending on the
nature of your sample
it is recommended to
wear protective gloves,
protective clothing,
and safety glasses to
prevent contact with
skin and eyes. Dispose
tissues, swabs and vials
appropriately.
7 Discard the supernatant and apply cells to a reseparation as soon
as possible. Keep cells on ice until the separation.
8 Reconnect all tubing at the appropriate positions and reposition
up-take needle in needle holder
7.7.2 Rescue procedure B
If it is not possible to restart the instrument the cells retained on the
columns can be recovered.
1 Switch OFF the instrument and disconnect from the power
supply.
2 Prepare two 50 mL tubes in rack and fill two 5 mL syringes with
Running Buffer/Separation Buffer.
3 Open the front cover and place absorbent tissue underneath the
columns.
4 Pull out the column from the column holder and replace the top
connector with a 5 mL syringe filled with Running Buffer.
5 Undo the bottom connector and flush the column into a 50 mL
tube. Discard column and syringe appropriately.
6 Repeat steps 4 to 5 with the second column.
7 Centrifuge tubes at 350×g for 10 minutes.
8 Discard the supernatant and perform reseparation on the
recovered cells as soon as possible. Keep cells on ice until the
separation.
7 Maintenance
163
9 Install new columns or column substitutes in place of the
discarded ones.
7.8 Spare parts list
164
Part order
number
Spare part
Part order
number
Spare part
130-022-101
Pump Seal
130-093-307 autoMACS Pro Bottle
Closure, red
130-090-684 4-port 4-way Valve
130-093-308 Dilutor Valve, 6-port
distribution
130-090-685 4-port Distribution
Valve
130-093-309 autoMACS Pro Tube
(t32)
130-090-387
Air Filter Connector
130-093-310 autoMACS Pro Tube
(t26)
130-093-291
autoMACS Pro
Bubble Sensor
130-093-311 autoMACS Pro Tube
(t20)
130-093-285
autoMACS Pro Tube
(t2)
130-093-312 autoMACS Pro Tube
(t12, t14)
130-093-287
autoMACS Pro Tube
(t21)
130-093-313 autoMACS Pro Tube
(t3)
130-093-284
autoMACS Pro Tube
(t27)
130-093-314 autoMACS Pro Tube
(t18)
130-093-288
autoMACS Pro Tube
(t5)
130-093-315 autoMACS Pro Tube
(t11, t25)
130-093-286
autoMACS Pro Tube
(t7)
130-093-316 autoMACS Pro Tube
(t6, t8, t23)
130-093-289
autoMACS Pro Tube,
reservoir (t9, t24)
130-093-317 autoMACS Pro Tube
(t10, t16, t17, t19, t22)
130-093-290
autoMACS Pro
Uptake Port Needle
130-093-349 Washing Station,
needle arm
130-090-676
Column Connector
130-093-350 autoMACS Pro Tube
(t1, t13)
130-090-834
Fuse Holder
130-093-362 Tube Connector 2×2
Ports (1/4”-28 UNF)
130-090-385
Hydrophobic Air
Filter
130-093-364 Tube Guiding Ball,
needle arm
130-090-386
O-Ring for Bottle
Closure
130-093-365 Peristaltic Pump Head
incl. Tube
130-090-644 Plunger Lock Screw
130-093-366 Outlet Port Unit,
needle arm
130-090-389
Power Cord (D)
130-093-367 Guard, needle arm
130-090-391
Power Cord (USA)
130-093-368 Thumb Screw (M5×16)
130-090-339
Pump Syringe
130-093-370 Magnet Lock, front
cover
7 Maintenance
7
Part order
number
Spare part
Part order
number
Spare part
130-090-378
Square Key
130-093-371 4-port 3-way Valve
130-091-996
Valve Blind Screw, 5
pcs.
130-093-372 autoMACS Pro Tube
(t31)
130-093-293
autoMACS Pro Tube
(t4)
130-093-397 Uptake Port Needle
Guiding, needle arm
130-093-302
Fuse 5×20 T4A, set
130-093-407 Thumb Screw
(M5×40), MiniSampler
130-093-303
autoMACS Pro Sensor 130-093Cable
669
Cover, MiniSampler
130-093-304
autoMACS Pro Bottle
Closure, green
130-094682
Pump Syringe,
Hamilton, 5mL, Cavro
XP
130-093-305
autoMACS Pro Bottle
Closure, blue
130-094-729 Dilutor Valve, 6-port
distribution, V2
130-093-306
autoMACS Pro Bottle
Closure, black
Table 7.1: List of available spare parts.
7 Maintenance
165
7.9 Accessories list
166
Accessory
order
number
Accessory
Accessory
order
number
130-091-339
Air Filter Extension
Set
130-093-412 MACS Cooling Tube
Rack, 3×Chill 15
130-093-245
autoMACS Pro Angle
Connector, set
130-093-416 MACS Cooling Tube
Rack, 3×Chill 5
130-094-573
autoMACS Pro
Autolabeling
Upgrade Kit
130-093-413 MACS Cooling Tube
Rack, 3×Chill 50
130-093-305
autoMACS Pro Bottle
Closure, blue
130-092-952 MACS Cooling Tube
Rack, Chill 15
130-093-304
autoMACS Pro Bottle
Closure, green
130-092-951 MACS Cooling Tube
Rack, Chill 5
130-093-246
autoMACS Pro
Laminar Hood Plate
130-092-953 MACS Cooling Tube
Rack, Chill 50
130-094-289
autoMACS Pro
Laminar Hood Set
130-092-990 MACS Cooling Tube
Rack, set
130-093-532
autoMACS Pro
Protection Cover
130-093-292 MACS Fluid Container
(1.5 L)
130-093-303
autoMACS Pro Sensor 130-094-574 MACS Reagent Rack 4
Cable
130-093-669
Cover, MiniSampler
Table 7.2: List of available accessories.
7 Maintenance
Accessory
8
Protocols
Note: Detailed protocols and product documentation
are provided on the data
sheet for the particular
MACS Cell Separation
Reagents.
Work fast, keep cells
cold, and use prechilled solutions. This
will prevent capping of
antibodies on the cell
surface and non-specific
cell labeling.
Volumes for magnetic
labeling procedures
described below are
for up to 10⁷ total cells.
When working with
higher cell numbers,
scale up all reagent
volumes and total
volumes accordingly
(e.g. for 2×10⁷ total cells,
use twice the volume of
all indicated reagents
and double the total
volume). When working
with fewer than 10⁷ cells,
do NOT scale down the
volumes.
Keeping the samples on
ice may result in poor cell
labeling. Temperatures
higher than 8 °C and/or
longer incubation times
may lead to non-specific
cell labeling.
Fluorescent labeling
can be performed
either before or after
the separation has been
completed.
The following chapter describes protocols that may be used with the
autoMACS Pro Separator using manual labeling. Please visit www.
miltenyibiotec.com for an up-to-date list of manual labeling and
autolabeling protocols using the autoMACS Pro Separator.
There are two basic approaches to magnetic labeling: labeling with
direct MACS MicroBeads or indirect labeling with MicroBeads against
primary antibodies or their conjugates. General instructions for
magnetic labeling are described in the following sections.
8.1 Direct magnetic labeling
A variety of antibody-conjugated MicroBeads targeting human,
non-human primate, mouse, and rat cell surface markers are
available for direct magnetic labeling. The general protocol given
below is based on a 1:5 dilution of MACS MicroBeads. Please note
that direct magnetic labeling of mouse cells is typically performed in
a 1:10 dilution of MACS MicroBeads. For details, refer to the specific
MACS Cell Separation Reagent data sheet.
1 Prepare a single-cell suspension and determine the cell number.
2 Centrifuge cell suspension at 300×g for 10 minutes. Aspirate
supernatant completely.
3 Resuspend cell pellet in 80 µL of fresh buffer per 10⁷ total cells.
4 Add 20 µL of MACS MicroBeads per 10⁷ total cells.
5 Mix well and incubate for 15 minutes in the refrigerator (2−8 °C).
6 (Optional) Add staining antibodies, e.g., 10 µL of MACS Fluorochrome-conjugated Antibodies, and incubate according to the
data sheet.
7 Wash cells by adding 1−2 mL of buffer per 10⁷ cells and centrifuge
at 300×g for 10 minutes. Aspirate supernatant completely.
8 Resuspend up to 10⁸ cells in 500 µL of buffer.
9 Proceed to magnetic separation (refer to section 5.3.5).
8 Protocols
167
8.2 Indirect magnetic labeling
Note: Primary antibodies
should be titrated to
determine the optimal
staining dilution.
After incubation with
primary antibodies,
wash the cells carefully.
If unbound primary
antibodies have not been
completely removed,
they may inhibit labeling
of cells with indirect
MACS MicroBeads.
Indirect magnetic labeling is the method of choice, if direct MACS
Cell Separation products are not available. Almost any monoclonal or
polyclonal primary antibody can be used: A variety of Anti-Fluorochrome MicroBeads is available for magnetic labeling of cells stained
with primary antibodies conjugated to VioBlue®, fluorescein
isothiocyanate (FITC), R-phycoerythrin (PE), allophycocyanin (APC),
peridinin chlorophyll protein (PerCP), or tandem molecules like
PE-Cy5 or APC-Cy7. Anti-Biotin MicroBeads and Streptavidin MicroBeads are recommended when using biotinylated primary antibodies. Streptavidin MicroBeads must be used with biotin-free buffer for
labeling. This is not necessary when using Anti-Biotin MicroBeads,
since they do not bind free biotin. Anti-Immunoglobulin MicroBeads
against human, mouse, rat, or rabbit immunoglobulins can be used
in combination with unconjugated antibodies.
1 Prepare a single-cell suspension and determine the cell number.
2 Centrifuge cell suspension at 300×g for 10 minutes. Aspirate
supernatant completely.
3 Resuspend cell pellet and incubate with the primary antibody
according to the manufacturer’s recommendations. For MACS
Fluorochrome-conjugated or Biotinylated Antibodies, resuspend
up to 10⁷ total cells in 100 µL of buffer and add 10 µL of the
respective antibodies.
4 Mix well and incubate in the refrigerator for 5–10 minutes
(2−8 °C) or according to the manufacturer’s recommendations. If
fluorochrome-conjugated antibodies are used, incubate in the
dark.
Note: When using AntiFITC MicroBeads or
Streptavidin MicroBeads,
resuspend cell pellet in
90 µL of buffer per 10⁷
total cells and add 10 µL
of MicroBeads per 10⁷
total cells.
5 Wash cells to remove unbound primary antibody by adding 1–2
mL of buffer per 10⁷ cells and centrifuge at 300×g for 10 minutes.
Aspirate supernatant completely.
6 (Optional) Repeat washing step.
7 Resuspend cell pellet in 80 µL of buffer per 10⁷ total cells and add
20 µL of indirect MicroBeads per 10⁷ total cells.
8 Mix well and incubate for 15 minutes in the refrigerator (2−8 °C).
Note: Keeping the samples
on ice may result in
poor cell labeling.
Temperatures higher
than 8 °C and/or longer
incubation times may
lead to non-specific cell
labeling.
168
9 (Optional) When using unconjugated or biotinylated primary
antibodies, cells can be stained with a fluorochrome-conjugated
antibody at this point.
10 Wash cells by adding 1−2 mL of buffer per 10⁷ cells and centrifuge
at 300×g for 10 minutes. Aspirate supernatant completely.
8 Protocols
11 Resuspend up to 10⁸ cells in 500 µL of buffer.
Note: For higher cell
numbers, scale up buffer
volume accordingly.
12 Proceed to magnetic separation (refer to section 5.3.5).
8
8.3 Direct magnetic labeling of human
cells using MACS® Whole Blood
MicroBeads
MACS® Whole Blood MicroBeads have been developed for positive
selection of many human cell types from anticoagulated whole
blood samples or bone marrow samples. Perform magnetic labeling
with MACS Whole Blood MicroBeads according to the following
general instructions. Refer to the specific MACS Cell Separation
Reagent data sheet for more details.
1 Prepare the sample as outlined by the data sheet.
2 Add 50 μL MACS Whole Blood MicroBeads per 1 mL anticoagulated whole blood. When working with larger or smaller blood
volumes, scale all reagent volumes and total volumes up or
down, accordingly (e.g. for 500 μL of blood use half the volume of
Whole Blood MicroBeads, i.e., 25 μL).
3 Mix well and incubate for 15 minutes in the refrigerator (2–8 °C).
4 Wash cells by adding 2–5 mL of buffer per mL whole blood and
centrifuge at 445×g at room temperature for 10 minutes and slow
deceleration (no brake).
5 Aspirate supernatant carefully. Do not disturb the cell pellet.
Leave a small residual volume of supernatant (approximately
1–2 mm in height) to avoid cell loss.
6 Resuspend the cell pellet, estimate the volume, and dilute with
the same volume of buffer and proceed to section 5.3.5.
7 Fluorescent labeling should be performed after the separation
process.
8 Protocols
169
170
8 Protocols
Quality control of separations
performed with the
autoMACS® Pro Separator
9
To evaluate any MACS Cell Separation, the separated cells can be
analyzed with regard to purity, recovery, and viability. Using MACS
MicroBeads, the magnetically labeled cells can be simultaneously
stained with fluorochrome-conjugated antibodies. Antibodies of the
same specificity can be used in most cases. MACS Fluorochromeconjugated Antibodies are standardized to evaluate MACS Cell
Separations. The stained cells can subsequently be analyzed by flow
cytometry, fluorescence microscopy, or other techniques.
9.1 Recovery of cells
Note: To count the cells
of the original fraction,
collect an aliquot of
the cell sample after
magnetic labeling
directly before the
magnetic separation
to analyze whether
cell losses are due
to centrifugation
steps OR to magnetic
separation. Also take
counting statistics into
consideration. The
standard deviation when
counting cells is N± N1/2.
Therefore, cell counting
might be associated with
large statistical errors.
In most cases, the number of isolated cells will be compared to the
number of cells theoretically expected from the heterogeneous
starting population. To calculate the target cell recovery, take an
aliquot from the magnetically labeled fraction just before starting
the cell separation.
The target cell recovery, e.g., positive cells in the magnetically
labeled cell fraction can be calculated as follows:
Target cell recovery (%) = 100 ×
No. of cells in pos. fraction × % positive cells in pos. fraction
No. of cells in orig. sample × % positive cells in orig. sample
The overall cell recovery can be calculated as follows:
No. of cells in pos. fraction + No. of cells in neg. fraction
Overall cell recovery (%) = 100 ×
No. of cells in orig. sample
9.2 Purity of isolated cell population
For most experiments that follow the cell separation, it is necessary
to document the purity of the isolated cell subset. It is recommended
to analyze the cells by flow cytometry. Alternatively, fluorescence
microscopy can be used. Cells can also be analyzed by
immunocytochemistry.
9 Quality control of separations performed with the autoMACS® Pro Separator
171
Note: Efficient staining of
the cells with regard
to signal intensity and
specificity are the prerequisites for an accurate
analysis. Magnetic cell
separation using the
MACS Technology is a
highly sensitive method
and often results in
extremely pure cell
populations. Make sure
that the method used
for analysis is sensitive
enough to accurately
analyze the purity.
Purity of the positively selected cell fraction:
Purity = % positive cells in positive (magnetically labeled) fraction
Purity of the depleted cell fraction:
Purity = % negative cells in negative (non-labeled) fraction
9.3 Viability of the cells
Different dyes are available to discriminate between live and dead
cells. The most common method to discriminate between live and
dead cells is based on trypan blue staining and analysis by light
microscopy. Trypan blue crosses the cell membrane of dead cells and
stains the cells. Live cells are not stained.
Propidium iodide (5.0 µg/mL) is most often used for flow cytometry
and fluorescence microscopy. It crosses the permeable cell
membrane of dead cells, enters the nucleus, and interacts with DNA.
Therefore, the nucleus of dead cells is fluorescently stained.
Other fluorescent dyes, for example, DAPI [4’,6-diamidino-2phenylindole] can be used depending on the properties of the
flow-cytometer, i.e., its excitation wavelength capabilities,
particularly in the UV range.
When working with fixed cells, it is recommended to use the Fixation
and Dead Cell Discrimination Kit (#130-091-163) for both the cell
fixation as well as the discrimination of dead cells.
The viability can be calculated as follows:
No. of live cells
Viability (%) = 100 ×
No. of live cells (live & dead)
172
9 Quality control of separations performed with the autoMACS® Pro Separator
Troubleshooting
Note: It is recommended
to use the program
check_up if general
hardware errors occur.
Select the Options
menu from the upper
navigation bar. Then
select User settings.
Highlight check_up and
press Run.
The program
automatically analyzes
the functionality of
moving hardware
components. A report
is displayed after the
analysis of each single
component.
The procedure can be
canceled after each
step or continued by
pressing OK. Following
hardware components
are analyzed: dilutor
valve, valves 1–5,
peristaltic waste pump,
magnet 1–2, needle arm
(movement along the
z-axis and the y-axis),
and MACS MiniSampler.
Furthermore, the
calibration data is
checked.
In the unlikely event of problems using the autoMACS Pro Separator
the following section aims to address any relevant issues. If the
outcome of a cell separation procedure is deemed unsatisfactory,
this may either be due to incorrect function of the instrument or to
inappropriate sample preparation. Both of these factors are discussed in this section. At the end of this section, a list of numerically
encoded errors and warning messages are presented along with user
actions for troubleshooting.
This section addresses problems that are not indicated by a warning
or error screen, but might occur during the separation or rinsing
programs. Identify the problem and refer to the appropriate section.
10
10.1 Hardware problems not indicated
by a warning or error screen
10.1.1 Column leakage
1 If a freshly installed autoMACS Column shows signs of leakage,
check if the column is installed properly. The column should be
inserted precisely into the column connector and fastened to the
point of resistance. If this is not the case, loosen the column
connector, insert the column precisely, and tighten the connector
again.
2 Run the Qrinse program: select the Separation menu from the
upper navigation bar and Wash now from the lower navigation
bar. Select Qrinse and press Run. Check if the leakage persists. If
so, unscrew the column and check if the luer connectors of the
columns are damaged. If this is the case, exchange the leaking
column with a new autoMACS Column (refer to section 3.3.4).
3 Check if the column connector is fastened properly. If not, use
second wrench to counter and tighten another quarter-turn.
4 If the problem persists, contact Technical Support.
10 Troubleshooting
173
10.1.2 Tubing leakage
1 Identify the location of the leaky tubing by running the Rinse
program:
• From the Separation menu select Wash Now (lower menu bar).
• Highlight Rinse and click Run.
2 Check whether the tubing is tightened properly. If this is not the
case, tighten the tube connector. The connector should be
inserted precisely.
3 If the problem persists, loosen the tube connector and pull back
the connector from the tubing.
Note: Do not remove the
connector from the
tubing.
Note: Please note that each
tubing has a specific
length and should be
exchanged with the
corresponding spare part
only.
4 Check the ends of the tubing for wear and fissures. If necessary,
replace tubing with the appropriate spare part. Insert the tubing
into the appropriate port. Then cautiously insert and fasten the
tube connector.
5 Run the Rinse program and check if the leakage persists. If so,
unscrew the tubing and check if the screw thread is damaged.
If this is the case, order and install new tubing.
6 If the problem persists, contact Technical Support.
10.1.3 Pump syringe leakage
Verify that the Running Buffer has equilibrated to room temperature
before performing a washing or separation program. Cold buffer will
make the plunger seal constrict more than usual and may lead to
leakage. Salt crystals may also damage the pump syringe seal.
To clean the pump syringe refer to section 7.3.2 and retry. If the
problem persists follow the guidelines below.
1 Run the Sleep program.
• Press the shutdown button on the upper right hand corner of the
screen ( ).
• Click Yes to shutdown the instrument.
2 Switch OFF the instrument.
3 Wash the pump syringe as described in section 7.3.2.
4 Switch ON the instrument and run a Qrinse program to ensure
that the problem is solved:
• From the Separation menu select Wash Now (lower menu
bar).
• Highlight Qrinse and click Run.
5 If the leakage persists, order and install either a new pump
syringe (# 130-090-339) or a new pump seal (# 130-022-101). For
details on the installation, refer to section 7.3.2.
174
10 Troubleshooting
10.1.4 Pump syringe is filled with air during operation
Note: Depending on
the level of use, the
pump syringe should
be cleaned every 1–3
months.
Appropriate
maintenance and longterm storage assures
that no salt deposits
accumulate in the pump
syringe. Salt deposits
may cause wear of the
pump seal and thus may
lead to leakage.
The pump syringe should
not run dry at any time.
This can damage the
pump seal and thereby
may lead to leakage of
the pump syringe.
1 If there is any air inlet into the pump syringe during operation,
the correct proceeding of a separation will be impaired.
10
2 Check all tubings that are connected to the fluid bottles.
Make sure that all tubings are fastened properly. If a screw thread
is damaged, order and install new tubing.
3 Check if the hydrophobic air filters connected to the bottles are
clogged. Clogging may cause positive or negative pressure in the
fluid bottles, which can lead to pressure problems in the fluidic
system. If filters are clogged, replace them with new hydrophobic
air filters (refer to section 7.4.5).
4 Check if the connections and pump syringe are leaky (refer to
section 10.1.3).
5 Check if the uptake port needle is connected correctly and no air
inlet is possible. If not, unscrew and check screw threads. If they
are undamaged, reinsert precisely and fasten. Then use the
wrench to turn an extra quarter-turn. Do not to overwind the
screw.
6 If the problem persists, contact Technical Support.
10.1.5 Washing station overflow
1 Verify that the washing station is not clogged with salt deposits.
Take out the washing station and clean as indicated in section
7.3.3.
2 Reassemble washing station and run a Rinse program.
• From the Separation menu select Wash Now (lower menu bar).
• Highlight Rinse and click Run.
3 If problem persists follow the steps below.
4 Make sure that the peristaltic waste pump works properly. Run
the check_up program:
• From the Option menu select User settings.
• Highlight Check_up and click Run.
Note: To prevent the
formation of salt
deposits, wipe the
outlet ports with a tissue
soaked with distilled (or
deionized) water before
each Sleep program.
5 If the check_up program reports a problem with the waste
pump, remove the pump head and clean the pin that drives the
pump (for details, refer to section 7.4.4). Clean the washing
station (refer to section 7.3.3). Reassemble the unit and check
whether the problem persists.
6 If the problem persists, replace the pump head (refer to section
7.4.4).
10 Troubleshooting
175
10.1.6 Outlet port is clogged
1 If the outlet ports are clogged, e.g., due to salt deposits, the
elution process might be affected.
2 Wipe the outlet port with a tissue soaked with 70% ethanol or
double-distilled water.
3 Flush the outlet port manually using a syringe filled with 70%
ethanol or double-distilled water.
10.1.7 MACS® MiniSampler does not move properly
1 Check whether the guiding of the MACS® MiniSampler is
connected properly to the connector at the autoMACS Pro
Separator labeled “External CAN”.
2 Check whether the bolt below the rack detection protrudes from
the instrument. If this is the case, push it in and turn it clockwise
to lock the bayonet mount.
3 Check the cable connection between MiniSampler and
autoMACS Pro Separator. Check for cable damages.
4 Check whether the MiniSampler can freely move to both sides
and check for any resistance or collision.
5 If the problem persists, contact Technical Support.
10.1.8 Touchscreen remains dark
1 Switch OFF the instrument, wait 5 seconds, and switch ON again.
If the autoMACS Pro Separator still does not initialize, go to step
2.
2 Check if the power cord is plugged in correctly and if the electric
power is switched on.
3 Replace the fuses (refer to section 7.6). Spare fuses are included in
the autoMACS Pro Separator Starting Kit.
4 If the problem persists, contact Technical Support.
Note: If initial wash (Rinse
program) is enabled,
press Stop as soon as the
Status menu appears on
the screen. A window
opens displaying that the
process is paused. Press
Cancel.
176
10.1.9 Disruption of power supply during cell separation
In the unexpected event of a power supply failure during the cell
separation procedure, follow the rescue procedure to recover the cell
sample trapped in the autoMACS Pro Separator fluidic system.
1 Switch ON the autoMACS Pro Separator.
2 Disconnect the outlet tubing from the waste cap and put the end
of the tubing in a 50 mL tube. The rescued cell sample will be
rinsed out at the waste port.
10 Troubleshooting
3 Select the Separation menu and Wash now. Select Qrinse and
press Run. The cells will be rinsed out with Running Buffer.
10
4 Reconnect waste closure and waste bottle.
5 Perform the Rinse program to prime the autoMACS Pro Separator.
6 The rescued cell sample can now be centrifuged and subsequently be reprocessed with the autoMACS Pro Separator.
10.2 Performance errors not indicated by
a warning or error screen
10.2.1 Output volumes are not correct
1 Check for air inlet and leakages in the fluidic system by running
the Rinse program.
• From the Separation menu select Wash Now (lower menu
bar).
• Highlight Rinse and click Run.
2 If the tubing is leaking, go to section 10.1.2.
3 If the pump syringe is leaking, go to section 10.1.3.
4 If the column is leaking, go to section 10.1.1.
5 If one or more valves are leaking, go to section 7.4.1.
6 Check whether all tubing connections including column
connections, bottle connections, and connections at the pump
syringe are fastened. Loose connections may allow air to enter
the system and therefore affect the performance.
7 If the problem persists, run the Calibr_2 program.
• From the Option menu select User settings.
• Highlight Calibr_2 and click Run.
If the problem persists contact Miltenyi Biotec technical support.
10.2.2 Low cell viability in final fraction
1 Low cell viability can result from problems during both the cell
preparation and the autoMACS Pro Cell Separation. Hence, also
check section 10.3.
2 Check the 70% ethanol. Make sure that analytical reagent grade
ethanol (without additives) is used to prepare the solvent.
10 Troubleshooting
177
3 Check the Running Buffer. Make sure that the appropriate buffer
has been used and that no contamination has occurred.
4 Check Washing Solution. Make sure that the appropriate solution
has been used and no contamination has occurred.
5 Check the pump syringe for contamination. If contamination is
obvious, refer to section 10.1.3 and change columns afterwards.
Check for contamination of the tubing system and refer to the
appropriate section.
6 Run the Safe program to decontaminate the fluidic system.
7 Check the column status. The autoMACS Columns should be
exchanged after 100 separations or two weeks after the last
column exchange, whichever comes first. The procedure is
described in detail in section 3.3.4.
8 If the problem persists, contact Technical Support.
10.2.3 Low purity of isolated cell population
1 Low purities can be caused by problems during both the cell
preparation and the autoMACS Pro Separation. Hence, also check
section 10.3.
2 Low purities can also result from using an inappropriate
separation program or labeling approach. Please also refer to
section 6.
3 Check the exchange date of the autoMACS Columns. Using the
autoMACS Columns for longer than two weeks or for more than
100 separations within two weeks may affect purity.
4 Check whether the autoMACS Pro Separator has been set to
Sleep/Store correctly. Inappropriate storage or allowing the
autoMACS Pro Separator fluidic system to run dry will affect the
columns and therefore the purity.
5 Make sure that the appropriate Running Buffer has been used.
6 Perform the Qrinse program. If pumps are filled with air during
the process, refer to section 10.1.4.
7 Perform a test run using PBS as a mock sample and check output
volumes. For correct volumes refer to table 6.2 in section 6.3.3.
If volumes are not correct, go to section 10.2.1.
8 Run the Safe program (refer to section 4.7).
9 If the problem persists, contact Technical Support.
178
10 Troubleshooting
When utilizing the autolabeling feature
1 Check whether the uptake needle is positioned in the middle of
the sample tube during the mixing procedure. If not, mixing will
be inadequate.
10
2 Check whether the reagent volume (contents of reagent vial) is
sufficient for labeling.
3 Check that the recommended maximal sample processing time
of 90 minutes was not exceeded. In the event of an elevated
room temperature the cooling capacity of the Chill Racks may be
compromised. Higher labeling temperatures could cause
non-specific binding which may lead to lower purities when
using positive selection kits.
10.2.4 Low recovery of isolated cells
1 Low recoveries and low purities may be due to similar problems.
Go to section 10.2.3, steps 1–4.
2 Low recoveries can also be caused by partial column blockage.
Run the Safe program and exchange the autoMACS Columns
(refer to sections 4.7 and 3.3.4).
3 Perform a test run using PBS as a mock sample and check output
volumes. For correct volumes refer to table 6.2 in section 6.3.3.
If volumes are not correct, go to section 10.2.1
4 If the problem persists, contact Technical Support.
Especially when using autolabeling
1 Check whether the uptake needle is positioned in the middle of
the sample tube during the mixing procedure. If not, mixing will
be inadequate.
2 Check whether the reagent volume (contents of reagent vial) is
sufficient for labeling.
3 Check that the recommended maximal sample processing time
of 90 minutes was not exceeded. In the event of an elevated
room temperature the cooling capacity of the Chill Racks may be
compromised. Higher labeling temperatures could cause
unspecific binding which may lead to lower purities when using
positive selection kits.
10.2.5 Sample not or only partly taken up
1 If the sample has been taken up only partly, check if the sample
contains clumps larger than 1 mm. Continue with the separation
of this sample. As soon as the separation is finished, continue
with step 2. Before processing any remaining samples, use a
Pre-Separation Filter (# 130-041-407) to remove the clumps from
the sample.
10 Troubleshooting
179
2 Remove the sample tube. Wipe the uptake port needle with a
tissue soaked with 70% ethanol. Run the Qrinse program.
3 Check for cell clumps in the tubing system. If cell clumps are
suspected, run the Safe program.
4 For separating cells that tend to aggregate (e.g. tissue cells), it
may be helpful to dilute the sample 1:2.
5 Remove the sample tube and run the Qrinse program. Check
tubing system and pump syringe for air inlet.
6 Make sure that all tubing are connected properly, especially the
tubing connected to the columns and to the buffer bottles.
7 Verify that the uptake port needle is connected correctly and that
no air inlet is possible. Tighten if necessary.
8 Make sure that both columns are installed correctly.
9 Clean pump syringe as described in section 10.1.3 to remove salt
deposits. Salt crusts might allow air to enter the fluidic system.
10 Check whether the hydrophobic air filters connected to the
bottles are clogged. If filters are clogged, replace them with new
hydrophobic air filters.
11 Run the Check_up program to identify hardware malfunctions.
12 If problem persists, call Technical Support.
10.2.6 Reagent vial runs dry
As the liquid levels in the reagent vials is not controlled by the system
before uptake of reagent, it will not be detected if the reagent
volume provided in the vial is sufficient for the current separation
process or not. Ensure enough reagent is present in all vials for all
programmed processes. As the residual volume in the vial is about
20 µL, please be sure to overfill the vial with reagent accordingly.
10.3 Magnetic labeling and separation
10.3.1 Positive selection
Positive cells have not been retained on the column
1 Magnetic labeling of the cells is insufficient because the
MicroBead concentration was too low. This may be due to the
fact that either too much buffer was added to the cells or too
much buffer was left on the cell pellet after centrifugation before
adding the MicroBeads. Furthermore, the total number of cells
180
10 Troubleshooting
may have been miscounted. Use a ratio of MicroBeads and cells as
stated in the respective MACS Cell Separation Reagent data sheet.
10
2 Labeling of cells was ineffective due to too much debris and or
dead cells in the sample. Debris and dead cells will
non‑specifically bind to all other components present. Antibodies
and MicroBeads will be captured non-specifically and not be able
to label the cells in the positive fraction sufficiently any more.
3 Labeling of cells was ineffective due to an incubation
temperature lower than recommended. It is recommended to
incubate cells in the refrigerator (2–8 °C) for labeling.
4 The number of magnetically labeled cells exceeds the column
capacity. Calculate the number of magnetically labeled cells, for
example, by staining with flurochrome-conjugated antibodies,
and subsequent fluorescence analysis. The number should not
exceed 2×10⁸ cells per sample. If necessary, split the sample.
5 Cells were not labeled with MicroBeads because the MicroBeads
were degraded. Check the expiration date. Check for sterility of
the MicroBeads, if the vial has been opened before.
6 Cells were labeled, e.g., with fluorochrome-conjugated antibodies,
prior to magnetic labeling with direct MicroBeads. When
antibodies recognizing the same epitope are used for fluorescent
and magnetic labeling, fluorochrome-conjugated antibodies and
MicroBeads might compete for the binding sites. This can result
in insufficient magnetic labeling. It is recommended to perform
magnetic labeling prior to staining with fluorochromeconjugated antibodies. Alternatively, use indirect MicroBeads.
7 A non-optimal separation program was chosen, e.g., Possel
instead of PosselS for dimly labeled cells.
Especially when using autolabeling
1 Check whether the uptake needle is positioned in the middle of
the sample tube during the mixing procedure. If not, inadequate
mixing will be performed.
2 Check whether the reagent volume (contents of reagent vial) is
sufficient for labeling.
3 Verify whether the sample volume was programmed correctly.
A reduced input volume will result in insufficient labeling of cells.
Low purity of magnetically labeled cell fraction
1 Check for cell aggregates. Negative cells may be retained when
forming clusters with positive cells and, thus, contaminate the
positive fraction. Use buffers devoid of Ca²+ and Mg²+ in order to
reduce formation of cell aggregates.
10 Troubleshooting
181
2 Dead cells in the cell suspension may non-specifically bind to
MicroBeads and will then be co-enriched in the positive fraction.
Remove dead cells before separation by using the MACS Dead
Cell Removal Kit (# 130-090-101) or by Ficoll-Paque™ density
gradient.
3 The concentration of MicroBeads or the temperature used for
magnetic labeling were too high. It is recommended to dilute the
MicroBeads according to the data sheet. Cells should be
incubated with MicroBeads in the refrigerator (2–8 °C).
4 The total number of cells may have been miscounted leading to
an inappropriate ratio of MicroBeads and cells. Use a ratio of
MicroBeads and cells as stated in the respective MACS Cell
Separation Reagent data sheet.
5 Incubation time with MicroBeads was too long, leading to
background labeling. Reduce the incubation time to the
recommended values (refer to individual MACS Cell Separation
Reagent data sheet). Typically, an incubation time of 15 minutes is
required when incubating in the refrigerator (2–8 °C).
For exceptions, refer to the respective data sheet.
6 When target cells are extremely rare (<5% of total cells), few
non-labeled cells which are retained non-specifically may
constitute a high portion compared to the target cells. Perform a
second separation without re-labeling to remove non-specifically
retained cells or choose a double column separation like PosselD,
PosselD2, or PosselDS.
Especially when using autolabelling
1 Check that the recommended maximal sample processing time
of 90 minutes was not exceeded. In the event of an elevated
room temperature the cooling capacity of the Chill Racks may be
compromised. Higher labeling temperatures could cause
unspecific binding which may lead to lower purities when using
positive selection kits.
2 Check whether the correct sample volume was programmed.
Higher sample input volumes will result in an excess
concentration of MicroBeads leading to non-specific labeling.
182
Recovery of magnetically labeled cells is low
Refer to section 10.3.1, Positive cells have not been retained on the
column.
Viability of magnetically labeled cells is low
Dead cells have been co-enriched in the positive fraction due to
non-specific binding. Remove dead cells before separation by using
the MACS Dead Cell Removal Kit. Refer to section 10.2.2. This is prone
to occur if the number of dead cells in the starting material exceeds
the number of target cells.
10 Troubleshooting
Overall recovery is low
Cells are often lost during washing steps. Determine the number of
cells immediately before magnetic separation to check whether the
low recovery is due to this or due to problems during the cell
separation.
10
10.3.2 Depletion
Too many cells are retained on the column
1 Magnetic labeling of the cells was non-specific. In order to block
non-specific binding, use MACS FcR Blocking Reagent, human
(# 130-059-901) or FcR Blocking Reagent, mouse (# 130-092-575)
before labeling.
2 The concentration of MicroBeads and/or the temperature used
for magnetic labeling were too high. It is recommended to dilute
the MicroBeads according to the data sheet. Cells should be
incubated with MicroBeads in the refrigerator (2–8 °C).
3 Incubation time with MicroBeads was too long, leading to
background labeling. Reduce the time for incubation to the
recommended values (refer to the respective MicroBeads data
sheet). Typically, an incubation time of 15 minutes is required at
2–8 °C. For exceptions, refer to the respective MACS Cell
Separation Reagent data sheets.
4 Dead cells in the cell suspension may bind non-specifically to
MicroBeads and will then be co-enriched in the positive fraction.
Remove dead cells before separation by using the MACS Dead
Cell Removal Kit (# 130-090-101) or by Ficoll-Paque™ density
gradient.
5 Incubation temperatures were higher than recommended,
typically 2–8°C, leading to non-specific binding.
6 Inadequately stringent separation programs were chosen, e.g.,
DepleteS instead of Deplete. Please refer to the respective data
sheet for the recommended program.
Especially when using autolabelling
1 Check that the recommended maximal sample processing time
of 90 minutes was not exceeded. If the room temperature is too
high the cooling capacity of the Chill Racks may be
compromised. Higher labeling temperatures could cause
unspecific binding which may lead to lower purities when using
positive selection kits.
Non-labeled fraction shows low purity
1 Magnetic labeling was insufficient due to a low expression level
of the surface marker. It is recommended to use an indirect
magnetic labeling system (for example MACS Anti-Biotin
MicroBeads) in order to increase magnetic labeling of the cells.
10 Troubleshooting
183
2 The number of magnetically labeled cells exceeds the column
capacity. Calculate the number of expected magnetically labeled
cells. The number of cells should not exceed 2×10⁸ per sample.
If necessary, split the sample.
3 Labeling of cells was ineffective due to an incubation
temperature lower than recommended. Incubate the cells in the
refrigerator (2–8 °C) for labeling.
4 Labeling of cells was ineffective due to too much debris and or
dead cells in the sample. Debris and dead cells will nonspecifically bind to all other components present. Antibodies and
MicroBeads will be captured non-specifically and not be able to
label the cells in the positive fraction sufficiently any more.
5 Cells were not labeled with MicroBeads because the MicroBeads
were degraded. Check the expiration date. Check for sterility of
the MicroBeads, if the vial has been opened before.
6 Labeling of cells was performed for a shorter time than
recommended. The typical incubation time is 15 min. Please refer
to the respective data sheet for more details.
Especially by using autolabeling
1 Check whether the reagent vial has enough reagent to perform
magnetic cell labeling.
2 Check whether the uptake needle is positioned in the middle of
the sample tube during the mixing procedure. If not, limited
mixing could lead to low purity.
3 Refer to the respective data sheet for the recommended
separation program.
Recovery of target cells is low
Refer to section 10.3.1.
Overall recovery is low
Refer to section 10.3.1.
10.3.3 Indirect MACS® MicroBeads
Positive cells have not been retained on the column
1 The unbound primary antibody was not completely removed
and inhibits magnetic labeling with indirect MACS® MicroBeads.
Wash cells carefully (optionally, wash twice) by adding 1–2 mL of
buffer per 10⁷ cells, i.e., 10–20 times the incubation volume) after
incubation with primary antibody. Centrifuge and remove
supernatant completely, preferably with a pipette or by vacuum.
2 The concentration of the primary antibody is too low. Therefore,
magnetic labeling is not sufficient to retain the desired cells on
184
10 Troubleshooting
the column. To avoid this, the primary antibody should be
titrated carefully. For tips and hints on titration, refer to the FAQs
under Customer Support at www.miltenyibiotec.com.
10
3 The isotype of the primary antibody is not recognized by the
Anti-Immunoglobulin MicroBeads. Make sure to use appropriate
MicroBeads.
4 Check the expression of the antigen/epitope with flow
cytometry.
5 Antibodies may have degraded. Check the antibody for its
function. Storage of diluted reagents at 4 °C or –20 °C may lead to
degradation
6 Cells were not labeled with MicroBeads because the MicroBeads
were degraded. Check the expiration date. Check for sterility of
the MicroBeads, if the vial has been opened before.Antibodies
may have degraded. Check the antibody for its function. Storage
of diluted reagents at 4 °C or –20 °C may lead to degradation.
Positive fraction shows poor purity
1 The concentration of the primary antibody was too high, leading
to non-specific binding of unwanted cells. The primary antibody
should be titrated carefully. For tips and hints on titration, refer to
the FAQs under Customer Support www.miltenyibiotec.com.
2 The primary antibody shows non-specific binding. Add blocking
reagents such as BSA or immunoglobulin before labeling the
cells.
Note: Generally, MACS
Fluorochromeconjugated Antibodies
are used in a 1:11
dilution (resuspend up
to 107 cells in 100 μL of
buffer and add 10 μL of
MACS Fluorochromeconjugated Antibodies).
For details or exceptions,
refer to the MACS
Reagent data sheet.
If other than MACS
Antibodies are used,
carefully titer staining
reagents. For tips and
hints on titration, refer to
the FAQs under Customer
Support at www.
miltenyibiotec.com.
3 The incubation time during labeling was too long. Do not exceed
the incubation times specified in the respective data sheet.
4 Check the primary antibody for its specificity. When antiserum is
used, it is recommended to pre-adsorb the antiserum, e.g., on
cells which do not express the antigen, or to purify it by affinity
chromatography, ammonium sulfate precipitation, ion
chromatography, etc. in order to avoid non-specific
cross‑reaction.
10.4 Fluorescent staining
10.4.1 Cells are poorly stained
1 Fluorochrome-conjugated antibodies may have deteriorated.
Store MACS Fluorochrome-conjugated Antibodies at 2–8 °C.
2 Fluorochrome-conjugated antibodies and MACS MicroBeads
might compete for epitopes. Check the efficiency of the
fluorescent staining on cell samples that are not magnetically
10 Troubleshooting
185
labeled. Especially for weakly expressed antigens, it might be
necessary to use a fluorochrome-conjugated antibody that is
directed against an epitope different from that recognized by the
MicroBeads.
3 For indirect staining of biotinylated antibodies with streptavidinfluorochromes, please note that buffers supplemented with fetal
bovine serum (FBS) or bovine serum albumin (BSA) may contain
free biotin which can inhibit streptavidin binding to the
biotinylated antibody. Alternatively, use MACS Anti-BiotinVioBlue, -FITC, -PE, or -APC. MACS Anti-Biotin antibodies do not
bind to free biotin.
10.4.2 Cells are excessively stained
1 High background staining may occur when the concentration of
the staining reagents is too high and the incubation time for the
staining procedure is too long. The use of the pre-titrated MACS
Fluorochrome-conjugated Antibodies is recommended to
achieve optimal results.
2 Check the staining reagent for its specificity.
10.5 Contamination of tubing system
Note: To prevent
contamination, run a
Sleep program before
turning off the
instrument.
1 Decontaminate the instrument: refer to section 7.3.4 for details.
2 If the problem persists, call Technical Support.
10.6 Problems indicated by error or
warning screens
186
If errors or warnings are displayed on the screen of the instrument,
please refer to the following table. If the below measures do not clear
the fault, call Miltenyi Biotec Technical Support. To assist in the
troubleshooting process please have the instrument serial number
and details of the error message at hand (i.e. error number, module
number, file and error line). If this is not possible, please go to the
instrument Log List and view the Log Details taking care to note the
displayed parameters exactly. To discuss the table below please call
Technical Support.
10 Troubleshooting
Error
code
-5
-27
-28
-29
-257
-263
Cause
Possible remedies
Hardware module is not
initialized. After a module
malfunction an initialization of
the module is neccessary. This
might also be a subsequent
error if another error has been
displayed shortly before.
Standard valve initialization
failed. Valve may be blocked or
worn and cannot be turned
correctly or valve drive is
damaged.
Restart instrument. Please call
Technical Support if error is
thrown again.
10
Switch off the instrument, wait
for 5 seconds, and switch the
instrument on again. If error
persists touch the button
DETAILS. Exchange displayed
valve. If error is displayed again
call Technical Support.
Motor rotation detection failed. Touch button DETAILS.
Valve may be blocked or worn
Exchange displayed valve if
and cannot be turned correctly. applicable. If error is displayed
Otherwise valve or magnet drive again or magnet is displayed call
malfunction.
Technical Support.
Valve rotation hindered. Valve
Switch off the instrument for 5
may be blocked or worn and
seconds and turn it on again. If
cannot be turned correctly.
error persists, switch off
instrument, loosen air filters on
buffer/waste bottles by a half
turn, exchange columns for
dummy columns, verify that
Washing Station is free of clogs
and salt deposits (eventually
clean Washing Station), verify
that uptake needle is not
clogged. Switch on instrument,
if error persists, touch DETAILS.
Exchange displayed valve if
applicable. Make sure to prepare
samples as specified. If error is
displayed again call Technical
Support.
Needle arm movement has been If object blocked movement,
hindered.
remove object. Switch off
instrument. Wait 5 seconds.
Switch on instrument. Otherwise
or if error is displayed again call
Technical Support.
Unable to read rack bar code
Check bar code on rack or try
correctly
different rack. Make sure
ambient or direct sun light does
not hit sensor. Clean sensor to
remove salt or dust using a cloth
soaked in 70% ethanol or double
distilled water and wipe dry.
10 Troubleshooting
187
Error
code
-264
-769
-775
-777
-6006
-6009
-6216
-7001
188
Cause
Possible remedies
Unable to read rack bar code
correctly
Check bar code on rack or try
different rack. Make sure
ambient or direct sun light does
not hit sensor.
Check if syringe is fastened
correctly. Exchange if broken or
damaged. If error is displayed
again call Technical Support.
Diluter plunger could not be
initialized. Syringe not mounted
correctly, syringe damaged, or
diluter valve not positioned
correctly.
Diluter is not initialized. After a
diluter malfunction an
initialization of the module is
necessary. This might also be a
subsequent error if another
error has been displayed shortly
before.
Plunger movement blocked
because of column clogging,
blocked tubing set, or any other
cross-section constriction
Restart instrument. Please call
Technical Support if error is
thrown again.
Restart instrument and try a
Qrinse to wash out clogged
material. If error persists run
Safe program. Otherwise
exchange diluter valve or
standard valves depending on
where a constriction is
suspected. Please call Technical
Support if error is displayed
again.
Air intake during sample uptake Make sure foam on top of
although needle did not yet hit sample is not higher than 5 mm
bottom of tube. Leakage of air
above liquid level. Verify that
into system in front of bubble
sample was filtered before
sensor, liquid level has been
separation and that is uptake
overestimated, or needle did not needle is not clogged. Check for
move to bottom (as fast as
leakage at point the where the
neccessary).
needle and tubing meet, and
where the tubing to bubble
sensor meet. Verify that
connectors are appropriately
fastened.
Unexpected air in system during Check for leakage or air bubbles
sample uptake.
in tubing from uptake-needle to
valve 1. Verify that connectors
are appropriately fastened.
Calibrate needle arm. Check for
buffer supply. Otherwise call
Technical Support.
The reagent designated for the Provide all necessary reagents in
current labeling process is not
reagent rack und correct
assigned a position in the
reagent rack definition.
reagent rack.
Needle could not be retreated
Try reinitialization by touching
completely.
RETRY. Otherwise call Technical
Support.
10 Troubleshooting
Error
code
-7002
-7003
-7004
-7005
-7006
-7007
-7008
-7009
Cause
Collision of the needle with the
bottom of the tube (or any other
object) has been detected, but
resetting the collision sensor
failed although the needle has
been lifted.
Possible remedies
Push back needle to it’s proper
position in the needle holder,
check for smooth running of the
needle in its support then touch
CONTINUE. Otherwise calibrate
needle arm, especially if using a
Chill 15 Rack.
Collision of the needle with an
Check for objects hindering the
unexpected object. Resetting
movement of the needle.
the collision sensor failed as the Remove the uptake needle from
needle could not be lifted
the needle holder and verify
(already too close to top).
that there are no physical
obstructions. Press CONTINUE.
Collision of the needle with an
Check that cover of the washing
unexpected object far above
station is properly closed.
expected tube bottom.
Remove any objects hindering
the movement of the needle. If
needle hits rim of tube or top of
rack calibrate needle arm using
Calibr_1 program. Touch LIFT for
needle retreat.
Collision of the needle with an
Check that cover of the washing
unexpected object far above
station is properly closed.
expected tube bottom.
Remove any objects hindering
the movement of the needle. If
needle hits rim of tube or top of
rack calibrate needle arm. Touch
RETRY to try again.
Collision of the needle with an
Check that cover of the washing
unexpected object far above
station is properly closed.
expected tube bottom.
Remove any objects hindering
the movement of the needle. If
needle hits rim of tube or top of
rack calibrate needle arm. Touch
RETRY to try again.
Sample volume exceeds
Do not use sample volumes
maximum volume specified for exceeding the maximum
rack or program type. Remainvolume specified for rack or
ing portion of sample will not be program type. If volumes are in
processed.
specified range but error is
displayed anyway, please call
Technical Support.
The sample volume has been
Please clean outside of needle
underestimated. The needle has manually. If this error is thrown
been rinsed but might still be
frequently please call Technical
contaminated.
Support.
Collision of needle with bottom Check if tubes are correctly
of tube could not be detected at positioned in rack correspondexpected position.
ing to template programming.
Check MACS MiniSampler
connection in front of autoMACS
Pro Separator.
10 Troubleshooting
10
189
Error
code
-7010
-7011
-7012
-7013
-7014
-7015
-7018
-7021
-7022
-7023
-7024
-7026
190
Cause
Not certain if liquid surface of
sample has been detected
correctly.
Possible remedies
Touch IGNORE to continue
without liquid detection. Needle
will be moved to bottom
directly. This might result in a
subsequent warning -7008 if the
liquid level is higher than 60 mm
above the tube bottom (see
above). TOUCH retry to continue
with liquid detection. Ensure
that the tubing from the needle
arm to bubble sensor can move
freely. Adjust the tubing if
necessary. Otherwise call
Technical Support.
Restart of the device is required. Please restart instrument.
Calibration data not found.
Please calibrate needle arm
axes. Run program Calibr_1.
Calibration data not found.
Please calibrate needle arm
axes. Run program Calibr_1.
Calibration data not found.
Please calibrate tubing. Run
program Calibr_2.
Columns are not installed.
Please install columns.
Calibration data not found.
Please calibrate MACS MiniSampler using program Calibr_1.
A separation program has been Please rinse system by touching
started but system had not been WASH or abort with CANCEL.
rinsed properly.
Columns are overdue.
Please install new columns.
Touch CANCEL to abort and
then install columns, touch
CONTINUE to ignore and use old
columns (not recommended).
Plunger movement blocked
Touch CONT to discard the
because of column clogging,
remaining negative cells into the
blocked tubing set or any other waste bottle. To output negative
cross-section constriction
fraction again at lower speed,
during output of the negative
exchange negative tube with an
fraction. The negative fraction
empty tube and touch RETRY.
has not been eluted completely.
Negative cells are still remaining
in the system.
The number of programmed
Exchange rack with rack holding
sample positions exceeds the
more samples and touch OK or
actual positions of the rack on
touch CANCEL to abort and
the MACS MiniSampler.
reprogram.
The protective cover of the
Check configuration and
MACS MiniSampler seems to be connection of the protective
opened by the moving needle
cover, the MACS MiniSampler,
arm hitting the cover.
and the front support at the
autoMACS Pro Separator then
touch CONTINUE. Touch CANCEL
to abort.
10 Troubleshooting
Error
code
-7027
-7028
-7029
-7030
-7031
-7032
-7033
-7034
-7035
Cause
The protective cover of the
MACS MiniSampler needs to be
closed.
Bar code on chill rack could not
be read. MACS MiniSampler is
not connected (properly).
Possible remedies
Please close protective cover
and touch CONTINUE. Touch
CANCEL to abort.
Check electrical connection of
MACS MiniSampler. If detected
the MACS MiniSampler symbol
would be displayed in the status
screen.
Unable to read rack bar code
Check bar code on rack or try
correctly
different rack. Make sure
ambient or direct sun light does
not hit sensor. Touch RETRY to
try again, touch SELECT to set
chill rack type without
automatic bare code reading.
The instrument has been shut
Always use SLEEP to shut down
down without using SLEEP.
the instrument.
The given whole blood sample
Do not use sample volumes
size exceeds the maximum
exceeding the maximum whole
volume specified. The sample
blood sample volume specified
cannot be diluted sufficiently.
for the used chill rack type. Split
sample into several tubes,
reprogram separation parameters and restart separation. If
volumes are in specified range
but error is displayed anyway,
please call Technical Support.
Air in system during calibration Check buffer supply. Check for
of tubing.
leakage of system (unintended
air intake). Start a rinse program
(WASH ONLY) and then retry
calibration. Otherwise call
Technical Support.
Date and time is outdated.
Set time and date to actual
values.
Air intake during sample uptake Make sure foam ontop of sample
although needle did not yet hit is not higher than 5 mm above
bottom of tube. Leakage of air
liquid level. Check for leakage at
into system in front of bubble
transition of needle to tubing
sensor, liquid level has been
and tubing to bubble sensor.
overestimated or needle did not Touch CONT to process currently
move to bottom (as fast as
uptaken sample volume. Touch
neccessary).
CANCEL to abort.
Air intake during sample uptake Make sure foam on top of
although needle did not yet hit sample is not higher than 5 mm
bottom of tube. Leakage of air
above liquid level. Check for
into system in front of bubble
leakage at transition of needle
sensor, liquid level has been
to tubing and tubing to bubble
overestimated, or needle did not sensor.
move to bottom (as fast as
neccessary). Uptaken sample
has been processed. Portion of
sample is remaining in tube.
10 Troubleshooting
10
191
Error
code
-7036
-7037
-7038
-7039
-7048
192
Cause
Possible remedies
Plunger movement blocked
because of column clogging,
blocked tubing set, or any other
cross-section constriction
during output of the positive
fraction. The positive fraction
has not been eluted completely.
Positive cells are still remaining
in the system.
Resuspensed sample could not
be taken up completely (no final
air intake detected). Leakage of
air into system behind bubble
sensor. Portion of resuspended
sample is remaining in tube.
Resuspensed sample could not
be taken up completely (no final
air intake detected). Leakage of
air into system behind bubble
sensor. Portion of resuspended
cells are remaining in tube.
Required volume cannot be
provided in given Chill Rack.
Touch CONT to discard the
remaining positive cells into the
waste bottle. To output positive
fraction again at lower speed,
exchange positive tube with an
empty tube and touch RETRY.
Miscalculation of diluter
movement. Target position is
negative.
10 Troubleshooting
Check for air inlet into system
behind bubble sensor. Touch
CONT to process currently
uptaken sample volume. Touch
CANCEL to abort.
Check for leakage of air into
system behind bubble sensor.
Readjust tubing connectors and
verify correct fastening of
columns.
Exchange rack with rack able to
provide requested volume (e. g.
Chill 50 instead of Chill 15).
Touch RETRY to try again. Touch
CANCEL to abort.
Touch RETRY to use target
position 0 instead of negative
value for current diluter move.
Touch CANCEL to abort. Please
contact the Technical Support in
all cases - also if the sample has
been processed completely
after touching RETRY.
Technical data and specifications
11
11.1 Labeled schematics of the autoMACS
Pro Separator
Integrated computer for control of cell processing
All interactions with the computer are performed with a TFT color
touchscreen (figure 11.1). A memory card is used to run all programs
and to log processes.
Figure 11.1: Front view of autoMACS Pro Separator.
Automated arm with ports for sample uptake and release of cell
fractions
The automated arm (figure 11.1) is a computer-controlled part of the
autoMACS Pro Separator. It holds two ports, one for sample uptake
and release of the magnetically labeled, positive cell fraction and one
for release of the non-labeled negative cell fraction. The automated
arm moves in y and z directions. The ports are automatically washed
in the autoMACS Pro Washing Station during and after the separation
process to prevent cross-contamination between samples.
Access covers
The front door (figure 11.1) is opened sideways to allow access to the
parts of the fluidic system that require periodic maintenance by the
user. This includes the autoMACS Columns, pump syringe, and upper
valves. The bottom cover (figure 11.1) gives access to the lower valves
and can be removed by pulling gently. The washing station cover
(figure 11.1) is opened sidewards giving access to the washing
station, the peristaltic pump, and the tubing of the autoMACS Pro
Washing Station.
11 Technical data and specifications
193
194
Fluid containers and fluid container baskets
Two baskets (figure 11.1) holding two fluid containers each, are
located at each side of the instrument. Fluid containers are connected to the autoMACS Pro System with color-coded tubing and
sensors at the bottle closures for fluid level control (figure 11.1).
Figure 11.2: Left side view of the autoMACS Pro Separator.
Figure 11.3: Right side view of the autoMACS Pro Separator.
Plugs, connections and guidings
Sockets for the main plug (figure 11.4), the fluid sensor cables, the 2D
code reader cable, and the MACS MiniSampler are installed at the
rear of the instrument. Additional sockets are implemented for
further instrument development. The main power switch is located
at the right hand side of the instrument (figure 11.4). Several guidings
at the rear and sides of the instrument ease the safe connection of
tubings and sensor cables.
Figure 11.4: Rear view of the autoMACS Pro Separator.
11 Technical data and specifications
MACS MiniSampler, Chill Racks, and MACS Reagent Rack
The MACS MiniSampler (figure 11.5) can be loaded with one of three
different cooling tube racks that carry cell samples and fraction
collection tubes and the MACS Reagent Rack 4. The upper plate of
the MiniSampler moves in an x-direction and aligns the tube
openings with the port of the automated arm. The guiding of the
MiniSampler is directly attached to the corresponding slot below the
washing station. When attaching the MiniSampler sensor cable to
the corresponding socket at the rear of the instrument the MiniSampler will be automatically detected. The type of tube rack carried by
the MiniSampler is automatically recognized by the rack detector
after starting the separation process. During operation, the tube rack
should be covered with the MiniSampler lid that is connected to the
lid guiding (figure 11.5). The MiniSampler can be disconnected from
the autoMACS Pro Separator by pulling is up on the front side and
pulling it towards the user.
Figure 11.5: Rear view of MACS MiniSampler with MACS Reagent Rack and
Chill Rack 5.
The cell separation unit
The central part of the cell processing unit consists of a magnet
(figure 11.6) and two autoMACS Columns (figure 11.6). Once installed,
the autoMACS Columns become part of a closed fluidic system and
can be used for up to two weeks OR 100 separations, whichever
comes first. Fluids are put through the fluidic system with the help of
a syringe pump and five valves.
11 Technical data and specifications
11
195
196
Figure 11.6: Front of autoMACS Pro Separator with access and bottom covers
removed.
2D code reader (barcode reader)
The autoMACS Pro Separator is equipped with a 2D code reader that
uses lasers and powerful light-emitting diodes (LEDs) for illuminating
the reading area. The 2D code reader is classified as a Class 1 laser
product per standard IEC 60825-1:1993+A1:1997+A2:2001 (maximum
output 116 µW; wavelength 655 nm, pulse duration 1 ms). Please refer
also to section 1.3.4 of the autoMACS Pro Separator user manual for
associated warning and precautionary information. Refer to section
12.3 for information on installation of the 2D code reader.
Figure 11.7: Expanded view of the autoMACS Pro Separator 2D code reader
(“barcode reader”).
The technical specifications of the autoMACS Pro Separator and the
peripheral devices are as follows:
11 Technical data and specifications
11.2 Technical data and specifications of
the autoMACS® Pro Separator
Parameter
Specification
Color
Blue / orange
Footprint
605 mm × 343 mm (w × d)
Footprint with MiniSampler
605 mm × 455 mm (w × d)
Height
392.5–454 mm (adjustable
touchscreen)
Weight
25 kg
Input voltage (autoMACS Separator)
100–240 VAC, 50–60 Hz
Power consumption
200 VA
Fuses
2×T4A/250
Programs
12 preset
Sample volume (input)
0.25–50 mL
Sample volume (output)
0.5–52 mL
Column capacity
4×10⁹ cells / sample
2×10⁸ magnetically labeled cells /
sample
15 mL of whole blood
11
Table 11.1: Technical data for the autoMACS Pro Separator.
11 Technical data and specifications
197
autoMACS Pro Separator
RS232-Interface (labeled “COM”)
Pins 1: 4, 6, 9 NC
Pin 2: RXD
Pin 3: TXD
Pin 5: GND
Pin 7: RTS
Pin 8: CTS
RS232-Interface (labeled “RS232/
AUX”)
Not in use
Pins 1, 4, 6, 7, 8, 9: NC
Pin 2: RXD
Pin 3: TXD
Pin 5: GND
RS232-Interface + DC-Output
(labeled “RS232/BCR”)
Pins 4, 6: NC
Pin 1: Input
Pin 2: RXD
Pin 3: TXD
Pin 5: GND
Pins 7, 8: Shorted
Pin 9: 5 VDC / 0.5 A
CAN-Bus + DC-Output (labeled
“External CAN”)
Pins 1, 4, 8: NC
Pin 2: CAN-L
Pins 3, 6: GND
Pins 5, 9: 24 VDC / 2A
Pin 7: CAN-H
AC-Output (labeled “Bottle Sensor”)
Pins 1, 2, 3, 4, 5: 5 VAC / 10 kΩ
Pins 6, 7, 8, 14, 15: GND
Pins 9, 10, 11, 12, 13: Input
CAN-Bus (labeled “CAN1” or
“CAN2”)
Pins 1, 4, 5, 8, 9: NC
Pin 2: CAN-L
Pins 3, 6: GND
Pin 7: CAN-H
Table 11.2: Pin assignment for autoMACS Pro Separator.
The autoMACS® Pro Separator is labeled as a protection class I
instrument and must be plugged into a grounded power outlet, refer
to section 1.
The main power supply cord and plug of the instrument shall comply
with following specifications (USA and Canada only): UL listed and
KAM cord, minimum type SJ, minimum 18 AWG, 3 conductors. Rated
for a minimum temperature of 60 °C. Provided with grounding-type
(NEMA 5-15P) attachment plug, rated 125 Vac, 10 A. Opposite end
terminates in IEC 320 style connector, rated 125 Vac, 10 A.
Conditions of operation: 15–30 °C with 0–85% humidity (noncondensing) at a maximum altitude of 2000 m. Supply voltage
fluctuations up to +/-10% of the nominal voltage. Transient
overvoltages present on the mains supply: category II. The
instrument is suitable for rated pollution degree 2. Emission sound
pressure level at workstation < 70 dB(A).
The autoMACS Pro Separator is not specified for use in the cold
198
Model
11 Technical data and specifications
room. The autoMACS Pro Separator has been investigated by
Underwriters Laboratories in accordance with the standards UL
61010-1, CAN/CSA- C22.2 No. 61010-1, and IEC 61010-2-081 and meets
the intent of the directive 2004/108/EC (electromagnetic
compatibility) and 2006/95/EC (low voltage equipment).
EMC:
EN 61326-1
EN 61000-3-2
EN 61000-3-3
Low voltage equipment:
EN 60825-1
EN 61010-1
EN 61010-2-081
Compliance was demonstrated by conformance to the following
standards which have been listed in the Official Journal of the
European Communities:
Compliance was demonstrated by conformance to the following FCC
Rules of the Code of Federal Regulations:
47 CFR §15, class B.
11
11.3 Technical data and specifications of
the MACS® MiniSampler
Parameter
Specification
Model
MACS MiniSampler
Input voltage
24 VDC
Current
0.8 A
Sub D9 interface
with shielding
Pin 1: NC
Pin 2: CANPin 3: GND
Pin 4: NC
Pin 5: +24 V
Pin 6: GND
Pin 7: CAN+
Pin 8: NC
Pin 9: +24 V
Table 11.3: Technical data and pin assignment for MACS MiniSampler.
11 Technical data and specifications
199
The MACS® MiniSampler is labeled as a protection class III instrument
and must only be plugged into the connector labelled with “External
CAN” of the autoMACS Pro Separator, refer to section 1.2.
Size without lid: 182 mm × 148 mm × 47 mm
Size with lid: 280 mm × 153 mm × 172 mm
Weight: 1.5 kg
The MACS MiniSampler is designed for operation with three different
tube racks and a reagent rack.
Rack type
Slots
Maximum
number of
samples
Maximum
sample
volume
Maximum
number of
cells per tube
Chill 5
24 × 5 mL
6 (5 mL tubes) 2.5 mL
5 × 10⁸
Chill 15
15 × 15 mL
5 × 5 mL
5 (15 mL
tubes)
12.5 mL
2.5 × 10⁸
Chill 50
6 × 50 mL
3 × 15 mL
3 × 5 mL
3 (50 mL
tubes)
50 mL
4 × 10⁸
Table 11.4: MACS Cooling Tube Racks: Chill Racks 5, 15, and 50.
Rack type
Slots
MACS Reagent Rack 4
4 × MACS Reagent vials
Table 11.5 MACS Reagent Rack 4
Conditions of operation: 15–30 °C with 0–85% humidity (noncondensing) at a maximum altitude of 2000 m.
The MACS MiniSampler is not specified for use in the cold room. The
MACS MiniSampler has been investigated by Underwriters
Laboratories in accordance with the standards UL 61010-1 and CAN/
CSA -C22.2 No. 61010-1 and meets the intent of the directive
2004/108/EC (electromagnetic compatibility).
LAB. EQUIP 52ZA
200
Compliance was demonstrated by conformance to the following
standards which have been listed in the Official Journal of the
European Communities:
EN 61326-1
EN 61000-3-2
EN 61000-3-3
Compliance was demonstrated by conformance to the following FCC
rules of the Code of Federal Regulations:
47 CFR §15, class B.
11 Technical data and specifications
Hardware and software installation
12
12.1 Installation of new software
Note: Do not remove or
insert a memory card
while the instrument is
turned ON. The memory
card must remain in the
unit. Removing the
memory card during
operation will abort all
running processes.
After installing an autoMACS Pro software update it is necessary to
calibrate the instrument as instructed below. The autoMACS Pro
Separator contains various control boards. During initialization of the
instrument with a software card, all of these components are
automatically checked for the currently installed software.
12.1.1 Exchanging the software cards
1 Ensure the instrument is switched-off before proceeding.
2 Note the memory card slot at the right hand side of the touch
screen.
Figure 12.1: Location of the memory card slot.
3 Remove the old memory card by pressing the black release
button beneath the card slot.
4 Insert the new memory card.
5 Switch the instrument ON. A dialog box will appear prompting
the operator to proceed if desired.
6 Select Update to confirm that you wish to proceed.
12 Hardware and software installation
201
Note: During the panel
software update process,
the display may turn
black or white or may
freeze or flicker. This
process may take several
minutes. The progress
will be indicated by an
acoustic signal.
* If warning “7030” is
reported confirm by
selecting OK.
* If warning “7016” is
reported select Ignore.
Figure 12.2: The user must confirm any update. The current software (panel
software version) will be overwritten.
12.2 Calibration of the autoMACS® Pro
Separator
The autoMACS Pro Separator is calibrated by using the two programs,
Calibr_1 and Calibr_2. Calibration 1 is recommended after
installation of new software. Calibration 2 is always necessary when
the pump syringe, the Diluter Valve, or the tubing are changed.
Calibr_1 is used to calibrate the settings of the needle arm (x, y, and
z-axis), i.e., alignment of the needle arm with the washing station, the
MACS Cooling Tube Racks, and the bottom detection sensor control.
Calibr_2 automatically calibrates the liquid volume control. This is
crucial for the correct measurement and processing of the sample
volumes. The fluidic system must be filled with buffer before
commencing this step, i.e., the Rinse program must be performed.
Calibration 1: Beginning the calibration sequence
1 Select menu Option.
2 Highlight User settings and select Calibr_1.
3 Select Run.
4 Select Calibrate to proceed. The first of five (1/5) calibration
steps will begin, namely, calibration of the washing station.
Note: If warning “-7016:
Columns are not
installed. Start column
exchange program.“
appears, select Ignore.
202
12 Hardware and software installation
12
Figure 12.3: Performing calibration of the needle-arm: a 5-step calibration
process.
Calibration 1: Calibration of the washing station – step 1/5
5 Select Calibrate and then Use to proceed with calibration. The
needle arm will automatically move towards the washing station
and should be located directly above the center of the rear
opening of the washing station.
Figure 12.4: Calibration of the washing station. To use already saved settings
select “Use“. To reset calibration settings (not recommended) select “Reset“.
6 Select Height and check the central positioning of the uptake
needle by using the buttons Move up and Move down. Select
Position and adjust by using the Move back and Move fwd
buttons. Select Done after making necessary adjustments.
Figure 12.5: Test calibration of the needle arm position in the washing station.
The position of the uptake needle should appear as shown above.
12 Hardware and software installation
203
7 Select Save to save the new configuration.
Figure 12.6: Saving new settings for calibration of the washing station.
Calibration 1: Calibration of the tube rack – step 2/5
8 Select Calibrate to continue with the calibration process.
9 Place a MACS Cooling Tube Rack with sample tubes onto the
MiniSampler. It is recommended to use a Chill 5 Tube Rack.
10 Select Done and then select Use (recommended) to start the
calibration using current settings.
11 Check the central positioning of the uptake needle on the
bottom of the tube by using the needle navigation buttons
(Move back, Move fwd, Height). Ensure the needle is
positioned at the bottom center of the tube in row A of the tube
rack. Select Done to continue.
Figure 12.7: The tube must appear.
12 Select Save to store the new settings.
Calibration 1: Calibration of the bottom detection – step 3/5
13 Select Calibrate to proceed with calibration.
14 Place a MACS Cooling Tube Rack onto the MACS MiniSampler.
15 Select Done.
204
12 Hardware and software installation
16 Select Use to start the calibration at current position
(recommended). Select Reset to reset the position to factory
settings. The needle will position itself a fraction of a millimeter
over the surface of the Chill Rack at a point equidistant to the
tube coordinates A1, A2, B1, B2. It should not make contact with
the plastic surface.
Note: The uptake needle
moves to the surface
of the tube rack. The
position of the needle
tip is correct if a sheet of
paper can be easily slid
between the needle tip
and the surface of the
tube rack.
12
Figure 12.8: Bottom detection calibration. In the case of a Chill 5 Tube Rack
the needle will be positioned midpoint (equidistant) to tube coordinates A1,
A2, B1, B2.
17 To adjust the position, select Change or select Done if the
current settings are correct.
18 If Change was selected (see above), use the Up and Down
navigation buttons to adjust the position as required.
Figure 12.9: If necessary, adjust the z-axis of the needle tip using “Up“ and
“Down“ navigation tools.
19 Select OK and Done to save the current configuration.
Calibration 1: Calibration of the x-axis – step 4/5
20 Select Calibrate to proceed with calibration.
21 Place a MACS Cooling Tube Rack and a MACS Reagent Rack 4
onto the MACS MiniSampler. It is recommended to use a Chill 5
Tube Rack.
22 Select Done.
12 Hardware and software installation
205
23 Select Use to start the calibration at current position
(recommended). Select Reset to use factory settings.
Note: It is possible that the
stored calibration value is
zero!
24 If necessary, adjust the central positioning of the uptake needle
by using the needle navigation buttons (Move left, Move right,
Height). The uptake needle must be positioned above the center
of the tube in row A of the tube rack.
In this event, step 23 will
be skipped. Continue
with step 24.
Figure 12.10: The uptake needle should be positioned as shown above.
Figure 12.11: Adjust MiniSampler position.
Note: Due to mechanical
limits of the MiniSampler
the correction potential
is limited. Exceeding
these limits is reported
by the message
“standard range
exceeded”.
Calibration outside the
standard range is not
recommended. The
outer positions (reagent
vial and sample row
6) will not be reached
properly. Labeling in
sample position 6 will
be prohibited. In this
event contact Technical
Support (refer to section
13).
25 Select Save to store new settings.
Calibration 1: Test current calibration settings – step 5/5
26 Select Test to test new configurations. The autoMACS Pro
Separator will perform a complete test of Calibration 1 settings.
206
Figure 12.12: It is important to test the new calibration settings. To navigate
back through the calibration steps, select “Previous“.
12 Hardware and software installation
27 Place a MACS Cooling Tube Rack onto the MACS MiniSampler.
28 Select Use to start the calibration at the current position
(recommended). Select Reset to reset the position to factory
settings.
12
29 Place a MACS Reagent Rack 4 onto the MACS MiniSampler.
30 Select Done.
31 Check all approached positions by using the needle navigation
buttons Move up and Move down, then select Done.
32 If any errors or misalignments were noted, repeat the entire
process.
Calibration 2
1 Select menu Option.
2 Highlight User settings and select Calibr_2.
3 Select Run.
Figure 12.13: Performing “Calibration 2“ by selecting program “Calibr_2“.
4 Select Calibrate. The calibration is performed automatically.
5 Press Save to finish Calibr_2.
12 Hardware and software installation
207
12.3 Installation of the 2D code reader
(barcode reader)
Note: Carefully read
the chapter 1 before
installing the 2D code
reader.
If the autoMACS Pro
Separator is not provided
with the optional
2D code reader, an
autolabeling package is
required for installation.
Please contact Miltenyi
Biotec or your local
distributor for further
information. The
autolabeling package
contains:
Figure 12.14: Contents of the autoMACS Pro Separator upgrade kit.
1 Switch OFF and unplug instrument.
2 Open and remove the washing station cover.
1× 2D code reader
1× MACS Reagent Rack 4
1× Autolabeling Software
Tools for installation (a 2
mm allen key, a headless
screw, an optical frame
for the 2D code reader
window in the washing
station cover, and a screw
driver for connecting
the reader to the
outlet at the rear of the
instrument).
Figure 12.15: Removing the washing station cover
3 Remove the peristaltic pump tube at the right hand side of the
washing station.
Figure 12.16: Remove the peristaltic pump tube
4 Unscrew the thumb screw. Pull to remove washing station from
instrument. Take care to clean spilled fluids with ethanol or
disinfectant. Remove the washing station.
208
12 Hardware and software installation
12
Figure 12.17: Unscrew the thumb screw.
5 Note the position of the 2D code reader port.
Figure 12.18: The position of the 2D code reader port.
6 Guide the cable of the 2D code reader underneath the lower
front access cover at the left-hand side. Make sure that 2D code
reader cable is located in-between the peristaltic pump tubes.
Figure 12.19: Make sure that 2D code reader cable is located in between the
peristaltic pump tubes.
7 Insert 2D code reader pin into corresponding opening.
12 Hardware and software installation
209
Figure 12.20: Inserting the 2D code reader.
8 Fix the connection by fastening the headless screw in the tapped
bore hand-tight with help of a 2 mm allen key.
Note: Please check if
headless screw is already
present in the tapped
bore. Otherwise use
headless screw provided
with autolabeling
package.
Figure 12.21: Fastening with the allen key.
9 Reinstall the washing station. Make sure that the cable is installed
straight and is guided between the peristaltic pump tubing.
210
12 Hardware and software installation
12
Figure 12.22: Reinstall washing station.
10 Remove the black plastic square from the 2D code reader
window of the Washing Station Cover (not shown). Snap in black
optical frame. Reinstall and close the washing station cover.
11 Guide the 2D code reader cable underneath the instrument.
Connect the 2D code reader plug with the corresponding outlet
at the back of the instrument labeled “RS232/BCR”. Use the screw
driver to fasten the screws of the connecter.
Figure 12.23: Location of the cable sockets at the back of the autoMACS Pro
Separator
12 Plug in and switch on instrument.
13 Select menu Option. Highlight User Settings and O_bcr. Press
Run.
Figure 12.24: Setting up the software to recognize the 2D code reader.
12 Hardware and software installation
211
14 Select Change.
15 Select Keyence.
16 Switch OFF instrument. Wait 5 seconds and switch ON instrument
again.
17 Replace the cover.
212
12 Hardware and software installation
13
Technical support
Miltenyi Biotec offers a full range of customer technical support
options for your autoMACS Pro Separator.
For support and technical questions, or if you think your autoMACS
Pro Separator is defective, please contact your local Miltenyi Biotec
representative or Miltenyi Biotec’s technical support team:
Germany/Austria/Switzerland
Miltenyi Biotec GmbH
Friedrich-Ebert-Str. 68
51429 Bergisch Gladbach
Germany
Phone +49 2204 8306-830
Fax +49 2204 8306-89
[email protected]
Benelux
Miltenyi Biotec B.V.
Postbus 85183
3508 AD Utrecht
Netherlands
Customer service, Belgium
Phone 0800 94016
Fax 0800 99626
[email protected]
USA/Canada
Miltenyi Biotec Inc.
2303 Lindbergh Street
Auburn, CA 95602, USA
Phone +1 530 888 8871
Fax +1 530 888 8925
Freephone 800 FOR MACS
Freephone +1 800 367 6227
[email protected]
Customer service, Luxembourg
Phone 800 24971
Fax 0800 24984
Australia
Miltenyi Biotec Australia Pty. Ltd.
Unit 16A, 2 Eden Park Drive
North Ryde, NSW 2113
Australia
Phone +61 02 8877 7400
Fax +61 02 9889 5044
[email protected]
13 Technical service
Customer service, Netherlands
Phone 800 4020120
Fax 0800 4020100
China
Miltenyi Biotec Shanghai Office
Fareast International Plaza A, Rm. 2301
No. 319 Xianxia Rd.
Shanghai 200051, P.R.China
Phone +86 21 62351005
Fax +86 21 62350953
[email protected]
213
214
Singapore
Miltenyi Biotec Asia Pacific Pte Ltd.
7, Temasek Boulevard #16–06
Suntec Tower One
Singapore 038987
Phone +65 6238 8183
Fax +65 6238 0302
[email protected]
Italy
Miltenyi Biotec S.r.l.
Via Persicetana, 2/D
40012 Calderara di Reno (Bologna)
Phone +39 051 64 60 411
Fax +39 051 64 60 499
[email protected]
Japan
Miltenyi Biotec K.K.
Nittsu-Etai Building 5F
16-10 Fuyuki, Koto-ku,
Tokyo 135-0041, Japan
Phone +81 3 56 46 8910
Fax +81 3 5646 8911
[email protected]
Spain
Miltenyi Biotec S.L.
C/ Luis Buñuel 2
Ciudad de la Imagen
28223 Pozuelo de Alarcón (Madrid)
Phone +34 91 512 1290
Fax +34 91 512 1291
[email protected]
France
Miltenyi Biotec
10 rue Mercoeur
75011 Paris, France
Phone +33 1 56 98 16 16
Fax +33 1 56 98 16 17
[email protected]
United Kingdom
Miltenyi Biotec Ltd.
Almac House
Church Lane, Bisley
Surrey GU24 9DR
Phone +44 1483 799 800
Fax +44 1483 799 811
[email protected]
13 Technical service
Limited warranty
Except as stated in a specific warranty statement, which may
accompany your autoMACS Pro Separator (the “Product”), or unless
otherwise agreed in writing by an authorized representative of
Miltenyi Biotec, Miltenyi Biotec’s warranty, if any, with respect to this
Product is subject to the terms and conditions of sale (the “Terms”) of
the company within the Miltenyi Biotec group which supplied the
Product. The Terms may vary by country and region. Copies of these
Terms are available on request or at www.miltenyibiotec.com.
Nothing in this document should be construed as constituting an
additional warranty.
Miltenyi Biotec‘s product warranty only covers Product issues caused
by defects in material or workmanship encountered during ordinary
use, as described in the user manual or other documentation
provided by Miltenyi Biotec; it does not cover Product issues not
arising out of defects in material or workmanship, including but not
limited to Product issues resulting from: failure to follow installation,
operating and/or maintenance instructions, or environmental
conditions prescribed in, this user manual or other Product documentation; misuse; abuse; neglect; mishandling; unauthorized or
improperly performed maintenance or repairs; accident; acts of God;
limitations of technology; electrical current fluctuations; modification of or to any part of the Product; use of accessories, spare parts
and/or consumables other than those recommended by Miltenyi
Biotec; or normal wear and tear. Miltenyi Biotec‘s product warranty
does not cover products sold AS IS or WITH ALL FAULTS, or which had
its serial number defaced, altered or removed, or any consumables,
or parts identified as being supplied by a third party; those thirdparty accessories or parts may be covered by a separate warranty
from their manufacturer.
Miltenyi Biotec must be informed immediately, if a claim is made
under such warranty. If a material or manufacturing defect occurs
within the warranty period, Miltenyi Biotec will take the appropriate
steps to restore the full usability of your Product.
Limitation on damages:
Miltenyi Biotec shall not be liable for any incidental or consequential damages for breach of any express or implied warranty
or condition on this Product.
14 Limited warranty
14
215
216
Some states or jurisdictions do not allow the exclusion or limitation
of incidental or consequential damages, so the above limitations or
exclusions may not apply to you. This warranty statement gives you
specific legal rights and you may have other rights, which may vary
from county to country or jurisdiction to jurisdiction.
14 Limited warranty
15
Glossary
Air filter: Hydrophobic 0.2 µm air filter attached to the bottle
closure. Used to vent the bottle and—at the same time—prevent
contaminants from entering the fluid bottle.
Air filter connector: Luer-to-thread connector for attaching the air
filter to the threaded bottle closure vent.
APC: Allophycocyanin
autoMACS Columns: Specifically designed autoMACS Columns;
reusable for two weeks or for 100 separations within these two
weeks.
autoMACS Column 1: First autoMACS Column in which labeled cells
are retained during positive selection and depletion programs. The
autoMACS Column 1 occupies the left slot of the black magnet cover.
autoMACS Column 2: The second autoMACS Column is used during
double selection programs. The autoMACS Column 2 occupies the
right slot of the black magnet cover.
autoMACS Pro Separator: Automated magnetic cell separator, also
referred to as device or instrument.
autoMACS Running Buffer: Sterile and ready-to-use solution for
cell separation and washing programs. The tubing connector is colorcoded blue.
autoMACS Pro Washing Solution: Sterile and ready-to-use solution
for washing and special rinsing programs. The tubing connector is
color-coded green.
Bottle closure: Vented screw-on closure with fluid uptake ports /
canules and distribution tubes. The bottle closures contain fluid
sensors and are equipped with sensor cable connectors.
Column Connector: Luer-to-thread connector connecting the
autoMACS Columns to the fluidic system.
Column substitute: Column without spheres that replace the
autoMACS Columns for long-term storage and shipment. Column
substitutes cannot be used for cell separations.
15 Glossary
217
218
Depletion: Isolation of target cells by labeling all cells other than the
target cells (non-target cells?) with MACS MicroBeads and subsequently performing a MACS Separation. The non-labeled fraction
contains the target cells.
Deplete: Depletion program, standard mode: a normal cell deposition rate is used. The non-labeled cells are eluted in row B of the
sample rack. This is the optimal program to be used in combination
with MACS Cell Isolation Kits or to achieve the highest recovery rate
of untouched cells.
Depletes: Depletion program, sensitive mode: a slow cell deposition
rate is used (1 mL/min). The non-labeled cells are eluted in row B of
the sample rack. This program is optimized for depletion of those
cells that weakly express the antigens used for magnetic labeling, or
to achieve optimal purity of the untouched cell fraction.
Depl05: Special depletion program: the cell deposition rate is 0.5
mL/min. The non-labeled cells are eluted in row B of the sample rack.
This program is used for strong depletion of those cells that weakly
express the antigens used for magnetic labeling, or to achieve the
highest purity of the untouched cell fraction. However, choosing
Depl05 might result in a reduced recovery of the target cell fraction.
Depl025: Special depletion program: the cell deposition rate is 0.25
mL/min. The non-labeled cells are eluted in row B of the sample rack.
This program is used for very strong depletion of those cells that
weakly express the antigens used for magnetic labeling, or to
achieve the highest purity of the untouched cell fraction. However,
choosing Depl025 might result in a reduced recovery of the target
cell fraction.
FITC: Fluorescein isothiocyanate
Fluid container: 1.5 L bottles holding the fluids for operational use
of the autoMACS Pro Separator. Fluid sensors monitor the fluid levels
in the containers for Running Buffer, Washing Solution, and waste via
electrolyte conductivity. The fluid level in the container for the 70%
ethanol cannot be monitored as no electrolytes are present in the
solvent.
Fluid sensors: This sensor type measures electrolyte conductivity
and is an integral part of the bottle closures of the fluid containers
for waste, Running Buffer, and Washing Solution.
Fluid sensor cable: Cable connecting the fluid sensor to the
autoMACS Pro Separator. The sensor cable connectors on the bottle
closures are color-coded: red for waste, green for Washing Solution,
and blue for Running Buffer.
15 Glossary
Fraction collection tube: 5 mL, 15 mL, or 50 mL plastic sample
tubes to collect the positive and negative fractions. The process has
been optimized using tubes from BD Falcon.
Front door: The front door opens sidewards, giving access to the
autoMACS Columns, pumps, valves, washing station, and tubings.
MACS Technology: Technology developed by Miltenyi Biotec for
immunomagnetic labeling and subsequent separation of cells or
biomolecules in a high-gradient magnetic field.
MACS MicroBeads: Super-paramagnetic particles conjugated to
antibodies for magnetic labeling of cells or biomolecules.
Magnet cover: Black cover surrounding the magnets. The magnet
cover is located in the center of the fluidic system and has slots for
the autoMACS Columns.
Memory card: Removable compact flash/SD RAM card containing
the autoMACS Pro Programs.
Memory card slot: Slot located on the right hand side of the
autoMACS Pro Touchscreen, giving access to the memory card. The
memory card should be removed by trained personnel only.
Negative fraction: Sample fraction containing the non-labeled cells
that pass through the autoMACS Column while the column is placed
in the magnetic field.
PE: Phycoerythrin
PerP: Peridinin chlorophill protein
Ports: The automated arm carries two ports: the port located
proximal to the instrument is designed for computer-controlled fluid
detection and distribution such as magnetic labeling, sample mixing,
sample uptake, and release of the magnetically labeled fraction
while the port in the front releases the non-labeled fraction.
Positive fraction: Sample fraction containing the cells labeled with
MACS MicroBeads. These cells are retained on the column while the
column is placed in the magnetic field. The cells are eluted from the
column after the column has been removed from the magnet.
Positive selection: Process of isolating cells by labeling the target
cells with MACS MicroBeads and performing a MACS Separation. The
labeled target cells are eluted in row C of the tube rack.
Possel: Positive selection program in standard mode using one
autoMACS Column. The target cells are eluted in row C of the sample
rack. This program is used for cells with normal to high frequency
and with normal antigen expression.
15 Glossary
15
219
220
Possel_s: Positive selection program, sensitive mode, using one
autoMACS Column. The target cells are eluted in row C of the
sample rack. This program is used for cells with normal to high
frequency which weakly express the antigens used for magnetic
labeling, or to achieve the highest recovery of the target cells.
Posseld: Positive selection program, normal mode, using both
autoMACS Columns. The target cells are eluted in row C of the
sample rack in a volume of 0.5 mL. This program is used to isolate
rare cells or to achieve a higher purity of the target cells.
Posseld2: Special positive selection program, normal mode, using
both autoMACS Columns. The target cells are eluted in row C of
the sample rack in a volume of 2 mL. This program is used to
isolate rare cells from whole blood, cord blood, or large cell
samples, and to achieve a higher recovery of the target cells.
Posselds: Positive selection program, sensitive mode, using both
autoMACS Columns. The target cells are eluted in row C of the
sample rack in a volume of 2 mL. This program is used to isolate
rare cells that weakly express antigens used for magnetic labeling
(e.g. CD133).
Posselwb: Special positive selection program using both
autoMACS Columns for the isolation of cell subsets from of whole
blood. The target cells are eluted in row C of the sample rack.
Running Buffer bottle: Container for Running Buffer. The bottle
closure is equipped with a fluid sensor. The closure, the fluid
sensor cable, and the tubing connector are color-coded blue.
Safe solution: Solution of 1% (w/v) sodium hypochlorite in
distilled water used to decontaminate the autoMACS Pro fluidic
system with the Safe program. The safe solution is fed into the
system from a 50 mL tube. Upon completion of the Safe program,
the fluidic system contains Running Buffer.
Storage solution: Solvent used during the Sleep, Store, Safe, and
Column Exchange programs to minimize the contamination risk.
The fluidic system of the autoMACS Pro Instrument is filled with
MACS Storage Solution (70% ethanol).
Storage solution bottle: Container for 70% ethanol. The bottle
closure, the fluid sensor cable, and the tubing connector are
color-coded black.
Store program: Prior to long term storage, the Store program
should be applied. During this procedure the autoMACS Columns
are replaced with substitutes. Upon completion of the Store
program, the fluidic system contains 70% ethanol.
15 Glossary
Syringe pump: Computer-controlled high precision syringe
pump with Teflon® seal plunger that drives fluids through the
autoMACS Pro fluidic system.
Touchscreen: High resolution TFT color touchscreen located on
top of the autoMACS Pro Separator. The touchscreen is used to
operate and monitor the instrument through on-screen menus.
Tubing connector: Plastic threaded connector with square nut
used to connect the tubings to the bottle closures, the columns,
the pump, or valves.
Tubing system: Permanent set of Teflon® tubing through which
fluids circulate in the autoMACS Pro Separator fluidic system.
Tube racks: Three different acrylic tube racks are provided with
the instrument. They are designed for optimal positioning of
sample tubes and fraction collection tubes at the ports of the
automated arm. They contain a coolant allowing to pre-cool the
racks in the refrigerator for cooling of the cells during the
separation process. The racks have four tube positions for each
sample. Position A holds the sample tube containing the starting
material. Position B holds the tube for the non-labeled fraction.
Position C holds the tube for the magnetically labeled fraction.
Position D is auxiliary. For details, refer to the table in section 4.1.2.
Washing Solution bottle: Container for autoMACS Pro Washing
Solution. The bottle closure is equipped with a fluid sensor. The
closure, the fluid sensor cable, and the tubing connector are
color-coded green.
Waste container: Container for waste fluid. The closure is
equipped with a fluid sensor. The closure, the fluid sensor cable,
and the tubing connector are color-coded red.
Whole Blood MicroBeads: MACS MicroBeads developed for
isolating target cells directly from whole blood by using the
autoMACS Pro Separator.
Wrench: Black wrench used to tighten and loosen tubing
connections.
15 Glossary
15
221
autoMACS® Pro Separator
Germany/Austria/
Switzerland
Miltenyi Biotec GmbH
Friedrich-Ebert-Straße 68
51429 Bergisch Gladbach
Germany
Phone +49 2204 8306-0
Fax +49 2204 85197
[email protected]
Australia
Miltenyi Biotec
Australia Pty. Ltd.
Unit 16A , 2 Eden Park Drive
North Ryde, NSW 2113
Australia
Phone +61 2 8877 7400
Fax +61 2 9889 5044
[email protected]
USA/Canada
Miltenyi Biotec Inc.
2303 Lindbergh Street
Auburn, CA 95602, USA
Phone 800 FOR MACS
Phone +1 530 888 8871
Fax +1 530 888 8925
[email protected]
Benelux
Miltenyi Biotec B.V.
Postbus 85183, 3508 AD Utrecht
The Netherlands
[email protected]
www.miltenyibiotec.com
Customer service Netherlands
Phone 0800 4020120
Fax 0800 4020100
Customer service Belgium
Phone 0800 94016
Fax 0800 99626
Customer service Luxembourg
Phone 800 24971
Fax 800 24984
China
Miltenyi Biotec Trading
(Shanghai) Co., Ltd.
Shanghai Office
Fareast International Plaza A
Rm. 2301, No. 319 Xianxia Rd.
Shanghai 200051, P.R. China
Phone +86 21 62351005
Fax +86 21 62350953
[email protected]
France
Miltenyi Biotec SAS
10 rue Mercoeur
75011 Paris, France
Phone +33 1 56 98 16 16
Fax +33 1 56 98 16 17
[email protected]
Japan
Miltenyi Biotec K.K.
Nittsu-Eitai Building 5F
16-10 Fuyuki, Koto-ku, Tokyo
135-0041, Japan
Phone +81 3 5646 8910
Fax +81 3 5646 8911
[email protected]
Singapore
Miltenyi Biotec
Asia Pacific Pte Ltd.
100 Beach Road
#28-06 to 28-08 Shaw Tower
Singapore 189702
Phone +65 6238 8183
Fax +65 6238 0302
[email protected]
Spain
Miltenyi Biotec S.L.
C/Luis Buñuel 2
Ciudad de la Imagen
28223 Pozuelo de Alarcón
(Madrid), Spain
Phone +34 91 512 12 90
Fax +34 91 512 12 91
[email protected]
140-002-016.04
User manual
United Kingdom
Miltenyi Biotec Ltd.
Almac House, Church Lane
Bisley
Surrey GU24 9DR, UK
Phone +44 1483 799 800
Fax +44 1483 799 811
[email protected]
Italy
Miltenyi Biotec S.r.l.
Via Persicetana, 2/D
40012 Calderara di Reno (BO)
Italy
Phone +39 051 6 460 411
Fax +39 051 6 460 499
[email protected]
Miltenyi Biotec provides products and services worldwide. Visit www.miltenyibiotec.com/local to find your nearest Miltenyi Biotec contact.
Unless otherwise specifically indicated, Miltenyi Biotec products and services are for research use only and not for therapeutic or diagnostic use.
MACS is a registered trademark of Miltenyi Biotec GmbH. Copyright © 2010 Miltenyi Biotec GmbH. All rights reserved.
Version 02