1
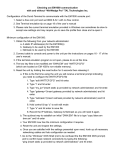
How to use Putty
Putty is a free Secure Shell client for Windows that will allow you to connect to a Linux Server. You will
be using putty extensively in this course so it is critical that you configure it correctly and learn how to
use it. Please do the following:
1) Download PuTTy.exe from http://www.chiark.greenend.org.uk/~sgtatham/putty/download.html
Place the PuTTy.exe file in your Windows folder.
a. Make a shortcut to PuTTy.exe on your desktop by right-clicking on your desktop, select
New, Shortcut, and navigate to PuTTy.exe
2) When you click on the putty shortcut you should see a screen like this:
3)
To configure a new session do the following:
a. Enter the IP number of your assigned Linux server.
b. Put SVCLinxServer in the Saved Sessions field
c. Click save
d. Connect to the SVC Lab (VPN in to MV or WIC)
e. Click Open
4)
You should get a message from the server regarding security.
a. Click Yes
b. This message will only be sent the first time you login.
5)
You should get a login prompt.
6)
Log in initially as the username root password of cisIsTheBest! (remember the ! at the end)
How to use Putty
7)
After logging in create a new user using your last name as the username:
a. Type useradd yourMySVCusername –p yourMySVCPassword at the prompt
8)
If you wish you may also change the screen colors by doing the following:
a. Click on your putty shortcut
b. Select your SVCLinuxServer Session and Click Load
c. In the left panel click on Colours
d. Select Default Foreground, Modify
1)
Black works well
e. Select Default Background, Modify
1)
White works well
f. Select Appearance
1)
Set the font used for terminal window
2)
Change
3)
Fixedsys
4)
Click OK
g. Click Session
h. Click Save
9)
To test your new setting click Open.
10)
If you cannot successfully connect to your Linux server, and you are first connected to the
network lab, let me know as soon as possible.
11)
To exit the putty session type exit.