1
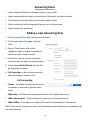
Profile and Settings User Guide Amplex Internet 27800 Lemoyne, Suite F Millbury, OH 43447 Free LOCAL support Mon. - Fri. 7am - 10pm [email protected] 888-419-3635 1 Table of Contents Logging Into Your Phone Account Page 3 Home Page 4-5 Profile Settings Page 5 Caller ID Settings Page 5 Account Password Page 5 Messages Pages 6-10 Check Voicemail Page 6 Configuring Voicemail Pages 7-8 Configure Greetings Pages 8-9 Configuring Recorded Names Page 9 Unified Messaging Page 10 Contacts Pages 11-13 Adding New Contacts Page 11 Exporting Contacts Page 12 Importing Contacts Page 13 Call History Pages 13-14 Adding Call History Filters Page 14 Clearing Call History Filters Page 14 Exporting Call History Page 14 Timeframes Page 15 Answering Rules Pages 16-17 Adding New Answering Rule Page 16 Call Forwarding Page 16 Allowed/Blocked Numbers Page 17 Music On Hold Page 18 ATA Provisioning Page 19 2 Logging Into Your Phone Account 1. Open your web browser 2. In the address bar, type nms.amplex.net 3. Optional: You can bookmark this page to access your phone account easier in the future. 4. Enter Your Login Name - [email protected] Example : [email protected] 5. Enter Your Password - by default is 1111 (See Page 5 for instructions on changing your password. Only numerical passwords are supported.) 6. Click Log In to continue 3 Home The homepage will provide you with an overview of your account information In the very top, right hand corner are 2 links: Profile and Log Out. Notice the links bar at the top of the page to access other areas of the website (Messages, Answering Rules. Contacts etc.) The home page will display new voicemails under the news messages box. On the bottom of the page is a recent call history (incoming, outgoing, and missed calls) On the right side you can see what Answering Rule is active (Page 16) At the top of every page, you will see the main menu navigation panel Each tab below is discussed, in depth, throughout this manual 4 Profile Settings From the Home page, click Profile on the top right corner of the page. This is where you will see your name, time zone, email addresses on the account, and be able to change your password. By default, the time zone is set to Eastern Standard Time, this option is able to be changed. Residential users leave the Directory Options boxes checked. Business users can choose to have individual lines listed in an auto-attendant directory. Configuring Caller ID Settings 1. Enter Area Code - 419 2. In the Caller ID box, type your phone number, all numbers - this is what will be displayed when calling others with Caller ID 3. 911 Caller ID can only be changed by contacting Amplex if you move to a new address. Changing Account Password Scroll to the bottom of Profile Settings All passwords must be all numbers, no letters It is important to change the password from the default login password (1111) Type the new password in, confirm the password in the second box Be sure to write down your new password here _____________ Click Save to continue 5 Messages On the top shortcut links—click Messages In this tab is where you can see all new, saved and deleted voicemail messages By default new messages will be displayed You will also notice the Refresh button on the right hand side of the page to check for new messages There is a blue Settings link, click on the link and this is where voicemail options will be configured CLICK TO REFRESH PAGE CLICK HERE TO CONFIGURE VOICEMAIL Drop down menu will display : New messages Saved messages Deleted messages 6 Message Settings Clicking Settings will display all options relating to messages and greetings In this window you can : Turn voicemail on/off, change voicemail time settings, change the greeting that callers will hear, configure email notifications Configuring Voicemail 1. To configure voicemail ensure the box is checked next to Enable Voicemail 2. Under Inbox Options there are three different choices to enable / disable this purely the users choice 7 Configuring Voicemail Continued 2a. Sort voicemail inbox by latest first - if this box is checked when you check for voicemail messages the oldest messages will play first ( this could be a useful tool by returning older messages before the most recent) 2b. Announce voicemail received time - if you check this box, when you listen to your voicemails at the beginning of the message the timestamp will be read aloud 2c. Announce incoming caller ID - this option will read the phone number of the caller before the message starts to play ( this is very useful when checking messages if the caller didn’t leave a phone number) Configuring Greetings For first time users, there will be no personalized greeting. The next steps will show you how to setup and manage a greeting Notice the voicemail greeting dropdown menu is empty Next to the drop down menu there are 2 buttons : the first is to play the current message (there are none) and the button to the right (looks like a speaker) is to setup greetings 3. Click the speaker button next to Voicemail Greeting (if you move your mouse over the speaker it will say Manage) 4. This will display the options to manage greetings 5. To create a new greeting you have two options : Upload or Record. 5a. With the Upload feature you can browse your computer for an audio file that is saved - if you are unsure of how to do this, use the record option. 5b. The Record option, when selected, will ask for a phone number to be called. This will call the phone number entered and the recording will be made over the phone. 8 Configuring Greetings Continued 5c. Enter a name for the voicemail greeting about to be created 5d. Click Call, wait for your phone to ring and after the beep begin recording, when finished hit the # button on your telephone 5e. Once the call has ended, you will notice the manage greeting page on the computer has changed 5f. Click the Done button at the bottom right hand side of the page 5g. Click the Refresh button on the messages website 5h. Now the voicemail greeting drop down menu will have a greeting to choose ( in this example the recording is called “test”) NOTE: You can always preview your voicemail recording by clicking the preview button next to the greeting name Managing Recorded Names This setting will allow you to record your name so when leaving voicemails for others your recorded name will also play 6. To make your name recording click the speaker icon next to recorded name under the greetings subsection 6a. Just like recording the voicemail you can either upload the recording, or have the system call your phone 6b. When you make the recording be sure to only state your name - either your first and last name, or just your first name 6c. The recording will automatically save, and use the name recording when applicable 9 Unified Messaging Options This dropdown menu is used to setup email notification preferences for received voicemails Any email that is sent will be sent to the email address added previously in this guide Each option will be explained below This settings can be changed at anytime to fit your needs 1. Still under Message Settings scroll to the bottom of the page and you will find Unified Messaging - the settings are used to configure email notifications None - No email notification is desired Send w/ hyperlink - an email with a link to log into the website to check voicemail Send w/ brief hyperlink - will still give you the link to check online, but will also show a brief summary of the message (caller, duration etc.) Send w/ attachment (leave as new) - will send an attachment of the voicemail which won’t require logging into the website, simply download the attachment and listen (leave as new will still show up as an unread message when checking your voicemail later) Send w/ attachment (move to saved) - will still send an attachment, but will move the voicemail from the new folder to the saved folder Send w/ attachment (move to trash) - will send an email attachment with messages, but will move the message to the trash folder NOTE: Send w/ brief attachment will send an email with attachment, but will also add a brief summary of the message in the email - the move to folder options are the same as above Click Save to apply changes made 10 Contacts On the top menu bar there is a button for Contacts - click on contacts This will display contacts that are currently saved in your address book It isn’t necessary to add contacts to the system, but some do find it beneficial When callers leave a voice mail, instead of just the number showing up, their name would be displayed Contact lists can easily be imported from Google, Outlook, and Apple V-card Likewise, exporting contacts is very simple and quite useful Add New Contact 1. In the top right corner, click Add Contact 2. Enter all the contacts information 3. Once all the information is filled out, click Save 4. Now that persons information will be displayed on the main contacts list 5. When hovering over the contacts name, you will see a pencil icon and a red X on the right - the pencil icon allows you to edit the contact if changes need to be made and the X will delete that contact 6. While hovering next to the name, you can star the contact - they are now in a favorites list 11 Exporting Contacts NOTE: This step is not required to use the voicemail service, this is just a “how to guide” if you would like to take advantage of all the features we offer 1. The top right corner of the contacts tab is a button the says Export, click the link 2. This will open up a menu in which you can choose the format and which contacts you would like to export 3. You will have the option to export all contacts, or just your favorites 4. Next, you will need to choose what format to export the contact list in 5. You can choose Outlook CSV format and save it as an Excel spreadsheet to later import into Microsoft Outlook 6. Exporting as a Google CSV format is useful if you would like to update your contacts associated with your Google account (Especially for Android users) 7. vCard (Apple) format is what you will want to export in if you are using a Mac computer (or have an iPhone) 8. Once you have made your selection click Export and choose either to save the file, or open the file 12 Importing Contacts 1. Under the contacts tab, click on the Import Contacts tab 2. In order to be able to import contacts, you must have exported a file with contacts from another service ( it could be Outlook, a Gmail account, or another service where your contacts could be stored) 3. Click Browse and find the file that you exported from another service 4. Select Import and your contacts will now be loaded into the contact list Call History On the top menu bar there is a button for Call History, click Call History This will display a complete list of calls (dialed, received, and missed calls) You will be able to see call duration and the time of the call There is a filter option to narrow down what information is displayed You are also able to export call history into a document 13 Adding Filters in Call History 1. To add filters in Call History, click Filters 2. From here you can customize the date range, caller number, dialed number and also if it was an inbound, outbound or missed call 3. You will always need to have a range of dates entered, from there is where you can narrow it down with the other options 4. If you’re looking for a specific phone number dialed and called for the month of June, enter 06/01/2013 to 06/30/2013 and enter the phone number in both Caller Number and Dialed Number fields and click Set Filters 5. This will now only display the month of June for that one specific phone number Clearing Call Filters In History 1. To clear an existing filter, click Filters 2. You will need to have a date range entered - most commonly for the month 3. Leave all other fields blank and click Set Filters 4. This will now display all calls for the month Exporting Call History 1. Just like with contacts, you can export Call History into a document 2. Set a filter to what time, numbers, type of call etc. click Set Filter 3. At the top right corner of Call History, click Export 4. Select either which program to open with or to save the file and click OK 14 Timeframes Great utility to block, forward or send calls straight to voicemail Advanced options when filtering calls Must be setup prior to use of Answering Rules Setting up Timeframes 1. Click Timeframes from the top shortcut links 2. This is where currently configured Timeframes will be displayed 3. To add a new Timeframe, click Add Time Frame 4. Name the new Timeframe 5. Select the duration of the Timeframe, it can be all the time, during specific times/days, or a specific range of dates 6. Once a Timeframe is configured, click Save 7. Next we will use these Timeframes to create Answering Rules 15 Answering Rules Uses existing Timeframes to forward, block or restrict calls Highly customizable to times on certain days of the week, to a span of weeks Great feature to forward calls to cell phones while at work Ability to block all calls during specific times, such as dinner time Great resource for businesses Adding a new Answering Rule 1. Click Answering Rules from the top shortcut menu 2. On the right side of the page, click Add Rule 3. Next to Time Frame, click on the dropdown menu and select a timeframe which you have already created 4. From here is where you can customize what you want to happen during that time 5. If you choose Do Not Disturb, all calls will go directly to voicemail 6. Call Screening can be used to screen calls before deciding to answer a call Call Forwarding Always - will always forward calls to another number or extension ( good for vacations) When Busy - will forward to another phone line if the original line is busy When Unanswered - if the line doesn’t answer you can forward the call When Offline - If the phone is turned off, the call will automatically be forwarded NOTE: Only use the features you wish, call forwarding can be disable by not selecting any of the above features 16 Adding an Answering Rule Continued These remaining options are best utilized in an office setting Make sure Just Ring User’s Extension is checked Click Save to continue Allowed/Blocked Numbers Ability to block all restricted or unknown numbers Adds a level of security to block unwanted callers from reaching you Can setup a list of numbers allowing only those to come through Useful tool that can benefit everyone Allow/Block Numbers Setup From the Answering Rules tab, click Allow/Block Numbers on the right hand side of the page The Allowed Numbers, on the left is a very secure way of managing your calls, only the numbers entered will ring through If you want all unknown/restricted calls blocked, check the box at the bottom To block a single number, click the + on the right side of the dialogue box and type the phone number in When finished adding numbers, click Done 17 Music on Hold A feature that will play a sound file while callers are placed on hold Typically used by business customers, home customers can utilize the feature Configuring Music on Hold 1. Click Music on Hold from the top shortcut menu 2. In the top right corner, click Add Music 3. Browse for the music file you wish to use 4. Title the song, give a description 5. Click Upload Music on Hold Settings Used to play a greeting for the caller before the phone will ring User can either record their own greeting, or upload a file 1. From the Music on Hold main page, click Settings on the top right side of the page 2. Check Play Introductory Greeting 3. If you choose to upload a greeting, click Upload then browse for the file you would like to use 4. Click Record and you will receive a phone call, the same way used to setup voicemail 5. Name the Greeting 6. Click Save to continue 18 ATA Provisioning Displays information about your VOIP Service Accessible from the top menu links If another phone line is needed contact Amplex, and an associate will guide you through the process 19