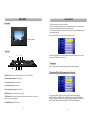
1
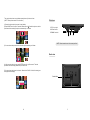
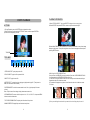
9”TFT LCD Digital Photo Frame with
Speaker and USB/SD/MMC Card Slot
MODEL NO.:NF-901
Instr uction Manual
-Thank you very much for selecting our product.
-Please enjoy the wonderful features of the latest digital technology.
-You will learn how to use it within a minute with this user manual.
SPECIFICATIONS
IMPORTANT INSTRUCTIONS
DISPL AY DE VICE: 9 ” CO LOUR TFT LED
POWE R SO URCE: AC a daptor
POWE R INP UT: AC100-240 V~ 50/6 0HZ DC 5V---1000 mA
AC PO WER CONS UMPT ION: ≤5W
RESO LUTIO N: 640X234
MEAS UREM ENT: 284X1 87X34 MM
WEIG HT: ab out 64 4g
C A U T I O N
RISK OF ELECTRI C SHOCK
DO NOT OPEN
CAUTIO N: To reduce the ri sk of fire or e lectric shock , do no t expose this produ ct to
wa ter, ra in or m oisture . To p revent the ris k of ele ctric s hock, do not remov e
the cove r or bac k of th is prod uct. In case of prod uct fa ilure, o nly qu alified
pe rsonne l can repair. There are no user-service able p arts in side.
Specifications are subject to c hange w ithout notice.
TROUBLESHOOTING
Befo re req uestin g service for this pl ayer, c heck t he cha rt belo w for a poss ible ca use o f the
prob lem yo u are experi encing . Som e simp le che cks or an adj ustme nt on y our pa rt may
eliminateth e prob lem a nd res tore proper o perati on.
Symp tom
R emed y
N o power.
Insert the A C adaptor s ecurely into t he power ou tlet.
The player is a utomatically
se t to the stan dby mode.
D isconnect the power sou rce and connect them again.
No picture .
Ensure that the equipment is connected properly.
AC CESS ORIES
9 ”TFT LCD D igita l Photo Fra m e wit h
Spe a ke r a nd US B/S D/MM C Ca r d Slot
MODE L NO. :NF-90 1
-THE DIGITAL PHOTO FRAME IS FOR INDOO R USE ONLY!
-TO AVO ID THE RISK OF FIRE OR ELECTRIC SHOCK DO NOT EXPO SE THIS
APPLIANCE TO RAIN OR MOISTURE.
-DO NOT BLO CK THE VENTILATION HOLES ON THE BACK OF THE UNI UNIT AT ANY
TIME.
-KEEP THE PRODUCT OUT OF STRONG SUNLIGHT. DIRECT SUNLIGHT M AY CAUSE
DAMAGE.
-DO NOT OPEN THE COVER OF THE DIGITAL PHOTO FRAME. THERE ARE NO USER
SERVICEABLE PARTS INSIDE.
-UNPLUG AC ADAPTOR FROM POWER SOCKET IF NOT USE THE UNIT FO R LO NG TIME.
MAINTENANCE:
-TOUCH THE SCREEN GENTLY. THE SCREEN IN THE DIGITAL PHOTO FRAME IS
M ADE OF GLASS AND IS EASILY SCRATCHED O R BRO KEN.
- DISCO NNECT THE AC ADAPTO R BEFORE MAINTAINING THE PLAYER.
- WIPE THE PLAYER WITH A DRY, SOFT CLO TH.
- IF THE SURFACES ARE EXTREMELY DIRTY ,WIPE CLEAN WITH A CLOTH WHICH
HAS BEEN DI PPED IN A WEAK S OAP- AND-WATER SOLUTION AND WRUNG OUT
THORO UGHLY, AND THEN WIPE AGAIN WI TH A DRY CL OTH.
- NEVER USE ALCOH OL, BENZIN E, THINNER, CLEANING FLUID OR OTHER
CHEMICALS. AND DO NO T USE COM PRESSED AIR TO REMO VE DUST
Inst ruct ion Manual
- Tha nk you ve ry much for se lectin g our p rod uct.
- Ple ase enj oy the won der ful fea tur es of th e late st digit al tech nolog y.
- You will lea rn ho wt o use it with in a minu te with t his user manu al.
Ins truc tion ma nual
............... .......... ..1
AC adap tor
....... ........ .1
A ll the pictures in the instr uction manu al is just for y our referenc e, specificat ion should
r efer to actua l accessories.
16
1
FEATURES
7.Clock
-Press UP/DOWN button to selec t the CLOCK item, press ENTER or UP/DOWN button to
se lect hour/minute/second.
-Press L EFT/RIGHT button to adjust .
-Press E NTER butto n to confirm.
THANKS FOR YOUR PURCHAS ING THIS DIGITAL P HOTO FRAME.
Italian
THESE I NSTRUCTIONS CAN HELP YOU TO MAKE THE BEST USE OF
Ran do m
THIS PLAYER. THE UNIT SUP PORTS THE FOLLOWING MEMORY C ARD
3 sec
S lid es ho w
FORMAT S: SD, MMC
16
50
59
06
14
20 08
V0 .01 Ma y 21 2 00 8
-9 i nch TFT LCD
8.Date
-Re solution: 640x234
-Press UP/D OWN b utton to select the DATE item, press ENTER or UP/DOWN bu tton to
select month /date/ year.
-Press LEFT /RIGH T button to a djust .
-Press ENTE R butt on to c onfirm .
-Supports SD, MMC c ard reader.
-Supports USB
-Supports format: JPEG
-Supports copy or delete pic tures
Ital ian
-Supports multi languages m enu: English and other l angua ges.
R a nd o m
3 se c
-Supports clock and c alendar.
Slid es how
-Store 4 pieces of picture in built-i n memory(8M [bit]Nor flash).
16
50
59
06
14
20 08
V0 .01 M a y 21 2 0 08
Note: When you in sert U SB and Car d at th e sam e tim e, the unit w ill rea d the f iles o f
USB a t first.
9.About
This will d ispla y the vers ion n umbe r.
2
15
3. Slideshow Interval
TABLE OF CONTENTS
This item ca n adju st the interv al time between the playi ng pic tures. You ca n sele ct the
interv al tim e from 3/5/7/ 10/15 /20/30 secon ds,1/1 0/30 m inute s, 1/2/ 4/8/12 hours ,1 day.
4.Startup Mode
T his ite m can selec t the s tartup mode. Which you s elect m ode will dis play on the s creen
a fter yo u turn on the unit. You ca n sele ct from slide show, Main menu, Calen dar.
I MP O RTAN T IN ST RU CT I O N .. .. .. .. . . . . . .. . . .. .. .. .. .. .. . . . . . .. . . .. .. .. .. .. .. .. . .. . . .. .. 1
FEATURE S .. .. .. .. .. .. . .. .. .. .. .. . .. .. .. .. .. .. . .. .. .. .. .. . .. .. .. .. .. . . . .. .. .. .. .. . . . .. .. .. .. .. . . . .. 2
5.Reset
T his ite m is th e factory de fault s etup. I f you s elect this ite m, the n pres s ENT ER bu tton to
c onfirm , the s creen will dis play a s follo w:
MAIN UNIT.... .. ..... .. ..... .. ... .. .. ... .. ... .. .. ..... .. ..... .. ..... ....... ..... .. ..... .. ..... .. ..... .. 4-5
BASI C CONNE CTIO N . .. .. .. .. . . . . . .. .. .. .. .. . . . .. .. .. .. .. . . . .. .. .. .. .. .. . .. .. .. .. .. .. . .. .. .. 6
I talian
Ra n do m
BA SI C OP ERATION . .. .. .. . .. .. .. .. .. .. .. . .. .. .. .. .. .. .. . .. .. .. .. .. .. .. . .. . . .. .. .. .. . . . .. . . .. 7
3sec
S l id es h ow
F act ory Reset
Yes
PHOTO PLAYBACK .. .. .. ... .. .. .. . .. .. .. .. . .. .. .. .. . .... .. .. ... .. .. .. ... .. .. .. . .. .. .. .. . .... 8-10
No
16
06
50
59
14
2 0 08
COPY&DELETE OPERATI ON..... ....... ... .. ..... ..... ....... ..... ....... ... .. ... ....... ..... .11-12
V0.01 Ma y 2 1 200 8
I NI T I A L S ET U P. .. .. .. .. .. .. . . . . . . . . . .. .. .. .. .. .. .. .. . . . . . . . .. .. .. .. .. .. .. . . . . . . . .. .. .. 13 - 15
“Yes” is go to the fa ctory reset.
“No” is canc el.
Press ENTER butt on to c onfirm .
SPECI FICATION.... .. ..... .. ..... .. ..... .. ... .. ... .. .. ..... .. ..... .. ..... .. ..... .. ... .. .. ... .. ... .. .. .16
TROUBLES HOOTING ... .. . .... .. . .... .. ... .. .. ... .. .. .. ... .. .. ... .. .. ..... .. ..... .. . .... .. ..... .. .16
6.Update
This item is for SO FTWA RE up dated. If you select this it em, th en pre ss RIG HT bu tton to
confir m, the scree n will d isplay as fol low:
ACCESSORIES . .. ... .. .. . .... .. ..... .. ... .. .. .. ... .. .. . .... .. ..... .. ... .. .. ..... .. .. . .. .. .. ..... .. .16
It alia n
Ra ndo m
3 sec
S lid es how
Software Update
Yes
No
16
06
50
59
14
2 008
V 0.01 Ma y 21 2 008
“Yes” is go t o the factory reset.
“No” i s canc el.
Press ENTER but ton to confirm .
14
3
MAIN UNIT
INITIAL SETUP
Front view
-There is a se tup menu fo r the in itial setting.
-Once the ini tial pro gramming is enter ed it is retain ed in memory unti l chang ed, the
player can al ways b e operated u nder the same con ditions.
-The settings will be retai ned in the me mory until th e sett ings are changed e ven after
setting the pl ayer to off.
-Sel ect the SET UP ico n in th e ma in men u to e nter s etup m enu.
I tal ian
TFT display window
Rand om
3 sec
S lide sho w
Top view
16
50
59
06
14
20 08
V 0.01 May 21 2 008
5
7
3
1
S TAND BY E NTER ME NU
-Pres s the U P/DO WN bu tton to selec t diffe rent ite m ,pre ss ENTER b utton to con firm.
-Pres s the L EFT/R IGHT button to sw itch.
1.Language
MODE
Th is unit suppo rt the followi ng lan guage s: Eng lish an d othe r lang uages .
8
6
4
2
2.Transition Effect (Slide mode picture effects):
1 .Mode butto n- To switch the d isplay mode AUTO, FULL , ORIG INAL.
Ital i an
2 .Righ t navi gation butto n -To m ove r ight.
Rand om
3 se c
S li de sho w
3 .Left naviga tion b utton -To m ove lef t.
4 .Up n avigat ion bu tton - To mo ve up.
5 .Dow n navi gation butto n -To move d own
16
50
59
06
14
2008
V 0. 01 May 21 2 008
6 .MEN U butt on- To enter the ma in me nu, or exit.
7 .ENTE R button -To ente r a too l bar, p ress le ft/righ t butto n to select, or to co nfirm
a selec tion, o r to m ove up /down .
You can se lect N ONE, ZIGZAG TOP, ZIGZ AG BO TTOM , BOX , BLIN DS(L R),
SHUTTER , SPIRAL, BARDO OR (TD) , BARDOO R (LR), CRO SS, C ROSS COM B,
STR IPE(T D), MA SK, D ISSOLVE, BAR ,PU SH(L R), DIAGONAL(LB 2RT), DIAGO NAL
(RB 2LT), FADE, BRICK , CHE CHER (CEN TER), STRE TCH(T D),RA NDOM .
8 .STAN DBY button -ON/O FF bu tton
4
13
Then ,we i ntroduce how to copy/del ete several p ieces of pict ure at a time .
(NO TE: Th ese pictures must in one interfa ce.)
1)Choose the picture which you want to cop y/dele te.
2)Press RIGHT b utton for up to 5 seconds, there will be a “ ” beside the picture, a nd the
pink frame will surrounding next picture automatic ally, as follows:
Side view
1.DC 5V input jack
2.USB connection
I N PU T 5 V ---
SD/MMC
US B
3.SD/MMC card s lot
1
3
2
NOT E: Ple ase in sert th e card into c orrect positio n!
3) You ca n sele ct othe r pictu res in this in terfac e by th e sam e way, as foll ows:
Back view
MODE
5) You store/cop y the picture into the unit. When the Nor FLASH is full ,the following i con
will appear on the display:
Stan d holder
DEVICE FULL
OK
12
5
STANDBY ENTER MENU
4 ) After you se lect th e pictures, p ress E NTER butto n for up to 5 s econd s. The n the
o peratio n like s as th at cop y/dele te one picture at a time.
BASIC CONNECTION
COPY&DELETE OPERATION
With this fu nction mode you ca n cop y some pictu res fro m USB key t o an SD/MM C card
and v ice ve rsa.
From slide show mode depres s “EN TER”, the fol lowing bar w ill app ears o n the b ottom
scre en, go to the last ic on and depre ss “ENTER”
Ensu re all t he cab les ar e disco nnect ed fro m the m ain u nit bef ore co nnecti ng to A C pow er
sourc e by A C power ada ptor.
Sel ect thi s icon
pre ss “EN TER”
Connecting to power source
Use n aviga tion bu tton to navig ate to the MI NIATURIZED imag es/ph otos yo u wan t “COP Y”
or “DELETE ”.
M AIN UNIT
Once you h ave go t to the MINI ATURI ZED im ages /photo s that you want to COPY or DEL ETE
depre ss EN TER for up to 5 sec onds the bars COP Y and DEL w ill app ear. Use you r
navig ator cursor t o decide whe ther y ou want to co py or delete , the p ink bac kgrou nd wil l
indica te you r actio n cho sen.
To power outlet
AC a daptor
Copy
Del
-Pres s UP/D OWN cursor to sel ect Co py or DEL ,th en press EN TER b utton ,the sc reen
will di splay a s:
Co py To N OR
Co py To U SB
De le te Cur r ent V iew?
If you haven’t insert the
USB/CARD,the bar will
display the gray background
OK
Ca n cel
Note: The un it supports t o copy the pi ctures from t he US B/CAR D into the un it(NO R flash ),or
copy t he pic tures b etwee n USB /CARD(SD/MMC). You ca n sele ct whe re the pictur e copy to.
-Press MENU butto n to back.
6
11
5.Adjust the brightness
Th e brightness of the unit could be adjus ted, y ou can adjus t it to s uitable.
Whe n it is sliding the picture ,you can adju st the level o f the B RIGHTNESS.
1) Press RIGHT button , the screen will dis play:
BASIC OPERATION
ON and OFF
A fter in stall the unit and c onnec t it to the power soc ket, press STANDBY but ton, the unit
w ill turn on. If you want to turn off the unit you should pres s this button again.
Basic display
-Switc h the p layer o n and the sc reen w ill display as below, choo se the item you wa nt
to play.
BRIGHTNESS
Press LEFT/RIGHT button to adjust it.
Press MENU button to exit.
6 .Selec t PICT URE I NFOR MATIO N in t he too l bar , t hen p ress ENTER to disp lay th e pictu re
in forma tion.
103 96214 44.JP G 600 x450
Sli desho w
Cale nda r
Set up
Pic ture in formation
1.SLI DE SHOW
-Pres s LEFT/RIGHT button to select this item, pre ss EN TER b utton t o conf irm, th e unit will
play the pict ures.
LOGO OPERATION
Th is unit can set the s tartup scree n logo .(Only in NO R flash mode)
On ce you read the pic tures in Nor flash, you ca n operate th em ,and set a piece of pic ture
to be startup sc reen logo.
No te: To know h ow to save t he pic ture in to the built-in mem ory, pl ease refer to “ COP Y OR
DELETE OPERATION” para graph .
-First, en ter the minia turize d pictu re. In NOR fl ash m ode.
-Then ,select the pict ure wh ich yo u want to set , press ENTER but ton for up to 5 seco nds.
Th e scre en will displa y as fo llows:
2. Calen dar
- Press UP/DO WN/L EFT/R IGHT button to select this item, the s creen will dis play the
c alendar as b elow:
Year, month, date calend ar
displa y
Pict ure dis play
L ogo
Del
Curre nt time
-Press UP/DOWN button to select “Logo ” or “D el”, th at you can set the p icture to be a
log o, or d elete the pic ture.
10
7
PLAYBACK OPERATION
PHOTO PLAYBACK
1.Se lect P REVIO US/N EXT , then press E NTER to play previ ous or next p icture .
2.S elect ROTATE the n pres s ENT ER to rotate one pi cture c lockwise by 90 ° .
ACTIONS
1. During Playb ack, p ress the ENTER b utton to show the t ool bar.
2. Select a function it em by pressing LE FT/RIG HT bu tton, and then pre ss ENT ER to
pe rform the co rrespo nding functi on.
3. S elect M INIATURIZ ED , th en pre ss EN TER t o ente r previ ew mo de, a n ine-pi cture i mage
dis plays on the screen . Then press navig ation cursor to ent er nex t page or select a p hoto
pre ssing ENTE R butto n.
TOO L BAR
TOOL BAR
1
2
3
4
5
6
7
8
1 .PREVIOUS F ILE: To play t he pre vious file.
2 .PLAY/ PAUSE : To pl ay the file or p ause t he file.
3 .NEXT FILE: To play the ne xt file.
4 .ROTATE FIL E: To ro tate th e pictu re play ing to right(c lockwis e) by 9 0°(Th e pictu res in
B MP, GI F formats can not be rotate d).
4.Switching th e CARD/USB/NOR Flash
Once you insert a CARD/ USB,y ou want to pl ay the files i n the CARD/USB/NOR F LASH.
You need sw itch th e CARD/USB/NOR Flash mode first .
1) Press LEFT navigation butto n on the unit contin uously to sw itch the mode which you
wanted when the unit in s lide show mode.
2) The mode will di splay on the picture in short tim e when the u nit in s lide show mo de.
As follow s:
5 .SCRE EN MO DE: To switch the sc reen m ode in auto, full, ori ginal (e xcept full scr een
p icture).
N ote: 16 :9 pict ures wi ll not c hange, being the same as screen size.
U SB
The mode in NOR FLASH.
7 .PICTURE IN FORMATION : To dis play th e inform ation of the picture .
SWITCH
SWITCH
6 .ZOOM /SHRI NK:To zoom o r shrin k the p icture in 1x, 1 .5x, 2x , 0.5x, 0.7x, then pre ss ME NU
b utton to enter the slide mod e.
The mode in SD/MMC CARD mode
8 .MINIATURIZ ED:To display 9 piec es of m iniatu rized p icture.
8
The mode in USB mode
3) After y ou swi tching the mo de wh ich yo u wan ted, th e unit will pla y the p icture s in it.
9