1
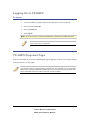
TEXAS DEPARTMENT OF AGRICULTURE Texas Unified Nutrition Programs System (TX-UNPS) School Nutrition Programs Direct Certification and Direct Verification (DCDV) Supplemental Manual Texas Department of Agriculture Food and Nutrition Division For External Users TABLE OF CONTENTS INTRODUCTION .......................................................................................................................... 1 USER MANUAL .............................................................................................................................................. 1 GETTING STARTED ................................................................................................................... 2 ACCESSING THE TX-UNPS WEB SITE ........................................................................................................... 2 LOGGING ON TO TX-UNPS .......................................................................................................................... 3 TX-UNPS PROGRAMS PAGE ......................................................................................................................... 3 SCHOOL NUTRITION PROGRAMS HOME PAGE ............................................................................................... 5 APPLICATIONS ............................................................................................................................ 7 TX-UNPS APPLICATIONS MENU .................................................................................................................. 7 DIRECT CERTIFICATION-DIRECT VERIFICATION MODULE............................................................................. 9 To Access Direct Certification-Direct Verification ................................................................................ 9 DIRECT CERTIFICATION SCREENS ............................................................................................................... 11 To Access a Direct Certification List .................................................................................................... 11 To View or Print A Direct Certification List ........................................................................................ 12 To Download A Direct Certification List ............................................................................................. 13 DIRECT VERIFICATION SCREENS ................................................................................................................. 14 To Access Direct Verification............................................................................................................... 14 To Perform a Manual Search of Direct Verification Records Using Case/EDG Number .................... 15 To Perform a Manual Search of Direct Verification Records Without Case/EDG Number ................. 17 To Print an Individual Direct Verification Record ................................................................................ 19 To Perform a Batch Upload Search of Direct Verification Records ..................................................... 20 To View or Print A Listing of All Direct Verification Matches ........................................................... 22 To Download A Listing of All Direct Verification Matches ................................................................ 23 i SCHOOL NUTRITION PROGRAMS DCDV SUPPLEMENTAL MANUAL TABLE OF FIGURES Figure 1: TX-UNPS Home Page .................................................................................................................... 2 Figure 2: TX-UNPS Programs Page ............................................................................................................... 4 Figure 3: School Nutrition Programs Home Page .......................................................................................... 5 Figure 4: Applications Menu screen (State view) .......................................................................................... 8 Figure 5: Direct Certification / Direct Verification screen ............................................................................. 9 Figure 6: Direct Certification - Direct Verification Home Page ................................................................... 11 Figure 7: Direct Certification Main Page ..................................................................................................... 11 Figure 8: Direct Certification View/Print screen .......................................................................................... 12 Figure 9: Direct Certification Download screen ........................................................................................... 13 Figure 10: Direct Certification - Direct Verification Home Page ................................................................. 14 Figure 11: Direct Verification Main Page .................................................................................................... 14 Figure 12: Direct Verification Search Screen ............................................................................................... 15 Figure 13: Direct Verification Case/EDG Search Criteria ........................................................................... 15 Figure 14: Direct Verification Search Results .............................................................................................. 16 Figure 15: Direct Verification Record Details .............................................................................................. 16 Figure 16: Direct Verification Search Screen ............................................................................................... 17 Figure 17: Direct Verification Student Information Search Criteria ............................................................ 17 Figure 18: Direct Verification Search Results .............................................................................................. 18 Figure 19: Direct Verification Record Details .............................................................................................. 18 Figure 20: Direct Verification Record Details .............................................................................................. 19 Figure 21: Direct Verification Individual Record Print Screen .................................................................... 19 Figure 22: Direct Verification Upload Screen .............................................................................................. 20 Figure 23: Direct Verification Batch Upload Results Pop-Up Screen.......................................................... 21 Figure 24: Direct Verification Batch Upload Results ................................................................................... 21 ii SCHOOL NUTRITION PROGRAMS DCDV SUPPLEMENTAL MANUAL Figure 25: All Direct Verification Matches Print Screen ............................................................................. 22 Figure 26: Direct Certification View/Print Screen ....................................................................................... 23 Figure 27: All Direct Verification Matches Print Screen ............................................................................. 23 Figure 28: Direct Verification Download Screen ......................................................................................... 23 iii SCHOOL NUTRITION PROGRAMS DCDV SUPPLEMENTAL MANUAL 1 Introduction Welcome to the Texas Unified Nutrition Programs System (TX-UNPS) supplemental user manual for the School Nutrition Programs module. TX-UNPS is a web-based software solution that provides administrators, state users, and Contracting Entities with efficient and immediate access to applications, claims, and related nutrition program functions. This manual will focus on the Direct Certification-Direct Verification (DCDV) function of the School Nutrition Programs Module. User Manual This user manual is intended for use by authorized Contracting Entity (CE) and Education Service Center (ESC) users that operate the School Nutrition Programs. It is designed to provide a general understanding of how to use the system in an effective and efficient manner. 1 SCHOOL NUTRITION PROGRAMS DCDV SUPPLEMENTAL MANUAL 2 Getting Started Before you can begin using TX-UNPS, you must be assigned a user ID and password by the TX-UNPS Help Desk that provides the required security rights. Once this setup is complete, you may use the Internet and your assigned user ID and password to access and log onto the TX-UNPS web site. Accessing the TX-UNPS Web Site You can access TX-UNPS from any computer connected to the Internet by opening your Internet browser and entering the following URL in the browser’s address line: https://txunps.texasagriculture.gov/ The TX-UNPS project page displays. Click the “Continue to TX-UNPS logon page” link to log into TXUNPS. TIP: You can add this URL to your browser’s FAVORITES list or create a shortcut to the web site on your desktop for quicker access to the site. Refer to your browser or operating system help files for further information. Figure 1: TX-UNPS Home Page 2 SCHOOL NUTRITION PROGRAMS DCDV SUPPLEMENTAL MANUAL Logging On to TX-UNPS To log on 1. Access TX-UNPS by typing the URL into the address line of your web browser. 2. Enter your assigned User ID. 3. Enter your Password. 4. Select Log On. Note: If you do not have a User ID and Password, contact the TX-UNPS Help Desk. TIP: The Password is case-sensitive, so be sure to use upper and lower-case letters, if necessary. TX-UNPS Programs Page Once you successfully log on, the TX-UNPS Programs page is displayed. Actual access to specific modules is based on the user’s security rights. TIP: The Accounting, Maintenance and Configuration, and Security tiles are always gray because these are administrative modules that are available to only authorized State users. Contracting Entities and ESCs will not have access to these modules. Only select authorized State users will have access to these modules. 3 SCHOOL NUTRITION PROGRAMS DCDV SUPPLEMENTAL MANUAL Figure 2: TX-UNPS Programs Page Selecting this button… Provides… School Nutrition Programs Access to the School Nutrition Programs home page Accounting Access to the Accounting Module home page Child and Adult Care Food Program Access to the Child and Adult Care Food Program home page Maintenance and Configuration Access to the Maintenance and Configuration module home page Summer Food Service Program Access to the Summer Food Service Program home page Security Access to the Security Module home page Food Distribution Program Access to the Food Distribution Program home page 4 SCHOOL NUTRITION PROGRAMS DCDV SUPPLEMENTAL MANUAL School Nutrition Programs Home Page The School Nutrition Programs home page contains the message board used by state administrators to post and maintain School Nutrition Programs-related messages. Messages may contain important news regarding the submission due dates, upcoming training, legislative changes, or any other SNP-specific information. To access the School Nutrition Programs home page 1. Log on to the TX-UNPS web site. 2. On the Programs screen, select School Nutrition Programs. Note: If a user only has access to the School Nutrition Programs module, the Programs screen is not be displayed 3. The School Nutrition Programs home page displays. Figure 3: School Nutrition Programs Home Page 5 SCHOOL NUTRITION PROGRAMS DCDV SUPPLEMENTAL MANUAL School Nutrition Programs menu options From the School Nutrition Programs home page, you can select a menu item from the blue menu bar at the top of the page. The School Nutrition Programs menu bar contains menu items specific to the School Nutrition Programs. The table below describes the features available for each menu option, which the remainder of this manual will discuss in detail. Please note: individual users may have varying menu options due to the user’s security configuration. Menu Item Applications Menu Features Access to overall application-related items including: Contracting Entity Manager (State users only). Application Packet (inc. Contracting Entity, SNP, SSO, and FFVP applications). Verification Reports. Food Safety Inspection Reports. Fresh Fruit and Vegetable Invitations and Grants. Summer Nutrition Program Costs. October Enrollment. Capital Expenditure Requests. Texas Summer Mandate. Direct Certification/Direct Verification. Download Forms. Claims Access to claim entry screens (e.g., SNP, SSO, and FFVP) and Contracting Entity-specific payment history. Security Access to an individual user’s security-related items including: Change Password (authenticated user changing their password). User Manager. Search Access to the Contracting Entity Search screen (State users, ESCs and Contracting Entity users with access to more than one Contracting Entity.). 6 SCHOOL NUTRITION PROGRAMS DCDV SUPPLEMENTAL MANUAL 3 Applications Now that you know how to access and log on to TX-UNPS, the remainder of the manual will explore the Direct Certification-Direct Verification function of the School Nutrition Programs module. TX-UNPS Applications Menu The Applications menu is the starting point for all tasks related to the annual School Nutrition Programs enrollment process. Menu items are based on security levels. To access the Applications Menu 1. On the blue menu bar, select Applications. The Applications Menu displays. 2. Select an application item to access that application function. The following figure displays the complete list of Applications menu items for authorized state users. It is important to note that Contracting Entities have significantly fewer Applications menu items. 7 SCHOOL NUTRITION PROGRAMS DCDV SUPPLEMENTAL MANUAL Figure 4: Applications Menu screen (State view) 8 SCHOOL NUTRITION PROGRAMS DCDV SUPPLEMENTAL MANUAL Direct Certification-Direct Verification Module The Direct Certification/Direct Verification menu item provides authorized users access to the Direct Certification-Direct Verification system from within TX-UNPS. Note: Please note that you will not be able to access the Direct Certification – Direct Verification module on the day your TX-UNPS password is reset (whether by you or by the TX-UNPS HelpDesk). You must wait until the following day to access these lists. To Access Direct Certification-Direct Verification 1. On the blue menu bar, select Applications. The Applications menu screen displays. 2. On the menu, select Direct Certification/Direct Verification. The Direct Certification/Direct Verification screen displays. 3. Select the <Back button to return to previous screen. Figure 5: Direct Certification / Direct Verification screen Note: By selecting the Direct Certification / Direct Verification link on this screen, a new browser window will open providing access to the Direct Certification/Direct Verification system. The screen will not open if you have a pop-up blocker running on your system. If this occurs, hold down the CTRL key and select Direct Certification / Direct Verification again. Your TX-UNPS browser session will remain active until the system times out (i.e., 20 minutes). If using the Direct Certification-Direct Verification system takes longer than 20 minutes, you will need to re-login to TX-UNPS. 9 SCHOOL NUTRITION PROGRAMS DCDV SUPPLEMENTAL MANUAL Note: Direct Verification is available to all School Nutrition Program Contracting Entity users and to ESC users. Direct Certification is only available to Contracting Entity users associated with public and charter schools and to ESC users. 10 SCHOOL NUTRITION PROGRAMS DCDV SUPPLEMENTAL MANUAL Direct Certification Screens To Access a Direct Certification List 1. After selecting the Direct Certification/Direct Verification link, a new browser window will open displaying the Direct Certification-Direct Verification Home Page. Figure 6: Direct Certification - Direct Verification Home Page 2. Click the Direct Certification link in the upper left corner to proceed to the Direct Certification screens. Figure 7: Direct Certification Main Page 3. If you are a CE user only associated with one Contracting Entity, the Contracting Entity ID, Contracting Entity Name and CD Code fields will be pre-populated. Proceed to step 5. 4. If you are a CE user with access to multiple Contracting Entities, or if you are an ESC user, the Contracting Entity ID field will be blank. Enter the 5-digit CE ID you wish to access and click the Tab key. The Contracting Entity Name and CD Code will populate based on the entered CE ID. If you enter a CE ID that is not associated with your user account, you will receive an error message. 5. Select the Direct Certification List you want to access. o Select the “Year to Date List” checkbox to access a comprehensive list, which includes all records released during the current school year. o Select a month from the “Update Period” drop-down list to view only records released during a specific month. 11 SCHOOL NUTRITION PROGRAMS DCDV SUPPLEMENTAL MANUAL To View or Print A Direct Certification List 1. After entering a CE ID (if applicable) and selecting a Report Parameter, click the View/Print button. The requested Direct Certification list will display on the screen. Figure 8: Direct Certification View/Print screen Note: 2. The actual report is not shown here, for security purposes. Click the Printer icon (under the Direct Certification link) to print the list of students. A pop-up box appears asking for the page range. Select “All” and click “OK”. Another pop-up box appears asking if you want to open or save the file. Click “Open”. o The list will display in PDF format. Click the Printer icon on the page. o Close the PDF window. Click the Direct Certification link in the upper left corner to return to the Direct Certification Main Page. o o 3. 4. When your direct certification activities are complete, close the Direct Certification – Direct Verification window. 12 SCHOOL NUTRITION PROGRAMS DCDV SUPPLEMENTAL MANUAL To Download A Direct Certification List 1. After entering a CE ID (if applicable) and selecting a Report Parameter, click the Download button. A pop-up box appears asking if you want to open or save the file. Click “Open”. (If you do not get the Open/Save dialog box, pop-ups may be disabled. Click the associated link to “Enable” pop-ups.) The requested Direct Certification list will display on the screen in Excel. Figure 9: Direct Certification Download screen Note: 2. 3. The actual report is not shown here, for security purposes. If using a version of Excel prior to 2007, use the following steps to save the file. If using Excel 2007 or later, skip to step 3. o Once the file opens in Excel, click “File--Save As”. Select a proper destination directory (either your computer hard disk or external media) to download the list of eligible students for Direct Certification. Enter a file name. o If saving as a comma delimited file, click the “Save as type” drop-down and select “CSV (Comma delimited)”. After clicking Save, a pop-up box appears asking about feature compatibility. Click “Yes” to continue saving as a CSV file. If using Excel 2007 or later, use the following steps to save the file. o Once the file opens in Excel, click the Office button (very top icon at the left hand corner) and select “Save As”. o If saving as an Excel file, click “Excel Workbook.” Then, select a proper destination directory (either your computer hard disk or external media) to download the list of eligible students for Direct Certification. o If saving as a comma delimited file, click “Other Formats”. A “Save As” window will appear. Click the “Save as type” drop-down and select “CSV (Comma delimited)”. Select a proper destination directory (either your computer hard disk or external media) to download the list of eligible students for Direct Certification. After clicking Save, a pop-up box appears asking about feature compatibility. Click “Yes” to continue saving as a CSV file. 4. After saving the file, click the Direct Certification link in the upper left corner to return to the Direct Certification Main Page. 5. When your direct certification activities are complete, close the Direct Certification – Direct Verification window. 13 SCHOOL NUTRITION PROGRAMS DCDV SUPPLEMENTAL MANUAL Direct Verification Screens To Access Direct Verification 1. After selecting the Direct Certification/Direct Verification link, a new browser window will open displaying the Direct Certification-Direct Verification Home Page. Figure 10: Direct Certification - Direct Verification Home Page 2. Click the Direct Verification link (second title from the left) to proceed to the Direct Verification screens. Figure 11: Direct Verification Main Page 3. If you are a CE user only associated with one Contracting Entity, the Contracting Entity ID, Contracting Entity Name and CD Code fields will be pre-populated. 4. If you are a CE user with access to multiple Contracting Entities, or if you are an ESC user, the Contracting Entity ID field will be blank. Enter the 5-digit CE ID you wish to access and click the Tab key. The Contracting Entity Name and CD Code will populate based on the entered CE ID. If you enter a CE ID that is not associated with your user account, you will receive an error message. Note: Throughout this manual, direct verification record details are not shown for security purposes. Note: Throughout the direct verification system, the Social Security # will be masked on all screens except for the last 4 digits. Note: Throughout the direct verification system, the search results and match results screens will display the Case/EDG number as a numeric field, excluding any preceding 0s. However, both manual and batch upload searches can be performed with any preceding 0s. 14 SCHOOL NUTRITION PROGRAMS DCDV SUPPLEMENTAL MANUAL To Perform a Manual Search of Direct Verification Records Using Case/EDG Number 1. On the Direct Verification main page, select “Search Page”. Figure 12: Direct Verification Search Screen 2. Select the “Case/EDG Number” radio button. Figure 13: Direct Verification Case/EDG Search Criteria 3. To search only direct verification records that have not been matched by your organization, select the “Unmatched” radio button. To search all direct verification records, including those already matched by your organization, select the “All” radio button. 4. Enter the Case/EDG (Eligibility Determination Group) Number into the provided text box. 5. Click Search. (Clicking the “Reset” button will clear any information you have entered in the Case/EDG Number field.) 6. If no records exist that match the entered search criteria, you will see the message “No matches found”. Click the Back button to return to the direct verification search screen. 7. If one or more records exist that match the entered search criteria, the results will display on the screen. 15 SCHOOL NUTRITION PROGRAMS DCDV SUPPLEMENTAL MANUAL Figure 14: Direct Verification Search Results 8. To access a specific record, click the “View” link to the left of the desired record. Figure 15: Direct Verification Record Details 9. To indicate that a record is being used to directly verify a student, click “Match”. Your CE ID will then display in the “Matched” field. Note: Once a record is matched, it will only appear in subsequent searches if you select “All” in the search criteria. (Selecting “Matched” on a search screen will exclude this record from the results.) In addition, the matched record will no longer appear in searches performed by other contracting entities. 10. To print the record, click “Print”. 11. If you click “Match” on a record, and subsequently realize this record should not be matched, you can click “Unmatch”. Your CE ID will be removed from the “Matched” field. 12. To search for another record, click “Return” to return to the direct verification search results screen. 16 SCHOOL NUTRITION PROGRAMS DCDV SUPPLEMENTAL MANUAL To Perform a Manual Search of Direct Verification Records Without Case/EDG Number 1. On the Direct Verification main page, select “Search Page”. Figure 16: Direct Verification Search Screen 2. Select the “Student Information” radio button to search for records without entering a Case or EDG (Eligibility Determination Group) number. Figure 17: Direct Verification Student Information Search Criteria 3. To search only direct verification records that have not been matched by your organization, select the “Unmatched” radio button. To search all direct verification records, including those already matched by your organization, select the “All” radio button. 4. Enter the desired search criteria into the provided text boxes. (For SSN, do not include dashes. For Birth Date, enter in the format mm/dd/yyyy.) Note: For confidentiality reasons, there are minimum search criteria on this screen. You can search by either social security number (SSN) and birth date, or by last name, first name and birth date (and county if desired). When using the second set of search criteria, you can also include a “Sounds Like” search on the first name. Selecting this option will 17 SCHOOL NUTRITION PROGRAMS DCDV SUPPLEMENTAL MANUAL result in matches where the last name and birth date fields match, but the first name has a different spelling (ex. Marisa vs Marissa). 5. Click Search. 6. If no records exist that match the entered search criteria, you will see the message “No matches found”. Click the Back button to return to the direct verification search screen. 7. If one or more records exist that match the entered search criteria, the results will display on the screen. Figure 18: Direct Verification Search Results 8. To access a specific record, click the “View” link to the left of the desired record. Figure 19: Direct Verification Record Details 9. To indicate that a record is being used to directly verify a student, click “Match”. Your CE ID will then display in the “Matched” field. Note: Once a record is matched, it will only appear in subsequent searches if you select “All” in the search criteria. (Selecting “Matched” on a search screen will exclude this record from the results.) In addition, the matched record will no longer appear in searches performed by other contracting entities. 10. If you click “Match” on a record, and subsequently realize this record should not be matched, you can click “Unmatch”. Your CE ID will be removed from the “Matched” field. 18 SCHOOL NUTRITION PROGRAMS DCDV SUPPLEMENTAL MANUAL 11. To search for another record, click “Return” to return to the direct verification search results screen. To Print an Individual Direct Verification Record 1. Follow the steps to perform a manual search and then select the desired record by clicking “Details”. Figure 20: Direct Verification Record Details 2. Click “Print”. Figure 21: Direct Verification Individual Record Print Screen 3. Click the Printer icon (under the Direct Certification link) to print the record. A pop-up box appears asking for the page range. Select “All” and click “OK”. Another pop-up box appears asking if you want to open or save the file. Click “Open”. o The list will display in PDF format. Click the Printer icon on the page. o Close the PDF window. Click the Direct Verification link in the upper left corner to return to the Direct Verification Main Page. o o 4. 19 SCHOOL NUTRITION PROGRAMS DCDV SUPPLEMENTAL MANUAL To Perform a Batch Upload Search of Direct Verification Records 1. On the Direct Verification main page, select “District Import”. 2. Click “Browse” and locate the file you wish to upload. Click “Upload File”. Figure 22: Direct Verification Upload Screen The uploaded file must be in .csv format and must not be larger than 4 MB. The table below lists the fields that must be included in the file and their order. All fields are required. The uploaded file should not contain a header record. Field Field Name Field Type Required? Definition Sample 1 Case/EDG Number Varchar Y 11111 2 Numeric Y 3 Social Security Number Last Name Variable length field; Do not include special characters; Preceding zeros can be included or excluded 9 digits; Do not include dashes Alphanumeric Y Doe 4 First Name Alphanumeric Y 5 6 7 8 Birth Date County Code Meal Code CE ID Alphanumeric Numeric Character Numeric Y Y Y Y Variable length field; Not case sensitive Variable length field; Not case sensitive mm/dd/yyyy 3-digit county of residence F for Free or R for Reduced 5-digit ID assigned by TX-UNPS Note: All fields are required when uploading a batch file. In order to result in a successful match, all fields in the record must match. 3. A pop-up box appears asking if you want to open or save the file. Click “Open”. (If you do not get the Open/Save dialog box, pop-ups may be disabled. Click the associated link to “Enable” pop-ups.) 20 SCHOOL NUTRITION PROGRAMS DCDV SUPPLEMENTAL MANUAL 111223333 John 10/04/1997 057 F 00528 Figure 23: Direct Verification Batch Upload Results Pop-Up Screen 4. The list containing the results of the batch upload will display on the screen in Excel. Figure 24: Direct Verification Batch Upload Results The table below lists the fields that will be included in the results file and their order. A header record will be included in the file. Field 1 2 3 4 5 6 7 8 9 10 Field Name Case/EDG Number (titled edgnum) Social Security Number (titled ssn) Last Name (titled lastname) First Name (titled firstname) Birth Date (titled birthdate) County Code (titled county) Meal Code (titled meal) CE ID (titled ceid) Site ID (titled siteid) Matched indicator (titled matched) 5. Field Type Numeric Sample 11111 Numeric Definition Variable length field; Any preceding zeros will be excluded 9 digits; Does not include dashes Alphanumeric Variable length field Doe Alphanumeric Variable length field John Alphanumeric mm/dd/yyyy 10/04/1997 Numeric 3-digit county 057 Character Numeric N/A Character F for Free or R for Reduced 5-digit ID assigned by TX-UNPS Will not contain a value Will contain a Y if the record was matched; Will contain an N if the record was not matched F 00528 111223333 Y If using a version of Excel prior to 2007, use the following steps to save the file. If using Excel 2007 or later, skip to step 6. 21 SCHOOL NUTRITION PROGRAMS DCDV SUPPLEMENTAL MANUAL 6. o Once the file opens in Excel, click “File--Save As”. Select a proper destination directory (either your computer hard disk or external media) to download the list of directly verified students. Enter a file name. o If saving as a comma delimited file, click the “Save as type” drop-down and select “CSV (Comma delimited)”. After clicking Save, a pop-up box appears asking about feature compatibility. Click “Yes” to continue saving as a CSV file. If using Excel 2007 or later, use the following steps to save the file. o Once the file opens in Excel, click the Office button (very top icon at the left hand corner) and select “Save As”. o If saving as an Excel file, click “Excel Workbook.” Then, select a proper destination directory (either your computer hard disk or external media) to download the list of directly verified students. o If saving as a comma delimited file, click “Other Formats”. A “Save As” window will appear. Click the “Save as type” drop-down and select “CSV (Comma delimited)”. Select a proper destination directory (either your computer hard disk or external media) to download the list of directly verified students. After clicking Save, a pop-up box appears asking about feature compatibility. Click “Yes” to continue saving as a CSV file. 7. After saving the file, click the Direct Verification link in the upper left corner to return to the Direct Verification Main Page. 8. When your direct verification activities are complete, close the Direct Certification – Direct Verification window by clicking Exit in the upper right corner. To View or Print A Listing of All Direct Verification Matches 1. On the Direct Verification main page, select “Print Direct Verification”. Figure 25: All Direct Verification Matches Print Screen 2. Select “View/Print”. The list containing all Matched direct verification records will display on the screen. 22 SCHOOL NUTRITION PROGRAMS DCDV SUPPLEMENTAL MANUAL Figure 26: Direct Certification View/Print Screen 3. Click the Printer icon (under the Direct Certification link) to print the list of students. A pop-up box appears asking for the page range. Select “All” and click “OK”. Another pop-up box appears asking if you want to open or save the file. Click “Open”. o The list will display in PDF format. Click the Printer icon on the page. o Close the PDF window. Click the Direct Verification link in the upper left corner to return to the Direct Verification Main Page. o o 4. 5. When your direct verification activities are complete, close the Direct Certification – Direct Verification window by clicking Exit in the upper right corner. To Download A Listing of All Direct Verification Matches 1. On the Direct Verification main page, select “Print Direct Verification”. Figure 27: All Direct Verification Matches Print Screen 2. Select “Download”. A pop-up box appears asking if you want to open or save the file. Click “Open”. (If you do not get the Open/Save dialog box, pop-ups may be disabled. Click the associated link to “Enable” pop-ups. Then click Download again.) The list containing all Matched direct verification records will display on the screen in Excel. Figure 28: Direct Verification Download Screen 23 SCHOOL NUTRITION PROGRAMS DCDV SUPPLEMENTAL MANUAL 3. 4. If using a version of Excel prior to 2007, use the following steps to save the file. If using Excel 2007 or later, skip to step 4. o Once the file opens in Excel, click “File--Save As”. Select a proper destination directory (either your computer hard disk or external media) to download the list of directly verified students. Enter a file name. o If saving as a comma delimited file, click the “Save as type” drop-down and select “CSV (Comma delimited)”. After clicking Save, a pop-up box appears asking about feature compatibility. Click “Yes” to continue saving as a CSV file. If using Excel 2007 or later, use the following steps to save the file. o Once the file opens in Excel, click the Office button (very top icon at the left hand corner) and select “Save As”. o If saving as an Excel file, click “Excel Workbook.” Then, select a proper destination directory (either your computer hard disk or external media) to download the list of directly verified students. o If saving as a comma delimited file, click “Other Formats”. A “Save As” window will appear. Click the “Save as type” drop-down and select “CSV (Comma delimited)”. Select a proper destination directory (either your computer hard disk or external media) to download the list of directly verified students. After clicking Save, a pop-up box appears asking about feature compatibility. Click “Yes” to continue saving as a CSV file. 5. After saving the file, click the Direct Verification link in the upper left corner to return to the Direct Verification Main Page. 6. When your direct verification activities are complete, close the Direct Certification – Direct Verification window by clicking Exit in the upper right corner. 24 SCHOOL NUTRITION PROGRAMS DCDV SUPPLEMENTAL MANUAL