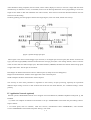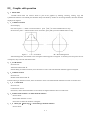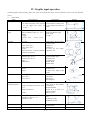
1
HL® Wire Cutting Control Programming System Copyright Statement 《HL Wire cutting control programming system》 、 《Towedm Wire cutting control programming system》 、 《HL Wire cutting control card》 、 《HL High frequency and electrode speed control circuit》 、 《HL Wire cutting control card product design》 and 《HL trademark》have separately gained a number of patents from State Intellectual Property Office of P.R.China, copyrights from National Copyright Administration of P.R.China, and registered trademark from State Administration for Industry and Commerce. Any unit or individual without permission is not allowed to copy or pirate whole or part of the contents protected by patent registration. Any unit or individual sales or use copy, pirated or counterfeit HL products, will be punished by law. PRC National Copyright No.: 2004SR06657,2006SR11815 PRC State Intellectual Property Patent No.ZL200320116897.1,ZL200620058536.X,ZL200620154454.5 HL Wire cutting Control System Operation Manual I. System Introduction: HL ® system is currently one of the most popular wire cutting control systems available. Its powerful features, high reliability and high stability have been widely recognized throughout the industry. The HL ® PCI version changes the original HL ® ISA interface to the more advanced PCI interface. As PCI interface of advanced features makes the bus of HL ® PCI card and machine control part better separate, HL ® system is further enhanced on anti-interference capability and stability. Furthermore, the wire installation is less complicated and maintenance is simplified. The HL ® PCI card requires less computer configuration and better compatibility than ISA card. It can be started without a hard disk or a floppy disk. II. Main Features: 1. A multi-control function, that one computer can controls as many as four machines to cut different workpieces at the same time, and be used for programming while machinig. 2. Taper processing adopts a 4 or 5-axis link-move control technology. The two taper machining methods of top-bottom different shapes and simply angle-input, make taper processing become faster and easier. It can also process changed-taper and equal arc. 3. Simulate machinig, fast show machining track, particularly the track of that taper and top-bottom sides of top-bottom different shape workpiece, and display the coordinates of final point. 4. Real-time display graphics machining process, by switching the screen, monitoring the machining status of four machines at the same time, and shows the relative coordinates of X, Y, J and absolute coordinates of X, Y, U, V, and other changing value. 5. Power off protection, that if sudden power off during machining, each machine automaticly returns to machining status after power on. The storaged documents in system can be long-term retained. 6. Accurate adjust calculation to the base-plane and wire frame distance. Offset in U and V direction to the offset by the guided pulley cutting point, to enhance the accuracy of taper machining, the accuracy of big taper cutting is significantly better than similar software. 7. Scan gallery to quickly find the necessary documents. 8. Mo wire offset (not necessarily increase the transition circle), the machining scale adjustments, coordinate transformation, the recycle machining, the stepper motor speed, automatic short-circuit regression, and other features. 9. Can start machining from any segment, and stop at any segment. Can forward / reverse machining. 10. Can set (or cancel) at any time pause after machining present segment instructions. 11.Pause, stop and short-circuit automatically rolled back and short-circuit long time (one minute) alarm. 12. Data conversion between AUTOCAD DXF format and ISOG format. 13. Access to customer network systems, exchange of data and monitor each machining process in network system (option). 14. Machining interpolated radius up to 1,000 meters. 15. Machining automaticlly accumulate working hours, easy for production management. 16. Machine installed with optical scale, can realize loop-back control. 17. Multi-time cutting function designed for medium wire-speed machine. 1 III. Operation: After power on, the computer can quickly enter into the system. Choose 1. RUN, press Enter to the main menu. In the main menu, move the cursor or click the corresponding red-letter keys on the menu to do corresponding operations. 1. Documents import: Before cutting the workpiece, 3 B directive document of the workpiece must be import to virtual disk machining document area. The so-called virtual disk machining document area, is actually machining orders temporary storage area. Operation as follows: First, press F key in the main menu. Then according to the import path do the following operation: ① Import WS-C from Gallery: Press enter, move cursor over the required document, press enter, press ESC to return. Note: Gallery WS-C is document storage area of the system, can store up to about 300 documents. Replacement of a higher degree of integration of storage Manifold can be expanded to about 1,200 documents. Document in Gallery can be long-term retained, documents stored in virtual disk will automaticly remove by shutdown or press reset. ② Import from the hard drive: Press F4, then D, to move cursor over the required documents, press F3, moved cursor to the virtual disk, press Enter, and then press ESC to return. ③ Import from floppy disk: Press F4, insert a floppy disk, press A, move cursor to the required document, press F3, move cursor to the virtual disk, press enter and then press ESC to return. Note: The use of F3 key to transform the document among gallery, hard disk and floppy disk. The system can work properly singly using gallery WS-C, without hard or floppy disks. ④ Edit 3B command: Sometimes need to modify 3 B command of certain segement. Methods of operation are as follows: In the main menu, press F key, move cursor to 3 B document which needs modify, press Enter key to display 3 B command, press INSERT key, use up, down, left and right arrow keys, PgUp and PgDn to check and modify 3B commands, when completed, press ESC to return. ⑤ Input manually 3 B command: Sometimes cutting some simple workpieces, such as a circle or a square, etc. Needn’t programming, directly manually input 3 B commands, methods of operation are as follows: In the main menu press B key, and press Enter, then input 3B command in standard format. For example: B3000B4000B4000GYL2, if coordinates vale is zero, can be omitted. For example: BBB5000GXL3. Input one command, press enter, and input nexst one, after input, press ESC to return. The manually input command is automatically named NON. B. ⑥ Browse Gallery: The system has a features of browse gallery, which can quickly find the necessary documents, the operation is as follows: In the main menu, press Tab key, then automatically display in turn graphics from gallery and its corresponding 3 B commands file name. Press space bar to pause, and press space bar again to continue. 2. Simulated cutting After file importing and before formal cutting, for insurance, do simulate cutting first, in order to observe if its graphics 2 (especially taper and top- bottom different contour workpiece) and zero coordinates are correct, avoiding workpiece scrappred for programming negligence or improper machining parameters set. Operations are as follows: ① In the main menu , press X, show machining files(3 B commands)in virtual disk. If there’s no file, must return to the main menu and import files (see section of file import). ② move cursor over the 3B command file which need to do simulate cutting. Press Enter, that shows graphics of workpiece. If the proportion of graphics too big or too small, not for observation, press +, - keys to adjust. If the location of graphics is not correct, press left, right, up and down arrow keys, PgUp and PgDn keys to adjust. ③ If the workpiece is general (that is, non-taper, non-deformed workpiece from top to bottom), press F4, and Enter key, real-time display the X, Y zero coordinates of final point. ④ taper or top to bottom deformed wokpiece, need to observe the cutting track on top and bottom. Press F3, show the sub-menu for simulated parameters set for sub-menu, including limited speed as simulate cutting speed, generally the maximum is 4096. Press left or right arrow keys to adjust. Press G, enter key, show sub-menu of taper parameter set, as follows: Taper set sub-menu: 锥 Degree File2 工件厚 丝架距 导轮半径 Vmode 锥度模式 Y diff. Y 相差 Rmin -3. Workpiece width, see Figure 1 基准面高 -4. Distance between base and center of lower idler wheel, Fig. 1 Height Idler -1.Set taper angle [Note 1] 异形文件 -2. Press [Enter] to select upper graphic file [Note 2] Width Base 度 等圆半径 -5. Machine wire frame distance(between two wheels center),Fig.1 -6. Radius of idler wheel (cut-off point for offset use), set to 0 when unnecessary, [Note 3] -7. Taper mechanism mode: slider/swing idler/ swing wire-frame [Note 4] -8. Correct Y direction error when cutting large angle(25 degree or above) taper[Note 5]。 -9.Equal circle radius (min. R), all arcs in the processing graphic that are smaller than Rmin will be treated as equal arcs. [Note 7] Cali. 校正计算 -10.Adjust calculation for base level height and wire frame height. [Note 7] Settings: press enter, input value (unit: 1: perspective, 3,4,5,6,7: mm). Then press enter. [Note 1]: Taper angle by unilateral, the unit is degree in metric. Non-metric converses to metric first (e.g.: 1 ° 30 '= 1.5 °). When anti-clockwise cutting, workpiece stays positive that small top and big botton (positive cone), negative angle that big top small bottom (inverted cone). Clockwise cutting is on the contrary. The system can process variable cone cutting. See example 1. [Note 2]: Select the menu can process top- bottom different shape workpiece, File2 is upper graphics of workpiece, move cursor over the required files, press enter, import the upper graphic file, press ESC to display top and bottom graphics superpose. See example 2. [Note 3]: Offset offset for the cut-off point, just input the radius of idler. [Note 4]: Press Enter three times to modify the taper machanism of small silder and swing idler mode, the system has 3 offset to idler cut-off point in U and V direction. To swing wire frame mode, only has idler cut-off point offset in U direction. [Note 5]: when cutting large angle(25 degree or above) taper, cut a square taper at first, measure the difference of the two Y side length and put the value here(unit: mm), Y direction error can be fixed. Because the error is caused by machenical, you may need to make this measurement every time when you want to cut large angle taper. [Note 6]: Once input equal arc radius value, all arc in the workpiece which smaller than the set value in radius will be cut to equal arc in its own radius. If want to certain arc be cut to equal arc, and other be cut in normal taper, then insert ER before the 3B command of the specific arc in the 3B command file. Its methods of operation can refer Example 1 variable cone cutting. [Note 7]: If the measurement of the wire frame distance and base-level height is not very accurate (demand as accurately as possible), first cut a tapered cylinder, and then measure the top and bottom diameters of the tapered cylinder, input to the computer to automatically calculate the precise wire frame distance and base level height. After taper parameters set completed, press ESC to return, press F1, enter key, then press Enter again to start simulate cutting. When cutting finished, show final point coordinates X ', Y', U, V. Umax, Vmax is the maximum move distance of the UV-axis in the process of cutting, and the value should not exceed the maximum allowable UV-axis trip. After the simulated cutting, press the space bar, E, ESC to return to the main menu. 3. Formal cutting After accurate simulate cutting, install and clamp the workpiece, open wire tubes, pumps, high frequency, to start formal cutting. ① In the main menu, select processing # 1 (choose processing # 1 when only one control card. If installed several control cards, one can processing # 2, processing # 3, processing # 4), press Enter, C, then display processing files. ② move cursor to the 3B file which need cutting, press Enter, shows the graphic of 3B command, adjust the size and proportion and suitable location (see section of simulate processing). ③ Press F3, display processing parameters set sub-menu as follows: Processing parameters set: V.F. 变频 -1. Cutting gap between Mo wire and workpiece, higher value closer tracking Gap Volt 间隙 -2.The gap voltage between molybdenum wire and workpiece.(see Multiple cutting parameters) Offset Grade Ratio 补偿值 -3. Set offset/offset value, [Note 1] 锥度值 -4. Press [Enter],to taper set sub-menu [Note2] 加工比例 -5. Graphic processing ratio Axis 坐标转换 -6. Optional 8 cordinates conversion, including mirror conversion Loop 循环加工 -7. Loop processing times 1:once, 2:twice,maximum 255 times Speed XYUV 步 速 -8. Enter to stepper motor limit speed set sub-menu [Note3] 拖板调校 -9. Enter to draggeradjustment sub-menu Process 控制 -10. Press [ENTER] to control sub-menu Hours 机时 -11.Machine actual work hours Settings: 4 1.5.6.7.8.9. Press [Enter], [PageUp], [PageDown] or left and right arrow keys 2.3.4. Press [Enter], then input values (unit: 2: mm, 3: angle degree) Speed limit set sub-menu: XY speed 速度 -1. XY axis work at highest speed (unit: μ / second, the same below) UV speed 速度 -2. UV axis work at highest speed XY limit 限速 —3. XY axis fast move at highest speed UV limit 限速 —4. UV axis fast move highest speed Tuning methods: press [Enter], [PageUp], [PageDown] or left and right arrow keys Draggeradjustment sub-menu: XY 拖板调校 -1. Adjust/move XYdragger [Note 5] UV 拖板调校 -2. Adjust/move UVdragger [Note5] Motor 步距角 -3. Set machine stepper system step angle [Note 4] 3/3:Three-phase Three shoot 6/3:Three-phase six shoot 10/5 :Five-phase ten shoot 5Axis.6/3:5-axis control Tuning methods: 1.2. Press [Enter], arrow keys to adjust, the space bar is zero (unit: μ) 3. Press Enter for three times adjust. Process parameters set: autoBack 回退 0 sec -1. Back choose for short-circuit [Note 6] HFdelay 清角 -2. Clear angle time choice [Note 7] 0 sec autoOff 自动停 On -3. Automatically stop set On or Off [Note 8] X pitch 齿补 0 - 4.X axis gear pitch[Note 9] Y pitch 齿补 0 - 5.Y axis gear pitch error U pitch 齿补 0 - 6.U axis gear pitch error V pitch 齿补 0 - 7.V axis gear pitch error [Note1]:Offset method: Cutting along the forward direction, molybdenum wire offset left, compensate positively, molybdenum wire offset right, compensate negativelyion. Do not have to add transition round, but must be closed graphics. If the programming has been offset offset for molybdenum wire, it can no longer compensate here, set to 0. [Note 2]: Taper set reference to the chapter of simulated processing. [Note 3]: Limit speed is to prevent the stepper motor moving fast leading to out-of-step when the draggermoves fast. Different models machines have different limit speed, which can be aquired through practice. Once the limit speed is set, the value should not be casually changed. Speed is the highest feed speed when the draggeractual work. A appropriate speed with frequency adjustment (V. F.), will enable cutting tracking stability. The thicker parts, the value of step speed 5 should be smaller which can be adjusted in processing. [Note 4]:step angle that is the work mode of stepper motor, for each type of machine, the distance is fixed. Once set, cannot be arbitrarily changed, otherwise the workppiece will be scrapped. So, for insurance, press Enter three times before change. [Note 5]: press enter, then up down left and right arrow keys, to enable X, Y, U, V dragger move, one press one step (for maintenance), while holding keep moving (for workpiece adjustment). Such as after press Enter, input value, open high frequency, feed, the value could be considered as a line command for cutting. [Note 6]: short-circuit return choice, each time press enter increase five seconds (sec), maximum is 35 seconds. The time is how long after short circuit happened the system automatically returns. When short-circuit dispears immediately automatically recover. If continued retreating for one minute has not yet clear out short-circuit, then automatic shutdown and alarm. Set 0 sec (0 seconds) as manual retreat, that is, when short-circuit happens, manually operation is needed to retreat, after clear short-circuit, manuall operation to recover. If the short-circuit last for one minute without manual operation, then the machine is automatically shutdown and alarm. [Note 7]: The delay of high frequency after each command processing completed, use for clear angle, clear angle time option, set to 0 sec (0 seconds) for the no-clear-angle feature. Each press Enter to increase one second, maximum 15 seconds. [Note 8]: automatically stop setting, press Enter to select the auto-stop function On or Off. [Note 9]: gear pitch error correction.(unit: μ),press [ENTER] 3 times continuesly to change the value, 0 means no error, maximum 31μ. ④ After parameters settings,press ESC to return. F1 to display start segment 1, means cutting from segment. (If cutting from N segment, use clear key to clear 1 and input number N). Then Enter to show final segment XX. (Similarly, if to stop in segment M, clear XX with Clear key, and input number M), then enter. ⑤ Press F12 to lock feed (feed menu color change from blue to light green to, then F12, from light green to blue, loose feed) Press F10 to automaticly choose (light green menu is for automatic, press F10, light green to Blue is for the manual) press F11 to open high-frequency and start cutting. (Press F11 again to shutdown high frequency). ⑥ Handling of various situations in cutting process: A. Tracking instability Press F3, use left and right arrow keys to adjust frequency (V.F.) value, till the track is stabilized. When cutting thick workpiece tracking is difficult to adjust, appropriately lower step speed before adjustment, till the track is stabilized. After the adjustment press ESC to exit. B. Short-circuit return When short circuit occurs, if set automaticly return in parameters setting, after a few seconds (set by the figures), the system will automatically return, when short-circuit clear, the system automatically restore forward. If continued retreat for one minute after the short circuit occurs, the system will automaticly shutdown and alarm. If the parameter is set to 6 manually retreat, then manually deal with: press the space bar, and then press B to retreat. After excluding short-circuit, press the space bar, and then F to restore forward. If the short-circuit time last for one minute without manually deal, then the system will automaticly shutdown and alarm. C. Temporary pause Press space bar to pause, and press C key to continue processing. D. Set to pause after the present segment cutting, just press F button, and then F again to cancel. E. Half-way power outage Cutting half-way power outage, the system automatically protect data. After power on, the system automatically restore the machine working status before power off. First, automaticly enter to the screen of the first machine, Press C, F11 to restore processing. Then press ESC to return. Then press number keys to enter the screen of the corresponding machine before power off, press C, F11 to resume processing. And so on. F. Broken wires during processing Press space bar, then W, Y, F11, F10, draggerwill automatically return to the starting point of processing. G. Exit processing When processing completed, press E, ESC to return to the main menu. During processing press space bar and then E, ESC, can also exit processing. If would like to resume after exit, press [Ctrl] and W (No. 1 machine)in the main menu. To No.2 machine, press [Ctrl] and O, to No.3 by [Ctrl] and R, to No.4 by [Ctrl ] and K. ⑦ Reverse cutting If broken wires during cutting, adopts reverse cutting to avoid duplicated cutting,and also save time, and also avoid lower smoothness and precision caursed by duplicated cutting. Operation method: In the main menu select processing, press enter, C, imporat command and press F2, enter, then press enter again, lock feed, open high frequency to start cutting. ⑧ Automatically Center: In the main menu, select processing, and press Enter, then F, F1 to automatically find the hole or rectangular hole centre, after the completion, show X, Y itinerary and hole radius. Press [Ctrl] and arrow keys to move and stop when meets side, X, Y itinerary shows once stops. 4. Programming: This system provides two automatic programming systems including programming editor (conversation programming) and two graphics programming, the specific reference to operation manual (followed). There are two points to note: ① During programming, data archiving and procedures for archiving, just save graphics file XX. DAT and 3 B directive document XX. 3B in virtual disk, and the virtual disk will not reserve after shutdown or reset. Therefore, save needed documents into the library or hard drives, floppy disks. The method is: after programming, return to the main menu, press F, can see the programmed graphic files and 3 B command files, move cursor over the file, press F3, then select library or hard disk, floppy disk, press Enter. 7 ② During programming, if want to export graphic files (XX.DAT) existed in the library or hard drives, floppy disk, transfer the graphics files to virtual disk first. 5. Format conversion: In main menu press T key, inserted disk with DXF or G format, then operate according to tips. DXF file should be AutoCAD R12 DXF format. When effective segment number more than 500, DAT files devided into multiple files automatically. Users can also use graphics programming Towedm "interface" to directly read DXF format, this way of reading DXF file has not segment number restriction, but also support AutoCAD R14 and the R2000 version. Please refer to Section 1.1 in the next chapter "Towedm Wire cutting programming system user manual". 6. Network Applications This system has the network function, conditional users can set up a local network to link the machine and model computer. The data files created by model designing can be sent to the machine for processing through the network and controled by computer. Note: Network Application is optional feature, installated by request. Example 1: variable cone cutting Variable cone cutting need to transfer 3 B procedures first, according to actual needs, input taper angle before the corresponding 3 B program. See right picture as example (set programm stored in library): a. In the main menu press F and then enter, open WS-C file from library, move cursor to 3 B file which for cutting. Press enter, then show 3 B procedures. N1:BBB5000GXL3 N2:BBB5000GYL4 N3:BBB10000GXL3 N4:BBB10000GYL2 N5:BBB10000GXL1 N6:BBB5000GYL4 N7:BBB5000GXL1 b. Suppose taper angle of ② ③ segments is 2 degrees Move cursor to N2: before, press enter, input DEG = 2 Suppose tanper angle of ④ segment is 5 degree Move cursor to N4: before, press enter, input DEG = 5 Suppose taper angle of ⑤ is 0 °. Move cursor to N5: before, press enter, input DEG = 0 If taper angle of ⑥ is same to that of ②. Move cursor to N6: before, press enter, input DEG = 2 that is : N1:BBB5000GXL3 8 DEG=2 N2:BBB5000GYL4 N3:BBB10000GXL3 DEG=4 N4:BBB10000GYL2 DEG=0 N5:BBB10000GXL1 DEG=2 N6:BBB5000GYL4 N7:BBB5000GXL1 c. After complete variable cone angle settings, press F3, enter, store 3B command. Press ESC to exit and start variable cone cutting. Through simulated cutting show the variable cone graphics, readers can deeply experience variable cone cutting operation. When cutting, the taper angle inserted into 3B procedure will plus the taper angler of F3 parameters. Therefore, during variable cone cutting the taper angle of F3 parameters is generally set to 0. Note: Top- bottom different shape cutting method can be used in variable cone-cutting. Separatly programe top and bottom graphics of the cone, and generate two 3B command files, then use top-bottom different shapes cutting method to start variable cone cutting. Example 2: top-bottom different shape cutting: Cutting top-bottom different shape should programme the two graphics of top and bottom of the workpiece to generate two 3 B command files, and store in the library. Right figure as an example: Let round as the top graphic of the workpiece, hexagons as the bottom graphics of the workpiece, 3 B command files have been stored in the library (hard disk or floppy disks). ① import 3B command file of the following graphic. ② press F3, G to enter into taper parameters set sub-menu. ③ Move cursor to File2 different shape document, press Enter, then move the cursor to 3B command file of top graphic, press Enter, then press ESC out, display top and bottom two graphics superposed. ④ Press F1, enter, and Enter again, simulate cutting begins. Note: When top and bottom graphics have same number of segments of 3B commands, each segment of commands for top and bottom graphics can be started and stopped at the same time. When top and bottom have different number of segments, segment the less commands of graphic in programming to achieve the same number of segments between top and bottom graphics. The corresponding location can be set determined by need (Right figure). Processing top-bottom different shapes must start from the same starting point and in the same direction. When one graphic is clockwise, the other should not be anti-clockwise processing. 9 After simulation cutting completes, check if Umax, Vmax values (display on screen) in UV-axis is larger than the actual maximum trip of machine UV axis, if exceeded, need revise the drawings dimension and re-programming or lower the height of wire frame so that after simulation the value of Umax, Vmax will not exceed the maximum machine UV axle and start a normal cutting. Generally speaking, the same graphics and the same angle degree, lower wire frame, smaller UV axis trip. [Figure 1] small carriage taper plan Above figure is the form of small dragger taper structure, to leveraged taper structure plan (also known as Rock Arm Type), the base height (BASE) should be started from the leverage point (that is the rocking fulcrum, which is also the center of lower roller for small carriage style). Wire frame distance (HEIGHT) should be the distance from leverage point to upper idler center. That in taper set sub-menu: Base height: the distance between base level to fulcrum point. (Usually the across clamp plane) Height wire frame distance: distance of the upper idler center to fulcrum point. Width workpiece thickness: the thickness of the workpiece. The accuracy of above three parameters is significant to the accuracy of taper processing, especially for top-bottom different shape cutting. On how to draw accurate base-level and wire frame distance, see <simulated cutting> section [Note6]. IV. Application Network (optional) Network system is WINDOWS network server. Support card can be REL8139, NE2000 compatible cards [Note 1], and PCI8029. (1): Select one computer of WIN9X in the network to set up a "MICROSOFT network file and print sharing" feature. Steps as follow: 1. In Control panel, click on "network", "add" and "service", manufacturers select "MICROSOFT", select network services "MICROSOFT network file and printer sharing", click "OK". 10 2. In Control panel, click on "network", "add" and "agreement", manufacturers select "MICROSOFT", select the network protocol "IPX / SPX", click "OK". 3. In Control panel, click on "network", click "logo", change the computer name HL, Working Group to HAOLIN, click "OK" to restart. 4. In the C: or D: create a folder named HL \ WSNCP and set it as public share. 5. If for the WIN2000 WIN XP system, need to register a username WIRE without password. (2): HL ® CNC system Settings: 1. Boot → main screen →System parameters → AUTOP.CFG settings. Press left and right arrow keys to adjust the value of AUTOP.CFG. Each HL ® computer in the network has different AUTOP.CFG settings, as HL ® system regards the value as a computer name. 2. If HL ® computer has hard disk installed. After the system boots-up, return to DOS, then copy all the contents in the virtual disk to D: \ WSNCP. After HL ® CNC system started, return to DOS mode, type 2000/8029/8139 (according to the netcard installed in the computer), if the network connection is normal, the WIN9X HL computer will automatically map the HL folder to a U: disk. Type HL and return to HL ® CNC system, in [document transferred] press F4 can see the existing of a U: disk. Any computer of the network can exchange data files via the HL folder in the HL ® computer, such as copy 3B files to the folder, Wire cutting control bench can immediately import the file for processing. WIN9X system HL® system HL® system HL® System After HL PCI cards and ISA cards V538, all network versions have assembled AUTOP and TOWEDM, the step to copy old version P20.EXE can be omit. [Note 1]: such as NE2000 card, the card should be set to INT5, PORT380. 11 V.System schematics and wiring diagram HF Power Machine One Driver power NC software card 1 HF Power NC software card 2 Driver power Micro Machine Two Computer NC software card 3 HF Power Network Machine Three Interface Link to customer network Driver power 1.NC interface card plug (Patent No.:ZL200320116897.1, 200620058536.X): XA XB XC YA YB YC UA UB UC VA VB VC Hi-frequency switch 1 2 3 5 7 8 9 10 12 14 4 15 16 17 Off2 H+ Off +12V 6 18 19 20 KHF2 21 22 XE XD 11 13 23 24 25 test YE YD Mo wire( 0V) Note: (1) Pin 21,22,24,25 is used for five-phase stepper motor, not suitable for three-phase stepper motors. (2) Pin 13 high frequency switch: connects to a relay touch point in HL ® card. The relay touch points are closed (or opend when change jump S11) when high-frequency is opened. And vice versa when when high-frequency is turned off. Pin 13 o o open high frequency public point(default to OV) (3) Pin 17 machine off: connects to a relay touch point in HL ® card. as starting-up the contacts are normally open (Change jump needle-S12 to normally closed state), When machining is finishing, the contacts will be connected for 5 seconds and then disconnected. When connected, it connects to 0 V. Pin 17 o o public points for machine off(default toOV) (4) Pin 14 and 18-19 connects to a DC12V from outside. (5) Pin 20 not used for factory etting, can be used for another high frequency switch point (by switching jump S7). (6) Pin 15 not used for factory etting, can be used for another machine off switch point (by switching jump S4). 12 (7) Pin 23 is for factory testing, no use recommend. (8) The version for servo motor driver or mix stepper motor controller: Pin 1 (X axis) Pin 2 (X axis) Pin 3 (X axis) Pin 4 (Y axis) Single pulse Step pulse High : + High : lock Step pulse (CP version) Low : Low : unlock Double pulse Step pulse + Step pulse High : lock Step pulse + (CW ersion) Low : unlock Pin 5 (Y axis) High : + Low : Step pulse - Pin 6 (Y axis) High : lock Low : unlock High : lock Low : unlock 2. Two HL ® computers connection Data can be transferd between two HL ® computers by selecting "Comm. Online" menu. Data connection is via RS-232 mouse interface in the computer. RS-232 mouse interface includes 9-pin and 25-pin, connected as follows: DB9F pin2 (or DB25F pin3) <-------> DB9F pin3 (or DB25F pin2) DB9F pin3 (or DB25F pin2) <-------> DB9F pin2 (or DB25F pin3) DB9F pin5 (or DB25F pin7) <-------> DB9F pin5 (or DB25F pin7) Shell <-------> Shell Besides: DB9F is for 9-pin RS-232 mouse interface, DB25F is for 25-pin RS-232 mouse interface. If required to tranfer data between an HL ® computer and a non- HL ® computer, download a running file named ® COMM5.EXE in www.hldeng.com documents and run it in the non- HL computer. 3. Graphics programming TOWEDM and connection of AUTOP and SBC TOWEDM tapes output is through the print inferface of a computer, connetion as follows: 2,3,4,5,6: data 10: synchronous 18, 19, 20: ground (Shell) "Autop.cfg setting" of the "Var. Parameters" set menu in the HL ® main screen decides the output level and output 3B file suspend code of graphics programming Towedm and AUTOP.Machine SBC requested receive way must be corresponded to the programme sending way, otherwise cannot achieve transmission. "Autop.cfg setting" inclides four numbers: First number determines transmission output level, 0: 5V level effective, 1: 0V-level effective. Second number determines 3B suspend code: 0: non suspend code 1: B0 B0 B0 HALT (For AUTOP) or D (for TOWEDM) 2: B0 B0 B0 FF 3: B0 B0 B0 GX L1 Fourth number determines Chinese or English help. More detailed definition on the numbers in ”Autop.cfg settings”, please refer to 4.11 of the next chapter "Towedm Wire programming system user manal". 13 VI. The use of USB disk 1. HL ® system embedded with a self-develop USB disk driver which is compatible with most of PC mother boards and most of the USB disks (1.0、1.1、2.0 and 2.1) available in the market can be recognised. The USB disk driver is developped for plug-and-play. You can insert your USB disk when needed and un-plug it after use. Make sure that the LED light in your USB disk is not flash when un-plug it or there may be a risk of data lose. 1.How to use: When USB disk is inserted, select “File” in the HL® main menu. Press [F4] to get the sub menu “Load”. You can view the file list and file folder by selecting “X:USB Drv”. To view files in the flie folder, select the desired <folder>. To go back upper folder, select <..>. To save files in the USB disk, after insert USB disk, select the desired file or files, press [F3] and select “X:USB Drv”. The selected file or files will be saved to the current folder in your USB disk. 2.Error process: If you can not see the “X:USB Drv”item when press [F4] or [F3] in the “File” menu, that means the mother board is not be supported by the HL ® USB disk driver. If “X:磁盘错” is displayed in the middle of the sreeen when read or write USB disks, there may be : 1:The mother board is not be supported by the HL ® USB disk driver; 2:The USB disk is not compatible; 3:The USB disk has not yet inserted well. 14 Towedm Wire Cutting Programming System User Manual Towedm Wire cutting programming system, is a Chinese interactive graphics wire cutting automatic programming software. Use keyboard, mouse and other input devices, in accordance with the display screen menu and tips, simply painted graphics of processing components on the screen, the system will immediately generate the necessary CNC procedures. The automatic programming software has a rich menu significance, both graphics and programming functions. It can draw any complex graphics composed by curve, arc, gear, non-circular curve (such as a parabola, an oval, involute line, Archimedes spiral, cycloid). Any graphics can be built to blocks in windows, in part or in whole to zoom, additions and deletions, rotation, symmetry, move, copy, print output. For any graphics drawn on the screen, system software can fast programm and process such as rotate, arrays, and symmetry. Meanwhile shows the processing line and does dynamic simulation, numerical control procedures can also be delivered directly to Wire Cutting Control SBC. Towedm adopts 32 bits Dos core as its development basis. Comparing the old-age Dos16 Wire cutting software, it gets rid of small memory constraints and can edit infinite files and unlimitedly extense features; Contrast to the new Win32 wire cutting software, it retains the features of directly access memory and directly operate display memory, thus when it operates large files or a large number of files, it still can maintain in high-speed. I. Menu Command Introduction After entering the system shows: Figure1.1:Screen structure 15 [Note]: The current file name is different to the old AUTOP. After entering Towedm system, the file name is automatically preset as NONAME00.DAT. If user wants to the file name,choose "save the file as" in the main menu to change. As shown in Figure 1.1, the screen is divided into four window intervals, that graphical display, variable menu, a fixed menu, and the conversation area. Move arrow keys or mouse to the suitable menu place, press ENTER key (or the left mouse button), to choose a menu operation. Main Menu NC program---- enter to NC program menu (see Chapter 4), NC line treatment. Data interface ---- According to conversation area tips, options: 1. DXF file merge: merge AutoCAD Dxf files into the current editing wire cutting graphic files, support point, line, multi-line, polygon, round, arc, oval conversion. Support AutoCAD R14 and R2000 Version. 2. DXF output: Output the current editing wire cutting graphic file in AutoCAD Dxf format, data points also be saved. 3. 3B merge: merge 3 B files as graphic files. 4. YH merge: Merge graphic files in YH2.0 format. Senior curve ---- Enter into senior curve menu (see Section 2.4). Last screen graphics--- Recover the graphis in last screen. When the graphics is zoomed in or out, use this menu to easily recover the last graphics state. Open file ---- Enter into file management (see Section 1.3), read the graphic data files(DAT) in the disk for editing. Can create a new file by opening a graphics file not exiting. Merge file ---- enter into file management (see Section 1.3), merge a graphical data file, equivalent to the old AUTOP "tranfer disk file". Save file ---- Save the currently editing graphics file. When saved, the graphic data file named in current file name, DAT as the suffix. If there’s no file name, enter into file management (see Section 1.3), directly input the file name. Save file as ----Enter into file management (see Section 1.3), save the currently editing wire cutting graphics file in another file name. Current file name as file name, equivalent to "change file name" of Autop. Print ---- print function is output the current screen display to bit file"$$$. BMP". Exit system ---- exit from the graphics state. Temporary Storage system ---- When running under WIN98 system, switch operating procedures. 1.2 Fixed menu Point ---- Enter to point menu (see Section 2.1). 16 Line --- Enter to line menu (see Section 2.2). Circle ---- Enter to circle menu (see Section 2.3). Window---- Enlarge the graphic selected in the rectangular (window) and display. Interrupt ---- Before executive interrupt, make sure there are two points on the line or circle that needed to interrupt. After interrupt the part between the two points will be cut off. If press Ctrl before interrupt operation, execute reverse interruption. The pixels between two points are retained, the others ares cut off. Auxiliary line cannot be interrupted. As shown below, use cursor to interrupt (line, circular, arc), when finished, press [ESC] to stop. Node ---- Capture node, require node should be within pixels of two intersected ciculars. move cursor near to the requested intersetion point, press ENTER key or left mouse button, automatically obtained accurate node. When finished, press [ESC] to stop. When only pick up points needn’t pre-use this operation, directly choose pixels junction point. Delete ---- delete geometric elements like point, line, round, and arc. Type ALL and press Enter, all the graphics will be removed. If to delete a certain element, move cursor the elements needed to delete, press ENTER or left mouse button. When finished, press [ESC] to exit. Cancel ---- cancel last step operation, if pixels are drawn in last operation, it will be deleted. If the last operation to delete the elements, it will resume. Conversation area tips are as follows: Cancel last step input graphics; <Y/N>: Y Redo ---- recover the last canceled pixel or other removed pixel in other operations, or delete the resumed pixel. Only support a step redo operation. Reference--- establish user reference coordinates. Relative ---- enter into relative menu (see Section 3.2). Block--- access to block menu (see Section 3.1). 17 Search ---- enquiries poit, line, circle, arc geometric information Conversation area tips are as follows: Search (point, line, round, the arc) = Use cursor to select geometric elements for searching, and information formats are as follows: 1. Point Xo=horizontal ordinate Yo=vertical ordinate 2. Auxiliary line Xo=reference horizontal ordinate Yo= reference vertical ordinate 3. Wire X1=First point horizontal ordinate Y1= First point vetical ordinate X2=Second point horizontal ordinate A= Angle 4. Circular Xo=Center horizontal ordinate 5. Arc Xo=Center horizontal ordinate A=angle Y2=Second point vetical ordinate L= Length Y1= Center vetical ordinate R=Radius Y1= Center vetical ordinate R=Radius A1=Starting point angle A2=Final poit angle Full screen ---- Full screen displays the entire graphic Zoom ----Display graphics according to the input times of zoom. In addition to the above way to zoom graphics, any time during drawing press PageDown to execute zoom out and PageUp to execute zoom in. Move ---- drag to show graphics Methods of operation: execute move function, when the cursor becomes the Crusaders press a mouse button or press Enter, to make the cursor become four directions arrow, and then move the cursor to drag the graph. To end the dragging state, press the mouse button or re-press enter key, the cursor will also change back to the original Crusaders graph. Can also drawing any time, press Ctrl + arrow keys to execute move operation. Clear screen ---- Hide all graphics. Return---- Return to the main menu, and display the current file name in conversision area. 1.3 File Manager File Manager can use to read and save files, map-preview and sort, etc. Operations are as follows: ↑ ↓ ← →: arrow keys use to select existed files, and can also use mouse click to select. "Preview Area" can immediate preview the selected file. Delete: to delete the selected file. F6: sort by file name. F7: sort by time. Tab: switch to amend region. Each click of Tab, amending region switchs between folder, the file name and telephone, the region switched to display in green, click mouse can also be used to edit the region. Users can keyboard input to edit the 18 content of green region. F4: switch folder. Each click F4 keys, switch between the current folder D: \ WSNCP (hard) and the procedures entering folder (virtual disk). If the system is not configurated with drive, D: \ WSNCP is also virtual disk. Esc/F3: exit from File Manager. Figure1.2:File Manager Specific operation example: 1. Open, merge an existing file: use mouse or ↑ ↓ ← → arrow keys to select a file name in "File list area", click "Open" or press ENTER key, or double-click mouse a file name in "File list area". 2. Open an unexisted file: use mouse to click or Tab key to switch "File name area" to green, type a file name, click "open" or "load", or press ENTER. 3. Save file, save file as: Click mouse or Tab key to switch "file name area" to green, type a file name, click "Save" or press ENTER. Also choose a file name from "file list area", then "Save". At this time, tip shows "replace the old file Y / N?", answer yes(Y) or not(N). 4. Change folder: click mouse or Tab to switch "folder area" to green, input existed folder (such as E:, F: \ FILE). By simply press F4 key to switch between two fixed folders. [Note: If no changed folder, all files stored in virtual disk will not be saved when power is off. Users must save the files from virtual disk to the library of HL ® system. 19 1.4 Definition of shortcut and mouse buttons You can also use the shortcut method in Towedm, directly press the letters or numbers hinted by “shortcut ” in conversation area to quickly select the appropriate menu operation. For convienent, Towedm also provided the following shortcuts: Home: accelerate the speed of cursor movement End: slow down the speed of cursor movement. PageUp: Larger graphics. PageDown: narrow graphics. ↑: move the cursor up. ↓: move the cursor down. ←: move the cursor left. →: move the cursor right. Ctrl + ↑:Move graphics upward. Ctrl + ↓:Move graphics downward.。 Ctrl + ←:Move graphics left. Ctrl + →:Move graphics right. O is shortcut to select origin. X is shortcut to select X axis. Y is shortcut to select Y axis. F2:Back to main menu, meanwhile display current file name in conversation area. F3:Import calculator (see Section 1.5) F4:Refresh graphics without drawing points. F5:Refresh graphics (draw points and support line). F6:Refresh graphics without drawing support line. F10:Re-painting the processing line. Definition of mouse buttons: Towedm default the left mouse button as "Enter," right button as "Cancel" In reply to "Y / N?" press "Enter" as "Y", press "Cancel" as "N", press the middle button as "Esc" to cancel. 1.5 Calculator ---- press F3 key to use the calculator. Towedm calculator can calculate plus (+), minus (-), times(*), divide(/), power (^) and trigonometric function sine(Sin), cosine (Cos), tangent (Tan) , cotangent (Cta), anti-sine(Asin), anti-cosine(Acos), anti-tangent(Atan). To call the last calculation result, press “?” in the data state. In addition, calculator can be used any time when data input, that above operators can be used during data input. 20 II.Graphic input operation Towedm graphic menu includes point, wire, circular and senior curves of all non-circular curves. 2.1 Point Menu Menu Pole/ Coordinate point Screen display Point<X,Y>= ( If to select origin, select it on screen or directly type Letter O) Cursor random point Center point Point on circular Cursor select point Circular,arc= Circular,arc= angle= Divide point Select line, circle, arc = Divide number<N>= Starting angle<A>= Lattice base point <X, Y>= Lattice distance<Dx , Dy>= X axis Number<Nx>= Y axis number<Ny>= Divide point of wire, circular and arc. Middle point Select wire,arc = The middle point of wire or arc Middle point of two points Select point one<X,Y>= Select point two<X,Y>= The middle point between two points CL node Select line arc one = Select line are two = Node of line,circle or arc, differ to “node” , “Clnode”not request visible point between line and circle.Execute the operation,system automaticly longer line and circle and then caculate their node. Point rotation Selected point<X,Y>= Center point<X,Y>= Rotation angle<A>= Rotation number<N>= Selected point<X,Y>= Symmitric points, line = Delete isolatede point Rotation copy point Point one<X,Y>= Point two<X,Y>= Distance between two <L>=??? Calcute the distance between two point. When cursor captureone one point. Otherwise, mouse enter botton to locate the cursor position coordinates. Lattice Point symmitric Delete isolated point Check distance between two points random Explanation 1.Normal input format:x,y 2 . Relative coordinates input format : @x,y (“ @ ” is relative coordinates mark,“x”is relative x axis coordinates,“y”is relative y axis coordinates).Last point as reference point, selected by cursor. 3.Relative polar coordinates input format:<a,l( “<”is the mark of relative polar coordinates, “a”is angle, “l”is length).Last point as relative reference point. If selected by cursor, hint to input polar radius and angle. Use cursor to select a point anywhere on the screen To find the center point of circular and arc. To find a point of a certain angle on the circular. Start from the first lattice point, step distance by(Dx,Dy) ,X axis number is points number on X axis.Y axis number is points number on Y axis and form a lattice.Change step Dx, Dy symbols can change the lattice endpoint to the upper left corner, the bottom left corner, the top-right corner and the lower right corner. The feature used with assisted mapping, to expedite the drawing speed. NC array processing procedures also need to tie in with this feature To find the symmetric point Delete isolated point 21 2.2 Wire Menu Wire Two point line Angle bisector Point +Angle Tangent Angle + Point-line angle Point tangent to circle Common tangent to two circles Line extension Line pan Wire symmetry Point-ray Clear ass-line Check angle of two lines Screen tips Two poin line Line endpoint<X,Y>= Line endpoint <X,Y>= Line endpoint <X,Y>= Select line 1 = Select line 2 = Line <Y/N ?> Select point〈X,Y〉= Angle A=90〉= Tangent to circle or arc Angle <A>= line <Y/N ?> Select point<X,Y>= Select line = Angle <A=90>= line <Y/N?> Select point<X,Y>= Tangent to circle or arc line <Y/N?> Tan to circle or arc 1 = Tan to circle or arc2 = Line <Y/N?> Select line = Intersect to line, circle or arc Select line = Pan distance<D>= Line <Y/N?> Select line = Suymmetry to line = Select point<X,Y>= angle <A>= intersect to line circle or arc Select line1= Select line2 = Angle = ??? Explanation Line through one point Start point To one point To one point Find angle bisector between two lines. Select one line from the two lines. Find assistant line through certain point and form Angle A with positive X axis Directly press ENTER for 90º. The assisant line tangent to circle or arc and Form Angle A with positive X axis. Find a line through a existed point and form Angle A with certain line. A point on the known line, and the line tangent to a known circle Find common tangent to two circles or arcs. Iftwo circles intersected, find two exterior common tangent. If two circles not intersected, find two exterior and two interior common tangent. Extense line to another selected line,circle orarc When two nodes, choose the one near cursor Pan copy line. If solid line will still be solid After copying,assistant line will be still assistant line after copy. Symmetry copy line One line symmetry to another line Line through certain point and form Angle A with positive X axis and intersect with a known line,circle or arc. Delete all assistant lines Calcuate the angle formed by two known lines. 22 2.3 Circle menu Menu Screen display Center+radius center <X,Y>= radius <R>= center+tangent center <X,Y>= tangent to line, circle = circle <Y/N?> Point-tangent + Circle point<X,Y>= radius Tangent point to line and circle Radius <R>= Circle <Y/N?> Two poits + Point 1<X,Y>= radius Point 2<X,Y>= radius <R>= Center Center line= line+tangent Tangent point to line Or circle radius <R>= circle <Y/N?> Double tangent Tangent to line, circle + radius(transit Tangent to line,circle arc) circle <Y/N?> 3 tangent circle Point,line,circle,arc 1= Point,line,circle,arc 2= Point,line,circle,arc 3= Circle <Y/N?> Arc extension Arc intersect with point, circle, arc Concentric Circle, arc Offset value <D>= Explanation Draw a circle according to a given center and radius. Draw a circle according to a given center, given tangent point to line, circle or arc. Choose one circle if several circles. Draw a circle by given point of a circle, given circle tangent to another point,line,circle or arc. And given radius Draw a circle by given two points and radius. Draw a circle by given center line and tangent point to line, circle or arc. Draw a circle in given radius and tangent poit on given circle to given point,line and circle or arc. Equivalent to Autop transit arc. find any 3 elements common tangent circle Extent arc to intersect with another line, circle or arc. Offset circle or arc in certain value Circular symmetry Circle, arc Symmetry to line= Draw symmetric circle or arc Circle to arc circle = arc startpoint<X,Y>= arc endpoint<X,Y>= Edit selected circle to arc in given start point and end point cusp to arc Radius <R>= Use cursor to find sharp point Change cusp to arc. Make sure that only two effective pixel in cusp (only line or arc)and end point superpose, otherwise operation fails Arc to circle arc = arc = press ESCto quit Change arc to circle 23 2.4 Senior curve Menu Elliptic Screen display Long axis <R a >= Short axis<R b >= Starting angle<A1>= Terminal angle<A2>= Explanation Spiral Starting angle<A1>= Starting radius<R1>= Terminal angle<A2>= Termianl radius<R2>= Archimedes spiral Parabola Coefficient<K2>= Starting parameters<X1>= Terminal parameters<X2>= Use parabola equation Y=K*X*X。 Involute line Base-circle radius <R>= Startingangle<A1>= Terminalangle<A2>= Parameter equation: x=R(cos(t)+sin(t)) y=R(sin(t)-cos(t)) Standard gear Gear modulus<M>= Gear teeth num <Z>= Effect teeth num<N>= Starting angle <A>= Equivalent to free gear, set the parameters: pressure angle <A> = 20, variable coefficient <O> = 0, tooth high coefficient <T> = 1, tooth-top gap coefficient <B> = 0.25, transit arc coefficient = 0.38. Do not make effective teeth more than teeth, although this can also make graphics, but there will be many repeat lines, generated processing code will cause trouble. Free gear Gear modulus <M>= Gear teeth num<Z>= Pressure angle<A>= Variablecoefficient <O>= Tooth high coefficient <T>= Tooth-top gap coefficient<B>= Transit arc coefficient= Effect teeth num<N>= Starting angle<A>= Involute gear: Base circle radius:Rb=MZ/2*cos(A) Tooth-top circle radius:Rt=MZ/2+M*(T+O) Tooth-root circle radius:Rf=MZ/2-M*(T+B-O) Parameter equation: x=acos(t) y=bsin(t) Experience parameters: Inner tooth T=1.25 B=-0.25 Spline tooth T=0.5 Inner spline tooth 内花键齿 T=0.75 24 B=-0.25 III.Graphic edit operation 3.1 Block menu Towedm block menu can execute whole or part of the graphics by deleting, zooming, rotating, copy and symmetrical treatment. The treated part should be firstly built block by window or increasing elements, the block elements displayed in magenta. 3.1.1 Window selection Screen display: First corner point ----- define a cornerof window,press[ESC]or mouse middle button to stop. Second coner point-----define another corner of window, press [ESC] or mouse middle button to stop. (B)after building block Figure 3.1(A)use window After building block, the element in the rectangular window appears in magenta. As auxiliary lines and points are not valid pixels, they cannot be selected as block 3.1.2 Add element Screen shows: Add block element disk If need adding an element to block, move the mouse to select. The selected block elements appear in magenta. 3.1.3 Reduce element Screen shows: Reduce block element disk If need reducing an element in block, move the mouse to select. The reduced block elements turn back to normal color. 3.1.4 Cancle block Screen shows: Cancle block <Y/N?> Press Enter, return all block elements to non-block, all magenta elements turn to normal color. 3.1.5 Delete block elements –to delete all block elements Screen shows: Delete block elements <Y/N?> Press Enter to delete all elements in magenta 3.1.6 Block pan(block copy)----Pan and copy all block elements. Screen shows: 25 Pan distance <DX,DY>= Pan times <N>= Figure3.2 The result of Pan distance<DX,DY>=30,0,Pan times<N>=2 3.1.7 Block rotate ----rotate copy all block elements Screen shows: Rotate center<X,Y>= Rotate angle<A>= Rotate times<N>= Rotate times(except itself) Figure 3.3 The result of rotate 120°for two times around coordinates center 3. 1. 8 Block symmetry ---- symmetry and copy all block elements Screen tips: Symmetry to point, line = symmtric to a point or a line Figure 3.4 Symmetry block element to X axis 3.1.9 Block zoom---- Zoom all block elements in input scale 3.1.10 Clear superposed lines ---- clear superposed line or arc, if errorly repeat to merge the same file, then use the function to clear duplicated line or arc. 3.1.11 Reverse choice ----set all block elements to non-block, set all non-block elements to block. 26 3.1.12 Select all ---- Set all lines, circle and archh to block elements 3.2 Relative Towedm provide relative coordinates, convinient for relative coordinates required graphic processing. 3.2.1 Relative pan Screen shows: Pan distance<Dx,Dy>= relative pan distance Pan the whole graphic for Dx in the current X-axis direction, Dy in Y-axis direction, as shown in figure 3.5. (A)no relative pan (B)pan(X,Y)=5,5 figure 3.5 relative pan 3.2.2 Relative rotation Screen shows: Rotate angle<A>= Rotate angle A around origin 绕原点旋转 A 角 Rotate the current whole graphic for Angle A around origin 3.2.3 Cancle relative Cancle done relative operation, recover the graphic state before relative operation. 3.2.4 Symmetrical treatment Screen shows: Symmetry to coordinates axis<X/Y?> Symmetry the current whole graphic to X or Y axis 3.2.5 Reset origin Screen shows: New origin<X,Y>= Set one point as the new coordinates origin. 27 IV.Automatic programming operation Towedm can generate processing lines for closed or unclosed graphics, and also can execute rotate and array processing, view and save NC programs and directly send them to WEDM SBC. 4.1 Processing line Generation process of starting processing code: <1> select process starting point and cutting point. <2> answer processing direction. (Yes / No). <3> give radius of sharp point arc. <4> give offset gap value, according to positive or negative mark showed by arrow on the graphic. <5> reply, "Repeated cutting", if answer No, then normally generate 3 B code. If Answer is (Yes), then: a. System asks "cutting leaving a blank? ", input the last cutting reserved length (unit: mm). b. Then enter the second cutting offset gap according to tips. The system automatically generates the second reverse cutting 3 B code. c. System will ask "repeat cutting?" Answer is (Yes) and repeat Step b can generate the second, third, and, N times cutting 3 B code. If answer not, then end. <6> Input final cutting offset gap according to tip. <7> If the operation completed without error, system will generate code information, if there error, then the system gives error hint. Hint message format is as follows: R = sharp point arc, F = gap offset, NC = number of code segments, L = line whole length, X = X-axis zero, Y = Y-axis zero 4.2 Cancle ex-code That is, the old AUTOP "Cancel the old line" (Cancle the generated processing line), the difference is that if there are a number of jump steps exist, only a step can only cancle last step line. 4.3 Save code Save the generated processing code to disk, after save, the extension is ".3 B". If the current document is empty, then save NONAME00.3B to disk, may cover all existed 3 B files, so must first save graphic file to file diske(the "main menu" of the "Save file as ", see 1 .1). [Note: If no defined folder, all the files stored in the virtual disk, could not be saved after the power failure. Users must save files in HL ® system by oneself. 4.4 Path simulation It is used for checking the processing sequence in a graphic visual way. Press F10 can also be re-draw processing line. 4.5 Starting point align When the generated code starting cutting point is not the starting point request, use the function to lead it to the request starting point. 28 4.6 Terminal point align When the generated code terminal point is not the terminal point request, use the function to lead it to the request terminal point. 4.7 Rotation processing Screen tips: Rotary Centre <X,Y> = Rotation <A> = Rotating number <N> = rotation number (not including itself) 4.8 Array processing Screen tips: Array points <X,Y> = Enter X, Y values or mouse clicks on the screen given point, which as starting point, and regenerate the processing line. Different to the old AUTOP, Towedm need to use “Array”in "point menu" to generate the need dot array (see 2.1), then click the starting point of each jump-step program to generate rray. This has the advantage that users can better plan the line for jump-step procedures in order to save useless walk. As shown in Figure 4.1, the old AUTOP can only have an array of jump-step as right figure, that journey unreasonable. Press Esc to exit, re-select "array processing", can be multiplied jump-step process. Figure 4.1 Array processing,right figure is array generated by old AUTOP 29 4.9 Check code Use “check code”function to check the generated processing code. 4.10 Load code Screen shows: Cancle current code <Y/N?> After press Enter, open File manager (see Section 1.3) to import existed 3B file Processing starting point <X,Y>= Select a point as the starting point of processing line. Press F10 to redraw processing line. 4.11 Code transmission “Response tranfer”is “send NC programme” ,send processing code in”response transfer” to machine SBC. “Synchronize transfer”is “through NC tape” ,send processing code in”synchronize transfer” to machine SBC. [Note]: 3 B transmisson is by seting "Autop.cfg settings" of "Var. Parameters" menu in HL® main screen. Machine SBC requested receive way must correspond to the send way, otherwise transmission will fail. "Autop.cfg set up" includes four numbers, The first number is to determine the send output level and response touch level: 0: send output level 5 V effective response handshake level 5 V effective; 1: send output level 0 V effective response handshake level 5 V effective; 2: send output level 5 V effective response handshake level 0 V effective; 3: send output level 0 V effective response handshake level 0 V effective; If use "synchroniza transmission", ignore the handshake-level response. Second number is to determine 3 B pause code: 0: no pause code 1: D 2: B0 B0 B0 FF 3: B0 B0 B0 GX L1 Third number is to determine the maintain time of "synchronization" signal, the larger the number, the longer the time. The fourth number is to determine Help introduction in Chinese or English. (Applicable to HL card in Chinese or English versions, meanwhile can convert to use Towedm in English version). 30 V. Drawing examples 5.1 Drawing example 1: 1、Pan X axis up and down for 35, pan Y-axis right for 60. 2、Find relatively polarcoordinates point(<140,15) to the intersecting point. Draw a circle with the polar point as center and 15 in radius. 3、Draw a big circle with primitive as center and 40 in radius 4、Connect the point right to Y axis intersected by the big circe and XL +35 in height, with the polar coordinates point (<200,80) to draw to a line 5、Through line left endpoint draw line (poind + angle, 90°) and intersect the horizontal XL –35 in height. 6、Draw a solid line by lower endpoint and the left node of XL -35 height and the big circle 7、Draw a small circle to intersect with XL 35 in height, broke the circle, and connect to other lines which havn’t been connected. 8、Execute cusp to arc on the node, arc radius is 2. 5.2 Drawing examples 2: 1, Pan X axial up for 10, take the intersection with Y-axis as the center and a radius of 5.1 to draw a circle. 2, Pan X axial up for 25, take the intersection with with the Y-axis intersection as the center and a radius of 8.2 to draw another circle. 3, Draw two exterior common tangent lines to the two circles. 4, Pan X axial up for 35, pan Y axial left and right for 2. Connect the two nodes into a solide line. 5, Interrupt the superfluous part of two circles. 6, Select all graphics as a block, and then execute block rotatation for 120 degrees, rotate for twice. 31 Introduction for HL®card multi-cutting operation and connection (A) Multi-cutting route generation HL ® card multi-cutting can generate multi-cutting route by using TOWEDM automatic programming, refer to section 4.1 "Towedm wire cutting programming system user manual", or simply by designating multi-cut times when starts a cutting work, which is easier for ordinary 3 B files to be used for multi-cutting and is explained in the following paragraphs. By selecting WORK menu, choosing a 3B file and pressing F1 to start a cutting work from the start to the end of 3B segments, the system will hints: "Multi-cut times:", Input number must be larger than 2, otherwise ordinary single-cutting will be excuted, if multi-cut has been processed by TOWEDM, press enter; "Remainder(mm or =seg):", Input the reserved length for final cutting, in unit of mm or the segment number by pre-fixing a ‘=’ to the digits; "Mono cut Remainder? Y / N", If Yes, the reserved segments cut by one time, if No, mulit-cut by input times. When cutting job proceeds to the reserved segments which choosed for multi-cutting, the system will pause in order to let you fix the cutting off part of the workpiece. "Multi offsets,,,:", input "Multi-cut times" offset values (unit: mm), separated by ",". These offset values can also be pre-input in "Multi-cut parameter table" (Figure 1). If a Yes is entered for "Mono cut Remainder? Y / N" selection, one more offset value is requested. These offset values are added to the offset value when generating 3B procedures. But not be affected by the “Offset offset value” in "processing parameters setting" (Page 4). According to the above values entered, system will re-produce mutli-cut route considering all 3B segements. If you just want some segments to be processed for multi-cut while the others left for single cut, insert two “MUL” lines in your 3B file. Only those segments between two “MUL” lines are to be processed for multi-cut. To multiple cut a taper, just set tape degree in "Gradian taper" of the “processing parameters setting” menu, and then input the above values to start multi-cut processing for a taper. (B) Multi-cut parameters (1) In HL ® main screen, move cursor to the "Multi parameters 1", press Enter, or directly by M button, enter the multi-cut parameters table (Figure 1). (To the 2nd vice card, the corresponding menu item is "multi parameters 2", press I to enter). (2) Figure 1 shows the multi-processing parameter table of the HL ® main card. The first row is line numbers. There are total nine lines of parameters. When cutting proceeds to the turning point, the system outputs a control command to let the multi-cut parameters automatically change into the next line. The procedure will pause for four seconds to allow the wire tube speed, high-frequency pulse, high-frequency current and variable frequency trace changing for the next cutting in different parameters. When a cutting job begins, the first line will be selected. The working line is shown in red. "RD" lines in 3B files are used to output control commands. 32 (3) Parameters instruction: Column 2“Pw”is pulse width,,unit is microsecond, range 2~ 200 microsec; Column 3 “Pi”is pulse interval, unit is times of pulse widt, if Pw is 10 microsec., Pi is 5 , then the pulse interval is 50 mircosec., ranging from 2-15; Column 4 “F.M.”is goup modulation setting,0:None,1 ~ 5:group puls width of 1-5 microseconds; Column 5 “Amp.”is high frequency current strength(see Section 5) ,range 1 ~ 15; Column 6“Gap” is the gap voltage between molybdenum wire and workpiece. The normal value is about 6V. When high frequency current is very strong, set to a larger value about 7~8V. Around 5.5V will be better for a smoother surface. Column 7 “W.S.”is wire tube speed terminal setting(see Section 6) ,range 0 ~ 7; Column 8 “V.F.”is variable frequency tracing variables. Column 9 “Offset”is offset value for each cutting(unit:mm) ,range +1.000 ~ -1.000,allowed to edit or input when cutting begins The set and edit parameters: press up down left right arrow keys to select the item needed to edit, press“+” 、 “-”key to adjust. Press ESC to quit. Figure 1. Multi-cut parameter table (4) As shown in Figure 2, high-frequency pulse signal is output by HF0, HF1, HF2, HF3. High-frequency current strength is to control the output of this four-way(see Table 1). User connects HF0 to a power FET, HF1 to two power FET, HF2 to four power FET, HF3 to eight power FET, by adjusting the "current Amp." Parameters, allows High-frequency current strength is divided into 1-15 blocks, as shown in Figure 3, using 15 power FET. Users can also choose the number of power FET, such as HF0, HF1 separately to one, HF2, HF3 separatly to three, a total of eight power FET. [Note 1]: HF0, HF1, HF2, HF3 and AC12H1 and AC12H2 must use the shield line, one end of the shield line connected to the computer casing (15 joints of metal-shell), the other end has no connection. [Note 2]: AC12H1, AC12H2 is to provide high-frequency signal ~ 12 V exchange power, must be provided by an 33 independent transformer, or from the tap of high-frequency transformers. Must ensure that there are ~ 12 V voltage value, output of measurable U23 (7812) has 12 V DC, otherwise the voltage of field-effect power tube will be not enough for normal high-frequency working. [Note 3]: DC12V +, DC12V-is used to commutated high frequency, when there’s 12 V DC voltage input between the two, high-frequency open, if non-voltage, high-frequency closed (that is HF0, HF1, HF2 and HF3 all no high-frequency signal output). Connect the stepper driven voltage via the contact of commutated high frequency. Table 1、High Frequency pulse signal outputg: HF3 HF2 Amp. 1 N(0) N(0) 2 N(0) N(0) 3 N(0) N(0) 4 N(0) Y(1) 5 N(0) Y(1) 6 N(0) Y(1) 7 N(0) Y(1) 8 Y(1) N(0) 9 Y(1) N(0) 10 Y(1) N(0) 11 Y(1) N(0) 12 Y(1) Y(1) 13 Y(1) Y(1) 14 Y(1) Y(1) 15 Y(1) Y(1) HF1 N(0) Y(1) Y(1) N(0) N(0) Y(1) Y(1) N(0) N(0) Y(1) Y(1) N(0) N(0) Y(1) Y(1) HF0 Y(1) N(0) Y(1) N(0) Y(1) N(0) Y(1) N(0) Y(1) N(0) Y(1) N(0) Y(1) N(0) Y(1) (5) Wire speed conrol(WS) :X1、X2、X3 and XCOM separately connects to control terminal of“Frequency converter”。 The curcuit changes the wire-tube speed by controlling the connection of X1, X2, X3 and XCOM, output code as below table: Table 2, WS control output code: X3 terminal Wire speed W.S. 0 0 1 0 2 0 3 0 4 1 5 1 6 1 7 1 X2 terminal X1 terminal 0 0 1 1 0 0 1 1 0 1 0 1 0 1 0 1 Note:0 – means terminal disconnects to XCOM public terminal 1 – means terminal connects to XCOM public terminal Users must preset " frequency converter" speed, corresponding to each gear of the "wire-speed WS" values. If preset X1 connect to XCOM in 50 Hz, X2 to XCOM in 30 Hz, X1 and X2 samely connected to XCOM in 20 Hz, and so on. 34 [Note]: Users can also use the X1, X2, X3 and XCOM terminal, linking the own developed decoding circuitry, for the formation of high-frequency signal, and change of wire tube rotate speed. (C) Multi-cutting experience parameters (for reference only): The case is to cut a 10 x10 squre column, use 0.18 molybdenum wire, materials: chromium -12, thickness: 25 mm. Account in 0.18 Mo wire, the offset gap generally choose: First cut 0.16 ~ 0.17 mm, Second cut 0.1 mm, Third cut 0.07 mm, the final cut 0.09 mm. Set reserved segment (that is, "cutting blank" or "length of final segment") generally in 1 ~ 2 mm. (1) Method 1: Generate 3B programme in general programming way, enter to processing menu, import 3B file. Press F1 twice; While prompt “Multiple:” input 3; prompt "End length:" input 2 (unit: mm); prompt "End thru? Y / N", input N (reserved segment cut for 3 times), then prompted "Offset,,,offset value ,,,: 0.16, 0.1, 0.07," Press enter to start multiple cutting. Method 2: Program three cuttings (see "processing line", "Towedm Wire Programming System User Manual" Section 4.1): The first cutting, give offset gap, input 0.16; prompted "Multiple cutting", select Yes; prompted "cutting blank", input 2 (unit: mm). Then accord to tips, enter the second cutting offset gap as 0.1; prompted "multiple cutting", select Yes; then accord to tips, enter the third cutting offset gap 0.07; prompted "multiple cutting," and if needn’t another cutting, select No; prompted again " final cutting offset gap ", which is cut off the offset gap of 2mm in" cutting blank ", input 0.09. At this point, the system automatically generated 3B code for three times cutting, save and return to HL processing screen. After return to HL processing screen, import the above-mentioned saved 3B file, press F1 twice to start processing. (2) Press“M”key to open “Multi-cutting parameter list”. First 4 lines in the list are separately the parameters of the 1 to 3 cutting and final cutting(cut off “cutting blank”).As for example, the parameters are as follows: Pulse intervalPi Modulatio n F.M. Current Amp. Wire speed W.S. 1 40-80 microsec. 0 About 5A 50~60Hz 2 About 10microsec. 3 ~ 5 microsec. About 10microsec. 5~7 times 5~7 times 5~8 times 5~7 times 0 About 1.5A 30~35Hz 80.7 0.1 0 0.6 – 1A 20~25Hz 76.1 0.07 0 2A 40~50Hz 84.9 0.09 3 4 Variable Freq. V.F. 90.9 补偿 Offset Pulse width Pw 0.16 [Note]: “Current Amp.”is the Ammeter value showed in Figure 3, “Wire speed W.S.” isthefrequency showed in “frequency converter” panel. 35 Figure 2. High-frequency output and wire speed control interface(Patent No.:ZL200620154454.5) 36 Figure 3. Proposed connection for high frequency power back pole 37 AUTOP Wire Cutting Programming System User Manual I. Abstract AUTOP automatic programming system uses the microcomputer as the control centre, with the Chinese interactive graphics Wire cutting automatic programming software. Users use keyboards, mouse or other input devices to draw the processing parts on the screen following the screen menu display and tips, the system will immediately generate the necessary NC program. The automatic programming software has a rich menu significance, including graphics drawing and programming functions. It can draw curve, arc, gear, non-circular curve (such as parabola, oval, involute line, Archimedes spiral, cycloid), components of any complex graphics. Any graphics can be built to window blocks, in part or in whole to zoom, add or delete, rotate, symmetry, offset, copy, print output. To any graphic drawn on the screen, the system software can fast program and do processing like rotation, array, symmetry,etc., meanwhile to show the processing line, dynamic simulation, NC program also can be sent directly to Wire cutting control host.。 II. System start operation 1. After entering the system, screen shows: 2.Name part as K1, press 1, the macine shows as follow: input file name=K1 (press Enter) If a part graphic named K1 existed ( K1. dat in disk ),then the computer import the graphich to memory, otherwise 38 will deal as another part name Enter AUTOPgraphic state, move mouse to any place. III. System command introduction When entering automatice programming system, the screen shown above. Now press pressing "0" to quit from AUTOP and return to DOS systems. Press "1" button, the screen shows, enter the file name: = Then enter the graphics state, as shown in Figure 3-1. The screen is divided into four windows interval, the graphical display, variable menu, a fixed menu, and the conversation area. Move the mouse to the required menu position, and press ENTER to select a menu operation. OXY button, when need to input Origin, X or Y axis, click cascading menu area the corresponding button to instead keyboard input Main menu area Conversation area, input data here Figure 3-1:AUTOP Screen structure 3.1 Main Menu AUTOP main menu as follows: Main menu NC program-----enter the NC program auto programming system menu List curve----- enter list curve menu Word processing------- enter word processing operation Import disk file----- import disk graphic file Printer------ enter printer service operation Search function-----search for point, line, circle, arc geometric information Page up graphic----- recover to last page graphic Change file name-----change file name 39 Save data ----- save graphic data Exit---- quit graphic state. 3.1-1 Import disk file Machine shows as follows: Import disk file Disk file name =A1.DAT (ENTER) Function: when drawing a NC program graphic for a complicated workpiece, break down the graphic into several parts, then save and exit separately, finally assemble the parts. ★ Note: In AUTOP, file and data will be saved in *.DAT suffix. 3.1-2 Search function Machine shows as follow: Search function Search (point, line, circle, arc)= Function: to search for the information for certain geometric element, use cursor to select, the information of the selected geometric element will be shown in following format: Point:X,Y Line:X1,Y1,X2,Y2, (X1,Y2)Line start point, (X2,Y2)Line endpoint;Beta=(angle) ,Length= (line length) 。 (Center coordinates, radius) Circle:X=X0,Y=Y0,R=r0 Arc coordinates:X=X0,Y=Y0,R=r0 X1,Y1,X2,Y2 (Center coordinates, radius) (start point, node) 3.1-3 Last screen graphic Screen shows: Last screen graphic Function: When the graphic is zoomed in or out, use the function to resume to the last graphic state. 3.1-4 Change file name Screen shows: Old file name=A1 New file name=B:A1 Function: to change the file directory for data storage 3.1-5 Data save Screen shows Save data (meanwhile Woo sound, driver light on) Function: save graphic data in disk for adjuster, the setup file is titled in *.DAT. 3.1-6 Exit system 40 Screen shows Exit(Y,N)Y Save data(Y,N)Y Function: exit graphic system state. 3.2 Fixed menu Point----enter to point menu line ---- enter to line menu Circle ----enter to circle menu block ----enter to block menu Window ---- setup window full screen ----full screen display graphic Break ---- break line zoom ---- graphic zoom in or out in times Node ---- find any node simulate ---- simulate to draw processing line Delete ---- delete geometric element clear screen ---- clear graphic display area Cancle ---- cancle last step operation exit ---- exit to main menu 3.2-1Window Machine shows as follow Left below point Press[ESC] to stop(choose left below point of the window) Right above point Press[ESC]to stop(choose right above point of the window) 3.2-2 Full screen Full screen to display the whole graphic 3.2-3 Break break the line between two points of lines, circle or arc. Machine shows: Break use cursor to break (line, circle or arc), press ESC to stop (A) (B)break 3.2-4 Zoom Zoom the graphice in or out in certain times Machine shows as follows: Zoom 41 Zoom multiple = Press ENTER key: Input more than 1 in multiples, graphics larger, less than 1 in multiples, graphics smaller. 3.2-5 Node Move cursor to the requested node, press Enter to automatically find accuate node; Screen shows: Node Use cursor to prompt node, press [ESC] to stop 3.2-6 Simulate If the processing line has been arranged, execute the menu to draw the actual processing line, and meanwhile mark the program segment and processing direction. 3.2-7 Delete Delete point, line, circle and arc, input ALL and ENTER to delete all the graphic. If to delete certain element, move mouse to the element, then press ENTER. Machine shows as follow: Delete Delete (point, line, circle, arc, all)= 3.2-8 Clear screen To clear the screen for better views the simulated processing line. 3.2-9 Cancle If discover the input data or graphic is error, can cancle by each step till to the beginning state. Machine shows as follow: Cancle last step input graphic; <Y/N>:Y Additionally, system defined some special keys for convinient operation; “ESC” ---- Mouse right button, to stop certain function and exit conversation; “R” button -------Mouse middle button, to redraw the whole graphic; “ENTER” --- Mouse left button, to select and also called Enter; “Ins” ---- To delete all supporting line (line of unlimited length) “v” ---- Clear screen; Mouse right button ---- When conversation area shows (Y/N), equivalent to (N); Mouse left button ---- When conversation area shows(Y/N), equivalent to (Y); Mouse [Left button]+[right button]---- redraw the processing line. 42 IV. Graphic input operation AUTOP graphic menu includes point, line, circle and various non-circle curves consisted of list curves and function curves. 4. 1 Point menu Menu X,Y point Polar point coordinates CLNode Screen display Point〈X,Y〉= (if select the origin, select 0 point on the upper left corner of screen.) Explanation Input basic point If use mouse to select circle or arc, mark circle center as point. Polar coordinates point polar coordinates origin <X,Y>= Angle= Length= (10.75as 10.75°,10.75°as 10° 75’) Find polar coordinates point Polar coordinates origin Polar angle Length CLNode Find node in any two lines, circles or arcs Element 1 Element 2 If there are two nodes, select any one. <line, circle, arc>= <line, circle, arc>= <Y/N>: when show Y/N, Y means selected, N means not selected Point rotation Point rotation Rotated point <X,Y>= Around point <X,Y>= angle = rotate times = Find a point to rotate around another point Rotated point Around point Rotate angle Rotate times Point in the circle Point in the circle Circle= Angel= Find a point in the circle Known circle A point in the angle on the circle Middle point Middle point point<X,Y>= point <X,Y>= Find middle point between two points First point Second point Single coordinates-point Single coordinates point Known a coordinates in line, circle to find another coordinates. Known element Kown X or Y value of a known element Select a point Single coordinates point<line, circle, arc>= Single coordinates = Symmetric point <Y/N>: Point symmetry Symmetric point<X,Y>= Symmetry to line Cursor any point Use cursor to select any point Cancle isolat point Cancle isolated point Find point symmetric to line Symmetric point Symmetry to line Use cursor to set any point in the screen Cancle isolated point 43 Graphic . . 4.2 Line menu Line Two points line Screen tips Two points line Line endpoint<X,Y>= Line endpoint<X,Y>= Line endpoint<X,Y>= Explanation Make a line throught a point start point to a point to a point Point tangent to circle Point tangent to circle point<X,Y>= Tangent to circle= <Y/N>: make a line through a point tangent to a circle through a point tangent to circle choose a line make common tangent line to two circles first line second line choose a line Commn tangent line for two circles Point-line angle Common tangent line for two circles Circle= Circle= <Y/N>: Point-line angle Point-line angle= point<X,Y>= line= <Y/N>: Line-circle angle Line-circle angle Line-circle angle = line= <Y/N>: Point ray Point ray angle point<X,Y>: to line, circle, arc= <Y/N>: Circle ray Circle ray angle= circle= <Y/N>: to<line, circle, arc>= <Y/N>: Normal line Normal line Normal length= Normal angle = make a line through a point and forming angle α with a given line two line angle α through a point angle formed with certain line choose a line Make a line tangent to circle and form angle αwith certain line angle form angle with certain line choose a line make a line through a point and form angle αwith line, circle and arc ray angleα through a point ray intersects with certain element choose a line Make a line tangent to a circle and form angle αwith line, circle or arc ray angle α tangent to circle choose a unlimited long line ray intersects with certain element choose a line Make a normal line normal length P Normal angle α 44 Graphic Point+ angle point<X,Y>= angle= Make a line through a point and form angle α through a point angle is α Line pan Line pan line= pan distance= <Y/N>: make line pan known line pan distance d choose a line Line symmetry Line symmetry 对称直线= 对称于直线= Make a symmetry line known a certain line symmetry to a line Tail vertical line Tail vertical line Make a line that one end is vertical to another line, with a lenght of d Known one end of the line known length d choose a line Point + angle Point<X,Y>= Length= <Y/N>: 4.3 Circle menu Line Circle center + radius Screen tips Center + radius center<X,Y>= radius= Circle center + tangent Center + tangent to line,circle Center <X,Y>= Tangent to <point, line, circle>= <Y/N>= Explanation Known center and radius center:X,Y; Origin 0,P/A; or mouse select a point Radius1.25= R 1.25 Diameter2.33 =Radius 1.165 Known center, to find a circle tangent to point line and circle Known circle center Tangent to point, line, circle Choose a circle Center line + tangent Center line + tangent to line, circle radius= center line= tangent to(point,line, circle)= <Y/N>= Known circle center in a line, to make a circle tangent to the point, line and circle Known circle radius, center is in a line tangent to point, line, circle choose a circle Through a point + tangent Through point + tangent to line, circle Circle through a point, known radius, to make a circle tangent to point,line,circle known radius of the circle through a point tangent to point, line, circle choose a circle Radius = Point <X,Y>= Tangent to<point,line,circle>= <Y/N>= 45 Graphic Tri-tangent circle Tri-tangent circle Tangent to<point, line, circle>= Tangent to<point, line, circle>= Tangent to<point, line, circle>= To make a circle common tangent to any three elements one of point, line and circle one of point, line and circle one of point, line and circle Two endpoints circle Two endpoints circle endpoint<X,Y>= endpoint<X,Y>= Cusp to arc Cusp to arc radius= cusp<X,Y>= Known diameter two endpoints,to make a circle Known endpoint Known endpoint Modify cusp to arc Known arc radius cusp position CL arc CLarc radius= <point, line, circle>= <point, line, circle>= <Y/N>= Arc to circle Are to circle To arc Arc symmetry Symmetry arc= Symmetry to line= To make a transition between line and circle transitioin radius element one element two choose a circle Turn arc to circle Arc Arc symmetry to line Known arc symmetry to line Circle symmetry Symmetry circle= Symmetry to line= Circle symmetry to line Known circle Symmetry to line = Arc symmetry Circle symmetry 4.4 List curve Line Ellipse Parabola Involute Screen tips Ellipse Semimajor Axis=a Semiminor Axis=b Initial parameter = t1 Termination parameter = t2 Explanation Parameter equation: x=acos(t) y=bsin(t) Parabola Distance = p Initial parameter= t1 Termination parameter = t2 Parameter equation: x=2pt*t y=2pt Involute Semi-line=R Initial parameter= t1 Termination parameter= t2 Parameter equation: x=R(cos(t)+sin(t)) y=R(sin(t)-cos(t)) Cycloid Cycloid Radius R = Initial parameter = t1 Termination parameter = t2 Parameter equation: x=R(t-sin(t)) y=R(t-cos(t)) 46 circle Graphic Archimedes spiral Archimedes spiral Polar angle increment= Radius = R Initial parameter= t1 Termination parameter = t2 Disk List Disk list List curve file name= Initial/termination angle <Y / N> = Initial angle= Termination angle = Input list Input list curve Input <X, Y> = Input <X, Y> = Involute gear Involute gear Module = m Teeth = z Pressure angle = x Gear teeth = n Initial gear angle = β AA.LB 1,000, 0.341 2,000, 1.288 3,000, 0.244 4,000, -1.514 5,000, -2.144 6,000, -0.884 7,000, 1.738 8,000, 2.798 Directly input X, Y coordinates Press Enter to exit Press [ESC] to stop Close the curve angle with no endpoint Base circle radius rb = mz / 2 * cos (x) teeth-top circle radius rt = mz / 2 + m tooth teeth-root circle radius rf = mz/2-1.25m V.Graphic Edit Operation 5.1 Block Menu AUTOP block menu can do deletation, rotation, copy and symmetry process to the whole or part of the graphic. The treated part should be built to block by window or increasing element, the block element is showed in dotted line. 5.1-1 Window building block Screen shows Window building block Left below point, press ESC to stop----------appoint left below poin of window Right above point, press ESC to stop --------appoint right aboe point of window Figure 5-1 (A) Use window (B)after building block 5.1-2 Add element 47 Machine shows as follow; Add element Add(line, circle, arc, all)= If just need to add one element to block, move mouse to select; if need to add all graphic to block, then press ALL and Enter. 5.1-3 Cancle block Screen shows: Cancle block If need to cancle the block mark, execute [Cancle block] menu, all doted lines turn to solid lines. 5.1-4Delete block element Screen shows Delete block element <Y/N>:Y if need to delete many elements, use window building block, and then press [cancle block element] menu,to delete the block element. This method is faster than [Delete]. 5.1-5 Block rotation Screen shows Block rotation Around point<X,Y>= rotate around the point Angle= rotate angle Rotate times= rotate times(except itself) Figure 5-2 is around the coordinates origin, rotate for 120°, and twice. Figure 5-2 5.1-6 Block copy Screen shows Block copy Block copy distance<DX,DY>= Copy times 48 Figure 5-3 copy distance<DX,DY>=30,0,copy times=2 5.1-7Block symmetry Screen shows Symmetry to line = symmetry to a certain line Figure5-4 Symmetry block element to X axis 5.2 Relative coordinates AUTOP provides relative coordinates, convienent for some relative coordinates required graphic processing. 5.2-1Relative pan Screen shows Relative pan<X,Y>= relative pan distance (A)no relative pan figure 5-5 (B)Pan(X,Y)=5,5 relative pan 5.2-2 Relative rotate Screen shows Relative rotate angle= Rotate around origin for angle A As shown in Figure 5-8, after finished left-half part of graphics, rotate the graphic around origin for -30 °, then the right part of graphic can be easily input. 49 (A)Workpiece (B)rotate around origin for -30 ° Figure 5-8 Relative rotate 5.2-3 Cancle relative Screen shows Cancle relative Execute [cancle relative] menu, to cancle the established relative coordinates. VI.Automatic programming operation AUTOP can automatically arrange the processing line, and can do rotary, array, and symmetrical processing to the closed graphics. The NC program can not only save, query, but also be sent directly to WEDM control host for processing. 6.1 Processing line Screen shows Start point <X,Y>= Mo wire cutting start point <Y/N>;Y along the dotted line processing cusp arc radius Cusp tranfer to arc in R radius 1.3B/2.4B/3.2XY press 1 to use 3B format, 2 for 4B format, 3 for 2XY format gap<left positive right negative>= Mo wire radius offset value according to the principle of positive to left negative to right. 6.2 Cancle old path line Machine shows If to cancle the original processing line <Y/N>:N Press [N]key not to cancle start point<X,Y>= Move mouse to select the point <Y/N>:Y cusp arc radius= Choose anti-clockwise as processing direction 选取逆圆加工方向 The radius of cusp transfer to arc 尖点过度圆弧半径 Gap<left positive right negative>= Mo wire offset principle: left positive right negative 6.3 Array processing Machine shows as follows Array processing Array distance(DX,DY)= Dx is distance of X axis, DY is distance of Y axis 50 X axis number= array numbers in X axis direction Y axis number= array numbers in Y axis direction Figure 6-1. Array processing 6.4 Rotary processing Machine shows as following Rotary processing Point = around the point to do rotary processing Rotate angle= Rotate angle Rotate times= Total times of rotary procseeing(except itself) ★ Note: the basic difference between [rotary processing ] and [block processing is [Block rotate] is used in graphic editing. 6.5 Symmetric processing Machine shows Symmetric processing Symmetry to line= 6.6 symmetry to a certain line to process Gear processing Machine shows as follow: Process involute gear Gear module M Module=m Gear=Z Pressure angle=α Variable coefficient=Xbv Pressure angle, stantard value is 20° standard gear variable coefficient Xbv=0 Tooth-top circle coefficient ha(1.0)=ha Standard gear ha=1.0 Tooth-top circle coefficient Ca(0.25)=Ca Standard gear Ca=0.25 Tooth-root transition circle coefficient ga(0.35)=ga Standard gear ga=0.35 Cusp arc radius =r generally cusp arc radius r=0.2mm Start point distance =D Distance from guideline start point to gear center 1,3B/2,4B/3,2XY= gap (left down right minus = choose format Process gap 51 6.7 Save program Machine shows as follow Save XX program (meanwhile,driver light on, alarm ring) Save information as follow: Name: Parts file name and format Conner: Cusp arc radius value Offset F: Gap offset value Length= Processing line length Start Point= Processing line start point coordinates ★ Note: If the part program named in A1 and in 3B format, the NC program will be saved as A1.3B;The same to 4B formatwill be A1.4B, 2XY format will be A.2XY. 6.8 Read NC program After arranging the processing line, one can get NC program, execute the menu to full-screen show the whole NC program; first, second and 25th lines are fixed lines, and the middle 22 lines are for full-screen show. The main information is as follows: Line Col Total Name Cursor current line number; cursor current column number; file total line number; Current NC program file name Defination of 22 lines full-screen editor as follows: [PgUp]键 [PgDn]键 Page up Page down [Ctrl]+[PgUp] One line up, cursor fixed [Ctrl]+[PgDn] One line down, cursor fixed [←] [→] [↑] [↓] Mouse-move cursor, enable to move full screen [Home]键 Move cursor to beg32inning of current line [END]键 Move cursor to end of current line Defination of 25 lines function menu as follows: [F4]Nc Data press [F1] to check the geometric coordinates of cursor processing program [ESC]Exit Press [ESC] to quite full screen state, and return to NC program menu 52 AUTOP: Line 1 Wordster Col 1 3B total Nc 90 LnSert Program On A:A3.3B (22l lines character area) F1 Nc 6.9 Data Esc Exit Send NC program Machine shows as follow: Send XXNC program send NC program in certain format NC= XXX total XXX lines of program Press[ESC] to stop 6.10 stop sending Through NC tape Machine shows as follow Through NC tape Through NC tape in certain format NC=XXX Total program lines Press[ESC] to stop stop through NC tape VII.NC edit and print output 7.1 Word-processing Machine tips as follow: Word-processing file name= If the file is existed, then the character area will display the file content If the file is not existed, then the character area shows blank for inputting data. AUTOP: LineXX Wordstar Col XX Edit Totat XX System Insert On Name 22 lines character area F1 Print F2 Run F3 Save Esc Exit The first, second and 25th line are fixed display area,the middle is 22 lines for character display, the second line is information line, information is as follows: Line cursor current line number Col cursor current row number Total Cursor total lines 53 Name Current word-processing file name Insert on/off Insert ON/OFF switch state 7.1-1 Definition of word-processing function keys The 25th line function keys are defined as follows: [F1]Print---- Use printer to print the edited file, press [ESC] key to stop print [F2]Pun----- If the input file is graphics data, press [F2] key to do graphics [F3]Save---- To save the edited file in disk [ESC]Edit---- Exit the full-screen word-processing environment and return to the interactive graphics state. If the edited file has been changed and no saved, the system shows: XX Not Save .Save Y/N): Press [Y] to save, press [N]to unsave. 7.1-2 List curve input Use keyboard word-processing menu to input in graph coordinates order; For example: Name file as AA.LB,input format as follows; 1.0 , 0.311 2.0 , 1.286 3.0 , 0.244 4.0 , –1.514 5.0 , –2.144 6.0 , –0.684 7.0 , 1.738 8.0 , 2.788 When inputting, use a comma to separate X and Y coordinates, input one point coordinates in one line After input, press [F3] key to save, one can use [disk list] to transfer AA. LB to the computer. 7.1-3 Word-processing input known geometric elements In full-screen word-processing environment, you can directly input point, line, circle, arc and broken line segments. The format provided is as follows: Point: P=X,Y Line:L=X1,Y1;X2,Y2 Circle: C=X,Y,R Arc:A=X0,Y0;X1,Y1 X2,Y2,S(N) point coordinates(X,Y) starting point X1,Y1,end point X2,Y2 Circle center(X,Y) ,Radius R Circle center(X0,Y0) ,starting point(X1,Y2) end point(X2,Y2) ,S is positive circle, N is reverse circle. 54 HL® card interface schematics:(Patent No.:ZL200320116897.1, 200620058536.X) 55 HL-PCI card circuit board installation diagram: (Patent No.:ZL200320116897.1, 200620058536.X) 56 HL-ISA card circuit board installation diagram: (Patent No.:ZL200320116897.1) 57 Introduction for HL-PCI Card Installation HL-PCI and the old HL ® cards adopt different computer bus interface, the old HL ® card adopts ISA bus interface, and the new HL-PCI card adopts PCI interface. T5herefore, the users who purchased HL-PCI card must pay attention not to plug HL-PCI card into ISA slots, otherwise, there will be a result of burning card. If that happens, will not belong to the scope of warranty. PCI card pin may be rusted because of the Southern humid weather. To avoid that happening, please use erasers to wipe both sides of the PCI pins clean during the initial installation. Figure 1: HL-PCI card socket process Figure 2: PCI slots recognition Figure 3: ISA Expansion Slot recognition 58