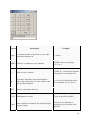
1
DMXControl 2.9
Manual
From DMXCWiki
http://www.dmxcontrol.de/
H
H
This manual contains the Wiki articles from December 2006. Please send comments directly via
DMXControl Wiki http://www.nextec.co.uk/dmxcontrol/Wiki or to [email protected]
H
H
For special support for creation of DDF files send an email to: [email protected]
1
DMXControl 2.9 ........................................................................................................................ 1
Manual........................................................................................................................................ 1
From DMXCWiki .............................................................................................................. 1
1. Introduction ........................................................................................................................ 4
Conditions of Use................................................................................................................... 4
Format .................................................................................................................................... 4
2. Using DMXControl............................................................................................................ 5
2.1 Basic terms of DMXControl ............................................................................................ 5
2.1.1 Audio scene ............................................................................................................... 5
2.1.1 Bank .......................................................................................................................... 5
2.1.4 Blackout .................................................................................................................... 5
2.1.2 Command .................................................................................................................. 5
2.1.3 Dimmer channel ........................................................................................................ 6
2.1.4 Effect ......................................................................................................................... 6
2.1.5 Fade-in time............................................................................................................... 6
2.1.6 Fader.......................................................................................................................... 6
2.1.7 Flash button ............................................................................................................... 7
2.1.8 Device........................................................................................................................ 7
2.1.9 Master........................................................................................................................ 7
2.1.10 Mixer channel.......................................................................................................... 7
2.1.11 Mixermode .............................................................................................................. 7
2.1.11 Moving scene .......................................................................................................... 8
2.1.12 Project...................................................................................................................... 8
2.1.13 Spectra..................................................................................................................... 8
2.1.14 Base DMX address.................................................................................................. 8
2.1.15 Submaster ................................................................................................................ 9
2.1.16 Scene ....................................................................................................................... 9
2.1.17 Scene list ................................................................................................................. 9
2.1.18 Crosspoint................................................................................................................ 9
2.1.18 Blackout .................................................................................................................. 9
DMXControl Tools .............................................................................................................. 10
2.2.1 The Control Centre.................................................................................................. 10
Description ........................................................................................................................... 10
Controls ................................................................................................................................ 10
2.2.2 Help System ............................................................................................................ 10
2.2.3 Graphical View ....................................................................................................... 10
2.2.4 Colour and Gobo lists.............................................................................................. 14
2.2.5 Submaster Tool ....................................................................................................... 14
Description ....................................................................................................................... 14
Operating controls ............................................................................................................ 15
Extended operating equipments ....................................................................................... 16
2.2.6 Master Tool ............................................................................................................. 16
2.2.7 Scene Tool............................................................................................................... 17
Changing a scene.............................................................................................................. 18
Taking over values of a scene .......................................................................................... 19
2.2.8 Effect Sequencer ..................................................................................................... 19
2.2.9 Sound Analyzer ....................................................................................................... 21
Description ....................................................................................................................... 21
Operation.......................................................................................................................... 21
TU
UT
2
1. Sound-to-light................................................................................................................... 22
2. Beattrigger........................................................................................................................ 22
*Spectrum-Analyzer: ....................................................................................................... 22
*VU-Meter: ...................................................................................................................... 22
2.2.10 BeatTool ................................................................................................................ 22
Description ....................................................................................................................... 22
User controls .................................................................................................................... 23
2.2.11 Textbook tool ........................................................................................................ 24
Operation.......................................................................................................................... 25
2.2.12 Scanner Control Tool ............................................................................................ 26
2.2.13 Moving scene editor .............................................................................................. 27
Controls ................................................................................................................................ 27
2.2.14 Shape Editor .......................................................................................................... 29
Operation ........................................................................................................................... 29
2.2.15 Audioplayer Tool .................................................................................................. 30
Operation.......................................................................................................................... 30
2.2.16 Timecode Player.................................................................................................... 32
Description ....................................................................................................................... 32
Definition ......................................................................................................................... 32
Operation.......................................................................................................................... 32
2.2.17 Command line Tool............................................................................................... 33
2.2.18 Command box ....................................................................................................... 35
Operation.............................................................................................................................. 35
2.2.19 DMX Channel overview Tool............................................................................... 36
Description ....................................................................................................................... 36
Operating.......................................................................................................................... 36
DMXControl Operation ........................................................................................................... 38
3.1 Keyboard control............................................................................................................ 38
3.2 Joystick Control.............................................................................................................. 38
3.3 Serial Remote Control (experimental) ........................................................................... 38
3.4 MIDI Remote Control .................................................................................................... 38
2.1 MIDI configuration at PC .............................................................................................. 38
2.2 MIDI banks in DMXControl.......................................................................................... 39
2.3 Assignment of commands to MIDI elements................................................................. 41
3.5 DMX In Remote Control................................................................................................ 42
3.6 Program Configuration................................................................................................... 43
Options ............................................................................................................................. 43
Graphical View ................................................................................................................ 44
Performance ..................................................................................................................... 44
3.7 Plugin administration ..................................................................................................... 45
3.8 Outputplugin................................................................................................................... 45
External Tools .......................................................................................................................... 46
5.1 Capture Integration......................................................................................................... 46
Capture integration............................................................................................................... 46
5.2 Winamp .......................................................................................................................... 46
5.3 Winamp AVS Plugin...................................................................................................... 46
5.4 Magic 3D Easy View Visualizer by Sunlite................................................................... 46
Description ........................................................................................................................... 46
Installation............................................................................................................................ 46
Operation.............................................................................................................................. 47
TU
UT
3
1.Introduction
DMXControl is a software tool that gives you complete control over your light show. With this
program, you can control any DMX enabled equipment from a computer with only a minimal
knowledge of how DMX works. It is one of the few freeware programs of its type available, and goes
far beyond the simple programme demos available.
DMXControl is extremely versatile, easy to use, and able to cope with a range of applications; from
lighting for advertising projects to the complete control of light shows for discotheques, parties or
stage productions.
DMXControl is freeware, we would therefore be very grateful if you would send any feedback that
may assist us with improving the next version to: [email protected].
The most important features of DMXControl are:
•
•
•
•
•
•
•
•
•
it supports DMX512 protocol for several DMX transmitter devices (list will be
expanded, see home page)
512 output channels
Graphical presentation of your equipment and configuration
Includes Effects, Moving scenes and Audio scenes
Multiple Sound-to-Light control capabilities
Several application oriented tools such as textbook (script), moving scene editor and
audio player
Offering of open interfaces for the extension of the functionality (Plugin concept)like
motion scene editor or script
Support for several input devices to control your light show, also MIDI and DMX-In
Compatible with multiple Microsoft Windows versions.
This manual is generated from contributions in the DMXControl-Wiki
http://www.nextec.co.uk/dmxcontrol/Wiki and www.dmxcontrol.de/wiki. It was partly translated by
tools. We thank all authors for the appropriation of contributions for this freeware project.
H
H
Conditions of Use
DMXControl is freeware, you are therefore permitted to freely pass on the DMXControl program and
its documentation to others; provided no changes are made to the original files.
For feedback purposes, we ask all users to register, free of charge, in the DMXControl forum
(www.dmxcontrol.de).
The authors accept no responsibility for any damage that may arise from the use of the DMXControl
software. Pay attention to the detailed licence conditions which are displayed during the installation.
Format
The links embedded in this document result from the take-over of text contributions from the Wiki.
They do not work within the current version of this document, but it gives you an impression which
concepts and items exist in the Wiki.
4
2.Using DMXControl
At start of DMXControl the main window opens, which provides you direct access to the most
important tools.
In the following chapters you will be introduced to the individual tools contained in DMXControl,
along with tips to help you get the most out of the software.
2.1 Basic terms of DMXControl
2.1.1 Audio scene
Audio scenes allow playing an audio file in a definable length. They are usable for scenes in various
tools. The light technician also can synchronously control audio sequences to the light with that. E.g.
there is an important application for this at the theatre control by means of script.
To other scenes an audio scene analoguely gets an eloquent name so that these are re-traceable also in
the scene library. As audio file format wav, mp3, mp2, mp1 and ogg files can be assigned. Like other
scenes also a duration can be assigned to the audio scence in order to control the temporal sequence of
the scenes. The option "stop account" will certainly used be often to break off the clay playing. As in
the case of other scenes, "manual duration" also can be defined to carry out the control over the "go"
key.
2.1.1 Bank
You can summarize to the roper overview Submaster in different banks within the SubMaster tool
(virtual controller). So you can create a bank for headlight, one for stroboscopes and one for another
equipment (as an example). Thus, you have several virtual controllers at the disposal being able to
change between any time.
2.1.4 Blackout
A Blackout is an instant switch-off of all light sources, for example at the end of a scene.
H
In DMXControl, a "Blackout" button is located in the main window. When this is activated, all
Dimmer channels are set to zero level.
H
Also any new brightness levels are not effective until the blackout is deactivated. When the blackout is
deactivated, then the levels are restored, with any changes included.
2.1.2 Command
Commands are a powerful concept in DMXControl. With them the different tools are able to “remotecontrol” each other.
5
For example:
•
•
•
•
Defining a key on a MIDI-keyboard or on your keypad for launching them.
Appearing in a scene procedure
Associate with buttons of the command box
Etc.
Nearly every module of DMXControl offers commands so your are able to automate things which you
otherwise do with your mouse.
Some Examples for commands:
•
•
•
•
•
•
•
Start/stop an effect
Set a channelvalue
Enable/disable the Sound Analyzer
Flash submaster
Call scene
Step scene list
Etc.
2.1.3 Dimmer channel
Dimmer channels are defined through the DDF of the respective fixture. On the basis of this
information, DMXControl can apply certain functions only to channels, that also impacts the
brightness of an fixture:
H
•
•
•
•
H
H
H
Grandmaster
Blackout
Automatic HTP
Bars below the device icons in Graphical View
H
H
H
H
H
H
2.1.4 Effect
Effect stands for:
•
•
A relating light play of different devices (e.g. changing of two colorchangers)
A functional sequence of a device (the sequence of the dmx-values describes a
function) specially terse activities (e.g. strobe-effect)
Effects allow you to set-up specific lighting effects, which you may want to use a number of times. An
effect in DMXControl is the same as a “Chaser” in other programs. An effect is like the scene list but
offers more functions.
2.1.5 Fade-in time
To get smooth transition between scenes a fade-in time can be defined in DMXControl.
During this time the signals are slowly faded in or out instead of a changing suddenly.
2.1.6 Fader
6
A fader corresponds to a slider on a hardware controller.
A fader can be moved on-screen with the mouse or arrow keys, using the slider on the hardware
controller or via MIDI devices. Each fader allows you to adjust the 256 values defined within DMX,
giving you control over light intensity, color, gobos etc. depending on the type of DMX equipment
you have connected. The selected fader can be used for the refection between 0 and 100%. The term
“fade” describes a floating transit between two scenes.
Some explanations:
The procedure, which blends the scenes, works with per cent values therfore from 0 to 100%. The
number of substeps is on the one side defined by the length of the fade (the shorter the fade the fewer
steps) and on the other side through the settings.
First, the fade-in-time (ms) is divided by the value which is set in the configuration. The result is the
number of steps, which is limited up to 50 steps at the moment.
2.1.7 Flash button
A flash button will trigger a high intensity flash of light (maximum DMX value on this channel).
2.1.8 Device
A (DMX capable) device is marked by its type (e.g. Spotlight, Colourchanger, Moving Head etc.) and
its DMX start value. This is usually a fixture. Note that many devices engage several addresses
because several channels are utilised for the triggering. These addresses are always numbered ascend
and without spaces. The first value is the start address.
H
H
2.1.9 Master
The Master is the shows primary controller. Changes to the master controller affect all Submasters.
2.1.10 Mixer channel
DMXControl uses a internally a mixer, that collects the DMX outputs of the different active tools and
generates the output value, that are passed out on the respective DMX transmitter then.
The different sources (therefore usually tools) are called “mixer channels" with it not to confuse with
DMX channels. A mixer channel normally includes the entire DMX channel space, that the respective
DMXControl version makes available, 265 as well as 512 channels).
If a mixer-channel is "closed", also the output values are calculated again.
2.1.11 Mixermode
DMXControl has an internal mixer which merges the output signals of the different parts of the
program to create the global output.
There are two main methods used in the lighting industry for merging signals and these are both used
by the mixer:
LTP and HTP
7
•
LTP stands for “latest takes precedence” and is used in DMXControl for all channels
automatically which are not defined as “Dimmer”.
Thereby the last change is transmitted to the output system. If the Mixingchannel is closed the
mixingchannel will re-establish the status-quo from all DMX-channels.
•
HTP stand for “highest takes precedence” and is usually used for dimmerchannels, e.g.
to prevent the glint which accrues when there are parallel changes from several
sources.
DMXControl sets this mode to every device which is defined as dimmer. As a consequence the
channel will use the highest value so that you can e.g. use the sound analyzer and enable an effect
simultaneously. A lamp preheat would be possible because the value “50” would supersede the value
“0” e.g. by a running effect.
If you have got problems with “hanging” channels the reason could be the HTP-mode. At the channel
overview is shown which channel was changed by the mixingchannel at last.
If e.g. a channel is set to 100 percent by a scene it only can be set by the next scene or setting it within
the scene to a lower value. If one scene blends another the old values shall be able to reduced, too.
In the program options you can disable the HTP-mode thus the dimming-channels will be mixed up in
the LTP-mode.
2.1.11 Moving scene
Moving scenes (motion scenes?) represent complex results of scenes similarly as effects which
especially focus on one or more MovingLights.
The motion is defined along a point consequence (or figure) in a particular duration. For the simple
graphical construction of the trace the figure editor exists. In turn a scene can be assigned to every
point, to control, e.g. color or Gobo changes at this position.
The motion scenes tool is carried out for the complete definition of a motion scene
2.1.12 Project
For each lightshow that you create within DMXControl, you will need to create a Project or Show, all
the components of your lightshow are then saved within this Project. You can generate and save
multiple projects/shows and load them individually as they are required. We recommend that you
create separate project/show directories for each lightshow or event. DMXControl project/show files
have the extension ".stg".
2.1.13 Spectra
This splits an audio file into different frequency ranges; you can then assign channels within
DMXControl to these specific frequency ranges.
2.1.14 Base DMX address
Each of your DMX devices has a start address between 1 and 512. This address must be set in the
device itself using DIP switches etc (Consult the user manual for your specific device for more
8
information)
Note: DMXControl currently supports one universe of addresses in the range 1-512.
TIP: In the dialogue “device settings” the positions of the DIP switch for the selected start value are
shown.
2.1.15 Submaster
Submasters are virtual controllers; each Submaster is assigned to a particular channel and consists of a
fader and a flash button.
2.1.16 Scene
A scene is a set of stored DMX values or levels for channels that control the equipment you have
connected.
A show consists of multiple scenes.
A duration time and a fade-in time can also be assigned to any scene. The term “scene” from
DMXControl is the same as “cue” for other programs.
2.1.17 Scene list
The scenes that make up your lightshow are stored in the Scene List. The number of scenes you can
have per Scene List is limited only by the resources of your computer.
Playing the Scene List will play each individual scene sequentially, complete with their fade-in time
and duration settings. It is also possible to step the scenes manually.
2.1.18 Crosspoint
The crossing point is used when fading between two scenes or looks.
While the "fadeable" channels are crossfaded smoothly, the channels which should not be faded have
to be set to a new value abruptly. This crossing point defines the level (between 0 and 100%) at which
the change should happen, e.g. change the gobos at the beginning or at the end of the crossfade.
2.1.18 Blackout
A Blackout is an instant switch-off of all light sources, for example at the end of a scene.
H
In DMXControl, a "Blackout" button is located in the main window. When this is activated, all
Dimmer channels are set to zero level.
H
Also any new brightness levels are not effective until the blackout is deactivated. When the blackout is
deactivated, then the levels are restored, with any changes included.
9
DMXControl Tools
2.2.1 The Control Centre
Description
This window appears and allows you after the program start:
•
•
•
•
the open memories your show, and end
the call of all tools of DMXControl
the configuration of your system
the call of the help
Projects should regularly be saved to be on the safe side in the construction phase particularly also
under another name to be able to go back to an older version if necessary. The experimental program
parts appear only in the menu when under configuration the corresponding option was chosen. The
name of the project loaded currently is displayed below the menu bar.
Controls
The individual DMXControl tools can be invoked over the button bar. About tool tips the significance
of the buttons is explained. Additional functions are
•
•
•
All (dimmable) equipment is turned off globally blackout key -- everyone.
Freeze key the current DMX seizure holds at the universe (output) but within
DMXControl can be experimented with new scenes without them being sent.
Stop audio account
2.2.2 Help System
The help system can be called via Control centre (Menue "?") by F1 key. With F1 key a context
senitive help related to the active tool is displayed.
H
H
2.2.3 Graphical View
Using this tool, you can graphically arrange your DMX-devices. For a clearer view it is recommended
that you choose and load a background picture of your stage, room, lighting rig etc e.g. a photograph
or drawing.
Right-Clicking on the background will open a context-menu:
•
•
Change Background -> Option to choose or change the background picture
Add Device -> see Add device
H
H
10
Right-Clicking on a device will also open a context-menu:
•
•
•
Configure -> the menu to configure the device will open (see Device configuration)
Delete -> the device will be deleted from your configuration
Move -> the device-symbol will follow your mouse
H
H
Moving your mouse over a device-symbol will show a yellow popup which contains a specific menu
of the device-type. From here the device can be directly controlled.
Note: In program configuration you can define the yellow popups only to appear if you left-click on
the device-symbols.
Some devices have sliders which act like faders. Double-Clicking on the symbols will change values
to min/max immediately.
In selection mode you can draw a rectangle to select multiple devices by using the left mouse button.
Only devices of the same type can be marked. You can also select multiple devices by holding the
STRG-Key.
In move mode you can move the stage, e.g. instead of using the scrollbars (if your windows is smaller
than the stage/background picture). In this mode you cannot use the rectangle to mark devices.
Note: Try the move mode with selecting a zoom factor of 2:1 and moving the picture then.
2.2.3.1 Device-Popup
11
If you hover a device in your graphical view you will see a yellow popup window. Here you can
manage the device. How to create specific menues for your individual device can be lerned in the
tutorial “Device- and Formsconfiguration-Tutorial”.
Hint: In the program settings you are able to set that the yellow popup only will appear when you click
on the device.
Some devices have got slider which work similar as the fader. A double-click with your left
mousebutton effects a sudden change from the minimal to the maximal value.
The popup menues are a huge help for your formation of your show:
•
•
•
Here you a dynamical view of the current (set) DMX-signals.
You can also change settings of the device directly without knowing the exact numeric
DMX-values.
Through the possibility that you can use procesures in the device definition (DDF,
Device Definition File) you can manage depencies and multi-occupancies elegancy
thus that the handling is very simple.
A device popup has got three buttons:
•
•
•
Move-Button: Click to move the popup
Pin-Button: Click to disable the automatic hide of the popup. It is possible to “pin”
more than on popup on the stageview.
Help-Button: If the help tag is defined in the DDF you will find here a short usage of
the DDF and perhaps the author.
A description of the elemts which can be used in a popup menue can be find at our homepage.
2.2.3.2 Device List
This tool allows you to you administer your DMX equipment using a list rather than the graphic stage
representation. Wwhen changes are made using either the list or the graphic stage representation, both
will be updated. Both presentations are always kept consistent. You can change the displayed
parameters directly in the list:
H
H
Address – DMX start address X-Pos; Y-Pos – graphical position of the icon in stage representation
H
H
12
Additional equipment parameters can be modified by clicking "Configure", see device parameters.
You can also open this window via the context menu for the equipment within the graphic stage
representation.
H
H
A list of all devices can be copied as tab-separated text into the clip board and e.g. imported into
Excel.
2.2.3.3 Add device
The following dialog box appears when you choose Add Device from a menu.
The function can be called from either the device list or the graphical view:
H
H
H
H
The upper section displays all available devices, listed by manufacturer (if available in DDFs in the
program installation device directory) or in alphabetical order.
H
H
The middle section displays details about the selected device (from the DDF).
H
H
The lower section can be used to set the following, additional parameters:
•
•
•
Number of devices
Start address for the first device
Number of free channels between individual devices
13
•
New device name: if the one from the DDF does not correspond to your requirements,
it is possible to create new names that enable you identify each unit more easily.
You can add additional parameters in the device configuration dialogue.
H
H
2.2.3.4 Device Configuration
Further device parameters can be configured by the button ‘’’Configure’’’ in device list You can call
this dialogue also via the context menu of the devices in graphical view .
H
H
H
H
You can assign a new icon, alter the start address, color, or Gobo lists assignment.
Tip: The Dip switch animation for the address put in previously helps you to check the correct address
on the light fixture.
You can set the Pan/Tilt orientation for moving lights using the check boxes Invert pan axis as well as
Invert tilt axis. That can be used meaningfully, depending on which way round you view the Moving
Lights from. This feature enables, for example, the movement of lights will follow your computer
mouse or joystick directly.
2.2.4 Colour and Gobo lists
Colour and Gobo lists
H
H
2.2.5 Submaster Tool
Description
With a Submaster tool the channels of the equipment can be controlled directly. These are arbitrarily
many banks(benches) possibly to 12 Submastern each. The banks (benches) are displayed on the left
page for the choice. Every Submaster (the elements on the right page) has a fader, a flashbutton as
well as a judging display for the assigned channel.
14
The Submasters are moved synchronously automatically if another control, such as master, or
graphical stage overlays are altered.
Operating controls
The banks are defined on the left page. See general using concepts for the significance of the buttons.
The name of a bank can be changed by overwriting in the text field (and enter). Approved, the
equipment have to group themselves into benches just like one operates it also together (put e.g. all
PARs in a bank).
There are different Flashmodi:
•
•
•
Normal -- short-time Flash (set the maximum value)
On/Off- alternating mode between maximum value and value adjusted/
Only one - flashed channel reaches the maximum value, the others are reset
respectively (radio button principle)
With the ALL button one can execute the operation defined in the Flashmodi on all channels of this
bank.
The allocation of an equipment channel for a Submaster is reached by clicking on the point below the
Flashbuttons. In the on bonking allocation menu several one or more channels can be chosen, these
then behave simultaneously.
You can also create interesting skip movements by clicking at points along the faders. The further
from the current position you click the bigger the jump (interval jump).
In addition to the "simple view" the Submaster supports also the Crosfade mode. This makes manual
or automatic over-blank faceplates of scene settings possible. Both represented benches (above bank A
and below bank B) refer respectively to the same DMX channels. At the channel allocation it is no
matter whether A or B is assigned at bank. From the concept a bank delivers the current scene settings
and the others the following scene, however the roles alternate.
15
Extended operating equipments
•
With the Crossfade slider on the right page the scene settings can be convicted
manually of bank A and B.
•
The Auto-A or Auto-B button imply the automatic overcrossing to the bank with the
chosen name.
The time of the overcrossing is adjusted with the slider "automatic over-blank faceplates" on the left
below.
•
•
Buttons A and B cause the volatile transition in the setting of the chosen bank.
With the copying buttons the settings of the other bank can be taken on. This is
advisable if only minor modifications are planned.
2.2.6 Master Tool
Description
All channels are controlled globally using the Master controls.
Grand master
•
•
The Grand Master controls the levels of all channels, overriding the settings of all
other controls. Alter the level of the Grand Master by using your mouse to drag the
slider handle [grey rectangle] up or down. You can also click the area above or below
the slider handle to change the level in discrete steps of x percent.
All Submasters are changed synchronously. E.g. If the Master is moved from 100% to
50% each individual Submaster's current value is halved. (do the submaster faders
actually move, or are their levels just controlled by the grand master?)
Flash master
16
•
•
•
The Flash Master sets the value for all Submaster's Flash Buttons.
Clicking (and holding) a Flash button immendiately sets the associated submaster's
level to whatever level the Flash Master is set to. Releasing a flash button restores the
submaster to its previous (slider position) level.
Change the level of the Flash Master (altering by click in five levels).
Effect master
•
•
Sets a global level for all effects.
Change the level of the Effect Master (altering by click in two levels).
Of course, the levels of all masters can be continuously altered too.
Controls
2.2.7 Scene Tool
Description
The scene list tool allows you to define the timing of your show - This is one of your your
management centres for the cues!
Your show comprises individual scenes to which you assign a fade-in time and duration. Every scene
is defined by the DMX values of its selected channels.
H
H
H
H
The scene list tool can be used for theater performances to schedule a simple list of scenes. Scenenlists
are processed in sequential order, starting at currently marked scene. The GO button advances to the
next scene in the list.
You have to select the first scene in order to start a sequence (should be done by default).
For the "GO" button to work, the following conditions must be met:
•
•
•
The scenelist must be started ("Play" mode have to be pressed)
The respective scene must have as duration "manually" (set the time to zero and
reduce another tenth).
The scenes must be marked with a checkmark, otherwise they are deactivated.
17
You may have to deactivate HTP in program configuration (depending on the scene definition).
H
H
H
H
The scene list tool is considerably less resource-intensive than the Effectsequencer.
H
H
For further informationen see article Working with scenes.
H
H
Controls
2.2.7.1 Save Scene
Save Scene
H
H
2.2.7.2 Working with scenes
A scene is collection of DMX channel values. Each scene is stored in a library of scenes. When you
store a scene in the library you give it a unique name, enabling you to find it easily from within the
different areas of DMXControl.
When you use a scene from the library, you are simply referencing that scene not copying it. This has
the advantage that you can edit the scene in one place, and it will update everywhere that you have
used it. Conversely if you wish to make a change in just one place, you will need to create a new scene
so that your changes are not reflected everywhere the scene is being used.
To recall a scene (i.e. set the DMX Channel values to those stored in the scene) simple double click it.
You can verify the current output by looking in the channel overview.
Changing a scene
18
Scenes can be changed by the button with the yellow pin.
The scene has to be activated to do this and the desired changes are made with the Submaster or
Graphical view tool. If the the little hooks in the "Save scene" dialog are graily marked for the values
to be stored, it indicates that no change has been made.
But also these gray elements can be deselected if this value shall not be stored any more in the new
version of the scene.
Taking over values of a scene
If you intend to make a similar scene to an existing scene, you should (as described above) take on the
values of the original scene by activating and modifying.
If a new name is given for the scene in the "Save scene" dialog, a new scene (new instance in the
scene library) is established. In this meaning in DMXControl actually there is no need for making a
copy of a scene, because two instancies of the same scene are needed nowhere.
2.2.7.3 Scene repository
Scene repository
H
H
2.2.8 Effect Sequencer
The Effect Sequencer allows you to create and order effects.
H
H
Example: You can create effects using speed, repetition, forward/backward process or the random
replay of the individual scenes.
Effects in DMXControl are displayed using a tree structure. Every effect will contain a number of
steps (individual scenes). Effects and steps can be added or deleted. Individual scenes can be chosen
from the scene library.
Unlike the Scene lists where the scenes are run sequentially only, here you can set effect parameters.
Several effects can be run at the same time.
Note: The Effect Sequencer uses substantially more system resources than the Scene Tool as effects
are processed about every 50ms (configurable parameter) where as scenes run according to their own
time settings.
H
H
19
On left hand side you can see the tree of already defined effects. With the +/- nodes you can open and
close displaying the individual steps of an effect.
The usage controls serve for following functions:
Effect:
•
+ Button: By pressing this button a nee effect is created. Assign a name and set the
parameters for this effect:
o Play mode - Select the order of playing the individual scenes. "Manual" stands
for deactivation of time control.
o Repeat - Repeated playing of the effect in a loop
o Beat triggerd - Here you can choose the beat triggered control for this effect.
The trigger can be deliverd by Soundanalyser or by the Beat tool.
o Speed boost - Select the speed of playing the individual scenes. All steps are
boosted or braked in the same rate.
H
H
H
H
•
Play Button: - With this button you can start and stop the selected effect. The button
orks in alternate start/stop mode.
•
Checkbox "Execute only one effect". - According to setting of this box the effect will
be started additionally or it replaces the running effects (which are completed in this
case). This property is globally assigned to the effekt sequencer and is not a permanent
attribute of an effect.
•
Checkbox "reuse last values": By default DMXControl returns after playing an effect
to the DMX values that existed before starting the effect.When switching between two
effects the old one will be transfered into the new one, but by after completing the
universe contains the values of previous effect. If the checkbox is marked, the last
values are kept (remain) on universum.
20
Step:
•
Button New Step: If you intend to create a new scene set at first in Graphical View or
by Submaster all DMX values for the wanted scene. Select an effect in the tree and
press the button "New Step". Establishing a "New scene" saves these values. A
window is opened where you can select the channels that are releted to this scene, see
also Save scene.You can also choose existing scenes.
H
H
H
H
H
H
General:
•
With the arrow buttons the order of effects resp. steps can be modified
•
With the Delete button an effect or step is removed.
2.2.9 Sound Analyzer
Description
DMXControl provides with the Winamp VB-Link Plugin an interface to the familar media player
Winamp. The sound analyser tool supports Sound-To Light (S2L) effects , also for signals from audio
input of your sound card.
H
H
Operation
The sound-to-light window fulfills two independent functions:
21
1. Sound-to-light
Here you can assign different device channels to each area of the spectrum. The devices are then
triggered by the spectrum level, i.e. DMXControl generates automatically DMX signals for these
channels depending on the level of audio signal. You can use this feature for instance for "light organ"
effects.
2. Beattrigger
Der Sound Analyzer kann auch versuchen, aus den WinAmp-Daten die Beat-Informationen zu
extrahieren. Diese können dann z.B. verwendet werden, um musikgesteuerte Effekte weiterzuschalten.
Zur Beaterkennung gibt es zwei Modi: The sound analyser tool tries to extract beat informations from
the Winamp files. These signals can be used for triggering of music-controlled effects. There are two
modes for beat detection:
*Spectrum-Analyzer:
Here you can select an "active region" with the red rectangle. Whenever an area of the spectrum rises
into this rectangle, a beat is detected.
*VU-Meter:
Here the beat detection is controlled by the red threshold marker hich can be moved by mouse. If the
VU-level crosses the threshold a beat is detected.
It is not necessary to assign channels to areas of the spectrum for using beat detection.
Of course, you can combine Sound-to-Light and Beatrigger and use it in parallel.
Note: The red rectangle only serves as a threshold definition for the sound-to-light tool. It doesn’t
influence the level-dependent values.
For further informationen to WinAmp plugin please read the article Winamp.
H
H
2.2.10 BeatTool
Description
The BeatTool extracts beat information from different sources and provides it to DMXControl. With
beat information you can synchronise light effects to music, e.g. the strobe light flashing to the beat of
music.
22
The red bar in the form flashes anytime, if the BeatTool has detected a beat. The label below shows
the time distance and the BPM value. You can click into this label in order to set manually a BPM
value (e.g. if known from beat counter of an DJ mixer).
In Manual mode you have to click synchronised with beat of music on Tap-Button as long as you have
reached a sufficient beat value (the median value of last 5 clicks is automatically computed, these
values are shown below the Tap-button).
The Beat Tool can also import beat information from external programs WinAmp (via AVS and
dedicated Winamp AVS-Plugin) or BPM Studio.
H
H
H
H
H
H
User controls
•
•
BPM display
Click to the label for setting BPM value in manual mode.
Sync Button
With this button you can re-synchronise the beat onto the music, if a delay
occured.
On right hand of this button you can maally double or half the beat value.
•
The Beattool supports three modes:
o Manual
You set beat value by yourself with Tap-Button.
o WinAmp AVS-Plugin
The beat is imported from dedicated Winamp AVS-Plugin. With the slider the
maximal BPM value can be configured, if the check box is activated
o BPM-Studio
DMXControl supports also an interface to external program BPM-Studio,
which detects the beat. Here you can configure the query interval and the
connection information to the host running BPM-Studio.
H
H
H
H
23
2.2.11 Textbook tool
Application areas of the Textbook Tool
With version 2.9 the textbook tool (script tool) is available for theatre people particularly. For the
theatre it is important that the effects start exactly on a keyword. The textbook tool shall make the
course of the light and audio effects easier with a text script.
Both lighting effects and audio recordings have to be started (from passing trains, barking of dogs,
cock crows ... ) By the way, a script does not have to be restricted on theatre but can be used
appropriately also in the context of festivities or also carnival events.
Structure of Textbook Tool
The script tool presents itself in 2 parts:
•
•
the text window with editing buttons like in a text editor
the management window with control badges for scenes.
The light scenes, effects etc. are visibly clear in the text window as stage directions.
These are additionally listed separately in the management window, there the connection with the
scenes and orders from DMXControl is established. The management window is synchronized with
the text window, if one selects a stage direction in a window, the other one is scrolled exactly on this
position.
No specific text structure is expected. Stage directions can be inserted in any arbitrary line.
There is the recommendation by theatre people of an act wise processing. The script should be
organized into several sub-scripts so that the text is not too large in the text window. The partial texts
are then loaded separately with the buttons over the management list in the break between the acts.
24
Operation
The Text window
The text window shows the text of the performance (management book). Here you can scroll manually
without influencing the active expiry of the scenes.
The simple text editor within the script window supports merely colour (also background), size, script
(+underlined, fatly, in italics). As a rule, the text in the window is not changed any more. Keyword
only must be formatted in principle. All other changes are made preferably at the stage directions in
the management window. The text window supports the formats .doc (Word) and rtf. Inadvertent
changes can be prevented with the check box for changes.
Stage directions
The stage directions stand out considerably from the general text for better readability. The separators
"###" are used which may not appear in the normal text flow! Stage directions always are always in a
separate line, they have following format:
### nnnn - Scene ### comment <end of line>
The "scene" refers in the scene library of DMXControl to an entry whereby an automatic numbering is
carried out. The type of the scene is stored internally and, however, should be made clear to the
support of its own by the naming or the comment
###0002 – Thunder stormr###Thunder(Audio)
The type of the stage directions corresponds to available scene types in DMXC: Simple scenes, orders
(effects), movement scenes and audio scene. Additionally, there are "comments" for the light
technician which do not have any assosiation to DMXC orders (or call an "empty" scene). Inserting
stage directions should be carried out by mechanism of the green "+" button whereby the cursor must
be at the right place in the text window.
External Editing of Stage directions
Since stage directions are only presented by a string in the text, the texts could be changed also
seamless in principle with other editors. A consistency check is carried out therefore when loading the
script, whether new instructions occur. Solid stage directions are marked with a green rhombus in the
management list. The corresponding new or missing instructions are announced red and then must be
removed manually or laid out as a DMXC scene. After that the script should be saved newly.
The management window
All stage directions are listed in the management window too. They are either created at loading time
of the script or by the "+" button like in the audio player, if e.g. a new light scene is needed. Either one
can access existing scenes/effects with that or a new scene is laid out by DMXControl in the scene
repository. Here the comment on the stage directions can also be changed and a keyword can be
entered for the stage direction. To this one clicks twice slowly behind each other to the appropriate
field (no double click)!
Like in the scene list tool or the audio player, the selected stage direction/scene can be edited or
deleted with the editing and deleting badge. It is indicated by the hooklet before the scene whether the
scene is active (set hooklets) or shall be left out at the expiry, e.g. at rehearsing and samples of the
performance.
25
Navigation within the text book
With the badges “Forward”and "Back" you can navigate between the stage directions without
executing the scenes. Alternatively this can be carried out by the scroll bars and the mouse of course.
One can "skip" instructions for the purpose of synchronization, i.e. leave out to be in the scenario
again with that. By pressing the button "GO" the straight highlighted stage direction (scene) is
executed and the following one is immediately marked.
The Autoscroll button serves the automatic scrolling the text window, e.g. if many lines of text exist
between two stage directions. The scrolling speed is derived from the defined delta time in the
management window, a manual justification is therefore required of course, as a rule.
Synchronisation with the script text
Since DMXControl naturally is not able to "listen or con-reading" the text, the graphic synchronization
must is carried out at the surface manually. One reads the text and reacts on the keywords. If one
meets a stage direction in the text and the keyword is spoken now, the scene is started so by "GO"
button (or at space bar/each return button).
The global progress bar below the text window shows to the rough orientation how far the
performance is shown.
2.2.12 Scanner Control Tool
no article available
26
2.2.13 Moving scene editor
The motion scene editor supports the comfortable definition of moving scenes for MovingLights. A
moving scene can refer to several equipment, ggfs. with respectively different motions (however the
same shape). The tool consists of 5 parts:
•
•
•
•
•
Scene setting
Equipment (-choice)
Settings to the chosen device
Shape view
Allocation of scenes to the (motion-) points
Controls
Scene setting
Here the name of the motion scene is defined under which it is also stored within the scene
repository and the allocation of the shape. New figures can also be created by the shape
editor.
With the duration the total time of the motion (of leaving the figure) is determinined. The
waiting time is the time between the renewed presentation of the shape. With number of
repetitions in the motion scene is said how often the figure shall be carried away.
27
Equipment choice
Equipment can be selected from the equipment list with the plus button, be removed
correspondingly with the erasing button here. Please take into account that as a rule only the
Pan and Tilt channels should be selected. The motion (the DMX values) also refers to the
additional chosen channels otherwise, what can partly be senseless.
Chosen equipment
One can carry out special settings to the device chosen in the list above, e.g.define the centre
and the size of the individual figures as well as define channel invertations here.
One can with the offset setting create particularly interesting motion scenes since a temporal
moving of the motion of the individual equipment has adjusted here. This seems optical at
certain figures as an undulation. Start position absolutely becomes at the taken the X/Y setting
from the motion scene. The motion relatively starts at from the current position the Moving
Lights.
Shape view
The shape is represented here (beeing differently for perhaps repeated equipment). A
modification of the shape only can be carried out via the shape editor only, on the other hand,
one can comprehend the consequences of the individual equipment settings directly here since
the figure of every device is represented in another colour.
Assigned scenes
A special scene can here be assigned to every point of the motion line (shape) to change e.g.
the colour or the Gobo when reaching this point. In principle even commands, audio scenes
and in turn motion scenes can be assigned. Please, however, think of the resource charges of
your PC and use such composite effects thriftily so that the motion scenes occur really
"jerking freely”.
28
2.2.14 Shape Editor
The figure editor is the aid to define the positions of the motion line at motion scenes. You can put the
figures together from arbitrarily many individual points in which the motion is represented by the
rubber lines in an afferent numbering of the points.
Operation
The figure library is managed in the upper part of the tool. Before a figure can be edited, this must be
selected from the Dropdown or be created newly over the adding button. The points are edited in the
middle part in which you can use three standard forms as output figure. Of course a figure can be
created also from individual points. Motion scenes tool being able to be assigned to the points scenes
in this later. One should therefore already put the points here so that one has the right positions for
scene changes. Everyone is editingbutton self-explanatorily. The button is in the lower part for saving
the figure.
29
2.2.15 Audioplayer Tool
With the Audioplayer you can create shows for specific songs using scenes and effects. Unlike the
Soundanalyser, you can assign individual scenes to times or certain musical events, i.e. you can
produce your own personal light composition.
H
H
H
H
H
H
Notably in the Audioplayer tool two audio tracks are shown, these represent the stereo tracks of a song
(green left, right red). In these graphics the amplitudes of the song and the defined events (commands)
are shown. For some low performance computers it is recommended that you select the check box "Do
not visualize" in order to turn off the display of the amplitude curves.
H
H
Operation
Please proceed as follows in order to load a track:
•
•
•
•
With the Add button you create a new track.
Now you assign to the track an audio file using the Open button and the file selection
box. You can load audio files of the types mp3, mp2, mp1, wav and ogg.
The buttons Rename, Delete and Copy refers on tracks and are self explanatory.
The blue lines in the graphic audio control show positions of scenes already assigned.
If you cross the line with mouse the scene or commend assigned is displayed.
By clicking in the audio control, you can set the cursor (yellow beam) to any position. For example in
Play mode (pressed Play button), you can jump to any position in order to listen to specific sections of
the audio file.
New scenes can be assigned as follows:
•
Listen to the song and watch for prominent positions in the song where you want to
locate scenes, effects or other commands.
30
•
The command is added by pressing the green Plus button in the same way as in other
DMXControl tools.
•
The position where the command is added is defined by the cursor position.
Experienced users may be able to press the green Plus button at precisely the desired
point in Play mode, alternatively you can stop the song and set the cursor at the
required position precisely. To assist in the positioning you can either:
o increase the width of the Audioplayer window over the entire screen or
o select a zoom factor for the graphic representation of the amplitudes.
•
Create a new scene or choose one from the scene repository.
•
Using the Change button (yellow pen) you can alter a scene. The scene to be changed
must be selected in the command list.
•
The Delete button (red cross) will remove the selected command.
•
You can adjust the position of a command in the audio track by dragging the
associated blue beam with the mouse, (double-arrow cursor). The new position is
updated in the command list. Clicking on the column heading "position" will sort the
commands in ascending or descending sequence.
•
The Fadein time can be modified by clicking the corresponding cell in the table.
•
If you turn off the check mark next to the command name the corresponding command
is deactivated but remains in the track definition. You can use this in the preparation
phase in order to test the interaction of individual effects until the right combination
has been found.
•
The check box Active indicates if DMX signals should be sent to the Mixer.
H
H
H
H
H
H
H
H
The remaining controls:
•
•
The DMXControl button sets the normal Audioplayer mode.
If you press the Winamp button the currently loaded song in Winamp is read. The
Audioplayer looks for a matching track and plays the commands, triggering the scenes
and effects at the indicated times.
•
Finally the Rewind button is used to rewind the audio song to the start and the Repeat
button indicates that the audio track should run in a continuous loop.
By check box active you activate sending of DMX signals to the mixer channel.
31
2.2.16 Timecode Player
Description
The time code player resembles the audio player in function and graphical surface but unlike the audio
player it is rather conceived for special applications, such as multimedia shows, video or firework
synchonisation.
The aim is to trigger scenes and effects to the time code of an external device synchronously. The time
code signal is created by an external master and connencted via the MIDI in port (as a MTC signal ??).
You can therefore assign individual instructions to certain external time signals. The time code can be
played in suitable MIDI keyboards or by MIDI sequencerc like Logic or Cubase. In this fall the
DMXControl scenes or effect consequence will always synchronously occur to the played music title.
For connection to a MIDI sequencer we refer to software "MidiOx".
Definition
SMPTE is used for the synchronization of digital and analogue audio components (by the way an
audible track) on an analogue site typically. MIDI Sequencer make use of the MIDI time code (MTC)
which can be translated in a SMPTE time code and reversed. With the help of corresponding
equipment (synchronizer) an analogue SMPTE signal can be generated from the digital MTC and
recorded in form of an audio signal on a track of a (logical) multiple track band engine. SMPTE can
therefore be used for a time sensitive light show also based on triggers of an audio or video signal.
SMPTE time codes can be recorded with a precision of 1/1000 of a second.
Operation
Setting
•
MIDI-in port: Here you choose the MIDI input via which the MTC signal is played
in.
32
•
Permissible offset area: Precision limit at movings in the synchronization. The
deceleration accepted at most is indicated here. If a greater tracking arises from a high
exploitation of the DMXControl PC, the effects are ignored.
Sequence
In order to load a sequence, you proceed as in the case of the audio player:
•
•
With the Add button you establish a new sequence.
The buttons rename, erase and copy refer to sequences and actual, are doing what they
mean.
You can assign new instructions by the green plus button. You select the desired instruction type from
the instruction context menu and you go on as described under "selecting command".
•
•
•
•
With the CHANGE button (yellow pin) you can change (newly) defined scene. This
must be marked to this.
With the DELETE button (Red Cross) the selected instruction is removed.
You can change the time stamps of an instruction time control corresponding via this
entry in the list.
The corresponding instruction deactivated will turn the check marks with the
instruction names off,
however, remains in the sequence definition if you. One can use this to test around the interaction of
single effects till one has the right combination gefumden in the construction phase.
•
You adjust with checking box active control, whether the DMX signals shall be sent
to the blender at all.
2.2.17 Command line Tool
The Command Line tool allows you to set DMX levels numerically. You must use the mouse to click
the buttons on the Command Line tool. A valid command consists of: [channels]@[level]
•
•
•
the set of channel number(s) you want to affect,
an @ symbol
the level you want the channels set to.
Examples of valid commands:
•
•
20+21+25@128 (Sends the value 128 to channels 20, 21 and 25)
1 THRU 50 - 20 @FULL (Sends the value 256 to channels 1-50, except 20)
33
Button
Digit
Description
A channel number is specified, e.g. the right
hand slider impacts on.
Example
27 <Enter>
THRU Chooses a continuous set of channels.
1 THRU 5 same as inputting
1+2+3+4+5
+/-
Add or remove chanels
1 THRU 50 - 20 means all channels
1 through 50 except channel 20
@
Separator: Should be entered immediately
before the numerical level value which is sent
the specified channels.
20+21+25@128 (Sends the value
128 to channels 20, 21 and 25)
DEL
Removes last input character
FULL Maximum level value
Enter
Enter (send the command) The input field will
become empty.
256 (or as specified in DDF)
The last recent command is
displayed in grey area above the
input line.
34
The slider on right hand side acts similar to a submaster for the channels specified in the recent sent
command, i.e. you can set the DMX values. (experimental)
2.2.18 Command box
H
With the commandbox tool you can execute standard situations on key stroke, for example pauses
mood, Black out or any random effects. The buttons are freely programmable, i.e. you can execute all
commands with them.
H
The number of the buttons is variably adjustable. With Mouse clicking you can configure at maximim
10x10 buttons. If you need more buttons, the number can be increased by keyboard input. You can
also adapt the size of the window exactly to the requirements, the buttons are scaled with it so that
they are evenly distributed on the window. A text and a color can be assigned to each button.
Operation
Hint: Please activate the programming mode for assignments of the buttons. Then you can click on
one of the buttons and change the parameters in the upper window. The buttons execute its functions
again after you have deactivated the programming mode.
At run time mode the recent activated button is highlighted by a frame due to mark the currently
executed command.
Please refer yourself also to the tipp colored command box.
H
H
35
2.2.19 DMX Channel overview Tool
Description
With the DMX channel overview you can view the values of each DMX channel and control edit them
directly. This function is designed more for test purposes than for the permanent control of your light
show. E.g you could use it to check the result of executing of procedures in DDFs.
H
H
The channel overview can be applied for testing of new devices, even there is still no DDF for it
available. You have to consider the starting address. Select the channel and modify the DMX value
with the left slider.
All channels are represented in a table. The individual cells show:
•
•
•
•
•
1. Line left: channel number
1. Line mid: a beam, his height reflects the current DMX value,
1. Line right: the current DMX value. You can alter this by double click.
2. Line: channel description from the DDF
3. Line: name of the device, to which the cannel belongs.
In the 4. line a colored beam shows, through which mixer chanel the respective DMX channel was
recently changed. This can serve as clue, if a channel in the HTP mode "hangs".
H
H
H
H
Operating
The currently chosen channel is marked by a red framework. Click into one of the cells in order to
select another channel. The value of the chosen channel can be changed by the slider at the left
window edge. After double click on a channel (field) you can insert the DMX value by keyboard.
The right slider serves the selection of the visible channels merely. The left slider shows the DMX
value for the selected channel and you can modifi this.
36
Double-click with one on a channel (field in the channel overview) can be used to enter one DMX
value directly by keyboard.
By the switch button you can choose between DMX-out and DMX-in if your DMX transmitter
supports DMX-In.
In the lower field, it is shown from which mixer channel a DMX channel was recently altered, (one
update per second). Typically tools or plugins possess their own mixer channel. The „Unknown
Sources(0)“ represent the „public“ mixer channel, which is created during start of DMXControl. If a
tool or plugin does not create its own channel it uses the public one. For instance, at program
configuration you can select whether the graphical view uses an own or public mixer channel.
H
H
Examples for values for „Unknown Sources“ are DMX values from DDF initialising part or from the
command that can be executed during start of DMXControl (see program configuration). Please adjust
these values if you have any side effects with your devices.
The colors of mixer channels help to assign the fiels in upper part to the channels displayed in lower
part. Currently only 16 colors are supported (multiple use is possible).
37
DMXControl Operation
3.1 Keyboard control
Besides the mouse the keyboard is the easiest way to control your show because she is available at
every computer. Keyboard Control is not as comfortable as an external Lightdesk, but everyone starts
with little things.
DXMControl offers the possibility to catch keyboard entries globally. So it does not matter in which
program you are actice, every entry is catched to execute several orders. Beforhand you have define
that orders in the keyboardconfiguration.
3.2 Joystick Control
Here you can give special orders to the axes and buttons to control your Scanner or Moving Head
directly.
At present you can only configure one joystick, but you have the possibility to control not only one but
the one you have selected in the graphical view. Through the group-select you can switch fastly
between the groups.
Mode:
Relative or absolute are configurable per axis. In the "relative Mode" you can define "deactivated
sectione" (useful when the re-positioning of your joystick is slow) and the acceleration to the border.
3.3 Serial Remote Control (experimental)
Serial Remote Control
H
H
3.4 MIDI Remote Control
2.1 MIDI configuration at PC
The following components are required In order to control DMXControl via a MIDI interface
successfully:
H
•
•
•
•
H
A MIDI device (or keyboard)
A sound card/DSP card fitted in the PC with MIDI/joy-stick connections and with all
required drivers installed for receiving MIDI signals
A MIDI cable from the MIDI device to the PC (as a rule, this will usually be a cable
with 5 pin DIN connector on 1 end and a 15 pin Sub-D connector on the other)
The DMXControl software.
To test whether the device is correctly set-up and signals are arriving at the PC, we recommend the
MIDIOX software. You can find the program here: http://www.MIDIox.com/zip/MIDIoxse.exe You
can also test the functional ability of the interface with a MIDI Sequencer program.
H
H
USB MIDI keyboards are also available which do not require a sound card with MIDI connection or
the corresponding cable. However, this solution has not been tested yet. (Possibly a MIDI-USB driver
must be installed which then emulates the corresponding MIDI signals).
38
After successful connection of the device, DMXControl should be started. To configure the settings
for the keys on the MIDI keyboard click "configuration" -> "MIDI remote control" from the control
centre of DMXControl (main window). Assuming that the keyboard was installed correctly you can
select the correct connection at “MIDI in port”. The MIDI out port is not important for a "normal"
MIDI keyboard.
2.2 MIDI banks in DMXControl
Several MIDI banks can be configured to select different configurations quickly. For example you can
define a bank in which the keys of the keyboard will be used to illuminate a band. On the other hand,
another bank can be defined for different scenes in a theatre play. Or you can use different banks
because you would like to use different MIDI equipment at different
events. In this case every device has its own configuration, which is its own MIDI bank. Finally you
can simply use the different banks for changing between different area’s at the same event because
you have prepared so many effects, scenes, submasters etc. that you have more settings than available
keys (e.g. 49 key music keyboard). It is left to the user how he would like to use the keyboard.
A new MIDI bank must be created first. Click "add" and allocate a name for the new bank. This name
can be selected directly under "selected bank" later.
Once this has been done, you can close and test the MIDI remote control, to ensure that data from the
MIDI keyboard actually arrives at DMXControl. To do this open the MIDI remote control window
39
from the main window of DMXControl by clicking "window" -> "MIDI remote control". The MIDI
bank you just made should be shown in this window. If this isn't the case, select the current bank from
the drop down menu. There may be several MIDI banks shown.
To activate the MIDI remote control put a tick in the “MIDI remote active” check box. Different
values should be shown at the bottom of this window when a key is pressed on the MIDI keyboard.
The following values are displayed
Message: The first number, indicates information about the MIDI event (e.g. note on/off ), the second
number displays the used MIDI channel, starting at "0" to "15". To control commands with a normal
MIDI keyboard in DMXC, only one type of MIDI event is needed: Note on/off.
Data 1: This value indicates the actual key, which is pressed at the MIDI keyboard.
Data 2: This value indicates the maximum value, which this key can accept, i.e. the value at which the
channel is "fully" on.
These values are important for the MIDI configuration and for the configuration of keys with different
events. To configure a key, which is indicated under data 1, you have to remember the value of data 1
and change to the MIDI remote control window again and click on control element "add":
40
After this you can rename the new control element. To avoid confusion, it is advisable to choose clear
and meaningful names.
Now select "note on/off" under "MIDI status". The "MIDI channel" is the number, that was noted in
the remote control window as the first number after "message". The "address" is the number that was
noted at data 1. The "max. value" is the value of data 2. DMXControl should now "know" which key
of the keyboard will be used, although no command (effect etc.) is assigned to it yet.
2.3 Assignment of commands to MIDI elements
You assign commands to MIDI elements in the lower part of the configuration window. Here the
newly created control element is listed, however, it is still disabled. Click on the word "disabled" and
select from the different choices in the drop down. You should select the module, you would like to
assign to the key of the keyboard. Depending on the choice of module the choices of
"equipment/function" and "channel" change.
For example, if you select the "scenes library" module, you can choose from your scenes (if you have
made scenes within DMXControl) under "equipment/function" and only one option "execute" remains
in the list under "channel".
However, if you select the "effect" module, you can choose an effect under "equipment/function" and
select from the list under "channel" whether the function assigned to the key is started and stopped or
is started or stopped only. Here a small example:
41
When you have finished the configuration, click on "Ok" and confirm that “MIDI remote active” is
ticked in MIDI remote control. The command configured should be executed correctly when pressing
a key of the MIDI keyboard.
We wish you success in using the MIDI device. Any notes and suggestions for this topic please send
to [email protected].
(Author: Daniel Miertz)
to be done:
•
add description of MIDI learning feature
3.5 DMX In Remote Control
With DMX-In you are able to control DMXControl only with MIDI. The configuration is similar to
the Midi-remote-control.
Analog to the MIDI-remote-control you can control all of DMX-Control's orders by the DMX-In,
provided you have an DMX-Interface which supports the DMX-In-mode.
Of course, you can submit DMX-Signals directly by an external DMX-desk. If you want you can
deflect the signals with the use of the Softpatch feature. With the Softpatch for DMX-In you are able
to combine channels of an external desk with the channels of DMXControl. In the Softpatch control
42
(right-handed side), the Input-channels are displayed on the left-handed side and the output channels
on the right-handed side.
The controlwindow should be used in the kind that the DMX channels are showed which should be
engaged by DMXControl orders. The defined control-elements should therefore be understanded as
virtual, strictly speaking they accord to one DMX-channel.
3.6 Program Configuration
Here you can tune DMXControl to the specifics of your PC or your DMX devices.
Options
Option
Time, after device
popups are closed
Description
If you leave popup areas with
your mouse, the popups
disappear after the configured
time frame
Default
Comment
1 sec.
Device popups appear Menues do not open, if you cross
no
by double click only over the device icon with mouse
Effects are startable
by double click
Alternatively to Play/Stop button no
Save color- and
Lists are available for all projects
Avoids not intended popups
43
Gobolists globally
Number of steps,
fade-in and delay time Tuning for fading
are split in
50
Default entry for
channels without
Fade-In
50%
Deactivate Highest
takes precendences
mixing
With number of steps the
performance
requirements are
increasing
see HTP
H
H
Graphical View
Option
Description
Default
Size of grafical icons
in grafical view
32 pixel.
Zoom icons in
grafical view
yes
Font Size in grafical
view
8
Own mixer channel
for grafical view
Activation: At closing of grafical view the
device values are set back to original value
Comment
No
(channel 0)
Performance
Option
Description
Default
Comment
44
Refresh intervall of
SoundAnalyser
H
H
The SoundAnalyser send signals
in this Time intervall to
Effecttool
Large intervall could
increase performance
50 ms
Scroll lock LED is
blinking at Beats
no
Execute following
command at program
start
nein
H
The command can be
created by usual
command definition
Limit channel Values
by DDF
If the DDF defines Minimum and
no
Maximum or DMX values you
can activate this option
Display DMX values
in %
Switch between absolute values
and percent display
H
Absolute
3.7 Plugin administration
DMXControl distinguishes Output plugins for the output of the DMX information to a transmitter
(DMX transmitter) and application plugins for the extension of the functionality of DMXControl. The
current versions of Plugins can be loaded from the home page and from the DMXControl-Wiki.
A number of Output plugins is delivered by DMXControl with the setup. These are filed in the
installation directory. Application plugins must, on the other hand, always installed by your
themselves. Simply copy only the .dll file into the subdirectory "Plugin" to this.
With the windows"Plugin administration" you can activate the Plugins respectively. Everyone in the
corresponding directories becomes available Plugin is shown in the list. For activating the
corresponding check mark is to put. The Plugins can have an individual configuration menu of their
own if necessary, which you can invoke over the button "configure chosen Plugin" . It is possible to
operate several Plugins (so also DMX transmitter) in parallel how one recognizes in the image. You
find further information under DMXC-Plugin.
H
H
H
H
3.8 Outputplugin
Outputplugin
H
H
45
External Tools
5.1 Capture Integration
Capture is a program that allows you to see a simulation of your stage lighting fixtures. It is not free, it
costs about $1000 or 1000 euros. More info on the Capture Software:
http://www.capturesweden.com/indexcap.htm
H
H
Capture integration
A Tutorial was written by Hendrik Hölscher about 3D visualization in DMXControl by means of
"Capture 3.0" which is on our home page (currently in German only). For many purposes the use of
the demo version of Capture is completely sufficient in your qualified sense. The demo version of
Capture is not being able to store projects and the program ends itself after 90 min. This time is
enough also for simulating most set-ups, though this program anyway is not suitable for the live mode
because of its hardware charges. This item also shall discuss additions for Hendrik's document. One
finds the Tutorial of Hendrik here: http://www.dmxcontrol.de/docs/Visual_ger_v10.pdf
H
H
5.2 Winamp
Winamp
H
H
5.3 Winamp AVS Plugin
Winamp AVS Plugin
H
H
5.4 Magic 3D Easy View Visualizer by Sunlite
Description
DMXControl is MEVP (Magic 3D Easy View protocol) compatible and can be used together with the
restricted version of Sunlite's "Magic 3D easy view" for FREE. Magic 3D Easy view is a 3DVisualizer for your DMX show.
If you buy the Sunlite DMX-IN interface to visualize any DMX console you have access to advanced
features like video, 2D plans, etc...
Additional product information on Sunlite interfaces is available here: [Sunlite]
H
H
Installation
To use the demo Visualizer on your PC, you load the file Magic.exe of www.nicolaudie.com.
Download: [Magic.exe].
H
H
Afterwards you install this tool e.g. under C:\Programme\SLMEV.
The Visualizer gets connected to DMXControl about an Output plugin. The corresponding file Sunlite
MEVP.out.dll must be available in the installation folder of DMXControl (it is usually delivered by
DMXControl with the set-up).
46
In the next step you must activate this Plugin under Plugin administration: SUNLITE MEVP
(Visualizer) Over the button "Configure chosen Plugin" the installation directory of Magic 3D Easy
view can be specified. The Visualizer should be started per default by DMXControl after a restart
now.
Operation
For the operation of the Visualizer please have a look into the EasyView manual, which you also can
download on the web page www.nicolaudie.com: [[1]]. Take into account, an exchange of the data of
the equipment configuration between the two tools does not happen, only an exchange of the DMX
signals is carried out. The configuration of the equipment must independently and manually be carried
out in the Visualizer.
H
H
As an example the stage is shown from our hosh demo video in the following picture.
Retrieved from
"http://www.nextec.co.uk/dmxcontrol/Wiki/index.php/Internal_DMXC_Manual_2.9"
H
H
47