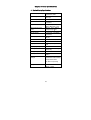
Download NOVA

Transcript
NOVA
C
M
Y
CM
MY
K
NOVA
LASER POWER/ENERGY MONITOR
USER MANUAL
OPHIR OPTRONICS
w w w. o p h i ro p t . c o m
Composite
CY CMY
Table of Contents
Chapter 1 Introduction: How to Use This Manual.....................................4
Chapter 2 Quick Reference...........................................................................5
2.1
Getting Started...............................................................................5
2.2
Thermal Heads...............................................................................7
2.2.1
Use of Nova with thermal type heads........................................7
2.2.2
Setting and Saving Startup Configuration.................................8
2.2.3
Power or Single Shot Energy Measurement ............................8
2.3
Photodiode Heads.......................................................................10
2.3.1
Use of Nova with photodiode type heads ...............................10
2.3.2
Selecting Chosen Wavelength..................................................11
2.3.3
Setting Startup Configuration....................................................11
2.3.4
Power Measurement ..................................................................11
2.4
Pyroelectric and Photodiode Energy Heads...........................12
2.4.1
Selecting Chosen Wavelength..................................................12
2.4.2
To set type of laser being used.................................................13
2.4.3
To set Laser Pulse and Average...............................................13
2.4.4
Setting Startup Configuration....................................................13
2.4.5
Setting up PE-DIF diffuser heads to diffuser IN or OUT
setting............................................................................................14
2.4.6
Energy or Average Power Measurement................................14
Chapter 3 The Nova Display Unit...............................................................17
3.1
General Description....................................................................17
3.2
Smart Connectors and Multihead Operation..........................18
Soft Keys and Menu Button.......................................................18
3.3
3.3.1
Menu Button ................................................................................18
3.3.2
Soft Keys.......................................................................................19
3.4
Power Up and Shut Down..........................................................20
3.5
Nova Functions which are independent of Head Type.........21
3.5.1
Line Frequency ............................................................................21
3.5.2
Zero Adjustments ........................................................................21
3.5.3
Baud Rate .....................................................................................22
3.6
Backlight.......................................................................................22
3.7
Kickstand ......................................................................................23
3.8
Charging........................................................................................23
3.9
Chart Recording...........................................................................24
3.10
Beam Splitter Function...............................................................24
Chapter 4 Operation with Thermopile Absorber Heads.........................26
4.1
Thermopile Absorber Heads .....................................................26
4.2
Selecting Settings from the Nova Screen...............................27
4.2.1
To Set Type of Laser being Used:.............................................27
4.2.2
To choose Manual or Automatic Ranging in Power
Measurement:..............................................................................28
4.2.3
To choose Power or Energy Measurement ...........................29
4.3
Startup and Configuration of Defaults .....................................29
4.4
Power Measurement ..................................................................30
4.4.1
Power Measurement, Basic Operation ...................................30
4.4.2
Advanced Power Measurement Features .............................31
4.5
Energy Measurement .................................................................37
4.5.1
Setup .............................................................................................37
4.5.2
Measurement...............................................................................37
4.5.3
Minimum Energy Threshold.......................................................38
4.5.4
Measuring Pulses of Very Low Energy....................................39
4.5.5
Measuring Energy of Rapidly Repeating Pulses....................40
4.5.6
Energy Log....................................................................................40
Chapter 5 Operation with Photodiode Type Heads ................................42
5.1
Photodiode Heads.......................................................................42
1
5.2
Setting up the PD300 and 3A-IS to display the user's chosen
wavelengths.................................................................................43
5.3
Startup Defaults...........................................................................44
5.4
Selecting Settings from the Nova Screen...............................45
5.4.1
To Set to the Laser Wavelength Being Used..........................45
5.4.2
To choose Manual or Automatic Ranging or dBm.................45
5.4.3
Operation with Filter In or Out ...................................................47
5.4.4
Zoom..............................................................................................48
5.4.5
Offset .............................................................................................49
5.4.6
Tune and Powerlog.....................................................................49
5.4.7
Average and Measuring Very Low Power Measurement....50
5.5
BC20 Heads for Scanned Beams..............................................50
5.5.1
General Description....................................................................51
5.5.2
Setting up the startup defaults..................................................51
5.5.3
Measuring Scanned Beams with the BC20 ............................51
5.5.4
Spectral Response......................................................................52
5.6
Special Photodiode Heads ........................................................52
5.6.1
PD 300-BB Radiameter Head.....................................................52
5.6.2
PD300-CIE Photometer Head.....................................................53
Chapter 6 Operation with Pyroelectric and Photodiode Energy Heads
........................................................................................................54
6.1
Pyroelectric and Photodiode Energy Detector Heads ..........54
6.2
Selecting Settings from the Nova Screen...............................55
6.2.1
Setting up the head to display the user's chosen
wavelengths.................................................................................55
6.2.2
Setup of Laser Pulse Length and Pulses / Sample............................56
6.3
Startup and Configuration of Defaults .....................................59
6.4
Energy, Power or Exposure Measurement .............................60
6.4.1
Energy Average Power and Frequency Measurement.........................60
6.4.2
Zoom..............................................................................................63
6.4.3
Measuring Total Energy Exposure. ..........................................63
6.4.4
Pyro Scope Adapter....................................................................64
6.5
Measuring Repeating Pulses of High Energy.........................65
6.6
Energy Log....................................................................................66
Chapter 7 Circuit Description .....................................................................67
Chapter 8 Calibration, Maintenance and Troubleshooting ...................69
8.1
Calibration of Thermopile Heads ..............................................69
8.1.1
Absorber types and Method of Calibration of Ophir Power
Meters...........................................................................................69
8.1.2
Linearity and Accuracy of Ophir Thermal Heads..............................72
8.1.3
Calibration Factor........................................................................73
8.1.4
Recalibration of Thermopil Heads Using the Nova ...........................74
8.2
Calibration of Photodiode type Heads .....................................77
8.2.1
Method of Factory Calibration ..................................................77
8.2.2
Accuracy of Calibration of PD300 and 3A-IS Heads..............78
8.2.3
Accuracy of calibration of BC20 Heads ..................................78
8.2.4
Recalibration of PD300 and 3A-IS Heads from a Known
Source of Laser Power...............................................................79
8.2.5
Recalibration of BC20 heads from a Known Source of Laser
Power ............................................................................................80
8.3
Calibration of Pyroelectric and Photodiode Energy Heads..80
8.3.1
Method of Calibration.................................................................81
8.3.2
Accuracy of Calibration .............................................................82
8.3.3
Recalibration from a Known Source of Laser Energy...........83
2
8.4
Error Messages ...........................................................................84
8.5
Troubleshooting...........................................................................84
8.5.1
Nova Display ................................................................................84
8.5.2
Thermal Heads, Energy Measurements ..................................85
8.5.3
Thermal Heads, Power ...............................................................85
8.5.4
Pyroelectric Heads .....................................................................86
8.6
Maintenance................................................................................86
8.6.1
Maintenance of Thermal Heads ...............................................86
8.6.2
Replacing Battery........................................................................88
Chapter 9 Nova Specifications ..................................................................89
9.1
System/Display Specifications .................................................89
9.2
Head Specifications....................................................................90
3
Chapter 1 Introduction: How to Use This
Manual
The Ophir Nova is a microprocessor-based Laser
Power/Energy Meter providing a broad range of
measurements, displays, and data handling options. It
operates with thermopile, pyroelectric and photodiode
heads, and uses smart connector technology. Just
connecting the head configures and calibrates the
instrument.
This manual tells you what you need to know to make
full use of the Nova for all your laser measurement
needs. It includes a "Quick Reference", (Chapter 2) to
allow you to perform basic measurements
immediately, without reading the whole manual.
The main measurement sections, Chapters 4, 5 and 6
include a general description and a section detailing
operating options.
4
Chapter 2 Quick Reference
2.1 Getting Started
The Nova is equipped with "soft keys." That is, the
functions of the keys change as indicated by the
legend above each key. (See Figure 2).
When the Nova is first switched on, the first screen
usually has a digital display with a bargraph at the
bottom. In order to access the soft keys, press the
menu button, located in the second row on the right of
the panel. Pressing the menu button again will access
more functions. Pressing it yet again will bring it back
in a cyclical manner to the original bargraph screen.
To connect head to the Nova Display
Insert the D type connector of the measuring head
cable into the socket marked "Head Input" on the rear
panel of the Nova display. (See Figure 1)
Figure 1
Nova Rear Panel View
5
To switch the Nova on:
1. Push up the slide switch on the left side of the
Nova display. (See Figure 2).
Figure 2.
Nova Top View
The unit will switch on, and the display will appear.
Note:
The head must be plugged in before the unit is
switched on.
To switch the Nova off:
1. Return the slide switch to its original position.
2. If you wish to save the current Nova configuration,
use the "configure" function before switching off.
See below, Section 2.2.2 or refer to the main body
of the manual for details.
To set line frequency:
1. Disconnect the head and switch off then on again.
"Head Disconnected" will appear.
2. Press "select" until "line freq" is highlighted.
3. Press "go" then change to correct frequency.
4. Press "exit" and change will be saved.
6
To zero instrument:
1. Disconnect head, turn off then on again. "Head
Disconnected" will be displayed.
2. Press "select" until "zero" is highlighted.
3. Press "go".
4. Make sure instrument is not in an electrically
noisy environment and is undisturbed. Press "go"
and wait for message, "zeroing completed". Press
"exit".
5. For thermal heads, zeroing with the head may also
be necessary. See section 3.5.2.
2.2 Thermal Heads
2.2.1 Use of Nova with thermal type heads
To set type of laser being used:
1. While the Nova is off, plug in the head then switch
it on again.
2. From bargraph measurement screen, press the
menu button twice and press "laser" until the
correct laser type is displayed.
3. Return to bargraph screen by pressing the menu
button again.
To choose manual or automatic ranging in power
measurement:
1. From the bargraph measurement screen, press the
menu button once, then press "range" or simply
press the right most soft key.
2. Select the appropriate manual range or autorange.
3. Press "exit" and then press the menu button twice
to return to the bargraph measurement screen.
7
To choose power or energy measurement:
1. To go from the bargraph power measurement
screen to the energy measurement screen, press
the menu button then press "energy".
2. Alternatively, you can press the leftmost soft key
directly from the bargraph screen to go to energy
measurement.
3. To go from the energy measurement screen to
power measurement press the "power" soft key.
2.2.2 Setting and Saving Startup Configuration
1. From the power measurement mode, press the
menu button located on the right side until "more"
appears. Press "more".
2. Press "select" until "configure" is highlighted.
Press "go".
3. Press "value" to choose "power" or "energy" for the
desired startup screen.
4. Press "select" until the laser type is high-lighted.
Now press "value" to select the laser type you
wish to be the default.
5. Press "select" and "value" to choose the manual
power range you wish to be the default or choose
autorange.
6. Now press "select" and "value" again to choose the
default energy range.
7. Press "exit" then "all" to save all present settings.
Further details on configuration in section 4.3.
2.2.3 Power or Single Shot Energy Measurement
Warning:
Do not exceed maximum head limits for power,
energy, power density and energy density as
listed in tables 6 and 7 in section 9.2. Otherwise,
there is a risk of damaging the absorber.
8
To use the Nova to measure Laser power:
1. Verify that the display shows power units in W,
mW etc.
2. If the display shows energy units of J, mJ etc.
then press "power" to switch to the power
measurement mode.
To expand the bargraph scale ±10% about the
present reading:
1. From the bargraph power measurement screen
press the center button.
2. Press the center "zoom" button again to return to
full scale.
To subtract background and set current reading to
zero:
1. From the bargraph power measurement screen
press the menu button twice then press "offset".
Press the menu button once to return to the
bargraph screen.
2. Press "offset" again to cancel. See Section 4.4.2.2.
for full details.
To use the Nova to fine-tune Laser power:
1. From the bargraph power measurement screen
press the menu button twice then press "more".
2. Press "select" until "tune" is highlighted. Press "go".
3. Set the percentage range of the power scale to be
displayed by repeatedly pressing the left key.
4. Set the horizontal sweep time using the middle soft
key See Section 4.4.2.3. for full details.
To use the Nova to measure Laser energy:
1. In measurement mode, verify that the units are J,
mJ etc. If not, press the menu key until "energy"
appears. Press that key to switch to energy
measurement mode. Alternately, press the left
soft key directly.
9
2. The energy mode is manual ranging. Press "range"
then the "up" "down" soft keys until the proper
range is highlighted then press "exit". The correct
range is the lowest one that is larger than the
pulse energy measured.
3. When the Nova screen flashes "ready," on and off,
fire the laser. See Section 4.5 for full details.
To save configuration:
1. To save configuration, follow directions in Section
2.2.2 above.
2.3 Photodiode Heads
2.3.1 Use of Nova with photodiode type heads
To set type of laser being used:
1. From bargraph measurement screen, press the
menu button twice and press "laser" until the
correct laser wavelength is displayed.
2. Return to bargraph screen by pressing the menu
button again.
To choose manual or automatic ranging or dBm in
power measurement:
1. From the bargraph measurement screen, press the
menu button once.
2. Press "range" and then select the appropriate
manual range, autorange or dBm (logarithmic
scale).
3. Press "exit" and then press the menu button twice
to return to the bargraph measurement creen.
Alternately, range is accessed directly by pressing
the right most soft key from the bargraph screen.
10
2.3.2 Selecting Chosen Wavelength
1. From the power measurement mode, press the
menu button until "more" appears. Press "more".
2. Press "select" until "wavelength" is highlighted.
Press "go".
3. Press "change" then "up" and "down" to select the
first wavelength. Repeat steps 2 and 3 for other
wavelengths desired. Up to 6 wavelengths may be
selected.
2.3.3 Setting Startup Configuration
1. From the power measurement mode, press the
menu button until "more" appears. Press "more".
2. Press "select" until "configure" is highlighted.
Press "go".
3. Now press "value" to select filter in or out to be the
default.
4. Press "select" and "value" to choose the manual
power range you wish to be the default or choose
autorange.
5. Now press "select" and "value" again to choose the
startup laser wavelength. For further details on
configuration See Section 5.3.
2.3.4 Power Measurement
Warning:
Do not exceed maximum head limits for power,
energy, power density and energy density as
listed in tables 6 and 7 section 9.2 Head
Specifications. Otherwise, there is a risk of
damaging the absorber.
To expand the bargraph scale 10% about the
present reading:
1. From the bargraph power measurement screen
press the menu button. Then press "zoom". Now
press the menu button twice again.
11
Alternatively press the center button from the
bargraph screen without the menu button.
2. Press "zoom" again to return to full scale.
To offset current reading and set to zero:
1. From the bargraph power measurement screen
press the menu button, press "offset" then press
menu twice to return to the bargraph screen.
Alternatively press the left upper button from the
bargraph screen.
2. Press "offset" again to cancel. See Section 5.4.5.
for more details.
To use the Nova to fine-tune laser power:
1. From the bargraph power measurement screen
press the menu button twice, then press "more".
2. Press "select" until "tune" is highlighted. Press "go".
3. With the left soft key set the percentage range of
the power scale to be displayed .
4. Set the horizontal sweep time using the middle soft
key. See Section 4.4.2.3. for full details.
2.4 Pyroelectric and Photodiode Energy Heads
2.4.1 Selecting Chosen Wavelength
1. While the instrument is switched off, plug in the
head, then switch on.
2. From the bargraph screen which appears, press
the menu button until "more" appears. Press
"more".
3. Press "select" until "wavelength" is highlighted.
Press "go".
4. Press "select" then "change" then "up" and "down"
to change the first wavelength. Now press "done".
Repeat steps 2 and 3 for other wavelengths
desired up to 6.
5. Save configuration as described in Section 2.4.4.
12
2.4.2 To set type of laser being used
1. From bargraph measurement screen, press the
menu button twice and press "laser" until the
correct laser type or wavelength is displayed.
2. Return to bargraph screen by pressing the menu
button again.
2.4.3 To set Laser Pulse and Average
1. From the bargraph measurement screen press the
menu button twice then press "setup".
2. Press "value" to choose the short pulse or long
pulse setting depending whether the pulses of
your laser are less than or greater than the short
setting.
3. Press "select" then "value" to choose the time
period over which you wish to average energy
readings. Press "exit".
4. Save configuration as described in section 2.4.4.
Warning:
Incorrect readings will result if pulse length is
not set up correctly.
Note:
Some heads have only one time setting for all
pulse lengths. In that case “N.A.” appears.
2.4.4 Setting Startup Configuration
1. From the bargraph energy measurement mode,
press the menu button until "more" appears. Press
"more".
2. Press "select" until "config" is highlighted. Press
"go".
3. Press "value" to choose "power" or "energy" for the
desired startup screen.
4. Press "select" until the laser wavelength is
highlighted. Now press "value" to select the laser
type you wish to be the default.
13
5. Press "select" and "value" to choose the pulse
length you wish to be the default.
6. Now press "select" and "value" again to choose the
default energy range.
7. Press "exit" then "all" to save. For further details on
configuration See Sections 6.2 and 6.3
2.4.5 Setting up PE-DIF diffuser heads to diffuser
IN or OUT setting
1. Press the menu button twice and press “setup”.
2. Press “select” until the diffuser setting is
highlighted and select “IN” or “OUT” as desired.
Make sure the diffuser is physically installed or
not installed on the head. Press exit.
3. Press the menu button twice and press “laser”
until the correct wavelength is selected. Note that
only wavelengths compatible with the diffuser
setting are visible. (All wavelengths for diffuser IN
have a D suffix, e.g. 106D = 1.06µm, diffuser in).
4. If you wish to save these settings as the defaults,
from the main display, press the menu button
twice then press “more”. Select “config” and
press “go”. Press “exit” and “all” to save all
present settings including diffuser IN or OUT.
2.4.6 Energy or Average Power Measurement
Warning:
Do not exceed maximum head limits for power,
energy, power density and energy density as
listed in tables 6 and 7 section 9.2 Head
Specifications. Otherwise, there is a risk of
damaging the absorber.
With the pyroelectric head, you have been supplied a
test slide with the same coating as on your
pyroelectric detector.
14
You can also obtain this slide from your dealer. You
should use this slide to test the damage threshold with
your laser pulses. If the slide is damaged, then either
enlarge your beam or lower the laser energy until
damage is no longer seen.
2.4.6.1 To choose Energy or Average
1. To go from the bargraph energy measurement
screen to power measurement, press the menu
button then press "power". Alternately, you can
press the leftmost soft key directly from the
bargraph screen to go to power measurement.
2. To go from the bargraph power measurement
screen to energy measurement, press the menu
button then press "energy". Alternately, you can
press the leftmost soft key directly from the
bargraph screen to go to energy measurement.
2.4.6.2 To use the Nova to measure Laser Energy
and Frequency
1. In measurement mode, verify that the units are mJ,
µJ etc. If not, press the left most soft key.
2. Press the menu button once then press "range"
then the "up" "down" soft keys until the proper
range is highlighted. The correct range is the
lowest one that is larger than the pulse energy
measured.
3. Press "exit" then press the menu button twice to
return to the bargraph measurement screen. If you
wish to have the frequency displayed, press the
menu button only once.
2.4.6.3 To use the Nova to measure Average Power
1. Verify that the display shows power units in W,
mW etc.
2. If the display shows energy units of J, mJ etc.
then press "power" to switch to the power
measurement mode.
15
2.4.6.4 To expand the bargraph scale fivefold
about the present reading
1. From the bargraph energy or power measurement
screen press the menu button then press "zoom",
then press the menu button twice, or just press the
center button from the bargraph screen.
2. Press "zoom" again to return to full scale.
2.4.6.5 To measure Total Energy Exposure
1. Press the menu button until "more" appears. Press
"more".
2. Press "select" until "exposure" is highlighted. Press
"go".
3. Select parameters then press "go". Press go
again. The Nova will start summing laser energy
exposure and the legend will change to "stop".
4. When you wish to stop measuring, press "stop". If
you wish to reset reading to zero before another
reading, press "reset".
5. To return to the bargraph screen, press "exit".
16
Chapter 3 The Nova Display Unit
3.1 General Description
The model Nova laser power/energy meter represents
a new level of sophistication, sensitivity, compactness
and accuracy, coupled with ease of operation. It can
operate with thermal, pyroelectric and photodiode
heads. It has smart connector technology. Simply
plugging in the head configures and calibrates the
Nova to operate with that head.
The Nova can graph power or energy vs. time. It
displays power measurements in both digital and
analog form at the same time. It will also autorange,
so you do not have to set scales; or it can manual
range if you wish. It will remember what mode you
were using before you turned it off and will return to
that mode when turned on. You can zoom in on the
present reading, or subtract background. Although the
calibration information is stored in the smart
connector, you can recalibrate from the screen and
store the new calibration in the head. You can also
zero the Nova at the touch of a button.
The main instructions are clearly shown on the screen
so you should not have to refer to this manual very
often. Above all, the Nova has advanced circuitry and
digital signal processing for excellent sensitivity,
signal to noise ratio, accuracy, and response time. It
also has special circuitry to reject electromagnetic
interference.
17
3.2 Smart Connectors and Multihead Operation
The Nova display, although very compact, is versatile
and can operate with either thermal, pyroelectric or
photodiode type laser measuring heads. The head
configuration and calibration information is stored in
an EEROM in the head connector plug. This means
that when the head is plugged in, the Nova
automatically identifies the head type, calibration and
configuration. The user does not have to adjust
anything.
Note:
The Nova automatically loads the head
information when first turned on, so when
changing heads, the display should be turned off,
the new head plugged in and then be turned on
again.
When no head is plugged in and the Nova is turned on,
the display indicates "Head Disconnected" and gives
the user the opportunity to change the power line
frequency or rezero the instrument. See section 3.4.
3.3 Soft Keys and Menu Button
3.3.1 Menu Button
The Nova is equipped with "soft keys". That is, the
functions of the keys change as indicated by the
legend above each key. (See Figure 3).
When the Nova is first switched on, the first screen
usually has a digital display with a bargraph along the
bottom. In order to access the soft keys, press the
menu button, located in the second row on the right of
the panel. Pressing the menu button again will access
more functions. Pressing it yet again will bring
it back in a cyclical manner to the original bargraph
screen.
18
Note:
The first set of menu choices can be accessed
without pressing "menu". Simply pressing the
appropriate key from the bargraph screen will
operate that key even though the label is not
visible. So if you remember the position of the key
you can take a shortcut. If the soft key is an
alternating "toggle" type, the label will be visible
while the key is being pressed.
3.3.2 Soft Keys
The soft keys accessed by the menu button have
functions defined by the legend above the key. The
legend usually indicates what will happen when
pressing the key. For example, if "energy" appears
above a key, pressing that key will change the Nova
into energy mode. Some functions operate when the
key is pressed and are canceled when the key is
pressed again. The keys show reverse highlighting
when operational. Pressing the same key again
cancels the operation and the highlighting.
Nova Top View
Figure 3.
Nova Rear Panel View
19
Figure 4
3.4 Power Up and Shut Down
To turn the Nova on:
1. Push up the slide switch on the left side of the
Nova display. (See Figure 4)
2. The unit will switch on, and the display will appear.
If no head is connected, a display showing "Head
Disconnected" will appear. If a head is connected,
the appropriate default measurement screen will
appear.
To switch the Nova off:
1. Return the Switch to its original position.
2. If you wish to save the current Nova configuration,
use the "configure" function before switching off.
For measurements of the same type, the Nova
does not need to be set up each time. See the
appropriate section in the chapter dealing with the
head type you intend to use.
20
3.5 Nova Functions which are independent of Head
Type
When no head is connected to the Nova and it is
turned on, the message "Head Disconnected" appears.
In this mode, the user can adjust either the power line
frequency so the instrument can be adjusted for
minimum interference at the power line frequency, or
the user can zero the instrument to eliminate any
offsets.
3.5.1 Line Frequency
The Nova is factory set for 50 Hz. If your country uses
60 Hz you must reset the line frequency.
To reset the line frequency:
1. Turn on the Nova while the head is disconnected.
2. Press "select" until "line frequency" is highlighted.
3. Press "go" then change to select the correct line
frequency.
4. Press "exit" to save the new value and exit.
3.5.2 Zero Adjustments
In the Nova, all adjustments, including zeroing internal
circuits, are done from the software. This ensures
simple and accurate realignment. It is recommended
to rezero the Nova every 2 months for best
performance. The simple zeroing procedure follows.
1. If a head is connected, disconnect the head, turn
off the instrument then back on again so the Nova
can identify that no head is connected. "Head
Disconnected" will be displayed.
2. Turn on the Nova, and let it run for at least 30
seconds before performing zero adjustment.
3. Press "go".
4. Make sure the instrument is not in an electrically
noisy environment and is undisturbed. Press "go"
and wait for message, "zeroing completed". Now
press "exit" and "saved" will be exhibited, indicating
that the zero configuration has been saved.
21
Note for Thermal Heads only:
For best results with thermal heads, it may be
necessary to do the procedure once with the head
disconnected then afterwards again with the head
connected.
After completing steps 1 - 5 above, Connect the
head and make sure it is at room temperature and
well shielded from any stray thermal power. It may
be best advised to lay the head with the absorber
face down on the table.
5. Switch the instrument off then on again with the
head connected.
6. Press the menu button twice then "more". Press
"select" until "zero" is highlighted.
7. Now repeat steps 4 and 5 above.
3.5.3 Baud Rate
If you are using the Nova for communication with PC,
the baud rate can be set by selecting "baud rate"
pressing "go" and selecting the appropriate rate. For
most purposes, the default of 9600 Baud will suffice.
3.6 Backlight
The backlight illuminates the display from the rear and
is operated by a push button on the back panel (See
Figure 3). Since the backlight consumes considerable
power, it is operable only when the charger is plugged
in.
22
The electroluminescent backlight does have a finite
lifetime of about 10,000 hours. Therefore, it is
recommended only to use it when necessary. To turn
on the backlight, push the push button while the
charger is connected. To turn off the backlight, push
the button again.
3.7 Kickstand
The Nova is equipped with a kickstand on the
underside of the case so the display can be tilted for
easy viewing. The kickstand folds away in a recessed
slot when not in use. When the Nova is folded flat, it is
only 203 x 95 x 35 mm, the most compact unit of this
type on the market.
3.8 Charging
The Nova is operated by a rechargeable battery. To
charge the battery, plug the charger into the jack
labeled “12VDC” on the back panel, (Figure 3). Note
the polarity of the charger. The Nova will charge the
batteries at about the same rate whether it is on or off
and whether the backlight is on or off – it fully charges
in about 14 hours. However, it will charge more slowly
while operating a pyroelectric type head. It is not
recommended to leave the charger plugged in for
much longer than 14 hours, in order to preserve the
battery lifetime. The unit will operate about 18 hours
from one battery charge. When the battery is low,
"BAT" flashes on and off indicating that the battery
needs recharging. However, even with “BAT”
displayed, the unit will operate properly for about one
hour before its accuracy will be impaired.
23
3.9 Chart Recording
The instrument provides an analog voltage output via a
2.5mm pin jack labeled "AN OUT" on the rear panel
(See figure 3).
This is useful for driving chart recorders and other
analog devices.
The voltage is proportional to the reading on the
display and scaled such that full scale equals 1.00
volts.
The output can drive up to 2mA into an external
device.
3.10 Beam Splitter Function
If you have a measurement setup with a beam splitter
or attenuator and wish to display the laser power or
energy before the splitter or attenuator and not the
actual value impinging on the measurement head the
beam splitter function allows you to do this. For
example, if you are splitting off 4.5% of a laser beam
into the meter and you wish to display the full beam,
do as follows:
1. Press the menu button twice and press “more”
then select “atten”. Press “go”.
2. Press “select” so the screen says “attenuation
screen – on”. Press “exit”.
3. Press “set %”. Now alternately press “select”
and “change” to set the value of the percent split
off to 4.5%. Press “exit” and the value will be
saved.
4. When you turn on the Nova now with a
measuring head, the display will come up in the
attenuation screen and the value displayed will
be 1/(attenuation fraction) instead of the power or
energy actually on the screen. For instance in the
present example, if the laser power on the head
is 5.5 Watts, 5.5/0.045 = 122.22 Watts will be
displayed. If the menu button is pressed again,
you will be in the normal measurement screen
where the actual value measured is displayed.
24
5. If you want to have the Nova come up in the
normal measurement screen, reverse the
process in steps 1 and 2.
Note 1:
The factory default for this screen is 100.00% and
in that case, the regular screen comes up on
startup and not the attenuator screen.
Note 2:
The attenuator screen only affects the value
displayed on that screen and nothing else. The
power and energy scales remain the same, the
damage thresholds remain the same etc. The
attenuator screen is only an extra screen to show
a different calculated number introduced by the
user.
25
Chapter 4 Operation with Thermopile
Absorber Heads
Warning:
Before using the head for power or energy
measurement, check that your laser power,
energy and energy density do not exceed the head
ratings. See tables in section 9.2 Head
Specifications.
If the head is a water-cooled type, ensure that the
cooling water is flowing at an adequate rate; see table
below. Also, note that the reflectance from the
absorber could be as much as 10% and with CO2
lasers, the reflected beam can be quite specular, so it
is advisable to provide a beam stop for the reflected
beam with the highest power lasers.
HEAD
TYPE
LITERS
PER
MIN
MIN
PRESSURE
BAR
8000W
5000W
L1500W
1000W
300W
7
4.5
2.5
1.7
1.0
1.5
0.8
0.5
0.4
0.3
US
GALLONS
PER
MINUTE
2
1.2
0.7
0.5
0.25
Table 1.
Minimum Flow Rates For Water-cooled Heads
4.1 Thermopile Absorber Heads
When a radiant heat source, such as a laser, is
directed at the absorber head aperture, a temperature
gradient is created across the thermopile of the
enclosed detector disc. This generates a voltage
proportional to the incident power.
26
The display unit amplifies this signal and indicates the
power level received by the head. At the same time,
signal processing software causes the display unit to
respond faster than the thermal rise time of the
detector disc, thus reducing the response time of the
Nova. Energy of a single pulse is measured on the
Nova by digitally integrating the pulse power over
time.
4.2 Selecting Settings from the Nova Screen
The Nova can be set to various chosen settings while
operating. In addition, it can be set so that it will be in
the desired configuration when turned on the next
time.
4.2.1 To Set Type of Laser being Used:
Thermopile heads have somewhat different absorption
at different wavelengths. In order to compensate for
this, each head has been calibrated by laser at several
wavelengths.
When you choose the correct laser wavelength, the
correction factor for that wavelength is automatically
introduced.
Note:
The laser wavelength correction in use is
displayed in the upper right corner of the display.
In order to choose the laser type, do the following:
1. From the bargraph power measurement screen,
press the menu button twice and press "laser" until
the correct laser type or wavelength is displayed.
2. Return to the bargraph screen by pressing the
menu button again.
27
4.2.2 To choose Manual or Automatic Ranging in
Power Measurement:
Autorange - The Nova allows you to choose
autorange or manual ranging. In autorange mode, you
do not have to change scales. When the reading of
the meter or bar is more than 100% of full scale, the
range goes to the next higher one. The ranges are
arranged in factors of 1, 10, 100, etc. When the
reading falls below 90% of full scale, the range
changes to one range lower. This change only occurs
after a few seconds delay. This provides overlap
(hysteresis) to keep the Nova from flipping back and
forth when reading close to the end of the scale.
Manual Range - There are certain disadvantages to
autorange since it changes scale even if you don't
want it to do so. If you want to measure the same
range all the time, it is better to use manual range. To
select manual range press the menu button twice until
"range" appears. Press "range" then press "up" or
"down" to select the desired manual range. The
correct range to select is the lowest one which is
larger than the largest expected measurement.
Now press exit to return to the measurement screen.
If you wish the Nova to be in manual mode when
switched on, save this configuration before switching
off. See Section 4.3.
To choose auto or manual range, follow these
steps:
1. From the bargraph measurement screen, press the
menu button once.
2. Press "range" and then select the appropriate
manual range or autorange by pressing the "up" or
"down" buttons.
3. Alternately, you may directly access range from
the bargraph screen by pressing the right most
soft key.
4. Press "exit" and then press the menu button again
to return to the bargraph measurement screen.
28
4.2.3 To choose Power or Energy Measurement
The Nova thermopile heads can measure both power
and single shot energy. See sections 4.4. and 4.5. for
details. To change from power to energy measurement
or vice versa do the following:
1. To go from the bargraph power measurement
screen power to energy measurement, press the
menu button then press "energy". Alternately, you
can press the left most soft key directly from the
bargraph screen to go to energy measurement.
2. To go from the energy measurement screen to
power measurement press the "power" soft key.
4.3 Startup and Configuration of Defaults
If you are planning to do measurements of the same
type most of the time, you can set up the Nova so that
it automatically starts up in the measurement mode
desired. Since these settings are saved in the head
"smart connector", you can save different settings for
different heads.
To set the Nova to start up in power or energy
measuring mode and to save the chosen
configuration:
1. From the power measurement bargraph screen,
press the menu button located on the right side
until "more" appears. Press "more".
2. Press "select" until "configure" is highlighted.
Press "go".
3. Press "value" to choose "power" or "energy" for the
desired startup screen. The Nova will now start
up in power or energy measurement mode,
respectively, when switched on.
4. Press "select" until the laser type is highlighted.
Now press "value" to select the laser type you
want to be the default. The Nova will now be
correctly calibrated for the absorption of the
detector at the wavelength of the laser type
selected.
29
5. Press "select" and "value" to choose the manual
power range you wish to be the default or
autorange. The Nova will now be in the mode
selected when switched on with the head in
question.
6. Now press "select" and "value" again to choose the
default energy range.
7. Now press "exit" when all selections have been
made.
8. Now press "all " if you wish to save all functions
presently selected or "previous screen" to change
the defaults of the previous screen only.
4.4 Power Measurement
The next section describes the procedure for basic
power measurement as well as more advanced
features with thermal measuring heads.
4.4.1 Power Measurement, Basic Operation
1. Switch the Nova on by means of the switch on the
left side. (See Figure 4). The Nova will enter the
mode of operation last saved with the "configure"
operation. For basic operation, you need only set
up the parameters for the type of measurement
you wish (Section 4.3 describes the procedure to
store your configuration.), and the Nova will be
ready to perform that type of measurement each
time it is switched on. The normal default mode is
the bargraph autoranging power measurement
screen.
2. If the Nova is in "energy" mode, pressing the
"power" soft key will cause it to enter the power
measurement mode.
3. Center the laser beam carefully on the absorber
surface and read the power.
30
4.4.2 Advanced Power Measurement Features
The following section describes additional Nova
functions in power mode in addition to the basic
power measurement mode described above.
4.4.2.1 Zoom
The Zoom function causes the scale to expand the
present scale fivefold. Thus, if the full scale of the
bargraph is 20 watts, and your reading is 15 watts,
pressing "zoom" will make the bargraph scale range
between approximately 13 and 17 watts. Variations in
power are more easily seen in this mode.
To access the zoom function, press the menu button
until "zoom" appears. Then press "zoom". When it is
highlighted it is engaged. Now press the menu button
twice to return to the bargraph power display. Note
that the fiducial marks of the bargraph are further
apart, indicating that zoom is engaged. You may also
directly engage the zoom function from the bargraph
screen by pressing the middle button. Note that while
the button is pressed, the soft key legend appears.
Pressing "zoom" again will cancel the function.
4.4.2.2 Offset
The offset function subtracts background from the
signal. If the ambient environment has a thermal
background, so that the Nova shows a nonzero power
reading even when there is no laser, you can subtract
the background using the zero function. For example,
the Nova display reads 0.1 Watts when the laser is
blocked, and 20.5 Watts with laser power applied. In
this case, the true power is 20.5 - 0.1 = 20.4 Watts. To
subtract the background, press the menu button until
"offset" appears and press "offset" while the laser is
blocked.
31
Now press the menu key again to return to the
bargraph screen. The Nova will now read zero, and
the 0.1 Watt background will be subtracted from all
subsequent readings. The laser power reading will
thus be 20.4 Watts.
When "offset" is engaged, the legend is highlighted. To
cancel, press "offset" again. If the "offset" is engaged,
and you wish to subtract out a new value of the
background, press "offset" twice. The first press will
cancel the old value, and the second will activate a
new value. If you suspect that the Nova has a
permanent zero offset, then disconnect the head while
it is in the power measurement mode. If the Nova still
shows a similar offset even when the head is not
connected, the instrument internal zero should be
reset. See Section 3.5.2.
4.4.2.3 Tune (See Figure 5)
The Tune function, an exclusive Ophir feature, makes
adjusting your laser to its maximum power easier than
ever before.
Unlike a bargraph or mechanical meter, this display
shows graphically what came before as well as the
current reading and the trend. This allows you to
determine if you have reached maximum power.
Figure 5
Tune Screen
The screen is completely autoranging. Therefore, as
soon as the cursor goes over the top or under the
bottom edge of the display, it rescales to put the
cursor back to the middle of the screen. This allows
you to devote all your attention to tuning the laser,
without having to worry about the Nova settings.
32
To use the Nova to fine tune laser power:
1. From the bargraph power measurement screen
press the menu button twice then press "more".
2. Press "select" until "tune" is highlighted. Press "go".
3. Press the menu button once to make legends
visible. Press again to reset and return to
measurement screen.
4. Set the power expansion scale to ±50% ,±120% or
±20% as desired, using the left soft key.. The
default value is 50%.
If the laser power will
change a lot, use a large value; if a little, use a
small value.
5. Set the horizontal sweep time to the rate desired,
using the middle soft key. The default value is 1
minute. Both the expansion and time settings are
saved for future use when using the configure
function. See section 4.3.
6. Measure the power of the laser and adjust the
laser until you determine that the power has
reached a maximum.
4.4.2.4 Powerlog (See figure 6)
The Nova in Powerlog mode has the option of
graphing the laser power against time, or successive
energy points as long as the Nova has not been turned
off. While measurements are being taken, the Nova
will record data until the screen is full or until the
center "reset" or "exit" button is pressed. With the
optional Ophir RS232 adapter, this data can be read
out to PC in real time or in later after storage. Contact
your Ophir agent for details.
To use the Nova to graph power vs. time:
1. From the bargraph power measurement screen,
press the menu button until "range" is shown.
Press "range". Select the appropriate manual
range and exit. (The Nova must be in manual
range to use the powerlog function.)
2. Press the menu button until "more" is shown. Now
press "more" and "select" until "power log" is
highlighted. Press "go".
3. Set the maximum power on the scale by pressing
"value" until the desired value is highlighted.
33
4. Now press select until the minimum setting is
highlighted. Press "select" until minimum value on
graph is chosen.
5. Press "select" again and then use "value" to
choose the desired horizontal time scale. Press
"go". The measurement will begin immediately.
6. When the screen is full, the measurement will stop
and the graph will be held until the center reset
button is pressed again.
7. The center button is the "reset" button. Press this
button to reset the screen and begin a new
measurement. Press the menu button once to
make the legends visible, and press the menu
button again to make the legends disappear.
Warning:
Pressing "reset" will erase all previously stored
data and start recording new data.
8. The left button is the "setup" button. Press this
button to go to the setup screen and readjust
measurement scales. The legends are visible
when the buttons are pressed or when pressing
the menu button.
Figure 6.
Laser Power vs Time Graph
4.4.2.5 Average
When a laser output is fluctuating or unstable, it is
useful to measure the average power over a certain
period. The Nova gives you this exclusive feature,
allowing averaging over periods varying from 1/3 s to 1
hour.
34
The Nova allows two modes of averaging: "continuous"
or "periodic" mode. The periodic mode is meant for
lasers which have rapid power fluctuations. In this
case, choose an averaging period from .33 to 30s. The
Nova averages over each period and displays the
result at the end of each period until the next average
arrives. The continuous mode is meant for lasers
having slow variations in output over a relatively
longer period. In the continuous mode, the Nova
displays a running average which is continuously
updated as time progresses. At the end of the period,
the measurement stops and the last value is displayed
until the instrument is reset. In continuous mode, the
measurement period is from 10s to 1hour.
To use the Nova to display average:
1. The average mode works only with manual range.
From the bargraph power screen, press the menu
button and press "range". Select a manual range
and press "exit".
2. Press the menu button again then press "more".
Press "select" until "average" is displayed. Press
"go".
3. Now press "value" to select periodic or
continuous mode as described above. Press
"select" and "value" to choose the time period
desired. Press "go".
4. The average will be displayed. If you wish to stop
temporarily, press "stop". After stopping, press
"go" to continue. If you wish to start over, press
"reset", the readings will be set to zero and then
press "start".
5. If there is a zero offset (see section 4.4.2.2.) then
you may subtract the offset by pressing “offset”.
4.4.2.6 Attenuation Screen
The Nova allows you to scale your measurement so as
to display the original power reading of a laser beam
which has been split or attenuated by a beam splitter
or attenuator.
35
For instance, if your original laser power is 100 Watts,
and you have split off 5% of the power, i.e. 5 Watts and
are measuring only the 5 Watts, you can display the
nonsplit value with the attenuation screen. To do so,
do the following:
1. From the main screen press the menu button twice
and press “more”. Select “atten” and press “go”.
2. Select “attenuation screen: ON” and press exit.
The attenuation screen is now activated.
3. Press “set %” and by alternately pressing change
and select, choose the percentage of the beam
that you are measuring (in our example above you
will set this to 005.000%). Now if you measure a
value, the large display will show the value before
attenuation and the small display will show the
actual value measured. (In our example, the large
display will show 100W and the small display 5W).
Note 1:
If the attenuation screen is activated, when the
Nova is turned on it will come up in the
attenuation screen. You may switch between the
attenuation screen and the regular power or
energy screen by pressing the menu button
several times.
Note 2:
The attenuation screen can operate with both
power and energy measurement.
5.000W
SET %
100.0 W
5.000%
RANGE
attenuation factor
measured value
power before
attenuation
Figure 7
Attenuation Screen
36
4.5 Energy Measurement
4.5.1 Setup
Switch the Nova on. If it is in power mode, press the
menu button once to make the legends visible and
then press the left soft key "energy" to put it into
energy mode. Alternately, if you remember the
position, you can press the left soft key without
pressing the mode button first. (See figure 8).
The energy mode is manual ranging: press "range" and
then press the "up" and "down" soft keys to get to the
proper range. The correct range is the lowest one
which is larger than the pulse energy measured.
If you plan to use the same setting often, use the
"configure" function as described in Section 4.3.
before switching the Nova off the first time. When the
Nova is switched on again, it will automatically go into
the same mode until a different configuration is saved.
Figure 8
Energy Mode Screen
4.5.2 Measurement
To measure energy of a single pulse, set up as above
and fire the laser. The display will go blank while the
energy is being integrated. After 2-4 seconds, the
correct energy will be displayed. When the Nova is
ready to measure a new pulse, "ready" will appear on
the screen and flash on and off. (See Figure 8). The
next pulse will automatically blank the screen, and the
new value will be displayed. If you fire another pulse
before "ready" appears, the reading may be inaccurate
or may not be displayed.
37
4.5.3 Minimum Energy Threshold
If the Nova is used in a noisy environment or where
there is a high level of background thermal radiation,
the instrument may trigger spuriously on the noise or
background radiation. It would then fail to measure
the intended pulse. Since there is always some degree
of noise or background radiation, the instrument is
designed not to respond to pulses below some preset
minimum size.
This "Minimum Energy Threshold" is typically set to
0.3% of full scale of the selected range. If this level is
found to be too sensitive for the user's particular
environment, it may be altered by the user. The
threshold should not, however, be raised higher than
necessary. This will cause degradation in the
accuracy of energy measurements of pulses below
about 4 times the threshold level. The factory setting
of energy threshold is "med" for medium. If the unit
triggers on noise, set the threshold to "high." If you are
measuring small energies and the unit does not
trigger, set the threshold to "low."
To set the energy threshold:
1. From the energy measurement screen, press
"more".
2. Press "select" until "threshold" is highlighted.
Press "go". "Energy Threshold is Now med" will be
displayed.
3. Press "value" to select "high," "med," or "low"
threshold. For the 3A-P head "optical" is also
available and is the default choice. (See below).
4. Press "exit" to return to main measurement screen.
If you wish to save this value, "save all" with the
configure function before switching the Nova off
(Section 4.3).
38
Note (to users of 3A-P type heads):
The 3A-P type head has special circuitry
enabling it to trigger on energy pulses of very
low energy. This is accomplished by a special
photodiode trigger which alerts the Nova that a
pulse has been received and to start integration.
This allows the 3A-P to react to smaller pulses
than would be measurable just by triggering on
the rising thermal signal as in other heads.
When you select "optical" this enables the
optical trigger. However, in some cases, the
optical trigger will not work and you should
select one of the thermal trigger settings, "low",
"med" or "high".
You should use thermal
triggering on the 3A-P in the following cases:
1.
2.
3.
The wavelength is outside the range of the of the
photodiode, i.e. outside of 0.19 - 1.064µm
You are measuring the energy of a shuttered
pulse of a continuous laser. In this case, the
peak power is too low to trigger the photodiode.
For some other reason, the instrument does not
trigger on the "optical" setting.
When using the optical trigger, the instrument should
be able to measure down to 0.1 - 0.2 mJ, depending on
wavelength. When using the thermal trigger (low,
med or high), you should not attempt to measure less
than about 1mJ.
4.5.4 Measuring Pulses of Very Low Energy
When it is necessary to measure pulses of very low
energy, i.e., less than 0.5% of the maximum range of
the instrument, the following two alternative methods
allow greater accuracy to be obtained.
1. A continuous train of pulses may be fired, and the
average power measured using "power" mode.
The energy per pulse can be calculated by:
Energy per pulse = Average power / Pulse Repetition Rate
39
2. A train of a known number of pulses may be fired,
and the total energy measured in "energy" mode.
This train should not exceed 5 seconds duration.
The energy per pulse can be calculated by:
Energy per pulse = Total Energy / Number of Pulses
In both of the above methods, the pulse repetition rate
must exceed 3Hz. Higher rates will generally give
improved accuracy, but care should be taken not to
exceed maximum power ratings.
4.5.5 Measuring Energy of Rapidly Repeating
Pulses
The standard Nova will only measure individual pulses
every 5 seconds or so. You can also calculate the
average energy of rapidly repeating pulses by
measuring average power on the power setting and
using the formula:
Average Energy per Pulse=Average Power/Pulse Repetition Rate
For rapidly repeating pulses, you can use one of the
Ophir pyroelectric heads, as long as the pulse
energies do not exceed the ratings of the pyroelectric
absorbers. The pyroelectric heads are compatible with
the Nova and just have to be plugged in to be used.
For higher pulse energies, you can use the Ophir
model DGX-RP to measure both average power and
exact individual pulse energy of the rapidly repeating
pulses.
See your Ophir agent or sales representative for
details.
4.5.6 Energy Log
The Nova has the option of displaying successive
energy points in a vertical bargraph form. While
measurements are being taken, the Nova will record
data until the screen is full or "reset" is pressed.
40
An RS232 interface can be purchased to attach to a PC
and then the data points can be transferred to PC
either in real time or after storage. Contact your Ophir
representative for details.
To use the Nova for graphical display of energy:
1. Make sure that the Nova is in the correct energy
measurement range. If not, press "range", adjust
and press "exit".
2. From the energy measurement screen press
"more" and then select "energy log". Press "go".
The histogram screen will appear. Now fire a
pulse when the "ready" legend flashes. The
measurement will immediately begin. When the
screen is full, the measurement will stop and the
graph will continue to be displayed.
Warning:
Pressing "reset" will erase all previously stored
data and start recording new data.
3. The left button is the "reset" button. Press this
button to reset the screen and begin a new
measurement. While pressing the button, the
legend "reset" is visible.
4. If you wish to see finer variations in the graph,
press the center "zoom" button.
Note:
Zoom can only be pressed after at least one
pulse has been recorded.
5. To return to the main energy measurement screen,
press "exit".
41
Chapter 5 Operation with Photodiode
Type Heads
Warning:
Before using the head for power or energy
measurement, check that your laser power or
energy and energy density does not exceed the
head ratings. See table 6.
5.1 Photodiode Heads
When a photon source, such as laser, is directed at
one of the PD300, 3A-IS or BC20 series photodiode
detectors, a current is created proportional to the light
intensity and dependent on the wavelength.
The PD300, PD300-3W and BC20 heads have a unique
dual detector head (patented) in which the two
detectors are identical and connected back to back.
When a uniform signal, such as room light
background, falls on the detector head the signal from
the two detectors cancels.
On the other hand, when a laser beam falls on the
head, it illuminates only the first detector and
therefore is detected. Thus the PD300 subtracts most
of the background while detecting the desired signal.
The subtraction is not perfect but usually 98% of the
background signal is eliminated so the detector can
usually be used in ordinary laboratory lighting
conditions.
The Nova display unit amplifies this signal and
indicates the power level received by the head. Due
to the superior circuitry of the Nova, the noise level is
very low, and the PD300 series heads with the Nova
display have a large dynamic range from nanowatts to
hundreds of milliwatts. Since many low power lasers
have powers on the order of 5 to 30mW, and most
photodiode detectors saturate at about 2mw, most
heads of the PD300 series have been constructed with
a built in filter so the basic head can measure to 30mW
or more without saturation. When the additional filter
is installed, the maximum power is on the order of
300mW or 3W with model PD300-3W.
42
The PD300 saturates when the output current exceeds
1.3mA so the exact maximum power depends on the
sensitivity of the detector at the wavelength used.
When saturated the legend "SAT" will appear on the
screen. Table 2 gives the actual maximum power as a
function of wavelength.
FILTER OUT
WAVE-- PD300
LENGTH
250N.A.
350nm
400nm
30mW
633nm
20mW
670nm
13mW
800nm
10mW
900mm
10mW
1060nm
25mW
FILTER IN
WAVE-PD300
LENGTH
250N.A.
350nm
400nm
300mW
633nm
300mW
670nm
200mW
800nm
100mW
900mm
150mW
1060nm
250mW
PD300- PD300- 3A-IS
3W
UV
N.A.
1mW
N.A.
WAVELENGTH
800nm
PD300IR
20mW
30mW
20mW
13mW
10mW
10mW
25mW
1-1.3µm
1.4µm
1.5µm
1.6µm
1.8µm
30mW
25mW
15mW
10mW
25mW
PD300 PD300- 3A-IS
-3W
UV
N.A.
100mW N.A.
WAVELENGTH
800nm
PD300IR
200mW
3W
3W
3W
1W
1.5W
2.5W
1-1.3µm
1.4µm
1.5µm
1.6µm
1.8µm
300mW
150mW
80mW
50mW
100mW
3mW
3mW
3mW
2.5mW
2.5mW
3mW
300mW
300mW
300mW
250mW
250mW
300mW
N.A.
1W
2W
3W
3W
3W
N.A.
N.A.
N.A.
N.A.
N.A.
N.A.
Table 2.
Maximum Measurable Laser Power as a Function of
Wavelength
5.2 Setting up the PD300 and 3A-IS to display the
user's chosen wavelengths
The PD300 and 3A-IS series have built in wavelength
correction curves for measurements either with the
removable filter installed (filter-in) or removed (filterout). These curves are stored in the head EEROM. the
correction curves, with a resolution of 1nm, ensure
that the power reading is correct at all laser
wavelengths.
In order to simplify changing from one laser
wavelength to another, the user can program up to 6
different wavelengths to be available from the screen
menu. Please use the following procedure to set the
PD300 to your laser wavelengths.
43
1. From the power measurement mode with the
bargraph display, press the menu button located
on the right side until "more" appears. Press
"more".
2. Press "select" until "wavelength" is highlighted.
Press "go".
3. Press "change" then "up" and "down" to select the
first wavelength desired. Press "done". Repeat
steps 2 and 3 for other wavelengths desired.
When finished press exit and the new values will
be saved.
5.3 Startup Defaults
If you are planning to do similar measurements most of
the time, you can set up the Nova so that it
automatically goes into the measurement mode you
want upon startup. Since these desired settings are
saved in the head "smart connector", you can save
different settings for different heads. The following
section describes how to set up the Nova with
photodiode heads so that they will start up in the
desired configuration.
Setting up the startup defaults:
1. From the power measurement bargraph screen,
press the menu button located on the right side
until "more" appears. Press "more".
2. Press "select" until "configure" is highlighted.
Press "go".
3. Press "value" to select filter in or out as the startup
default. For details of filter in/out See Section
5.4.3.
4. Press "select" then "value" to choose the manual
power range you wish to be the default, autorange
or dBm. The Nova will now be in the mode
selected when switched on with this head
connected.
5. Now press "select" and "value" again to choose the
default laser wavelength.
6. Press "exit" when all selections have been made
and press "all" to save all current Nova settings. If
you only want to save the last changes made on
the previous screen, press "previous screen".
44
5.4 Selecting Settings from the Nova Screen
The Nova can conveniently be set to various chosen
parameters from the screen. In addition these settings
can be saved as startup defaults so the head will be in
the desired configuration when turned on.
5.4.1 To Set to the Laser Wavelength Being Used
Photodiode heads have a different sensitivity at
different wavelengths. Moreover, the filters used in
the head have a different transmission at different
wavelengths. In order to compensate for this, each
head has a built in calibration curve (with 1nm
resolution) over the measurement range.
When you choose the correct laser wavelength, the
correction factor for that wavelength is automatically
introduced. Note that the laser wavelength presently
corrected for is displayed in the upper right corner of
the display. In order to define the laser wavelengths
to choose from, See Section 5.2.
In order to choose the laser wavelength, do the
following:
1. From the bargraph measurement screen, press the
menu button twice and press "laser" until the
correct laser type or wavelength is displayed.
2. Return to bargraph screen by pressing the menu
button again.
5.4.2 To choose Manual or Automatic Ranging or
dBm
Autorange - The Nova allows you to choose
autorange or manual ranging when the reading is in
watts. In autorange mode, you do not have to change
scales. When the reading of the meter or bar is more
than 100% of full scale, the range goes to the next
higher one. When the reading falls below 90% of full
scale, the range changes to one range lower. This
change occurs after a short delay. This provides
overlap (hysteresis) to keep the Nova from flipping
back and forth when reading close to the end of the
scale.
45
Manual Range - There are certain disadvantages to
autorange since it changes scale even if you don't
want it to do so. If you want to measure the same
range all the time, it is better to use manual range.
The correct range to select is the lowest one which is
larger than the largest expected measurement. If you
wish the Nova to be in manual mode when switched
on, save this configuration before switching off. See
Section 5.3.
dBm - The Nova allows the measurement to be made
in units of dBm which is a logarithmic scale. dBm
units are defined as:
10 x log10(reading in mW)
At 1mW the reading will be 0 dBm, at 100mW it will be
20 dBm etc.
To choose auto, manual or dBm range, follow these
steps:
1. From the bargraph measurement screen, press the
menu button once.
2. Press "range" and then select the appropriate
manual range, autorange or dBm by pressing the
"up" or "down" buttons.
3. Press "exit" and then press the menu button twice
to return to the bargraph measurement screen.
Measuring loss using the dB offset function:
Since dBm is a logarithmic measurement, the ratio
between two measurements will be the difference
between the dBm measurements. For instance, if you
want to measure the loss in a fiber optic cable where
the measurement before the cable is:
1mW = 0dBm
and the measurement after the cable is:
0.1mW = -10dBm.
The ratio is then 1:10 = 0.1 and the dB loss is:
0 – (-10) = 10dB.
The dB offset function allows you to easily measure
this. To do so do as follows:
1. When measuring the reference value press
“dbofst”. The value changes to 0 dB (note that now
the units are dB, a relative value instead of dBm,
an absolute value).
46
2. Now make your second measurement and the
value of the difference in dB = ratio in numerical
units will be shown.
Note:
If there is a zero offset in the reference value, you
cannot subtract this using the DBOFST function.
Instead, before the start of the measurement, go
into a numerical scale, press “offset” and subtract
the zero offset. Then go into the dBm scale and
follow steps 1 and 2 above. The zero offset
activated in the numerical scale will be saved in
the dBm scale and you can now use the DBOFST
setting to measure true ratio without zero offset
problems.
5.4.3 Operation with Filter In or Out
The PD300 head is equipped with a built in filter so that
the photodiode can measure up to 30mW without
saturating the detector. In addition, the PD300 comes
with an additional removable filter for measuring up to
300mW. Other models of the PD300 series also have
built-in and removable filters. The exact maximum
power is reached when the reading reaches full scale
or the output current from the head reaches 1.3mA,
whichever comes first. See Table 2 for the exact
maximum as a function of wavelength.
Depending on what powers you wish to measure, you
should choose to work with the removable filter
installed or not. For this purpose, the Nova has a
"filter" setting and uses the proper correction curve
depending on whether the filter is installed or not.
Warning:
If the PD300 is used in the "filter in" setting and
the filter is not installed or vice versa the
readings will be completely incorrect.
If the power of your laser exceeds the maximum for
filter in, you can purchase a thermal head for that
wavelength. Consult your Ophir agent for details.
47
To choose the filter setting:
1. From the bargraph measurement screen press the
menu button twice.
2. Press "filter" .
3. If you wish to work with filter installed, press
"change" until display says "filter is in". Be sure to
install removable filter on detector head.
4. If you wish to work with the filter out, press
"change" until display says "filter is out". Be sure
to remove the filter from the detector head.
5. When finished press exit to return to the
measurement screen.
5.4.4 Zoom
The Zoom function causes the scale to expand around
the present reading ±10%. Thus, if the full scale of the
bargraph is 20mW and your reading is 15mW, pressing
"zoom" will make the bargraph scale range between
approximately 13.5 and 16.5 mW.
Variations in power are more easily seen in this mode.
When zoom is engaged, the legend is highlighted. To
cancel the zoom function, press "zoom" again. The
zoom function can be useful for laser power tuning
and peaking.
To access the zoom function, press the menu button
until "zoom" appears. Then press "zoom". When it is
highlighted it is engaged. Now press the menu button
twice again to return to the bargraph power display.
Note that the fiducial marks of the bargraph are
further apart, indicating that zoom is engaged. You
may also directly engage the zoom function from the
bargraph screen by pressing the middle button. Note
that while the button is pressed, the soft key legend
appears. Pressing "zoom" again will cancel the
function.
48
5.4.5 Offset
The PD300, PD300-3W and BC20 heads have automatic
background subtraction as described in Section 5.1.
In addition, the offset function can be used to subtract
the residual background signal which remains if
desired. If the Nova shows a nonzero power reading
even when there is no laser, you can subtract the
background using the zero function. For example, the
Nova display reads 0.1mW when the laser is blocked
and 20.5 mW with laser power applied. In this case,
the true power is:
20.5 - 0.1 = 20.4 mW.
To subtract the background, press the menu button
until "offset" appears and press "offset" while the laser
is blocked. The Nova will now read zero (0.0), and the
0.1 mW background will be subtracted from all
subsequent readings. The laser power reading will
thus be 20.4 mW.
When "offset" is engaged, the legend is highlighted.
To cancel, press "offset" again.
If the "offset" is
engaged, and you wish to subtract a new value of the
background, press "offset" twice. The first press will
cancel the old value, and the second will activate a
new value.
If you suspect that the Nova has a
permanent zero offset, then disconnect the head while
it is in the power measurement mode. If the Nova still
shows a nonzero reading even when the head is not
connected, the instrument internal zero should be
reset. See section 3.5.2.
5.4.6 Tune and Powerlog
The Tune function, an exclusive Ophir option, makes
adjusting your laser to its maximum power easier than
ever before. Unlike a bargraph or mechanical meter,
this display shows graphically what came before as
well as the current reading and the trend. This allows
you to see at a glance if you have reached maximum
power.
49
The Nova also has the option of graphing the laser
power vs. time, or successive energy points as long
as the Nova has not been turned off. While
measurements are being taken, the Nova will record
data until the screen is full, or "reset" or "exit" is
pressed.
5.4.7 Average and Measuring Very Low Power
Measurement
If the laser power is fluctuating, the Nova can display
the average power readings with averaging periods
varying from 1/3s to 1 hour. When measuring very low
powers, such as picowatt measurements using the
PD300-IRG or PD300-UV, there will be a rather large
zero offset coming from the detector as well as a
considerable noise fluctuation. Nevertheless, you can
measure these low values by using the average
function and pressing offset to eliminate the detector
zero offset. In order to measure very low powers do as
follows:
1. Select the lowest manual power range which is
larger than the value you wish to measure.
2. Go into the average screen by pressing the menu
button twice then “more” then selecting
“average” and pressing “go”.
3. Select average over the appropriate period in
seconds and press “go”.
4. Now block the power source you wish to
measure, wait for a few measurement periods
and press “offset” to subtract the zero offset.
5. Now unblock the power source and measure.
For more about the average function See Sections
4.4.2.5.
Note:
The average function does not work with
autorange or dBm scales.
5.5 BC20 Heads for Scanned Beams
Note:
Many of the functions of the BC20 head are the
same as the PD300. This section only describes
the PD300 functions which are different from
ordinary PD300 functions. For standard PD300
functions, please refer to the rest of chapter 5.
50
5.5.1 General Description
Model BC20 scanned beam laser power meter has
become the industry standard for measuring scanned
laser beams as well as hard to reach static beams.
The BC20 smart head has built into its smart plug
innovative circuitry to measure scanned as well as
static beams of up to 20 milliwatts with a noise level of
microwatts.
The BC20 has the same patented dynamic background
subtraction as the PD300 which eliminates over 95% of
background light and allows measurement in normal
room light.
5.5.2 Setting up the startup defaults
1. From the power measurement bargraph screen,
press the menu button located on the right side
until "more" appears. Press "more".
2. Press "select" until "configure" is highlighted.
Press "go".
3. Press "select" then "value" to choose whether you
want the instrument to operate in “continuous” or
“hold” mode. In continuous mode, the peak
reading of every 1/3 sec period is displayed and
in “hold” mode, the peak reading of every 5s
period is displayed.
Note:
Do not use autorange when in hold mode.
4. Now press "select" and "value" again to choose the
default laser wavelength and the default power
range.
5. Press "exit" when all selections have been made
and press "all" to save all current Nova settings. If
you only want to save the last changes made on
the previous screen, press "previous screen".
5.5.3 Measuring Scanned Beams with the BC20
1. Verify that the head is plugged in.
2. Set to the proper power range or autorange.
51
3. Set up the startup defaults and choose
“continuous” if you want continuous readings or
“hold” if you want readings to be held for 5s
before updating. (See section 5.5.2 above).
4. Hold the wand so the beam strikes the detector
vertically. While the beam is scanning, move the
scanner slightly up and down in a direction
perpendicular to the scan direction so that the
scanned beam is sure to cross the center of the
detector. (The BC20 captures the highest reading
so that the most accurate results are obtained if
the beam scans across the center of the detector).
The unit will also measure static beams as would a
normal laser power meter.
5.5.4 Spectral Response
A graph of the approximate relative spectral response
of the BC20 is given for purpose of interpolation. This
is in case the user wishes to use the instrument at a
wavelength other than the ones which are factory
calibrated.
100
90
80
70
%
60
50
40
30
20
10
0
340
440
540
640
740
840
940
1040
Wavelength, nm
5.6 Special Photodiode Heads
5.6.1 PD 300-BB Radiometer Head
In addition to photodiode head for individual
wavelength, Ophir also supplies heads for measuring
the output of broadband light sources. The PD300-BB
head has spectrally flat response from 400 to 1000 nm
and therefore can give the true total power of any
broadband light source in that spectral region.
52
Note:
Because the BB heads are spectrally flat,
wavelength selection is disabled. Other than that,
operation is the same as other PD300 type heads.
5.6.2 PD300-CIE Photometer Head
The PD300-CIE head has a spectral response similar to
that of human eye and can therefore make
measurements in eye response units of Lux. The
PD300-CIE is designed with a small detector where the
source overfills the detector. It measures the light
intensity per unit area in units of Lux or Foot Candles.
Note:
Because the CIE heads have a spectral response
similar to the human eye wavelength selection is
disabled. Other than that, operation is the same as
other PD300 type heads.
53
Chapter 6 Operation with Pyroelectric
and Photodiode Energy Heads
Warning:
Before using the head for power or energy
measurement, check that your laser power,
energy or energy density do not exceed the
head ratings as listed in the table with the head
specifications. Otherwise, there is a risk of
damaging the absorber.
With the pyroelectric head, you have been supplied a
test slide with the same coating as on your
pyroelectric detector. You can also obtain this slide
from your dealer. You should use this slide to test the
damage threshold with your laser pulses. If the slide
is damaged, then either enlarge your beam or lower
the laser energy until damage is no longer seen.
6.1 Pyroelectric and Photodiode Energy Detector
Heads
When a pulsed heat source, such as a laser, is
directed at the detector head, a temperature gradient
is created across the pyroelectric crystal mounted in
the head. An electric charge is produced which is
proportional to the energy absorbed. The detector
head has sophisticated circuitry unique to Ophir
(patent applied for) which determines the baseline
before the pulse is received, measures the voltage
after a pre-determined interval, amplifies it and holds it
for a pre-determined time.
Due to this innovative circuitry, Ophir pyroelectric
heads can measure very long pulses as well as short
ones. They can measure low energies as well as high.
They can also measure at higher repetition rates than
was possible before.
The Nova display amplifies this signal and indicates
the energy received by the head as well as the
frequency at which the laser is pulsing. Using the
energy and frequency information, the Nova is also
able to display average power.
54
The photodiode based PD10 head also uses the same
circuitry but can measure much lower energies due to
the sensitivity of the photodiode.
6.2 Selecting Settings from the Nova Screen
The Nova can conveniently be set to various chosen
parameters from the screen. In addition, it can be set
to startup defaults so it will be in the desired
configuration when turned on.
6.2.1 Setting up the head to display the user's
chosen wavelengths
The sensitivity of the detector varies somewhat with
wavelength. The correction curve for the absorber is
stored in the head EEROM. This correction curve
ensures that the power reading is correct at all laser
wavelengths.
In order to simplify changing from one laser
wavelength to another, the user can program up to 6
different wavelengths to be available from the screen
menu. Please use the following procedure to set the
pyroelectric or PD10 head to your laser wavelengths.
1. From the bargraph display, press the menu button
located on the right side until "more" appears.
Press "more".
2. Press "select" until "wavelength" is highlighted.
Press "go".
3. Press "select", "change" then "up" and "down" to
change the first wavelength desired. Press "done".
Repeat for other wavelengths desired up to 6.
Now press exit.
4. Now press "more" then "select" until "config" is
highlighted. Press "go", "exit" then "all" to save the
wavelengths you have set. If you wish to save
other defaults in the "config" screen, See Section
6.3.
Note:
The broadband type heads (BB) have less
variation with wavelength, and in those heads,
fixed wavelength ranges are selected similar to
thermal heads. This section is not relevant with
those heads.
55
6.2.2 Setup of Laser Pulse Length and Pulses / Sample
6.2.2.1 Laser Pulse Length
As was mentioned before, the Ophir pyroelectric
heads can measure long as well as short pulses. In
order to do this, the user must indicate to the Nova if
the laser pulses are going to be longer or shorter than
the maximum wavelength in the short pulse mode.
(Some models only have only one maximum pulse
length setting which is usually 3ms. In that case,
“N.A.” for not applicable appears and the setting
cannot be changed).
Warning:
If the pulse length is incorrectly set to the
short pulse setting for long pulses, the
reading will be erroneously low. If it is set to
the long pulse setting for short pulses the
reading will be correct but noisy.
To set up for pulse length, please do the following:
1. From the bargraph measurement screen, press the
menu button twice and press "setup".
2. Now press "value" to select proper setting for your
laser pulse length. If your laser pulses are longer
than the short pulse setting, then the long pulse
setting should be selected and if shorter, then the
short setting should be selected.
6.2.2.2
Setup for Number of Pulses per Sample
The Nova has the ability to measure a number of
pulses and display the average value of the energy of
the pulses. This function is useful if the laser energy is
not stable. Then the user can choose to measure a
number of pulses and display only the average.
Note:
The Pyroelectric and photodiode energy heads
are capable of measuring pulses up to very high
repetition rates on the order of kilohertz or
above.
56
However, at high repetition rates, the display
can capture the pulses at rates not exceeding
15Hz. The Nova samples individual pulses at a
rate of 15Hz from the laser pulse train. Thus if
the user has a laser pulsing at over 15Hz and
wishes to average over a number of pulses, the
average will be over the number of pulses
processed by the Nova and not over those
emitted by the laser.
Example:
If the user's laser is pulsing at 300Hz, and the
user selects to average over 1s, the Nova will
collect 15 pulses of the 300 emitted during that
period, and will average over those 15 pulses.
The Nova will then update the display every 1s.
To set up for averaging over a number of pulses:
1. From the bargraph measurement screen, press the
menu button twice and press "setup".
2. Now press "select" until "average over" is
highlighted.
Now press "value" until the time
period you wish to average over is displayed. If
you do not want to average, but collect individual
pulses then select "none".
3. Press "exit". If you wish to save the new setting,
follow the instructions in section 6.3.
Note:
The average function only affects the numerical
readings on the screen. The bargraph always
shows individual pulses.
6.2.2.3 PD10 Photodiode Energy Head
The PD10 operates in a similar fashion to the
pyroelectric PE heads except it has a photodiode
detector instead of pyroelectric. Because of its great
sensitivity, it can operate down to about 1nJ of energy.
It has complete wavelength correction over its entire
measurement range of 200 - 1100nm.
57
The PD10 operates in a similar fashion to the PE head
except that it has one extra function. When measuring
very low energies, the head will also be sensitive to
background light and therefore show a spuriously high
reading. Therefore we have added a function to
measure the background light. When measuring low
energies, block the laser and press “bkgrnd”.
You will see a reading of the background light. This
reading can be subtracted from your laser reading to
obtain a more accurate reading. Also, making the
room darker will reduce this background effect.
6.2.2.4 PE -DIF diffuser heads
PE50BB-DIF and PE50-DIF-ER heads with removable
diffusers have to be set up properly to operate with the
diffuser IN or OUT. Since the wavelength settings with
diffuser in are not the same as with diffuser out, two
things must be changed every time the head is
changed from diffuser IN to OUT. (in addition to
changing the pulse length setting if necessary).
To change from diffuser OUT to IN and back:
1. Press the menu button twice and press “setup”.
2. Press “select” until the diffuser setting is
highlighted and select “IN” or “OUT” as desired.
Make sure the diffuser is physically installed or
not installed on the head. Press exit.
3. Press the menu button twice and press “laser”
until the correct wavelength is selected. Note that
only wavelengths compatible with the diffuser
setting are visible. (All wavelengths for diffuser IN
have a D suffix, e.g. 106D = 1.06µm, diffuser in).
4. If it is necessary to change the pulse length
setting, from the bargraph screen press the menu
button twice, press “setup” and press “value” to
choose the correct pulse length. Then press exit.
5. If you wish to save these settings as the defaults,
from the main display, press the menu button
twice then press “more”. Select “config” and
make sure the settings are those you want. Press
“exit” and “all” to save all present settings
including diffuser IN or OUT and pulse length
setting.
58
6.3 Startup and Configuration of Defaults
If you are planning to do repetitive measurements
most of the time, you can set up the Nova so that it
automatically goes into the measurement mode you
want upon startup.
Since these desired settings are saved in the head
"smart connector", you can save different settings for
different heads.
To set the Nova to start up in power or energy
measuring mode and to save the chosen Nova
configuration:
1. From the bargraph measurement screen, press the
menu button located on the right side until "more"
appears. Press "more".
2. Press "select" until "config" is highlighted. Press
"go".
3. Press "value" to choose "power" or "energy" for the
desired startup screen. The Nova will now start
up in power or energy measurement mode,
respectively, when switched on.
4. Press "select" until the laser wavelength is
highlighted. Now press value to select the laser
wavelength you want to be the default. The Nova
will now be correctly calibrated for the absorption
of the detector at the wavelength of the laser type
selected. If you wish to choose another
wavelength, See Section 6.2.1.
5. Press "select" and "value" to choose the default
pulse length and energy range.
6. Now press exit when all selections have been
made. Now press "all" if you want to save all
current settings, or "previous screen" if you want
to save only the settings previously set.
7. In addition to the choices made above, the Nova
will now save all other functions as they have
been chosen at this point, such as laser pulse
width, number of pulses for average, power and
energy graph settings and so forth. Therefore,
before this point, it is best to set up all other
functions also.
59
6.4 Energy, Power or Exposure Measurement
Warning:
Before using the head for power or energy
measurement, check that your laser energy,
energy density and average power do not
exceed the head ratings as listed in the table
with the head specifications at the end of the
manual, otherwise, there is a risk of damaging
the absorber. With the pyroelectric head, you
have been supplied a test slide with the same
coating as on your pyroelectric detector. You
can also obtain this slide from your dealer. You
should use this slide to test the damage
threshold with your laser pulses. If the slide is
damaged, then either enlarge your beam or
lower the laser energy until damage is no longer
seen.
Note:
To measure pyroelectric energies properly, it is
important that the head is not grounded to the
optical bench. Make sure that the head is
isolated electrically from the ground. The PE
head has been supplied with an insulating
mounting post for this purpose.
6.4.1 Energy Average Power and Frequency Measurement
Unlike most pyroelectric and photodiode energy
meters, the Nova measures the pulse frequency to a
high degree of accuracy and is therefore able to
display pulse frequency and average power as well as
pulse energy. The following paragraph will describe
how to set up and measure these functions.
6.4.1.1 Energy Measurement
Ordinarily, when the instrument is switched on, it is in
the bargraph energy measurement mode. This can be
verified by the fiducial marks at the bottom of the
screen and the units of mJ, µJ etc. (See figure 9).
60
How to set up for pulse energy measurement is
described below.
1. Make sure the instrument is in the bargraph
energy measurement mode indicated by the
fiducial marks at the bottom of the screen and the
units of mJ, µJ, etc. If it is in power measurement
mode with units of mW, W etc, then press the left
soft key or alternatively, press the menu button
and then the left "energy" soft key. The Nova can
be setup to start up in energy or power
measurement mode when turned on. See section
6.3.
Figure 9
Pyroelectronic and Photodiode Head Energy Screen
2. Press the menu button once then press "range"
then the "up" "down" soft keys until the proper
range is highlighted. The correct range is the
lowest one that is larger than the pulse energy
measured.
3. Press exit then press the menu button twice to
return to the bargraph measurement screen. If
you wish to have the frequency displayed, press
the menu button only once.
4. If you wish to display the average of a number of
pulses, press the menu button until "setup" is seen.
Press "setup" and then "select" until
"pulses/sample" is highlighted. Press "value" to
select the number of pulses you wish to average
over. This function can be permanently saved.
See also Section 6.2.2.2. and 6.3.
61
The Nova is now ready to measure energy pulses. The
energy reading will operate in the following manner if
"none" selected as the averaging period, following
every 1/15th of a second period, the Nova will display
on the screen the next pulse which arrives. The Nova
will hold the display of the latest pulse until a new one
arrives. If an averaging period is selected, the Nova
will collect pulses at up to 15Hz and will then display
the average of those pulses. When a new pulse
triggers the Nova, a "T" will appear in the upper left
corner of the screen. At over 5 Hg, the "T" stops
flashing and appears all the time.
6.4.1.2 Minimum Energy Threshold
If the pyroelectric heads are used in a electrically or
acoustically noisy environment the instrument may
trigger spuriously. It will then display a spurious pulse.
Since there is always some degree of noise or
background, the instrument is designed not to respond
to pulses below some preset minimum size. This
"Minimum Energy Threshold" is typically set to 4% of
full scale of the selected range. Pulses which are very
close to background may read sporadically or
inaccurately. Therefore it is important to always use
the lowest energy range which is larger than the
energies you are measuring.
6.4.1.3 Power Measurement
1. Make sure the instrument is in the bargraph power
measurement mode indicated by the fiducial
marks at the bottom of the screen and the units of
mW, W, etc. If it is in energy measurement mode
with units of mJ, µJ etc, then press the left soft key
or alternatively, press the menu button and then
the left "power" soft key. The Nova can be
configured to start up in power measurement
mode when turned on. See section 6.3.
2. Press the menu button once then press "range"
then the "up" "down" soft keys until the proper
range is highlighted.
62
The correct range is the lowest one that is larger
than the highest energy being measured. Note
that the proper range is related to the pulse
energy even though we are measuring average
power.
3. Press exit then press the menu button twice to
return to the bargraph measurement screen. If
you wish to have the frequency displayed, press
the menu button only once.
6.4.2 Zoom
The Zoom function causes the scale to expand around
the present reading ±10%. Thus, if the full scale of the
bargraph is 25mJ and your reading is 15mJ, pressing
"zoom" will make the bargraph scale range between
approximately 13.5 and 16.5 mJ. Variations in energy
or power are more easily seen in this mode. When
zoom is engaged, the legend is highlighted. To cancel
the zoom function, press "zoom" again. The zoom
function can be useful for laser power tuning and
peaking.
To access the zoom function, press the menu button
until "zoom" appears. Then press "zoom". When it is
highlighted it is engaged. Now press the menu button
twice to return to the bargraph power display. Note
that the fiducial marks of the bargraph are further
apart, indicating that zoom is engaged. You may also
directly engage the zoom function from the bargraph
screen by pressing the middle button.
Note:
While the button is pressed, the soft key legend
appears. Pressing "zoom" again will cancel the
function.
6.4.3 Measuring Total Energy Exposure.
The Nova has the ability to sum the total energy of a
number of pulses over a given time period or number
of pulses. This gives the total energy "exposure" over
that time period. For example if the laser is pulsing at
30 times/s at 1mJ per pulse and you measure the
exposure over 20 seconds then the total exposure is
30 x 1 x 20 = 600mJ
63
In order to measure exposure, do the following:
1. Press the menu button until "more" appears. Press
"more".
2. Press "select" until "exposure" is highlighted. Press
"go".
3. Setup the desired measurement parameters in the
setup screen and press "go".
4. Press "go" again. The Nova will start summing
laser energy exposure and the legend will change
to "stop". When you wish to stop measuring, press
"stop" or wait for the timeout selected in the setup
screen. The Nova will now display the total
energy emitted during that period, the time
elapsed and the number of pulses during the
period. If you wish to reset reading to zero before
another reading, press "reset".
5. To return to the bargraph screen, press exit.
Figure 10.
Exposure Screen
6.4.4 Pyro Scope Adapter
A special adapter can be purchased which is plugged
in between the head connector and the Nova head
socket. This adapter has a cable and BNC connector
to attach to an oscilloscope. It enables the user to see
on the scope pulses proportional to energy up to the
maximum pulse rating of the head . Unlike the Nova
display, which samples at the maximum rate, the
scope adapter shows every single pulse.
64
Activate the scope adapter as follows:
1. Plug the adapter into the Nova display and then
plug the head plug into the adapter. Plug the BNC
connector into a standard 1MΩ scope input.
2. Press the menu button twice and then press
‘more”. Select “scope” and press “go”. The
display will now say “in scope mode”. Select the
appropriate measurement range in the usual way.
3. You can return to the ordinary measurement mode
by pressing “exit” from the scope mode screen.
4. If you wish the instrument to start up in scope
mode, press the menu button twice and press
‘more”. Select “config” and press “go”. Select
“display” and press “value”. It will change to
“scope”. Press “exit” and “all” to save the new
configuration.
6.5 Measuring Repeating Pulses of High Energy
Because of their construction, pyroelectric heads are
restricted in the energy density they can withstand,
particularly for short pulses on the order of
nanoseconds. If the energy density of your laser
exceeds the rating of the pyroelectric absorber, there
are several options available.
1. You can use Pyroelectric heads with a diffuser.
Ophir has several heads with a diffuser which
increases the damage threshold by an order of
magnitude. (See table 7 at the end of this manual).
2. You can enlarge your laser beam using a negative
lens until the energy density is below damage
threshold. You should test this using the test slide.
See section 6.4.
3. You can use the Ophir beam splitter which mounts
the PE heads and splits off typically 8 -10% of the
light. If you use this method, note that there may
be polarization effects. You can calibrate the
beam splitter by running the laser at an energy
below damage threshold and measuring the
energy with and without the beam splitter. The
Ophir beam splitter is built to facilitate this
measurement.
4. Ophir has models RP which are specifically
designed for pulses with energies up to 100
Joule/cm².
65
Contact your Ophir dealer for details.
6.6 Energy Log
This is the same as for thermal heads, except you do
not have to wait for "reset",
See section 4.5.6.
66
Chapter 7 Circuit Description
The NOVA has three circuit boards: an analog
processor, a digital processor and a power supply.
Analog Processor:
The signal from the detector head enters the analog
processor board and passes through EMI protection
components to a differential transimpedance
preamplifier. From there it is further amplified by a
programmable gain voltage amplifier and passes to a
dual slope integrating analog to digital converter. All
calibration data for the analog processor is stored on a
memory chip on the analog processor board. There are
no adjustable components (trimmers etc.) in the NOVA
except for the display contrast adjustment on the rear
panel.
Digital Processor:
The digital processor is built around a Motorola
MC68332 32-bit central processing unit (CPU) with a
16-bit bus. On the digital processor board there is a
socket containing the upgradeable program ROM and
a 256Kbit static RAM.
The processor receives signals from the analog
processor and converts them into current in amps.
When used with thermopile heads the signal is then
processed by a sophisticated digital filter which
speeds up the effective response time of the head and
rejects noise. The digital processor is also responsible
for controlling the analog processor, reading the
keypad, and driving the display.
The CPU obtains calibration and capability data from a
memory chip in the plug of the detector head and
configures itself accordingly. Recalibration data and
saved settings are also stored in this memory chip.
67
Power Supply:
The power supply board, which also holds the display
module and the keypad switches, provides the internal
DC voltages for the analog and digital processors. It also
contains the battery charging circuit and the AC supply
for the backlight. All of the power supplies operate in
switch mode with an oscillator frequency of 32KHz.
Electromagnetic Interference:
The Nova and associated heads have extensive circuitry
both to reject outside electromagnetic and electrostatic
interference. The Nova and associated heads are fully
CE qualified and are extremely resistant to EMI. If there
is still some interference in an unusually high EMI
environment, it is recommended to use the Nova without
the charger plugged in.
68
Chapter 8 Calibration, Maintenance and
Troubleshooting
8.1 Calibration of Thermopile Heads
8.1.1 Absorber types and Method of Calibration of
Ophir Power Meters
8.1.1.1 Types of Ophir Laser Absorbers
Two types of absorber surface are used in Ophir
thermal measuring heads.
1. Surface Absorbers:
BB (broadband) absorber:
On standard, high power density, broadband Ophir
power monitor heads, a special refractory coating is
used to provide high absorptivity from the UV through
the IR. This coating can withstand very high power
densities, up to 20 kW/cm², without changing
calibration. The absorption of this coating is above
90% for most of its range, as shown in Graph 1 below.
EX (excimer) absorber :
The EX absorber provides high absorption in the UV,
and it can withstand both the pulse energies and the
average power of excimer lasers. These discs also
have excellent absorption for 10.6 µm and other wavelengths. They can therefore be used for other types of
lasers as well. The absorption of the various Ophir
absorbers as a function of wavelength is shown in
Graph 1 below.
LP (long pulse) absorber:
This absorber has a particularly high damage
threshold for long pulse (ms) or continuous lasers and
is therefore offered for use with high power heads. It
is calibrated for use with YAG laser at 1.064µm or CO2
laser at 10.6µm and absorbs about 90% at these
wavelengths.
69
2. Volume absorbers
P (pulse) type absorber:
The models with the P suffix, for use with pulsed
lasers, have a special absorbing glass with an
absorbance of 95 +2% over the operating range. Since
the surface is a glass, its reflectivity does not change
even if damaged or melted locally.
HE/HE1 (high energy) absorber:
The HE and HE1 types have a particularly high damage
threshold for pulsed and repetitively pulsed lasers of
both the short and long pulse variety and are useful
where the highest pulse energies and average powers
are used.
HL (high energy long pulse) absorber:
The HL absorber is the absorber of choice for high
energy repetitive pulses longer than 2ms. For these
long pulses it has flatter spectral response than the
HE/HE1 and withstands higher pulse energy and
average power.
70
Percent absorption
100
98
96
94
92
90
88
86
84
82
80
0.1
1
10
BB therm.
100
EX
Wavelength, µm
100
Wavelength, µm
P
Percent absorption
95
90
85
80
75
70
65
60
55
Wavelength, µm
50
0.1
Wavelength, µm
1
HE
HE1
LP
HL
Graph 1.
Absorption of Ophir Thermal Absorbers vs. Wavelength
71
10
8.1.1.2 Method of Calibration
The absorption of the various Ophir thermal absorbers
can vary from disc to disc. Therefore, all Ophir
absorbers are individually calibrated against NIST
traceable standards.
Ophir power/energy meters with the broadband or P
type absorbers are individually calibrated by laser at
several wavelengths against a NIST calibrated
standard meter. The meter can be switched to give
the exact calibration at the various wavelengths
(Argon, YAG, and, where applicable, CO2); or, for some
models, an average value is given.
The EX type detector is calibrated by measuring the
ratio of absorption in the UV to that at 515nm. The total
absorption is measured in both cases using an
integrating sphere. The detector is then calibrated
with an argon laser and given a correction factor from
this ratio.
8.1.2 Linearity and Accuracy of Ophir Thermal Heads
8.1.2.1 Linearity
The linearity of most Ophir thermal detectors is
specified to be 1% over the specified power range of
each particular instrument. The linearity is tested by
electrical substitution heating. Models of up to 30
watts maximum rating are subjected to electrical input
up to their maximum rating, models of up to 300W
maximum rating are heated up to 100 watts, and
models of 1000W rating and above are heated up to
200 watts. On CAL models, the built in CAL resistor is
used.
On non CAL models, a CAL resistor is temporarily
affixed to the sensor. For those models for which the
linearity is not tested over their entire range, randomly
chosen sample models are tested periodically over
their entire range.
72
The test is performed with a high power laser that can
cover the entire detector range using a rear leak
detector for comparison. This rear leak detector is a
low power Ophir detector which has previously been
tested for linearity. Thus, in all cases, the linearity of
the detectors is traceable to electrical standards.
8.1.2.2 Total Accuracy of Calibration
Since the instruments are calibrated against NIST
standards, the accuracy is generally 1% at the power
level at which the calibration has been performed.
This accuracy has been verified by checking the
scatter of the results when several instruments are
calibrated against the same standard. The maximum
error in measurement will be less than the sum of the
specified accuracy and linearity. Since the linearity is
also 1%, the maximum error in measurement will
generally be less than 2%.
8.1.3 Calibration Factor
For models equipped with the Ophir CAL resistor, the
calibration factor is determined at the factory by the
following procedure. After calibration of the sensor as
described above in Section 8.1.1.2, electrical power is
applied to the CAL resistor. The calibration factor is
given by the formula:
CAL factor = reading on meter / applied electrical power.
If you wish to check and adjust the power reading,
apply electrical power to the CAL resistor, and
measure the voltage and current to obtain the applied
power. The correct power reading for the meter is the
applied electrical power multiplied by the CAL factor
given above.
73
8.1.4 Recalibration of Thermopil Heads Using the Nova
If your measuring head is equipped with the exclusive
Ophir CAL resistor then calibration is performed
according to the instructions in Section 8.1.4.2.
If you do not have the CAL resistor, then you can
recalibrate from a known source of power or energy
following the instructions in Section 8.1.4.3.
On the rear center of the sensor disc is the exclusive
Ophir calibration heater. The disc can be heated by
electrical power instead of by radiation by applying
electrical power to the terminals at the rear of the
sensor head.
By accurately measuring the voltage and current
applied, the calibration can be checked and if
necessary, readjusted, taking into account the
calibration factor. See Section 8.1.3
8.1.4.1 Guidelines for using the CAL resistor for
calibration:
1. Do not exceed the maximum electrical power
stated in the table.
Model
Power
3A Series
10A Series
30A Series
150A Series
300W Series
1500W
Series
and above
1 Watt
10 Watts
30 Watts
100 Watts
125 Watts
200 Watts
Aprox. Max
Voltage
7 Volts
17 Volts
35 Volts
65 Volts
65 Volts
95 Volts
Table 3.
Maximum Power to Apply to Sensor CAL Resistors
74
2. Use the resistor for calibration only.
3. Turn off the power as soon as calibration is done.
4. Do not operate the calibration resistor when the
sensor disc is under radiation; the excessive heat
may burn out the calibration resistor.
5. To eliminate residual non-linear effects, it is
advisable to perform electrical calibration at about
the same power level as that to be measured, so
long as the rating of the heating resistor is not
exceeded.
8.1.4.2 Recalibration of Power using the Built in
CAL Resistor
If your thermal head has the Ophir CAL resistor then
you have a traceable absolute calibration source
available just by measuring the voltage and current
into the CAL resistor and multiplying by the calibration
factor provided by Ophir.
Calibration instructions:
1. Set the instrument to power. If you want to
recalibrate energy, this can be done from a known
energy source. See section 8.1.4.3.
2. From the bargraph power screen press the right
soft key and set to the proper manual power
range. Press "exit".
3. Press the menu button twice then "more." Now
press select until "calibrate" is highlighted. Press
"go".
4. Press "power with CAL" .
5. Using the "laser" button select the proper laser
wavelength. (See note 1 below). When laser
wavelength is set press "go".
6. Using a DC power supply, apply power to the CAL
resistor (black and red terminals at the back of the
head). For highest accuracy, use the same power
as you intend to measure, but do not exceed
values in Table 3, Section 8.1.4.1.
7. Maximum voltage applied should not exceed:
√(resistance of CAL resistor) x (maximum power)
75
8. The voltage should be measured at the input to the
head and the current in series with the current
loop.
9. Press go and adjust up/down until the power
reading on the screen reads the (voltage in volts) x
(current in amps) x (current calibration factor for
your model and laser or as shown on Nova).
Note 1:
For units which have different calibration factors,
e.g. CO2, YAG, or VISIBLE, press "laser" to select
correct type of laser before calibration. When
recalibrating using the CAL resistor, the other two
settings will change proportionately. If you wish
to change the calibration of only one laser type,
use the function "Power with laser".
Note 2:
The unit retains for your information the current
sensitivity of the head in A/W in engineering
notation. The original value is retained at the
factory. You should record the original setting so
you can return to it if you wish.
8.1.4.3 Recalibration from a Known Source of
Laser Power / Energy
1. Set the instrument to power or energy depending
which you wish to recalibrate.
2. Set to the proper manual power or energy range.
3. From the bargraph power screen press the menu
button twice and press "more." ("more" is directly
accessible from the energy measurement screen.)
Now press select till "calibrate" is highlighted.
Press "go".
4. Press "power/energy with laser".
5. Using the "laser" button select the proper laser
wavelength. See note 1 below. When laser
wavelength is set press "go".
6. Apply the known laser power/energy.
7. Adjust up/down until the power/energy reading on
the screen equals the known power/energy. The
power/energy calibration factor will change
accordingly. See note 1.
8. Press exit. The new value will be saved.
76
Note 1:
For units which have different calibration factors,
e.g. CO2, YAG, or VISIBLE, press "laser" to select
correct type of laser before calibration. When
recalibrating using "power with laser:" function,
only the calibration of the chosen laser
wavelength will change. If you wish to change the
calibration of all wavelengths proportionately,
then use the function "power with CAL".
Note 2:
When changing power calibration, this will also
change energy calibration proportionately.
However, changing energy calibration will not
change power calibration.
8.2 Calibration of Photodiode type Heads
Photodiode detectors are inherently very linear but
also have a large variation in sensitivity with
wavelength. In addition, the Ophir model PD300 is
equipped with both a built in filter and removable filter
to allow measurement of higher powers without
detector saturation.
These filters also have a
transmission which depends on wavelength.
Therefore, the PD300 Nova has a built in calibration
adjustment for wavelength which is described in the
next paragraph.
8.2.1 Method of Factory Calibration
The sensitivity of various Ophir photodiode sensors
varies from one head to another as well as with
wavelength. Therefore, Ophir photodiode detectors
are individually calibrated against a NIST standard
which has been calibrated at several nm intervals over
the entire spectral range.
The spectral sensitivity curve of the detector, both for
filter out and filter in, is fed into the head EEROM and
this information is used to set the gain to the proper
value at all wavelengths.. When the user selects his
wavelength on the Nova, the correction factor for that
wavelength is applied.
The BC20 head does not have a calibration curve. It is
calibrated at the fixed wavelengths that are available
with that instrument.
77
8.2.2 Accuracy of Calibration of PD300 and 3A-IS
Heads
Since the instruments are calibrated against NIST
standards, the accuracy is generally ±2% at the
wavelength the calibration has been performed. The
maximum error in measurement will be less than the
sum of the calibration accuracy, linearity, inaccuracy
due to errors in the wavelength curve and variations in
gain with temperature. The linearity of the photodiode
detector is extremely high and errors due to this factor
can be ignored. The maximum error due to the above
factors is given in Table 4 below.
Wave
Length
Error, Filter Out*
PD300
PD3003W
-
-
200 - 250nm
250 - 360nm
PD300UV
±5%
PD300IR
3A-IS
±3%
-
360 - 400nm
±10%
±10%
±3%
400 - 950nm
±3%
±3%
±3%
950 1100nm
1100 1600nm
16001800nm
±5%
±5%
±5%
±5%
-
-
-
±5%
-
-
-
±7%
5%
10%
Table 4 .
Maximum Error as a Function of Wavelength and Filter
* Add ±2% to error for filter in (±3% for PD300-3W and PD300-UV).
8.2.3 Accuracy of calibration of BC20 Heads
The sensitivity of various BC20 sensor varies from one
head to another as well as with wavelength.
Therefore, each BC20 head is individually calibrated at
each specified wavelength against a NIST standard
which has been calibrated at the relevant
wavelengths.
78
Since the instruments are calibrated against NIST
standards, the accuracy is generally ±2% at the
wavelength the calibration has been performed. The
maximum error in measurement will be less than the
sum of the calibration accuracy and linearity The
linearity of the photodiode detector is extremely high
and errors due to this factor can be ignored. The
maximum error due to all factors is the stated
accuracy of ±3%.
The calibration is carried out with a fixed laser. In
addition to the error in calibration, the reading drops
somewhat with scanning speed. The BC20 is specified
to deviate from the static reading no more than –3% up
to a scanning velocity of 30,000 inch/sec.
8.2.4 Recalibration of PD300 and 3A-IS Heads from
a Known Source of Laser Power
1. Set the instrument to the appropriate manual
power range.
2. From the bargraph power screen press the menu
button twice and press "more." Now press "select"
until "calibrate" is highlighted. Press "go".
3. Using the "laser" button select the proper laser
wavelength. See note 1 below. When laser
wavelength is set press "go".
4. Apply the known laser energy.
5. Adjust up/down until the power on the screen
equals the known power. The power calibration
factor will change accordingly.
6. Press exit. The new value will be saved.
Note 1:
The relative readings at different wavelengths are
fixed by the wavelength calibration curve stored in
the head EEROM. When changing the calibration
at one wavelength, the calibration at all other
wavelengths will change proportionately.
79
8.2.5 Recalibration of BC20 heads from a Known
Source of Laser Power
1. Set to the proper manual power or energy range.
2. From the bargraph power screen press the menu
button twice and press "more. Now press select
till "calibrate" is highlighted. Press "go".
3. Press "power with laser".
4. Using the "laser" button select the proper laser
wavelength. Press “go”. Apply the known laser
power/energy.
5. Adjust up/down until the power/energy reading
on the screen equals the known power/energy.
The power/energy calibration factor will change
accordingly.
6. Press exit and save.
8.3 Calibration of Pyroelectric and Photodiode
Energy Heads
Several types of absorber are used in Ophir
pyroelectric and photodiode energy heads:
1. Metallic type: The type with no suffix in the name
have a partially reflective multilayer metallic
coating which absorbs approximately 50% and
whose absorption graph is shown in graph 2
below. The metallic coating permits very high
repetition rates, up to 5000Hz as well as high
sensitivity.
2. Broadband type: The type with the BB suffix has
a broadband black absorbing coating to provide
high absorptivity from the UV through the IR. This
coating can withstand energy densities, up to
0.3J/cm² for short pulses and 2J/m² for long pulses
without changing calibration. The absorption of
this coating is above 90% for most of its range, as
shown in Graph 2 below. This coating is available
for the PE50 and PE25.
80
3. High speed broadband type: The type with the
BBH suffix has a special broadband coating
spectrally flat from 190nm to 3µm. Unlike the BB
type, it is able to work at high repetition rates to
1000Hz. On the other hand, its damage threshold is
considerably lower, on the order of 0.05J/cm².
4. PD10 type: Unlike the other heads, the PD10 has
a silicon photodiode with a neutral density filter
mounted permanently in front of it. The filter
detector combination are calibrated over the
entire wavelength range similarly to the PD300
power heads and therefore the heads have a high
accuracy at any wavelength in the range. This is
an exclusive feature with Ophir energy heads.
Absorption %
100
90
BB - Broadband
80
70
60
50
Metallic Coating
40
30
0.1
1
10
100
Wavelength (nm)
Graph 2
Absorption of Ophir Pyroelectric Absorbers
8.3.1 Method of Calibration
The sensitivity of the various Ophir pyroelectric
sensors can vary from one to another as well as with
wavelengths. Therefore, Ophir pyroelectric detectors
are individually calibrated against NIST traceable
standards. In addition, the calibration is corrected in
the Nova for different wavelengths.
Ophir pyroelectric detectors are calibrated using a
1.06µm repetitively pulsed laser referenced to a NIST
traceable thermal power meter. The average energy
is set to the average power of the standard power
meter divided by the laser frequency.
81
The spectral absorption of the detector coating is
measured spectroscopically and the absorption curve
is used to correct the calibration for other
wavelengths. When the user selects his wavelength
on the Nova, the correction factor for that wavelength
is applied.
The PD10 heads are calibrated in a two step fashion.
First the photodiode detector - filter combination are
calibrated against a NIST traceable master in a similar
fashion to the PD300 heads over the wavelength range
of the head. Then the head is calibrated at one
wavelength using a 905nm repetitively pulsed laser
referenced to a NIST traceable photodiode meter. The
average energy is set to the average power of the
standard power meter divided by the laser frequency.
8.3.2 Accuracy of Calibration
Since the instruments are calibrated against NIST
standards, the accuracy is generally 3% at the energy
level and wavelength at which the calibration has
been performed. This accuracy has been verified by
checking the scatter of the results when several
instruments are calibrated against the same standard.
The maximum error in measurement will be less than
the sum of the specified accuracy, linearity and
inaccuracy due to errors in the wavelength curve.
The non linearity is approximately 2%, and the error
due to wavelength is given in table 5 below.
In addition to the above errors, the reading of
pyroelectric heads changes with frequency. The Nova
has a built in correction for this error. For frequencies
above 50% of maximum frequency, inaccuracies in
this correction can increase the total error by up to
3%.
The maximum error in measurement will be less than
the sum of the above errors and in general will be
considerably less.
82
Wavelength
Broadband
Coating Type
Metallic
PD10
190 - 350nm
400 - 800nm
1064nm
1-1.5µm
2 - 3µm
10.6µm
±1%
±1%
0
±1%
±2%
±5%
ERROR
±4%
±4%
0
±2%
±8%
±15%
2%
0
2%
N.A.
N.A.
N.A.
Table 5.
Additional Measurement Error due to Wavelength
8.3.3 Recalibration from a Known Source of Laser
Energy
1. Set the instrument to energy.
2. Set to the proper energy range.
3. From the bargraph power screen press the menu
button twice and press "more." Now press "select"
until "cal" is highlighted. Press "go".
4. Using the "value" button, select the time period
over which you wish to average. Now press
"select" and "value" to choose the correct laser
wavelength. See Note 1 below. Now press "go".
5. Apply the known laser energy.
6. Adjust up/down until the energy reading on the
screen equals the known energy. The energy
calibration factor will change accordingly.
7. Press exit. The new value will be saved.
Note 1:
For metallic and PD10 type heads, when the
calibration is changed at one laser wavelength,
the overall calibration of all other wavelengths
changes proportionately. For BB type, the
calibration is only changed for the wavelength set.
83
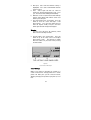
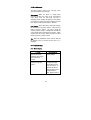
8.4 Error Messages
The Nova displays various error messages when
operated outside its normal range:
Over-range: When the power or energy being
measured exceeds the range of the measurement
scale being used, the over-range message is
displayed, but the reading still appears on the display.
If the power or energy exceeds the maximum by more
than 10%, the reading on the display is blanked.
Low Battery: When the battery is almost discharged,
the flashing message "BAT" appears. When the low
battery message appears, the Nova should be
connected to the charger. It will operate normally and
charge slowly while connected to the charger. When
connected to the charger while turned off, the Nova
will charge faster, in about 18 hours.
Sat: When the photodiode current exceeds 1mA and
the detector starts to saturate, the message "sat " is
displayed.
8.5 Troubleshooting
8.5.1 Nova Display
Problem
Instrument will not
operate after being
completely discharged
and connected to
charger.
Instrument operates with
charger but not with
battery.
Cause/Remedy
Check that charger
provides 200mA.
Battery is low.
Recharge overnight
with the Nova turned
off for 14-16 hours. If
the Nova still doesn't
work with battery, then
the NiCd battery is
dead. Replace battery.
84
8.5.2 Thermal Heads, Energy Measurements
Problem
Instrument triggers on
background noise or
sometimes fails to
catch large pulse.
Instrument does not
show ready for a long
while after a reading is
made.
Non-reproducible
results when measuring
very small energy
pulses; or no response
to pulses at low energy.
Cause/Remedy
Increase threshold
level; See Section.
4.5.3.
Increase threshold
level; See Section 4.5.3.
Decrease threshold
level: See Section 4.5.3.
8.5.3 Thermal Heads, Power
Problem
Instrument
shows zero
reading in both
power and
energy modes.
Instrument
responds while
head is cold, but
suddenly fails as
it heats up.
Instrument does
not return
completely to
zero on power
measurement.
Cause/Remedy
Check connections between
the head and the instrument.
See signal tracing (Section
8.6) Check that the sensor disc
is operative. Resistance
between pins 1 and 9 of the
head connector should be
about 1.8k. If the sensor is
defective, there will be an
open or short circuit.
Replace sensor disc. See
Section-8.6.1.2.
If head is very hot, allow it to
cool. Disconnect the head
from the instrument. If
readout unit does not zero,
adjust zero with head
disconnected. If the offset
persists, try zeroing with the
head connected as well, as
described in Section 3.5.2.
85
8.5.4 Pyroelectric Heads
Problem
1. Instrument reads
incorrectly or
erratically.
Especially on
sensitive scale.
2. Instrument triggers
even without being
exposed to laser
pulses.
3. Instrument shows
frequency which is
too high.
Cause/Remedy
Possible electromagnetic
interference from pulsing
laser is causing misreading
and/or false triggering.
Check the following:
1. Head is mounted to stand
using insulated plastic rod
provided with instrument,
and not metal rod.
2. Try keeping cable away
from bench.
3. Move head/display further
away from EMI.
8.6 Maintenance
8.6.1 Maintenance of Thermal Heads
8.6.1.1 Tracing the Signal from the Head to the
Nova
1. With the instrument on, apply an approximately
known amount of power to the head. This test can
be performed using either a laser or an electrical
power supply and the calibration resistor.
2. Estimate the approximate signal current that
should be developed by the head by multiplying
the input power by the head-sensitivity shown in
the head specification table.
3. Unplug the head from the Nova and check that this
current appears between pin 1 and 9 of the D type
plug.
8.6.1.2 Disc Replacement
If you have ordered a replacement disc, it has been
factory calibrated for the wavelength region shown on
the calibration sheet sent with the disc.
86
It has been calibrated at the wavelength requested, or
for the 3 wavelengths listed. If it is a CAL type disc, a
CAL Factor is also included to use for electrical
calibration checks on your power/energy meter.
Please follow the following steps in disc replacement.
1. Remove the screws from the front and rear
flanges of the absorber head.
2. Remove the front flange and raise the rear flange,
taking care not to tear the wires attached to the
connectors.
3. Unsolder the wires from the faulty absorber disc
attached to the BNC connector in the head,
remembering which wire is connected to each
terminal.
4. Pry the absorber disc free from its seat by using a
screwdriver in the hole provided at the edge of the
seat.
5. Smear the absorber disc seat evenly with silicone
heat sink compound.
6. Feed the wires through the hole and install the
new disc. It is best to turn the disc back and forth
a few times while pressing on it, to ensure good
contact between the disc, grease and head.
7. Reassemble the front flange, making sure the
screws are tight.
8. Resolder the two wires to their proper locations on
the rear flange and reassemble the rear flange.
8.6.1.3 Recalibrating the Head to a new Disc
1. From the bargraph power measurement screen
press the menu button twice, then press "more".
2. Press "select" until "calibrate" is highlighted. Press
"go" then "power with CAL". Press "laser" and
select the first laser wavelength sent with the
disc. Now press "go" and adjust up/down until the
sensitivity agrees with that sent with the disc.
Now press exit to save the new value.
3. For heads with calibration at several laser
wavelengths, you now have to adjust the
calibration for the other wavelengths.
87
From the bargraph power measurement screen,
press the menu button twice and press "more".
Press "select" until "calibrate" is highlighted. Press
"go". Now press "power with laser". Use the
"laser" button to select one of the laser
wavelengths. Press "go" and adjust until the cal
factor is the same as that sent with the disc for the
wavelength shown. Now press "exit" to save that
value.
4. Now repeat step 3 for the other laser wavelengths.
Each time, use the "laser" button to select a
different laser wavelength and enter the proper
calibration factor sent with the disc for that
wavelength.
8.6.2 Replacing Battery
1. Remove the bottom of the Nova by unscrewing the
4 Phillips screws.
2. Unscrew screw in the center of the PC boards.
Carefully lift the boards up together.
3. Unplug the battery connector from the circuit
board.
4. Remove the battery and replace it with a new one
obtained from your Ophir representative.
5. Reassemble the boards and screw in the center
screw. Now reassemble into the case and close 4
case screws.
88
Chapter 9 Nova Specifications
9.1 System/Display Specifications
Detector Compatibility
Input ranges
A to D Sampling rate
A to D resolution
Electrical accuracy
Electrical input noise
level
Dynamic range
Analog output
Analog output accuracy
Dimensions
Mass
Display
Display digit height
Backlight
Bargraph segments
Battery
Operation between
charges
Charger
Thermopile, photodiode
pyroelectric, OEM
15nA - 1.5mA full scale in
16 ranges
15Hz
17 bits plus sign. (0.0007%
resolution)
±0.25% ± 20pA new;
±0.5% ±50pA after 1 year
500nV or 1.5pA + 0.0015%
of input range @3Hz.
9 decades (1:109)
0-1 Volt with 11-bit (0.05%
resolution.)
±0.2% ±2mV relative to
display
203H x 95W x 37D (mm)
550g
122 x 32 pixel Super twist
LCD
12mm
EL: Operates from charger
power only
120
2 X RR (Sub-C) 1.8Ah NiCd.
Built in.
18 Hrs, 10Hrs with
pyroelectric heads. Battery
charge time10-14 Hrs
(15-30 Hrs if operating)
DC: 11 to 22V: or AC 9 to
15Vrms 3 Watt.
89
9.2 Head Specifications
HEAD
MAX
POWER
(WATTS)
MAX AVG.
POWER
DENSITY
ABSORB
ER
TYPE
PD300/UV/I
R
PD300-3W
3A-IS
F100A-IS
300mW
50W/cm²
PD
3W
3W
100W
50W/cm²
200W/cm²
200W/cm²
2W
3W
10W
30W
30(150)W
200W/cm²
50W/cm²
50W/cm²
50W/cm²
1000W/cm²
PD
Int Sph PD
Int Sph
Ther
BB
P
P
P
HE/HE1
10W
30W
30(100)W
150W
250W
300W
1000W
1500W
5000W
8000W
30W
250W
20mW
2W
10W
20W
40W
20KW/cm²
20KW/cm²
20KW/cm²
20KW/cm²
20KW/cm²
20KW/cm²
6KW/cm²
6KW/cm²
5KW/cm²
5KW/cm²
1KW/cm²
1KW/cm²
50W/cm²
50W/cm²
10W/cm²
10W/cm²
500W/cm²
BB
BB
BB
BB
BB
BB/LP
BB
BB/LP
BB/LP
BB/LP
EX
EX
PD
PE
PE
PE
PE
2A
3A-P-CAL
10A-P
30A-P
30(150)AHE
10A
30A
30(150)A
F150A
FL250A
F300A
1000W
1500W
5000W
8000W
L30A-EX
FL250A-EX
PD10
PE10
PE25
PE50
PE50-DIF
Table 6.
Max Power Specifications of Heads
PD - Photodiode
P - P type volume absorber for short pulse lasers
HE/HE1- volume absorber for high energy pulses
EX - Excimer type, volume absorber
PE - pyroelectric metallic or black absorber
BB - broadband surface absorber, high power density
LP - broadband surface absorber for highest power
density
90
Absorber
Type
P
HE/HE1
BB
EX
PE, Metallic
PE, BB
PE-DIF
PE BB-DIF
Max Energy Density J/cm²
Pulse Length
10ns
1µs
300µs
10
10
10
5
10
100
0.3
0.5
5
0.5
0.6
4
0.1
0.2
4
0.3
0.3
1
1.5
3
40
3
3
10
Table 7.
Maximum Energy Densities for Various Absorbers
Rev3.14/11/eg ver2.4/29.7.99/eg added instructions for PE-DIF. Corrected
short/long pulse descriptions. Ver2.5/21.9.99/eg changed page breaks
ver/2.6/14.11.99/eg added attenuator function.
Rev2.7/22.12.99/eg corrected chapter headings pages: cover, 14, 15, 16
NovaforUser
Manual
Rev 2.8/12.2.01/eg added section
BC20-SH
Rev 2.81/21.5.01/eg updatedOphir
damageP/N
threshold
section
1J06013
Rev 3.14/12.11.01/eg added sections for attenuation screen and new offset functions
20 March
2005
Rev 3.20/23.7.02/eg changed electical
accuracy
spec
Rev 3.20-1/6.8.02/eg changed instructions
for attenuation screen next rev3.25
Rev 3.27-1
Rev 3.20-2/12.10.04/be Ophir logo Rev 3.20-3/1.12.04/be New Ophir logo + banner
Rev 3.27-1/16.03.05/be New Graphics
91