1
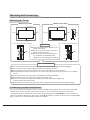
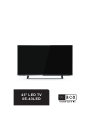
43" LED TV
0E-43LED
Contents
Features………………………………………………1
Safety Warning and Notice…………………………1
Mounting and Connecting…………………………3
Packing list…………………………………………3
Mounting the TV set………………………………4
Connecting peripheral equipment… … … … … … 4
Panel Control Keys…………………………………7
Remote Control………………………………………7
General Operating Instructions……………………8
Power on……………………………………………8
Installation guide-setting…………………………8
Standby………………………………………………9
Signal source selection ……………………………9
OSD menu operation ………………………………9
Picture………………………………………………10
Sound ………………………………………………11
Setting………………………………………………11
TV……………………………………………………15
Troubleshooting… … … … … … … … … … … … … …16
Technical Specifications… … … … … … … … … …17
Base Installation Instructions… … … … … … … …18
Warranty… … … … … … … … … … … … … … … … …19
Features
1. LED panel with no glint feature and low radiation can reduce eye' fatigue and protect eyes.
2. High-quality LED TV with LED backlight panel is built with high brightness, high contrast, wide viewing
angle, and super fast response time. Super fast response time can greatly eliminate the shadowing of moving
images.
3. De-interlacing image disposal is adopted. Today's most advanced technique for movement compensation,
can completely improve the picture.
4. 3-D digital comb filter, dynamic interlaced scanning technology, and 3-D noise reduction function;
5. ATSC/NTSC digital-analog integrated tuner, supporting auto scan.
6. Power is designed to save energy.
7. All functions can be conveniently operated with the remote control.
8. With High Definition Component and HDMI,supports signal in of 1080p@60Hz max.
9. HDMI2 support MHL feature.
10. Input ports include VGA, YPbPr, HDMI, and AV.
11. Output ports include earphone and coaxial-OUT.
12. High quality speakers provide audiovisual enjoyment.
13. Dynamic contrast technology can obviously improve the definition and contrast of the picture.
14. Timing function sets the length of time until the TV turns off.
15. TV/Monitor comes with two-in-one and multiple input ports to easily switch between modes.
16. Auto Adjustment can help you setup the picture for best performance in a few.
17. Ultra-thin and super narrow design.
Safety Warning and Notice
Thank you for choosing W Box Technologies LED TV with LED Backlight. In order to ensure safety and to
extend the life of the product, please read the entire manual carefully and understand its content. This product
was designed to ensure the safety of its users, and all products are strictly tested before leaving the factory.
Users should follow all operation, maintenance and safety instructions, as incorrect use can lead to harmful
injury. Always comply with the following precautions to avoid dangerous situations. Please retain this manual
for future reference.
Warning
May result in personal injury or
May result in possibility of
accident or death
Attention property losses
Indicates the behaviors that must be
prohibited
Indicates the operations that must be
performed
1
Safety Warning and Notice
Under Following Conditions
Turn off the TV set immediately,
unplug the power cord from the
power outlet, and contact
authorized maintenance
personnel.
● Power failure or unstable voltage.
● Abnormal sound or smell from the device.
● AC power cord is damaged.
● TV set is damaged due to falling impact.
● Any liquid or foreign matters gets onto the TV set.
● If coal gas or other flammable gases leak, do not unplug the power cord of the TV set or other electric
appliances; instead, close the valve of the gas immediately and open the doors and windows.
Warning
●
●
●
●
●
●
●
●
●
●
●
●
●
Only use 100-240VAC 60/50Hz power supply.
This TV must be connected to a three pin socket outlet for safety.
All cables can be connected or pulled out only after power supply is turned off.
Do not attempt to fix the TV set in an unstable position, it may fall, become damaged, or
even catch fire.
Do not place TV set in the following environments:
1. With direct sunshine, moisture, excessive heat, excessive cold or heavy dust;
2. With flammable or explosive substances;
3. With flammable or corrosive gases;
4. In bathroom, kitchen, etc.
Do not use damaged or improper power socket, and ensure the plug and socket are
connected properly.
Keep the power plug and socket free of dust and metal materials.
Do not damage the power cord:
1. It is prohibited to refit the power cord;
2. Do not place heavy objects on the power cord;
3. Keep the power cord away from heat source;
4. Do not drag the power cord when unplugging.
Do not connect too many appliances to one power strip, or else it may cause fire due to high
power consumption.
Do not let open flame (e.g. lit candle) near the TV set, or it may cause electric shock
or fire.
Do not place water or other liquids on the TV set as electric shock or fire could occur.
To avoid short circuit, electric shock and damaging the product, do not penetrate any sharp
objects, metal or liquid into the signal connector or air vents.
The vents on the case are designed to release heat so the inside components of the unit do
not reach high temperatures and can operate for long periods of time. Do not cover any of the
holes.
Do not touch the plug with wet hands, it may cause electric shock.
Do not turn on the TV set in thunderstorm weather; instead, unplug the power plug and antenna
connector to avoid lightning strike.
Do not disassemble the TV set by yourself, it may cause electric shock or fire. Contact
qualified personnel for maintenance.
2
Safety Warning and Notice
Attention
●
●
●
●
Do not let children climb on or hang on the TV set.
Keep small accessories away from children's reach to avoid swallowing.
If the TV set won't be used for a long time, turn off the device and unplug the power cord.
Before cleaning the TV set, unplug the power cord and wipe with soft cloth; do not use chemicals
or any foreign substances to the device. Incorrect cleaning (such as cleaning fluid, water, etc) may
lead to damage of product's appearance, erasing products printing information and may flow into
the machine and damage components and display.
● To adjust the position or angle of the TV set, disconnect all wires and move slowly to
avoid dropping off.
● Do not rub with hard object, knock at, bend or squeeze the screen.
● Do not use TV set immediately after moving from place of low temperature to place of high
temperature, this may cause fogging inside the machine and failures.
● If the screen is broken and the liquid splashes on skin, please wash with clean water immediately
for 15 minutes, and go to see your doctor.
● To carry the TV set in your hands, grasp the corners and hold the bottom, do not apply force
on the panel.
● Displaying the same image for a long period of time or an active image with fixed words or icons
can leave image persistence on screen which will not disappear after powering the machine off for
a long time. This is not covered by warranty.
● Healthy TV watching:
1. Watch the TV in appropriate light; poor light or long time watching may cause discomfort to
your eyes.
2. If a headset is used, adjust the volume appropriately to avoid damage to hurting your hearing.
● Unplug the power cord of the device to cut off the power supply.
● If a power plug or appliance coupler is used as disconnecting device, it should ensure easy
operation.
● Power plug should be connected properly. Loose power plugs may cause spark and fire.
● All the technical specifications in the user manual and on the packaging are subject to changes
without prior notice. If there is slight deviation between the user manual and actual operation,
the latter shall prevail.
Mounting and Connecting
Packing list
1. The TV set.
2. User Manual.
3. Remote control.
4. Power cord (or attached to TV set).
3
Mounting and Connecting
Mounting the TV set
Mount on the base
Mount on the wall
30cm
10cm
30cm
10cm
10cm
10cm
7cm
10cm
Do not obstruct the air circulation
Wall
Ventilation
● Keep minimal space around the TV, as
shown in the figure.
● Do not cover the air vents or insert any
object into the enclosure.
● Do not put the device in limited space,
e.g. bookcase or embedded closet,
unless the TV set is properly ventilated.
Do not obstruct the air circulation
Wall
Tips on Installation
● The TV set should be mounted near the AC power socket for easy plugging and unplugging.
● For your safety, please select appropriate wall mount bracket or base.
● To avoid injury, it is required to place the TV set on stable plane, or fix on firm wall.
● Ask qualified personnel to mount the TV set on the wall. Improper mounting may result in an unstable
TV set.
● Do not place the TV set at any place susceptible to mechanical vibration.
● Do not place the TV set at any place where insects may enter.
● Do not mount the TV set against air conditioner, internal panel of the display may
create moisture and cause failure.
● Do not place the TV set at any place with strong magnetic field, to avoid electromagnetic damage.
Connecting peripheral equipment
You can connect various devices to the TV set and view high quality images. If the video device has HDMI,
YPbPr/YCbCr, AV, PC and other video output/input ports, you can select one of them and connect to
corresponding input or output ports of the TV set. After connected, press [SOURCE] key, then the menu of
signal source will be displayed on the screen. Press [▲] and [▼] key to select the input signal, and press [OK]
key to confirm. The connecting mode is shown in the figure.
4
Mounting and Connecting
AV1 input connection
Connect to the devices
with AV output interface
(e.g. DVD, VCR, game console)
Y Yellow (VIDEO signal cable)
W White(AUDIO-L signal cable)
USB interface
R Red (AUDIO-R signal cable)
R
Audio cable
Connecting power supply
Video cable
W
To power socket
(100-240VAC 60/50Hz)
Y
AV2 input connection
Connect to the devices
with AV output interface
(e.g. DVD, VCR, game console)
HDMI input connection
Connect to the AV device
with HDMI interface
Audio cable
HDMI signal cable
HDMI signal cable
HDMI signal cable
W
Video cable
Y
R
VGA cable
ARC function connection
Connect to the audio devices
with ARC function
Coaxial cable
PC audio cable
Connect to the audio devices
with coaxial interface
HDMI signal cable
VGA input connection
5
Coaxial-out connection
Mounting and Connecting
Remark:
1. The VIDEO-2 and component Y signal of the device share the same input interface. AV2 and
component audio share the same input interface.
2. When connecting to equipment with MHL function, please select HDMI2 as input signal
source.
3. SERVICE/USB: USB interface (is used only for software upgrade).
4. If an earphone is inserted, the speaker of the TV set turns off automatically.
5. The peripheral equipment and cables described in this manual should be purchased
separately.
G
Green (Y signal cable)
B Blue (Pb/Cb signal cable)
W White(AUDIO-L signal cable)
R Red (AUDIO-R and Pr/Cr signal cables)
Component input connection
Earphone port
Connect to the device with
YPbPr/YCbCr output interface
R
MHL function connection
Mobile phone or other
equipments with MHL function
YPbPr/YCbCr cable
B
Audio cable
MHL signal cable
G
W
R
Warning
When connecting the outdoor antenna to signal port of the TV set, please
turn off the main power switch on the TV set first. The wired network
antenna connected to the TV set must be isolated from the protective
grounding, or can cause fire or other hazards.
RF
Antenna connection
6
Panel Control Keys
3
4
5
1
2
6
7
1) Power LED indicator and remote receiving window.
2) Power switch(optional): Press '' I '' end to turn power on, and press ''O'' end to turn power off.
3) SOURCE: Press this key to enter the menu of signal source and choose signal source.
4) CH+/CH-: Press these two keys to select the channel. In OSD menu, press the two keys to adjust the items,
which have the same functions as ▲/▼ key on the remote control.
5) VOL+/VOL-: Press these two keys to add or reduce volume. In OSD menu, press the two keys to adjust the
analog value of selected item, which have the same functions as t
/u
key on the remote control.
6) MENU: Press this key to enter main menu.
7) Standby: To switch the TV on or back to standby.
Note: Different models may have different appearances; please refer to the actual device.
Remote Control
Installing battery
Remove the battery cover, and insert two AAA (1.5V) batteries; make sure that the polarity of the battery is
consistent with the marks "+/-" in the battery slot.
Operating Notes for Remote Control
1. Aim the remote control at the remote receiving sensor. Any article placed between the remote control and
remote receiving sensor could affect the normal operation.
2. Do not shake the remote control or operate or put it under direct sunlight, as heat could deform the
remote control.
3. If the remote receiving sensor is located under direct sunlight or strong light, the remote control could fail to
work. Please change the light angle or TV angle or get closer to the remote receiving sensor to operate the
remote control.
4. Low battery power could affect the remote control distance, please replace the battery. If the remote control
is going to be idle for a long period of time or the battery is used up, remove the battery to avoid any leakage,
eroding or damage to the remote control.
5. Do not use any batteries with any other specifications. Do not mix old and new batteries. Always replace both
batteries together.
6. Do not charge, disassemble, heat or burn the used battery as this may cause it to short circuit. Please
comply with the relevant environmental protection regulations to dispose of the waste battery.
7
Remote Control
Keys on Remote Control
Name
Function Description
POWER ( )
Shift between work state and standby state
SOURCE
Display the signal source selection menu
MUTE (
)
Turn on/off the sound
Numerical
Numerical keys
F1(3D)
Freeze image: On/Off
DASH
Select digital TV programs
SMART S
Shift among sound modes
SMART P
Shift among picture modes
Cursor ( , , , )
/
: select functions.
/ : adjust the analog value
VOL+/VOL-
Increase or decrease the volume
CH+/CH-
Select the previous or next channel
MENU
Display the main menu
EXIT
Return to the previous menu
EPG
Display electronic program guide (Digital TV programs)
INFO
Display the channel information
Return(
)
MTS(optional)
Quickly return to the channel you selected last time
Select different ATV sounds: Stereo/SAP/MONO or select DTV
sounds from MTS
CH. LIST
Display the channel list
FAV
Display your favorite channel list
WIDE
Switch picture ratio
CC
Select CC modes
OK
Confirm the operation
Note: Actual remote control may differ in appearance from the above figure.
General Operating Instructions
Power on
Insert the power plug into the power socket. Press the [ ] button on the TV(If it doesn't have this button, you
can skip this step), and then press [ ] key on the remote control or on the panel to turn on the TV.
Installation guide-setting
When you turn on the TV for the first time, the first page will be the setting menu below.
1. Menu Language: Menu language selection. Press [t
] and [u
] on the remote control or [VOL-] and [VOL+]
on the panel to select an menu language, and then press [OK] to confirm your selection and enter the next
item "Time Zone."
8
General Operating Instructions
2. Time Zone: Press [t
] and [u
] on the remote control or
Setup Wizard
[VOL-] and [VOL+] on the panel to select your time zone,
and then press [OK] to confirm your selection and enter
Menu Language
English
the next item "DST."
Time Zone
Pacific
3. DST: Daylight Saving Time, press [u
] on the remote
DST
Off
control to select from On/Off to enable or disable
daylight saving.
Antenna
Air
4. Antenna: Press [u
] to select the TV receiving mode from
Auto Scan
Air/Cable repeatedly.
5. Auto Scan: Auto channel scan selection. Press [u
] on the
Select
Move
Exit
remote control to enter the auto channel scan page and
start scanning. You can also press [EXIT] to skip this operation and exit this page. Refer to the section TV
for detailed operation steps.
MENU
Standby
Press [
] on the remote control or on the panel to enter the standby state.
★Special Attention
1. If there is no signal input after turning on the TV, the system will automatically enter
the standby state a few minutes later.
2. If you are not going to use the TV soon, press the power button to turn
off the power.
INPUT SOURCE
TV
AV1
AV2
YPBPR
Signal source selection
PC
Press [SOURCE] on the remote control or on the panel to enter the menu "Input
Source". Press [▲] and [▼] on the remote control or [CH+] and [CH-] on the panel to
select a signal source, and then press [OK] on the remote control to enter the signal
input source you've selected.
HDMI1
HDMI2
HDMI3
OSD menu operation
Press [MENU] on the remote control or panel to display the
Picture Mode
Personal
main menu:
Contrast
50
1. Press [t
] and [u
] on the remote control or [VOL-] and
Brightness
50
[VOL+] on the panel to select a functional menu.
Saturation
50
Tint
50
2. Press [▼] on the remote control or [CH-] on the panel to
Sharpness
50
enter the functional menu.
Advanced Video
3. Press [▲] and [▼] on the remote control or [CH+] and
[CH-] on the panel to select an adjustment item from the
Return
Move
Select
functional menu.
4. Press [t
] and [u
] on the remote control or [VOL-] and [VOL+] on the panel to change the analog value.
When there is an icon " " on the screen, you can press [u
] on the remote control or [VOL+] on the panel to
enter the next sub-menu or press [MENU] to exit the current menu.
5. No matter which menu you have chosen, you can press [MENU] to exit the current menu, press [EXIT] to
exit the entire menu, press [SOURCE] to display the menu "Input Source", and then press [SOURCE] to exit
the menu "Input Source."
6. In menu operation, each disabled option will be automatically hidden with a purple icon. When you change
the OSD menu setting value, the new setting value will automatically take effect upon the disappearance of
the menu even if you do not press the relevant key to exit the OSD menu.
7. The operating instructions provided in this User's Manual for the menu "Picture," "Sound," "Setting" and
MENU
9
General Operating Instructions
"TV" are all based on TV Input Source. The operating steps for any other Input Source are nearly the same
as TV Input Source.
Note: [t
], [ u
], [▲] and [ ▼] in this Manual stand for the direction cursor keys on the remote control unless
specifically defined. The operating instructions in the text below are all based on keys on the remote control.
Please review and understand the keys on the panel.
Below is a list of menu options. You will find detailed operating instructions later in the manual.
In TV Mode
Picture Mode
Contrast
Brightness
Sound
Picture
Saturation
Tint
Sharpness
Advanced Video
Sound Mode
Bass
Treble
Setting
Balance
Surround
SPDIF
Audio Language
Menu Language
Parental Controls
Time
TV
Closed Caption
Menu Settings
VGA Settings
Restore Default
Antenna
Auto Scan
Favorite
Show/ Hide
Channel No.
Channel Label
DTV Signal:
Picture
1. Press [MENU] to display the main menu.
2. Press [▼] to enter the menu "Picture" and press [▲] and
[▼] to move the cursor to select an adjustment item.
3. Press [t
] and [u
] to change the analog value. When there
is an icon " " on the screen, you can press [u
] to enter
the next sub-menu or press [MENU] to exit the current
menu.
Picture Mode
Contrast
Brightness
Saturation
Tint
Sharpness
Advanced Video
Select
★ Special Attention
All the analog values adjusted by the user will be auto saved as personal mode.
Personal
50
50
50
50
50
Move
MENU
Return
★ Remote Control Shortcut Keys
Press [SMART P] to directly shift among Standard, Dynamic, Soft and Personal.
Function:
Picture Mode
Select from four image modes: Standard/Dynamic/Soft/Personal
Standard: Moderate color and brightness
Dynamic: Brilliant, bright, and dynamic image
Soft: Soft and bright image
Personal: Set the value as you prefer
Contrast
Adjust the image contrast and change the image level feeling with an analog value of 0-100
Brightness
Adjust the screen brightness with an analog value of 0-100
Saturation
Adjust the image brilliance with an analog value of 0-100
Tint
Adjust the image hue to be warmer or cooler with an analog value of 0-100 only in NTSC
system
Sharpness
Adjust the image definition and sharpen or soften the image with an analog value of 0-100
Advanced Video Color Temp.: Adjust the white chroma of the image, selecting from Cool/Normal/Warm
repeatedly
Scale Mode: Select picture scale: Auto/Subtitle/Cinema/4:3/Full mode
Noise Reduction: Set the noise reduction level: Off/Weak/Middle/Strong/Auto
10
General Operating Instructions
Sound
1. Press [MENU] to display the main menu.
2. Press [t
] and [u
] to move the cursor to select the menu
"Sound," press [▼] to enter the menu "TV" and press [▲]
and [▼] to move the cursor to select an adjustment item.
3. Press [t
] and [u
] to change the analog value or state.
Function:
Sound Mode
Bass
Treble
Balance
Surround
SPDIF
Audio Language
Select
Personal
75
70
50
Off
RAW
English
Move
MENU
Return
Select from five sound modes: Standard/Music/Movie/Sports/Personal
Adjust bass value of 0-100
Adjust treble value of 0-100
Adjust the sound output proportion of the left and right sound channels within 0-100.
When you set the analog value as 0, there will be no sound from the right speaker. When
you set the analog value as 100, there will be no sound from the left speaker. When you
set the analog value as 50, both speakers will have the same volume.
Enable or disable surround sound
Surround
Select SPDIF mode, selecting from RAW/PCM
SPDIF
Audio Language Digital TV language selection: English/French/Spanish
Note: This item is adjustable only in DTV mode. It is not adjustable in ATV mode.
The default value is English.
Sound Mode
Bass
Treble
Balance
Volume Adjustment
Press [VOL+] and [VOL-] to adjust the volume. Press [VOL+] to increase the volume and press [VOL-] to
decrease the volume.
Mute
If you want to turn off the sound for a-while, press [MUTE] to enable the mute function and you will
see a mute icon appear on the screen. Press [MUTE] again to disable the mute function.
★Special Attention
Please set the balance value as 50 in general cases.
★Remote Control Shortcut Keys
Press [SMART S] to directly shift among Standard/Music/Movie/Sports/Personal.
Setting
1. Press [MENU] to display the main menu.
Menu Language
2. Press [t
] and [u
] to move the cursor to select the menu
Parental Controls
"Setting," press [▼] to enter the menu "Setting" and press
Time
[▲] and [▼] to move the cursor to select an adjustment
Closed Caption
Menu Settings
item.
VGA Settings
3. Press [t
] and [u
] to change the analog value. When
Restore Default
there is an icon " " on the screen, you can press [u
] to
enter the next sub-menu or press [MENU] to exit the
Select
current menu.
11
English
Move
MENU
Return
General Operating Instructions
Menu Language:
Select the OSD menu language. There are many languages
that can be selected.
Parental controls
Set the level of the TV program or movie. Press [▼] to
select the menu "Parental Control" and press [u
] or [OK] to
enter it as shown below. Each time you enter
this menu, you will need to input the correct password.
Generally, the initial password provided
by the manufacturer is 0000. You can follow the
instructions below to set the password.
Change Password
System Lock
Input Lock
US
Canada
RRT Setting
Reset RRT
Select
On
Move
MENU
Return
Change Password Set the parental controls access password. The message "Enter New password" asks
you to input a new password. The message "Confirm password" asks you to confirm the
new password you've just entered. If the two passwords you've entered are exactly the
same, your new password is set successfully.
System Lock
Press [t
] and [u
] to select the state of System Lock: On/Off. Before you select the "on"
option, the item below will be automatically hidden in a purple icon.
Input Lock
Press [u
] or [OK] to ente, press [▲] and [▼] to move the cursor to select an
adjustment source, Press [t
] and [u
] on the remote control to Lock or Unlock.
US
TV: Set the TV program ratings. Press
[u
] or [OK] to enter it as shown below.
Press [▲], [▼], [t
] and [u
] on the
TV RATING
remote control to move the cursor and
L
S
D
ALL
FV
V
press [OK] to confirm the TV program
T V- Y
T V- Y 7
rating setting and mark it with a tick.
T V- G
Any program marked with a tick will
T V- P G
T V- 1 4
not be played. If you want to cancel or
T V- M A
reset the TV program rating, please
:Block
Press OK to Block or Unblock
follow the above steps again. Press
Return
Move
Select
[MENU] to return to the previous menu
and press [EXIT] to exit the entire menu.
TV-Y: applicable to all children
TV-Y7: applicable to children no younger than 7
TV-G: applicable to all people
TV-PG: requires parental guidance
TV-14: accompanied by parents
TV-MA: only applicable to adults
ALL: select all TV programs
FV: fantasy violence
V: violence
S: sex scene
L: indecent language
D: suggestive dialogue
MENU
12
General Operating Instructions
US
MPAA: Stands for Motion Picture Association of America. Press [▲],
[▼] to select rate
G: GENERAL AUDIENCES: Nothing
that would offend parents for
G
viewing by children
PG
PG:PARENTAL GUIDANCE
PG-13
SUGGESTED: Parents urged to
R
NC-17
give "parental guidance." May
X
contain some material not suitable
N/A
for children.
Press
Press to Lock
:Block
Move
Select
to Unlock
MENU
Return
PG-13: PARENTS STRONGLY CAUTIONED: Parents are urged to be cautious. Some
material may be inappropriate for children under age 13.
R: RESTRICTED: Contains some adult material. Not suitable for children.
NC-17: NO ONE 17 AND UNDER ADMITTED: Clearly adult. Children are not permitted
N/A: movies without rating
Canada
Canadian English: Canada Video Rating System, similar to MPAA Guidelines
G: Suitable for viewing by all ages
PG: Parental guidance is advised
Themes or content may not be
C
suitable for children
C8+
14A: Suitable for people 14 years of
G
PG
age or older. Those under 14
14+
should view with an adult.
18+
Parents cautioned
EXEMPT
Press to Lock
Press
to Unlock
:Block
18A: Suitable for people 18 years of
Return
Move
Select
age or older. Persons under 18
should view with an adult. Parents strongly cautioned
R: Restricted to 18 years and over. Content not suitable for minors
EXEMPT: Contains material not subject to classification such as documentaries,
nature, travel, music, arts and culture, sports and educational and
instructional information
Canadian French:
G: General rating, applicable to all
people
G
8ans+
13+: Applicable to children
13ans+
above 13
MENU
16ans+
18ans+
EXEMPT
:Block
Press
Select
13
to Lock
Press
Move
to Unlock
MENU
Return
General Operating Instructions
16+: Applicable to children above 16
18+: Only applicable to people no younger than 18
EXEMPT: Exempt programming
Canada
RRT Setting
Set the rating region table that defines the rating standard
for a particular geographic region and/or country. The
menu may vary depending on the local broadcasting
system. This setting is not available in the United states.
Sleep Timer
Time Zone
Auto Sync
DST
Clock
Reset RRT
Reset all options in the filtering options.
Off
Atlantic
Off
Off
1980 1 6 3:16 A M
Time
Press [▼] to select the menu "Time" and then press [u
] or
[OK] to enter it, as shown below.
Sleep Timer
Time Zone
Auto Sync
DST
Clock
Select
Move
MENU
Return
Set a time for the system to auto enter the standby state: Off/5min/10min/15min/30min/60min/
90min/120min/180min/240min
Time zone selection: Eastern/Central/Mountain/Pacific/ Alaska/Hawaii/Atlantic
Auto sync clock from digital stream; Selection: On/Off
Daylight Saving Time; Selection: On/Off
DTV program clock information
Closed Caption
Press [▼] to select the menu "Closed Caption" and then press [u
] or [OK] to enter it, as shown below.
CC Mode
Basic Selection
Advance Selection
Option
Press [t
] or [u
] to select On/CC On Mute/Off
Caption mode, selection: CC1/CC2/CC3/CC4/Text1/Text2/Text3/Text4/Off
Selection: service 1/service 2/service 3/service 4/service 5/service 6/Off, It is enable
only in DTV source
Caption Option
Menu Settings
Press [▼] to select the menu "Menu Settings" and then press [u
] or [OK] to enter it, as shown below.
Transparency
OSD Time
To adjust the OSD menu transparency
Set the OSD menu display time: 5sec/15sec/30sec/45sec/60sec
VGA Settings
Use for adjusting display images when in PC mode. Only for
PC mode.
Note: Under PC source mode, if there is no signal input, the
device will enter power saving state after one minute. When
PC signals are connected, the device will wake up and
display normally.
Select
14
0
0
100
0
H-Position
V-Position
Clock
Phase
Auto
Move
MENU
Return
General Operating Instructions
Note:
(1). The PC screen varies according to Windows version and video card.
(2). If nonstandard video format is selected, the PC screen display will be abnormal.
1. Press [▲] or [▼] to move the cursor and select VGA Settings, press [u
] or [OK] to enter the VGA menu, and
press [▲] or [▼] to move the cursor and select desired item in the VGA Settings.
2. Press [MENU] to return to previous menu, and press [EXIT] to hide the menu.
Function:
H-Position
V-Position
Clock
Phase
Auto
Move the screen to left/right (range: 0-100)
Move the screen up/down (range: 0-100)
Adjust when image flashes and has vertical stripe (range: 0-100)
Reduce the water wave in line to increase image sharpness (range: 0-100)
The PC screen of the machine can adjust automatically according to the PC video signal
Restore Default
Restore the system default, please press [▼] to select the menu "Restore Default" and press [u
] or [OK] to
conduct the restore operation.
TV
1. Press [MENU] to display the main menu.
2. Press [t
] or [u
] to move the cursor to select the menu
"TV," press [▼] to enter the menu "TV" and press [▲] and
[▼] to move the cursor to select an item.
3. When there is an icon " " on the screen, you can press
[u
] to enter the next sub-menu or press [MENU] to exit
the current menu.
Antenna
Auto Scan
Favorite
Show/Hide
Channel No.
Channel Label
DTV Signal :
Select
Air
Move
MENU
Return
Antenna
Press [▲] or [▼] to select the menu "Antenna" and then press [t
] or [u
] to select Air and Cable repeatedly.
Auto Scan
Press [▼] to move the cursor to select "Auto Scan," press [u
] or [OK] to enter the menu "Auto Scan", press
[t
] or [u
] to select "Yes", and press [OK] to start auto scanning . When scanning is finished, it will stop at the
channel where the auto scan began.
Friendly Tip: Select Auto Scan for new products. The system will automatically scan channels in your area.
Please wait a few minutes for auto scan to complete, do not disconnect the power or turn off the TV.
Favorite
Press [▲] or [▼] to move the cursor to select "Favorite" and then press [u
] or [OK] to enter the menu "Favorite
List." Press [▲] and [▼] to select a channel as your favorite channel, then press [OK], the channel which you
selected will be added to the "Favorite channel list"; Press [OK] again to delete the channel from the "Favorite
channel list".
Show/Hide
Press [▲] or [▼] to move the cursor to select "Show/Hide" and then press [u
] or [OK] to enter the menu
15
General Operating Instructions
"Show/Hide." Press [▲] and [▼] to select a channel, then press [OK], the channel which you selected will hide.
Press [OK] again to display the channel.
Channel No.
Press [▲] or [▼] to move the cursor to select "Channel No ." and then press [t
] or [u
] to select Channel.
Channel Label
Press [▲] or [▼] to move the cursor to select "Channel Label" and then press [u
] or [OK] to enter the menu
"Channel Label,"press [▲], [▼], [t
] or [u
] to edit channel label.
DTV Signal:
Display the signal intensity of programme in DTV system.
Troubleshooting
Failure
The TV image has snowflakelike spots, and noise
Reason
1. Antenna connector is loose, or
cable is damaged
2. Antenna type isn't suitable
3. Antenna orientation or position isn't
proper
4. Weak signal
Solution
1. Check whether antenna connector is loose,
whether cable is intact
2. Check antenna type (VHF/UHF)
3. Adjust antenna orientation and position
4. Use signal amplifier
The screen has no display, no
audio, and the indicator isn't
on
1. Power plug is loose, or power
supply isn't connected
2. The power button is not turned on
1. Check whether the power cord is connected
properly
2. Check if " " button on the front panel is on
The TV image has spot, line
or stripe interference
The signal is interfered with by neon
light, electric hair dryer, etc.
Do not use the electric hair dryer near the device,
and adjust the antenna direction to reduce
interference
Image ghosting occurs
1. The TV signal is reflected by a large
1. Use high-directional antenna
building such as a tower block or hotel, etc.
2. Adjust the antenna orientation
2. Antenna orientation isn't properly positioned
The image doesn't have color
Color saturation is too low
Enter "Picture" to increase the color saturation
The TV has no audio
1. The volume is too low
2. The audio is mute
1. Adjust the volume properly
2. Press the "MUTE" key on the remote control to
cancel the mute state
DTV screen has mosaic
The signal is weak
Check whether the antenna plug is loose and
whether the cable is intact
The PC has no display,
prompts no signal input, and
the red indicator flashes
The signal cable is loose or has fallen
off
Check whether the signal cable is loose or has
fallen off, and reconnect it properly
The remote control distance
is short, or out of order
1. The signal receiver of the remote
control is blocked by certain object
2. The battery voltage of the remote
control is low
1. Move the object that blocks the signal receiver
2. Replace the battery
PC display is blurry
1. The adjustment isn't properly set
2. The display mode isn't properly set
1. Use automatic adjustment function
2. Use recommended mode
1. The adjustment isn't properly set
PC image shifts, can't fill the
screen, or exceeds the screen 2. The display mode isn't properly set
1. Use automatic adjustment function
2. Use recommended mode
Can't operate the device
External influences (e.g. lighting,
static, etc.) will interfere with the
normal operation
16
Disconnect the power supply first,connect the
power supply after about 1-2 minutes, then turn
on the TV again
Technical Specifications
Master unit
Panel size
Max. Resolution
Best Resolution
Pixel Pitch
Active Area
Power Supply
Power Consumption of Speaker
43"
1920×1080
1920×1080@60Hz
0.019"x0.019"(0.4902mm×0.4902mm)
37.05"x 20.8" (941.18mm×529.20mm)
100-240VAC 60/50Hz 8W
+8W
Dimension (L×H×W) and Weight
Panel size
43"
Unpacking
The base
Excluding base 38"x22"x3"(968×565×77(mm3)
Including base 38"x24"x3"(968×616×77(mm3)
Packing
/
Net Weight
Gross Weight
/
42"x26"x6"(1085×667×150(mm3) 17.6lbs (8.0kg)
/
22.04lbs (10.0kg)
Operating environment: temperature: 5℃~40℃; RH: 10%~85%; atmospheric pressure: 86kPa~104kPa
Storage environment: temperature: -20℃~55℃; RH: 5%~95%; atmospheric pressure: 86kPa~104kPa
Technical specifications for TV
1. Supported Systems: ATV: NTSC M; DTV: ATSC
2. TV(RF): 75Ω Imbalance
3. AV Video-Input: 75Ω, 1VP-P, RCA
4. AV Audio-Input: 20KΩ, 500mV RMS
5. YPbPr/HDMI Video Input: 480i, 480p, 576i, 576p, 720p, 1080i, 1080p
VGA display mode
NO.
1
2
3
4
5
6
7
8
Mode
VGA
SVGA
XGA
WXGA
WUXGA
Resolution
720×400
640×480
800×600
1024×768
1280×720
1360×768
1600×900
1920×1080
Refresh rate
70Hz
60Hz
60Hz
60Hz
60Hz
60Hz
60Hz
60Hz
Recommended mode:1920X1080@60Hz
Power management
Mode
Normal working
Standby
Power Consumption
43"
≤75W
≤0.5W
17
Base Installation Instructions
Put machine flat on table first. Install base in machine back cover bottom as arrow direction in the figure, and
make the positioning hole on top of V cover of base aligned with the positioning raised stand on the bottom of
machine back cover, then fasten screws. (notice that base has to be adjusted at figure status, otherwise it
cannot be installed in.)
Base
Screws
Remark: The actual base and machine appearance may be different from pictures; please refer to the actual
device.
18
Warranty
1.Limited Warranty
a.General
Subject to the terms and conditions of this Limited Warranty, from the date of sale through the period of
time for product categories specified in Section 1(b), ADI warrants its W Box Technologies products to be
free from defects in materials and workmanship under normal use and service, normal wear and tear
excepted. Except as required by law, this Limited Warranty is only made to Buyer and may not be
transferred to any third party.
ADI shall have no obligation under this Limited Warranty or otherwise if:
(i)
The product is improperly installed, applied or maintained;
(ii)
The product is installed outside of stated operating parameters, altered, or improperly services or
repaired;
(iii) Damage is caused by outside natural occurrences, such as lightning, power surges, fire, floods, acts
of nature, or the like.
(iv)
Defects resulting from unauthorized modification, misuse, vandalism, or other causes
unrelated to defective materials or workmanship, or failures related to batteries of any type used in
connection with the products sold hereunder.
ADI only warrants those products branded as W Box Technologies products and sold by ADI. Any other
products branded by third parties are warranted by the third party manufacturer for a period as defined by
the third party manufacturer, and ADI assigns to Buyer those warranties and only those warranties
extended by such third party manufacturers or vendors for non-ADI branded products. ADI does not itself
warrant any non-ADI branded product and sells only on an as is basis in accordance with ADI’s terms and
conditions of sale.
b.Specific Warranties for product categories are as follows:
Product Categories
Warranty Period
Soundbars
Walk Through Metal Detectors
Intrusion Wireless Communication Accessories
Analog Cameras
Televisions
CCTV Power Supplies
In Ceiling Speakers
Amplifiers
Magnetic Locks
Request to Exit Devices
Surge Protection
UPS (uninterruptible power supplies)
Volume Controls
12 months
12 months
12 months
24 months
24 months
24 months
24 months
24 months
24 months
24 months
24 months
24 months
24 months
19
Warranty
Product Categories
Warranty Period
Intrusion Audio Devices
Monitors
Video Baluns
DVR's, NVR's
IP Cameras
Racks
TV Mounts
PIR’s
Analog Cables
B Connectors
Bus Terminals
Extension Cords
HDMI Cables
Jacks, Cords and Intrusion Communication Accessories
Patch Cables
Raceway Conduit
Wire Ties
Magnetic Contacts
30 months
30 months
30 months
60 Months
60 Months
60 Months
60 Months
84 months
Limited Lifetime
Limited Lifetime
Limited Lifetime
Limited Lifetime
Limited Lifetime
Limited Lifetime
Limited Lifetime
Limited Lifetime
Limited Lifetime
Limited Lifetime
2.EXCLUSION OF WARRANTIES, LIMITATION OF LIABILITY
HERE ARE NO WARRANTIES OR CONDITIONS, EXPRESS OR IMPLIED, OF MERCHANTABILITY, OR
FITNESS FOR A PARTICULAR PURPOSE OR OTHERWISE, WHICH EXTEND BEYOND THE
DESCRIPTION ON THE FACE HEREOF. TO THE FULLEST EXTENT PERMITTED BY LAW, IN NO CASE
SHALL ADI BE LIABLE TO ANYONE FOR ANY (I) CONSEQUENTIAL, INCIDENTAL, INDIRECT,
SPECIAL, OR PUNITIVE DAMAGES ARISING OUT OF OR RELATING IN ANY WAY TO THE PRODUCT
AND.OR FOR BREACH OF THIS OR ANY OTHER WARRANTY OR CONDITION, EXPRESS OR IMPLIED,
OR UPON ANY OTHER BASIS OF LIABILITY WHATSOEVER, EVEN IF THE LOSS OR DAMAGE IS
CAUSED BY ADI’S OWN NEGLIGENCE OR FAULT AND EVEN IF ADI HAS BEEN ADVISED OF THE
POSSIBILITY OF SUCH LOSSES OR DAMAGES.
Any product description (whether in writing or made orally by ADI or ADI’s agents), specifications,
samples, models, bulletin, drawings, diagrams, engineering sheets, or similar materials used in
connection with the Buyer’s order are for the sole purpose of identifying ADI’s products and shall not be
construed as an express warranty or condition. Any suggestions by ADI or ADI’s agents regarding use,
applications or suitability of the products shall not be construed as an express warranty or condition
unless confirmed to be such in writing by ADI. ADI does not represent that the products it sells may not be
compromised or circumvented; that the products will prevent any personal injury or property loss by
burglary, robbery, fire or otherwise, or that the products will in all cases provide adequate warning or
protection. Buyer understands and will cause its customer to understand that a properly installed and
maintained product is not insurance or guarantee that such will not cause or lead to personal injury or
property loss.
CONSEQUENTLY ADI SHALL HAVE NO LIABILITY FOR ANY PERSONAL INJURY, PROPERTY DAMAGE
OR OTHER LOSS BASED ON ANY CLAIM AT ALL INCLUDING A CLAIM THAT THE PRODUCT FAILED
TO GIVE WARNING.
However, if ADI is held liable whether directly or indirectly for any loss or damage with respect to the
products it sells, regardless of cause or origin, its maximum liability shall not in any case exceed the
purchase price of the product, which shall be fixed as liquidated damages and not as a penalty and shall
be the complete and exclusive remedy against ADI.
20
Warranty
3.Limitation on Liability to Buyer’s Customers
Buyer agrees to limit liability to its customers to the fullest extent permitted by law. Buyer acknowledges
that ADI shall only be deemed to give consumers of its products such statutory warranties as may be
required by law and at no time shall Buyer represent to its customers and/or users of ADI products that ADI
provides any additional warranties. By accepting the products, to the fullest extent permitted by law,
Buyer assumes all liability for, and agrees to indemnity and hold ADI harmless against and defend ADI
from, any and all suits, claims, demands, causes of action and judgments relating to damages, whether
for personal injury or to personal property, suffered by any person, firm, corporation or business
association, including but not limited to, Buyer’s customers and/or users of the products because of any
failure of the products to detect and/or warn of the danger for which the goods were designed or any other
failure of the products whether or not such damages are caused or contributed to by the sold or joint
concurring negligence or fault of ADI.
4.Returns
Subject to the terms and conditions listed below, during the applicable warranty period, ADI will replace
Product or provide a credit at purchase at its sole option free of charge any defective products returned
prepaid. Any obligations of ADI to replace Limited Lifetime warranty products pursuant to this warranty
which result from defect are limited to the availability of replacement product. ADI reserves the right to
replace any such products with the then currently available products, or provide a credit in its sole
discretion. In the event Buyer has a problem with any ADI product, please call your local ADI branch for
return instructions:
For US call 1-800-233-6261
For Canada call 877-234-7378
For Puerto Rico call 787-793-8830
Be sure to have the model number and the nature of the problem available. In the event of replacement,
the return product will be credited to Buyer’s account and a new invoice issued for the replacement item.
ADI reserves the right to issue a credit only in lieu of replacement.
If any W Box Technologies product is found to be in good working order or such product’s inability to
function properly is a result of user damage or abuse, the product will be returned to Buyer in the same
condition as received and Buyer shall be responsible for any return freight changes.
5.Governing Law
The laws of State of New York apply to this Limited Warranty.
6.Governing Law
Where any term of this Limited Warranty is prohibited by such laws, it shall be null and void, but the
remainder of the Limited Warranty shall remain in full force and effect.
21
Made in China
0E-32LED