1
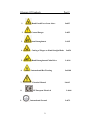
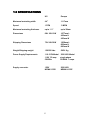
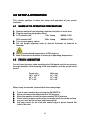
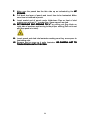
READ ALL PRECAUTIONS &
INSTRUCTIONS CAREFULLY
BEFORE OPERATING LAMINATOR
Setup
Instruction
Operation
Maintenance
44” POUCH
LAMINATOR
Model XL44XL44-110/220
Operation
Manual
TABLE OF CONTENTS
1.0 INTRODUCTION
Page No.
2
1.1 Features and benefits
1.2 Specifications
1.3 Principles of operation
1.4 Warranty
3
4
5
6
2.0 UNPACKING AND INVENTORY
8
3.0 SAFETY PRECAUTIONS
10
4.0 SETUP & OPERATION
12
4.1 Warm up to operating temperature
4.2 Pouch Laminating
4.3 Mounting & Laminating
4.4 Mounting
5.0 MAINTENANCE
12
12
14
15
16
5.1 Monthly Service Schedule
5.1.2 Rubber Roll Cleaning
1
16
16
Glossary Of Symbols
Part #
1.
Hand Crush/Force from Above
Lab35
2.
General Danger
Lab52
3.
Arm Entanglement
Lab51
4.
Cutting of Fingers or Hand/Straight Blade
Lab54
5.
Hand Entanglement/Chain Drive
Lab36
6.
International/Hot Warning
Lab100
7.
Electrical Hazard
8.
CE European Electrical
9.
International Ground
2
Lab 43
Lab06
Lab79
1.0 INTRODUCTION
The 44” Pouch Laminator, when used in conjunction with mounting boards
and pouches is designed to provide a quality lamination using a wide
range of papers and materials. Common applications include but are not
limited to: maps, digital imaging, packaging, posters, menus, instructional
aids, signs, presentation materials, photographs, copies (B&W or color),
prints, flyers, promotional sheets, and many other items.
To assure the best performance from your new laminator, please follow
the safety, installation, operation, and maintenance instructions in this
manual. Read the manual before using the laminator. Keep the manual
with the machine and periodically review the instructions. This manual
also contains the warranty. Additional copies are available from the
manufacturer.
We take this opportunity to thank you for selecting this Pouch laminator
and to assure you of our commitment to your satisfaction with our
products.
As you unpack your new laminator, please complete the following
information. Always have this information ready when calling.
Dealer Where Purchased_____________________________________________
InstallationDate______________________________Serial#__________________
Ledco, Inc. 4265 North Main Street Hemlock, NY 14466
Fax: 585-367-2978
Phone: 585-367-2392
Web: ledcoinc.com E-mail: [email protected]
3
1.1 FEATURES & BENEFITS
Your new pouch laminator has several standard features that set it apart
from other models
•
Variable Heat Control The heat may be adjusted by the turn of a
knob from 200 to 400 degrees Fahrenheit.
•
Rubber Roll Adjustment from 0 to 1 ½” The roll height
adjustment graduations are 0, 1/16, 1/8, 3/16, 1/4, 3/8, 1/2, 5/8, 3/4, 1,
1 1/4, 1 1/2.
4
1.2
1.2 SPECIFICATIONS
US
Europe
Maximum laminating width
44"
1117mm
Speed
1 FPM
.3 MPM
Maximum laminating thickness
up to 1 ½”
up to 38mm
Dimensions
66L 16H 19W
1677mm L
406mm H
483mm W
Shipping Dimensions
72L 24H 26W
1829mm L
609mm H
660mm W
Weight/Shipping weight
130/200 Lbs.
59/91 Kg
Power Supply Requirements
110-125V Model
110V 20 amp
50/60Hz
208-240V Model
single phase
50/60Hz 7 amps
Supply connector
125V
NEMA 5-20R
208-240V
NEMA L6-20P
5
1.3
1.3 PRINCIPLES OF OPERATION
Pouch Laminating Two sheets of film are put together with thermal
adhesive facing each other and sealed at one edge forming a pouch. An
item to be laminated is placed between these two sheets of film. The
pouch with the item to be laminated is placed on a sled and slid into the
pouch laminator. The pouch laminator has one set of rolls. The bottom roll
is cold and driven. The top roll is heated and idles. When the sled with
pouch intact is slid into the laminator, the top and bottom rubber rolls
come in contact. The bottom roll pulls the sled through and the top roll
heats the pouch and activates the thermal adhesive. The film’s adhesive is
pressed into the ink and fibers on the surface of the item being laminated.
Mounting & Laminating
Laminating One sheet of laminating film is sealed to the
lead edge of a mounting board. The thermal adhesive on the board and the
thermal adhesive on the film, face each other. An item to be mounted and
laminated is placed between the film and the board. When the board is slid
into the laminator, the top and bottom rubber rolls come in contact with
the mounting board. The bottom roll pulls the board through and the top
roll heats the film. The film’s adhesive and the board’s adhesive are
pressed into the ink and fibers on the surface of the item being mounted.
Mounting – Only The mounting board has a thermal adhesive on one
side. An item to be mounted is placed on the thermal adhesive side of the
mounting board. A release liner sheet with silicon coating on one side is
placed over the surface of the item and covering the entire board (with the
silicon surface facing item and board to prevent adhesive from the
mounting board transferring to the top heated laminating roll). When the
board is slid into the laminator, the top and bottom rubber rolls come in
contact with the mounting board. The bottom roll pulls the board through
and the top roll heats the item to be mounted and the mounting board. The
board’s adhesive activates and is pressed into the ink and fibers of the
item being mounted.
6
1.4
1.4 WARRANTY
This pouch laminator is guaranteed against defects in material and
workmanship for a period of two years after date of shipment. Defective
parts will be replaced without cost within the warranty period, provided
the laminator has not been abused, altered, or operated contrary to
instructions. Ledco, Inc. shall not be liable for any alterations or repairs
except those made with its written consent.
This obligation under warranty shall not extend to the following:
• The adjustment or replacement of parts which are the normal
responsibility of the owner. For example, rubber rolls, scratched or
chipped paint, loose fasteners (screws, nuts, etc.), or other items that
show wear under normal use; i.e. "normal wear parts".
•
Normal operating adjustments to heat, thickness, etc..
•
Parts that are not manufactured by Ledco, Inc. If the individual
manufacturer warrants these items, their warranty is, in turn, passed
on to the original purchaser of the laminator. Ledco, Inc. does not incur
any obligation or liability as a result of the warranties, which are the
sole responsibility of the appropriate individual manufacturer.
Any pouch laminator that proves defective during the warranty period may
be returned to Ledco, Inc. unless it is decided that the necessary repairs
can be made during a service call. Notice of the defect should be
submitted in writing or by phone to Ledco before any steps are taken to
repair or return the machine. Phone: 585-367-2392 Fax: 585-367-2978
If the machine is returned, the following should accompany it.
• Customer name, address, and phone number
• Written particulars regarding the malfunction
• Date of installation
• Serial number of the machine.
• RA number on outside of box
RETURNS MUST HAVE A RETURN AUTHORIZATION NUMBER
ON THE OUTSIDE OF THE SHIPPING CONTAINER.
Send all returned equipment freight PREPAID to:
Ledco, Inc., 4265 North Main Street, Hemlock, NY 14466
7
If your machine needs servicing after the warranty has expired, please
contact your dealer. Ledco, Inc. does offer technical support if your dealer
is unable to assist.
This warranty is expressly in lieu of all other warranties expressed or
implied. This includes the warranties of Merchantability and Fitness For
Use and of all other obligation or liabilities of Ledco, Inc. Ledco neither
assumes nor authorizes any other person to assume it for any other
obligation or liability in connection with the sale of this laminator except as
provided for above.
Further, this warranty will not apply to any machine or part thereof which
has been damaged as result of an accident or as a result of abuse, misuse,
or neglect of the machine. The warranty is also void if the pouch laminator
has been altered or repaired by any other than an authorized repair facility
or dealer. If you have any questions about this warranty, contact Ledco.
Phone: 585-367-2392
Fax: 585-367-2978
Email: [email protected]
8
2.0 UNPACKING AND INVENTORY
The laminator arrives fully assembled. Upon arrival, inspect the unit
immediately and thoroughly using the packing list that accompanies the
shipment. Please follow these steps to correct any problem with your
shipment. Ledco, Inc. cannot accept any responsibility for damage or loss
unless you notify us within ten days of receipt of shipment and follow these
procedures:
imperative
BREAKAGE OR DAMAGE: It is im
perative that any shipping damage is
reported and a claim is filed with the delivering carrier immediately upon
receipt of damaged shipment. The procedure for reporting damage
depends on the method of shipment. Please note damage on bill of lading.
FREIGHT,
FREIGHT, EXPRESS, or TRUCK DELIVERY: According to the contract
terms and conditions of the carrier, the responsibility of the shipper ends
at the time and place of shipment. The carrier then assumes full
responsibility for the shipment.
1.
Notify Ledco IMMEDIATELY.
2.
Hold damaged goods with container and packing for inspection by
the examining agent. Ledco will arrange the inspection.
3.
DO NOT RETURN ANY GOODS
AUTHORIZATION BY LEDCO.
4.
Submit a copy of the inspector's report to Ledco. Ledco will file the
claim with the carrier. Ledco will replace your machinery if
necessary. You will be credited for the damaged machinery when the
claim is processed.
TO
LEDCO
PRIOR
TO
SHORTAGE:
1.
Check the packing list notations. The apparent shortage may have
been marked as an international short-shipped (back-ordered) item.
2.
Examine the container and packing material, particularly for smaller
items.
3.
Make certain that unauthorized personnel prior to complete
unpacking did not remove the item and inventory.
4.
Call us and send immediate written notification of the shortage.
9
INCORRECT SHIPMENT:
1.
If the material you receive does not correspond with your order,
notify Ledco immediately. Include the order number and item(s).
2.
Hold item(s) until return instructions are received.
RETURNS: DO NOT RETURN DAMAGED
DAMAGED OR INCORRECT ITEMS UNTIL
YOU
HAVE
RECEIVED
SHIPPING
INSTRUCTIONS
AND
AN
AUTHORIZATION NUMBER FROM LEDCO.
10
3.0 SAFETY PRECAUTION
DO NOT OPERATE THIS MACHINE UNTIL YOU READ AND FULLY
UNDERSTAND THE FOLLOWING SAFETY PRECAUTIONS.
1.
Never operate this machine without reminding yourself that a
laminator is a potentially dangerous tool. If misused, used carelessly,
or used without observing the rules of safe operation, very serious
injury can result.
2.
Never operate this machine unless you have been fully trained and
have received and fully understood all operating instructions. Make
sure you know how the machine works and how it is controlled.
3.
Never operate this machine without all guards, housings, safety
shields, stop switches or other safety devices in place and fully
operational.
4.
Never use this laminator for other than its intended use.
5.
Never immerse your laminator in whole or part in any water or other
liquids.
6.
Never enclose your laminator while in use as to interfere with its
proper ventilation.
7.
Never operate the laminator with a damaged cord, plug, or after the
laminator has been dropped or damaged in any manner.
8.
Never operate this machine if it is not working properly or if you
notice any abnormality in its performance.
9.
Never tamper with, rewire, or bypass any control or safety device on
this machine.
10. Never attempt to clean feed rollers while the power is on.
11. Never remove the machine housing or attempt any kind of
maintenance without disconnecting power to the unit.
12. Always be sure all persons are clear of the machine before pushing
the start button, especially when multiple operators or observers are
present.
11
13. Never wear loose clothing, ties, jewelry or any item, which could get
caught in the rollers or machinery when operating the machine.
Operators with long hair must put their hair up before running the
machine.
14. Always keep your hands clear of any moving parts except when the
power is off and you intend to adjust the laminator.
15. Always unplug the laminator when it is not to be used for a long
period.
16. Because castors raise the center of gravity and increase the risk of
tipping, use a minimum of two people to move the machine. Move
slowly, and avoid any obstructions.
17. Always connect to the proper power supply of the voltage, amperage,
and frequency. The laminator comes with a grounded plug. To reduce
the risk of electrical shock, this plug is intended to fit only a grounded
outlet of proper amperage, and in only one way. If it does not fit in the
outlet, contact a qualified electrician. Do not modify the plug in
anyway.
18. If the supply cord is damaged it must be replaced by a special cord
available from the manufacturer or servicing agent.
NOTICE TO EMPLOYER: A copy of these safety precautions must be given
to all operators, set-up personnel, maintenance people, and supervisors of
this machine. A copy should also be hung on the machine readily
accessible and visible to the operator. Additional copies are available upon
request.
IMPORTANT: Where a language barrier or insufficient schooling would
prevent a person from reading and understanding these safety
precautions, you should either translate this information or have it read or
interpreted to the person, and get assurance that it is understood.
12
4.0 SETUP & OPERATION
OPERATION
This section explains in detail the setup and operation of your pouch
laminator.
4.1
WARM UP TO OPERATING TEMPERATURE
1. Remove machine from shipping container and place in work area.
2. Plug the machine into proper outlet.
3. 110v standard 44"
110v 15amp
NEMA 5-15R
220v standard 44"
220v 15amp
NEMA L6-20R
4. Turn on main power switch.
5. Set roll height adjusting knob to desired thickness of material to
laminate.
6. Set to recommended temperature of 350 degrees.
7. Wait 30 minutes for machine to warm up to operating temperature.
4.2
POUCH LAMINATING
You will need a proper sized mounting sled (flat board used to carry pouch
through laminator while keeping it flat and smooth), and the proper sized
pouch.
Pouch size
18.5” x 24.5”
25” x 37”
37” x 49”
Sled size
21” x 28”
27” x 40”
40” x 52”
When ready to laminate, please follow these easy steps:
1.
2.
3.
4.
5.
6.
Turn on your machine by pressing the ON SWITCH.
Set to recommended temperature of 350 degrees.
Allow the machine to heat for approximately 20-30 minutes.
Check sled to make sure there are no foreign particles on the surface.
Lay your sled on flat surface with foam side up.
Lay your pouch on the sled with sealed edge of pouch toward the
front of the sled.
13
7.
Make sure the pouch has the thin side up as indicated by the UP
STICKER.
8. Pull back top layer of pouch and insert item to be laminated. Make
sure item is centered in pouch.
9. Insert sealed end of pouch under Hold-down Flap on front of sled
making sure at least ½ ” is under flap. Square pouch on sled.
10. SET MACHINE
MACHINE GAP OPENING TO ¼” by pulling out Gap Knob on
right side of machine and turning to the proper setting (Pull out to set
and then push in to hold).
11. Insert pouch and sled into laminator making sure they are square to
laminating rolls.
12. Remove sled as soon as it exits laminator. BE CAREFUL NOT TO
TOUCH POUCH UNTIL IT IS COOL.
COOL
14
4.3
MOUNTING & LAMINATING POUCHES
When ready to laminate & mount, please follow these easy steps:
1.
2.
3.
4.
5.
6.
7.
8.
9.
Turn on your machine by pressing the ON SWITCH.
Set to recommended temperature of 350 degrees.
Allow the machine to heat for approximately 35-45 minutes.
Check item to be mounted and laminated to make sure there are no
foreign particles on the surface.
Place laminating pouch on flat surface and insert item to be mounted
and laminated between the film and board. Make sure item is square
to edges of board.
SET MACHINE GAP OPENING TO THE THICKNESS OF THE
MOUNTING BOARD (example 3/16” board = 3/16” gap) by pulling out
Gap Knob on right side of machine and turning to the proper setting
(Pull out to set and then push in to hold).
Insert board into laminator (sealed edge FIRST) making sure the film
is flat on the item.
The board will be laminated at a speed of one foot per minute.
Remove board from laminator as soon as it is ejected from machine.
10. Lay on flat surface until cool to touch.
15
4.4
MOUNTING
When ready to mount, please follow these easy steps:
1.
2.
3.
4.
Turn on your machine by pressing the ON SWITCH.
Set to recommended temperature of 350 degrees.
Allow the machine to heat for approximately 35-45 minutes.
Check item to be mounted and mounting board to make sure there
are no foreign particles on the surface.
5. Place mounting board on flat surface and place item to be mounted on
the adhesive side of board. Make sure item is square to edges of
board.
6. Tack item to board using a heat seal iron or glue stick. Tack only the
front two corners of the item.
7. SET MACHINE GAP OPENING TO THE THICKNESS OF THE
MOUNTING BOARD (example 3/16” board = 3/16” gap) by pulling out
Gap Knob on right side of machine and turning to the proper setting
(Pull out to set and then push in to hold).
8. Place release sheet over entire surface (silicon side down). This
prevents adhesive from adhering to the rubber roll.
9. Insert board into laminator (tacked edge FIRST).
10. The item will be mounted at a speed of one foot per minute.
11. Remove board from laminator as soon as it is ejected from machine.
12. Lay on flat surface until cool to touch.
16
5.0 MAINTENANCE
This section explains the schedule and the maintenance in detail.
5.1 MONTHLY SERVICE SCHEDULE
5.1.2 CLEANING RUBBER ROLLS
1. Disconnect power to machine.
2. Lift the top front cover up.
3. Clean the rubber rollers with a mildly abrasive cleaning pad such as
the white Scotch Brite (Trademark of 3M) pad which may be
purchased in the household section of your grocery store (the green
pads are too abrasive). Use “COOL CLEAN” to clean the rollers
(available through your local LEDCO dealer). Rub firmly but do not
scrub the rollers vigorously as this will mar the surface. Do not use
sharp metal objects or steel wool as these will also mar the rollers.
4. Return top front cover to closed position.
17
NOTES
18
19