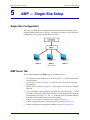
1
Drake Hosted
User Guide
Last Revision Date: 11/23/2015
Support.DrakeSoftware.com
(828) 524-8020
Drake Hosted User Guide
Copyright
The Drake Hosted User Guide, Drake Tax Software, and any other related materials
are copyrighted material. All rights are reserved by Drake Enterprises, LTD, including
all ownership rights. This document, associated software, and related material are the
property of Drake Enterprises, LTD.
Drake Enterprises, LTD, hereby authorizes you to download, display, print, and reproduce the material in this document in an unaltered form only for your personal, noncommercial use or for non-commercial use within your organization. Copyright,
trademark, and other proprietary notices may not be removed.
© 2015 Drake Enterprises, LTD. All rights reserved.
While every attempt has been made to produce an accurate and complete manual,
there is no warranty, expressed or implied, to that effect. Drake Enterprises, LTD,
assumes no liability for damages or claims resulting from the use of the information
contained herein.
Trademarks
The Drake Software Logo and Drake Tax are registered trademarks of Drake
Enterprises, LTD.
Other product names mentioned in this manual may be trademarks or registered
trademarks of their respective companies.
i
Drake Hosted User Guide
ii
Drake Hosted User Guide
Table of Contents
Introduction ................................................................................................ 1
About Drake Hosted . . . . . . . . . . . . . . . . . . . . . . . . . . . . . . . . . . . . . . . . . . . . . . . . . . . . . . . . . . . . . . . . . . .
Signing Up to Use Drake Hosted . . . . . . . . . . . . . . . . . . . . . . . . . . . . . . . . . . . . . . . . . . . . . . . . . . . . . . . . .
Important Drake Hosted Terminology . . . . . . . . . . . . . . . . . . . . . . . . . . . . . . . . . . . . . . . . . . . . . . . . . . . . .
Contacting Drake Support . . . . . . . . . . . . . . . . . . . . . . . . . . . . . . . . . . . . . . . . . . . . . . . . . . . . . . . . . . . . . .
1
1
1
2
Station Setup.............................................................................................. 3
Installing the Citrix Receiver . . . . . . . . . . . . . . . . . . . . . . . . . . . . . . . . . . . . . . . . . . . . . . . . . . . . . . . . . . . . 3
Logging in to Drake Hosted . . . . . . . . . . . . . . . . . . . . . . . . . . . . . . . . . . . . . . . . . . . . . . . . . . . . . . . . . . . . . 4
Running Applications in Hosted .............................................................. 5
File Browser Setup . . . . . . . . . . . . . . . . . . . . . . . . . . . . . . . . . . . . . . . . . . . . . . . . . . . . . . . . . . . . . . . . . . . . 5
Backing Up Drake Hosted Files . . . . . . . . . . . . . . . . . . . . . . . . . . . . . . . . . . . . . . . . . . . . . . . . . . . . . . . . . . 7
Moving Drake Data to Drake Hosted . . . . . . . . . . . . . . . . . . . . . . . . . . . . . . . . . . . . . . . . . . . . . . . . . . . . . . 8
Bringing Prior Year CWU Clients into Hosted CWU . . . . . . . . . . . . . . . . . . . . . . . . . . . . . . . . . . . . . . . . . 9
Copying Current Year CWU Clients into Hosted CWU . . . . . . . . . . . . . . . . . . . . . . . . . . . . . . . . . . . . . . 10
Setting Up Hosted CWU to Upload W2/1099 Information . . . . . . . . . . . . . . . . . . . . . . . . . . . . . . . . . . . . 10
Account Manager Portal.......................................................................... 11
Signing in to the Account Manager Portal (AMP) . . . . . . . . . . . . . . . . . . . . . . . . . . . . . . . . . . . . . . . . . . . 11
Terminating an Account During the Trial Period. . . . . . . . . . . . . . . . . . . . . . . . . . . . . . . . . . . . . . . . . . . . 12
AMP — Single-Site Setup........................................................................ 15
Single-Site Configuration . . . . . . . . . . . . . . . . . . . . . . . . . . . . . . . . . . . . . . . . . . . . . . . . . . . . . . . . . . . . . .
AMP Home Tab . . . . . . . . . . . . . . . . . . . . . . . . . . . . . . . . . . . . . . . . . . . . . . . . . . . . . . . . . . . . . . . . . . . . .
AMP Billing Tab . . . . . . . . . . . . . . . . . . . . . . . . . . . . . . . . . . . . . . . . . . . . . . . . . . . . . . . . . . . . . . . . . . . .
AMP Help Tab . . . . . . . . . . . . . . . . . . . . . . . . . . . . . . . . . . . . . . . . . . . . . . . . . . . . . . . . . . . . . . . . . . . . . .
Site Management . . . . . . . . . . . . . . . . . . . . . . . . . . . . . . . . . . . . . . . . . . . . . . . . . . . . . . . . . . . . . . . . . . . .
15
15
17
18
18
AMP — Multi-Site Setup .......................................................................... 27
Multi-Site Configuration . . . . . . . . . . . . . . . . . . . . . . . . . . . . . . . . . . . . . . . . . . . . . . . . . . . . . . . . . . . . . . 27
Site Management . . . . . . . . . . . . . . . . . . . . . . . . . . . . . . . . . . . . . . . . . . . . . . . . . . . . . . . . . . . . . . . . . . . . 27
Drake Hosted FAQs ................................................................................. 31
iii
Drake Hosted User Guide
iv
Drake Hosted User Guide
1
About Drake Hosted
Introduction
Welcome to the Drake Hosted User Guide. Before you begin using the Drake Hosted
service, please read this introduction, which includes an overview of the Service and
the Account Manager Portal.
About Drake Hosted
Drake Hosted is designed to allow a firm’s preparers to run the Drake desktop applications in the cloud. These applications include the Drake Tax Software, Client WriteUp, and the Drake Document Manager. Other applications available to be run in the
cloud include: Microsoft Outlook, Microsoft Word, Microsoft Excel, Microsoft PowerPoint, Microsoft OneNote, and Microsoft Publisher. Using Drake Hosted provides
access to these programs, and their data, from anywhere, at any time. You can also use
your local peripherals, such as printers and scanners, with these programs. Because all
data created using a Drake Hosted application is stored on Drake’s servers, this data is
always backed up and secure.
Signing Up to Use Drake Hosted
To sign up to use Drake Hosted, go to http://www.DrakeHosted.com. On the Drake
Hosted page, click Sign me up! Once you submit basic information about your business, a Drake Account Setup Representative will call you to answer any questions you
might have about Drake Hosted. They will also assist in setting up your account. After
that, you will receive an order confirmation email, as well as a welcome email containing instructions on how to set up your account and install the Citrix Receiver. See
“Installing the Citrix Receiver” on page 3.
IMPORTANT
Once you sign up to use Drake Hosted, you will receive an email
detailing how to access the Account Manager Program (AMP)
and how to set your AMP password. The link in the email for setting your AMP password expires in 24 hours.
Important Drake Hosted Terminology
Term — With Drake Hosted, you have the option of three auto-renewing terms for
use of the Drake Hosted services on each station: monthly, biannually (6 months), or
annually (12 months).
Site — A site is a tax office location that has agreed to the terms of the Drake Software license agreement and the Drake Hosted Agreement.
Station Username — This is a unique login name used to access the Drake Hosted
Environment in conjunction with its corresponding Password. Do not think of a “Sta-
1
Contacting Drake Support
Drake Hosted User Guide
tion” as a specific computer. Think of it as an access login to the Drake Hosted environment. Just as you can log into your email account from any computer, you can log
into Drake Hosted from any computer using your assigned Station Username. A
unique Station Username can be used by multiple individuals from any supported
device, but the system prevents a Station Username from being used simultaneously
from different devices. A Station Username is unique to a site and cannot be shared
among multiple sites, even if the sites are set up under the same Company. Each site
can purchase up to 99 station Usernames.
Contacting Drake Support
Drake offers unparalleled telephone and e-mail support. Use one of the following
methods to consult a member of the Drake Support team:
•
•
•
e-mail Support — [email protected] — Recommended for simpler
Drake Hosted questions.
Telephone Support — (828) 524-8020 — Recommended for more complicated
Drake Hosted questions.
Fax Support — (828) 349-5718 — Drake replies to faxes with faxes, not phone
calls.
Drake Support Hours
December – April
Monday – Friday, 8 a.m. – 10 p.m. EST
Saturdays 8 a.m. – 6 p.m. EST
_NOTE
May – November
Monday – Friday, 8 a.m. – 9 p.m. EST
Saturday 9 a.m. – 5 p.m. EST
To view the Drake Hosted Customer Service Agreement, go to:
https://amp.drakehosted.com/PDF/Service_Agreement.pdf.
To view the Drake Hosted Billing Policy, go to: https://amp.drakehosted.com/PDF/Billing_and_Payment_Policy.pdf.
For the most up-to-date system requirements, go to:
https://amp.drakehosted.com/PDF/System_Requirements.pdf.
2
Drake Hosted User Guide
2
Installing the Citrix Receiver
Station Setup
Installing the Citrix Receiver
The Citrix Receiver is the gateway to the Drake Hosted environment and must be
installed on each computer that will be accessing Drake Hosted.
IMPORTANT
Important Installation Notes
•
•
•
Check to see if you already have a Citrix Receiver by going to
Control Panel > Uninstall (or Add/Remove) Programs. If you have
Citrix installed and are actively using it to access another service,
contact Drake Hosted Support ([email protected] / 828524-8020) before proceeding with the installation. If you no longer
use Citrix to access another service, uninstall the receiver, reboot
your computer, and then proceed with our receiver installation
instructions below.
Complete the receiver installation on each computer you plan to
use.
Have your Station Username and Password available. You might
need it during installation. You can locate this information in the
Drake Hosted Account Manager. To access the Account Manager,
see “Signing in to the Account Manager Portal (AMP)” on page 11.
To install the Citrix Receiver:
1.
2.
3.
4.
5.
6.
7.
Go to http://receiver.citrix.com/.
Click the Download Receiver for Windows button.
After the file has been saved, access the Downloads folder through your browser.
Select CitrixReceiver.exe from the Downloads folder and click Run.
Click Start on the “Welcome to Citrix Receiver” screen.
Accept the license agreement and click Next.
Click Next. (Do not select “enable single sign-on;” it does not apply to Drake
Hosted.)
8. Select whether or not you want to send data and usage statistics to Citrix. Then
click Install. Please wait while the receiver installs.
9. When installation is complete, click Add Account.
10. Enter this server address: https://castle12.drakehosted.com, and click Add.
11. Enter your Station username and password, and click Log On.
3
Logging in to Drake Hosted
Drake Hosted User Guide
Logging in to Drake Hosted
To log into Drake Hosted:
1. Click the Citrix Receiver icon from the desktop, program list, or sysem tray.
2. Enter your station user name and password.
4
Drake Hosted User Guide
3
File Browser Setup
Running Applications in Hosted
File Browser Setup
The default view of the File Browser (Figure 3-1) does not display the full path (and
drive letter) of the Drake Hosted drives (Figure 3-2).
Figure 3-1: Receiver Home window
Figure 3-2: File Browser default view
5
File Browser Setup
Drake Hosted User Guide
To change the view of the File Browser, and see the full path of the Drake Hosted
drives:
1. Right-click an open space on the File Browser window.
2. Select View > Details. Alternatively, click the View drop list near the top right
side of the File Browser window, and select Details (Figure 3-3).
Figure 3-3: View options
3. Drag the column divider (Figure 3-4) between the Name and Type header to the
right to widen the Name column and display the full path and drive letters.
Figure 3-4: Expand the Name column
Figure 3-5: File Browser with columns widened to show full path and drive letters
Drive X: is the Company Share location. This location can be used to share files
among multiple sites.
6
Drake Hosted User Guide
Backing Up Drake Hosted Files
Drive Y: is the Station Profile location. Each Station has a unique, private Profile
location for storing files.
Drive Z: is the Site storage location, and is accessible by each Station within the Site.
Store files in this location if they need to be shared among all Stations. This is where
the Drake programs are installed.
Backing Up Drake Hosted Files
When backing up files in Drake Hosted, both the Hosted drives (X:, Y:, and Z:) and
the local drives are available.
To backup Drake Hosted files:
1. From the Drake Hosted Home page, go to Tools > File Maintenance > Backup.
The Backup window displays (Figure 3-6).
Figure 3-6: Backup window
_NOTE
The automatic backup feature is not available in Drake Hosted.
2. Select the
icon to select a backup location.
3. Click OK to return to the Backup window.
4. Select the file or file types to back up by entering the SSN or EIN, or by selecting
All File Types, Setup Files, System Files, or Client Files.
7
Moving Drake Data to Drake Hosted
Drake Hosted User Guide
5. If you marked a box, click Advanced. The Advanced Backup dialog box lists all
files of the selected type. Filter or sort files as needed using the date and type filters on the right side of the Advanced Backup window.
6. Click Backup.
Moving Drake Data to Drake Hosted
Moving Drake data into the software in the Drake Hosted environment is a two step
process.
1. Backup Drake files in desktop Drake
2. In Drake Hosted, restore the backed up files into Drake
Backing Up Desktop Drake Files
To backup Drake files from your desktop Drake environment:
1. From the Drake Home window, select Tools > File Maintenance > Backup.
2. Click Select a backup location and browse to the file-storage location. Select any
3.
4.
5.
6.
location for these backup files.
Click OK to return to the Backup window.
Select the file or file types to back up by entering the SSN or EIN, or by selecting
All File Types, Setup Files, System Files, or Client Files.
If you marked a box, click Advanced. The Advanced Backup dialog box lists all
files of the selected type. Filter or sort files as needed using the date and type filters on the right side of the Advanced Backup window.
Click Backup.
_NOTE
To backup Drake Document Manager files from the desktop Drake
Archive Cabinet, click the Backup icon from the DDM Archive
Cabinet toolbar. The default backup location is the DDMBackup
folder on the same drive where desktop Drake is installed.
Restoring Drake Files into Drake Hosted
To restore Drake files into Drake Hosted:
1. Using the Drake Hosted File Browser, copy the local backup folder and paste it to
the Drake Hosted Z: drive.
2. From the Drake Hosted Home window, select Tools > File Maintenance >
Restore.
3. Click the
button and browse to the backup folder on the Drake Hosted Z:
drive.
4. Choose to Restore All Files in Folder or Restore Select Files in Folder.
5. Click Restore.
8
Drake Hosted User Guide
Bringing Prior Year CWU Clients into Hosted CWU
_NOTE
It is recommended to delete the backup folder that was copied to
the Z: drive once the files have been restored.
Restoring DDM Files into Drake Hosted
To restore DDM files that were backed up from desktop Drake into Drake Hosted:
1. Using the Drake Hosted File Browser, copy the local DDM backup folder. The
2.
3.
4.
5.
default location for these files is the DDMBackup folder on the same drive where
desktop Drake is installed.
Still using the Drake Hosted File Browser, paste the folder to the Drake Hosted Z:
drive.
Click the Drake DDM icon on the Citrix Receiver Home window.
Click the Backup icon on the DDM toolbar.
Click the Restore tab.
6. Click the
icon to navigate to the location of the backed up Drake DDM files
on the Drake Hosted Z: drive.
7. Use the Select a Backup to Restore drop list to select a backup to be restored.
8. Click Start.
_NOTE
It is recommended to delete the backup folder that was copied to
the Z: drive once the files have been restored.
Bringing Prior Year CWU Clients into Hosted CWU
To bring prior year client information from the local version of Client Write-Up into
the current year Drake Hosted Client Write-Up environment, you will use the Update
Prior Year Clients function.
In the Hosted CWU, complete the following:
1. Go to Tools > Update Prior Year Clients.
2. Click the browse icon (
) and navigate to the location of the local CWU program.
3. The client files in the selected location are displayed at the bottom of the dialog
box. Select the individual client files by clicking the box, or click Select All to
convert all clients in this location.
4. Click Update.
9
Copying Current Year CWU Clients into Hosted CWU
Drake Hosted User Guide
Copying Current Year CWU Clients into Hosted CWU
To bring current year client information from the local version of Client Write-Up into
the current year Drake Hosted Client Write-Up environment, you will use the Backup/
Restore feature.
1. In the local version of Client Write-Up, go to
Tools > File Maintenance > Backup.
2. Select the clients to be backed up by clicking the boxes in the Client Code column.
3. Click Backup.
4. In the Hosted File Browser, browse to d:\CWUyyyy\CLIENTS\ (substitute the
correct drive letter for the drive where local Client Write-Up was backed up in
step 3, if not ‘d’, and “yyyy” represents the appropriate year of the CWU software).
5. Copy the Backups folder.
6. Paste the Backups folder into the Hosted location, Z:\CWUyyyy\CLIENTS\
(where “yyyy” represents the appropriate year of the CWU software).
7. In Hosted Client Write-Up, restore the backup by going to
Tools > File Maintenance > Restore.
8. Select a client from the list at the top of the window. The files that have been
backed up for the selected client display in the bottom portion of the window.
9. Select a file to restore.
10. Click Restore.
Setting Up Hosted CWU to Upload W2/1099 Information
In order to upload W2, 1099, and state wage report information electronically, the
submission files must reside on either a local or a network drive. To set up CWU so
that this happens automatically, complete the following in Hosted CWU:
1. Go to Firm > Firm Info./Global Settings.
2. Select the Use Drake Hosted check box. This makes the Hosted to Local Path
field active.
3. Click the browse icon (
) beside the Hosted to Local Path field and browse to
the root drive of the local machine. It is not necessary to select a folder, just the
drive.
4. Click Save. A folder named “CWUHosted_yy” (where “yy” indicates the twodigit year of the CWUHosted program) is created on the specified drive. The
upload files will be created and reside in a client folder created under the
CWUHosted_yy folder.
10
Drake Hosted User Guide
4
Signing in to the Account Manager Portal (AMP)
Account Manager Portal
The Account Manager Portal, or “AMP”, is used by the administrator to manage the
Drake Hosted experience. Use AMP to:
•
•
•
•
Add and deactivate sites to the Drake Hosted service
Add and deactivate stations at each site
Add and remove applications to be used by each station
Set up billing information for Drake Hosted services
Signing in to the Account Manager Portal (AMP)
To sign in to the Account Manager Portal, go to https://amp.DrakeHosted.com and
sign in to AMP by entering your Account Manager Username and Password. Then
click Sign In.
_NOTE
The first time you log in, you will be prompted to create a Station
Nickname and Station Password for Station 1. This is required.
Figure 4-1: Account Manager Portal Sign-In screen
Once you set up your Drake Hosted account with Drake, you will receive an e-mail
with instructions on setting your AMP password.
Lost AMP Username
If the Account Manager’s username is lost or forgotten, click Forgot username? on
the AMP login screen. Drake will send the username to the email address that is current in the Company Setup.
11
Terminating an Account During the Trial Period
Drake Hosted User Guide
Lost AMP Password
If the Account Manager’s password is lost or forgotten:
1. Click Forgot password? on the AMP login screen.
2. The Account Manager will be prompted to enter his or her AMP Username and
click Submit. A link to reset the password is sent to the email address that is current in the Company Setup.
3. Click the link in the email to go to the Set Account Manager Password screen.
4. Answer the security question (see “General Settings” on page 16 for information
on establishing the security question and answer), then enter, and repeat, a new
Account Manager AMP password.
_NOTE
The Account Manager’s password must be between 8 and 25 characters long and meet at least 3 of the following requirements:
–
–
–
–
At least one lower case letter
At least one upper case letter
At least one number
Contain a special character, like !@#$%^&*()-+=.?
5. Once the password has been reset, return to the AMP login screen to login using
the new password.
Terminating an Account During the Trial Period
_NOTE
It is required that you retrieve your data prior to initiating a termination of account request. (See “Backing Up Drake Hosted Files” on
page 7)
To submit a request to cancel a Drake Hosted account during the trial period:
1. From the AMP Home window, click the Cancel My Account link located below
the Company Account Number at the top right of the window.
12
Drake Hosted User Guide
Terminating an Account During the Trial Period
Figure 4-2: Cancel My Account During the Trial Period
2. The Request Account Cancellation window is displayed. Enter a Reason for
Termination (#1 in Figure 4-3) and read the termination information at the bottom of the window (#2 in Figure 4-3).
Figure 4-3: Request Account Cancellation window
3. Click Request Service Termination (#3 in Figure 4-3). The termination request
can take up to a week to process. You will receive an email notification once
Drake has terminated the account.
13
Terminating an Account During the Trial Period
14
Drake Hosted User Guide
Drake Hosted User Guide
5
Single-Site Configuration
AMP — Single-Site Setup
Single-Site Configuration
The single-site Drake Hosted configuration has just one site in the company that is
using the Drake Hosted service. Set up 1 - 99 stations for each site. In the single-site
configuration, the Company and the Site are the same.
AMP Home Tab
The Account Manager Portal Home page, or “Dashboard”, lists:
•
•
•
•
•
•
•
The company account number (see item #1 in Figure 5-1). This is also the Drake
account number.
Active sites (see item #2 in Figure 5-1). Only one site is listed in the single-site
configuration.
Inactive sites (see item #3 in Figure 5-1). This applies to the multi-site configuration only.
Active site numbers, their nicknames, and status (see item #4 in Figure 5-1). The
site number is the same number as the company account number in the single-site
configuration (#1 in Figure 5-1). The “-1” at the end of the site number indicates
the number of the Drake Hosted site for the company.
Number of active stations at each site (see item #5 in Figure 5-1).
Number of stations that have been deactivated (see item #6 in Figure 5-1).
Number of stations with deactivation pending (see item #7 in Figure 5-1).
15
AMP Home Tab
Drake Hosted User Guide
•
•
There is also a button for adding sites (item #8 in Figure 5-1). This button is not
used in the single-site configuration. See “Adding a Site” on page 28 under the
multi-site configuration for more information about this feature.
Edit Account Settings (item #9 in Figure 5-1). See “Account Settings” below.
Figure 5-1: AMP Home screen (“Dashboard”)
Account Settings
Use the Account Settings tab to change the email address of the Account Manager,
the Account Manager’s password, and add a security question.
To access Account Settings, either click the Home tab followed by the Account Settings tab or click the Edit Account Settings link on the Home page (item #9 in
Figure 5-1).
General
Settings
Email — Enter the email address for the Account Manager. This serves as the contact
address for the Account Manager when a “Lost Password” request is sent to Drake.
Security Question and Answer — The security question is used to verify the identify
of the Account Manager before access is granted to AMP in the case that the Account
Manager’s Password has been lost or forgotten. Select a security question from the
drop list and type an answer to the question. The answer can either be masked or displayed by clicking show answer.
Click Submit Changes.
16
Drake Hosted User Guide
Change
Password
AMP Billing Tab
The Account Manager can change his or her login password to AMP.
To change the password:
1.
2.
3.
4.
Go to Home > Account Settings
Enter your current password
Enter and reenter the new Account Manager AMP password.
Click Submit Changes
AMP Billing Tab
Use the Billing tab (Figure 5-2) to record and update the credit card information to be
used for the payment of Drake Hosted services. Enter or update credit card information prior to adding sites, stations, or applications.
_NOTE
The initial account setup is performed with the help of a Drake
Account Setup Representative and includes collecting the credit
card information and billing address. Drake Hosted uses an automated, recurring billing process for payments.
A payment summary is also available.
Figure 5-2: AMP Billing Tab
Paying an Outstanding Balance
The Billing tab can also be used to pay an outstanding balance on the Drake Hosted
account. If there is an outstanding balance on the account, the amount is displayed on
the Billing tab. An outstanding balance can occur if a payment is delinquent (payment
is declined one month), or the account is suspended (payment is declined two months
in a row.
17
AMP Help Tab
Drake Hosted User Guide
To pay the outstanding balance, verify that the credit card information is up to date,
then click Pay Now. If the payment is successful, station statuses are updated.
AMP Help Tab
Use the Help tab to access an electronic version of this User Manual and information
about contacting Drake Support.
Figure 5-3: Help > Contact Us
Site Management
Use the Manage Site window to add stations, make changes to station setup, deactivate a station, and deactivate a site.
To access the Manage Site window, either:
•
•
Select the Sites tab on the left side of the window. Then select the site to manage from the Site droplist on the Sites tab.
From the Home window, select the site to manage by clicking the Site
Account #.
See “Adding a Station” on page 19, “Station Management” on page 21, and “Deactivating a Station” on page 23 for information on these functions.
18
Drake Hosted User Guide
Site Management
Adding a Station
To add a station to a site:
1. From the AMP Home window, click the Site Account # to go to the Manage Site
window.
Figure 5-4: Acessing the Manage Site window
2. On the Manage Site window, click Add a Station.
Figure 5-5: Click Add a Station
3. Select the site where the station should be added.
19
Site Management
Drake Hosted User Guide
Figure 5-6: Adding a Station
4. Enter the Station nickname.
5. Enter, and re-enter the Station Password. The station password requirements are
the same as for the Account Manager’s password. See “Lost AMP Password” on
page 12 for password requirement details.
6. Select the term from the Term drop list. Select Monthly, Bi-Annual, or Annual.
7. Removing Drake as an Installed App is not an option. If you are purchasing
Microsoft Office programs for this station, select the MS Office check box.
8. Click Calculate Payment. The amount of the charge is displayed.
Figure 5-7: Add a Station - Calculate Payment
9. If the amount of the charge is correct, select the I agree to the Drake Hosted Service Agreement and the I agree to the Drake Hosted Billing and Payment Policy check boxes.
10. Click Charge Card. The credit card currently setup on the Billing tab is charged.
11. A summary of the added station is displayed with the amount of the charge and
the next billing date (Figure 5-8).
20
Drake Hosted User Guide
Site Management
Figure 5-8: Add a Station Summary
The Account Manager is also sent a confirmation email with information about the
added station similar to Figure 5-9.
Figure 5-9: Add a Station Confirmation Email
Click Return to Site Management to go back to the Sites tab. The new station is
added to the Active Station for Site list.
Station Management
“Managing a station” includes changing a station’s nickname, password, and term,
and adding and removing additional applications. Stations can also be scheduled for
deactivation.
To manage a station:
1. From the Home window, click the Site Account # to go to the Manage Site window.
Figure 5-10: Accessing the Manage Site window
2. From the Manage Site window, click the Station Number to edit or manage.
21
Site Management
Drake Hosted User Guide
Figure 5-11: Manage Station Selection
_NOTE
The Station Number ending in “-1” is the “Anchor Station”. This
indicates the first station to be set up at the site. If this station is
deactivated, the site is also deactivated. All other stations at a site
can be deactivated without the site being deactivated.
3. The Manage Station window is displayed.
Figure 5-12: Manage Station window
– To edit the Station nickname, delete the current nickname from the appropriate field and enter the new one. (#1 in Figure 5-12)
_NOTE
If Station Password is forgotten, you can reset it. Enter and re-enter
the new station password. Click Submit Changes. Click the Reset
Password link for station password change instructions.
– The Term for a station can only be changed during the last month of the current term. Access to this field is available during that time only. (#2 in
Figure 5-12). Change the term by selecting from the drop list.
– To add or remove additional applications, select or clear the MS Office
checkbox. Clearing the checkbox automatically sends a removal request to
Drake (once the changes have been submitted). Access to an application is
removed at the end of the month the removal is requested. (#3 in Figure 5-12)
4. Click Submit Changes once all changes have been made. If a billable event was
selected, such as adding an application, payment information is displayed.
22
Drake Hosted User Guide
Site Management
Figure 5-13: Billing Information
5. To complete the transaction, select the I agree to the Drake Hosted Service
Agreement and I agree to the Drake Hosted Billing and Payment Policy
checkboxes, then click Charge Card. A summary of the transaction is displayed
with the amount of the charge. The Account Manager also receives a transaction
confirmation email. Click the PDF icon beside each checkbox to view the agreements.
_NOTE
When a station is “upgraded”, such as adding an application, the
credit card currently setup on the Billing tab is charged immediately rather than waiting until the next billing cycle. The amount
charged is prorated to the end of the current billing cycle.
Deactivating a Station
_NOTES
A station can be scheduled for deactivation at any time during the
station’s term, to be effective at the end of the term. A station’s term
cannot be changed. A station can continue to be used until the last
day of its term.
Deactivating the #1 station, or “Anchor Station”, of a site deactivates the site.
To deactivate a station:
1. From the Home window, click the Site Account # to go to the Manage Site window.
2. From the Manage Site window, click the Station Number to be deactivated.
3. On the Manage Station window, click Deactivate Station. This will schedule the
Station to be deactivated at the end of the current term.
23
Site Management
Drake Hosted User Guide
Figure 5-14: Deactivate Station
4. Click Schedule Deactivation on the Deactivate Station Warning window to confirm the deactivation.
Figure 5-15: Deactivate Station Warning
The station is scheduled to be deactivated on the last day of the term. The Manage
Station window is displayed with the date the station was scheduled for deactivation.
_NOTE
Cancelling
Station
Deactivation
Station deactivation can be cancelled at any time prior to the day
the station is scheduled to be deactivated.
Station deactivation can be cancelled at any time prior to the day the station is scheduled to be deactivated.
To cancel station deactivation:
1. From the Home window, click the Site Account # to go to the Manage Site window.
2. From the Manage Site window, click the Station Number to be reactivated.
24
Drake Hosted User Guide
Site Management
3. On the Manage Station window, click undo.
Figure 5-16: Cancel Station Deactivation
Reactivating
a Station
The purpose of reactivating a station is to reuse the Station ID. Reactivating a station
does not provide the opportunity to retrieve files that existed prior to station deactivation. You are essentially adding a new station with a previously used Station ID. By
reusing an ID, you can maintain some consistency with your Station numbers from
year to year for your seasonal staff.
To reactivate a previously deactivated station:
1. From the Home window, click the Site Account # to go to the Manage Site window.
2. From the Manage Site window, in the Inactive Stations for Site section of the
window, click Reactivate beside the Station to be reactivated.
Figure 5-17: Select a Station to Reactivate
3. The Reactivate Station screen is displayed (Figure 5-18). Make any changes
needed for the station and click Calculate Payment.
25
Site Management
Drake Hosted User Guide
Figure 5-18: Reactivate a Station
26
Drake Hosted User Guide
6
Multi-Site Configuration
AMP — Multi-Site Setup
Multi-Site Configuration
The multi-site Drake Hosted configuration has more than one site in the company that
is using the Drake Hosted service. There are only minor differences in the administration of the single-site and multi-site Drake Hosted configurations. The primary differences are in specifying which site is being administered.
Site Management
Use the Manage Site window to add sites, add stations, make changes to station setup,
deactivate a station, and deactivate a site.
To access the Manage Site window, either:
•
•
Select the Sites tab on the left side of the window. Then select the site to manage from the Site droplist on the Sites tab.
From the Home window, select the site to manage by clicking the Site
Account #.
See “Adding a Station” on page 19, “Station Management” on page 21, and “Deactivating a Station” on page 23 for information on these functions.
27
Site Management
Drake Hosted User Guide
Adding a Site
To add a site in the multi-site configuration:
1. Click Add a Site from the AMP Home window.
Figure 6-1: AMP Multi-Site Home window
2. On the Add Site window (Figure 6-2), select the site to add from the Available
sites drop list. This lists the sites associated with the Drake account that have not
been added to Drake Hosted services.
Figure 6-2: Add Site window
3. Enter a Site nickname and the number of stations to add to the site. More stations
can be added at another time if needed (99 maximum per site).
28
Drake Hosted User Guide
Site Management
4. Enter the number Stations to add for the new site.
5. Enter, and re-enter the initial station Password.
6. Select the length of the Term. This term will be applied to all stations chosen for
this initial site setup. If you prefer different terms for your additional stations, set
up only one station during this initial site setup. Then, after setup of this station is
complete, use the Add a Station feature (see “Adding a Station” on page 19) to
add stations with different terms.
7. Selecting the MS Office checkbox adds this service to all of the stations being
added at this time. Do not select the MS Office checkbox if you do not want to
add this service to all stations being added at this time. You can add this service to
individual stations at a later time. See “Station Management” on page 21 for information on adding this service.
8. Click Calculate Payment.
9. The payment summary is displayed. Click the I agree to the Drake Hosted
Terms and Conditions checkbox.
10. Click Charge Card. A summary of the added site is displayed and the Account
Manager is sent a confirmation email with information about the added site.
Deactivating a Site
_NOTES
A site can be scheduled for deactivation any time during the site's
term. A station’s term cannot be changed. A site can continue to be
used until the last day of its term.
Deactivating the #1 station, or “Anchor Station”, of a site deactivates the site.
To deactivate a site:
1. From the Home window, click the Site Account # to go to the Manage Site window.
2. From the Manage Site window, verify that the site to be deactivated is selected
from the drop list, then click Deactivate Site. This will schedule the Site to be
deactivated at the end of the current term.
Figure 6-3: Deactivate Site
3. Confirm the deactivation.
29
Site Management
30
Drake Hosted User Guide
Drake Hosted User Guide
7
Drake Hosted FAQs
Q: I am trying to install updates, but it says someone has the program open?
A: Similar to running the Drake program locally, all users must exit the software in
order to run the update. Users can stay logged in to Drake Hosted, but they must
close the Drake program. Note: The Drake Hosted service automatically installs
all program updates for the Drake Tax program every night.
Q: How do I log off/shut down Drake Hosted?
A: First, close all Hosted applications. Then click the Station Username in the top
right and select Log Off from the drop-down menu.
Q: How do I activate my Drake15 software? It is in Demo mode.
A: Go to File > Convert Demo to Standard, and enter your account number and
2015 serial number.
Q: How can I prepare returns if I lose my Internet connection?
A: As a contingency, you can install Drake Software on your local computer and prepare returns. Once the connection issue is resolved, you can then copy the returns
you prepared to Drake Hosted.
Caution: Do not transmit returns from Drake Hosted and then also from your local
copy of Drake. This will create a database conflict and requires intervention from
Drake Support to correct the issue.
Q: Can I remove states to free up space?
A: No – state programs are automatically installed and updated so that they are available when needed.
Q: When I try to install the Citrix Receiver, I get a pop-up window that says “Setup
cannot continue because this version of receiver is incompatible with a previouslyinstalled version.”
A: Uninstall the receiver (Start > Control Panel > Remove Programs), reboot your
computer, and reinstall the receiver using the instructions in this User Guide (see
“Installing the Citrix Receiver” on page 3).
31
Drake Hosted User Guide
Q: In the Account Manager Portal, when I click Charge card to add a Station, I get
“E00027: A duplicate transaction has been submitted.”
A: Allow for at least 3 minutes between each charge event. For example, after adding
a station, wait at least 3 minutes before adding another station.
Q: In the Account Manager Portal, when I click Charge card to add a Station, I get
“E00027: This transaction has been declined.”
A: Your credit card may have insufficient funds. Contact your credit card company to
check your balance.
Q: When I try to print, it only shows “Send To OneNote 2013”, “Microsoft XPS Document Writer”, and “Drake PDF Printer” as the available printers. It doesn’t display
my local printers?
A: Close your Hosted applications and log off of the Citrix Receiver. Then, log back
in and try again. If this occurs on a frequent basis, contact Hosted support at
[email protected].
Q: When I try to launch the Drake Document Manager (DDM), I get the following
error: “Drake Document Manager – Working Cabinet (or Archive Cabinet) has
stopped working. A problem caused the program to stop working correctly. Please
close the program.”
A: Close your Hosted applications and log off of the Citrix Receiver. Then, log back
in and try again. If this occurs on a frequent basis, contact Hosted support at
[email protected].
Q: I get an Open File - Security Warning box when I click on the Research button
on the Drake Home screen?
A: Click Run to continue to the Search window. At this time, there is no mechanism
for turning off this prompt.
Q: When does planned maintenance (downtime) occur for Drake Hosted?
A: Software updates (Drake Tax and DDM) are performed daily at 4am ET and
should last no longer than an hour. System updates are performed weekly on Sunday at 4am ET and should last no longer than two hours. During these scheduled
maintenance periods, all users must be logged off.
Q: How do I set up my email account in Microsoft Outlook?
A: View the following article in the Drake Knowledgebase: 13438: Drake Hosted
Outlook - Setting Up Email. For specific instructions on setting up Gmail, Yahoo,
or Hotmail, contact us at [email protected].
32
Drake Hosted User Guide
Index
A
Account Settings 16
Adding a Site 28
AMP
Account Settings 16
Billing Tab 17
Home Tab 15
Lost Password 12
Lost Username 11
Signing in 11
B
Back Up
Desktop Drake Files 8
Drake Hosted Files 7
Billing Tab 17
C
Contacting Drake Support
E-mail Drake Support 2
Fax Support 2
Telephone Support 2
CWU
Prior Year Clients 9
Upload W2/1099 Information 10
Adding a Site 28
Deactivating a Site 29
R
Restore
DDM Files 9
Drake Files 8
S
Signing Up to Use Drake Hosted 1
Single-Site Configuration 15
Adding a Station 19
Deactivating a Station 23
Station Management 21
Site
Adding 28
Deactivating 29
Station
Adding 19
Cancelling Deactivation 24
Deactivation 23
Management 21
Reactivating 25
T
Terminating an Account 12
D
Deactivating a Site 29
Deactivating a Station 23
Drake Hosted Terminology 1
F
File Browser 5
I
Installing Citrix Receiver 3
L
Logging in to Drake Hosted 4
Lost AMP Password 12
Lost AMP Username 11
M
Multi-Site Configuration 27
v
Drake Hosted User Guide
vi