1
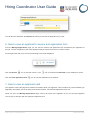
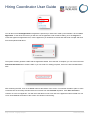
Hiring Coordinator User Guide Recruitment Management & Onboarding The University of Adelaide Hiring Coordinator User Guide Contents 1. How to create a job ....................................................................................................................................................... 3 2. How to approve a job .................................................................................................................................................... 6 3. How to search for jobs via manage jobs ....................................................................................................................... 7 4. How to select Panel members and the Panel Coordinator for a job ............................................................................. 8 5. How to search for job applications ................................................................................................................................ 8 6. How to view an applicant’s resume and application form ............................................................................................. 9 7. How to view an applicant card ...................................................................................................................................... 9 8. Applications section – How to change application statuses (on applicant card) ........................................................ 10 9. Applications section – How to bulk assign applications for review ............................................................................. 11 10. Applications section – How to use a phone screen / reference check form ............................................................. 12 11. Applications section – How to leave a note .............................................................................................................. 12 12. How to review applications as a Panel member ....................................................................................................... 12 13. How to review applications as a Panel Coordinator ................................................................................................. 14 14. How to create an event ............................................................................................................................................. 14 15. How to create a timeslot with user ............................................................................................................................ 15 16. How to invite applicants to the event ........................................................................................................................ 16 17. How to move an application to offer .......................................................................................................................... 16 18. How to complete the offer details and initiate the approval process ........................................................................ 17 19. How to view and add additional tasks ....................................................................................................................... 18 20. How to close a job ..................................................................................................................................................... 19 Page 2 of 25 – PageUp People 19 February 2014 Hiring Coordinator User Guide 1. How to create a job Click on the New job link in the right menu. On the Select template screen, you will need to select a Peoplesoft position number using the binoculars. The Peoplesoft Position number will pre-populate some fields on the following job card. You will also be required to select an approved advertising template which will be the advertising text that appears in the job ad. Click Next at the bottom of the screen. Page 3 of 25 – PageUp People 19 February 2014 Hiring Coordinator User Guide The first thing you will be required to do is attach a position description or selection criteria to the job. Click on the Documents tab and select Document from library. You will be able to search through the folder structure to find the appropriate documentation to attach. Once the document/s is attached to the job, click on the view link next to the documents to save a copy locally on your computer (i.e. on your desktop). You may need to include this document in the job ad at a later stage so it can be viewed by applicants. Click back on the Position info tab. Fill in all mandatory fields, including any other relevant information for the position you are creating. Note that mandatory fields are displayed with an asterisk against them. When you get to the Advertising text field, you will be required to update the text. This includes removing irrelevant paragraphs and adding text to the dot points within the Advertising Text field. You may be required to attach a document to the job ad, such as a selection criteria documents. To do this, click on the Tools dropdown and select insert document. Click on the browse button to search for the document on your local computer. You have the option to select an icon for the document. Click Insert. Page 4 of 25 – PageUp People 19 February 2014 Hiring Coordinator User Guide In the Hiring Manager field, enter in the Hiring Manager for the job. This person can review assigned applicants that have been sent to them for review by the Hiring Coordinator. Underneath the Hiring Manager field there is a section to fill in an approval process. Select the relevant approval processes for the role. Some user fields in the approval steps will auto-populate with the required approver. Enter the relevant approvers into the blank approval steps. The Hiring Coordinator is responsible for moving applicants through the recruitment process. Enter yourself into the Hiring Coordinator into this field. Set the Status of the job to pending approval. Click Save to at the bottom of the page. If all mandatory fields have been filled in, the system will initiate the approval process and display a requisition number. If mandatory fields have been missed the form will not save. You will be directed to complete all mandatory fields prior to saving the job card. Page 5 of 25 – PageUp People 19 February 2014 Hiring Coordinator User Guide 2. How to approve a job Users will typically receive an email notifying them to review and approve the job. As a Hiring Coordinator you can view all jobs awaiting your approval via the My job approvals link in the right menu. Once you click on the My job approvals link you will then be directed to your Manage Approvals screen. From this screen you will be able to access all jobs that have been assigned to you for review and approval. Click on the View button on the right hand side of the screen to access your job. You can click through the tabs of the job card to view any attached documents and notes. Scroll down to the bottom of the position info tab of the job card to see approve and decline buttons. Click Approve. Page 6 of 25 – PageUp People 19 February 2014 Hiring Coordinator User Guide 3. How to search for jobs via manage jobs Click Manage jobs in the right side menu to view and search for jobs in the system (both open and closed jobs). Access to jobs from this area is based on your permission and team settings (i.e. some users can only see their jobs and others can see their team member jobs). Click on the show other search criteria link to expand further searching options. Here you can: Search by job status (includes current and non-current recruitment) Search by job title (use the job title that you have just created) Search by job number (use the job number that you have just created) Page 7 of 25 – PageUp People 19 February 2014 Hiring Coordinator User Guide 4. How to select Panel members and the Panel Coordinator for a job The Panel information can be entered into the job card while creating a job if the Panel Coordinator and Members are known. If they are not known, it can be filled out at a later stage. Use the binoculars to search for the Panel Coordinator. The Panel Coordinator will be able to see the other Panel Members feedback of the applicants. You will need to add yourself as the Panel Coordinator even if you are the Hiring Coordinator or Hiring Manager for a job. Click on the Add Panel member button to add panel members. The selected Panel Members will be listed in the recipient field. Once the Panel Coordinator and Panel Members have been selected, press Save at the bottom of the job card. 5. How to search for job applications On your dashboard, click the number under the Apps heading. This will direct you to the Manage applications page. Alternatively you can click on the Manage applications link in the right menu. To find application for a specific job click on the Search tab, use the binoculars to search for your job and click Search. Page 8 of 25 – PageUp People 19 February 2014 Hiring Coordinator User Guide You will then be directed to the Results tab where you will see all application for you job. 6. How to view an applicant’s resume and application form From the Manage applications page you can view the resume and application form submitted by the applicant for this job. The list of applicant’s who have applied to that job will be returned in the search results. On the right hand side of the screen the following icons will be displayed. Click the Resume icon to view the resume, or the Click the View application form icon to download the Resume to your desktop for review. icon to view the application form answers. 7. How to view an applicant card The applicant card is the page that contains information about your applicant. This includes their personal details, job application information, previous history and communications, resumes and application forms etc... While you are in the Manage applications page, click on the name of the applicant so you can see their applicant card. A pop-up will open with the applicant’s applicant card. Page 9 of 25 – PageUp People 19 February 2014 Hiring Coordinator User Guide 8. Applications section – How to change application statuses (on applicant card) One of the most important functions you can perform from the applications section of the applicant card is updating the status of an application. Open the applicant card of an applicant you have submitted for a job (if you are not there already). When an applicant applies to a job they sit in a status titled New. Click on the word New to bring up a list of available statuses. Select the status you would like to move them into and click Next. You can update the Job status at the same time as the application status change at the bottom of the window. Note that some statuses will have communication templates (emails) linked to them. You can click Yes or No to sending an email if you choose to. By default some statuses are set to Yes as communication should be sent at this stage in the recruitment process. Page 10 of 25 – PageUp People 19 February 2014 Hiring Coordinator User Guide 9. Applications section – How to bulk assign applications for review You can assign applications to a user so they can place comments about the application and approve or decline them. This can be done via the applicant card individually or as a bulk action. Click on Manage applications in the right menu. Once you have selected your job, press Search. This will take you to the results screen. Check the boxes to the left of the applicant’s details. It does not matter which coloured box you select but make sure they are all the same. The coloured boxes are normally used to perform different actions per colour. E.g. Move the green applicant’s into the status of interview. Move the red applicant’s into the status of unsuccessful. Click on the Select a bulk action drop down at the top of the screen and select Bulk assign. Search for your Hiring Manager by using the binoculars. Click Assign at the bottom of the screen. They will receive an email advising that they can now review the applications. Page 11 of 25 – PageUp People 19 February 2014 Hiring Coordinator User Guide 10. Applications section – How to use a phone screen / reference check form Forms such as Phone screen and Reference check forms can be added at any stage in the recruitment process. While on the applicant card, click on the Actions dropdown next the application and select New form. You will then be presented with a range of different forms. Select Phone screening form and press Next (do not enter text within the preview screen). The phone screen form gives you a range of questions (some mandatory) and areas to enter text. After you complete the form, press Save. This form will be saved in the applicant’s history. 11. Applications section – How to leave a note You are able to leave notes about an application that can be reviewed by the Hiring Manager. While on the applicant card, click the Actions dropdown next to the application and select Add note. You will be presented with the Add not screen where you can type your note. This note should relate to the applicant application for a specific job. After you complete your note, click Save. This note will be saved in the applicant’s history and can be viewed by the Hiring Manager and Recruiters. 12. How to review applications as a Panel member Panel members can review the applicant’s application form and supporting documents that are attached to the application. Applicants will only be available to comment on when they are in specific statuses, such as long list and short list. To access applications where you have been made a panel member, click on the My panel jobs link in the right menu. Page 12 of 25 – PageUp People 19 February 2014 Hiring Coordinator User Guide You will then see a View Applicants link against the jobs that you have been made a panel member. Click on View Applicants. To the left of the screen you will see a list of applicants under a status heading, such as long list. To review the applicant’s application form, tick the applicants you would like to review and select bulk compile and send from the dropdown field above. The system will then generate a PDF with the application details. Once the PDF if complete, you can click on the blue Download document link to view the PDF or you can email. For testing purposes, click on the link to download the PDF. After reviewing the PDF, click on the Close button at the bottom of the screen. You will then be able to place in some comments into the summary field and select an outcome from the Outcome dropdown. Click Save and next to continue on to the next applicant. You will notice that there is now a tick next to the applicants name instead of a red cross. Click Close at the bottom of the screen once finished commenting. Page 13 of 25 – PageUp People 19 February 2014 Hiring Coordinator User Guide 13. How to review applications as a Panel Coordinator The purpose of a Panel Coordinator is to review other panel member’s responses which can then be printed or created as a PDF. This can be then taken to interviews or internal meetings. They can also comment on applicants like a Panel member can. To access the applicants to review, click on My panel jobs in the right menu. You can see that your role under the Your role column is as a Panel Coordinator. Click on View responses to view the Panel members responses. In the following screen you can filter which comments you would like to print. You can filter by application status using the Feedback from panel members dropdown. To print the responses, click on the printer icon. 14. How to create an event During your recruitment process, you may wish to invite applicants to an event such as an interview. Before you can ask your applicants to book themselves into a timeslot, you need to create an event. Click on New Event in the right side menu. You will need to enter in the event title (e.g. name of interview), select Interview as the Event type, user the binoculars to find the venue, find the job that you want to attached the event to and the Owner field will pre-populate with your name but can be changed. The Contact name and Public instructions fields are optional and the content placed in these fields will be visible to the applicant once they book themselves in. Page 14 of 25 – PageUp People 19 February 2014 Hiring Coordinator User Guide You will then be required to add timeslots so that applicants can book themselves in. Make sure that the timeslots you create are at least 48 hours in the future. Timeslots can be created individually or in bulk. If you click on Bulk add timeslots you will then be able to put in a date range, select the days within the date range that the timeslots will be created, enter the times of the timeslots and how many positions are per timeslot (the position number is dependent on how many applicants you would like to be able to book into the one timeslot. E.g. 1 position = 1 applicant can accept. With the way that the below screenshot is setup, this will create a timeslot at 9:00am and 10am on Monday, st Wednesday and Friday with the week starting the 21 of October and each timeslot will have 1 position. 1 Position means that only one applicant can book themselves in against that timeslot. Once you have placed in the timeslot information, click Add at the bottom of the page. You should then see your timeslots appear in the timeslot area. You can set a reminder to be sent to the applicants however for this test, select no to remind applicants. Press Save at the bottom of the screen. 15. How to create a timeslot with user When you create timeslots, you can also invite users to these times (i.e. a Panel Member/s to an interview). Click on the Events tab and edit the event you have just created. Click on the Invite button. A pop up window will be displayed allowing you to search for and select system users to invite to the timeslot. Click on the binoculars icon to bring up a list of users. Select the required user and click on OK. When complete click on OK at the bottom of the pop up. Press Save at the bottom of the screen. Page 15 of 25 – PageUp People 19 February 2014 Hiring Coordinator User Guide 16. How to invite applicants to the event You can move applications into an event status individually or in bulk To invite one applicant, open their applicant card and go to the Applications section and click on the application status which is blue. Move the applicant into the status of First Interview or Final Interview (depending on where they are in the recruitment process) and press next. Select an event for the applicant by using the binoculars and find the event you created earlier. In the Event timeslot section, allow the applicant to select their own timeslot. You can update the job status at the bottom of the screen and Click on Move now. You will be returned to the applicant card. The applicant would receive an email advising them to login and select a timeslot. 17. How to move an application to offer Open the applicant’s applicant card. Change the applicant’s current status by clicking on the blue status link and choose Create an offer for approval (this status is used to create an offer for the applicant). Click Next. Click Yes to update the Job status at the same time you are updating the applicant status (offer status). Click on Move Now. The Offer card (offer details page) will be displayed. This status is an internal status to create the offer only. At this stage no communication would typically be sent to the applicant. Page 16 of 25 – PageUp People 19 February 2014 Hiring Coordinator User Guide 18. How to complete the offer details and initiate the approval process Some fields in the offer card are hidden from the Hiring Coordinators view. This is because you are only required to enter in certain information. From the Offer details page, enter details into the fields ensuring all mandatory fields are completed. You will notice that some fields are pre-populated and that is because they feed through from the Job card. These fields can be updated if required. When you get to the Onboarding Details section of the offer card, select an Onboarding workflow (this sets the tasks for both the employee and Reports to user), Reports to user (this person has access to the onboarding tasks) and Onboarding delegate (this person also has access to the onboarding tasks). Select the relevant approval process from the drop down list at the bottom of the screen. Enter the required users into the blank approval steps. Employee Services will enter in loading amounts (if required) and they will merge the offer contract on your behalf. Select Save & Close to finish. Page 17 of 25 – PageUp People 19 February 2014 Hiring Coordinator User Guide 19. How to view and add additional tasks Once an applicant has started the onboarding process, you can monitor their tasks and see which tasks you may need to complete. To do this, click on My new starters in the right side menu under Applicants. You will then be presented with a list of applicants where you are responsible for their tasks. You should see your applicants name here and a link to View all tasks. Click on this link which will take you to the task dashboard. Here you can filter by the Employee’s tasks, Hiring Manager tasks and all tasks. Filter by Hiring Manager tasks by clicking on the following icon. Click on the title of the tasks within the groups (e.g. Arrange workstation under Pre Commencement), this will allow you to view the content of the task an mark it as completed. You can add optional tasks to the new employees list or create on the go tasks. To add optional tasks, click on the green plus symbol against one of the tasks. You can simply press save or you can modify the task content if required. Page 18 of 25 – PageUp People 19 February 2014 Hiring Coordinator User Guide If you add optional tasks, you can communicate with the new employee by clicking on the email link at the top left of the page. Again you can modify the content of the email and press send. 20. How to close a job Once the position has been filled for a job, you will then need to close the job. Click on Manage jobs in the menu to the right. Search for the job that you created and click on the close job icon to the right. You will then be directed to a new screen which allows you to close the job. Move the job into the status of Filled and press Save. Any advertising channels that are still open will be automatically closed by performing this action. Page 19 of 25 – PageUp People 19 February 2014 Notes Notes Page 21 of 25 – PageUp People 19 February 2014 Notes Page 22 of 25 – PageUp People 19 February 2014 Notes Page 23 of 25 – PageUp People 19 February 2014 Notes Page 24 of 25 – PageUp People 19 February 2014 Notes Page 25 of 25 – PageUp People 19 February 2014