1
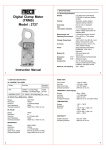
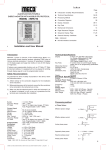
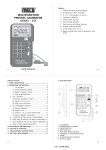
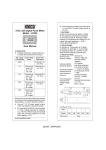
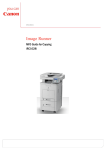
® ® Certificate of Calibration We hereby certify that this product has been calibrated and found to be in accordance with the applicable SPECIFICATIONS and STANDARDS. Accuracies of the standard equipment used in this calibration are traceable to the National Standards. MECO METERS PVT. LTD. Plot No. EL-60, MIDC Electronic Zone, TTC Industrial Area, Mahape, Navi Mumbai - 400710 (INDIA) Tel : 0091-22-27673311-16, 27673300 (Board) Fax : 0091-22-27673310, 27673330 E-mail : [email protected] Web : www.mecoinst.com SR. NO. THERMO HYGROMETER : CHECKED BY : DATE : MODEL : 920 MODEL NO. : USER MANUAL Contents Contents ................................................................................... 2 Safety Information .................................................................... 3 Specifications ........................................................................... 5 Operations ................................................................................ 5 1. Turning on and off meter ............................................ 5 2. Measurement Mode .................................................... 5 3. Set Mode ..................................................................... 6 4. Hold Mode ................................................................... 7 INTRODUCTION This instrument is a portable easy use and compact digital Thermo-Hygrometer designed for simple one hand operation. It uses thermistor as temperature sensor, and a digitalized humidity sensor as the hygrometer sensor with excellent long term stability. Humidity measurement is shown on upper display and temperature in lower display. SAFETY INFORMATION Maintenance ............................................................................. 8 It is recommended that you read the safety and operation instructions before using the thermohygrometer. Installing and Replacing Battery .............................................. 8 1. When not use for long time remove battery. Cleaning .................................................................................... 8 2. Don't keep in place with high Temp, or high humidity. CAUTION l Do not immerse the hygrometer sensor head into liquids since this causes permanent damage to the sensor. l The meter when not in use, please use protective cover to extend sensors life. 2 3 920 : 28-09-2012 SPECIFICATIONS HUMIDITY MEASURING Sensor : Digital Capacitive humidity sensor Range : 0% to 100% RH Accuracy : ±2.5% at 23±5°C (73.4±9°F), 10% to 90% RH ±5% at 23±5°C (73.4±9°F), 0% to 10% RH, 90% to 100% RH Sensor Response Time for 90% of Total Range : 60sec typical Sensor Hysteresis (excursion of 10% to 90% to 10% RH) : ±1%RH typical TEMPERATURE MEASURING Sensor : Thermistor temperature sensor Range : -20°C to 60°C (-4°F to 140°F) Accuracy : ±0.5°C for 0°C to 45°C, at 23°C±5°C ±1.0°C for -20°C to 0°C, 45°C to 60°C, at 23°C±5°C ±1.0°F for 32°F to 113°F, at 73.4°F±9°F ±2.0°F for -4°F to 32°F, 113°F to 140°F, at 73.4°F±9°F Resolution : 0.1°C/°F Measuring Rate : 1 measurement/second Temperature Coefficient : 10% per °C out of 23±5°C (73.4±9°F) Operation Environment : -20 to 60°C (-4°F to 140°F) at <70% R.H. Storage Environment : -20 to 60°C (-4°F to 140°F), 0 to 80% R.H. with battery removed from meter. Battery : 1.5Vx2pcs AAA size Battery Life : 260 hours typical with alkaline battery " is displayed when Low battery indication : The " the battery voltage drops below the operating level Dimensions : 25 x 51 x 133mm (approx.) Weight : 120gms including battery (approx.) Accessories : 1.5V AAA battery (installed) x 2, Wristlet x 1, Protection cap x 1 4 3.3 APO ON/OFF : short push on "s" key switches between ON and OFF. OPERATIONS There are 3 operation modes, namely Measurement Mode, Set Mode and Hold Mode. 1. Press and hold " To turn off power in Set Mode abandon the current setting and previous settings remain unchanged. If " " indicator appeared, the setting value can works till power off but did not save to meter. 4. Hold Mode : In Measurement Mode, short push "Mode" key to enter Hold Mode with indicator "HOLD" shows at center of LCD. Right after entering this mode, shown in the LCD is the last measurement and the reading will not be updated with new measurement. " key turns on the " key for 2 seconds turns the power off. Right after power on, all the indicators on the LCD display lights up for one second. 2. Measurement Mode : When power is on, the meter start measuring and refresh every second. Changing among temperatures : Press the "s" key, the meter can cycle through Dry-bulb temperature (no indicator) Dew Point (with indicator "td" Wet-bulb temperature (with indicator "WB") reading on lower display. Backlight : In measurement mode, a short push on " " key turns on the backlight for dark environment, it goes off automatically after 15 seconds if without further operation. 3. Set Mode : In set mode, user can set °C/°F unit and turn on/off APO function (APO = Auto Power Off, when APO is ON, the meter power off automatically if no operation in 10 minutes). When power is off, press and hold " to enter Set Mode. " key for 2 seconds 3.1 °C/°F Unit : short push on "s" key switches between °C and °F. 3.2 Push "MODE" key to save the setting, exit °C/°F setting mode and enter APO setting mode. 5 SPECIAL CONSIDERATIONS l Before a reliable measurement can be made, the measuring hygrometer and medium to be measured must be in temperature and humidity equilibrium. l Temperature measurement errors 3.4 Push "MODE" key to save the setting, exit APO setting mode and enter measuring mode. Note : Turning on and off the meter : When power is off, a short push on " meter and enter Measurement Mode. Due to too short measurement time, sunshine during the measurement, heating, cold outer walls, air draft (e.g. fans), radiating hand and / or body heat etc. l Humidity measurement errors Due to steam, water splashes, dripping water or condensation (not water condensate) on the sensor etc. However, repeatability and long-term stability are not impaired by this. Push "Mode" key each time the display changes in following sequence : 4.1 Last Measurement: with indicator "HOLD". 4.2 Maximum value recorded: with indicator "HOLD" + "MAX". 4.3 Minimum value recorded: with indicator "HOLD" + "MIN". 4.4 Maximum-Minimum value recorded: with indicator "HOLD" + "MAX-MIN". 4.5 Average of values recorded: with indicator "HOLD" + "AVG". 4.6 Exit the Hold Mode and return to Measure-ment Mode. To clear the recorded values : In Hold Mode and during viewing MAX, MIN, MAX-MIN or AVG, press and hold "Mode" key for 2 seconds, to clear the recorded data and return to measurement mode. 6 7 920 : 28-09-2012 MAINTENANCE Installing and Replacing Battery Battery Battery Cover 1. Power is supplied by 2pcs 1.5V (AAA SIZE). 2. The " " appears in the display when battery replacement is needed. 3. Push the Battery Cover and lift it in the direction as shown in the figure. 4. Remove the batteries from battery compartment. 5. Replace with 2 new AAA batteries with polarity as indicated on the bottom of Battery Compartment. 6. Place the Battery Cover. Cleaning Periodically wipe the case with a damp cloth and detergent, do not use abrasives or solvents. 8 9 920 : 28-09-2012 ® ® Certificate of Calibration We hereby certify that this product has been calibrated and found to be in accordance with the applicable SPECIFICATIONS and STANDARDS. Accuracies of the standard equipment used in this calibration are traceable to the National Standards. MECO METERS PVT. LTD. Plot No. EL-60, MIDC Electronic Zone, TTC Industrial Area, Mahape, Navi Mumbai - 400710 (INDIA) Tel : 0091-22-27673311-16, 27673300 (Board) Fax : 0091-22-27673310, 27673330 E-mail : [email protected] Web : www.mecoinst.com SR. NO. HYGRO ANEMOMETER : CHECKED BY : DATE : MODEL : 961 MODEL NO. : USER MANUAL Contents Contents ................................................................................... 2 Safety Information .................................................................... 3 Specifications ........................................................................... 5 Operations ................................................................................ 5 1. Turning on and off meter ............................................ 5 2. Measurement Mode .................................................... 5 3. Set Mode ..................................................................... 6 4. Hold Mode ................................................................... 7 Maintenance ............................................................................. 8 INTRODUCTION This instrument vane type air speed meter. When air flows through the meter, turns the vane air speed is measured. The measurement air speed is shown at upper display, while environment temperature is shown at lower display. SAFETY INFORMATION It is recommended that you read the safety and operation instructions before using the hygro-anemometer. 1. Only operate the measuring instrument properly, for its intended purpose and within the parameters specified. Do not use force. Installing and Replacing Battery .............................................. 8 2. Never store the product together with solvents, acids or other aggressive substances. Cleaning .................................................................................... 8 3. Don't keep in place with high Temp, or high humidity 2 3 961 : 28-09-2012 SPECIFICATIONS Storage temperature : -20°C to 60°C(-4°F to 140°F), 0 to 80% R.H. with battery removed from meter. WIND VELOCITY Battery : 1.5V x 2pcs AAA size. Range : 0.4 to 20 m/s, 80 to 4000ft/m Battery Life : 50 hours typical with alkaline battery. Accuracy : ±0.2m/s + 2% of reading, ±40ft/m + 2% of reading " is displayed Low battery indication : The " when the battery voltage drops below the operating level. Resolution : 0.1m/s, 1ft/m Dimensions : 25 x 51 x 133mm (approx.) RELATIVE HUMIDITY Sensor : Digital Capacitive humidity sensor Range : 0% to 100% RH Accuracy : ±2.5% at 25°C(77°F), 10% to 90% RH ±5% at 25°C(77°F), 0% to 10% RH, 90% to 100% RH Sensor Response Time for 90% of Total Range : 60sec typical. Sensor Hysteresis (excursion of 10% to 90% to 10% RH) : ±1%RH typical. Weight : 120gms including battery (approx.) Accessories : 1.5V AAA battery (installed) x 2, Wristlet x 1, Protection cap x 1 OPERATIONS There are 3 operation modes, namely Measurement Mode, Set Mode and MAX/MIN Mode. 1. When power is off, a short push on " " key turns on the meter and enter Measurement Mode. When power is on, press and hold " " key for 2 seconds turns the power off. AIR TEMPERATURE Range : -20°C to 60°C, -4°F to 140°F Accuracy : ±0.5°C for 0°C to 45°C ±1.0°C for -20°C to 0°C, 45°C to 60°C ±1.0°F for 32°F to 113°F ±2.0°F for -4°F to 32°F, 113°F to 140°F Right after power on, all the indicators on the LCD display lights up for one second. 2. 3. Resolution : 0.1°C, 0.1°F Accuracy : Stated accuracy at 18°C to 28°C(64°F to 82°F), <75% R.H. Push the "s" key scroll the reading through air speed, relative humidity and Wind Chill Temperature (WCT). Temperature Coefficient : 0.1 times the applicable accuracy specification per °C out of 18°C to 28°C (64°F to 82°F). Note : When power is turn off the display setting (either air speed, relative humidity or WCT) at that moment will be saved and remains unchanged when the meter is turned on next time. Operating environment : 0°C to 50°C(32°F to 122°F) at <70% R.H. 5 Backlight : Note : In measurement mode, a short push on " " key turns on the backlight for dark environment, it goes off automatically after 15 seconds if without further operation. To turn off power in Set Mode abandon the current setting " indicator and previous settings remain unchanged. If " appeared, the setting value can works till power off but did not save to meter. Set Mode : In set mode, user can turn on/off APO function, select unit of temperature and select unit of velocity and select humidity or wet-bulb temperature (WB) measurement. (APO = Auto Power Off, when APO is ON, the meter power off automatically if no operation in 10 minutes) 4. When power is off, press and hold " to enter Set Mode. 4.1 Last Measurement: with indicator "HOLD". 4.2 Maximum value recorded: with indicator "MAX". 4.3 Minimum value recorded: with indicator "MIN". 4.4 Maximum-Minimum value recorded: with indicator "MAXMIN". 4.5 Average of values recorded: with indicator "AVG". 4.6 Exit the MAX/MIN MODE and return to Measurement Mode. " key for 2 seconds In Set Mode, press "Mode" key each time move settable position in following sequence (indicator of settable position blinks.) 3.1 Measurement Mode : After power on, face the back side (where battery cover is) of the meter to the air flow, the measurement reading refreshed every second. Measurement rate : 1 times/second 4 Turning on and off the meter: Unit of velocity: Short push on "s" key scroll unit of velocity (m/s, Km/h, ft/m, mph, kts, Beau). Push "Mode" key to select the unit of velocity and enter selection unit of temperature. 3.2 Unit of temperature: short push on "s" key scroll units of temperature(°C,°F). Push "Mode" key to select the unit of temperature and enter selection of humidity td or WB measurement. 3.3 Selection of humidity td or WB measurement: short push on "s" key to change the measurement through humidity (%), td, and WB. Push "Mode" key to select and enter APO ON/OFF setting. 3.4 APO ON/OFF: short push on "s" key switches between ON and OFF. Push "Mode" key to select and exit Set Mode and Entering Measurement Mode. MAX/MIN Mode : In Measurement Mode, short push "Mode" key to enter MAX/MIN MODE. Push "Mode" key each time the display changes in following sequence: To clear the recorded values : In MAX/MIN MODE and during viewing MAX, MIN, MAXMIN or AVG, press and hold "Mode" key for 2 seconds, to clear the recorded data and return to measurement mode. (Please refer to the section of Measurement Mode.) 6 7 961 : 28-09-2012 MAINTENANCE Installing and Replacing Battery Battery Battery Cover 1. Power is supplied by 2pcs 1.5V (AAA SIZE). 2. The " " appears in the display when battery replacement is needed. 3. Push the Battery Cover and lift it in the direction as shown in the figure. 4. Remove the batteries from battery compartment. 5. Replace with 2 new AAA batteries with polarity as indicated on the bottom of Battery Compartment. 6. Place the Battery Cover. Cleaning Periodically wipe the case with a damp cloth and detergent, do not use abrasives or solvents. 8 9 961 : 28-09-2012