1
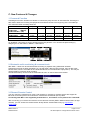
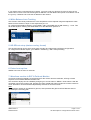
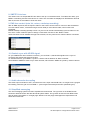
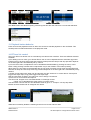
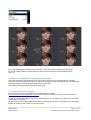
AMIRA SUP 1.1
Software Update Package SUP 1.1.36
R E L E A S E
N O T E S
Date: December 10, 2014
Table of Contents
A. Introduction .................................................................................................................. 3 New features & changes overview ........................................................................... 3 Product Line up ........................................................................................................ 3 Feature Overview SUP 1.1 ....................................................................................... 4 B. Update Instructions ..................................................................................................... 5 Download and Registration Process for software updates ....................................... 5 How to get a Software Update Package ................................................................... 5 Camera Update Procedure ....................................................................................... 5 C. New Features & Changes ............................................................................................ 6 1. Prerecord Function ............................................................................................... 6 2. Bluetooth audio monitoring & comment track ....................................................... 6 3. Ethernet Remote Control ...................................................................................... 6 4. White Balance Auto Tracking ............................................................................... 7 5. HD-SDI out setup (status overlay, format) ............................................................ 7 6. Faster boot up time ............................................................................................... 7 7. Waveform monitor in EVF & Fold-out Monitor ...................................................... 7 8. SMPTE Color bars ................................................................................................ 8 9. ENG lens control (auto iris, return, start/stop recording) ...................................... 8 10. Genlock sync with HD SDI signal ....................................................................... 8 11. Audio channels decoupling ................................................................................. 8 12. Simplified messaging .......................................................................................... 8 13. Playback button behavior ................................................................................... 9 14. EF lens iris control .............................................................................................. 9 15. New improved de-bayering ............................................................................... 10 16. Many UI and Menu improvements .................................................................... 10 17. H + V image flip (for UWZ support) .................................................................. 11 18. LDS Quicktime metadata support ..................................................................... 11 19. LDS data display in EVF/Monitor/SDI (Iris, Focus, Zoom) ............................... 11 20. Image Sharpness & Detail parameters ............................................................. 11 21. Improved viewfinder zoom & Peaking function................................................. 12 21. Temporary license support ............................................................................... 12 22. High Humidity Mode ......................................................................................... 13 23. Audio Line input level ....................................................................................... 13 24. Support for new generation SanDisk 128 GB cards ......................................... 13 D. Known Issues ............................................................................................................. 15 Accessories ............................................................................................................ 15 Audio ...................................................................................................................... 15 Inputs/Outputs ........................................................................................................ 15 Media ...................................................................................................................... 16 Monitoring ............................................................................................................... 16 Recording ............................................................................................................... 16 SUP update ............................................................................................................ 17 Timecode ................................................................................................................ 17 Usability .................................................................................................................. 17 Viewfinder ............................................................................................................... 18 Service .................................................................................................................... 18 AMIRA SUP 1.1
Release Notes
Page 2 of 18
All data subject to change without further notice.
A. Introduction
We are proud to announce the release of AMIRA Software Update Package 1.1 for all ARRI AMIRA
cameras. This version expands functions for all AMIRA models as indicated below.
SUP 1.1 includes major improvements for AMIRA and we strongly recommend installing this update
at your earliest convenience on all AMIRA camera models.
This document also contains known issues that exist in for this software version. Please take your time to
go through this information.
For more information, please visit www.arri.com/amira.
New features & changes overview
•
•
•
•
•
•
•
•
•
•
•
•
•
•
•
•
•
•
•
•
•
•
•
•
•
Prerecord Function
Bluetooth audio monitoring & comment track
Remote control
White Balance Auto Tracking
HD-SDI out setup (status overlay)
Faster boot up time
Waveform monitor in EVF & Fold-out Monitor
SMPTE Color bars
ENG lens control (auto iris, return, start/stop recording)
HD SDI sync (Genlock)
Audio channels decoupling
Simplified messaging
Playback button behavior
EF lens iris control
New improved de-bayering
Many UI and Menu improvements
H + V image flip (for UWZ support)
LDS Quicktime metadata support
LDS data display in EVF/Monitor/SDI (Iris, Focus, Zoom)
Image Sharpness & Detail parameters
Improved viewfinder zoom & Peaking function
Temporary license support
High Humidity mode
Audio Line input level enhanced
Support for new generation SanDisk 128 GB card
Product Line up
(new in SUP 1.1 in blue)
The economical - AMIRA
Features include: HD 1080i and 1080p; 0.75-100 fps; ProRes 422 and 422 (LT) recording in Rec 709; three
looks; adjustable in-camera image parameters for knee, gamma and saturation; peaking for focus control;
zebra, false color and waveform for exposure control.
The all-rounder - AMIRA ADVANCED
Features additional to AMIRA: 100-200 fps; ProRes 422 (HQ) recording; Log C; unlimited look functions;
import looks; ASC CDL in-camera grading; Dynamic auto tracking WB, Bluetooth audio, Prerecord function
The all-inclusive - AMIRA PREMIUM
Features additional to the AMIRA Advanced: 2K (2048 x 1152) and ProRes 4444 recording; import custom
3D LUTs.
AMIRA SUP 1.1
Release Notes
Page 3 of 18
All data subject to change without further notice.
Feature Overview SUP 1.1
Product
AMIRA
AMIRA Advanced
AMIRA Premium
Sensor Type
35mm format ARRI ALEV III CMOS (28.17x18.13)
Sensor Pixel Count
3414 x 2198 total pixels: 2880 x 1620 (HD 16:9), 2868 x 1612 (2K 16x9), for monitoring with
surround area: 3168 x 1772 (HD), 3154x1764 (2K)
Recording Pixel Count
1920x1080 ProRes HD and HD-SDI, 2048 x 1152 ProRes 2K
Lens Mounts
PL mount w/ Hirose connector and LDS, B4 mount w/ Hirose connector, EF mount
Shutter
Electronic shutter, 5.0° to 356.0°, 1/8000s to 1.3s
Exposure Index
EI 800 base sensitivity
Exposure Latitude
14+ stops over the entire sensitivity range from EI 160 to EI 3200 as measured with the ARRI
Dynamic Range Test Chart (DRTC-1)
Integrated motorized ND
Filters
FSND 0.6, 1.2, 2.1
Sound Level
< 20 dB(A)
Weight
~ 4.1 kg/9.2 lbs (camera body with PL Lens mount)
Dimensions
Length: 309mm/12.1", width: 139 mm/5.4" , height: 149mm/5.8" (camera body with PL lens mount)
Environmental
-20° C to +50° C (-4° F to +122° F)
Viewfinder
AMIRA Multi Viewfinder MVF-1 (OLED and LCD)
Outputs Video
2x HD-SDI out 1.5G and 3G: uncompressed HD video with embedded audio and metadata
Outputs Audio
3,5mm headphone jack, Bluetooth audio
Outputs Power
Hirose 12pin (for ENG type zoom lenses); 12V: D-tab, Hirose 4pin, Lemo 2pin; 24V: RS 3pin
Inputs
Genlock (Blackburst, Trilevel, HD-SDI), Timecode (In and Output), all BNC
Other Interfaces
USB 2.0 (for user setups, Look files, frame grabs etc.), Ethernet
Recording media
CFast 2.0 memory cards
USB stick
For importing and storing AMIRA Look Files, user setup files, frame line files and feature license
keys. Stores captured stills from the live image in DPX (.dpx, 10 bit) or JPEG (.jpg, 8 bit) format.
Stores log files. Also used for installing Software Update Packages (SUPs).
Recording Formats
HD 1920x1080
(interlaced &
progressive)
HD 1920x1080 (interlaced &
progressive)
2K 2048x1152, HD 1920x1080
(interlaced & progressive)
Recording Frame rates
0,75 - 100 Fps
(progressive)
0,75 - 200 Fps (progressive)
0,75 - 200 Fps (progressive)
Recording Codecs (w/
embedded audio &
metadata)
ProRes 422, 422 (LT)
ProRes 422 (HQ), 422, 422 (LT)
ProRes 4444, 422 (HQ), 422, 422
(LT)
Rec709/LogC
Rec709
Rec709 & Log C
Rec709 & Log C
Looks
3 fix Looks (in camera
adjustable)
Complete Look functions; import
Looks
Complete Look functions; import
Looks
Adjustable image
parameters
Knee, Gamma,
Saturation, Black
Gamma, Saturation by
Hue
Knee, Gamma, Saturation, Black
Gamma, Saturation by Hue
ASC CDL parameter (Slope,
Offset, Power, Saturation)
Knee, Gamma, Saturation, Black
Gamma, Saturation by Hue
ASC CDL parameter (Slope,
Offset, Power, Saturation)
Import of custom 3D LUTs
-
-
Import of custom 3D LUTs
Focus and exposure control
Peaking, Zebra, False
color, Waveform
Peaking, Zebra, False color,
Waveform
Peaking, Zebra, False color,
Waveform
Whitebalance
Auto WB
Auto WB, Dynamic auto tracking
WB
Auto WB, Dynamic auto tracking
WB
WiFi & Ethernet camera
remote control
-
*
*
Audio monitoring
Headphone output
(mini jack)
Headphone output (mini jack),
Bluetooth audio monitoring
Headphone output (mini jack),
Bluetooth audio monitoring
Pre Record function
-
Prerecord function
Prerecord function
* Ethernet remote control is supported with SUP 1.1, WiFi remote control is planned for a later SUP (other
than previously announced).
AMIRA SUP 1.1
Release Notes
Page 4 of 18
All data subject to change without further notice.
B. Update Instructions
Download and Registration Process for software updates
You can find the Software Update Package (SUP) in the AMIRA Downloads Section on
arri.com/amira/downloads. You have to register your AMIRA camera with your camera serial number to
access the Software Update Package (SUP) download. Existing ALEXA customers with an active ALEXA
account for the download section can use this account, unless otherwise requested.
A SUP can be installed on the camera by using an USB stick as described in detail below.
How to get a Software Update Package
• If you have not registered yet, please go to the AMIRA downloads page at arri.com/amira/downloads and
scroll to the 'AMIRA Software Update Package x.x' section (where ‘x.x’ is the version number of the
desired Software Update Package). Click 'Please -> register to get an account.' The AMIRA customer
registration page will be opened.
• Fill in the requested data and make sure to put in the serial number(s) of your camera(s) in the format of
K1.71700.0-xxxxx. Don't forget to agree to the registration terms at the end of the page.
• When you hit the 'create account' button the system will send you an acknowledgement email with a link
for the activation of your account. After following the link a welcome mail is sent containing the login
credentials. Please login at arri.com/login/login.html and navigate to the download section again.
• Upon access of the software package download you will be asked to agree to the terms and conditions of
this download. As soon as you agree to these terms the download link is released.
Camera Update Procedure
The AMIRA software is updated with an USB stick.
The SUP package will update the AMIRA camera as well as the Viewfinder (MVF-1) as long as the
viewfinder is connected to the camera.
•
•
•
•
•
•
•
•
•
After the download, please double click the downloaded file (*.zip) in order to unpack it or unpack it
manually. This will place two update files (*.SUP and *.lic) and the SUP 1.1 release notes onto your
computer.
If not done prior, prepare the USB stick for use with AMIRA by connecting it to the camera: please
navigate to MENU>Media>Prepare USB medium & press CONFIRM. This will create the required
folder structure on the USB stick.
Connect the USB stick to your computer and place the downloaded *.SUP file in the folder
ARRI/AMIRA/SUP on the USB stick.
Then place the downloaded *.lic file in the folder ARRI/AMIRA/LICENSES on the USB stick.
Make sure the camera is connected to a cable power source, or is powered with a full battery to
avoid power loss during the update process.
Connect the USB stick to the camera and navigate to MENU>System>Camera update.
Select the SUP file from the list and press the jogwheel.
In the following message, press CONFIRM to start the installation.
Check the audio screen for the update process.
After the update process has finished, a success message is displayed on the monitor.
AMIRA SUP 1.1
Release Notes
Page 5 of 18
All data subject to change without further notice.
C. New Features & Changes
1. Prerecord Function
Activating this function enables the camera to continuously loop-record to an internal buffer. Pressing the
REC button starts the recording and prepends the buffered content to the beginning of the recorded clip.
The maximum buffer recording times are:
25 fps
30 fps
50 fps
60 fps
100 fps
200 fps
ProRes 422 LT (HD/2K)
ProRes 422
(HD/2K)
ProRes 422 HQ (HD)
20 sec
16 sec
10 sec
8,3 sec
4,9 sec
2,3 sec
ProRes 422 HQ (2K)
18 sec
15 sec
8,3 sec
7,4 sec
4,3 sec
2,1 sec
ProRes 4444
(HD)
13 sec
11 sec
6,7 sec
5,5 sec
3.2 sec
1,5 sec
ProRes 4444
(2K)
12 sec
9,9 sec
5,9 sec
4,8 sec
2,8 sec
1,4 sec
Go to MENU > Recording to set the desired prerecording duration. You can activate prerecording by
assigning it to a user button in MENU > User buttons.
2. Bluetooth audio monitoring & comment track
With SUP 1.1 audio can be monitored while recording or playback using a Bluetooth headset.
Supported protocols are HFP (handsfree 1.5/1.6) and A2DP. With the HFP protocol, there is also a talk
back channel, which is recorded as an individual audio track in the QuickTime clips (track 5). This may be
used for adding comments while recording.
The Bluetooth setup can be found the audio SETUP menu on the left side of the camera.
3. Ethernet Remote Control
You can control the camera menu using a web browser on a laptop (or another device with support for
Ethernet connection) that is connected to the camera with an Ethernet (RJ-45) cable.
Connecting with WiFi is not supported yet with SUP 1.1, this feature is now planned for a later SUP.
After connecting your remote control device to the camera's network (SSID: “AMIRA-serialnumber” (5 digit
number), you can access the camera remote at http://amira-serialnumber.local (e.g. http://amira15040.local).
AMIRA SUP 1.1
Release Notes
Page 6 of 18
All data subject to change without further notice.
If your device does not support Bonjour (Apple), you have to set your device's IP to the IP range of the
camera and connect to the camera using the IP address. Use the INFO button (lower round button next to
the (i) icon) > Network info to see the IP address of the camera.
4. White Balance Auto Tracking
This function continuously measures the color temperature of the captured image and adjusts the white
balance of the camera in steps of 10 K respectively 0.1 CC.
To configure white balance tracking, go to HOME > WB > OPTIONS and set WB Tracking… to On. This
will enable dynamic tracking auto white balance for the WB switch position IV.
5. HD-SDI out setup (status overlay, format)
The HD-SDI outputs can be set to show status overlays and frame lines in different configurations.
To configure the HD-SDI outputs, go to MENU > Monitoring > SDI > SDI processing.
6. Faster boot up time
AMIRA now boots in about 13 seconds.
7. Waveform monitor in EVF & Fold-out Monitor
A luminance waveform display can be activated for the monitor and the viewfinder, offering a further
exposure control beside Zebra and False color.
The waveform display can be enabled by assigning it to a user button in MENU > User buttons. With the
viewfinder monitor live image mode, pressing the upper middle soft button toggles the monitor waveform
on/off. Waveform can be activated independently for the EVF and the monitor.
Note:
The waveform readout is normalized for gamma, and represents the gamma of EVF/Monitor and not
necessarily the recording path.
AMIRA SUP 1.1
Release Notes
Page 7 of 18
All data subject to change without further notice.
8. SMPTE Color bars
The camera can now output SMPTE color bars to set up a connected monitor. To enable color bars, go to
MENU > Monitoring and set Color bars to On. Note: The color bars are displayed on EVF/Monitor and HD
SDI out, but are not recorded on CFast 2.0 cards.
9. ENG lens control (auto iris, return, start/stop recording)
With an ENG style lens, like the Fujinon Cabrio or the Canon CN17x7 with PL mounts or also a standard
2/3’ lens with B4 mount, connected using a Hirose 12/20 pin lens camera cable, new functions are
supported:
Beside start/stop recording (already in SUP 1.0), the iris can be set automatically by the iris button on the
lens servo. There is also the option to assign a user button function for the “Return” button.
These functions are not available through LDS contacts, but only when a lens camera cable is connected.
10. Genlock sync with HD SDI signal
To sync AMIRA with other cameras or screens, you can feed a 1,5G HD-SDI signal into the “Sync In”
connector and activate the Genlock function.
To activate Genlock, go to MENU > System > Sensor and set Genlock to Slave or Master.
Set to Master if AMIRA is used to sync other cameras, set to Slave if AMIRA is synced by another camera.
11. Audio channels decoupling
The stereo input channels A1 and 2, as well as the mono input channels B and C no longer have a ganged
level setting, when the gain is set to MAN + L (manual gain with limiter) and AUTO (automatic gain).
12. Simplified messaging
The user messaging system has been simplified and restructured. The (!) button on the HOME screen
shows the ALERTS screen that lists all critical system states. The (i) button shows the new INFO screen
with all camera information on a single page. Status icons and popup messages have replaced the info
states and events lists.
AMIRA SUP 1.1
Release Notes
Page 8 of 18
All data subject to change without further notice.
The INFO screen also allows exporting camera log files and the user manual to a connected USB stick.
13. Playback button behavior
Press and hold the playback button for about one second to activate playback on the viewfinder. This
should prevent accidental activation of the playback mode.
14. EF lens iris control
The iris for EF mount lenses can be controlled by the camera user interface. There are different methods
available:
a) For dialing in an iris value, go to Home>EI>Iris: the iris can be adjusted with the viewfinder jog wheel.
Pressing the jog wheel changes step size between full stops and sub-stops. Sub-stop precision depends
on the lens type and is automatically set by camera.
b) On the Live screen, iris adjustment can be activated and deactivated by pressing the lower, round
button. Keep pressing activates the iris adjustment only for the duration of the button pressing.
While active, the iris value can be adjusted with the jog wheel. Pressing the jog wheel changes step size
between full stops and sub-stops. Sub-stop precision depends on the lens type and is automatically set by
camera.
c) Assign a user button with "Open iris" and another one with "Close iris" to control the iris. Short press
triggers sub stops steps, long press triggers full stops steps.
See the user button chapter in the manual on how to assign user buttons.
d) Auto Iris: Go to Home>EI>Iris>Options
Auto iris mode: Integral: Iris is calculated based on full image content.
Center: Iris is calculated with higher priority on image center.
Auto iris offset: Corrects the auto iris calculation result by up to +/- 3 stops in 1/3 stop step sizes.
Modes can be activated with an assigned user button.
ARRI has successfully tested the following lenses for iris control and lens data:
AMIRA SUP 1.1
Release Notes
Page 9 of 18
All data subject to change without further notice.
Canon
EF 8-15mm f/4L Fisheye USM
Canon
EF 17-40mm f/4L USM
Canon
EF 24-105mm f/4L IS USM
Canon
EF 70-200mm f/2.8L IS II USM / EF70-200f/2.8 USM
Canon
EF 200-400mm f/4L IS USM Extender 1.4X
Canon
EF 14mm f/2.8L II USM
Canon
EF 24mm f/1.4L II USM
Canon
EF 35mm f/1.4L USM
Canon
EF 50mm f/1.2L USM
Canon
EF 85mm f/1.2L II USM
Canon
EF 135mm f/2L USM
Canon
EF 400mm f/2.8L IS II USM
Canon
EF 100mm f/2.8L Macro IS USM
15. New improved de-bayering
SUP 1.1 includes a new and improved de-bayering algorithm, further improving the image quality of the
AMIRA.
16. Many UI and Menu improvements
a) The home screen parameter adjustment is simplified: For FPS, SHUTTER, EXP TIME, EI, LOOK and
WB, the SET functions have been moved from the lower middle screen button to the jog wheel. This allows
faster adjustments with less finger movements.
b) The DELETE functions in delete screens have also been moved to the jog wheel, while CONFIRM still
remains a screen button for safety reasons.
c) The Project settings sub-menu is now under MENU > Recording, for project related settings.
d) The Audio setup screen has been prepared for a hardware upgrade, supporting to switch between 8 and
24 dBu maximum line level inputs. This will be functional only on cameras with this specific audio hardware
integrated (IOAU2).
e) Instead of displaying single licenses, the camera license model is shown under MENU > Licensed
features. Pressing the FEATURES button displays the detailed features of a license model. With the
DELETE button, the camera can be downgraded to Advanced (for Premium cameras) or Eco (for Premium
and Advanced cameras). Upgrade back to the previous license can be done with the appropriate individual
license files loaded from a USB stick.
f) Change of project rate matches sensor fps: When setting the project rate, the sensor fps is automatically
matched to result in real time recording. Checking SDI frame rate is also suggested by a popup message,
including a direct link. Note: When the user switch is set to FPS, a popup message will display the correct
fps for real time recording.
g) Non-real time warning: When the sensor fps setting does not result in real time recording (quick-motion
or slow-motion), the FPS labels in the home screen, the monitor live screen, the EVF and the SDI overlays
turn orange to prevent accidental recording at un-intended frame rates.
h) Battery and Media capacities are flashing grey/orange when reaching warning levels (battery warning
levels as user defined, card warning level at a capacity < 2 minutes.) on home screen, monitor live image,
EVF and SDI overlays.
i) Smart User Button Behavior: For several functions the user button behavior has been changed, so that a
short press toggles the assigned function, while a long-press (press and keep) activates it temporarily.
Functions supported: EVF peaking, EVF exp. tool, EVF zoom, EVF Gamma, EVF surround, EVF frame
lines, Return In, SDI frame lines, SDI gamma, SDI surround, SDI peaking, SDI exp. Tool, EVF Waveform,
Monitor Waveform
k) Popup when a switch position was changed while the camera Lock was activated.
AMIRA SUP 1.1
Release Notes
Page 10 of 18
All data subject to change without further notice.
17. H + V image flip (for UWZ support)
For certain use cases and when using the ARRI Ultra Wide Zoom, the camera image can be mirrored
horizontally and/or vertically.
To activate image mirroring, go to MENU > System > Sensor and set Mirror image to V”, “H” or “V+H”.
18. LDS Quicktime metadata support
With a lens, supporting lens data (ARRI Lens Data System LDS, Cooke /i, ENG-style lenses) the
iris/focus/zoom settings are recorded as metadata within the ProRes QuickTime files.
19. LDS data display in EVF/Monitor/SDI (Iris, Focus, Zoom)
The lens data for iris, zoom and focus can be displayed as an overlay on the monitoring outputs.
To check lens metadata, go to HOME > (i) > Lens data.
To display lens metadata on the monitor or in the viewfinder eyepiece, go to MENU > Monitoring >
EVF/Monitor > EVF overlays or Monitor overlays > Status components and activate Lens data.
The setting for SDI can be found in MENU > Monitoring > SDI > SDI processing > SDI overlays > Status
components.
20. Image Sharpness & Detail parameters
The parameters for Image sharpness and Image detail allow adjusting the image for a generally sharper (or
also a softer) look. This may be helpful for matching different lens types or for an overall harder (or softer)
looking image.
The sharpness parameter adjusts the definition of edges. Higher values will result in a larger local i.e.
harder contrast. Lower values result in a softer looking image.
The detail parameter defines the resolving power for showing smaller image details.
Both parameters range from -5 and +5. “0” is the default value and matches the Sharpness and Detail
settings used in SUP 1.0.
Please make sure to judge the resulting image with an appropriate monitoring device, ideally a HD-SDI
connected professional monitor with sufficient quality.
To configure sharpness and detail, go to MENU > System > Sensor.
AMIRA SUP 1.1
Release Notes
Page 11 of 18
All data subject to change without further notice.
The image sharpness increases from top to bottom. The image detail increases from left to right.
The center image shows the default values (0) which match the sharpness and detail settings in
SUP 1.0.
21. Improved viewfinder zoom & Peaking function
The Zoom function for the viewfinder has a higher zoom factor and an increased visibility for details,
offering an enhanced judgment for focus. It might also be used to check the image for the new Sharpness
and Detail settings (if no HD-SDI connected monitor is at hand).
The Peaking has a improved mapping and value range.
21. Temporary license support
Temporary licenses are now available in the AMIRA license webshop
(https://alshop.arri.de/catalog/amira_licenses) for “Advanced”, “Premium” and “Advanced to Premium”
model upgrades.
Temporary licenses are valid for one week (7 calendar days). The countdown only starts once the license
is activated in the camera.
Multiple licenses can be purchased and installed for extending the duration. Just make sure to activate the
licenses according to the number count of the license.
AMIRA SUP 1.1
Release Notes
Page 12 of 18
All data subject to change without further notice.
Purchase, download, installation and a finally the activation in the camera is done in the exactly same way
as with permanent licenses.
The license end time can be observed under MENU > System > Licensed features
22. High Humidity Mode
SUP 1.1 includes a High Humidity Mode (available only for cameras which has been calibrated for that
mode). The High Humidity Mode minimizes potential issue with fogging on the sensor, in environments with
very high temperatures combined with a very high humidity (like in ranges of 40°C and 100% humidity). To
enable High Humidity mode, go to MENU > System > Sensor and set Sensor temperature to High Humidity
Note: This mode implies potential restrictions in image quality; please use it only when applicable.
23. Audio Line input level
For cameras with the new audio board (IAOU2), an increased audio line input level at 24dBu can be
activated. This allow higher signal levels as used by some devices. To activate, please go to to SETUP >
Maximum line levels and choose between +8 DBu and +24 dBu for IN A,B and C.
Note: For cameras with IAOU1 board generation, these parameters are disabled.
24. Support for new generation SanDisk 128 GB cards
Beside the current SanDisk 60 GB and 120 GB CFast 2.0 cards, SUP 1.1 supports the new generation
SanDisk 128 GB cards with firmware HDX 14.14.
Unfortunately SanDisk’s 64 GB cards (firmware HDX 14.02 and HDX 14.14) and 128 GB cards with
firmware HDX 14.02, are NOT supported due to technical limitations of the cards.
Please note that no other cards can work with AMIRA running SUP 1.1. Once new cards are supported,
they will be enabled in a future SUP.
SanDisk delivered a first batch of 64 GB and 128 GB cards with a firmware (HDX 14.02) that had not been
qualified for use in ARRI cameras:
Q: Why are the new SanDisk 64 GB and 128 GB cards not working with AMIRA or ALEXA?
A: SanDisk delivered the first batch of these cards with firmware version HDX 14.02. However, this version
of firmware is not supported by the AMIRA and ALEXA cameras as this firmware version did not complete
the ARRI qualification cycle.
AMIRA SUP 1.1
Release Notes
Page 13 of 18
All data subject to change without further notice.
Q: Will AMIRA SUP 1.1 and ALEXA SUP 11 continue to support the SanDisk 60 GB and 120 GB cards
versions.
A: Yes, AMIRA and ALEXA will continue to support these cards (firmware version HDX 8.03).
Q: Will there be SanDisk 64 GB and 128 GB cards that work with AMIRA and ALEXA cameras?
A: ARRI has tested and certified the 128 GB SanDisk card with a new firmware version (HDX 14.14), which
will be supported by AMIRA with Software Update Package SUP 1.1.
SanDisk is working on an update for the 64 GB cards, so they may also be supported in a later SUP.
For ALEXA XT the cards are planned to be supported with SUP 11.
Q: When will the SanDisk 64 GB and 128 GB cards with firmware version HDX 14.14 be available?
A: The 128 GB card will ship early January 2015 while the 64 GB cards will ship at a later date.
Q: How do I identify which firmware version is on the card?
A1: Compatible cards will have the letter “A” printed on the lower left corner of the back label on the card.
A2: Cards that are sold in retail packaging will be marked with new part numbers:
•
SDCFSP-128G -A46A
•
SDCFSP-128G- G46A
•
SDCFSP-128G -J35A
•
Each new part number ends with “A”
A3: Cards that are sold through ARRI will have a “Tested by ARRI” sticker on the card's case,
confirming tested functionality by ARRI.
Q: How can I get my cards exchanged if I have bought cards with the prior firmware release?
A: SanDisk will offer a RMA process to exchange the cards. Send an email to [email protected] or call
866-270-5532 (USA Toll Free) to talk to the SanDisk Extreme Cards Team. State that you have purchased
64 GB or 128 GB CFAST 2.0 cards that are not recognized in an ARRI camera. Provide the quantity
purchased needing replacement and your full contact information (name, email, address). Emails will be
responded to within 24-48 hours.
Q: Can customers update the card firmware in the field?
A: No, SanDisk will offer a RMA process to exchange the cards.
AMIRA SUP 1.1
Release Notes
Page 14 of 18
All data subject to change without further notice.
D. Known Issues
This is a list of known issues for this particular SUP 1.1 software Package. For a listing of answers to
frequently asked questions please visit our website at arri.com/camera/amira/learn/amira_faq.
Accessories
• Lens mount change.
When changing the lens mount, please make sure the camera is powered down when you remove or
attach a lens mount. Changing lens mounts with powered up camera can potentially damage the camera
electronics.
• EF lens image stabilizer
The image stabilizer of EF lenses is not supported.
• Lens data for ENG style lenses using LDS contacts vs. lens camera cable
When using an ENG style lens, the lens data readout may differ between data from the LDS contacts (and
no lens camera cable connected) compared to a connected lens camera cable.
• Re-connecting Bluetooth devices after boot up
Bluetooth devices for audio monitoring are not automatically reconnected when camera is booted. Please
make sure to manually reconnect your bluetooth device.
• Auto iris calculation for EF and ENG lenses
The Auto iris calculation with EF and ENG style lenses is based on the exposure for a neutral gray card.
Use HOME > EI > IRIS > OPTIONS > AUTO IRIS OFFSET to adjust the offset for auto iris.
Audio
• Specific behavior on the audio line inputs.
The audio line inputs allow a signal of +8dBu max, while the signal attenuation is limited to -6dB max.
Please make sure that your line input is not exceeding +8dBu in order to avoid clipping. For higher input
levels, please use an external attenuator or just reduce the signal level.
For cameras including the new audio board (IAOU2) the line input level can be switched to 24dBu. For
details on how to activate this mode, please check the bullet 22. in the above “New Features” section.
• Single audio input cannot be recorded with different levels.
A single audio input can be routed to different recording channels, but the recording levels are the same on
all channels and cannot be different.
• Audio glitches when booting down
Please be cautious for potentially loud audio glitches when wearing headphones while powering down the
camera.
• Audio playback is off when AUDIO RECORDING is disabled
Audio playback of clips that have been recorded with audio do not play back audio when the AUDIO
RECORDING setting is set to OFF.
• No SDI embedded audio with SDI frame rate not matching PROJECT frame rate
When the SDI output frame rate is different to the PROJECT frame rate, a clip with audio has no SDI
embedded audio at playback. The audio will be played back on the headphone output.
Inputs/Outputs
• HD-SDI genlock is limited to single link HD-SDI 422 1.5G signal
For genlock with HD-SDI, the input needs to be a progressive 422 1.5G single link HD-SDI signal, using the
identical frame rate (30fps max).
AMIRA SUP 1.1
Release Notes
Page 15 of 18
All data subject to change without further notice.
• Only one USB slot can be used at a time
When 2 USB sticks are connected during boot up, the device in slot 1 is ignored and only the device in slot
2 is used. You may use the second slot to power a USB device.
• Removing a USB stick
When a USB stick is removed while the camera reads or writes data (user setup, camera log, frame lines,
license keys etc.), please make sure the file transfer is finished, before removing the device. An incomplete
file transfer can cause corrupt files on the camera or on the stick.
• Some USB devices may not work properly with AMIRA
You may encounter issues with some USB devices. Please test the device prior to use it for critical tasks,
or use the USB stick delivered with the camera.
• USB devices for AMIRA
AMIRA only supports USB sticks or pendrives. Harddrives or similar will not be recognized. Please see the
manual for more information.
• Limited scaling quality in HD-SDI outputs when recording in 2K
The resulting image quality is considered as sufficient for monitoring but may be limited for recording the
signal as the master record. This is due to the downscaling of the 2K resolution to HD. Please set the
recording format to HD when recording HD on the HD-SDI output as master record.
Media
• *_BIN.bin file on CFast cards
AMIRA creates a file named "*_BIN.bin" (i.e. A001R3VJ_BIN.bin) when recording . This is only for internal
data management, you can ignore this file.
Monitoring
• Activating RETURN IN while recording may lead to an error
Please do not activate RETURN IN while recording.
• No Test Tone on SDI outputs when Color Bars are activated
When the test tone is enabled, it will be muted on SDI out when COLOR BARS are activated.
• RETURN IN is limited to progressive signals
The return in HD-SDI signal needs to be a progressive format and identical to the camera settings.
Recording
• Power loss during record with SanDisk cards.
When a SanDisk CFast 2.0 card is removed while the camera is recording onto the card, or if the power of
the battery or power supply suddenly goes down while recording, the card may need to be re-formatted for
further use when indicated by the camera: The camera will show a warning message in this case. Please
follow these instructions in order to avoid potential damage of the card or further recordings. If there is no
warning message by the camera, no action is required.
Please contact ARRI service for more information or if you encounter any further issues.
• SanDisk CFast 60GB card frame rate limitations.
Due to the lower write speed on the SanDisk 60GB cards, the max frame rates are limited at the highest
data rates: ProRes 4444 recording in 2K: 120 fps; ProRes 4444 recording in HD: 137 fps; ProRes 422HQ
recording in 2K: 181 fps. ProRes 422HQ recording in 2K: 181 fps
• SanDisk 120GB cards recording in card slot B at very high temperatures with very high data rates.
Using SanDisk 120GB cards at extremely high environmental temperatures well above 40° Celsius or 104°
Fahrenheit, and recording ProRes 4444 at highest frame rates close to 200fps, the card slot B might be
limited in the maximal duration of recording. Please use CFast slot A for longer recordings if the above
conditions are met.
AMIRA SUP 1.1
Release Notes
Page 16 of 18
All data subject to change without further notice.
• Error message for maximum clip size.
On very rare occasions, the camera may stop recording and report "Recording stopped - maximum clip
size reached". This can only occur with image content that has very little detail and using a codec with low
data rate like ProRes LT.
• 400 clips max possible per card
AMIRA cannot record more than 400 clips on a single card. Please note that the camera gives no further
information but just refuses to record more clips.
SUP update
• Camera default setup is reset
When updating the camera with a SUP, the "Default setup" is cleared.
• Timezone/daylight saving time are reset
After a SUP update, please make sure to re-set Timezone/daylight saving time accordingly.
Timecode
• No embedded timecode with 3G HD-SDI output on some devices
With HD-SDI outputs set to 3G, the timecode embedded in the signal may not be read by some devices.
No limitations are seen with timecode output using 1.5G HD-SDI output settings.
Usability
• Licenses can be removed from the camera menu.
All licenses installed can be deleted in the license menu. This will remove the corresponding function from
the camera. To re-install a license (like AMIRA Advanced or Premium licenses), the appropriate license key
for this individual camera needs to be reloaded. In the case a camera set was purchased including the
license, the license key can be found on the USB stick which has been delivered with the camera. In the
case of a license being purchased from the ARRI license webshop, please use the license provided there.
• Loading looks containing a custom 3D LUT require the "AMIRA Premium license"
When attempting to load such a look, it will just fail but no message will be displayed.
• Filename length 28 characters max.
Filenames longer than 28 characters (excluding extension) cannot be loaded by AMIRA, they are neither
seen in the corresponding lists nor can be used.
• Limited number of camera files on USB sticks.
There is a limited number of camera files that can be supplied on a USB stick: User Setups: 20; Look Files:
100; Frame lines: 100; License files: 100; SUPs: 20.
• Re-loading default LOOK files
When a default LOOK file is deleted, it can only be re-loaded if a USB stick, containing at least one LOOK
file, is connected to the camera. A factory reset also restores any deleted default LOOK files.
• "REC 709" look file export
If for any reason you may want to export the look file "REC 709" to USB, you are suggested to make a
DUPLICATE and just save it under a different name (i.e. "REC 709mod").
• Changing Exposure Index or White Balance during record
When changing Exposure Index or White Balance during record it is possible that a single frame contains
two different image characteristics.
• During erase, Record is not possible on other card
During card erase it is not possible to record to the second card.
It is also not possible to change any camera settings while cards are erased.
AMIRA SUP 1.1
Release Notes
Page 17 of 18
All data subject to change without further notice.
• Running the SENSOR FPS at a different speed than the PROJECT RATE
The frame rates for sensor and project rate must match to enable audio recording and to create clips that
will play back at project speed (i.e. not in slow or fast motion).
The settings can be checked here:
- on the HOME screen, where the project rate is shown behind the time code (e.g. @25p).
- on the FPS screen, where the project rate is shown below the FPS setting, including an notation whether
you are recording normal speed, slow-, or quick motion.
- Non-matching settings will also show the message "audio recording disabled (FPS)" on the audio screen
and a small crossed-out speaker icon over the audio levels on the viewfinder monitor.
Non-matching settings will also show the FPS icon in the homescreen and the EVF/SDI status overlays in
orange. The home screen will show an orange exclamation mark next to the FPS logo.
Viewfinder
• Never constantly cover the viewfinder proximity sensor!
Please note that constantly covering the proximity sensor at the edge of the viewfinder close to the
eyepiece, e.g. with tape, can cause an irreversible burn-in on the OLED display!
• The viewfinder sometimes may not turn on.
The AMIRA MVF uses a proximity sensor to activate the OLED display only while the eyepiece is in use.
Approaching the MVF at an unfavorable angle may cause it not to trigger properly.
• The AMIRA viewfinder is not hot-pluggable.
When the AMIRA viewfinder is connected while the camera is booted, it will not be operational until the
camera is restarted.
• ZOOM or SURROUND VIEW at very low framerates
The EVF/MONITOR´s image momentarily fades when either zoom or surround view get activated or deactivated at very low frame rates (below about 5 fps).
• Heated Eyecup HE-6 is not compatible with the AMIRA viewfinder.
When using the heated eyecup, the proximity sensor that activates the OLED display will always be in an
activated state. In this state, the OLED display will not switch off when not in use, and can burn in when the
displayed image does not change over time. This is especially true for status overlays.
• A new version of the Viewfinder will be available which does address potential issues with the
proximity sensor. Please contact service for an upgrade.
• A compatible heated eyecup HE-7 will also be available.
Service
For service purposes the ND filter stage can be moved mechanically with screws at the bottom side of the
camera. Please do not turn the screws on your own, as this could severely damage the camera internals.
Please contact an ARRI service station for any issue here.
AMIRA SUP 1.1
Release Notes
Page 18 of 18
All data subject to change without further notice.