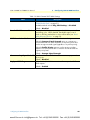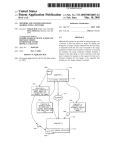
1
For Quick
Start Installation
BODi rS BD007 and BD004 Series
Bandwidth-on-Demand Internet
with Reliability and Survivability
User Manual
This is a Class A device and is not intended for use in a residential environment.
Important–The compliance information in this document is pending and subject to change.
IMPORTANT
Sales Office: +1 (301) 975-1000
Technical Support: +1 (301) 975-1007
E-mail: [email protected]
WWW: www.patton.com
Part Number: 07MBD007_BD004-UM, Rev. A
Revised: November 14, 2012
www.4Gon.co.uk [email protected] Tel: +44 (0)1245 808295 Fax: +44 (0)1245 808299
Patton Electronics Company, Inc.
7622 Rickenbacker Drive
Gaithersburg, MD 20879 USA
Tel: +1 (301) 975-1000
Fax: +1 (301) 869-9293
Support: +1 (301) 975-1007
Web: www.patton.com
E-mail: [email protected]
Copyright © 2012, Patton Electronics Company. All rights reserved.
The information in this document is subject to change without notice. Patton Electronics assumes no liability for errors that may appear in this document.
Kensington is a registered trademark of ACCO Brands. The Kensington Promise is a
service mark of ACCO Brands.
Important Information
To use virtual private network (VPN) and/or AES/DES/3DES encryption capabilities
with the BODi rS, you may need to purchase additional licenses, hardware, software,
network connection, and/or service. Contact [email protected] or +1 (301) 975-1000
for assistance.
Warranty Information
Patton Electronics warrants all BODi rS components to be free from defects, and
will—at our option—repair or replace the product should it fail within one year from
the first date of the shipment.
This warranty is limited to defects in workmanship or materials, and does not cover
customer damage, abuse or unauthorized modification. If the product fails to perform
as warranted, your sole recourse shall be repair or replacement as described above.
Under no condition shall Patton Electronics be liable for any damages incurred by the
use of this product. These damages include, but are not limited to, the following: lost
profits, lost savings and incidental or consequential damages arising from the use of or
inability to use this product. Patton Electronics specifically disclaims all other warranties, expressed or implied, and the installation or use of this product shall be deemed
an acceptance of these terms by the user.
www.4Gon.co.uk [email protected] Tel: +44 (0)1245 808295 Fax: +44 (0)1245 808299
Summary Table of Contents
1 General Information...................................................................................................................................... 17
2 Installing BODi rS ........................................................................................................................................ 23
3 Configuring LAN & WAN Interfaces ............................................................................................................ 30
4 Configuring Wi-Fi Settings ........................................................................................................................... 54
5 Configuring WAN Bonding .......................................................................................................................... 59
6 Managing Outbound Traffic to the WAN ..................................................................................................... 66
7 Configuring Port Forwarding & NAT........................................................................................................... 75
8 Configuring Quality of Service...................................................................................................................... 82
9 Configuring Firewall Settings........................................................................................................................ 86
10 Configuring Miscellaneous Services .............................................................................................................. 91
11 Managing System Settings............................................................................................................................. 97
12 Managing Status Settings ............................................................................................................................ 112
13 Contacting Patton for assistance ................................................................................................................. 119
A Compliance Information ............................................................................................................................ 122
B Specifications .............................................................................................................................................. 124
C Terms ......................................................................................................................................................... 128
3
www.4Gon.co.uk [email protected] Tel: +44 (0)1245 808295 Fax: +44 (0)1245 808299
Table of Contents
Summary Table of Contents ........................................................................................................................... 3
Table of Contents ........................................................................................................................................... 4
List of Figures ................................................................................................................................................. 9
List of Tables ................................................................................................................................................ 11
About this guide ........................................................................................................................................... 13
Audience............................................................................................................................................................... 13
Structure............................................................................................................................................................... 13
Precautions ........................................................................................................................................................... 14
Safety when working with electricity ...............................................................................................................15
General observations .......................................................................................................................................16
Typographical conventions used in this document................................................................................................ 16
General conventions .......................................................................................................................................16
1 General Information...................................................................................................................................... 17
BODi rS Overview ................................................................................................................................................18
Network Features ............................................................................................................................................18
BODi rS Panels .....................................................................................................................................................21
BD007 Front Panel .........................................................................................................................................21
BD007 Rear Panel ..........................................................................................................................................21
BODi rS Panels .....................................................................................................................................................22
BD004 Front Panel .........................................................................................................................................22
BD004 Rear Panel ..........................................................................................................................................22
2 Installing BODi rS ........................................................................................................................................ 23
Planning the Installation........................................................................................................................................24
Setting Up the Network ........................................................................................................................................24
Constructing the Network ..............................................................................................................................24
Configuring the Network Environment ..........................................................................................................25
Mounting BODi rS ...............................................................................................................................................25
Rack Mount ....................................................................................................................................................25
Car Mount for BD004 only ............................................................................................................................26
Connecting BODi rS Interfaces.............................................................................................................................27
Connecting the Ethernet Interfaces .................................................................................................................27
Connecting the Wi-Fi Interfaces .....................................................................................................................27
Connecting the USB Interfaces .......................................................................................................................27
Connecting to the Web Admin Interface...............................................................................................................28
Restoring Factory Default Settings ........................................................................................................................29
3 Configuring LAN & WAN Interfaces ............................................................................................................ 30
Introduction ..........................................................................................................................................................31
Configuring the LAN Interface..............................................................................................................................31
Basic Settings ..................................................................................................................................................31
4
www.4Gon.co.uk [email protected] Tel: +44 (0)1245 808295 Fax: +44 (0)1245 808299
BODi rS BD007 and BD004 User Manual
Table of Contents
IP Settings .................................................................................................................................................32
DHCP Server Settings ..............................................................................................................................32
Static Route Settings .................................................................................................................................33
WINS Server Settings ................................................................................................................................33
DNS Proxy Settings ..................................................................................................................................34
Wi-Fi AP Settings ...........................................................................................................................................35
Wireless Network Settings .........................................................................................................................36
Wireless Security Settings ..........................................................................................................................36
Access Control Settings .............................................................................................................................37
Configuring the WAN Interface............................................................................................................................38
Ethernet WAN Settings ..................................................................................................................................39
General Ethernet WAN Settings ...............................................................................................................40
DHCP Settings .........................................................................................................................................42
Static IP Settings .......................................................................................................................................43
PPPoE Settings .........................................................................................................................................44
Dynamic DNS Settings .............................................................................................................................45
USB Interface Settings ....................................................................................................................................46
Wi-Fi WAN Settings ......................................................................................................................................48
General Wi-Fi WAN Settings ...................................................................................................................48
Create Wi-Fi Connection Profile ..............................................................................................................50
WAN Health Check .......................................................................................................................................51
Health Check Methods .............................................................................................................................51
Additional Health Check Settings .............................................................................................................52
Bandwidth Allowance Monitor .......................................................................................................................53
4 Configuring Wi-Fi Settings ........................................................................................................................... 54
Introduction ..........................................................................................................................................................55
Configuring Wi-Fi Settings ...................................................................................................................................55
Wi-Fi AP Radio Settings .................................................................................................................................56
Wi-Fi WAN Radio Settings ............................................................................................................................56
Wi-Fi AP Advanced Settings ...........................................................................................................................57
Spanning Tree Protocol (STP) Settings .....................................................................................................58
5 Configuring WAN Bonding .......................................................................................................................... 59
Introduction ..........................................................................................................................................................60
Configuring a WAN Bonding VPN Profile ...........................................................................................................60
VPN Settings ..................................................................................................................................................62
WAN Connection Priority Settings ................................................................................................................62
Managing Link Failure Detection Settings.............................................................................................................63
Configuring a NAT Router Behind BODi rS for VPN Connections.....................................................................64
Viewing the VPN Status........................................................................................................................................65
6 Managing Outbound Traffic to the WAN ..................................................................................................... 66
Introduction ..........................................................................................................................................................67
Selecting the Outbound Policy ..............................................................................................................................67
Creating Custom Rules for the Outbound Policy ..................................................................................................68
5
www.4Gon.co.uk [email protected] Tel: +44 (0)1245 808295 Fax: +44 (0)1245 808299
BODi rS BD007 and BD004 User Manual
Table of Contents
New Custom Rule Settings .............................................................................................................................69
Algorithm: Weighted Balance ...................................................................................................................70
Algorithm: Persistence ...............................................................................................................................71
Algorithm: Enforced .................................................................................................................................72
Algorithm: Priority ....................................................................................................................................72
Algorithm: Overflow .................................................................................................................................72
Algorithm: Least Used ...............................................................................................................................73
Algorithm: Lowest Latency ........................................................................................................................73
Expert Mode Settings ......................................................................................................................................74
7 Configuring Port Forwarding & NAT........................................................................................................... 75
Introduction ..........................................................................................................................................................76
Configuring Port Forwarding ................................................................................................................................76
Port Forwarding Service Settings .....................................................................................................................76
UPnP/NAT-PMP Settings ..............................................................................................................................79
Configuring NAT Mappings .................................................................................................................................80
8 Configuring Quality of Service...................................................................................................................... 82
Introduction ..........................................................................................................................................................83
Managing User Groups .........................................................................................................................................83
Setting Up Bandwidth Control .............................................................................................................................84
Configuring Applications ......................................................................................................................................84
Application Prioritization ................................................................................................................................84
Prioritization for Custom Applications ...........................................................................................................85
DSL/Cable Optimization ................................................................................................................................85
9 Configuring Firewall Settings........................................................................................................................ 86
Introduction ..........................................................................................................................................................87
Configuring Outbound and Inbound Firewall Rules .............................................................................................87
Enabling Intrusion Detection and DoS Prevention ...............................................................................................90
10 Configuring Miscellaneous Services .............................................................................................................. 91
Introduction ..........................................................................................................................................................92
Enabling the PPTP Server .....................................................................................................................................92
Enabling Service Forwarding .................................................................................................................................93
SMTP Forwarding ..........................................................................................................................................94
Web Proxy Forwarding Settings ......................................................................................................................95
DNS Forwarding Settings ...............................................................................................................................95
Enabling Service Passthrough ................................................................................................................................96
11 Managing System Settings............................................................................................................................. 97
Introduction ..........................................................................................................................................................98
Configuring Administration Security Settings .......................................................................................................98
Admin Settings ...............................................................................................................................................98
WAN Connection Access Settings ................................................................................................................101
Upgrading the Firmware .....................................................................................................................................102
Firmware Upgrade Status ..............................................................................................................................102
6
www.4Gon.co.uk [email protected] Tel: +44 (0)1245 808295 Fax: +44 (0)1245 808299
BODi rS BD007 and BD004 User Manual
Table of Contents
Configuring the Time Server ...............................................................................................................................103
Configuring Email Notifications .........................................................................................................................104
Setting Up the Remote System Log .....................................................................................................................106
Configuring Simple Network Management Protocol (SNMP) ............................................................................107
General SNMP Settings ................................................................................................................................107
SNMP Community Settings .........................................................................................................................108
SNMPv3 User Settings .................................................................................................................................108
Importing and Exporting System Configuration Files..........................................................................................109
Restore Configuration to Factory Settings .....................................................................................................109
Downloading Active Configurations .............................................................................................................109
Uploading Configurations ............................................................................................................................109
Rebooting the System..........................................................................................................................................109
Testing System Connections................................................................................................................................110
Ping Test ......................................................................................................................................................110
Traceroute Test .............................................................................................................................................111
VPN Test ......................................................................................................................................................111
12 Managing Status Settings ............................................................................................................................ 112
Introduction ........................................................................................................................................................113
Viewing General Device Information ..................................................................................................................113
Viewing Details of Active Sessions.......................................................................................................................114
Viewing the Client List........................................................................................................................................114
Viewing the WINS Client List ............................................................................................................................115
Viewing Site-to-Site VPN Connection Details ....................................................................................................115
Viewing UPnP and NAT-PMP Connection Details............................................................................................115
Viewing Event Log Details ..................................................................................................................................115
Viewing Bandwidth Usage Statistics ....................................................................................................................116
Real-Time Bandwidth Usage ........................................................................................................................116
Daily Bandwidth Usage ................................................................................................................................117
Monthly Bandwidth Usage ...........................................................................................................................118
13 Contacting Patton for assistance ................................................................................................................. 119
Introduction ........................................................................................................................................................120
Contact information............................................................................................................................................120
Patton support headquarters in the USA .......................................................................................................120
Alternate Patton support for Europe, Middle East, and Africa (EMEA) ........................................................120
Warranty Service and Returned Merchandise Authorizations (RMAs).................................................................120
Warranty coverage ........................................................................................................................................120
Out-of-warranty service ...........................................................................................................................121
Returns for credit ....................................................................................................................................121
Return for credit policy ...........................................................................................................................121
RMA numbers ..............................................................................................................................................121
Shipping instructions ..............................................................................................................................121
A Compliance Information ............................................................................................................................ 122
Compliance .........................................................................................................................................................123
7
www.4Gon.co.uk [email protected] Tel: +44 (0)1245 808295 Fax: +44 (0)1245 808299
BODi rS BD007 and BD004 User Manual
Table of Contents
EMC .............................................................................................................................................................123
Low-Voltage Directive (Safety) .....................................................................................................................123
CE Declaration of Conformity ............................................................................................................................123
Authorized European Representative ...................................................................................................................123
B Specifications .............................................................................................................................................. 124
WAN Interface....................................................................................................................................................125
LAN Interface .....................................................................................................................................................125
Antenna...............................................................................................................................................................125
VPN....................................................................................................................................................................125
Load Balancing....................................................................................................................................................126
Networking .........................................................................................................................................................126
Advanced QoS.....................................................................................................................................................126
Device Management............................................................................................................................................126
.....................................................................................................................................................................126
Physical ...............................................................................................................................................................127
BD007 ..........................................................................................................................................................127
BD004 ..........................................................................................................................................................127
C Terms ......................................................................................................................................................... 128
Abbreviations ......................................................................................................................................................129
8
www.4Gon.co.uk [email protected] Tel: +44 (0)1245 808295 Fax: +44 (0)1245 808299
List of Figures
1
2
3
4
5
6
7
8
9
10
11
12
13
14
15
16
17
18
19
20
21
22
23
24
25
26
27
28
29
30
31
32
33
34
35
36
37
38
39
40
41
42
43
44
45
46
47
BODi rS BD007 and BD004 . . . . . . . . . . . . . . . . . . . . . . . . . . . . . . . . . . . . . . . . . . . . . . . . . . . . . . . . . . . . . . 18
BODi rS BD007 front panel connectors . . . . . . . . . . . . . . . . . . . . . . . . . . . . . . . . . . . . . . . . . . . . . . . . . . . . . . 21
BODi rS BD007 rear panel connectors . . . . . . . . . . . . . . . . . . . . . . . . . . . . . . . . . . . . . . . . . . . . . . . . . . . . . . . 21
BODi rS BD004 front panel connectors . . . . . . . . . . . . . . . . . . . . . . . . . . . . . . . . . . . . . . . . . . . . . . . . . . . . . . 22
BODi rS BD004 rear panel connectors . . . . . . . . . . . . . . . . . . . . . . . . . . . . . . . . . . . . . . . . . . . . . . . . . . . . . . . 22
BODi rS Network Connections . . . . . . . . . . . . . . . . . . . . . . . . . . . . . . . . . . . . . . . . . . . . . . . . . . . . . . . . . . . . 24
Mounting BODi rS in a rack . . . . . . . . . . . . . . . . . . . . . . . . . . . . . . . . . . . . . . . . . . . . . . . . . . . . . . . . . . . . . . 25
Mounting BODi rS in a car . . . . . . . . . . . . . . . . . . . . . . . . . . . . . . . . . . . . . . . . . . . . . . . . . . . . . . . . . . . . . . . 26
Web Admin Interface home page . . . . . . . . . . . . . . . . . . . . . . . . . . . . . . . . . . . . . . . . . . . . . . . . . . . . . . . . . . . 28
BODi rS BD007 and BD004 front panel reset button . . . . . . . . . . . . . . . . . . . . . . . . . . . . . . . . . . . . . . . . . . . 29
Network > LAN > Basic Settings . . . . . . . . . . . . . . . . . . . . . . . . . . . . . . . . . . . . . . . . . . . . . . . . . . . . . . . . . . . 31
Network > LAN > Wi-Fi AP . . . . . . . . . . . . . . . . . . . . . . . . . . . . . . . . . . . . . . . . . . . . . . . . . . . . . . . . . . . . . . 35
Network > LAN > Wi-Fi AP > Add . . . . . . . . . . . . . . . . . . . . . . . . . . . . . . . . . . . . . . . . . . . . . . . . . . . . . . . . . 35
Network > WAN . . . . . . . . . . . . . . . . . . . . . . . . . . . . . . . . . . . . . . . . . . . . . . . . . . . . . . . . . . . . . . . . . . . . . . . 38
Network > WAN > Ethernet WAN Settings . . . . . . . . . . . . . . . . . . . . . . . . . . . . . . . . . . . . . . . . . . . . . . . . . . . 39
Network > WAN > Ethernet WAN Settings > DHCP Connection . . . . . . . . . . . . . . . . . . . . . . . . . . . . . . . . . 42
Network > WAN > Ethernet WAN Settings > Static IP Connection . . . . . . . . . . . . . . . . . . . . . . . . . . . . . . . . 43
Network > WAN > Ethernet WAN Settings > PPPoE Connection . . . . . . . . . . . . . . . . . . . . . . . . . . . . . . . . . 44
Network > WAN > Ethernet WAN Settings > Dynamic DNS . . . . . . . . . . . . . . . . . . . . . . . . . . . . . . . . . . . . . 45
Network > WAN > Wi-Fi WAN Settings . . . . . . . . . . . . . . . . . . . . . . . . . . . . . . . . . . . . . . . . . . . . . . . . . . . . . 48
Network > WAN > Wi-Fi WAN Settings > Wi-Fi Connection Profile . . . . . . . . . . . . . . . . . . . . . . . . . . . . . . . 50
Network > WAN > Details > Other Health Check Settings . . . . . . . . . . . . . . . . . . . . . . . . . . . . . . . . . . . . . . . 52
Network > WAN > Details > Bandwidth Allowance Monitor . . . . . . . . . . . . . . . . . . . . . . . . . . . . . . . . . . . . . . 53
Advanced > Wi-Fi Settings . . . . . . . . . . . . . . . . . . . . . . . . . . . . . . . . . . . . . . . . . . . . . . . . . . . . . . . . . . . . . . . . 55
Advanced > Wi-Fi Settings > STP . . . . . . . . . . . . . . . . . . . . . . . . . . . . . . . . . . . . . . . . . . . . . . . . . . . . . . . . . . . 58
Advanced > WAN Bonding . . . . . . . . . . . . . . . . . . . . . . . . . . . . . . . . . . . . . . . . . . . . . . . . . . . . . . . . . . . . . . . 60
Advanced > Site-to-Site VPN> Add VPN Connection . . . . . . . . . . . . . . . . . . . . . . . . . . . . . . . . . . . . . . . . . . . 61
Advanced > WAN Bonding > Link Failure Detection . . . . . . . . . . . . . . . . . . . . . . . . . . . . . . . . . . . . . . . . . . . . 63
BODi rS Behind a NAT Router Application . . . . . . . . . . . . . . . . . . . . . . . . . . . . . . . . . . . . . . . . . . . . . . . . . . 64
Advanced > Outbound Policy > Select Policy . . . . . . . . . . . . . . . . . . . . . . . . . . . . . . . . . . . . . . . . . . . . . . . . . . 67
Outbound Policy > Edit Default Custom Rule . . . . . . . . . . . . . . . . . . . . . . . . . . . . . . . . . . . . . . . . . . . . . . . . . 68
Outbound Policy > Add New Custom Rule . . . . . . . . . . . . . . . . . . . . . . . . . . . . . . . . . . . . . . . . . . . . . . . . . . . 68
Outbound Policy > Custom Rule > Persistence . . . . . . . . . . . . . . . . . . . . . . . . . . . . . . . . . . . . . . . . . . . . . . . . . 71
Outbound Policy > Custom Rule > Enforced . . . . . . . . . . . . . . . . . . . . . . . . . . . . . . . . . . . . . . . . . . . . . . . . . . 72
Outbound Policy > Custom Rule > Priority . . . . . . . . . . . . . . . . . . . . . . . . . . . . . . . . . . . . . . . . . . . . . . . . . . . 72
Outbound Policy > Custom Rule > Overflow . . . . . . . . . . . . . . . . . . . . . . . . . . . . . . . . . . . . . . . . . . . . . . . . . . 72
Outbound Policy > Custom Rule > Least Used . . . . . . . . . . . . . . . . . . . . . . . . . . . . . . . . . . . . . . . . . . . . . . . . . 73
Outbound Policy > Custom Rule > Lowest Latency . . . . . . . . . . . . . . . . . . . . . . . . . . . . . . . . . . . . . . . . . . . . . 73
Outbound Policy > Custom Rule > Expert Mode . . . . . . . . . . . . . . . . . . . . . . . . . . . . . . . . . . . . . . . . . . . . . . . 74
Advanced > Port Forwarding . . . . . . . . . . . . . . . . . . . . . . . . . . . . . . . . . . . . . . . . . . . . . . . . . . . . . . . . . . . . . . 76
Advanced > Port Forwarding > Add Service . . . . . . . . . . . . . . . . . . . . . . . . . . . . . . . . . . . . . . . . . . . . . . . . . . . 77
Status > UPnP/NAT-PMP . . . . . . . . . . . . . . . . . . . . . . . . . . . . . . . . . . . . . . . . . . . . . . . . . . . . . . . . . . . . . . . . 79
Advanced > NAT Mappings . . . . . . . . . . . . . . . . . . . . . . . . . . . . . . . . . . . . . . . . . . . . . . . . . . . . . . . . . . . . . . . 80
NAT Mappings > Add NAT Rule . . . . . . . . . . . . . . . . . . . . . . . . . . . . . . . . . . . . . . . . . . . . . . . . . . . . . . . . . . 80
Advanced > QoS > User Groups . . . . . . . . . . . . . . . . . . . . . . . . . . . . . . . . . . . . . . . . . . . . . . . . . . . . . . . . . . . . 83
Advanced > QoS > Bandwidth Control . . . . . . . . . . . . . . . . . . . . . . . . . . . . . . . . . . . . . . . . . . . . . . . . . . . . . . 84
Advanced > QoS > Application Prioritization . . . . . . . . . . . . . . . . . . . . . . . . . . . . . . . . . . . . . . . . . . . . . . . . . . 84
9
www.4Gon.co.uk [email protected] Tel: +44 (0)1245 808295 Fax: +44 (0)1245 808299
BODi rS BD007 User Manual
48
49
50
51
52
53
54
55
56
57
58
59
60
61
62
63
64
65
66
67
68
69
70
71
72
73
74
75
76
77
78
79
80
Advanced > QoS > Custom Applications Prioritization . . . . . . . . . . . . . . . . . . . . . . . . . . . . . . . . . . . . . . . . . . 85
Advanced > QoS > DSL/Cable Optimization . . . . . . . . . . . . . . . . . . . . . . . . . . . . . . . . . . . . . . . . . . . . . . . . . . 85
Advanced > Firewall > Outbound and Inbound Firewall Rules . . . . . . . . . . . . . . . . . . . . . . . . . . . . . . . . . . . . . 87
Advanced > Firewall > Add Firewall Rule . . . . . . . . . . . . . . . . . . . . . . . . . . . . . . . . . . . . . . . . . . . . . . . . . . . . . 87
Advanced > Firewall > Reorder Rules List . . . . . . . . . . . . . . . . . . . . . . . . . . . . . . . . . . . . . . . . . . . . . . . . . . . . . 89
Advanced > Firewall > Intrusion Detection and DoS Prevention . . . . . . . . . . . . . . . . . . . . . . . . . . . . . . . . . . . 90
PPTP Server Application . . . . . . . . . . . . . . . . . . . . . . . . . . . . . . . . . . . . . . . . . . . . . . . . . . . . . . . . . . . . . . . . . 92
Advanced > Miscellaneous Settings > Service Forwarding . . . . . . . . . . . . . . . . . . . . . . . . . . . . . . . . . . . . . . . . . 93
Miscellaneous Settings > Service Forwarding > SMTP Forwarding . . . . . . . . . . . . . . . . . . . . . . . . . . . . . . . . . . 94
Miscellaneous Settings > Service Forwarding > Web Proxy Forwarding . . . . . . . . . . . . . . . . . . . . . . . . . . . . . . 95
Miscellaneous Settings > Service Forwarding > DNS Forwarding . . . . . . . . . . . . . . . . . . . . . . . . . . . . . . . . . . . 95
Advanced > Miscellaneous Settings > Service Passthrough . . . . . . . . . . . . . . . . . . . . . . . . . . . . . . . . . . . . . . . . 96
System > Admin Security . . . . . . . . . . . . . . . . . . . . . . . . . . . . . . . . . . . . . . . . . . . . . . . . . . . . . . . . . . . . . . . . . 99
System > Firmware . . . . . . . . . . . . . . . . . . . . . . . . . . . . . . . . . . . . . . . . . . . . . . . . . . . . . . . . . . . . . . . . . . . . . 102
System > Time . . . . . . . . . . . . . . . . . . . . . . . . . . . . . . . . . . . . . . . . . . . . . . . . . . . . . . . . . . . . . . . . . . . . . . . . 103
System > Email Notification . . . . . . . . . . . . . . . . . . . . . . . . . . . . . . . . . . . . . . . . . . . . . . . . . . . . . . . . . . . . . . 104
Test Email Notification . . . . . . . . . . . . . . . . . . . . . . . . . . . . . . . . . . . . . . . . . . . . . . . . . . . . . . . . . . . . . . . . . 105
Test Email Result . . . . . . . . . . . . . . . . . . . . . . . . . . . . . . . . . . . . . . . . . . . . . . . . . . . . . . . . . . . . . . . . . . . . . . 105
System > Remote Syslog . . . . . . . . . . . . . . . . . . . . . . . . . . . . . . . . . . . . . . . . . . . . . . . . . . . . . . . . . . . . . . . . . 106
System > SNMP . . . . . . . . . . . . . . . . . . . . . . . . . . . . . . . . . . . . . . . . . . . . . . . . . . . . . . . . . . . . . . . . . . . . . . . 107
System > SNMP Community . . . . . . . . . . . . . . . . . . . . . . . . . . . . . . . . . . . . . . . . . . . . . . . . . . . . . . . . . . . . . 108
System > SNMPv3 User . . . . . . . . . . . . . . . . . . . . . . . . . . . . . . . . . . . . . . . . . . . . . . . . . . . . . . . . . . . . . . . . . 108
System > Configuration . . . . . . . . . . . . . . . . . . . . . . . . . . . . . . . . . . . . . . . . . . . . . . . . . . . . . . . . . . . . . . . . . 109
System > Reboot . . . . . . . . . . . . . . . . . . . . . . . . . . . . . . . . . . . . . . . . . . . . . . . . . . . . . . . . . . . . . . . . . . . . . . . 109
System > Tools > Ping Test . . . . . . . . . . . . . . . . . . . . . . . . . . . . . . . . . . . . . . . . . . . . . . . . . . . . . . . . . . . . . . 110
System > Tools > Traceroute Test . . . . . . . . . . . . . . . . . . . . . . . . . . . . . . . . . . . . . . . . . . . . . . . . . . . . . . . . . . 111
Status > Device . . . . . . . . . . . . . . . . . . . . . . . . . . . . . . . . . . . . . . . . . . . . . . . . . . . . . . . . . . . . . . . . . . . . . . . . 113
Status > Active Sessions . . . . . . . . . . . . . . . . . . . . . . . . . . . . . . . . . . . . . . . . . . . . . . . . . . . . . . . . . . . . . . . . . . 114
Status > Client List . . . . . . . . . . . . . . . . . . . . . . . . . . . . . . . . . . . . . . . . . . . . . . . . . . . . . . . . . . . . . . . . . . . . . 114
Status > Event Log . . . . . . . . . . . . . . . . . . . . . . . . . . . . . . . . . . . . . . . . . . . . . . . . . . . . . . . . . . . . . . . . . . . . . 115
Real-Time Bandwidth Usage . . . . . . . . . . . . . . . . . . . . . . . . . . . . . . . . . . . . . . . . . . . . . . . . . . . . . . . . . . . . . 116
Daily Bandwidth Usage . . . . . . . . . . . . . . . . . . . . . . . . . . . . . . . . . . . . . . . . . . . . . . . . . . . . . . . . . . . . . . . . . 117
Monthly Bandwidth Usage . . . . . . . . . . . . . . . . . . . . . . . . . . . . . . . . . . . . . . . . . . . . . . . . . . . . . . . . . . . . . . . 118
10
www.4Gon.co.uk [email protected] Tel: +44 (0)1245 808295 Fax: +44 (0)1245 808299
List of Tables
1
2
3
4
5
6
7
8
9
10
11
12
13
14
15
16
17
18
19
20
21
22
23
24
25
26
27
28
29
30
31
32
33
34
35
36
37
38
39
40
41
42
43
General conventions . . . . . . . . . . . . . . . . . . . . . . . . . . . . . . . . . . . . . . . . . . . . . . . . . . . . . . . . . . . . . . . . . . . . . 16
BODi rS BD007 LEDs . . . . . . . . . . . . . . . . . . . . . . . . . . . . . . . . . . . . . . . . . . . . . . . . . . . . . . . . . . . . . . . . . . . 21
BODi rS BD004 LEDs . . . . . . . . . . . . . . . . . . . . . . . . . . . . . . . . . . . . . . . . . . . . . . . . . . . . . . . . . . . . . . . . . . . 22
LAN: IP Settings . . . . . . . . . . . . . . . . . . . . . . . . . . . . . . . . . . . . . . . . . . . . . . . . . . . . . . . . . . . . . . . . . . . . . . . 32
LAN: DHCP Server Settings . . . . . . . . . . . . . . . . . . . . . . . . . . . . . . . . . . . . . . . . . . . . . . . . . . . . . . . . . . . . . . 32
LAN: Static Route Settings . . . . . . . . . . . . . . . . . . . . . . . . . . . . . . . . . . . . . . . . . . . . . . . . . . . . . . . . . . . . . . . . 33
LAN: WINS Server Settings . . . . . . . . . . . . . . . . . . . . . . . . . . . . . . . . . . . . . . . . . . . . . . . . . . . . . . . . . . . . . . . 33
LAN: DNS Proxy Settings . . . . . . . . . . . . . . . . . . . . . . . . . . . . . . . . . . . . . . . . . . . . . . . . . . . . . . . . . . . . . . . . 34
LAN: Wi-Fi AP Network Settings . . . . . . . . . . . . . . . . . . . . . . . . . . . . . . . . . . . . . . . . . . . . . . . . . . . . . . . . . . 36
LAN: Wi-Fi AP Security Settings . . . . . . . . . . . . . . . . . . . . . . . . . . . . . . . . . . . . . . . . . . . . . . . . . . . . . . . . . . . 36
LAN: Wi-Fi AP Access Control Settings . . . . . . . . . . . . . . . . . . . . . . . . . . . . . . . . . . . . . . . . . . . . . . . . . . . . . . 37
WAN: General Ethernet WAN Settings . . . . . . . . . . . . . . . . . . . . . . . . . . . . . . . . . . . . . . . . . . . . . . . . . . . . . . 40
WAN: DHCP Settings . . . . . . . . . . . . . . . . . . . . . . . . . . . . . . . . . . . . . . . . . . . . . . . . . . . . . . . . . . . . . . . . . . . 42
WAN: Static IP Settings . . . . . . . . . . . . . . . . . . . . . . . . . . . . . . . . . . . . . . . . . . . . . . . . . . . . . . . . . . . . . . . . . . 43
WAN: PPPoE Settings . . . . . . . . . . . . . . . . . . . . . . . . . . . . . . . . . . . . . . . . . . . . . . . . . . . . . . . . . . . . . . . . . . . 44
WAN: Dynamic DNS Settings . . . . . . . . . . . . . . . . . . . . . . . . . . . . . . . . . . . . . . . . . . . . . . . . . . . . . . . . . . . . . 45
WAN: USB Settings . . . . . . . . . . . . . . . . . . . . . . . . . . . . . . . . . . . . . . . . . . . . . . . . . . . . . . . . . . . . . . . . . . . . . 46
WAN: General Wi-Fi WAN Settings . . . . . . . . . . . . . . . . . . . . . . . . . . . . . . . . . . . . . . . . . . . . . . . . . . . . . . . . 48
WAN: Create Wi-Fi Connection Profile . . . . . . . . . . . . . . . . . . . . . . . . . . . . . . . . . . . . . . . . . . . . . . . . . . . . . . 50
WAN: Health Check Methods . . . . . . . . . . . . . . . . . . . . . . . . . . . . . . . . . . . . . . . . . . . . . . . . . . . . . . . . . . . . . 51
WAN: Other Health Check Settings . . . . . . . . . . . . . . . . . . . . . . . . . . . . . . . . . . . . . . . . . . . . . . . . . . . . . . . . 52
WAN: Bandwidth Allowance Monitor . . . . . . . . . . . . . . . . . . . . . . . . . . . . . . . . . . . . . . . . . . . . . . . . . . . . . . . 53
Wi-Fi: AP Radio Settings . . . . . . . . . . . . . . . . . . . . . . . . . . . . . . . . . . . . . . . . . . . . . . . . . . . . . . . . . . . . . . . . . 56
Wi-Fi: WAN Radio Settings . . . . . . . . . . . . . . . . . . . . . . . . . . . . . . . . . . . . . . . . . . . . . . . . . . . . . . . . . . . . . . . 56
Wi-Fi: AP Advanced Settings . . . . . . . . . . . . . . . . . . . . . . . . . . . . . . . . . . . . . . . . . . . . . . . . . . . . . . . . . . . . . . 57
Wi-Fi: STP Settings . . . . . . . . . . . . . . . . . . . . . . . . . . . . . . . . . . . . . . . . . . . . . . . . . . . . . . . . . . . . . . . . . . . . . 58
WAN Bonding: New VPN Connection Settings . . . . . . . . . . . . . . . . . . . . . . . . . . . . . . . . . . . . . . . . . . . . . . . 62
WAN Bonding: WAN Connection Priority Settings . . . . . . . . . . . . . . . . . . . . . . . . . . . . . . . . . . . . . . . . . . . . 62
WAN Bonding: Link Failure Detection . . . . . . . . . . . . . . . . . . . . . . . . . . . . . . . . . . . . . . . . . . . . . . . . . . . . . . 63
Outbound Policy: Options . . . . . . . . . . . . . . . . . . . . . . . . . . . . . . . . . . . . . . . . . . . . . . . . . . . . . . . . . . . . . . . . 67
Outbound Policy: Custom Rule Settings . . . . . . . . . . . . . . . . . . . . . . . . . . . . . . . . . . . . . . . . . . . . . . . . . . . . . 69
Persistence Algorithm: Persistence Mode Options . . . . . . . . . . . . . . . . . . . . . . . . . . . . . . . . . . . . . . . . . . . . . . 71
Port Forwarding Service: New Service Settings . . . . . . . . . . . . . . . . . . . . . . . . . . . . . . . . . . . . . . . . . . . . . . . . . 77
NAT Mappings: New Rule Settings . . . . . . . . . . . . . . . . . . . . . . . . . . . . . . . . . . . . . . . . . . . . . . . . . . . . . . . . . 81
QoS: User Group Settings . . . . . . . . . . . . . . . . . . . . . . . . . . . . . . . . . . . . . . . . . . . . . . . . . . . . . . . . . . . . . . . . 83
QoS: Application Prioritization Settings . . . . . . . . . . . . . . . . . . . . . . . . . . . . . . . . . . . . . . . . . . . . . . . . . . . . . . 85
Firewall: Inbound/Outbound Firewall Settings . . . . . . . . . . . . . . . . . . . . . . . . . . . . . . . . . . . . . . . . . . . . . . . . . 88
Misc Settings: PPTP Server . . . . . . . . . . . . . . . . . . . . . . . . . . . . . . . . . . . . . . . . . . . . . . . . . . . . . . . . . . . . . . . . 92
Misc. Settings: Service Forwarding . . . . . . . . . . . . . . . . . . . . . . . . . . . . . . . . . . . . . . . . . . . . . . . . . . . . . . . . . . 93
Misc. Settings: Service Passthrough Support . . . . . . . . . . . . . . . . . . . . . . . . . . . . . . . . . . . . . . . . . . . . . . . . . . . 96
System: Admin Security Settings . . . . . . . . . . . . . . . . . . . . . . . . . . . . . . . . . . . . . . . . . . . . . . . . . . . . . . . . . . . . 99
System: WAN Connection Access Settings . . . . . . . . . . . . . . . . . . . . . . . . . . . . . . . . . . . . . . . . . . . . . . . . . . . 101
System: Time Server Settings . . . . . . . . . . . . . . . . . . . . . . . . . . . . . . . . . . . . . . . . . . . . . . . . . . . . . . . . . . . . . 103
11
www.4Gon.co.uk [email protected] Tel: +44 (0)1245 808295 Fax: +44 (0)1245 808299
BODi rS BD007 User Manual
44
45
46
47
48
49
System: Email Notification Settings . . . . . . . . . . . . . . . . . . . . . . . . . . . . . . . . . . . . . . . . . . . . . . . . . . . . . . . . 104
System: Remote Syslog Setup . . . . . . . . . . . . . . . . . . . . . . . . . . . . . . . . . . . . . . . . . . . . . . . . . . . . . . . . . . . . . 106
System: SNMP Settings . . . . . . . . . . . . . . . . . . . . . . . . . . . . . . . . . . . . . . . . . . . . . . . . . . . . . . . . . . . . . . . . . 107
System: SNMP Community Settings . . . . . . . . . . . . . . . . . . . . . . . . . . . . . . . . . . . . . . . . . . . . . . . . . . . . . . . 108
System: SNMP Community Settings . . . . . . . . . . . . . . . . . . . . . . . . . . . . . . . . . . . . . . . . . . . . . . . . . . . . . . . 108
Status: System Information . . . . . . . . . . . . . . . . . . . . . . . . . . . . . . . . . . . . . . . . . . . . . . . . . . . . . . . . . . . . . . . 113
12
www.4Gon.co.uk [email protected] Tel: +44 (0)1245 808295 Fax: +44 (0)1245 808299
About this guide
This guide describes BODi rS BD007 and BD004 hardware, installation and basic configuration.
Audience
This guide is intended for the following users:
• Operators
• Installers
• Maintenance technicians
Structure
This guide contains the following chapters and appendices:
•
•
•
•
•
•
•
•
•
•
•
•
•
•
•
•
Chapter 1 on page 17 provides information about BODi rS features and capabilities
Chapter 2 on page 23 provides information about connecting BODi rS hardware interfaces
Chapter 3 on page 30 provides information about configuring LAN and WAN settings
Chapter 4 on page 54 provides information about setting up WiFi on BODi rS
Chapter 5 on page 59 provides information about configuring WAN Bonding
Chapter 6 on page 66 provides information about managing outbound traffic to the WAN
Chapter 7 on page 75 provides information about setting up port forwarding and NAT mappings
Chapter 8 on page 82 provides information about configuring Quality of Service (QoS) settings
Chapter 9 on page 86 provides information about setting up the firewall for BODi rS
Chapter 10 on page 91 provides information about configuring the PPTP server and service forwarding
Chapter 11 on page 97 provides information about managing general BODi rS system settings
Chapter 12 on page 112 provides information about managing BODi rS status settings
Chapter 13 on page 119 provides information on contacting Patton technical support for assistance
Appendix A on page 122 provides compliance information for BODi rS
Appendix B on page 124 provides specifications for BODi rS
Appendix C on page 128 provides a glossary of technical terms used in this guide
For best results, read the contents of this guide before you install BODi rS BD007 or BD004.
13
www.4Gon.co.uk [email protected] Tel: +44 (0)1245 808295 Fax: +44 (0)1245 808299
BODi rS BD007 and BD004 User Manual
Precautions
Notes, cautions, and warnings, which have the following meanings, are used throughout this guide to help you
become aware of potential problems. Warnings are intended to prevent safety hazards that could result in personal injury. Cautions are intended to prevent situations that could result in property damage or
impaired functioning.
Note
A note presents additional information or interesting sidelights.
The alert symbol and IMPORTANT heading calls attention to
important information.
IMPORTANT
The alert symbol and CAUTION heading indicate a potential hazard. Strictly follow the instructions to avoid property damage.
CAUTION
The shock hazard symbol and CAUTION heading indicate a
potential electric shock hazard. Strictly follow the instructions to
avoid property damage caused by electric shock.
CAUTION
The alert symbol and WARNING heading indicate a potential safety hazard.
Strictly follow the warning instructions to avoid personal injury.
WARNING
WARNING
The shock hazard symbol and WARNING heading indicate a potential electric
shock hazard. Strictly follow the warning instructions to avoid injury caused
by electric shock.
14
www.4Gon.co.uk [email protected] Tel: +44 (0)1245 808295 Fax: +44 (0)1245 808299
BODi rS BD007 and BD004 User Manual
Safety when working with electricity
• Do not open the device when the power cord is connected. For systems
WARNING
•
•
•
•
•
•
without a power switch and without an external power adapter, line voltages are present within the device when the power cord is connected.
For devices with an external power adapter, the power adapter shall be a
listed Limited Power Source. The main outlet that is utilized to power the
device shall be within 10 feet (3 meters) of the device, shall be easily
accessible, and protected by a circuit breaker in compliance with local regulatory requirements.
For AC powered devices, ensure that the power cable used meets all applicable standards for the country in which it is to be installed.
For AC powered devices, which have 3 conductor power plugs (L1, L2 &
GND or Hot, Neutral & Safety/Protective Ground), the wall outlet (or
socket) must have an earth ground.
For DC powered devices, ensure that the interconnecting cables are rated
for proper voltage, current, anticipated temperature, flammability, and
mechanical serviceability.
WAN, LAN & PSTN ports (connections) may have hazardous voltages
present regardless of whether the device is powered ON or OFF. PSTN
relates to interfaces such as telephone lines, FXS, FXO, DSL, xDSL, T1, E1,
ISDN, Voice, etc. These are known as “hazardous network voltages” and
to avoid electric shock use caution when working near these ports. When
disconnecting cables for these ports, detach the far end connection first.
Do not work on the device or connect or disconnect cables during periods of
lightning activity
This device contains no user serviceable parts. This device can only be
repaired by qualified service personnel.
WARNING
In accordance with the requirements of council directive 2002/
96/EC on Waste of Electrical and Electronic Equipment (WEEE),
ensure that at end-of-life you separate this product from other
waste and scrap and deliver to the WEEE collection system in
your country for recycling.
15
www.4Gon.co.uk [email protected] Tel: +44 (0)1245 808295 Fax: +44 (0)1245 808299
BODi rS BD007 and BD004 User Manual
Always follow ESD prevention procedures when removing and
replacing cards.
CAUTION
Wear an ESD-preventive wrist strap, ensuring that it makes good
skin contact. Connect the clip to an unpainted surface of the
chassis frame to safely channel unwanted ESD voltages
to ground.
To properly guard against ESD damage and shocks, the wrist
strap and cord must operate effectively. If no wrist strap is available, ground yourself by touching the metal part of the chassis.
General observations
• Clean the case with a soft slightly moist anti-static cloth
• Place the unit on a flat surface and ensure free air circulation
• Avoid exposing the unit to direct sunlight and other heat sources
• Protect the unit from moisture, vapors, and corrosive liquids
Typographical conventions used in this document
This section describes the typographical conventions and terms used in this guide.
General conventions
The procedures described in this manual use the following text conventions:
Table 1. General conventions
Convention
Garamond blue type
Meaning
Indicates a cross-reference hyperlink that points to a figure, graphic, table, or section heading. Clicking on the hyperlink jumps you to the reference. When you
have finished reviewing the reference, click on the Go to Previous View
button
Futura bold type
Futura bold-italic type
Italicized Futura type
Futura type
Garamond bold type
<>
[]
{a | b | c}
screen
node
SN
#
in the Adobe® Acrobat® Reader toolbar to return to your starting point.
Commands and keywords are in boldface font.
Parts of commands, which are related to elements already named by the user, are
in boldface italic font.
Variables for which you supply values are in italic font
Indicates the names of fields or windows.
Indicates the names of command buttons that execute an action.
Angle brackets indicate function and keyboard keys, such as <SHIFT>, <CTRL>,
<C>, and so on.
Elements in square brackets are optional.
Alternative but required keywords are grouped in braces ({ }) and are separated
by vertical bars ( | )
Terminal sessions and information the system displays are in screen font.
The leading IP address or nodename of a BODi rS is substituted with node in
boldface italic font.
The leading SN on a command line represents the nodename of the BODi rS
An hash sign at the beginning of a line indicates a comment line.
16
www.4Gon.co.uk [email protected] Tel: +44 (0)1245 808295 Fax: +44 (0)1245 808299
Chapter 1
General Information
Chapter contents
BODi rS Overview ................................................................................................................................................18
Network Features ............................................................................................................................................18
BODi rS Panels .....................................................................................................................................................21
BD007 Front Panel .........................................................................................................................................21
BD007 Rear Panel ..........................................................................................................................................21
BODi rS Panels .....................................................................................................................................................22
BD004 Front Panel .........................................................................................................................................22
BD004 Rear Panel ..........................................................................................................................................22
17
www.4Gon.co.uk [email protected] Tel: +44 (0)1245 808295 Fax: +44 (0)1245 808299
BODi rS BD007 and BD004 User Manual
1 • General Information
BODi rS Overview
Patton’s BODi rS BD007 and BD004 (see Figure 1) are small, light and full featured. Unique bonding, load
balancing and failover technology ensures bandwidth robustness and network survivability. All this combined
with IPSec VPNs and WiFi mesh capability makes BODi rS the ideal fixed or mobile solution for secure,
seamless network connectivity and backup.
BODi rS provides link aggregation and load balancing across seven WAN connections, allowing a combination
of technologies like 3G/4G, HSPA, LTE. EVDO, Wi-Fi, external WiMAX dongle, and Satellite to be utilized
to connect to the internet.
Figure 1. BODi rS BD007 and BD004
Network Features
BODi rS includes the following key features:
• WAN
– Ethernet WAN Connection in Full/Half Duplex
– USB WAN connections
– Wi-Fi WAN connection
– Network Address Translation (NAT) / Port Address Translation (PAT)
– Inbound and Outbound NAT mapping
– IPsec NAT-T and PPTP packet passthrough
– MAC address clone and passthrough
– Customizable MTU and MSS values
– WAN connection health check
– Dynamic DNS (Supported service providers: changeip.com, dyndns.org, no-ip.org and tzo.com)
• LAN
– Wi-Fi AP
BODi rS Overview
18
www.4Gon.co.uk [email protected] Tel: +44 (0)1245 808295 Fax: +44 (0)1245 808299
BODi rS BD007 and BD004 User Manual
1 • General Information
– Ethernet LAN ports
– DHCP server on LAN
– Static routing rules
• VPN
– Secure Site-to-Site VPN
– VPN load balancing and failover among selected WAN connections
– Site-to-Site VPN bandwidth bonding
– Ability to route internet traffic to a remote VPN peer
– Optional pre-shared key setting
– Site-to-Site VPN Throughput, Ping and Traceroute Test
– PPTP server
– PPTP and IPsec passthrough
• Firewall
– Outbound (LAN to WAN) firewall rules
– Inbound (WAN to LAN) firewall rules per WAN connection
– Intrusion detection and prevention
– Specification of NAT mappings
• Outbound Policy
– Link load distribution per TCP/UDP service
– Persistent routing for specified source and/or destination IP addresses per TCP/UDP service
– Traffic Prioritization and DSL optimization
– Prioritize and route traffic to VPN tunnels with Priority and Enforced algorithms
• QoS
– Quality of Service for different applications and custom protocols
– User Group classification for different service levels
– Bandwidth usage control and monitoring on group- and user- level
– Application Prioritization for custom protocols and DSL optimization
BODi rS Overview
19
www.4Gon.co.uk [email protected] Tel: +44 (0)1245 808295 Fax: +44 (0)1245 808299
BODi rS BD007 and BD004 User Manual
1 • General Information
• Other Supported Features
– User-friendly web-based administration interface
– HTTP and HTTPS support for Web Admin Interface
– Configurable web administration port and administrator password
– Firmware upgrades, configuration backups, Ping, and Traceroute via Web Admin Interface
– Remote web based configuration (via WAN and LAN interfaces)
– Time server synchronization
– SNMP
– Email notification
– Read-only user for Web Admin
– Authentication and Accounting by RADIUS server for Web Admin
– Built-in WINS Servers
– Syslog
– SIP passthrough
– PPTP packet passthrough
– Event Log
– Active Sessions
– Client List
– WINS Client List
– UPnP / NAT-PMP
– Real-Time, Daily and Monthly Bandwidth Usage reports and charts
BODi rS Overview
20
www.4Gon.co.uk [email protected] Tel: +44 (0)1245 808295 Fax: +44 (0)1245 808299
BODi rS BD007 and BD004 User Manual
1 • General Information
BODi rS Panels
BD007 Front Panel
™
USB 1
USB 2
USB 3
USB 4
BODi rS
1
3G/4G Device
Inputs USB 1-4
2
3
4
Gigabit Ethernet LAN
Gigabit Ethernet
Ports LAN 1-4
(RJ-45)
1
2
Gigabit Ethernet WAN
WiFi WiFiStatusPwr
AP WAN
Gigabit Ethernet
Ports LAN 1-4
(RJ-45)
Status LEDs
Reset
Figure 2. BODi rS BD007 front panel connectors
Table 2. BODi rS BD007 LEDs
LED
Indication
Description
Wi-Fi AP
OFF
Blinking
ON
Continuous Blinking
Disabled
Enabled, but no client is associated
Client(s) associated to the wireless network
Transferring data to wireless network
Wi-Fi WAN
OFF
Blinking
ON
Continuous Blinking
Disabled
Attempting to connect
Connnected to wireless network(s) without traffic
Transferring data
Status
OFF System initializing
Red Booting up or busy
Green Ready state
Power
OFF System is not connected to a power source
ON System has a power connection
LAN/WAN
(Green LED)
OFF 10/100 Mbps
ON 1000 Mbps
LAN/WAN
(Yellow LED)
Solid Port is connected without traffic
Blinking Transferring data
OFF Port is not connected
BD007 Rear Panel
WAN
AP LAN
120–240
50/60 Hz
1.5A max
WiFi
Modem
(Antennas)
WiFi
Access Points
(Antennas)
AC Power Input
and I/O Power Switch
Figure 3. BODi rS BD007 rear panel connectors
BODi rS Panels
21
www.4Gon.co.uk [email protected] Tel: +44 (0)1245 808295 Fax: +44 (0)1245 808299
BODi rS BD007 and BD004 User Manual
1 • General Information
BODi rS Panels
BD004 Front Panel
BODi rS
™
10V to 30V
2.8A max
WAN
WiFi
LAN WiFi
AP
1
WiFi
Access Points
(Antennas)
2
3
4
Gigabit Ethernet LAN
1
2
Gigabit Ethernet WAN
3G/4G Device
Inputs USB 1-4
WiFi WiFiStatusPwr
AP WAN
Gigabit Ethernet
Ports LAN 1-4
(RJ-45)
–
–
+
+
Status LEDs
Reset
WiFi
Modem
(Antennas)
Figure 4. BODi rS BD004 front panel connectors
Table 3. BODi rS BD004 LEDs
LED
Indication
Description
Wi-Fi AP
OFF
Blinking
ON
Continuous Blinking
Disabled
Enabled, but no client is associated
Client(s) associated to the wireless network
Transferring data to wireless network
Wi-Fi WAN
OFF
Blinking
ON
Continuous Blinking
Disabled
Attempting to connect
Connnected to wireless network(s) without traffic
Transferring data
Status
OFF System initializing
Red Booting up or busy
Green Ready state
Power
OFF System is not connected to a power source
ON System has a power connection
LAN/WAN
(Green LED)
OFF 10/100 Mbps
ON 1000 Mbps
LAN/WAN
(Yellow LED)
Solid Port is connected without traffic
Blinking Transferring data
OFF Port is not connected
BD004 Rear Panel
®
Figure 5. BODi rS BD004 rear panel connectors
BODi rS Panels
22
www.4Gon.co.uk [email protected] Tel: +44 (0)1245 808295 Fax: +44 (0)1245 808299
Chapter 2
Installing BODi rS
Chapter contents
Planning the Installation........................................................................................................................................24
Setting Up the Network ........................................................................................................................................24
Constructing the Network ..............................................................................................................................24
Configuring the Network Environment ..........................................................................................................25
Mounting BODi rS ...............................................................................................................................................25
Rack Mount ....................................................................................................................................................25
Car Mount for BD004 only ............................................................................................................................26
Connecting BODi rS Interfaces.............................................................................................................................27
Connecting the Ethernet Interfaces .................................................................................................................27
Connecting the Wi-Fi Interfaces .....................................................................................................................27
Connecting the USB Interfaces .......................................................................................................................27
Connecting to the Web Admin Interface...............................................................................................................28
Restoring Factory Default Settings ........................................................................................................................29
23
www.4Gon.co.uk [email protected] Tel: +44 (0)1245 808295 Fax: +44 (0)1245 808299
BODi rS BD007 and BD004 User Manual
2 • Installing BODi rS
Planning the Installation
Please refer to the Quick Start Guides for BD007 and BD004 for each model’s specific installation instructions.
Before installing BODi rS, gather the following information and materials:
• At least one internet/WAN access account and/or Wi-Fi access information
• Network connections:
– Ethernet WAN: A 10/100/1000BaseT UTP cable with RJ45 connector
– USB: A USB modem
– Wi-Fi WAN: A Wi-Fi antenna
•
A computer with TCP/IP network protocol and a web browser installed. Supported browsers include
Microsoft Internet Explorer 7.0 or above, Mozilla Firefox 3.0 or above, Apple Safari 3.1.1 or above, and
Google Chrome 2.0 or above.
Setting Up the Network
Constructing the Network
At the high level, construct the network according to the following steps:
1. With an Ethernet cable, connect a computer to one of the LAN ports on BODi rS. Repeat with different
cables for up to 4 computers to be connected.
2. With another Ethernet cable, a USB modem, or a Wi-Fi antenna, connect it to one of the WAN ports on
the BODi rS. Repeat the same procedure for other WAN ports.
3. Connect the power adapter to the power connector on the rear panel of BODi rS, and then plug it into a
power outlet.
Figure 6 illustrates the network configuration:
Figure 6. BODi rS Network Connections
Planning the Installation
24
www.4Gon.co.uk [email protected] Tel: +44 (0)1245 808295 Fax: +44 (0)1245 808299
BODi rS BD007 and BD004 User Manual
2 • Installing BODi rS
Configuring the Network Environment
To ensure that BODi rS works properly in the LAN environment and can access the internet via the WAN
connections, refer to the following setup procedures:
• To physically connect the LAN and WAN interfaces, refer to “Connecting BODi rS Interfaces” on page 27.
• To initially configure the LAN and WAN interfaces refer to “Connecting to the Web Admin Interface” on
page 28.
• To configure advanced settings for the LAN and WAN interfaces, refer to Chapter 3, “Configuring the
LAN Interface” on page 31.
Mounting BODi rS
Rack Mount
BODi rS can be mounted in a rack using the attachable rack mount ears (see Figure 7). Align the rack mount
ears with the three holes on each side of the device. Place screws through the mounting holes and secure to the
device. Place the device in a rack and secure using the open slots on the rack mount ears.
Figure 7. Mounting BODi rS in a rack
Mounting BODi rS
25
www.4Gon.co.uk [email protected] Tel: +44 (0)1245 808295 Fax: +44 (0)1245 808299
BODi rS BD007 and BD004 User Manual
2 • Installing BODi rS
Car Mount for BD004 only
BODi rS BD004 can be mounted on a flat surface using the included car mounting plates. Place each car
mount according the label’s direction, and screw it onto the device. After mounting each plate on the sides of
the device, screw the plate onto the flat surface.
N
WA Fi
Wi
V
30
to ax
V m
10.8A
2
+
+
–
wr
usP
at
St
Fi
WiN
Fi WA
WiP
A
1 i
b
ga
Gi
t
™
rS Fi
Di N Wi
BO LA AP
1
3 et
n
er
th
2 t E
bi
ga
Gi
2 t
e
rn
he
Et
–
N
WA
4
N
LA
Car Mounting Plates
Mounting
Screw
Holes
Figure 8. Mounting BODi rS in a car
Mounting BODi rS
26
www.4Gon.co.uk [email protected] Tel: +44 (0)1245 808295 Fax: +44 (0)1245 808299
BODi rS BD007 and BD004 User Manual
2 • Installing BODi rS
Connecting BODi rS Interfaces
Connecting the Ethernet Interfaces
BODi rS includes four LAN Gigabit Ethernet ports and two Gigabit Ethernet WAN ports on the rear panel.
Use a straight-through or cross-over Ethernet cable to connect the Ethernet RJ-45 ports.
Refer to Chapter 3, “Configuring LAN & WAN Interfaces” on page 30 for information about configuring the
LAN and WAN interfaces via the Web Admin interface.
Connecting the Wi-Fi Interfaces
BODi rS provides four Wi-Fi antenna connectors on the rear panel– two connectors provide interfaces to connect wireless LAN Access Points (AP LAN), and two connectors provide interfaces to connect the wireless
WAN. Use a SMA cable to connect the female SMA antenna ports.
Refer to Chapter 3, “Configuring LAN & WAN Interfaces” on page 30 for information about configuring the
AP LAN and WAN wireless interfaces via the Web Admin interface.
Connecting the USB Interfaces
BODi rS provides four USB 2.0 ports on the front panel. You can use the USB ports to connect cellular
modems.
Refer to Chapter 3, “Configuring LAN & WAN Interfaces” on page 30 for information about configuring
USB WAN interfaces via the Web Admin interface.
Connecting BODi rS Interfaces
27
www.4Gon.co.uk [email protected] Tel: +44 (0)1245 808295 Fax: +44 (0)1245 808299
BODi rS BD007 and BD004 User Manual
2 • Installing BODi rS
Connecting to the Web Admin Interface
After physically connecting the LAN, use the Web Admin interface to configure BODi rS interfaces. To login
to the Web Admin Interface:
1. Start a web browser on a computer that is connected to BODi rS through the LAN port.
2. Enter the following default LAN IP address in the address field of the web browser: http://192.168.50.1
3. Enter the username admin and password admin to login to the Web Admin Interface. This is the default
Username and Password of BODi rS. (You may change the Admin and Read-only User Password by clicking on System > Admin Security in the Web Admin Interface).
4. After successfully logging in, the Dashboard of the Web Admin Interface displays:
Figure 9. Web Admin Interface home page
The Web Admin Interface Dashboard shows the current WAN, LAN, Wi-Fi AP settings and statuses.
The Dashboard enables you to change the priority of the WAN connections and switch theWi-Fi AP connections off or on. For more information about configuring these connections, refer to Chapter 3, “Configuring LAN & WAN Interfaces” on page 30.
The Device Information section shows the details about BODi rS system, including the Firmware version
and system uptime. For more information about viewing system status information, refer to Chapter 12,
“Managing Status Settings” on page 112.
Note
Configuration changes will only take effect after clicking the Save
button at the bottom of each page. The Apply Changes button
causes the changes to be saved and applied.
Connecting to the Web Admin Interface
28
www.4Gon.co.uk [email protected] Tel: +44 (0)1245 808295 Fax: +44 (0)1245 808299
BODi rS BD007 and BD004 User Manual
2 • Installing BODi rS
Restoring Factory Default Settings
To restore the factory default settings on BODi rS units, follow the steps below:
1. Locate the reset button on the front panel of BODi rS BD007 or BD004.
Reset Button
Figure 10. BODi rS BD007 and BD004 front panel reset button
2. With a paper clip, press the reset button and hold it for at least 10 seconds until the unit reboots itself.
After BODi rS finishes rebooting, it will operate with the factory default settings.
IMPORTANT
After restoring the factory default configuration, BODi rS permanently removes all previous configurations and bandwidth usage
data.
Patton strongly recommends performing backups of configuration
settings on a regular basis.
Restoring Factory Default Settings
29
www.4Gon.co.uk [email protected] Tel: +44 (0)1245 808295 Fax: +44 (0)1245 808299
Chapter 3
Configuring LAN & WAN Interfaces
Chapter contents
Introduction ..........................................................................................................................................................31
Configuring the LAN Interface..............................................................................................................................31
Basic Settings ..................................................................................................................................................31
IP Settings .................................................................................................................................................32
DHCP Server Settings ..............................................................................................................................32
Static Route Settings .................................................................................................................................33
WINS Server Settings ................................................................................................................................33
DNS Proxy Settings ..................................................................................................................................34
Wi-Fi AP Settings ...........................................................................................................................................35
Wireless Network Settings .........................................................................................................................36
Wireless Security Settings ..........................................................................................................................36
Access Control Settings .............................................................................................................................37
Configuring the WAN Interface............................................................................................................................38
Ethernet WAN Settings ..................................................................................................................................39
General Ethernet WAN Settings ...............................................................................................................40
DHCP Settings .........................................................................................................................................42
Static IP Settings .......................................................................................................................................43
PPPoE Settings .........................................................................................................................................44
Dynamic DNS Settings .............................................................................................................................45
USB Interface Settings ....................................................................................................................................46
Wi-Fi WAN Settings ......................................................................................................................................48
General Wi-Fi WAN Settings ...................................................................................................................48
Create Wi-Fi Connection Profile ..............................................................................................................50
WAN Health Check .......................................................................................................................................51
Health Check Methods .............................................................................................................................51
Additional Health Check Settings .............................................................................................................52
Bandwidth Allowance Monitor .......................................................................................................................53
30
www.4Gon.co.uk [email protected] Tel: +44 (0)1245 808295 Fax: +44 (0)1245 808299
BODi rS BD007 and BD004 User Manual
3 • Configuring LAN & WAN Interfaces
Introduction
This chapter describes setting up Ethernet access through the physical LAN and WAN ports, and USB and
Wi-Fi interfaces. For information about setting up the LAN interface, see “Configuring the LAN Interface” on
page 31. For information about setting up the WAN interface, see “Configuring the WAN Interface” on
page 38.
Configuring the LAN Interface
This section describes configuring the basic settings and Wi-Fi AP settings for the LAN using BODi rS Web
Admin Interface.
Basic Settings
To configure basic settings for the LAN, click on Network > LAN > Basic Settings in the Web Interface.
Figure 11. Network > LAN > Basic Settings
The following sections provide information for configuring the LAN on the Basic Settings configuraration
page:
• “IP Settings” on page 32
• “DHCP Server Settings” on page 32
• “Static Route Settings” on page 33
• “WINS Server Settings” on page 33
• “DNS Proxy Settings” on page 34
Introduction
31
www.4Gon.co.uk [email protected] Tel: +44 (0)1245 808295 Fax: +44 (0)1245 808299
BODi rS BD007 and BD004 User Manual
3 • Configuring LAN & WAN Interfaces
IP Settings
Table 4. LAN: IP Settings
Field
Description
IP Address
The IP address for the Ethernet LAN management port
Subnet Mask
The subnet mask for the Ethernet LAN management port
Speed
The speed of the Ethernet LAN management port
By default, Auto is selected and the appropriate data speed is automatically
detected by BODi rS.
In the event of negotiation issues, the port speed can be manually specified to circumvent the issues. You can also choose whether or not to advertise the speed to
the peer by selecting the Advertise Speed checkbox.
DHCP Server Settings
Table 5. LAN: DHCP Server Settings
Field
DHCP Server
Description
When enabled, the DHCP server automatically assigns an IP address to each
computer that is connected via the LAN and configured to obtain an IP
address via DHCP. The DHCP server can prevent IP address collision on
LAN.
IP Range & Subnet Mask Allocates a range of IP addresses that the DHCP Server will assign to LAN
computers
Lease Time
Specifies the length of time that an IP address of a DHCP client remains
valid. Upon expiration of the Lease Time, the assigned IP address will no
longer be valid and the renewal of the IP address assignment will be
required.
DNS Servers
Allows manual input of DNS server addresses to be offered to the DHCP clients. If the Assign DNS server automatically option is selected, BODi
rS’s built-in DNS server address (i.e. LAN IP address) will be offered.
WINS Server
Specifies the Windows Internet Name Service (WINS) server. You may
choose to use the Built-in WINS server or External WINS servers.
When Site-to-Site VPN is connected, other VPN peers can share this unit's
built-in WINS server by entering this unit's LAN IP address in their DHCP
WINS Servers setting. Therefore, all PC clients in the VPN can resolve the
NetBIOS names of other clients in remote peers. If enabled, you can view a
list of WINS clients by clicking Status > WINS Clients.
Extended DHCP Option
Specifies the value of additional Extended DHCP Options defined in RFC
2132 (in addition to standard DHCP options like. DNS server address, gateway address, and subnet mask). In this case, you can pass additional configuration information to LAN hosts.
To define an Extended DHCP Option, click the Add button, choose the
option that you want to define and enter its value. For values that are in IP
address list format, you can enter one IP address per line in the provided text
field. You may only define each option one time.
Configuring the LAN Interface
32
www.4Gon.co.uk [email protected] Tel: +44 (0)1245 808295 Fax: +44 (0)1245 808299
BODi rS BD007 and BD004 User Manual
3 • Configuring LAN & WAN Interfaces
Table 5. LAN: DHCP Server Settings
Field
Description
DHCP Reservation
Reserves the assignment of fixed IP addresses for a list of computers on the
LAN. The MAC addresses identify the computers that will be assigned fixed
IP addresses on the LAN.
The fixed IP address assignment is displayed as a cross-reference list
between the computers’ Name, MAC addresses and fixed IP addresses.
The field Name (an optional field) is used to define a name to represent the
device. MAC addresses should be in the format of AA:BB:CC:DD:EE
Press
to create a new record. Press
to remove a record.
Reserved clients information can be imported from the Client List, located on
the Status > Client List configuration page. For more details, refer to
Chapter 12, “Managing Status Settings” on page 112.
Static Route Settings
Table 6. LAN: Static Route Settings
Field
Description
Static Route
Defines static routing rules for the LAN segment.
A static route consists of the network address, subnet mask, and gateway address.
The address and subnet mask values are in the format of w.x.y.z.
The local LAN subnet and subnets behind the LAN will be advertised to the VPN._
Remote routes sent over the VPN will also be accepted._ Any VPN member will be
able to route to the local subnets.
Press
to create a new route. Press
to remove a route.
WINS Server Settings
Table 7. LAN: WINS Server Settings
Field
Enable
Description
Check the box to enable the WINS Server. A list of WINS clients display on the
Status > WINS Clients configuration page.
Configuring the LAN Interface
33
www.4Gon.co.uk [email protected] Tel: +44 (0)1245 808295 Fax: +44 (0)1245 808299
BODi rS BD007 and BD004 User Manual
3 • Configuring LAN & WAN Interfaces
DNS Proxy Settings
Table 8. LAN: DNS Proxy Settings
Field
Description
Enable
Check the box to enable the DNS Proxy feature.
DNS Caching
Enables DNS caching on the built-in DNS proxy server. When enabled, queried
DNS replies will be cached until the records’ Time To Live (TTL) limit has been
reached. This feature can help improve the DNS lookup time. However, it cannot
return the most updated result for frequently updated DNS records.
Default = Disabled.
Use Google DNS
Server as Backup
Check the box to enable the Google DNS feature, and BODi rS will automatically
use the Google DNS Server as a backup DNS server. The DNS proxy server will forward DNS requests to Google's Public DNS Servers in case all of the WAN connections' DNS servers become unavailable.
Default = Disabled.
Local DNS Records Defines custom local DNS records.
A static local DNS record consists of a Host Name and an IP Address. When looking up the Host Name from the LAN to LAN IP of BODi rS, the corresponding IP
Address will be returned.
Press
Configuring the LAN Interface
to create a new record. Press
to remove a record.
34
www.4Gon.co.uk [email protected] Tel: +44 (0)1245 808295 Fax: +44 (0)1245 808299
BODi rS BD007 and BD004 User Manual
3 • Configuring LAN & WAN Interfaces
Wi-Fi AP Settings
To configure wireless Access Point settings, click on Network > LAN > Wi-Fi AP in the Web Admin Interface. Wi-Fi AP may be switched on or off using the Web Admin Interface Dashboard.
Figure 12. Network > LAN > Wi-Fi AP
The following sections provide information for configuring the LAN on the Wi-Fi AP configuraration page.
Click the Add button on the Wi-Fi AP page to create a new Service Set Identifier (SSID).
Figure 13. Network > LAN > Wi-Fi AP > Add
Refer to the following sections for information about configuring a new Wi-FI Access Point:
• “Wireless Network Settings” on page 36
• “Wireless Security Settings” on page 36
• “Access Control Settings” on page 37
Configuring the LAN Interface
35
www.4Gon.co.uk [email protected] Tel: +44 (0)1245 808295 Fax: +44 (0)1245 808299
BODi rS BD007 and BD004 User Manual
3 • Configuring LAN & WAN Interfaces
Wireless Network Settings
Table 9. LAN: Wi-Fi AP Network Settings
Field
Description
Network Name (SSID) Specifies a unique name to represent the virtual AP scanned by Wi-Fi clients
Enable
Select Yes to enable the virtual AP. Click No to disable the virtual AP.
Default = Enabled.
Broadcast SSID
When Enabled, Wi-Fi clients can scan for this SSID.
Default = Enabled.
Multicast Filter
When Enabled, multicast network traffic to the wireless SSID is filtered.
Default = Disabled.
Multicast Rate
Specifies the rate at which multicast packets are transmitted by the access point
on your wireless network. Multicast packets are used to send a single message
to a set of recipients in a defined group. Examples include: Teleconferencing,
videoconferencing, and group email. Specifying a high multicast rate may
improve performance of multicast features.
Default= 1Mbps
Wireless Security Settings
Table 10. LAN: Wi-Fi AP Security Settings
Field
Security Policy
Description
Specifies the security policy used for this wireless network. Available options:
• Open: No Encryption
• WPA/WPA2 – Personal: Wi-Fi Protected Access for Home/Small Business Use
Requires a specified Shared Key
• WPA/WPA2 – Enterprise: Wi-Fi Protected Access for Commercial Use
Requires specified RADIUS Server settings
• Static WEP: Wired Equivalent Privacy (WEP)
Requires a specified Key Size, Key Format, and Encryption Key
Configuring the LAN Interface
36
www.4Gon.co.uk [email protected] Tel: +44 (0)1245 808295 Fax: +44 (0)1245 808299
BODi rS BD007 and BD004 User Manual
3 • Configuring LAN & WAN Interfaces
Access Control Settings
Table 11. LAN: Wi-Fi AP Access Control Settings
Field
Restriction Mode
Description
Enables access control through MAC address filtering. Available options: None,
Deny all except listed, or Accept all except listed
Configuring the LAN Interface
37
www.4Gon.co.uk [email protected] Tel: +44 (0)1245 808295 Fax: +44 (0)1245 808299
BODi rS BD007 and BD004 User Manual
3 • Configuring LAN & WAN Interfaces
Configuring the WAN Interface
This section describes managing the WAN settings using the BODi rS Web Admin Interface. From the Dashboard, click on Network > WAN to reach the main WAN configuration page.
Figure 14. Network > WAN
To reorder the priority list for different WANs, click on the desired WAN listing, hold the left mouse button
and drag it to the desired priority level in the list (the first one would be the highest priority, the second one
would be lower priority, etc...). Release the mouse button after moving the WAN listing.
To disable a particular WAN connection, click on the desired WAN listing, hold the left mouse button and
drag it to the DISABLED row. Release the mouse button after moving the WAN listing.
You can also manage priority settings through the Dashboard (refer to “Connecting to the Web Admin Interface” on page 28 for information).
Click the Details button in the corresponding row of the WAN connection to modify the connection settings.
Note
Connection Details will be changed and effective immediately after
clicking the Save and Apply button.
Refer to the following sections for configuring specific WAN settings:
• Ethernet WAN basic settings (see “Ethernet WAN Settings” on page 39)
• USB Devices (see “USB Interface Settings” on page 46)
• Wireless WAN (see “Wi-Fi WAN Settings” on page 48)
• WAN Status Monitoring (see “WAN Health Check” on page 51)
• Bandwidth Monitoring (see “Bandwidth Allowance Monitor” on page 53)
Configuring the WAN Interface
38
www.4Gon.co.uk [email protected] Tel: +44 (0)1245 808295 Fax: +44 (0)1245 808299
BODi rS BD007 and BD004 User Manual
3 • Configuring LAN & WAN Interfaces
Ethernet WAN Settings
To configure Ethernet WAN settings, click on Network > WAN in the Web Admin Interface. Then, click on
the Details button in the Ethernet WAN row of the WAN Connection Status table. The Ethernet WAN
configuration page displays.
Figure 15. Network > WAN > Ethernet WAN Settings
The following sections provide information for configuring the Ethernet WAN:
• “General Ethernet WAN Settings” on page 40
• “DHCP Settings” on page 42
• “Static IP Settings” on page 43
• “PPPoE Settings” on page 44
• “Dynamic DNS Settings” on page 45
Configuring the WAN Interface
39
www.4Gon.co.uk [email protected] Tel: +44 (0)1245 808295 Fax: +44 (0)1245 808299
BODi rS BD007 and BD004 User Manual
3 • Configuring LAN & WAN Interfaces
General Ethernet WAN Settings
Table 12. WAN: General Ethernet WAN Settings
Field
Description
WAN Connection Name
Defines a unique name to represent the WAN connection
Connection Method
Available connection methods for Ethernet WAN:
• DHCP: See “DHCP Settings” on page 42
• Static IP: “Static IP Settings” on page 43
• PPPoE: “PPPoE Settings” on page 44
Standby State
Specifies the state of the WAN connection. Available options
include Remain connected and Disconnect.
Upstream Bandwidth
Specifies the data bandwidth in the outbound traffic from the WAN
interface.
Downstream Bandwidth
Specifies the data bandwidth in the inbound direction to the WAN
interface.
Default = Remain Connected
This value is referenced as the default weight value when using the
custom rule default (Auto), the algorithm Least Used, or the algorithm Persistence (Auto) in Outbound Policy with Managed by
Custom Rules chosen (see “Creating Custom Rules for the Outbound Policy” on page 68).
Health Check Method
Specifies the health check method for the WAN connection (see
“WAN Health Check” on page 51).
Available methods include Ping, DNS Lookup, or Disabled.
Default = Disabled
Dynamic DNS
Specifies the dynamic DNS service provider to use for the WAN
based on supported dynamic DNS service providers:
• hangeip.com
• dyndns.org
• no-ip.org
• zo.com
Select Disabled to disable this feature. (See “Dynamic DNS Set-
tings” on page 45 for more information).
Bandwidth Allowance Monitor
Configuring the WAN Interface
Enables bandwidth usage monitoring on this WAN connection for
each billing cycle. When disabled, bandwidth usage for each
month is still being tracked but no action will be taken (see “Bandwidth Allowance Monitor” on page 53).
40
www.4Gon.co.uk [email protected] Tel: +44 (0)1245 808295 Fax: +44 (0)1245 808299
BODi rS BD007 and BD004 User Manual
3 • Configuring LAN & WAN Interfaces
Table 12. WAN: General Ethernet WAN Settings
Field
Port Speed
Description
Specifies the speed and duplex configurations of the WAN Port.
By default, Auto is selected and BODi rS automatically detects the
appropriate data speed.
In the event of negotiation issues, the port speed can be manually
specified to circumvent the issues. You can also choose whether or
not to advertise the speed to the peer by selecting the Advertise
Speed checkbox.
MTU
Specifies the Maximum Transmission Unit. Default = Custom 1440
You may adjust the MTU value by editing the text field. Click
Default to restore the default MTU value. Select Auto and BODi rS
will automatically detect the appropriate MTU value. The auto-detection will run each time the WAN connection establishes.
MSS
Configures the maximum payload size that the local system can handle. The MSS (Maximum Segment Size) is computed from the MTU
minus 40 bytes for TCP over IPv4. If MTU is set to Auto, the MSS will
also be set automatically.
Default = Auto
MAC Address Clone
Specifies the MAC address. Some service providers (e.g. cable providers) identify the client’s MAC address and require the client to
always use the same MAC address to connect to the network. In
these cases, use the MAC Address Clone field to change the
WAN’s MAC address to the original client PC’s MAC address.
The default MAC Address is a unique value assigned at the factory.
In most cases, the default value is sufficient. Click the Default button
to restore the MAC Address to the default value.
Reply to ICMP Ping
When disabled, the WAN connection will not respond to ICMP
PING requests.
Default = Enabled
Additional Public IP Address
When there are more than one IP addresses assigned to the WAN
connection, the IP Address List represents the list of fixed internet
IP addresses assigned by the ISP.
Enter the fixed internet IP addresses and the corresponding subnet
mask, and then click the Down Arrow button to populate IP address
entries to the IP Address List.
Configuring the WAN Interface
41
www.4Gon.co.uk [email protected] Tel: +44 (0)1245 808295 Fax: +44 (0)1245 808299
BODi rS BD007 and BD004 User Manual
3 • Configuring LAN & WAN Interfaces
DHCP Settings
The DHCP connection method is suitable if the ISP provides an IP address automatically by DHCP (e.g. via
Satellite Modem, WiMAX Modem, Cable, Metro Ethernet, etc.).
Figure 16. Network > WAN > Ethernet WAN Settings > DHCP Connection
Table 13. WAN: DHCP Settings
Field
Description
IP Address
BODi rS obtains this information from the ISP automatically.
Subnet Mask
BODi rS obtains this information from the ISP automatically.
Default Gateway
BODi rS obtains this information from the ISP automatically.
DNS Servers
Specifies the DNS (Domain Name System) Servers to be used when a DNS
lookup is routed through this connection. Each ISP may provide a set of DNS
servers for DNS lookups.
Selecting Obtain DNS server address automatically allows the WAN
DHCP Server to assign the DNS Servers used for outbound DNS lookups over
the connection. (The DNS Servers are obtained along with the WAN IP
address assigned from the DHCP server.)
When Use the following DNS server address(es) is selected, you may
enter custom DNS server addresses for this WAN connection into the DNS
server 1 and DNS server 2 fields.
Hostname
(Optional)
Configuring the WAN Interface
If your service provider's DHCP server requires you to supply a hostname value
upon acquiring an IP address, you may enter the value in the Hostname field.
If your service provider does not provide you with the value, you can safely
bypass this option.
42
www.4Gon.co.uk [email protected] Tel: +44 (0)1245 808295 Fax: +44 (0)1245 808299
BODi rS BD007 and BD004 User Manual
3 • Configuring LAN & WAN Interfaces
Static IP Settings
The Static IP connection method is suitable if the ISP provides a static IP address to connect directly.
Figure 17. Network > WAN > Ethernet WAN Settings > Static IP Connection
Table 14. WAN: Static IP Settings
Field
Description
IP Address
Specifies a fixed IP address to connect to the internet.
The ISP typically provides this information.
Subnet Mask
Specifies the subnet mask for the IP address.
The ISP typically provides this information.
Default Gateway
Specifies the default gateway to connect to the internet.
The ISP typically provides this information.
DNS Servers
Specifies the DNS (Domain Name System) Servers to be used when a DNS
lookup is routed through this connection. Each ISP may provide a set of DNS
servers for DNS lookups.
You may enter the DNS server addresses provided by the ISP into the DNS
server 1 and DNS server 2 fields. If no address is entered, this link will not
be used for DNS lookups.
Configuring the WAN Interface
43
www.4Gon.co.uk [email protected] Tel: +44 (0)1245 808295 Fax: +44 (0)1245 808299
BODi rS BD007 and BD004 User Manual
3 • Configuring LAN & WAN Interfaces
PPPoE Settings
The PPPoE connection method is suitable if the ISP provides the login ID /password to connect via PPPoE.
Figure 18. Network > WAN > Ethernet WAN Settings > PPPoE Connection
Table 15. WAN: PPPoE Settings
Field
Description
IP Address
BODi rS obtains this information from the ISP automatically.
Subnet Mask
BODi rS obtains this information from the ISP automatically.
Default Gateway
BODi rS obtains this information from the ISP automatically.
PPPoE Username /
Password
Enter the username and password to connect to the ISP via the PPPoE server.
The ISP typically provides this information.
Confirm PPPoE
Password
Enter the password again for verification.
Service Name
Specifies the Service Name. The ISP typically provides this information.
Note: Leave this field blank unless it is provided by your ISP.
DNS Servers
Specifies the DNS (Domain Name System) Servers to be used when a DNS
lookup is routed through this connection. Each ISP may provide a set of DNS
servers for DNS lookups.
Selecting Obtain DNS server address automatically allows the PPPoE
Server to assign the DNS Servers used for outbound DNS lookups over the
WAN connection. (The DNS Servers are obtained along with the WAN IP
address assigned from the PPPoE server.)
When Use the following DNS server address(es) is selected, you may
enter custom DNS server addresses for this WAN connection into the DNS
server 1 and DNS server 2 fields.
Configuring the WAN Interface
44
www.4Gon.co.uk [email protected] Tel: +44 (0)1245 808295 Fax: +44 (0)1245 808299
BODi rS BD007 and BD004 User Manual
3 • Configuring LAN & WAN Interfaces
Dynamic DNS Settings
BODi rS provides the functionality to register the domain name relationships to dynamic DNS service providers. Through registration with dynamic DNS service provider(s), the default public internet IP address of each
WAN connection can be associated with a hostname.
When the IP address is changed or 23 days have passed without a link reconnection, BODi rS will connect to
the dynamic DNS service provider to perform an IP address update within the provider’s records.
Figure 19. Network > WAN > Ethernet WAN Settings > Dynamic DNS
Table 16. WAN: Dynamic DNS Settings
Field
Description
Dynamic DNS
Specifies the dynamic DNS service provider to be used for the WAN based on
supported dynamic DNS service providers:
• hangeip.com
• dyndns.org
• no-ip.org
• zo.com
Select Disabled to disable this feature.
Account Name
Specifies the registered username for the dynamic DNS service
Password
Specifies the password for the dynamic DNS service
Hosts
Specifies a list of hostnames or domains to be associated with the WAN connection’s public internet IP address. You may use the Enter key to add more
than one host.
Note
In order to use dynamic DNS services, appropriate hostname registration(s) as well as a valid account with a supported dynamic DNS service provider are required.
A dynamic DNS update is performed whenever a WAN’s IP address
changes (e.g. IP is changed after a DHCP IP refresh, reconnection,
etc...).
Due to dynamic DNS service providers’ policy, a dynamic DNS host
will automatically expire if the host record has not been updated for a
long time. BODi rS performs an update every 23 days even if a
WAN’s IP address has not changed.
Configuring the WAN Interface
45
www.4Gon.co.uk [email protected] Tel: +44 (0)1245 808295 Fax: +44 (0)1245 808299
BODi rS BD007 and BD004 User Manual
3 • Configuring LAN & WAN Interfaces
USB Interface Settings
To configure the USB device settings, click on Network > WAN in the Web Admin Interface. Then, click on
the Details button in the USB row of the WAN Connection Status table. Table 17 describes the settings for
configuring a USB device.
Table 17. WAN: USB Settings
Field
Description
SIM Card IMSI
Displays the International Mobile Subscriber Identity which uniquely
identifies the SIM card. This is applicable to 3G modems only.
Carrier
Displays the name of the carrier that issues the SIM card (for 3G) or
the modem (for EVDO)
Country / Region
Displays the country/region of the carrier that issues the EVDO
modem
Signal Strength
Displays the signal strength of the connection
IP Address
BODi rS obtains this information from the carrier automatically.
DNS Servers
Specifies the currently effective DNS (Domain Name System) Servers
when a DNS lookup is routed through this connection. Each carrier
may provide a set of DNS servers for DNS lookups.
BODi rS obtains this information from the carrier automatically, or
you may enter the DNS server entries manually.
WAN Connection Name
Defines a unique name to represent the WAN connection
Standby State
Select whether to keep the connection or disconnect the link when
this WAN connection is no longer the highest priority and has
entered the standby state.
When Remain connected is enabled, the WAN connection will
be available immediately when it is active.
Operator Settings
*Applies to 3G / EDGE / GPRS modem only. It does not apply to
EVDO / EVDO Rev. A modem.
Configures the APN settings of the WAN connection. Select Auto to
detect the mobile operator automatically. The operator will automatically configure and connect the device.
If there is any difficulty in making connection, select Custom to
enter the carrier’s PN, Login, Password, and Dial Number settings
manually. You may obtain this information from your carrier.
Default/Recommended Setting = Auto
APN / Login / Password /
Dial Number / SIM PIN
Select Auto to automatically provide the information for these fields.
Health Check Settings
Specifies the health check method for the WAN connection (see
“WAN Health Check” on page 51).
Select Custom to manually enter these parameters. You may obtain
this information from your ISP.
Available options include SmartCheck or Disabled.
Default = SmartCheck
Configuring the WAN Interface
46
www.4Gon.co.uk [email protected] Tel: +44 (0)1245 808295 Fax: +44 (0)1245 808299
BODi rS BD007 and BD004 User Manual
3 • Configuring LAN & WAN Interfaces
Table 17. WAN: USB Settings
Field
Description
Bandwidth Allowance Monitor
Enables bandwidth usage monitoring on this WAN connection for
each billing cycle. When disabled, bandwidth usage for each
month is still being tracked but no action will be taken (see “Bandwidth Allowance Monitor” on page 53).
Modem Specific Settings
The Modem Specific Settings may or may not be available depending on the model of the connected device.
Network Type
Specifies the preference for using the 4G, 3G and/or 2G networks.
4G networks include WiMAX; 3G networks include HSPA / UMTS;
2G networks include EDGE / GPRS.
Select 3G only or 2G only to use the HSPA / UMTS or EDGE /
GPRS network, respectively. If the chosen network is not available,
no other network will be used regardless of its availability. The
modem connection will remain offline.
Select 3G preferred or 2G preferred to use the chosen network
when it is available. If the chosen network is not available, the other
network will be used where available.
Default = 3G preferred
(The example above uses a Huawei 3G modem).
GSM Frequency Band
Specifies which GSM frequency band to use.
Select GSM1900 for use in the United States, Canada, and many
other countries in the Americas.
Select GSM900 / GSM1800 / GSM2100 for use in Europe,
Middle East, Africa, Asia, Oceania, and Brazil.
Select All Bands to automatically use the appropriate frequency
band.
Default = All Bands
WiMAX Settings
This setting is associated with the detected WiMAX modem. BODi rS
supports 3G/4G USB modems.
Enter the associated Login ID and Password in the WiMAX field.
Note
For a list of supported modems for the BODi rs, visit
http://www.patton.com/products/usb_modems.asp
Configuring the WAN Interface
47
www.4Gon.co.uk [email protected] Tel: +44 (0)1245 808295 Fax: +44 (0)1245 808299
BODi rS BD007 and BD004 User Manual
3 • Configuring LAN & WAN Interfaces
Wi-Fi WAN Settings
To configure Wi-Fi WAN settings, click on Network > WAN in the Web Admin Interface. Then, click on the
Details button in the Wi-Fi WAN row of the WAN Connection Status table. The Wi-Fi WAN configuration page displays.
Figure 20. Network > WAN > Wi-Fi WAN Settings
The following sections provide information for configuring the Wi-Fi WAN:
• “General Wi-Fi WAN Settings” on page 48
• “Create Wi-Fi Connection Profile” on page 50
General Wi-Fi WAN Settings
Table 18. WAN: General Wi-Fi WAN Settings
Field
Description
Network Name (SSID)
Displays the Wi-Fi connection broadcast name from the access point
MAC Address (BSSID)
Displays the MAC address of the device at the Wi-Fi access point
Signal Strength
Displays the signal strength of the Wi-Fi connection
IP Address
BODi rS obtains this information from the Wi-Fi AP automatically.
Subnet Mask
BODi rS obtains this information from the Wi-Fi AP automatically.
Default Gateway
BODi rS obtains this information from the Wi-Fi AP automatically.
DNS Servers
BODi rS obtains this information from the Wi-Fi AP automatically.
WAN Connection Name
Defines a unique name to represent the WAN connection
Standby State
Specifies the state of the WAN connection when it is in standby
mode. Available options include Remain connected (hot standby)
and Disconnect (cold standby).
Configuring the WAN Interface
48
www.4Gon.co.uk [email protected] Tel: +44 (0)1245 808295 Fax: +44 (0)1245 808299
BODi rS BD007 and BD004 User Manual
3 • Configuring LAN & WAN Interfaces
Table 18. WAN: General Wi-Fi WAN Settings
Field
Health Check Method
Description
Specifies the health check method for the WAN connection (see
“WAN Health Check” on page 51).
Available methods include Ping, DNS Lookup, or Disabled.
Default = Disabled
Bandwidth Allowance Monitor
Enables bandwidth usage monitoring on this WAN connection for
each billing cycle. When disabled, bandwidth usage for each
month is still being tracked but no action will be taken (see “Bandwidth Allowance Monitor” on page 53).
Wi-Fi Association Mode
Specifies the Wi-Fi access point selection criteria during association.
Select the Stronger Signal Strength option to use an access
point that matches one of the listed Wi-Fi Connection Profiles and
has the strongest received signal (regardless of its profile priority).
Select the Profile Priority option to use the access point that
matches one of the listed of Wi-Fi Connection Profiles and has the
highest priority level.
Default = Stronger Signal Strength
Connect to Any Open Mode AP Specifies whether the Wi-Fi WAN will connect to any open mode
access point.
Default = Disabled
Reply to ICMP Ping
When disabled, the WAN connection will not respond to ICMP
PING requests.
Default = Enabled
Configuring the WAN Interface
49
www.4Gon.co.uk [email protected] Tel: +44 (0)1245 808295 Fax: +44 (0)1245 808299
BODi rS BD007 and BD004 User Manual
3 • Configuring LAN & WAN Interfaces
Create Wi-Fi Connection Profile
You can manually create a profile to use for a specific Wi-Fi connection. It is useful for creating a profile for
connecting to hidden-SSID access points. To configure Wi-Fi Connection Profiles, click on the Create Profile
link under the Wi-Fi Connection Profiles table. The Wi-Fi Connection Profile configuration page displays.
Figure 21. Network > WAN > Wi-Fi WAN Settings > Wi-Fi Connection Profile
Table 19. WAN: Create Wi-Fi Connection Profile
Field
Description
Network Name (SSID) Defines a name to represent the specific Wi-Fi connection
Security
Specifies the security policy to use with the wireless network. Available options:
• Open: No Encryption
• WEP: Wired Equivalent Privacy (WEP)
Requires a specified Key Size, Key Format, and Encryption Key
• WPA/WPA2 – Personal: Wi-Fi Protected Access for Home and Small
Business Use; Requires a specified Shared Key
• WPA/WPA2 – Enterprise: Wi-Fi Protected Access for Commercial Use
Requires specified RADIUS Server settings
Configuring the WAN Interface
50
www.4Gon.co.uk [email protected] Tel: +44 (0)1245 808295 Fax: +44 (0)1245 808299
BODi rS BD007 and BD004 User Manual
3 • Configuring LAN & WAN Interfaces
WAN Health Check
To ensure that traffic is routed only to healthy WAN connections, BODi rS provides the functionality to periodically check the health of each WAN connection. The Health Check settings for each WAN connection can
be independently configured. To configure WAN Health Check settings, click on Network > WAN in the
Web Admin Interface. Then, click on the Details button in the row of the desired WAN connection in the
WAN Connection Status table. The configuration page for that WAN connection displays, which includes
the Health Check options.
Health Check Methods
The Health Check drop-down menu specifies the health check method for the WAN connection. Available
methods include Disabled, Ping, or DNS Lookup. The default value is DNS Lookup.
Table 20. WAN: Health Check Methods
Method
Disabled
Description
Select the Disabled option so that the WAN connection will always be considered as
“up”. The connection will not be treated as down in the event of IP routing errors.
Ping
Select the Ping method to issue ICMP PING packets to test the connectivity of a target
IP address or hostname. A WAN connection is considered “up” if PING responses are
received from either one or both of the PING Hosts.
The Ping Hosts field specifies the IP addresses or hostnames to test with the ICMP
PING method for connectivity.
If you select the Use first two DNS servers as Ping Hosts box, the target PING
Host will be the first DNS server for the corresponding WAN connection.
DNS Lookup
Select the DNS Lookup method to test the connectivity with target DNS servers. The
connection will be treated as “up” if DNS responses are received from either one or
both of the servers, regardless of whether the result was positive or negative.
The Health Check DNS Servers field allows you to specify two DNS hosts’ IP
address with which connectivity is to be tested via DNS Lookup.
If you select the Use first two DNS servers as Health Check DNS Servers
box, the first two DNS servers will be the DNS lookup targets for checking a connection's health. If the box is not checked, field Host 1 must be filled and field Host 2 is
optional.
If you select the Include public DNS servers box and no response is received from
all specified DNS servers, DNS lookups will also be issued to some public DNS servers. A WAN connection will be treated as “down” only if there is no response
received from the public DNS servers.
Connections will be considered as “up” if DNS responses are received from any one
of the health check DNS servers, regardless of a positive or negative result.
Configuring the WAN Interface
51
www.4Gon.co.uk [email protected] Tel: +44 (0)1245 808295 Fax: +44 (0)1245 808299
BODi rS BD007 and BD004 User Manual
3 • Configuring LAN & WAN Interfaces
Additional Health Check Settings
Figure 22. Network > WAN > Details > Other Health Check Settings
Table 21. WAN: Other Health Check Settings
Method
Description
Timeout
Specifies the timeout, in seconds, for ping/DNS lookup requests.
Default = 5 seconds
Health Check Interval
Specifies the time interval, in seconds, between ping or DNS lookup requests.
Default = 5 seconds
Health Check Retries
Specifies the number of consecutive ping/DNS lookup timeouts to try before
BODi rS marks the corresponding WAN connection as “down”.
Default = 3 retries
For example, with the default Health Retries setting of 3, after 3 consecutive
timeouts, the corresponding WAN connection will be treated as “down”.
Recovery Retries
Specifies the number of consecutive successful ping/DNS lookup responses
that must be received before BODi rS considers a previously down WAN connection to be “up” again.
Default = 3 retries
For example, a WAN connection that is treated as “down” will be considered
to be up again after receiving 3 consecutive successful ping/DNS lookup
responses.
Note
When the health check method is set to DNS Lookup and the corresponding health checks fail, BODi rS will automatically perform
DNS lookups on some public DNS servers. If the tests are successful,
the WAN may not be considered as “down”; however, the target
DNS server may malfunction. If a malfunction occurs, the following
warning displays on the main page:
Configuring the WAN Interface
52
www.4Gon.co.uk [email protected] Tel: +44 (0)1245 808295 Fax: +44 (0)1245 808299
BODi rS BD007 and BD004 User Manual
3 • Configuring LAN & WAN Interfaces
Bandwidth Allowance Monitor
The Bandwidth Allowance Monitor feature tracks network usage for BODi rS. The Bandwidth Allowance settings for each WAN connection can be independently configured.
To configure the Bandwidth Allowance Monitor, click on Network > WAN in the Web Admin Interface.
Then, click on the Details button in the row of the desired WAN connection in the WAN Connection Status
table. The configuration page for that WAN connection displays, which includes the Bandwidth Allowance
Monitor option. Select the box to enable and configure Bandwidth Allowance settings.
Figure 23. Network > WAN > Details > Bandwidth Allowance Monitor
Table 22. WAN: Bandwidth Allowance Monitor
Method
Action
Description
Enable the Email Notification feature to be notified through email when network usage hits 75% and 95% of the monthly allowance.
Select the Disconnect when usage hits 100% of monthly allowance
box to automatically disconnect this WAN service when the usage hits the
monthly allowance. It will not resume connection unless this option has been
turned off, or the usage has been reset when a new billing cycle starts.
Start Day
Defines which day in the month each billing cycle begins
Monthly Allowance
Defines the maximum bandwidth usage allowed for the WAN connection each
month
Configuring the WAN Interface
53
www.4Gon.co.uk [email protected] Tel: +44 (0)1245 808295 Fax: +44 (0)1245 808299
Chapter 4
Configuring Wi-Fi Settings
Chapter contents
Introduction ..........................................................................................................................................................54
Configuring Wi-Fi Settings ...................................................................................................................................54
Wi-Fi AP Radio Settings .................................................................................................................................55
Wi-Fi WAN Radio Settings ............................................................................................................................55
Wi-Fi AP Advanced Settings ...........................................................................................................................56
Spanning Tree Protocol (STP) Settings .....................................................................................................57
54
www.4Gon.co.uk [email protected] Tel: +44 (0)1245 808295 Fax: +44 (0)1245 808299
BODi rS BD007 and BD004 User Manual
4 • Configuring Wi-Fi Settings
Introduction
This chapter describes setting up advanced Wi-Fi settings for WAN connections. To configure advanced WiFi settings for BODi rS, click on Advanced > Wi-Fi Settings in the Web Admin Interface. The Wi-Fi Settings configuration page displays:
Figure 24. Advanced > Wi-Fi Settings
Configuring Wi-Fi Settings
This section describes the following settings for managing Wi-Fi interfaces using BODi rS Web Admin Interface:
• Wi-Fi AP Radio Settings (see “Wi-Fi AP Radio Settings” on page 56)
• Wi-Fi WAN Radio Settings (see “Wi-Fi WAN Radio Settings” on page 56)
• Wi-Fi AP Advanced Settings (see “Wi-Fi AP Advanced Settings” on page 57)
Introduction
55
www.4Gon.co.uk [email protected] Tel: +44 (0)1245 808295 Fax: +44 (0)1245 808299
BODi rS BD007 and BD004 User Manual
4 • Configuring Wi-Fi Settings
Wi-Fi AP Radio Settings
Table 23. Wi-Fi: AP Radio Settings
Field
Description
Protocol
Specifies whether to accept 802.11b and/or 802.11g client association requests.
Available options include 802.11b/g, 802.11b Only and 802.11g Only.
Default = 802.11b/g
Operating Country
Specifies which country regulations to follow
Channel
Specifies which 802.11 RF channel to use
Default = Channel 1 (2.412 GHz)
Output Power
Specifies the transmission output power for the Wi-Fi AP
Default = 23 dBm (200mW) or 20 dBm (100 mW), depending on the
selected Operating Country
Wi-Fi WAN Radio Settings
Table 24. Wi-Fi: WAN Radio Settings
Field
Output Power
Description
Specifies the transmission output power for the Wi-Fi WAN
Default = 23 dBm (200 mW) or 20 dBm (100 mW), depending on the
selected Operating Country
Configuring Wi-Fi Settings
56
www.4Gon.co.uk [email protected] Tel: +44 (0)1245 808295 Fax: +44 (0)1245 808299
BODi rS BD007 and BD004 User Manual
4 • Configuring Wi-Fi Settings
Wi-Fi AP Advanced Settings
Table 25. Wi-Fi: AP Advanced Settings
Field
Description
STP
Select this option to enable the Spanning Tree Protocol to prevent path
redundancy (refer to “Spanning Tree Protocol (STP) Settings” on page 58).
Default = Disabled
Layer 2 Communication
When Enabled, clients on the network are allowed to communicate with
each other directly, and traffic will not be passed to any uplink equipment.
When Disabled, clients on the network are not allowed to communicate
with each other directly. Traffic will be passed to uplink equipments/uplink
routers before communication can be established among clients.
Default = Enabled
802.1X Version
Specifies the version of the 802.1X Extensible Authentication Protocol over
LAN (EAPOL).
Select V1 to allow both V1 and V2 clients to associate with this Wi-Fi AP.
Select V2 to only allow V2 clients to associate with this Wi-Fi AP.
Most wireless clients support V2. In case there are stations that do not support V2, select the V1 option.
Default = V2
Beacon Rate
Sets the transmit bit rate for sending a beacon
Default = 1 Mbps
Beacon Interval
Sets the time interval between each beacon
Default = 100 milliseconds
DTIM
Sets the frequency for the beacon to include a Delivery Traffic Indication
Message (DTIM). The interval is measured in milliseconds.
Default = 1 millisecond
RTS Threshold
Sets the minimum packet size for the unit to send a Request To Send (RTS)
frame using the Request To Send/Clear To Send (RTS/CTS) handshake.
Default = 0 (Disabled)
Slot Time
Specifies the unit wait time before transmitting a packet
Default = 9 μs
ACK Timeout
Specifies the wait time to receive an acknowledgement packet before retransmitting
Default = 48 μs
Channel Bonding
Determines the channel width for the AP
Select 20 to turn off channel bonding and set the channel width to 20 MHz.
Select 20/40 to allow the AP to automatically choose the channel width
between 20 and 40 MHz.
Select 40 to enforce channel bonding and set the channel width to 40 MHz.
Frame Aggregation
Enables frame aggregation to increase transmission throughput
Guard Interval
Specifies a short or long guard period interval for transmissions
Configuring Wi-Fi Settings
57
www.4Gon.co.uk [email protected] Tel: +44 (0)1245 808295 Fax: +44 (0)1245 808299
BODi rS BD007 and BD004 User Manual
4 • Configuring Wi-Fi Settings
Spanning Tree Protocol (STP) Settings
Figure 25. Advanced > Wi-Fi Settings > STP
Table 26. Wi-Fi: STP Settings
Field
Description
STP
Select this option to enable the Spanning Tree Protocol to prevent path redundancy (Default = Disabled)
Bridge Priority
Specifies the priority level for determining the root switch
Default = 32768
Ethernet Path Cost
Specifies the preference to provide the best path from the switch to the root switch
Default = 100
Configuring Wi-Fi Settings
58
www.4Gon.co.uk [email protected] Tel: +44 (0)1245 808295 Fax: +44 (0)1245 808299
Chapter 5
Configuring WAN Bonding
Chapter contents
Introduction ..........................................................................................................................................................59
Configuring a WAN Bonding VPN Profile ...........................................................................................................59
VPN Settings ..................................................................................................................................................61
WAN Connection Priority Settings ................................................................................................................61
Managing Link Failure Detection Settings.............................................................................................................62
Configuring a NAT Router Behind BODi rS for VPN Connections.....................................................................63
Viewing the VPN Status........................................................................................................................................64
59
www.4Gon.co.uk [email protected] Tel: +44 (0)1245 808295 Fax: +44 (0)1245 808299
BODi rS BD007 and BD004 User Manual
5 • Configuring WAN Bonding
Introduction
This chapter describes setting up and managing the WAN Bonding functionality for BODi rS. The WAN
Bonding functionality securely connects BODi rS in a different branch to another BODi rS. The data, voice or
video communications between these locations are kept confidential across the public internet.
The WAN Bonding for BODi rS is specifically designed for a multi-WAN enviroment. BODi rS can aggregate the bandwidth for all WAN connections to route Site-to-Site VPN traffic. Unless all of the WAN connections of one site are down, BODi rS can still keep the VPN up and running. With VPN Bandwidth Bonding,
all available bandwidth will be utilized to establish the VPN tunnel, and all traffic will be load balanced at
packet level across all links. VPN Bandwidth Bonding is enabled by default.
Note
You can define firewall rules to control access within the VPN network. Outbound traffic can be redirected to VPN tunnels with custom outbound policies (see Chapter 6, “Managing Outbound Traffic
to the WAN” on page 66).
To configure Site-to-Site VPN options for BODi rS, click on Advanced > WAN Bonding in the Web Admin
Interface. BODi rS WAN Bonding configuration page displays:
Figure 26. Advanced > WAN Bonding
Refer to the following sections for details about configuring and managing Site-to-Site VPN connections:
• “Configuring a WAN Bonding VPN Profile” on page 60
• “Managing Link Failure Detection Settings” on page 63
• “Configuring a NAT Router Behind BODi rS for VPN Connections” on page 64
• “Viewing the VPN Status” on page 65
Configuring a WAN Bonding VPN Profile
BODi rS supports making two Site-to-Site VPN connections with a remote BODi rS unit. The local LAN
subnet and subnets behind the LAN (defined in the “Static Route Settings” on page 33) will be advertised to
the VPN. All VPN members (branch offices and headquarters) will be able to route to the local subnets.
Introduction
60
www.4Gon.co.uk [email protected] Tel: +44 (0)1245 808295 Fax: +44 (0)1245 808299
BODi rS BD007 and BD004 User Manual
Note
5 • Configuring WAN Bonding
All LAN subnets and subnets behind the LAN must be unique. Otherwise, the VPN members will not be able to access each other.
All data can be routed over the VPN with 256-bit AES encryption standard.
To configure a new WAN Bonding connection, click on Advanced > Site-to-Site VPN in the Web Admin
Interface, and click the New Profile button to create a new VPN profile. The VPN Profile configuration page
displays:
Figure 27. Advanced > Site-to-Site VPN> Add VPN Connection
This section describes the following settings for creating a new VPN profile:
• VPN Settings (see “VPN Settings” on page 62)
• WAN Connection Priority Settings (see “WAN Connection Priority Settings” on page 62)
Configuring a WAN Bonding VPN Profile
61
www.4Gon.co.uk [email protected] Tel: +44 (0)1245 808295 Fax: +44 (0)1245 808299
BODi rS BD007 and BD004 User Manual
5 • Configuring WAN Bonding
VPN Settings
Table 27. WAN Bonding: New VPN Connection Settings
Field
Description
Active
Check this box to enable the VPN connection.
Encryption
By default, VPN traffic is encrypted with 256-bit AES standard. If the Off option
is selected on both sides of a VPN connection, no encryption will be applied.
Remote I.D.
BODi rS only establishes a VPN connection with a remote peer that has a serial
number specified in this Peer Serial Number field. If the remote peer is in a
high availability setup, select the Remote client is set up in high availability mode option, and enter the second unit's serial number into the second
text box.
Pre-Shared Key
Defines the pre-shared key used for this particular VPN connection. The VPN
connection's session key will be further protected by thepre-shared key. The connection will be up only if the pre-shared keys on each side match.
Peer IP Addresses /
Host Names
(Optional) Enter the remote peer’s WAN IP address(es) or host name(s) in the
Peer IP Addresses field. Enter one IP address or host name per line. BODi rS
also accepts Dynamic-DNS host names.
When you provide the peer details, BODi rS will initiate a connection to each of
the remote IP addresses until they connect successfully.
If the field is empty, BODi rS will wait for a connection from the remote peer.
Therefore, at least one side of the two VPN peers has to have this peer field
filled. Otherwise, a VPN connection cannot be established.
WAN Connection Priority Settings
Table 28. WAN Bonding: WAN Connection Priority Settings
Field
WAN Connection
Priority
Description
You can specify the priority level of the WAN connections used for making VPN
connections. WAN connections set to OFF will never be used. Only available
WAN connections with the highest priority will be utilized.
Configuring a WAN Bonding VPN Profile
62
www.4Gon.co.uk [email protected] Tel: +44 (0)1245 808295 Fax: +44 (0)1245 808299
BODi rS BD007 and BD004 User Manual
5 • Configuring WAN Bonding
Managing Link Failure Detection Settings
To configure Link Failure Detection settings for BODi rS, click on Advanced > WAN Bonding in the Web
Admin Interface. BODi rS WAN Bonding configuration page displays, including the Link Failure Detection section:
Figure 28. Advanced > WAN Bonding > Link Failure Detection
WAN Bonding can detect routing failures on the path between two sites over each WAN connection. Failed
WAN connections will not be used to route VPN traffic. Health check packets are sent to the peer to detect
any failure. Checking the status more frequently leads to a shorter detection time, but higher bandwidth overhead will be consumed.
Table 29. WAN Bonding: Link Failure Detection
Link Failure Detection Time
Description
Recommendeda
Select the Recommended option to send a health check packet every 5
seconds. The expected detection time is 15 seconds.
Fast
Select the Fast option to send a health check packet every 3 seconds.
The expected detection time is 6 seconds.
Faster
Select the Faster option to send a health check packet every 1 second.
The expected detection time is 2 seconds.
Extreme
Select the Extreme option to send a health check packet every 0.1 second.
The expected detection time is under 1 second.
a. Recommended is the default setting for the Link Failure Detection Time.
Note
BODi rS WAN Bonding feature uses TCP and UDP port 32015 for
establishing VPN connections. If you have a firewall in front of the
devices, you will need to add firewall rules for these ports and protocols that will allow inbound and outbound traffic to pass through the
firewall.
Managing Link Failure Detection Settings
63
www.4Gon.co.uk [email protected] Tel: +44 (0)1245 808295 Fax: +44 (0)1245 808299
BODi rS BD007 and BD004 User Manual
5 • Configuring WAN Bonding
Configuring a NAT Router Behind BODi rS for VPN Connections
BODi rS supports establishing Site-to-Site VPN over WAN connections that are behind a NAT (Network
Address Translation) router. In order for a WAN connection behind a NAT router to accept VPN connections, you can configure the NAT router in front of the WAN connection to forward to TCP port 32015.
If one or more WAN connections on Router A can accept VPN connections (by means of port forwarding or
not) while none of the WAN connections on the peer Router B can, you should put all public IP addresses or
host names of the Router A in the Router B on Router B. Leave the Peer IP Addresses / Host Names field
on Router A empty. With these settings in place, BODi rS can set up a site-to-site VPN connection and all
WAN connections on both sides can be used.
For example, see Figure 29 below:
Figure 29. BODi rS Behind a NAT Router Application
One of the WAN connections of Router A is not using NAT (212.1.1.1). The rest of the WAN connections
on Router A and all of the WAN connections on Router B are using NAT. In this case, the Peer IP
Addresses / Host Names field in Router B should be filled with all of the Router A’s host names or public IP
addresses (i.e. 212.1.1.1, 212.2.2.2 and 212.3.3.3), and the field in Router A can be left blank. The two NAT
routers on WAN1 and WAN3 of Router A should forward inbound traffic through TCP port 32015 to
Router A so that all of the WAN connections can be utilized to establish the VPN connection.
Configuring a NAT Router Behind BODi rS for VPN Connections
64
www.4Gon.co.uk [email protected] Tel: +44 (0)1245 808295 Fax: +44 (0)1245 808299
BODi rS BD007 and BD004 User Manual
5 • Configuring WAN Bonding
Viewing the VPN Status
To view the status of VPN connections, click on the Dashboard in the Web Admin Interface. The WAN
Bonding section shows the connection status of each connection profile. To view more details about a VPN
connection status, click the Details button in the top-right hand corner of the WAN Bonding table. The Status > WAN Bonding page displays that provides the subnet and WAN connection information of each VPN
peer.
Refer to “Viewing Site-to-Site VPN Connection Details” on page 115 for more information.
Note
Viewing the VPN Status
IP Subnets must be unique among VPN peers.
The entire inter-connected Site-to-Site VPN network is one single
non-NAT IP network. No two subnets in two sites can be duplicated. Otherwise, BODi rS will experience connectivity problems in
accessing those subnets.
65
www.4Gon.co.uk [email protected] Tel: +44 (0)1245 808295 Fax: +44 (0)1245 808299
Chapter 6
Managing Outbound Traffic to the
WAN
Chapter contents
Introduction ..........................................................................................................................................................66
Selecting the Outbound Policy ..............................................................................................................................66
Creating Custom Rules for the Outbound Policy ..................................................................................................67
New Custom Rule Settings .............................................................................................................................68
Algorithm: Weighted Balance ...................................................................................................................69
Algorithm: Persistence ...............................................................................................................................70
Algorithm: Enforced .................................................................................................................................71
Algorithm: Priority ....................................................................................................................................71
Algorithm: Overflow .................................................................................................................................71
Algorithm: Least Used ...............................................................................................................................72
Algorithm: Lowest Latency ........................................................................................................................72
Expert Mode Settings ......................................................................................................................................73
66
www.4Gon.co.uk [email protected] Tel: +44 (0)1245 808295 Fax: +44 (0)1245 808299
BODi rS BD007 and BD004 User Manual
6 • Managing Outbound Traffic to the WAN
Introduction
BODi rS provides the functionality to flexibly manage and balance the load of outbound traffic among the
WAN connections. To manage outbound traffic and load balancing, click on Advanced > Outbound Policy
in the Web Admin Interface.
Note
The Outbound Policy is only applied when more than one WAN
connection is active.
Selecting the Outbound Policy
BODi rS provides three policy options for managing outbound traffic: High Application Compatibility, Normal Application Combatibility (Default), and Custom Rules.
Figure 30. Advanced > Outbound Policy > Select Policy
Table 30. Outbound Policy: Options
Field
Description
High Application Compatibility
Select this policy to route outbound traffic from a source LAN
device through the same WAN connection, regardless of the destination IP address and protocol.
This option provides the highest application compatibility.
Normal Application
Compatibilitya
Select this policy to persistently route outbound traffic from a
source LAN device to the same destination IP address via the
same WAN connection, regardless of the protocol.
This option provides high compatibility to most applications, and
users still benefit from WAN link load balancing when multiple
internet servers are accessed.
Custom
Select this policy to manually define custom rules to manage outbound traffic behavior.
Rules can be defined in a custom rule table. A default rule can
be defined for connections that cannot be matched with any one
of the rules.
a. The default policy is Normal Application Compatibility.
Introduction
67
www.4Gon.co.uk [email protected] Tel: +44 (0)1245 808295 Fax: +44 (0)1245 808299
BODi rS BD007 and BD004 User Manual
6 • Managing Outbound Traffic to the WAN
Creating Custom Rules for the Outbound Policy
To configure custom rules for the outbound policy, click on the Pencil icon in the Outbound Policy window.
Select the Custom option in the drop-down menu, then press Save. The Custom Rules section displays.
Click on the Default rule listing at the bottom of the table. You may edit this rule to change the device’s
default method of controlling outbound traffic for all connections, as long as it does not match any of the rules
above it in the table. Drag and drop a row to rearrange the preferred priority level of an outbound rule:
Figure 31. Outbound Policy > Edit Default Custom Rule
By default, Auto is the selected setting for the Default Rule. Click on Custom to change the Algorithm used
to define the rule. To create a custom rule, click Add Rule at the bottom of the table. The Add a New Custom
Rule window displays:
Figure 32. Outbound Policy > Add New Custom Rule
Creating Custom Rules for the Outbound Policy
68
www.4Gon.co.uk [email protected] Tel: +44 (0)1245 808295 Fax: +44 (0)1245 808299
BODi rS BD007 and BD004 User Manual
6 • Managing Outbound Traffic to the WAN
New Custom Rule Settings
Table 31. Outbound Policy: Custom Rule Settings
Field
Description
Service Name
Specifies the name of the custom rule
Enable
Specifies whether the outbound traffic rule takes effect.
Click Yes to enable the outbound traffic rule. When enabled, BODi rS
matches traffic and takes action based on the other parameters of the rule.
Click No to disable the outbound traffic rule. When disabled, BODi rS disregards the other parameters of the rule.
Source
Specifies the source IP Address, IP Network or MAC Address for outbound
traffic that matches the rule
Destination
Specifies the destination IP Address or IP Network for outbound traffic that
matches the rule
Protocol and Port
Specifies the IP Protocol and Port of outbound traffic that matches this rule.
Click the drop-down menu for the Protocol Selection Tool to choose a
common protocol.
Algorithm
Specifies the behavior of BODi rS for the custom rule. Available options:
• Weighted Balance (see “Algorithm: Weighted Balance” on page 70)
• Persistence (see “Algorithm: Persistence” on page 71)
• Enforced (see “Algorithm: Enforced” on page 72)
• Priority (see “Algorithm: Priority” on page 72)
• Overflow (see “Algorithm: Overflow” on page 72)
• Least Used (see “Algorithm: Least Used” on page 73)
• Lowest Latency (see “Algorithm: Lowest Latency” on page 73)
Terminate Sessions on
Link Recovery
Specifies whether to terminate existing IP sessions on a less preferred WAN
connection in the event that a more preferred WAN connection is recovered.
This setting only applies to the Weighted Balance, Persistence, and
Priority options.
By default, this option is disabled. When disabled, all existing IP sessions will
not be terminated or affected when any other WAN connection is recovered.
When enabled, existing IP sessions may be terminated when another WAN
connection is recovered, so that only the preferred healthy WAN connection(s) are used at any point in time.
Creating Custom Rules for the Outbound Policy
69
www.4Gon.co.uk [email protected] Tel: +44 (0)1245 808295 Fax: +44 (0)1245 808299
BODi rS BD007 and BD004 User Manual
6 • Managing Outbound Traffic to the WAN
Algorithm: Weighted Balance
The Weighted Balance algorithm specifies the ratio of WAN connection usage to be applied on the specified IP
Protocol and Port. These settings only apply when the Algorithm is set to Weighted Balance (shown in
Figure 32 on page 68).
The amount of matching traffic that is distributed to a WAN connection is proportional to the weight of the
WAN connection relative to the total weight. Use the sliders to change the weight for each WAN.
For example, the weight settings in the bulleted list have these results:
• Ethernet WAN: 10
• USB1: 10
• USB2: 0
• Wi-Fi WAN: 5
The total weight is 25 = (10 + 0 + 0 + 10 + 0 + 5)
Matching traffic distributed to Ethernet WAN is 40% = (10 / 25) x 100%
Matching traffic distributed to USB1 is 40% = (10 / 25) x 100%
Matching traffic distributed to USB2 is 0% = (0 / 25) x 100%
Matching traffic distributed to Wi-Fi WAN is 20% = (5 / 25) x 100%
Creating Custom Rules for the Outbound Policy
70
www.4Gon.co.uk [email protected] Tel: +44 (0)1245 808295 Fax: +44 (0)1245 808299
BODi rS BD007 and BD004 User Manual
6 • Managing Outbound Traffic to the WAN
Algorithm: Persistence
The Persistence algorithm provides solutions to fix undesirable link load distribution for internet services.
For example, many e-banking and other secure websites, for security reasons, terminate the session when the
client computer’s internet IP address changes during the session.
In general, different internet IP addresses represent different computers. The security concern is that an IP
address change during a session may be the result of an unauthorized intrusion attempt. Therefore, to prevent
damages from the potential intrusion, the session is terminated upon the detection of an IP address change.
BODi rS can be configured to distribute data traffic across multiple WAN connections. Also, the internet IP
depends on the WAN connections where communication actually takes place. As a result, a LAN client computer behind BODi rS may communicate using multiple internet IP addresses. For example, a LAN client
computer behind an BODi rS with three WAN connections may communicate on the internet using three different IP addresses.
When using the Persistence algorithm with BODi rS, rules can be configured to enable client computers to
persistently utilize the same WAN connections for e-banking and other secure websites. As a result, a client
computer will communicate with the other end using one IP address to eliminate the issues.
Figure 33. Outbound Policy > Custom Rule > Persistence
The Persistence algorithm provides two options: By Source or By Destination.
Table 32. Persistence Algorithm: Persistence Mode Options
Mode
By Sourcea
Description
The same WAN connection will be used for traffic matching the rule and originating from
the same machine regardless of its destination. This option will provide the highest level of
application compatibility.
By Destination The same WAN connection will be used for traffic matching the rule, originating from the
same machine, and going to the same destination. This option can better distribute load
to WAN connections when there are only a few client machines.
a. Default Persistence Mode
When there are multiple client requests, they can be distributed (persistently) to WAN connections with a
weight. Select Auto for the Load Distribution setting to automatically adjust weights according to each
WAN’s Downstream Bandwidth specified in the WAN settings page (see “Configuring the WAN Interface”
on page 38). Alternatively, select Custom to manually set the weight of each WAN using the sliders.
Creating Custom Rules for the Outbound Policy
71
www.4Gon.co.uk [email protected] Tel: +44 (0)1245 808295 Fax: +44 (0)1245 808299
BODi rS BD007 and BD004 User Manual
6 • Managing Outbound Traffic to the WAN
Algorithm: Enforced
The Enforced algorithm specifies the WAN connection usage to be applied on the specified IP Protocol and
Port. These settings only apply when the Algorithm is set to Enforced:
Figure 34. Outbound Policy > Custom Rule > Enforced
Matching traffic will be routed through the specified WAN connection regardless of the connection’s health
check status. Outbound traffic can be enforced to go through a specified Site-to-Site VPN connection.
Algorithm: Priority
The Priority algorithm specifies the priority of the WAN connections to be utilized to route the specified network service. The highest priority WAN connection available will always be used for routing the specified type
of traffic. A lower priority WAN connection will be used only when all higher priority connections have
become unavailable.
Figure 35. Outbound Policy > Custom Rule > Priority
Outbound traffic can be prioritized to go through a specified Site-to-Site VPN connection. You may configure
multiple distribution rules to accommodate different kinds of services.
Algorithm: Overflow
The Overflow algorithm manages traffic by routing through the healthy WAN connection that has the highest
priority and is not fully loaded. When this connection gets saturated, new sessions will be routed to the next
healthy WAN connection that is available.
Figure 36. Outbound Policy > Custom Rule > Overflow
Drag and drop to specify the order of WAN connections to be used for routing traffic. Only the highest priority healthy connection that is not in full load will be utilized.
Creating Custom Rules for the Outbound Policy
72
www.4Gon.co.uk [email protected] Tel: +44 (0)1245 808295 Fax: +44 (0)1245 808299
BODi rS BD007 and BD004 User Manual
6 • Managing Outbound Traffic to the WAN
Algorithm: Least Used
Figure 37. Outbound Policy > Custom Rule > Least Used
The Least Used algorithm manages traffic by routing through the healthy WAN connection that is selected in
the Connection field and has the most available downstream bandwidth. The available downstream bandwidth of a WAN connection is calculated from the total downstream bandwidth specified in the WAN settings
page and the current downstream usage. The available bandwidth and WAN selection is determined every time
an IP session is made.
Algorithm: Lowest Latency
Figure 38. Outbound Policy > Custom Rule > Lowest Latency
The Lowest Latency algorithm manages traffic by routing through the healthy WAN connection that is
selected in the Connection field and has the lowest latency. Latency checking packets are issued periodically to
a nearby router of each WAN connection to determine its latency value. The latency of a WAN is the packet
round trip time of the WAN connection. Additional network usage may be incurred as a result.
The round trip time of a “6M down / 640k up” link can be higher than that of a “2M down / 2M up” link.
This occurs because the overall round trip time is lengthened by its lower upstream bandwidth, despite the
higher downlink speed. This algorithm is ideal for the following two scenarios:
• All WAN connections are symmetric.
• A latency sensitive application must be routed through the lowest latency WAN, regardless the WAN’s
available bandwidth.
Creating Custom Rules for the Outbound Policy
73
www.4Gon.co.uk [email protected] Tel: +44 (0)1245 808295 Fax: +44 (0)1245 808299
BODi rS BD007 and BD004 User Manual
6 • Managing Outbound Traffic to the WAN
Expert Mode Settings
The Expert Mode is available for advanced users to configure custom rules. Click the ? Help circle at the top of
the Custom Rules window, and click the link to turn on Expert Mode.
Under Expert Mode, a special rule - "Site-to-Site VPN Routes" is available in the Custom Rules table. This
option represents all Site-to-Site VPN routes learned from remote VPN peers. By default, this bar is on the top
of all custom rules. That means traffic for remote VPN subnets will be routed to its corresponding VPN peer.
You can create custom Priority or Enforced rules and move them above the bar to override the Site-to-Site
VPN Routes.
When disabled, all of the rules above the Expert Mode bar will be deleted.
Figure 39. Outbound Policy > Custom Rule > Expert Mode
Creating Custom Rules for the Outbound Policy
74
www.4Gon.co.uk [email protected] Tel: +44 (0)1245 808295 Fax: +44 (0)1245 808299
Chapter 7
Configuring Port Forwarding & NAT
Chapter contents
Introduction ..........................................................................................................................................................75
Configuring Port Forwarding ................................................................................................................................75
Port Forwarding Service Settings .....................................................................................................................75
UPnP/NAT-PMP Settings ..............................................................................................................................78
Configuring NAT Mappings .................................................................................................................................79
75
www.4Gon.co.uk [email protected] Tel: +44 (0)1245 808295 Fax: +44 (0)1245 808299
BODi rS BD007 and BD004 User Manual
7 • Configuring Port Forwarding & NAT
Introduction
This chapter describes setting up port forwarding services and NAT mappings. For information about setting
up port forwarding, see “Configuring Port Forwarding” on page 76. For information about setting up NAT
mappings, see “Configuring NAT Mappings” on page 80.
Configuring Port Forwarding
This section describes the following settings for managing port forwarding features using BODi rS Web
Admin Interface: port forwarding service settings (see “Port Forwarding Service Settings” on page 76) and Universal Plug and Play (UPnP) and NAT Port Mapping Protocol (PMP) settings (see “UPnP/NAT-PMP Settings” on page 79).
Port Forwarding Service Settings
BODi rS can act as a firewall that blocks all inbound access from the internet by default. By using the port forwarding, internet users can access the servers behind BODi rS.
To configure inbound port forwarding rules, click on Advanced > Port Forwarding in the Web Admin Interface.
Figure 40. Advanced > Port Forwarding
Introduction
76
www.4Gon.co.uk [email protected] Tel: +44 (0)1245 808295 Fax: +44 (0)1245 808299
BODi rS BD007 and BD004 User Manual
7 • Configuring Port Forwarding & NAT
To define a new service, click the Add Service button and the following window displays:
Figure 41. Advanced > Port Forwarding > Add Service
Table 33. Port Forwarding Service: New Service Settings
Field
Enable
Description
Specifies whether the inbound service rule takes effect.
Select Yes for the inbound service rule to take effect. If the inbound traffic
matches the specified IP Protocol and Port, BODi rS will take action based on the
other parameters of the rule.
Select No to disable the inbound service rule. BODi rS will disregard the other
parameters of the rule.
Service Name
Identifies the service to the System Administrator. Valid values for this setting consist only of alphanumeric and the underscore “_” characters.
IP Protocol
Specifies the protocol of the service as TCP, UDP, ICMP or IP.
Traffic that is received by BODi rS via the specified protocol at the specified
port(s) is forwarded to the LAN hosts specified by the Servers setting. (See
below for details on the Port and Servers settings.)
Alternatively, use the Protocol Selection Tool drop-down menu to automatically fill in the Protocol and a single Port number of common internet services
(e.g. HTTP, HTTPS, etc.). After selecting an item from the Protocol Selection
Tool drop-down menu, you may still manually modify the Protocol and Port
settings.
Configuring Port Forwarding
77
www.4Gon.co.uk [email protected] Tel: +44 (0)1245 808295 Fax: +44 (0)1245 808299
BODi rS BD007 and BD004 User Manual
7 • Configuring Port Forwarding & NAT
Table 33. Port Forwarding Service: New Service Settings
Field
Port
Description
Specifies the port(s) that correspond to the service, and can be configured to
behave in one of the following ways:
• Any Port: All traffic that is received by BODi rS via the specified protocol is
forwarded to the servers specified by the Servers setting.
– For example, with IP Protocol set to TCP and Port set to Any Port,
all TCP traffic is forwarded to the configured servers.
• Single Port: Traffic that is received by BODi rS via the specified protocol at
the specified port is forwarded via the same port to the servers specified by
the Servers setting.
– For example, with IP Protocol set to TCP and Port set to Single Port
and Service Port 80, TCP traffic received on Port 80 is forwarded
to the configured servers via Port 80.
• Port Range: Traffic that is received by BODi rS via the specified protocol at
the specified port range is forwarded via the same respective ports to the
LAN hosts specified by the Servers setting.
– For example, with IP Protocol set to TCP and Port set to Single Port
and Service Port 80-88, TCP traffic received on ports 80 through
88 is forwarded to the configured servers via the respective ports.
• Port Mapping: Traffic that is received by BODi rS via the specified protocol at the specified port is forwarded via a different port to the servers specified by the Servers setting.
– For example, with IP Protocol set to TCP and Port set to Port Map
Service Port 80 and Map to Port 88, TCP traffic on Port 80 is for-
warded to the configured servers via Port 88.
• Range Mapping: Traffic that is received by BODi rS via the specified protocol at the specified port range is forwarded via a different port to the servers specified by the Servers setting.
Inbound IP Addresses Specifies the WAN connections and internet IP address(es) from which the service can be accessed.It is required to select at least one IP address.
Server IP Address
Configuring Port Forwarding
Specifies the LAN IP address of the server that handles the service requests
78
www.4Gon.co.uk [email protected] Tel: +44 (0)1245 808295 Fax: +44 (0)1245 808299
BODi rS BD007 and BD004 User Manual
7 • Configuring Port Forwarding & NAT
UPnP/NAT-PMP Settings
Universal Plug and Play (UPnP) and NAT Port Mapping Protocol (NAT-PMP) are network protocols that
automate the process of inbound port forwarding. UPnP and NAT-PMP allow a computer on the LAN to
automatically configure the router to allow parties on the WAN to connect to itself.
When a computer creates a rule using these protocols, the specified TCP/UDP port of all WAN connections of
the default IP address will be forwarded.
Click on Status > UPnP/NAT-PMP and check the corresponding box(es) to enable UPnP and/or NAT-PMP.
Only enable these features if you trust the computers on the LAN. A list of the forwarded ports controlled via
UPnP or NAT-PMP will display.
Figure 42. Status > UPnP/NAT-PMP
Configuring Port Forwarding
79
www.4Gon.co.uk [email protected] Tel: +44 (0)1245 808295 Fax: +44 (0)1245 808299
BODi rS BD007 and BD004 User Manual
7 • Configuring Port Forwarding & NAT
Configuring NAT Mappings
This section describes how to set up NAP mappings on BODi rS. A NAT Mapping configuration allows
BODi rS to map IP addresses of all inbound and outbound NAT traffic to and from an internal client IP
address. To configure NAT mappings, click on Advanced > NAT Mappings in the Web Admin Interface.
Figure 43. Advanced > NAT Mappings
To add a rule for NAT Mappings, click Add NAT Rule and the following window displays:
Figure 44. NAT Mappings > Add NAT Rule
Table 34 on page 81 explains the new NAT rule settings.
Configuring NAT Mappings
80
www.4Gon.co.uk [email protected] Tel: +44 (0)1245 808295 Fax: +44 (0)1245 808299
BODi rS BD007 and BD004 User Manual
7 • Configuring Port Forwarding & NAT
Table 34. NAT Mappings: New Rule Settings
Field
Description
LAN Client(s)
Specifies where the new rule applies: a single LAN Address, an IP Range, or
an IP Network.
Address
Refers to the LAN host’s private IP address. The system maps this address to a
number of specified public IP addresses in order to facilitate inbound and outbound traffic.
*This option is only available when IP Address is selected as the LAN Client.
Range
Refers to a contiguous group of private IP addresses used by the LAN host. The
system maps these addresses to a number of specified public IP addresses to
facilitate outbound traffic.
*This option is only available when IP Range is selected as the LAN Client.
Network
Refers to all private IP addresses and ranges managed by the LAN host. The system maps these addresses to a number of specified public IP addresses to facilitate outbound traffic.
*This option is only available when IP Network is selected as the LAN Client.
Inbound Mappings
Specifies the system to bind on these WAN connections and corresponding
WAN-specific IP addresses. Any access to the specified WAN connection(s) and
IP address(es) will be forwarded to the LAN Host.
*This option is only available when IP Address is selected as the LAN Client.
Note Inbound Mapping is not needed for WAN connections in drop-in or IP
forwarding mode.
Note Each WAN IP address can be associated to one NAT Mapping only.
Outbound Mappings Specifies which WAN IP addresses to use when an IP connection is made from a
LAN host to the internet.
Each LAN host in an IP range or IP network will be evenly mapped to one of each
selected WAN's IP addresses (for better IP address utilization) in a persistent
manner (for better application compatibility).
Note If you do not want to use a specific WAN for outgoing accesses, you
should select the Default option, then customize the outbound access
rule in the Outbound Policy section.
Note WAN connections in drop-in or IP forwarding mode are not shown.
Click Save to save the new configuration.
Note
Inbound firewall rules override the Inbound Mapping settings.
Configuring NAT Mappings
81
www.4Gon.co.uk [email protected] Tel: +44 (0)1245 808295 Fax: +44 (0)1245 808299
Chapter 8
Configuring Quality of Service
Chapter contents
Introduction ..........................................................................................................................................................82
Managing User Groups .........................................................................................................................................82
Setting Up Bandwidth Control .............................................................................................................................83
Configuring Applications ......................................................................................................................................83
Application Prioritization ................................................................................................................................83
Prioritization for Custom Applications ...........................................................................................................84
DSL/Cable Optimization ................................................................................................................................84
82
www.4Gon.co.uk [email protected] Tel: +44 (0)1245 808295 Fax: +44 (0)1245 808299
BODi rS BD007 and BD004 User Manual
8 • Configuring Quality of Service
Introduction
This chapter describes managing Quality of Service (QoS) settings for BODi rS. To configure QoS settings,
click on Advanced > QoS in the Web Admin Interface. There are three services that you can manage under
QoS: User Groups, Bandwidth Control, and Applications.
Managing User Groups
LAN and PPTP clients can be categorized into three user groups– Manager, Staff, and Guest. The User
Group table allows you to define rules and assign client IP addresses or subnets to a user group. You can apply
different bandwidth and traffic prioritization policies on each user group in the Bandwidth Control and
Application sections.
The table is automatically sorted, and the table order signifies the rules' precedence. The smaller and more specific subnets are put towards the top of the table and have higher precedence; larger and less specific subnets are
placed towards the bottom.
Click the Add button to define clients and their user group. Click
to remove the defined rule.
Two default rules are pre-defined and put at the bottom of the table. They include All DHCP reservation clients and Everyone; these rules cannot be removed from the table. All DHCP reservation clients represents
the LAN clients defined in the DHCP Reservation table in the LAN settings page. Everyone represents all
clients that are not defined in any rule above. Click on a rule to change its group.
Figure 45. Advanced > QoS > User Groups
Table 35. QoS: User Group Settings
Field
Subnet / IP Address
Description
Select an option from the drop-down menu to define the client via Subnet or IP
Address.
Select IP Address to enter a name defined in the DHCP Reservation table or
a LAN client's IP address.
Select Subnet to enter a subnet address and specify a subnet mask.
Group
Defines the User Group for the specified Subnet / IP Address
Once users have been assigned to a user group, their internet traffic will be restricted by the rules defined for
that particular group. For more information on setting these rules, refer to “Setting Up Bandwidth Control”
on page 84 and “Configuring Applications” on page 84.
Introduction
83
www.4Gon.co.uk [email protected] Tel: +44 (0)1245 808295 Fax: +44 (0)1245 808299
BODi rS BD007 and BD004 User Manual
8 • Configuring Quality of Service
Setting Up Bandwidth Control
You can define a maximum download speed (over all WAN connections) and upload speed (for each WAN
connection) that each individual Staff and Guest member can consume. No limit can be imposed on individual Manager members.
By default, Download and Upload Bandwidth Limits are set to unlimited (set as 0).
Figure 46. Advanced > QoS > Bandwidth Control
Configuring Applications
You may use the Application section of the QoS page for prioritizing and optimizing Application services.
Application Prioritization
You can choose whether to apply the same Prioritization settings to all user groups or customize the settings for
each group.
Figure 47. Advanced > QoS > Application Prioritization
You may choose from three priority levels for application prioritization: ÇHigh, –Normal, and ÈLow.
Setting Up Bandwidth Control
84
www.4Gon.co.uk [email protected] Tel: +44 (0)1245 808295 Fax: +44 (0)1245 808299
BODi rS BD007 and BD004 User Manual
8 • Configuring Quality of Service
Prioritization for Custom Applications
Click the Add button to define a custom application. Click
application in the corresponding row.
in the Action column to delete the custom
Figure 48. Advanced > QoS > Custom Applications Prioritization
Table 36. QoS: Application Prioritization Settings
Field
Description
PPTP and IPSec VPN
Enable to prioritize any PPTP and IPSec traffic
SIP/Vonage
Enable to prioritize any SIP and Vonage voice traffic
Skype, Google Talk,
RealVideo, Windows
Streaming Media
Enable to prioritize any voice and video traffic from Skype, Google Talk,
RealVideo, and Windows Streaming Media
Secure Web (HTTPS)
Enable to prioritize HTTPS (TCP Port 443) traffic
DSL/Cable Optimization
A DSL/cable-based WAN connection sets the upload bandwidth lower than the download bandwidth. With
DSL/Cable Optimization option enabled, the download bandwidth of the WAN can be fully utilized in any
situation.
When a DSL/cable circuit's uplink is congested, the download bandwidth will be affected. Users will not be
able to download data in full speed until the uplink becomes less congested. The DSL/Cable Optimization
feature can relieve issues with this case. When enabled, the download speed will become less affected by the
upload traffic.
By default, this feature is Enabled.
Figure 49. Advanced > QoS > DSL/Cable Optimization
Configuring Applications
85
www.4Gon.co.uk [email protected] Tel: +44 (0)1245 808295 Fax: +44 (0)1245 808299
Chapter 9
Configuring Firewall Settings
Chapter contents
Introduction ..........................................................................................................................................................86
Configuring Outbound and Inbound Firewall Rules .............................................................................................86
Enabling Intrusion Detection and DoS Prevention ...............................................................................................89
86
www.4Gon.co.uk [email protected] Tel: +44 (0)1245 808295 Fax: +44 (0)1245 808299
BODi rS BD007 and BD004 User Manual
9 • Configuring Firewall Settings
Introduction
This chapter describes managing Firewall settings for BODi rS. To configure the Firewall, click on Advanced
> Firewall in the Web Admin Interface. A firewall is a mechanism that selectively filters data traffic between
the WAN side (the internet) and the LAN side of the network. It can protect the local network from potential
hacker attacks, offensive Web sites, and/or other inappropriate uses.
The firewall functionality of BODi rS supports the selective filtering of data traffic in both directions:
• Outbound (LAN to WAN)
• Inbound (WAN to LAN)
• Intrusion Detection and DoS Prevention
With Site-to-Site VPN enabled (see Chapter 5, “Configuring WAN Bonding” on page 57), the firewall rules
also apply to VPN tunneled traffic.
Configuring Outbound and Inbound Firewall Rules
To configure the outbound and inbound firewall settings, click on Advanced > Firewall and click the Add
Rule button.
Figure 50. Advanced > Firewall > Outbound and Inbound Firewall Rules
After clicking Add Rule, the following configuration window displays:
Figure 51. Advanced > Firewall > Add Firewall Rule
Table 37 on page 88 describes the settings for configuring a new firewall rule.
Introduction
87
www.4Gon.co.uk [email protected] Tel: +44 (0)1245 808295 Fax: +44 (0)1245 808299
BODi rS BD007 and BD004 User Manual
9 • Configuring Firewall Settings
Table 37. Firewall: Inbound/Outbound Firewall Settings
Field
Description
Rule Name
Specifies a name for the firewall rule
Enable
Specifies whether the firewall rule should take effect.
Select Yes for the firewall rule to take effect. If the traffic matches the specified
Protocol/IP/Port, BODi rS will take action based on the other parameters of the
rule.
Select No to disable the firewall rule. BODi rS will disregard the other parameters of the rule.
WAN Connection
Specifies the WAN connections for the rule. Available options include:
• Any (applies to all WAN connections)
• Ethernet WAN
• USB1
• USB2
• Wi-Fi WAN
Protocol
Specifies the protocol for the rule. Select one of the following protocols from the
drop-down menu:
• TCP
• UDP
• ICMP
• IP
Alternatively, you may use the Protocol Selection Tool drop-down menu to
automatically fill in the Protocol and Port number of common internet services
(e.g. HTTP, HTTPS, etc.). After selecting an item from the Protocol Selection Tool
drop-down menu, you may still modify the Protocol and Port number manually.
Source IP & Port
Specifies the source IP address(es) and port number(s) to match with the firewall
rule. You may specify a single address or network, and a single port or a range
of ports.
Destination IP & Port
Specifies the destination IP address(es) and port number(s) to match with the firewall rule. You may specify a single address or network, and a single port or a
range of ports.
Action
Specifies what BODi rS should do upon encountering traffic that matches the
Source IP & Port or Destination IP & Port.
Select Allow to let the matching traffic pass through BODi rS (to be routed to the
destination).
Select Deny to disable the matching traffic from passing through BODi rS.
Configuring Outbound and Inbound Firewall Rules
88
www.4Gon.co.uk [email protected] Tel: +44 (0)1245 808295 Fax: +44 (0)1245 808299
BODi rS BD007 and BD004 User Manual
9 • Configuring Firewall Settings
Table 37. Firewall: Inbound/Outbound Firewall Settings
Field
Description
Event Logging
Specifies whether or not to log matched firewall events. You may view logged
messages by clicking on Status > Event Log.
The following shows a sample log message:
Aug 13 23:47:44 Denied CONN=Ethernet WAN SRC=20.3.2.1
DST=192.168.1.20 LEN=48 PROTO=TCP SPT=2260 DPT=80
• CONN: The connection specified in the log entry
• SRC: Source IP address
• DST: Destination IP address
• LEN: Packet length
• PROTO: Protocol
• SPT: Source port
• DPT: Destination port
Click Save to add the new rule to the Firewall Rules table. To reorder the rules in the table, hold the left
mouse button on the desired rule, drag it to the new position, and release the mouse button:
Figure 52. Advanced > Firewall > Reorder Rules List
To delete a rule from the table, click
. Rules are matched from top to bottom. If a connection matches any
one of the upper rules, the matching process will stop. If none of the rules match the connection, BODi rS will
apply the Default rule. The Default rule is set to Allow for both outbound and inbound access.
Note
If the default inbound rule is set to Allow for NAT-enabled WANs,
no inbound allowed firewall rules will be required for inbound Port
Forwarding and inbound NAT Mapping rules. However, if the
default inbound rule is set to Deny, a corresponding Allow firewall
rule will be required.
Configuring Outbound and Inbound Firewall Rules
89
www.4Gon.co.uk [email protected] Tel: +44 (0)1245 808295 Fax: +44 (0)1245 808299
BODi rS BD007 and BD004 User Manual
9 • Configuring Firewall Settings
Enabling Intrusion Detection and DoS Prevention
BODi rS supports detecting and preventing intrusions and Denial-of-Service (DoS) attacks from the internet.
To turn on this feature, click
and check Enable for Intrusion Detection and DoS Prevention. Click Save
to apply the setting.
Figure 53. Advanced > Firewall > Intrusion Detection and DoS Prevention
When enabled, BODi rS will detect and protect the network from the following kinds of intrusions and denialof-service attacks:
• Port Scan:
- NMAP FIN/URG/PSH
- Xmas Tree
- Another Xmas Tree
- Null Scan
- SYN/RST
- SYN/FIN
• SYN Flood Prevention
• Ping Flood Attack Prevention
Enabling Intrusion Detection and DoS Prevention
90
www.4Gon.co.uk [email protected] Tel: +44 (0)1245 808295 Fax: +44 (0)1245 808299
Chapter 10 Configuring Miscellaneous Services
Chapter contents
Introduction ..........................................................................................................................................................91
Enabling the PPTP Server .....................................................................................................................................91
Enabling Service Forwarding .................................................................................................................................92
SMTP Forwarding ..........................................................................................................................................93
Web Proxy Forwarding Settings ......................................................................................................................94
DNS Forwarding Settings ...............................................................................................................................94
Enabling Service Passthrough ................................................................................................................................95
91
www.4Gon.co.uk [email protected] Tel: +44 (0)1245 808295 Fax: +44 (0)1245 808299
BODi rS BD007 and BD004 User Manual
10 • Configuring Miscellaneous Services
Introduction
To configure the PPTP Server, Service Forwarding, and Service Passthrough, click on Advanced > Miscellaneous Settings in the Web Admin Interface.
Enabling the PPTP Server
Figure 54. PPTP Server Application
BODi rS has a built-in PPTP Server that enables remote computers to conveniently and securely access the
local network. To configure the PPTP server settings, click Advanced > Misc. Settings > PPTP Server.
Check the Enable box to turn on the PPTP server function. To view all connected PPTP sessions, click on
Status > Client List (see “Viewing the Client List” on page 114).
Table 38. Misc Settings: PPTP Server
Field
Description
Listen On
Specifies the WAN connection(s) and IP address(es) where the PPTP server
should listen.
User Accounts
Defines the PPTP User Accounts. Click Add to enter a username and password to create an account. After adding the user accounts, you can click on
a username to edit the account password.
Click
Introduction
to delete a corresponding account.
92
www.4Gon.co.uk [email protected] Tel: +44 (0)1245 808295 Fax: +44 (0)1245 808299
BODi rS BD007 and BD004 User Manual
10 • Configuring Miscellaneous Services
Enabling Service Forwarding
To configure service forwarding settings, click on Advanced > Misc. Settings > Service Forwarding in the
Web Admin Interface. The following section displays:
Figure 55. Advanced > Miscellaneous Settings > Service Forwarding
Table 39. Misc. Settings: Service Forwarding
Field
SMTP Forwarding
Description
Click Enable to intercept all outgoing SMTP connections destined for any
host at TCP Port 25. These connections will be redirected to a specified
SMTP server and port number. SMTP server settings for each WAN can be
specified after selecting Enable.
For more information, see “SMTP Forwarding” on page 94.
Web Proxy Forwarding
Click Enable to intercept all outgoing connections destined for the proxy
server specified in Web Proxy Interception Settings These connections
will be redirected to a specified web proxy server and port number. Web
Proxy Interception Settings and proxy server settings for each WAN can be
specified after selecting Enable.
For more information, see “Web Proxy Forwarding Settings” on page 95.
DNS Forwarding
Click Enable to intercept all outgoing DNS lookups to the built-in DNS name
server.
If any LAN device is using DNS name servers of a WAN connection, you
may want to enable this option to enhance the DNS availability without modifying the DNS server setting of the clients. The built-in DNS name server will
distribute DNS lookups to corresponding DNS servers of all available WAN
connections. In this case, DNS service will not be interrupted even if any
WAN connection is down.
For more information, see “DNS Forwarding Settings” on page 95.
Enabling Service Forwarding
93
www.4Gon.co.uk [email protected] Tel: +44 (0)1245 808295 Fax: +44 (0)1245 808299
BODi rS BD007 and BD004 User Manual
10 • Configuring Miscellaneous Services
SMTP Forwarding
Some ISPs require their users to send e-mails via the ISP’s SMTP server. All outgoing SMTP connections are
blocked except for those connecting to the ISPs. BODi rS supports intercepting and redirecting all outgoing
SMTP connections (destined for TCP port 25) via a WAN connection to the WAN’s corresponding SMTP
server:
Figure 56. Miscellaneous Settings > Service Forwarding > SMTP Forwarding
To turn on SMTP forwarding, select the Enable check box under SMTP Forwarding Setup, then select the
boxes for the WAN connections in the Enable Forwarding column that require forwarding. Enter the ISP’s
e-mail server address and TCP port number for each WAN service.
BODi rS will intercept SMTP connections, select a WAN with reference to the Outbound Policy, and then
forward the connection to the forwarded SMTP server if the chosen WAN has enabled forwarding. If the forwarding is disabled for a WAN connection, BODi rS will forward the SMTP connections to the connection’s
original destination.
Note
To route all SMTP connections only to specific WAN connection(s),
you should create a rule in Outbound Policy (see “Creating Custom
Rules for the Outbound Policy” on page 68).
Enabling Service Forwarding
94
www.4Gon.co.uk [email protected] Tel: +44 (0)1245 808295 Fax: +44 (0)1245 808299
BODi rS BD007 and BD004 User Manual
10 • Configuring Miscellaneous Services
Web Proxy Forwarding Settings
Figure 57. Miscellaneous Settings > Service Forwarding > Web Proxy Forwarding
To turn on Web Proxy forwarding, select the Enable check box under Web Proxy Forwarding Setup. When
enabled, BODi rS will: 1) intercept all outgoing connections destined for the proxy server specified in the Web
Proxy Interception Settings, 2) choose a WAN connection with reference to the Outbound Policy, and 3)
forward them to the specified web proxy server and port number.
You may configure the redirected server settings for each WAN in the Web Proxy Interception Settings section. If forwarding is disabled for a WAN, BODi rS will forward the web proxy connections for the WAN to
the connection’s original destination.
DNS Forwarding Settings
Figure 58. Miscellaneous Settings > Service Forwarding > DNS Forwarding
To turn on DNS forwarding, select the Enable check box under DNS Forwarding Setup. When enabled,
BODi rS will intercept all clients’ outgoing DNS requests and forward them to the built-in DNS proxy server.
Enabling Service Forwarding
95
www.4Gon.co.uk [email protected] Tel: +44 (0)1245 808295 Fax: +44 (0)1245 808299
BODi rS BD007 and BD004 User Manual
10 • Configuring Miscellaneous Services
Enabling Service Passthrough
To configure service passthrough settings, click on Advanced > Misc. Settings > Service Passthrough in the
Web Admin Interface. The following section displays:
Figure 59. Advanced > Miscellaneous Settings > Service Passthrough
Some internet services require special handling in a multi-WAN environment. BODi rS supports handling
these services so that that internet applications do not notice it is behind a multi-WAN router.
Table 40. Misc. Settings: Service Passthrough Support
Field
SIP
Description
With Voice-over-IP (VoIP) Session Initiation Protocol (SIP), BODi rS acts as a SIP Application Layer Gateway (ALG) that binds connections for the same SIP session to the same
WAN connection and translate IP address in the SIP packets correctly in NAT mode.
This type of passthrough support is always enabled. Available options include Standard
Mode and Compatibility Mode.
If your SIP server’s signal port number is non-standard, check the box Define custom
signal ports and enter the port numbers into the text boxes.
H.323
With H.323 enabled, BODi rS defines protocols that provide audio-visual communication sessions on any packet network to pass through BODi rS.
FTP
FTP sessions consist of two TCP connections: one for control and one for data. In multiWAN situations, FTP sessions must be binded to the same WAN connection. Otherwise,
problems will arise when transferring files.
By default, BODi rS monitors TCP control connections on port 21 for any FTP connections
and binds TCP connections of the same FTP session to the same WAN.
If you have an FTP server listening on a port number other than 21, check the box Define
custom control ports and enter the port numbers into the text boxes.
TFTP
BODi rS monitors outgoing TFTP connections and routes any incoming TFTP data packets
back to the client. Select Enable if you want to turn on TFTP Passthrough support.
IPSec NAT-T
With IPsec NAT-T Passthrough enabled, BODi rS monitors UDP ports 500, 4500 and
10000 by default.
Select the box Define custom ports to add more custom data ports for your IPsec system. If the VPN contains IPsec Site-to-Site VPN traffic, you must check the box Route
IPsec Site-to-Site VPN and select the WAN connection to route traffic.
If you have IPsec Site-to-Site VPN traffic routed, check the Route IPsec Site-to-Site
VPN option and select a WAN to force routing traffic to the specified WAN.
Enabling Service Passthrough
96
www.4Gon.co.uk [email protected] Tel: +44 (0)1245 808295 Fax: +44 (0)1245 808299
Chapter 11 Managing System Settings
Chapter contents
Introduction ..........................................................................................................................................................97
Configuring Administration Security Settings .......................................................................................................97
Admin Settings ...............................................................................................................................................97
WAN Connection Access Settings ................................................................................................................100
Upgrading the Firmware .....................................................................................................................................101
Firmware Upgrade Status ..............................................................................................................................101
Configuring the Time Server ...............................................................................................................................102
Configuring Email Notifications .........................................................................................................................103
Setting Up the Remote System Log .....................................................................................................................105
Configuring Simple Network Management Protocol (SNMP) ............................................................................106
General SNMP Settings ................................................................................................................................106
SNMP Community Settings .........................................................................................................................107
SNMPv3 User Settings .................................................................................................................................107
Importing and Exporting System Configuration Files..........................................................................................108
Restore Configuration to Factory Settings .....................................................................................................108
Downloading Active Configurations .............................................................................................................108
Uploading Configurations ............................................................................................................................108
Rebooting the System..........................................................................................................................................108
Testing System Connections................................................................................................................................109
Ping Test ......................................................................................................................................................109
Traceroute Test .............................................................................................................................................110
VPN Test ......................................................................................................................................................110
97
www.4Gon.co.uk [email protected] Tel: +44 (0)1245 808295 Fax: +44 (0)1245 808299
BODi rS BD007 and BD004 User Manual
11 • Managing System Settings
Introduction
This chapter describes setting up and managing general system administration utilities, including security,
upgrades, time, notifications, logs, SNMP, and connection tests.
Configuring Administration Security Settings
This section describes the following settings for managing account and connection access via the BODi rS Web
Admin Interface: user account settings (see “Admin Settings” on page 98) and connection access settings (see
“WAN Connection Access Settings” on page 101).
Admin Settings
BODi rS provides two user accounts for accessing the Web Admin: admin and user. The admin account has
full administration access, while user is a read-only account. The user account can only access the device's status information and cannot make any changes to the configuration.
Web login sessions will log out automatically after being idle for longer than the specified Web Session Timeout. The default timeout is 4 hours. Before the session expires, click the Logout button in the Web Admin
Interface to close the session.
For security reasons, you should change the administrator password after logging into the admin account for
the first time. You may also configure access to the admin account from the LAN only to improve system security.
To configure user accounts and sessions, click on System > Admin Security in the Web Admin Interface
(Figure 60 on page 99).
Introduction
98
www.4Gon.co.uk [email protected] Tel: +44 (0)1245 808295 Fax: +44 (0)1245 808299
BODi rS BD007 and BD004 User Manual
11 • Managing System Settings
Figure 60. System > Admin Security
Table 41. System: Admin Security Settings
Field
Description
Router Name
Defines a name for this specific BODi rS unit.
Admin User Name
*Non-configurable. Set as admin by default.
Admin Password
Specifies a new password for the admin account.
Confirm Admin Password Verifies and confirms the new password for the admin account.
Read-only User Name
*Non-configurable. Set as user by default.
User Password
Specifies a new password for the user account. When confirmed, the user
account will be available for read-only use.
Confirm User Password
Verifies and confirms the password for the user account
Web Session Timeout
Specifies the number of hours and minutes that a web session can remain
idle before BODi rS terminates the session.
Default = 4 hours
Configuring Administration Security Settings
99
www.4Gon.co.uk [email protected] Tel: +44 (0)1245 808295 Fax: +44 (0)1245 808299
BODi rS BD007 and BD004 User Manual
11 • Managing System Settings
Table 41. System: Admin Security Settings
Field
Authentication by
RADIUS
Description
Select the Authentication by RADIUS option to authenticate access
using an external RADIUS server.
BODi rS treats authenticated users as admin users with full read-write permissions. Local "admin" and "user" accounts will be disabled. When the
device is not able to communicate with the external RADIUS server, local
accounts will be enabled again for emergency access.
*Authentication options will be available once this box is checked.
Auth Protocol
Specifies the authentication protocol used. Available options include:
MS-CHAP v2 and PAP.
Auth Server
Specifies the access address of the external RADIUS server
Auth Server Secret
Defines the secure password phrase for accessing the RADIUS server
Auth Timeout
Specifies the time value for authentication timeout
Accounting Server
Specifies the access address of the external Accounting server
Accounting Server Secret Defines the secure password phrase for accessing the Accounting server
Network Connection
Specifies the network connection that BODi rS will use for the authentication
connection. Select an option from LAN, WAN and VPN connections.
Security
Specifies the authorized protocol(s) for accessing the Web Admin Interface:
• HTTP
• HTTPS
• HTTP/HTTPS
Web Admin Port
Specifies the port number to use to access the Web Admin Interface
Web Admin Access
Specifies the authorized network interfaces for accessing the Web Admin
Interface:
• LAN only
• LAN/WAN (see “WAN Connection Access Settings” on page 101)
Configuring Administration Security Settings
100
www.4Gon.co.uk [email protected] Tel: +44 (0)1245 808295 Fax: +44 (0)1245 808299
BODi rS BD007 and BD004 User Manual
11 • Managing System Settings
WAN Connection Access Settings
To configure WAN Connection Access settings, select LAN/WAN as the Web Admin Access option in the
Admin Settings section.
Table 42. System: WAN Connection Access Settings
Field
Description
Allowed Source IP Subnets Specifies authorized IP subnets that may access the Web Admin Interface.
Available options include:
• Any: Allow web admin access from any location, without IP address
restrictions.
• Allow access from the following IP subnets only: Only the
defined IP subnets may access the Web Admin Interface. When
selected, this option displays a text field that allows you to enter the
authorized IP subnet addresses.
Each IP subnet must be in form of w.x.y.z/m, where:
– w.x.y.z is an IP address (e.g. 192.168.0.0)
– /m is the subnet mask in CIDR format, which is between 0 and
32 inclusively. (e.g.168.0.0/24)
To define multiple subnets, enter only one IP subnet on each line.
For example:
168.0.0/24
10.8.0.0/16
Allowed WAN IP Addresses Specifies the WAN IP address(es) where the web server should listen for
activity
Configuring Administration Security Settings
101
www.4Gon.co.uk [email protected] Tel: +44 (0)1245 808295 Fax: +44 (0)1245 808299
BODi rS BD007 and BD004 User Manual
11 • Managing System Settings
Upgrading the Firmware
This section describes how to upgrade the firmware for BODi rS through the Web Admin Interface. To reach
the firmware page, click on System > Firmware:
Figure 61. System > Firmware
To use the online upgrade option, click on the Check Again button in the Firmware Upgrade section of the
screen. With this option, BODi rS checks online for new firmware. If a new firmware update is available,
BODi rS will automatically download the new firmware file. BODi rS will automatically initiate the upgrade
process after downloading the new firmware file.
To use the manual upgrade option, go to www.patton.com/support/upgrades and select BODi rS from the
Model Number drop-down menu. Then, click the Download hyperlink for the desired software release. In
the BODi rS Web Admin Interface, click Browse... to select the firmware file from the local computer, and
then click Manual Upgrade to send the firmware to the unit. BODi rS will automatically initiate the upgrade
process after downloading the new firmware file.
BODi rS has the ability to store two different firmware versions in two different partitions. A firmware upgrade
will always replace the inactive partition. If you want to keep the inactive firmware, you can simply reboot your
device with the inactive firmware, and then perform the firmware upgrade.
Firmware Upgrade Status
During the firmware upgrade, the Status LED on the front of the unit shows the upgrade process:
• OFF: Firmware upgrade in progress (DO NOT disconnect the power)
• Red: BODi rS is rebooting
• Green: The firmware upgrade is successfully completed.
Note
• The firmware upgrade process may not necessarily preserve the previ-
ous configuration, and the behavior varies on a case-by-case basis.
• Do not disconnect the power during the firmware upgrade process.
• Do not attempt to upload a non-firmware file, or a firmware file that
is not supported by BODi rS.
• Upgrading BODi rS with an invalid firmware file will damage the
unit, and may void the warranty.
Upgrading the Firmware
102
www.4Gon.co.uk [email protected] Tel: +44 (0)1245 808295 Fax: +44 (0)1245 808299
BODi rS BD007 and BD004 User Manual
11 • Managing System Settings
Configuring the Time Server
The Time Server functionality enables the system clock of BODi rS to synchronize with a specified Time
Server. To configure the time server settings, click on System > Time in the Web Admin Interface.
Figure 62. System > Time
Table 43. System: Time Server Settings
Field
Time Zone
Description
Specifies the time zone (along with the corresponding Daylight Savings Time
scheme) for BODi rS.
The Time Zone value affects the time stamps in the Event Log of BODi rS and Email notifications.
Select the box for Show all to view all available time zone options.
Time Server
Configuring the Time Server
Specifies the NTP network time server to be utilized by BODi rS.
103
www.4Gon.co.uk [email protected] Tel: +44 (0)1245 808295 Fax: +44 (0)1245 808299
BODi rS BD007 and BD004 User Manual
11 • Managing System Settings
Configuring Email Notifications
The Email Notification functionality of BODi rS sends the System Administrator up-to-date information on
the network status. To configure notification settings, click on System > Email Notification in the Web
Admin Interface.
Figure 63. System > Email Notification
Table 44. System: Email Notification Settings
Field
Email Notification
Description
Select Enable to allow BODi rS to send email messages to a System
Administrator when the WAN status changes, or when new firmware is
available.
If the Enable box is not checked, BODi rS will not send email messages
about the system.
SMTP Server
Specifies the SMTP server used for sending email. If the server requires
authentication, select Require authentication.
SSL Encryption
Select the box to Enable SMTPS. When enabled, the SMTP Port field
will change to 465 automatically.
SMTP Port
Specifies the SMTP Port number; by default, this is set to 25. Select the SSL
Encryption box to automaticaly change the port to 465.
You may also enter a new port number, or you may click Default to
restore the default port setting.
SMTP Username/
Password
Specifies the SMTP username and password while sending email.
Select Require authentication in the SMTP Server field to view these
options.
Confirm SMTP Password
Verifies and confirms the new administrator password
Sender’s Email Address
Specifies the sender email address shown on the email notifciations sent by
BODi rS.
Recipient’s Email Address
Specifies the email addresses where BODi rS may send notifications to the
administrator(s). You may enter multiple recipients’ email addresses in this
field.
Configuring Email Notifications
104
www.4Gon.co.uk [email protected] Tel: +44 (0)1245 808295 Fax: +44 (0)1245 808299
BODi rS BD007 and BD004 User Manual
11 • Managing System Settings
After you have completed the settings, click the Test Email Notification button to test the settings before saving it. The following screen displays to confirm the settings:
Figure 64. Test Email Notification
Click Yes to confirm. Wait a few seconds, and a window displays with detailed test results:
Figure 65. Test Email Result
Configuring Email Notifications
105
www.4Gon.co.uk [email protected] Tel: +44 (0)1245 808295 Fax: +44 (0)1245 808299
BODi rS BD007 and BD004 User Manual
11 • Managing System Settings
Setting Up the Remote System Log
The Remote Syslog functionality of BODi rS enables event logging at a specified remote Syslog server. To configure the remote system log settings, click on System > Remote Syslog in the Web Admin Interface.
Figure 66. System > Remote Syslog
Table 45. System: Remote Syslog Setup
Field
Description
Remote Syslog
Specifies whether or not to log events at the specified remote Syslog server
Remote Syslog Host
Specifies the IP address or host name of the remote Syslog server
Remote Syslog Host Port
Specifies the port number of the remote Syslog service
Default = 514
Setting Up the Remote System Log
106
www.4Gon.co.uk [email protected] Tel: +44 (0)1245 808295 Fax: +44 (0)1245 808299
BODi rS BD007 and BD004 User Manual
11 • Managing System Settings
Configuring Simple Network Management Protocol (SNMP)
Simple Network Management Protocol (SNMP) is an open standard that can be used to collect information
from BODi rS. To configure SNMP settings, click on System > SNMP in the Web Admin Interface.
Figure 67. System > SNMP
General SNMP Settings
Table 46. System: SNMP Settings
Field
Description
SNMP Device Name
Displays the router name defined in System > Admin Security
SNMP Port
Specifies the SNMP port to use. Default = 161
SNMPv1
Select the box to Enable SNMP version 1.
SNMPv2
Select the box to Enable SNMP version 2.
SNMPv3
Select the box to Enable SNMP version 3.
Configuring Simple Network Management Protocol (SNMP)
107
www.4Gon.co.uk [email protected] Tel: +44 (0)1245 808295 Fax: +44 (0)1245 808299
BODi rS BD007 and BD004 User Manual
11 • Managing System Settings
SNMP Community Settings
To add a community for either SNMPv1 or SNMPv2, click the Add SNMP Community button in the Community Name table. The following screen displays:
Figure 68. System > SNMP Community
Table 47. System: SNMP Community Settings
Field
Description
Community Name
Specifies aunique name for the SNMP Community
Allowed Source Subnet Address Enter a subnet address where the SNMP Server will allow access
Allowed Source Subnet Mask
Specifies the subnet mask that corresponds with the Allowed Source
Subnet Address (e.g. 255.255.255.0).
SNMPv3 User Settings
To define a user name for SNMPv3, click Add SNMP User in the SNMPv3 User Name table. The following
screen displays:
Figure 69. System > SNMPv3 User
Table 48. System: SNMP Community Settings
Field
Description
User Name
Specifies an account name to use with SNMPv3
Authentication Protocol
Select an authentication protocol from the drop-down menu.
Available options include:
• NONE
• MD5
• SHA
Authentication Password Specifies the authentication password (only applies to MD5 or SHA)
Privacy Protocol
Select a privacy protocol from the drop-down menu.
Available options include:
• NONE
• DES
Privacy Password
Specifies the privacy password (only applies to DES)
Configuring Simple Network Management Protocol (SNMP)
108
www.4Gon.co.uk [email protected] Tel: +44 (0)1245 808295 Fax: +44 (0)1245 808299
BODi rS BD007 and BD004 User Manual
11 • Managing System Settings
Importing and Exporting System Configuration Files
Backing up BODi rS settings immediately after successful completion of the initial setup is strongly recommended. To configure the settings for uploading and downloading system files, click on System > Configuration in the Web Admin Interface.
Figure 70. System > Configuration
Restore Configuration to Factory Settings
Use the Restore Factory Settings button to reset BODi rS to the factory default settings. You must click the
Apply Changes button for the new settings to take effect.
Downloading Active Configurations
Use the Download button to back up the current active settings and save the configuration file.
Uploading Configurations
To restore or change settings based on a configuration file, click Browse… to locate the configuration file on
the local computer, and then click Upload. You must click the Apply Changes button for the new settings to
take effect.
Rebooting the System
For the highest reliability, BODi rS provides two copies of the firmware in different versions. The firmware
marked (Running) is the current system firmware file used for booting up.
Note
A firmware upgrade always replaces the inactive firmware partition.
To restart BODi rS, click on System > Reboot System in the Web Admin Interface. Select a firmware file,
then click the Reboot button.
Figure 71. System > Reboot
Importing and Exporting System Configuration Files
109
www.4Gon.co.uk [email protected] Tel: +44 (0)1245 808295 Fax: +44 (0)1245 808299
BODi rS BD007 and BD004 User Manual
11 • Managing System Settings
Testing System Connections
You may test the health of connections using the BODi rS built-in system utilities. To access the setup screens
for these tests, click on System > Tools in the Web Admin Interface.
• Use the Ping Test (see “Ping Test” on page 110) to view the connectivity of a WAN or VPN link.
• Use the Traceroute Test (see “Traceroute Test” on page 111) to view the connection path of a WAN or
VPN link.
• Use the VPN Test (see “VPN Test” on page 111) to view the throughput between different VPN peers.
Ping Test
BODi rS provides a Ping Test tool that checks the connection of a specified Ethernet interface or a Site-to-Site
VPN link. A System Administrator can use the Ping utility to manually check the connectivity of a particular
LAN/WAN connection. You can specify the number of pings in the Number of Times field (to a maximum
of 10 times), and you may specify the Packet Size (to a maximum of 1472 bytes).
To run a ping test on a BODi rS connection, click on System > Tools > Ping in the Web Admin Interface.
Select an option from the Connection drop-down menu. If desired, adjust the packet size and number of
times for the connection test to run, then click the Start button. Click Stop to end the ping test.
Figure 72. System > Tools > Ping Test
Testing System Connections
110
www.4Gon.co.uk [email protected] Tel: +44 (0)1245 808295 Fax: +44 (0)1245 808299
BODi rS BD007 and BD004 User Manual
11 • Managing System Settings
Traceroute Test
BODi rS provides a Traceroute Test tool that follows and reports the routing path to the destination through
a particular Ethernet interface or a Site-to-Site VPN connection. A System Administrator can use the Traceroute utility to analyze the connection path of a LAN/WAN connection.
To run a traceroute test on a BODi rS connection, click on System > Tools > Traceroute in the Web Admin
Interface. Select an option from the Connection drop-down menu, then click the Start button. Click Stop to
end the traceroute test.
Figure 73. System > Tools > Traceroute Test
VPN Test
BODi rS provides a VPN Test tool that tracks the throughput between different VPN peers. To run a VPN
test on a BODi rS connection, click on System > Tools > VPN in the Web Admin Interface. Select an option
from the VPN Profile drop-down menu, and select the Test Type and Direction. Enter the length of time for
the test (in seconds), then click the Go! button.
Testing System Connections
111
www.4Gon.co.uk [email protected] Tel: +44 (0)1245 808295 Fax: +44 (0)1245 808299
Chapter 12 Managing Status Settings
Chapter contents
Introduction ........................................................................................................................................................112
Viewing General Device Information ..................................................................................................................112
Viewing Details of Active Sessions.......................................................................................................................113
Viewing the Client List........................................................................................................................................113
Viewing the WINS Client List ............................................................................................................................114
Viewing Site-to-Site VPN Connection Details ....................................................................................................114
Viewing UPnP and NAT-PMP Connection Details............................................................................................114
Viewing Event Log Details ..................................................................................................................................114
Viewing Bandwidth Usage Statistics ....................................................................................................................115
Real-Time Bandwidth Usage ........................................................................................................................115
Daily Bandwidth Usage ................................................................................................................................116
Monthly Bandwidth Usage ...........................................................................................................................117
112
www.4Gon.co.uk [email protected] Tel: +44 (0)1245 808295 Fax: +44 (0)1245 808299
BODi rS BD007 and BD004 User Manual
12 • Managing Status Settings
Introduction
This chapter describes viewing system information for BODi rS, including active sessions, the client list, the
WINS client list, Site-to-Site VPN connections, UPnP/NAT-PMP information, events, and bandwidth statistics.
Viewing General Device Information
To view system status information, click on Status > Device in the Web Admin Interface:
Figure 74. Status > Device
Table 49. Status: System Information
Field
Description
Router Name
Displays the name specified for this specific BODi rS device in the Router Name
field located in System > Admin Security
Model
Shows the model name and number of this specific BODi rS device
Hardware Revision
Shows the hardware version of this specific BODi rS device
Serial Number
Shows the serial number of this specific BODi rS device
Firmware
Shows the firmware version that BODi rS is currently running
Uptime
Shows the length of time since BODi rS has rebooted
System Time
Shows the current system time
Diagnostic Report
Use the Download button to export a diagnostic report file of system statistics.
The second table on the Device status page shows the MAC address of each LAN/WAN interface connected to
BODi rS.
Introduction
113
www.4Gon.co.uk [email protected] Tel: +44 (0)1245 808295 Fax: +44 (0)1245 808299
BODi rS BD007 and BD004 User Manual
12 • Managing Status Settings
Viewing Details of Active Sessions
The Active Sessions section displays the active inbound / outbound and UDP / TCP sessions of each WAN
connection on BODi rS. To view information about current sessions that are currently active on BODi rS,
click on Status > Active Sessions in the Web Admin Interface. A filter is available to help sort out the active
session information. Enter a keyword in the field or check one of the WAN connection boxes for filtering:
Figure 75. Status > Active Sessions
Viewing the Client List
The Client List section shows DHCP clients associated with BODi rS since it has powered up. To view information about DHCP clients, click on Status > Client List in the Web Admin Interface.
The table lists the DHCP client IP Addresses, their Names (retrieved from DHCP reservation table or
defined by users), current Download and Upload rates, and MAC addresses.
The Network Name (SSID) and Signal refers to the information about Wi-Fi AP, which is the name of the
Network and its signal strength. Clients can be imported into the DHCP Reservation table by clicking the
arrow button in the far right column. To update the record after importing clients, go to Network > LAN.
If you have enabled the PPTP Server (see “Enabling the PPTP Server” on page 92), you may see the corresponding connection name listed in the Name field of the Client List:
Figure 76. Status > Client List
Viewing Details of Active Sessions
114
www.4Gon.co.uk [email protected] Tel: +44 (0)1245 808295 Fax: +44 (0)1245 808299
BODi rS BD007 and BD004 User Manual
12 • Managing Status Settings
Viewing the WINS Client List
The WINS Client section shows Windows Internet Name Service (WINS) clients associated with BODi rS.
This section is only available if you have enabled the WINS Server (see “WINS Server Settings” on page 33).
To view information about WINS clients, click on Status > WINS Client in the Web Admin Interface.
The table lists the names of clients retrieved and automatically matched with the DHCP Client List (see
“Viewing the Client List” on page 114). Click the button Flush All to clear the table of all WINS client
records.
Viewing Site-to-Site VPN Connection Details
The Site-to-Site VPN section shows the current status and details of all VPN peers. To view details about peer
WAN connections, click on Status > Site-to-Site VPN in the Web Admin Interface.
Viewing UPnP and NAT-PMP Connection Details
The UPnP/NAT-PMP section shows forwarded ports using UPnP and NAT-PMP protocols. This section is
only available if you have enabled UNnP/NAT-PMP functions (see “UPnP/NAT-PMP Settings” on page 79).
To view details about these connections, click on Status > UPnP/NAT-PMP in the Web Admin Interface.
Click the X button to delete a single UPnP / NAT-PMP record in its corresponding row. To delete all records,
click the Delete All button below the table. UPnP/NAT-PMP records are deleted immediately without confirmation.
Viewing Event Log Details
The Event Log section displays a list of events that have taken place on BODi rS. To view log details, click on
Status > Event Log in the Web Admin Interface.
Click the Refresh button to update the list of log entries. Click the Clear Log button to remove all of the log
entries. Select the number of entries to show in the log screen at a time: 50, 100, or all.
Figure 77. Status > Event Log
Viewing the WINS Client List
115
www.4Gon.co.uk [email protected] Tel: +44 (0)1245 808295 Fax: +44 (0)1245 808299
BODi rS BD007 and BD004 User Manual
12 • Managing Status Settings
Viewing Bandwidth Usage Statistics
The Bandwidth section shows bandwidth usage statistics for BODi rS, including details about real-time, daily,
and monthly bandwidth usage. To view bandwidth statistics, click on Status > Bandwidth in the Web Admin
Interface.
• “Real-Time Bandwidth Usage” on page 116
• “Daily Bandwidth Usage” on page 117
• “Monthly Bandwidth Usage” on page 118
Real-Time Bandwidth Usage
The Data Transferred since installation table shows you how much network traffic has been processed by
BODi rS since the first bootup.
Click the Show Details link in the top right corner of each table to display the details of transferred data.
Select the Stacked box below the data transferred graph to show the aggregated transferred rate of both traffic
directions.
Figure 78. Real-Time Bandwidth Usage
Viewing Bandwidth Usage Statistics
116
www.4Gon.co.uk [email protected] Tel: +44 (0)1245 808295 Fax: +44 (0)1245 808299
BODi rS BD007 and BD004 User Manual
12 • Managing Status Settings
Daily Bandwidth Usage
The Daily Bandwidth status page shows the daily bandwidth usage for all WAN connections and for each
specific WAN connection.
From the drop-down menu, select theWAN connection to display its bandwidth information. If you have
enabled the Bandwidth Monitoring feature (see “Bandwidth Allowance Monitor” on page 53), BODi rS will
display the Current Billing Cycle table for that specific WAN connection.
In the Client Bandwidth Usage table, click on a date hyperlink to view the client bandwidth usage for that
specific date. This feature is not available if you have selected to view the bandwidth usage of one specific
WAN connection.
In the Daily Usage table, you may select to show the scale of the graph in Megabytes (MB) or Gigabytes
(GB).
Figure 79. Daily Bandwidth Usage
Viewing Bandwidth Usage Statistics
117
www.4Gon.co.uk [email protected] Tel: +44 (0)1245 808295 Fax: +44 (0)1245 808299
BODi rS BD007 and BD004 User Manual
12 • Managing Status Settings
Monthly Bandwidth Usage
The Monthly Bandwidth status page shows the bandwidth usage for each month for each specific WAN connection.
From the drop-down menu, select a specific WAN connection to display its monthly bandwidth usage information. If you have enabled the Bandwidth Monitoring feature (see “Bandwidth Allowance Monitor” on
page 53), BODi rS will display the Billing Cycle or Calendar Month for that specific WAN connection.
In the Client Bandwidth Usage table, click on the first or second row to view the client bandwidth usage for
the current month. This feature is not available if you have selected to view the bandwidth usage of one specific
WAN connection.
In the Monthly Usage table, you may select to show the scale of the graph in Megabytes (MB) or Gigabytes
(GB).
Note
By default, the scale of data size is in MB. 1GB equals 1024MB.
Figure 80. Monthly Bandwidth Usage
Viewing Bandwidth Usage Statistics
118
www.4Gon.co.uk [email protected] Tel: +44 (0)1245 808295 Fax: +44 (0)1245 808299
Chapter 13 Contacting Patton for assistance
Chapter contents
Introduction ........................................................................................................................................................119
Contact information............................................................................................................................................119
Patton support headquarters in the USA .......................................................................................................119
Alternate Patton support for Europe, Middle East, and Africa (EMEA) ........................................................119
Warranty Service and Returned Merchandise Authorizations (RMAs).................................................................119
Warranty coverage ........................................................................................................................................119
Out-of-warranty service ...........................................................................................................................120
Returns for credit ....................................................................................................................................120
Return for credit policy ...........................................................................................................................120
RMA numbers ..............................................................................................................................................120
Shipping instructions ..............................................................................................................................120
119
www.4Gon.co.uk [email protected] Tel: +44 (0)1245 808295 Fax: +44 (0)1245 808299
BODi rS BD007 and BD004 User Manual
13 • Contacting Patton for assistance
Introduction
This chapter contains the following information:
• “Contact information”—describes how to contact Patton technical support for assistance.
• “Warranty Service and Returned Merchandise Authorizations (RMAs)”—contains information about the
warranty and obtaining a return merchandise authorization (RMA).
Contact information
Patton Electronics offers a wide array of free technical services. If you have questions about any of our other
products we recommend you begin your search for answers by using our technical knowledge base. Here, we
have gathered together many of the more commonly asked questions and compiled them into a searchable
database to help you quickly solve your problems.
Patton support headquarters in the USA
• Online support: available at www.patton.com
• E-mail support: e-mail sent to [email protected] will be answered within 1 business day
• Telephone support: standard telephone support is available five days a week—from 8:00 am to
5:00 pm EST (1300 to 2200 UTC/GMT)—by calling +1 (301) 975-1007
• Fax: +1 (301) 869-9293
Alternate Patton support for Europe, Middle East, and Africa (EMEA)
• Online support: available at www.patton.com
• E-mail support: e-mail sent to [email protected] will be answered within 1 business day
• Telephone support: standard telephone support is available five days a week—from 9:00 am to
5:30 pm CET (0800 to 1630 UTC/GMT)—by calling +41 (0)31 985 25 55
• Fax: +41 (0)31 985 25 26
Warranty Service and Returned Merchandise Authorizations (RMAs)
Patton Electronics is an ISO-9001 certified manufacturer and our products are carefully tested before shipment. All of our products are backed by a comprehensive warranty program.
Note
If you purchased your equipment from a Patton Electronics reseller, ask your
reseller how you should proceed with warranty service. It is often more convenient for you to work with your local reseller to obtain a replacement.
Patton services our products no matter how you acquired them.
Warranty coverage
Our products are under warranty to be free from defects, and we will, at our option, repair or replace the product should it fail within one year from the first date of shipment. Our warranty is limited to defects in workmanship or materials, and does not cover customer damage, lightning or power surge damage, abuse, or
unauthorized modification.
Introduction
120
www.4Gon.co.uk [email protected] Tel: +44 (0)1245 808295 Fax: +44 (0)1245 808299
BODi rS BD007 and BD004 User Manual
13 • Contacting Patton for assistance
Out-of-warranty service
Patton services what we sell, no matter how you acquired it, including malfunctioning products that are no
longer under warranty. Our products have a flat fee for repairs. Units damaged by lightning or other catastrophes may require replacement.
Returns for credit
Customer satisfaction is important to us, therefore any product may be returned with authorization within 30
days from the shipment date for a full credit of the purchase price. If you have ordered the wrong equipment or
you are dissatisfied in any way, please contact us to request an RMA number to accept your return. Patton is
not responsible for equipment returned without a Return Authorization.
Return for credit policy
• Less than 30 days: No Charge. Your credit will be issued upon receipt and inspection of the equipment.
• 30 to 60 days: We will add a 20% restocking charge (crediting your account with 80% of the purchase price).
• Over 60 days: Products will be accepted for repairs only.
RMA numbers
RMA numbers are required for all product returns. You can obtain an RMA by doing one of the following:
• Completing a request on the RMA Request page in the Support section at www.patton.com
• By calling +1 (301) 975-1007 and speaking to a Technical Support Engineer
• By sending an e-mail to [email protected]
All returned units must have the RMA number clearly visible on the outside of the shipping container. Please use
the original packing material that the device came in or pack the unit securely to avoid damage during shipping.
Shipping instructions
The RMA number should be clearly visible on the address label. Our shipping address is as follows:
Patton Electronics Company
RMA#: xxxx
7622 Rickenbacker Dr.
Gaithersburg, MD 20879-4773 USA
Patton will ship the equipment back to you in the same manner you ship it to us. Patton will pay the return
shipping costs.
Warranty Service and Returned Merchandise Authorizations (RMAs)
121
www.4Gon.co.uk [email protected] Tel: +44 (0)1245 808295 Fax: +44 (0)1245 808299
Appendix A Compliance Information
Chapter contents
Compliance .........................................................................................................................................................122
EMC .............................................................................................................................................................122
Low-Voltage Directive (Safety) .....................................................................................................................122
Radio and TV Interference ..................................................................................................................................122
CE Declaration of Conformity ............................................................................................................................122
Authorized European Representative ...................................................................................................................122
122
www.4Gon.co.uk [email protected] Tel: +44 (0)1245 808295 Fax: +44 (0)1245 808299
BODi rS BD007 and BD004 User Manual
A • Compliance Information
Compliance
EMC
• EN55022, Class A
• EN55024
• EN 301 489-1
• EN 301 489-17
Low-Voltage Directive (Safety)
• UL 60950-1/CSA C22.2 No. 60950-1
• IEC/EN60950-1, 2nd edition
CE Declaration of Conformity
Patton Electronics, Inc declares that this device is in compliance with the essential requirements and other relevant provisions of Directive 1999/5/EC. The Declaration of Conformity may be obtained from Patton Electronics, Inc at www.patton.com/certifications.
The safety advice in the documentation accompanying this device shall be obeyed. The conformity to the
above directive is indicated by CE mark on the device.
Authorized European Representative
D R M Green
European Compliance Services Limited.
Avalon House, Marcham Road
Abingdon,
Oxon OX14 1UD, UK
Compliance
123
www.4Gon.co.uk [email protected] Tel: +44 (0)1245 808295 Fax: +44 (0)1245 808299
Appendix B Specifications
Chapter contents
WAN Interface....................................................................................................................................................124
LAN Interface .....................................................................................................................................................124
Antenna...............................................................................................................................................................124
VPN....................................................................................................................................................................124
Load Balancing....................................................................................................................................................125
Networking .........................................................................................................................................................125
Advanced QoS.....................................................................................................................................................125
Device Management............................................................................................................................................125
Physical ...............................................................................................................................................................126
BD007 ..........................................................................................................................................................126
BD004 ..........................................................................................................................................................126
124
www.4Gon.co.uk [email protected] Tel: +44 (0)1245 808295 Fax: +44 (0)1245 808299
BODi rS BD007 and BD004 User Manual
B • Specifications
WAN Interface
4 x USB
2 x Gigabit Ethernet Ports
802.11b/g/n Wi-Fi Modem
Support for PPPoE, Static IP, DHCP
WAN Link Health Check
Bandwidth Allowance Monitor
LAN Interface
4-Port Gigabit Ethernet Switch
802.11b/g/n Wi-Fi Access Point
Extended DHCP Options
DHCP Reservation
Support for Dynamic DNS services
DNS Proxy for LAN Clients
Antenna
4 x 5.5dBi Magnetic Base
Omni Metal Antenna for Wi-Fi
VPN
Complete VPN Solution
Site-to-Site VPN Bonding
Bandwidth Aggregation
Intelligent Failover
256-bit AES Encryption
Pre-shared Key Authentication
Dynamic Routing PPTP VPN Server
RADIUS, LDAP Authentication
IPsec VPN (Network-to-Network)
WAN Interface
125
www.4Gon.co.uk [email protected] Tel: +44 (0)1245 808295 Fax: +44 (0)1245 808299
BODi rS BD007 and BD004 User Manual
B • Specifications
Load Balancing
Intelligent Failover
Session Persistence
Per-Service Load Distribution
Multiple Algorithms
Networking
NAT and IP Forwarding
Static Routes
Port Forwarding
Many to One, One to One NAT
NAT Pool
SIP ALG, H.323 ALG
UPnP, NAT-PMP
WINS Server
Advanced QoS
User Groups
Bandwidth Reservation
Individual Bandwidth Limit
Custom Application QoS
Application Prioritization
Device Management
Web Administrative Interface
Email Notification
Active Client & Session Lists
Bandwidth Usage Statistics
Web Reporting Services
Syslog Service
SNMP v1, v2c and v3
Load Balancing
126
www.4Gon.co.uk [email protected] Tel: +44 (0)1245 808295 Fax: +44 (0)1245 808299
BODi rS BD007 and BD004 User Manual
B • Specifications
Physical
BD007
Dimensions: 35.6L x 21.6W x 4.3H cm (14L x 8.5W x 1.7H inch)
Weight: 4.4lbs (2kg)
Operating temperature: -40–149°F (-40–65°C)
BD004
Dimensions: 35.6L x 13.5W x 4.3H cm (14L x 5.8W x 1.7H inch)
Weight: 2.9lbs (1.32kg)
Operating temperature: -40–149°F (-40–65°C)
Physical
127
www.4Gon.co.uk [email protected] Tel: +44 (0)1245 808295 Fax: +44 (0)1245 808299
Appendix C Terms
Chapter contents
Abbreviations ......................................................................................................................................................128
128
www.4Gon.co.uk [email protected] Tel: +44 (0)1245 808295 Fax: +44 (0)1245 808299
BODi rS BD007 and BD004 User Manual
C • Terms
Abbreviations
Abbreviation
Meaning
3G
3rd Generation standards for wireless communications (e.g. HSDPA)
4G
4th Generation standards for wireless communications (e.g. WiMAX, LTE)
DHCP
Dynamic Host Configuration Protocol
DNS
Domain Name System
EVDO
Evolution-Data Optimized
HSDPA
High-Speed Downlink Packet Access
GRE
Generic Routing Encapsulation
HTTP
Hyper-Text Transfer Protocol
ICMP
Internet Control Message Protocol
IP
Internet Protocol
LAN
Local Area Network
MAC Address
Media Access Control Address
MTU
Maximum Transmission Unit
MSS
Maximum Segment Size
NAT
Network Address Translation
PPPoE
Point to Point Protocol over Ethernet
QoS
Quality of Service
SNMP
Simple Network Management Protocol
TCP
Transmission Control Protocol
UDP
User Datagram Protocol
VPN
Virtual Private Network
VRRP
Virtual Router Redundancy Protocol
WAN
Wide Area Network
WINS
Windows Internet Name Service
WLAN
Wireless Local Area Network
Abbreviations
129
www.4Gon.co.uk [email protected] Tel: +44 (0)1245 808295 Fax: +44 (0)1245 808299