1
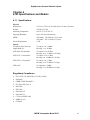
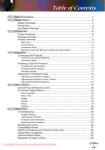
Model 6703
CWDM Transponder
User Manual
EdgeAccess Universal Chassis System
CAUTION!
This product may contain a laser diode operating at a wavelength of 1300 nm - 1600 nm. Use of
optical instruments (e.g., collimating optics) with this product may increase eye hazard. Use of
controls or adjustments, or performing procedures other than those specified herein may result in
hazardous radiation exposure.
Under normal conditions, the radiation levels emitted by this product are under Class 1 limits in 21
CFR Chapter 1, Subchapter J.
ATTENCION!
Cet équipement peut avoir une diode laser émettant à des longueurs d'onde allant de 1300nm à
1600nm. L'utilisation d'instruments optiques (par exemple : un collimateur optique) avec cet
équipement peut s'avèrer dangereuse pour les yeux. Procéder à des contrôles, des ajustements ou toute
procédure autre que celles décrites ci-après peut provoquer une exposition dangereuse à des
radiations.
Sous des conditions normales, le niveau des radiations émises par cet équipement est en dessous des
limites prescrites dans CFR21, chapitre 1, sous chapitre J.
NOTICE!
This device contains static sensitive components. It should be handled only with proper ElectroStatic
Discharge (ESD) grounding procedures.
NOTE!
Cet équipement contient des composants sensibles aux décharges électro-statiques. Il doit absolument
être manipulé en respectant les règles de mise à la terre afin de prévenir de telles décharges.
CWDM Transponder Model 6703
i
EdgeAccess Universal Chassis System
NOTICE
Canoga Perkins has prepared this users manual for use by customers and Canoga Perkins personnel as
a guide for the proper installation, operation and/or maintenance of Canoga Perkins equipment. The
drawings, specifications and information contained in this document are the property of Canoga
Perkins and any unauthorized use or disclosure of such drawings, specifications and information is
prohibited.
Canoga Perkins reserves the right to change or update the contents of this manual and to change the
specifications of its products at any time without prior notification. Every effort has been made to
keep the information in this document current and accurate as of the date of publication or revision.
However, no guarantee is given or implied that the document is error free or that is accurate with
regard to any specification.
Canoga Perkins Corporation
20600 Prairie Street
Chatsworth, California 91311-6008
Business Phone: (818) 718-6300
(Monday - Friday 7 a.m. - 5 p.m. Pacific Time)
FAX: (818) 718-6312 (24 hrs.)
Web Site: www.canoga.com
Email: [email protected]
Copyright © 2003, 2004 Canoga Perkins Corporation
All Rights Reserved
EdgeAccess®
Universal Chassis System
Model 6703
CWDM Transponder
User Manual
Model Number 6703-UM
Product Number 6912830
Rev. E 01/2008
ii
CWDM Transponder Model 6703
EdgeAccess Universal Chassis System
Table of Contents
Chapter 1 Overview .................................................................................................1-1
Chapter 2 Hardware Installation and Operation .................................................2-1
2.1
2.2
Install the Module...................................................................................................................2-1
Front Panel LEDs ...................................................................................................................2-2
Chapter 3 Software Management...........................................................................3-1
3.1
3.2
3.2.1
3.2.2
3.3
3.4
3.4.1
3.4.2
3.4.3
3.4.4
3.4.5
3.5
3.6
3.6.1
3.7
3.8
3.8.1
3.8.2
3.9
3.9.1
3.9.2
3.9.3
3.10
Use VT100 Terminal Emulation ............................................................................................3-1
Management User Interface ...................................................................................................3-2
General Screen Format ...........................................................................................................3-2
User Interface Organization ...................................................................................................3-3
Main Menu .............................................................................................................................3-3
System Configuration Menu ..................................................................................................3-4
Hardware Description/Interface Description Screen..............................................................3-4
Trap Configuration .................................................................................................................3-5
Alarm Output Configuration ..................................................................................................3-6
SNMP Configuration..............................................................................................................3-7
Host Table ..............................................................................................................................3-8
Configuration/Status Screen...................................................................................................3-9
Error Counters ......................................................................................................................3-12
Utilities Screen .....................................................................................................................3-12
PING.....................................................................................................................................3-13
Upgrading the Software........................................................................................................3-14
Determine Current Software and Version ............................................................................3-14
Install the New Software Version.........................................................................................3-15
SNMP - TCP/IP....................................................................................................................3-16
Set Up a Dial-up Connection................................................................................................3-16
Create A Script to Configure the Serial Port ........................................................................3-16
Switch to PPP or SLIP Mode Without a Script ....................................................................3-17
The Canoga Perkins MIB .....................................................................................................3-17
Chapter 4 6703 Specifications and Models............................................................4-1
4.11
4.12
Specifications .........................................................................................................................4-1
6703 Models ...........................................................................................................................4-2
Appendix A Warranty Information ......................................................................A-1
CWDM Transponder Model 6703
iii
EdgeAccess Universal Chassis System
List of Figures
Figure 1. 6703 Wavelength Converter Function................................................................................ 1-1
Figure 2. Front Panel, 6703 With Local Port Interface Options ........................................................ 1-2
Figure 3. General Screen Navigation................................................................................................. 3-2
Figure 4. Main Menu ......................................................................................................................... 3-3
Figure 5. System Configuration Menu............................................................................................... 3-4
Figure 6. Hardware Description Report............................................................................................. 3-5
Figure 7. Interface Description Report .............................................................................................. 3-5
Figure 8. Trap Configuration Menu................................................................................................... 3-6
Figure 9. Alarm Output Configuration Menu .................................................................................... 3-6
Figure 10. SNMP Configuration Screen ............................................................................................ 3-7
Figure 11. Host Table Screen............................................................................................................. 3-9
Figure 12. Configuration/Status Screen ........................................................................................... 3-10
Figure 13. Clock Data Recovery/SpeedCop Screen ........................................................................ 3-11
Figure 14. Error Counters Screen .................................................................................................... 3-12
Figure 15. Utilities Screen ............................................................................................................... 3-12
Figure 16. PING Generation Screen ................................................................................................ 3-13
Figure 17. Software Upgrade Screen ............................................................................................... 3-14
List of Tables
Table 1.
Table 2.
Table 3.
Table 4.
Table 5.
Table 6.
Table 7.
Table 8.
Table 9.
iv
6703 LEDs ........................................................................................................................... 2-2
System Configuration Option Definitions ........................................................................... 3-4
Alarm Output Definitions .................................................................................................... 3-7
SNMP Configuration Parameters Description..................................................................... 3-8
Configuration Status Reports............................................................................................. 3-10
Configuration Control Options .......................................................................................... 3-11
Link Error Counters Definitions ........................................................................................ 3-12
Utilities Menu Options....................................................................................................... 3-13
EIA Interface Pinout ............................................................................................................ 4-2
CWDM Transponder Model 6703
EdgeAccess Universal Chassis System
Chapter 1
Overview
The 6703 Coarse Wavelength Division Multiplexer (CWDM) Transponder converts optical signals
from standard optical interfaces to Single mode CWDM wavelengths for use with a CWDM
Multiplexer/Demultiplexer (Mux/Demux). The 6703 is protocol transparent and uses Avalanche
Photo Diodes and Clock Data Recovery (CDR) to increase receiver sensitivity at high data rates.
The 6703 supports these options:
•
•
•
•
•
Industry-standard and proprietary data rates from 100 Mbps to 2.5 Gbps
Small Form Pluggable (SFP) transceivers, optional for Local port and standard for Remote port;
order compatible, supported SFPs from Canoga Perkins
Local and Remote optical port loopback
Variable clock for data recovery; supports eight user-defined rates
SpeedCop for monitoring received transmission rates
Connect the remote optical interfaces from five 6703 CWDM Transponders to one 6004 CWDM
Passive Optical Mux/Demux to carry five full-duplex optical channels on one fiber pair. Similarly,
connect nine 6703 Transponders to one 6008 CWDM Passive Optical Mux/Demux to carry nine
channels on a fiber pair.
You can use the 6703 for these general applications; Figure 1:
•
•
•
Wavelength Converter (transponder), which receives an optical signal at 850 or 1310 nm and
converts it to a specific CWDM wavelength or standard 1310 nm high-power optics
SpeedCop function, which monitors and assigns data rate limitations on the link
3R Repeater, which reshapes, retimes, and retransmits the optical signal
Figure 1. 6703 Wavelength Converter Function
You can use either of these methods to manage the 6703 through software:
•
•
CanogaView® Network Management System (NMS), a management package with graphical user
interface (GUI) that requires a network connection and can be opened through a web browser
from a network terminal or through the internet
VT100 Terminal Emulation through a Telnet session, HyperTerminal or similar terminal
emulation software
CWDM Transponder Model 6703
1-1
EdgeAccess Universal Chassis System
The 6703 front panel, shown in Figure 2, includes:
•
•
•
•
•
•
•
Status LED
Reset button
TRM/MDM switch: Selects terminal emulation or a dial-up modem
EIA-232 (Console) port with RJ-48 connector: Provides software management access
Local port with Rx/Tx LEDs: Receives from/transmits to the local equipment; LEDs show port
status; optical interface can be fixed SC at 1310 nm (6703-0003) or SFP (6703-0000)
Remote port with Rx/Tx LEDs: Receives from/transmits to the 6004 or 6008 Passive
Mux/Demux or remote site; LEDs show the transmitter and receiver status for the port; optical
interface is always an SFP
LCDR/SC and RCDR/SC LEDs: Show CDR and SpeedCop status for local and remote ports
Figure 2. Front Panel, 6703 With Local Port Interface Options
1-2
CWDM Transponder Model 6703
EdgeAccess Universal Chassis System
Chapter 2
Hardware Installation and Operation
This section describes how to install a 6703 in a UCS 1000 or 1001 chassis or in a Model 1040 or
1050 standalone enclosure.
2.1
Install the Module
You can install the 6703 module in any slot from slot 1 to 15 in the UCS 1000, in either slot in a
UCS 1001, or in a Model 1040 or 1050 standalone enclosure. To install the module, follow these
steps:
1. Unpack and inspect all components. Save the shipping carton and packing materials in case you
need to return any equipment; see Appendix A for information about returning equipment.
2. Insert the module in the selected slot, pushing it firmly into the backplane connector. Do not
force it.
3. Hand-tighten the captive screws to secure the module in the chassis.
Note:
The 6703 module is hot-swappable and can be inserted or removed at any time without
affecting other modules.
4. Plug the SFP(s) into the port(s); the slot is keyed. To remove an SFP, either lift the bail or press
the button on the SFP, then gently pull it out.
Dirty optical connectors are a common cause of link loss or attenuation problems, especially for
single mode fiber (SMF). Clean the connectors before plugging in a cable and whenever there is a
significant or unexplained light loss. To prevent contamination, always install protective dust covers
on unused fiber optic connectors.
5. Wipe the ferrule and the end-face surface of the male fiber coupler with a lint-free, isopropyl
alcohol pad from a fiber cleaning kit.
6. Use canned air to blow any dust out of the female fiber coupler.
Caution:
To avoid damaging the fiber end-surface or connector, use extreme care when
installing or removing cables.
7. Plug in the optical cables with Local to Local and Remote to Remote orientation. The remote
device can be either a CWDM Mux/Demux or a remotely located 6703. See Figures 1 and 2.
•
•
For an SFP, push the cable in until it clicks. To unplug the cable, push the button on the side
of the cable and gently pull.
If you have a duplex connector, use Tx to Rx, and Rx to Tx orientation.
CWDM Transponder Model 6703
2-1
EdgeAccess Universal Chassis System
8. If you will directly manage the 6703, such as in a UCS 1001 or 1050 standalone enclosure, follow
these steps:
a. Plug the RJ-48 serial cable into the console port on the front of the 6703.
b. Plug the other end of the serial cable into an RJ-48 to DE-9 adapter, then into the modem or
the COM port on the PC.
c. Set the TRM/MDM switch to TRM for local management through a local terminal or to
MDM for remote management through a dial-up modem.
9. For ease of maintenance, label each cable and connector with the signal name and direction.
2.2
Front Panel LEDs
The front panel includes LEDs that show general status for the 6703 and specific status for each Rx
and Tx port. See Table 1.
Table 1. 6703 LEDs
LED
Status
Status
Indicates
Off
No power
Green
Normal operation
Amber
Power-on process
Blinking amber Running Bootcode during power-on
Local Rx
Local Tx
Red
Hardware failure
Green
Received signal is above threshold (normal
operation)
Red
Received signal is below threshold
Off
Disabled
Green
Enabled
Blinking amber Local Rx and Tx are in loopback mode
Remote Rx
Remote Tx
Green
Port is active and received signal is above threshold
(normal operation)
Amber
Port is inactive and received signal is above
threshold (secondary port)
Red
Received signal on port is below threshold
Blinking red
SFP not certified by Canoga Perkins
Off
Disabled
Green
Enabled
Blinking amber Remote Rx and Tx are in loopback mode
Blinking red
2-2
SFP not certified by Canoga Perkins
CWDM Transponder Model 6703
EdgeAccess Universal Chassis System
LED
Status
LCDR/SC and RCDR/SC Off
Indicates
Clock Recovery and SpeedCop are disabled
Green
Clock Recovery is enabled and locked and/or
SpeedCop is enabled and within range
Amber
Clock Recovery is disabled; SpeedCop detects a
violation
Red
Clock Recovery detects a loss of sync; SpeedCop is
disabled
Blinking
green/amber
Clock Recovery is enabled and locked; SpeedCop
detects a violation
Blinking
red/amber
Clock Recovery detects a loss of sync; SpeedCop
detects a violation
CWDM Transponder Model 6703
2-3
EdgeAccess Universal Chassis System
2-4
CWDM Transponder Model 6703
EdgeAccess Universal Chassis System
Chapter 3
Software Management
The standard management package is the VT100 Terminal Emulation, which you can access through
a Telnet session, HyperTerminal or similar terminal emulation software, or CanogaView. You can
run up to two management sessions at one time.
3.1
Use VT100 Terminal Emulation
You can access the VT100 terminal emulation management functions through the console port, a dialup modem, or the Domain Management Module (DMM) for the domain. For details on the DMM,
see the Model 1500 Domain Management Module Users Manual.
Note
If the 6703 is in a UCS 1001, you cannot access it through a DMM because the UCS 1001
cannot host a DMM or Chassis Interconnect Module (CIM).
You must use a VT100 program through a serial connection for your first session. Canoga Perkins
suggests that you use HyperTerminal. If you want to manage the 6703 through the Ethernet port on a
1040 enclosure, first set up the SNMP parameters; see Section 3.4.4.
These are general steps for the Windows interface; for details, see your Windows documentation.
1. Set the TRM/MDM switch on the 6703 front panel to TRM.
2. Turn on your PC.
3. When the Windows desktop appears, click Start, then highlight Programs, Accessories, the
HyperTerminal Folder, and then click HyperTerminal.
4. At the Connection Description dialog, select an icon, enter a name for the connection to the
system, and click OK.
5. At the Connect To dialog, pull down the Connect using menu, select the COM port, and
click OK.
6. At the COM Properties dialog, on the Port Settings tab, set these values:
•
•
•
•
•
Bits per second: 19200
Data bits: 8
Parity: None
Stop bits: 1
Flow control: None
7. When HyperTerminal opens and is ready for login, press <Esc>. The Main Menu for the 6703
appears.
CWDM Transponder Model 6703
3-1
EdgeAccess Universal Chassis System
3.2
Management User Interface
The Management User Interface for the system provides screens for setup, monitoring, and
diagnostics. These sections discuss the screens for the system, using a Telnet session for access.
3.2.1 General Screen Format
A typical 6703 screen includes standard screen descriptions and references. See Figure 3. All
screens use a common method for navigation.
Chassis and slot numbers
Model number
Status reports
Screen navigation
instructions
Change options
Messages and
urgent status
Figure 3. General Screen Navigation
Not all screens and menus provide options that you can modify. Some menu items reach screens that
only report status, such as revision number, module type, or alarms. On other screens, you can select
options and enter data.
Use these keys to navigate the screens:
•
•
•
•
3-2
Spacebar When a menu item is highlighted, press <Space> to cycle through all options for that
menu item.
Tab Press <Tab> to move the highlight to the next column to the right.
Enter Press <Enter> to select the highlighted option for a menu item.
Escape Press <Esc> to return to the previous screen.
CWDM Transponder Model 6703
EdgeAccess Universal Chassis System
3.2.2 User Interface Organization
The user interface consists of selectable, nested screens, available in this order:
Main Menu
1) System Configuration
1) Hardware Description/Interface Description
2) Trap Configuration
3) Alarm Output Configuration
4) SNMP Configuration Parameters
13) Host Table
2) Configuration/Status
1) Clock Data Recovery/SpeedCop
3) Error Counters
4) Utilities
6) PING Generation
5) Software Upgrade
6) Logout
This chapter describes each of these screens in detail.
3.3
Main Menu
The Main Menu provides access to all functions for the 6703: setup, diagnostics, and reports. See
Figure 4.
MAIN MENU
1)
2)
3)
4)
5)
6)
System Configuration
Configuration/Status
Error Counters
Utilities
Software Upgrade
Logout
Figure 4. Main Menu
CWDM Transponder Model 6703
3-3
EdgeAccess Universal Chassis System
3.4
System Configuration Menu
The System Configuration menu provides access to most configuration options for the 6703. To
access the System Configuration menu, follow theses steps:
1. From the Main Menu, type 1, "System Configuration," and press <Enter>. The System
Configuration menu appears.
2. To return to the Main menu, press <Esc>.
SYSTEM CONFIGURATION
1)
2)
3)
4)
Hardware Description
Trap Configuration
Alarm Output Configuration
SNMP configuration
Figure 5. System Configuration Menu
Table 2. System Configuration Option Definitions
Selection
Description
1) Hardware Description
Shows the model, type, revision and serial numbers; Alarm,
power supply, and fan status; and interface types; no
configurable options
2) Trap Configuration
Shows the trap configuration; you can enable/disable traps to
the Network Manager
3) Alarm Output Configuration
Shows the alarm configuration; you can set each alarm
parameter to Major, Minor or Off
4) SNMP Configuration
Shows the SNMP parameters if a Network Manager is in use;
you can set options.
3.4.1 Hardware Description/Interface Description Screen
The Hardware Description screen shows the module type, with model and revision numbers, and the
power supply status. The Interface Description screen shows parameters for both optical interfaces.
Use this information when troubleshooting, such as tracking down an error in a data link or the
configuration. To view the Hardware Configuration screen, follow these steps:
1. From the System Configuration menu, type 1, "Hardware Description," and press <Enter>. The
Hardware Description report appears; see Figure 6.
2. To view the Interface Description report, press <Tab>; see Figure 7.
3. To return to the System Configuration menu, press <Esc>.
3-4
CWDM Transponder Model 6703
EdgeAccess Universal Chassis System
HARDWARE DESCRIPTION
Chassis Type
Chassis/Slot
5U UCS 1000
5/4
Model
Type
Hardware Rev.
Serial Number
6703-0000
UNIV OC48 TRANSPONDER SFP/SFP
A1
20030485762
Power Supply Pri
Power Supply Sec
Fan Status
Alarm Relay Inputs
DC Non Isolated
AC 120/240
OK
N/A
Figure 6. Hardware Description Report
INTERFACE DESCRIPTION
Local
Remote
Type
Part Number
Wavelength
Data Rate
Distance
:
:
:
:
:
SFP
SFP1-0055
850nm
2500Mbps
200m
Type
Part Number
Wavelength
Data Rate
Distance
:
:
:
:
:
SFP
SFP2-5765
1570nm
2500Mbps
80 km
Figure 7. Interface Description Report
3.4.2 Trap Configuration
Traps are messages to alert network management about non-emergency conditions and events. Traps
are logged, compiled, and saved for viewing, but are not sent to alarm relays for immediate
notification. The DMM in the system logs the traps and transmits them by SNMP to the network
manager. At the Trap Configuration screen, enable or disable traps individually or use the "Master
Trap Control" to enable or disable all traps. See Figure 8. To configure traps, follow these steps:
1. From the System Configuration menu type 2, "Trap Configuration," and press <Enter>.
2. At the Trap Configuration menu, type the number for a trap and press <Enter>; for items 6, 7,
and 8, press <Tab> to cycle between Local Port and Remote Port.
Note:
"Master Trap Control" enables or disables all traps. The factory default is Disabled.
3. Press <Space> to cycle to Enabled or Disabled, then press <Enter>.
4. To return to the System Configuration menu, press <Esc>.
CWDM Transponder Model 6703
3-5
EdgeAccess Universal Chassis System
TRAP CONFIGURATION
1)
2)
3)
4)
5)
6)
7)
8)
9)
Master Trap Control
Diagnostics Trap
Cold Start Traps
Power/Fan Malfunction Traps
Alarm Input Traps
Receive Level Traps
SpeedCop Violation Traps
CDR Unlock Traps
SFP Transceiver Traps
Enabled
Enabled
Enabled
Enabled
Enabled
Local Port
Remote Port
Enabled
Enabled
Enabled
N/A
Enabled
Enabled
Enabled
Enabled
Figure 8. Trap Configuration Menu
3.4.3 Alarm Output Configuration
The alarms for the 6703 are output-only through a data bus to the rear panel on a UCS 1001 or 1040
standalone enclosure, or to the CIM in the same chassis, which routes any alarm to an external alarm.
For details, see the Model 1200 Chassis Interconnect Module User Manual, UCS 1001 Chassis User
Manual, or the Model 1040 Standalone Enclosure User Manual.
You can set each alarm condition to Major, Minor, or Off. To set the alarms, see Figure 9 and
Table 3, and follow these steps:
1. From the System Configuration menu type 3, "Alarm Output Configuration," and press <Enter>.
The Alarm Output Configuration screen appears.
2. Type the number for the alarm you want to set and press <Enter>; for items 4, 5, and 6, press
<Tab> to cycle between Local, Remote Active, and Remote Inactive.
3. Press <Space> to cycle to Major, Minor, or Off, and press <Enter>.
ALARM OUTPUT CONFIGURATION
1) Factory Default
2) Power Supply/Fan Alarm
3) Power On Self Test Alarm
4)
5)
6)
7)
Receive Level Alarm
SpeedCop Violation Alarm
CDR Unlock Alarm
SFP Transceiver Alarm
Off
Off
Local Port
Active
Minor
Off
Off
N/A
Major
Off
Off
Minor
Figure 9. Alarm Output Configuration Menu
3-6
CWDM Transponder Model 6703
Remote
Inactive
N/A
EdgeAccess Universal Chassis System
Table 3. Alarm Output Definitions
Alarm
Description
2) Power Supply/Fan
Power is low or fan is off; default is Minor
3) Power On Self Test
Module failed when power was turned on; default is Major
4) Receive Level
Receiver detects a low level or no low light; default is Major
5) SpeedCop Violation
Data speeds are outside the currently set value; default is Minor
6) CDR Unlock
Clock Recovery is out of sync; default is Major
7) SFP Transceiver
SFP not certified by Canoga Perkins
3.4.4 SNMP Configuration
If you want to access the 6703 through a LAN connection to the 10BASE-T port on a 1040 enclosure,
view and set up the SNMP parameters through the SNMP Configuration screen. See Figure 10 and
Table 4. To view and set SNMP parameters, follow these steps:
1. From the System Configuration menu type 4, "SNMP Configuration," and press <Enter>. The
SNMP Configuration screen appears.
2. Type the number for the parameter you want to set and press <Enter>.
3. Type the information or value, and press <Enter>.
4. To return to the System Configuration menu, press <Esc>.
Ethernet Address
Ethernet Link
1)
2)
3)
4)
5)
6)
7)
8)
9)
10)
11)
12)
13)
SNMP CONFIGURATION PARAMETERS
00 40 2A 00 53 E7
UP/Half Duplex
System Contact
System Name
System Location
Read Community
Write Community
SLIP/PPP IP Address
Ethernet IP Address
Ethernet Subnet Mask
Ethernet Default Gateway
BOOTP Enabled
Serial Port Config
Telnet Timeout
Host Table
public
public
192.0.0.90
172.16.143.10
255.255.0.0
172.16.1.1
No
VT100
Never
Figure 10. SNMP Configuration Screen
CWDM Transponder Model 6703
3-7
EdgeAccess Universal Chassis System
Table 4. SNMP Configuration Parameters Description
Item
Description
1) System Contact
2) System Name
3) System Location
Local information for the 6703, up to 50 characters in each field
4) Read Community
Name for the people who can view the reports, up to 10
characters; default is public
5) Write Community
Name for the people who can set values for parameters, up to 10
characters; default is public
6) SLIP/PPP IP Address
Enter the IP address for access through SLIP or PPP
7) Ethernet IP Address
Enter the IP address for access through the Ethernet network
8) Ethernet Subnet Mask
Enter the mask that sets the network ID part of the IP address
9) Ethernet Default Gateway Enter the address of the network node that connects to another
network
10) BOOTP Enabled
Enable this if the module needs to obtain its IP address from a
BOOTP server; when the unit has an IP address, disable BOOTP
11) Serial Port Config
Set the type of serial port connection: VT100 (default), SLIP, or
PPP
12) Telnet Timeout
Set the time with no activity until a Telnet connection
automatically logs out
13) Host Table
Access the Host Table screen
3.4.5 Host Table
The SNMP agent allows access to up to 24 Host IP addresses listed in the Host Table. Set up the
Host information for the 6703 on the Host Table screen. See Figure 11. To access the Host Table,
follow these steps:
1. From the SNMP Configuration menu, type 13, "Host Table," and press <Enter>. The Host Table
screen appears.
2. To add a host, type 1 and press <Enter>, then follow the prompts, to enter values for these
parameters:
a. IP Address for the Host
b. Access level for the host; can be 1, read; 2, read/write; 3, read/trap; or 4, read/write/trap
c. Trap community string (up to 10 characters)
3. To delete a host, type 2 and press <Enter>, press <Space> to highlight the host address, and press
<Enter>. The host table appears again with your changes.
4. To return to the SNMP Configuration menu, press <Esc>.
3-8
CWDM Transponder Model 6703
EdgeAccess Universal Chassis System
HOST TABLE
Managing
Access
Trap
Trap Managing
Access
Trap
Trap
Host
Level Community Port
Host
Level
Community Port
----------------------------------- ---------------------------------172.16.142.20 4
public
162
172.16.142.3
4
public
162
192.0.0.3
4
public
162
Add or Delete a host entry (1=Add, 2=Delete from table):
Figure 11. Host Table Screen
3.5
Configuration/Status Screen
The Configuration/Status report and menu provide information about the switches set in hardware,
with options to set software control. To access the Configuration/Status screen, follow these steps:
1. From the Main Menu, type 2, "Configuration/Status," and press <Enter>. The
Configuration/Status screen appears; see Figure 12 and Tables 5 and 6.
2. To set the CDR or SpeedCop option and rate, type 1 and press <Enter>. The Clock Data
Recovery/SpeedCop screen appears; see Figure 13.
a. Type 1 and press <Space> to cycle through these options, then press <Enter>:
•
•
•
•
•
•
•
•
CDR Local RX: Checks and reclocks data rate on the Local Rx toward Remote Tx
CDR Remote Rx: Checks and reclocks data rate on the Remote Rx toward Local Tx
CDR Local & Remote Rx: Checks and reclocks data rate on both Local Rx and Remote Rx
SpeedCop Local Rx: Checks the maximum data rate on the Local Rx toward Remote Tx
SpeedCop Remote Rx: Checks the maximum data rate on the Remote Rx toward Local Tx
CDR & SpeedCop Local Rx: Checks the maximum data rate and reclocks the data rate on
the Local Rx toward Remote Tx
CDR & SpeedCop Remote Rx: Checks and reclocks data rate on Remote Rx toward Local Tx
Disabled: Does not check data rate or reclock data
b. To select the data rate, type a number from 2 to 24, or type A to auto detect the rate, then
press <Enter>. Standard data rates include those for Ethernet/SAN, SONET/SDH, and digital
video. Use selections 2 through 9 to define up to eight data rates to reclock, in Mbps.
c. To return to the Configuration/Status screen, press <Esc>.
3. At the Configuration/Status screen, type the number for a control item and press <Enter>, then
press <Space> to cycle through the options, and press <Enter> to select an option. See Table 6.
4. To return to the Main menu, press <Esc>.
CWDM Transponder Model 6703
3-9
EdgeAccess Universal Chassis System
CONFIGURATION/STATUS
1) Clock Data Recovery/SpeedCop: CDR Local & Remote Rx
CDR Rate: Auto Detect (1250 Mbps detected)
Local Port:
TX Status
SpeedCop Status
CDR Status
RX Level
ON
Disabled
N/A
OK
2) TX Control
3) Loopback
ON
OFF
Remote Port:
TX Status
SpeedCop Status
CDR Status
RX Level
SFP Xcvr Status
ON
Disabled
Locked
-21.2 dBm (OK)
Present
4) TX Control
On
5) Loopback
OFF
6) Dual RX Control N/A
Figure 12. Configuration/Status Screen
Table 5. Configuration Status Reports
Status Display
Function
TX Status
Shows transmission status for Local and Remote ports; normally On
SpeedCop Status
Shows one of these:
Data Rate OK Speed within selected range
Out of Range Speed out of range for user-defined or standard rate
Disabled No SpeedCop mode selected
N/A No SFP installed
CDR Status
Shows one of these:
Locked CDR circuit is locked on selected rate
Not Locked speed out of range for set rate (including Auto Detect)
N/A No SFP installed or no CDR mode selected
RX Level
Shows one of these:
Actual level, such as -21.2 dBm, for some SFPs
OK Signal level within normal range
No Signal Signal level too low or not present
N/A No SFP installed
SFP Xcvr Status
Shows one of these:
Present SFP installed
Not Present SFP not installed
Invalid SFP not certified by Canoga Perkins
3-10
CWDM Transponder Model 6703
EdgeAccess Universal Chassis System
Table 6. Configuration Control Options
Control Option
Function
1) Clock Data Recovery/ Opens the Clock Data Recovery/SpeedCop screen to select CDR
and/or SpeedCop option and rate; also shows current SpeedCop
SpeedCop Mode
threshold or CDR rate; see Step 2 on page 3-9
2) TX Control (local)
4) TX Control (remote)
Set transmission for Local and Remote ports to one option (you
cannot independently select redundant remote Tx ports, both ports
work under a single control); default is On:
On Always on, independent of quality of received signal
Off Always off, independent of quality of received signal
Off if Rx Low On unless received signal is below threshold
3) Loopback (local)
5) Loopback (remote)
Set loopback in software for Local ports and/or Remote ports;
Loopback sends the Local Rx signal to the Local Tx port and/or the
Remote Rx signal to the Remote Tx port; use for troubleshooting;
when On, Loopback overrides current TX Control settings;
default is Off:
Local loopback, only, disables Remote Tx (due to invalid Tx signal)
Remote loopback, only, disables Local Tx (due to invalid Tx signal)
Both Local and Remote loopback enables both Local and Remote Tx
6) Dual Rx Control
Not used; always N/A
CLOCK DATA RECOVERY/SPEEDCOP
1) Clock Data Recovery/SpeedCop: CDR Local & Remote Rx
CDR Rate: Auto Detect (1250 Mbps detected)
User Defined Rates (Mbps):
2) 620.03
4) Available
3) Available
5) Available
ETHERNET/SAN:
10) Fast Ethernet (125 Mbps)
11) Gigabit Ethernet (1250 Mbps)
12) ESCON (200 Mbps)
13) 1G FICON (1063 Mbps)
14) 2G FICON (2125 Mbps)
15) 1G Fibre Channel (1063 Mbps)
16) 2G Fibre Channel (2125 Mbps)
6)
7)
Available
Available
8)
9)
SONET/SDH:
17) OC3/STM1 (155 Mbps)
18) OC12/STM4 (622 Mbps)
19) OC24 (1244 Mbps)
20) OC48/STM16 (2488 Mbps)
Available
Available
Digital
21) 143
22) 177
23) 270
24) 360
Video:
Mbps
Mbps
Mbps
Mbps
Figure 13. Clock Data Recovery/SpeedCop Screen
CWDM Transponder Model 6703
3-11
EdgeAccess Universal Chassis System
3.6
Error Counters
The Error Counters screen reports errors that occur on the 6703 link. See Figure 14 and Table 7. To
view the link errors, follow these steps:
1. From the Main menu type 3, "Error Counters," and press <Enter>. The Error Counters screen
appears.
2. To reset the timer and counters, press <Tab>.
3. To return to the Main Menu, press <Esc>.
ERROR COUNTERS
Timer
0 days 00:05:26
Receive Level
SpeedCop Violations
CDR Unlock
Local
Remote Rx1
Remote Rx2
1
0
0
201
6
0
330
Figure 14. Error Counters Screen
Table 7. Link Error Counters Definitions
Item
Definition
Timer
Number of days, hours, minutes, and seconds since the last reset
Receive Level
Number of times the data level was too low to be detected
SpeedCop Violations
Number of times the data rate exceeded the selected rate
CDR Unlock
Number of times the data rate did not match the selected clock rate
3.6.1 Utilities Screen
Use the Utilities screen to set the time and date; change the password; set values for various
parameters, including for communications; or to run the diagnostic PING. See Figure 15 and Table 8.
To access the Utilities screen, follow this step:
1. From the Main Menu, type 4, "Utilities," and press <Enter>. The Utilities menu appears.
1)
2)
3)
4)
5)
6)
UTILITIES
Set Date and Time
New Password
Modem/Slip/PPP Baud Rate
19200
Modem Initialization String
AT
Reset Configuration To Default
PING Generation
Figure 15. Utilities Screen
3-12
CWDM Transponder Model 6703
EdgeAccess Universal Chassis System
Table 8. Utilities Menu Options
Item
Definition
1) Set Date and Time
Change the time and date information for the 6703 if needed; if
in a chassis with a DMM, the DMM date and time overrides
the 6703; if the 6703 loses power, it loses the Date and Time
2) New Password
Add, delete, or update the password for the user interface; type
the new password, then confirm it at the prompt; after you log
out, the new password will be required the next time a user
tries to access the 6703 module
3) Modem/Slip/PPP Baud
Rate
Set the baud rate, 9600, 19200, 38400, 57600, or 115200 bps
for the modem/SLIP/PPP serial port
4) Modem Initialization String The default string is "AT"
5) Reset Configuration To
Default
Restores all configurable settings to the defaults except for:
date and time; password; BOOTP; Telnet timeout
6) PING Generation
Access the PING diagnostics screen
3.7
PING
Use the PING Generation screen to test the connection to a specific IP address. See Figure 16.
PING Generation
IP Address to PING: 0.0.0.0
PING count (1 to 255, 0 = forever):
0
Figure 16. PING Generation Screen
To use the PING option, follow these steps:
1. From the Main Menu, type 4, "Utilities," and press <Enter>.
2. From the Utilities menu, type 6, "PING Generation," and press <Enter>.
3. At the prompt, type the IP address to PING and press <Tab>.
4. At the prompt, type the number of times to send a PING, from 1 to 256, or type 0 to PING
continuously every 3 seconds, and press <Enter>.
"PING response received..." indicates a good connection;
"TIMEOUT: Unable to reach [IP address]..." indicates a faulty connection.
5. To stop the PING and return to the Utilities menu, press <Esc>.
CWDM Transponder Model 6703
3-13
EdgeAccess Universal Chassis System
3.8
Upgrading the Software
Each 6703 has two flash memory banks for storing firmware:
•
•
Active Flash Memory holds the software in current use
Inactive Flash Memory holds the software upgrade after downloading; can be swapped with the
firmware in active memory
Use the Software Upgrade report and menu screen to check the current version of the firmware and
upgrade it, if necessary. All 6703 modules within the system must run the same version of software.
Check the readme file for the newer software to be sure that you need the upgrade.
Because downloading a software upgrade takes some time, the software is downloaded to the inactive
memory to avoid disrupting service. Swapping the active and inactive memory banks automatically
resets the module.
Note:
The specific steps in this process vary, depending on the availability of a DMM to
automatically upload software revisions to all modules directly from the software source.
If you manage your 6703 through a DMM, you can download the file from the Canoga Perkins
website to your hard drive. Use the DMM to TFTP the file into the DMM library and, from there, to
the 6703. For details, see the Model 1500 Domain Management Module User Manual.
3.8.1 Determine Current Software and Version
To determine the current software version used by the 6703, follow these steps:
1. At the Main Menu, type 5, "Software Upgrade," the Software Upgrade screen appears. See
Figure 17.
SOFTWARE UPGRADE
Active Firmware
Inactive Firmware
Bootcode
01.68
01.65
05.10
1
2
Software Reset
Swap Bank
Reset
Swap
3
4
Get New File with TFTP
Copy Active bank to Inactive Bank
Figure 17. Software Upgrade Screen
2. View and record the Active Firmware and Inactive Firmware versions. If the module has been
updated, the Inactive and Active Firmware version numbers differ. The lower number, such as
1.33, is older than the higher number, such as 1.44. If the module has not been updated, the
Active and Inactive Firmware version numbers are the same.
If a newer version of Firmware is available for the 6703, you can download it from the Canoga
Perkins website or, if you cannot access the Internet, call Canoga Perkins at 818-718-6300.
3-14
CWDM Transponder Model 6703
EdgeAccess Universal Chassis System
3. Log on to www.canoga.com and check that a newer version of the software is available.
4. Click Download.
5. Scroll to the listing for the 6703 software.
6. If this version is newer than your current version, click the file name to start the download
process.
7. At the File Download window, select Save this Program to Disk.
8. At the Save As dialog, save the download to the root directory of your server.
3.8.2 Install the New Software Version
You can download the software revision to the DMM. For details, Model 1500 Domain Management
Module Uses Manual.
To upgrade and install the new software version, activate the TCP/IP stack for the 6703 and follow
these steps:
Caution:
Do not update bootcode unless it is absolutely necessary. To avoid losing the bootcode
during the download process, do not reset or power-down the module.
1. At the Software Upgrade screen, type 3, "Get New File with TFTP." The TFTP Software
Upgrade Screen appears.
2. At the prompt, enter the TFTP Server IP Address. You can use the default IP address or enter a
new host IP address and follow the prompts to save it as the new default.
3. Enter the filename. The last digits of the filename indicate the version number. For example,
"67xx0173.zip" indicates firmware version 1.73 and "67xx0115.bin" indicates bootcode
version 1.15.
4. Follow the prompts to download the file; "Download in progress, please wait" appears. When the
download is complete, the new version is in the inactive flash memory. To use the new firmware,
you must swap flash memory.
5. At the TFTP Operation screen, press <Enter> to return to the Software Upgrade screen.
6. At the Software Upgrade screen, type 2, "Swap Bank." The 6703 automatically resets, then goes
online with the new firmware active. The inactive flash memory contains the old firmware. If a
problem occurs with the new version, you can swap the old version back to active memory.
Other 6703 modules in the same domain can be simultaneously upgraded through the Virtual Group
feature on the DMM. For details on using the Virtual Group, see the Model 1500 Domain
Management Module User Manual.
CWDM Transponder Model 6703
3-15
EdgeAccess Universal Chassis System
3.9
SNMP - TCP/IP
You can use TCP/IP options such as TFTP, Telnet, PING and SNMP agents with the 6703 console
port over SLIP or PPP. You must enable TCP/IP separately.
3.9.1 Set Up a Dial-up Connection
When the 6703 boots up, the serial port defaults to VT100 terminal mode for access. However, to use
Telnet, TFTP or SNMP applications, you must switch the serial port to SLIP/PPP mode. To set up a
Dial-Up Connection, follow these steps:
1. Set the MDM/TRM switch on the front panel to MDM.
2. Connect a straight-through cable between the serial port and the modem.
3. On your PC, launch Dial-up Networking. For details, see your Windows documentation.
4. Create a new dial-up entry in the Phonebook. Set up the protocol and specify the IP address for
the computer. Set the serial port mode to match the protocol selected in the Dial-up Network
setup on the PC.
5. Set the initialization string for the dial-up modem to include Hardware Flow Control and Data
Compression Enabled, then select the modem, dial-up number and dial-up speed.
6. Set the dial-up speed on the PC to the speed selected for the modem. To check modem speed:
a. Set the MDM/TRM Switch on the front panel to TRM.
b. Reach the Main Menu and type 4, "Utilities."
c. At the Utilities screen, view the modem speed at item 3.
3.9.2 Create A Script to Configure the Serial Port
Because the DMM defaults to VT100 mode when booting, you cannot see the screens and commands
used to switch to SLIP or PPP mode when you exit VT100 mode. Use a script file to successfully
exit VT100 mode and switch to SLIP or PPP.
1. To create a script on your PC, open Notepad and type the steps you would follow to enter SLIP or
PPP mode. On the last line, press <Space> once to select SLIP mode or twice for PPP mode
proc main
;
waitfor "Password :"
transmit $PASSWORD, raw
transmit "^M"
transmit
transmit
transmit
transmit
"1^M"
"4^M"
"11^M"
" ^M"
endproc
3-16
CWDM Transponder Model 6703
EdgeAccess Universal Chassis System
2. Save the Notepad document with a .SCP file extension in the folder where the Dialup Connection
application looks for scripts. The script will be available in the Dialup script menu. This file is
typically in the Windows\System32\ras\ folder.
3. To run the script, reach the Phonebook Entry dropdown menu and select either the PPP or the
SLIP script.
3.9.3 Switch to PPP or SLIP Mode Without a Script
If you do not have a script file, and dial-up networking initializes a VT100 terminal screen, you will
not see the screens, but the 6703 responds to the commands normally. Follow these steps:
1. After dialing, enter the password.
2. Type 1 to access the System Configuration screen.
3. Type 4 to access the SNMP Configuration screen.
4. Type 11 to highlight the Serial Port Configuration line.
5. Press <Space> once to select SLIP or twice to select PPP.
6. Press <Enter> to confirm the choice for port configuration.
You can now run TCP/IP applications.
3.10 The Canoga Perkins MIB
The Canoga Perkins private MIB provides fully managed access to configuration features, status
reports and diagnostics. The private MIB is required for defining and indexing objects that will be
recognized by the SNMP management system.
All major components of the modules monitored by the SNMP network are assigned index numbers,
defined in a tree hierarchy. The index allows the SNMP manager to precisely identify each
component (and other objects defined by the MIB file) when reporting module status.
You can download the private MIB, called "cp.mib," from the Canoga Perkins web site. This file
must be compiled. The SNMP software on your system probably provides a feature to compile a
MIB; for details, see the documentation for your PC.
CWDM Transponder Model 6703
3-17
EdgeAccess Universal Chassis System
3-18
CWDM Transponder Model 6703
EdgeAccess Universal Chassis System
Chapter 4
6703 Specifications and Models
4.11 Specifications
Physical
Dimensions:
7.9" H x 1.0" W x 10.4" D (201 mm x 25 mm x 264 mm)
Weight:
0.92 lb (0.417 kg)
Operating Temperature:
0 to 50° C (32 to 122° F)
Operating Humidity:
Up to 95% (non-condensing)
MTBF:
6703-0000: 174,978 hours (30.2 years)
6703-0003: 219,713 hours (25 years)
Power Requirements:
9.5 W
Optical
Local Port, Fixed 1310 nm,
Single Mode, SC
Tx output -3 to -10 dBm
Rx range -3 to -18 dBm
SFP1-0055, 850 nm MM
Tx output -9.5 to -4 dBm
Rx range -4 to -17 dBm at 1.25 Gbps
SFP1-2155, 1310 nm SM
Tx output -9.5 to -3 dBm
Rx range 0 to -19 dBm at 1.25 Gbps
SFP1-2555, 1310 nm SM
Tx output -2 to +3 dBm
Rx range -9 to -27 dBm at 2.5 Gbps
SFP2-xx65
Tx output 0 to +5 dBm
Rx range -7 to -28 dBm at 2.5 Gbps
Regulatory Compliance
•
•
•
•
•
•
•
•
•
•
•
ETL, cETL (UL 60950/CSA C22.2 No. 60950)
EN 60950
CDRH CFR21/EN 60825-1
FCC Part 15B, Class A
EN 55022
EN 55024
EN 61000-3-2
EN 61000-3-3
C-Tick (AS/NZS 3548)
NEBS, Level 3
CE Mark
CWDM Transponder Model 6703
4-1
EdgeAccess Universal Chassis System
Table 9. EIA Interface Pinout
Signal
Pin
Switch at MDM
Switch at TRM
DCD
1
To module
From module
RXD
2
To module
From module
TXD
3
From module
To module
DTR
4
From module
To module
DSR
6
To module
From module
RTS
7
From module
To module
CTS
8
To module
From module
RI
9
To module
From module
4.12 6703 Models
Model
Description
6703-0000 Universal 6703 Transponder Base Unit, holds 2 SFPs
6703-0003 Local Tx/Rx 1310 nm SM, holds 1 CWDM SFP
Local Port SFPs
SFP1-0055 SFP for Local Interface, 1062 Mbps - 2125 Mbps, 850 nm MM
SFP1-2155 SFP for Local Interface, 100 Mbps - 2500 Mbps, 1310 nm SM
Remote Port CWDM SFPs, 100-2500 Mbps
SFP1-2555 1310 nm SFP, 100-2500 Mbps, 60 Km, LC
SFP2-4765 1470 nm SFP, 100-2500 Mbps, 80 Km, LC
SFP2-4965 1490 nm SFP, 100-2500 Mbps, 80 Km, LC
SFP2-5165 1510 nm SFP, 100-2500 Mbps, 80 Km, LC
SFP2-5365 1530 nm SFP, 100-2500 Mbps, 80 Km, LC
SFP2-5565 1550 nm SFP, 100-2500 Mbps, 80 Km, LC
SFP2-5765 1570 nm SFP, 100-2500 Mbps, 80 Km, LC
SFP2-5965 1590 nm SFP, 100-2500 Mbps, 80 Km, LC
SFP2-6165 1610 nm SFP, 100-2500 Mbps, 80 Km, LC
4-2
CWDM Transponder Model 6703
EdgeAccess Universal Chassis System
Appendix A
Warranty Information
Current Warranty information is available on-line in the Client Login Area of the Canoga Perkins web
site (www.canoga.com) or by contacting Technical Support at 800-360-6642 (voice) or
[email protected] (email).
CWDM Transponder Model 6703
A-1
CANOGA PERKINS CORPORATION
20600 Prairie Street
Chatsworth, California 91311-6008 USA
Phone: (818) 718-6300
FAX: (818) 718-6312
Web Site: www.canoga.com
Email: [email protected]