1
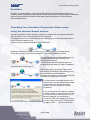
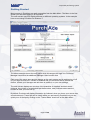
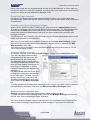
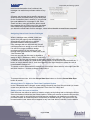
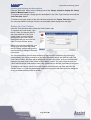
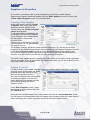
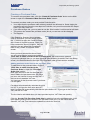
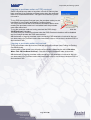
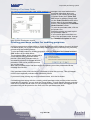
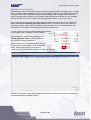
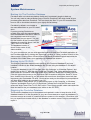
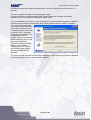
User Manual PurchAce, Corporate purchasing system Corporate purchasing system PurchAce Corporate Purchasing System Table of Contents PurchAce _________________________________________________________________ 5 Checking Your PurchAce Connection Status when using the internet based version. ____ 5 Off Line Mode _________________________________________________________________ 6 Data transit status ______________________________________________________________ 6 Getting Started _____________________________________________________________ 7 PurchAce User Accounts ________________________________________________________ 8 Creating users and changing privileges _____________________________________________ 8 Creating a new User Account ____________________________________________________ 8 Setting a users as a ‘Manager User’________________________________________________ 8 Assigning Users Cost Centres Privileges ____________________________________________ 9 Allowing Users To Authorise Their Own Purchase Orders _____________________________ 9 Setting a User Account as Inactive ________________________________________________ 9 Deleting A User Account _______________________________________________________ 10 Editing a User Account ________________________________________________________ 10 Starting the Multi-Company Version Of PurchAce__________________________________ 11 Logging in to PurchAce ________________________________________________________ 12 Checking ‘Who’s Logged In’ and logging users out _________________________________ 12 Setting-up PurchAce _______________________________________________________ 13 Changing the Purchase Order Numbers that PurchAce gives to new purchase orders _____ 13 The Setup Screen __________________________________________________________ 13 Changing the Default VAT Value ________________________________________________ 13 The P.O. Settings Tab __________________________________________________________ Allowing users to print purchase orders before they are authorised ______________________ Allowing users to delete purchase orders __________________________________________ Hiding the Purchase Order Number until a purchase order is authorised __________________ Preventing Users from Back-Dating POs __________________________________________ 14 14 14 14 14 The P. O. Defaults Tab _________________________________________________________ 14 Setting the PurchAce Currency __________________________________________________ 14 Altering the Free Field _________________________________________________________ 15 Setting the Default Depot ______________________________________________________ 15 Setting the printed purchase order ‘Company Reg No’ and ‘Vat Reg No’ in the Printed Purchase Order tab ___________________________________________________________________ 15 Setting up Units to be used in Purchase Orders _____________________________________ 15 Creating and Deleting Unit Descriptions ___________________________________________ 16 Setting Up Cost Centres ________________________________________________________ 16 Page 2 of 36 Corporate purchasing system Depots / sites In PurchAce ___________________________________________________ 17 Creating A New Depot _________________________________________________________ 17 Editing An Existing Depot / Site. _________________________________________________ 17 Deleting An Existing Depot /Site. _________________________________________________ 17 Adding Deleting Site Locations __________________________________________________ 17 Suppliers in PurchAce ______________________________________________________ 19 Creating A New Supplier _______________________________________________________ 19 Supplier Products _____________________________________________________________ 19 Editing a Supplier _____________________________________________________________ 20 Deleting a Supplier ____________________________________________________________ 20 Purchase Orders___________________________________________________________ 21 Creating a Purchase Order _____________________________________________________ Adding purchase order lines to the purchase order ___________________________________ Selecting Supplier Products for Use in a Purchase Order ______________________________ Requesting Authorisation by a Specific Manager ____________________________________ Cancelling a Manager Authorisation Request _______________________________________ 21 21 22 22 23 Editing a Purchase Order _______________________________________________________ 23 Deleting a Purchase Order line __________________________________________________ 23 Deleting an Entire Purchase Order _______________________________________________ 23 Authorising a Purchase Order _______________________________________________ 23 Receipting Purchase Orders _____________________________________________________ 24 Setting Individual Purchase Order Lines As Received ________________________________ 24 Setting An Entire Purchase Order As Received _____________________________________ 24 Finding an Existing Purchase Order ______________________________________________ 25 Finding A Specific Purchase Order By Its Number___________________________________ 25 Finding A Specific Purchase Order By Selecting Criteria______________________________ 25 Overcoming Purchase Order Lock-outs ___________________________________________ 25 Logging a purchase order as POD received ________________________________________ 27 Logging a purchase order as Invoiced _____________________________________________ 27 Printing a Purchase Order ______________________________________________________ 28 Printing purchase orders for auditing purposes __________________________________ 28 Manager User Specifics_________________________________________________________ 29 Designing Your Purchase Order Layouts __________________________________________ The Purchase Order Designer ___________________________________________________ Creating a New Purchase Order Style _____________________________________________ Deleting a Purchase Order Layout ________________________________________________ Importing a Purchase Order Layout_______________________________________________ Exporting an Invoice Layout ____________________________________________________ 30 30 30 30 31 31 Changing Purchase Order Layouts _______________________________________________ 31 Moving Purchase Order Text Items _______________________________________________ 31 Setting Purchase Order Items Visibility ___________________________________________ 31 Page 3 of 36 Corporate purchasing system The Purchase Order Designer Details Section _______________________________________ Additional Details Items In The Purchase Order Footer _______________________________ Changing the Text Size ________________________________________________________ Changing the Text Description Location ___________________________________________ Changing the purchase order Page Height __________________________________________ Resizing purchase order sections _________________________________________________ Using Your Own Logo in an Purchase order Layout _________________________________ Drawing Boxes on an Purchase order Layout _______________________________________ Creating a Box _______________________________________________________________ Deleting a Box _______________________________________________________________ Moving a Box _______________________________________________________________ Resizing a Box _______________________________________________________________ 32 32 32 32 32 32 32 33 33 33 33 33 Saving Changes to Your Purchase Order Layout ___________________________________ 33 Setting Up PurchAce To Share A Database On A Network ___________________________ 34 System Maintenance _______________________________________________________ 35 Backing Up The PurchAce Database ______________________________________________ 35 Backing Up to CD /DVD ________________________________________________________ 35 Repairing the PurchAce Database ________________________________________________ 35 Page 4 of 36 Corporate purchasing system PurchAce PurchAce is a cost effective, user-friendly MS Windows™ based software system for creating, authorising and printing Purchase Order documents. PurchAce replaces traditional carbon copy pre-printed Purchase Order pads and eliminates all the inconvenience associated with them. Checking Your PurchAce Connection Status when using the internet based version. PurchAce operates over the internet on any PC or Laptop with an internet connection with no need for slow overly complex VPN connections. The bottom Left of the PurchAce main screen displays your current connection status to the PurchAce central server. Here is how you want this display to look at all times! However, there are two points of failure for your connection to the central server. These are you have no internet connection or you can not reach the server. The connection status display shown here is telling us that we do not currently have access to the internet. In order to access the PurchAce server to receive and save data you must re-establish your connection to the internet. The display here is showing us that we are successfully connected to the internet but we can not currently reach the server. This may occur when you first install PurchAce if the server settings are not correct. You will receive a message similar to the screen here if you try and access the data or save when you can not reach the server or you do not have an internet connection. If you in the process of creating or editing a vehicle, trailer or employee and you lose your internet connection, when you try to save the changes you will receive a Connection Failure message. Don’t worry, you can simply click on the ‘Connect and try again’ button ….. and connect to the Page 5 of 36 Corporate purchasing system internet and try again. If you still have not established an internet connection, you will receive a ‘Connection Failure’ message every time you try to save, until you have a connection. If you can not manage to connect to the internet again, you will lose the changes or the vehicle, trailer or employee will be lost if you cancel out of the screen. Off Line Mode If want to access the information stored on your computer as of the last time you used it, but you do not have an internet connection, simply start PurchAce and when you are told you have no internet connection, click the ‘Run in Off Line Mode’ button. You will now be able to access all the fleet data as of last time you were connected. Obviously there may be more up to date information on the server and you may not create or edit anything whilst in Off Line Mode. This is ‘permanent offline mode’, you will not be able to connect at all in this mode until you exit PurchAce and then log back in. Data transit status PurchAce keeps you informed of its status whilst downloading data or saving your changes to the central server. The Mouse Pointer will change to indicate the current data transit status and the Connection Status display also changes to represent the status. When data is in transit, either from or to the central server, your PurchAce Connection Status will display a clock above the ‘World’ icon and an arrow will appear, showing the direction of the data: represent receiving from the server. to represent saving to the server and The mouse pointer will change to when saving (uploading) to the server and to when receiving (downloading) data from the server. You must wait whilst these icons / mouse pointers are displayed. With most connections, these icons will flash momentarily but for slower connection, for example dialup connections you may have to wait a short while whilst your data is being received or saved to the server. Page 6 of 36 Corporate purchasing system Getting Started Most screens in PurchAce are easily accessible from the Main Menu. The Menu is the first screen you see after logging in to PurchAce. The main screen may look slightly different on different operating systems. In the example here we are using PurchAce on Windows 7. The above example shows the main menu when a manager user logs in to PurchAce. Manager users have the additional ‘Manager Users’ section that Each one of the menu items and the buttons on the main screen can be switched on or off for your login account so if a button is disabled and you should be able to access this feature, contact your manager and ask them to enable it on your user settings. The main screen displays an overview of the quantities of suppliers and their stored products, the number or unauthorised purchase orders, total purchase orders and the number of sites you have set up. By default, PurchAce will display information tip ‘balloons’ when you hover your mouse over some buttons etc. These tips can be useful whilst you are learning PurchAce but you can quickly turn of the tips by clicking on the ‘Tutorial Mode’ check box on the Main Menu. Page 7 of 36 Corporate purchasing system Some menu items are only available whilst you are on the Main Menus, so if you require to use a menu item but it is greyed / disabled, try exiting back to the main menu, but remember some menu items are only available to Manager users. PurchAce User Accounts PurchAce is an advanced multi-user system that allows many users to access its data simultaneously. Users must log into PurchAce using a user account with a unique username and password. Creating users and changing privileges When you first install PurchAce, it has only one user account, the administrator account. This user is a manager user, so has the ability to create new users. The initial password for administrator is admin (all in lower case) but it is recommended that you change this password or delete the administrator user once you have created your own users with manager privileges. The first time you use PurchAce, you will need to log in using the administrator account and create user accounts for all employees. User Accounts are edited and created in PurchAce in the ‘Users And Privileges’ screen that can be accessed from the from the ‘Manager Features’ menu by selecting the ‘Edit User Accounts’ menu item. This menu is only accessible to users that have specifically been given access to it in the ‘Users and Privileges’ screen. Creating a new User Account To create a new user, in the ‘Users And Privileges’ screen, click the New User button. Type the new users name and their new password in the text boxes (NB blank passwords are not allowed). The password must be typed again in the Retype textbox as a check to make sure you have typed it correctly as you cannot see the password on screen. Password characters are displayed as asterisks (*). PurchAce allows each user to be given privileges for menu items and buttons on the main menu. To allow a user to access a menu item, make sure the checkbox corresponding to that menu item is ticked in the ‘Menu Privileges’ list. To make a button on the Main Menu accessible to the current user make sure the checkbox corresponding to the button is ticked in the ‘Main Screen Menu Privileges’ frame. Setting a users as a ‘Manager User’ Manager users can authorize purchase orders, delete purchase orders. To make the current user a Manager User, first click the ‘Manager Settings’ tab and then tick the ‘Give This User Manager Rights’ checkbox. You can also allow manager users to authorise their own purchase orders and specify the value to which a manager can authorise for each manager. If you leave the ‘User has Page 8 of 36 Corporate purchasing system restricted authorisation level’ unticked, the manager can authorise purchase orders of any value. All users can request that a specific manager to authorise their purchase order (if you have paid for the ‘Advanced Users’ module). If you provide the email address for a manager in the ‘User Email’ text box, users will also be able to email the manager with a HTML copy of the purchase order when they request their authorisation. If you leave the email blank for this manager, users will not be able to email them a request. Assigning Users Cost Centres Privileges When a manager user creates a new cost centre, they can specify that all users are automatically given authority to assign purchase orders to that cost centre. If the manager did not automatically give all users permission to assign to a cost centre or if a user is no longer entitled to assign purchase orders to a cost centre you can change these permissions for each user in the ‘Cost Centres’ tab. Here we can see that this user is allowed to assign to 0001 | Stationary, 0002 | IT and 0003 | Vehicles. The user can not assign to any cost centres in the left hand list. To allow a user to assign to a cost centre, either select it in the left hand list and click the ‘>’ button or simply double click it. It will then appear in the right hand list to show the user is now allowed to assign to it. To cancel a users authorisation to assign to a cost centre, either select it in the right hand list and then click the ‘<’ button or simply double click it. To accept the new user, click the Accept New User button or click the Cancel New User button to cancel. Allowing Users To Authorise Their Own Purchase Orders In the ‘Passwords and Privileges’ screen simply choose a user from the pull down (or create a new user) and tick the ‘User Can Authorise Their Own Pos’ check box. Setting a User Account as Inactive User accounts can either be active or inactive, simply set by ticking and un-ticking the Active Account checkbox below the User Name textbox. Setting an account as inactive will prevent a user from login in using that account and inactive managers can therefore not authorize purchase orders. An inactive account is effectively a deleted account. The account can not be used and the user name will not appear in any user lists within PurchAce, but the details Page 9 of 36 Corporate purchasing system of the account remain in PurchAce. This ensures that purchase orders continue to display the username of the user who originated or authorized purchase orders. An inactive account can be reactivated at any time by ticking the Active Account checkbox. The user can then login as before. Deleting A User Account To delete a user account, select the user name from the User Name pull-down and then click the Delete User button. NB only accounts that have no purchase orders in PurchAce can be deleted. You can make an account inactive which has the same effect as deleting the account if there are purchase orders originated or authorized by a user. Editing a User Account To edit a user account, select the users user name from the User Name pull-down. NB the pull-down will not be visible in create user mode. You can edit the users password and change any privileges by clicking the check boxes but the user name is not editable. Click the Save Changes button to save the users new settings. Page 10 of 36 Corporate purchasing system Starting the Multi-Company Version Of PurchAce PurchAce can be ran as a multi-company version for companys that want to operate more than one company from PurchAce keeping the purchase orders totally separate between the companies with their own purchase order numbers sequence for all companies. Please contact Assist IT Solutions Ltd if you would like to upgrade to the multi-company version. You will not see this screen if you are not registered as a multi-company user. This company has two companies on registered on its PurchAce installation, Company One Ltd and Company Two Ltd. To open a company in PurchAce, select if from the company list and then click on the ‘Open Selected Company’ button or just double click the company in the company list. The Company Name is derived from the name of the Depot that has been set as the Invoice Address in the ‘Edit A Depot’ screen for that company. You will be presented with the login screen for that company once you have selected the company to open. The Co No column in the company database list is simply the unique number assigned by PurchAce to that company database and has no other implications. Page 11 of 36 Corporate purchasing system Logging in to PurchAce The default user account is the administrator account and the password for this account is admin (all in lower case). We recommend renaming the password of the administrator account as is can be guessed. Once you have created user accounts for your employees, they can log into PurchAce using their username and password. After PurchAce runs through its startup routine and initializes itself, you will be presented with the Log In window. At this screen you must select your user name from the User Name pull-down list and type your password in the Password text box. If you enter your password correctly, PurchAce will then allow you to access the main menu. PurchAce will only allow a user account to be logged in once at a time. If you attempt to log in using a user account that is already logged in, PurchAce will inform you that the specified user is already logged in and will allow you to attempt to log out that user account. You will Not be able to log the user out if someone is still actually using the account on another computer. This feature is available in the event that PurchAce wrongly thinks that a user is still logged in, if for example PurchAce previously terminated prematurely as a result of a system crash or power cut and PurchAce did not have the opportunity to log the user out. Checking ‘Who’s Logged In’ and logging users out All users can view a list of users that are currently logged in to PurchAce on the network. To do this, simply select the ‘Who’s Logged In’ menu item from the ‘PurchAce System’ menu. You will be presented with a screen similar to the one to the right. The screen shows a list of all users logged in by user type. All Manager Users are displayed in the top section of the list and all Standard Users are displayed in the bottom section of the list. You may from need to log a user out of PurchAce from time to time in the event that PurchAce still thinks a user is editing a Purchase Order because the user failed to close PurchAce down correctly due to a network failure or power cut for example. To log a user out, simply select the user from the list and then click the ‘Log Out’ button. NB only Manager Users have the ability to log out another user. The ‘Log Out’ button will not be displayed when viewing the ‘Who’s Logged In’ screen from a standard user account. Page 12 of 36 Corporate purchasing system Setting-up PurchAce This section of the user manual explains how to change any default values or settings that can be changed to alter the way that PurchAce is used. Changing the Purchase Order Numbers that PurchAce gives to new purchase orders PurchAce numbers purchase orders sequentially. It is possible for you to tell PurchAce to start numbering order numbers from a different start sequence. This is useful when you first start using PurchAce, if you would like to carry on the sequence of a previous manual paper system. You can reset the ‘next purchase order number’ at any time but you can not set the number lower than the number given to any purchase orders already on the system. This is obviously to prevent duplicates of purchase order numbers. To change the purchase order number sequence, select ‘Change purchase order numbers’ from the ‘PurchAce System’ menu to open the ‘Change Purchase Order Numbers’ screen. Simply type the value of the number you would like the next purchase order generated in PurchAce to be given in the ‘New PO Start Number’ text box, then click the ‘Set New PO Number’ button. The Setup Screen Only Manager user have access to the Setup Screen which is accessed by selecting the ‘Setup’ menu item from the ‘PurchAce System’ menu (the menu at the top of PurchAce visible at all times). Changing the Default VAT Value Open the Setup screen by clicking the Setup button on the Main Menu and make sure the ‘VAT (TAX)’ tab is selected at the top of the setup screen. PurchAce allows you to alter the description of the tax from VAT for customer not in the UK. Whatever you type in the Txt Description text box, will appear on this screen, in the tax description on the purchase order screen and the printed purchase orders. If the tax rate changes in your country, simply type the new tax % value in the ‘Default VAT Rate’ text box then click the ‘Save Changes’ button. Page 13 of 36 Corporate purchasing system The P.O. Settings Tab The P.O. Settings tab in the Setup screen contains a few self explanatory features but they shall be explained here for clarity: Allowing users to print purchase orders before they are authorised The ‘Users Can Print and email Purchase Orders BEFORE they have been authorised’ check box will allow any user to print out or email purchase orders before they have been authorized when ticked. If this check box is not ticked, users will only be able to print or email the purchase orders after they have been authorized by a manager user. Allowing users to delete purchase orders The ‘All Users Can Delete Purchase Orders’ checkbox gives all users the ability to delete purchase orders when ticked. When this checkbox is not ticked, only manager users can delete purchase orders. Hiding the Purchase Order Number until a purchase order is authorised Some companies do not want their users to be able to see a purchase order number until a manager has authorised the purchase order. Simply ensure that the ‘PO Number not shown until PO is authorised’ check box is ticked to prevent users from seeing the PO number. Once the PO is authorised, they will be able to see the number when they open the purchase order. Preventing Users from Back-Dating POs By default, PurchAce will automatically input todays date when a user creates a purchase order, however, the user can change this date. Ensure that the ‘Users can NOT backdate POs’ checkbox to lock the PO date to the date of creation. The P. O. Defaults Tab Setting the PurchAce Currency PurchAce expresses values in £ by default. This can easily be changed in the Setup screen by typing your currency symbol or abbreviation in the Currency textbox in the Settings tab. You can type a maximum of 3 characters for your currency so you can either type AUD or $, or USD or $, GBP or £ etc. whatever you type here will appear on the PurchAce Page 14 of 36 Corporate purchasing system screens in place of the default £ and in the printed purchase order. Altering the Free Field PurchAce has a field that by default is set to ‘Cust. Inv. No’. If you would like to store something other than the customer invoice number, simply type your description for this field in the ‘Free Field Description’ text box. Your description for this field will appear on the Edit A Purchase Order screen and on the printed purchase order. This field is searchable so you can find purchase orders by the contents of this field in the ‘Find A Purchase Order’ screen. Setting the Default Depot If you purchase orders are mainly produced for one depot, you can set the default depot here and PurchAce will automatically select this depot every time a new purchase order is created. Just remember to change from the default depot when creating purchase orders for a depot other than the default. Setting the printed purchase order ‘Company Reg No’ and ‘Vat Reg No’ in the Printed Purchase Order tab PurchAce will display you company registrations number (if you are a UK incorporated company or other company with a registration number that should be displayed on company literature) and VAT number if you are VAT registered. You can tell PurchAce your registration number in the Setup screen in the ‘Printed Purchase Order’ tab. There are more settings, such as displaying or hiding the VAT and Company reg in the PurchAce integrated ‘Purchase Order Designer’, Setting up Units to be used in Purchase Orders Click the ‘Units’ tab in the Setup screen to create and delete units and to switch them on or off in purchase orders. The ‘Include units In Purchase order’ check box will switch on or off the field for storing the units of a purchase order line. Some users need to indicate the measurement of a purchase order line, e.g. KG, meters, bag etc. If you are not concerned with this feature, simply switch it off here and it units will not be shown on the PO and when creating an order line you will not see the units pull-down list. If you are using the units feature, you can add, delete and amend unit descriptions by clicking the ‘Edit Units’ button. Page 15 of 36 Corporate purchasing system Creating and Deleting Unit Descriptions Click the ‘Edit Units’ button on the ‘Settings’ tab of the ‘Setup’ screen to display the ‘Setup Units Of Measurement’ screen. To create a new unit type, simply type the description in the ‘Unit Type’ text box and click the ‘Add This Unit’ button. To delete a unit type, select it from the pull-down and click the ‘Delete This Unit’ button. You can only delete a unit type if there a no purchase orders assigned to that type. Setting Up Cost Centres Click the ‘Cost Centres’ tab to show the ‘Cost Centres’ tab. To create a new cost centre, type the ID / code you want to refer to this cost centre as in the ‘Cost Centre Code’ text box and the description in the Cost Centre Description text box and click the ‘Add This Cost Centre’ button. Before you can start using this cost centre, you must open the ‘Users and Privileges’ screen and give the users authority to assign to this new cost centre. You can alternatively give all users authority to use this cost centre here by clicking the ‘Automatically give users permission to use this’ check box before you click the ‘Add This Cost Centre’ button. All users will be allowed to use the cost centre, as if you had manually assigned it to each user in the ‘Users and Privileges’ screen. You can of course open the ‘Users and Privileges’ and remove each users permission to use this cost centre at any time. To delete a cost centre, select it from the ‘Existing Cost Centres’ pull down and click the ‘Delete’ button. You will only be allowed to delete cost centres that have not been assigned to any purchase orders or user accounts. Page 16 of 36 Corporate purchasing system Depots / sites In PurchAce In PurchAce, a purchase order must be assigned to a depot /site, even if you are operating a single depot / site company. A depot / site is one Depots are created, edited and deleted from the ‘Create / Edit a Depot’ screen by clicking the ‘Create / Edit Our Depots’ button from the Main Menu. Creating A New Depot At the main screen, click the ‘Create our Depots / Sites’ button to open the ‘Create A New Depot’ screen. Type in the depot details. This will appear in the purchase order as the delivery address for this depot. Click on the ‘Use this As The Invoice Address’ check box to set this depot /site as the invoice address. PurchAce will then place this depots address at the top right of all purchase orders. NB You can only set the ‘Invoice Address’ check box for one depot. PurchAce will prevent you from setting the invoice address to more than one depot. Click the ‘Save Changes’ button to save the new depot / site. Once you have created a site / depot, you can then select the site from the pull down and add site locations. Editing An Existing Depot / Site. From main screen, click the ‘Edit our Depots / sites’, select the depot from the ‘Depot Name’ pull down. Change the details, then click the ‘Save Changes’ button. NB You can only set the ‘Invoice Address’ check box for one depot. PurchAce will prevent you from setting the invoice address to more than one depot. Deleting An Existing Depot /Site. From the ‘Create / Edit a Depot’ screen, select the depot from the ‘Depot Name’ pull down. Now click the ‘Delete Depot’ button. Adding Deleting Site Locations If you operate large sites / depots, PurchAce allows you to create locations so that the delivery of the purchases can get to the correct location within the site. Large offices could for example create site locations for each department of Marketing Dept, I.T. Dept, Purchasing Dept, etc. Page 17 of 36 Corporate purchasing system When you then create a purchase order in the ‘Create A Purchase Order’ screen, you will be able to select these site locations if you select this depot from the additional ‘Site Location’ pull down underneath the ‘For Depot / Site’ pull down. This site location will also appear in the printed / or emailed purchase order in the delivery address. If you do not want to use the Site Locations feature you can click the ‘<’ button to hide the ‘Site Locations part of the screen. Click the ‘>’ button to show it again in future if you want to start using site locations. Page 18 of 36 Corporate purchasing system Suppliers in PurchAce In PurchAce, a purchase order must be assigned to a previously created Supplier. Suppliers are created, edited and deleted from the ‘Edit a Supplier’ screen by clicking the ‘Create / Edit A Supplier’ button from the Main Menu. Creating A New Supplier At the main screen, click the ‘Create A A Supplier’ then simply type all the details for the new supplier in the ‘Details’ tab of the ‘Create A Supplier screen’ that appears. The Supplier Name and Address will be used by PurchAce as the address for the Purchase Order and therefore this will appear in the printed purchase order. All other info on this screen is for your own information, so it is your decision if you require it or not. The Supplier Category pull down contains several categories. You can set one of these categories to this supplier by selecting it from the pull down. The Supplier Category is shown in the ‘Find a Purchase Order’ screen so it may be useful to specify the category here. You can now assign purchase order lines to cost centres so for most users this feature is obsolete. You can obviously use this for any other purpose you choose. The email on the supplier screen is used by PurchAce when you choose to email a purchase order to a supplier. If you do not provide a purchase order here, you will not be able to email a purchase order to this supplier. Supplier Products PurchAce allows you to create a suppliers products including default description, price, VAT and cost centre so that users can select products rather than having to type them into a purchase order line. You can not create products at the point of creating a supplier, you can only create products for a supplier that has been created through the ‘Edit a Supplier’ screen. In the ‘Edit A Supplier’ screen, select the supplier for the pull down then click the ‘Products’ tab. Now type all the default details for the new product and click the ‘Accept New Item’ button If a cost centre or unit description does not already exist, manager users can create them by either clicking on the + button or going to the Setup screen through the menu. Page 19 of 36 Corporate purchasing system Editing a Supplier To edit a supplier, select it from the ‘Supplier Name’ pull down at the top of the ‘Edit a Supplier’ screen then simply make the changes to the existing data and click the ‘Save Changes’ button. Deleting a Supplier To delete a supplier, select it from the ‘Supplier Name’ pull down at the top of the ‘Edit a Supplier’ screen then simply click the ‘Delete Supplier’ button. NB only manager users have the ability to delete suppliers. This button is disabled for standard users. Page 20 of 36 Corporate purchasing system Purchase Orders Creating a Purchase Order To create a new purchase order, click the ‘Create A Purchase Order’ button on the Main screen to open the ‘Generate A New Purchase Order’ screen. To create a purchase order you must provide PurchAce with: Your depot that the purchase order relates to and will be delivered to. Some single site companies will only have the one depot on PurchAce, but you still must select the Depot even if you only have one. If you have a large site, you may want to use the ‘Site Location’ but this can be left blank. The person who created the purchase order (this is you and can not be changed) The Supplier. If the Depots or Suppliers do not already exist on PurchAce, you can simply click on the ‘+’ buttons to open the ‘Create A Depot’ and ‘Create A Supplier’ screens. Once you have created the depot or supplier, they will appear in the pull down lists immediately back on the ‘Create A Purchase Order’ screen. Once you have selected the above items you will notice that the large button labelled ‘Click here to add a new line to the Purchase Order’ has now become enabled. If you are a manager user (or you have given all users authority to delete POs in the Setup screen), the Delete buttons to the right of the purchase order grid will also be enabled. Adding purchase order lines to the purchase order To add items to the purchase order, click the ‘Click here to add a new line to the Purchase Order’ to open the ‘Purchase Order Line’ screen. Now, type the text for the first item that you wan to add to the purchase order, the value per item, the number of items and the VAT if this has a non-standard VAT rate. You can type in the Accounts code if you know it at this point. PurchAce will automatically calculate the price inc VAT if you type the item value and VAT rate. PurchAce will automatically calculate the price before VAT if you type in the Price Inc VAT and the VAT rate. The line total is calculated when you have provided a price, VAT Rate and quantity. Click the ‘Accept This Purchase Order Item’ to add this line to the purchase order. It will then appear on the previous screen in the purchase order grid. You will notice that the Subtotal, VAT and Total values are updated to include the new line. Page 21 of 36 Corporate purchasing system Selecting Supplier Products for Use in a Purchase Order If you have created products for the selected supplier, PurchAce allows you to find the product and include it in the purchase order. To find a product for the current customer in the ‘Add a Purchase Order Line’ screen click the ‘<Choose’ button at the top right of the screen. The ‘Select a saved product for this supplier’ grid will now appear. The grid will initially display every product for the selected supplier. The ‘Grid Filter’ text box allows us to reduce the list of found products. As you type in more text into the text box, only matching products will be displayed in the grid. In our example here, we can see that this customer has one product that matches ‘widget’ that we have typed in the text box. To select the product, simply double click the grid selector to the left of the grid that corresponds to the product you want to choose. PurchAce will automatically fill in the details in the purchase order line for you but you can alter any of the details before accepting the line. Requesting Authorisation by a Specific Manager PurchAce allows you to request that a specific manager authorises a purchase order for you. Click the ‘Request Authorisation /\’ button at the bottom of the ‘Edit A Purchase Order’ screen to display the ‘Authorisation Request’ pop-up. The ‘Manager’ pull-down list will contain a list of all manager users on PurchAce. Select a manager from the ‘Manager’ pull down list and then click the ‘Request Now’ button to assign this PO to be authorised by this manager. If the manager user has their email address on their user account, you can click the ‘Email Request To Manager’ check box before clicking the ‘Request Now’ button. PurchAce will then open up your default email software with an email addressed to the manager with a HTML copy of the purchase order attached. Simply edit the email and click send, as you normally would with your email software. Manager users can have authorisation levels set, allowing them to authorise purchase orders up to a certain value. If you select a manager from the list and their authorisation level is less than the value of the purchase order you are seeking authorisation for, the ‘Request Now’ button will be disabled and will read ‘Exceeds Their Auth Level’ Once you have requested authorisation from a manager, the ‘Request Authorisation /\’ button disappears and a notification appears in its place informing you that the purchase order is awaiting authorisation from the specified manager. Page 22 of 36 Corporate purchasing system Cancelling a Manager Authorisation Request To cancel the request, click the notification and answer yes when asked if you are sure you want to cancel the request. You will then be able to request authorisation from another manager or leave it open. Editing a Purchase Order You can edit the Purchase Order Lines, depot and supplier for any purchase order any number of times up to the point where the Purchase Order is authorized. Once Authorized the only item that can be changed is the ‘Acc’s Use’ column in the Purchase Order Lines grid, everything else is ‘set in stone’ To edit the purchase order lines simply click in one of the grid items in the purchase order grid and type the new value. Deleting a Purchase Order line To delete one purchase order item line from a purchase order, click on the line selector to the right of the purchase order grid corresponding to the line you want to delete so an arrow appears in the selector to indicate it is selected. Now click on the ‘Delete Selected Purchase Order item’ button. NB only manager users can delete order lines. Deleting an Entire Purchase Order To delete the entire purchase order, click the ‘Delete This Entire Purchase Order’ button. Authorising a Purchase Order At the point of creating a purchase order, the purchase order can not be printed. First the purchase order must be authorized by a Manager User. A Manager User can authorize a Purchase Order at any point as long as there is at least one Purchase Order Line on the Purchase Order. If a standard user is inputting a Purchase Order and needs it authorizing immediately, it is possible for a Manager User to input their code on that screen. You will notice that the Authorize button is enabled but will have the text ‘You Can’t Authorise’ on it. At this point a Manager User can click the ‘You Can’t Authorise’ button to display the ‘Manager User Authorisation’ frame. This will appear to the right of the button. From here the Manager User can simply select their User Name and type their Password in the relevant boxes and then click the ‘Authorise’ button to authorize this Purchase Order. PurchAce will log which manager has authorized this purchase order. If you clicked the Authorize button by accident you can click the ‘Cancel Authorisation’ button to cancel and make the frame disappear. Alternativley, Manager Users can authorize Purchase Orders at their leisure by searching for and reopening unauthorized Purchase Orders from the ‘Find an Existing Purchase Order’ screen (see next section) and then click on the ‘Authorise This’ button. The Purchase Will immediately be authorized without the need to type a password if you are logged on as a manager and the Purchase Orders were not originated by you, otherwise you will be presented with the ‘Manager User Authorisation’ frame. PurchAce will log which manager has authorised the purchase order. Page 23 of 36 Corporate purchasing system Receipting Purchase Orders Setting Individual Purchase Order Lines As Received You can set one purchase order line as received by typing the number of items received for the line in the ‘Rec’vd’ field of the ‘Purchase Orders Grid’ corresponding to the line that has been received from the supplier. PurchAce will recognise when you have set all items as received. Setting An Entire Purchase Order As Received You can set an entire purchase order as received by filling in the ‘Rec’vd’ field for all lines in the purchase order to the value of the expected number. PurchAce also allows you to quickly set all the ‘Rec’vd’ fields of the purchase order by clicking the ‘All Received’ check box. All ‘Rec’vd’ lines will be assigned to the value of the expected number of items for you in the. Page 24 of 36 Corporate purchasing system Finding an Existing Purchase Order To find and edit an existing purchase order, click the ‘Find an Existing Purchase Order’ button to display the ‘Find an Existing Purchase Order’ screen. Finding A Specific Purchase Order By Its Number From this screen you may search for a single purchase order by typing the purchase order number in the ‘Find This Ref:’ text box if you know it to return the one purchase order, then click the ‘Find Ref >>>’ button. Finding A Specific Purchase Order By Selecting Criteria Alternatively you can search for a purchase order or a series of purchase orders by selecting criteria. The ‘Report Criteria’ section on the left-hand side of the screen will look similar to the example here, although yours may have more or less options on the screen at one time, depending on the screen resolution you are running windows at. To show any options not visible on the screen, slide the scroll bar on the right hand side of the options up and down. To search using criteria, simply click on the option buttons and select from pull downs for your criteria. For example, if you want to return all purchase for supplier ABC Ltd placed between 01/01/05 and 31/12/05, click the ‘Selected Supplier Only’ then select ABC Ltd from the pull down then click the ‘Specify Dates’ option button and type 01/01/05 in the From text box and 31/12/05 then click the ‘Find Now >>>’ button. All purchase orders for ABC Ltd made between 01/01/05 and 01/12/05 will then appear in the grid to the left of the screen. To edit a purchase order displayed in the grid, click on the purchase order selector so it displays an arrow in the selector. Then double click on the selector to be presented with the purchase order screen. NB to prevent database locking errors, PurchAce will only allow one user to edit one specific Purchase Order at a time. If you attempt to edit a Purchase Order that another user is currently editing you will be given the User Name of the other user that is editing the Purchase Order and prevented from editing the Purchase Order yourself. Overcoming Purchase Order Lock-outs In the unlikely event of a system failure or power cut where users can not successfully shut PurchAce down correctly, you may find that PurchAce informs you that a Purchase Order is being edited by a user when it is in fact no longer the case. There are two methods of alleviating this problem: 1) When the user who PurchAce thinks is editing the Purchase Order logs back in PurchAce will know the user is not editing the Purchase Order and unlock it so others can use it. Page 25 of 36 Corporate purchasing system 2) If the user who is falsely locking a Purchase Order is not available to log in, a Manager User can log the user out from PurchAce from the ‘Who’s Logged In’ screen. Please see the ‘Whos Logged In’ section in this manual. Page 26 of 36 Corporate purchasing system Logging a purchase order as POD received Some companies may want to log when a Proof Of Delivery has been received for a particular purchase order when the purchase order is for subcontracted work. Just ignore this feature if you do not need it. To log POD as received, find and open the purchase order you are interested in (see Finding an Existing Purchase Order). You may have noticed the POD Received checkbox earlier when creating the purchase order but it is disabled until the purchase order was authorized. To log the purchase order as having received the POD simply click the ‘POD Received’ checkbox. The next time you view this purchase order the POD Received checkbox will be disabled and it will show the date the POD was received. NB the benefit of logging purchase orders as having POD received or Invoiced is that you can later search for purchase orders that have been invoice, not invoiced, received POD or Not received POD. Logging a purchase order as Invoiced To log a purchase order as Invoiced, find and open the purchase (see Finding an Existing Purchase Order). At the bottom of the screen you will notice a long button containing the text ‘Click Here When This PO Has Been Invoiced’. Click this to log the purchase order as invoiced. NB the benefit of logging purchase orders as having POD received or Invoiced is that you can later search for purchase orders that have been invoice, not invoiced, received POD or Not received POD. Page 27 of 36 Corporate purchasing system Printing a Purchase Order You can not print a purchase order whilst creating it. A manager user must authorize the purchase order then when you reopen it (see Finding an Existing Purchase Order) then ‘Print This PO’ button is enabled. Simply click on the ‘Print This PO’ button at the bottom right of the purchase order screen. This displays the ‘Purchase Order Preview’ screen: To print the purchase order, click on the printer icon. Select the printer you want to print the purchase order to. If you need to print more than one copy of the purchase order, change the ‘Number of Copies’ text box then click the Print button to print. Printing purchase orders for auditing purposes It may be one persons responsibility to check all purchase orders against invoices received. PurchAce allows you to print out all purchase orders logged as invoiced but not previously printed using the auditing feature. To print purchase orders for auditing purposes, click the ‘Print Not Yet Printed Invoiced POs’ buttons on the Main Menu. The purchase orders will be printed one at a time without being presented with a preview. After each purchase order is successfully printed it is flagged as been printed so it will not be printed next time you run the audit. After each purchase order has been sent to the printer you will be presented with the message box like this: If the purchase order prints ok click the Yes button to print the next one. This will happen until the last unprinted purchase order has been printed. If you want to stop printing any more purchase orders, click the No button. If something goes wrong with the currently printed purchase order and the printer become inoperable for example, you can click the Cancel button. This will flag the current purchase order as not printed and all other not yet printed purchase orders will be left flagged as not printed so they will be printed on the next run of the purchase order audit. Page 28 of 36 Corporate purchasing system Manager User Specifics Besides being able to authorise purchase orders to specified values manager users can also have purchase orders assigned to them for authorisation. When a user specifically requests that a purchase order is authorised by a certain manager, that manager may receive an email informing them that there is a purchase order pending authorisation but the manager will also be able to see the number of pending purchase orders on the main screen. When logged in as a manager user PurchAce will display a small button to the right hand side of the ‘Find An Existing Purchase Order’ button. This button shows the number of pending purchase orders that the manager needs to authorise. In our example here, the manager has 1 purchase order waiting to be authorised by them. To view a list of purchase orders pending authorisation when logged in as a manager, click the button. This will open up a screen very similar to the ‘Find A Purchase Order’ screen but there is not options on the left hand side. Simply double click a purchase order in the list to open the purchase order in ‘Edit A Purchase Order’ screen and authorise it as per the ‘Authorising A Purchase Order’ section of this user manual. Click the close button at the bottom right of the screen to return to the main menu when you have authorised the purchase orders. Page 29 of 36 Corporate purchasing system Designing Your Purchase Order Layouts PurchAce now includes an integrated Purchase Order Designer that allows you to design several purchase order layouts to your design or to fit existing pre-printed stationary. The Purchase Order Designer Select PO Layout Designer from the Administrator Menu to see the Purchase Order Designer window. The currently selected purchase order style name is displayed in the Purchase Order Type pull-down at the very bottom right of the screen. You can select a different purchase order style from this list if you want edit a different previously created style. The purchase order style consists of three sections, the Header, Detail and Footer. Only one section can be viewed at once, you can select a section by clicking on the ‘PO Section Selector’ tabs at the top right of the Purchase Order Designer screen. Creating a New Purchase Order Style To create a new purchase order style, select Create New Layout from the Purchase Orders menu and then type the name that you want to give this new purchase order style in the input box that appears. A new purchase order style will be created using the currently viewed purchase order style as a template so it will initially appear exactly the same as the current purchase order layout. Once the new style has been created, select the if from the Purchase Order Type pull-down at the very bottom right of the screen to view it. Deleting a Purchase Order Layout To delete purchase order style simply select Delete Current Layout from the Purchase Orders menu and the current purchase order style will be deleted. Once deleted it can not be brought back (unless you have previously exported it to a .TAI file (explained next)). Page 30 of 36 Corporate purchasing system Importing a Purchase Order Layout PurchAce allows you to Import a PurchAce purchase order layout from a .PAP (PurchAce Purchase Order) file that has been created by someone else for you or one you have previously saved as a backup. Simply select the Import Purchase Order Layout menu item from the Invoices menu and select the .TAI file that you want to import. You may have to provide a new name for the invoice if it conflicts with one already in your PurchAce invoice database. The imported invoice appears in the Invoice Type list at the bottom right of the screen for you to select. Exporting an Invoice Layout PurchAce allows you to export your purchase order layout to a file with a .PAP extension . To do this simply select Export Purchase Order Layout from the Purchase Order menu and specify the name you want to give the exported invoice file and where you want to save it. Changing Purchase Order Layouts PurchAce gives you the freedom to move all the text on your printed purchase orders to any location within the section it belongs. You can also create boxes for aesthetic purposes around your text to group associated text together e.g. the customers address details PurchAce allows you to display your company logo (or a graphic of your choice) in the Header section of the purchase order. The following section will now explain the processes necessary in order to perform these actions. Moving Purchase Order Text Items Within each of the purchase order sections is a selection of text boxes that represent the text fields that will appear on the printed Purchase Order. To move a text box field, simply click the left mouse button on it and (without releasing the left mouse button) move the mouse. When you release the mouse button the field will be relocated. After selecting a text box, notice that its coordinates are displayed in the co-ordinates box at the top of the screen. This is a useful reference when you want to line a group of text boxes as you simply drag the text box until its coordinates are the same as the text box you want to line up with. Setting Purchase Order Items Visibility Using the PurchAce purchase order designer you will be able to create your own professional purchase order designs to your taste (or use one of the pre-installed professional designs). Some users may have pre-printed stationary that that need to make the printed PurchAce purchase order fit into. Because some users may want to use their existing pre-printed purchase order paper, certain purchase order items and ‘Text Descriptions’ can be set as visible in the Purchase Order Designer to prevent them from appearing on the printed purchase order. An example of a text description would be the words ‘Supplier Name’ which by default will appear to the left of the suppliers name on the printed purchase order. If you are using preprinted stationary that already has the words ‘Supplier Name’ where the suppliers name will appear, you will obviously want to set the text description to invisible. Some items such as the suppliers name and address details can not be set to invisible because they must appear on the purchase order. To set an item as visible or invisible, click the right mouse button on Page 31 of 36 Corporate purchasing system the item to reveal a popup menu that may include a ‘Visible’ or ‘Text Description Visible’ menu item. Click on these menu items to toggle between visible and invisible. If your pre-printed purchase order paper already has your company logo and address on it you will want to make the logo and company address text items invisible so they do not appear on the printed purchase order. When a purchase order item has been set to be invisible, it appears red in the Purchase order Designer to signify this and will not appear in the purchase order. Your company logo can also be displayed in this manor providing you have created a logo#.BMP file and saved it to the PurchAce folder (please see the ‘Using Your Own Logo in an Purchase order Layout’ section below to read more about displaying your logo) The Purchase Order Designer Details Section You can not make any changes to the layout of the details section (the section that displays the actual purchase order line details) except altering the height to make it bigger than the text height per line. Additional Details Items In The Purchase Order Footer In the footer of the purchase order designer are two Additional Details items. You can use these to add any additional text to your purchase order. Simply click on the item and type the text you want to appear at its location on the purchase order. NB the Additional Details items do not have a visible setting. You must delete the text in the Additional Details items to make the invisible on the purchase order. Changing the Text Size The size of the text on the purchase order can be altered by simply sliding the Font Size slider at the top of the screen. If you increase the font size you may find that the text boxes do not resize to accommodate the new font size. Simply close the Purchase order designer and restart it after resizing the fonts to resize the text boxes. Changing the Text Description Location Some text boxes have descriptive text on their left hand side that will be printed on the purchase order. The location of this text relative to the text box can be altered by sliding the Text Spacing slider at the top of the screen. The description text will move closer or further away from the text box as you slide the slider. Changing the purchase order Page Height Specifying the Purchase order paper size varies slightly depending on which Operating System you are using. NB you must have told PurchAce the correct operating system when you first installed it otherwise your purchase order size will not be accepted. (See The Miscellaneous Options tab section in the Configuring PurchAce section of this manual to redefine the operating system) Resizing purchase order sections To change the height of any of the purchase order sections, move the mouse over the splitter bar at the bottom of the section (that contains the words "Drag to Resize" on the left hand side) and press and hold the left mouse button whilst moving the mouse up or down. Using Your Own Logo in an Purchase order Layout PurchAce allows you to include your own company logo or any image of your choice in your printed purchase orders. To include a picture in your purchase order, click the right button on the logo item and click Visible Logo in the popup menu. NB to use a logo you must create a Bitmap image (.BMP) and save it as Logo1.bmp in the same directory as your PurchAce application NB to find the Page 32 of 36 Corporate purchasing system installed location of your PurchAce software, open the ‘About’ screen from the ‘Help’ menu. You can physically open the application location in Windows Explorer by clicking the ‘Open App Location’ button on the PurchAce Help screen. To not show the logo, right click the logo item and click Visible Logo again to un-check it. The Logo1.bmp file should be no bigger than approximately 421(wide) x 140 (high) pixels. If you are using the multi-company version of PurchAce you will need to create a Logo1.bmp, Logo2.bmp, Logo3.bmp… etc for each company. Drawing Boxes on an Purchase order Layout If you are not using pre-printed purchase order literature you may want to be able to draw section boxes on your purchase order layout. PurchAce allows you to do this using the Boxes menu. The boxes appear on the Purchase Order Designer as they will on the printed purchase order but a number that represents the number of the box appears in blue to the top right of the box on the screen (these numbers will not print on the printer purchase order). The blue number is the number of the box and can be used to identify the box if you need to resize, delete or move it (see below). Creating a Box To create a box, select Create a Box from the Boxes menu and then draw the box by clicking the left mouse button on the purchase order section area once and then move the mouse until the box is the right shape, and click the left mouse button again and the box stays on the purchase order section with its ID number in its top left. Deleting a Box To delete a previously drawn box, note its number in its top left and select Delete Box x from the Delete a Box menu in the Boxes menu, where x is the number of the box you want to delete. Moving a Box To move a previously drawn box, note its number in its top left and select Move Box x from the Move a Box menu in the Boxes menu, where x is the number of the box you want to move. Move the mouse around until you have the box where you want it and then click the left mouse button. Resizing a Box To resize a previously drawn box, note its number in its top left and select Resize Box x from the Resize a Box menu in the Boxes menu, where x is the number of the box you want to resize. Move the mouse around until you have the box the correct size you want and then click the left mouse button. Saving Changes to Your Purchase Order Layout To save the changes you have made to your purchase order layout at any time, click on the button. The button will be greyed out / disabled if you have not made any changes to the layout. You will also be asked if you want to save your changes if you try to close the purchase order designer and you have not saved any changes. Page 33 of 36 Corporate purchasing system Setting Up PurchAce To Share A Database On A Network Making PurchAce use a database on a shared folder is very simple. Firstly you must copy the database to a shared folder somewhere on your network then all is necessary is to tell all your PurchAce application where to look for the database. To tell PurchAce where the database is, select ‘About’ from the ‘Help’ menu to open the About PurchAce screen. The database that PurchAce is currently pointing to is shown in the middle of the About screen. Click on the ‘Connection…’ button to show the ‘Database Connection’ window. Click the ‘…’ button and then find and double click the PurchAce.PAD database in the standard windows file search window. This will need to be done for all PurchAce application on all your network PC’s that need to use the shared database. If you cut or delete the database from a PC, you will be told by PurchAce that the database is missing and then automatically be presented with the PurchAce ‘Database Connection window’. Page 34 of 36 Corporate purchasing system System Maintenance Backing Up The PurchAce Database PurchAce does not include any backup facility as it is extremely simple to back up. You will only need to make a backup copy of one file PurchAce.PAD which holds all your purchase order data from PurchAce. This can simply be ‘Sent To’ your CD recorder then burnt to CD or should be included in your nightly server backup. PurchAce by default, now installs to the users data folder on your PCs hard drive. If you are running PurchAce on multiple PCs using the same database, then the database could be on either of the computers hard driver or on a shared folder on your server. You can find the location of the PurchAce.PAD database by selecting ‘About’ from the ‘Help’ menu in PurchAce. The database location is shown in the centre of the About window. For your conveinience you can now open the location of either the PurchAce application or the PurchAce data file by clicking the ‘Open App Location’ or ‘Open Location’ buttons on the About screen. Clicking either of these buttons will display Windows Explorer and show the contents of the folder where your application or database are located. Backing Up to CD /DVD The following instruction explain how to back up your PurchAce database if you have installed PurchAce to the default database and you are using the database in it’s default location. To copy the database to you CD recorder open ‘My Computer’ or ‘Windows Explorer’ and double click on the ‘C:’ hard disk then locate the ‘Program Files’ folder and double click it. Now locate the ‘PurchAce’ folder and double click it and then locate the PurchAce.PAD file. Click the right mouse button on the PurchAce.PAD file and then select the ‘Send To’ menu item. Another menu should ‘fly out’ and within this menu there should be a menu item that represents your Recordable CD drive. Click that item and you should then be prompted that you have files waiting to be recorded to you CD. Click the ‘balloon’ that prompts you or alternatively open up ‘My Computer’ or ‘Windows Explorer’ and double click on your CD ReWritter / recorder then click the File menu and select the ‘Write These Files To CD /DVD’ menu. Then simply provide a disk name and click Next and wait for the your database to be written to the CD /DVD. Repairing the PurchAce Database The PurchAce database may be compacted and repaired in order to keep the size of the database smaller. It is also necessary in very rare circumstances to repair the database if it becomes corrupt as a result of a network failure or power-cut for example. If PurchAce runs but you experience unusual activity in the database or random errors it may be necessary to repair it. Page 35 of 36 Corporate purchasing system PurchAce compact and repairs simultaneously, you can not choose to perform either / or process. You can Compact and Repair the database two ways. 1) From within the PurchAce program itself. Simply select the ‘Compact and Repair Database’ menu item from the ‘PurchAce System’ menu. 2) If your database is corrupt you may not be able to run the PurchAce program so Assist IT Solutions have provided a small repair utility that is installed when PurchAce is installed. This utility can be accessed from the Windows Start Menu at the same location as your Purchase shortcut. It can also be found in the C:\Program Files\Purch Ace\ folder, if you installed to the default location. Run this program by double clicking it and you will be presented with the ‘PurchAce Database Repair System’ utility window. Simply click on the ‘Repair and Compact Now’ button and the database will be repaired. The repair process can take a short while, depending on this size of the PurchAce database and how long ago you last compacted and repaired. Page 36 of 36