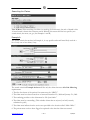
1
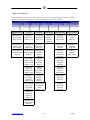
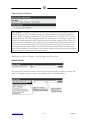
Users Manual
For further support,
please call 877.633.7486
1850 Polk Street
San Francisco, CA 94109, USA
415/202-8600
415/202-8620 fax
www.medrium.com
© Copyright 2000, Medrium.com
Table of Contents
Every feature in your account can be found in one of six categories: Appointments, Claims,
Patients, Financials, Maintenance and Communication Center. (See Below)
Appointments
Claims
Patients
Financials
Maintenance
Com. Center
Scheduling an
Appointment
Page 32-34
Adding a
New Claim
Page 15-17
Searching
for Patients
Page 3-4
Reports,
Reports,
Reports
Page 40
Adding a
New User
Page 42-43
Viewing Your
Inbox
Page 51
Viewing/Print
Appointments
Page 35-38
Searching for
Claims
Page 18-19
Adding a
New Patient
Page 5-7
Changing Your
Password
Page 44
Reading Your
Messages
Page 52
Searching for
Appointments
Page 39
Updating an
Existing Claim
Page 20
Updating an
Existing
Patient
Page 8
Using a
Different
Credit Card
Page 45
Sending a
Message
Page 53-54
Using the
E-Bill to Add
a New Claim
Page 21-22
Posting a
Patient
Payment
Page 9
Defining Your
Procedure
Charges
Page 46
Printing a
Claim to a
HCFA Form
Page 23-24
Printing
Patient
Statements
Page 10
Adding an
Insurance
Carrier
Page 47-49
Posting an
Insurance
Payment
Page 25-28
Viewing a
Patient’s
History
Page 11
Editing Your
Web Site
Page 41
View Existing
Insurance
Payments
Page 29
Downloading
Your Patient
Data
Page 12-14
Adding a
Referring
Provider
Page 50
Posting a
Capitation
Payment
Page 30
Updating the
Claim Status
Page 31
www.medrium.com
<2>
8/29/01
Searching for Patients
Less Is More. Searching for a patient is the action you will perform more than any other. It’s
the first thing you have to do before you post a patient payment, view a patient statement,
update a patient’s insurance information or view the patient notes. You even have to search
patients when you add claims and appointments. No matter what you’re trying to do, the best
advice for searching patients is this: A broad search is better than a narrow search. When you
search patients (or anything for that matter), less is more. Basically, this means that when you
are trying to find a patient by name, you’ll get better results if you only type a portion of the
name, rather than the whole thing. Of course this will only work when you are searching by
name. When searching by the patient’s social security number, patient ID number or insurance
ID, you must get it exactly right to find the patient.
Whenever you click on “Patients,” the first thing you will see is this:
The space on the left allows you to select the type of patient search you wish to conduct. The
space on the right is where you type your search criteria. (See Example Below.)
www.medrium.com
<3>
8/29/01
Helpful Tips for Searching Patients
I Want a List of ALL Patients. There are two good ways to generate a list of all your patients.
The first is to use the search type “Date of Birth Greater Than.” Simply type: “01/01/1850” and
you’ll get a list of all patients born on or after January 1st, 1850. Of course, this will not work if
you have any patients born before then. (That would be something!) In that case, you can
generate a list of all patients by using the search type “Last Name Starts With,” typing the
percentage symbol (shift + 5 on your keyboard), and clicking once on “Search.”
I Don’t Know How to Spell the Patient’s Name! You know it starts with the letter “d” but
you couldn’t spell it if your life depended on it. You don’t know the social security number, the
insurance ID, or the patient ID. Basically, this limits you to only two choices: You could follow
the “less is more” rule and search by patient name, typing only the letter “d.” (That would bring
up every single patient whose name starts with the letter “d.”) Or… you could use the search
type “Last Name Sounds Like.” This way you can type how you think the last name is spelled
and still find the patient… even if you spell it wrong! For example, typing the name “Steel”
would bring up patients with the last names “Steele,” “Steal” and “Steale.”
What Patient ID?! If you haven’t noticed already, patients are automatically assigned a
permanent ID number when you add them to your account. This ID number can always be
substituted for the patient name, saving you an extra step whenever you add a claim, search for
a claim or add an appointment. The patient ID is also invaluable between patients with the
same or similar names. So, it may just help you in the long run to start memorizing the ID
numbers of patients that have a lot of account activity.
www.medrium.com
<4>
8/29/01
Adding a New Patient
Save Yourself Some Unnecessary Typing! Whenever you are entering data or even typing
search criteria, keep these five rules in mind:
iNothing is case sensitive: This means you never have to capitalize anything! Or if you
wish, you can type everything in all caps. It makes no difference.
iNo slashes, hyphens, spaces, etc: No hyphens or parentheses are necessary when typing
phone numbers. No spaces or hyphens are needed when typing social security numbers. And
you’ll never have to type the slashes when typing dates.
iType abbreviated dates: If a patient’s birthday is July 24th, 1969, all you need to type is
“072469.” The “19” and the slashes will automatically appear for you.
iType the first or last name: If you are searching for a patient and the last name is NOT
specifically asked for, you can type all or a portion of the patient’s first name if you wish.
iUse the “Tab” key: Whenever you are adding a new patient, adding a new claim, posting an
EOB, etc., use the “Tab” key on your keyboard to move your cursor to the next space. Use
“Shift” + “Tab” to move the cursor to the previous space.
Personal Information
1. Type the patient’s last name, first name and middle initial in the spaces provided.
(Box 2 of the HCFA-1500 Form)
2. Type the patient’s nine-digit social security number in the space provided.
3. Type the chart number in the space provided.
4. Type the patient’s date of birth (MMDDYY) in the space provided.
(Box 3 of the HCFA-1500 Form)
5. Select the patient’s sex in the space provided. (Box 3 of the HCFA-1500 Form)
6. Select the patient’s marital status, student status and employment status from the options
provided. (Box 8 of the HCFA-1500 Form)
7. Type the patient’s address in the spaces provided. (Box 5 of the HCFA-1500 Form)
8. Type the city, state and zip code in the spaces provided. (Box 5 of the HCFA-1500 Form)
9. Type the patient’s home phone number (area code first) in the space provided.
(Box 5 of the HCFA-1500 Form)
10. Type the patient’s work phone number and extension (area code first) in the spaces
provided.
www.medrium.com
<5>
8/29/01
11. Type the patient’s email address and pager number (area code first) in the spaces provided.
12. Type the dollar amount of the patient’s visit co-pay in the space provided.
13. Type the effective date of the patient’s current or newest insurance in the space provided.
14. If the patient does NOT have insurance, skip to step 28. Otherwise, click once on “Primary
Insurance” and follow steps 15 through 27.
Primary Insurance
15. In the space titled “Insurance,” select the patient’s current insurance carrier.
The Insurance Carrier I Need Isn’t There! You will only be able to select from the
insurance carriers you have already added to your account. If you need to add another insurance
carrier, make sure that first, you click once on “Add” so that you won’t lose any patient info
you have already entered. Then click once on “Maintenance” and once on “Insurance.” When
you are finished adding the new insurance carrier, click once on “Patients” and search for the
patient you were adding. Select that patient, select the action “Update Patient Info” and click
once on “Go!” Now you are free to finish adding the patient’s insurance information.
16. Type the patient’s insurance ID number (Box 1a of the HCFA-1500 Form) and group
policy number (Box 11 of the HCFA-1500 Form) in the spaces provided.
17. Type the insurance carrier’s telephone number and eligibility phone number in the spaces
provided.
18. If the patient is capitated with this insurance, check the space titled “Capitated.”
19. Select the patient’s relationship to the insured from the options provided.
(Box 6 of the HCFA-1500 Form)
20. Type the insured’s last name, first name and middle initial in the spaces provided.
(Box 4 of the HCFA-1500 Form)
21. Type the insured’s nine-digit social security number in the space provided.
22. Type the insured’s date of birth (MMDDYY) in the space provided and select the
insured’s sex. (Box 11a of the HCFA-1500 Form)
23. Type the insured’s address and home phone number (area code first) in the spaces
provided. (Box 7 of the HCFA-1500 Form)
24. Under the heading titled “Employer Information,” type the full name of the insured’s
employer. (Box 11b of the HCFA-1500 Form)
25. Type the insured’s employer ID number in the space provided.
26. Type the address of the insured’s employer in the spaces provided.
27. Type the city, state and zip code of the insured’s employer in the spaces provided.
www.medrium.com
<6>
8/29/01
Secondary Insurance
iIf the patient does NOT have any secondary insurance, skip to step 28.
iIf you wish to add secondary insurance for the patient, click once on “Secondary Insurance”
and repeat steps 15 through 27.
Tertiary Insurance
i If the patient does NOT have any tertiary insurance, skip to step 28.
iIf you wish to add tertiary insurance for the patient, click once on “Tertiary Insurance”
and repeat steps 15 through 27.
28. Click once on “Add.”
www.medrium.com
<7>
8/29/01
Updating an Existing Patient
When a Patient Changes Insurance Carriers
iBefore you change the patient’s insurance, make sure that all previous claims have been
successfully submitted. Any claims on hold may be affected by the insurance change.
iMake sure that you change the insurance effective date as well or all outstanding claims will
be affected. This is found under the “Personal Information” header for each patient.
(See step 13 of Adding a New Patient.)
1. Type the necessary changes in the spaces provided.
2. When you are finished, click once on “Update.”
For more detailed information on updating an existing patient, please refer to the section of
this manual titled Adding a New Patient.
www.medrium.com
<8>
8/29/01
Posting a Patient Payment
1. Type the transaction date in the space provided.
2. Type the payment reference number and select the type of payment in the spaces provided.
3. Type the dollar amount of the patient payment in the space provided.
4. Type any additional remarks you wish to make regarding this payment in the space provided.
5. Click once on “Post Patient Payment.”
Transaction Date. This date will determine how and where the payment appears on your
Daysheet. Both the Daysheet and the Daysheet Summary can be run either by transaction date
or posting date. In regards to patient payments, the transaction date is the date you type in. The
posting date is the actual day you posted the payment. You can always change the transaction
date by updating the payment. However, the posting date can never be changed.
www.medrium.com
<9>
8/29/01
Printing Patient Statements
1. Select the provider you wish to print statements for.
2. In the space provided, type the minimum dollar amount you wish to print statements for.
3. Specify which statements to print and which not to print in the spaces provided.
4. Type the name of whom to make checks payable to in the space provided.
5. Type the address, city, state and zip code to send the payments to in the spaces provided.
6. Type the phone number (area code first) that you wish to appear on the statement in the
space provided.
7. Type any messages you wish to appear on the statements in the spaces provided.
8. Click once on “Print.”
www.medrium.com
< 10 >
8/29/01
Viewing a Patient’s Financial History
iIf you wish to view the detail for any transaction on the patient’s history, click once on the
claim ID or reference number for that transaction.
iThe balance you see in the financial history is the patient’s total account balance with the
selected provider. It is NOT necessarily the amount due from the patient, since insurance
payments may still be outstanding. To determine the amount due from the patient, click once
on “View Statement.”
For Multiple Providers. You can view the patient’s financial history with any other provider
by using the “Select a Provider” box at the top of the page:
www.medrium.com
< 11 >
8/29/01
Downloading Your Patient Data
1. Click once on “Patients.”
2. Specify a search for the patients you wish to download.
I Want a List of ALL Patients. There are two good ways to generate a list of all your patients.
The first is to use the search type “Date of Birth Greater Than.” Simply type: “01/01/1850”
and you’ll get a list of all patients born on or after January 1st, 1850. Of course, this will not
work if you have any patients born before then. (That would be something!) In that case, use
the search type “Last Name Starts With,” type the percentage symbol (shift + 5 on your
keyboard), and click once on “Search.”
3. Once you have the list of patients you wish to download, check the space titled “Select All
Patients” and select the action “Export Patient Info.” (See example below)
4. Click once on “Go!”
PC Users with Netscape Navigator
Netscape users on PC will see something similar to this:
iClick once on “Save File.” This will save the file as a comma separated value file or CSV.
iGive the file any name you wish and save it to your desktop.
www.medrium.com
< 12 >
8/29/01
PC Users with Internet Explorer
Explorer users on PC will see something similar to this:
iSelect the option “Save this file to disk” and click once on “OK.”
iGive the file any name you wish and save it on your desktop. In the example above, we are
calling the file “Patient Data.csv.”
www.medrium.com
< 13 >
8/29/01
Mac Users with Netscape
Netscape users on Mac will see something similar to this:
iClick once on “Save File.” This will save the file as a comma separated value file or CSV.
Mac Users with Internet Explorer
Explorer users on Mac will see something similar to this:
iClick once on “Save File As...” This will save the file as a comma separated value file or CSV.
www.medrium.com
< 14 >
8/29/01
Adding/Submitting a New Claim
Two Ways to Submit a Claim. There are currently two ways to add/submit a new claim: the
Add Claim Form and the E-Bill. The following instructions are specific to the Add Claim Form
only. If you would like instructions on how to add a new claim using the E-Bill, please refer to
the section of this manual titled Using the E-Bill to Add a New Claim.
1. In the space titled “Patient,” type the first few letters of the patient’s last name or type the
patient ID number in the space titled “ID.” (The patient you select will determine the
information required in boxes 1-9, 11 and 26 of the HCFA-1500 form)
Once You Have Selected a Patient, you can click on “Get Last Values” to fill in the “Prior
Auth. #,” the “Referring Provider” and the “Diagnoses Codes” that were used on the last claim
you added for that patient. (See Below)
2. If you wish to post a patient payment along with claim, type the payment amount, the payment
type (cash, check or credit card) and the reference number if any.
3. Select the rendering provider and the location where services were performed in the spaces
provided. (The provider and location you select will determine the information required in
boxes 24k, 25, 32 and 33 of the HCFA-1500 form)
4. Type the Medical Record Number (if any), select the special program (if any) and select the
patient’s current status in the spaces provided.
5. In the space titled “Date of Current,” select either “Illness” (if any) or “LMP” (pregnancy).
Then type the start date of the current illness or pregnancy in the space to the right of that.
(Box 14 of the HCFA-1500 form)
6. If the patient has had a similar illness or injury, type the date of the similar illness or injury in
the space provided. (Box 15 of the HCFA-1500 form)
7. Select the referring provider in the space provided. (The ID of the referring provider should
appear in the appropriate space.) (Box 17 and 17a of the HCFA-1500 form)
www.medrium.com
< 15 >
8/29/01
8. If the current services are related to a hospital stay, type the admission date in the space titled
“Hospitalization From.” Type the discharge date in the space titled “To.”
(Box 18 of the HCFA-1500 form)
9. Type the prior authorization number (if any) in the space provided.
(Box 23 of the HCFA-1500 form)
10. In the spaces titled “Diagnosis Codes,” (1-4) type the diagnosis code or codes you wish to
use. (Box 21 of the HCFA-1500 form)
I Don’t Have an ICD-9 Book Handy. No problem. You can search for the diagnosis code
you need by clicking once on the magnifying glass next to each diagnosis space:
11. If there are outside laboratory charges, click once on “Lab Charges.” Enter the lab
information and click once on “Save.” (Box 20 of the HCFA-1500 form)
12. If the patient’s treatment is accident related, click once on “Accident Information.” Enter
the accident information and click once on “Save.” (Box 10 of the HCFA-1500 form)
13. If the patient’s treatment is related to a disability, click once on “Disability.” Enter the
disability information and click once on “Save.” (Box 16 of the HCFA-1500 form)
14. If you are billing on the patient’s behalf and would like the payment to go directly to the
patient, uncheck the space titled “Accept Assignment.”
(Boxes 13 and 27 of the HCFA-1500 form)
15. If the provider’s signature is NOT on file, uncheck the space provided.
(Box 31 of the HCFA-1500 form)
16. If the release of patient information is NOT authorized, uncheck the space provided.
(Box 12 of the HCFA-1500 form)
17. In the spaces titled “From” and “To,” type the dates of service.
(Box 24a of the HCFA-1500 form)
Use the “Tab” Key. If the dates of service “From” and “To” are the same, you only need to
type the date once. Simply type the date of service in the space titled “From” and press the
“Tab” key on your keyboard twice. This should automatically fill in the date of service “To”
with the same date you typed in “From.” If the “From” and “To” dates of service are the same
as the current date, then you don’t need to type any dates at all. Today’s date will automatically
appear in those spaces when you validate the claim.
18. Type the place of service code, type of service code, procedure code and modifier code in
the spaces provided. (Box 24b, 24c and 24d of the HCFA-1500 form)
www.medrium.com
< 16 >
8/29/01
Save Yourself a Step! In most cases, you can skip the place of service and type of service
codes and go directly to the procedure and modifier codes. The place of service can be
determined from the location you selected previously and the type of service can often be
determined from the procedure code that you type.
I Don’t Have a CPT/HCPC Book Handy. No problem. You can search for the procedure,
modifier, place of service and type of service codes you need by clicking once on the
magnifying glass next to each appropriate space:
19. Type the number(s) (1-4) of the corresponding diagnosis codes as well as the number of
units for the procedure code you typed. (Box 24e and 24g of the HCFA-1500 form)
Save Yourself a Step! If the procedure corresponds with ALL of the previously entered
diagnosis codes, then you can skip that step. And if the number of units is equal to one, then
you can skip that step as well. When you leave “Diag. Code” and the “Units” spaces blank, they
will be automatically filled when you validate the claim.
20. If the service was rendered on an emergency basis, check the space titled “EMG” by
clicking on it once. (Box 24i of the HCFA-1500 form)
21. If you wish to make any additional remarks regarding this service, click once on the icon
titled “Remarks.” Type your remarks and click once on “Save.”
(Box 19 of the HCFA-1500 form)
iRepeat steps 17 through 21 for each additional line item on the claim.
iWhen you are finished, click once on “Validate.” At this point, the system will check the
claim over for any basic errors. If any are found, the page will reappear and the errors will
be highlighted in red for you to correct. If no errors are found, you should see a summary
of the claim. You will then have the opportunity to enter or change the procedure charges
and you will be left with three choices. Click once on one of the
following options to continue:
www.medrium.com
< 17 >
8/29/01
Searching for Claims
Less Is More. When searching for claims (or anything for that matter), the rule of thumb is this:
A broad search is better than a narrow search. Basically, this means that the less specific your
search criteria, the more you get. (See Example A and B)
Example A
The search criteria, shown here in Example A, is very specific and would most likely result in a
list of only one or two claims, if any.
The search criteria in Example A above will list only the claims that meet all of the following
requirements:
1. The first four letters of the patient’s last name must be “GREY.”
2. The claim must have been created on or between December 23rd, 2000 and January 23rd, 2001.
3. The rendering provider on the claim must be “Dr. Jean Smith.”
4. The claim must be outstanding. (This excludes claims that are rejected, on hold, recently
submitted or paid.)
5. The claim must indicate that the service was provided at the location called “Main Office.”
6. The patient must not have been flagged as capitated at the time the claim was created.
www.medrium.com
< 18 >
8/29/01
Example B
The search criteria, shown here in Example B, is very unspecific and would most likely result in a
list of many claims.
The search criteria in Example B above will list ALL claims:
1. Submitted to “Aetna U.S. Healthcare.”
2. For ALL patients.
3. Created on ANY date.
4. With ANY rendering provider.
5. For all types of claims, regardless of status.
6. Performed at ANY location.
7. For both capitated and non-capitated patients.
www.medrium.com
< 19 >
8/29/01
Updating an Existing Claim
1. Type the necessary changes in the appropriate spaces.
2. Click once on “Validate.” Then choose one of the following options to continue:
For more detailed information on updating an existing claim, please refer to the section of this
manual titled Adding/Submitting a New Claim.
www.medrium.com
< 20 >
8/29/01
Using the E-Bill to Add a New Claim
1. If you use multiple e-bills, you should first select the e-bill you wish to use from the space
titled “E-Bill.” If you wish NOT to use the e-bill, select the option “Use Add Claim Form.”
2. In the space titled “Patient,” type a portion of the patient’s name or type the patient’s ID
number in the space titled “ID.” (The patient you select will determine the information
required in boxes 1-9, 11 and 26 of the HCFA-1500 form)
Once You Have Selected a Patient, you can click on “Get Last Values” to fill in the “Prior
Auth. #,” the “Referring Provider” and the “Diagnoses Codes” that were used on the last claim
you added for that patient. (See Below)
3. Select the rendering provider and the location where services were performed in the spaces
provided. (The provider and location you select will determine the information required in
boxes 24b, 24k, 25, 32 and 33 of the HCFA-1500 form)
4. Select the referring provider and type the prior authorization number (if any).
5. Type the dates of service in the spaces provided. (Box 24a of the HCFA-1500 form)
6. If you wish to post a patient payment along with claim, type the payment amount, the payment
type (cash, check or credit card) and the reference number if any.
7. Select the diagnoses codes you wish to use by checking the box to the left of each code.
(See Below) (Box 21 of the HCFA-1500 form)
www.medrium.com
< 21 >
8/29/01
8. Select the procedure codes you wish to use by checking the box to the left of each code.
(See Below) (Box 24c and 24d of the HCFA-1500 form)
9. In the spaces provided at the bottom of the e-bill, type the number of units for each procedure
code as well as the appropriate diagnosis pointers. (Box 24e and 24g of the HCFA-1500 form)
You will then have the following options:
iOnce you click on “Validate,” you will have the option to change the procedure charges on the
claim. You will then have the following options:
www.medrium.com
< 22 >
8/29/01
Printing a Claim to a HCFA
A Word About Certificates. Before you can print a claim, print appointments, super-bills or
patient statements, you must accept the certificate that allows these features to happen. Once you
have accepted the certificate, you will not have to accept it again on that computer. For more
information on certificates, see the next page.
1. Put a HCFA-1500 form in your printer.
2. Click once on “Offset Print Page.”
3. Adjust you x and y offsets appropriately and click once on “Save.”
4. Click once on “Print to HCFA Form.”
Offsetting the Print Page. In order for everything to print properly in each box of the HCFA
form, you may need to offset the print page for your printer. And the only effective way to
determine what your printer’s offsets are is to change them several times until your claims print
properly. Every printer is unique and each one will have different offsets. So once you figure
out the x and y offsets for your printer, WRITE THEM DOWN and store them with that
printer.
The numbers above represent pixels. One millimeter is approximately equal to ten pixels (or
twenty-five pixels per inch). This means that changing the x offset from negative fifteen to
negative sixteen will only move the printing to the left one tenth of a millimeter. When testing
different offsets, it is recommended that you change the offsets by increments of at least five.
www.medrium.com
< 23 >
8/29/01
Certificates
The first time you view the claim info, a security warning will appear. Netscape users will see
something like this:
Check the box titled “Remember This Decision” by clicking on it once.
Then click once on “Grant.”
Internet Explorer users will see something like this:
Check the box titled “Always Trust Content from Medrium.com” by clicking on it once.
Then click once on “Yes.”
YOU MUST ACCEPT THIS CERTIFICATE or you will not be able to print any claims to a
HCFA-1500 form. To ensure that you have access to all of your account features, you should
ALWAYS grant or accept certificates issued by Medrium.com.
www.medrium.com
< 24 >
8/29/01
Posting an Insurance Payment
Insurance Payments Vs. Capitation Payments. Posting an insurance payment serves several
purposes: It keeps a clean audit trail, reconciles the claim and determines what portion of the
balance is the patient’s responsibility. This is not the same as posting a capitation payment. Even
if the amount paid is zero (as with capitated contracts), you post the appropriate amounts to each
line item on every claim. Posting monthly capitation payments is a separate function. Its only
purpose is to keep records of all monies received, so that capitation analysis reports can be
created with the appropriate financial data. If you wish to post a monthly capitation check, please
refer to the section of this manual titled Posting a Capitation Payment.
Step One: Search Claims
1. In the space titled “Insurance,” select the insurance carrier that issued the check. (See Below)
If you have more than one insurance with the same or similar names, you may instead type the
insurance keyword for a broader search. (See Below)
www.medrium.com
< 25 >
8/29/01
2. Type the date range of the EOB then click once on “Next” to continue. (See Below)
Step Two: Post Payments
3. Type the check number, the total check amount and the payment date in the spaces provided
at the top of the page. (See Below)
Payment Date. This date will determine how and where the payment appears on your
Daysheet. Both the Daysheet and the Daysheet Summary can be run either by transaction date
or posting date. In regards to insurance payments, the transaction date is the date you type in.
The posting date is the actual day you posted the payment.
4. You may have more claims listed than there is on the EOB so make sure you posting to the
correct claim. Each claim listed will display the patient’s name, the patient’s insurance ID number,
the claim ID and the amount previously posted (if any). The patient name, insurance ID and
amount previously posted can all be clicked upon for more detail. (See Example on Next Page)
www.medrium.com
< 26 >
8/29/01
5. For each line item on the claim, type the allowed amount, the amount applied to the
deductible, the co-insurance amount (co-pay), the amount paid and the write off amount. The
disallowed amount should already be calculated for you. If you wish to record any notes or
remarks with the posting, click once on the “Addtl. Info” box next to the line item. Select the
adjudication reason(s), type your remarks in the space provided and click once on “Save.”
Save Yourself Some Unnecessary Typing! While posting insurance payments, keep the
following tips in mind.
iUse the “Tab” key: Once you have typed the allowed amount, use the “Tab” key on your
keyboard to move the curser to the deductible space. When you do, the system will use that
number to calculate the disallowed and the amount paid. Type the amount applied to the
deductible and hit “Tab” again. The system will then recalculate the amount paid. The same
rule applies for the co-insurance amount or co-pay.
iDon’t Type Zeroes: If the amount applied to the deductible is zero, you do not have to type
in “0.00.” You can simply tab over to the next space. While posting insurance payments, any
space that you leave blank is automatically recognized as a zero.
iUse the Auto Write Off: You can save your self some time by clicking on “Auto Write Off.”
This will automatically write off any remaining balance for each line item on the claim.
6. Once you have typed the appropriate amounts for each line item, make sure to select the status
you wish to change the claim to. (See Below) For more information on changing the status of a
claim, please the section of this manual titled Updating the Claim Status.
7. Once you have typed the appropriate amounts for each claim on the EOB, verify that the
check totals at the bottom of the page match the totals on your EOB. If everything is correct,
click once on “Post EOBS” to complete the entire posting.
www.medrium.com
< 27 >
8/29/01
Using the Default Values to Post Insurance Payments
Default Values. The default values are sets of numbers that are saved in the database, to be
retrieved again at a later time. In the case of insurance payments, the default values include the
allowed amount, the deductible, the co-insurance amount, the amount paid, the write off amount
and the disallowed. Basically, for every insurance carrier on your list, you can save an entire set of
numbers for every procedure code you use. This will not only save you from typing the same
numbers over and over again, but it is also a good way to make sure that you are receiving the full
contractual amount.
Setting the Default Values
1. To save a set of default values for a procedure code, you must post those numbers at least
once. The first time you post a payment for a particular insurance, you can save the set of
numbers for each line item, by simply checking the box titled “Save as Default.” (See Below)
That way, the next time you post a payment from that insurance, you can retrieve those
numbers. Saving a set of default values for a procedure code does NOT mean that you will be
forced to use those numbers next time. Default values, can be manually altered after retrieval.
Retrieving the Default Values
2. To retrieve the default values you previously set, click once on “Get Default Values.” This will
bring up any previously set values for the entire claim. (See Below)
www.medrium.com
< 28 >
8/29/01
View/Update Existing Insurance Payments
Update an Insurance Payment
1. Select the insurance payment you wish to update.
2. Select the action “Update Insurance Payment.”
3. Click once on “Go!”
4. Type the necessary changes in the spaces provided.
5. Click once on “Update.”
Remove an Insurance Payment (Administrator Only)
1. Select the insurance payment you wish to remove.
2. Select the action “Remove Insurance Payment.”
3. Click once on “Go!”
www.medrium.com
< 29 >
8/29/01
Posting a Capitation Payment
Insurance Payments Vs. Capitation Payments. Posting an insurance payment serves several
purposes: It keeps a clean audit trail, reconciles the claim and determines what portion of the
balance is the patient’s responsibility. This is not the same as posting a capitation payment.
Posting monthly capitation payments is a separate function. Its only purpose is to keep records of
all monies received, so that capitation analysis reports can be created with the appropriate data. If
you wish to post a line item insurance payment, please refer to the section of this manual titled
Posting an Insurance Payment.
iType any remarks you wish to make about the capitation check in the space provided. When
you are finished, click once on “Post Payment.”
www.medrium.com
< 30 >
8/29/01
Updating the Claim Status
1. Select the new claim status from the options provided.
2. Click once on “Update Status.”
iThe options provided will vary depending on the current status of the claim. Below are few
brief explanations of each possible status and their effect.
Submit Primary: Submits the claim to the primary insurance carrier.
Primary Submitted: Changes the status but does NOT submit the claim to the carrier.
Resubmit Primary: Resubmits the claim to the primary insurance carrier.
Submit Secondary: Submits the claim to the secondary insurance carrier.
Secondary Submitted: Changes the status but does NOT submit the claim to the carrier.
Resubmit Secondary: Resubmits the claim to the secondary insurance carrier.
Submit Tertiary: Submits the claim to the tertiary insurance carrier.
Tertiary Submitted: Changes the status but does NOT submit the claim to the carrier.
Resubmit Tertiary: Resubmits the claim to the tertiary insurance carrier.
Claim Reconciled: Reconciles the claim. Any remaining balance is forwarded to the patient.
You may sometimes see a claim that has a status not listed above. Below are explanations.
Primary Rejected/Secondary Rejected/Tertiary Rejected: This means that the insurance
carrier rejected the claim. You can view the payer response by clicking once on the word
“Rejected.” The payer response will give you a brief explanation as to why the claim was
rejected so that the appropriate changes can be made before you resubmit the claim.
Hold Primary: This means that when the claim was created, it was never submitted but put on
hold instead.
Not Submitted: This could mean one of two things: A) The patient has no insurance for that
date of service. B) The claim was created today. All new claims begin with the status “Not
Submitted” since, technically, we have not submitted them yet. Normally, we submit all new
claims at the end of every business day. If you check the status of a new claim at least 24 hours
after it was created, you will see that it has been automatically changed from “Not Submitted”
to “Primary Submitted.”
www.medrium.com
< 31 >
8/29/01
Scheduling/Rescheduling an Appointment
1. The first thing you must do is select the appropriate event type for the appointment you are
scheduling. (See Below) The event type will determine the duration, availability and the color
of the appointment you are scheduling. To add a new event type, or to edit the specifics of an
existing event type, click once on “Event Types.”
2. If the appointment you are scheduling is for a sales representative or for a patient that has not
yet been added to the system, type the last name, first name and phone number in the spaces
provided. If the appointment is for an existing patient, type the first few letters of the patient’s
last name in the space provided. If there is only one patient that matches what you type in, that
patient’s full name and phone number will automatically appear in the appropriate spaces. If
more than one patient matches what you type in, you will be presented with a list of patient’s
to choose from. For example, if you type in “PRES” in the space titled “Last Name,” you may
see something like the example below. Click once on the appropriate patient, and the system
will fill in the full name and phone number of that patient.
www.medrium.com
< 32 >
8/29/01
3. Verify that the date, time, provider, location and duration of the appointment are correct. If the
date, the time or the duration is incorrect, type the appropriate changes. If the provider or
location is incorrect, you must click once on appointments and select the appropriate provider
and/or location. Type any remarks you wish to make regarding the appointment in the space
provided. (See Below)
4. When you are finished, click once on “Add.”
i To reschedule an appointment, click once on the pencil icon next to the appointment you
wish to reschedule. (See Below)
i In the spaces provided, type the date, time and duration you wish to reschedule the
appointment to. Click once on “Update” when you are finished or click once on “Remove” to
completely remove the appointment from your schedule.
www.medrium.com
< 33 >
8/29/01
Searching for Open Slots. Whenever you schedule a new appointment or reschedule an existing
appointment, you can search for available times by clicking once on “Find Open Slot.”
If you are searching for an open slot for a new appointment, you may see results like this:
If you are searching for an open slot to reschedule an appointment, you may see results like
this:
www.medrium.com
< 34 >
8/29/01
Viewing/Printing Your Appointments
iOnce you click on “Appointments,” the small calendar on the left side of your screen will
help you navigate through the different days. (See below)
i Use the date, provider and location fields at the top of your appointments to view other
schedules. (See Below)
i To add an appointment, click once on the time closest to the actual time you wish to add the
appointment for. (See Below) For more detailed information regarding adding appointments,
please refer to the section of this manual titled Scheduling/Rescheduling an Appointment.
www.medrium.com
< 35 >
8/29/01
Certificates
The first time you view your appointment screen, a security warning will appear. Netscape users
will see something like this:
Check the box titled “Remember This Decision” by clicking on it once.
Then click once on “Grant.”
Internet Explorer users will see something like this:
Check the box titled “Always Trust Content from Medrium.com” by clicking on it once.
Then click once on “Yes.”
YOU MUST ACCEPT THIS CERTIFICATE or you will not be able to print any claims,
appointments or statements. To ensure that you have access to all of your account features, you
should ALWAYS grant or accept certificates issued by Medrium.com.
www.medrium.com
< 36 >
8/29/01
i To print your appointments for the day, complete with patient phone numbers and
appointment notes, click once on the “Print” button, found at the bottom of the appointment
screen. (See Below) Do NOT use the print button on your browser.
i Each appointment in your appointment book will have the following options: Edit/reschedule
the appointment, view the patient’s information, add a claim from the appointment, post a
patient payment or view the patient’s statement. (See below)
i Once you add a claim for a patient on your schedule, the white box should be filled in. Click
once on the fille din box to update that claim. (See Below)
www.medrium.com
< 37 >
8/29/01
Appointment Status. There are five possible statuses that an appointment can be: “Confirmed,”
“Checked In,” “Cancelled,” “No Show” and “Unknown.” Every new appointment that you add
to your schedule begins with the status: “Unknown.” To change the status of an appointment,
click once on the pencil icon next to the appointment. (See Below)
Select the new status from the options provided. (See Below)
The new status will then appear next to the appointment. (See Below)
www.medrium.com
< 38 >
8/29/01
Searching for Existing Appointments
Click once on “Search” and you may see search results similar to below:
www.medrium.com
< 39 >
8/29/01
Reports, Reports, Reports
About Financial Reports. The best way to get to know the reports is simply to run them all
until you find the one that’s right for you. They can all be manipulated in one way or another. So
the best thing to do is play around with them until they make sense. Below is a very general
breakdown of each report and what they do.
Daysheet: This report will show every transaction for a given day, i.e. charges added, patient
payments posted and insurance payments posted. The daysheet can be run either by the posting
date or by the transaction date. You can run user specific daysheets if you want to know who
performed what transactions and when.
Daysheet Summary: This is like the day sheet, except that you can provide a date range rather
than a single day. Although this report doesn’t give you all the details of the daysheet, it does
have direct links to each daysheet in your date range.
Patient Aging: This report will list every patient with a balance (per provider). It also has
direct links to the statements for each patient.
Insurance Aging: When it’s time to do your follow-ups, this report can help point out which
carriers have the oldest outstanding balances. This report also has direct links to outstanding
claims in question.
Adjustments Summary: This report illustrates your average charges, reimbursement rates and
write-offs for each procedure. This report can be sorted either by procedure or by insurance.
Procedure Summary: This report breaks down each procedure for any given date range and
lays out the number of procedures billed, the total charges, the total payments and the total
amount of write-offs for each procedure code used.
Financial Summary: This report will show you each provider’s total numbers (Charges,
receipts and adjustments) for any given date range. It also shows the total A/R, net A/R and
the percentage of the charges that have been accounted for. This is an excellent report for end
of the year or quarterly analysis.
Capitation Summary: This report summarizes the total number of charges and procedures
performed for capitated patients along side the amount received in capitation checks. It also
shows any payments received on non-capitated procedures performed on capitated patients.
This is a good report to determine which capitation contracts are working out in your favor and
which ones are not.
www.medrium.com
< 40 >
8/29/01
Editing Your Web Site
Your Web Site. Each billing provider in your account already has a Web site and listing in our
provider directory, where patients can search for physicians by specialty and location. The Web
pages are automatically created using the information provided when the account was originally
created. You can view these Web pages by selecting the action “Preview.” (See below)
However, if you wish to differentiate your Web site from the rest of the web sites in our
provider directory, there are several ways to do so. Below is an overview of how to customize
your site to suit your needs.
1. Select the provider whose Web site you wish to update from the space on the left.
2. Select an action from the space on the right.
3. Click once on “Go!”
Update Home Page: Add your photograph; edit your introduction, your professional
information, and your health tips.
Update Office Page: List your offices and office hours.
Update Insurance Page: List the insurance carriers you participate with so patients can be sure
that their visit with you will be covered.
Update Hospital Affiliations: List your hospital affiliations for those who need to know.
Change Home Page Address: Change your Web address to: www.whatever_you_want.com
Change Template Style: We offer several Web templates to choose from.
Preview: See what you’re your Web site looks like to anyone browsing the World Wide Web.
www.medrium.com
< 41 >
8/29/01
Adding a New User
1. Type the User ID in the space provided. The User ID must be between five and twelve
characters in length.
2. Select the user type from the options provided. The user type you select will determine which
features that user will have access to. (See chart below)
3. Type the user’s password and then the exact same password again. Keep in mind that both
the User ID and password are NOT case sensitive so capital letters make no difference. The
password must be between five and twelve characters in length.
4. In the space titled “Password Hint,” type any word or phrase that will remind the user of
his/her password incase it is forgotten.
5. In the space provided, select the provider (if any) you wish to restrict this user’s access to.
6. Click once on “Add.”
There are currently six types of users you can add to your account. They are: Administrator, Biller
(can delete claims), Biller (can NOT delete claims), Provider, Receptionist and Accountant. Below
is a chart that details which features each user type will have access to. The “X” indicates that the
user DOES HAVE ACCESS to that feature. Only Administrators will have access to ALL
features.
Feature
Accountant
Receptionist
Provider Biller (Can
Biller
NOT delete)
Appointments
(View Appointments)
X
X
Appointments
(Everything Else)
X
X
X
Claims
(Delete Claims)
X
X
Claims
(Remove Ins. Payments)
Claims
(Everything Else)
X
X
X
(Continued on Next Page)
www.medrium.com
< 42 >
8/29/01
(Continued)
Feature
Patients
(View Patient Payments)
Accountant
Receptionist
Provider Biller (Can
Biller
NOT delete)
X
X
X
X
X
X
X
X
X
X
X
X
Patients
(Remove Pat. Payments)
Patients
(Everything Else)
Financials
(Entire Section)
X
My Web Page
(Entire Section)
Maintenance-Account
(List & View Users)
X
X
X
X
X
X
X
X
X
X
X
X
X
X
X
X
X
X
X
X
X
X
X
X
X
X
X
X
Maintenance-E-Bills
(Everything Else)
X
X
X
Maintenance-Provider
Numbers
X
X
X
Maintenance-Account
(Everything Else)
Maintenance-Insurance
(List Insurances)
Maintenance-Insurance
(Add or Remove Ins)
Maintenance-Providers
(List Provider)
X
X
X
Maintenance-Providers
(Add a Provider)
Maintenance-Providers
(Everything Else)
Maintenance-Locations
(List & View Locations)
X
Maintenance-Locations
(Everything Else)
Maintenance-E-Bills
(List & View Templates)
www.medrium.com
X
< 43 >
8/29/01
Changing Your Password (Updating a User)
1. Make the appropriate changes in the spaces provided.
2. Click once on “Update User.”
Changing Another User’s Password. Any user in your account can log in and change his/her
own password but only an Administrator can change someone else’s password.
www.medrium.com
< 44 >
8/29/01
Using a Different Credit Card (Updating Your Account)
1. Type the necessary changes in the spaces provided.
2. Click once on “Update.”
Credit Card Information. When you are entering your credit card information, be sure that
you type the name EXACTLY as it appears on the card. The Credit card billing address must
also match exactly with the credit card statement. The credit card verification system we use is
EXTREMELY sensitive. The slightest difference between what you type and what the credit
card company has on file will cause your credit card to be rejected.
www.medrium.com
< 45 >
8/29/01
Defining Your Procedure Charges
If You Use the E-Bill. Each e-bill you create gives you an opportunity to add charges for each
procedure on the e-bill. The directions below are a way to define a set of alternate charges for
each billing provider in your account. When you add a claim using the e-bill, you should see
this:
If you leave the above space checked, the e-bill will use the charges defined in the e-bill. If you
uncheck this box, the e-bill will use the alternate charges defined for that provider. If you do
NOT use the e-bill to add a claim, the alternate charges will be used.
1. Type the procedure code and modifier(s) (If any) in the spaces provided.
2. Type the charge for each procedure code in the space provided.
3. Click once on “Add.”
Procedures with Modifiers. If you sometimes use a procedure code with a modifier and
sometimes use the same code without any modifiers, they must be added as separate charges –
even if the amount is the same. (See example below)
Any combination of a procedure and modifier code not specified will result in a charge of $0
when you validate the claim. At that time, you will have an opportunity to add the appropriate
charge manually.
www.medrium.com
< 46 >
8/29/01
Adding an Insurance Carrier
Search Insurances
Before you add an insurance carrier, you should first search our database for a carrier to add,
using one or more of the following six search types:
Insurance Name Starts With
1. Select “Insurance Name Starts With” from the space on the left.
2. Type the first few letters of the insurance carrier name in the space on the right.
3. Click once on “Search.”
Search Tips. When using the search type “Insurance Name Starts With,” keep the following
search tips in mind.
iLess Is More. If you’re looking for an insurance carrier named “National Health and Life,
Inc.,” do NOT type the entire name. Instead, type “National” or even just “Nat.”
iUse BC and BS. If you are searching for a Blue Cross or a Blue Shield, use BC, BS or BCBS
instead of the full name.
iNothing Is Case Sensitive. Don’t worry about correct capitalization because it doesn’t
matter what you do or do not capitalize.
Payer ID Equals [*Recommended]
1. Select “Payer ID Equals” from the space on the left.
2. Type the complete payer ID in the space on the right.
3. Click once on “Search.”
www.medrium.com
< 47 >
8/29/01
*What Is a Payer ID? The payer ID is an insurance carrier’s “electronic address.” When
submitting claims electronically, the payer ID determines “where” the claim is sent. The payer
ID is usually a number four to six characters in length and every insurance carrier that accepts
electronic claims has a payer ID. You can always learn a carrier’s payer ID by calling them and
asking two questions: Do they accept electronic claims submission and if so, what is their payer
ID? Some major carriers have even started to print the payer ID on their patients’ insurance
card. When you search for an insurance carrier, you may get several results, all with the same
payer ID. You only need to add one of them, regardless of the different print mail addresses.
For example, you have two patients with Prudential Healthcare – one with a claims address in
Millville, NJ and the other with a claims address in Iselin, NJ. You search using the search type
“Insurance Name Starts With” and type in “PRUD.” You get the following results:
Notice that both the Millville and the Iselin addresses have the same payer ID (68241). This
means that you only need to add one of them to your list of carriers. Even though the two
patients have different addresses printed on their cards, both can use the same prudential since
the electronic address is the same. You may even have a Prudential with the same payer ID
already on your list of insurances, in which case you do not need to add any of the above.
Adding two insurance carriers to your list with the same payer ID will only cause confusion
when it comes time to post insurance payments.
Insurance Name Contains
1. Select “Insurance Name Contains” from the space on the left.
2. Type any portion of the insurance name in the space on the right.
3. Click once on “Search.”
Insurance by City
1. Select “Insurance by City” from the space on the left.
2. Type the city of the insurance address in the space on the right.
3. Click once on “Search.”
www.medrium.com
< 48 >
8/29/01
Insurance by State
1. Select “Insurance by State” from the space on the left.
2. Type the two-letter postal abbreviation of the carrier’s state in the space on the right.
3. Click once on “Search.”
Insurance Address Contains
1. Select “Insurance Address Contains” from the space on the left.
2. Type any portion of the carrier’s address in the space on the right.
3. Click once on “Search.”
iOnce you find the insurance carrier you are looking for, you can add it to your list by clicking
once on the space to the left of the carrier name, then clicking once on “Add.”
Adding a New Insurance Carrier
You’ve searched and searched but you still can’t find the insurance carrier you are looking for. In
that case, click once on “Add New” and you should see the following:
1. Type the name of the insurance carrier in the space provided. If you know the payer ID, type
the name of the carrier with the payer ID in parentheses.
2. Select the insurance type from the options provided.
3. Type the claims address and phone number in the spaces provided.
4. Click once on “Add.”
www.medrium.com
< 49 >
8/29/01
Adding a Referring Provider
1. Type the referring provider’s full name, address and phone number in the spaces provided.
2. Under “Professional Information,” “Referring Provider” should be the ONLY provider type
checked. (See Below)
3. Type the provider’s UPIN number in the space provided.
4. When you are finished, click once on “Add Provider.”
www.medrium.com
< 50 >
8/29/01
Viewing the Messages in Your Inbox
The Communication Center allows you to securely send and receive messages to any other user
in your account. You can also send messages to technical support for questions regarding your
account. The Communication Center is designed to look and feel just like real email. When you
have a new message, you will see an envelope icon at the top of the page. (See Below)
Once you are viewing the messages in your inbox, you can click on any message to read it.
www.medrium.com
< 51 >
8/29/01
Reading Your Messages
While you are reading a message, you will have several options available to you. (See Below)
www.medrium.com
< 52 >
8/29/01
Sending a Message
If you are replying to a message or if you are writing a new message, there are only three things
that make up the message: The recipient, the subject and the body of the message.
The Recipient
You will only be able to send messages to Tech Support or to people who have user names in
your account. Each user in your account can be found in your address book.
Once the address book is opened, check the box for each recipient that you want to receive the
message you are about to write. (See Below)
Once you have selected your recipients, they should appear in the space titled “To.” (See Below)
www.medrium.com
< 53 >
8/29/01
The Subject and the Body
Type the subject of the message in the space titled “Subject.” The subject is what will appear as
the message title when the recipient checks his or her inbox.
www.medrium.com
< 54 >
8/29/01