1
Porting NETMF
Beginners Guide
October 6th 2010
Rev 0.03
***This Book in INCOMPLETE***
Copyright © 2010 GHI Electronics, LLC
www.GHIElectronics.com
www.TinyCLR.com
By: Gus Issa
Beginners guide to C# and .NET Micro Framework
Table of Contents
1.Change Log........................................................3
2.About the Book..................................................4
2.1.Intended Audience.....................................4
2.2.Translating the Book..................................4
3.Introduction.......................................................5
3.1.Advantages.................................................5
4.Porting vs GHI's Offers.....................................6
4.1.Features......................................................6
4.2.Support.......................................................6
4.3.Maintenance...............................................6
4.4.Robustness.................................................6
4.5.Time-to-Market..........................................7
5.Selecting a GHI Device.....................................8
5.1.ChipworkX Module...................................8
5.2.EMX Module.............................................9
5.3.USBizi Chipset..........................................9
5.4.FEZ Family..............................................10
FEZ Domino and FEZ Mini......................10
FEZ Cobra.................................................12
Other Devices............................................13
6.Supported Processors.......................................14
6.1.Bootstrap..................................................14
6.2.Peripheral Drivers....................................15
7.DIY NETMF Hardware...................................16
Find a suitable Processor/Board................16
Select a PCB Design Software..................16
Finding Component Packages...................16
PCB Layout...............................................16
Ordering the board....................................17
Soldering...................................................18
Loading Software......................................18
FEZ Hacker vs FEZ Panda........................18
7.1.Taking DYI to the Next Level.................19
8.Software Setup.................................................20
8.1.Visual Studio Express..............................20
Copyright © 2010 GHI Electronics, LLC
8.2.Microsoft NETMF SDK..........................20
8.3.GHI NETMF SDK...................................20
8.4.Microsoft NETMF Porting Kit................20
8.5.GNU GCC Compiler...............................21
9.The PK Build System......................................22
9.1.Output Folder...........................................24
10.FEZ Hacker Firmware...................................26
10.1.Building Steps........................................26
Build TinyBooterDecompressor...............26
10.2.SAM-BA................................................28
10.3.MFDeploy..............................................32
11.Hardware Setup.............................................35
11.1.USBizi Firmware...................................35
11.2.Adding RS232........................................35
11.3.Using FEZ Panda...................................35
11.4.Erasing FEZ Panda................................36
11.5.Loading Test Application......................36
12.Solution Wizard.............................................38
13.Memory Layout.............................................41
14.Bootstrap........................................................42
14.1.Bootstrap Debugging.............................42
15.NativeSample.................................................43
15.1.Blink LED..............................................43
15.2.Debug Messages....................................43
16.Booting Firmware..........................................44
16.1.Bootup Messages...................................44
16.2.MFDeploy Ping......................................44
17.Managed Applications...................................45
17.1.Block Storage.........................................45
18.Interops..........................................................46
18.1.PWM Interop.........................................46
19.Final Words...................................................47
19.1.Further Reading.....................................47
19.2.Disclaimer..............................................47
Page 2/47
Beginners guide to C# and .NET Micro Framework
Change Log
1. Change Log
Not active for preliminary releases.
Copyright © 2010 GHI Electronics, LLC
Page 3/47
Beginners guide to C# and .NET Micro Framework
About the Book
2. About the Book
2.1. Intended Audience
This book is for beginners wanting to port .NET Micro Framework (NETMF). The users are
expected to have good knowledge in C#, C++ and command line compilation.
I have used my personal free time (if that is ever available!) to make this book. Expect a
lot of typos and grammar errors, but please report them on the forum so I can enhance
this book.
2.2. Translating the Book
This a book given to the community in an efforts to make NETMF easier to port. If you think
you can translate the book to other languages then we would love see your contribution.
This option will be available after the book is completed.
Copyright © 2010 GHI Electronics, LLC
Page 4/47
Beginners guide to C# and .NET Micro Framework
Introduction
3. Introduction
Microsoft offers a technology that, in my opinion, is the best thing that have ever happened to
the embedded system world. This technology is called .NET Micro Framework, NETMF for
short. NETMF is not an OS and at the same time is not an application. NETMF is a system
that sits in between your high-level C# code and low-level C/C++/Assembly. At the end,
programmers can develop and debug code ease through C# (Visual Basic in future) and
Visual Studio. All the amazing features available in Visual Studio are now available to you on
a very small systems. For programing libraries, NETMF offers a subset of the full .NET
Framework. Any existing knowledge with .NET can be leveraged to any system running
NETMF. Developers that do not have experience with .NET can still take advantage of any
books or online example code that are targeting .NET since there are a lot of similarities
between the full .NET and NETMF.
While NETMF is great, I believe that Microsoft didn't do enough as far as documentation. This
why I wrote the first book aimed for beginners wanting to use NETMF and this second book is
for developers wanting to port NETMF to their hardware.
3.1. Advantages
If you are using .NET Micro Framework then there are many advantages, here just a few:
1. It runs on Microsoft's Visual C# Express, free and and high-end IDE.
2. .NET Micro Framework is open-source and free.
3. Your code will run on all these devices with almost on changes.
4. Full debugging capabilities. (Breakpoints, stepping in code, variables...etc.)
5. Has been tested in many commercial products so quality is assured.
6. Includes many bus drivers. (SPI, UART , I2C...etc.)
7. No need to use processors data-sheets because of the standard framework.
8. If you are already a PC C# programmer then you are already an embedded system
developer with NETMF!
Copyright © 2010 GHI Electronics, LLC
Page 5/47
Beginners guide to C# and .NET Micro Framework
Porting vs GHI's Offers
4. Porting vs GHI's Offers
There are two sides of working with NETMF, porting it and using it. For example, writing a
JAVA game on a cell phone is much easier than placing the JAVA virtual machine (JVM) on a
phone. The phone manufacture did all the work of porting JAVA to their phone and game
programmers can use it with less effort. NETMF works the same way, porting is not easy but
using it is very easy.
Now, When using a GHI NETMF product, you are not paying for NETMF but for the free and
unlimited features, support, maintenance, robustness and time-to-market. Let's cover
these in detail.
4.1. Features
GHI NETMF products include many exclusive features, such as USB Host, USB Device, onewire, CAN, PPP, WiFi; too many to list here. All these are included at no additional cost. GHI
continues to adds exclusive features via updates free of charge!
4.2. Support
Our world-class support is free. The same engineers that invented these devices are
monitoring the forums, emails and phone to provide superior support. We're here to assist
you every step of the way until your product is on the market as soon as possible. We would
love for you to visit our forum and ask other customers how satisfied they are with GHI
support.
4.3. Maintenance
Every few months, Microsoft releases a new NETMF version. GHI works very closely with
Microsoft on any new possible issues and does all the work required to update all GHI's
NETMF devices. For GHI customers, this is a five minute FREE firmware update and GHI
takes care of the rest.
4.4. Robustness
There are thousands of GHI's NETMF devices used around the world in most markets. This
vast usage guarantees quality and stability of GHI Electronics products. You can use any of
the GHI Electronics products with ease of mind.
Copyright © 2010 GHI Electronics, LLC
Page 6/47
Beginners guide to C# and .NET Micro Framework
Porting vs GHI's Offers
4.5. Time-to-Market
Using GHI Electronics' NETMF products will speed up development. Your design is almost
done as soon as you add one of the GHI NETMF products. We have seen customers that
create full products in a week! You can for example, take a FEZ Rhino starter kit, write a little
code over a few days, add your company's logo-sticker on top and you have your own
product. You will probably spend most of your time designing/ordering the logo-sticker than
you would spend on the hardware design!
Copyright © 2010 GHI Electronics, LLC
Page 7/47
Beginners guide to C# and .NET Micro Framework
Selecting a GHI Device
5. Selecting a GHI Device
GHI Electronics offers an extensive range from the very basic to the very advance.
•
ChipworkX
•
EMX
•
USBizi
•
FEZ Family
•
FEZ Domino and FEZ Mini
•
FEZ Rhino
•
FEZ Cobra
•
FEZ Panda
...and many more.
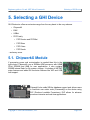
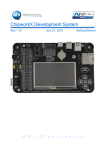
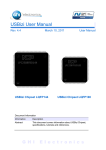
5.1. ChipworkX Module
If processing power and customization is needed then this is the
right choice. ChipworkX runs a 200Mhz ARM processor with 64MB
32-bit SDRAM and 8MB for user applications. It also contains
256MB internal flash for file system storage. It includes all NETMF
major features and adds GHI exclusive features like WiFi and USB
host support.
ChipworkX also adds SQLite database support and allows users
to load their own native code (C/assembly) on the device using
RLP (Runtime Loadable Procedures). RLP allows for advance
processor intensive and real-time applications.
Copyright © 2010 GHI Electronics, LLC
Page 8/47
Beginners guide to C# and .NET Micro Framework
Selecting a GHI Device
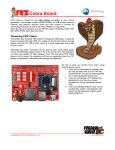
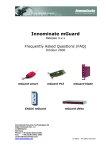
5.2. EMX Module
This small module includes all NETMF major features and adds
many GHI exclusive features. On the software side: File system,
TCP/IP, SSL, Graphics, debugging and more NETMF features are
included. GHI also adds: WiFi, PPP, USB host, USB device
builder, CAN, Analog in/out, PWM and more. As for the hardware:
It is 72Mhz ARM processor with 8MB SDRAM and 4.5MB FLASH.
The processor on EMX contains Ethernet MAC built right in with
DMA transfers, which gives it a large boost when compared with
classical SPI-based Ethernet chipset used by others.
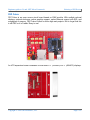
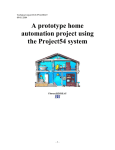
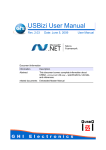
5.3. USBizi Chipset
USBizi is the smallest and only single-chip running
NETMF in the world. The software running on it is a scaled
down version of Embedded Master. It includes all features
except networking (TCP/IP and PPP) and native graphics.
Even though these features are missing, USBizi can be
connected to a network using TCP/IP chipsets like WIZnet
and can run simple displays. There are example projects
already provided showing how USBizi can be networked
and can display graphics.
Copyright © 2010 GHI Electronics, LLC
Page 9/47
Beginners guide to C# and .NET Micro Framework
Selecting a GHI Device
5.4. FEZ Family
FEZ Domino and FEZ Mini
FEZ Domino and FEZ Mini are very small (open source) boards targeted for beginners. They
are based on the USBizi chipset. FEZ offers many peripherals, such as USB host and SD
interface, not available with many hobbyist-targeted boards. Even though FEZ is targeted for
beginners, it's also a low-cost starting point for professionals wanting to explore NETMF.
FEZ stands for “Freakin' Easy!”
Copyright © 2010 GHI Electronics, LLC
Page 10/47
Beginners guide to C# and .NET Micro Framework
Selecting a GHI Device
FEZ offers many features not found in Arduino, BASIC STAMP and others:
•
Based on Microsoft's .NET Micro Framework.
•
Runs on a 72Mhz NXP ARM processors.
•
Supports run time debugging (breakpoints, variable inspection, stepping, etc.)
•
Uses Visual Studio 2008 C# Express Edition for development.
•
Advanced capabilities like FAT, USB device and USB host.
•
Easily upgrades to hardware such as Embedded Master.
•
Open source hardware design files.
•
Use existing shields and holder boards.
•
Based on the USBizi chipset (ideal for commercial use).
•
FEZ Mini pin-out compatible with BS2.
•
FEZ Domino pin-out compatible with Arduino.
When using FEZ, the possibilities are endless...
There is a numerous amount of sensors that are ready to plug directly into the kits. From
LEDs and buttons to reflection and temperature sensors.
These book examples are made for FEZ devices. In general, the examples are still for
.NET Micro Framework, so modifying it to run on any NETMF system should be an easy task.
Copyright © 2010 GHI Electronics, LLC
Page 11/47
Beginners guide to C# and .NET Micro Framework
Selecting a GHI Device
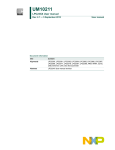
FEZ Cobra
FEZ Cobra is an open source circuit board based on EMX module. With multiple optional
displays, optional enclosure, native graphics support, native Ethernet support with SSL, and
megabytes of memory, FEZ Cobra is ideal for those high-end projects. Not to forget that this
is still FEZ so it is Freakin' Easy to use!
An LCD expansion board is available to hold either 3.5” (320x240) or 4.3” (480x272) displays.
Copyright © 2010 GHI Electronics, LLC
Page 12/47
Beginners guide to C# and .NET Micro Framework
Selecting a GHI Device
Other Devices
GHI strives to deliver the latest technologies dynamically to its customer needs. There is
always something new at GHI so please visit www.GHIElectronics.com and
www.TinyCLR.com for the latest offers.
Copyright © 2010 GHI Electronics, LLC
Page 13/47
Beginners guide to C# and .NET Micro Framework
Supported Processors
6. Supported Processors
ARM is the most common processor used with NETMF but other processors are also an
option. I usually see this about once a week “How do I run NETMF on my PIC or AVR?” or “I
want to run NETMF dsPIC32”. If you are a beginner, here is a simple answer, you can but it is
not going to be easy to use anything beside what is officially supported in the NETMF porting
kit, and only ARM for first time porters. But wait, there is a more complicated answer! I will try
to explain it in details since this is a common subject and sometimes users look down on
NETMF not knowing the power of this free product. First of all, NETMF is not a simple library.
This is not the 10 source code files that most microcontroller users are usually used to build
(TCP/IP, FAT...etc.). This is a very large system with thousands or probably millions of lines
of code. Not every processor is capable of handling such load. Do not expect to find a “main”
function to learn NETMF. I have seen developers ask this actually, “Where is main function or
main execution loop?”.
Now, if your processor is not 32-bit then you may want to forget about NETMF. Even if it
worked, it would be too slow. The good news is that most processor manufactures are moving
in 32-bit direction, why not I always say. Assuming you have a 32-bit processor such as
AVR32 or dsPIC32 then, in theory, it is possible to port NETMF build-system to your
processor's compiler and it is possible to port the HAL layer to your processor. While this is
possible, I will say do not try this unless you are a very much an expert in porting NETMF and
have done few NETMF ports from scratch. Proving that NETMF can run on processors other
than ARM, NETMF 4.1 ships with ports supporting Renesas' SH processors.
6.1. Bootstrap
Most programmers are used to see “main” as the starting point to their programs. This is not
entirely correct. There is a lot of code that runs first to initialize the processor, memories and
runtime system before “main” is executed. This is called bootstrap. Bootstraping is very much
processor dependent. It initializes the system clocks and enable required peripherals. Now, if
you are using an ARM processor other than what is already in the PK, you will be needing to
write your own bootstrap code. Doing so is very difficult to debug usually. Since the system
hasn't run yet, there is no way to send debug messages to a serial port or to display. Even
JTAG may not work properly before clocks are setup properly.
If you look at the available NETMF devices on the market, they are almost all using a
processor that is already found in the porting kit. As far as I know, GHI is the only company
who went far enough to provide a product that needed a completely write of NETMF port, for
NXP LPC2478 processor. The current PK includes this port but GHI had it available long time
before hand. By the way, this was GHI's very first product too. Why did GHI go the difficult
route and not just use one of the ports in PK like others do? Simply, GHI wanted to master the
porting kit. Mastering the PK allowed GHI to add a lot of exclusive features that made NETMF
Copyright © 2010 GHI Electronics, LLC
Page 14/47
Beginners guide to C# and .NET Micro Framework
Supported Processors
even more powerful. This step was very difficult for GHI since NETMF had many bugs that
slowed GHI. NETMF wasn't tested enough on porting since most just used what is in the PK. I
am talking about NETMF 2.5, we are now at NETMF 4.1 which has matured much and is very
solid, big thanks to the NETMF Team, who by the way helped GHI very much.
6.2. Peripheral Drivers
Assuming you listened to my suggestion and selected ARM as the processor you want to use,
now what ARM processor? The core NETMF will simply run on any ARM processor, that is
easy. But, the NETMF needs a lot of hardware access to function properly. At the bare
minimum, it needs timers. Same as earlier “bootstrap” story, you really should use one of
available ports, at least to start learning. Another good option is to use a processor from the
same family. For example, if you want to use LPC2387 processor, the porting kit already has
LPC2478 which has a compatible set of peripherals. In fact, this is what I will use for
demonstration throughout this book.
Copyright © 2010 GHI Electronics, LLC
Page 15/47
Beginners guide to C# and .NET Micro Framework
DIY NETMF Hardware
7. DIY NETMF Hardware
Although working with porting NETMF can be a little bit complex, you can create your own
NETMF device very easily and almost for free (you still need to buy the raw components).
Just use one of the processors in the porting kit. I wanted to test this myself so I started from
scratch just to see how long it would take to create my own device, software and hardware. I
was actually able to do it in one weekend while watching TV!
These are the steps I took to create this device, which I call FEZ Hacker:
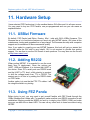
Find a suitable Processor/Board
I want to make a simple device, no external memories. Currently, the simplest option is
SAM7_EK, which is a port for AT91SAM7X-EK Evaluation Board from Atmel.
Here is the User Guide Which also includes full schematics:
http://www.tinyclr.com/downloads/FEZ%20Hacker/AT91SAM7X-EK.pdf
Select a PCB Design Software
I only need to copy the schematics to create my own board. I will be using the free version of
EAGLE, found at http://www.cadsoft.de/ for schematic capture and PCB layout.
Finding Component Packages
Do not reinvent the wheel. If you look enough, you will find packages for everything you need
to create this board, FEZ Hacker. For example, the main component, which is the processor,
is already made by someone and it is found at EAGLE website. Just click on “Libraries” on
this page http://www.cadsoft.de/download.htm. All other components like resistors and
capacitors ship with EAGLE. Do not worry about finding all that, I am giving you the design
files.
PCB Layout
Now, how do we want our circuit board to look like? I would say make it an Arduino pinout
compatible so you can use the many available shields. But, this processor has a lot more IOs
that what is on Arduino board that we do not want to lose. This is easily solved by extending
the board slightly on one side and add another header. I will take the open-source FEZ Panda
or FEZ Domino design files to get started then modify it to fit the plan.
Copyright © 2010 GHI Electronics, LLC
Page 16/47
Beginners guide to C# and .NET Micro Framework
DIY NETMF Hardware
You can see that I even added a JTAG to the board. JTAG is not needed for NETMF usage
but it is handy since I can use this board for anything I like.
The design files are found at: http://www.tinyclr.com/downloads/FEZ%20Hacker/FEZ%20Hacker
%201.1.zip
Ordering the board
When running all traces and running some verification scripts, we are ready to order the PCB.
There are too many websites that would love to make these boards for you. I used
www.my4pcb.com
Few days later and I received this board.
Copyright © 2010 GHI Electronics, LLC
Page 17/47
Beginners guide to C# and .NET Micro Framework
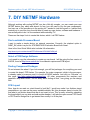
DIY NETMF Hardware
Soldering
You can send the board to places like http://www.screamingcircuits.com/ or you can have
more fun and assemble the board yourself. I have few videos on YouTube on how to solder if
you are interested in watching them
1 of 4: http://www.youtube.com/watch?v=QEEV3AZjRMM
2 of 4: http://www.youtube.com/watch?v=RPtLviWt06A
3 of 4: http://www.youtube.com/watch?v=JtAv3Le0eoA
4 of 4: http://www.youtube.com/watch?v=MvuRXWzk9_c
After some soldering, we get this beautiful FEZ Hacker. Feel free to make your own. I am only
asking you to keep www.TinyCLR.com on the board and keep the FEZ Hacker name. Do not
to add your name to your own board so everyone knows who made them.
Loading Software
Chapter FEZ Hacker Firmware details this step. You need to instal few software components
first.
FEZ Hacker vs FEZ Panda
So, why am I also referring to FEZ Panda porting since we have this board?
SAM7 port is already included in the porting kit so you will not learn much if you use it. I will
be using the FEZ Panda processor (LPC2387) to explain the porting procedure better. Not
only that, LPC chips cost less than SAM chips. Which I do not understand why since LPC
chips are faster and have more features, SAM only has more RAM, 96K vs 128K.
Copyright © 2010 GHI Electronics, LLC
Page 18/47
Beginners guide to C# and .NET Micro Framework
DIY NETMF Hardware
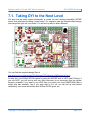
7.1. Taking DYI to the Next Level
We saw how we easily copied schematics to create our own Arduino-compatible NETMF
board. Now what about making it even better? For example, take the Ethernet shield design
and merge that right into your board. You will end up with on-board Ethernet.
You can find the complete design files at
http://www.tinyclr.com/downloads/FEZ%20Hacker/FEZ%20Hacker%20Ethernet%201.0.zip
So why did I use WIZnet W5100 instead of using the NETMF built in LWIP stack? Simply, if
you use LWIP, you will end up with very little resources (or no resources) that the system
become unusable. If you want to use LWIP then you need a lot more RAM/FLASH than a
single chip has internally. And if you were able to fit it all, you will end up with limited
networking, even more limited that what WIZnet W5100 gives you.
Copyright © 2010 GHI Electronics, LLC
Page 19/47
Beginners guide to C# and .NET Micro Framework
Software Setup
8. Software Setup
Before we do anything, we want to make sure our system can compile one of the example
ports with no modifications. In the following steps, we will install all the needed software and
compile one of the built-in ports. I will assume the users own no software so we will use free
software throughout the book, after all NETMF is free.
8.1. Visual Studio Express
You will need C# and C++, so install both. Here is where you can find the downloads
http://www.microsoft.com/express/
Once Visual Studio is installed, try to make a simple windows application, compile and
debug...etc. We basically need to make sure all is good before we move on to the next step.
8.2. Microsoft NETMF SDK
The next step is to install the Microsoft NETMF SDK, not the porting kit, just yet. At the time
this book was made, the latest version was NETMF 4.1. The download is available at this link
http://www.microsoft.com/downloads/details.aspx?familyid=CFF5A7B7-C21C-4127-AC655516384DA3A0&displaylang=en
When done installing, run a “Hello World” application using the emulator. If not sure how, use
this book http://www.tinyclr.com/downloads/Beginners%20guide%20to%20NETMF.pdf
8.3. GHI NETMF SDK
This is an optional download if you want to try your GHI-device exclusive features. All
downloads you need are on this page http://www.tinyclr.com/dl/
8.4. Microsoft NETMF Porting Kit
This Porting Kit includes all NETMF amazing source codes. At the time this book was made,
the latest version was NETMF 4.1. The download is available at this link
http://www.microsoft.com/downloads/details.aspx?FamilyID=ccdd5eac-04b1-4ecb-bad93ac78fb0452b&displaylang=en
Copyright © 2010 GHI Electronics, LLC
Page 20/47
Beginners guide to C# and .NET Micro Framework
Software Setup
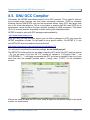
8.5. GNU GCC Compiler
Fortunately, the NETMF team added support to free GCC compiler. This is ideal for free use
but produces larger firmware size than other commercial compilers, RVDS for example.
Knowing that the ARM RVDS tools are few thousands dollars, using GCC with larger code
size is not a bad idea anymore. This is a good place to mention that GHI uses RVDS for its
development, which should be the best compiler available for ARM processors. This allows
GHI to fit as many features as possible in those exciting little chipsets/modules.
NETMF is tested to work with GCC package made available by
http://www.codesourcery.com/
Now, you can't just use the latest version you can find as changes on GCC may cause the
NETMF compilation to break. You will need to use a specific version. For NETMF 4.1, I use
arm-2007q3-53-arm-none-eabi.exe found at this link
http://www.codesourcery.com/sgpp/lite/arm/portal/release316
You will need to download the windows package, do not install just yet!
The NETMF PK build system has a problem compiling GCC build if the GCC path has spaces
. So, you will need to use the old “8.3” naming so instead of “C:\Program Files\...” use
“C:\PROGRM~1\...”. I still highly recommend the GCC tool-chain is installed in the root of your
hard drive with the simplest possible name. I simply used “C:\GCC” for the installation
location.
We are now ready to install the GCC tools. Keep all options to the default except for the install
location, as shown above.
Copyright © 2010 GHI Electronics, LLC
Page 21/47
Beginners guide to C# and .NET Micro Framework
The PK Build System
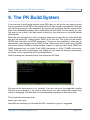
9. The PK Build System
If you are used to build simple projects using IDEs then you will not be very happy to know
that you work with the NETMF source codes will be all done through command-line. With that
said, the build system is really impressive. By running one command, the build system builds
some tools (MetadataProcessor) that is used within the build itself! For this reason, the very
first time you run a build, it will take a while to finish but, from that point on, the build finishes
relatively fast.
Before we write a single line of code, we need to make sure we can build one of the ports that
ship with the porting kit. I always select “iMXS” as my first test. This is the port that started
NETMF and most used by NETMF developers. This port is also available in other form to
demonstrate other features such as “iMXS_thumb” which shows how to build using THUMB
instructions instead of ARM to reduce firmware footprint. In case you didn't know, ARM7 and
ARM9 processors can run either 32-bit (ARM) instructions or 16-bit (THUMB) instructions.
Using 16-bit will reduce performance very slightly but will make the memory requirements
much less, so it is a good trade off for most applications.
Start by opening the command prompt, then access the PK folder
We now set the environment to our compiler. If you are using one the supported compiler
then this is one command, if you want to make this for your own compiler then expect long
weeks of debugging. Note that there is no documentation anywhere on how this is done.
This is how the environment is set
setenv_gcc.cmd c:\gcc\
Note that I am assuming you did install the GCC compiler at c:\gcc as I suggested.
Copyright © 2010 GHI Electronics, LLC
Page 22/47
Beginners guide to C# and .NET Micro Framework
The PK Build System
The next step is to build the iMXS solution to make sure our system is all set. At this point,
you still haven't made any modifications to any file in the porting kit. This is important to track
down any possible errors in the system setup.
Access the C:\MicroFrameworkPK_v4_1\Solutions\iMXS\TinyCLR folder and run this
command
MSBUILD.EXE /t:build /p:flavor=release;memory=flash
You should see a lot of things happening in the prompt window and then you will have no
errors at the end. This can take a while the first time you run this build.
Copyright © 2010 GHI Electronics, LLC
Page 23/47
Beginners guide to C# and .NET Micro Framework
The PK Build System
When all is done and seem going perfectly, run the build a second time to see how much
faster it will build. Now, let us assume you made some changes but things are not working as
expected to you decided to run a clean build. This is easily accomplished using
MSBUILD.EXE /t:clean /p:flavor=debug;memory=flash
9.1. Output Folder
Each solution in the PK is built in a separate folder so you can easily make separate builds
and not worry about possible errors.
For our example, the output folder is found at
C:\MicroFrameworkPK_v4_1\BuildOutput\ARM\GCC4.2\le\FLASH\debug\iMXS
You will find 2 folders, bin, lib and obj
The we are most interested in is the bin folder
Copyright © 2010 GHI Electronics, LLC
Page 24/47
Beginners guide to C# and .NET Micro Framework
The PK Build System
In the folder, tinyclr.axf is an ELF file that contains all needed debugging info. This is the file
you need if you were to use JTAG.
tinyclr.map lists where every method lives in memory. You will rarely use this file but when
you need it you will be very happy to know it is there for you.
The tinyclr scatterfile.ldf is a very important file when we are starting a port and laying out
memory. This is the file used by the linker to place object in their appropriate location. NETMF
build system uses an XML file to layout the memory and then this file is generated using
MetadataProcessor. It maybe useful to check this file to make sure the source XML file is
correct.
Finally, and most importantly is the firmware. The firmware is generated in two forms, raw
binary image and s-record file. The s-record file contains information on where the data
should go in memory. Ideally, you will take the s-record file and use a chip programmer to
place the firmware on the processor and then the processor will simply run it. So, you will
always use the s-record file which is in tinyclr.hex folder. If you look in this folder you will see
three files. All these file makeup the firmware but they are divided into separate regions. In
the port we will be making in this book, I will only use one region.
A good use of the raw binary file is to determine how much flash is the firmware using.
Copyright © 2010 GHI Electronics, LLC
Page 25/47
Beginners guide to C# and .NET Micro Framework
FEZ Hacker Firmware
10. FEZ Hacker Firmware
If you are using the DIY FEZ Hacker board then you are using the SAM7_EK port. All you
need to do is compile it an load it, which should be simple.
Start by compiling the port as we did in last chapter. We compiled TinyCLR in last chapter but
we also want to compile TinyBooter for this port. GHI didn't use TinyBooter on its low-end
NETMF devices to save on memory but this SAM port uses TinyBooter.
10.1. Building Steps
Build TinyBooterDecompressor
MSBUILD TinyBooterDecompressor.proj /t:build /p:flavor=release;memory=flash
If the build completed with an error saying something about ”CreateSymdef” then copy
CreateSymdef.exe file from
C:\MicroFrameworkPK_v4_1\tools\bin to
C:\MicroFrameworkPK_v4_1\BuildOutput\public\Release\Server\dll
This is a sample of the error message
Copyright © 2010 GHI Electronics, LLC
Page 26/47
Beginners guide to C# and .NET Micro Framework
FEZ Hacker Firmware
Then try to build again if needed and make sure you have no errors at the end.
Here is the build completed with no errors.
The output folder is located at
C:\MicroFrameworkPK_v4_1\BuildOutput\THUMB\GCC4.2\le\FLASH\release\SAM7X_EK\bin
It should have plenty of files but you are specifically interested in
TinyBooterDecompressor.hex and TinyBooterDecompressor.bin
You are now ready to load the firmware
Copyright © 2010 GHI Electronics, LLC
Page 27/47
Beginners guide to C# and .NET Micro Framework
FEZ Hacker Firmware
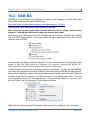
10.2. SAM-BA
SAM-BA is a free software from Atmel that is used to load firmware on Atmel ARM chips
using USB. Download and install SAM-BA from
http://www.atmel.com/dyn/resources/prod_documents/sam-ba_2.10.exe
If the link didn't work then search Atmel website for SAM-BA
Note: If you are not sure if your chip is erased, short the “Erase” jumper and power the
board for 1 second then disconnect power and remove the jumper.
Now, plug in your FEZ Hacker to the PC, windows will ask for drivers. Windows will probably
see it as “GPS Camera Detect”. Do not worry about the name and take a note of the com port
number, mine is COM57
If windows was not able to locate the drivers on its own, direct windows to ChipworkX loader
drivers in the GHI SDK found at C:\Program Files (x86)\GHI Electronics\GHI NETMF v4.1
SDK\ChipworkX\Firmware\TinyBooter Updater\USB Tinybooter Updater driver
Loading the driver will create a new virtual serial port on windows. You can now start SAM-BA
and select the appropriate board and COM port. Note that running SAM-BA can take minutes,
thanks Atmel!! Another problem is that this software doesn't seem to work with high COM port
numbers so we need to change our COM port number to something lower than 9. You can
use any COM as long as it is not used already. I do not have any under 9 in my list so I will
just use COM4. You can change the COM number as follows
Right click the device and select “Properties” then from the “Port Settings” click “Advanced...”
Copyright © 2010 GHI Electronics, LLC
Page 28/47
Beginners guide to C# and .NET Micro Framework
FEZ Hacker Firmware
Although windows telling me it is “in use”, I know it is not connected right now so I will go
ahead and use COM4. Click OK and then disconnect and reconnect your FEZ Hacker board.
My port is now COM4
We can now run SAM-BA software. If you had it open then you will have to close it and
reopen it.
Copyright © 2010 GHI Electronics, LLC
Page 29/47
Beginners guide to C# and .NET Micro Framework
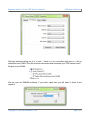
FEZ Hacker Firmware
Remember how our board is compatible with AT91SAM7X512-EK board? We basically just
copied the schematics. So, we will use that option from the menu. Also select the appropriate
COM port, mine was forced to COM4 in previous steps.
Click connect and you will have a new dialog. From the “Flash” menu,
TinyBooterDecompressor.bin file and click “SendFile”
direct SAM-BA to
Now that TinyBooter is loaded, we can run the script “Boot from Flash”, hit Execute.
When done, close SAM-BA and reset the board. This time windows will see the device as a
NETMF device and will start looking for drivers. Windows will fail to locate drivers at the end
since you do not have drivers just yet.
Copyright © 2010 GHI Electronics, LLC
Page 30/47
Beginners guide to C# and .NET Micro Framework
FEZ Hacker Firmware
GHI has its own USB VID (Vendor ID) and that what it uses for its devices. The SAM port you
built uses some random VID but it is not GHI's. To make the GHI drivers work, you have 2
options. Either change the VID in source codes to the GHI's VID or change the VID in the GHI
USB drivers to match what is used in the SAM port. The problem with the second option is
that you will lose the digital signing if you make any changes on the USB drivers. So, we will
change the VID in the SAM port source codes to use GHI's.
Open “usb_config.cpp” file located at
C:\MicroFrameworkPK_v4_1\Solutions\SAM7X_EK\DeviceCode\USB
Find the VID and PID
and change them to same ones used by GHI, VID 1B9F and PID 0102
We can now rebuild and deploy just like we did before, just remember to erase FEZ Hacker
first using the “Erase” jumper.
When all is done, you will see this in your “Device Manager”
We have now a device that is booted with TinyBooter. I told you NETMF doesn't have to be
difficult.
Copyright © 2010 GHI Electronics, LLC
Page 31/47
Beginners guide to C# and .NET Micro Framework
FEZ Hacker Firmware
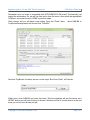
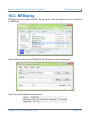
10.3. MFDeploy
MFDeploy has many uses in NETMF. We will use it to load the firmware fro now. Locate and
run MFDeploy
Select USB and you will see AT91SAM7X_EK showing up in the the device list.
Click “Ping” and the device should respond
Copyright © 2010 GHI Electronics, LLC
Page 32/47
Beginners guide to C# and .NET Micro Framework
FEZ Hacker Firmware
We are almost done, just build TinyCLR and load it using MFDeploy.
The build step is simple but first we have to make a little modification.
Locate C:\MicroFrameworkPK_v4_1\Solutions\SAM7X_EK\TinyCLR
TinyCLR.proj
folder
and
open
This is an XML file so you can open it with Visual Studio, just drag and drop it in it.
Now find this line and delete it
<MultipleOutputSections Condition="'$(MEMORY)'=='FLASH'">true</MultipleOutputSections>
Save and close TinyCLR.proj file
Finally, access TinyCLR folder and run
C:\MicroFrameworkPK_v4_1\Solutions\SAM7X_EK>
MSBUILD /t:build /p:flavor=release;memory=flash
You may have some warning at the end but need to make sure that we have no errors.
Back to MFDeploy, select TinyCLR.hex file from the output folder and click Deploy. This will
take a while! By the way, this runs much faster on other FEZ boards.
Copyright © 2010 GHI Electronics, LLC
Page 33/47
Beginners guide to C# and .NET Micro Framework
FEZ Hacker Firmware
When done, click Ping and you will see TinyCLR instead of TinyBooter
We can now use Visual Studio to blink an LED or do whatever we like. If not sure how, use
the other free “Beginner Guide to NETMF” ebook for details on using NETMF. This book only
covers porting. Here is an example on blinking an LED, which is connected to PA7 (that is
IO7).
using
using
using
using
System;
System.Threading;
Microsoft.SPOT;
Microsoft.SPOT.Hardware;
namespace MFConsoleApplication1
{
public class Program
{
public static void Main()
{
OutputPort LED = new OutputPort(Cpu.Pin.GPIO_Pin7, true);
while (true)
{
Thread.Sleep(500);
LED.Write(false);
Thread.Sleep(500);
LED.Write(true);
}
}
}
}
Copyright © 2010 GHI Electronics, LLC
Page 34/47
Beginners guide to C# and .NET Micro Framework
Hardware Setup
11. Hardware Setup
I have selected FEZ Panda since it is the smallest device GHI offers and it is all open source.
You may need to buy two FEZ Panda's, one pre-programmed and one you can erase as
explained below.
11.1. USBizi Firmware
By default, FEZ Panda (and Rhino, Domino, Mini...) ship with GHI's USBizi firmware. This
firmware has a lot of exclusive features not found any any NETMF device. GHI does all the
maintenance, testing and upgrades free of any charge. The firmware also ship with a superior
support and is maintained to have commercial quality.
Now, if you select to compile your own NETMF firmware, this book will get you started but
note that, while the GHI staff is very helpful, GHI is not required to provide free porting
support. You are free to use the GHI forums to ask questions. You may also use the forums
at http://www.netmf.com/
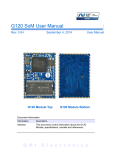
11.2. Adding RS232
When porting NETMF, it is essential to use the most
basic form of deployment. Since the options are
UART, USB and Ethernet, it is obvious that UART is
the choice. Since PC's serial ports are RS232 levels
and the UART is TTL level, a little circuitry is required
to shift the voltage levels from TTL to RS232. The
easiest way to do this is by adding the RS232 shield
on FEZ Panda.
Another option is to use the the FTDI TTL cables. I will
be using the shield in my testing.
11.3. Using FEZ Panda
Before trying to port, you may want to get yourself familiar with FEZ Panda through the
USBizi firmware that it ships with. For example, make sure that your RS232 connection is well
established. Maybe ground the MODE pin and try to deploy over RS232 (COM) and make
sure you can blink the on-board LED. You can use my other book to learn more about using
NETMF.
Copyright © 2010 GHI Electronics, LLC
Page 35/47
Beginners guide to C# and .NET Micro Framework
Hardware Setup
11.4. Erasing FEZ Panda
The next step is to erase FEZ Panda. Once FEZ Panda is erased you can NOT put the
USBizi firmware back on it. Basically, once FEZ Panda is erased, it becomes a board with
LPC2387 ARM processor. Support from GHI is optional but GHI provides the EAGLE design
files and PDF schematics, all open source. If you need to load USBizi official firmware back
on FEZ Panda board, you must send the board back to GHI (not distributor) to have it
reflashed.
Once you are sure you want to void the warranty and erase your FEZ Panda, you can follow
these steps (you can't restore USBizi firmware once it is erased):
1. Download this file
http://www.tinyclr.com/downloads/Porting/Do_NOT_use_will_erase_firmware.GHI
2. Make sure you are using UART, NOT USB, for accessing the FEZ Panda loader.
3. Open TeraTerm and do “erase all” (see USBizi user manual)
4. Load the above file the same way you load USBizi firmware.
5. When done, you will see some messages on TeraTerm as showing in image below,
you will need to confirm you want the firmware erased.
**** image ***
11.5. Loading Test Application
Now that the board is erased, you can now load anything you want on FEZ Panda. The JTAG
is now also unlocked so debugging is also possible if you want to use it.
I will assume you do not have JTAG and we will load flash using a tool called Flash Magic. In
this stage, we will load a hex file that blinks an LED. This will test out that Flash Magic and the
NXP boot loader is working as expected. Remember how I said you need UART? The NXP
loader only works on UART.
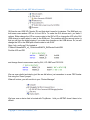
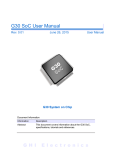
Loading hex files on NXP chips is easy but can be tricky so please follow these steps. We will
start by connecting TeraTerm at 9600 baud, not 115200. Then enter “?”, without quotes. FEZ
Panda should return “Synchronized” as shown in image below.
**image**
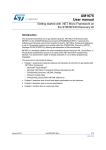
Now, download the LED blink application from
Copyright © 2010 GHI Electronics, LLC
Page 36/47
Beginners guide to C# and .NET Micro Framework
Hardware Setup
http://www.tinyclr.com/downloads/Porting/BlinkPandaLED.hex
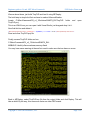
We will use Flash Magic to load this file. Make sure you configure the tool as showing in the
image below, the baud rate must be 57600. The COM port number is whatever is the COM
port you are using to communicate with FEZ Panda
If loading failed, click reset on FEZ Panda and try again. Once loading complete, reset the
FEZ Panda and the LED should be blinking. Note that the LED is blinking using a simple
compiled C program, not using NETMF. We erased NETMF in the previous step.
We are now ready to compile NETMF and load on FEZ Panda, excited yet?!
Copyright © 2010 GHI Electronics, LLC
Page 37/47
Beginners guide to C# and .NET Micro Framework
Solution Wizard
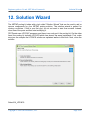
12. Solution Wizard
The NETMF porting kit ships with a tool called “Solution Wizard” that can be used to add or
remove components for your NETMF porting solution. The solution wizard is perfect for
cloning a solutions. If this is your first port, you do not want to start from scratch. Instead,
clone one of the ports and then start modifying it.
FEZ Panda uses LPC2387 processor and there is no such port it the porting kit. On the other
hand, the porting kit includes LPC2478 which has almost the same peripherals. First, make
sure you can compile the LPC2478 solution as explained earlier in this book. Next, clone the
solution.
Select EA_LPC2478
Copyright © 2010 GHI Electronics, LLC
Page 38/47
Beginners guide to C# and .NET Micro Framework
Solution Wizard
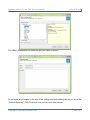
Put USBizi_OpenSource for name and put your name for author.
Do not make any changes on the rest of the settings and keep clicking next till you are at the
“Solution Summary”. Click Finish and now you have your new solution.
Copyright © 2010 GHI Electronics, LLC
Page 39/47
Beginners guide to C# and .NET Micro Framework
Solution Wizard
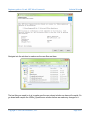
Navigate into the solution to make sure the new files are there
The last thing we need to do is to make sure the new cloned solution we have will compile. So
go ahead and compile the USBizi_OpenSource solution before we make any changes to it.
Copyright © 2010 GHI Electronics, LLC
Page 40/47
Beginners guide to C# and .NET Micro Framework
Memory Layout
13. Memory Layout
Xml file...regions...output file verify
Copyright © 2010 GHI Electronics, LLC
Page 41/47
Beginners guide to C# and .NET Micro Framework
Bootstrap
14. Bootstrap
14.1. Bootstrap Debugging
Use LED
Copyright © 2010 GHI Electronics, LLC
Page 42/47
Beginners guide to C# and .NET Micro Framework
NativeSample
15. NativeSample
15.1. Blink LED
15.2. Debug Messages
Copyright © 2010 GHI Electronics, LLC
Page 43/47
Beginners guide to C# and .NET Micro Framework
Booting Firmware
16. Booting Firmware
16.1. Bootup Messages
16.2. MFDeploy Ping
Copyright © 2010 GHI Electronics, LLC
Page 44/47
Beginners guide to C# and .NET Micro Framework
Managed Applications
17. Managed Applications
17.1. Block Storage
Copyright © 2010 GHI Electronics, LLC
Page 45/47
Beginners guide to C# and .NET Micro Framework
Interops
18. Interops
GHI started with virtual COM port..
GHI exclusive features
RLP
18.1. PWM Interop
Copyright © 2010 GHI Electronics, LLC
Page 46/47
Beginners guide to C# and .NET Micro Framework
Final Words
19. Final Words
If you found this book useful and it saved you few minutes of research then I have
accomplished what I had in mind. I very much thank you for your downloading and reading
this book.
19.1. Further Reading
This book only covers the basics of C# and .NET Micro Framework. This is a list of some
resources to learn more:
•
•
•
•
My blog is always a good place to visit
http://tinyclr.blogspot.com/
The Micro Framework Project website is an excellent resource
http://www.microframeworkprojects.com/
A good and free eBook to continue learning about C# is available at
http://www.programmersheaven.com/2/CSharpBook
Jens Kuhner excellent book on .NET Micro Framework
http://www.apress.com/book/view/9781430223870
•
USB complete is an excellent book on USB
http://www.lvr.com/usbc.htm
•
Wikipedia is my favorite place for information about everything!
http://en.wikipedia.org/wiki/.NET_Micro_Framework
•
.NET Micro Framework main page on Microsoft's website
http://www.microsoft.com/netmf
19.2. Disclaimer
This is a free book only if you download it directly from GHI Electronics. Use it for your
own knowledge and at your own risk. Neither the writer nor GHI Electronics is responsible for
any damage or loss caused by this free eBook or by any information supplied by it. There is
no guarantee any information in this book is valid.
The book reflect my personal knowledge and personal opinion and is not related to GHI
views. USBizi, Embedded Master, EMX, ChipworkX, RLP and FEZ are trademarks of GHI
Electronics, LLC. Visual Studio and .NET Micro Framework are trademarks or registered
trademarks of Microsoft Corporation.
Copyright © 2010 GHI Electronics, LLC
Page 47/47