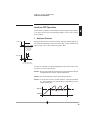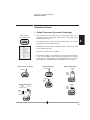
1
The LFI-3751 with Autotune PID is a high performance
temperature controller specifically designed for sensitive
applications. Now with Autotune PID capability, the
LFI-3751 automatically optimizes virtually any thermal
load; reduce overshoot or improve temperature stability
with the push of a button.
Key Features . . .
• < 0.002°C temperature stability even at ambient
• Controls temperature with thermistors, RTDs, LM335, or AD590
. . . The Wavelength Advantage
Autotune PID
PID Constants adjustable via front panel
Auto-ranging thermistor & RTD bias current
Bipolar or Unipolar output current operation
High and Low Temperature Limits
Auxiliary temperature sensor input
Analog input allows for external temperature control
(Analog model only)
Addressable RS-232 interface
LFI-3751 with Autotune PID
Thermoelectric Temperature Controller
LFI3751-00400-C Rev D
The Front Panel at a Glance
MODEL LFI-3751
Status Section
Digi-Pot
Adjust Knob
STATUS
TEMP LIMIT
Temp Limit
Button
T LIMIT
LIMIT I
REMOTE
RS-232
SENSOR
ERROR
HOLD FOR LOCAL
°C
kW
AMPS
VOLTS
4 Digit Display
ACT T
Display
Select
Switch
SET T
I
TE I
D
TE V
A
LIM I
B
AUX T
C
SENSOR
A
C
HOLD SHIFT FOR
RS-232 ADDRESS
T2, R 2
1, 1
T1 , R 1
T2 , R 2
AD590
2, 2
µA / K
µA offset
LM335
3, 3
mV / K
mV offset
SHIFT
Shift Button
OUTPUT
On
5 Amp - 40 Watt
Temperature Controller
avelength Electronics
AC Power Switch
2
Output Section
ON
POWER
Off
Display
Section
T3 , R 3
T1 , R 1
RTD
Thermistor
Sensor
Reference
Section
B
P
}
Units of
Measure
Output Button
Front Panel Operations at a Glance
Operation Legend
While displayed, Parameter
can be changed by rotating
Digi-Pot Adjust Knob
Limit Current LED
Adjusting Limit Current
Positive LIM I
Digi-Pot Adjust Knob
is disabled. Monitor
parameter only.
LIMIT I
AMPS
ACT T
P
SET T
I
TE I
D
TE V
A
LIM I
B
AUX T
C
LIMIT I LED flashes:
TE Current is limited by
LIM I settings.
Negative LIM I
LED is OFF
AMPS
ACT T
LED is lit SOLID
P
SET T
I
TE I
D
TE V
A
LIM I
B
AUX T
C
WAIT - Most thermal loads require maximum
current while initially controlling to temperature.
To control properly, the output current must be
less than the LIM I current setting.
Rotate the Display Select Switch to LIM I.
Positive Limit Current (0 to +5 Amps) will
alternate with the Negative Limit Current
(-5 to 0 Amps).
LED FLASHES
CAUTION: Improperly set LIM I
can damage your thermoelectric
Adjusting Temperature Limits : -199.9 to +199.9°C
TEMP LIMIT
Note: Temperature Limit does not
operate in Resistance Mode for
thermistors or RTDs.
T LIMIT
TEMP LIMIT 1
TEMP LIMIT 2
°C
°C
(Cycles three times, then reverts to prior display)
Press &
Release
Temperature Limit LED & Correcting the Temperature Limit Error
Press Output Button to
clear error.
Press Output Button to
re-enable output current.
OUTPUT
T LIMIT
ON
BEEP
OUTPUT
OVER / UNDER
TEMPERATURE
CONDITION
CORRECTED?
YES
3
BEEPS
ON
YES
NO
OVER / UNDER
TEMPERATURE
CONDITION
CORRECTED?
LONG
BEEP
T LIMIT LED flashes:
Sensor temperature is
outside temperature
limits. Output is disabled.
PRESS
OUTPUT
BUTTON
NO
Sensor Error LED & Correcting the Sensor Error
Press Output Button
to clear error.
SENSOR
ERROR
Press Output Button to
re-enable output current.
OUTPUT
ON
BEEP
OUTPUT
IS SENSOR
ERROR CONDITION
CORRECTED?
YES
ON
3
BEEPS
YES
NO
SENSOR ERROR LED
flashes: Sensor is either
OPEN or SHORTED. Output
forced OFF.
LONG
BEEP
PRESS
OUTPUT
BUTTON
IS SENSOR
ERROR
CONDITION
CORRECTED?
NO
3
Adjusting RS-232 Address
REMOTE
RS-232
SHIFT
Continuously
Hold the Shift
Button
BEEP
BEEP
After 3 seconds, REMOTE RS-232
LED lights solid red, unit beeps.
RS-232 Address
Displayed while Shift
Button is held. When
Button released, new
address (if changed) is
saved and unit beeps.
Remote RS-232 LED
REMOTE
RS-232
BEEP
A flashing RS-232 LED indicates active communication
between computer and instrument
REMOTE RS-232 LED flashes,
unit BEEPS:
RS-232 communication is
initiated and the port is active.
A solid RS-232 LED indicates the instrument is under
remote RS-232 control, but communication between
computer and instrument is not active.
Enable / Disable Output Current During Continuous RS-232 Operation
OUTPUT
REMOTE
RS-232
Remote RS-232
Operation
TEMP LIMIT
BUTTON
Press and Hold
TEMP LIMIT and Press
OUTPUT BUTTON to
shut output off
Revert to Local Mode Operation
OPERATE VIA
RS-232
TEMP LIMIT
BUTTON
REMOTE
RS-232
4
REVERT TO
LOCAL OPERATION
REMOTE
RS-232
Press & Hold
for more than
3 seconds
REMOTE
RS-232
ON
OUTPUT
Output shuts off,
Unit remains in
RS-232 operation
Enable / Disable Output Current
ON
PRESS &
RELEASE
Output Current
Disabled
ON
PRESS &
RELEASE
Output Current
Enabled
ON
Output Current
Disabled
The Front Panel at a Glance
Quick Autotune PID Operation
Quick Autotune PID Operation
decrease
Step 1.
Adjust the Limit Current below the rated
maximum current for your thermoelectric or
resistive heater.
increase
(0.00 to 5.00 Amps)
Positive LIM I
AMPS
ACT T
P
SET T
I
TE I
D
TE V
A
LIM I
B
AUX T
Negative LIM I
C
(-5.00 to 0.00 Amps)
AMPS
ACT T
P
SET T
I
TE I
D
TE V
A
LIM I
B
AUX T
C
decrease
increase
Step 2.
Adjust the Temperature Setpoint to your desired
operating temperature.
°C
kΩ
ACT T
P
SET T
I
TE I
D
TE V
A
LIM I
B
AUX T
C
temperature (°C)
or resistance (kΩ)
displayed
-199.9˚C to +199.9˚C
or
0 to 500 kΩ
Continued next page...
5
The Front Panel at a Glance
Quick Autotune PID Operation
Quick Autotune PID Operation, continued
decrease
Step 3. Adjust the P term to display AutS or Autd.
increase
AutS: Setpoint Response Optimization
Autd: Disturbance Rejection Optimization
AutS or Autd (below 0)
(Wait about two seconds before enabling the
output current.)
ACT T
P
SET T
I
TE I
D
TE V
A
LIM I
B
AUX T
C
Step 4. Begin Autotune Optimization: Enable Output
Current.
The time to complete an Autotune optimization
sequence varies from load to load. While tuning,
the ON LED will flash. When complete, the
LFI-3751 beeps once and the ON LED lights solid.
Three audible beeps indicate if the Autotune
sequence is aborted. The ON LED is not lit. If the
actual sensor temperature exceeds the high or low
temperature limits the optimization will abort.
BEEP
ON
PRESS &
RELEASE
Output Current
Disabled
Autotune
Optimization
in Progress,
ON LED flashes
ON
Autotune
Complete
See Page 23 for more detail on the LFI-3751
Autotune feature.
Autotune Process
Setpoint
First
Pass
Phase 1: The LFI-3751 ramps the thermoelectric
current to drive the load toward the setpoint
temperature.
Second
Pass
Third
Pass
Phase 2: The LFI-3751 performs three characterization
passes.
Ambient
Phase 1
6
Phase 2
Phase 3
Phase 3: The LFI-3751 reverts to normal operation,
saving the optimized P, I, and D settings in
non-volatile memory and settling in at the
setpoint temperature.
The Front Panel at a Glance
Displaying and Adjusting Values on the Front Panel
Display Section
SHIFT
SHIFT
OFF
ON
ACT T -199.9°C to +199.9°C
OR
kΩ
0 to 500 k Ω
SET T
I
°C
-199.9°C to +199.9°C
OR
OR
OFF (0)
OR
0.4 to 10.0 secs.
kΩ
0 to 500 k Ω
TE I
AutS or Autd
(Autotune PID)
or
1 to 100 Amps / Volt
P
°C
OR
- 5.00 to +5.00 Amps
D
AMPS
OFF (0)
OR
1 to 100 secs.
TE V
-12.0 to +12.0 Volts
LIM I
[A1]
A
VOLTS
[A2]
°C
kΩ
B
0.00 to +5.00 Amps
POSITIVE
Thermistors or
RTDs (T, R) data
AMPS
[B1]
-5.00 to 0.00 Amps
NEGATIVE
AD590, LM335,
Slope
°C
[B1] only
AMPS
[B2]
AUX T -8.00°C to +150.00°C
kΩ
C
°C
(typical)
Thermistors or
RTDs (T, R) data
[C1]
°C
AD590, LM335,
Offset
[C1] only
[C2]
kΩ
Default Sensor Configuration
A
Sensor Type
Thermistor
RTD
AD590
LM335
B
C
[A1]
[A2]
[B1]
[B2]
[C1]
[C2]
10°C
1
2
3
19.9 kΩ
1
2
3
25°C
0°C
1 µA / K
10 mV / K
10 kΩ
0.100 kΩ
-
40°C
100°C
0 µA
0 mV
5.326 kΩ
0.139 kΩ
-
7
Rear Panel at a Glance
Analog Input
BNC Connector
Output
Connector
(9 pin male
D-sub plug)
RS-232 Output
Connector
(25 pin male
D-sub plug)
ANALOG
INPUT
RS-232 OUTPUT
OUTPUT
RS-232 Input
Connector
(25 pin female
D-sub receptacle)
RS-232 INPUT
S/N
Serial
Number
8F0-2995
Fan Vent Holes
Do Not Block or place
any objects within 6" of
the rear panel of
this instrument.
CAUTION
Risk of Electrical Shock
Do Not Open
!
ATTENTION
Risque d’ Electrocution
Ne Pas Ouvrir
VORSICHT
Hochspannung
Nicht ffnen
Earth Ground
If your AC power system
does not bring earth
ground through the
AC Power Entry Module,
connect earth ground
via a 16 AWG wire to
this screw terminal.
AC Power
Entry Module
FUSE (250V):
2000 maT @ 115V
1000 maT @ 230V
(5x20mm SLO BLO)
115V
Use only the power cable
provided. Ensure that the
power source you plug
the LFI-3751 into is
properly grounded.
LINE:
115/230 VAC, 50/60 Hz, 160 VA
SELECT:
Wavelength Electronics
AC Voltage
Select Switch
Do not change this
setting while power is
supplied to the unit.
AC Fuse
For 115 VAC operation, install a 2000 maT 5 x 20 mm SLO BLO fuse
For 230 VAC operation, install a 1000 maT 5 x 20 mm SLO BLO fuse
Output
9 pin male D-sub plug
1
6
1
2
3
4
5
6
7
8
9
RS-232 Input
25 pin female D-sub receptacle
5
9
TEC +
TEC Aux Sensor +
*Sensor Main Sensor +
AD590 Voltage
*Fan *Fan+ (+12 V)
*-12 V
* Thermally Fused to 100 mA
8
MADE IN USA
Bozeman, Montana USA
13
1
25
14
2 Instrument Receive (In)
3 Instrument Transmit (Out)
7 Signal Ground
5, 6, 8, & 20 shorted
All other pins are floating
RS-232 Output
25 pin male D-sub plug
1
14
13
25
2 Peripheral Transmit (Out)
3 Peripheral Receive (In)
7 Signal Ground
All other pins are floating
In This Book
Quick Start. Chapter 1 prepares the temperature controller for
use and familiarizes you with a few of its features.
Front Panel Operation. Chapter 2 details the features and
functions of the front panel. You will find this chapter useful
whether you are operating from the front panel or from the
RS-232 interface.
Rear Panel Operation. Chapter 3 details the rear panel
features and connector pin outs.
Remote Interface Reference. Chapter 4 details the RS-232
commands and responses. Remote interface programs are
provided to help you develop programs for your temperature
control application.
Specifications. Chapter 5 lists the temperature controller
specifications.
If your LFI-3751 fails within one year of purchase, Wavelength
Electronics will repair it free of charge. If you have questions
relating to the operation of the LFI-3751, you can contact
Technical Support:
Call (406) 587-4910 in the U.S.
Fax (406) 587-4911
email [email protected]
If you have purchased the controller from an international
distributor, please contact them for technical support or
repairs.
9
This page intentionally left blank.
10
Table of Contents
Chapter 1: Quick Start.................................................................................... 13
Preparing the Temperature Controller for Use ..................................................................15
Nine Steps to Operating the LFI-3751 ................................................................................17
Chapter 2: Front Panel Operation ................................................................. 21
Chapter 3: Rear Panel Operation .................................................................. 69
Table of Contents
Autotune PID Operation.......................................................................................................23
Theory of Autotune PID ......................................................................................................30
Controlling Temperature with Thermistors ........................................................................35
Controlling Temperature with RTDs ...................................................................................39
Controlling Temperature with an AD590 ............................................................................45
Controlling Temperature with an LM335 ............................................................................48
Controlling Temperature with an LM35 ..............................................................................51
Sensor Error Condition........................................................................................................55
Setting Limit Currents..........................................................................................................56
Setting Temperature Limits .................................................................................................57
Manually Setting the P, I, and D Constants .......................................................................58
Setting Operating Temperature or Resistance ..................................................................60
Enabling Output Current .....................................................................................................61
Measuring Thermoelectric Current and Voltage ................................................................62
Measuring Auxiliary Thermistor Temperature....................................................................63
Setting the RS-232 Address ................................................................................................66
Operating with Resistive Heaters .......................................................................................67
Connector Pinouts ...............................................................................................................71
BNC Connector.....................................................................................................................73
AC Power...............................................................................................................................74
11
Table of Contents
Chapter 4: Remote Interface Reference ....................................................... 75
RS-232 Interface Configuration...........................................................................................77
RS-232 Command and Response Packet Formats ...........................................................80
Standard Command Code Listing .....................................................................................82
Calibration Command Code Listing ..................................................................................85
Diagnostic Command Code Listing...................................................................................86
End Code Listing..................................................................................................................87
Starting RS-232 Communication with the LFI-3751 ..........................................................89
Configuring the Sensor .......................................................................................................90
Measuring Actual Temperature or Resistance...................................................................94
Setting the Limit Currents ...................................................................................................95
Setting Temperature Limits .................................................................................................96
Autotune PID & Setting the P, I, and D Constants .............................................................97
Setting Temperature Setpoint..............................................................................................99
Setting Resistance Setpoint................................................................................................100
Enabling and Disabling the Output Current ......................................................................101
Measuring Thermoelectric Current and Voltage ................................................................102
Measuring Auxiliary Sensor Temperature..........................................................................103
Setting Gain for Analog Input Signal (Rear Panel BNC Connector) ................................104
Checking the Alarm Status..................................................................................................105
Halting the Processor ..........................................................................................................106
Reverting to LOCAL Mode...................................................................................................107
Entering the PASSWORD.....................................................................................................108
Reading Serial & Model Numbers, Firmware Version .......................................................109
Calibration - Sensor Bias Current and AD590 Sense Resistance ...................................110
Calibration - ACT T, TE I, TE V uncalibrated voltages ........................................................112
Calibration - Measurement Slopes & Offsets ....................................................................113
Calibration - SET T Slopes & Offsets..................................................................................115
Calibration - TE Limit Current Slopes & Offsets................................................................116
RESTORE Calibration Defaults ...........................................................................................117
Diagnostic - Lamp Control ..................................................................................................118
Diagnostic - Switch Status ..................................................................................................119
Diagnostic - Digi-Pot Status ................................................................................................120
End Code Reference ............................................................................................................121
Calculating FCS....................................................................................................................123
Example BASIC Control Program for IBM PC Compatible Machines..............................124
Chapter 5: Specifications .............................................................................. 127
General Specifications.........................................................................................................129
Electrical Specifications ......................................................................................................129
Mechanical Specifications...................................................................................................130
Appendix:
CAT-220 Cable Accessory Diagram ......................................................... 133
12
1
1
Chapter 1: Quick Start
13
Chapter 1 - Quick Start
Quick Start
This chapter shows how to set up an LFI-3751. Become
familiar with the temperature controller by following the
Nine Steps to Operating the LFI-3751 for a thermoelectric
load with a 10 kΩ thermistor temperature sensor. Later
chapters expand on this information and offer complete
reference information.
14
Chapter 1 - Quick Start
Preparing the Temperature Controller for Use
1
Preparing the Temperature Controller for Use
The following steps help you verify the temperature controller is ready for use.
A
Verify you have received these items.
If anything is missing, contact Wavelength Electronics or your nearest
international distributor.
5
B
One power cord
9 pin D-Sub receptacle (solder cup) and metal hood
AC fuses (Two each for 115V or 230V operation)
50 Ω BNC terminator (Analog version only)
Certificate of Calibration
This User’s Guide
Benchlink software (3.5” floppy included with this User’s Guide)
Verify the power line voltage setting.
The line voltage is set to the proper value for your country when the
temperature controller is shipped from the factory. The available settings
are 115 or 230 VAC. If the voltage setting is incorrect, change it and check
that the correct fuse is installed. If fuses are not available locally, call
the Wavelength Electronics Technical Support Group or your international
distributor to order new fuses.
Remove power cord. Change
switch to proper voltage.
Remove fuse holder assembly
and verify fuse rating or install
proper fuse.
OR
230V
115V
Remove with
a screwdriver
2000 maT for 115 V
1000 maT for 230 V
5 x 20 mm SLO BLO
C
Connect power cord and power on the LFI-3751.
Ensure the power source you plug the temperature controller into is properly
grounded. Once the AC Power Switch on the front panel is pressed in,
all LEDs on the front panel will light up while the temperature controller
performs its power-on self test. After the test, the temperature controller
is ready for normal operation.
15
Chapter 1 - Quick Start
Preparing the Temperature Controller for Use
D
Perform a complete self test.
The complete self test is a more extensive set of tests than those performed
at power-on. Hold down the Shift Button as you power the unit on with
the AC Power Switch. A complete self test will start after holding the
Shift Button for three seconds. If the self test is successful, “PASS”
is displayed. If the self test is not successful, “FAIL” is displayed. If
“FAIL” is displayed, see Step F for information on returning the unit to
Wavelength for repair.
E
If the temperature controller does not turn on.
Verify that there is AC power to the temperature controller. First, check that
the AC Power Switch is in the ON position. Also, make sure the power cord
is firmly plugged into the Power Entry Module on the rear panel. Check
that the fuse in the rear panel fuse holder is in place and functional. You
should also make sure that the power source you plugged the temperature
controller into is energized.
F
If the controller fails step D or still does not turn on.
Call your nearest Wavelength Electronics sales office for instructions
on returning the temperature controller to Wavelength for service.
In North America, call the factory directly at (406) 587-4910,
Fax
to
(406)
587-4911,
or
email
Customer
Service
at
[email protected]. If you live outside North America, contact the
international distributor you purchased the unit from.
16
Chapter 1 - Quick Start
Nine Steps to Operating the LFI-3751
1
Nine Steps to Operating the LFI-3751
These nine basic steps will familiarize you with the LFI-3751
temperature controller. This example controls a thermoelectric load
to 25°C using a 10 kΩ thermistor. Complete details are included
in later chapters.
1
Thermoelectric
(1 Amp, 3 Volt)
Output Connector
9 pin D-sub plug (male)
PINOUT
TEC +
1
TEC 2
Aux Sensor +
3
4
*Sensor 5
Main Sensor +
6
AD590 Voltage
7
*Fan 8
*Fan + (+12 V)
9
*-12 V
-
+
2
1
4
5
1
Make sure
all connections
are solid.
Wire Output Connector
9
Thermistor
(Wavelength # TCS-610)
This 9 pin D-Sub male plug requires a mating female
receptacle. Wire the thermoelectric module to pins 1
(positive lead) and 2 (negative lead). Wire the sensor
(a thermistor in this example) to pins 4 & 5. The
remaining hookups are optional. If you need a fan to
cool a heatsink, wire a +12 V fan (100 mA maximum)
to pins 8 & 7. If you need a second sensor to monitor
an auxiliary zone (ambient, heatsink...) wire a 10 kΩ
thermistor to pins 3 & 4. Install the 50 Ω BNC terminator
on the Analog Input BNC on the rear panel.
* Thermally Fused to 100 mA
2
Steinhart-Hart Thermistor
Equation
1
= χ1 + χ2 ln(R) + χ3 (ln(R))3
T
T = Temperature (Kelvin)
R = Resistance (Ohms)
Graph of Resistance vs.
Temperature for TCS-610
10 kΩ Thermistor
Resistance kΩ
35
30
25
20
15
10
5
0
T1, R1
T2, R2
T3, R3
0
10
20
30
40
50
Configure Sensor
The change in resistance vs. temperature of a thermistor can be modeled
by the Steinhart-Hart Thermistor equation. The LFI-3751 calculates the
three coefficients (χ1, χ2, & χ3) from three (Temperature, Resistance) data
pairs that you enter. Using the Steinhart-Hart equation, the temperature
controller converts the thermistor resistance to a displayed temperature.
Calibration is more accurate when the data pairs are close to the desired
operating temperature. For this example, 25°C is the goal. Calibrating
this 10 kΩ thermistor with 10°C, 25°C, and 40°C will offer a wide range of
operation as well as 0.01°C accuracy.
Rotate the Display Select Switch to A and toggle the Shift Button ON.
A temperature and a resistance will alternate on the display. See the unit
of measure LEDs to determine if it is the temperature or resistance value.
For the 10 kΩ thermistor in this example, we choose A, B, and C to be
(10°C, 19.9 kΩ), (25°C, 10 kΩ), and (40°C, 5.326 kΩ) respectively. This
information is available from the thermistor manufacturer (usually in table
form). Use the Digi-Pot Adjust Knob to change either value when it is
displayed. Rotate the Display Select Switch to B then C, making any
necessary adjustments.
Temperature °C
17
Chapter 1 - Quick Start
Nine Steps to Operating the LFI-3751
Positive LIM I
3
Set Limit Current
AMPS
ACT T
P
SET T
I
TE I
D
TE V
A
LIM I
B
AUX T
C
Negative LIM I
AMPS
ACT T
P
SET T
I
TE I
D
TE V
A
LIM I
B
AUX T
C
4
STATUS
T LIMIT
TEMP LIMIT
LIMIT I
REMOTE
RS-232
With the output off, set the limit current below the thermoelectric’s
maximum current. Assume the example thermoelectric’s maximum
current is 1.25 Amps. Set the Limit Current to 1.0 Amps. Rotate the
Display Select Switch to LIM I with the Shift Button OFF. The positive
and negative limits will alternate on the display. Rotate the Digi-Pot
Adjust Knob until 1.00 and -1.00 alternate.
SENSOR
ERROR
HOLD FOR LOCAL
°C
ACT T
P
SET T
I
TE I
D
TE V
A
LIM I
B
AUX T
C
HOLD SHIFT FOR
RS-232 ADDRESS
SHIFT
°C
ACT T
P
SET T
I
TE I
D
TE V
A
LIM I
B
AUX T
C
Set Temperature Limit
Press and release the TEMP LIMIT Button. Two numbers will alternate
on the display. If the thermistor temperature exceeds these limits, the
output current will be turned off. The numbers will alternate three times
before the display reverts to the parameter selected by the Display Select
Switch, in this case, LIM I. Assume that the load should not be allowed
to freeze (0°C) and should not exceed 55°C. Rotate the Digi-Pot Adjust
Knob until 0°C and 55°C are displayed. The highest temperature is
selected as the High T LIMIT and the lowest temperature is used as
the Low T LIMIT.
HOLD SHIFT FOR
RS-232 ADDRESS
SHIFT
REPEATS 3 TIMES
°C
18
ACT T
P
SET T
I
TE I
D
TE V
A
LIM I
B
AUX T
C
5
Display and Adjust Setpoint Temperature
Rotate the Display Select Switch to SET T and toggle the Shift Button
OFF. The setpoint temperature is displayed. Rotate the Digi-Pot Adjust
Knob until 25°C is displayed.
Chapter 1 - Quick Start
Nine Steps to Operating the LFI-3751
1
6
ACT T
SET T
I
TE I
D
TE V
A
LIM I
B
AUX T
C
Begin Autotune Optimization
Autotune: Rotate the Display Select Switch to P and toggle the Shift
Button ON. Use the Digi-Pot Adjust Knob to change the value. To begin
Autotune optimization, adjust the P value to display AutS or Autd.
AutS: Setpoint Response Autotune Optimization
Autd: Disturbance Rejection Autotune Optimization
You determine what kind of control loop the Autotune will use based on
your settings for the I and D terms. If set to zero, that control term
will not be used. The following chart shows which control modes are
available and the appropriate I and D settings. Rotate the Display
Select Switch to I then D, making any necessary adjustments with the
Digi-Pot Adjust Knob.
I
Control Mode:
D
non-zero
PID
non-zero
non-zero
PI
OFF = zero
OFF = zero
PD
non-zero
OFF = zero
P
OFF = zero
P
For this example, adjust P to AutS, I to 1.0, and D to 1.0 .
Manual setting: Adjust P to a value other than AutS or Autd.
7
OUTPUT
ON
Enable the Output Current
Press the Output Button to enable the output current and begin the
Autotune optimization sequence. The ON LED indicator will flash while
Autotune optimization is in progress. Once the Autotune sequence is
finished, the LFI-3751 will control to the desired operating temperature
entered in Step 5. Refer to Chapter 2, Autotune PID operation for
more detail.
°C
ACT T
P
SET T
I
TE I
D
TE V
A
LIM I
B
AUX T
C
P
SET T
I
TE I
D
TE V
A
LIM I
B
AUX T
C
Measure Actual Temperature
Rotate the Display Select Switch to ACT T (Shift Button OFF) to
monitor the load temperature. ACT T temperature now approaches
the SET T temperature.
AMPS
or
VOLTS
ACT T
8
9
Measure Thermoelectric Current and Voltage
Rotate the Display Select Switch to TE I (Shift Button OFF) to monitor
the current flowing through the thermoelectric. Rotate the Display Select
Switch to TE V (Shift Button OFF) to monitor the voltage across the
thermoelectric.
19
This page intentionally left blank.
20
2
2
Chapter 2: Front Panel Operation
21
Chapter 2 - Front Panel Operation
Front Panel Operation
By now, you should be familiar with the Autotune PID
feature, how to measure temperature, thermoelectric
current & voltage, and how to set various operating
parameters. If not, we recommend you read Chapter 1,
“Quick Start,” starting on page 13.
This chapter details basic operation with each sensor, how
to set limits and control parameters, and how to monitor
actual results. Corresponding remote interface commands
are briefly noted. Complete RS-232 commands are
detailed in Chapter 4.
For sensor configuration, the following notation is used:
A, B, or C refers to the Display Select Switch settings.
Each sensor type requires different configuration
data.
The data entered for A, B, and C changes
for each sensor.
T and R refer to Temperature and Resistance data pairs
used to characterize resistive sensor’s response to
temperature. Subscripts are used when more than
one data pair is required.
Slope and Offset are used to characterize the non-resistive
sensor’s response to temperature changes.
Text in brackets (e.g. [A1]) refers to the corresponding
RS-232 command.
22
Chapter 2 - Front Panel Operation
Autotune PID Operation
Autotune PID Operation
The LFI-3751 is capable of automatically characterizing your thermoelectric
or resistive heater load and calculating optimum control loop settings
for P, I, and D .
1. Autotune Process
TE Current
Time
When started,
Autotune generates
a step response
to characterize
your system.
During an Autotune, the LFI-3751 measures the load’s thermal lag time, L,
the maximum Temperature versus Time slope, Rmax, and the load’s thermal
time constant, T, for a given output step current, TE I.
T
Temperature
R max
L
Time
Your system responds by
going towards the setpoint.
The time to complete an Autotune Optimization varies from load to load.
The process occurs in three phases:
Phase 1: The LFI-3751 ramps the thermoelectric current to drive the thermal
load temperature toward the setpoint temperature.
Phase 2: The LFI-3751 performs three characterization passes.
Phase 3: The LFI-3751 reverts to normal operation, saving the optimized
P, I, and D settings in non-volatile memory and settling in at the
setpoint temperature.
Setpoint
First
Pass
Second
Pass
Third
Pass
Ambient
Phase 1
Phase 2
Phase 3
23
2
Chapter 2 - Front Panel Operation
Autotune PID Operation
2. Preliminary Considerations
Before performing an Autotune, certain parameters must be set. Here are five
items to consider before you start an Autotune sequence.
A. Current Limit Setting
•
•
•
Make sure the LIM I setting does not exceed the maximum TE I rating
for your thermoelectric.
In Phase 1 of an Autotune sequence, the initial TE current is 10% of
the limit current setting. If the ramp rate decreases, the current will be
increased in 10% increments to maintain the ramp rate until the load
reaches the setpoint temperature.
The LFI-3751 will display Error 2 (E002) when the temperature setpoint
cannot be reached using the TE Current Limit setting.
B. Temperature Limit Setting
•
•
The Autotune sequence will abort if the thermal load temperature exceeds
either temperature limit.
Resolution: While completing the Autotune, reduce the TE Current Limit
or if your thermal load can withstand higher or lower temperatures, then
increase the Temperature Limit settings.
C. Setpoint Temperature
•
•
•
Autotune will optimize the control parameters around the setpoint (SET T)
that you have selected.
In temperature mode for thermistors, the controller will capture the
information used to calculate the control parameters. When you change
your setpoint, the Autotune feature will automatically recalculate the PID
terms for the new setpoint.
If your temperature limits and the SET T temperature are too close
(within about 5°C), the sequence will probably reach the temperature
limit and abort.
D. If an active device is under temperature control
•
•
Avoid applying power to temperature sensitive devices during the Autotune
sequence because extreme temperature fluctuations may occur.
Apply steady state power to the device for the best Autotune results.
E. Choosing the control loop method
•
•
•
24
If you are in an electrically noisy environment, don’t use the D term.
Use only the P & I terms.
Generally, it is best to choose PID control and let the LFI-3751 determine
your control loop method.
For slow thermal loads that cycle around the setpoint even after PI or
PID Autotune, select P or PD for the control loop. Note: P or PD control
loops will not settle the load temperature at SET T and will also result
in setpoint inaccuracy.
Chapter 2 - Front Panel Operation
Autotune PID Operation
3. Choose an Autotune method
There are two Autotune optimization selections available: Setpoint
Response Tuning and Disturbance Rejection Tuning.
Before Setpoint
Response Autotune
Temp
After Setpoint
Response Autotune
Setpoint Response Tuning is valuable when continuously stepping the
LFI-3751 from one temperature to another. Your system will go to
temperature quickly and settle in with little or no overshoot.
Time
Temp
Disturbance Rejection Tuning is valuable when your thermal load is
exposed to varied environmental conditions, such as air currents or
ambient temperature fluctuations. It also improves temperature stability in
applications where the device being temperature controlled experiences
significant power or heat transients, such as those found in pulsed laser
diode applications.
Time
Before Disturbance
Rejection Autotune
After Disturbance
Rejection Autotune
Before Autotune
Temp
After Autotune
Time
Starts in opposite direction
because of right-hand zero
When a system is optimized for Disturbance Rejection, it is not optimized
for Setpoint Response and vice versa. More simply, a thermal load that is
optimized to reject disturbances will often overshoot and ring when changing
from one setpoint temperature to the next.
NOTE: Sometimes thermal loads behave in a manner referred to as a
“non-minimum phase system” or more simply, the initial response of the
system is to move in the opposite direction of the desired temperature
change. This effect is caused by a zero in the right-hand plane of the thermal
system. When the LFI-3751 performs a Setpoint Response Autotune, it
assumes the thermal load is a single pole system. The right-hand plane
zero is not compensated for and the load temperature will still overshoot.
In most cases where the thermal load exhibits this behavior, the Autotune
removes the majority of the overshoot and still improves the settling
time performance.
If your thermal load exhibits a non-minimum phase response, do not
optimize with Disturbance Rejection Autotuning.
25
2
Chapter 2 - Front Panel Operation
Autotune PID Operation
4. Configure LFI-3751 for Autotune
decrease
increase
Proportional Gain
ACT T
P
SET T
I
TE I
D
TE V
A
LIM I
B
AUX T
C
Integral Time Constant
ACT T
P
SET T
I
TE I
D
TE V
A
LIM I
B
AUX T
C
Differentiator Time Constant
ACT T
26
P
SET T
I
TE I
D
TE V
A
LIM I
B
AUX T
C
A.
•
•
•
•
•
•
•
•
Setpoint Response Tuning
Rotate the Display Select Switch to P (Shift Button ON).
While the output current is disabled, rotate the Digi-Pot Adjust Knob
counter-clockwise to change the value displayed to AutS. Wait about two
seconds before starting an Autotune sequence.
Rotate the Display Select Switch to I (Shift Button ON).
Rotate the Digi-Pot Adjust Knob to change the value displayed. If I = 0,
Autotune will optimize your system without an integrator. If I K 0, Autotune
will optimize your system with the integrator function.
Rotate the Display Select Switch to D (Shift Button ON).
Rotate the Digi-Pot Adjust Knob to change the value displayed. If D = 0,
Autotune will optimize your system without a differentiator. If D K0,
Autotune will optimize your system with the differentiator function.
Refer to pages 30 & 31 for a discussion of the integrator and differentiator
functions.
RS-232 Command: [P], [I], [D]
Chapter 2 - Front Panel Operation
Autotune PID Operation
decrease
B.
increase
Proportional Gain
ACT T
P
SET T
I
TE I
D
TE V
A
LIM I
B
AUX T
C
Integral Time Constant
ACT T
•
•
•
•
•
•
P
SET T
I
TE I
D
TE V
A
LIM I
B
AUX T
C
•
•
Disturbance Rejection Tuning
2
Rotate the Display Select Switch to P (Shift Button ON).
While the output current is disabled, rotate the Digi-Pot Adjust Knob
counter-clockwise to change the value displayed to Autd. Wait about two
seconds before starting an Autotune sequence.
Rotate the Display Select Switch to I (Shift Button ON).
Rotate the Digi-Pot Adjust Knob to change the value displayed. If
I = 0, Autotune will optimize your system without an integrator. If I K 0,
Autotune will optimize your system with the integrator function.
Rotate the Display Select Switch to D (Shift Button ON).
Rotate the Digi-Pot Adjust Knob to change the value displayed. If
D = 0, Autotune will optimize your system without a differentiator.
If D K 0, Autotune will optimize your system with the differentiator
function.
Refer to pages 30 & 31 for a discussion of the integrator and differentiator
functions.
RS-232 Command: [P], [I], [D]
Differentiator Time Constant
ACT T
P
SET T
I
TE I
D
TE V
A
LIM I
B
AUX T
C
27
Chapter 2 - Front Panel Operation
Autotune PID Operation
5. Start Autotune Optimization
ON
•
Output Current
Disabled
•
PRESS &
RELEASE
•
•
Prior to enabling current, the thermoelectric and sensor must be wired
to the LFI-3751 output connector, and the current and temperature
limits must be set.
Press the Output Button to enable current flow and start the Autotune
optimization through the thermoelectric (or resistive heater). The Output
LED will flash green.
When the Autotune is complete, the unit will beep once and the Output
LED will light solid green. The new P, I, and D settings are written
to non-volatile memory.
RS-232 Command: [RUN / STOP]
Autotune
Optimization
in Progress,
ON LED flashes
BEEP
ON
Autotune
Complete
Press & Release
Output Button
Autotune
Optimization
in Progress,
ON LED flashes
28
BEEP
BEEP
BEEP
OFF
Autotune
Aborted
6. Manually Abort Autotune Optimization
•
•
•
•
To abort the Autotune, press the Output Button once.
The unit will beep three times.
The Output LED turns off, and current flow is disabled.
The P, I, and D settings are returned to values set before starting
Autotune.
Chapter 2 - Front Panel Operation
Autotune PID Operation
7. Autotune Error Codes
Four error conditions can occur that will abort the Autotune sequence. When
an error occurs, the error is displayed as follows. The error is also returned in
the [RUN / STOP] RS-232 command:
E001 – Error 1: Zero Value Current Limit Error
• The LFI-3751 detected that either the required positive or negative
current limit was set to zero. The LFI-3751 cannot drive the
temperature toward the setpoint.
• Correction: Set the limit to something other than zero.
E002 – Error 2: Current Limit Cannot Reach SET T
• The LFI-3751 determined the current limit is not high enough to reach
the desired operating temperature entered in SET T.
• Correction: Increase the current limit or review the design to see why
the desired temperature differential cannot be achieved.
E003 – Error 3: Non-uniform TE I Step Measured
• It is critical that the step current, TE I, remain constant throughout the
Autotune parameter measurements for L, Rmax, and T. If the output
current is limited because the compliance voltage of the LFI-3751 has
been reached, the step current will not be uniform.
• Correction: Reduce the current limit or use a thermoelectric with
a lower voltage requirement.
E004 – Error 4: Zero Slope
• The load temperature is not changing over time. Either the sensor
signal is not changing, no current is flowing to the thermoelectric,
or even with the maximum current flowing to the thermoelectric the
load temperature is not changing.
• Correction: Verify that the sensor is in good thermal contact with
the load and that it is properly wired to the LFI Output Connector.
Verify that the thermoelectric is properly wired to the LFI Output
Connector.
29
2
Chapter 2 - Front Panel Operation
Theory of Autotune PID
Theory of Autotune PID
1. Proportional Gain – “P” and Autotune Optimization
TE Current
Time
When started,
Autotune generates
a step response
to characterize
your system.
T
Temperature
R max
L
Time
Your system responds by
going towards the setpoint.
The proportional gain, P, is measured in Amps Output Current per Volt Error
Voltage. The Error Voltage is the difference between the LFI-3751’s Setpoint
D to A and the measured sensor voltage feedback. When a difference exists
between the setpoint temperature and actual temperature, the proportional
gain directs the output power stage to supply an output current that is
proportional to the difference. Unfortunately, if the Error Voltage drops to
zero then so does the output current, which will cause the load temperature to
fall back towards ambient. The larger the P value, the closer the proportional
gain will settle the load to the desired operating temperature. Likewise,
the larger the P value, the greater the tendency to cause temperature
overshoot.
L and Rmax affect the proportional gain setting P. A long thermal lag, L,
decreases the proportional gain value. P also decreases when Rmax, the
maximum temperature versus time slope, is large.
Setpoint Response Tuning results in smaller P values than Disturbance
Rejection Tuning because lower proportional gains produce less temperature
overshoot of the setpoint temperature.
2. Integrator Time Constant – “I” and Autotune
Optimization
The integrator time constant, I, is measured in seconds. The integrator
function forces the actual temperature to stabilize at the setpoint temperature,
something the proportional gain cannot do alone. This is accomplished
because the integrator “integrates” the Error Voltage over time. When the
actual temperature is far from the setpoint temperature, the integrator charges
more quickly since the Error Voltage is large at this point. As the actual
temperature approaches the setpoint temperature, the Error Voltage decreases
and the integrator charges less quickly until finally the Error Voltage is zero.
Once the Error Voltage is zero, the integrator stops charging and controls the
output current at the necessary level to maintain a constant load temperature
equal to the setpoint temperature.
Some thermal loads oscillate around the setpoint temperature. This oscillation
is referred to as thermal cycling. Thermal cycling can occur if the proportional
gain is greater than the system’s critical proportional gain or more commonly
too small an integrator time constant has been set to compensate for the
thermal load’s lag time, L. A small integrator time constant charges more
quickly than a larger integrator time constant. If L is significantly larger than
the integrator time constant then the integrator will force the output current to
shoot past the setpoint temperature since the temperature sensor is lagging
behind the thermal load’s actual temperature.
30
Chapter 2 - Front Panel Operation
Theory of Autotune PID
The sensor temperature eventually overshoots the setpoint temperature,
forcing the integrator to charge in the opposite direction, reversing the output
current. The thermal load’s lag causes an overshoot in this direction also and
the cycle simply repeats itself. A large enough integrator time constant can
be set to compensate for a thermal load’s lag time by charging slowly enough
to not over-drive the output current. Commonly, temperature controllers
will exhibit a damped oscillation when settling to temperature. This occurs
because the integrator is set large enough to compensate for the thermal
load’s lag time but small enough that the integrator must overshoot several
times to properly balance the charge on the integrator to deliver the correct
output current.
The calculated value of integrated time constant, I, depends on whether the
thermal load has been optimized using Setpoint Response or Disturbance
Rejection Tuning. Setpoint Response determines I from the thermal load’s
time constant, T. Disturbance Rejection uses the thermal load’s lag time, L,
to calculate I. Notice that T is always greater than L and so that Setpoint
Response Tuning always calculates a more conservative value of I. Too large
a value of I is detrimental when rejecting disturbances because a slower
charging integrator will take longer to settle the load’s temperature.
3. Differentiator Time Constant – “D” and Autotune
Optimization
The differentiator’s time constant, D, is also measured in seconds. The
differentiator uses the derivative of the Error Voltage versus time to compensate
for the proportional gain’s and the integrator’s tendency to cause the thermal
load’s temperature to overshoot the setpoint temperature. To understand the
differentiator, we must first examine how the proportional gain responds as the
load’s temperature approaches the setpoint temperature.
As long as the Error Voltage is non-zero, the proportional gain will drive
the output to move the thermal load’s temperature towards the setpoint
temperature. The proportional gain stops driving the output current once the
Error Voltage drops to zero (when the load’s temperature equals the setpoint
temperature). At this point, the load’s thermal inertia forces it to overshoot
the setpoint temperature. It is not until the Error Voltage reverses polarity
that the proportional gain provides an output current that drives the actual
temperature back towards the setpoint temperature, which now results in
an undershoot condition.
The differentiator is dependent on the slope of Error Voltage versus time and
not its magnitude. The faster a load responds, the more the differentiator
forces the output current to reduce changes in the Error Voltage. Unlike the
proportional gain that moves the load temperature to the setpoint temperature,
the differentiator forces the output current to maintain a stable temperature
or zero slope whether the load’s temperature is at the setpoint temperature
or not. Therefore the differentiator produce’s a “braking” current that resists
changes to the thermal load temperature.
31
2
Chapter 2 - Front Panel Operation
Theory of Autotune PID
Obviously the differentiator should not be set so high that it counteracts the
proportional gain and integrator’s attempts to move the load’s temperature
to the setpoint temperature.
The differentiator time constant is dependent on the thermal load’s lag
time, L, since this parameter contributes to the integrator overshooting the
setpoint temperature. A larger lag time results in a larger calculated D. The
differentiator value also depends on the magnitude of proportional gain. A
larger proportional gain results in a larger differentiator time constant to
compensate for the proportional gain’s tendency to cause overshoot.
The Setpoint Response Autotune results in smaller values for D than the
Disturbance Rejection. Disturbance Rejection Autotune takes advantage of
the differentiator’s resistance to temperature variations at the thermal load to
suppress the effects of thermal transients.
If your thermal load operates in an electrically noisy environment, it might
be to your advantage to turn the differentiator off since the differentiator will
interpret the resulting fast variations in the Error Voltage incorrectly as thermal
load temperature variations. The differentiator can actually cause poorer
temperature stability in this instance.
Understanding the Differentiator - A real life analogy
If you still do not understand the differentiator function, fortunately, the
LFI-3751 Autotune PID eliminates the need to completely comprehend this
control parameter. None the less, this following real life example may give
you some insight into the differentiator. Consider the everyday situation of
braking a car for a STOP sign. Imagine that the location of the STOP sign is
our setpoint temperature and the location of our car is the load temperature.
When we are far away from the STOP sign we step on the accelerator to
quickly get to the STOP sign. This is exactly what the proportional gain portion
of our brain tells us to do since we are far from our destination and want to
get there as quickly as possible. The gears in our car are like the current limit
function of the LFI-3751, a lower gear limits our acceleration rate towards the
STOP sign and a lower current limit setting decreases how much “gas” we
can apply and determines how fast we can approach the stop sign. If we did
not have a differentiator function in our brain we would not apply the brakes
until after we went through the stop sign. For most of us, we stop accelerating
our car and begin applying our brakes some distance before we reach the
STOP sign. This is exactly how the proportional gain and differentiator work in
the PID control loop. Now imagine that the road you are driving on is covered
with ice; this corresponds to thermal loads with long thermal lag times. In
the case of the icy road we would stop accelerating sooner and apply the
brakes for a longer period of time. Remember that a longer thermal lag time
results in a smaller proportional time constant and a larger differentiator
time constant.
32
Chapter 2 - Front Panel Operation
Theory of Autotune PID
4. Temperature Sensors and Autotune Optimization
Sensor type also affects the magnitude of the proportional gain value
calculated when using Autotune optimization. For sensors with high
sensitivity (a large change in sensor signal per °C), the resulting proportional
gain value will be smaller than if a lower sensitivity sensor were installed
into the same thermal load. Correspondingly, the integrator time constant
increases when using highly sensitive temperature sensors and the
differentiator time constant decreases.
Thermistors are temperature sensors that exhibit high sensitivity and
therefore require less proportional gain for optimum performance.
Unfortunately, thermistors only perform well over a limited temperature
range and their sensor sensitivity is non-linear. This means that thermal
loads using thermistors are optimally tuned around one temperature but
performance degrades as the setpoint temperature is moved away from the
initial tuning temperature. The LFI-3751 compensates for a thermistor’s
non-linear sensitivity in temperature mode by recalculating the optimum P, I,
and D terms whenever the setpoint temperature is changed.
Linear sensors such as the Analog Devices AD590 and National
Semiconductor LM335, and Platinum RTDs exhibit poor sensitivity and
therefore require considerably higher proportional gains, but do not require
recalculation of the PID terms.
5. Thermal load variation and Autotune Optimization
Ideally, we would measure the load’s thermal lag time, L, the maximum
temperature versus time slope, Rmax, and the load’s thermal time constant,
T for a given output step current, TE I at any temperature and achieve
the same results. Unfortunately, most thermal loads are only linear over
a small range of temperatures.
Several factors cause a thermal load to respond differently from one
temperature to another. One such factor is a thermoelectric’s efficiency,
which varies depending on the current being pumped through the
thermoelectric and the temperature difference between its cold and hot
plate. At some point, a thermoelectric’s heatsink temperature raises to a
point where it absorbs heat more slowly from the thermoelectric. Both these
factors affect the maximum temperature versus time slope, Rmax.
Other factors such as ambient temperature change and power being applied
to an active device affect the thermal load’s lag time, L, and time constant, T.
Fortunately, PID controllers are relatively robust and still control quite well
even if they are not optimized. Depending on the size of your load, you may
find it good practice to perform a PID Autotune each time the LFI-3751 is
powered on to compensate for changes in the thermal load.
33
2
This page intentionally left blank.
34
Chapter 2 - Front Panel Operation
Controlling Temperature with Thermistors
ACT T
P
SET T
I
TE I
D
TE V
A
LIM I
B
AUX T
C
Controlling Temperature with Thermistors
Default Thermistor
Configuration
A
B
C
T1
R1
T2
R2
T3
R3
[A1]
[A2]
[B1]
[B2]
[C1]
[C2]
= 10.00°C
= 19.90 kΩ
= 25.00°C
= 10.00 kΩ
= 40.00 °C
= 5.326 kΩ
Thermistor
4
Key to accurately measuring and controlling temperature with a thermistor
is properly entering the configuration data. A thermistor’s temperature
response can be modeled by the Steinhart-Hart equation. To calculate the
three Steinhart-Hart coeffcients, the LFI-3751 requires three data pairs
A = (T1, R1), B = (T2, R2), and C = (T3, R3). Thermistor manufacturers
provide this information in a table of Resistance vs. Temperature data. With
the Steinhart-Hart equation and coefficients, the LFI-3751 can calculate
temperature from thermistor resistance and properly calculate the setpoint
resistance from the setpoint temperature.
1. Wiring a Thermistor
5
1
9
Wire the thermistor to the Output Connector on the rear panel. Shielded
cables are available (Wavelength part number CAT-220). Do not exceed
1 meter cable length.
Refer to Sensor Error Condition on page 55 if
you can’t clear a Sensor Error.
2. Automatic Bias Current
Thermistor Voltage
(pins 5 & 4)
VT = IBIAS * RT
VT = Voltage across pins 4 & 5
IBIAS = LFI-3751 Bias Current
RT = Resistance of thermistor
A fixed bias current, IBIAS, flows from pin 5, through the thermistor and
back into pin 4 to produce a voltage, VT. As the thermistor resistance (RT)
changes, the voltage changes. VT must be maintained between 0 and +5 V
for proper operation. The LFI-3751 automatically ranges between four
bias currents (10 µA, 100 µA, 1 mA, and 10 mA) to optimize feedback
while allowing a wider temperature range of operation. Hysteresis is
designed in to produce “bumpless” operation when switching from one
bias current to another.
Bias Current and Sensor Resistance
Sensor Current Resistance Range
25 kΩ to 500 kΩ
10 µA
2.5 kΩ to 45 kΩ
100 µA
0.25 kΩ to 4.5 kΩ
1 mA
0 kΩ to 0.45 kΩ
10 mA
35
2
Chapter 2 - Front Panel Operation
Controlling Temperature with Thermistors
Steinhart-Hart Equation
3. Thermistor Temperature vs. Resistance
1
= χ1 + χ2 ln(R) + χ3 (ln(R))3
T
Temperature can be determined by the Steinhart-Hart equation
given the thermistor resistance and the equation coefficients
χ1, χ2, and χ3.
T = Temperature (Kelvin)
R = Resistance (Ohms)
Typical Thermistor
R vs. T response
To calculate the Steinhart-Hart coefficients, the LFI-3751 needs
three (Temperature, Resistance) data pairs. Enter A: (T1, R1),
B: (T2, R2), and C: (T3, R3) through the front panel or [A1], [A2],
[B1], [B2], [C1], and [C2] via the RS-232 interface. Using the
thermistor resistance vs. temperature chart provided with your
thermistor, select three temperatures. These temperatures
can be far apart if you’re working with a wide temperature
range, or close together to optimize the curve fit around one
temperature.
Resistance kΩ
35
30
25
20
15
10
5
0
T1, R1
T2, R2
T3, R3
0
10
20
30
40
50
Temperature °C
4. Entering Data Pair - A
decrease
•
increase
Adjust A
Enter T1 [A1]
•
°C
•
ACT T
P
SET T
I
TE I
D
TE V
A
LIM I
B
AUX T
C
Enter R1 [A2]
kΩ
ACT T
36
P
SET T
I
TE I
D
TE V
A
LIM I
B
AUX T
C
•
•
•
Rotate the Display Select Switch to A (Shift Button ON).
The first two data pairs alternate on the display. One is
temperature (°C LED lit), the other is the corresponding
thermistor resistance (kΩ LED lit).
Rotate the Digi-Pot Adjust Knob to change the value
displayed. Default from the factory sets up for a 10 kΩ
thermistor (Wavelength part number TCS-610).
To display thermistor resistance rather than temperature,
enter (0.000, 0.000) for the A terms. [B & C are ignored
for resistance display.]
A, B, and C cannot be adjusted while the output is on.
Data pairs A, B, and C are saved in non-volatile memory.
RS-232 Command: [A1] = T1, [A2] = R1
Display Resolution:
Temperature -199.9
-19.99
-1.999
10.00
100.0
0
Resistance
10.00
100.0
to
to
to
to
to
to
to
to
-20.0°C
-2.00°C
9.999°C
99.99°C
199.9°C
9.999 kΩ
99.99 kΩ
499.9 kΩ
Chapter 2 - Front Panel Operation
Controlling Temperature with Thermistors
decrease
increase
Adjust B
Enter T2 [B1]
°C
ACT T
I
TE I
D
TE V
A
LIM I
B
AUX T
C
•
•
•
•
•
P
SET T
5. Entering Data Pair - B
Rotate the Display Select Switch to B (Shift Button ON)
to display the second data pair.
Rotate the Digi-Pot Adjust Knob to adjust each value
as it is displayed.
A, B, and C cannot be adjusted while the output is on.
Data pairs A, B, and C are saved in non-volatile memory.
RS-232 Command: [B1] = T2, [B2] = R2
Display Resolution:
Enter R2 [B2]
Temperature -199.9
-19.99
-1.999
10.00
100.0
0
Resistance
10.00
100.0
kΩ
ACT T
P
SET T
I
TE I
D
TE V
A
LIM I
B
AUX T
C
to
to
to
to
to
to
to
to
-20.0°C
-2.00°C
9.999°C
99.99°C
199.9°C
9.999 kΩ
99.99 kΩ
499.9 kΩ
decrease
increase
Adjust C
Enter T3 [C1]
°C
ACT T
I
TE I
D
TE V
A
LIM I
B
AUX T
C
kΩ
P
SET T
I
TE I
D
TE V
A
LIM I
B
AUX T
C
•
Rotate the Display Select Switch to C (Shift Button ON)
to display the third data pair.
Rotate the Digi-Pot Adjust Knob to adjust each value
as it is displayed.
A, B, and C cannot be adjusted while the output is on.
Data pairs A, B, and C are saved in non-volatile memory.
RS-232 Command: [C1] = T3, [C2] = R3
Display Resolution:
Enter R3 [C2]
ACT T
•
•
•
•
P
SET T
6. Entering Data Pair - C
Temperature -199.9
-19.99
-1.999
10.00
100.0
0
Resistance
10.00
100.0
to
to
to
to
to
to
to
to
-20.0°C
-2.00°C
9.999°C
99.99°C
199.9°C
9.999 kΩ
99.99 kΩ
499.9 kΩ
37
2
Chapter 2 - Front Panel Operation
Controlling Temperature with Thermistors
Display Actual
Thermistor Temperature
•
°C
ACT T
P
SET T
I
TE I
D
TE V
A
LIM I
B
AUX T
C
7. Displaying Actual Thermistor Temperature
SHIFT
•
-19.99
-1.999
10.00
100.0
Display Actual
Thermistor Resistance
•
P
SET T
I
TE I
D
TE V
A
LIM I
B
AUX T
C
SHIFT
Display Setpoint Temperature
decrease
•
•
°C
ACT T
•
•
•
P
SET T
I
TE I
D
TE V
A
LIM I
B
AUX T
C
Display Setpoint Resistance
decrease
increase
38
P
SET T
I
TE I
D
TE V
A
LIM I
B
AUX T
C
Rotate the Display Select Switch to SET T (Shift Button OFF).
Temperature will be displayed.
To adjust the setpoint, rotate the Digi-Pot Adjust Knob. While the knob
is rotating, the display will change, but the instrument will not control to
the new setpoint until the knob stops moving.
The decimal point will move to display maximum resolution.
SET T is saved in non-volatile memory.
RS-232 Command: [SET T]
10. Adjusting Thermistor Resistance Setpoint
•
•
kΩ
ACT T
Enter [0.000, 0.000] for A to have the LFI-3751 display thermistor
resistance (kΩ) when the Display Select Switch is rotated to ACT T
Display Resolution
(Shift Button OFF).
RS-232 Command: [ACT R]
0 to 9.999 kΩ
10.00 to 99.99 kΩ
100.0 to 499.9 kΩ
9. Adjusting Thermistor Temperature Setpoint
•
increase
to -2.00°C
to 9.999°C
to 99.99°C
to 199.9°C
8. Displaying Actual Thermistor Resistance
kΩ
ACT T
Rotate the Display Select Switch to ACT T (Shift Button OFF) to display
the thermistor temperature.
Display Resolution
RS-232 Command: [ACT T]
-199.9 to -20.0°C
•
•
•
•
Rotate the Display Select Switch to SET T (Shift Button OFF). If (0.000,
0.000) has been entered for A, resistance will be displayed.
To adjust the setpoint, rotate the Digi-Pot Adjust Knob. While the knob
is rotating, the display will change, but the instrument will not control to
the new setpoint until the knob stops moving.
The decimal point will move to display maximum resolution.
SET R is saved in non-volatile memory.
Temperature Limits are disabled in Resistive Operating Mode.
RS-232 Command: [SET R]
Chapter 2 - Front Panel Operation
Controlling Temperature with RTDs
ACT T
Controlling Temperature with RTDs
P
SET T
I
TE I
D
TE V
A
LIM I
B
AUX T
C
Default RTD Configuration
[A1]
A
= 1.000
[A2]
= 1.000
[B1]
B T1 = 0.00°C
R1 = 0.100 kΩ [B2]
C T2 = 100.00 °C [C1]
R2 = 0.139 kΩ [C2]
2 wire RTD
Key to accurately measuring and controlling temperature with an RTD
is properly entering the configuration data. An RTD’s temperature
response can be assumed to be linear or more precisely modeled by
the Callendar - Van Dusen Curve fit. To indicate that the sensor is an
RTD, A = (1.000, 1.000). To calculate the linear or Callendar - Van Dusen
coeffcients, the LFI-3751 requires two data pairs B = (T2, R2), C = (T3, R3).
With the appropriate equation and coefficients, the LFI-3751 can calculate
temperature from RTD resistance and properly calculate the setpoint
resistance from the setpoint temperature.
1. Wiring an RTD
4
5
1
9
Wire the RTD to the Output Connector on the rear panel. Shielded
cables are available (Wavelength part number CAT-220). Do not exceed
1 meter cable length.
Refer to Sensor Error Condition on page 55 if
you can’t clear a Sensor Error.
3 wire RTD
Kelvin
Lead
4 5
1
9
2. Automatic Bias Current
RTD Voltage (pins 5 & 4)
VRTD = IBIAS * RRTD
VRTD = Voltage across pins 4 & 5
IBIAS = LFI-3751 Bias Current
RRTD = Resistance of RTD
A fixed bias current, IBIAS, flows from pin 5, through the RTD and back into
pin 4 to produce a voltage, VRTD. As the RTD resistance (RRTD) changes,
the voltage changes. The voltage must be between 0 and +5 V for proper
operation. The LFI-3751 automatically ranges between four bias currents
(10 µA, 100 µA, 1 mA, and 10 mA) to optimize the feedback while allowing
a wider temperature range of operation. Hysteresis is designed in to
produce “bumpless” operation when switching from one bias current
to another.
Bias Current and Sensor Resistance
Sensor Current Resistance Range
25 kΩ to 500 kΩ
10 µA
2.5 kΩ to 45 kΩ
100 µA
0.25 kΩ to 4.5 kΩ
1 mA
0 kΩ to 0.45 kΩ
10 mA
39
2
Chapter 2 - Front Panel Operation
Controlling Temperature with RTDs
Typical RTD
R vs. T response
The LFI-3751 uses three data pairs to configure an RTD- A, B, and C. To
indicate you’re using an RTD, the first data pair A must be (1.000, 1.000).
Enter A: (1.000, 1.000), B: (T1, R1), and C: (T2, R2) through the front panel
or [A1], [A2], [B1], [B2], [C1], and [C2] via the RS-232 interface. RTD
resistance changes almost linearly with temperature. Depending on your need
for accuracy, the LFI-3751 offers two methods for modeling RTDs: Linear or
Callendar - Van Dusen Curve fit.
Resistance (Ω)
150
T2, R2
140
130
120
110
100
T1, R1
90
80
3. RTD Temperature vs. Resistance
0
100
Temperature (°C)
Linear Configuration Constants
R0 = R2 -
(R2 - R1)
(T2 - T1)
* T2
(R - R )
2
1
alpha = a =
R0 *(T2 - T1)
R0 = RTD Resistance at 0°C
(T1, R1) & (T2, R2) = B & C entries
alpha = Normalized ∆R vs.
Temperature
Linear Temperature Calculation
(R
TRTD =
RTD
- R0)
R0 * alpha
R0 = RTD Resistance at 0°C
RRTD = Resistance of RTD
TRTD = Temperature of RTD
alpha = Normalized ∆R vs.
Temperature
40
Linear RTD Configuration
The first method assumes the RTD temperature response to be linear. Enter
two (Temperature, Resistance) data pairs B: (T1, R1) and C: (T2, R2). R0
(resistance at 0°C) and alpha are calculated to derive temperature from
the measured RTD resistance, RRTD. All resistances are in ohms and T is
in °C. Note that R0 is typically the resistance the RTD is known by: i.e. a
“100 Ω RTD” is usually 100 Ω at 0°C.
Chapter 2 - Front Panel Operation
Controlling Temperature with RTDs
Callendar - Van Dusen Curve Fit RTD Configuration
Callendar - Van Dusen Curve Fit
RT = R0 (1 + β1 T + β2 T2 + β3 (T - 100)3)
R0 = RTD Resistance at 0°C
RT = Resistance of RTD
T = Temperature of RTD
β1, β2, β3 = Callendar - Van Dusen coefficients
For more accuracy, the RTD response can be approximated
by the Callendar-Van Dusen curve fit. Most platinum RTDs
follow one of three standardized curves, the DIN 43760
standard, the U.S. Industrial or American standard, or the
International Temperature Scale that is used with wire-wound
RTDs. The following table lists the coefficients for these
three platinum RTDs.
Callendar - Van Dusen Coefficients
Alpha
β1
β2
β3
Φ
0.003850
0.003911
0.003926
3.908 x 10 -3
3.9692 x 10⁻³
3.9848 x 10⁻³
-5.8019 x 10⁻⁷
-5.8495 x 10⁻⁷
-5.87 x 10⁻⁷
-4.2735 x 10⁻¹²
-4.2325 x 10⁻¹²
-4.0 x 10⁻¹²
1.39
1.40
1.41
Standard
DIN 43760
American
ITS-90
To use these coefficients, rather than the linear configuration,
certain values must be entered for B and C. The LFI-3751 will
use the Callendar Van-Dusen coefficients if T1 = 0°C, T2 = 100°C,
and R2 = Φ R1. Φ is listed in the table above. The following
table shows what should be entered for a 100 Ω RTD that
follows each of the standardized curves.
Example Entries for three different standard 100 Ω RTDs
B
Standard
DIN 43760
American
ITS-90
Calculate Temperature from Resistance,
Callendar - Van Dusen Curve Fit
T=
- β1 R1 +
(β1 R1)2 - 4 β2 R1 (R1 - RRTD)
2 β2 R1
T1 or [B1]
0°C
0°C
0°C
R1 or [B2]
0.100 kΩ
0.100 kΩ
0.100 kΩ
C
T2 or [C1] R2 or [C2]
100°C
0.139 kΩ
100°C
0.140 kΩ
100°C
0.141 kΩ
Temperature will be calculated using the first two coefficients
(β1 & β2). Coefficient β3 is not used, but its absence does not
introduce considerable error.
R1 = RTD Resistance at 0°C
RRTD = Resistance of RTD
T = Temperature of RTD
41
2
Chapter 2 - Front Panel Operation
Controlling Temperature with RTDs
decrease
increase
Adjust A
Enter [A1]
4. Entering Data Pair - A
•
Rotate the Display Select Switch to A (Shift Button ON).
The first two data pairs alternate on the display. (1.000, 1.000)
indicates to the LFI-3751 that you’re using an RTD.
Rotate the Digi-Pot Adjust Knob to change the value
displayed.
A, B, and C cannot be adjusted while the output is on.
Data pairs A, B, and C are saved in non-volatile memory.
RS-232 Command: [A1] = +001.000, [A2] = +001.000
°C
•
ACT T
P
SET T
I
TE I
D
TE V
A
LIM I
B
AUX T
C
•
•
•
Enter [A2]
kΩ
ACT T
P
SET T
I
TE I
D
TE V
A
LIM I
B
AUX T
C
decrease
5. Entering Data Pair - B
increase
Adjust B
Enter T1 [B1]
•
•
°C
•
ACT T
P
SET T
I
TE I
D
TE V
A
LIM I
B
AUX T
C
Enter R1 [B2]
kΩ
ACT T
42
P
SET T
I
TE I
D
TE V
A
LIM I
B
AUX T
C
•
•
•
Rotate the Display Select Switch to B (Shift Button ON)
to display the second data pair.
Rotate the Digi-Pot Adjust Knob to adjust each value as
it is displayed. Default from the factory sets up for a 100 Ω
RTD using the DIN 43760 coefficients.
To display RTD resistance rather than temperature, enter
(0.000, 0.000) for the B terms. [C terms are ignored for
resistance display.]
A, B, and C cannot be adjusted while the output is on.
Data pairs A, B, and C are saved in non-volatile memory.
RS-232 Command: [B1] = T1, [B2] = R1
Display Resolution:
Temperature -199.9 to -20.0°C
-19.99 to -2.00°C
-1.999 to 9.999°C
10.00 to 99.99°C
100.0 to 199.9°C
0 to 9.999 kΩ
Resistance
10.00 to 99.99 kΩ
100.0 to 499.9 kΩ
Chapter 2 - Front Panel Operation
Controlling Temperature with RTDs
decrease
increase
Adjust C
Enter T2 [C1]
P
SET T
I
TE I
D
TE V
A
LIM I
B
AUX T
C
•
•
°C
ACT T
6. Entering Data Pair - C
•
•
•
Display Resolution:
Temperature -199.9 to -20.0°C
-19.99 to -2.00°C
-1.999 to 9.999°C
10.00 to 99.99°C
100.0 to 199.9°C
0 to 9.999 kΩ
Resistance
10.00 to 99.99 kΩ
100.0 to 499.9 kΩ
Enter R2 [C2]
kΩ
ACT T
P
SET T
I
TE I
D
TE V
A
LIM I
B
AUX T
C
Display Actual RTD Temperature
7. Displaying Actual RTD Temperature
•
°C
•
ACT T
P
SET T
I
TE I
D
TE V
A
LIM I
B
AUX T
C
SHIFT
Display Resolution:
8. Displaying Actual RTD Resistance
•
kΩ
P
SET T
I
TE I
D
TE V
A
LIM I
B
AUX T
C
Rotate the Display Select Switch to ACT T (Shift Button
OFF) to display the RTD temperature.
RS-232 Command: [ACT T]
-199.9 to -20.0°C
-19.99 to 99.99°C
100.0 to 199.9°C
Display Actual RTD Resistance
ACT T
Rotate the Display Select Switch to C (Shift Button ON)
to display the third data pair.
Rotate the Digi-Pot Adjust Knob to adjust each value
as it is displayed.
A, B, and C cannot be adjusted while the output is on.
Data pairs A, B, and C are saved in non-volatile memory.
RS-232 Command: [C1] = T2, [C2] = R2
SHIFT
•
Enter (1.000, 1.000) for A and (0.000, 0.000) for B to have
the LFI-3751 display RTD resistance (kΩ) when the Display
Select Switch is rotated to ACT T (Shift Button OFF).
RS-232 Command: [ACT R]
Display Resolution:
0 to 9.999 kΩ
10.00 to 99.99 kΩ
100.0 to 499.9 kΩ
43
2
Chapter 2 - Front Panel Operation
Controlling Temperature with RTDs
9. Adjusting RTD Temperature Setpoint
Adjusting RTD
Temperature Setpoint
decrease
•
increase
•
°C
ACT T
•
•
•
P
SET T
I
TE I
D
TE V
A
LIM I
B
AUX T
C
10. Adjusting RTD Resistance Setpoint
Adjusting RTD
Resistance Setpoint
decrease
•
increase
•
kΩ
ACT T
44
P
SET T
I
TE I
D
TE V
A
LIM I
B
AUX T
C
SHIFT
Rotate the Display Select Switch to SET T (Shift Button OFF).
Temperature will be displayed.
To adjust the setpoint, rotate the Digi-Pot Adjust Knob. While the
knob is rotating, the display will change, but the instrument will not
control to the new setpoint until the knob stops moving.
The decimal point will move to display maximum resolution.
SET T is saved in non-volatile memory.
RS-232 Command: [SET T]
•
•
•
•
Rotate the Display Select Switch to SET T (Shift Button OFF).
If (1.000, 1.000) has been entered for A and (0.000, 0.000) has been
entered for B, resistance will be displayed.
To adjust the setpoint, rotate the Digi-Pot Adjust Knob. While the knob
is rotating, the display will change, but the instrument will not control to
the new setpoint until the knob stops moving.
The decimal point will move to display maximum resolution.
SET R is saved in non-volatile memory.
Temperature Limits are disabled in Resistive Operating Mode.
RS-232 Command: [SET R]
Chapter 2 - Front Panel Operation
Controlling Temperature with an AD590
ACT T
Controlling Temperature with an AD590
P
SET T
I
TE I
D
TE V
A
LIM I
B
AUX T
C
Default AD590 Configuration
[A1]
A
= 2.000
[A2]
= 2.000
B Slope = 1.000 µA / K [B1]
[C1]
C Offset = 0.00 µA
Key to accurately measuring and controlling temperature with an AD590 is
properly entering the configuration data. An AD590 is a current source with
an output current that varies linearly with temperature. To indicate to the
LFI-3751 that the sensor is an AD590, A = (2.000, 2.000). To characterize
the linear response, the LFI-3751 requires a Slope and Offset. For the
AD590, B = Slope and C = Offset. With this information, the LFI-3751
can calculate temperature from AD590 current and properly calculate the
setpoint current from the setpoint temperature.
Bottom
View
-
+
AD590
TO-52
package
case
5
1
6
1. Wiring an AD590
Wire the AD590 to the Output Connector on the rear panel. Shielded
cables are available (Wavelength part number CAT-220). Do not exceed
1 meter cable length. Refer to Sensor Error Condition on page 55 if you
can’t clear a Sensor Error.
9
Bottom
View
AD592
TO-92
package
- +
5
1
6
9
2. Temperature vs. AD590 Current
AD590 Temperature
IAD590 - bAD590
T=
- 273.15
m
AD590
T = AD590 Temperature (°C)
IAD590 = AD590 Current
mAD590 = AD590 Slope
bAD590 = AD590 Offset
An AD590 is a current source with an output current that varies linearly with
temperature. The LFI-3751 requires a Slope and Offset to model this response
mathematically. To indicate you’re using an AD590, A = (2.000, 2.000).
To configure its response, B = Slope, and C = Offset. Typically the Slope is
1 µA / Kelvin and the Offset is 0 µA.
Enter A: (2.000, 2.000), B: Slope, and C: Offset through the front panel or
[A1], [A2], [B1], and [C1] via the RS-232 interface.
45
2
Chapter 2 - Front Panel Operation
Controlling Temperature with an AD590
decrease
increase
Adjust A
Enter [A1]
°C
ACT T
I
TE I
D
TE V
A
LIM I
B
AUX T
C
•
•
•
•
•
P
SET T
3. Entering Data Pair - A
Rotate the Display Select Switch to A (Shift Button ON).
The first two data pairs alternate on the display. (2.000, 2.000)
indicates to the LFI-3751 that you’re using an AD590.
Rotate the Digi-Pot Adjust Knob to change the value
displayed.
A, B, and C cannot be adjusted while the output is on.
Data for A, B, and C are saved in non-volatile memory.
RS-232 Command: [A1] = +002.000, [A2] = +002.000
Enter [A2]
kΩ
ACT T
P
SET T
I
TE I
D
TE V
A
LIM I
B
AUX T
C
decrease
increase
Adjust B
Enter Slope [B1]
ACT T
46
P
SET T
I
TE I
D
TE V
A
LIM I
B
AUX T
C
4. Entering Data Point - B
•
•
•
•
•
Rotate the Display Select Switch to B (Shift Button ON) to
display the AD590’s Slope in µA / Kelvin.
Rotate the Digi-Pot Adjust Knob to change the value.
Default from the factory sets up for a 1 µA / Kelvin slope.
A, B, and C cannot be adjusted while the output is on.
Data for A, B, and C are saved in non-volatile memory.
RS-232 Command: [B1] = Slope
Display Resolution:
Slope 0.100 to 9.999 µA / K
Chapter 2 - Front Panel Operation
Controlling Temperature with an AD590
decrease
increase
Adjust C
5. Entering Data Point - C
•
Enter Offset [C1]
•
ACT T
P
SET T
I
TE I
D
TE V
A
LIM I
B
AUX T
C
•
•
•
Rotate the Display Select Switch to C (Shift Button ON) to
display the AD590 Offset in µA.
Rotate the Digi-Pot Adjust Knob to change the value.
Factory default is 0 µA.
A, B, and C cannot be adjusted while the output is on.
Data pairs A, B, and C are saved in non-volatile memory.
RS-232 Command: [C1] = Offset
Display Resolution:
Offset -9.99 to 9.99 µA
Display Actual AD590 Temperature
6. Displaying Actual AD590 Temperature
°C
•
•
ACT T
P
SET T
I
TE I
D
Display Resolution:
TE V
A
LIM I
B
AUX T
C
-199.9 to -20.0°C
-19.99 to 99.99°C
100.0 to 199.9°C
SHIFT
Display AD590 Setpoint Temperature
decrease
7. Adjusting AD590 Temperature Setpoint
•
increase •
°C
ACT T
Rotate the Display Select Switch to ACT T (Shift Button
OFF) to display the AD590 temperature.
RS-232 Command: [ACT T]
P
SET T
I
TE I
D
TE V
A
LIM I
B
AUX T
C
•
•
•
Rotate the Display Select Switch to SET T (Shift Button OFF).
Temperature will be displayed.
To adjust the setpoint, rotate the Digi-Pot Adjust Knob.
While the knob is rotating, the display will change, but the
instrument will not control to the new setpoint until the knob
stops moving.
The decimal point will move to display maximum resolution.
SET T is saved in non-volatile memory.
RS-232 Command: [SET T]
47
2
Chapter 2 - Front Panel Operation
Controlling Temperature with an LM335
ACT T
P
SET T
I
TE I
D
TE V
A
LIM I
B
AUX T
C
Controlling Temperature with an LM335
Default LM335 Configuration
[A1]
A
= 3.000
[A2]
= 3.000
B Slope = 10.00 mV / K [B1]
[C1]
C Offset = 0.0 mV
LM335
Bottom View
TO-46
(metal can package)
+
Bottom
View
+
-
to pin 5
to pin 4
Key to accurately measuring and controlling temperature with an LM335 is
properly entering the configuration data. An LM335 produces a voltage
that changes linearly with temperature. To indicate to the LFI-3751 that
the sensor is an LM335, A = (3.000, 3.000). To characterize the linear
response, the LFI-3751 requires a Slope and Offset. For the LM335,
B = Slope and C = Offset. With this information, the LFI-3751 can calculate
temperature from LM335 voltage and properly calculate the setpoint voltage
from the setpoint temperature.
1. Wiring an LM335
Wire the LM335 to the Output Connector on the rear panel. Shielded
cables are available (Wavelength part number CAT-220). Do not exceed
1 meter cable length. Refer to Sensor Error Condition on page 55 if you
can’t clear a Sensor Error.
TO-92
(plastic package)
4
5
1
9
LM335 Temperature
T=
VLM335 - bLM335
mLM335
- 273.15
2. Temperature vs. LM335 Voltage
The LM335 produces a voltage that changes linearly with temperature in
Kelvin. The LFI-3751 requires a Slope and Offset to model this response
mathematically. To indicate you’re using an LM335, A = (3.000, 3.000). To
configure the response, B = Slope and C = Offset.
T = LM335 Temperature (°C)
VLM335 = Voltage across pins 4 & 5
mLM335 = LM335 Slope =
Enter A: (3.000, 3.000), B: Slope, and C: Offset through the front panel or
10 mV / Kelvin
[A1], [A2], [B1], and [C1] via the RS-232 interface.
bLM335 = LM335 Offset = 0 mV
48
Chapter 2 - Front Panel Operation
Controlling Temperature with an LM335
decrease
increase
Adjust A
Enter [A1]
3. Entering Data Pair - A
•
°C
•
ACT T
P
SET T
I
TE I
D
TE V
A
LIM I
B
AUX T
C
•
•
•
2
Rotate the Display Select Switch to A (Shift Button ON).
The first two data pairs alternate on the display. (3.000,
3.000) indicates to the LFI-3751 that you’re using an
LM335.
Rotate the Digi-Pot Adjust Knob to change the value
displayed.
A, B, and C cannot be adjusted while the output is on.
Data for A, B, and C are saved in non-volatile memory.
RS-232 Command: [A1] = +003.000, [A2] = +003.000
Enter [A2]
kΩ
ACT T
P
SET T
I
TE I
D
TE V
A
LIM I
B
AUX T
C
decrease
increase
Adjust B
Enter Slope [B1]
4. Entering Data Point - B
•
•
ACT T
P
SET T
I
TE I
D
TE V
A
LIM I
B
AUX T
C
•
•
•
Rotate the Display Select Switch to B (Shift Button ON)
to display the Slope in mV / Kelvin.
Rotate the Digi-Pot Adjust Knob to change the value.
Default from the factory sets up for a 10 mV / Kelvin
slope.
A, B, and C cannot be adjusted while the output is on.
Data for A, B, and C are saved in non-volatile memory.
RS-232 Command: [B1] = Slope
Display Resolution:
1.00 to 20.00 mV / K
Slope
49
Chapter 2 - Front Panel Operation
Controlling Temperature with an LM335
decrease
5. Entering Data Point - C
increase
Adjust C
Enter Offset [C1]
ACT T
I
TE I
D
TE V
A
LIM I
B
AUX T
C
•
•
•
•
P
SET T
•
Rotate the Display Select Switch to C (Shift Button ON) to
display the Offset in mV. For the LM335, Offset is 0 mV.
Rotate the Digi-Pot Adjust Knob to change the value.
Default from the factory sets up for a 0 mV offset.
A, B, and C cannot be adjusted while the output is on.
Data pairs A, B, and C are saved in non-volatile memory.
RS-232 Command: [C1] = Offset
Display Resolution:
Offset -9.99 to 9.99 mV
6. Displaying Actual LM335 Temperature
Display Actual LM335
Temperature
•
•
Rotate the Display Select Switch to ACT T (Shift Button
OFF) to display the LM335 temperature.
RS-232 Command: [ACT T]
°C
ACT T
P
SET T
I
TE I
D
TE V
A
LIM I
B
AUX T
C
Display Resolution:
-199.9 to -20.0°C
-19.99 to 99.99°C
100.0 to 199.9°C
SHIFT
Display Setpoint Temperature
decrease
increase
7. Adjusting LM335 Temperature Setpoint
•
•
°C
ACT T
50
P
SET T
I
TE I
D
TE V
A
LIM I
B
AUX T
C
•
•
•
Rotate the Display Select Switch to SET T (Shift Button
OFF). Temperature will be displayed.
To adjust the setpoint, rotate the Digi-Pot Adjust Knob.
While the knob is rotating, the display will change, but the
instrument will not control to the new setpoint until the
knob stops moving.
The decimal point will move to display maximum resolution.
SET T is saved in non-volatile memory.
RS-232 Command: [SET T]
Chapter 2 - Front Panel Operation
Controlling Temperature with an LM35
ACT T
P
SET T
I
TE I
D
TE V
A
LIM I
B
AUX T
C
Controlling Temperature with an LM35
Default LM35 Configuration
[A1]
A
= 4.000
[A2]
= 4.000
B Slope = 10.00 mV /°C [B1]
[C1]
C Offset = 0.0 mV
LM35
TO-46
(metal can package)
Vs
Vout
TO-92
Bottom
(plastic package)
View
Vs to pin 8
GND
Vout to pin 5
GND to pin 4
Key to accurately measuring and controlling temperature with an LM35 is
properly entering the configuration data. An LM35 produces a voltage
that changes linearly with temperature. To indicate to the LFI-3751 that
the sensor is an LM35, A = (4.000, 4.000). To characterize the linear
response, the LFI-3751 requires a Slope and Offset. For the LM35,
B = Slope and C = Offset. With this information, the LFI-3751 can calculate
temperature from LM35 voltage and properly calculate the setpoint voltage
from the setpoint temperature.
1. Wiring an LM35
Wire the LM35 to the Output Connector on the rear panel. Shielded
cables are available (Wavelength part number CAT-220). Do not exceed
1 meter cable length. Refer to Sensor Error Condition on page 55 if you
can’t clear a Sensor Error.
Bottom View
4
5
1
8
9
240 kΩ
(for either
package)
2. Temperature vs. LM35 Voltage
LM35 Temperature
T=
VLM35 - bLM35
mLM35
The LM35 produces a voltage that changes linearly with temperature in
Celcius. The LFI-3751 requires a Slope and Offset to model this response
mathematically. To indicate you’re using an LM35, A = (4.000, 4.000). To
configure the response, B = Slope and C = Offset.
T = LM35 Temperature (°C)
VLM35 = Voltage across pins 4 & 5
mLM35 = LM35 Slope = 10 mV / °C
Enter A: (4.000, 4.000), B: Slope, and C: Offset through the front panel or
bLM35 = LM35 Offset = 0 mV
[A1], [A2], [B1], and [C1] via the RS-232 interface.
51
2
Chapter 2 - Front Panel Operation
Controlling Temperature with an LM35
decrease
increase
Adjust A
3. Entering Data Pair - A
•
Enter [A1]
•
°C
•
•
•
ACT T
P
SET T
I
TE I
D
TE V
A
LIM I
B
AUX T
Rotate the Display Select Switch to A (Shift Button ON).
The first two data pairs alternate on the display. (4.000, 4.000)
indicates to the LFI-3751 that you’re using an LM35.
Rotate the Digi-Pot Adjust Knob to change the value
displayed.
A, B, and C cannot be adjusted while the output is on.
Data for A, B, and C are saved in non-volatile memory.
RS-232 Command: [A1] = +004.000, [A2] = +004.000
C
Enter [A2]
kΩ
ACT T
P
SET T
I
TE I
D
TE V
A
LIM I
B
AUX T
C
decrease
increase
Adjust B
Enter Slope [B1]
4. Entering Data Point - B
•
•
ACT T
P
SET T
I
TE I
D
TE V
A
LIM I
B
AUX T
C
•
•
•
Rotate the Display Select Switch to B (Shift Button ON)
to display the Slope in mV / °C.
Rotate the Digi-Pot Adjust Knob to change the value.
Default from the factory sets up for a 10 mV / °C slope.
A, B, and C cannot be adjusted while the output is on.
Data for A, B, and C are saved in non-volatile memory.
RS-232 Command: [B1] = Slope
Display Resolution:
Slope 1.00 to 20.00 mV / °C
52
Chapter 2 - Front Panel Operation
Controlling Temperature with an LM35
decrease
increase
Adjust C
Enter Offset [C1]
ACT T
I
TE I
D
TE V
A
LIM I
B
AUX T
C
•
•
•
•
•
P
SET T
5. Entering Data Point - C
Rotate the Display Select Switch to C (Shift Button ON)
to display the Offset in mV. For the LM35, Offset is
0 mV.
Rotate the Digi-Pot Adjust Knob to change the value.
Default from the factory sets up for a 0 mV offset.
A, B, and C cannot be adjusted while the output is on.
Data pairs A, B, and C are saved in non-volatile memory.
RS-232 Command: [C1] = Offset
Display Resolution:
Offset -9.99 to 9.99 mV
6. Displaying Actual LM35 Temperature
Display Actual LM35
Temperature
•
•
Rotate the Display Select Switch to ACT T (Shift Button
OFF) to display the LM35 temperature.
RS-232 Command: [ACT T]
°C
ACT T
P
SET T
I
TE I
D
TE V
A
LIM I
B
AUX T
C
Display Resolution:
-199.9 to -20.0°C
-19.99 to 99.99°C
100.0 to 199.9°C
SHIFT
Display Setpoint Temperature
decrease
increase
7. Adjusting LM35 Temperature Setpoint
•
•
°C
ACT T
P
SET T
I
TE I
D
TE V
A
LIM I
B
AUX T
C
•
•
•
Rotate the Display Select Switch to SET T (Shift Button
OFF). Temperature will be displayed.
To adjust the setpoint, rotate the Digi-Pot Adjust Knob.
While the knob is rotating, the display will change, but the
instrument will not control to the new setpoint until the
knob stops moving.
The decimal point will move to display maximum resolution.
SET T is saved in non-volatile memory.
RS-232 Command: [SET T]
53
2
This page intentionally left blank.
54
Chapter 2 - Front Panel Operation
Sensor Error Condition
Sensor Error Condition
2
Sensor Error Process
SENSOR
ERROR
BEEP
•
The Sensor Error LED flashes red and the unit beeps whenever the
sensor error condition occurs. The output is forced OFF.
•
If you correct the error condition then press the Output Button to clear
the error, the instrument will beep three times to indicate that the error
is cleared. Once the error is cleared, press the Output Button to
re-enable the current.
•
If the error condition has not been corrected, when you press the Output
Button to clear the error, the instrument will sound one long beep. As long
as the error condition has not been corrected, pressing the Output
Button will produce the long beep. If the error condition is corrected,
when you press the Output Button, the unit will beep three times to
indicate the error has been cleared. Press the Output Button again to
turn on the output current.
•
The sensor error condition is triggered by a sensor signal that is either too
high or too low a voltage. The table below indicates where each sensor
will trigger a sensor error.
OUTPUT
ON
PRESS
OUTPUT ON
BUTTON
IS SENSOR
ERROR CONDITION
CORRECTED?
YES
NO
LONG
BEEP
3
BEEPS
PRESS
OUTPUT
BUTTON
IS SENSOR
ERROR CONDITION
CORRECTED?
NO
YES
OUTPUT
ON
Press Output
Button to
re-enable
output current
SENSOR
Thermistor
RTD
AD590
LM335
LM35
Low Sensor
Error Condition
≤ 0.01 V
≤ 0.01 V
≤ 0.01 V
≤ 0.01 V
≤ -4.99 V
High Sensor
Error Condition
≥ 4.99 V
≥ 4.99 V
≥ 4.99 V
≥ 4.99 V
≥ 4.99 V
Sensor Error LED flashes when
sensor is shorted or open. One
long beep sounds if error has not
been corrected after pressing the
Output Button.
55
Chapter 2 - Front Panel Operation
Setting Limit Currents
ACT T
P
SET T
I
TE I
D
TE V
A
LIM I
B
AUX T
C
Setting Limit Currents
To protect the thermoelectric or resistive heater, positive and negative limit
currents can be set below the damage threshold.
Default Limit Currents
Positive LIM I = 1.00 Amp
[LIM I POSITIVE]
Negative LIM I = -1.00 Amp
[LIM I NEGATIVE]
Display Limit Currents
Positive LIM I
•
Rotate the Display Select Switch to LIM I (Shift Button OFF). Current (in
Amps) will be displayed. The positive limit will alternate with the negative
limit. Rotating the Digi-Pot Adjust Knob clockwise makes the Positive
LIM I more positive. Rotating the Digi-Pot Adjust Knob counter-clockwise
makes the Negative LIM I more negative.
•
To operate a Resistive Heater, set the Positive Limit to 0.00 Amps.
•
The limit settings will not be updated until the Digi-Pot stops moving.
•
When the output is current limited, TE I will be within ± 50 mA of the
limit setting.
•
LIM I settings are saved in non-volatile memory.
•
When the setpoint and actual temperature are different, the LFI-3751
drives current to the thermoelectric or resistive heater until the load
approaches the setpoint temperature. Sometimes the output current is
driven up to the limit current settings (indicated by the LIM I LED flashing).
A lower Limit Current will increase the settling time since less power is
delivered to the thermoelectric (or resistive heater).
•
The LIM I LED in the Status Section flashes when the maximum current
(positive or negative) is being sourced to the thermoelectric or resistive
heater.
•
RS-232 Command: [LIM I POSITIVE], [LIM I NEGATIVE]
AMPS
ACT T
P
SET T
I
TE I
D
TE V
A
LIM I
B
AUX T
C
Negative LIM I
AMPS
ACT T
P
SET T
I
TE I
D
TE V
A
LIM I
B
AUX T
C
LIM I LED flashes when
Positive or Negative Limit is
reached
LIMIT I
Display Resolution:
Positive LIM I
Negative LIM I
56
0.00 to +5.00 Amps
-5.00 to 0.00 Amps
Chapter 2 - Front Panel Operation
Setting Temperature Limits
Default Temperature Limits
High Temp Limit = 35.0°C
[T LIM HIGH]
Low Temp Limit
= 10.0°C
[T LIM LOW]
Setting Temperature Limits
If the thermoelectric or resistive heater drives the load temperature
beyond the temperature limits, the output will shut off and the T LIMIT
LED will flash.
•
Press and release the TEMP LIMIT Button. The high and low limits
will alternate on the display three times before reverting to the Display
Select Switch selection.
•
Rotate the Digi-Pot Adjust Knob to change the value displayed.
•
The LFI-3751 uses the lowest number as the Low Temperature LIMIT
and the highest number as the High Temperature LIMIT.
•
The temperature limits will not be updated until the Digi-Pot stops
moving.
•
The T LIMIT LED in the Status Section lights solid red to indicate the
limits are displayed and can be adjusted.
•
The Temperature Limits are disabled when thermistors or RTDs are
configured to display resistance rather than temperature.
•
High Temp Limit and Low Temp Limit settings are saved in non-volatile
memory.
•
If you push and release the TEMP LIMIT Button or rotate the Display
Select Switch while displaying the temperature limits, the display will
revert to the prior Display Select Switch selection.
•
If the T LIMIT LED flashes and the unit beeps, the load temperature
has exceeded one of the limits. The output is forced off. Press the
Output Button to clear the error. If cleared, the unit beeps three times.
Press the Output Button again to re-enable output current. If the error
persists, the unit will sound a long beep. Once the error is corrected, you
can press the Output Button to re-enable output current.
•
RS-232 Command: [T LIM HIGH], [T LIM LOW]
Display Temperature Limits
decrease
STATUS
T LIMIT
TEMP LIMIT
LIMIT I
REMOTE
RS-232
SENSOR
ERROR
increase
HOLD FOR LOCAL
°C
ACT T
P
SET T
I
TE I
D
TE V
A
LIM I
B
AUX T
C
HOLD SHIFT FOR
RS-232 ADDRESS
SHIFT
°C
ACT T
P
SET T
I
TE I
D
TE V
A
LIM I
B
AUX T
C
HOLD SHIFT FOR
RS-232 ADDRESS
SHIFT
REPEATS 3 TIMES
T LIMIT
BEEP
T LIMIT LED flashes when load
temperature exceeds either High
or Low Limit Temperature. One
long beep sounds if error has not
been corrected after pressing the
Output Button.
57
2
Chapter 2 - Front Panel Operation
Manually Setting the P, I, and D Constants
ACT T
P
SET T
I
TE I
D
TE V
A
LIM I
B
AUX T
C
Manually Setting the P, I, and D Constants
Default P, I, & D Constants
P
I
D
= 30
= 1 second
= 0 (OFF)
[P]
[I]
[D]
Selecting optimum PID control parameters tha minimize overshoot and
maximize stability is even easier now when using the LFI-3751 with Autotune
PID. Refer to Autotune PID operation on page 23 for a detailed description of
the Autotune feature. The LFI-3751 can be configured to operate as a P, PI,
PD, or PID temperature controller.
The following sections discuss how to manually adjust the P, I, and D
constants.
•
•
•
decrease
increase
Display Proportional Gain
ACT T
P
SET T
I
TE I
D
TE V
A
LIM I
B
AUX T
C
For most small loads, set the Proportional Gain to 30, the Integral Time
Constant to 1 second, and Differentiator Time Constant to OFF (0).
The P, I, and D settings are saved in non-volatile memory.
When first controlling a load, adjust only the P term while leaving the I
term at 1 second and the D term OFF. If the load will not stabilize for any
P term, then increase the I term to 2 seconds. Again, adjust the P term
to optimize the system. Repeat these steps until the load temperature
stabilizes around the setpoint temperature. Use the D term to reduce
overshoot and to damp the system.
1. Adjusting the P Term
•
•
•
•
•
Rotate the Display Select Switch to P (Shift Button ON).
Rotate the Digi-Pot Adjust Knob to change the displayed value.
The Proportional Gain range is AutS, Autd, and 0 to 100.
RS-232 Command: [P]
Increasing the proportional gain will improve overall temperature stability.
Since most thermal systems are “gain limited”, too high a proportional
gain can cause thermal cycling or instability in the instrument’s control
loop. If you notice the temperature of your load cycling around the setpoint
temperature, then reduce the proportional gain.
Proportional Gain Range
Auto Setpoint
AutS
Auto Disturbance Autd
OFF
0.0
ON
0.1 to 100
58
Chapter 2 - Front Panel Operation
Setting the P, I, and D Constants
2. Adjusting the I Term
Display Integral
Time Constant
ACT T
P
SET T
I
TE I
D
TE V
A
LIM I
B
AUX T
C
•
•
•
•
Rotate the Display Select Switch to I (Shift Button ON).
Rotate the Digi-Pot Adjust Knob to change the displayed value.
RS-232 Command: [I]
Increasing the integrator time constant will improve the instrument’s
control loop stability (especially with large thermal loads). Increasing
the integrator too much produces a sluggish response and long settling
times. If you notice the temperature of your load slowly approaching the
setpoint temperature, then reduce the integrator time constant. Reducing
the integrator too much can cause thermal cycling.
Integral Time Constant Range
OFF
ON
Display Differentiator
Time Constant
ACT T
P
SET T
I
TE I
D
TE V
A
LIM I
B
AUX T
C
0.0
0.4 to 10 seconds
3. Adjusting the D Term
•
•
•
•
Rotate the Display Select Switch to D (Shift Button ON).
Rotate the Digi-Pot Adjust Knob to change the displayed value.
RS-232 Command: [D]
Increasing the differentiator time constant also improves the instrument’s
control loop stability. The differentiator term is typically only useful or
necessary for large, hard to control thermal loads. The differentiator
term can amplify electrical noise from the sensor. If you notice the
temperature of your load quickly cycling then reduce the differentiator
time constant.
Differentiator Time Constant Range
OFF
0.0
ON
1 to 100 seconds
59
2
Chapter 2 - Front Panel Operation
Setting Operating Temperature or Resistance
ACT T
P
SET T
I
TE I
D
TE V
A
LIM I
B
AUX T
C
Setting Operating Temperature or Resistance
Default Setpoints
SET T = 25°C
SET R = 10 kΩ
[SET T]
[SET R]
•
Rotate the Display Select Switch to SET T (Shift Button
OFF). Temperature (or resistance) will be displayed.
•
To adjust the setpoint, rotate the Digi-Pot Adjust Knob.
While the knob is rotating, the display will change, but the
instrument will not control to the new setpoint until the knob
stops moving.
•
The decimal point will move to display maximum resolution.
•
SET T or SET R is saved in non-volatile memory.
•
RS-232 Command: [SET T], [SET R]
Display Setpoint
Temperature or Resistance
decrease
increase
°C
kΩ
ACT T
60
P
SET T
I
TE I
D
TE V
A
LIM I
B
AUX T
C
temperature (°C)
or resistance (kΩ)
displayed
Display Resolution:
Temperature -199.9
All Sensors
-19.99
100.0
Resistance
0
Thermistor &
10.00
RTD
(in Resistance Mode)
100.0
to
to
to
to
to
to
-20.0°C
99.99°C
199.9°C
9.999 kΩ
99.99 kΩ
499.9 kΩ
Chapter 2 - Front Panel Operation
Enabling Output Current
Enabling Output Current
Thermoelectric
2
9
•
Wire the thermoelectric or resistive heater to the Output Connector
on the rear panel with at least 20 gauge wire. Shielded cables
are available (Wavelength part number CAT-220). Do not exceed
1 meter cable length.
•
Select your sensor and refer to the appropriate section on Controlling
Temperature with that sensor.
Resistive
Heater
1
2
9
2. Adjusting Current and Temperature Limits
•
OUTPUT
2
1. Wiring the Output Connector
1
Do not enable current until all the Current Limits, Temperature Limits, and
Setpoint are adjusted for your application. See page 56 for Current Limits,
57 for Temperature Limits, and 60 for Setpoint.
3. Enabling Output Current
ON
•
•
•
Press the Output Button to enable current flow through the thermoelectric
(or resistive heater). The Output LED will light solid green.
Expect the actual temperature to change in the direction of the setpoint
and then stabilize.
RS-232 Command: [RUN / STOP]
4. Disabling Output Current
•
•
Press the Output Button to disable current flow through the thermoelectric
(or resistive heater). The Output LED turns OFF.
RS-232 Command: [RUN / STOP]
5. Clearing Error Conditions
•
If the Temperature Limits are exceeded or a Sensor Error occurs, the
T LIMIT LED or SENSOR LED will flash red and the output will turn off.
Once the error condition is corrected, press the Output Button to clear
the error. If successfully cleared, you will hear three beeps. Press the
Output Button again to re-enable the output current. If the error condition
was not corrected, you’ll hear one long beep. Pressing the Output Button
then will produce the long beep until you clear the error. Once the error is
cleared, pressing the Output Button will enable current.
61
Chapter 2 - Front Panel Operation
Measuring Thermoelectric Current and Voltage
Measuring Thermoelectric Current and Voltage
Measuring Thermoelectric Current
Display
Thermoelectric Current
AMPS
ACT T
P
SET T
I
TE I
D
TE V
A
LIM I
B
AUX T
C
•
Rotate the Display Select Switch to TE I (Shift Button OFF).
•
Current (in Amps) will be displayed with 10 mA resolution.
•
The output current is limited by the positive and negative limit currents
to -5.00 to +5.00 Amps.
•
When the output is disabled, TE I will display a small current of up to
±0.08 Amps. This small current is being supplied to the output. Do not
remove the output connector until AC power to the unit is removed.
•
RS-232 Command: [TE I]
Measuring Thermoelectric Voltage
Display
Thermoelectric Voltage
VOLTS
62
ACT T
P
SET T
I
TE I
D
TE V
A
LIM I
B
AUX T
C
•
Rotate the Display Select Switch to TE V (Shift Button OFF).
•
Voltage (in Volts) will be displayed with 0.1 V resolution.
•
The measured voltage across pins 1 & 2 can range from -15.00 to
+15.00 V.
•
The measurement display assumes using the Wavelength cable (part
number CAT-220) which uses one meter of 20 AWG wire.
•
With a load, up to ±0.2 V will be displayed when the output is disabled.
Without a load, approximately ±11 V will be displayed.
•
RS-232 Command: [TE V]
Chapter 2 - Front Panel Operation
Measuring Auxiliary Thermistor Temperature
Measuring Auxiliary Thermistor Temperature
This sensor input is available to monitor the temperature of an auxiliary zone
(e.g. heatsink or ambient). It is calibrated to the TCS-610 10 kΩ thermistor
and uses a 100 µA bias current. The temperature range of this sensor is
-8°C to +150°C. Only temperature can be displayed.
10 k Ω Thermistor
(Wavelength
part number TCS-610
Auxiliary Sensor)
1. Wiring the Output Connector
Wire the thermistor to the output connector on the rear panel.
4
3
1
9
2. Displaying Auxiliary Temperature
Display Auxiliary Temperature
°C
ACT T
P
SET T
I
TE I
D
TE V
A
LIM I
B
AUX T
C
•
Rotate the Display Select Switch to AUX T (Shift Button OFF) to
display the auxiliary sensor temperature.
•
The decimal point position changes automatically to display maximum
resolution.
•
If not installed, four dashes will be displayed “----”.
•
RS-232 Command: [AUX T]
Display Resolution:
-199.9 to -20.0°C
-19.99 to 99.99°C
100.0 to 199.9°C
63
2
Chapter 2 - Front Panel Operation
Measuring Auxiliary Thermistor Temperature
TCS-610 Temperature vs. Resistance Chart
Temperature,
°C
-8
-7
-6
-5
-4
-3
-2
-1
0
1
2
3
4
5
6
7
8
9
10
11
12
13
14
15
16
17
18
19
20
21
22
23
24
25
26
27
28
29
30
31
64
Resistance,
kΩ
49.67
47.08
44.64
42.34
40.17
38.12
36.20
34.38
32.66
31.04
29.51
28.06
26.69
25.40
24.18
23.02
21.92
20.89
19.90
18.97
18.09
17.26
16.47
15.71
15.00
14.32
13.68
13.07
12.49
11.94
11.42
10.92
10.45
10.00
9.572
9.165
8.777
8.408
8.056
7.721
Temperature,
°C
32
33
34
35
36
37
38
39
40
41
42
43
44
45
46
47
48
49
50
51
52
53
54
55
56
57
58
59
60
61
62
63
64
65
66
67
68
69
70
71
Resistance,
kΩ
7.402
7.098
6.808
6.531
6.267
6.015
5.774
5.545
5.326
5.116
4.916
4.725
4.543
4.368
4.201
4.041
3.888
3.742
3.602
3.468
3.340
3.217
3.099
2.987
2.878
2.775
2.675
2.580
2.489
2.401
2.317
2.236
2.158
2.084
2.012
1.944
1.878
1.814
1.753
1.695
Chapter 2 - Front Panel Operation
Measuring Auxiliary Thermistor Temperature
Temperature,
°C
72
73
74
75
76
77
78
79
80
81
82
83
84
85
86
87
88
89
90
91
92
93
94
95
96
97
98
99
100
101
102
103
104
105
106
107
108
109
110
111
Resistance,
kΩ
1.638
1.584
1.532
1.482
1.433
1.387
1.342
1.299
1.258
1.218
1.179
1.142
1.106
1.072
1.039
1.007
0.9759
0.9461
0.9174
0.8897
0.8630
0.8372
0.8123
0.7882
0.7650
0.7426
0.7209
0.7000
0.6798
0.6602
0.6413
0.6231
0.6054
0.5884
0.5719
0.5559
0.5404
0.5255
0.5110
0.4970
Temperature,
°C
112
113
114
115
116
117
118
119
120
121
122
123
124
125
126
127
128
129
130
131
132
133
134
135
136
137
138
139
140
141
142
143
144
145
146
147
148
149
150
Resistance,
kΩ
0.4835
0.4704
0.4577
0.4454
0.4335
0.4219
0.4108
0.3999
0.3894
0.3793
0.3694
0.3598
0.3506
0.3416
0.3329
0.3244
0.3162
0.3083
0.3005
0.2930
0.2858
0.2787
0.2718
0.2652
0.2587
0.2524
0.2464
0.2404
0.2347
0.2291
0.2236
0.2184
0.2132
0.2082
0.2034
0.1987
0.1941
0.1896
0.1853
2
65
Chapter 2 - Front Panel Operation
Setting the RS-232 Address
Setting the RS-232 Address
Default Address
RS-232 address: 01
Display RS-232 Address
decrease
STATUS
TEMP LIMIT
T LIMIT
LIMIT I
REMOTE
RS-232
SENSOR
ERROR
increase
HOLD FOR LOCAL
ACT T
P
SET T
I
TE I
D
TE V
A
LIM I
B
AUX T
C
Hold in for
3 seconds
Release the SHIFT Button to
save the displayed
RS-232 address.
66
•
Press and hold the Shift Button. After three seconds, the RS-232
address will be displayed.
•
The REMOTE RS-232 LED will light solid to indicate the address is
displayed and can be adjusted.
•
Continue to hold the Shift Button and rotate the Digi-Pot Adjust Knob
to change the value from 1 to 99.
•
Release the Shift Button to save the displayed RS-232 address.
•
The RS-232 address can only be changed via the front panel.
Chapter 2 - Front Panel Operation
Operating with Resistive Heaters
Operating with Resistive Heaters
Resistive
Heater
1
2
9
Resistive Heater operation is similar to operation with thermoelectrics except
only heating current is delivered to a resistive heater.
•
The LFI-3751 can be configured to deliver only heating current by
adjusting the Positive Current Limit to 0.00 Amps.
•
Since the LFI-3751 has a limited output voltage of 8 Volts at 5 Amps,
select a low value resistive heater to use the maximum power from
the LFI-3751.
67
2
This page intentionally left blank.
68
3
3
Chapter 3: Rear Panel Operation
69
Chapter 3 - Rear Panel Operation
Rear Panel Operation
This chapter details the sections of the rear panel and
provides pinouts for all connectors.
70
Chapter 3 - Rear Panel Operation
Connector Pinouts
Connector Pinouts
1. Output Connector (9 pin male D-sub plug)
Output Connector
9 pin male D-sub plug
1
•
The thermoelectric or resistive heater is wired between pins 1 & 2.
Regardless of your sensor type, always attach the positive lead of
the thermoelectric to pin 1.
•
The Auxiliary sensor (10 kΩ thermistor, Wavelength part number
TCS-610) connects between pins 3 & 4.
•
A thermally fused fan output is available to drive a 100 mA fan. Wire
the fan between pins 8 & 7.
•
Pin 8 is also used to connect an LM35.
•
For thermistors, RTDs, or the LM335, connect the sensor between pins
5 & 4. For an AD590, connect the positive terminal to pin 6 and the
negative to pin 5. For an LM35, an external 240 kΩ resistor is required.
See Chapter 2 for individual sections that detail the sensor usage.
5
9
6
TEC +
TEC Aux Sensor +
*Sensor Main Sensor +
AD590 Voltage
*Fan *Fan+ (+12 V)
*-12 V
1
2
3
4
5
6
7
8
9
* Thermally Fused to 100 mA
Example Thermistor Wiring
Example RTD Wiring
Example AD590 Wiring
2 wire RTD
Bottom
View
Thermistor
4
4
5
9
9
-
+
5
1
1
AD590
TO-52
package
case
5
1
3 wire RTD
6
Kelvin
Lead
LM335
Bottom View
TO-46
(metal can package)
+
Bottom
View
+
-
to pin 5
to pin 4
1
9
AD592
TO-92
package
5
1
6
TO-92
(plastic package)
4
Bottom
View
- +
Example LM335 Wiring
9
4 5
9
5
1
9
71
3
Chapter 3 - Rear Panel Operation
Connector Pinouts
Example LM35 Wiring
LM35
TO-46
(metal can package)
Vs
Vout
TO-92
Bottom
(plastic package)
View
Vs to pin 8
GND
Vout to pin 5
GND to pin 4
Bottom View
4
5
1
8
9
240 kΩ
(for either
package)
RS-232 Output
(25 pin male D-sub plug)
1
25
2
3
7
Peripheral Transmit
Peripheral Receive
Signal Ground
2. RS-232 Connectors
These connectors meet the RS-232C standard for wiring. See Chapter 4 for
detailed RS-232 commands. Some computers may require a null modem
for proper operation. Check your computer’s RS-232 port for proper wiring
before connecting to the instrument.
RS-232 Output
The RS-232 output connects to another Wavelength Electronics
instrument with addressable RS-232 interface. The RS-232 OUTPUT
always connects to the other instrument’s RS-232 INPUT connector.
Up to 99 instruments can be daisy chained together and controlled from
one RS-232 port on a computer.
RS-232 Input
(25 pin female D-sub receptacle)
1
25
2 Instrument Receive (In)
3 Instrument Transmit (Out)
7 Signal Ground
5, 6, 8, & 20 shorted
RS-232 Input
The RS-232 input can be connected to any RS-232 port on a computer.
The proper configuration of the computer’s RS-232 port is 8, N, 1
(8 bits, no parity, 1 stop bit).
3. Controlling Multiple Instruments via RS-232
DB-9
To Host
Computer
!
!
!
!
RS-232 Connector
from host computer
72
Unit 1
Unit 2
115V
115V
115V
115V
or DB-25
Unit 3
Unit 99
Chapter 3 - Rear Panel Operation
BNC Connector
BNC Connector [Used with Analog Version only]
Analog Input BNC
Analog Input BNC
Input a 0 to ±10 V analog signal to adjust the setpoint remotely. The sum
of the front panel SET T setting and analog input determine the control
temperature. If not using the analog input, install the 50 Ω BNC terminator
provided with the unit to minimize electrical noise and protect against
electro-static discharge. The transfer functions change according to the
sensor type and bias current.
Analog Input Transfer Functions
Thermistors & RTDs (10 µA or 100 µA)
10 kΩ / V
Thermistors & RTDs (1 mA or 10 mA)
100 Ω / V
LM335/35, AD590, Thermocouples
10°C / V
•
Example: With a thermistor biased with 100 µA, if SET R is 12 kΩ, if you
input +0.2 V at the Analog Input BNC, the setpoint becomes:
12 kΩ + (0.2 V) (10 kΩ / V) = 14 kΩ
•
RS-232 Command: [MOD Gain Configuration]
73
3
Chapter 3 - Rear Panel Operation
AC Power
AC Power
1. AC Power Entry Module
The AC Power Entry Module on the rear panel is designed to accept input
voltages from 98 to 133 and 196 to 265 VAC. Ensure that the power source
you plug the temperature controller into is properly grounded.
115V
LINE:
115/230 VAC, 50/60 Hz, 160 VA
SELECT:
2. AC Voltage Select Switch
The Voltage Select Switch configures the instrument for 115 or 230 VAC
operation. Before connecting power to your instrument, check the Voltage
Select Switch for proper AC voltage in your country. Only use the power
cord supplied with your instrument.
Do not change the setting of this switch while power is supplied to the
instrument. See the table below for the proper AC Voltage selection.
AC Voltage Available
98 -133 VAC
196 -265 VAC
Voltage Select
115 V
230 V
FUSE (250V):
2000 maT @ 115V
1000 maT @ 230V
(5x20mm SLO BLO)
3. AC Fuse
For 115 VAC operation, install a 2000 maT fuse 5 x 20 mm SLO BLO fuse.
For 230 VAC operation, install a 1000 maT fuse 5 x 20 mm SLO BLO fuse.
4. Earth Ground Connection
If your AC power system does not bring earth ground through the AC
Power Entry Module, then connect earth ground via a 16 AWG wire to
this screw terminal.
74
4
3
4
Chapter 4: Remote Interface Reference
75
Chapter 4 - Remote Interface Reference
Remote Interface Reference
This chapter details the RS-232 hardware, command and
response packet structure, and how to use each command.
Command codes and error codes are also listed.
All example command strings assume the instrument’s
RS-232 address is 01.
76
Chapter 4 - Remote Interface Reference
RS-232 Interface Configuration
RS-232 Interface Configuration
You connect an LFI-3751 to the RS-232 interface using the 25-pin D-sub
serial connector (DB-25) on the rear panel (RS-232 Input Connector).
You can add up to 98 more LFI-3751s by connecting the RS-232 Output
Connector on the rear panel of the first unit to the RS-232 Input Connector
on the rear panel of the second and so on (daisy chain configuration). The
temperature controller is not configured as a DTE (Data Terminal Equipment)
device. If your serial port is configured as a DTE device, you do not need a
null modem to communicate with the LFI-3751. The LFI-3751 uses software
XON/XOFF flow control.
4
1. RS-232 Configuration Overview
•
Communication conforms to the RS-232C interface specifications.
•
Up to 99 temperature controllers can be connected to each RS-232
port on the host computer.
•
Cable length should not exceed 15 meters between computer and
LFI-3751 or between two LFI-3751s.
•
Use shielded, twisted pair cables (AWG 28 minimum).
•
The communications specifications of the LFI-3751 are fixed. Set the
host computer to match the specifications listed below.
RS-232
Communication
Settings
Parameter
Setting
Baud Rate
19.2 kbps
Bit Length
8 Bit
Parity
No Parity
Stop Bit
1 Stop Bit
77
Chapter 4 - Remote Interface Reference
RS-232 Interface Configuration
1. Connections to a Computer
•
Pins 5, 6, 8, and 20 on the LFI-3751 RS-232 Input Connector are shorted
at the connector to ensure that the computer serial port is properly
configured to transmit and receive data. Pin 4 on the 9 pin D-Sub male
plug (Data Terminal Ready Out) provides the appropriate handshaking to
the computer’s Data Carrier Detect In (pin 1), Data Set Ready In (pin 6),
and Clear to Send In (pin 8).
•
Pins 5, 6, 8, and 20 on the LFI-3751 RS-232 Input Connector do not
connect to any internal circuitry.
DB-9 Serial Connection
DB-9 to DB-25 RS-232
Wavelength Cable
CRS-801 (6 feet)
Host Computer
RS-232C Connector
Data Carrier Detect (In)
Receive Data (In)
Transmit Data (Out)
Data Terminal Ready (Out)
Signal Ground
Data Set Ready (In)
Request to Send (Out)
Clear to Send (In)
Ring Indicator (In)
D-Sub SHELL *
DB-9
Male
1
2
3
4
5
6
7
8
9
SH
DB-9
Female
* D-Sub Shell on LFI-3751 is connected to chassis.
LFI-3751 (First Unit)
RS-232 Input Connector
1
2
3
4
5
6
7
8
20
SH
DB-25
Male
Instrument Receive (In)
Instrument Transmit (Out)
Signal Ground
D-Sub SHELL *
DB-25
Female
Always properly earth ground the LFI-3751
chassis through your AC power system.
DB-25 Serial Connection
Host Computer
RS-232C Connector
Protective Ground
Transmit Data (Out)
Receive Data (In)
Request to Send (Out)
Clear to Send (In)
Data Set Ready (In)
Signal Ground
Data Carrier Detect (In)
Data Terminal Ready (Out)
D-Sub SHELL *
DB-25
Male
DB-25 to DB-25 RS-232
Wavelength Cable
CRS-803 (6 feet)
1
2
3
4
5
6
7
8
20
SH
DB-25
Female
* D-Sub Shell on LFI-3751 is connected to chassis.
chassis through your AC power system.
78
1
2
3
4
5
6
7
8
20
SH
DB-25
Male
LFI-3751 (First Unit)
RS-232 Input Connector
Instrument Receive (In)
Instrument Transmit (Out)
Signal Ground
D-Sub SHELL *
DB-25
Female
Always properly earth ground the LFI-3751
Chapter 4 - Remote Interface Reference
RS-232 Interface Configuration
2. Connections between instruments
LFI-3751 (First Unit)
RS-232 Output
Connector
Peripheral Transmit (Out)
Peripheral Receive (In)
Signal Ground
D-Sub SHELL *
DB-25
Male
DB-25 to DB-25 RS-232
Wavelength Cable
CRS-802 (2 feet)
1
2
3
4
5
6
7
8
20
SH
LFI-3751 (Second Unit)
RS-232 Input Connector
1
2
3
4
5
6
7
8
20
SH
DB-25
Female
DB-25
Male
* D-Sub Shell on LFI-3751 is connected to chassis.
Instrument Receive (In)
Instrument Transmit (Out)
Signal Ground
D-Sub SHELL *
DB-25
Female
Always properly earth ground the LFI-3751
chassis through your AC power system.
3. Controlling Multiple Instruments via RS-232
DB-9
To Host
Computer
!
!
!
!
115V
115V
115V
115V
or DB-25
4. RS-232 Connector Pinouts
RS-232 Input
(25 pin female D-sub receptacle)
1
25
2 Instrument Receive (In)
3 Instrument Transmit (Out)
7 Signal Ground
5, 6, 8, & 20 shorted
RS-232 Output
(25 pin male D-sub plug)
1
25
2 Peripheral Transmit (Out)
3 Peripheral Receive (In)
7 Signal Ground
79
4
Chapter 4 - Remote Interface Reference
RS-232 Command and Response Packet Formats
RS-232 Command and Response Packet Formats
80
•
The host computer sends a Command Packet to the instrument and the
temperature controller returns a Reponse Packet to the host computer. A
Response Packet always returns after each Command Packet is sent. The
[HALT PROCESSOR] command is the only exception. The processor is
immediately halted and does not return a Reponse Packet.
•
All characters in the Command and Response Packets are ASCII. The
character fields are decimal [‘0’ to ‘9’] except for the Frame Check Sum
(FCS) which is represented in HEX [‘0’ to ‘9’ or ‘A’ to ‘F’].
•
The characters within the packets follow a rigid structure. The instrument’s
parser expects 17 characters in a Command Packet. Extra Command
Packet characters will be ignored until a new start character is received.
A Response Packet always contains 21 characters.
•
READ commands (Command Type 1) do not use the data field. The data
field must still contain a number between -999.999 and +999.999.
•
There are no restrictions on how fast the host computer sends characters
to the instrument. The packets can be sent at one character per second
or using the full 19200 baud capacity. If the host computer can’t buffer the
instrument’s Response Packets at full speed, configure the host computer’s
RS-232 port for XON/XOFF flow control.
•
When a value is written to the instrument in a Command Packet, the
corresponding Response Packet will return the instrument’s interpretation
of the value. For example, if the data field for the [SET T] Command
Packet is +120.263, then the Response Packet will return +120.300
in its data field.
•
The instrument’s measurements are updated about every 600 milliseconds
with an additional delay of about 750 milliseconds every ten minutes
when the unit automatically zeros the instrument’s measurement
A/D. The 19.2 k BAUD rate allows Measurement Reads about every
19.8 milliseconds.
The instrument returns the most recent value
immediately so as not to tie up the interface in a multi-packet, multiinstrument environment. If a new measurement is required for each
Command Packet, program in a 800 millisecond delay between Command
Packets.
•
No Response Packet is returned from any unit unless it at least receives a
valid Start Character, a matching Unit Type and Unit Number.
Chapter 4 - Remote Interface Reference
RS-232 Command and Response Packet Formats
Command Packet
Command
Start
Unit
Type
!
1
Command
Type
Unit #
X
X
Command
Code
X
X
X
FCS
Data
± X X X . X X X
X
X
7 6 5 4 3 2 1 0
Data Field Characters
Response Packet
Response Unit
Start
Type
@
1
Unit #
X
Command
Type
X
X
Command
Code
X
End
Code
X
X
FCS
Data
X
± X X X . X X X
X
X
CR LF
7 6 5 4 3 2 1 0
Data Field Characters
Command Start
Response Start
Unit Type
!
@
1-2
01 - 99
1-2
00 - 99
00 - 99
Response indicating action success or
failure. See “End Code Listing” for detail.
[Decimal]
Data
Specifies the type of command to initiate.
See “Command Code Listing” for detail.
[Decimal]
End Code
1 = Read data
2 = Write data
[Decimal]
Command Code
RS-232 address of the unit as set on the
front panel of the unit (00 is reserved)
[Decimal]
Command Type
Signifies the start of a Response Packet.
1 = Temperature Controller
2 = Laser Diode Driver
[Decimal]
Unit #
4
Signifies the start of a Command Packet.
±XXX.XXX
Data must match this format exactly. A
sign character is followed by three digits,
[Decimal]
a decimal point, and three digits. Data
is decimal and between -999.999 and
+999.999.
FCS
00 - FF
Number used to check the data received
[HEX]
and sent. See “Calculating FCS” for detail.
CR LF
Carriage Return and Line Feed included
in Response Packet.
81
Chapter 4 - Remote Interface Reference
Standard Command Code Listing
Standard Command Code Listing
Command
Type
Command
Code
ACT T
1
01
Actual Temperature Measurement
ACT R
1
02
Actual Sensor Resistance Measurement
SET T
1 or 2
03
Temperature Setpoint: -199.900 to +199.900°C
SET R
1 or 2
04
Resistance Setpoint: +000.000 to +499.900 kΩ
TE I
1
05
Thermoelectric Current Measurement
TE V
1
06
Thermoelectric Voltage Measurement
Command
Description and Data Field Range
1
1
1
LIM I POSITIVE
1 or 2
07
Positive Current Limit: +000.000 to +005.000 Amps
LIM I NEGATIVE
1 or 2
08
Negative Current Limit: -005.000 to +000.000 Amps
AUX T
1
09
Auxiliary Sensor Temperature Measurement
P
1 or 2
10
Proportional Gain:
-002.000 Setpoint Response Autotune
-001.000 Disturbance Rejection Autotune
+000.000 to +100.000 Amps / Volt
1
I
1 or 2
11
Integral Time Constant: +000.000 = OFF or +000.400 to +010.000 sec
D
1 or 2
12
Differentiator Time Constant: +000.000 = OFF or +001.000 to +100.000 sec
A1
1 or 2
21
Sensor Configuration Term: -199.900 to +199.900°C
A2
1 or 2
22
Sensor Configuration Term: +000.000 to +499.900 kΩ
B1
1 or 2
23
Sensor Configuration Term: Range is a function of sensor. See below.
B2
1 or 2
24
Sensor Configuration Term: Range is a function of sensor. See below.
C1
1 or 2
25
Sensor Configuration Term: Range is a function of sensor. See below.
C2
1 or 2
26
Sensor Configuration Term: Range is a function of sensor. See below.
T LIM HIGH
1 or 2
31
High Temperature Limit: -199.900 to +199.900°C
T LIM LOW
1 or 2
32
Low Temperature Limit: -199.900 to +199.900°C
These measurement values return full floating point precision.
Sensor Type
Thermistor
RTD
AD590
LM335
82
Range of [B1]
Range of [B2]
Range of [C1]
Range of [C2]
-199.900 to +199.900°C
+000.000 to +499.900 kΩ
-199.900 to +199.900°C
+000.000 to +499.900 kΩ
-199.900 to +199.900°C
+000.000 to +499.900 kΩ
-199.900 to +199.900°C
+000.000 to +499.900 kΩ
+000.100 to +009.999 µA / K
-
-009.990 to +009.990 µA
-
+001.000 to +020.000 mV / K
-
-009.990 to +009.990 mV
-
Chapter 4 - Remote Interface Reference
Standard Command Code Listing
Command
Command
Type
Command
Code
Alarm Status
Description and Data Field Range
Char 7 = Sign Char [+ always]
Char 6 = Sensor Open Error [0 = OK, 1 = Error]
Char 5 = Sensor Short Error [0 = OK, 1 = Error]
1
35
Char 4 = Low Temperature Limit [0 = OK, 1 = Error]
Char 3 = Decimal Point
Char 2 = High Temperature Limit [0 = OK, 1 = Error]
Char 1 = Current Limit [0 = OK, 1 = Error]
Char 0 = Output Status [0 = Output Off, 1 = Output On]
Char 7 = Sign Char [+ = manual, - = automatic]
Sensor Bias
Configuration
To Set Sensor Bias,
enter ‘+’ in Char 7 with
settings in Char 6 - 0.
To Return to Auto
Sensor Bias Current,
enter ‘-’ in Char 7 or
turn off power.
Char 6 = NTC / PTC Sensor [0 = NTC, 1 = PTC]
Char 5 = AD590 [0 = OFF, 1 = use 10 kΩ resistor for feedback]
1 or 2
41
Char 3 = Decimal Point
Char 2 = 1 mA [0 = OFF, 1 = use 1 mA bias current]
Char 1 = 100 µA [0 = OFF, 1 = use 100 µA bias current]
Char 0 = 10 µA [0 = OFF, 1 = use 10 µA bias current]
Char 7 = Sign Char [+ = manual, - = automatic]
MOD Gain
Configuration
To Set Analog Input
Gain (BNC on rear
panel), enter ‘+’ in
Char 7 with settings in
Char 2 - 0.
To Return to Auto
Analog Input Gain,
enter ‘-’ in Char 7 or
turn off power.
RUN/STOP
4
Char 4 = 10 mA [0 = OFF, 1 = use 10 mA bias current]
Char 6 = Not Used
Char 5 = Not Used
1 or 2
42
Char 4 = Not Used
Char 3 = Decimal Point
Char 2 = Mod Gain 3 (100 : 1) [0 = OFF, 1 = ON]
Char 1 = Mod Gain 2 (10 : 1) [0 = OFF, 1 = ON]
Char 0 = Mod Gain 1 (1 : 1) [0 = OFF, 1 = ON]
1 or 2
51
To Enable Output or Initiate Autotune: Write data is +XXX.XX1
To Disable Output or Abort Autotune: Write data is +XXX.XX0
Char 5 = Autotune Error Codes
1 = Zero Value Current Limit Error
2 = Current Limit Cannot reach SET T
3 = Non-uniform TE I step measured
4 = Rate Sign Change
Char 4 = Autotune Status [0 = Normal, 1 = Autotune]
Char 3 = Decimal Point
Char 2 = Temp Limit or Error Limit Status [1 = requires clearing]
Char 1 = Integrator Status [0 = OFF, 1 = ON]
Char 0 = Output Status [0 = OFF, 1 = ON]
83
Chapter 4 - Remote Interface Reference
Standard Command Code Listing
Command
HALT
Command
Type
Command
Code
Description and Data Field Range
2
52
Turns all lamps off, disables interrupts, and shuts off all timers,
clocks, and watchdog then freezes the CPU. Remove power
PROCESSOR
to reset unit.
LOCAL
PASSWORD 2
2
53
Restore to local operation. Returns Response Packet as last act.
1 or 2
54
Factory set password to access calibration and diagnostics mode.
Read the current state of password flag in Char 0
0 = PASSWORD not issued; 1 = PASSWORD properly issued
SERIAL
2
1 or 2
55
FIRMWARE
Enter or read unit serial number - PASSWORD required to enter
serial number
NUMBER
1
56
Read firmware version.
1
57
Read Model Number.
VERSION
MODEL NO. 2
2 These Command and Response Packets violate the ±XXX.XXX data format. The data field is used for eight ASCII
characters: ‘XXXXXXXX’. No other commands violate the standard data format.
84
Chapter 4 - Remote Interface Reference
Calibration Command Code Listing
Calibration Command Code Listing
•
Command
All WRITE Command Packets are PASSWORD protected.
Command
Type
Command
Code
Description & Data Field Range
10 µA BIAS CAL
1 or 2
61
Enter actual 10 µA sensor bias current in µA
100 µA BIAS CAL
1 or 2
62
Enter actual 100 µA sensor bias current µA
1 mA BIAS CAL
1 or 2
63
Enter actual 1 mA sensor bias current in mA
10 mA BIAS CAL
1 or 2
64
Enter actual 10 mA sensor bias current in mA
AD590 10 kΩ CAL
1 or 2
65
Enter actual 10 kΩ resistance for sensing AD590 current in kΩ
RAW ACT T VOLT
1
71
Measure uncalibrated ACT T voltage in Volts
RAW TE I VOLT
1
72
Measure uncalibrated TE I voltage in Volts
RAW TE V VOLT
1
73
Measure uncalibrated TE V voltage in Volts
ACT T SLOPE CAL
1 or 2
74
Calibrate ACT T slope
ACT T OFFSET CAL
1 or 2
75
Calibrate ACT T offset
TE I SLOPE CAL
1 or 2
76
Calibrate TE I slope
TE I OFFSET CAL
1 or 2
77
Calibrate TE I offset
TE V SLOPE CAL
1 or 2
78
Calibrate TE V slope
TE V OFFSET CAL
1 or 2
79
Calibrate TE V offset
POS SET T SLOPE CAL
1 or 2
80
Calibrate positive SET T slope
POS SET T OFFSET CAL
1 or 2
81
Calibrate positive SET T offset
NEG SET T SLOPE CAL
1 or 2
82
Calibrate negative SET T slope
NET SET T OFFSET CAL
1 or 2
83
Calibrate negative SET T offset
TE POS LIM I SLOPE CAL
1 or 2
84
Calibrate LIM I POSITIVE slope
TE POS LIM I OFFSET CAL
1 or 2
85
Calibrate LIM I POSITIVE offset
TE NEG LIM I SLOPE CAL
1 or 2
86
Calibrate LIM I NEGATIVE slope
TE NEG LIM I OFFSET CAL
1 or 2
87
Calibrate LIM I NEGATIVE offset
RESTORE FACTORY
2
88
Resets the calibration constants to factory defaults
4
CALIBRATION
DEFAULTS
85
Chapter 4 - Remote Interface Reference
Diagnostic Command Code Listing
Diagnostic Command Code Listing
Command
LAMP CONTROL
Command
Type
Command
Code
2
91
Description and Data Field Range
Turns Front Panel Lamps on and off.
Char 7: Sign Char [+ = manual, - = automatic]
Char 6: Sequence Lamps [0 = OFF, 1 = Lamp ON]
To check the lamps,
enter ‘+’ in Char 7 with
settings in Char 6 - 0.
To return to Normal
Operation, enter ‘-’ in
Char 7 or turn off
power.
Char 5: All Lamps ON [0 = OFF, 1 = Lamp ON]
Char 4: 7 Segment Displays [0 = OFF, 1 = Lamp ON]
Char 3: Decimal Point
Char 2: Unit of Measure & Shift LEDs [0 = OFF, 1 = Lamp ON]
Char 1: Status LEDs [0 = OFF, 1 = Lamp ON]
Char 0: Output ON LED [0 = OFF, 1 = Lamp ON]
PUSHBUTTON
1
92
SWITCH STATUS
OUTPUT, SHIFT, & TEMP LIMIT Pushbutton Status
Char 7 = Sign Char (Not Used); Returns ‘+’
Char 6, 5, 4 = (Not Used); Returns ‘000’
Char 3 = Decimal Point
Char 2 = Temp Limit Pushbutton [0 = OFF, 1 = ON]
Char 1 = Shift Pushbutton [0 = OFF, 1 = ON]
Char 0 = Output Pushbutton [0 = OFF, 1 = ON]
ROTARY
1
93
SWITCH STATUS
Rotary Switch Status
A ‘1’ indicates position of rotary switch
Char 7 = Sign Char (Not Used); Returns ‘+’
Char 6 = AUX T / C
Char 5 = LIM I / B
Char 4 = TE V / A
Char 3 = Decimal Point
Char 2 = TE I / D
Char 1 = SET T / I
Char 0 = ACT T / P
DIGIPOT STATUS
1
94
Read Digi-Pot counter
Char 7 = Sign Char: ‘+’ = clockwise, ‘-’ = counterclockwise
When DIGI-POT is not moving, this command clears
the DIGI-POT counter. Once the DIGI-POT is
moving, this command reads the DIGI-POT counter.
The counter will contain the number of interrupts
generated since counter was last cleared.
DIGI-POT has 32 interrupts per rotation.
Char 6, 5, 4 = Integer Number of Interrupts since last cleared
Char 3 = Decimal Point
Char 2 = 0
Char 1 = 0
Char 0 = 0
86
Chapter 4 - Remote Interface Reference
End Code Listing
End Code Listing
End Code
Description
00
Normal Ending - No errors
01
Command Type not supported (Valid values are ‘1’ or ‘2’)
02
Illegal ASCII digit contained in Command Code or FCS field
03
Data field Char 7 must be ‘+’ or ‘-’
04
Data field Char 3 must be ‘.’
05
Data field Char 6, 5, 4, 2, 1, or 0 contains an illegal ASCII character (not ‘0’ to ‘9’)
20
Command Type not supported for Command Code (for example, executing an ACT T
measurement with ‘2’ = WRITE as Command Type)
21
PASSWORD protected data - no PASSWORD issued prior to command execution
22
Command Code not implemented
23
FCS does not match computed FCS for this Command Packet
24
Parser programming error. Please contact factory.
25
Write command requires ‘1’ or ‘0’ in one of the data characters. Invalid ASCII value found.
26
Query Calculation Error. Instrument unable to calculate requested measurement. Data
4
returned is ‘+999.999’
27
Sensor Configuration data written while Output is on. Sensor Data unchanged.
81
RS-232 Lamp Control Write Error- Data characters not valid. One test state allowed per write.
Ignoring the decimal point, data must translate to a binary value of 0, 1, 2, 4, 8, 16, or 32.
87
This page intentionally left blank.
88
Chapter 4 - Remote Interface Reference
Starting RS-232 Communication with the LFI-3751
Starting RS-232 Communication with the LFI-3751
Once you have connected a computer and at least one LFI-3751, set the
unit’s RS-232 address from the front panel.
Display RS-232 Address
decrease
STATUS
TEMP LIMIT
1. Set RS-232 address
T LIMIT
LIMIT I
REMOTE
RS-232
SENSOR
ERROR
increase
•
Press and hold the Shift Button. After three seconds, the RS-232
address will be displayed.
•
The REMOTE RS-232 LED will light solid to indicate the address is
displayed and can be adjusted.
•
Continue to hold the Shift Button and rotate the Digi-Pot Adjust Knob
to change the value from 1 to 99.
•
Release the Shift Button to save the displayed RS-232 address.
•
The RS-232 address can only be changed via the front panel.
HOLD FOR LOCAL
ACT T
P
SET T
I
TE I
D
TE V
A
LIM I
B
AUX T
C
Hold in for
3 seconds
Release the SHIFT Button to
save the displayed
RS-232 address.
2. Send a Command Packet
Then, simply send a Command Packet to that instrument’s address.
•
The REMOTE RS-232 LED will flash to indicate communication is
occuring. The LED will light solid if the unit has not reverted to LOCAL
mode, and no communication with the host computer is ongoing.
The following sections detail how to operate the LFI-3751 via RS-232
communication.
89
4
Chapter 4 - Remote Interface Reference
Configuring the Sensor
Configuring the Sensor
RS-232
Commands Discussed:
[A1]
[A2]
[B1]
[B2]
[C1]
[C2]
For complete detail about sensor configuration, see Chapter 2.
1. Characterizing Temperature Response
•
Four or six parameters must be set depending on the type of sensor you’re
using: [A1], [A2], [B1], [B2], [C1], and [C2]. [B2] and [C2] are used
for thermistors and RTDs only.
•
For example, to configure a thermistor, three (Temperature, Resistance)
data pairs are entered to establish how the thermistor resistance changes
with temperature. Six Command Packets are sent to configure these
values. The following packets configure the instrument for a TCS-610
10 kΩ thermistor operating around 25°C. The three configuration data pairs
are (10°C, 19.9 kΩ), (25°C, 10 kΩ), and (40°C, 5.326 kΩ).
Write
!101221+010.00024
!101222+019.90027
!101223+025.00020
!101224+010.00021
!101225+040.00025
!101226+005.32620
(Sets [A1])
(Sets [A2])
(Sets [B1])
(Sets [B2])
(Sets [C1])
(Sets [C2])
•
The table on the next page details the Command Codes and expected
data for all the sensors supported by the LFI-3751.
•
To read the current sensor configuration, the Command Type changes
from a WRITE (2) to a READ (1):
Read
!101121+000.00026
!101122+000.00025
!101123+000.00024
!101124+000.00023
!101125+000.00022
!101126+000.00021
90
(Reads [A1])
(Reads [A2])
(Reads [B1])
(Reads [B2])
(Reads [C1])
(Reads [C2])
Chapter 4 - Remote Interface Reference
Configuring the Sensor
Command Codes and Expected Data to Configure Supported Sensors
Sensor Type
RS-232 Command
Command Code
Data Description
Data Range
Thermistor
[A1]
21
Temperature 1
-199.900 to +199.900°C
[A2]
22
Resistance 1
+000.000 to +499.900 kΩ
[B1]
23
Temperature 2
-199.900 to +199.900°C
[B2]
24
Resistance 2
+000.000 to +499.900 kΩ
[C1]
25
Temperature 3
-199.900 to +199.900°C
[C2]
26
Resistance 3
+000.000 to +499.900 kΩ
[A1]
21
Sensor Type
+001.000
[A2]
22
Sensor Type
+001.000
[B1]
23
Temperature 1
-199.900 to +199.900°C
[B2]
24
Resistance 1
+000.000 to +499.900 kΩ
[C1]
25
Temperature 2
-199.900 to +199.900°C
[C2]
26
Resistance 2
+000.000 to +499.900 kΩ
[A1]
21
Sensor Type
+002.000
[A2]
22
Sensor Type
+002.000
[B1]
23
Slope
+000.100 to +009.999 µA / K
[C1]
25
Offset
-009.990 to +009.990 µA
[A1]
21
Sensor Type
+003.000
[A2]
22
Sensor Type
+003.000
[B1]
23
Slope
+001.000 to +020.000 mV / K
[C1]
25
Offset
-009.990 to +009.990 mV
[A1]
21
Sensor Type
+004.000
[A2]
22
Sensor Type
+004.000
[B1]
23
Slope
+001.000 to +020.000 mV / °C
[C1]
25
Offset
-009.990 to +009.990 mV
RTD
AD590
LM335
LM35
•
4
Sensor Data [A1], [A2], [B1], [B2], [C1], or [C2] cannot be changed
while the Output is ON.
91
Chapter 4 - Remote Interface Reference
Configuring the Sensor
2. Selecting Automatic or Manual Sensor Bias
•
RS-232
Commands Discussed:
Each sensor type needs a different bias. The following table details the
typical settings for each type of sensor. See Chapter 2 for a thorough
discussion of each sensor type.
Typical Sensor Settings
[Sensor Bias Configuration]
NTC or PTC
•
Sensor Type
Sensor
Typical Bias Current or Sense Resistance
Thermistor
NTC
10 µA or 100 µA
RTD
PTC
1 mA or 10 mA
AD590
PTC
10 kΩ resistor across output
LM335
PTC
1 mA
LM35
PTC
10 kΩ resistor across output
The temperature controller automatically adjusts the sensor bias current to
optimize the sensor voltage and also allow a wider temperature operating
range. You can control the feedback or bias current selection with the
[Sensor Bias Configuration] Command. This command also controls the
loop polarity (NTC or PTC sensor). For example, the following Command
Packet sets the bias current to 10 µA.
Write
!101241+000.00122
(Sets Sensor Bias to manual 10 µA for an NTC sensor)
•
This command is helpful for configuring the instrument for use with
non-standard temperature sensors.
•
The following table details the structure of the characters in the data field.
Char 7 = Sign Char [+ = manual, - = automatic]
Char 6 = NTC / PTC Sensor
[0 = Negative Temperature Coefficient Sensor,
1 = Positive Temperature Coefficient Sensor]
Char 5 = AD590 [0 = OFF, 1 = use 10 kΩ resistor for feedback]
Char 4 = 10 mA [0 = OFF, 1 = use 10 mA bias current]
Char 3 = Decimal Point
Char 2 = 1 mA [0 = OFF, 1 = use 1 mA bias current]
Char 1 = 100 µA [0 = OFF, 1 = use 100 µA bias current]
Char 0 = 10 µA [0 = OFF, 1 = use 10 µA bias current]
92
Chapter 4 - Remote Interface Reference
Configuring the Sensor
•
When writing the [Sensor Bias Configuration] command, Character
7 (+ or -) configures the instrument to manual or automatic mode.
A ‘+’ puts the sensor configuration under manual control.
A ‘-’ lets
the instrument automatically configure the sensor. When a ‘-’ is in
Character 7, Characters 6 through 0 are ignored when writing.
Character 6 determines the feedback polarity. A thermistor is a Negative
Temperature Coefficient Sensor. All others are Positive Temperature
Coefficient Sensors.
You can combine settings to integrate a unique sensor. For example, if
you need 11 mA bias current, you can set Character 4 and Character 2
to ‘1’ to produce an 11 mA bias current.
•
When reading the Sensor Bias Configuration, the Command Type
changes from a WRITE (2) to a READ (1):
Read
!101141+000.00020
(Reads [Sensor Bias Configuration])
This helps you determine what sensor configuration the instrument
is using.
93
4
Chapter 4 - Remote Interface Reference
Measuring Actual Temperature or Resistance
Measuring Actual Temperature or Resistance
RS-232
Commands Discussed:
•
[ACT T]
[ACT R]
To measure actual sensor temperature from an instrument, send the
following Command Packet.
Read
!101101+000.00024
•
(Reads [ACT T] in °C)
To measure actual sensor resistance from an instrument, send the following
Command Packet.
Read
!101102+000.00027
94
(Reads [ACT R] in kΩ)
Chapter 4 - Remote Interface Reference
Setting the Limit Currents
Setting the Limit Currents
RS-232
Commands Discussed:
[LIM I POSITIVE]
[LIM I NEGATIVE]
For complete detail about setting the Limit Current, see Chapter 2.
•
Separate positive and negative current limits are available:
[LIM I POSITIVE] and [LIM I NEGATIVE].
•
For example, to configure the instrument with maximum currents of
+1 Amp and -0.5 Amps, send the following two Command Packets.
Write
!101207+001.00020
!101208-000.5002D
•
(Sets [LIM I POSITIVE] in Amps)
(Sets [LIM I NEGATIVE] in Amps)
To read the instrument’s limit current settings, the Command Type
changes from a WRITE (2) to a READ (1):
Read
!101107+000.00022
!101108+000.0002D
(Reads [LIM I POSITIVE] in Amps)
(Reads [LIM I NEGATIVE] in Amps)
•
[LIM I POSITIVE] ranges from +000.000 to +005.000 Amps.
•
[LIM I NEGATIVE] ranges from -005.000 to +000.000 Amps.
To Configure for a Resistive Heater
•
Set [LIM I POSITIVE] to +000.000 Amps to operate a resistive heater.
95
4
Chapter 4 - Remote Interface Reference
Setting Temperature Limits
Setting Temperature Limits
RS-232
Commands Discussed:
[T LIM HIGH]
[T LIM LOW]
For complete detail about setting the Temperature Limits, see Chapter
2, page 59.
•
Separate high and low temperature limits are available to protect your
load: [T LIM HIGH] and [T LIM LOW].
•
For example, to configure the instrument with temperature limits of 50°C
and 0°C, send the following two Command Packets.
Write
!101231+050.00021
!101232+000.00027
•
(Sets [T LIM HIGH] in °C)
(Sets [T LIM LOW] in °C)
To read the current temperature limits, the Command Type changes from
a WRITE (2) to a READ (1):
Read
!101131+000.00027
!101132+000.00024
96
(Reads [T LIM HIGH] in °C)
(Reads [T LIM LOW] in °C)
•
Temperature Limits range from -199.900 to +199.900°C
•
The temperature limits are disabled when thermistors or RTDs are
configured to display resistance rather than temperature.
Chapter 4 - Remote Interface Reference
Autotune PID & Setting the P, I, and D Constants
Autotune PID & Setting the P, I, and D Constants
RS-232
Commands Discussed:
For complete details about Autotune PID operation, see Chapter 2.
For complete detail about setting the P, I, and D constants, see Chapter 2.
[P]
[I]
[D]
The LFI-3751 with Autotune PID can optimize the PID control parameters
to minimize temperature overshoot and reduce settling times with Setpoint
Response Autotuning or to reject thermal transient effects on temperature
stability by using Disturbance Rejection Autotuning.
The LFI-3751 can be configured to operate as a P, PI, PD, or PID
temperature controller.
•
To configure the instrument to begin an Autotune Optimization, send
one of the following Command Packets.
Write
!101210-002.00023
!101211-001.00021
•
(Sets [P] to AutS)
(Sets [P] to Autd)
To configure the instrument as a Proportional (P) controller with P = 30,
send the following Command Packets.
Write
!101210+030.00024
!101211+000.00026
!101212+000.00025
•
(Sets [P] to 30)
(Sets [I] to OFF)
(Sets [D] to OFF)
To configure the instrument as a PI controller with P = 30 and
I = 1 second, send the following Command Packets.
Write
!101210+030.00024
!101211+001.00027
!101212+000.00025
(Sets [P] to 30)
(Sets [I] to 1 second)
(Sets [D] to OFF)
97
4
Chapter 4 - Remote Interface Reference
Setting the P, I, and D Constants
•
To configure the instrument as a PD controller with P = 30 and
D = 1 second, send the following Command Packets.
Write
!101210+030.00024
!101211+000.00026
!101212+001.00024
•
(Sets [P] to 30)
(Sets [I] to OFF)
(Sets [D] to 1 second)
To configure the instrument as a PID controller with P = 30, I = 1 second,
and D = 1 second, send the following Command Packets.
Write
!101210+030.00024
!101211+001.00027
!101212+001.00024
•
(Sets [P] to 30)
(Sets [I] to 1 second)
(Sets [D] to 1 second)
To read the P, I, and D constants, the Command Type changes from
a WRITE (2) to a READ (1):
Read
!101110+000.00024
!101111+000.00025
!101112+000.00026
98
(Reads [P])
(Reads [I])
(Reads [D])
•
[P] ranges from +001.000 to +100.000.
•
[I] ranges from OFF (+000.000) or +000.400 to +010.000 seconds.
•
[D] ranges from OFF (+000.000) or +001.000 to +010.000 seconds.
Chapter 4 - Remote Interface Reference
Setting Temperature Setpoint
Setting Temperature Setpoint
RS-232
Commands Discussed:
For complete detail about setting the Operating Temperature, see
Chapter 2.
[SET T]
•
To configure the instrument with a temperature setpoint of 35°C, send
the following Command Packet.
Write
!101203+035.00023
•
(Sets [SET T])
To read the instrument’s setpoint temperature, the Command Type
changes from a WRITE (2) to a READ (1):
Read
!101103+000.00026
•
(Reads [SET T] in °C)
Temperature Setpoint ranges from -199.900 to +199.900°C
99
4
Chapter 4 - Remote Interface Reference
Setting Resistance Setpoint
Setting Resistance Setpoint
RS-232
Commands Discussed:
•
[A1]
[A2]
[B1]
[B2]
[SET R]
To use resistance as the setpoint, you must be using a resistive sensor:
thermistor or RTD. The following table shows the configuration settings
and Command Packets to set the configuration for a thermistor or RTD
in resistance mode.
How to Configure Thermistor and RTD for Resistance Setpoint
Configuration /
Sensor Type
Setting
Command Packet: Write
Thermistor
[A1] = 0
!101221+000.00025
[A2] = 0
!101222+000.00026
[A1] = 1
!101221+001.00024
[A2] = 1
!101222+001.00027
[B1] = 0
!101223+000.00027
[B2] = 0
!101224+000.00020
RTD
•
For example, after the sensor is properly configured, send the following
Command Packet to configure the instrument with a resistance setpoint
of 10 kΩ.
Write
!101204+010.00023
•
(Sets [SET R] in kΩ)
To read the instrument’s setpoint resistance, the Command Type changes
from a WRITE (2) to a READ (1):
Read
!101104+000.00021
•
100
(Reads [SET R] in kΩ)
Resistance Setpoint ranges from +000.000 to +499.900 kΩ
Chapter 4 - Remote Interface Reference
Enabling and Disabling the Output Current
Enabling and Disabling the Output Current
RS-232
Commands Discussed:
[RUN / STOP]
For complete detail about Enabling the Output Current, see Chapter 2.
1. Enable Current
•
To enable the instrument’s output current send the following Command
Packet.
Write
!101251+000.00123
(Enable Output Current)
2. Disable Current
•
To disable the instrument’s output current send the following Command
Packet.
Write
!101251+000.00022
(Disable Output Current)
3. Monitor Output Status
•
To read the output status, the Command Type changes from a WRITE
(2) to a READ (1):
Read
!101151+000.00021
•
The following table details the structure of the characters returned
in the data field.
Char 7 = Sign Char [always +]
Char 6 = Not Used
Char 5 = Autotune Error Code
1 = Zero Value Current Limit Error
2 = Current Limit Cannot reach SET T
3 = Non-uniform TE I step measured
4 = Rate Sign Change
Char 4 = Autotune Status [0 = Normal Operation, 1 = Autotune Operation]
Char 3 = Decimal Point
Char 2 = Temp Limit or Sensor Error Status [1 = requires clearing]
Char 1 = Integrator Status [0 = OFF, 1 = ON]
Char 0 = Output Status [0 = OFF, 1 = ON]
If Character 2 is ‘1’, a Temp Limit or Sensor Error has occurred. The next
command to enable current will clear the error without enabling current.
101
4
Chapter 4 - Remote Interface Reference
Measuring Thermoelectric Current and Voltage
Measuring Thermoelectric Current and Voltage
RS-232
Commands Discussed:
[TE I]
[TE V]
For complete detail about measuring thermoelectric current and voltage,
see Chapter 2.
•
To measure the thermoelectric current out of the instrument, send the
following Command Packet.
Read
!101105+000.00020
•
(Reads [TE I] in Amps)
To measure the thermoelectric voltage out of the instrument, send the
following Command Packet.
Read
!101106+000.00023
102
(Reads [TE V] in Volts)
Chapter 4 - Remote Interface Reference
Measuring Auxiliary Sensor Temperature
Measuring Auxiliary Sensor Temperature
RS-232
Commands Discussed:
[AUX T]
For complete detail about measuring temperature with the auxiliary sensor,
see Chapter 2.
•
To measure temperature of the auxiliary 10 kΩ thermistor wired to the
instrument, send the following Command Packet.
Read
!101109+000.0002C
(Reads [AUX T] in °C)
4
103
Chapter 4 - Remote Interface Reference
Setting Gain for Analog Input Signal (Rear Panel BNC Connector)
RS-232
Commands Discussed:
Setting Gain for Analog Input Signal (Rear Panel
BNC Connector)
•
The instrument automatically sets the gain of the Analog Input Connector
to match your sensor and bias current configuration. You can manually
control the gain through the [MOD Gain Configuration] command.
For Analog Input Gain 3, if you put in 1 Volt at the BNC, the setpoint
changes 0.01 Volts.
[MOD Gain Configuration]
Write
!101242+000.10021
(Sets Analog Input Gain to manual, 100 : 1)
•
The following table details the structure of the characters in the data field.
Char 7 = Sign Char [+ = manual, - = automatic]
Char 6 = Not Used
Char 5 = Not Used
Char 4 = Not Used
Char 3 = Decimal Point
Char 2 = Analog Input Gain 3 (100 : 1) [0 = OFF, 1 = ON]
Char 1 = Analog Input Gain 2 (10 : 1) [0 = OFF, 1 = ON]
Char 0 = Analog Input Gain 1 (1 : 1) [0 = OFF, 1 = ON]
•
When writing the [MOD Gain Configuration] command, Character
7 (+ or -) configures the instrument to manual or automatic mode. A
‘+’ puts the Analog Input Gain under manual control. A ‘-’ lets the
instrument automatically change the gains. When Character 7 is ‘-’,
Characters 6 through 0 are ignored when writing. When the gain is
controlled automatically, the transfer function changes with sensor
and bias.
Analog Input Transfer Functions
•
Thermistors & RTDs (10 µA or 100 µA)
10 kΩ / V
Thermistors & RTDs (1 mA or 10 mA)
100 Ω / V
LM335/35, AD590
10°C / V
To read the MOD Gain Configuration, the Command Type changes from
a WRITE (2) to a READ (1):
Read
!101142+000.00023
104
(Reads [MOD Gain Configuration])
Chapter 4 - Remote Interface Reference
Checking the Alarm Status
Checking the Alarm Status
RS-232
Commands Discussed:
•
[Alarm Status]
To monitor the status of the Sensor Error, Temperature Limits, Current
Limits, and Output Current, use the [Alarm Status] command. To
read the Alarm Status of the instrument, send the following Command
Packet.
Read
!101135+000.00023
•
(Reads [Alarm Status])
The following table details the structure of the characters in the
data field.
Char 7 = Sign Char [always +]
4
Char 6 = Sensor Open Error [ 0 = OK, 1 = Error]
Char 5 = Sensor Short Error [ 0 = OK, 1 = Error]
Char 4 = Low Temperature Limit [ 0 = OK, 1 = Error]
Char 3 = Decimal Point
Char 2 = High Temperature Limit [ 0 = OK, 1 = Error]
Char 1 = Current Limit [ 0 = OK, 1 = Error]
Char 0 = Output Current ON/OFF status [ 0 = OFF, 1 = ON]
105
Chapter 4 - Remote Interface Reference
Halting the Processor
Halting the Processor
RS-232
Commands Discussed:
•
[HALT PROCESSOR]
The [HALT PROCESSOR] command turns all front panel lamps off,
disables interrupts, shuts off all timers, clocks, and the watchdog then
freezes the CPU. To stop the processor on the instrument, send the
following Command Packet.
Write
!101252+000.00021
106
(Halts Processor)
•
You have to power off the instrument for 30 seconds before resuming
operation.
•
No Response Packet is returned when this command is executed.
Chapter 4 - Remote Interface Reference
Reverting to LOCAL Mode
Reverting to LOCAL Mode
RS-232
Commands Discussed:
•
[LOCAL]
To switch from computer to front panel control of the instrument, use
the [LOCAL] command. To revert to LOCAL mode, send the following
Command Packet.
Write
!101253+000.00020
•
([LOCAL])
Before reverting to LOCAL mode, the instrument will return a Response
Packet.
4
107
Chapter 4 - Remote Interface Reference
Entering the PASSWORD
Entering the PASSWORD
RS-232
Commands Discussed:
•
[PASSWORD]
Prior to writing a Calibration or Diagnostic Command Packet, the instrument
must be given the proper password. To confirm the PASSWORD, send
the following Command Packet. Note that the ‘????????’ represents the
eight ASCII characters in the actual password.
Write
!101254????????(FCS)
([PASSWORD])
•
This data field does not follow the standard format. These eight characters
are only restricted to ASCII characters.
•
The PASSWORD can be obtained by calling Wavelength Electronics
Technical Support or your local distributor.
•
To read the status of PASSWORD access, send the following Command
Packet. A ‘0’ returned in Character 0 indicates the PASSWORD has not
been issued. A ‘1’ returned in Character 0 indicates the PASSWORD
has been issued properly.
Read
!101154+000.00024
108
(Reads Status of password flag)
Chapter 4 - Remote Interface Reference
Reading Serial & Model Numbers, Firmware Version
Reading Serial & Model Numbers, Firmware Version
RS-232
Commands Discussed:
•
These data fields do not follow the standard format. These eight data
field characters are only restricted to ASCII characters.
[SERIAL NUMBER]
[FIRMWARE VERSION]
[MODEL NUMBER]
•
To read the instrument’s Serial Number, send the following Command
Packet.
Read
!101155+000.00025
•
(Reads Serial Number ‘XXXXXXXX’)
To read the instrument’s Firmware Version, send the following Command
Packet.
4
Read
!101156+000.00026
•
(Reads Firmware Version ‘XXXXXXXX’)
To read the instrument’s Model Number, send the following Command
Packet.
Read
!101157+000.00027 (Reads Model Number ‘XXXXXXXX’;
should return “LFI-3751”)
109
Chapter 4 - Remote Interface Reference
Calibration - Sensor Bias Current and AD590 Sense Resistance
RS-232
Commands Discussed:
Calibration - Sensor Bias Current and AD590
Sense Resistance
•
[PASSWORD]
[10 µA BIAS CAL]
[100 µA BIAS CAL]
[1 mA BIAS CAL]
All sensor bias currents and the AD590 sense resistance are calibrated
at the factory. To change these calibrated values, you must first send
the [PASSWORD] command. You should not use these commands
without direct supervision from Wavelength Electronics Technical Support
Group.
Write
!101254????????(FCS) ([PASSWORD])
Calibrating the 10 µA Reference Current
•
If the instrument’s 10 µA reference current is actually 9.89 µA, send the
following Command Packet to properly calibrate the unit.
Write
!101261+009.89029
([10 µA BIAS CAL] in µA)
Calibrating the 100 µA Reference Current
•
If the instrument’s 100 µA reference current is actually 99.5 µA, send the
following Command Packet to properly calibrate the unit.
Write
!101262+099.50027
([100 µA BIAS CAL] in µA)
Calibrating the 1 mA Reference Current
•
If the instrument’s 1 mA reference current is actually 1.005 mA, send the
following Command Packet to properly calibrate the unit.
Write
!101263+001.00527
110
([1 mA BIAS CAL] in mA)
Chapter 4 - Remote Interface Reference
Calibration - Sensor Bias Current and AD590 Sense Resistance
RS-232
Commands Discussed:
[10 mA BIAS CAL]
[AD590 10 kΩ CAL]
Calibrating the 10 mA Reference Current
•
If the instrument’s 10 mA reference current is actually 10.262 mA, send
the following Command Packet to properly calibrate the unit.
Write
!101264+010.26223
([10 mA BIAS CAL] in mA)
Calibrating the 10 kΩ Resistance (for AD590)
•
If the instrument’s 10 kΩ resistance is actually 10.003 kΩ, send the
following Command Packet to properly calibrate the unit.
Write
!101265+010.00327
([AD590 10 kΩ CAL] in kΩ)
Reading the Sensor Bias Current and AD590 Sense
Resistance Settings
•
To read the sensor bias and AD590 sense resistance settings, the
Command Type changes from a WRITE (2) to a READ (1) and no
[PASSWORD] is required:
Read
!101161+000.00022
!101162+000.00021
!101163+000.00020
!101164+000.00027
!101165+000.00026
(Reads [10 µA BIAS CAL] in µA)
(Reads [100 µA BIAS CAL] in µA)
(Reads [1 mA BIAS CAL] in mA)
(Reads [10 mA BIAS CAL] in mA)
(Reads [AD590 10 kΩ CAL] in kΩ)
111
4
Chapter 4 - Remote Interface Reference
Calibration - ACT T, TE I, TE V uncalibrated voltages
Calibration- ACT T, TE I,TE V uncalibrated voltages
RS-232
Commands Discussed:
[RAW ACT T VOLT]
[RAW TE I VOLT]
[RAW TE V VOLT]
Reading the uncalibrated ACT T voltage
•
This command reads the uncalibrated ACT T voltage from the instrument’s
A/D. This command is useful for calculating the instrument’s ACT T
Slope and Offset. To read the uncalibrated ACT T voltage, send the
following Command Packet.
Read
!101171+000.00023
([RAW ACT T VOLT] in Volts)
Reading the uncalibrated TE I voltage
•
This command reads the uncalibrated TE I voltage from the instrument’s
A/D. This command is useful for calculating the instrument’s TE I Slope
and Offset. To read the uncalibrated TE I voltage, send the following
Command Packet.
Read
!101172+000.00020
([RAW TE I VOLT] in Volts)
Reading the uncalibrated TE V voltage
•
This command reads the uncalibrated TE V voltage from the instrument’s
A/D. This command is useful for calculating the instrument’s TE V Slope
and Offset. To read the uncalibrated TE V voltage, send the following
Command Packet.
Read
!101173+000.00021
112
([RAW TE V VOLT] in Volts)
Chapter 4 - Remote Interface Reference
Calibration - Measurement Slopes & Offsets
Calibration - Measurement Slopes & Offsets
RS-232
Commands Discussed:
[PASSWORD]
[ACT T SLOPE CAL]
[ACT T OFFSET CAL]
[TE I SLOPE CAL]
[TE I OFFSET CAL]
[TE V SLOPE CAL]
[TE V OFFSET CAL]
•
All measurements are calibrated at the factory. To change these
calibrated values, you must first send the [PASSWORD] command.
You should not use these commands without direct supervision from
Wavelength Electronics Technical Support Group.
Write
!101254????????(FCS) ([PASSWORD])
Calibrating ACT T Slope & Offset
•
These commands are used to calculate the instrument’s ACT T
measurement.
Write
!101274+001.00024
!101275+000.00024
([ACT T SLOPE CAL])
([ACT T OFFSET CAL] in Volts)
Calibrating TE I Slope & Offset
•
These commands are used to calculate the instrument’s TE I
measurement.
Write
!101276+001.00026
!101277+000.00026
([TE I SLOPE CAL])
([TE I OFFSET CAL] in Amps)
Calibrating TE V Slope & Offset
•
These commands are used to calculate the instrument’s TE V
measurement.
Write
!101278+001.00028
!101279+000.00028
([TE V SLOPE CAL])
([TE V OFFSET CAL] in Volts)
113
4
Chapter 4 - Remote Interface Reference
Calibration - Measurement Slopes & Offsets
Reading the ACT T, TE I, TE V Slopes and Offsets
•
To read the measurement calibration settings, the Command Type changes
from a WRITE (2) to a READ (1) and no [PASSWORD] is required:
Read
!101174+000.00026
!101175+000.00027
!101176+000.00024
!101177+000.00025
!101178+000.0002A
!101179+000.0002B
114
(Reads [ACT T SLOPE CAL])
(Reads [ACT T OFFSET CAL] in Volts)
(Reads [TE I SLOPE CAL])
(Reads [TE I OFFSET CAL] in Amps)
(Reads [TE V SLOPE CAL])
(Reads [TE V OFFSET CAL] in Volts)
Chapter 4 - Remote Interface Reference
Calibration - SET T Slopes & Offsets
Calibration - SET T Slopes & Offsets
RS-232
Commands Discussed:
•
[PASSWORD]
[POS SET T SLOPE CAL]
[POS SET T OFFSET CAL]
[NEG SET T SLOPE CAL]
[NEG SET T OFFSET CAL]
The setpoint temperature values are calibrated at the factory. To change
these calibrated values, you must first send the [PASSWORD] command.
You should not use these commands without direct supervision from
Wavelength Electronics Technical Support Group.
Write
!101254????????(FCS) ([PASSWORD])
Calibrating Positive SET T Slope & Offset
•
These commands calibrate the positive voltage SET T setpoints.
4
Write
!101280+001.0002F
!101281+000.0002F
([POS SET T SLOPE CAL])
([POS SET T OFFSET CAL] in Volts)
Calibrating Negative SET T Slope & Offset
•
These commands calibrate the negative voltage SET T setpoints.
Write
!101282+001.0002D
!101283+000.0002D
([NEG SET T SLOPE CAL])
([NEG SET T OFFSET CAL] in Volts)
Reading the Current Calibration Settings
•
To read the current calibration settings, the Command Type changes from a
WRITE (2) to a READ (1) and no [PASSWORD] is required.
Read
!101180+000.0002D
!101181+000.0002C
(Reads [POS SET T SLOPE CAL])
!101182+000.0002F
!101183+000.0002E
(Reads [NEG SET T SLOPE CAL])
(Reads [POS SET T OFFSET CAL] in Volts)
(Reads [NEG SET T OFFSET CAL] in Volts)
115
Chapter 4 - Remote Interface Reference
Calibration - TE Limit Current Slopes & Offsets
Calibration - TE Limit Current Slopes & Offsets
RS-232
Commands Discussed:
•
[PASSWORD]
[T POS LIM I SLOPE CAL]
[T POS LIM I OFFSET CAL]
[T NEG LIM I SLOPE CAL]
[T NEG LIM I OFFSET CAL]
The TE Limit Current values are calibrated at the factory. To change
these calibrated values, you must first send the [PASSWORD] command.
You should not use these commands without direct supervision from
Wavelength Electronics Technical Support Group.
Write
!101254????????(FCS)
([PASSWORD])
Calibrating LIM I POSITIVE Slope & Offset
•
These commands calibrate the positive limit current settings.
Write
!101284+001.0002B ([TE POS LIM I SLOPE CAL])
!101285+000.0002B ([TE POS LIM I OFFSET CAL] in Amps)
Calibrating LIM I NEGATIVE Slope & Offset
•
These commands calibrate the negative limit current settings.
Write
!101286+001.00029
!101287+000.00029
([TE NEG LIM I SLOPE CAL])
([TE NEG LIM I OFFSET CAL] in Amps)
Reading the Current Calibration Settings
•
To read the current calibration settings, the Command Type changes from a
WRITE (2) to a READ (1) and no [PASSWORD] is required.
Read
116
!101184+000.00029
!101185+000.00028
(Reads [TE POS LIM I SLOPE CAL])
!101186+000.0002B
!101187+000.0002A
(Reads [TE NEG LIM I SLOPE CAL])
(Reads [TE POS LIM I OFFSET CAL] in Amps)
(Reads [TE NEG LIM I OFFSET CAL] in Amps)
Chapter 4 - Remote Interface Reference
RESTORE Calibration Defaults
RESTORE Calibration Defaults
RS-232
Commands Discussed:
•
[PASSWORD]
[RESTORE FACTORY
CALIBRATION DEFAULTS]
To issue this command you must first send the [PASSWORD] command.
You should not use this command without direct supervision from
Wavelength Electronics Technical Support Group. To revert this
instrument back to the default settings, send the following Command
Packets.
Write
!101254????????(FCS)
!101288+000.00026
•
([PASSWORD])
([RESTORE FACTORY
CALIBRATION DEFAULTS])
NOTICE! This command will clear the calibration E2PROM and clear
any previous calibration values. All slopes will reset to ‘1’ and offsets
to ‘0’. The sensor bias currents will become 10 µA, 100 µA, 1 mA,
and 10 mA. The AD590 sense resistance returns to 10 kΩ. The serial
number will revert to CALLWE.
117
4
Chapter 4 - Remote Interface Reference
Diagnostic - Lamp Control
Diagnostic - Lamp Control
RS-232
Commands Discussed:
•
The [LAMP CONTROL] command tests whether the LEDs or 7 segment
displays are properly operating.
[LAMP CONTROL]
•
Six test states are provided. The following table details the structure
of the characters in the data field. Only one test state is allowed
per Command Packet. For example, you can turn on the 7 Segment
Display with one Command Packet and the Status LEDs with a second
Command Packet.
Char 7 = Sign Char [‘+’ = manual, ‘-’ = automatic]
Char 6 = Sequence Lamps, Sound Beeper [0 = OFF, 1 = Lamp ON]
Char 5 = All Lamps On [0 = OFF, 1 = Lamp ON]
Char 4 = 7 Segment Displays [0 = OFF, 1 = Lamp ON]
Char 3 = Decimal Point
Char 2 = Unit of Measure & Shift LEDs [0 = OFF, 1 = Lamp ON]
Char 1 = Status LEDs [0 = OFF, 1 = Lamp ON]
Char 0 = Output ON LED [0 = OFF, 1 = Lamp ON]
•
For example, to turn on an instrument’s Unit of Measure & Shift LEDs,
send the following Command Packet.
Write
!101291+000.1002F (Turns on Unit of Measure & Shift LEDs])
118
•
Once the Command Packet is executed, the test state will be repeated
until the instrument is returned to normal operation.
•
To return the instrument to normal operation, either turn off the power or
send a Command Packet with a ‘-’ in Character 7.
Chapter 4 - Remote Interface Reference
Diagnostic - Switch Status
Diagnostic - Switch Status
RS-232
Commands Discussed:
[PUSHBUTTON SWITCH
STATUS]
[ROTARY SWITCH STATUS]
Output, Shift, and Temp Limit Pushbutton Status
•
The following table details the structure of the characters in the data field
for the [PUSHBUTTON SWITCH STATUS] command.
Char 7 = Sign Char (Not Used)
Char 6 = Not Used
Char 5 = Not Used
Char 4 = Not Used
Char 3 = Decimal Point
Char 2 = Temp Limit Pushbutton [0 = OFF, 1 = ON]
Char 1 = Shift Pushbutton [0 = OFF, 1 = Lamp ON]
4
Char 0 = Output Pushbutton [0 = OFF, 1 = Lamp ON]
•
To read the current status of the pushbutton switches, send the following
Command Packet.
Read
!101192+000.0002E (Reads [Pushbutton Switch Status])
Rotary Switch Status
•
The following table details the structure of the characters in the data
field for the [ROTARY SWITCH STATUS] command. A ‘1’ indicates the
position of the rotary switch.
Char 7 = Sign Char (Not Used)
Char 6 = AUX T / C
Char 5 = LIM I / B
Char 4 = TE V / A
Char 3 = Decimal Point
Char 2 = TE I / D
Char 1 = SET T / I
Char 0 = ACT T / P
•
To read the current status of the Rotary switch, send the following
Command Packet.
Read
!101193+000.0002F (Reads [Rotary Switch Status])
119
Chapter 4 - Remote Interface Reference
Diagnostic - Digi-Pot Status
Diagnostic - Digi-Pot Status
RS-232
Commands Discussed:
•
The [DIGIPOT STATUS] command reads whether the Digi-Pot is moving
clockwise or counterclockwise and quantifies how far it has rotated
since it was last cleared.
•
The Digi-Pot Counter increases when the Digi-Pot is moving at 32
counts per rotation.
•
When the Digi-Pot is not moving, sending this command will clear
the Digi-Pot Counter.
•
When the Digi-Pot is moving, this command reads the Digi-Pot
Counter.
•
When the Digi-Pot is moving clockwise, the counter increases. When the
Digi-Pot is moving counter clockwise, the counter decreases.
•
The following table details the structure of the characters in the data
field for the [DIGIPOT STATUS] command.
[DIGIPOT STATUS]
Char 7 = Sign Char [‘+’ = clockwise, ‘-’ = counterclockwise]
Char 6, 5, 4 = Integer number of counts since last cleared
Char 3 = Decimal Point
Char 2 = 0
Char 1 = 0
Char 0 = 0
•
To read the current status of the Digi-Pot, send the following Command
Packet.
Read
!101194+000.00028 (Reads [DIGIPOT STATUS])
120
Chapter 4 - Remote Interface Reference
End Code Reference
End Code Reference
00 - Normal Ending
Command in the Command Packet has been processed correctly and
Response Packet contains valid data. Data is not valid if any other
End Code is returned.
01 - Command Type Not Supported
Fifth character of the Command Packet (Command Type) contains
a character other than ‘1’ or ‘2’. Only 1 = Read and 2 = Write are
supported Command Types.
4
02 - Illegal ASCII Digit
The Command Code or FCS fields contain an illegal ASCII digit. The
Command Code can accept ‘00’ through ‘99’. FCS is a HEX number,
so can accept ‘00’ through ‘FF’.
03 - Invalid Data Character 7
This character must contain either ‘+’ or ‘-’.
04 - Invalid Data Character 3
This character must contain a decimal point ‘.’
05 - Invalid ASCII Data Character Digit
Characters 6, 5, 4, 2, 1, or 0 must contain a valid ASCII digit ‘0’
through ‘9’.
20 - Command Code does not support CommandType
Certain Command Codes can only read data and other Command
Codes can only write data. Some do both. For example, measurement
codes are read only commands. If you send an [ACT T] code with a ‘2’
in the fifth character (Command Type = WRITE), the Response Packet
will return with this End Code.
121
Chapter 4 - Remote Interface Reference
End Code Reference
21 - PASSWORD Required
The Command Packet attempts to write password protected data. The
[PASSWORD] command must be issued first.
22 - Command Number Not Implemented
The Command Packet uses a Command Code that is not recognized.
23 - Calculated FCS does not Match Transmitted FCS
The Frame Check Sum is used to verify proper transmission of data.
If the calculated FCS does not match the transmitted FCS, either the
data was corrupted in transmission or the FCS in the Command Packet
was incorrectly calculated.
24 - Parser Programming Error
Please contact the factory if a Response Packet returns this End Code.
25 - Invalid Data Character
The parser expects only a ‘0’ or ‘1’ in one of the data characters. Some
other ASCII value was transmitted.
26 - Query Calculation Error
The LFI-3751 was unable to calculate the requested measurement. Data
in the Response Packet is ‘+999.999’. This occurs when the sensor is open
or shorted. This also occurs when the sensor is improperly configured
or out of the temperature range.
27 - Sensor Data not Updated
Sensor configuration data cannot be changed while the Output is ON.
81 - RS-232 Lamp Control Write Error
The [LAMP CONTROL] command allows only one test condition at a
time. Only one of the data characters can be a ‘1’.
122
Chapter 4 - Remote Interface Reference
Calculating FCS
Calculating FCS
•
•
BASIC Routine for
calculating FCS
1110
1120
1130
1140
1150
1160
1170
1180
1190
1200
1210
1220
1230
1240
1250
1260
1270
1280
‘Copy either Command$ or Response$ into Packet$
‘Run FCS Generator routine: FCSGEN
‘For Command Packets, the routine generates the proper FCS
‘For Response Packets, the routine compares the FCS received to
‘a calculated FCS and returns the FCSVALID flag
FCSGEN:
FCS = 0
FCSVALID = “TRUE”
Input Packet$
STARTCHAR$=MID$(Packet$,1,1)
IF STARTCHAR$ = “!” THEN FCSLEN = LEN(Packet$)
IF STARTCHAR$ = “@” THEN FCSLEN = LEN(Packet$) - 4
IF STARTCHAR$ <> “!” OR STARTCHAR$ <> “@” THEN FCSVALID = “FALSE”
For IFCS=1 to FCSLEN
FCS=FCS XOR ASC(MID$(Packet$, IFCS, 1))
Next
FCS$=RIGHT$(“0”,HEX$(FCS),2)
IF STARTCHAR$ = “@” and FCS$ <> MID$(Packet$,18,2) THEN FCSVALID = “FALSE”
•
Visual C++
Routine for
calculating FCS
FCS (Frame Check Sum) is used to assure that the RS-232 transmission
was not corrupted.
The following BASIC routine calculates the FCS for a Command or
Response Packet.
The following Visual C++ routine calculates the FCS for a Command
or Response Packet.
static BYTE ComputeFCS ( const CString& srPreFcsCmd )
{
BYTE ucFCS = 0;
// zero FCS byte
// For debugging: Validate CString object reference is to the first part of a Command or
//Response Packet
ASSERT( srPreFcsCmd.GetAt(0) = = ‘!’ || srPreFcsCmd.GetAt(0) = = ‘@’ );
ASSERT( srPreFcsCmd.GetLength() = = 15 || srPreFcsCmd.GetLength() = = 17 );
// Loop through each character of the string and ‘Exclusive OR’ result
// with next character. Byte returned should match transmitted FCS.
for( BYTE ucCharIdx = 0; ucCharIdx < srPreFcsCmd.GetLength(); ucCharIdx++ )
ucFCS ^= (BYTE) srPreFcsCmd.GetAt( ucCharIdx ) ;
return ucFCS;
}
srPreFcsCmd contains the Command Packet up to the FCS characters.
•
The instrument always checks the Command Packet’s FCS against the
calculated FCS. The host computer program can use the Response
Packet’s FCS to verify proper communication from the instrument but
it is not necessary.
123
4
Chapter 4 - Remote Interface Reference
Example BASIC Control Program for IBM PC Compatible Machines
Example BASIC Control Program for IBM PC
Compatible Machines
1000 ‘ LFI-3751 RS-232 Control Program for IBM PC Compatible Machines
1001 ‘
1002 ‘ Configure the COM Port #1 for RS-232 communications with the following settings
1003 ‘
1004 ‘ Baud: 19200
1005 ‘ Parity: None
1006 ‘ Data: 8
1007 ‘ Stop: 1
1008 ‘
1009 OPEN “COM:19200,N,8,1,CD0,CS0,DS0,RB256,RS” FOR RANDOM AS #1 LEN=256
1010 ‘
1011 ‘ Get the instruments RS-232 address
1012 ‘
1013 PRINT “Enter instrument’s RS-232 address [i.e. 01]”;
1014 INPUT ADDRESS$
1015 ‘
1016 ‘ The following loop issues command packets to the instrument and prints out the
1017 ‘ instrument’s response packets
1018 ‘
1019 RS232LOOP:
1020 ‘
1021 ‘ Determine if the command is a read or write command and enter a valid command
1022 ‘ code. Enter a valid data field.
1023 ‘
1024 PRINT “Enter command type [ 1 - Read , 2 - Write]:”;
1025 INPUT TYPE$
1026 PRINT “Enter command code:”;
1027 INPUT CODE$
1028 IF TYPE$=”1" THEN DATA$=”+000.000"
1029
ELSE PRINT$ “Enter data [i.e. “xxx.xxx]:”;:INPUT DATA$
1030 COMMAND$=”!1"+ADDRESS$+TYPE$+CODE$+DATA$
1031 ‘
124
Chapter 4 - Remote Interface Reference
Example BASIC Control Program for IBM PC Compatible Machines
1032 ‘ Calculate the Frame Check Sum (FCS) for the entered command
1033 ‘
1034 FCS=0
1035 FOR IFCS=1 TO LEN(COMMAND$)
1036
FCS=FCS XOR ASC(MID$(COMMAND$,IFCS,1))
1037 NEXT
1038 FSC$=RIGHT$(“0”+HEX$(FCS),2)
1039 ‘
1040 ‘ Issue command packet to the instrument
1041 ‘
1042 PRINT #1, COMMAND$+FCS$
1043 ‘
1044 ‘ Receive the response packet back from the instrument
1045 ‘
1046 RCNT=0
1047 RECV$=””””
1048 RLOOP:
1049 ‘
1050 ‘ If the COM port buffer contains data then process data in RDATA loop otherwise
1051 ‘ keep track of time gone by since data has been entered into COM port buffer.
1052 ‘
1053 IF LOC(1) <> 0 THEN RDATA
1054 RCNT=RCNT+1
1055 ‘
1056 ‘ If no data has been entered into the COM port buffer by the time the counter RCNT
1057 ‘ reaches 100000 then indicate the instrument is not responding. If you receive the
1058 ‘ “No Response!” error too frequently then increase the error count value.
1059 ‘
1060 IF RCNT=100000 THEN RERROR
1061 ELSE RLOOP
1062 ‘
125
4
Chapter 4 - Remote Interface Reference
Example BASIC Control Program for IBM PC Compatible Machines
1063 ‘ The following loop sums the COM port buffer to create a response packet.
1064 ‘ If 21 characters are detected in the COM port buffer, then the response packet is
1065 ‘ printed to the screen.
1066 ‘
1067 RDATA:
1068 RECV$ = RECV$ + INPUT$(LOC(1),#1)
1069 IF LEN(RECV$) = 21 THEN REND
1070 ELSE RCNT=0: GOTO RLOOP
1071 ‘
1072 ‘ No response packet received.
1073 ‘
1074 RERROR:
1075 RECV$ = “No Response!”
1076 ‘
1077 ‘ Print the response packet.
1078 ‘
1079 PRINT “Instrument’s response packet is:”; RECV$
1080 ‘
1081 ‘ Send another packet or end program
1082 ‘
1083 PRINT “Continue [ Y or N]?”:;
1084 INPUT C$
1085 IF C$ = “Y” THEN RS232LOOP
1086 CLOSE #1
1087 END
126
5
5
Chapter 5: Specifications
127
Chapter 5 - Specifications
Specifications
This chapter details the General, Electrical, and Mechanical
Specifications of the LFI-3751 Temperature Controller.
128
Chapter 5 - Specifications
General and Electrical Specifications
General Specifications
Power Supply:
115 / 230 ±15% VAC
(Switch Selectable)
Power-Line Frequency:
60/50 Hz
Power Consumption:
160 VA peak
25 Watt average (Output Off)
55 Watt average (Output On)
Operating
Environment:
Acoustic Noise:
26 dBa
Warm-Up Time:
1 hour
Warranty:
1 year standard
Remote Interface:
RS-232 standard
Accessories Included:
User’s Guide, Test Report,
connector kit, and power cord
Cleaning Instructions:
Clean with dry, lint free cloth
0 to 55°C
80% Relative Humidity to 30°C
Storage Environment:
-40°C to 70°C
State Storage:
Power OFF State Automatically
Saved
Dimensions:
Bench Top:
(W x D x H)
4.25” x 12” x 6.5”
(108 mm x 305 mm x 165 mm)
Weight:
4.5 kg (10 lbs)
5
Electrical Specifications
Temperature Control
Short Term Stability, 1 hr.
Long Term Stability, 24 hr.
Setpoint Resolution
TEC Output
Bipolar Output Current
Compliance Voltage
Maximum Output Power
Current Limit Range
Control Loop
Proportional Gain, adjustable
Integrator Time Constant,
adjustable
Differentiator, adjustable
< 0.002°C
< 0.005°C
12 bit D to A
± 5.0 A
±8V
40 W
0 to ± 5.0 A
P, PI, PD, PID
AutS, Autd,
0 to 100 Amps / Volt
OFF or
0.4 to 10.0 seconds
OFF or
1 to 100 seconds
Display (4 digit)
Temperature
Resistance
TE Current
TE Voltage
Measurement Resolution
Sensors Supported
Thermistors
RTDs
AD590
LM335
LM35
- 199.9 to +199.9°C
0 to 499.9 kΩ
- 5.00 to +5.00 A
- 9.99 to +9.99 V
15 bit A to D
0 to 499.9 kΩ
0 to 499.9 kΩ
Stability quoted for a typical 10 kΩ thermistor at
100 µA bias current. One hour to rated stability.
129
Chapter 5 - Specifications
Mechanical Specifications
Mechanical Specifications
12.00" [305mm]
MODEL LFI-3751
STATUS
6.50" [165mm]
ACT T
P
SET T
I
TE I
D
TE V
B
AUX T
C
SENSOR
A
B
7.10" [180mm]
A
LIM I
OUTPUT
C
5 Amp - 40 Watt
Temperature Controller
Wavelength Electronics
4.25" [108 mm]
130
12.65" [321mm]
Appendix:
CAT-220 Cable Accessory Diagram
131
Appendix
CAT-220 Cable Accessory Diagram
CAT-220 Cable Accessory Diagram
CAT-220
Pin
1
2
3
4
5
6
7
8
9
SHELL
132
Description
TEC +
TEC Aux Sensor +
Sensor Main Sensor +
AD590 Voltage
Fan Fan+ (+12 V)
-12 V
Wire color
RED
BLACK
BROWN
GREEN
WHITE
ORANGE
YELLOW
BLUE
PURPLE
SLATE