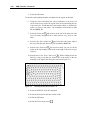
1
Groundwater Modeling System
TUTORIALS
Const Head = 0 ft
in column 1 of
layers 1 & 2
Recharge = 0.003 ft/d
Drain
Unconfined
Confined
Confined
Layer 1: K = 50 ft/d, top elev. = 200 ft, bot elev. = -150 ft
Layer 2: K = 3 ft/d, top elev. = -150 ft, bot elev. = -400 ft
Layer 3: K = 7 ft/d, top elev. = -400 ft, bot elev. = -700 ft
Sheet Pile
11.0 ft
PCE/TCE
Spill
Clay Blanket
32.0 ft
11.0 ft
32.0 ft
Silty Sand
kx = ky = 100 ft/yr
Monitoring well locations
Volume III
•
•
•
•
FEMWATER
SEEP2D
UTCHEM
GIS Module
GMS version 5.0
Ground Water
Flow Direction
GMS 5.0 Tutorials
Copyright © 2004 Brigham Young University – Environmental Modeling
Research Laboratory
All Rights Reserved
Unauthorized duplication of the GMS software or user's manual is strictly
prohibited.
THE BRIGHAM YOUNG UNIVERSITY ENVIRONMENTAL MODELING
RESEARCH LABORATORY MAKES NO WARRANTIES EITHER
EXPRESS OR IMPLIED REGARDING THE PROGRAM GMS AND ITS
FITNESS FOR ANY PARTICULAR PURPOSE OR THE VALIDITY OF
THE INFORMATION CONTAINED IN THIS TUTORIAL DOCUMENT.
The software GMS is a product of the Environmental Modeling Research
Laboratory (EMRL) of Brigham Young University.
emrl.byu.edu
Last Revision: July 19, 2004
TABLE OF CONTENTS
1
INTRODUCTION ................................................................................................................................... 1-1
1.1
1.2
1.3
2
SUGGESTED ORDER OF COMPLETION ................................................................................................ 1-1
DEMO VS. NORMAL MODE ................................................................................................................. 1-1
FORMAT ............................................................................................................................................. 1-2
FEMWATER – FLOW MODEL ........................................................................................................... 2-1
2.1
DESCRIPTION OF PROBLEM ................................................................................................................ 2-1
2.2
GETTING STARTED............................................................................................................................. 2-2
2.3
REQUIRED MODULES/INTERFACES .................................................................................................... 2-2
2.4
BUILDING THE CONCEPTUAL MODEL................................................................................................. 2-3
2.4.1 Importing the Background Image................................................................................................. 2-3
2.4.2 Defining the Units......................................................................................................................... 2-3
2.4.3 Initializing the FEMWATER Coverage ........................................................................................ 2-3
2.4.4 Creating the Boundary Arcs ......................................................................................................... 2-4
2.4.5 Redistributing the Arc Vertices..................................................................................................... 2-4
2.4.6 Defining the Boundary Conditions ............................................................................................... 2-5
2.4.7 Building the Polygon .................................................................................................................... 2-6
2.4.8 Assigning the Recharge ................................................................................................................ 2-6
2.4.9 Creating the Wells ........................................................................................................................ 2-6
2.5
BUILDING THE 3D MESH .................................................................................................................... 2-7
2.5.1 Defining the Materials.................................................................................................................. 2-8
2.5.2 Building the 2D Projection Mesh ................................................................................................. 2-8
2.5.3 Building the TINs.......................................................................................................................... 2-8
2.5.4 Interpolating the Terrain Data ..................................................................................................... 2-9
2.5.5 Interpolating the Layer Elevation Data...................................................................................... 2-10
2.5.6 Building the 3D Mesh................................................................................................................. 2-11
2.6
HIDING OBJECTS .............................................................................................................................. 2-12
2.7
CONVERTING THE CONCEPTUAL MODEL ......................................................................................... 2-13
2.8
SELECTING THE ANALYSIS OPTIONS ................................................................................................ 2-13
2.8.1 Entering the Run Options ........................................................................................................... 2-13
2.8.2 Setting the Iteration Parameters................................................................................................. 2-14
2.8.3 Selecting Output Control ............................................................................................................ 2-14
2.8.4 Defining the Fluid Properties..................................................................................................... 2-14
2.9
DEFINING INITIAL CONDITIONS........................................................................................................ 2-15
2.9.1 The Scatter Point Set .................................................................................................................. 2-15
2.9.2 Creating the Data Set ................................................................................................................. 2-16
2.10
DEFINING THE MATERIAL PROPERTIES ............................................................................................ 2-17
2.11
SAVING AND RUNNING THE MODEL ................................................................................................. 2-17
2.11.1
Viewing Head Contours ......................................................................................................... 2-18
2.11.2
Viewing a Water Table Iso-Surface ....................................................................................... 2-18
2.11.3
Draping the TIFF Image on the Ground Surface .................................................................. 2-19
2.12
CONCLUSION ................................................................................................................................... 2-20
3
SEEP2D - CONFINED............................................................................................................................ 3-1
3.1
DESCRIPTION OF PROBLEM ................................................................................................................ 3-1
vi
GMS Tutorials – Volume III
3.2
GETTING STARTED ............................................................................................................................. 3-2
3.3
REQUIRED MODULES/INTERFACES ..................................................................................................... 3-2
3.4
SETTING THE UNITS ........................................................................................................................... 3-3
3.5
CREATING THE MESH ......................................................................................................................... 3-3
3.5.1 Defining a Coordinate System ...................................................................................................... 3-3
3.5.2 Creating the Conceptual Model.................................................................................................... 3-4
3.5.3 Creating the Corner Points .......................................................................................................... 3-4
3.5.4 Creating the Arcs.......................................................................................................................... 3-5
3.5.5 Modeling the Sheet Pile ................................................................................................................ 3-6
3.5.6 Redistributing Vertices ................................................................................................................. 3-7
3.5.7 Creating the Polygons and Building the Mesh ............................................................................. 3-7
3.6
RENUMBERING THE MESH.................................................................................................................. 3-8
3.7
INITIALIZING SEEP2D ....................................................................................................................... 3-9
3.8
ASSIGNING MATERIAL PROPERTIES ................................................................................................... 3-9
3.9
ASSIGNING BOUNDARY CONDITIONS ............................................................................................... 3-10
3.9.1 Constant Head Boundaries......................................................................................................... 3-11
3.10
SAVING THE SIMULATION ................................................................................................................ 3-13
3.11
RUNNING SEEP2D .......................................................................................................................... 3-13
3.12
CONCLUSION.................................................................................................................................... 3-13
4
SEEP2D - UNCONFINED ...................................................................................................................... 4-1
4.1
DESCRIPTION OF PROBLEM ................................................................................................................ 4-1
4.2
GETTING STARTED ............................................................................................................................. 4-2
4.3
REQUIRED MODULES/INTERFACES ..................................................................................................... 4-2
4.4
SETTING THE UNITS ........................................................................................................................... 4-2
4.5
CREATING THE MESH ......................................................................................................................... 4-3
4.5.1 Defining a Coordinate System ...................................................................................................... 4-3
4.5.2 Creating a Coverage .................................................................................................................... 4-3
4.5.3 Creating the Corner Points .......................................................................................................... 4-4
4.5.4 Creating the Arcs.......................................................................................................................... 4-5
4.5.5 Redistributing Vertices ................................................................................................................. 4-5
4.5.6 Creating the Polygons .................................................................................................................. 4-6
4.5.7 Assigning the Material Types ....................................................................................................... 4-6
4.5.8 Constructing the Mesh.................................................................................................................. 4-7
4.6
RENUMBERING THE MESH.................................................................................................................. 4-7
4.7
INITIALIZING THE SEEP2D SOLUTION ............................................................................................... 4-7
4.8
ASSIGNING MATERIAL PROPERTIES ................................................................................................... 4-8
4.9
ASSIGNING BOUNDARY CONDITIONS ................................................................................................. 4-8
4.9.1 Specified Head Boundary Conditions........................................................................................... 4-9
4.9.2 Exit Face Boundary Conditions.................................................................................................... 4-9
4.10
SAVING THE SIMULATION ................................................................................................................ 4-10
4.11
RUNNING SEEP2D .......................................................................................................................... 4-10
4.12
VIEWING THE SOLUTION .................................................................................................................. 4-11
4.13
MODELING FLOW IN THE UNSATURATED ZONE ............................................................................... 4-11
4.13.1
Reading in the Original Model............................................................................................... 4-11
4.13.2
Changing the Mesh Display ................................................................................................... 4-12
4.13.3
Changing the Analysis Options .............................................................................................. 4-12
4.13.4
Editing the Material Properties ............................................................................................. 4-12
4.14
SAVING THE SIMULATION ................................................................................................................ 4-13
4.15
RUNNING SEEP2D .......................................................................................................................... 4-13
4.16
VIEWING THE SOLUTION .................................................................................................................. 4-13
4.17
CONCLUSION.................................................................................................................................... 4-14
5
UTCHEM ................................................................................................................................................. 5-1
Table of Contents
vii
5.1
DESCRIPTION OF PROBLEM ................................................................................................................ 5-1
5.2
GETTING STARTED............................................................................................................................. 5-3
5.3
REQUIRED MODULES/INTERFACES .................................................................................................... 5-3
5.4
CREATING THE GRID .......................................................................................................................... 5-3
5.5
CONTAMINATION PHASE .................................................................................................................... 5-4
5.5.1 Initializing the UTCHEM Simulation ........................................................................................... 5-4
5.5.2 Saving the Project......................................................................................................................... 5-5
5.5.3 Time Options ................................................................................................................................ 5-6
5.5.4 Output Control.............................................................................................................................. 5-8
5.5.5 Reservoir Properties..................................................................................................................... 5-8
5.5.6 Physical Properties ...................................................................................................................... 5-9
5.5.7 Boundaries.................................................................................................................................. 5-13
5.5.8 Wells ........................................................................................................................................... 5-14
5.5.9 Saving the Model and Running UTCHEM ................................................................................. 5-16
5.5.10
Viewing the Solution .............................................................................................................. 5-16
5.5.11
Changing the Contouring Options ......................................................................................... 5-17
5.5.12
Setting Up the Animation ....................................................................................................... 5-17
5.6
DISSOLUTION PHASE........................................................................................................................ 5-17
5.6.1 Initializing the UTCHEM Simulation ......................................................................................... 5-18
5.6.2 General Options ......................................................................................................................... 5-18
5.6.3 Time Options .............................................................................................................................. 5-19
5.6.4 Drainage Option......................................................................................................................... 5-20
5.6.5 Capillary Pressure...................................................................................................................... 5-20
5.6.6 Saving and Running the Model................................................................................................... 5-20
5.6.7 Viewing the Solution................................................................................................................... 5-21
5.6.8 Additional Simulations ............................................................................................................... 5-21
5.7
PRE-FLUSH PITT PHASE .................................................................................................................. 5-21
5.7.1 Initializing the UTCHEM Simulation ......................................................................................... 5-22
5.7.2 General Options ......................................................................................................................... 5-22
5.7.3 Time Options .............................................................................................................................. 5-23
5.7.4 Physical Properties .................................................................................................................... 5-24
5.7.5 Wells ........................................................................................................................................... 5-25
5.7.6 Saving and Running the Model................................................................................................... 5-28
5.7.7 Viewing the Solution................................................................................................................... 5-28
5.8
WATER FLUSH TREATMENT PHASE ................................................................................................. 5-28
5.8.1 Initializing the UTCHEM Simulation ......................................................................................... 5-29
5.8.2 General Options ......................................................................................................................... 5-29
5.8.3 Injection Period for Flushing ..................................................................................................... 5-30
5.8.4 Physical Properties .................................................................................................................... 5-30
5.8.5 Editing the Well Data ................................................................................................................. 5-31
5.8.6 Saving and Running the Model................................................................................................... 5-32
5.8.7 Viewing the Solution................................................................................................................... 5-32
5.9
SURFACTANT FLUSH TREATMENT PHASE ........................................................................................ 5-33
5.9.1 Initializing the UTCHEM Simulation ......................................................................................... 5-33
5.9.2 General Options ......................................................................................................................... 5-33
5.9.3 Editing the Injection Periods...................................................................................................... 5-34
5.9.4 Initial Conditions........................................................................................................................ 5-35
5.9.5 Editing the Phase Behavior Parameters .................................................................................... 5-35
5.9.6 Interfacial Tension...................................................................................................................... 5-36
5.9.7 Relative Permeability ................................................................................................................. 5-37
5.9.8 Viscosity...................................................................................................................................... 5-37
5.9.9 Component Density .................................................................................................................... 5-38
5.9.10
Diffusion and Dispersion ....................................................................................................... 5-38
viii
GMS Tutorials – Volume III
5.9.11
Boundaries ............................................................................................................................. 5-38
5.9.12
Editing the Concentrations at Wells....................................................................................... 5-39
5.9.13
Saving and Running the Model .............................................................................................. 5-40
5.9.14
Viewing the Solution............................................................................................................... 5-41
5.9.15
Designing a More Effective System........................................................................................ 5-41
5.10
POST-FLUSH PITT (OPTIONAL) ........................................................................................................ 5-41
5.10.1
Initializing the UTCHEM Simulation..................................................................................... 5-41
5.10.2
General Options ..................................................................................................................... 5-42
5.10.3
Time Options .......................................................................................................................... 5-43
5.10.4
Tracer Properties ................................................................................................................... 5-43
5.10.5
Wells ....................................................................................................................................... 5-44
5.10.6
Saving and Running the Model .............................................................................................. 5-47
5.10.7
Viewing the Solution............................................................................................................... 5-47
5.11
CONCLUSION.................................................................................................................................... 5-47
6
GIS MODULE ......................................................................................................................................... 6-1
6.1
PART 1 - WITHOUT ESRI® ARCOBJECTS®.......................................................................................... 6-1
6.2
GETTING STARTED ............................................................................................................................. 6-2
6.3
REQUIRED MODULES/INTERFACES ..................................................................................................... 6-2
6.4
READING THE SHAPEFILE ................................................................................................................... 6-2
6.5
VIEWING THE SHAPEFILE ................................................................................................................... 6-2
6.6
VIEWING THE ATTRIBUTE TABLE ....................................................................................................... 6-3
6.7
CONVERTING THE SHAPEFILE TO 2D SCATTER POINTS ...................................................................... 6-3
6.8
CONVERTING THE SHAPEFILE TO FEATURE OBJECTS ......................................................................... 6-4
6.8.1 Creating the Conceptual Model.................................................................................................... 6-4
6.8.2 Mapping the GIS Data.................................................................................................................. 6-4
6.8.3 Part 1 Conclusion......................................................................................................................... 6-5
6.9
PART 2 - WITH ESRI® ARCOBJECTS® ................................................................................................ 6-5
6.10................................................................................................................................................................. 6-6
6.11
CONCLUSION...................................................................................................................................... 6-6
1
Introduction
CHAPTER
1
Introduction
This document contains tutorials for the Department of Defense Groundwater
Modeling System (GMS). Each tutorial provides training on a specific
component of GMS. Since the GMS interface contains a large number of
options and commands, you are strongly encouraged to complete the tutorials
before attempting to use GMS on a routine basis.
The tutorials are not intended to teach groundwater modeling concepts. They
are only meant to illustrate the use of GMS.
In addition to this document, the online GMS Help document also describes the
GMS interface. Typically, the most effective approach to learning GMS is to
complete the tutorials before browsing the GMS Help document.
1.1
Suggested Order Of Completion
In most cases, the tutorials can be completed in any desired order. However,
some of the tutorials are pre-requisites for other tutorials. Tutorials that have
other tutorials as pre-requisites will indicate it at the beginning of the tutorial.
1.2
Demo vs. Normal Mode
The interface for GMS is divided into eleven modules. Some of the modules
contain interfaces to models such as MODFLOW. Such interfaces are
typically contained within a single menu. Since some users may not require all
of the modules or model interfaces provided in GMS, modules and model
interfaces can be licensed individually. Modules and interfaces that have been
1-2
GMS Tutorials – Volume III
licensed are enabled using the File | Register command. The icons for the
unlicensed modules or the menus for model interfaces are dimmed and cannot
be accessed.
GMS provides two modes of operation: demo and normal. In normal mode,
the modules and interfaces you have licensed are undimmed and fully
functional and the items you have not licensed are dimmed and inaccessible.
In demo mode, all modules and interfaces are undimmed and functional
regardless of which items have been licensed. However, all of the print and
save commands are disabled.
The modules and interfaces needed for the tutorial are listed at the beginning of
each tutorial. While some of the tutorials may be completed in either normal or
demo mode, many of them can only be completed in normal mode. If some of
the required items have not been licensed, you will need to obtain an updated
password or hardware lock before you complete the tutorial.
1.3
Format
Throughout the tutorials, interface objects like menus or buttons, are shown in
italics. Menu commands are given by specifying the menu followed by a “|”
symbol followed by the command, like this: “Select the File | Open
command”. Values that must be entered by the user are given in bold, like this:
“Enter 2.0 for the Hydraulic conductivity.”
2
FEMWATER – Flow Model
CHAPTER
2
FEMWATER – Flow Model
FEMWATER is a three-dimensional finite element ground water model. It can
be used to simulate flow and transport in both the saturated and the unsaturated
zone. Furthermore, the flow and transport can be coupled to simulate density
dependent problems such as salinity intrusion. This tutorial describes how to
build a FEMWATER model to simulate flow only.
2.1
Description of Problem
The site to be modeled in this tutorial is shown in Figure 2-1. The site is a
small coastal aquifer with three production wells, each pumping at a rate of
100,000 ft^3/day. The no flow boundary on the upper left corresponds to a
parallel flow boundary and the no flow boundary on the left corresponds to a
thinning of the aquifer due to a high bedrock elevation. A stream provides a
specified head boundary on the lower left and the remaining boundary is a
coastal boundary simulated with a specified head condition.
The stratigraphy of the site consists of an upper and lower aquifer. The upper
aquifer has a hydraulic conductivity of 10 ft/day and the lower aquifer has a
hydraulic conductivity of 30 ft/day. The wells extend to the lower aquifer.
The recharge to the aquifer is about one foot per year. The objective of this
tutorial is to create a steady state flow model of the site.
2-2
GMS Tutorials – Volume III
No Flow
Boundary
Production Wells
Specified Head
Boundary
Figure 2-1
2.2
Site to be Modeled with FEMWATER Flow Model.
Getting Started
If you have not yet done so, launch GMS. If you have already been using
GMS, you may wish to select the File | New command to ensure the program
settings are restored to the default state.
2.3
Required Modules/Interfaces
The license registration system used by GMS allows the components of GMS
to be licensed individually, depending on the needs of the user. Before
continuing, you may wish to check whether or not the GMS components used
in this tutorial have been enabled in the copy of GMS you are using. This can
be accomplished by selecting the Register | File command. On the left side of
the Register dialog, the following components should have “ENABLED”
displayed in the Status column to the right of each of the following
components:
•
Sub-surface characterization
•
Mesh
•
Geostatistics
•
Map
FEMWATER – Flow Model
•
2.4
2-3
FEMWATER
Building the Conceptual Model
FEMWATER models can be constructed using the direct approach or the
conceptual model approach. With the direct approach, a mesh is constructed
and the boundary conditions are assigned directly to the mesh by interactively
selecting nodes and elements. With the conceptual model approach, feature
objects (points, arcs, and polygons) are used to define the model domain and
boundary conditions. The mesh is then automatically generated and the
boundary conditions are automatically assigned. We will use the conceptual
model approach for this tutorial.
2.4.1
Importing the Background Image
Before creating the feature objects, we will import a scanned image of the site.
The image was generated by scanning a section of a USGS quadrangle map on
a desktop scanner. The image has previously been imported to GMS and
registered to real world coordinates. The registered image was saved to a GMS
project file. To read the image:
1. Select the Open button
.
2. Locate and open the directory entitled: tutfiles\femwater
3. Select the file entitled start.gpr and select the Open button.
2.4.2
Defining the Units
We will now define the units. GMS uses the units we select to plot helpful
labels next to input edit fields.
1. Select the Edit | Units command.
2. Check to ensure that the default Length unit is feet and the default
Time unit is days.
3. Change the Mass unit to slug. The remaining units are for a transport
simulation and can be ignored.
4. Select the OK button to exit the Units dialog.
2.4.3
Initializing the FEMWATER Coverage
Before creating the feature objects, we first need to create a FEMWATER
coverage.
2-4
GMS Tutorials – Volume III
1. Switch to the Map module
.
2. Right-click on the Map Data folder in the Data Tree and, from the
pop-up menu, select the New Conceptual Model command.
3. Change the name to “femmod”.
4. Change the model to FEMWATER and click OK.
5. Right-click on the femmod conceptual model and select the New
Coverage command from the pop-up menu.
6. Change the Name to “femwater”.
7. Turn on the following properties:
•
Flow BC
•
Wells
•
Refinement
•
Meshing options
8. Select the OK button.
2.4.4
Creating the Boundary Arcs
We are now ready to begin creating the arcs defining the boundary of the
model. Notice that the three boundaries on the left have been marked on the
background image and are color-coded.
1. Select the Create Arc tool
.
2. Using the boundary lines shown on the background image, create one
arc for each of the three marked boundaries on the left side of the
model. Click on a series of points along each line to trace the arc and
double click at the end of the boundary to end the arc. Make sure the
arcs are connected by starting one arc precisely at the ending point of
the previous arc.
3. Create an arc for the coastline boundary. Once again, be sure the arc is
connected to the other boundary arcs.
2.4.5
Redistributing the Arc Vertices
The two endpoints of each arc are called nodes and the intermediate points are
called vertices. These arcs will be used to generate a 2D mesh that will be
FEMWATER – Flow Model
2-5
converted into a 3D mesh. The spacing of the line segments defined by the
vertices will control the size and number of elements. Thus, we need to
redistribute the vertices along each arc to ensure that they are evenly spaced
and of the correct length.
1. Select the Select Arcs tool
.
2. Select all of the arcs by dragging a box that encloses all of the arcs.
3. Select the Feature Objects | Redistribute Vertices command.
4. Change the Spacing to 300.
5. Select the OK button.
2.4.6
Defining the Boundary Conditions
Now that the arcs are defined, we can assign boundary conditions to the arcs.
The two no-flow boundaries do not need to be altered since the default
boundary type is no-flow. However, we need to mark the stream arc and the
coastline arc as constant head arcs.
1. Select the Select Arcs tool
.
2. While holding down the Shift key, click on both the stream arc and on
the coastline arc.
3. Select the Properties button
.
4. In the All row in the spreadsheet, change the Flow bc to spec. head.
This assigns this type to both arcs.
5. Select the OK button.
Note that no head values were assigned to the arcs. The head values are
assigned to the nodes at the ends of the arc. This allows the head to vary
linearly along the length of the arc. For the coastline arc, the head at both ends
is the same. Since the default head value is zero, no changes need to be made.
However, we do need to enter a head value for the upper end of the stream.
The head will vary linearly along the stream from the specified value at the top
to zero at the coast.
6. Select the Select Points/Nodes tool
.
7. Double click on the node at the top (left) end of the stream arc.
8. Enter a value of 200 for the head.
9. Select the OK button.
2-6
GMS Tutorials – Volume III
2.4.7
Building the Polygon
Now that the arcs are defined, we are ready to build a polygon defining the
model domain. The polygon is necessary for two reasons: 1) it is used to
define the model domain when the mesh is generated, and 2) it is used to assign
the recharge. In many cases, the model domain is subdivided into multiple
recharge zones, each defined by a polygon. In this case, we will use one
polygon since we have a single recharge value.
1. Select the Feature Objects | Build Polygons command.
2.4.8
Assigning the Recharge
Next, we will assign the recharge value. There are two ways to assign recharge
in FEMWATER: using a specified flux boundary or using a variable boundary.
The variable boundary is more accurate but it is more time-consuming and less
stable. To ensure that the tutorial can be completed in a timely fashion, we will
use the simpler specified flux approach.
.
1. Select the Select Polygons tool
2. Double click anywhere in the interior of the model domain.
3. Change the Flow bc to be spec. flux.
4. Enter a value of 0.003 for the flux (this value is in ft/d and corresponds
to about 1.1 ft/yr).
5. Select the OK button.
6. Click anywhere outside the polygon to unselect it.
2.4.9
Creating the Wells
The final step in defining the conceptual model is to create the wells. To create
the first well, do the following:
1. Select the Create Point tool
.
2. Click on a point anywhere in the upper right corner of the model.
3. Using the edit fields at the top of the screen, change the xyz
coordinates of the point you just created to (52b90, 4206, 45). Hit the
Tab or Enter key after entering each value.
4. With the point still selected, select the Properties button
.
FEMWATER – Flow Model
2-7
First, we will mark the point as a well point. For a well, we define the
pumping rate, and the elevation of the screened interval. The screened interval
is used to determine which nodes in the 3D mesh to assign the pumping rate to.
The pumping rate is factored among all nodes lying within the screened
interval. In our case, there will only be one node.
5. Change the Type to well.
6. Enter -185 for the Top of screen.
7. Enter -195 for the Bottom of screen.
8. Enter -100000 for the Flow rate.
Next, we will set the "Refine" option so that the mesh is refined around the
well.
9. Turn on the Refine option.
10. Enter 150 for the Element size (this controls the element size at the
well).
11. Select OK to exit the dialog.
Repeat this entire process to create two more wells with the following
properties:
Well #
X
Y
Z
Element size
Top of screen
Bottom of screen
Flux rate
2.5
1
3854
3034
75
150
-200
-210
-100000
2
5026
1872
45
150
-240
-250
-100000
Building the 3D Mesh
At this point, the conceptual model is complete and we are ready to build the
3D finite element mesh. The mesh will consist of two zones, one for the upper
aquifer and one for the lower aquifer. The upper zone will consist of two
layers of elements and the lower zone will consist of three layers of elements.
To build the mesh, we will first create a 2D "projection" mesh using the feature
objects in the conceptual model. We will then create three triangulated
irregular networks (TINs): one for the top (terrain) surface, one for the bottom
of the upper aquifer, and one for the bottom of the lower aquifer. We will then
create the 3D elements by extruding each of the elements in the 2D mesh into a
column of 3D elements.
2-8
GMS Tutorials – Volume III
2.5.1
Defining the Materials
Before building the mesh, we will define a material for each of the aquifers.
The materials are assigned to the TINs and eventually to each of the 3D
elements.
1. Select the Edit | Materials command.
2. Change the name of the default material to Upper Aquifer. To change
the name click on the material name in the text window.
3. Change the material color to green.
4. Select the New button to create another material.
5. Change the name of the new material to Lower Aquifer.
6. Change the material color to red.
7. Select the OK button.
2.5.2
Building the 2D Projection Mesh
The 2D projection mesh can be constructed directly from the conceptual
model:
1. Select the Feature Objects | Map ´ 2D Mesh command.
2. Select OK to accept the defaults in the Map ´ 2D Mesh dialog.
After a few seconds, the mesh should appear.
2.5.3
Building the TINs
To build the TINs defining the stratigraphic horizons, we will make three TINs
where each TIN is a copy of the 2D mesh. At first, these three TIN's will have
the same elevations (zero) as the 2D mesh. We will then import a set of scatter
points and interpolate the proper elevations to the TINs.
To create the top TIN:
1. Switch to the 2D Mesh module
.
2. Select the Build Mesh | Mesh ´ TIN command.
3. Enter terrain for the name of the TIN.
4. Select the list of materials, select Upper Aquifer (this defines the
material below the TIN).
FEMWATER – Flow Model
2-9
5. Select OK.
6. Select No at the prompt. We do not want to delete the 2D mesh.
To create the second TIN:
1. Select the Build Mesh | Mesh ´ TIN command.
2. Enter bottom upper aquifer for the name of the TIN.
3. Select the list of materials, select Lower Aquifer.
4. Select OK.
5. Select No at the prompt.
To create the third TIN:
1. From the Build Mesh | Mesh ´ TIN command.
2. Enter bottom lower aquifer for the name of the TIN.
3. Select the list of materials, select Lower Aquifer (this value is ignored
for the bottom TIN).
4. Select OK.
5. Select No at the prompt.
2.5.4
Interpolating the Terrain Data
Next, we will use the scatter points defining the terrain elevations to interpolate
to the top TIN. The terrain points were created by digitizing elevations from
the contour map. Before interpolating to the TIN, we need to make sure the top
TIN is the active TIN.
1. Switch to the TIN module
.
2. From the Data Tree, select the TIN named terrain.
Before interpolating, we will make some adjustments to the interpolation
options (based on our experience with these scatter point data).
3. Switch to the 2D Scatter Point module
.
4. Select the data set entitled terrain in the Data Tree to make it the active
scatter point set.
5. From the Interpolation | Interpolation Options command.
2-10
GMS Tutorials – Volume III
6. Select the Options button next to the Inverse distance weighted item.
7. In the Nodal function section, select the Constant option.
8. Select the OK button and then the OK button to exit both dialogs.
To interpolate from the scatter points to the TIN.
9. Select the Interpolation | Interpolate ´ Active TIN command.
10. Select the OK button.
To view the interpolated elevations:
11. Select the Oblique View macro
.
12. Select the Display | Settings command.
13. Enter a magnification factor of 4.0.
14. Select the OK button.
2.5.5
Interpolating the Layer Elevation Data
Next, we will interpolate the elevations defining the bottom of the upper and
lower aquifers. These elevations were obtained from a set of exploratory
boreholes. Once again, before interpolating to the TIN, we need to make sure
the desired TIN is the active TIN.
1. Switch to the TIN module
.
2. Select the TIN named bottom upper aquifer from the Data Tree.
Before interpolating, we will switch back to the default interpolation method.
3. Switch to the 2D Scatter Point module
.
4. Select the Interpolation | Interpolation Options command.
5. Select the Options button next to the Inverse distance weighted item.
6. In the Nodal function section, select the Gradient plane option.
7. Select the OK button and then the OK button to exit both dialogs.
This scatter point set has two data sets: one set of elevations for the bottom of
the upper aquifer and one set for the bottom of the lower aquifer. We will first
interpolate the elevations for the bottom of the upper aquifer.
FEMWATER – Flow Model
2-11
8. Select the data set entitled elevs in the Data Tree to make it the active
scatter point set.
9. If necessary, expand the elevs item so you can see the data sets
associated with the scatter point set.
10. Select the bot of layer 1 data set to make it active.
To interpolate from the scatter points to the TIN.
11. Select the Interpolation | to Active TIN command.
12. Select the OK button.
Finally, we will interpolate the elevations for the bottom TIN.
13. Switch to the TIN module
.
14. Select the TIN named bottom lower aquifer in the Data Tree.
15. Switch to the 2D Scatter Point module
.
16. Select the data set named bot of layer 2 in the Data Tree.
17. Select the Interpolation | to Active TIN command.
18. Select the OK button.
At this point, you should see the correct elevations on all three TINs. To
simplify the display:
19. Switch to the TIN module
.
20. Select the Display Options button
.
21. Turn off the Vertices option and turn on the Triangle faces option.
22. Select the OK button.
2.5.6
Building the 3D Mesh
We are now ready to build the 3D mesh. The 3D mesh is constructed by
selecting a pair of TINs and then extruding elements between the TINs.
1. Select the Select TINs tool
.
2. Select the top and middle TINs by clicking on the icons for the TINs
while holding down the Shift key.
2-12
GMS Tutorials – Volume III
3. Select the Build TIN | Fill Between TINs ´ 3D Mesh command.
4. Enter 2 for the Number of interpolated mesh layers.
5. Select the Specify material option.
6. Select the material called Upper Aquifer.
7. Select the OK button.
Next, we will build the elements for the lower aquifer.
8. Select the bottom two TINs.
9. Select the Build TIN | Fill Between TINs ´ 3D Mesh command.
10. Enter 3 for the Number of interpolated mesh layers.
11. Select the Specify material option.
12. Select the material called Lower Aquifer.
13. Select the OK button.
2.6
Hiding Objects
Before continuing, we will unclutter the display by hiding the objects we are
finished with. We will hide everything but the feature objects and the 3D
mesh.
To hide the TINs:
1. Uncheck all three TINs in the Data Tree.
We can also hide the scatter points:
2. Switch to the 2D Scatter Point module
.
3. Uncheck both scatter point sets in the Data Tree.
To hide the 2D mesh:
4. Switch to the 2D Mesh module
.
5. Hide the mesh by unchecking the 2D Mesh Data object in the Data
Tree.
To unclutter the display of the 3D mesh:
FEMWATER – Flow Model
6. Switch to the 3D Mesh module
2-13
.
7. Select the Display Options button
.
8. Turn off the Nodes option.
9. Select the OK button.
2.7
Converting the Conceptual Model
Now we are ready to convert the conceptual model to the 3D mesh model.
This will assign all of the boundary conditions using the data defined on the
feature objects.
1. Select the FEMWATER | New Simulation command. (this initializes the
data structures for the FEMWATER simulation).
2. Select the OK button.
3. Switch to the Map module
.
4. Select the Feature Objects | Map ´ FEMWATER command.
5. Select OK at the prompt (since we only have one coverage, the choice
here does not matter).
A set of symbols should appear indicating that the boundary conditions have
been assigned.
2.8
Selecting the Analysis Options
Next, we will switch to the 3D Mesh module and select the analysis options.
2.8.1
Entering the Run Options
First, we will indicate that we wish to run a steady state flow simulation:
1. Switch to the 3D Mesh module
.
2. Select the FEMWATER | Run Options command.
3. For the Type of simulation, ensure the Flow only option is selected.
4. In the Steady State vs. Transient section, select Steady state solution.
2-14
GMS Tutorials – Volume III
The problem we are solving has a very large partially saturated region, mainly
in the upper left corner of the model. The larger the unsaturated zone, the more
difficult it is to get FEMWATER to converge. For these types of problems, the
Nodal/Nodal option is a qood choice for quadrature. It is not as accurate as the
default option (Gaussian/Gaussian), but it is more stable.
5. In the Quadrature selection section, select the Nodal/Nodal option.
6. Select the OK button.
2.8.2
Setting the Iteration Parameters
Next, we will adjust the iteration parameters.
1. Select the FEMWATER | Iteration Parameters command.
2. Set the Max iterations for non-linear equation to 100.
3. Set the Max iterations for linear equation to 1000.
4. Set the Steady state convergence criterion to 0.01.
5. Select the OK button.
2.8.3
Selecting Output Control
Next, we will select the output options. We will choose to output a pressure
head file only.
1. Select the FEMWATER | Output Control command.
2. Turn off the Save nodal moisture content file, Save velocity file, and
Save flux file options.
3. Select the OK button.
2.8.4
Defining the Fluid Properties
Finally, we will define the fluid properties.
1. Select the FEMWATER | Fluid Properties command.
The items in this dialog are dependent on the units we have selected. Since this
is a steady state solution, we can ignore the viscosity and compressibility
options.
2. Enter 1.94 for the Density of water.
FEMWATER – Flow Model
2-15
3. Select the OK button.
2.9
Defining Initial Conditions
Because of the non-linear equations used by FEMWATER to model flow in the
unsaturated zone, FEMWATER is more sensitive to initial conditions than
saturated flow models such as MODFLOW. If a set of initial conditions is
defined that is significantly different than the final head distribution,
FEMWATER may be slow or even unable to converge.
For a flow simulation, FEMWATER requires a set of pressure heads as an
initial condition. The FEMWATER interface in GMS includes a command
that can be used to automatically create a set of pressure heads from a userdefined water table surface. The water table surface is defined by a set of
scatter points. A total head data set is generated by interpolating head values
from the scatter points to the nodes of the 3D mesh. Finally, the pressure head
data set is created by subtracting the node elevations from the total head values.
2.9.1
The Scatter Point Set
To define the initial condition, we will use a small set of points at the expected
elevation of the computed water table surface. In the interest of time, these
points have already been created for you and are already in the project. To
learn more about how to create scatter points, refer to the tutorial in Volume I
entitled 2D Geostatistics.
Before digitizing the points, we will turn off the flux boundary condition
display options.
1. Select the FEMWATER | BC Display Options command.
2. Turn off the Flux option.
3. Select the OK button.
To view the scatter point set.
4. Switch to Plan View
.
5. Switch to the 2D Scatter Point module
.
6. In the Data Tree, turn on the scatter point set named Starting Heads.
The scatter points should be located as shown in Figure 2-2. The values will
not be visible by default, but you could turn them on if desired.
2-16
GMS Tutorials – Volume III
0
0
0
40
2
100
20
0
200
0
100
0
Figure 2-2
2.9.2
Locations and Elevations for New Points.
Creating the Data Set
Finally, to define the initial condition, we must create a pressure head data set.
The data set will be saved to a data set file. The path to this file will be passed
to FEMWATER when the simulation is launched.
1. Switch to the 3D Mesh module
.
2. Select the FEMWATER | Initial Conditions command.
3. In the Cold start section on the upper left side of the dialog, select the
Read from data set file option.
4. Select the Generate IC button.
5. Select Starting_Heads for the Active 2D scatter point set.
6. Enter -200 for the Minimum pressure head.
7. Select the OK button.
8. When prompted for the file name, enter starthd.phd and select the
Save button.
9. Select the OK button to exit the Initial Conditions dialog.
FEMWATER – Flow Model
2.10
2-17
Defining the Material Properties
The final step in setting up the model is to define the material properties.
1. Select the FEMWATER | Material Properties dialog.
We need to enter a hydraulic conductivity and a set of unsaturated zone curves
for each aquifer.
To define the material properties for the upper aquifer:
2. Select the Upper aquifer material from the list of materials.
3. Select the FEMWATER Flow tab.
4. Enter a value of 10.0 in the upper left edit field in the Conductivity
section and select the Isotropic button. This should fill in all of the
diagonal terms with a value of 10.0.
5. Select the Generate Curves button.
6. Set the Curve type to van Genuchten equations.
7. Enter 6.0 for the Max. height above water table.
8. Select the Preset parameter values section and select Silt.
9. Select the Compute Curves button.
10. Select the OK button.
To define the material properties for the lower aquifer:
11. Select the Lower aquifer item in the list at the top of the dialog.
12. Enter a value of 30.0 in the upper left edit field in the Conductivity
section and select the Isotropic button
13. Select the Generate Curves button.
14. Select the Compute Curves button.
15. Select the OK button.
16. Select the OK button to exit the Material Properties dialog.
2.11
Saving and Running the Model
We are now ready to save and run the model.
2-18
GMS Tutorials – Volume III
1. Select the File | Save As command.
2. Enter femmod.gpr for the project name.
3. Select the Save button.
To run FEMWATER:
4. Select the FEMWATER | Run FEMWATER command.
The FEMWATER window should appear and you will see some information
on the progress of the model convergence. The model should converge in a
few minutes.
5. When the model converges, select the Close button.
2.11.1 Viewing Head Contours
First, we will view a color fringe plot.
1. Select the Display Options button
.
2. Turn on the Contours option.
3. Select the Options button next to the Contours item.
4. Under the Line options section of the dialog change the color of the
line to blue.
5. Select OK to exit the dialog.
6. Select the FEMWATER tab.
7. Turn off the Head option.
8. Select the OK button.
2.11.2
Viewing a Water Table Iso-Surface
Another way to view the solution is to generate an iso-surface at a pressure
head of zero. This creates a surface matching the computed water table.
Further, if we cap the iso-surface on the side greater than zero, we will get a
color-shaded image of the pressure variation in the saturated zone.
1. Expand the femmod solution in the Data Tree.
2. Select pressure_head to make it the active data set.
FEMWATER – Flow Model
3. Select the Display Options button
2-19
.
4. Turn off the Element edges and the Contours options.
5. Turn on the Iso-surfaces option.
6. Select the Options button next to the Iso-surfaces item.
7. Make sure that the number of iso-surfaces is 1.
8. For the upper value on the first line of the spreadsheet enter a value of
0.0.
9. Turn on the Fill between toggle on the second line of the spreadsheet
to fill between 0.0 and the maximum value.
10. Turn on the Iso-surface faces.
11. Turn on the Contour specified range option.
12. Set the Minimum to 0 and the Maximum to 456.
13. Select the OK button to exit both dialogs.
14. Select the Oblique View macro
.
2.11.3 Draping the TIFF Image on the Ground Surface
Finally, we will drape the TIFF image on the terrain surface to illustrate the
spatial relationship between the computed water table surface and the ground
surface. To do this, we will first unhide the top TIN.
1. Switch to the TIN module
.
2. Check the box next to the terrain TIN to show it.
3. Select the terrain TIN in the Data Tree to make it active.
Next we will set the option to map the TIFF image to the TIN when shaded.
4. Switch to the Map module.
5. Select the Display Options button
.
6. Select the Images/Drawing tab.
<<< This option is not yet available >>>
2-20
GMS Tutorials – Volume III
After a short wait (this may take up to several minutes depending on the
machine speed), the shaded image should appear. To view the image from the
other side:
7. Select the Rotate tool
.
8. Click on the screen and drag horizontally to the left side of the screen.
Repeat as necessary until the other side of the model is visible.
Finally, we will try the smooth shade option.
9. Select the Display | Lighting Options command.
10. Select the Smooth features option.
11. Select the OK button.
2.12
Conclusion
This concludes the FEMWATER – Flow Model tutorial. If you wish to exit
GMS at this time:
1. Select the File | Exit command.
2. Select No at the prompt.
3
SEEP2D - Confined
CHAPTER
3
SEEP2D - Confined
SEEP2D is a 2D finite element, steady state, flow model. It is typically used
for profile models, i.e., cross-section models representing a vertical slice
through a flow system which is symmetric in the third dimension. Examples
include earth dams, levees, sheet piles, etc.
SEEP2D can be used for both confined and unconfined problems.
Accordingly, the SEEP2D tutorials are divided into two parts. The tutorial in
this chapter describes how to set up and solve a confined seepage problem for
SEEP2D using GMS. The steps required for simulating the unconfined
condition are described in the following chapter. The two SEEP2D tutorials
are entirely independent and can be completed in any order. However, it is
recommended that the first tutorial be completed before the second tutorial
since the motivation behind many of the steps in the model definition process
is described in more detail in the first tutorial.
3.1
Description of Problem
The problem we will be solving in this tutorial is shown in Figure 3-1.
3-2
GMS Tutorials – Volume III
Figure 3-1
Confined Flow Problem.
The problem involves a partially penetrating sheet pile wall with an impervious
clay blanket on the upstream side. The sheet pile is driven into a silty sand
deposit underlain by bedrock at a depth of 32 feet.
From a SEEP2D viewpoint, this problem is a "confined" problem. For
SEEP2D, a problem is confined if it is completely saturated. A problem is
unconfined if it is partially saturated.
3.2
Getting Started
If you have not yet done so, launch GMS. If you have already been using
GMS, you may wish to select the File | New command to ensure the program
settings are restored to the default state.
3.3
Required Modules/Interfaces
The license registration system used by GMS allows the components of GMS
to be licensed individually, depending on the needs of the user. Before
continuing, you may wish to check whether or not the GMS components used
in this tutorial have been enabled in the copy of GMS you are using. This can
be accomplished by selecting the Register | File command. On the left side of
the Register dialog, the following components should have “ENABLED”
displayed in the Status column to the right of each of the following
components:
•
Mesh
•
Map
•
SEEP2D
SEEP2D - Confined
3.4
3-3
Setting the Units
We will start by setting the units we are using. GMS will display the units we
select next to the input fields to remind us what they are.
1. Select the Edit | Units command.
2. Select ft for the Length units.
3. Select yr for the Time units.
4. Select slug for the Mass units.
5. Select the OK button.
3.5
Creating the Mesh
The first step in setting up the problem is to create the finite element mesh.
Two types of elements can be used with SEEP2D: three node triangular
elements and four node quadrilateral elements.
A variety of methods are available in GMS for constructing a 2D mesh. The
approach we will use here will be to define the boundary of the mesh using
map objects, and then use the Map ´ 2D Mesh command to automatically fill
in the elements and nodes.
3.5.1
Defining a Coordinate System
Before we construct the mesh, we must first establish a coordinate system. We
will use a coordinate system with the origin 90 feet upstream of the sheet pile
at the top of the bedrock as shown in Figure 3-2.
(90,32)
(0,32)
(150,32)
(58,32)
y
(90,18)
(0,0)
(150,0)
x
Figure 3-2
Coordinate System.
3-4
GMS Tutorials – Volume III
3.5.2
Creating the Conceptual Model
First we’ll create a SEEP2D conceptual model. Then we’ll create a coverage
in that conceptual model.
1. Switch to the Map module
.
2. In the Data Tree, right-click on the Map Data folder and select the
New Conceptual Model command from the pop-up menu.
3. Change the Name to “Confined”.
4. Change the Model to SEEP2D.
5. Click OK.
6. In the Data Tree, right-click on the Confined conceptual model and
select the New Coverage command from the pop-up menu.
7. Turn on the following properties:
•
Refinement
8. Click OK.
3.5.3
Creating the Corner Points
We are now ready to create some points at key corner locations. These points
will then be used to guide the construction of a set of arcs defining the mesh
boundary.
1. Select the Create Point tool
from the Tool Palette.
2. Click anywhere on the graphics window to create a point. Then edit
the coordinates using the edit fields at the top of the GMS window.
Change the X: value to 0.0 and the Y: value to 0.0.
3. Create another point by clicking on the graphics window and change
the x and y coordinates to 150.0 and 32.0 respectively.
4. Now select the Frame macro
.
5. Now create points at the following locations using the same steps as
before:
SEEP2D - Confined
X
0
58
90
90
150
3-5
y
32
32
32
18
0
If you need to edit the node coordinates this can be done by using the Select
. When this tool is active you can select points and
Points/Nodes tool
change the coordinates using the edit fields. You can also select points and
delete them using the Delete key on the keyboard or the Delete command in the
Edit menu.
The nodes you have created should resemble the nodes shown in Figure 3-3.
A
B
C
D
G
E
Figure 3-3
3.5.4
F
Points Created with the Create Point Tool
Creating the Arcs
Now that the corner nodes are created, the next step is to create the arcs. This
can be accomplished as follows:
1. Select the Create Arc tool
.
2. Click on the existing points to create arcs between the points around
the perimeter of the model. Start by clicking on point A, as shown in
Figure 3-4, then B and so on to point F. Then double click on point A
to finish creating the boundary.
3. Also create an arc for the sheet pile. Start by clicking on point C and
double click on point G to finish.
4. Your model should now look like Figure 3-4.
3-6
GMS Tutorials – Volume III
A
B
C
D
G
F
Figure 3-4
3.5.5
E
Arcs Connecting Points
Modeling the Sheet Pile
To model the sheet pile, we need a no-flow boundary. However, SEEP2D
doesn’t have a no-flow boundary condition that we can apply. Thus, we will
put a break in the mesh at the location of the sheet pile, as shown in Figure 3-5.
C
H
G
Figure 3-5
Sheet Pile Zoomed
To create the break, we need to add another point and another arc as shown in
Figure 3-5. To create the point:
1. Use the Zoom tool
Figure 3-5.
to zoom up on the sheet pile area shown in
2. Choose the Create Vertex tool
.
3. Create point H by clicking anywhere on the arc to the right of node C.
4. With the vertex still selected, change the vertex coordinates to x =
90.25 and y = 32.0 using the x and y fields in the Edit Window.
5. With the vertex still selected, select the Feature Objects | Vertices ³´
Nodes command.
SEEP2D - Confined
3-7
This turns the vertex into a node and splits the arc into 2 arcs. Now we can
delete the small arc between points C and H.
6. Select the Select Arcs tool
.
7. Delete the small arc between points C and H by selecting it and hitting
the Delete key.
8. Select the Create Arc tool
.
9. Create the vertical arc between points G and H as shown in Figure 3-5
by clicking on point G and double-clicking on point H.
10. Select the Frame macro
3.5.6
to see the entire model.
Redistributing Vertices
At this point, all of our arcs have one edge and zero vertices. When we issue
the Map ´ 2D Mesh command, the density of the elements in the interior of
the mesh is controlled by the edge spacing along the arcs. Thus, we will
subdivide the arcs to create appropriately sized edges.
1. Choose the Select Arcs tool
.
2. Select the Edit | Select All command.
3. Select the Feature Objects | Redistribute Vertices command.
4. Select the Specified spacing option.
5. Enter a value of 4.0 for the spacing.
6. Select the OK button.
Notice the arcs are divided into much smaller segments now.
3.5.7
Creating the Polygons and Building the Mesh
Before we can create the mesh, we first have to build a polygon. Simply
creating the arcs does not create the polygon. We must explicitly create the
polygons using the Build Polygons command.
1. Select the Feature Objects | Build Polygons command.
At this point, we are ready to construct the mesh.
2. In the Feature Objects | Map ´ 2D Mesh command.
3-8
GMS Tutorials – Volume III
3. Select OK at the prompt.
You should now see a 2D mesh.
3.6
Renumbering the Mesh
The next step in the model definition process is to renumber the nodes and
elements. The sequence that the nodes are numbered has a dramatic impact on
the amount of time required by SEEP2D to find a solution. The nodes and
elements have been numbered in the order that they were created. This
numbering is not optimal. The relative quality of the node numbering is
indicated by the nodal half band width. The time required for a solution is
quadratically proportional to the nodal half band width. To view the nodal half
band width:
1. Switch to the 2D Mesh module
.
2. In the Data Tree, right-click on the 2D Mesh Data object and select the
Properties command from the pop-up menu.
3. Note the Max node half band width.
4. Select the Done button.
The ID's of each of the nodes in the mesh can be displayed as follows:
5. Select the Display Options button
.
6. Turn on Node numbers.
7. Select the OK button.
To renumber the nodes and elements, we must first select a string of nodes on
the boundary. This string of nodes defines a starting point for the renumbering
process.
8. Choose the Select Node String tool
.
9. Select the leftmost column of nodes in sequence from top to bottom.
This can be done one of two ways:
(a) Click on the top node, then the next node down and so on until all of
the nodes in the column have been selected. Or,
(b) Click on the top node in the column, and while holding down the
Control key, click on the bottom node in the column. All of the
intermediate nodes will automatically be selected.
SEEP2D - Confined
3-9
10. Select the Modify Mesh | Renumber command.
Notice how the node numbering has changed. Bring up the Get Info dialog
again to examine the new nodal half band width. Generally, the best node half
band width occurs when a sequence of renumbering nodes is selected along the
minor axis of the mesh. When in doubt, the mesh can be renumbered using
several different strings of nodes to find the best numbering sequence.
To turn off the node numbers:
11. Select the Display Options button
.
12. Turn the Node numbers option off.
13. Select the OK button.
3.7
Initializing SEEP2D
Now that the mesh is constructed, we can begin to enter the SEEP2D data.
1. Select the SEEP2D | New Simulation command.
2. Select the Model Type section, select the Confined option.
3. Select the OK button to exit the dialog.
3.8
Assigning Material Properties
The next step in creating the model is to define material properties. There is
one set of material properties for each zone of the mesh. The material
properties are k1, k2, and an angle. The values k1 and k2 represent the two
principal hydraulic conductivities and the angle is the angle from the x-axis to
the direction of the major principle hydraulic conductivity measured counterclockwise as shown in Figure 3-6.
3-10
GMS Tutorials – Volume III
k2
y
k1
a
x
Figure 3-6
Definition of Hydraulic Conductivity Angle.
With most natural soil deposits, the major principal hydraulic conductivity is in
the x direction, the minor principal hydraulic conductivity is in the y direction,
and the angle is zero.
Each element in the mesh is assigned a material id. The material id is an index
into a list of material properties. All of the elements we have created so far
have a default material id of 1. This is sufficient since we only have one soil
type in our problem. To enter the properties for material #1:
1. Select the SEEP2D | Material Properties command.
2. Enter a value of 100 for both k1 and k2.
3. Select the OK button.
Note: The units for hydraulic conductivity are L/T (length / time). The length
units should always be consistent with the units used in defining the mesh
geometry. Any time units can be used. However, small time units (such as
seconds) will result in very small velocity values and may make it difficult to
display velocity vectors. It is recommended that time units of days or years be
used.
3.9
Assigning Boundary Conditions
The final step in defining the model is to assign boundary conditions to the
mesh. For the problem we are modeling there are two types of boundary
conditions: constant head and no-flow (flow is parallel to the boundary). With
the finite element method, not assigning a boundary condition is equivalent to
assigning a no-flow boundary condition. Therefore, all of the boundaries have
a no-flow boundary condition by default and all that is necessary in this case is
to assign the constant head boundary conditions.
SEEP2D - Confined
3.9.1
3-11
Constant Head Boundaries
The constant head boundary conditions for our mesh are shown in Figure 3-7.
h = 43 ft
h = 32 ft
58 ft
Figure 3-7
Constant Head Boundary Conditions.
The region on the left in Figure 3-7 represents the top of the mesh on the
upstream side that is not covered with the clay blanket. The region on the right
represents the downstream side of the mesh. Using a datum of zero, the total
head in either case is simply the elevation of the water. As mentioned above,
all other boundaries on the mesh have a no-flow boundary condition by default.
To enter the constant head boundary conditions for the region on the left:
1. Choose the Select Nodes tool
.
2. Using the cursor and noting the cursor coordinates in the lower left
corner of the screen, locate the node with the coordinates (58, 32).
This node represents the left end of the clay blanket. Drag a box which
just encloses this node and all of the other nodes on the top boundary
to the left of this node, as shown in Figure 3-8.
Figure 3-8
Selecting Nodes Where Head = 43.
3. Select the SEEP2D | Node BC command.
4. Select the Head option and enter a value of 43.
3-12
GMS Tutorials – Volume III
5. Select the OK button.
To enter the constant head boundary conditions for the region on the right:
6. Using the cursor and noting the cursor coordinates in the lower left
corner of the screen, locate the region of the mesh representing the top
of the sheet pile. Recall that this is the location where we defined two
nodes very close to each other. The coordinates of the nodes are (90,
32) and (90.25, 32).
and zoom in on the top of the sheet pile until
7. Select the Zoom tool
you can clearly distinguish the 2 nodes that are very close to each
other.
and select the node on the right at
8. Switch to the Select Nodes tool
the top of the sheet pile (the node with coordinates (90.25, 32).
and zoom out until you can see all the
9. Switch to the Zoom tool
nodes on the top boundary of the mesh to the right of the node you just
selected.
. While holding down the
10. Switch back to the Select Nodes tool
Shift key, drag a box that just encloses all of the nodes on the top
boundary to the right of the sheet pile, as shown in Figure 3-9.
Figure 3-9
Selecting Nodes Where Head = 32.
11. Select the SEEP2D | Node BC command.
12. Select the Head option and enter a value of 32.
13. Select the OK button.
14. Select the Frame Image macro
.
SEEP2D - Confined
3.10
3-13
Saving the Simulation
We are now ready to save the simulation.
1. Select the File | Save As command.
2. Locate and open the directory entitled tutfiles\s2con.
3. Enter blanket for the file name.
4. Select the Save button.
3.11
Running SEEP2D
To run SEEP2D:
1. Select the SEEP2D | Run SEEP2D command. At this point SEEP2D is
launched in a new window.
2. When the solution is finished, select the Close button.
GMS automatically reads in the SEEP2D solution. You should see the solution
as a flow net. The flow net consists of equipotential lines (total head contours)
and flow lines.
You can also view the total flow through the cross section. To turn on the
display of the total flow through the cross section as do the following:
3. Select the Display Options button
.
4. Select the SEEP2D tab.
5. Turn on the Title and Total flow rate options.
6. Select the OK button.
3.12
Conclusion
This concludes the SEEP2D tutorial. If you wish to exit GMS at this time:
1. Select the File | Exit command.
2. Select No at the prompt.
4
SEEP2D - Unconfined
CHAPTER
4
SEEP2D - Unconfined
SEEP2D can be used for both confined and unconfined problems. The steps
involved in performing a SEEP2D simulation for the unconfined condition are
described in this tutorial.
Two approaches are available for unconfined problems with SEEP2D. With
the first approach, the solution is only computed in the saturated zone and the
mesh is truncated to the phreatic surface. The computed solution then consists
of a new mesh geometry file and a solution file with the heads. With the
second approach, the mesh is not deformed and the flow in both the saturated
and unsaturated zones is computed. Both approaches will be illustrated in this
tutorial.
It is recommended, but not required, that you complete the first SEEP2D
tutorial (the previous chapter) before doing this tutorial.
4.1
Description of Problem
The problem we will be solving in this tutorial is shown in
Figure 4-1. The problem consists of an earth dam with anisotropic soil and a
low permeability core in the interior.
4-2
GMS Tutorials – Volume III
Core
kx = 150 ft/yr
ky = 60 ft/yr
Shell
kx = 75 ft/yr
ky = 30 ft/yr
28 ft
72 ft
60 ft
6 ft
60 ft
Core
Shell
56 ft
360 ft
Figure 4-1
4.2
Unconfined Flow Problem
Getting Started
If you have not yet done so, launch GMS. If you have already been using
GMS, you may wish to select the File | New command to ensure the program
settings are restored to the default state.
4.3
Required Modules/Interfaces
The license registration system used by GMS allows the components of GMS
to be licensed individually, depending on the needs of the user. Before
continuing, you may wish to check whether or not the GMS components used
in this tutorial have been enabled in the copy of GMS you are using. This can
be accomplished by selecting the Register | File command. On the left side of
the Register dialog, the following components should have “ENABLED”
displayed in the Status column to the right of each of the following
components:
4.4
•
Mesh
•
Map
•
SEEP2D
Setting the Units
We will start by setting the units we are using. GMS will display the units we
select next to the input fields to remind us what they are.
1. Select the Edit | Units command.
2. Select ft for the Length units.
SEEP2D - Unconfined
4-3
3. Select yr for the Time units.
4. Select slug for the Mass units.
5. Select the OK button.
4.5
Creating the Mesh
The first step in defining the model is to create the finite element mesh. The
mesh will be constructed using the Map ´ 2D Mesh command in the Map
module. With this approach, we simply need to define the boundaries of the
problem domain and GMS automatically constructs all of the interior nodes
and elements.
4.5.1
Defining a Coordinate System
Before we construct the mesh we must first establish a coordinate system. We
will use a coordinate system with the origin at the lower left corner of the dam
as shown in Figure 4-2.
(194, 72)
(166, 72)
y
(138, 60)
(166, 60)
(0, 0)
(194, 60)
x
(152, 0)
Figure 4-2
(346, 6)
(208, 0)
(360, 0)
Coordinate System.
We will begin the mesh construction by creating some points at key locations
in the mesh.
4.5.2
Creating a Coverage
Before we construct the feature objects defining the boundary of the mesh, we
must first create a 2D mesh coverage.
1. Switch to the Map module
.
2. In the Data Tree, right-click on the Map Data item and select the New
Conceptual Model command from the pop-up menu.
3. Change the name to SEEP2D Mesh.
4. Change the Model to SEEP2D and click OK.
4-4
GMS Tutorials – Volume III
5. Right-click on the SEEP2D Mesh conceptual model and select the
New Coverage command from the pop-up menu.
6. In the list of Areal Properties, turn on Meshing options.
7. Select the OK button.
4.5.3
Creating the Corner Points
We are now ready to create some points at key corner locations. These points
will then be used to guide the construction of a set of arcs defining the mesh
boundary.
1. Select the Create Point tool
from the Tool Palette.
2. Click anywhere on the graphics window to create a point. Then edit
the coordinates using the edit fields at the top of the GMS window.
Change the X: value to 0.0 and the Y: value to 0.0.
3. Create another point by clicking on the graphics window and change
the x and y coordinates to 194.0 and 72.0 respectively.
4. Create another point by clicking on the graphics window and change
the x and y coordinates to 360.0 and 0.0 respectively.
5. Now select the Frame macro
.
6. Now create points at the following locations using the same steps as
before:
x
138
166
166
194
152
208
346
y
60
72
60
60
0
0
6
If you need to edit the node coordinates this can be done by using the Select
. When this tool is active you can select points and
Points/Nodes tool
change the coordinates using the edit fields. You can also select points and
delete them using the Delete key on the keyboard or the Delete command in the
Edit menu.
The nodes you have created should resemble the nodes shown in Figure 4-3
(without the labels).
SEEP2D - Unconfined
C
D
E
F
4-5
B
I
J
A
Figure 4-3
4.5.4
H
G
Points Created with the Create Point Tool
Creating the Arcs
Now that the corner nodes are created, the next step is to create the arcs
defining the boundaries of both the shell and the core of the dam. This can be
accomplished as follows:
1. Select the Create Arc tool
.
2. Create a series of arcs around the perimeter of the dam by clicking on
the following points in order (double click on the last point to end the
sequence): A-B-C-D-I-J-H-G-A.
3. Create the remaining arcs around the core boundary by clicking on the
following points in order (double click on the last point to end the
sequence): G-E-F-H.
4.5.5
Redistributing Vertices
Arcs are composed of both nodes and vertices. The nodes are the two end
points of the arc. The vertices are intermediate points between the nodes. The
gaps between vertices are called edges. At this point, all of our arcs have one
edge and zero vertices. When we issue the Map ´ 2D Mesh command, the
density of the elements in the interior of the mesh is controlled by the edge
spacing along the arcs. Thus, we will subdivide the arcs to create appropriately
sized edges.
1. Choose the Select Arcs tool
.
2. Select all of the arcs by dragging a box that encloses all of the arcs.
3. Select the Feature Objects | Redistribute Vertices command.
4. Select the Specified spacing option.
5. Enter a value of 8.0 for the spacing.
6. Select the OK button.
4-6
GMS Tutorials – Volume III
In this particular problem most of the head loss will occur in the core of the
dam. To more accurately model the core we will make the mesh more dense in
the core of the dam.
1. Select the arcs that make up the core of the dam (G-E, E-F, F-H, H-G).
2. Select the Feature Objects | Redistribute Vertices command.
3. Select the Specified spacing option.
4. Enter a value of 3.0 for the spacing.
5. Select the OK button.
4.5.6
Creating the Polygons
Now we are ready to create the polygons defining the two material zones.
Simply creating the arcs does not create the polygons. We must explicitly
create the polygons using the arcs.
1. Select the Feature Objects | Build Polygons command.
4.5.7
Assigning the Material Types
Now that the polygons are created, we need to define a material type to be
associated with each polygon.
1. Select the Edit | Materials command.
2. Create a new material by clicking the New button.
3. Rename the materials to “Shell” and “Core”. To change the name of a
material simply double-click on the material in the list.
4. Click OK.
5. Choose the Select Polygons tool
.
6. Double click anywhere inside the polygon representing the shell of the
dam.
7. Make sure the material associated with this polygon is the Shell
material.
8. Select the OK button.
Now we will do the same for the other polygon.
SEEP2D - Unconfined
4-7
9. Double click anywhere inside the polygon representing the core of the
dam.
10. Make sure that Core is selected as the material for this polygon.
11. Select the OK button.
12. Click anywhere on the Graphics Window to unselect the polygon.
4.5.8
Constructing the Mesh
At this point, we are ready to construct the mesh.
1. In the Feature Objects | Map ´ 2D Mesh command.
2. Select OK at the prompt.
4.6
Renumbering the Mesh
The next step in the mesh construction process is to renumber the nodes and
elements. The motivation behind the renumbering process and some tools for
viewing node and element numbering are described in the previous tutorial and
in the GMS Online Help.
To renumber the nodes and elements, we must first select a string of nodes on
the boundary. This string of nodes defines a starting point for the renumbering
process. In the case of a simple earth dam, the numbering is typically optimal
if the renumbering begins at the leftmost or rightmost node in the mesh.
Therefore, in this case, the string of nodes for renumbering will consist of only
one node.
1. Switch to the 2D Mesh module
.
2. Choose the Select Node Strings tool
.
3. Select the leftmost node in the mesh (point A in Figure 4-3).
4. Select the Modify Mesh | Renumber command.
4.7
Initializing the SEEP2D Solution
Now that the mesh is constructed, we can begin to enter the SEEP2D data.
1. Select the SEEP2D | New Simulation command.
4-8
GMS Tutorials – Volume III
We will select the option to deform the mesh to the phreatic surface. This will
model flow in the saturated zone only.
1. In the Model Type section, select the Unconfined option.
2. Select the Saturated with deforming mesh option.
3. Select the OK button to exit the dialog.
4.8
Assigning Material Properties
The next step is to define material properties. Each element in the mesh is
assigned a material. The materials were automatically assigned to the elements
using the polygons when the mesh was constructed. At this point, all that is
left is to enter the hydraulic conductivity.
1. Select the SEEP2D | Material Properties command.
2. Highlight the material entitled Shell.
3. Enter a value of 150 for k1 and 60 k2.
4. Highlight the material entitled Core.
5. Enter a value of 15 for k1 and 6 k2.
6. Select the OK button.
4.9
Assigning Boundary Conditions
The final step in defining the model is to assign boundary conditions to the
mesh. For the problem we are modeling there are three types of boundary
conditions: (1) no-flow (flow is parallel to the boundary), (2) specified head,
and (3) exit face. With the finite element method, not assigning a boundary
condition is equivalent to assigning a no-flow boundary condition. Therefore,
all of the boundaries have a no-flow boundary condition by default and all that
is necessary is to assign the specified head and exit face boundary conditions.
SEEP2D - Unconfined
4.9.1
4-9
Specified Head Boundary Conditions
The specified head boundary conditions for our mesh are shown in Figure 4-4.
head = 6 ft
head = 60 ft
Figure 4-4
The Specified Head Boundary Conditions.
To enter the specified head boundary conditions for the region on the left:
1. Choose the Select Node Strings tool
.
2. Select the node on the left face of the dam at y = 60 ft (where the water
surface touches the dam on the upstream side). If you select the wrong
node by mistake, press the ESC key.
3. While holding down the Control key, select the leftmost node on the
mesh (at y = 0).
4. Select the SEEP2D | Node BC command.
5. Select the Head option and enter a value of 60.
6. Click on the OK button.
To enter the specified head boundary conditions for the region on the right:
7. Select the rightmost node on the dam (at y = 0).
8. While holding down the Control key, select the node at y = 6 ft (where
the water surface touches the dam on the downstream side).
9. Select the SEEP2D | Node BC command.
10. Select the Head option and enter a value of 6.
11. Click on the OK button.
4.9.2
Exit Face Boundary Conditions
The remaining type of boundary condition to enter is the exit face definition.
Since we are using the deforming mesh option, SEEP2D will iterate to find the
location of the phreatic surface. During this iteration, the geometry of the mesh
4-10
GMS Tutorials – Volume III
will be altered so that the top of the mesh coincides with the phreatic surface.
To guide the iteration process, we need to mark all of the nodes on the mesh
where the phreatic surface may exit as exit face nodes. The region of the mesh
where the phreatic surface may exit is illustrated in Figure 4-5.
Exit Face
Figure 4-5
The Exit Face Boundary Condition.
To define the exit face boundary conditions:
1. Select the node just above the tail water level (the node just above the
top specified head node) on the right side of the dam.
2. Holding down the Control key, select the node at approximately y = 60
ft on the right side of the dam.
3. Select the SEEP2D | Node BC command.
4. Select the Exit Face option.
5. Click on the OK button.
4.10
Saving the Simulation
We are now ready to save the simulation.
1. Select the File | Save As command.
2. Locate and open the directory entitled tutfiles\s2unc.
3. Enter dam1 for the file name.
4. Select the Save button.
4.11
Running SEEP2D
We are now ready to run SEEP2D.
1. Select the SEEP2D | Run SEEP2D command.
SEEP2D - Unconfined
4-11
At this point SEEP2D is launched in a new window. When the solution is
finished, select the Close button. GMS will automatically read in the SEEP2D
solution when this dialog is closed.
2. Select OK at the prompt to delete the existing mesh.
4.12
Viewing the Solution
You should now see a plot of the flow net. To better view the flow net, we will
turn off the display of nodes and elements.
1. Select the Display Options button
.
2. Turn off the Nodes and Element edges options.
3. Turn on the Mesh boundary option.
4. Select the OK button.
Note that there are only a small number of flow lines. GMS determines the
number of flow lines to display based on how closely spaced the equipotential
lines are in one of the materials. By default, the interval is computed based on
the Shell material. To base the number of flow lines on the Core material:
5. Select the Display Options button
.
6. Select the SEEP2D tab.
7. Select the Base Material pull-down list, select the Core material.
8. Select the OK button to exit the dialog.
You should now see a more flow lines through your model.
4.13
Modeling Flow in the Unsaturated Zone
For the last stage of the tutorial, we will compute a solution using a different
approach. Rather than deforming the mesh and computing the solution in the
saturated zone only, we will compute the flow in both the saturated and the
unsaturated zone.
4.13.1
Reading in the Original Model
Before making the required changes to the model, we need to read the
undeformed model back into memory.
4-12
GMS Tutorials – Volume III
1. Select the File | Open command.
2. Select No at the prompt to confirm we don't want to save changes if it
appears.
3. Change the filter to be Model Super Files.
4. Select the file entitled dam1.sps.
5. Select the Open button.
6. Select OK at the prompt.
4.13.2 Changing the Mesh Display
Next, we will turn on the display of the nodes and elements.
1. Select the Display Options button
.
2. Turn on the Element edges option.
3. Select the OK button.
4.13.3
Changing the Analysis Options
Next, we will change the analysis options. Two methods are provided in
SEEP2D for computing the relative conductivity in the unsaturated zone: the
linear front method and the Van Genuchten method. With the linear front
method, the relative conductivity varies linearly from the saturated value down
to a user specified minimum at a given negative pressure head. With the Van
Genuchten method, the Van Genuchten parameters are used to define the
variation of the relative conductivity in the unsaturated zone. Both methods
are described in detail in the SEEP2D Primer. We will use the linear front
option.
1. Select the SEEP2D | Analysis Options command.
2. Enter Sample Unconfined Problem, Part II for the title.
3. In the Model type section, change the unconfined type to
Saturated/Unsaturated with linear front.
4. Select the OK button.
4.13.4
Editing the Material Properties
Next, we need to define a minimum relative conductivity and a threshold
pressure head for each material.
SEEP2D - Unconfined
4-13
1. Select the SEEP2D | Material Properties command.
2. Select the material entitled Shell.
3. Enter a value of -1.0 for ho.
4. Enter a value of 0.001 for kro.
5. Select the material entitled Core.
6. Enter a value of -4.0 for ho.
7. Enter a value of 0.001 for kro.
8. Select the OK button.
4.14
Saving the Simulation
We are now ready to save the simulation and compute a new solution.
1. Select the File | Save As command.
2. Enter dam2.sps for the file name.
3. Select the Save button.
4.15
Running SEEP2D
To run SEEP2D:
1. Select the SEEP2D | Run SEEP2D command.
At this point SEEP2D is launched in a new window. When the solution is
finished, select the Close button. GMS will automatically read in the SEEP2D
solution when this dialog is closed.
4.16
Viewing the Solution
You should see a display of the equipotential lines and flow lines. To make the
lines more visible:
1. Select the Display Options button
2. Turn off the Element edges option.
.
4-14
GMS Tutorials – Volume III
Another useful way to view a sat/unsat solution is to create a plot of the
phreatic surface.
3. Select the SEEP2D tab.
4. Turn off the Flow lines option.
5. Turn on the Phreatic surface option.
6. Select the OK button.
The displayed line corresponds to the boundary between the saturated and
unsaturated zones.
4.17
Conclusion
This concludes the SEEP2D tutorial. If you wish to exit GMS at this time:
1. Select the File | Exit command.
2. Select No at the prompt.
5
UTCHEM
CHAPTER
5
UTCHEM
UTCHEM is a highly sophisticated, multi-phase flow and multi-constituent,
reactive transport model capable of performing a wide variety of groundwater
simulations. UTCHEM was developed at the Center for Petroleum and
Geosystems Engineering at the University of Texas at Austin as a chemical
flood simulator for enhanced oil recovery design. In recent years, UTCHEM
has been adapted for a variety of environmental applications as well,
particularly surfactant-enhanced aquifer remediation (SEAR). The steps
involved in setting up, running, and visualizing the results of a UTCHEM
simulation are described in this tutorial.
5.1
Description of Problem
The problem to be solved in this tutorial is shown in Figure 20.1. This problem
is a modified and expanded version of the ex21 and ex22 sample problems
described in the UTCHEM documentation, which, in turn, are based on the
SEAR demonstration at the Borden site (Brown and Jin, circa 1993). The
problem is a single slice model in the X-Z plane with one PCE
(perchloroethylene or, more accurately, tetrachloroethene) spill in the center.
The evaluation and remediation are performed with one extraction well at the
spill location and an injection well on either side. The regional gradient creates
a flow from left to right.
5-2
GMS Tutorials – Volume III
Well A (Treatment Phase)
Injection Well, Q = 2000 ft3/d
Number of rows = 1
Number of columns = 49
Number of layers = 24
DY = 50 ft
Kx (ave) = 5000
Ky/Kx = 1.0
Kz/Kx = 0.5
Porosity = 0.34
Well B (Contamination Phase)
Injection Well, Q= 33 ft3/d
C = 100% PCE (oil species)
Well C (Treatment Phase)
Production Well, Q = -4000 ft3/d
Well D (Treatment Phase)
Injection Well, Q = 2000 ft3/d
A
DZ = 39 ft
B
D
C
Constant
Pressure
boundary
(14.7 psi)
Constant
Pressure
boundary
(15.028 psi)
Z
No flow boundary
X
Figure 5-1
DX = 160 ft
Sample Problem to be Solved with UTCHEM.
The problem is divided into six simulation phases, each designed to highlight
particular aspects of UTCHEM. These simulation phases are described briefly
as follows:
Contamination. Define media and contaminant properties, initial and
boundary conditions, and PCE release well. Simulate release of 1000
ft3 of PCE DNAPL (33.33 ft3/day for 30 days) at point C (Fig-1),
followed by 60 days of redistribution. UTCHEM file: UTCcontam.gpr.
Dissolution. Equilibrium PCE dissolution (only) from DNAPL and
conservative transport over a 20 year period are simulated as a
modification of simulation #1. UTCHEM file: UTC-dissol.gpr.
Pre-flush PITT. A partitioning interwell tracer test (PITT) to assess
DNAPL saturations is simulated. Injection and withdrawal wells are
defined. This 60 day simulation is a modification of simulation #1.
UTCHEM file: UTC-prePITT.gpr.
Water Flush. A “pump and treat” simulation of 270 days of flushing
using water. The results of this flush can be compared with the
surfactant flush simulation. This is a restart from the UTC-contam.gpr
simulation. UTCHEM file: UTC-flush.gpr.
Surfactant Flush. A SEAR simulation using a surfactant to enhance
dissolution and recovery; the 60 day simulation is a restart from the
UCT-contam.gpr simulation. UTCHEM file: UTC-SEAR.gpr.
UTCHEM
5-3
Post-flush PITT (optional). Same as simulation #3, but post-flush (i.e.
restarting from simulation #4) to assess the success of the water flush.
UTCHEM file: UTC-postPITT.gpr.
Although the six phases of this tutorial are designed to be run in sequence, they
can be completed in any order using a set of provided sample files. A set of
model files (with solutions) for each of the six phases can be found in the
gms\tutfiles\utchem\samples\ directory.
5.2
Getting Started
If you have not yet done so, launch GMS. If you have already been using
GMS, you may wish to select the File | New command to ensure the program
settings are restored to the default state.
The user may select either metric or English units, which must be used
consistently (mixing can be perilous). Several model parameters and their
units may be unfamiliar to users accustomed to more traditional groundwater
models. The units in UTCHEM reflect its roots in petroleum and chemical
engineering disciplines. All time units are in days. Chemical concentrations
are expressed in either volume fractions or mg/L (see UTCHEM
documentation for details). We will be working in English units throughout
these tutorials. Lengths will be in feet.
5.3
Required Modules/Interfaces
The license registration system used by GMS allows the components of GMS
to be licensed individually, depending on the needs of the user. Before
continuing, you may wish to check whether or not the GMS components used
in this tutorial have been enabled in the copy of GMS you are using. This can
be accomplished by selecting the Register | File command. On the left side of
the Register dialog, the following components should have “ENABLED”
displayed in the Status column to the right of each of the following
components:
5.4
•
Grid
•
UTCHEM
Creating the Grid
The first step in setting up the flow simulation is to create the grid. Since this
is a profile model in the xz plane, there will be only one cell width in the ydirection. To create the grid:
5-4
GMS Tutorials – Volume III
.
1. Switch to the 3D Grid module
2. Select the Grid | Create Grid command.
3. In the section entitled X-dimension, enter 160.0 for the Length value,
and 49 for the Number Cells value. (dX = 160/49 = 3.265 ft)
4. In the section entitled Y-dimension, enter 50.0 for the Length value,
and 1 for the Number Cells value.
5. In the section entitled Z-dimension, enter 39.0 for the Length value,
and 24 for the Number Cells value. (dZ = 39/24 = 1.625 ft).
6. Keep Orientation/type set to MODFLOW. Keep Rotation about Z-axis
at 0.0. These are the default values.
7. Select the OK button.
A grid should appear in the Graphics Window. The grid appears as a single
row since we are looking down the z axis at the xy plane. To view the xz
plane:
8. Select the View I Axis macro
5.5
.
Contamination Phase
The first phase of our simulation will be to model the spill and dispersal of a
pure PCE DNAPL from near the surface. The spill will be simulated using a
single injection well in the center of the model that injects a steady stream of
the DNAPL over a thirty-day period.
5.5.1
Initializing the UTCHEM Simulation
To initialize a new UTCHEM simulation:
1. Select the UTCHEM | New Simulation command.
First, we will enter the Titles and other basic information.
2. For the Run number, enter “EX21-1”
3. For Title 1, enter: "2D (X-Z) PCE DNAPL Release in Saturated
Heterogeneous Media (EX21)”.
4. For Title 2, enter: “30 day PCE spill - 60-day redistribution”
5. For Title 3, enter your name and the current date.
UTCHEM
5-5
6. For the Numerical dispersion control, choose the Improved TVD 3rd
order method from the dropdown menu.
7. This is not a restart simulation, so leave the Use Restart option
unselected (we will make use of this later).
8. Ensure that the default units are English.
Next, we will define the species used in the simulation. This simulation will
model two species: water and PCE.
9. Select the Define Species button.
10. Unselect the Surfactant, Chloride, Calcium, Alcohol 1, Air/Gas species
toggles. At this point, only two names should show up in the names
list window (water and oil).
11. Select the oil species and change the name to PCE.
We also need to define four water/oil tracers. We will not be using these
tracers in the contamination phase of the simulation. However, we will be
using the tracers for the PITT simulation later in the tutorial. If any
supplemental species are used (NAPLs, tracers, or bio species) in a restartbased simulation, UTCHEM requires that these species be defined in the
original run used to generate the restart file. Thus, in order to use the
contamination simulation as a restart file for later runs, we need to have the
tracers defined in this simulation. These species will not be injected into the
model for this simulation, so they essentially act as “dummy” species.
12. Change the number of Water/Oil Tracers to 4. Four wot (water/oil
tracer) entries should appear in the Names list.
13. Rename the wot entries to 1Pr, 2Pr, Hex, and Hep. In subsequent
dialogs, these tracers will be listed as 1Pr_wo, 2Pr_wo, Hex_wo, and
Hep_wo.
14. Select the OK button twice to exit both dialogs.
5.5.2
Saving the Project
Before continuing, we will save the files associated with the simulation.
1. Select the File | Save As command.
2. Locate the gms\tutorials\utchem\ directory.
3. Enter “UTC-contam.gpr” for the file name.
4. Select the Save button.
5-6
GMS Tutorials – Volume III
Having saved and named the project, you can now select the Save macro
save your changes as you go along through the tutorial.
5.5.3
to
Time Options
The next step is to set up the time options for the UTCHEM output and the
time step control.
1. Select the UTCHEM | Time Options command.
2. Ensure that Days is selected as the option for both the Output and Max
& Inject option controls.
3. For the Time step size option, choose Automatic.
Injection Periods
The time domain of a UTCHEM simulation is subdivided into Injection
Periods. Pumping rates and boundary condition values can only change at the
beginning of an injection period. For the contamination phase of this
simulation, we will create a 30-day injection period, followed by 60-day
redistribution period.
1. Select the Injection Periods… button.
By default, GMS creates one injection period so we will simply change the
length of the first period (PCE injection) and then insert a second period (PCE
redistribution).
2. Enter 30.0 [days] as the Length value for Injection period #1.
Before creating the second injection period, we will complete the input for the
first injection period. By doing so, all of the values defined for the first period
will be the default values when we create the second period.
Time steps
When using the automatic time step option, UTCHEM allows the minimum
and maximum time steps to be governed by Courant numbers or Days. For
injection periods where the flow rate in one or more wells is non-zero, the
Courant number option is generally preferable. For injection periods with no
well activity, the Days option must be used. Since the first injection period
corresponds to a spill event simulated with a well, we will use the Courant
number option. The initial time step size always has units of days. A
description of these options can be found in Appendix E of the UTCHEM
User’s Guide.
1. Enter a value of 0.001 for the Initial time step size value.
UTCHEM
5-7
2. Enter a value of 0.003 for the Tol. for conc. change value.
3. In the Time steps section, choose Courant Numbers as the units for the
min and max time steps.
4. Enter a value of 0.15 for the Max time step size value.
5. Enter a value of 0.01 for the Min time step size value.
Output Intervals
The Output Intervals determine when values will be saved from UTCHEM.
The most important of these is the Profiles value. This determines at what
intervals concentration values will be output to GMS data set solution files.
1. Enter a value of 15.0 for the Print data value.
2. Enter a value of 15.0 for the Prod. data value.
3. Enter a value of 5.0 for the Prod. histories value.
4. Enter a value of 5.0 for the Profiles value.
Second Injection Period
Next, we will define a second Injection Period of 60 days, during which the
PCE injected in the first 30 day period is allowed to redistribute.
1. Select the Insert Right button to create the second injection period.
Note that all of the Time steps and Output intervals from the first
period are retained as initial settings for this period.
2. Make sure that the Injection period field counter is at 2 and enter a
value of 60 for the Length.
Since this injection period does not include any injection or extraction via
wells, we must use the Days option for the min and max time step values.
3. In the Time steps section, choose Days as the units for the min and max
time steps.
4. Enter a value of 0.28 for the Max time step size value.
5. Enter a value of 0.014 for the Min time step size value.
This concludes the input for the Injection Periods dialog.
6. Select OK button twice to exit both dialogs.
5-8
GMS Tutorials – Volume III
5.5.4
Output Control
Output Control allows us to choose what data will be saved from UTCHEM.
1. Select the UTCHEM | Output Control command.
The Profiles section includes data that can be saved in GMS dataset solution
format, and should be checked on by default. The Print section includes other
important data output from UTCHEM that can be viewed in a text editor. In
the Profiles section, we want to output Phase pressures, Phase saturations, and
Component concentrations. In the Print section, we want all options to be off.
This should correspond to the default options in the dialog so no changes need
to be made.
2. Select the OK button the exit the Output Control dialog.
5.5.5
Reservoir Properties
In the Reservoir Properties section, we will define the aquifer characteristics.
Some properties, such as porosity and pressure, will be entered as an array of
values (one for each cell). The other properties, like the hydraulic conductivity
ratios, are single values applied to the aquifer as a whole.
1. Select the UTCHEM | Reservoir Properties command.
2. Make sure that the Rock Compressibility value is 0.0 and the Reference
pressure value is 14.7.
Porosity
To define the porosity:
1. Select the Porosity button.
2. Select the Constant ´ Grid button and enter a value of 0.34.
3. Select OK on both dialogs to return to the Reservoir Properties dialog.
Initial Conditions
To define the initial conditions:
1. Select the Pressure button.
2. Select the Constant ´ Grid button and enter a value of 14.7.
3. Select OK on both dialogs to return to the Reservoir Properties dialog.
4. Select the Water Sat button.
UTCHEM
5-9
5. Select the Constant ´ Grid button and enter a value of 1.0 (default).
6. Select OK on both dialogs to return to the Reservoir Properties dialog.
Permeability (k)
The average permeability at the Borden test site was approximately 8300
millidarcies (md). For this tutorial, we will use a somewhat lower value (5000
md) for most of the domain, with four lower-k layers (3000 md) at grid layers
5, 10, 15, and 20. The lower permeability prevents the PCE from dropping
straight to the bottom. The simple heterogeneities demonstrate model stability,
but also make for a more interesting and realistic tutorial. For those unfamiliar
with Darcy units of intrinsic permeability, 1 Darcy is equivalent to 1 µm2 or 108
cm2 or, if the fluid is water, a hydraulic conductivity of 10-3 cm/s.
1. Select the Kx button.
2. Select the Constant ´ Grid button.
3. Enter a value of 5000; Press OK.
4. Move the Layer counter to 5.
5. Select Constant ´ Layer button (not the Constant ´ Grid button this
time).
6. Enter a value of 3000.
7.
Repeat steps 4-6 for layer 10, 15, and 20.
8. Click OK on both dialogs to return to the Reservoir Properties dialog.
9. Ensure that the Ky/Kx value is set at 1.0.
10. Change the Kz/Kx value to 0.5.
11. Select OK to exit the Reservoir Properties dialog.
Notice that the values defined by arrays can also be edited on a cell-by-cell
basis if necessary. One quick way to perform such editing is to select the cells
and use the UTCHEM | Cell Properties command.
5.5.6
Physical Properties
Next, we will enter the Physical Property data. These data include relative
permeability, viscosity, density, compressibility, dispersion, and sorption
parameters. These items are organized in a submenu in the UTCHEM menu.
5-10
GMS Tutorials – Volume III
Phase Behavior
The phase behavior properties are related to surfactants and cosolvents, which
are not being used in this case. We will edit these values in a later tutorial.
Interfacial Tension
These values are also related to surfactant properties.
Organic Mass Transfer
To edit the organic mass transfer parameters:
1. Select the UTCHEM | Physical Properties | Organic Mass Transfer
command.
2. Select the Allow solubility of oil in water in absence of surfactant
option.
3. Enter a value of 0.00015 for the Equilibrium conc. of oil in water.
[Note: These are volume fraction units. PCE liquid density is 1.623
g/cm3 or 1.623E+06 mg/L. In more familiar units, this equilibrium
concentration is 243.45 mg/L, within the reported solubility range for
PCE at 20C (150-250 mg/L)].
4. Click OK to exit the Organic Mass Transfer dialog.
Relative Permeability
To edit the relative permeability data:
1. Select the UTCHEM | Physical Properties | Relative Permeability
command.
2. Choose the First drainage corey option.
Note: When simulating an initial spill, the First drainage corey option is
preferable. Studies have shown that it best simulates gravity drainage of
DNAPLs. However, for flushing simulations, the Imbibition corey option
produces the best results. We will use the First drainage corey option for this
phase and use the Imbibition corey option later in the tutorial for the flushing
simulations.
In the Aqueous column, do the following:
3. Select the Residual Saturation button.
4. Select the Constant ´ Grid button and enter a value of 0.24.
5. Select OK on both dialogs to return to the Relative Permeability dialog.
UTCHEM
5-11
6. Select the Kr Endpoint button.
7. Select the Constant ´ Grid button and enter a value of 0.486.
8. Select OK on both dialogs to return to the Relative Permeability dialog.
9. Select the Kr Exponent button.
10. Select the Constant ´ Grid button and enter a value of 2.85.
11. Select OK on both dialogs to return to the Relative Permeability dialog.
In the Oleic column, do the following:
12. Select the Residual Saturation button.
13. Select the Constant ´ Grid button and enter a value of 0.17.
14. Select OK on both dialogs to return to the Relative Permeability dialog.
15. Select the Kr Endpoint button.
16. Select the Constant ´ Grid button and enter a value of 0.65.
17. Select OK on both dialogs to return to the Relative Permeability dialog.
18. Select the Kr Exponent button.
19. Select the Constant ´ Grid button and enter a value of 2.7.
20. Select OK on both dialogs to return to the Relative Permeability dialog.
We’re now done with the Relative Permeability dialog.
21. Select the OK button to exit the Relative Permeability dialog.
Viscosity
Next, we will enter the viscosity data:
1. Select the UTCHEM | Physical Properties | Viscosity command.
2. Change the Water viscosity value to 1.0.
3. Change the Oil viscosity value to 0.89.
4. Make sure the Reference temp. is set to 0.0.
5. Select the OK button to exit the Viscosity dialog.
5-12
GMS Tutorials – Volume III
Component Density
Next, we will enter the component density data [Units: g/cm3 or psi/ft; 1 g/cm3
= 62.428 lbs/ft2 = 0.4335 psi/ft ]
1. Select the UTCHEM | Physical Properties | Component Density
command.
2. Enter a value of 0.433 for the Water value (0.998 g/cm3).
3. Enter a value of 0.7036 for the Oil value (1.623 g/cm3) .
4. Select the Consider gravity effect option.
5. Click OK to exit the Component Density dialog.
Fluid Compressibility
We will assume the fluids are incompressible in this simulation so the default
values of 0.0 for fluid compressibility will be fine.
Capillary Pressure
To edit the capillary pressure data:
1. Select the UTCHEM | Physical Properties | Capillary Pressure
command.
2. Choose the Strongly water wet option from the Wettability section.
3. Select the Cap. Press. Endpoint button.
4. Select the Constant ´ Grid button and enter a value of 1.4.
5. Select OK on both dialogs to return to the Capillary Pressure dialog.
6. Select the Cap. Press. Exponent button.
7. Select the Constant ´ Grid button and enter a value of -0.52.
8. Select OK on both dialogs to return to the Capillary Pressure dialog.
9. Click OK to exit the Capillary Pressure dialog.
Diffusion and Dispersion
We will neglect molecular diffusion (use default diffusion coefficients of 0.0
ft2/d) and edit the dispersion coefficients.
1. Select the UTCHEM | Physical Properties | Diffusion/Dispersion
command.
UTCHEM
5-13
2. In the Dispersivity section, change the Aqueous phase, Longitudinal
value to 0.1 [ft2/d].
3. Change the Aqueous phase, Transverse value to the value 0.03.
4. Repeat the last two steps (2 and 3) for the Oleic phase.
5. Click OK to exit the Diffusion & Dispersion dialog.
Adsorption
We will neglect sorption for this simulation.
Tracer Properties
There are no partitioning tracers in this simulation.
5.5.7
Boundaries
Our simulation will contain a flow field from left to right that models only the
saturated zone. Both the left and right sides will be specified; all other sides
are no-flow boundaries.
1. From the UTCHEM | Boundaries command.
2. Ensure that the Saturated only option is selected in the Zone to be
modeled section.
3. Select the Left boundary is specified and Right boundary is specified
options.
Left
For the parameters in the Left column, do the following:
1. Select the Pressure at top layer curve.
2. Under the pressure heading, enter 15.028 into both edit fields.
3. Click OK to return to the Boundaries dialog.
4. Select the Conc. of water curve.
5. Under the concentration heading, enter 1.0 (phase volume fraction)
into both edit fields.
6. Click OK to return to the Boundaries dialog.
5-14
GMS Tutorials – Volume III
Right
For the parameters in the Right column, do the following:
1. Select the Pressure at top layer curve.
2. Under the pressure heading, enter 14.7 into both edit fields.
3. Click OK to return to the Boundaries dialog.
4. Edit the water concentration values for the right side so that they match
what was entered for the left side.
5. Click OK to exit the Boundaries dialog.
5.5.8
Wells
For this simulation, we will only be using one well: an injection well
simulating the PCE spill. However, in subsequent model runs we will be
simulating flushing using two injection wells and an extraction well. In order
to use the results of the spill simulation as a “restart” for the flushing and
SEAR simulations, the first simulation must contain the same number of wells
as all subsequent simulations. Thus, we will create all four wells now but only
define a non-zero flow rate for the spill well.
PCE Spill Well
First, we will create a single well in the center of the model to simulate the
PCE spill at the surface.
1. Select the UTCHEM | Wells command.
2. Select the New button.
3. Enter “PCE spill” into the Name field.
4. Change the Column value to 25. Leave the Starting layer and Ending
layer at 1.
5. Select the oleic option from the Phases list.
6. Select the Q curve.
7. Under the flow rate heading, enter 33.33 into the first edit field (0-30
days); leave the second field at 0.0. (Total: ~1000 ft3 or 6428.3 gal or
28.316 m3 or 28,316 L of PCE)
8. Click OK to return to the Wells dialog.
UTCHEM
5-15
9. Select the PCE component from the Components list (with oleic
selected in the Phases list)
10. Select the Conc. curve.
11. Under the concentration heading, enter 1.0 on the first line; leave 0.0 in
the second line.
12. Click OK to return to the Wells dialog.
Left Injection Well
Next we will create the left injection well (corresponding to an infiltration
trench) to be used in subsequent flushing simulations. We will leave the flow
rate at zero for all phases.
1. Select the New button.
2. Change the text in the Name field to “Left Injection Well”
3. Enter a value of 16 for the Column entry. We will leave the Row with
a value of 1.
4. Enter a value of 24 for the Ending layer value.
Production Well
Likewise, we will create a production will at the center of the grid at the
location of the spill to simulate the extraction well during the subsequent
flushing simulations.
1. Select the New button.
2. Change the text in the Name field to “Center Production Well”.
3. Change the Type to Rate Constrained Production Well.
4. Enter a value of 25 for the Column value. We will leave the Row with
a value of 1.
5. Enter a value of 24 for the Ending layer value.
Right Injection Well
Finally, we will create the right injection well (corresponding to an infiltration
trench) to be used in the subsequent flushing simulations:
1. Select the New button.
2. Change the text in the Name field to “Right Injection Well”
5-16
GMS Tutorials – Volume III
3. Enter a value of 34 for the Column entry. We will leave the Row with
a value of 1.
4. Enter a value of 24 for the Ending layer value.
5. Select the OK button to exit the Wells dialog.
5.5.9
Saving the Model and Running UTCHEM
We are now ready to save the model and launch UTCHEM.
1. Select the File | Save command.
2. Select the UTCHEM | Run UTCHEM command.
At this point, UTCHEM will begin execution. You will see a message
displayed after each time step reporting the time elapsed in days, the step, the
time step in days, and the time step courant number.
When UTCHEM has finished, a message will report the time that elapsed and
that UTCHEM terminated successfully. Select the Close button to close the
window and return to GMS.
5.5.10
Viewing the Solution
Next, we will view the computed solution. After closing the UTCHEM
window, GMS should have automatically read in the computed UTCHEM
solution. The UTCHEM solution is organized into a folder in the GMS Data
Tree. The UTCHEM solution contains concentration data sets for each
component along with pressure and saturation data sets for each phase. We are
most interested in the PCE concentration.
1. Expand the folder titled “UTC-contam (UTCHEM)” in the Data
Tree.
2. Select the UTC1-contam_pce item in the UTCHEM solution folder in
the Data Tree.
3. Select one of the latter time steps from the Time Steps list at the bottom
of the Data Tree.
You may wish to experiment with the different time step values. As you view
the solution, notice that since the PCE is a DNAPL, it rapidly drops to the
bottom of the aquifer.
UTCHEM
5.5.11
5-17
Changing the Contouring Options
You should see a set of contours representing the contaminant plume. To
better illustrate the relative concentrations, we will turn on color ramp.
1. Select the Data | Contour Options command.
2. Turn on the Use color ramp option.
3. Select the OK button.
5.5.12
Setting Up the Animation
Finally, we will observe how the solution changes during the flushing
simulation by generating a film loop animation. To set up the animation:
1. Select the Display | Animate command.
2. Make sure the Data set option is on and click Next.
3. Select the Match time steps option.
4. Turn on the Display clock option.
5. Select the Finish button.
You should see some images appear on the screen. These are the frames of the
film loop which are being generated. When the film loop is completely
generated, it will appear in a separate window for playback.
6. After viewing the animation, select the Stop
animation.
7. Select the Step
button to stop the
button to move the animation one frame at a time.
8. You may wish to experiment with some of the other playback controls.
When you are finished, close the window and return to GMS.
5.6
Dissolution Phase
In this simulation we consider the non-enhanced dissolution of the PCE
DNAPL starting with the conditions predicted at the end of the 30 day DNAPL
spill period and 60 day redistribution. To dissolve the entire 1000 ft3 (28.316
m3) PCE DNAPL under the regional flow gradient would require
approximately 17 years (~6200 days). This estimate assumes local equilibrium
partitioning and is conditioned on a DNAPL distribution as simulated. These
are highly idealized conditions.
5-18
GMS Tutorials – Volume III
We will assume local equilibrium partitioning. An equilibrium partitioning
concentration of oil (PCE) in water was set to 0.00015 in the Organic mass
transfer section above. We will retain this parameter.
This simulation will be run as a restart of the contamination phase. We will
create a third injection period and change the drainage option to Imbibition
Corey. So, rather than start from scratch, it is expedient simply to edit the file
upon which this simulation builds. The initial contamination phase file (“UTCcontam.gpr”) should be edited and saved under a new name indicative of this
dissolution phase.
Project File: (“UTC-dissol.gpr”).
5.6.1
Initializing the UTCHEM Simulation
If the UTC-contam.gpr simulation is currently loaded into GMS, you can skip
the next two steps and proceed with the tutorial. Otherwise, read in the
simulation as follows:
1. Select the File | Open command.
2. Select and open the UTC-contam.gpr file (from the directory to which
it had been saved).
Before editing this file for the current simulation phase, save it under a new
name:
3. Select the File | Save As command.
4. Rename the project to UTC-dissol.gpr.
5. Select Save.
Now, we can proceed with modifications.
5.6.2
General Options
First, we will edit the general options. These options include the problem title
and the restart option.
1. Select the UTCHEM | General Options command.
Titles
First, we will enter the titles and other basic information.
1. For the Run number, enter “UTC-dissol-run1”
UTCHEM
5-19
2. For Title 1, enter: "2D (X-Z) PCE DNAPL spill in Saturated
Heterogeneous Media”.
3. For Title 2, enter: “30-day PCE spill - 60-day Redistribution – 20year dissolution.”
4. For Title 3, enter your name and the current date.
5. Ensure that the default units are English.
Restart
The objective of this phase is to simulate DNAPL dissolution following the
initial spill simulation. We will run the dissolution phase in restart mode.
There are two reasons for running in restart mode: 1) we save a little time by
not having to re-run the first 90 days of the simulation, and 2) it allows us to
use a different drainage option for the dissolution simulation.
1. Select the Use restart option.
2. Click on the Browse button.
3. Select the file titled “UTC-contam.RESTAR” and select Open.
4. Select the OK button to exit the General Options dialog.
5.6.3
Time Options
Next, we will create a third injection period:
1. Select the UTCHEM | Time Options command.
2. Select the Injection Periods button.
3. Select the second injection period by either clicking on the appropriate
segment on the time line or by selecting “2” in the Injection Period
counter.
4. Select the Insert Right button to create a third period. Note that all of
the time steps and output intervals from the second period are retained
as initial settings for this period.
5. Make sure that the Injection period field counter is at 3 and change the
length of the injection period to 7300 days (20 years).
6. Within the Output intervals section, set the Print data and Prod. data
values to 1460 days.
7. Enter a value of 365 days for the Prod. histories and Profiles.
5-20
GMS Tutorials – Volume III
8. Select OK twice to exit both dialogs.
5.6.4
Drainage Option
Next, we will edit the drainage option. The contamination phase was simulated
using the First Drainage Corey option. We will use the Imbibition Corey
option to simulate the dissolution phase.
1. Select the UTCHEM | Physical Properties | Relative Permeability
command.
2. Select the Imbibition Corey option.
3. Select the OK button to exit the dialog.
5.6.5
Capillary Pressure
For the Imbibition Corey option, we need to change the Capillary Pressure
parameters.
1. Select the UTCHEM | Physical Properties | Capillary Pressure
command.
2. Select the Cap. Press. Endpoint button.
3. Select the Constant ´ Grid button.
4. Enter a value of 2.9 and select the OK button twice to return to the
Capillary Pressure dialog.
5. Select the Cap. Press. Exponent button.
6. Select the Constant ´ Grid button.
7. Enter a value of 2.0 and select the OK button repeatedly to exit all
dialogs.
5.6.6
Saving and Running the Model
We are now ready to save the model and launch UTCHEM.
1. Select the File | Save command.
2. Select the UTCHEM | Run UTCHEM command.
This simulation takes much longer to run than the first simulation due to the
fact that it covers a much longer period.
UTCHEM
5-21
3. Once the simulation is finished, click on the Close button.
5.6.7
Viewing the Solution
Next, we will view the computed component concentration values for the
dissolution phase.
1. Select UTC1-dissol_PCE from the Data Tree.
2. Select one of the latter time steps from the Time Steps window.
You may wish to experiment with the different time step values and other postprocessing options.
5.6.8
Additional Simulations
Consider running these following additional (optional) scenarios:
(1) Non-equilibrium partitioning. Equilibrium partitioning probably is an
optimistic assumption in that dissolution is effectively accelerated.
5.7
Pre-Flush PITT Phase
In this tutorial we demonstrate the forward modeling of a partitioning interwell
tracer test (PITT). The three wells created in the first phase of this simulation
will be used – one withdrawal well in the DNAPL zone and two injection wells
(Figure 5-1). The UTCHEM technical documentation presents the concepts
and mathematical descriptions for partitioning tracers.
Ideally, one may use a suite of partitioning tracers to detect and semi-quantify
the amount of DNAPL present within the swept zone. We will use two pairs of
tracers (4 alcohols) of contrasting hydrophobicity – a different pair in each of
the two injection wells. Through one well, we will inject 1-propanol (npropanol) and 1-heptanol. Through the second well, we will inject 2-propanol
(a.k.a. isopropyl alcohol or isopropanol) and 1-hexanol.
1-propanol (1Pr) and 2-propanol (2Pr) are highly hydrophilic with partitioning
coefficients (Kp ) of 0.0. Thus, partitioning into any DNAPL would be
minimal and they should pass through the media with a minimum of
retardation.
1-hexanol (Hex) and 1-heptanol (Hep) are relatively hydrophobic tracers with
Kp’s of 30.0 and 141.0, respectively. The retardation of these strongly
hydrophobic (lipophilic) tracers should be in direct proportion to the amount of
DNAPL encountered.
5-22
GMS Tutorials – Volume III
The DNAPL encountered by the tracer plumes should selectively retard the
more lipophilic tracer, while the hydrophilic tracer behaves conservatively.
Negligible biodegradation of the tracers is assumed.
This phase will be simulated as a restart of the 90 day contamination phase
simulation. We will do a 41 day PITT test where the tracers are injected during
the first day followed by a water flush for the next 40 days. We will create two
new injection periods for the tracer slug and the flushing and we will switch the
drainage option to Imbibition Corey.
GMS Project File: UTC-prePITT.gpr
5.7.1
Initializing the UTCHEM Simulation
We will build the input for this problem by modifying the input used in the
contamination phase. If the UTC-contam.gpr simulation is currently loaded
into GMS, you can proceed with the tutorial. Otherwise, read in the simulation
as follows:
1. Select the File | New command.
2. Select the File | Open command.
3. Select and open the UTC-contam.gpr file (from the directory to which
it had been saved).
Before editing this file for the current simulation phase, save it under a new
name:
4. Select the File | Save As command.
5. Rename the project to UTC-prePITT.gpr.
6. Select Save.
Now, we can proceed with modifications.
5.7.2
General Options
First, we will set up the general options. These options include the problem
title, the restart option, and the species involved in the simulation.
1. Select the UTCHEM | General Options command.
Titles
First, we will enter the titles and other basic information.
1. For the Run number, enter “UTC-prePITT-run1”
UTCHEM
5-23
2. For Title 2, enter: “30-day PCE spill - 60-day Redistribution – 41day PITT”.
3. For Title 3, enter your name and the current date.
Restart
To turn on the restart option:
1. Select the Use restart option.
2. Click on the Browse button.
3. Select the file titled “UTC-contam.RESTAR” and select Open.
Species
At this point, we would normally define the four tracers used in the simulation.
However, we already defined these species (1Pr, 2Pr, Hex, Hep) in the
contamination phase, so no changes need to be made.
1. Select the OK button to exit the dialog.
5.7.3
Time Options
The next step is to set up the time options for the UTCHEM output and the
time step control. We will create two new injection periods, a one day period
for the tracer slug and a 40 day period for the water flush.
1. Select the UTCHEM | Time Options command.
2. Select the Injection Periods button.
3. Select the second injection period by either clicking on the appropriate
segment on the time line or by selecting “2” in the Injection Period
counter.
4. Select the Insert Right button to create a third injection period. Note
that all of the Time steps and Output intervals from the second period
are retained as initial settings for this period.
5. Make sure that the Injection period field counter is at 3 and enter a
value of 1.0 for the Length item.
6. In the Time Steps section, change the time step size option from Days
to Courant numbers.
7. Change the Max time step size to 0.2.
5-24
GMS Tutorials – Volume III
8. Change the Min time step size to 0.04.
9. Within the Output intervals section, change all of the output intervals
to 1.0.
10. Select the Insert Right button to create a fourth injection period.
11. Make sure that the Injection period field counter is at 4 and enter a
value of 40.0 for the Length item.
12. Within the Output intervals section, change the Print data and Prod.
data values to 10.0.
13. Enter a value of 2.0 for the Prod. histories and Profiles.
14. Select OK twice to exit both dialogs.
5.7.4
Physical Properties
Now, we will edit the Physical Property data. We will change the drainage
option to Imbibition Corey since it better simulates flushing situations. We
will also edit the tracer properties.
Drainage Option
To change the drainage option:
1. Select the UTCHEM | Physical Properties | Relative Permeability
command.
2. Select the Imbibition Corey option.
3. Select the OK button to exit the dialog.
Capillary Pressure
For the Imbibition Corey option, we need to change the Capillary Pressure
parameters.
1. Select the UTCHEM | Physical Properties | Capillary Pressure
command.
2. Select the Cap. Press. Endpoint button.
3. Select the Constant ´ Grid button.
4. Enter a value of 2.9 and select the OK button twice to return to the
Capillary Pressure dialog.
UTCHEM
5-25
5. Select the Cap. Press. Exponent button.
6. Select the Constant ´ Grid button.
7. Enter a value of 2.0 and select the OK button three times to exit all
dialogs.
Tracer Properties
We will edit the tracer properties to define the partitioning coefficients.
1. Select the UTCHEM | Physical Properties | Tracer Properties
command.
2. Select 1PR_wo (1-propanol) from the Tracers list.
3. Make sure all the coefficients are set to the default value of 0.0.
4. Select 2Pr (2-propanol) from the Tracers list.
5. Make sure all the coefficients are set to the default value of 0.0.
6. Select Hex_wo (1-hexanol) from the Tracers list.
7. Enter a value of 30.0 for the Partition coefficient. Accept the default
values of 0.0 for the other coefficients.
8. Select Hep_wo (1-heptanol) from the Tracers list.
9. Enter a value of 141.0 for the Partition coefficient. Accept the default
values of 0.0 for the other coefficients.
10. Select OK.
5.7.5
Wells
The wells will have been defined in the original simulation (UTC-contam.gpr).
Only the pump rates and compositions for the third and fourth injection periods
must be edited here.
1. Select the UTCHEM | Wells command.
Left Injection Well
To define the flow rates for the left well:
1. Select the Left Injection Well from the wells list.
2. Select the aqueous option from the Phases list.
5-26
GMS Tutorials – Volume III
3. Select the Q curve.
4. Under the flow rate heading, enter 1000.0 into the third edit field
(representing the third injection period) and enter a value of 2000.0
into the fourth edit field (representing the fourth injection period).
5. Click OK to return to the Wells dialog.
To define the component concentrations for the left well:
6. Select the Water component from the Components list.
7. Select the Conc. curve.
8. Under the concentration heading, enter 1.0 into both the third and
fourth edit fields.
9. Click OK to return to the Wells dialog.
10. Select the 1PR_wo component from the Components list.
11. Select the Conc. curve.
12. Assign a concentration of 1000 mg/L (∞ solubility; miscible) only in
the third injection period line.
13. Click OK to return to the Wells dialog.
14. Select the Hex_wo component from the Components list.
15. Select the Conc. curve.
16. Assign a concentration of 500 mg/L only in the third injection period
(1-hexanol has an aqueous solubility of about 6000 mg/L).
17. Click OK to return to the Wells dialog.
Production Well
To modify the variables for the center production well:
1. Select the Center Production Well item from the Wells list.
2. Note that the Phases list is dimmed because the pump rate is lumped
(vs. for individual phases). Note that the Components field is also
dimmed for production wells.
3. Select the Q curve.
UTCHEM
5-27
4. Enter a value of -2000.0 for the third injection period. The values
should be zero in the earlier periods.
5. Enter a value of -4000.0 for the fourth injection period.
6. Click OK to return to the Wells dialog.
Right Injection Well
To define the flow rates for the right well:
1. Select the Right Injection Well from the wells list.
2. Select the aqueous option from the Phases list.
3. Select the Q curve.
4. Under the flow rate heading, enter 1000.0 into the third edit field and
enter a value of 2000.0 into the fourth edit field and click OK.
To define the component concentrations for the right well:
5. Select the Water component from the Components list.
6. Select the Conc. curve.
7. Under the concentration heading, enter 1.0 into both the third and
fourth edit fields.
8. Click OK to return to the Wells dialog.
9. Select the 1PR_wo component from the Components list.
10. Select the Conc. curve.
11. Assign a concentration of 1000 mg/L (∞ solubility; miscible) only in
the third injection period line.
12. Click OK to return to the Wells dialog.
13. Select the Hep_wo component from the Components list.
14. Select the Conc. curve.
15. Assign a concentration of 500 mg/L only in the third injection period
(1-heptanol has an aqueous solubility of about 2000 mg/L).
16. Click OK twice to exit all dialogs.
5-28
GMS Tutorials – Volume III
5.7.6
Saving and Running the Model
We are now ready to save the model and launch UTCHEM.
1. Select the File | Save command.
2. Select the UTCHEM | Run UTCHEM command.
3. Once the simulation is finished, click on the Close button.
5.7.7
Viewing the Solution
Next, we will view the computed component concentration values for the
dissolution phase.
1. Select one of the tracers from the Data Tree.
2. Select one of the latter time steps from the Time Step window.
View each of the tracers at the later time steps. Notice how the Hex and Hep
tracers partition to the PCE and the 1Pr and 2Pr tracers do not. Also, notice
that at the end of the simulation, the Hex tracer from the left injection well is
primarily trapped by the PCE that is settled at the very bottom of the aquifer.
However, the Hep tracer from the right injection well at the end of the
simulation is distributed both at the bottom and just to the right of the center
production well. The difference is due to the left to right background flow
gradient. After the 90 day spill and redistribution, the center of mass of the
PCE plume will be somewhat to the right of the center production well.
Furthermore, the background flow gradient assists the flushing from the left
injection well but hinders the flow from the right injection well.
Another important type of output from a PITT simulation is the concentration
of the tracers at the production well. GMS does not include a post-processing
tool for this output, but it can be viewed as part of the text output from
UTCHEM (the “history” files) in a text editor.
5.8
Water Flush Treatment Phase
The next phase of this tutorial involves using the injection and extraction wells
defined previously to simulate water flushing of the PCE plume. One
extraction well was added at the location of the spill and two injection wells
were added on each side of the spill. We will use the restart option to start the
flushing simulation at the end of the previously defined spill simulation. The
wells will then run for 280 days (nine months). In the next simulation, we will
simulate surfactant flushing and compare the results.
UTCHEM file: UTC-flush.gpr
UTCHEM
5.8.1
5-29
Initializing the UTCHEM Simulation
To build this simulation we will read in and modify the contamination
simulation:
1. Select the File | New command.
2. Select the File | Open command.
3. Select and open the UTC-contam.gpr file (from the directory to which
it had been saved).
Before editing this file for the current simulation phase, save it under a new
name:
4. Select the File | Save As command.
5. Rename the project UTC-flush.gpr
6. Select Save.
Now, we can proceed with modifications.
5.8.2
General Options
First, we will set up the general options. We will edit the problem title and the
restart option.
1. Select the UTCHEM | General Options command.
Titles
First, we will enter the titles and other basic information.
1. For the Run number, enter “UTC-flush-run1”
2. For Title 2, enter: “30-day PCE spill - 60-day redistribution – 9 mo.
flush”.
3. For Title 3, enter your name and the current date.
Restart
To turn on the restart option:
1. Select the Use restart option.
2. Click on the Browse button.
3. Select the file titled “UTC-contam.RESTAR” and select Open.
5-30
GMS Tutorials – Volume III
4. Select the OK button to exit the General Options dialog.
5.8.3
Injection Period for Flushing
Next, we will create a third injection period to simulate the flushing phase.
This injection period will last for 280 days.
1. Select the UTCHEM | Time Options command.
2. Select the Injection Periods button.
3. Select the second injection period by either clicking on the appropriate
segment on the time line or by selecting “2” in the Injection Period
counter.
4. Select the Insert Right button to create a third injection period
5. Change the Length of the new injection period to 280 days.
6. In the Time Steps section, change the time step size option from Days
to Courant numbers.
7. Change the Max time step size to 0.2.
8. Change the Min time step size to 0.04.
In the Output Intervals section, do the following:
9. Enter a value of 56.0 for the Print data value.
10. Enter a value of 56.0 for the Prod. data value.
11. Enter a value of 14.0 for the Prod. histories value.
12. Enter a value of 14.0 for the Profiles value.
13. Select the OK button twice to exit both dialogs.
5.8.4
Physical Properties
In the Physical Properties section, we will change the drainage option to
Imbibition Corey, which better simulates flushing conditions.
Drainage Option
To change the drainage option:
1. Select the UTCHEM | Physical Properties | Relative Permeability
command.
UTCHEM
5-31
2. Select the Imbibition Corey option.
3. Select the OK button.
Capillary Pressure
For the Imbibition Corey option, we need to change the Capillary Pressure
parameters.
1. Select the UTCHEM | Physical Properties | Capillary Pressure
command.
2. Select the Cap. Press. Endpoint button.
3. Select the Constant ´ Grid button.
4. Enter a value of 2.9 and select the OK button twice to return to the
Capillary Pressure dialog.
5. Select the Cap. Press. Exponent button.
6. Select the Constant ´ Grid button.
7. Enter a value of 2.0 and select the OK button three times to exit all
dialogs.
5.8.5
Editing the Well Data
Next, we will edit the well data to turn on the injection and extraction wells for
the flushing injection period.
1. Select the UTCHEM | Wells command.
Injection Wells
To set up the injection wells:
1. Select the Left Injection Well item from the list of wells.
2. In the list of phases, select the aqueous item.
3. Click on the curve labeled Q.
4. Under the flow rate heading, enter 2000.0 into the third edit field
representing the third injection period.
5. Click OK to return to the Wells dialog.
6. In the Components section, select the water item.
5-32
GMS Tutorials – Volume III
7. Click on the curve labeled Conc.
8. In the concentration column, enter a value of 1.0 for the third injection
period.
9. Click OK to return to the Wells dialog.
10. Select the Right Injection Well item from the list of wells.
11. Repeat steps 2-9 to enter the appropriate values for the right injection
well.
Extraction Well
To set up the extraction well:
1. Select the Center Production Well item from the list of wells.
2. Click on the curve labeled Q.
3. Under the flow rate heading, enter -4000.0 into the third edit field
representing the third injection period.
4. Click OK twice to exit both dialogs.
5.8.6
Saving and Running the Model
We are now ready to save the model and launch UTCHEM.
1. Select the File | Save command.
2. Select the UTCHEM | Run UTCHEM command.
This simulation takes several minutes to run.
3. Once the simulation is finished, click on the Close button.
5.8.7
Viewing the Solution
Next, we will view the computed PCE concentrations for the water-flushing
phase.
1. Select UTC4-flush_PCE from the Data Tree.
2. Select one of the latter time steps using the Time Steps window.
You may wish to experiment with the different time step values.
UTCHEM
5.9
5-33
Surfactant Flush Treatment Phase
The next phase of this tutorial involves modifying the flushing simulation
defined in the previous phase to include the injection of surfactants to
accelerate the dissolution of the PCE. Instead of flushing for nine months, this
simulation will only cover a period of 21 days (7 days of surfactant flood
followed by 14 days of water flood). During the water flood, we will increase
the flow rate in each injection well to 3000 ft3/day.
UTCHEM file: UTC-SEAR.gpr
5.9.1
Initializing the UTCHEM Simulation
If the UTC-flush.gpr simulation is currently loaded into GMS, you can skip
the next three steps and proceed with the tutorial. Otherwise, read in the
simulation as follows:
1. Select the File | New command.
2. Select the File | Open command.
3. Select and open the UTC-flush.gpr file (from the directory to which it
had been saved).
Before editing this file for the current simulation phase, save it under a new
name:
4. Select the File | Save As command.
5. Rename the project UTC-SEAR.gpr and click Save.
Now, we can proceed with modifications.
5.9.2
General Options
First, we will set up the general options. We will edit the problem title and add
the surfactant and electrolyte species.
1. Select the UTCHEM | General Options command.
Titles
To change the titles:
1. For the Run number, enter “UTC-SEAR-run1”
2. For Title 2, enter: “30-day PCE spill - 60-day redistribution – 21
day surfactant flush”.
5-34
GMS Tutorials – Volume III
3. For Title 3, enter your name and the current date.
Species
Next, we will add three new species: surfactant, chloride, and calcium:
1. Select the Define Species button.
2. Turn on the Surfactant, Chloride, and Calcium options.
3. Select the OK button twice to exit both dialogs.
5.9.3
Editing the Injection Periods
Next, we will edit the injection periods. With the surfactant, the PCE is
removed much more rapidly. Rather than nine months, we will only run the
simulation for 21 days. This will require two injection periods: a 7 day period
for the surfactant flood, and a 14 day period for the water flood. We will
change the length of the existing third injection period to 7 days for the
surfactant flood and add a new fourth injection period for the water flood.
Surfactant Injection Period
To edit the surfactant injection period:
1. Select the UTCHEM | Time Options command.
2. Select the Injection Periods button.
3. Select the third injection period and change the Length to 7 days.
In the Output Intervals section, do the following for the third period:
4. Enter a value of 3.5 for the Print data value.
5. Enter a value of 3.5 for the Prod. data value.
6. Enter a value of 1.0 for the Prod. histories value.
7. Enter a value of 1.0 for the Profiles value.
Water Injection Period
To create a new injection period for the water flood:
1. Make sure the third injection period is selected and select the Insert
Right button.
2. Change the Length of the new injection period to 14 days.
UTCHEM
5-35
In the Output Intervals section, do the following:
3. Enter a value of 7.0 for the Print data value.
4. Enter a value of 7.0 for the Prod. data value.
5. Enter a value of 1.0 for the Prod. histories value.
6. Enter a value of 1.0 for the Profiles value.
7. Select the OK button twice to exit both dialogs.
5.9.4
Initial Conditions
Next, we will use the Reservoir Properties dialog to define an initial condition
for chloride and calcium.
1. Select the UTCHEM | Reservoir Properties command.
2. Enter a value of 0.009 for the initial condition for both Chloride and
Calcium.
3. Select the OK button to exit the dialog.
5.9.5
Editing the Phase Behavior Parameters
Next, we will edit the surfactant properties in the Phase Behavior dialog.
These properties define the behavior of the surfactant.
1. Select the UTCHEM | Physical Properties | Phase Behavior command.
Concentration
To edit the concentrations:
1. Select the Concentrations tab.
2. Change the Oil concentration at plait point(+) value to 0.0.
3. Change the Oil concentration at plait point(-) value to 1.0.
4. Change the Critical micelle concentration value to 0.0001.
Binodal Curve
To edit the binodal curve:
1. Select the Binodal Curve tab.
5-36
GMS Tutorials – Volume III
2. Enter 0.1 for the Intercept at zero salinity.
3. Enter 0.0267 for the Intercept at optimal salinity.
4. Enter 0.1 for the Intercept at twice optimal salinity.
Salinity
To edit the salinity parameters:
1. Select the Salinity tab.
2. Enter 0.0198 for the Lower effective salinity limit.
3. Enter 0.0231 for the Upper effective salinity limit.
4. Enter 1.0 for the Effective salinity slope param. for calcium.
5. Select the OK button to exit the dialog.
5.9.6
Interfacial Tension
The interfacial tension parameters are also related to the behavior of the
surfactant. To edit the interfacial tension parameters:
1. Select the UTCHEM | Physical Properties | Interfacial Tension
command.
2. Select the Healy & Reed’s correlation option.
For the Water/micro-emulsion parameters:
3. Under the G11 heading, enter a value of 13.0.
4. Under the G12 heading, enter a value of -14.8.
5. Under the G13 heading, enter a value of 0.007.
For the Oil/micro-emulsion parameters:
6. Under the G21 heading, enter a value of 13.0.
7. Under the G22 heading, enter a value of -14.5.
8. Under the G23 heading, enter a value of 0.01.
Finally,
9. Change the XIFTW value to 1.65.
UTCHEM
5-37
10. Click OK to exit the Interfacial Tension dialog.
5.9.7
Relative Permeability
Next, we will edit the relative permeability data related to the microemulsion
phase:
1. Select the UTCHEM | Physical Properties | Relative Permeability
command.
In the Microemulsion column, do the following:
2. Select the Residual Saturation button.
3. Select the Constant ´ Grid button and enter a value of 0.24.
4. Select OK on both dialogs to return to the Relative Permeability dialog.
5. Select the Kr Endpoint button.
6. Select the Constant ´ Grid button and enter a value of 0.486.
7. Select OK on both dialogs to return to the Relative Permeability dialog.
8. Select the Kr Exponent button.
9. Select the Constant ´ Grid button and enter a value of 2.85.
10. Select OK to exit all three dialogs.
5.9.8
Viscosity
We also need to edit the viscosity data related to the microemulsion phase:
1. Select the UTCHEM | Physical Properties | Viscosity command.
In the Microemulsion viscosity section, do the following:
2. Change the Alpha 1 property to a value of 3.4.
3. Change the Alpha 2 property to a value of 1.0.
4. Change the Alpha 3 property to a value of 3.0.
5. Change the Alpha 4 property to a value of 1.0.
6. Change the Alpha 5 property to a value of 1.0.
7. Click OK to exit the Viscosity dialog.
5-38
GMS Tutorials – Volume III
5.9.9
Component Density
Next, we need to enter a value of component density for the surfactant:
1. Select the UTCHEM | Physical Properties | Component Density
command.
2. Enter a value of 0.7036 for the Coef. of oil in microemulsion value.
3. Enter a value of 0.498 for in the Surfactant edit field.
4. Select OK to exit the dialog.
5.9.10
Diffusion and Dispersion
Next, we will edit the dispersion coefficients related to the microemulsion
phase:
1. Select the UTCHEM | Physical Properties | Diffusion/Dispersion
command.
2. In the Dispersivity section, change the Microemulsion phase,
Longitudinal value to 0.1 [ft2/d].
3. Change the Microemulsion phase, Transverse value to the 0.03.
4. Click OK to exit the Diffusion & Dispersion dialog.
5.9.11 Boundaries
Now that we have added the chloride and calcium components, we must edit
the boundary condition data.
1. Select the UTCHEM | Boundaries command.
Left
For the parameters in the Left column, do the following:
1. Select the Conc. of chloride curve.
2. Under the cholorine conc heading, enter 0.009 into all the edit fields.
3. Click OK to return to the Boundaries dialog.
4. Select the Conc. of calcium curve.
5. Under the calcium conc heading, enter 0.009 into all the edit fields.
UTCHEM
5-39
6. Click OK to return to the Boundaries dialog.
Right
1. Repeat the previous steps to enter the chloride and calcium values to
the right side.
2. Exit the Boundaries dialog when finished.
5.9.12
Editing the Concentrations at Wells
Finally, we will edit the component densities at the injection wells to ensure
that the surfactant is injected during the third injection period and that water is
injected during the fourth injection period.
1. Select the UTCHEM | Wells command.
Left Injection Well
To edit the left injection well:
1. In the list of Wells, select the Left Injection Well item.
2. In the Phases section, make sure the aqueous item is selected.
3. Click on the curve labeled Q:
4. In the flow rate column, enter a value of 1125 for injection period #3
and 3000 for injection period #4.
5. Select the OK button to return to the Wells dialog.
6. In the Components section, select the water item.
7. Click on the curve labeled Conc.
8. In the concentration column, enter a value of 0.96 for the third
injection period and a value of 1.0 for the fourth injection period.
9. Select the OK button to return to the Wells dialog.
10. In the Components section, select the Surfactant item.
11. Click on the curve labeled Conc.
12. In the concentration column, enter a value of 0.04 for the third
injection period and leave the other values at 0.0.
13. Select the OK button to return to the Wells dialog.
5-40
GMS Tutorials – Volume III
14. Select the Chloride component from the Components list.
15. Select the Conc. curve.
16. Under the concentration heading, enter 0.009 into both the third and
fourth edit fields.
17. Click OK to return to the Wells dialog.
18. Select the Calcium component from the Components list.
19. Select the Conc. curve.
20. Under the concentration heading, enter 0.009 into the both the third
and fourth edit fields.
21. Click OK to return to the Wells dialog.
Right Injection Well
Repeat each of the steps in the previous section to edit the well data for the
right injection well.
Center Production Well
To edit the pumping rate for the center production well:
In the list of wells, select the Center Production Well item
1. Click on the curve labeled Q:
2. In the flow rate column, enter a value of -2250 for injection period #3
and -6000 for injection period #4.
3. Select the OK button twice to exit both dialogs.
5.9.13 Saving and Running the Model
We are now ready to save the model and launch UTCHEM.
1. Select the File | Save command.
2. Select the UTCHEM | Run UTCHEM command.
This simulation takes several minutes to run.
3. Once the simulation is finished, click on the Close button.
UTCHEM
5.9.14
5-41
Viewing the Solution
Next, we will view the computed PCE concentrations for the surfactantflushing phase.
1. Select UTC5-SEAR_PCE from the Data Tree.
2. Select one of the later time steps using the Time Steps window.
You may wish to experiment with the different time step values.
5.9.15
Designing a More Effective System
As you view the solution, notice that only a portion of the PCE is removed.
Most of the PCE is concentrated at the bottom of the aquifer. To achieve a
more effective remediation design, you may wish to try the following and rerun the model:
1. Change the screened interval for the wells. Since most of the PCE is
concentrated at the bottom of the aquifer, try changing the screened
interval for the injection and extraction wells so that the screened
interval is focused on the bottom of the aquifer. This can be
accomplished by editing the Starting layer and Ending layer values in
the Wells dialog.
2. Change the pumping rates and/or lengths of the injection periods for
the wells. However, keep in mind that surfactants are expensive. If
you inject surfactants for a long time period, you can completely
remediate the PCE. But you may bankrupt your client!
5.10
Post-Flush PITT (optional)
One of the purposes of a PITT is to assess the effectiveness of a cleanup effort.
Repeating the tracer tests, presumably in the absence of DNAPL, should show
little retardation of the hydrophobic tracers. In this phase, we will simulate a
PITT following the surfactant flush. We will follow the same basic steps we
followed in setting up the pre-flush PITT simulation. This simulation will be a
restart of the surfactant flush (SEAR) simulation.
UTCHEM file: UTC-postPITT.gpr
5.10.1
Initializing the UTCHEM Simulation
We will build the input for this problem by modifying the input used in the
SEAR phase. If the UTC-SEAR.gpr simulation is currently loaded into GMS,
you can proceed with the tutorial. Otherwise, read in the simulation as follows:
5-42
GMS Tutorials – Volume III
1. Select the File | Open command.
2. Select and open the UTC-SEAR.gpr file (from the directory to which
it had been saved).
Before editing this file for the current simulation phase, save it under a new
name:
3. Select the File | Save As command.
4. Rename the project UTC-postPITT.gpr.
5. Select OK.
Now, we can proceed with the modifications.
5.10.2
General Options
First, we will set up the general options. These options include the problem
title and the species involved in the simulation.
1. Select the UTCHEM | General Options command.
Titles
First, we will enter the titles and other basic information.
1. For the Run number, enter “UTC-postPITT-run1”
2. For Title 2, enter: “30-day PCE spill - 60-day redistribution –21 day
SEAR - 61-day PITT”.
3. For Title 3, enter your name and the current date.
4. Ensure that the default units are English.
Restart
This simulation will be a restart of the SEAR simulation.
1. Click on the Browse button in the Restart Option section.
2. Select the file titled “UTC-SEAR.RESTAR” and select Open.
Species
Next, we will define the species used in the simulation. However, since the
four tracers were already created in the contamination phase simulation, no
changes need to be made.
UTCHEM
5-43
1. Select the OK button to exit the dialog.
5.10.3
Time Options
The next step is to set up the time options for the UTCHEM output and the
time step control. A fifth injection period of one day will be defined, during
which the tracer slug will be injected at the distal wells and recovered via the
central well. A sixth injection period of sixty days will be defined to flush the
tracer slug through the system.
1. Select the UTCHEM | Time Options command.
2. Select the Injection Periods button. Select the fourth injection period
by either clicking on the appropriate segment on the time line or by
selecting “4” in the Injection Period counter.
3. Select the Insert Right button to create a fifth injection period.
4. Make sure that the Injection period field counter is at 5 and enter a
value of 1.0 for the Length item.
5. Within the Output intervals section, enter a value of 1.0 for all of the
output intervals.
6. Select the Insert Right button to create a sixth injection period.
7. Make sure that the Injection period field counter is at 6 and enter a
value of 60.0 for the Length item.
8. Within the Output intervals section, set the Print data and Prod. data
values to 20.0.
9. Enter a value of 6.0 for the Prod. histories and Profiles.
10. Select OK twice to exit both dialogs.
5.10.4
Tracer Properties
Now, we will edit the tracer properties to define the partitioning coefficients.
1. Select the UTCHEM | Physical Properties | Tracer Properties
command.
2. Select Hex_wo (1-hexanol) from the Tracers list.
3. Enter a value of 30.0 for the Partition coefficient. Accept the default
values of 0.0 for the other parameters.
5-44
GMS Tutorials – Volume III
4. Select Hep_wo (1-heptanol) from the Tracers list.
5. Enter a value of -141.0 for the Partition coefficient. Accept the default
values of 0.0 for the other parameters.
6. Select OK.
5.10.5
Wells
The well pump rates and compositions for the two new injection periods must
be edited.
1. Select the UTCHEM | Wells command.
Left Injection Well
To define the flow rates for the left well:
1. Select the Left Injection Well from the wells list.
2. Select the aqueous option from the Phases list.
3. Select the Q curve.
4. Under the flow heading, enter 1000.0 into the fifth edit field
(representing the fifth injection period) and enter a value of 2000.0 into
the sixth edit field (representing the sixth injection period).
5. Click OK to return to the Wells dialog.
To define the component concentrations for the left well:
6. Select the Water component from the Components list.
7. Select the Conc. curve.
8. Under the concentration heading, enter 1.0 into both the fifth and sixth
edit fields.
9. Click OK to return to the Wells dialog.
10. Select the Chloride component from the Components list.
11. Select the Conc. curve.
12. Under the concentration heading, enter 0.009 into both the fifth and
sixth edit fields.
13. Click OK to return to the Wells dialog.
UTCHEM
5-45
14. Select the Calcium component from the Components list.
15. Select the Conc. curve.
16. Under the concentration heading, enter 0.009 into both the fifth and
sixth edit fields.
17. Click OK to return to the Wells dialog.
18. Select the 1PR_wo component from the Components list.
19. Select the Conc. curve.
20. Assign a concentration of 1000 mg/L (∞ solubility; miscible) only in
the fifth injection period line.
21. Click OK to return to the Wells dialog.
22. Select the Hex_wo component from the Components list.
23. Select the Conc. curve.
24. Assign a concentration of 500 mg/L only in the fifth injection period
(1-hexanol has an aqueous solubility of about 6000 mg/L).
25. Click OK to return to the Wells dialog.
Production Well
To modify the variables for the center production well:
1. Select the Center Production Well item from the Wells list.
2. Select the Q curve.
3. Enter a value of -2000 for the fifth injection period.
4. Enter a value of -4000 for the sixth injection period.
5. Click OK to return to the Wells dialog
Right Injection Well
To define the flow rates for the right well:
1. Select the Right Injection Well from the wells list.
2. Select the aqueous option from the Phases list.
3. Select the Q curve.
5-46
GMS Tutorials – Volume III
4. Under the flow heading, enter 1000.0 into the fifth edit field and enter a
value of 2000.0 into the sixth edit field.
To define the component concentrations for the right well:
5. Select the Water component from the Components list.
6. Select the Conc. curve.
7. Under the concentration heading, enter 1.0 into both the fifth and sixth
edit fields.
8. Click OK to return to the Wells dialog.
9. Select the Chloride component from the Components list.
10. Select the Conc. curve.
11. Under the concentration heading, enter 0.009 into both the fifth and
sixth edit fields.
12. Click OK to return to the Wells dialog.
13. Select the Calcium component from the Components list.
14. Select the Conc. curve.
15. Under the concentration heading, enter 0.009 into both the fifth and
sixth edit fields.
16. Click OK to return to the Wells dialog.
17. Select the 1PR_wo component from the Components list.
18. Select the Conc. curve.
19. Assign a concentration of 1000 mg/L (∞ solubility; miscible) only in
the fifth injection period line.
20. Click OK to return to the Wells dialog.
21. Select the Hep_wo component from the Components list.
22. Select the Conc. curve.
23. Assign a concentration of 500 mg/L only in the fifth injection period
(1-heptanol has an aqueous solubility of about 2000 mg/L).
24. Click OK twice to exit both dialogs.
UTCHEM
5-47
5.10.6 Saving and Running the Model
We are now ready to save the model and launch UTCHEM.
1. Select the File | Save command.
2. Select the UTCHEM | Run UTCHEM command.
3. Once the simulation is finished, click on the Close button.
5.10.7
Viewing the Solution
Next, we will view the computed component concentration values for the
dissolution phase.
1. Select one of the tracers from the Data Tree.
2. Select one of the latter time steps using the Time Steps window.
View each of the tracers at the later time steps. Notice how the Hex and Hep
tracers partition to the PCE and the 1Pr and 2Pr tracers do not.
Another important type of output from a PITT simulation is the concentration
of the tracers at the production well. GMS does not include a post-processing
tool for this output, but it can be viewed as part of the text output from
UTCHEM (the “history” files) in a text editor.
5.11
Conclusion
This concludes the UTCHEM tutorial. If you wish to exit GMS at this time:
1. Select the File | Exit command.
2. Select No at the prompt.
6
GIS Module
CHAPTER
6
GIS Module
The GIS module can be used to display data from a GIS database directly in
GMS without having to convert that data to GMS data types. Native GMS data
such as grids and boreholes can be displayed along with the GIS data. The GIS
module can also be used to select a portion of the GIS data and convert it to
GMS data types to be used in constructing a groundwater model. Currently the
GIS module can only be used for steady state data.
If you have a license of ArcObjects® installed on your computer, many features
available in ESRI® software (such as ArcMap®) become available in GMS. If
you do not have a license of ArcObjects® installed, you can still use the GIS
module, but many features will not be available. You can still import and
display shapefiles and convert them to GMS feature objects. For a full list of
the features available in the different modes, refer to the GMS Help.
This tutorial will introduce you to the GIS module. There are two parts to the
tutorial. The first part shows the features available to you if you don’t have a
license of ArcObjects® installed on your computer. The second part shows the
features available if you do. You will not be able to complete the second part
if you do not have a license of ArcObjects® installed on your computer.
6.1
Part 1 - Without ESRI® ArcObjects®
We will import a point shapefile containing well data. Then we will create
scatter points from the shapefile points. Next we will create a GMS
MODFLOW conceptual model in the Map module, and create a coverage with
well attributes. Then we will convert the shapefile to GMS wells that we could
6-2
GMS Tutorials – Volume III
use to help build a model. This will illustrate how GIS data can be imported
and converted to GMS data.
6.2
Getting Started
If you have not yet done so, launch GMS. If you have already been using
GMS, you may wish to select the File | New command to ensure the program
settings are restored to the default state.
6.3
Required Modules/Interfaces
The license registration system used by GMS allows the components of GMS
to be licensed individually, depending on the needs of the user. Before
continuing, you may wish to check whether or not the GMS components used
in this tutorial have been enabled in the copy of GMS you are using. This can
be accomplished by selecting the Register | File command. On the left side of
the Register dialog, the following components should have “ENABLED”
displayed in the Status column to the right of each of the following
components:
6.4
•
Map
•
GIS
Reading the Shapefile
The first step is to read the shapefile.
1. Select the Open button
.
2. Locate and open the directory entitled: tutfiles\gismodule
3. In the Open dialog, change the Files of type to Shapefiles (*.shp).
4. Select the file entitled arcmap.shp and select the Open button.
6.5
Viewing the Shapefile
You should not see a number of points displayed on the screen. These are the
wells in the shapefile.
1. Switch to the GIS module
.
2. In the Data Tree, expand the GIS Layers folder if necessary.
GIS Module
6-3
Notice the arcmap.shp object in the data tree. This is the shapefile we just
opened.
Without ESRI® ArcObjects®, we have only a limited set of options for
displaying the shapefile.
3. Select the Display Options button
.
4. Click on the button displaying the point symbol style.
5. Change the point radius and color. Click OK to exit all dialogs.
Notice that the point color has changed.
6.6
Viewing the Attribute Table
The shapefile we opened has a number of attributes associated with each point.
Let’s take a look at them.
1. In the Data Tree, right-click on the arcmap.shp object.
2. Select the Attribute Table command from the pop-up menu.
3. Resize the dialog by dragging the bottom right corner out so you can
see more of the data.
There are number of attributes (columns) associated with each point. Notice
the data is not editable.
4. Click OK to exit the dialog.
6.7
Converting the Shapefile to 2D Scatter Points
Now we will convert the GIS data to 2D scatter points that we could use to do
interpolation with.
1. In the Data Tree, right-click on the arcmap.shp object.
2. Select the Convert to 2D Scatter Points command from the pop-up
menu.
You should see some new symbols appear on the screen. These are the new
2D scatter points.
3. Switch to the 2D Scatter Points module
.
4. If necessary, expand the 2D Scatter Data folder.
6-4
GMS Tutorials – Volume III
Notice the arcmap.shp 2D scatter point that we just created.
5. Expand the arcmap.shp object.
Notice that GMS automatically created a data set from each numeric attribute
in the attribute table. You could use this procedure to create scatter points and
then interpolate from the scatter points to a grid. If you had water level
information for each point, for example, you could create a starting head data
set for your model.
We won’t do anything more with the scatter points, so we’ll delete them now.
6. Select the Edit | Delete All command.
6.8
Converting the Shapefile to Feature Objects
Now we will convert the GIS data to GMS feature objects that we could use to
build a conceptual model. First we must create a default conceptual model and
coverage with the appropriate attributes.
6.8.1
Creating the Conceptual Model
1. Switch to the Map module
.
2. In the Data Tree, right click on the Map Data folder and select the
New Conceptual Model command from the pop-up menu.
3. Change the Name to Model1.
4. Make sure the Model is set to MODFLOW and click OK.
5. In the Data Tree, right click on the Model1 folder and select the New
Coverage command from the pop-up menu.
6. Rename the new coverage coverage1.
7. Select the Wells option in the list of Sources/Sinks/BCs and click OK.
6.8.2
Mapping the GIS Data
1. Switch to the GIS module
.
2. Select the Mapping | Shapes -> Feature Objects command.
3. Click Yes to confirm that we want to use all visible shapes.
At this point, the GIS to Feature Objects Wizard appears.
GIS Module
6-5
4. Click Next.
5. In the WELLNAME column, change the mapping to Name.
6. In the PUMPRATE column, change the mapping to Flow rate.
7. Click Next.
8. Click Finish.
Feature points now exist in the same location as the GIS points, but since
they’re in the same locations, you probably won’t notice any difference in the
display.
9. Uncheck the arcmap.shp object in the Data Tree.
10. Switch to the Map module
.
11. In the Data Tree, right-click on coverage1 and select the Attribute
Table command from the pop-up menu.
This dialog shows the properties of all the feature points in the coverage.
Notice that the names and flow rates were transferred from the GIS attributes,
just like we specified. However, the points are all of type NONE. We need to
make them wells.
12. Find the spreadsheet cell corresponding to the All row and the Type
column. Change the type to Well. Since this is the All row, all of the
points are changed to wells.
13. Click OK.
6.8.3
Part 1 Conclusion
At this point we have well points that we could use as we further construct a
MODFLOW conceptual model. This topic is further discussed in the tutorial
entitled MODFLOW – Conceptual Model Approach and will not be discussed
further here.
6.9
Part 2 - With ESRI® ArcObjects®
If you have a license of ArcObjects® installed on your computer or on your
network, you can proceed through part 2 of this tutorial If you have ESRI®
software like ArcGIS® installed then you should have a license of ArcObjects®
available. If you don’t know if you have a license of ArcObjects®, the tutorial
will show you how you can tell.
6-6
GMS Tutorials – Volume III
Many more features in the GIS module are available if you have a license of
ArcObjects®. This part of the tutorial introduces those features.
6.10
We will delete everything we have done so far and read in a new file.
1. Select the New button
.
<THIS TUTORIAL IS NOT YET COMPLETED>
6.11
Conclusion
<THIS TUTORIAL IS NOT YET COMPLETED>