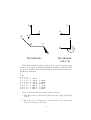
1
Yet Another Extended Hückel Molecular Orbital
Package
(YAeHMOP)
Version 3.0 User Manual
Greg Landrum and Wingfield Glassey
July 27, 2006
Contents
1 bind
4
2 viewkel
5
3 Keywords
3.1 Geometry (required) . . . . . . . . . . . . . . . . . . .
3.2 Lattice (mandatory for extended systems) . . . . . . .
3.3 Crystal Spec (required for use of crystallographic coordinates) . . . . . . . . . . . . . . . . . . . . . . . .
3.4 Electrons (potentially required) . . . . . . . . . . . . .
3.5 Charge (potentially required) . . . . . . . . . . . . . .
3.6 Alternate Occups . . . . . . . . . . . . . . . . . . . .
3.7 Parameters (optional) . . . . . . . . . . . . . . . . . .
3.8 Molecular (mandatory for molecular calculations) . . .
3.9 Just Geom (optional) . . . . . . . . . . . . . . . . . .
3.10 Walsh (optional) . . . . . . . . . . . . . . . . . . . . .
3.11 Symmetry (optional) . . . . . . . . . . . . . . . . . .
3.12 Symm Tol (optional) . . . . . . . . . . . . . . . . . .
3.13 Principle Axes (optional) . . . . . . . . . . . . . . . .
3.14 Zeta (optional) . . . . . . . . . . . . . . . . . . . . .
3.15 Nonweighted (optional) . . . . . . . . . . . . . . . . .
3.16 The Constant (optional) . . . . . . . . . . . . . . . . .
1
9
9
10
10
11
11
11
12
13
13
13
14
14
15
15
15
15
3.17 Zero Overlap (optional) . . . . . . . . . . . . . . . . .
3.18 Nearest Neighbor Contact (optional) . . . . . . . . . .
3.19 K Points (mandatory for Average Properties calculations on extended systems) . . . . . . . . . . . . . . .
3.20 Band (optional) . . . . . . . . . . . . . . . . . . . . .
3.21 FMO (optional) . . . . . . . . . . . . . . . . . . . . .
3.22 FCO (optional) . . . . . . . . . . . . . . . . . . . . .
3.23 Average Properties (optional) . . . . . . . . . . . . . .
3.24 No Total DOS (optional) . . . . . . . . . . . . . . . .
3.25 Dump Overlap (optional) . . . . . . . . . . . . . . . .
3.26 Dump Hamil (optional) . . . . . . . . . . . . . . . . .
3.27 Dump Dist (optional) . . . . . . . . . . . . . . . . . .
3.28 Projected DOS (optional) . . . . . . . . . . . . . . . .
3.29 COOP (optional) . . . . . . . . . . . . . . . . . . . .
3.30 Printing (optional) . . . . . . . . . . . . . . . . . . . .
3.31 MO Print (optional) . . . . . . . . . . . . . . . . . . .
3.32 Orbital Occupations (optional) . . . . . . . . . . . . .
3.33 Charge Iteration (optional) . . . . . . . . . . . . . . .
3.34 Sparsify (optional) . . . . . . . . . . . . . . . . . . . .
3.35 Just Average E (optional) . . . . . . . . . . . . . . . .
3.36 Just Matrices (optional) . . . . . . . . . . . . . . . . .
3.37 Diagwo (optional) . . . . . . . . . . . . . . . . . . . .
15
16
16
16
17
18
18
19
19
19
19
19
20
21
23
24
24
25
25
25
25
4 A couple of disclaimers
27
5 Using bind on a Macintosh
28
6 The fitting programs
28
7 General Mac hints
28
8 sub dos and add dos
31
9 cooperate
31
10 What is a bug?
33
11 What to do if you find a bug
33
12 Choosing how many overlaps to use
34
2
13 Choosing the number of k points to use
34
14 Choosing the number of points in band structures
35
15 Calculations on big systems
35
16 Using viewkel in X
16.1 Special keys in viewkel . . . . .
16.2 General use of buttons . . . . .
16.3 The main button window . . . .
16.4 The PS options button window
16.5 The molecule button window . .
16.6 The MO button window . . . .
16.7 FMO button window . . . . . .
16.8 Walsh button window . . . . . .
16.9 Band button window . . . . . .
16.10Properties button window . . .
16.11Graph button window . . . . .
.
.
.
.
.
.
.
.
.
.
.
17 Using viewkel from a Tek terminal
3
.
.
.
.
.
.
.
.
.
.
.
.
.
.
.
.
.
.
.
.
.
.
.
.
.
.
.
.
.
.
.
.
.
.
.
.
.
.
.
.
.
.
.
.
.
.
.
.
.
.
.
.
.
.
.
.
.
.
.
.
.
.
.
.
.
.
.
.
.
.
.
.
.
.
.
.
.
.
.
.
.
.
.
.
.
.
.
.
.
.
.
.
.
.
.
.
.
.
.
.
.
.
.
.
.
.
.
.
.
.
36
. 36
. 37
. 37
. 40
. 41
. 43
. 47
. 48
. 49
. 49
. 50
50
What is YAeHMOP and why should I use it?
YAeHMOP is a group of programs for performing extended Hückel
calculations [1, 2] and analyzing and visualizing the results. The
programs bind and viewkel form the core of the package.
1
bind
bind is the program which performs the actual extended Hückel
calculations. It can be used to perform calculations on both isolated
molecules and extended systems of 1, 2, or 3 dimensions.
bind is an almost complete rewrite of the program new3 and is
written almost entirely in C (the routines for evaluating overlap matrix elements and diagonalizing the Hamiltonian matrix from new3
remain) Because of the fact that all memory used in the program
is allocated dynamically, there are no restrictions on the number of
atoms, K points, or orbitals which can be used (this isn’t totally
true: there is a limit of 20 user defined atom types). The only limitation is the amount of memory that your computer has and the
length of time which you are willing to wait for the run to finish.
Because of the fact that bind is written to be easy to maintain
and understand, we have not spent a lot of time trying to make it
fast. This isn’t to say that it’s slow, but it certainly could be faster.
The input files to bind are keyword based, so, with a few exceptions, it doesn’t really matter what order things are in. In addition,
white space (spaces, tabs, etc.) in the input are ignored.
Here are just a few reasons to use bind :
• Built in parameters for most elements.
• Gaussian style Z–matrix, standard Cartesian, or crystallographic
coordinate input.
• Automatic generation of points along a reaction coordinate (for
Walsh diagrams).
• Particular pieces of information can be monitored at each step
along a reaction coordinate (e.g. the reduced overlap population between two atoms can be printed at each step along a
Walsh diagram).
• Automagic generation of K points along symmetry lines for
band structures.
4
• Orientation independent determination of symmetry elements.
• More symmetry elements are found (up through S8 ).
• DOS and COOP data are in ASCII format, so you can plot the
data with any plotting program... though you will want to use
viewkel :-).
2
viewkel
viewkel is an X–Windows based, interactive program for displaying
and printing the results obtained using bind (though there’s no
reason that it can’t be made to display data from other programs).
Some of viewkel ’s features are:
• Interactive 3-D manipulation of molecular structures.
• Support for extended systems: “grow” crystals of any size.
• Postscript output.
• It doesn’t use Motif.
• Ability to place as many structures and graphs as desired on
the same page.
• Numerous options for displaying molecules and MO surfaces.
• Automatic generation of input files for rayshade , a freeware
raytracing program. This can be used to get extra gratuitous
color 3D plots.
• The official Roald Hoffmann seal of approval on the way the
output looks. (NOTE: this feature is still under development.)
Both bind and viewkel were written to be as easy to port to
other flavors of UNIX as possible. This is one of the reasons why
viewkel doesn’t use any of the snazzy user interface libraries which
are available.
What’s new in version 3.0?
Quite a few new features have been added to YAeHMOP and one
or two ’problems’ have gone away :-)
5
The YAeHMOP development team has also increased in size as of
this release ... so please use the version 3.0 citations when publishing results generated with YAeHMOP . Thanks !
Additions to bind include ...
• f-orbitals ... at last !!!
• COOP’s in a fragment molecular orbital (FMO) basis
• Hamilton population analysis: a tool for total energy partitioning built on the orbital, atom and fmo COOP options offered
in YAeHMOP [3, 4, 5]
also the ’known bugs’ section of the ’those damn bugs’ chapter of
the version 2.0 manual has vanished ... so there are absolutely NO
bugs left in YAeHMOP :-)
What’s new in version 2.0?
A bunch of stuff has been added to this version. This is almost
certainly the last non-bug fix release of the programs until I graduate.
• Numerous bug fixes.
• Much improved MO plotting. Including Jorgenson and Salem
(or CACAO) style plots that can be rotated in “real-time” to
find the optimal viewing angle. Also included are contour plots
of MOs.
• Fragment Crystal Orbital analysis, a new interpretive tool for
crystalline systems.
• A new keyword allowing diagonalization of the hamiltonian
without including the overlap matrix.
• viewkel now provides distances, angles, and dihedral angles
between selected atoms in molecules.
• There are several new options for display of molecules in viewkel .
Including tube bonds and pseudo-3D crosses.
What’s new in version 1.2?
6
• Support for using LAPACK routines to diagonalize the matrices.
• A version for Power Macs.
• I have more faith in the MO drawings now. The normalization
constants were right and now that I evaluate them in atomic
units the pictures look right too. Thanks Grisha!
• More juicy raisins in every bite!
• Other things that escape me at the moment.
Overview of how a calculation is done
So you’ve come up with a cool problem (or it was assigned in
class), and you want to do an extended Hückel calculation using
YAeHMOP . The goal of this section is to get you familiar with
the basic process for moving from initial idea to final graphs and
pictures.
The first step is to set up your input file. Basically, the input
file contains a specification of the geometry of your molecule or extended system, the number of electrons in the system, any special
information needed (the ranges of Walsh variables, any special parameters you may want to use, etc.) and any printing options that
you want to set.
Here’s a minimal input file example called foo.bind
; the name of the job
A silly example: a square of H atoms
; specification that this is a molecular problem
Molecular
;the geometry
geometry
4
1 H 0.0 0.0 0.0
2 H 1.0 0.0 0.0
3 H 1.0 1.0 0.0
4 H 0.0 1.0 0.0
; The number of electrons
7
Electrons
4
; printing options
PRINT
Overlap Population
Reduced overlap population
charge matrix
wavefunction
end_print
The contents of this file will be explained later.
To run the file execute the following command:
bind foo.bind
This will create two output files: foo.bind.status has some
status information; foo.bind.out has all the results in it.
That’s it!
If you had done a Walsh diagram or an average properties calculation then there are some utility programs that need to be run
to get the data in shape to be displayed. These will be discussed a
later.
The data and results are now ready to be displayed using viewkel
or your favorite plotting program.
The input file
Like many other programs, the input file for bind is based on
keywords. This allows the file to be broken into logical blocks and
makes the format for constructing the file a little less rigid. Each
keyword is described below. Note that the input routine (the parser)
is not case sensitive when dealing with keywords, i.e. Electrons,
electrons, and ELECTRONS will all work.
Any line in the input file which begins with a semicolon is ignored. This allows comments to be put into the input file. It also
makes it easy to temporarily change the contents of a file, just put a
semicolon in front of anything you don’t want the program to read.
Blank lines and spaces in the input are also ignored.
The first non-empty line should contain the title of the job.
8
3
Keywords
The remainder of the file contains the keywords which control the
job. These keywords are all described below.
The notation used is as follows:
• Words in sans-serif style, such as foo, are keywords.
• Words in slanted type, such as bar , are variable names used
within the program. They are used for convenience.
3.1
Geometry (required)
The line following this keyword should have the number of atoms:
num atoms .
If the line containing the keyword Geometry also contains the
string Z Matrix then the input is take to be in Gaussian style Z matrix format. If the line containing Geometry also contains the string
Crystallographic then the input is taken to be in fractional coordinates and the Crystal Spec keyword must be specified. Otherwise
the input is assumed to be in Cartesian coordinates. If you are unfamiliar with Z matrix input, it is described in a later chapter of
this document.
The following num atoms lines should contain the atomic coordinates and types in the following fashion:
• Z-matrix Input: number atom label ref1 r ref2 alpha ref3
beta
• Cartesian Input: number atom label X Y Z
• Crystallographic Input: number atom label X Y Z
number is the number of the atom. There is no reason why the
atoms in the list have to be in increasing numeric order.
atom label is the label for the atom, it should be one or two
characters long. If the atom label is a single asterix (*), then the
atom is taken to be a custom type and a symbol and parameters
should be provided for it in the Parameters section. If the atom label
is an ampersand (&), then the atom is taken to be a dummy atom.
The other variables are the coordinates for the atom in whatever
system is being used. If a reaction coordinate is being traced out (see
9
keyword Walsh below), any coordinate which is an integer multiple
of 1000 is assumed to be variable. For example: placing 2000 as the
X coordinate of some atom would cause that coordinate to take on
the values of the second Walsh variable.
3.2
Lattice (mandatory for extended systems)
NOTE: If this keyword appears in the file it must follow the Geometry keyword in the input file.
These are the lattice parameters. The keyword should be followed
by a line containing the dimensionality of the crystal. The next
line contains the number of overlaps considered along each lattice
direction. The following lines should contain the lattice vectors in
the form: atom1 atom2 , where atom1 is the beginning of the
vector (it is inside the unit cell) and atom2 is the end of the vector
(it is outside the unit cell).
NOTE: The ends of the lattice vectors must be the highest numbered atoms in the geometry specification. For example, if there are
are 6 atoms defined for a 3 dimensional unit cell, then the ends of
the three lattice vectors must be numbers 4, 5, and 6.
Only a number of lattice vectors equal to the dimensionality of
the crystal need to be provided. If you feel like putting in zeroes for
the other lattice vectors, go ahead... we can’t stop you.
3.3
Crystal Spec (required for use of crystallographic coordinates)
This section has the stuff needed to define the crystal lattice so that
crystallographic coordinates can be used.
The first line following the Crystal Spec keyword should contain
the lengths of each of the lattice vectors. The next line should
contain the crystallographic angles α, β and γ.
Variables in the Crystal Spec section can be used as variables in
Walsh diagrams in exactly the same way as variables in the Geometry
section, i.e. by using integer multiples of 1000 as values.
For example, the following Geometry, Lattice and Crystal Spec
sections define a body centered lattice of H atoms where the length
of the c lattice vector is the first Walsh Variable.
10
Geometry Crystallographic
5
1 H 0 0 0
2 H 0.5 0.5 0.5
3 H 1 0 0
4 H 0 1 0
5 H 0 0 1
Lattice
3
5 5 5
1 3
1 4
1 5
Crystal Spec
; a b c
1 1 1000
; alpha beta
90
90
3.4
gamma
90
Electrons (potentially required)
The line following this keyword should have the number of valence
electrons in the molecule (or unit cell for an extended system).
3.5
Charge (potentially required)
The line following this keyword should have the charge on the molecule
(or unit cell for an extended system).
Either the Charge or Electrons keywords must appear in the
input file.
3.6
Alternate Occups
This keyword is for looking at the effects of changing the number of
electrons in the unit cell upon the position of the Fermi level, the
average energy, and orbital occupations. This is a far more efficient
way of probing these changes than rerunning the calculation with
alternate electron numbers.
11
On the line following the keyword, the number of alternate occupations (num occups ) should be given. The next line contains the
step that is to be taken between occupations.
For example, the following input fragment would result in the
program doing a calculation with 5 electrons, then printing out the
Fermi level, average energy, net charges, and orbital occupations for
4.8,4.6,4.4,4.2, and 4.0 electrons per unit cell.
Electrons
5
Alternate Occup
; num_occups
5
; the step
-.2
3.7
Parameters (optional)
NOTE: If this keyword appears in the file it must follow the Geometry keyword in the input file.
There should be a line following this keyword for each type of
custom atom which is being defined. Recall that a custom atom
is defined by replacing the first occurance of that atom’s label in
the Geometry specification with an asterix: *. If there are multiple
custom atom types, then define them in this section in the order in
which they occurred in the Geometry section.
The format of a parameter specification is:
Symbol Atomic Number Num Valence Electrons ns ζs IPs np ζp IPp nd
ζ1d IPd c1 ζ2d c2
and if you’re dealing with f-elements (which, like d orbitals, are described by a double zeta expansion) add: nf ζ1f IPf c1 ζ2f c2 to
the end of the parameter specification.
In this specification, the ζ values are the radial exponents of the
Slater type orbitals and the Hii values are the valence state ionization potentials (diagonal elements of the hamiltonian) for each AO.
Here’s an example of a section of input file where 3 different custom
atoms are defined:
12
Geometry
8
1 *
.000000000
2 O
1.952000000
3 *
1.952000000
4 O
1.952000000
5 *
0.000000000
6 O
3.904000044
7 O
.000000000
8 O
.000000000
.000000000
.000000000
1.952000000
.000000000
.000000000
-.3
.000000000
1.4862
1.952000022
1.9422
.000000000
.000000000
3.904000044
.000000000
0.0
4.152
Parameters
O 8 6 2 2.275 -32.3 2 2.275 -14.8
Ti 22 4 4 1.075 -8.970 4 1.075 -5.400 3 4.55 -10.81 .4206 1.400 .7839
Pb 82 4 6 2.50 -16.70 6 2.06 -8.000
In this example, atom 1 is an O, atom 3 is a Ti, and atom 5 is a
Pb. Atoms 2,4,6,7, and 8 will use the same parameters as atom 1.
Clarification: The parameters specified here for O are the default
parameters.
3.8
Molecular (mandatory for molecular calculations)
Indicates that a molecular calculation (not an extended one) is being
performed. Otherwise it is assumed that the calculation is on an
extended system.
3.9
Just Geom (optional)
Do not actually do a calculation, just generate the molecular geometry. This is useful to check whether or not an input file is okay
before running a calculation. It will also print the estimated memory
requirements of bind for this run into the status file.
3.10
Walsh (optional)
Do a series of calculations along a reaction coordinate.
The next line should contain the number of variables (reaction
coordinates): num Walsh var , and the number of steps to be taken
along each coordinate: num steps . There should then be num Walsh var
lines consisting of a list of comma separated num steps values.
13
To generate the values of a variable automagically, place an exclamation point (!) at the beginning of the line for that variable
followed by the starting and ending values of the variable, separated
by a comma. The program will generate num steps values between
those values.
For example, the following sample section will generate a reaction
with coordinate with 5 steps and 2 variables. The values of the first
variable will be automatically generated between 1.0 and 2.0, the
values of the second variable are specified explicitly.
Walsh
; the number of variables and number of steps
2 5
; use Auto-Walsh for the first variable:
! 1.0,2.0
100.0,100.1,100.2,100.3,100.4
Please note that, while there are two Walsh variables, they are
varied simultaneously. There is not, at this point, a capability to
vary the Walsh variables independently in order to automatically
generate a multi-dimensional potential energy surface.
3.11
Symmetry (optional)
Find and report all the symmetry elements possessed by the molecule.
The characters of all wave functions with respect to these operations
will also be reported.
Note: As is explained in the section of this manual on symmetry
elements, bind does not actually find all symmetry elements. It
only finds those which are aligned with the Cartesian axes. You can
increase the number of symmetry elements which the program finds
by making sure that it align with the axes in a reasonable manner.
3.12
Symm Tol (optional)
Allows the user to adjust the value of the tolerance used for determining whether or not symmetry elements are present in the
molecule.
The next line should contain the new value of symm tol .
If the position of an atom after a symmetry operation differs
from that of an atom before the symmetry operation is applied by
14
less than symm tol Å, then the two atoms are considered to be
equivalent under the symmetry operation.
3.13
Principle Axes (optional)
Determine the center of mass and principle axes of the molecule and
transform the atoms into the principle axis frame. This can allow
the program to find more symmetry elements.
Note: Principle axes are only found if the meschach library was
linked with bind . If you do not have meschach, then the program
will just translate the molecule into the center of mass frame before
finding symmetry elements.
3.14
Zeta (optional)
Toggles self consistent variation of radial exponents. This is under
development and if you don’t know what it means, you probably
shouldn’t be using it.
3.15
Nonweighted (optional)
Use the non-weighted Hij form [6]. By default the weighted Hij form
is used in order to reduce problems arising from counter–intuitive
orbital mixing (gasp!) [7, 8].
3.16
The Constant (optional)
Allows replacement of the value K used in evaluating the Hij elements. The next line should contain the new value for K . By
default K =1.75.
3.17
Zero Overlap (optional)
Set some elements of the overlap matrix to zero. The next line
should contain the number of different types of overlap being set to
zero (num to zero ). The next num to zero lines should consist of:
type contrib1 contrib2 which
type should be either Atom or Orbital to indicate which type
of overlap is being zeroed. If which is set to Intercell, then overlaps
between contrib1 and contrib2 between cells will be zeroed. If
15
which is set to Intracell then the overlaps inside the cell will be
zeroed.
NOTE: This option should be used with caution, as it can result
in a non-positive-definite overlap matrix and non-physical results.
3.18
Nearest Neighbor Contact (optional)
Determines the longest contact between atoms in nearest neighbor
cells that will be reported in the output file. The next line should
contain the new value. The default is 2.5 Å.
NOTE: This keyword only makes sense for extended systems.
3.19
K Points (mandatory for Average Properties calculations on extended systems)
A K point set for an average properties calculation. If you want to
do a band structure, we recommend that you use the Band keyword.
The keyword is followed by a line containing the number of K
points: num KPOINTS . The next num KPOINTS lines should
contain the coordinates and weights of the K points themselves in
the following form:
a b c weight
Each K point should go on its own line.
3.20
Band (optional)
Generate a band structure.
The line following the keyword should contain the number of K
points to use along each symmetry line: points per line .
The next line should have the number of special points to be
used: num special points .
The following num special points lines should have the names
and locations of the special points in the form:
label x y z
The program will generate symmetry lines connecting the special
points in the order in which they are defined. points per line K
points will be generated automatically along each of these symmetry
lines. The program will produce an additional output file containing
16
the information needed by viewkel to plot the band structure. If
your input file is called foo.bind, then the band file will be called
foo.bind.band.
For example, the following segment will generate a band diagram
with symmetry lines containing 40 K points running from Γ to X to
M and then back to Γ:
Band
; the
40
; the
4
Gamma
X
M
Gamma
0.0
0.5
0.5
0.0
3.21
FMO (optional)
number of points along each line
number of special points
0.0
0.0
0.5
0.0
0.0
0.0
0.0
0.0
Perform Fragment Molecular Orbital analysis.
The next line should contain the number of fragments num FMO frags .
Note that num FMO frags should be ≥ 1. There is no upper limit
on the number of fragments.
The next line consists of a comma delimited list of the number
of electrons in each fragment.
The following num FMO frags lines consist of comma delimited
lists of the numbers of the atoms in each fragment.
In the specification of atoms for each fragment, you can use a
hyphen (dash) to indicate groups of sequentially numbered atoms.
For example, the following segment will generate 2 fragments, the
first fragment containing atoms 1, 2, 3, 4, 5 and 8 and the second
fragment containing atoms 6 and 7.
FMO
; the number of fragments
2
; the number of electrons in each fragment
12,2
; the lists of atoms contained in each fragment
1-5,8
6-7
17
If a molecular calculation is being done, the data necessary to
construct an FMO interaction diagram will be written to a separate
output file.
3.22
FCO (optional)
Perform Fragment Crystal Orbital analysis. The lines following this
keyword are identical to those for the FMO keyword.
3.23
Average Properties (optional)
Do an average properties calculation for the system. This consists
of:
• Generating a total DOS curve.
• Finding Ef , the Fermi energy.
• Determining the average overlap population and reduced overlap population matrices within the unit cell (if the printing
option for these is set).
• Finding average orbital occupations and net charges.
• Reporting the average values of any COOPs specified (see keyword COOP).
• Show average occupations of Fragment MO’s (if FMO analysis
is being done).
NOTE: if you are doing an average properties calculation on an
extended system, you must provide a set of K points, see keyword
K Points.
Specifying an average properties calculation for a molecular problem will allow the generation of MOOP (Molecular Orbital Overlap
Population) diagrams and the RCM (Reduced Charge Matrix) as
for extended syatems.
18
3.24
No Total DOS (optional)
Turns off printing of the total DOS into the output file. This option
can be used to conserve disk space when the total DOS isn’t going
to be looked at.
Note: If this keyword is specified neither total DOS nor projected DOS calculations will be done.
3.25
Dump Overlap (optional)
Toggles creation of a binary file containing the overlap matrix at
each K point. This file can be used with the matrix view utility to
generate pictures of overlap matrices.
3.26
Dump Hamil (optional)
Toggles creation of a binary file containing the hamiltonian matrix
at each K point. This file can be used with the matrix view utility
to generate pictures of hamiltonian matrices.
3.27
Dump Dist (optional)
Toggles creation of a binary file containing the distance matrix for
the system. This .DMAT file can be used by the utiltity cooperate
to generate specifications for COOPs automatically.
3.28
Projected DOS (optional)
This section contains the list of densities of states (DOS’s) that will
be projected. Each DOS can have multiple contributions which will
be added up.
The keyword is followed by a line containing the number of different projections: num proj DOS . The next num proj DOS lines
should consist of:
type contrib1 weight1 , contrib2 weight2 ,...
type should be either Atom, Orbital, or FMO to indicate whether
the contribution from an entire atom, a single orbital, or a fragment
MO is being projected out.
There can be as many contributions to each projection as you
like, just put it all on one line and separate the contrib –weight
pairs by commas. Entries for a single projection can be spread over
19
multiple lines by placing a “\” at the end of each line. To average
contributions make the sum of the individual contributions add up
to 1.0. To add contributions, make each of the contributions 1.0. In
general, it is a good idea to add projected DOS curves rather than
average them.
3.29
COOP (optional)
Do a Crystal Orbital Overlap (or Hamilton) Population analysis
[2, 5, 9, 10]. Note: the COOP option results in a Molecular Orbital Overlap (or Hamilton) Population analysis when the molecular
keyword is specified.
The line following the keyword has the total number of COOPs
specified (not just the number of different types): tot num COOPs .
The next tot num COOPs lines should contain the definitions of
the COOPs themselves in the form:
type which contrib1 contrib2 a b c
type should be either Atom, Orbital or FMO to indicate whether the
COOP between atoms, orbitals or fragment MO’s is being projected.
Setting type to H-Atom, H-Orbital or H-FMO will generate the corresponding Hamilton population between atoms, orbitals or fragment
MO’s respectively.
which is the number of the COOP. Multiple COOPs with the same
value of which will be averaged.
The COOP reported is between contrib1 in the unit cell and
contrib2 in a cell defined by the vector (a b c ). For example, the
following sample section will average the COOP between atoms 1
and 2 in the unit cell with that between atom 2 in the unit cell and
atom 1 in the adjacent cell in the b direction:
COOP
; the total number of lines here:
2
; definitions of the COOPS
;type which contrib1 contrib2
Atom
1
1
2
Atom
1
2
1
20
a b c
0 0 0
0 1 0
Note: If you are doing a COOP calculation on a high-symmetry
system where you are using K points within the irreducible wedge
of the first Brillouin zone, it is very important that you average all
symmetry equivalent bonds [11]. If you do not do so, your results
may be inaccurate.
3.30
Printing (optional)
This keyword controls what information is printed into the output
file. In most cases, this also controls what things the program actually calculates. For example, if the user doesn’t request that the
reduced overlap population matrix be printed, then there’s no reason to calculate it. We have tried to make the program “smart”
about what it calculates, but, there may be problems here. Please
let us know if you see strange behavior.
This keyword is different from all the others in that the program
expects it to be followed by another list of keywords. In fact, any
keyword following Printing is assumed to be controlling what gets
printed. The way to tell bind that you are done giving it printing
options is to either let it hit the end of the file (i.e. to have Printing as the last keyword in your input file, or to put the keyword
End Print at the end of the printing options.
Each of the printing keywords is described below.
• Distance: Print the distance matrix.
• Overlap Population: Print the Mulliken overlap population matrix.
• Reduced Overlap Population: Print the Mulliken reduced overlap
population matrix.
• Charge Matrix: Print the charge matrix.
• Wave Functions: Print the wavefunctions for the molecule.
• Net Charges: Print the net charges on the atoms, as determined
using Mulliken population analysis.
• Overlap: Print the overlap matrix.
21
• Hamil: Print the hamiltonian matrix.
• Electrostatic: Print the electrostatic contribution to the total
energy. NOTE: this is under development and is not to be
considered reliable.
• Levels: Toggles the printing of energy levels at each k point in
an extended calculation.
• Fermi: Print the Fermi energy (this is primarily useful in combination with the Walsh option, described below).
• Orbital Energy: Allows the energy of a particular orbital to be
printed. (this is primarily useful in combination with the Walsh
option, described below).
• Orbital Coeff: Allows the coefficient of a particular atomic orbital in a given molecular orbital to be printed. (this is primarily useful in combination with the Walsh option, described
below).
• Orbital Mapping: Generates the scheme used to number the
individual atomic orbitals in a calculation (especially useful
when working out the contributions for COOP’s)
• Levels Print out the calculated energy levels at each k point in
an extended calculation.
Each of these options control printing at every K point and/or
step along a reaction coordinate. Turning on all the printing options
can lead to a huge output file if you have a lot of K points or steps
in a Walsh diagram.
Placing the keyword Transpose after a printing option for a matrix
will result in the transpose of the matrix being printed. This feature
has been introduced to appease those who think that the default way
of printing is stupid.
To facilitate the construction of graphs of various quantities (overlap populations, net charges, etc.) along a reaction coordinate, there
is a second option that can be used with printing options. If you
place the keyword Walsh on the same line as a printing option, then
you can select a particular quantity to monitor along the Walsh diagram. These values are put into a separate file. If you are using an
22
input file named foo.bind then the values of these quantities would
be put into foo.bind.walsh.
To use this feature, place Walsh after your printing keyword, then
on the next line put the following three pieces of information:
type contrib1 contrib2
Once again, type is one of Atom, Orbital or FMO and contrib1
and contrib2 refer to particular atoms, orbitals or fragment MO’s.
NOTE: there are certain combinations of these Walsh printing
options which do not make sense. For example, specifying that you
want to monitor the reduced overlap population between 2 orbitals
is nonsensical. The program will notice this and complain, so just
think a bit before you start printing everything out.
For example, the following section would print out the entire
overlap population matrix and all the net charges at every step into
the main output file, and then print the overlap population between
orbitals 13 and 23 into the Walsh output file:
; start dealing with printing options
Print
Overlap Population
Net charges
; this is a Walsh printing value
Overlap Population
Walsh
Orbital 13 23
End_Print
3.31
MO Print (optional)
This keyword controls creation of a .MO file. This can be read
in by viewkel to produce iso-surface plots of molecular and crystal
orbitals.
The first line following the keyword contains the number of MO’s
to be printed: num MOs . The next num MOs lines contain the
numbers of the individual MO’s that should be printed.
If you are doing an extended calculation, the MO’s will be printed
at each k point. If you are doing a Walsh diagram, the MO’s will
be printed at each step along the reaction coordinate.
23
3.32
Orbital Occupations (optional)
This section is used to change the occupations of molecular orbitals.
This is primarily useful for trying to model open shell systems or
molecules in excited states.
The first line following the keyword should contain the number of
orbital occupations to change, num occups . The next num occups
lines consist of an integer specifying the orbital whose occupation
should be changed and a real number specifying what the new occupation should be.
For example, the following piece of an input file would place 1
electron in both orbitals 49 and 50:
Orbital Occupations
; the number of occupations to change
2
; the orbitals and new occupations
49 1.0
50 1.0
3.33
Charge Iteration (optional)
bind has the capability to perform charge iteration (a self consistent
adjustment of the Hii s in order to lessen the amount of charge flow).
The charge iteration algorithm in bind is somewhat experimental (...
so beware!) and is discussed in the file charge.ps.
For those of you who know no fear here’s a summary of the CI
keywords:
The keywords controlling the CI process are sandwiched between
the charge iteration and end charge keywords.
The keywords within the CI block are:
Param followed by a line giving the number of different atoms that
parameters will be specified for: num CI parms each of the next
num CI parms lines should contain the charge iteration parameters
in the form: Atomic symbol sA sB sC pA pB pC dA dB dC
(i.e. the A, B, and C parameters for each of the orbitals. These
are the same parameters used in the old programs for single configuration CI and are NOT distributed with YAeHMOP). Note: charge
iteration for f orbitals is not supported.
Vary(follows Param) followed by a single line containing the numbers of the atoms whose parameters are to be varied. This is a
24
comma delimited list, you can use “-” to abbreviate series of atoms
(i.e. 1-4 and 1,2,3,4 are equivalent)
Tolerance followed by a single line specifying the tolerance used
to terminate the iteration
lambda followed by a single line specifying the step size for the
iteration process
max iter followed by a single line specifying the maximum number
of iterations
3.34
Sparsify (optional)
This is used to set small elements of the hamiltonian and overlap
matrices to zero. The next line should contain the value which is
considered to be zero.
NOTE: This is primarily here for development purposes and
we’d encourage you not to use this.
3.35
Just Average E (optional)
Tells bind to only generate the average energy, total DOS, and Fermi
level of the system. This causes the program to require considerably
less memory when run on systems with a lot of orbitals.
If you are using a version of bind that uses the LAPACK libraries
to diagonalize the matrices, then only eigenvalues will be generated.
This can result in a significant speed increase. (A factor of 10 decrease in execution time for sufficiently large systems is possible !).
3.36
Just Matrices (optional)
Generate just the overlap and hamiltonian matrices, then exit. This
is basically useless unless it is used in conjunction with either the
Dump Overlap or Dump Hamil keywords, or the Hamiltonian or Overlap printing options.
3.37
Diagwo (optional)
Performs the matrix diagonalization without using the overlap matrix, so that a calculation is similar to a simple Hückel calculation.
Symmetry analysis
25
The symmetry analysis performed by bind is relatively extensive
and flexible. While the program doesn’t find all of the symmetry
elements possessed by molecules, it does get a lot of them.
In order to make the symmetry analysis as flexible as possible, the
molecule can first be moved to the center of mass frame of reference.
The moments of inertia are then found and the whole molecule is
rotated into the principle axis frame. This allows molecules which
are not located exactly at the origin or aligned perfectly with the
Cartesian axes to be analyzed.
The transformation to the principle axis frame is controlled by
the keyword Principle Axes. If this keyword is not specified, the
symmetry analysis will be done in the orientation specified in the
Geometry section.
The program searches for the following symmetry elements:
• an inversion center
• rotation axes from C2 through C8 about the three Cartesian
axes.
• improper rotation axes from S3 through S8 about the three
Cartesian axes.
• mirror planes perpendicular to the Cartesian axes.
The elements found, their axes, and atoms which are equivalent
under each operation are printed to the output file.
The characters of the wavefunctions with respect to each operation are determined by constructing the appropriate transformation
matrix for each operation and transforming the vector of atomic orbital coefficients for each molecular orbital. The result of this process is the actual character of the wavefunction with respect to the
symmetry operation, not just a symmetric/anti-symmetric label. It
is important to realize that the results of this method of displaying
the results of symmetry analysis can give results which are, at first,
confusing for degenerate orbitals. If you are looking at the characters of a set of degerate orbitals and trying to compare them to the
characters given in a character table, it is very important that you
sum the characters of each of the members of the degenerate set.
When a reaction coordinate is being followed, bind first generates all the geometries along the coordinate and determines the symmetry elements which they possess. The only symmetry elements
26
reported are those which are conserved along the entire distortion.
This means that you don’t have to worry about moving from high
to low symmetry geometries or vice versa. Note: It is possible that
loss of symmetry elements will lead to problems in constructing a
Walsh diagram. In these cases fit walsh will warn you. If the diagram as constructed is incorrect, you can either change your reaction
coordinate to not include geometries with problematic degeneracies
or edit the .WALSH file by hand to fix it. This is explained in more
detail below in the section on fitting programs.
YAeHMOP on the Macintosh
As of version 1.2 of YAeHMOP , there is a Macintosh port of
everything. At the moment, the Mac version only runs on Power
Macs. A port to the 68K based Macs is not suported.
The Mac port was done using the CodeWarrior compiler from
Metrowerks. Source code and project files for the Metrowerks IDE
are available upon request. Codewarrior is fantastic ! Metroworks
prices it reasonably, includes a ton of useful examples and libraries,
and has an excellent upgrade policy. In addition, the MW technical
support is excellent.
The Fortran bits of the program were converted using f2c on our
workstations, and then compiled on the Mac using a port of the
f2c libraries. All input and output that would normally go to the
console on a workstation is handled by the SIOUX library included
with CodeWarrior. The basic structure of the graphics stuff used in
viewkel was done using the EasyApp application shell distributed
with CW.
4
A couple of disclaimers
The Mac version of YAeHMOP is not the most beautiful thing that
the world has ever seen. Some of the operations are handled in an
ugly, non-Mac way. This is a direct consequence of the program’s
Unix heritage. Hopefully, in some future version these difficulties
will be eliminated.
The Mac version of the programs are not nearly as stable as
the UNIX version, principally because the MacOS isn’t a protected
mode operating system.
27
5
Using bind on a Macintosh
When bind starts up it will open a standard file choice dialog, you
should choose the input file in that dialog box. If the program has
problems opening the parameter file (usually called eht parms.dat),
it’ll pop up another dialog box. You should use that dialog box to
find and select the parameter file. You can avoid this by having a
copy of the parameter file in the same folder as the input file. To
work around this make an alias for eht parms.dat, copy it to the
input folder, and then rename it eht parms.dat.
6
The fitting programs
The fitting programs will open a file choice dialog on start up. You
should pick the input file used to run the calculation.
7
General Mac hints
If you get errors about the programs not having enough memory or
not being able to allocate matrices, increase the size of the memory
allocation for the troublesome program. If you don’t know how to
do this: select the application you want to change, select “Get Info”
from the File menu (or hit CMD-I), then increase the “Preferred
Size” entry.
Sample Extended System Input File
This is an input file for doing a band structure and average properties calculation on a square 2 dimensional mesh of hydrogen atoms.
; the title
2-D mesh of hydrogen
; the geometry
Geometry
; number of atoms
3
; the positions
1 H 0.0 0.0 0.0
2 & 1.0 0.0 0.0
3 & 0.0 1.0 0.0
28
; lattice parameters
Lattice
; dimension of lattice
2
; number of overlaps along each lattice vector
4 4
; the lattice vectors (begin atom -> end atom)
1 2
1 3
; number of electrons per unit cell
Electrons
1
; band structure details
Band
; K points per symmetry line
40
; number of special points
4
; special points
Gamma 0.0 0.0 0.0
X
0.5 0.0 0.0
M
0.5 0.5 0.0
Gamma 0.0 0.0 0.0
; do average properties calculation
Average Properties
; do a COOP
COOP
; number of COOP’s
2
; COOP specifications
; type which
contrib1 contrib2
orbital 1
1
1
orbital 1
1
1
cell
1 0 0
0 1 0
; this averages H-H COOP’s between cells (0,0,0)->(1,0,0) and (0,0,0)->(0,1
; the K points
K points
; number of K points
10
; the K points and respective weights
29
0.0625
0.1875
0.1875
0.3125
0.3125
0.3125
0.4375
0.4375
0.4375
0.4375
0.0625
0.0625
0.1875
0.0625
0.1875
0.3125
0.0625
0.1875
0.3125
0.4375
0.0000
0.0000
0.0000
0.0000
0.0000
0.0000
0.0000
0.0000
0.0000
0.0000
1
2
1
2
2
1
2
2
2
1
; end of file
The Fitting Programs
In order to generate nice looking DOS and COOP curves, it is
necessary to either use hundreds of k points in the calculation or to
smooth the data which is generated by bind . For obvious reasons,
it is far more common to adopt the latter approach.
Smoothing of DOS and COOP curves is done by putting a gaussian on each data point, then summing up the contributions from
each of the gaussians between the data points. This process gives
rise to the type of curves we are used to seeing.
The parts of YAeHMOP which perform this smoothing operation
are called fit dos and fit coop. These both take the name of the
input file which was given to bind as an argument.
Here is a sample session:
% bind H_mesh.bind
% fit_dos H_mesh.bind
Enter E min: -30.0
Enter E max: 30.0
Enter broadening: 10.0
Enter Energy Step: 0.5
The broadening parameter given to the fitting programs is the
exponent of the normalized Gaussian smoothing function. A larger
broadening parameter gives rise to sharper lines in the DOS/COOP
curves.
After this smoothing process, which produces either a .DOS or
.COOP file, the data is ready for viewing with viewkel .
In order to view a Walsh diagram, the program fit walsh must
be run. fit walsh is run the same way as fit dos or fit coop:
30
you give it the name of the input file which was given to bind . If
you lose symmetry elements along the distortion coordinate and degeneracies are broken, it is possible that fit walsh will get confused
and generate a silly looking Walsh diagram. fit walsh will warn
you if this happens. If the output looks wrong in viewkel you can either manually edit the .WALSH file created by fit walsh or rerun the
calculation with more points along the distortion and use the program dumb walsh, which ignores symmetry operations. If you take
the dumb walsh route, we recommend you use at least 30–40 points
along the distortion. Hopefully a future version of the program will
have a smarter version of fit walsh so that these contortions are
no longer necessary.
Other Utility Programs
There are a number of other utilities distributed with YAeHMOP .
These are described below.
8
sub dos and add dos
These are used to manipulate .DOS files. sub dos is used to subtract
two DOS curves from each other. This is the basic operation needed
for the Crystal Orbital Displacement (COD) analysis developed by
Eliseo Ruiz and Santiago Alvarez [12]. COD is a very sensitive tool
for tracking complicated interactions in the solid state. Running
sub dos without any arguments will give you the correct ordering
of arguments.
add dos is like sub dos except that it adds two DOS curves together.
Note: It is very important that the DOS curves used for sub dos
are fit (using fit dos) within the same energy window and with
the same broadening and energy step. The programs will warn you
about this.
9
cooperate
cooperate reads in the .DMAT file generated when bind is given the
keyword Dump Distance Matrix and generates a COOP specification
that can be pasted into an input file for bind . The output from
cooperate needs very little modification before incorporation into
31
an input file. The necessary modifications are fairly obvious. Once
again, running the program without any arguments will give you a
complete list of possible arguments.
Contents of Files
The various programs in YAeHMOP produce different output
files, the names of the files may be confusing.
For a run on a file named example, here are the names of the
files produced and the contents of those files:
• example.status: status information about the job
• example.out: the main output file. Contains energies, occupations, average properties, etc.
• example.walsh: the values of variables which were printed out
along each step of a reaction coordinate.
• example.band: the information needed by viewkel for constructing a band diagram.
• example.DOS: (generated by fit dos) the information needed
by viewkel to generate DOS curves.
• example.COOP: (generated by fit coop) the information needed
by viewkel to generate COOP curves.
• example.WALSH: (generated by fit walsh) the information needed
by viewkel to generate Walsh diagrams.
• example.FMO: contains the information needed by viewkel to
generate FMO diagrams.
• example.MO: contains the information needed by viewkel to
generate MO pictures.
• example.DMAT: generated when the dump distance matrix keyword is used, contains the information needed by cooperate
to automatically generate COOP specifications for crystals.
Those Damn Bugs!
One thing to be aware of is that YAeHMOP is under development, so there are some features built into it which may or may
not be permanent. We’ve tried to indicate wherever possible when
things are not finished or are in the testing stages.
32
10
What is a bug?
There are two possible reasons for a calculation to screw up: a bug
in the program or a user error. Please make sure that your input
file is correct before you send in a bug report.
Any of the following things could indicate a bug:
1. bind gives you answers that don’t make any sense at all
2. bind does something funny like not printing out something you
told it to print out.
3. bind wanders off into space and never comes back (i.e. it runs
forever).
4. bind crashes without giving you some idea of what happened.
5. bind seg faults and dies. (You see the message: Segmentation
Fault: core dumped)
We have yet to see bind do anything like #3 above. If you do
think that the run is taking too long, check the status file and make
sure that it is still doing something.
bind should never do either #4 or #5 above. If either of these
happen you have definitely found a bug. Please report it. The
major cause of segmentation faults seems to be problems in the
input files given to bind . Error checking routines are in place to
catch many of these problems, but we probably missed a few. So
please let us know if you find input file formats that give rise to
segmentation faults without generating a warning.
viewkel is a slightly different story. The code for viewkel isn’t
nearly as clean or carefully written as that in bind . The result is
that viewkel occasionally will dump core and/or die unexpectedly.
We’re aware of some of these problems and are working on them. If
you can make viewkel dump core reproducibly, please let us know.
Similarly, if the output from viewkel just looks wrong, tell us and
we’ll see what we can do.
11
What to do if you find a bug
In order for us to be able to fix bugs, we have to be able to reproduce
the circumstances that gave rise to them. In order to do this, we
33
need a copy of the input file that caused the problem. Please include
the following in any bug report that you send:
1. A description of what went wrong, or why you think the answers you got are wrong.
2. Copies of the input file (essential), and the status and output
files (optional, but extremely useful).
3. Information about what kind of computer you are using (machine type and operating system version if possible).
4. Some way to get in touch with you.
Please send bug reports to the following email address:
[email protected]
Some (hopefully) helpful hints
12
Choosing how many overlaps to use
The overlaps specified determine how many unit cells the program
uses when building the overlap matrix in K space. The important
thing when answering this question is to remember that the goal is
to include all unit cells surrounding the ’home’ cell that have a nonzero contribution to the overlap matrix. The general criterion here
is that you should go out far enough that the length of the lattice
vector times the number of overlaps is between 10 and 20 Å. Some
systems don’t require this many overlaps, and some require more.
It’s safe to go with too many overlaps, though this causes bind to
use more memory and go slower. If you don’t have enough overlaps,
the diagonalization procedure will fail. This will be reported in the
status file after the program finishes running.
13
Choosing the number of k points to use
This is a tricky question. The right answer is that you should always
do a k point convergence test for every calculation (i.e. you should
try using a variety of different sampling densities and stop when you
get convergence). However, this isn’t always practical or possible.
The general guideline we use is that the number of crystal orbitals
34
(number of orbitals in the unit cell times the number of k points)
should be equal to 1000. This criterion is highly questionable when
doing slab models of interfaces or surfaces, so be careful with these
systems.
14
Choosing the number of points in band structures
Generally using 40 k points per symmetry line works fine. If your
bands are flat, you can use less than this. If you are really worried
about seeing weakly avoided crossings and you can’t tell if you are
seeing one, use more points.
15
Calculations on big systems
When doing calculations on large systems (where the meaning of
large depends on how much memory your computer has), it’s very
good idea to do the average properties and band structure calculations separately. This is because average properties calculations use
a lot more memory, and band structure calculations use a lot more
k points. If you are nearing the limit of the memory available on
your machine because of the demands of the average properties calculation, the band structure calculation will take much much longer
than it has too. You are better off if you do the two runs separately. It’s also a good idea to do the band structure once, then
comment out the band part of the input file. That way if you add
projected DOS’s or COOPs later, you won’t accidentally redo the
band structure, which won’t have changed.
Using viewkel
viewkel is written to display results on either X Windows displays or Tektronix terminals. The program will automatically detect whether or not X Windows are available and will use them if
they are. Printing is handled by generating Postscript files which
can then be directly printed or included in documents. The actual
graphics calls used to draw the data are all included in a separate
file, so it should be reasonably easy to port the program to other
graphics systems.
35
Since the use of the X and Tek versions of viewkel is different,
they will be dealt with separately.
Note: I haven’t put much work into the command line (Tektronix) version of viewkel recently, so it doesn’t have a lot of the
features mentioned below and some of the features it purportedly
does have may not work.
16
Using viewkel in X
When you start viewkel under X, it will open 2 windows. The first,
and larger, window (the graphics window) is used to display output.
The second window (the main button window) has buttons which
are used to control the program.
The individual button windows and the functions of the buttons
found therein are described below. Each button is only described
once, so though many different windows have a X Legend button,
it is only described once.
You can cause the program to redraw at any time (except when
an isosurface is being evaluated) by middle clicking in any of the
windows.
16.1
Special keys in viewkel
There are a number of keys that can be used in viewkel , some of
these duplicate features found in button windows, some are unique.
• q: will cause viewkel to quit.
• r: switches into rotate mode.
• t: switches into translate mode.
• c: switches into center mode.
• s: switches into scale mode.
• the spacebar: switches into choose mode.
• h: in choose mode hides the selected atoms
• +: in choose mode shows previously hidden atoms
36
• z: rotates the selected molecule so that you are looking along
the Z axis.
• y: rotates the selected molecule so that you are looking along
the Y axis.
• x: rotates the selected molecule so that you are looking along
the X axis.
• 1: viewkel will prompt you for a file name to use, then write
an input file for rayshade.
• d: writes the cartesian coordinates of the molecule to standard
output.
16.2
General use of buttons
In order to avoid having to use a user interface library that may not
exist on some machines, I wrote all the button code myself. This
means that the buttons aren’t necessarily the most beautiful things
you’ve ever seen, and sometimes they behave in ways which are just
plain wrong (for example, text can overflow out of the button). The
most important thing from my perspective is that these buttons do
work, and the code to deal with them is simple and small.
To activate a button, left click on it. If it is a toggle button, then
the toggle will be changed. If the button is for changing the value
of some variable, you will be prompted to enter a new value for that
variable (no, I didn’t write dialog box code).
Buttons which are for toggling the display of lines will show a
sample of the line style to the right of the button. You can change
this line style by right clicking in the toggle button.
16.3
The main button window
The buttons in the main button window are described below:
• the Mode button: This is the top button in the window. It
displays what mode the program is using to manipulate the
graphics displayed in the graphics window. Left clicking in this
window changes the active mode. This mode determines what
action the control keys have. The control keys are i,j,k,l,p,and
37
;. The first four of these form an inverted arrow on a standard
keyboard.
The possible modes are:
– None: the control keys do nothing.
– Rotate: the control keys rotate the active object. i and k
rotate about the y axis, j and l rotate about x, and p and
; rotate about z. Holding down shift while hitting any of
these keys results in a larger rotation step. In versions of
viewkel greater than or equal to 2.0, you can also rotate
molecules in rotate mode by left clicking and dragging in
the graphics window. This is easier to do than it is to
explain, so try it out. Note: Rotations only apply to
displayed molecules and MO’s, not to graphs because that
would be silly.
– Translate: the control keys translate the active object. i
and k move along the y axis, j and l move along x, and p
and ; move along z. Holding down shift while hitting any
of these keys results in a larger step.
– Center: the control keys translate the center of the active
object. i and k move along the y axis, j and l move along x,
and p and ; move along z. Holding down shift while hitting
any of these keys results in a larger step. This is different
from the Translate mode for molecules and MO surfaces in
that the molecule and the point that the camera used to
construct the perspective view looks at are move simultaneously. This allows the molecule to be moved about the
screen without the view changing. In versions of viewkel
greater than or equal to 2.0, you can also change the center
of your molecule by left clicking in the graphics window.
When you do this, the center of the molecule will be moved
to where you clicked. If you then drag, the molecule will
move. Note: For anything other than molecules and MO
surfaces Translate and Center are equivalent.
– Scale: the control keys change the size of the active object.
j shrinks along x, l grows along x, k shrinks along y, i grows
along y, ; shrinks along z, and p grows along z. Once again,
holding down shift while hitting a key increases the size of
the step.
38
– Choose: Left clicking on atoms selects them. Right clicking
then either displays the distance between those atoms (two
selected), the angle between them (three selected), or the
relevant dihedral angle (four selected). A label is placed at
the location of the right click and lines are drawn to the
controlling atoms. If you right click with just a single atom
selected, the coordinates and identity of that atom will be
printed in the window from which you ran viewkel . This
is a convenient way to find the coordinates of a particular
atom if you forget (or if you have centered the molecule
using the “center” button in the molecule option window).
The labels displayed in Choose mode remain on screen until
the Clear Labels button is hit.
• Read Molecule: Reads in the atomic positions of a molecule.
You will be prompted for the name of the output file containing the geometry. Enter the name of the file in the window
from which you started up viewkel . The molecule will be read
in and displayed and a molecule button window will be opened.
• Read MO: Reads in the specification of an MO. You will be
prompted for the name of the input file used to perform the
calculation. Enter the name of the file in the window from
which you started up viewkel . The program will read in the
geometry of the molecule itself from the .out file and the MO
specification from the .MO file. You will be prompted for which
MO you which to use if there are multiple MO’s in the .MO file.
Note: To use this option you must have specified MO printing
when bind was run.
• Read Contours: Reads in a contour plot. You will be prompted
for the name of the file containing the contour data. This option is primarily intended for dealing with FCO plots.
• Read FMO: Reads in FMO data and constructs an interaction
diagram. You will be prompted for the name of a .FMO file.
viewkel will read in the FMO data, construct an interaction
diagram, and open an FMO options window.
• Read Props: Reads in average properties (DOS, COOP or
COD) data and displays it. You will be prompted for the name
39
of a data file (either .DOS, .COOP, or .SUB). The program will
read in the data and open a property options window.
• Read Walsh: Reads in data for a Walsh diagram. You will
be prompted for the name of a .WALSH file. viewkel will read
in the data and open a walsh option window.
• Read Bands: Reads in the data to display a band structure.
You will be prompted for the name of a .bands file. viewkel will
display and band structure and open a bands option window.
• Read Graph: Reads in raw data for a graph. You will be
prompted for the name of the file containing the graph data.
This allows construction of very primitive graphs. This option
just exists because it was easy to do. viewkel is not intended
to be a general purpose graphing program.
• Fill Proj.s: Toggles filling of projected DOS curves. On screen
these will be shown shaded, in the printed output they will be
lined. Note: in the Macintosh version of viewkel , this keyword
has no effect on the way things are displayed on screen, it does
still affect the Postscript output.
• Purge!: Deletes all currently displayed objects and closes all
of their button windows.
• Printing Options: Opens a window which allows you to
change some of the default behavior for the Postscript printing.
• Print: Prompts for the name of a file, then redraws the screen,
writing its contents to the file as Postscript. This file can then
be printed however you normally print .ps files.
• Clear Labels: Removes labels from the display. They will not
be refreshed, so once you clear them, they are gone.
16.4
The PS options button window
This window allows you to control some of the default behavior of
the Postscript printing from viewkel .
• Location: This button controls where the graph is located on
the output page. There are three possible values: Top, Middle
and Bottom. The default is Bottom.
40
• Font: Allows specification of the standard text font. The default is Times–Roman. Note: This option can be overridden
using the enhanced Postscript commands (described in an Appendix).
• Font Size: Allows specification of the standard text font size
(in points). The default is 12.
• Scale: Allows scaling of the whole output. This does not affect
the size of the text font, to change that use the Font Size
button.
Note: None of the changes made in this window will be visible
on screen.
16.5
The molecule button window
This is the window which is popped up when a molecule is opened.
It is used to control the viewing options for the molecule being
displayed.
• Hydrogens?: Toggles drawing of hydrogens.
• Dummies?: Toggles drawing of dummy atoms.
• Center: When this is pressed, the molecule is moved so that it
is centered at the center of mass (Note: since viewkel doesn’t
actually know what the masses of your atoms are, the center
of mass is actually calculated assuming all the atoms have the
same mass. The resulting positioning is usually still right.).
• Hide Atoms Allows you to make it so that some atoms in the
molecule aren’t displayed. You will be prompted for a list of
atoms to hide. Enter a comma delimited list. You can use the
dash (hyphen) just as it was used in the FMO specification.
For example, the following list will hide atoms 1-23 and 99:
1-23, 99
• Show Atoms Allows you to “unhide” atoms you may have
hidden before.
• Axes?: Toggles display of a set of axes on screen.
41
• Outlines?: Toggles the drawing of dark circles around the
atoms being displayed.
• Shading?: Toggles shading of the atoms being displayed.
• Crosses?: Toggles display of pseudo-3D crosses on the atoms.
If this is turned on and shading is turned off, the interiors of the
atoms are drawn as solid white with the cross superimposed.
• Connectors?: Toggles drawing of lines connecting atoms which
are a distance within bond tol (see below) of the sum of their
covalent radii apart.
• Fancy Lines?: When this is on lines between atoms are drawn
as if they are intersecting the sphere of the atoms. When off,
the lines are drawn all the way to the center of the atoms.
Turning “Fancy Lines” off is useful when drawing a structure
without the atoms being displayed.
• Breaking Lines?: When this is turned on, lines “cut” those
behind them that they intersect.
• Tube Lines?: Toggles display of bonds as tubes instead of
lines. Tubes are drawn as a white center with a black edges
and cut lines behind them just like breaking lines. Note: if
both “Tube Bonds” and “Breaking Lines” are turned on, only
the Breaking Lines will be drawn.
• Numbers?: Toggles display of the numbers of atoms.
• Symbols?: Toggles display of atomic symbols.
• Line Width: Used to control the thickness of the lines drawn
between atoms.
• Bond Tol: Used to enter a new value of bond tol . When this
is changed the lines between atoms are recalculated.
• Rad Scale: Used to control the scaling of the circles drawn
for atoms.
• Grow Xtal!: This button only appears for molecules that have
lattice parameters in the output file (i.e. extended systems).
Clicking this allows you to show more than one unit cell.
42
16.6
The MO button window
Note: This section is substantially changed since viewkel version
1.2.
When an MO isosurface is opened, two button windows are opened.
One of these windows is a Molecule window as described above. The
other window is used to control the drawing of MO isosurfaces on
screen. These options are described below.
There are two ways to draw isosurfaces in viewkel version 2. The
first method draws the isosurface just as it was done in version 1.2:
a solid isosurface made up of filled triangles is drawn. These isosurfaces do not look particularly good when drawn in viewkel, but
generate very nice illustrations when rayshade is used to raytrace the
object. The second method draws Jorgenson and Salem style contour plots of the surface, with hidden line removal. These plots are
similar to those generated by CACAO and PSI88. I will refer to these
as “solid” surfaces and “contour” surfaces respectively. Finally, this
button window is also used to generate a two dimensional contour
plot of an MO, I’ll refer to these as “contour plots”.
While some buttons apply to both types of figures, the majority
control only solid or contour surfaces.
To explain what the solid surface buttons do, it is necessary to
understand how the calculation of solid isosurfaces is done. The
algorithm used to generate the polygonal isosurface is taken from a
section by Jules Bloomenthal (at Xerox PARC) in the book Graphics
Gems IV. The algorithm as published is suitable for polygonalization of continuous surfaces. Unfortunately, isosurfaces of molecular
and crystal orbitals are rarely continuous. They are, instead, made
up of a number of discrete parts (usually lobes centered on particular atoms). In order to work around this problem, Bloomethal’s
algorithm has been modified to look for individual pieces of the surface around each atom in the molecule. The algorithm starts at
the corners of a cube of side length search radius centered on each
atom. The default value of search radius seems to work most of the
time, if you see that lobes are obviously missing, try changing the
value of search radius . The algorithm evaluates the MO values on
a grid of spacing voxel size . Increasing voxel size results in quicker
evaluation and drawing of the surface (less triangles are found, so
the surface can be drawn more rapidly), but the resolution suffers.
Decreasing voxel size gives a smoother surface, but it takes much
43
longer to calculate and to draw. My best advice here is to start with
the default value (0.2Å) and then play around with it to see what
size suits your purpose.
Some Cautions about solid isosurfaces:
• I haven’t had a chance to do shading (simulated lights) of the
isosurfaces. I think that this will improve the appearance of
the final images.
• A heuristic needs to be developed to warn the user when lobes
of the MO might have been missed. I have some ideas here,
but I’m still working on them.
When the surface is first read in, the user is prompted for values
used in constructing the radial lookup table. This is a table of values
for the radial part of the wavefunctions. Use of this lookup table
results in a tremendous gain in speed. The default values should be
fine for almost any calculations.
One important note about both solid and contour isosurfaces:
viewkel does not deal with the imaginary part of wavefunctions yet.
I will put this in later, until then, limit yourself to pure real wavefunctions. You’ll always be okay with molecular wavefunctions, but
general k points for extended systems will be problematic.
Well, with my salvo of disclaimers fired, here are the explanations
of the buttons in the MO options window.
• Surface?: Toggles display of the solid isosurface once it has
been calculated.
• Molecule?: Toggles display of the molecule.
• Isosurface: This is the isosurface value that is displayed on
screen. This is applies to both solid and contour isosurfaces.
• Voxel Size: The spacing of the grid used to calculate the solid
surface.
• Search Rad: The size of the cube around each atom used to
provide starting points for the solid surface search.
• Slop: Used to determine how far past the end of the molecule’s
bounding box the solid isosurface grid extends.
44
• Exclude Atoms: Used to remove atoms from the calculation
of the isosurface. For example, if you are doing a 7 layer metal
slab and are only interested in the surface states (a topic near
and dear to my heart), you can exclude the atoms which are
in the middle of the slab. This will result in a cleaner looking,
more quickly evaluated isosurface. You will be prompted to
enter a list of atoms, the syntax here is the same as for the
Hide Atoms button described in the Molecule options section.
• Include Atoms: This is used if you make a mistake when you
exclude atoms. It turns the atoms you switched off back on.
• Surf Evolve: Starts the calculation of a solid isosurface.
• Change MO: Allows you to change which MO you are looking
at without having to reload the whole molecule.
• Tri Shading?: Toggles filling of the triangles which make up
the displayed solid isosurface.
• Tri Outlines?: Toggles the drawing of outlines around the
triangles which make up the solid isosurface.
• Contours?: Toggles display of the calculated contours that
make up either a contour plot of an MO or a contour isosurface.
• Contour Mode: This mode button determines the method
which is used to generate contour levels in contour plots. There
are three possibilities: Auto num contours contour levels are
automatically selected between the maximum and minimum
values in the data set; Incremental, you will be prompted for a
starting value and a step between contours when the contour
plot is evaluated; Discrete, you will be prompted to enter the
num contours contour values when you evaluate the contour
plot.
• Contour it: Evaluates a contour plot. You will be prompted
for:
– the orientation of the plane used to evaluate the contours
(i.e. perpendicular to X, Y or Z)
– the height and width of the plane in which the MO will be
evaluated.
45
– the number of steps to take along each side of the evaluation plane.
– the number of contours you want to use
– an offset, this shifts the evaluation plane off the origin,
useful if you want to contour an MO where most of the
density isn’t at X,Y, or Z = 0.
– Whether or not you want to do a “stack” of contour plots.
If you say yes here, you will be prompted for the number of
planes you want in the stack, the location of the start of the
stack, and the distance between planes in the stack. What
this does is generate a series of plots which are parallel to
each other and located at different heights. This is a quick
and dirty way to get a feeling for the shape of an MO.
Note: if the contour mode is Auto, viewkel will generate
the contour levels automatically in the first plane of the
stack, but then will use those contour values in all other
planes.
viewkel will then go off and evaluate the values of the MO
in the plane, contour that data, show you the values of the
contours it found, and finally display those contours (if the
Contours? toggle described above is switched on). MO contour
plots are real three dimensional objects just like the molecule
they are associated with, and will rotate, translate, and scale in
three dimensions along with the molecule. This feature seems
gratuitous, but it’s kind of fun to play with and it was a lot
easier to implement than having the contour be a fixed 2D
object. It can even be useful: if you rotate the molecule so
that you are looking at the edge of the contour plot, you can
see exactly where it cuts through your molecule.
• Contour Surf: Evaluates an MO contour plot.
• Invert Phase: This toggle allows you to invert the phase of
the MO displayed on screen. This can be helpful when you
want to visually compare two similar MO’s that have opposite
phases: just invert the phase of one of them.
• Hidden: Toggles the use of the hidden line removal algorithm
for contour plots and MO surfaces. When Hidden is on, you
46
should no longer be able to “see through” the MO isosurface.
However, this can make it take a lot longer to draw plots, so
you may want to have Hidden turned off when you are rotating
your molecule. The hidden line removal does not work particularly well for normal contour plots, but viewkel will still allow
you to use it if you wish. Note: there are still some boundary
conditions that get screwed up sometimes in the hidden line removal. If a plot looks bad: rotate the molecule a small amount,
that should clear things up. Very, Very Important Note:
The hidden line removal algorithm is not guaranteed to work
at all if you have some contours displayed which are not closed
(this can arise if the plane in which you evaluated the MO was
too small). Sometimes it works, sometimes it does stuff that is
very, very wrong.
• Grow Xtal: This grows the crystal and propagates the MO
coefficients with the correct phase factors for the given k point.
If you want to display the MO of an extended system in more
than one unit cell, you must use this button to grow the crystal.
Using the Grow Xtal button in the Molecule button window
will not correctly propagate the MO coefficients.
Note: If are looking at an extended system, and you want to
see the crystal orbital in more than the home unit cell, you must
evaluate the isosurface after growing the crystal.
16.7
FMO button window
This window contains buttons for controlling the display of an FMO
interaction diagram.
• Electrons: Controls the drawing mode for the electrons in the
interaction diagram. Each mode is described below:
– None: Do not draw electrons.
– HOMO: Draw electrons only in the highest occupied level
of each fragment and the molecule.
– All: Draw electrons in all occupied levels on screen.
• Levels: Toggles display of the levels in the FMO diagram.
47
• Left Fragment: Controls which fragment is displayed on the
left side of the interaction diagram. Set this to zero or -1 to
not show a fragment on the left side.
• Right Fragment: Controls which fragment is displayed on
the right side of the interaction diagram. Set this to zero or -1
to not show a fragment on the right side.
• Y min: This is the minimum energy displayed.
• Y max: This is the maximum energy displayed.
• Level Width: The width (horizontal length) of the levels
drawn.
• Thickness: The thickness of the lines used to draw the levels.
• Electron len: The length of the lines used to represent electrons.
• Y tics: Toggles the display of tic marks on the y axis.
• Frame: Toggles the display of a frame around the interaction
diagram.
• Show Title: Toggles display of the title of the graph (if one
has been entered).
• Title: Allows you to enter a new title to be displayed across
the top of the graph.
• Main Label: Allows you to enter a new label for the central
set of levels (those of the full molecule).
• Frag n Label: There will be one of these buttons for each
fragment used in the calculation. These are used to enter labels
to be displayed under each fragment displayed.
16.8
Walsh button window
This window is used to control the display of Walsh diagrams. The
coordinate used to label the x axis is specified when fit walsh is run.
• MO’s: Toggles display of the MO levels.
• Total E: Toggles display of the total energy.
48
• X tics: Toggles display of X tics.
• MO tics: Toggles display of Y axis tic marks (for the energies
of the MO’s displayed) on the left side of the diagram.
• Tot E tics: Toggles display of Y axis tic marks (for the total
energy curve) on the right side of the diagram.
• X Legend: Allows you to enter a legend to be displayed under
the X axis.
• Y Legend: Allows you to enter a legend to be displayed beside
the Y axis.
16.9
Band button window
Controls the display of band structure data on screen.
• Bands: toggles display of the bands.
• Show Fermi: toggles display of the Fermi energy on the band
graph.
• Fermi E: allows you to enter a value for the Fermi energy. The
location of the Fermi energy is not stored in the band file, so
you must enter this yourself to get an accurate value.
16.10
Properties button window
This is used to control display of average properties data (DOS,
COOP, or COD data).
• Curve n: where n is an integer. This is a toggle to control
display of each curve in the file. The numbering of the curves
varies from type to type:
– DOS data: Curve 1 is the total DOS. Projections are labeled starting from Curve 2. The projections are in the
order in which they were specified in the input file.
– COOP data: The curves are numbered in the same way as
the COOPs were numbered in the input file.
– COD data: There is only one curve per COD file, this is
curve 1.
49
• Integration n: where n is an integer. These toggle display of
the integration of the corresponding curve.
• Integ Scale: toggles use of the integration data to label the X
axis. This is particularly useful for integrated DOS data. There
are problems with using this option for COOP and COD data.
These will be fixed in the next version of the program.
• Fermi E: allows you to change the value of the Fermi energy.
For DOS and COOP data the value of the Fermi energy is
stored in the output file, so viewkel will know the proper value.
16.11
Graph button window
This controls displays of graph data. There are no new buttons for
control of graph data.
17
Using viewkel from a Tek terminal
When you are sitting at a Tek terminal (Tek 4014 compatible),
viewkel will use a command line driven interface and will use the
graphics capabilities of the terminal to display graphs.
You can get help in the Tek version of the program by typing
“help” or “?” at the prompt. This will list all the commands along
with a brief description. Since this is available, I will not describe
all the features here.
Though it can be convenient, the Tek interface does have some
limitations:
• You can not look at either molecules or MO’s.
• Not all features of each type of graph are modifiable.
• Once a new graph has been opened, previously opened (and
displayed) graphs cannot be modified.
• Due to limitations of the technology, the graph you see onscreen
is not nearly as similar to what comes out of the printer as in
the X windows version of viewkel .
Note: It has been a long time since I have worked on the Tektronix version of viewkel , so it’s not guaranteed to work at all.
50
Using the enhanced Postscript features in viewkel
It is now possible to include superscripts, subscripts, different
fonts, and all kinds of other wacky stuff in output from viewkel .
This is accomplished using an adaptation of the enhpost terminal
type from gnuplot. If you are familiar with this, then you don’t have
to read this section, everything is exactly the same here except that
you can’t do rotated text.
To get a superscript, use the ˆ symbol. ˆ only holds for one character unless a group of characters is enclosed in squiggly brackets ({
and }), so the line:
X^10
comes out looking like:
X1 0,
while the line
X^{10}
gives:
X10 .
To get a subscript, use the symbol. behaves in the same manner
as ˆ .
To change font, put a backslashed version of the name of the font
inside squiggly brackets with the text to be changed. For example
look at {/Symbol G} now
gives:
look at Γ now.
There are some other features of the enhpost drivers, but these
are the most important.
A word (or two) from Greg ... some acknowledgements
The members of the Hoffmann group were invaluable in the development and testing of these programs. They provided moral support, bug reports, featur suggestions, and esthetic criticisms that
were invaluable. The group members most involved were: Hugh
Genin, Norman Goldberg, Kimberly Lawler, Qiang Liu, Erika Merschrod, Udo Radius, Grigoriy Vajenine (who pointed out that I
51
should be evaluating the radial parts of wavefunctions in atomic
units), and Kazunari Yoshizawa. In addition, the students and auditors of Chemistry 798 in the fall of 1994 and the spring of 1995.
acted as unwitting beta-testers and uncovered a few problems I never
would have found. Roald Hoffmann (my advisor) was very supportive of my efforts and never chastised me for how much time I was
devoting to this project. Of course, he did accuse the program
of being vaporware, but this should nip that criticism in the bud.
Thanks Roald!
Edgar Müller has provided a number of helpful suggestions as
well as some Fortran code which served as the template for the
code to deal with crystallographic coordinates. Edgar also came
up with a consistent parameter set for the entire periodic table.
This parameter set is distributed with this release of the program
as muller parms.dat.
Paul Kögerler has also provided suggestions for features which are
now integrated and has even agreed to add some features himself.
Expect to see these in a future release.
The function used to diagonalize the inertia tensor as part of the
symmetry analysis is taken from the meschach library. This is a
freely available package of functions written in C for working with
matrices. meschach was written by David Stewart and Zbigniew
Leyk at the Australian National University. If you want to use this
function in your own code, please obtain a copy of the entire library.
I want to go ahead and take the chance to thank David Stewart for
making this library freely available. At this point I can’t help but
interject a piece of propaganda: free software is top quality stuff,
find out about it and use it!
The basis of the code to calculate solid isosurfaces was taken
from the article “An Implicit Surface Polygonalizer” by Jules Bloomenthal in Graphics Gems IV, Academic Press, 1994. If you do
graphics, taking a look at these books is a really good idea.
The algorithm used to do hidden line removal in the Jorgenson
and Salem style MO plots is a slight modification of that used in
Jorgenson’s PSI88 program. Because PSI88 is written in Fortran,
none of the code from the program was used, I just used PSI88 to
figure out the algorithm.
The enhanced postscript code is adapted from the file enhpost.trm
for gnuplot version 3.5. The original code was written by David Den52
holm and Matt Heffron, both of whom have given me permission to
distribute this adaptation.
The code used to contour data (both for FCO and MO plots)
is adapted from that used in gnuplot version 3.5 (I love borrowing
code from gnuplot!). The original code was written by Gershom
Elber and this modification is distributed with his permission.
Using the LAPACK diagonalizer
bind can now use a function from the LAPACK library (zhegv)
to diagonalize the hamiltonian. This diagonalizer is significantly
faster than the default routine cboris. In addition, zhegv can be
used to generate just the eigenvalues of a matrix. This speeds up
band structure calculations and properties calculations with the Just
Average E keyword enormously.
If you have a binary distribution of the program, it will use
zhegv to diagonalize (this is, unfortunately not true of the Mac
version of the program, which still uses cboris). If you have a
source distribution, you can turn on the LAPACK diagonalizer by
including -DUSE LAPACK in the CFLAGS line of the makefile. Most
of the functions necessary to use LAPACK with YAeHMOP are
distributed in the file zhegv.f. This is the good news. The bad
news is that zhegv.f will not work unless you have an implementation of the Basic Linear Algebra Subroutines (BLAS) library installed on your machine (this is why the Mac version doesn’t currently support LAPACK). Most modern distributions of UNIX include a specially tuned version of the BLAS library (it’s usually
/usr/lib/libblas.a), so you should be able to use LAPACK. In
addition, many UNIX implementations will include (as an optional
product) a tuned version of LAPACK. The name of this library is
very system dependant, so you’ll have to determine if it exists (if
you have an SGI, it’s /usr/lib/libcomplib.sgimath.so). If you
do have a vendor-supplied version of LAPACK, it’s advisable to use
it instead of the zhegv.f distributed with YAeHMOP , the vendor
product tends to be faster.
If you are willing to compile BLAS for your system, or if you
want the full LAPACK distribution, you can get them from the
netlib server (http://netlib.att.com). Netlib is a great source
for numerical routines.
Distributing and Modifying YAeHMOP
You can distribute YAeHMOP to anybody you like. It’s intended
53
to be given away. However, you cannot charge others for the distribution. We are firm believers in free software, and would like
YAeHMOP to remain freeware.
The programs which make up YAeHMOP are available in source
form. If there is a feature lacking which you feel really should be
there, feel free to add it. If you think that others might like to use
this feature, let us know and we’ll see about integrating it into the
main distribution. This is much easier if you clearly indicate in the
source code where you have made changes and, if possible, send a
context sensitive diff of the modified source files. If you find and fix
bugs, please do the same thing.
Updates
YAeHMOP is still under development. The next version will contain bug fixes and other great stuff. If you send us email ([email protected]
and let us know that you have the program, we can send you mail
and let you know when the next version is done. If you don’t let
us know that you have the program, you’ll just have to keep checking
our anonymous ftp site (ftp://overlap.chem.cornell.edu/dist/yaehmop)
or the YAeHMOP home page on the World Wide Web (http://overlap.chem.cornell.edu:8080/
Citing YAeHMOP
If you publish calculations and/or figures that you produce using
either bind or viewkel , we’d appreciate it if you’d cite the program
in your references section. At this point, there are no print publications describing YAeHMOP , so there’s no obvious citation to give.
Please use the following citation for bind :
G.A.Landrum and W.V.Glassey, bind (ver 3.0). bind is distributed
as part of the YAeHMOP extended Hückel molecular orbital package
and is freely available on the WWW at;
http://sourceforge.net/projects/yaehmop/
and the following citation for viewkel :
G.A.Landrum, viewkel (ver 3.0). viewkel is distributed as part of the
YAeHMOP extended Hückel molecular orbital package and is freely
available on the WWW at;
http://sourceforge.net/projects/yaehmop/
54
Specifying your geometry with a Z-Matrix
A Z-Matrix is a convenient way to specify the geometry of a
molecule or crystal in terms of bond lengths, bond angles, and dihedral angles. There are several styles of Z-matrix used in various
programs, bind uses a format similar to that used in Gaussian. This
is intended to be a brief introduction to how a Z-matrix works.
If you already know how to use a Z-matrix, here’s all you need
to know about the implementation in bind :
• The first atom is put at the origin.
• The second atom is put along the Z axis.
• The third atom is in the XZ plane.
• Dihedrals are evaluated using the right hand rule.
The easiest way to explain a Z-matrix is to show one and then
explain it, so that’s what we’ll do. Before we start, however, we
need to briefly define a dihedral angle. A dihedral is specified by
4 atoms, we’ll call them A, B, C, and D. The dihedral A–B–C–D
is the angle between the plane defined by A–B–C and the plane
defined by B–C–D. Here’s an alternative explanation: the dihedral
A–B–C–D is the angle between the lines C–D and B–A if you are
looking down the line C–B. There’s one more piece of information
we need to fully understand the dihedral: there is a handedness
associate with them. If you think about it, looking down the line
C–B there are two different angles between lines C–D and B–A: θ
and 360-θ. The dihedrals in bind are defined using the right hand
rule: Take your right hand and point the thumb down the line C–B,
now align your fingers with the line C–D, curling your fingers shows
the direction in which the dihedral angle is measured. This is all
about a million times easier to understand using a picture, here’s a
picture demonstrating both views of dihedrals and their handedness.
55
z
z
y
A
x
x
A
B
C
D
B,C
D
The Molecule
The dihedral:
A-B-C-D
With that definition under our belt, here’s the Geometry specification for a square pyramidal (CH3 )BiI4 fragment, where the CH3
group is along the Z axis and the Bi and four I’s lie in the XY plane:
Geometry Z
9
1 Bi
2 C 1 2.1
3 I 1 2.7
4 I 1 2.7
5 I 1 2.7
6 I 1 2.7
7 H 2 1.1
8 H 2 1.1
9 H 2 1.1
Matrix
2 90.0
2 90.0
2 90.0
2 90.0
1 109.5
1 109.5
1 109.5
3
3
3
3
3
3
90.0
180.0
270.0
0.0
120.0
240.0
Let’s look at the first few entries in more detail.
1. The first atom is a Bi and it’s placed at the origin. Cartesian:
(0 0 0).
2. Atom two is a C. It’s placed on the Z axis, 2.1 Å away from
atom 1. Cartesian: (0 0 2.1).
56
3. Atom three is an I. It’s placed 2.7 Å away from atom 1 and
the angle between atoms 3–1–2 in the XZ plane is 90.0 degrees.
Cartesian: (2.7 0 0).
4. Atom four is an I. It’s placed 2.7 Å away from atom 1, the angle
4–1–2 is 90 degrees. This angle puts us in the XY plane. At
this point we know that atom 4 lies on a circle in the XY plane
with radius 2.7 Å. The dihedral 4–1–2–3 (90 degrees) tells us
where on the circle we are. This dihedral is particularly easy
to see: if we look down the bond 2–1 (which is looking down
the Z axis), the angle between the bond 3–1 and the bond 4–1
is 90 degrees. So atom 4 lies on the Y axis. Taking the righthandedness of dihedrals into account, we know that atom 4 lies
on the negative Y axis. Cartesian (0 -2.7 0).
5. Atom five is an I. It’s 2.7 Å away from atom 1, making an angle
of 90 degrees with 2 and a dihedral of 180 with 3. This puts us
on the negative X axis. Cartesian (-2.7 0 0).
If you find the handedness of dihedrals confusing, just play around
with a couple of molecules defined using Z matrices, you’ll get the
hang of it fairly quickly.
References
[1] (a) R. Hoffmann, W. N. Lipscomb, J. Chem. Phys. 36, 2179
(1962) ibid 36, 3489 (1962)
(b) R. Hoffmann, W. N. Lipscomb, J. Chem. Phys. 37, 2872
(1963)
(c) R. Hoffmann, J. Chem. Phys. 39, 1397 (1963)
(d) R. Hoffmann, J. Chem. Phys. 40, 2474 (1964) ibid 40, 2745
(1964).
[2] T. A. Albright, J. K. Burdett and M. -H. Whangbo, Orbital
Interactions in Chemistry (Wiley-Interscience, 1985).
[3] R. Dronskowski, J. Am. Chem. Soc. 114, 7230 (1992).
[4] R. Dronskowski and P. E. Blöchl, J. Phys. Chem. 97, 8617
(1993).
[5] W. V. Glassey, G. A. Papoian and R. Hoffmann, accepted for
publication in J. Chem. Phys.
57
[6] M. Wolfsberg and L. Helmholtz, J. Chem. Phys. 20, 837 (1952).
[7] M. -H. Whangbo and R. Hoffmann, J. Chem. Phys. 68, 5498
(1978).
[8] J. H. Ammeter, H. -B. Burgi, J. C. Thibeault and R. Hoffmann,
J. Am. Chem. Soc. 100, 3686 (1978).
[9] R. S. Mulliken, J. Chem. Phys. 23, 1841 (1955).
[10] T. Hughbanks and R. Hoffmann, J. Am. Chem. Soc. 105, 3528
(1983).
[11] G.A.Landrum, Ph.D. dissertation, Cornell University 1997
Greg’s thesis is also available on the WWW via a link from the
YAeHMOP home page:
http://www.overlap.chem.cornell.edu:8080/yaehmop.html
[12] E. Ruiz, S. Alvarez, R. Hoffmann and J. Bernstein, J. Am.
Chem. Soc. 116, 8207 (1994).
58