1
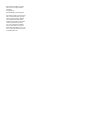
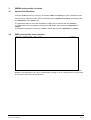
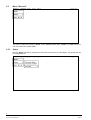
Cerberus® CerGas
Software tool SWE60
User manual
Fire & Security Products
Siemens Building Technologies
Data and design subject to change
without notice. / Supply subject to
availability.
© Copyright by
Siemens Building Technologies AG
We reserve all rights in this document
and in the subject thereof. By acceptance of the document the recipient
acknowledges these rights and undertakes not to publish the document
nor the subject thereof in full or in
part, nor to make them available to
any third party without our prior express written authorization, nor to use
it for any purpose other than for which
it was delivered to him.
1.
INTRODUCTION ..............................................................................................................................................1
1.1
PURPOSE ....................................................................................................................................................1
1.2
USER INTERFACE .........................................................................................................................................1
1.3
USER PROFILE .............................................................................................................................................1
1.4
SYSTEM REQUIREMENTS ..............................................................................................................................2
1.4.1
Ordering information ..........................................................................................................................2
1.5
STARTING SWE-60 .....................................................................................................................................2
1.6
OPERATION .................................................................................................................................................2
2.
STARTING SWE60 MENU SHELL .................................................................................................................3
2.1
2.2
2.3
2.4
3.
OPENING SCREEN ........................................................................................................................................3
MENU "GENERAL"........................................................................................................................................3
MENU "SYSTEM DISK" .................................................................................................................................4
SWE 60 SYSTEM EDITOR.............................................................................................................................4
SWE60 SYSTEM EDITOR FUNCTIONS.........................................................................................................5
3.1
GENERAL AND OPERATION ...........................................................................................................................5
3.2
SWE SYSTEM EDITOR MENU INTERFACE .......................................................................................................5
3.3
MENU "GENERAL"........................................................................................................................................6
3.3.1
Setup..................................................................................................................................................6
3.3.2
Printer.................................................................................................................................................7
3.4
MENU "CONTROL UNIT"................................................................................................................................8
3.4.1
Data transfer CC ---> SWE ................................................................................................................8
3.4.2
Data transfer SWE ---> CC ..............................................................................................................10
3.4.3
Software update ...............................................................................................................................10
3.5
MENU "FILE" .............................................................................................................................................11
3.5.1
New ..................................................................................................................................................11
3.5.2
Open ................................................................................................................................................12
3.5.3
Save .................................................................................................................................................13
3.5.4
Convert.............................................................................................................................................13
3.5.5
Create list .........................................................................................................................................14
3.5.6
Delete...............................................................................................................................................15
3.6
MENU "EDIT" .............................................................................................................................................16
3.6.1
Operation - General .........................................................................................................................16
3.6.2
System parameters..........................................................................................................................17
3.6.2.1 System times ...................................................................................................................................18
3.6.3
Hardware..........................................................................................................................................19
3.6.4
Interfaces .........................................................................................................................................20
3.6.5
Detection lines..................................................................................................................................21
3.6.6
Detector parameters ........................................................................................................................22
3.6.6.1 ASSIGNMENT DETECTOR / FE.....................................................................................................22
3.6.6.2 Bar display configuration..................................................................................................................23
3.6.6.3 Alarm hold ........................................................................................................................................24
3.6.6.4 General configuration.......................................................................................................................24
3.6.6.5 Inversion of alarms...........................................................................................................................25
3.6.6.6 Alarm release FA/WA/PA/AL ...........................................................................................................26
3.6.6.7 Sensor type ......................................................................................................................................26
3.6.6.8 Analogue outputs configuration .......................................................................................................27
3.6.6.9 Calibration gas concentration ..........................................................................................................28
3.6.6.10 Set threshold values (WA/PA/AL) ................................................................................................28
3.6.7
Copy function ...................................................................................................................................29
3.6.8
Control zones ...................................................................................................................................30
3.6.8.1 Detector assignment ........................................................................................................................31
3.6.8.2 Relay assignment ............................................................................................................................32
3.6.8.3 On / Off delay ...................................................................................................................................33
3.6.8.4 Alarm hold ........................................................................................................................................34
3.6.8.5 Zone activity/ Alarm outputs.............................................................................................................35
I
Siemens Building Technologies
Fire & Security Products
10.2002
Modifications
Version
Date
Description
e1369c
04.2000
SIEMENS layout new.
Section 1.4: Ordering information modified
e1369d
08.2002
Information about saving
e1369e
10.2002
Design
II
Siemens Building Technologies
e1369e
Fire & Security Products
10.2002
1.
1.1
Introduction
Purpose
SWE-60 is an application which runs on the CW100-03 Cerberus Service tool (notebook/laptop).
The tool supports configuration and parameterization, and also data backup for the CC-60 gas detection system control unit.
The program is largely linked into the existing CS menu shell (SWE menu) and has been adapted to
this specification.
1.2
User interface
The user interface is adapted as far as possible to the CS standard (MODULA-2 mode interface).
Thus the tool is defined to be usable with an SAA window-oriented user interface.
Deviations from standard CS operation are described in this user manual.
The user interface has been developed to allow extremely simple language adaptations.
1.3
User profile
The user group is defined as consisting of the service engineers, project members and construction
site supervisors. The user interface has thus been defined according to the CS standard. The project
member and construction site supervisor will typically use the tool in the office to pre-program a gas
detection system. The service engineer will typically use the tool on the customer's site for servicing
and commissioning work on gas detection systems.
1
Siemens Building Technologies
e1369e
Fire & Security Products
10.2002
1.4
System requirements
The tool requires the following platform as a minimum configuration:
Computer
Operating system
RAM
EM 368.exe
Smart drive
Mass storage
Screen
Keyboard
Interfaces
Copy protection
Accessory
1.4.1
Ordering information
Item
SWE 60-01
M3C 060
B3D 021
AT CABLE
-
1.5
: IBM AT (or compatible)
: MS-DOS/PC-DOS v6.2x
: at least 550 KB free memory
® disabled
® disabled
: HD / FD
: CGA / EGA / VGA
: PC / XT / AT, mouse optional
: 1 x RS232, 1 Centronics
: protected by dongle on LPT1
: B3D021 modem with data cable
Part no
® OSS
462088
505259
427667
417279
466453
433842
Designation
Parameter editor for SWE 60
DONGLE D FULL
V24 DUAL MODEM
AT cable 9f/25m; L=0.25m
Cable 25f/25m; L=2m Ribbon
AT modem cable 25m/9f / L=4.5m
MONITOR CABLE 9f / 9m./ L=3m
Starting SWE-60
The program is always started from the CS menu shell (SWE).
The program is started using the command "SWE60" (Cerberus specification batch file).
The program will not run unless the dongle (M3 C060 / CC60 / 462 075 CS specified) is connected to
the computer's printer port.
1.6
Operation
The program is operated through the keyboard using hotkeys, function keys and the tab key.
The program optionally supports a mouse on the serial ports COM1 or COM2.
The dialogue language is the national language of the installation country, this can be selected in a
configuration file.
See the Cerberus guidelines and the operating element listed in the documents "PC Setup / Installation / Operation" (e996a) and "SWUDSK" (e969a) for further operations. (Documentation in "SWTS 60"
file)
2
Siemens Building Technologies
e1369e
Fire & Security Products
10.2002
2.
2.1
Starting SWE60 menu shell
Opening screen
The opening screen appears once the SWE60 tool is started from the Cerberus menu shell.
The dropdown menus can be opened using the <Ins> key.
2.2
Menu "General"
An information box can be opened under the "General" menu. The User Manual is opened under
"Manual".
SWE60 is also closed by selecting "End" in this menu.
3
Siemens Building Technologies
e1369e
Fire & Security Products
10.2002
2.3
Menu "System Disk"
A system disk must first be created using the SWUDSK program before the SWE60 system editor can
be started.
The functions of the SWUDSK program are described in document "SWUDSK" e969a.
2.4
SWE 60 system editor
The opening screen is displayed when the SWE60 system editor is started. It includes all the instructions necessary for the functions of the SWE60 system editor. These include, e.g., the presence of the
dongle (M3C060) in the parallel port, the installation diskette in drive "A", etc.
4
Siemens Building Technologies
e1369e
Fire & Security Products
10.2002
3.
SWE60 system editor functions
3.1
General and Operation
Press the <F10>function key or the key combination <Alt> and <hotkey> to open a dropdown menu.
A menu item in a dropdown menu may be selected with the <up/down arrow key>, and opened with
the <Spacebar> or the <Enter> key.
The parameters within a menu item available for editing may be selected with the <tab key>.
The edited data can be accepted by selecting the "OK" button and pressing the <Spacebar> or
<Enter>.
To discard the parameters, select the "CANCEL" button and press the <Spacebar> or <Enter>.
3.2
SWE system editor menu interface
When the system editor is started, a menu bar with the options General, Control unit, File and Edit is
displayed. The Edit option can only be activated after opening a new or existing system. The functions
for the various options are described below.
5
Siemens Building Technologies
e1369e
Fire & Security Products
10.2002
3.3
Menu "General"
This menu includes the functions "About“ for the SWE60 system editor, “Setup“ and "Quit" which you
can use to leave the system editor.
3.3.1
Setup
Use the "Setup" function to change the screen from monochrome to color display. Any printer port will
be configured here.
6
Siemens Building Technologies
e1369e
Fire & Security Products
10.2002
3.3.2
Printer
The parallel or serial port is configured under the function "Selection“.
The port can be selected under the function "Port"
The port desired can be selected using the <cursor keys> and confirmed with the
<Tab key> by selecting "OK".
Note:
The printer driver CWPRINT.EXE, which is located in c:\swe60\sys will be
used for printing.
7
Siemens Building Technologies
e1369e
Fire & Security Products
10.2002
3.4
Menu "Control unit"
The "Control unit" menu is used for communication with the CC60 control unit. Communication can take place in both directions : Data can be transmitted from the control unit to the PC, and vice versa.
3.4.1
Data transfer CC ---> SWE
Data is transferred from the control unit to the PC to back up the data on the system. In order to carry
out the backup procedure, you must first use the selector box to specify the file in the appropriate directory in which the control unit data will be saved.
Note: If you choose an existing file, the existing parameters will be overwritten.
8
Siemens Building Technologies
e1369e
Fire & Security Products
10.2002
Once you have selected the file and confirmed with <Enter>, you are automatically to the port definition. In this function you must select the serial port "Com no." and specify the "Baud rate" on the PC
Note:
A percentage bar, representing the data transfer will appear on screen if the communication
between the control unit and the PC is in order.
Requirement for data transmission:
1.
PC connection for data backup
CC60
SU 60
M3C060
Parallelport
PC
Drucker
P5
Modem
P4
RS232C
Com1
Note: If the B3D021 modem is used
- Input A1/A2
- Output K1/K2
- Switch S1/S2 to position S (down)
2.
Configuration of the CC60 control unit for data backup
1. Release operation, password 7000
2. F4 040 Service PC ON
3. F4 045 baud rate 9600
9
Siemens Building Technologies
e1369e
Fire & Security Products
10.2002
3.4.2
Data transfer SWE ---> CC
Data is transferred between the PC and the control unit to load control unit parameterization which has
been configured on the PC.
To carry out control unit parameterization, you use first the selector box, select the file in the appropriate directory in which the control unit data are stored.
Caution:
Any existing control unit parameters will be overwritten when a control unit is configured
through the PC!
The remainder of the procedure is analogous to data backup, subclass 3.3.1
3.4.3
Software update
This function is not yet implemented!
10
Siemens Building Technologies
e1369e
Fire & Security Products
10.2002
3.5
Menu "File"
In the "File" menu, parameters are set for new systems under "New", existing systems are edited under "Open", the data are saved to disk under "Save", existing system parameters converted to a higher software version under "Convert", the system parameters are printed out under "Create list" and
existing systems deleted under "Delete".
3.5.1
New
Parameters for a new system are set under File "New". All directories on the diskette previously produced using the SWUDSK program are listed in the file selector box. The directory in which the installation data is to be stored must first be selected. The system number without an extension must
then be entered in the input window. The control unit number is then the name of the file in which the
system data is stored.
11
Siemens Building Technologies
e1369e
Fire & Security Products
10.2002
The following input screen appears once a file has been opened:
The missing data must now be added and the window closed by pressing <Enter>with the cursor on
the "OK" button.
3.5.2
Open
An existing system is opened under "Open". The directories present on the system diskette are listed
in the file selector box. When the directory to be used has been selected, the existing systems (control
unit numbers) are listed. The system is opened by selecting the "Open" button and confirming with
<Enter>.
Note: opening a system can take up to 5 minutes!
12
Siemens Building Technologies
e1369e
Fire & Security Products
10.2002
3.5.3
Save
The system currently open is saved to disk with "Save". The directories present on the system diskette
are listed in the file selector box. Once the directory has been selected, the configuration must be stored under the same file name (control unit number) as it was opened.
Caution: it’s forbidden to use file names with special signs like ( ) / \ - ? * !
3.5.4
Convert
This function is not yet implemented!
13
Siemens Building Technologies
e1369e
Fire & Security Products
10.2002
3.5.5
Create list
A listing for the system currently opened may be created using this function.
It is only necessary to check the menu "File" if you wish only to create a data file. The "Printer" function must also be checked if you wish to print the system data.
Caution:
No listing can be created if no port has been selected for the printer under the General
menu.
The window illustrated below only appears if you are printing via the serial port.
14
Siemens Building Technologies
e1369e
Fire & Security Products
10.2002
3.5.6
Delete
Existing systems can be can be deleted with function "Delete". You must first select the appropriate directory before a system can be deleted. The relevant control unit number can be selected within the
directory and deleted by confirming the "Open" button by pressing <Enter>.
15
Siemens Building Technologies
e1369e
Fire & Security Products
10.2002
3.6
Menu "Edit"
A gas detection system is actually configured in the menu "Edit". This menu will not be active unless a
new system first has been created or an existing system has been
3.6.1
Operation - General
A parameter must be selected using the <Tab key> if you wish to edit it.
<Shift> and <Tab> takes you back one parameter.
Within an editable parameter you can use the <Cursor keys> to select the setting desired, which you
can then confirm with the <Spacebar>.
The confirmation is indicated by a point next to the setting selected.
Where a number of settings are possible for a parameter, but not listed on the screen, an appropriate
selection can be displayed by pressing the <Spacebar>.
16
Siemens Building Technologies
e1369e
Fire & Security Products
10.2002
3.6.2
System parameters
All control unit-specific system data and all system times are configured under System parameters.
"Language selection"
This can be used to select the language to be used when working with the control unit. You always
have the option of selecting between the Default language of English and the national language stored
in the text EPROM in the control unit.
"Mains freq."
Setting the mains frequency according to national mains ratings.
"Password"
The control unit has three levels of hierarchy, each with three individually editable
passwords:
Level 0 = Service engineer
Level 1 = Unrestricted authority
Level 2 = Restricted authority
It is also possible to specify the duration of the release (4-99 min. , or 999 for infinite).
"VD60 Query without passw."
This can be used to select whether the control unit parameters should be visible for viewing on the
control unit display (VD60) or not, without entering a password.
"Access authoriz. F1 + F2" is used to define from which password hierarchy on the control unit detector on/off and detector test can be released.
Recommended : User with all rights
17
Siemens Building Technologies
e1369e
Fire & Security Products
10.2002
3.6.2.1 System times
"System times" is used to set the current date, the time of day and the date of commissioning in the
control unit.
The "Change time Day/Night" define when the switch-over from day to night operation (CAK) is to
take place.
With "Aut.det.ON chang. Night" is possible to configure whether detectors that have switched off
are to be switched on automatically during the switch-over from day to night.
Note : never switch on detectors automatically.
The "Switch-over dates" define the Summer/Winter and the Winter/Summer switchover times. At
least one switchover data must be defined for each occasion, otherwise a fault will be signaled on the
control unit.
The Cerberus-Alarm-Concept is set up using the "CAK Delay times".
With "Mains fail delay" the event of mains failure can be edited (0-10000 sec.).
The "Time dat. Check" specifies when any check on switch-over times has to be carried out.
18
Siemens Building Technologies
e1369e
Fire & Security Products
10.2002
3.6.3
Hardware
Note: "Hardware" specifies the hardware configuration to the control unit.
The "Bus slots" is used to configure the plug-in cards plugged into the sub-rack bus (G3E010). Parameterization must be carried out as follows:
1. The <Cursor keys> are used to select the BUS number to be configured, this is confirmed with the
<Spacebar>.
2. Use the <Tab key> to select the selector box showing the possible cards. Then you can select the
card required with the <Cursor keys> and confirm your choice with <Enter >.
The "Front elements" specifies to the control unit how many FE-60 are located on the control unit.
Later, in the assignment of the physical to the logical detector address, only those logical addresses
will be released that have been selected with the display elements.
The "Keyb. for fire stat" indicates whether a fire department control panel is fitted in the control unit.
Note:
The E4G030 controller cards are automatically set on bus no. 18 and 19
if fire department control panel is set "Yes".
19
Siemens Building Technologies
e1369e
Fire & Security Products
10.2002
3.6.4
Interfaces
The "Interfaces" function defines the interfaces on SU-60.
"Service PC" function specifies whether the Service PC interface is to be active or inactive. You also
define the corresponding transmission rate, which must be identical on the PC and the control unit. A
selection box can be opened by pressing <Space>
"Remote display" function is used to indicate whether further terminals (CT-60) are connected to the
control unit. (not currently available)
The "Printer" function is used to specify whether a Cerberus printer, a third-party printer or no printer
is connected to the control unit. A selection box can be opened by pressing <Space>
With the "Management system" function is the same way as for the printer, you can define whether
the control unit is to communicate with a management system.
A selection box can be opened by pressing <Space>
20
Siemens Building Technologies
e1369e
Fire & Security Products
10.2002
3.6.5
Detection lines
Note:
The "Detector lines" function is used to define the gas detector lines. This may be either a
stub line or a loop line. In addition, you are able to define whether the detectors are fed from
the control unit, or whether the detectors are supplied from outside.
"Detection lines" Parameterization is carried out as follows:
1. The <Cursor keys> are used to select the line interface to be configured, this is confirmed with
the <Spacebar>.
2. Use the <Tab key> to select the selector box showing the possible line types. Then you can select the line type required with the <Cursor keys> and confirm your choice with <Enter>.
21
Siemens Building Technologies
e1369e
Fire & Security Products
10.2002
3.6.6
Detector parameters
Note:
All detector-specific parameters are defined under this function "
The menu is used as follows:
Use the <Tab key> to select the field you wish to configure. Confirming by pressing <Enter>then takes you to the relevant submenu.
Recommendation:
Parameterization must be carried out in sequence, first from
left to right, and then from top to bottom.
3.6.6.1 ASSIGNMENT DETECTOR / FE
"ASSIGNMENT DETECTOR / FE" is for the assignment of a physical detector address to a logical
address on the FE-60 display.
Select with the <Cursor keys> the detector position which a physical detector address is to be assigned. After them you must use the <Tab key> to switch to the "Detector number, phys" selector
box.
22
Siemens Building Technologies
e1369e
Fire & Security Products
10.2002
Use the <Cursor keys> to select the physical detector address required. Pressing the <Tab key>
again selects the "Assign" field and the function is concluded by pressing <Enter>.
The assignment is now indicated at the detector position.
An assignment is deleted in exactly the same way, except that the "Remove" field is selected instead.
3.6.6.2 Bar display configuration
"Bar display configuration" is used to define the resolution of the concentration indicator on the FE60 for each gas detector.
The resolution can be increased or reduced with a start value and end value. This is done by first selecting the FE address desired in the selector box.
The bar display can also be set up to the inverse. This is useful if a purge process (e.g. O2) is to be
displayed.
23
Siemens Building Technologies
e1369e
Fire & Security Products
10.2002
3.6.6.3 Alarm hold
The "Retention of the Display" function is used to program whether the indication on the FE display is
to be holding /not holding for each event level and detector.
The following event levels for each detector can be programmed as holding or not holding:
- Faults
(FA)
- Warning
(WA)
- Prealarm
(PA)
- Alarm
(AL)
Caution:
Hold relates only to the display and has no impact on the relay
controllers.
3.6.6.4 General configuration
The "General configuration" function is used to define the calibration parameters for the gas detectors.
24
Siemens Building Technologies
e1369e
Fire & Security Products
10.2002
"ENABLE blocked" can be used to lock the selected detector out.
Caution: A detector must be set to Lock "No" for it to function.
With "Sensitivity" you can define the value (in % of the calibration value) below which a detector is
considered to be outside the tolerance during the test using calibration gas and is recorded as too insensitive.
Important: It must not be changed !!
"Init commissioning" and "Next change" are entry of the corresponding data.
The periodicity of sensor change can be found in the maintenance documentation.
"Last calibration" can not be changed.
3.6.6.5 Inversion of alarms
This menu defines whether a detector is to be operated in the inverse (e.g. O2).
You can also define which event levels are to be transmitted to the printer or to the DMS. Make the
selection by pressing the <Spacebar>.
25
Siemens Building Technologies
e1369e
Fire & Security Products
10.2002
3.6.6.6 Alarm release FA/WA/PA/AL
This function is used to enable or block the Fault, Warning, Pre-alarm and Alarm event levels for
each detector. The selection is made with the <Spacebar>.
Note :
Enable all event levels. Reporting of events can be suppressed in the zone
definition if it is not required.
3.6.6.7 Sensor type
"Sensor type" is used to assign an application-specific sensor type to the detector.
The FE address required is first selected using the <Arrow keys>. Select the sensor selector box with
the <Tab key>, then select the "Sensor type" required with the <Cursor keys>.
The selection must then be confirmed with <Enter>. The relevant sensor is shown next to the FE
address.
26
Siemens Building Technologies
e1369e
Fire & Security Products
10.2002
3.6.6.8 Analogue outputs configuration
Note:
The "Analogue outputs" function is only enabled if an analogue card (AK60) has been defined in the
function "Hardware".( see 3.6.3 )
An analogue output (4 - 20 mA) can then be assigned to each detector.
Parameterization operates as follows:
1. The appropriate FE address is first selected using the <Cursor keys>.
2. Change to the selector box showing the "Analogue outputs" available using the
<Tab key>, then select the analogue output desired using the cursor keys.
3. The "Start value" and "End value" of the analogue output can be edited by pressing the <Tab
key> again.
4. The resolution can thus be changed as for the bar display. The function is saved by selecting the
"OK" button and confirming with <Enter>.
27
Siemens Building Technologies
e1369e
Fire & Security Products
10.2002
3.6.6.9 Calibration gas concentration
This function defines the concentration of the "Zero gas" (purge) and the concentration of the "Cal.
Gas" (calibration gas bottle) for each sensor.
3.6.6.10 Set threshold values (WA/PA/AL)
The threshold values (event levels) for each detector are defined using this function.
The following threshold values can be defined for each detector:
- Warning
(WA)
- Prealarm
(PA)
- Alarm (AL)
Recommendations for the threshold values can be found in the maintenance documentation.
28
Siemens Building Technologies
e1369e
Fire & Security Products
10.2002
3.6.7
Copy function
The "Copy function" function does not become active until all detector parameters have been defined.
All detector parameters with the exception of the "Assignment of the physical detector address to the
logical FE address" can be copied with the copy function.
Nor can the calibration data of the detectors be copied.
Zone parameters and assignments cannot be copied!
Copy procedure:
Select the "Master detector" with the <Tab key> and specify the appropriate, completely configured
Master detector.
Then use the <Tab key> again to select the From FE ... To FE ... function where you will have to enter
the FE addresses of the detectors into which the master data are to be imported.
The copy function is executed when the "OK" field is selected and confirmed with <Enter>.
Caution !
Detector parameters that have already been configured will be overwritten by
the copy function.
29
Siemens Building Technologies
e1369e
Fire & Security Products
10.2002
3.6.8
Control zones
The function "Control zones" does not become active until the detector parameters have been defined.
All detector zone-specific parameters are defined under the function "Control zones".
The menu is used as follows:
Use the <Tab key> to select the field you wish to configure.
Then, confirming by pressing <Enter> takes you to the corresponding submenu.
Note:
Parameterization must be carried out in sequence, i.e. first from left to right
and then from top to bottom.
30
Siemens Building Technologies
e1369e
Fire & Security Products
10.2002
3.6.8.1 Detector assignment
The individual detectors are assigned to the control zones under detector assignment.
Parameterization is carried out as follows:
1. Use the <Cursor keys> to select the zone number to be configured.
2. Pressing the <Tab key> again takes you to the "Associations" field in which the
number of detectors which must reach the corresponding threshold value for the corresponding zone activity must be entered.
Caution: At least 1 must be entered to allow a zone to be activated.
3. The <Tab key> is pressed again to select the "Items" field where the <Cursor keys> can be used
to select the detector which is to be assigned to the zone.
4. Press the <Tab key> to select the "Assign" field and confirm by pressing <Enter> Assignment to a
zone is indicated in the "Assign" field.
Note:
If the "Splitting Flag" has been released in the CC60, you can shift to the
"Zone capability" using the <Tab key>. The <Cursor keys> and the
<Spacebar> can then be used to define the zone capability.
The assignment of detectors to a zone must be defined separately for each
detector, i.e. steps 3 and 4 must be repeated as many times as there are detectors in a
zone.
31
Siemens Building Technologies
e1369e
Fire & Security Products
10.2002
3.6.8.2 Relay assignment
Relays located on relay cards on the control unit BUS, can be assigned to the processes of defined
control zones using the function "Relay assignment".
It is only possible to assign relays which have been defined under the
function "Hardware" ( see 3.6.3 )
Parameterization is carried out as follows:
1. Use the <Cursor keys> to select the zone number to be configured.
2. Use <Tab key> to switch to the "Zone capability" field. Then you can use the
<Cursor keys> and the <Spacebar> to define the zones or Relay capability.
3. Pressing the <Tab key> again takes you to the "Relay" field in which the relay desired can be assigned to the selected group with the Cursor keys.
4. Press the <Tab key> to select the "Assignment" field and confirm by pressing <Enter> Relay associations can be seen in the "Assignments" field.
Comment:
The assignment of zone to relay must be defined separately for each relay, i.e. steps
3 and 4 must be repeated as many times as there are relays in a zone.
32
Siemens Building Technologies
e1369e
Fire & Security Products
10.2002
3.6.8.3 On / Off delay
The on and off delays per zone and per event level are defined in this function.
The <Cursor keys> are used to select the control zone control zone to be configured from the "Zone"
field.
Pressing the <Tab key> takes the cursor to the selector box in which the times desired can be entered in 6 second increment.
Once all times have been defined, the "OK" field can be selected with the <Tab key> and the parameters accepted by pressing <Enter>.
The energizing delay times and release delay times are shown in the upper selector box. The times
must be defined separately for each zone.
33
Siemens Building Technologies
e1369e
Fire & Security Products
10.2002
3.6.8.4 Alarm hold
The holds for the zones are configured in this menu. It is possible to specify for each zone whether
Warning, Pre-alarm and Alarm are self-holding or automatically resetting once the value has fallen
below a relevant threshold value.
The control zone which is to be configured is selected in the "Zone" field using the <Cursor keys>.
Pressing the <Tab key> changes into the "Self-hold" field, where the hold at each threshold value can
be configured by pressing the <Spacebar> The definition is stored by pressing <Enter> when the cursor is in the "OK" field.
34
Siemens Building Technologies
e1369e
Fire & Security Products
10.2002
3.6.8.5 Zone activity/ Alarm outputs
This function is used to specify where the zone and relay messages are to be sent.
You may choose between no output message, message to the printer and message to DMS.
Use the <Cursor keys> to select from the "Zone" field the control zone which is to be configured.
Pressing the <Tab key> changes to the "Configuration" field where the criterion required can be specified by pressing the <Spacebar> . The definition is saved by pressing <Enter> with the cursor in the
"OK" field.
Parameterization must be carried out separately for each control zone.
PRT
DMS
None
=
=
=
Important:
Printer
Management system
No output
every control zone used must be set to Active "Yes" in the Configuration
field, otherwise the control zone has no function.
There must be at least 1 zone with all detectors, so that the relays on the SU60 become active in the
event of a WA, PA, AL activity.
35
Siemens Building Technologies
e1369e
Fire & Security Products
10.2002
Siemens Building Technologies AG
Alte Landstrasse 411
CH-8708 Männedorf
Tel. +41 1 - 922 61 11
Fax +41 1 - 922 64 50
www.cerberus.ch
Document no. e1369e
Edition 10.2002
Manual CG60
Section 6