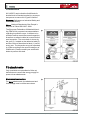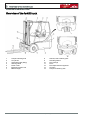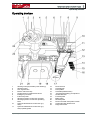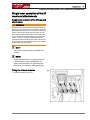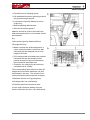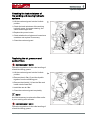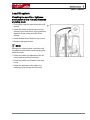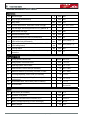
1
Electric forklift truck Original instructions 335-03 series E16C-03, E16P-03, E20P-03 335 801 1701 EN – 04/2014 Preface g Linde − Your Partner With over 100,000 fork lift trucks and warehouse machines sold annually, Linde is one of the world’s leading manufacturers of material handling equipment. There are many reasons for this success: Linde products are renowned not only for their innovative, cutting-edge technology, but also for their low energy and operating costs, which are up to 40 per cent lower than those of their competitors. The high quality of Linde products is also matched by the quality of our service. With ten production plants worldwide and an extensive network of sales partners, we are at your service round the clock and around the world. Operating Instructions – 335 801 1701 EN – 04/2014 Your local Linde partner can offer you a complete package from a single source; ranging from expert advice on all aspects of sales and service through, of course, to appropriate finance options. Our leasing, hire or lease-purchase agreements provide you with the flexibility to tailor decision-making to your individual business requirements. Linde Material Handling GmbH Carl-von-Linde-Platz 63743 Aschaffenburg Telephone +49 (0) 6021 99-0 Fax +49 (0) 6021 99-1570 Mail: [email protected] Web: http://www.linde-mh.com I Table of contents g 1 Introduction Introduction . . . . . . . . . . . . . . . . . . . . . . . . . . . . . . . . . . . . . . . . . . . . . . . . . . . . . . . . . 2 Intended use . . . . . . . . . . . . . . . . . . . . . . . . . . . . . . . . . . . . . . . . . . . . . . . . . . . . . . . . 5 Impermissible use . . . . . . . . . . . . . . . . . . . . . . . . . . . . . . . . . . . . . . . . . . . . . . . . . . . . 6 Description of use and climatic conditions . . . . . . . . . . . . . . . . . . . . . . . . . . . . . . . . . . . 7 Symbols used . . . . . . . . . . . . . . . . . . . . . . . . . . . . . . . . . . . . . . . . . . . . . . . . . . . . . . . 7 Technical description . . . . . . . . . . . . . . . . . . . . . . . . . . . . . . . . . . . . . . . . . . . . . . . . . . 7 EC declaration of conformity . . . . . . . . . . . . . . . . . . . . . . . . . . . . . . . . . . . . . . . . . . . . 10 2 Safety Safety guidelines . . . . . . . . . . . . . . . . . . . . . . . . . . . . . . . . . . . . . . . . . . . . . . . . . . . . 14 Residual risks . . . . . . . . . . . . . . . . . . . . . . . . . . . . . . . . . . . . . . . . . . . . . . . . . . . . . . 15 Stability . . . . . . . . . . . . . . . . . . . . . . . . . . . . . . . . . . . . . . . . . . . . . . . . . . . . . . . . . . . 16 In the case of tip-over . . . . . . . . . . . . . . . . . . . . . . . . . . . . . . . . . . . . . . . . . . . . . . . . . 16 Handling consumables . . . . . . . . . . . . . . . . . . . . . . . . . . . . . . . . . . . . . . . . . . . . . . . . 17 Qualified person . . . . . . . . . . . . . . . . . . . . . . . . . . . . . . . . . . . . . . . . . . . . . . . . . . . . 17 Regulations . . . . . . . . . . . . . . . . . . . . . . . . . . . . . . . . . . . . . . . . . . . . . . . . . . . . . . . . 17 Fit attachments . . . . . . . . . . . . . . . . . . . . . . . . . . . . . . . . . . . . . . . . . . . . . . . . . . . . . 18 Emergency exit with attached rear window . . . . . . . . . . . . . . . . . . . . . . . . . . . . . . . . . 20 Manually tilting the mast and lowering the fork . . . . . . . . . . . . . . . . . . . . . . . . . . . . . . . 21 Do not use cables to open the overhead guard by force . . . . . . . . . . . . . . . . . . . . . . . . 23 3 Overview of the forklift truck Identification plate . . . . . . . . . . . . . . . . . . . . . . . . . . . . . . . . . . . . . . . . . . . . . . . . . . . 26 Overview of the forklift truck . . . . . . . . . . . . . . . . . . . . . . . . . . . . . . . . . . . . . . . . . . . . 28 Operating devices . . . . . . . . . . . . . . . . . . . . . . . . . . . . . . . . . . . . . . . . . . . . . . . . . . . 29 Display unit . . . . . . . . . . . . . . . . . . . . . . . . . . . . . . . . . . . . . . . . . . . . . . . . . . . . . . . . 30 4 Operation Pre-use daily checks and maintenance Pre-shift checks . . . . . . . . . . . . . . . . . Opening the overhead guard . . . . . . . Checking the battery level . . . . . . . . . Battery change . . . . . . . . . . . . . . . . . . . . . . Operating Instructions – 335 801 1701 EN – 04/2014 . . . . . . . . . . . . . . . . . . . . . . . . . . . . . . . . . . . . . . . . . . . . . . . . . . . . . . . . . . . . . . . . . . . . . . . . . . . . . . . . . . . . . . . . . . . . . . . . . . . . . . . . . . . . . . . . . . . . . . . . . . . . . . . . . . . . . . . . . . . . . . . . . .... .... .... .... .... .. .. .. .. .. 36 36 36 40 42 III Table of contents g Pre-use daily checks and maintenance . . . . . . . . . . . . . . . . . . . . . . . . . . . . . . . . . . . . 44 Adjusting the driver’s seat . . . . . . . . . . . . . . . . . . . . . . . . . . . . . . . . . . . . . . . . . . . . . . 45 Emergency off switch . . . . . . . . . . . . . . . . . . . . . . . . . . . . . . . . . . . . . . . . . . . . . . . . . 47 Driving . . . . . . . . . . . . . . . . . . . . . . . . . . . . . . . . . . . . . . . . . . . . . . . . . . . . . . . . . . . . 48 Single-pedal operation (optional) . . . . . . . . . . . . . . . . . . . . . . . . . . . . . . . . . . . . . . . . 51 Steering system . . . . . . . . . . . . . . . . . . . . . . . . . . . . . . . . . . . . . . . . . . . . . . . . . . . . . 55 Brake system . . . . . . . . . . . . . . . . . . . . . . . . . . . . . . . . . . . . . . . . . . . . . . . . . . . . . . . 56 Operating the lift mast and attachments using the centralised control lever (joystick) . . . . . . . . . . . . . . . . . . . . . . . . . . . . . . . . . . . . . . . . . . . . . . . . . . . . . . . . . . . 58 Single lever operation of the lift mast and attachments . . . . . . . . . . . . . . . . . . . . . . . . . 61 Working spotlights*, windscreen wipers*, headlights*,direction indicator lights* . . . . . . 63 Horn, electrical system cover . . . . . . . . . . . . . . . . . . . . . . . . . . . . . . . . . . . . . . . . . . . 65 Fuses . . . . . . . . . . . . . . . . . . . . . . . . . . . . . . . . . . . . . . . . . . . . . . . . . . . . . . . . . . . . 66 Before loading . . . . . . . . . . . . . . . . . . . . . . . . . . . . . . . . . . . . . . . . . . . . . . . . . . . . . . 68 Loading . . . . . . . . . . . . . . . . . . . . . . . . . . . . . . . . . . . . . . . . . . . . . . . . . . . . . . . . . . . 70 Tow coupling . . . . . . . . . . . . . . . . . . . . . . . . . . . . . . . . . . . . . . . . . . . . . . . . . . . . . . . 72 Truck transport . . . . . . . . . . . . . . . . . . . . . . . . . . . . . . . . . . . . . . . . . . . . . . . . . . . . . 73 Towing regulations . . . . . . . . . . . . . . . . . . . . . . . . . . . . . . . . . . . . . . . . . . . . . . . . . . . 73 Carrying and lifting the forklift truck . . . . . . . . . . . . . . . . . . . . . . . . . . . . . . . . . . . . . . . 74 Wheel change . . . . . . . . . . . . . . . . . . . . . . . . . . . . . . . . . . . . . . . . . . . . . . . . . . . . . . 76 Use in cold stores . . . . . . . . . . . . . . . . . . . . . . . . . . . . . . . . . . . . . . . . . . . . . . . . . . . . 78 Truck storage . . . . . . . . . . . . . . . . . . . . . . . . . . . . . . . . . . . . . . . . . . . . . . . . . . . . . . 80 Taking the forklift truck out of operation . . . . . . . . . . . . . . . . . . . . . . . . . . . . . . . . . . . . 80 Disposal of old trucks . . . . . . . . . . . . . . . . . . . . . . . . . . . . . . . . . . . . . . . . . . . . . . . . . 82 5 Maintenance Summary . . . . . . . . . . . . . . . . . . . . . . . . . . . . . . . . . . . . . . . . . . . . . . . . . . . . . . . . . . 84 Working on the lift mast or front section of the fork lift truck . . . . . . . . . . . . . . . . . . . . . . 85 Inspection and maintenance parameters Recommended lubricants . . . . . . . . . . . . . . . . . . . . . . . . . . . . . . . . . . 88 . . . . . . . . . . . . . . . . . . . . . . . . . . . . . . . . . . . . . . . . . . . . . 89 1000 hour maintenance plan . . . . . . . . . . . . . . . . . . . . . . . . . . . . . . . . . . . . . . . . . . . 91 3000 hour maintenance plan . . . . . . . . . . . . . . . . . . . . . . . . . . . . . . . . . . . . . . . . . . . 93 Reduction gearbox . . . . . . . . . . . . . . . . . . . . . . . . . . . . . . . . . . . . . . . . . . . . . . . . . . . 96 Checking the wheel gear oil level . . . . . . . . . . . . . . . . . . . . . . . . . . . . . . . . . . . . . . . . 96 Checking whether the speed reduction gearbox is leaking . . . . . . . . . . . . . . . . . . . . . . 96 IV Operating Instructions – 335 801 1701 EN – 04/2014 Table of contents g Cleaning both sides of the traction motor, the power steering and working hydraulic pump motor . . . . . . . . . . . . . . . . . . . . . . . . . . . . . . . . . . . . . . . . . . . . . . . . . . . . . . 97 Replacing the gear oil in the speed reduction gearbox . . . . . . . . . . . . . . . . . . . . . . . . . 97 Frame and installation . . . . . . . . . . . . . . . . . . . . . . . . . . . . . . . . . . . . . . . . . . . . . . Checking the counterweight, motors, chassis, speed reduction gearbox, overhead guard and steering axle fastenings . . . . . . . . . . . . . . . . . . . . . . . . . . . . . . . . . . . Lubricating the overhead guard pin shaft . . . . . . . . . . . . . . . . . . . . . . . . . . . . . . . . . Checking and lubricating other pins and swivel points . . . . . . . . . . . . . . . . . . . . . . . Checking the status of the anti-static belts* (only for trucks fitted with super clean tyres) . . . . . . . . . . . . . . . . . . . . . . . . . . . . . . . . . . . . . . . . . . . . . . . . . . . . . . . . . . . 101 Chassis frame . . . . . . . . . . . . . . . . . . . . . . Check the brake system . . . . . . . . . . . . . . . Tighten the wheel nuts . . . . . . . . . . . . . . . . Cleaning/lubricating the steering axle . . . . . Replacing the brake fluid . . . . . . . . . . . . . . .. .. .. .. .. ............... ............... ............... ............... ............... ............... ............... ............... ............... ............... . . 100 . . 100 . . 100 . . 101 102 102 104 105 106 Operating devices . . . . . . . . . . . . . . . . . . . . . . . . . . . . . . . . . . . . . . . . . . . . . . . . . . . 107 Checking the joystick pad . . . . . . . . . . . . . . . . . . . . . . . . . . . . . . . . . . . . . . . . . . . . . . 107 Checking and lubricating the pedal mechanisms, control linkage mechanisms and the overhead guard locking devices . . . . . . . . . . . . . . . . . . . . . . . . . . . . . . . . . . . . . . . 107 Electrical system . . . . . . . . . . . . . . . . . . . . . . . . . . . . . . . . . . . . . . . . . . . . . . . . . . . . Checking the status and tightness of the electrical cables, electrical connections and plug connectors . . . . . . . . . . . . . . . . . . . . . . . . . . . . . . . . . . . . . . . . . . . . . . . . . . . (As required) Clean the power modules of the traction and lift controls, the fans and the radiator housing with compressed air . . . . . . . . . . . . . . . . . . . . . . . . . . . . . . . . . . . Cleaning the digital control cables . . . . . . . . . . . . . . . . . . . . . . . . . . . . . . . . . . . . . . . . Inspect the contactor contacts, and replace if necessary . . . . . . . . . . . . . . . . . . . . . . . 108 108 109 110 111 Hydraulic system . . . . . . . . . . . . . . . . . . . . . . . . . . . . . . . . . . . . . . . . . . . . . . . . . . Check the hydraulic oil level . . . . . . . . . . . . . . . . . . . . . . . . . . . . . . . . . . . . . . . . . . Checking the leak resistance of the working and steering hydraulic systems . . . . . . . Replacing the air, pressure and suction filters . . . . . . . . . . . . . . . . . . . . . . . . . . . . . Replacing the hydraulic oil (if it is Bio hydraulic oil, the Aral Forbex SE46 is 6000operating hours) . . . . . . . . . . . . . . . . . . . . . . . . . . . . . . . . . . . . . . . . . . . . . . . . . . . . .. .. .. .. Load lift system . . . . . . . . . . . . . . . . . . . . . . . . . . . . . . . . . . . . . . . . . . . . . . . . . . . Checking the condition, tightness and function of the lift mast, lift chains and stop block . . . . . . . . . . . . . . . . . . . . . . . . . . . . . . . . . . . . . . . . . . . . . . . . . . . . . . . . . Adjusting the length of the lift chains, and lubricating using chain spray . . . . . . . . . . . Checking the truck’s releasing and locking equipment . . . . . . . . . . . . . . . . . . . . . . . . . 117 Operating Instructions – 335 801 1701 EN – 04/2014 111 111 113 113 . . 115 . . 117 . . 118 . . 119 V Table of contents g 6 Technical data List of technical parameter marks . . . . . . . . . . . . . . . . . . . . . . . . . . . . . . . . . . . . . . . . 122 Technical parameters – E16P forklift . . . . . . . . . . . . . . . . . . . . . . . . . . . . . . . . . . . . . . 123 Technical parameters – E16P forklift . . . . . . . . . . . . . . . . . . . . . . . . . . . . . . . . . . . . . . 126 Technical parameters – E20P forklift . . . . . . . . . . . . . . . . . . . . . . . . . . . . . . . . . . . . . . 129 Lift mast data . . . . . . . . . . . . . . . . . . . . . . . . . . . . . . . . . . . . . . . . . . . . . . . . . . . . . . . 131 Annex 7 Circuit diagrams Electrical circuit diagram Circuit diagrams . . . . . . Circuit diagrams . . . . . . Circuit diagrams . . . . . . ... .... .... .... . . . . . . . . . . . . . . . . . . . . . . . . . . . . . . . . . . . . . . . . . . . . . . . . . . . . . . . . . . . . . . . . . . . . . . . . . . . . . . . . . . . . . . . . . . . . . . . . . . . . . . . . . . . . . . . . . . . . . . . . . . . . . . . . . . . . . . . . . . . . . . . . . . . . ...... ...... ...... ...... 142 142 144 145 Hydraulic oil diagram . . . . . . . . . . . . . . . . . . . . . . . . . . . . . . . . . . . . . . . . . . . . . . . . . 146 Working and steering hydraulic system circuit diagrams . . . . . . . . . . . . . . . . . . . . . . . 146 Working and steering hydraulic system circuit diagrams . . . . . . . . . . . . . . . . . . . . . . . 148 VI Operating Instructions – 335 801 1701 EN – 04/2014 1 Introduction 1 Introduction Introduction Introduction Your Linde forklift truck With maximum economic efficiency, safety and driving comfort. Yet, it is up to you, the forklift truck operator, to take good care when working and use its potential to the fullest. During the manufacturing process (if affixed with CE mark): We adhered to all CE safety requirements. We carried out all compliance tests required by law. Any modification of your truck, in particular fitting of equipment or conversion of the truck, is prohibited without the permission of the manufacturer. Attachment manuals are provided NOTE Add a load identification plate for any attachments to the forklift truck. CAUTION This is proven by the CE stamp shown on the identification plates. Taking into account stability and the specified minimum braking distance, do not carry out stacking/destacking operations on a slope. The manual provides you important information on activating, driving, operating and maintaining a Linde forklift truck. The climbing degrees in the model parameters table are ascertained from the forklift truck traction, and only apply when going over small obstacles and driving on relatively flat surfaces. Please regularly complete the maintenance checklists and make sure it is done on time. Use the tools, cleaning products etc. specified. In order to maintain valid warranty service for your forklift truck, please keep and save a complete, detailed record of the maintenance process. All maintenance procedures must be recorded; otherwise you will lose the warranty. Users, especially forklift truck drivers and maintenance personnel, must strictly adhere to GB 10827-1999 regulations. Users, especially forklift truck drivers and maintenance personnel, must strictly follow "Guidelines on correct and safe use of materials handling equipment" and BITA guidelines. (Overseas edition) Technical notes This user manual must not be copied, translated or sent to a third party without the manufacturer’s written consent. Linde Corp., Ltd’s business philosophy is to constantly improve its products in terms of design and structure. Hence, Linde reserves the right to change a forklift truck’s design and technical parameters at any time. Hence, the company may refuse to take responsibility for any complaint with respect to the technical parameters, illustrations, and instructions of this user manual. If you want to use the forklift truck for purposes that are not mentioned in the user manual, please contact dealers accredited by Linde Corp. Ltd. Forklift trucks with accessories delivered from the factory come with accessory operating instructions. Before starting forklift trucks with accessories, you must ensure that goods have been stabilized. You may need to make adjustments according to accessory type, such as adjustments to pressure settings or to stoppers and operating speeds.For the relevant instructions, please refer to the accessory operating instructions. Accessories must be used in compliance with the accessory operating instructions. 2 Operating Instructions – 335 801 1701 EN – 04/2014 User shall be responsible for any loss caused by improper use. Manufacturer Linde, Ltd will not be responsible for such loss. Introduction 1 Introduction Use dedicated work supplies according to checking and maintenance overviews. Perform specified work regularly at the anticipated time. To comply with warranty conditions, please ensure that work carried out is recorded in the registration documents for the industrial forklift truck. The designations used in the text (front, back, left, right) always refer to the installation position of the parts described, with a forward drive direction of the truck (fork arms forwards). Servicing work not described here will require specialist knowledge, measuring devices and often also special tools. Please contact an authorized dealer to carry out this work. Servicing should only be carried out by qualified personnel approved by Linde (specialists). For questions about the forklift truck and orders for spare parts, please contact your local Linde dealer and leave an accurate shipping address. In order to maintain the original technical efficiency of the forklift truck, please use authentic Linde spare parts when repairing. When ordering spare parts, please provide the following information in addition to the part numbers: Forklift model number: Serial number/Year of manufacturing: Lifting height of the lift mast [mm]: When taking delivery of the forklift truck, please copy data from the components’ identification plate details into this user manual. You may find the relevant information on the identification plate of the forklift truck.We recommend you write down the information in this manual for future reference. Forklift truck handover Before leaving the factory, every forklift truck must be carefully examined so that it is completely up to standard and can be delivered to the user in perfect condition. In order to guarantee the forklift truck works correctly, Linde dealers are obliged to check the following items before the handover: Check whether the driving wheel nuts are tightened Check the battery status Checking the hydraulic oil level Check the braking function Check the steering function Check the traction function Check the mast lift and attachments operating function In order to avoid the inconvenience of claims after use, please check that the forklift truck is in perfect condition and state of repair, and confirm your satisfaction with the forklift truck on the manufacturer’s product qualification certificate upon handover. NOTE Delivery date: Part numbers should be specified when ordering parts. Part number of the lift mast: Operating Instructions – 335 801 1701 EN – 04/2014 When a forklift truck with attachments leaves the factory, operating instructions for the attachments should be provided along with the vehicle. NOTE Every forklift truck is provided with the following technical documents: 3 1 Introduction Introduction • Operating instructions for the truck • Spare parts manual • Operating instructions for the attachments (only applies to trucks delivered from the factory with attachments) • VDMA (EU countries only) • EC Declaration of Conformity (applicable for CE certified forklift trucks) 4 Operating Instructions – 335 801 1701 EN – 04/2014 Introduction 1 Intended use Intended use The industrial truck may only be used as permitted. The industrial truck is used for moving and lifting the loads indicated on the capacity rating plate. Damages and defects Damages and other defects to industrial trucks or to attachments must be reported to the Supervisor immediately. Industrial trucks and attachments which are not safe to operate may not be used until they have been properly repaired. Safety installations and switches may not be removed or rendered unusable. Specified settings may only be changed with the approval of the manufacturer. Danger areas Danger areas are those areas in which persons are in danger as a result of the movements of industrial trucks, their operating equipment, their load carrying devices (e.g. their attachments) or the loaded goods. This also includes the area which can be reached by falling goods or lowering or falling operating equipment and devices. People must not stand in the danger area of an industrial truck. Working areas Only the areas approved by the operating company or its representative may be used for transportation purposes. Loads may only be deposited or stored at the intended places. Driving routes Driving routes shall be sufficiently paved, level and free of objects. Drain channels and railways crossings, etc., shall be levelled and, if necessary, covered with ramps in such a way that they can be driven over without bumps as far as possible. Operating Instructions – 335 801 1701 EN – 04/2014 Industrial trucks shall only be used on routes without sharp curves, excessive slopes and gates which are too narrow or too low. Inclines used by industrial trucks shall not exceed the limits specified by the manufacturer and must have an adequately rough surface. Level and smooth transitions at the upper and lower end shall prevent the load from touching the floor or causing damages to the chassis. The admissible area and point load of driving lanes or routes may not be exceeded. There shall be an adequate clearance between the highest parts of industrial trucks or the load and the fixed parts of the surrounding areas. The EU Directive 89/654/EEC (Minimum Regulations for Health and Safety at Work) shall be observed. The respective national regulations apply for non-EU countries. Danger points on driving lanes or routes shall be secured or marked by the customary road traffic signs and by additional warning signs, if necessary. When driving on public roads, the corresponding regulations must be observed, as well as country-specific restrictions for winter road conditions. Fire protection The operating company is responsible for adequate fire protection in the vicinity of the industrial truck. Depending on the form of use, it is responsible for additional fire protection on the industrial truck. Enquiries should be directed to the responsible supervisory authority in case of doubt. Attachments Attachments shall only be used as permitted. The driver shall be instructed in the handling of attachments. The attachment operating instructions are enclosed for trucks that are delivered from the factory with an attachment. Before commissioning a truck with an attachment, you must 5 1 Introduction Impermissible use check that loads are handled securely. Depending on the type of attachment, it may be necessary to make adjustments, e.g. pressure settings or adjusting stops and operating speeds. See the attachment operating instructions for the corresponding instructions. If attachments are not supplied with the industrial truck, the specifications of the industrial truck manufacturer and the attachment manufacturer must be observed. The attachments and the connection of power supplies for powered attachments may only be made by specialists in accordance with the specifications of the manufacturer. The proper functioning of the attachments shall be checked after each installation before initial use. The permissible carrying capacity of the attachments and the permitted load of the industrial truck (carrying capacity and load moment) combined with the attachments shall not be exceeded., refer to additional capacity rating plate. Modifications, in particular attachments or conversions, are not permitted to be made to the industrial truck without the manufacturer’s approval. Trailers Industrial trucks may only be used to tow trailers if they are intended for this purpose by the manufacturer and if they are fitted with the appropriate trailer coupling. The maximum towed load specified in the operating instructions for unbraked or braked trailers must not be exceeded. The towing industrial truck must be operated in such away that safe driving and braking of the towed vehicle is ensured for all driving movements. Impermissible use DANGER High risk of property damage, injury and death. Avoid impermissible use. The operating company or driver, and not the manufacturer, is liable if the truck is used in a manner that is not permitted. The following list is exemplary and is not intended to be exhaustive. 6 It is not permitted: • To use the truck to transport people (if the truck is not designed for this purpose) • in areas where there is a risk of fire of explosion • for stacking/unstacking operations on slopes • To stand on the fork arms when raised • To exceed the truck’s maximum load capacity • To increase the truck’s load capacity, e.g. by attaching an additional weight. Operating Instructions – 335 801 1701 EN – 04/2014 Introduction 1 Description of use and climatic conditions Description of use and climatic conditions Normal use • Indoor and outdoor use • Ambient temperature in tropical and Nordic regions ranging from -10 °C to 40 °C • Use at up to 2000 metres above sea level. Special use (partly with special measures) • Ambient temperature in tropical regions to 40 °C • Cold store version to -32 °C Symbols used The terms DANGER, WARNING, CAUTION, NOTE and ENVIRONMENT NOTE are used in these operating instructions for notes on particular hazards or for unusual information that needs to be highlighted: DANGER Means that failure to comply can cause risk to life and/or major damage to property. WARNING Means that failure to comply can cause risk of serious injury and/or major damage to property. CAUTION Means that failure to comply can cause risk of material damage or destruction. NOTE Means that particular attention is drawn to combinations of technical factors which may not be evident even to a specialist. ENVIRONMENT NOTE The instructions listed here must be complied with as otherwise environmental damage may result. CAUTION This label is found on the truck in the areas where particular care and attention are required. You should refer to the appropriate section in these operating instructions. For your safety, additional symbols are also used. Please heed the various symbols. Technical description The corresponding maximum load for the 335-3 Series battery forklift E16C, E16P is 1.6 tons; the corresponding maximum load for the E20P is 2.0tons, Operating Instructions – 335 801 1701 EN – 04/2014 7 1 Introduction Technical description NOTE Refer to the safe working load diagram for the centre of gravity data. Open structure cabin designed according to the latest engineering techniques, energy saving control system (LDC) as standard, ensuring the value for money of the truck’s equipment. Its features include its compactness, excellent visibility, optimum stability on sharp turns and cornering stability. These advantages all benefit from the truck’s various different wheel bases. The electric forklift truck is available with two different steering axle designs: Compact steering axle Model no. E 16C The compact steering axle has a low consumption, and tyre wear is minimal due to the mutual compensation of the dual rear wheels. The body width is small, and the steering is light and flexible, making it especially suitable for working in narrow spaces. Compound steering axle E 16P, E20P The compound steering axle ensures that the entire axle has a larger swing range, stronger grip and increased driving safety, making it especially suited to operating on uneven road surfaces. The truck has an electrical towing device, in addition to a motor and hydraulic pump used to provide the needed power to the power steering and working hydraulics. Drive The truck is driven by two AC motors, which are automatically controlled according to their motor characteristic curve. These two motors drive the right and left transmission, the power from which is then transmitted from the transmission to the wheels. 8 Electrical power is provided by the storage battery installed inside the truck. Forward and reverse stepless speed regulation can be carried out extremely lightly by means of the digital traction controller (LDC), operated by the right and left accelerator pedals. Steering Operating the truck’s steering wheel allows free and easy control of the hydrostatic steering system’s steering cylinder, allowing the truck to turn. Hydraulic equipment The hydraulic system includes a motor and hydraulic pump that provide power steering, mast lifting and cylinder tilting, and a filter with ventilation. The dipstick and oil-absorption filter and the pressure filter’s hydraulic tank. DANGER Connecting any device whose safety is at the safety critical point to the third auxiliary hydraulic manifold is strictly prohibited. These safety critical point devices, such as oil drum clamps or rotary devices, may cause inadvertent misuse of the clamps, or rotation. If a device located at the safety critical point must be connected to the third auxiliary hydraulic manifold, then this device must first pass the third auxiliary manifold and then be connected. Operation The traction motor is controlled by the forward and reverse travel pedals. Both forward and reverse speeds can be regulated steplessly from rest to maximum speed. Both hands can be used specifically for steering operation and its auxiliary operation, enabling rapid direction reversal and high-efficiency stacking. The lifting, lowering and tilting of goods can be controlled by using just one operating lever (centralised joystick). The truck’s attachments can be controlled by the other operating lever. Another operating lever (joystick) can be fitted to operate additional attachments. Operating Instructions – 335 801 1701 EN – 04/2014 Introduction 1 Technical description If desired, all work devices (lifting, lowering and tilting) can also be controlled by individual operating levers. a diagnostic unit can be used to cancel LBC braking. NOTE Brake The truck has multiple independent braking systems. These braking systems can be divided into electrical brakes and hydraulic brakes, as well as the parking brake. Depressing the brake pedal activates the hydraulic servo, in order to control the multi-disc brakes in the drive unit axle. When the driver reverses direction and depresses the accelerator pedal, the truck produces electric braking (regenerative braking). This truck provides an energy feedback system as a standard device. When braking, or when the driver changes the direction of movement, the energy is transformed into electrical energy and recharges the storage battery. When the accelerator pedal is released, the truck performs electrical braking by means of the Linde braking controls (LBC). If required, Operating Instructions – 335 801 1701 EN – 04/2014 After cancelling LBC braking, a ’No LBC braking’ label must be stuck in a place that will be easily seen by the driver. Please contact you Linde dealer for assistance. Parking brake The multi-disc brakes in the drive unit axle can be controlled by manually pulling on the parking lever. Electrical system The electrical system is mounted in the counterweight. The needed power is provided by a 48 V rechargeable battery mounted in the chassis. The lifting overhead guard guarantees rapid replacement of the rechargeable battery. NOTE The housing of electrical parts must not be opened during the warranty period or the terms of the warranty will be void. 9 1 Introduction EC declaration of conformity EC declaration of conformity Declaration Linde (China) Forklift Truck Corp. Ltd No. 89 Jinshang Road, Xiamen 361009 Xiamen, P.R.China We declare that the Industrial truck according to these operating instructions Model No. E16C, E16P, E20P, 335-03 series according to these operating instructions complies with the most recent version of machinery directive 2006/42/EC. Personnel authorised to compile the technical documents: see EC declaration of conformity Linde (China) Forklift Truck Corp. Ltd Manufacturer’s declaration on the forklift truck’s compliance to EC code comes into effect upon its sale. This can be verified by the EC compliance declaration and CE label on the identification plate. See the above statement. Unauthorised modification or additional installation of equipment to the structure of the forklift truck may affect its safety, and therefore will invalidate the EC compliance declaration. 10 Operating Instructions – 335 801 1701 EN – 04/2014 Introduction 1 EC declaration of conformity The EC compliance declaration must be carefully conserved and kept ready to be presented to the relevant authorities. Operating Instructions – 335 801 1701 EN – 04/2014 11 1 Introduction EC declaration of conformity 12 Operating Instructions – 335 801 1701 EN – 04/2014 2 Safety 2 Safety Safety guidelines Safety guidelines The "Rules for proper use of industrial trucks" supplied with these operating instructions must be brought to the attention of the persons responsible, in particular to those persons concerned with operating and maintaining the industrial trucks, before working with or on the trucks. The operating company must ensure that the driver understands all the safety information. Please observe the directives and guidelines listed, e.g. • Operation of industrial trucks, • Driving licences, • Rules for driveways and the area of operation, • Driver rights, duties and rules of behaviour • Special operating areas • Information regarding setting off, driving and braking • Information for maintenance and repair • Periodic checks, • Disposal of greases, oils and battery, • Residual risks. As the operating company or responsible person, ensure that all directives and safety guidelines that are applicable to your industrial truck are complied with. When training a forklift truck driver who has already been trained to BGV D 27 standard, the following must be practised sufficiently by training, driving, switching and steering, so that they are fully mastered: Only then should training exercises in the racking commence. Safety information DANGER The truck must not be used by unauthorised persons. As the operating company, you must ensure that access to the truck is only possible for authorised personnel. DANGER Safety systems (e.g. the seat switch) are there for your safety. Safety systems - of whatever kind - must never be disabled. DANGER Loads should be arranged so that they do not project beyond the edge of the truck loading surface and cannot slip, topple over or fall off. If necessary, use a load backrest (special equipment). DANGER When retrofitting a 3rd auxiliary hydraulic system, using solutions other than those recommended by the truck manufacturer will render CE conformity null and void, and is therefore expressly prohibited. Trucks may only be retrofitted with a 3rd auxiliary hydraulic system with the approval of the truck manufacturer. DANGER • The special features of the Linde forklift truck (dual-pedal control, central control lever (joystick), stop pedal), • Any special equipment for attachments • Peculiarities of operation and the working area It is prohibited for any safety-critical functions such as a bale clamp or the swivel device for a fluid container to be connected to any (toggle-switchcontrolled) third auxiliary hydraulic system that may be fitted. 14 Operating Instructions – 335 801 1701 EN – 04/2014 To prevent inadvertent opening of the clamp or swivel device, the additional function should be connected to the first auxiliary hydraulic system. Safety 2 Residual risks DANGER WARNING Any additional bores or welding to the overhead guard on the overhead guard will compromise its rigidity. Depending on the duration of use and operating time, components carrying exhaust gases and exhaust air may become hot. It is therefore strictly prohibited to drill holes in the overhead guard or to weld to it. CAUTION Welding operations on other parts of the truck can cause damage to the electronics. Therefore, always disconnect the battery and all connections to the electronic controls beforehand. CAUTION For ease of operation, various functions on your truck are gas-spring assisted. Gas springs are complex components that contain high internal pressures (up to 300 bar). They must not be opened under any circumstances, unless you have received specific instructions to do so. In addition, they must only be dismantled when not under compression. Any type of damage, lateral force, tight fastening, temperatures exceeding 80°C, and dirt must be avoided in every environment. Damaged or deformed gas springs must be replaced immediately. Please contact the authorised agent. When necessary, the authorised dealer will relieve the pressure in the gas springs according to regulations. The pressure in the gas springs must be relieved before recycling. WARNING When installing the accumulator, attention must be given to the following problems. Incorrect operation of the accumulator will result in serious injury. Before working on the accumulator, it must be depressurised. Please contact your authorised dealer. Therefore wear protective equipment. WARNING The industrial truck working area must be adequately lit. If it is insufficiently lit, working spotlights must be installed To ensure that the driver can see properly CAUTION Various items of special equipment fitted to your truck have the "speed reduction" special function. . It is purely an auxiliary function. This means that the driver must not rely solely on the "speed reduction" function during operation. The driver is always responsible for safe operation. CAUTION If the driver has active medical equipment, e g: pace makers or hearing aids, may be impaired. Check with a doctor or the medical equipment manufacturer whether the equipment is sufficiently protected against electromagnetic interference. NOTE If the forklift truck is equipped with a fire extinguisher, please ensure that you are familiar with how to use it in an emergency situation. Relevant handling information is provided on the fire extinguisher. Residual risks Despite careful work and compliance with all applicable standards and regulations, the possibility of other dangers when using the industrial truck cannot be entirely excluded. The industrial truck and its possible attachments all comply with current safety regulations. However, even if the truck is used in Operating Instructions – 335 801 1701 EN – 04/2014 the proper way and all related instructions are followed, it is impossible to avoid a certain number of residual risks. Apart from the relatively small range of hazards associated with the truck itself, there are also some unavoidable residual risks. In order to be able to react immediately in the event of 15 2 Safety Stability errors, accidents or malfunctions, personnel involved in working with the truck must practise to raise their awareness levels. DANGER Persons in the vicinity of the industrial truck must be instructed with regard to the dangers that arise through use of the truck. These operating instructions also contain additional safety regulations. Residual dangers can include: • Escape of consumables due to leakages or the rupture of lines, hoses or containers, • Risk of accident when driving over difficult ground such as gradients, smooth or irregular surfaces, or with poor visibility, • Risk of falling, tripping, slipping etc. during movement of the industrial truck, (especially in the wet, with leaking consumables or on icy surfaces), • Risk of fire and explosion due to the battery and electrical voltages, • Human error, • Disregarding the safety regulations, • Risk caused by unrepaired damage, • Risk caused by insufficient maintenance or testing, • Risk caused by using the wrong consumables. Stability Stability is guaranteed if the industrial truck is used correctly according to specified targets. Common reasons for a lack of stability in industrial trucks include: • Cornering at excessive speeds • moving with the load raised, • Moving with a load that is protruding to the side (e.g. side shift) • turning and driving diagonally across gradients, • driving on gradients with the load on the downhill side, • Loads that are too wide • swinging loads, • Ramp edges or steps In the case of tip-over d3921101 • • • • • 16 Stay buckled up Don’t jump Hold on tight Brace feet Lean away The stability of your industrial truck is ensured if used properly and as intended. Should the industrial truck tip over during an unapproved application or due to incorrect operation, always follow the instructions depicted above. Operating Instructions – 335 801 1701 EN – 04/2014 Safety 2 Handling consumables Handling consumables ENVIRONMENT NOTE Consumables must be handled properly and in accordance with the manufacturer’s instructions. • Consumables should only be stored in containers complying with applicable regulations and at the locations stipulated. • Do not bring flammable consumables into contact with hot objects or a naked flame. • When topping up consumables, use only clean containers. • Observe the manufacturer’s instructions relating to safety and disposal. • Avoid spilling. • Remove any spilled fluid immediately with a suitable binder and dispose of it according to applicable regulations. • Old and contaminated operating materials should be disposed of according to the regulations. • Comply with the statutory provisions. • Before performing greasing, filter changes or any work on the hydraulic system, carefully clean the area around the part involved. • Dispose of used spare parts in an environmentally friendly manner. WARNING The penetration of pressurised hydraulic fluid into the skin, e.g. due to leakage, is hazardous. If an injury of this type occurs, always consult a doctor. Protective equipment must be worn. WARNING The improper handling of coolant and coolant additives presents a risk to health and the environment. Observe the manufacturer’s instructions without fail. Qualified person A specialist is considered to be someone whose technical training and experience have enabled them to develop a sufficient depth of knowledge regarding industrial trucks and who is sufficiently familiar with the applicable national occupational health and safety regulations, accident prevention regulations, directives and generally recognised techni- cal conventions (standards, VDE regulations, technical regulations of other EU member states or other countries that are signatories to the treaty establishing the European Economic Area) in order to be able to assess the condition of industrial trucks in terms of health and safety. Regulations Regular safety inspection Periodic safety inspections are essential in order to keep your truck / industrial truck safe and in good working order. Observe the national regulations for your country. Europe: Provisions of national law based on Directives 95/63/EC, 99/92/EC and Operating Instructions – 335 801 1701 EN – 04/2014 17 2 Safety Fit attachments 2001/45/EC require that the forklift truck/industrial truck is checked regularly by a competent person to ensure it is in good condition. Germany: Ordinance on Industrial Safety and Health (BetrSichV). China: National Standards of the People’s Republic of China GB 10827-1999. The European Federation of Materials Handling FEM 4.004 proposed recommendations regarding inspection scope. It defined an inspection mark to record the current inspection, as well as an adhesive label to be used for the nest inspection. The next check is shown by the year (3) , located on the adhesive label(2), and the colour of the adhesive label (1) varies every year. The inspection scope is expanded by Linde according to the specific category of forklift truck. Please contact your authorised dealer to perform this task. Fit attachments Only specialists are permitted to fit the attachment and connect the energy supply for power-driven attachments. Mechanical connection For hung attachments, the attachment and fork carriage must be of the same class. 18 Operating Instructions – 335 801 1701 EN – 04/2014 Safety 2 Fit attachments Class As per ISO 2328 Load Load capacity centre of Truck gravity kg mm Design a mm 1 0 - 999 400 and 600 A 76 B 114 2 1000 2500 500 and 600 A 76 B 152 3 2501 4999 500 and 600 A 76 B 203 4 5000 8000 600 A 127 B 254 5 8001 10999 600 A 127 B 257 b mm c2 mm i2 mm h3 mm 331 16 13 305 407 16 13 381 508 21.5 16 476 635 25.5 19 597 728 34 25 678 Integrated attachments are made to match the installed lift mast. When fitting attachments retroactively, the correct attachment and all necessary parts from the industrial truck manufacturer—especially lift mast rollers and chain holders—must be available. Contact your Service-partner. Hydraulic connection WARNING Hydraulic system is under pressure. Risk of injury. Wear protective equipment. CAUTION Damage to the hydraulic system through contamination. When connecting hydraulic lines, ensure they are clean. Before connecting hydraulic lines or hydraulic couplings, the hydraulic system must be depressurised. Without depressurisation: Place a collection container underneath. Carefully release connection of the hydraulic lines. Operating Instructions – 335 801 1701 EN – 04/2014 19 2 Safety Emergency exit with attached rear window When the pressure is reduced, hydraulic oil escapes. Disconnect hydraulic lines. Connect hydraulic lines to attachment. With depressurisation: (special equipment) Depressurise the hydraulic lines as described in section "Depressurisation". Disconnect hydraulic lines. Connect hydraulic lines to attachment. Additional capacity rating plate Attachments alter the load capacity and stability of the truck. For each attachment, an additional capacity rating plate must be mounted where the driver can see it that indicates the load capacity of the truck with attachment; see section "Additional capacity rating plate for attachments". A symbol sticker for the relevant attachment must be affixed behind the actuating lever. Emergency exit with attached rear window NOTE If the truck is equipped with a front or rear window, should the truck experience a malfunction while in a narrow passageway, it is very difficult for the driver to open the side door. In this emergency situation, the driver can leave the truck from the rear window. The driver can use a hammer to break the glass and get out. 20 Operating Instructions – 335 801 1701 EN – 04/2014 Safety 2 Manually tilting the mast and lowering the fork Remove the fixed bolt (2)from the fixator(1) mounted on the lower right corner of the additional electronic equipment. Remove the hammer(3), and break the window glass DANGER Be careful of scratches! Remove all the shards of glass. Carefully climb out from the rear window. Manually tilting the mast and lowering the fork Manually tilting the mast NOTE The overhead guard cannot be opened when the mast is tilted backwards. If the truck experiences a malfunction, the mast can be tilted forwards manually. If possible, completely lower the fork carriage. DANGER When the mast is tilted backwards, do not stand in the vicinity of the fork. The mast and fork will tilt forwards after the tilt cylinder has been bypassed. Operating Instructions – 335 801 1701 EN – 04/2014 21 2 Safety Manually tilting the mast and lowering the fork Loosen the overhead guard. Stop when the overhead guard touches the mast. Remove the cap. (1). Insert the screwdriver through the opening and find the round head screw (2). Slowly turn the screwdriver anticlockwise for about 2revolutions. Push the mast forward by hand. So that it separates from the overhead guard. Tighten the round head screw (2) as much as possible. NOTE When finished, immediately turn the round head screw (2) back to its original position, otherwise there will be no way to use the control lever to operate the tilt cylinder. Replace the cap (1) in its original position. Manually lowering the fork NOTE Note If the truck has a malfunction, the fork can be lowered manually. Open the overhead guard to the first locking position. DANGER Do not stand in the vicinity of the fork when it is being lowered. The lowering of the mast can be stopped at any time by separating the screwdriver from the round head screw (3). Use the screwdriver to turn the screw (3) anticlockwise 1revolution, until the fork is completely lowered. Tighten the round head bolts (3) as much as possible by turning in a clockwise direction; otherwise there will be no way to use the control lever to operate the fork. 22 Operating Instructions – 335 801 1701 EN – 04/2014 Safety 2 Do not use cables to open the overhead guard by force Do not use cables to open the overhead guard by force Do not use cables to open the overhead guard by force NOTE Only use when it is not possible to use a cable with a rod (4) to open the overhead guard. Lower mast. If it is the triple mast equipped with twin hydraulic attachments, the lift mast will prevent lowering. Use a suitable tool (hammer handle (1), or crowbar) to push the lever (2). When the overhead guard has been loosened, it is held in place only by a catch pin (4). CAUTION After loosening the catch pin, the overhead guard will open automatically due to spring force. The overhead guard can continue to be opened as usual. Operating Instructions – 335 801 1701 EN – 04/2014 23 2 Safety Do not use cables to open the overhead guard by force 24 Operating Instructions – 335 801 1701 EN – 04/2014 3 Overview of the forklift truck 3 Overview of the forklift truck Identification plate Identification plate 11 12 13 26 Mast number (stamped) Working and power steering hydraulic pump motor nameplate Gearbox, left side 14 15 16 17 Traction motor, left side Traction motor, right side Gearbox, right side Chassis serial number (stamped) Operating Instructions – 335 801 1701 EN – 04/2014 Overview of the forklift truck 3 Identification plate NOTE The CE mark confirms compliance with the EC machinery directive and with all regulations applicable to forklift trucks. 1 2 3 4 5 6 7 8 9 10 Operating Instructions – 335 801 1701 EN – 04/2014 Identification plates Manufacturer CE mark (This mark indicates compliance with EC mechanical regulations and all relevant regulations) Serial number/year Truck weight Battery Voltage Minimum battery weight Maximum battery weight Rated load capacity Model 27 3 Overview of the forklift truck Overview of the forklift truck Overview of the forklift truck 1 2 3 4 5 6 7 28 Compact steering axle Lift cylinder Overhead guard (lifting) Steering wheel Driver’s seat Electrical system hood Ballast weight 8 9 10 11 12 13 14 Chassis, built-in battery pack Left side gearbox Fork carriage Forks Fork rapid release equipment Lift chain Compound steering axle Operating Instructions – 335 801 1701 EN – 04/2014 Overview of the forklift truck 3 Operating devices Operating devices 1 2 3 4 5 6 7 8 9 10 11 Steering wheel (hydrostatic power steering) Steering wheel Horn signal button Electric switch and key Toggle switch for additional functions* Emergency off switch Instrument panel Working hydraulic control lever (joystick) Working hydraulic control lever operating label Hydraulic attachments control lever (joystick) * Hydraulic attachments control lever (joystick) operating label Operating Instructions – 335 801 1701 EN – 04/2014 12 13 14 15 16 17 18 19 20 21 22 23 Driver armrest Load diagram Prompt label Load label (attachments) * "No electrical braking" prompt label ** Hand brake level Forward pedal Brake pedal Reverse pedal Driver’s seat with seat position switch Overhead guard release lever Diagnostic socket 29 3 Overview of the forklift truck Display unit Display unit 1 2 3 4 30 Display unit Direction indicator light (green) Engine temperature at upper limit (red) Neutral warning light (red) / no function 5 6 Error in electrical controller or integrated battery charger (red) Drive direction forwards for single-pedal trucks (green) Operating Instructions – 335 801 1701 EN – 04/2014 Overview of the forklift truck 3 Display unit 7 8 9 10 11 12 13 14 15 16 17 18 19 20 21 Active lift stop reached (green) Error in lift stop sensor system (red) (special equipment) Speed reduction activated (green) Lift mast vibration absorption active (yellow) (special equipment) Drive direction backwards for single-pedal trucks (green) Refer to truck documentation (yellow) Battery discharge indicator (green/red) Without function Steering position display active Operating hours display Hour meter active Service interval exceeded Clock display (am/pm) Display for electric forklift truck remaining travel time active Without function Speed display (km/h / mph) The indicator unit (1) is located to the right side of the overhead guard, above the driver. Fixed within the driver’s field of vision, it provides centralised information regarding all vehicle functions. After opening the key switch, the display unit performs a self-test. During self-testing, all indicator lights and LCD indicators are activated. (2)Direction indicator light (green) The green direction indicator light on forklift trucks with lighting equipment is used to check whether the direction indicator light has already been activated. It lights up when the direction indicator light switch on the turning wheels is started. (3)Indicator light (red), motor temperature at upper limit When the motor or power module reaches its acceptable temperature limit, the red indicator light lights up. An error code is displayed in the text display area, which can be used to determine which components have been affected. When the maximum permissible temperature limit is reached, the warning buzzer integrated in the display unit is also activated. (4) Neutral warning light (red), no function Operating Instructions – 335 801 1701 EN – 04/2014 22 23 24 25 26 27 28 29 30 31 32 33 34 35 36 Function key Reset button Clock / remaining travel time / speed display Without function Parking brake activated Operating hours until next service Seat belt not fastened Text field for error code Lift mast positioning activated (special equipment) LCD display with backlight (orange) Neutral warning light (yellow) Rear cover monitoring Prewarning: engine temperature increasing (yellow) Battery charging via integrated charger finished — green (special equipment) Integrated charger in charging mode — yellow (special equipment) The red indicator light provides optional information regarding necessary maintenance tasks. This function can be programmed via truck diagnostics. Please contact your authorised dealer. (5)Indicator light (red), error in the electronic control or integrated charger Lights up when a malfunction occurs during electrical controller or battery charger operation. An error code is simultaneously displayed in the text area (29). (6)Indicator light (green), forward drive direction in single-pedal trucks Lights up when the drive direction forwards is selected using the drive direction switch for single-pedal trucks. (7)Activated lift stop (red/green) If the green indicator light lights up, it shows that the activated lift stop has already been reached. If the red indicator light lights up, it shows that an error has occurred in the lift stop sensor system. (8)Indicator light (green), speed reduction activated The green indicator light signals that the speed has been reduced via an optional switch. 31 3 Overview of the forklift truck Display unit (9)Indicator light (yellow), lift mast vibration absorption (14) Steering position display symbol display activated The yellow indicator light illuminates as soon as vibration absorption is active for the lift mast. The second line of the text display area displays the steering angle. If the steering angle display is turned on, the symbol on the indicator unit (14) lights up. (10)Indicator light (green), reverse drive direction in single-pedal trucks With single-pedal trucks, the green indicator light signals that backwards direction has been selected using the drive direction selector switch. (11)Indicator light (yellow), observe truck documentation When the yellow indicator light lights up, it may show that there is an operational error or malfunction. When this indicator light lights up, there will usually be an error code displayed in the text display area (29) at the same time. The following operating errors will activate the lamp: • Seat switch and/or FDE unit not activated and accelerator pedal actuated • Battery charger connected to system voltage and accelerator pedal actuated • Tilt angle sensor alignment process active • Alignment of the sensor system for a new truck control unit not yet taken place Please contact your authorised dealer. (12)Battery discharge indicator (LED bar display) (15)Operating hours display Indicates the truck’s operating hours. This display is evidence of the truck’s operating time and of the inspection and maintenance work to be performed. NOTE If replacing a malfunctioning indicator unit, the operating hours up until that moment must be recorded. The data should be attached to the embossed strip beside the indicator unit. This should also be done later when replacing the new indicator unit. Please contact your authorised dealer. (16) Symbol for hour meter active Hour meter symbol (16) flashes and the operating hours are counted when the truck is switched on and the seat switch is activated. (17) Symbol for service interval exceeded (18)Clock display symbol (am/pm) (19)Display for electric forklift truck remaining travel time active (20)Without function (21)Speed display (km/h / mph) Displays the current charging status of the battery. The discharge status of the battery is displayed on the display unit via the LED bar display. 7 green LEDs go out one by one as the battery discharges. Once the battery discharge reaches 80%, the red LED with the rechargeable battery symbol lights up. As the rechargeable battery continues to discharge (remaining capacity of the battery <20%), the red LED flashes. (22)Function key (13) Particle filter symbol display active without function 24-hour clock display. 32 Operating Instructions – 335 801 1701 EN – 04/2014 To adjust the time, to switch off the warning sound and other functions depending on the version. (23)Reset button Assignment depending on version (24)Clock / remaining travel time / speed display Overview of the forklift truck 3 Display unit NOTE It is possible to change to 12 -hour format using diagnostic software. Please contact your authorised dealer. (32)Depressurisation of working hydraulics (yellow) / without function (25)Without function The neutral yellow indicator light flashes and provides information on whether all conditions for depressurisation of the working hydraulics have been met. (26)Symbol for parking brake activated (33)Rear cover (yellow) open The parking brake symbol is switched on as soon as the parking brake is activated. If the truck’s rear cover is open, the yellow indicator light lights up. For trucks with an integrated charger, this is monitored to prevent the truck from being driven if the charging cable is still connected to the truck. (27)Symbol for operating hours until the next service When the key switch is switched on, the display shows the operating hours until the next service for approx. 5 seconds. The symbol lights up simultaneously. Adjustment and reset of the intervals can be performed only with the diagnostic software provided for this purpose. Please contact your authorised dealer. (28)Seat belt not fastened (29)First line in text field contains error code for lift height display Second line in text field contains error code for steering position display (30)Lift mast position identification symbol (special equipment) Lights up when the "lift mast position identification function is activated." (31)LCD display Operating Instructions – 335 801 1701 EN – 04/2014 (34)Indicator light (yellow), prewarning for increased motor temperature Lights up when the temperature of a motor is raised. (35)Indicator light (green), battery charging via integrated charger finished. The green indicator light is activated by the integrated charger when charging of the rechargeable battery is complete. The indicator light flashes during charging. The indicator light is directly activated by the integrated charger. (36)Indicator light (yellow), charging via integrated charger (special equipment) The yellow indicator light illuminates if the truck battery is charged. The yellow indicator light is activated by the integrated charger during charging of the truck battery. The indicator light flashes during charging. 33 3 Overview of the forklift truck Display unit 34 Operating Instructions – 335 801 1701 EN – 04/2014 4 Operation 4 Operation Pre-use daily checks and maintenance Pre-use daily checks and maintenance Pre-shift checks Carried out Chassis, bodywork and fittings Check the condition and function of the driver’s seat and seat belt. Chassis frame Checking the tyres Check brake system and parking brake. Electrics/electronics Check the charging state of the battery. Check electrical system (e.g. lighting, horn, lift functions). Check condition of anti-static belt. Hydraulics Check the oil level in the oil tank of the working and steering hydraulic systems. Check truck for leak tightness (visual inspection). Subsequent tasks Carry out functional test and test drive. Opening the overhead guard Opening the overhead guard NOTE Do not open the door of the driver’s cab when the overhead guard is lifted backwards (position 1 or 2), otherwise damage may be caused to the gas spring installation and injury to the driver. 36 Operating Instructions – 335 801 1701 EN – 04/2014 Operation 4 Pre-use daily checks and maintenance The first lock position: maintenance position NOTE The overhead guard cannot be opened when the lift mast is tilted backwards. Lower the fork carriage. Tilt the lift mast forwards slightly. The truck must be stationary on the ground. Pull the hand brake(3). Press the emergency off switch(4). Stand on the left side of the forklift truck and release the overhead guard. NOTE In order to make enough space when lifting the overhead guard backwards, ensure that A is a minimum of 2200 mm and B is a minimum of 1500 mm. The lock handle(2) should be pulled back as far as possible. When the overhead guard has been released, it is only supported by the lock handle(1). CAUTION After releasing the lock handle (2) support, the spring assembly will automatically open the overhead guard. Push the overhead guard down in the direction of the arrow(5) so that there is no longer any force exerted on the lock handle(1). Pull up the lock handle(1) to release the overhead guard. The overhead guard will pop up. Manually pull the overhead guard into the first lock position, and then release it. The overhead guard will be automatically locked in the first lock position by the lock rod(6). Operating Instructions – 335 801 1701 EN – 04/2014 37 4 Operation Pre-use daily checks and maintenance CAUTION For an overhead guard with a driver’s cab, a maximum of one door only may be removed from the driver’s cab. If both doors are removed, the excessively high spring force will make it impossible to close the overhead guard. The second lock position: when replacing the battery NOTE The overhead guard cannot be opened when the lift mast is tilted backwards. Stand on the left side of the forklift truck and release the overhead guard. Hold the overhead guard handle* or overhead guard rear support and lift the overhead guard back as far as possible into the second lock position(6). * Optional part 38 Operating Instructions – 335 801 1701 EN – 04/2014 Operation 4 Pre-use daily checks and maintenance Close the overhead guard Stand on the left side of the truck. Hold the overhead guard handle* or overhead guard rear support and push the overhead guard in the direction of the mechanical lock release position(6). Lift the handle(6) until the second lock position latch releases. Push the overhead guard forwards into the first lock position. * Optional part Operating Instructions – 335 801 1701 EN – 04/2014 39 4 Operation Pre-use daily checks and maintenance Checking the battery level Checking the battery level Pull the hand brake (3). Press the emergency off switch against the spring (4). Press the switch as far as it will go. Insert the electric switch key (1) and turn clockwise. Check the power level shown on the dashboard (2) discharge indicator (5). Battery charging NOTE Check that the specific gravity of the electrolytes is at least 1.14. Charge and maintain the battery in accordance with instructions from the manufacturer. If there are no instructions, please contact your maintenance agent. Optional battery chargers must also be operated according to instructions. If you already have a battery charger, please follow the instructions. CAUTION No metal objects should be placed on the battery. Be careful of short-circuiting the battery! The battery should be filled up with distilled water after charging. CAUTION The charging current for the battery must not exceed 160 ammeters. If you are using a charger with a high charging current, please contact your Linde dealer. 40 Operating Instructions – 335 801 1701 EN – 04/2014 Operation 4 Pre-use daily checks and maintenance Connecting the battery to an external charger Lower the fork. Tilt the lift mast forwards slightly. The truck must be stationary on the ground. Pull the hand brake (1). Press the emergency off switch (2). Lift the overhead guard (3) backwards into either the first or second lock position. The leading edge of the overhead guard must be raised at least 300mm. Disconnect the battery male connector (5) from the battery female connector (4). Plug the battery plug into the battery socket . Switch on the charger. Recharge the battery in time. Do not keep the battery fully discharged. This rule also applies to partly discharged batteries. Battery: Checking the battery condition, electrolyte level and specific gravity Inspect battery for cracks, raised plates and electrolyte leaks. Unscrew the battery cover and check the electrolyte level. Operating Instructions – 335 801 1701 EN – 04/2014 41 4 Operation Pre-use daily checks and maintenance If the battery has an inspection tube, then the electrolyte level should be at the base of the tube. If there is no inspection pipe, then the electrolyte level should be 10-15 mm higher than the plate. If the electrolyte level is excessively low, it can only be filled up with distilled water. Remove any sediment from the electrodes and lubricate with non-acidic lubricating grease. Retighten the electrode holder. Use a hydrometer to check the electrolytes. The specific gravity should be between 1.24-1.28. WARNING Deep discharge (more than 20% of the battery rated capacity) will cause the battery life to shorten. Battery change Battery change When replacing the battery there should be an interval of at least 6 minutes between removing and reinstalling the battery. Otherwise the discharge indicator will display incorrect data and the working hydraulic equipment will be slower. CAUTION The size and weight of the replacement battery must be the same as the original battery. Extra weight should be added to compensate if the battery weight is insufficient. The battery must be secured so that it does not slide. Please contact your Linde dealer if necessary. 42 Operating Instructions – 335 801 1701 EN – 04/2014 Operation 4 Pre-use daily checks and maintenance Insert the electric switch key (1) and turn clockwise. Tilt the lift mast forwards slightly. The truck must be stationary on the ground. Pull the hand brake. Press the emergency off switch. Lift the overhead guard (1) into the second lock position. Operating Instructions – 335 801 1701 EN – 04/2014 43 4 Operation Pre-use daily checks and maintenance Using a hoist to lift the battery Use a hoist and lifting hook with enough lift capacity (refer to the technical data for battery weight). Disconnect the battery male connector (3) from the battery female connector (2). Pull out the lock pin (4) and retain. Lift the hand brake and control assembly (5) forwards. Release the lock pin. Place the hoist equipped with a sling below the battery. Attach the lifting hook to the battery. Place the battery to one side after lifting it away from the chassis. Pre-use daily checks and maintenance Check the brake fluid level ENVIRONMENT NOTE Relevant safety regulations should be followed when handling the brake fluid. Lower the fork. Tilt the lift mast forwards slightly. The truck must be stationary on the ground. Pull the hand brake. Press the emergency off switch. Lift the overhead guard backwards into the first lock position. 44 Operating Instructions – 335 801 1701 EN – 04/2014 Operation 4 Pre-use daily checks and maintenance The brake fluid level must be between the highest and lowest marks on the brake fluid dipstick(4). If required, remove the dipstick cap (1)and fill the brake fluid up to the highest marking(2). CAUTION The brake fluid level must be higher than the lowest marking(3), or the brakes will lose their effectiveness. Close the overhead guard. Adjusting the driver’s seat Adjusting the driver’s seat Pull the handle (1) to horizontally adjust the driver’s seat. Slide the driver’s seat to find the best operating position relative to the steering wheel, the accelerator and braking pedals, and the joystick. Return the handle to its place. The position of the backrest can be adjusted by lifting the handle (3) upwards. Move the backrest forwards and backwards until the driver finds the best sitting position. Release the handle (3). NOTE Remaining in a sitting position for long periods of time puts a great amount of pressure on the spine. Make sure to reduce the pressure by bending forwards frequently. Operating Instructions – 335 801 1701 EN – 04/2014 45 4 Operation Pre-use daily checks and maintenance Adjusting the driver’s armrest NOTE After releasing the clamp screw (1), the armrest will be moved forwards automatically by spring force. Sit on the driver’s seat and release the clamp screw (1). Pull the armrest down against the spring (3) until the most comfortable armrest position is found. Lock the clamp screw (1). After releasing the clamp screw (2) and slide the armrest (3) forwards or backwards until you can operate the control lever with ease (4). Fastening the seat belt DANGER The seat belt should be fastened when using the forklift truck! The seat belt can only be used by one person. For the driver’s cab to completely comply with driver safety systems, the vehicle doors (rigid or folding) must be shut tightly when the truck is in operation. We recommend that a seat belt be added to the driver’s seat. The seat belt must be fastened when operating the truck with the doors open or when the doors have been removed. PVC (polyvinyl chloride) vehicle doors are not included in the driver safety system. Slowly pull the seat belt (3) out from the seat belt retractor on the left. Position the seat belt over the groin area and not the abdomen. Insert the buckle (2) into the seat belt socket (5). Press the button (4) to adjust the tightness of the seat belt. Check the tightness of the safety belt. The safety belt should be just tight enough to secure the body. NOTE 46 Operating Instructions – 335 801 1701 EN – 04/2014 Operation 4 Emergency off switch The driver should sit as far back as possible when the truck is in use (e.g. when driving, when the lift mast is in motion etc.) so that his back rests against the seat backrest. Unfastening the seat belt Press the red button on the seat belt socket (4) and release the seat belt buckle (2). Continue to press the button (4) to make the seat belt return to the retractor (1). Emergency off switch DANGER This switch button is the primary power supply switch. Do not disconnect this switch when performing an emergency stop. Press the emergency off switch Press the emergency off switch(1) and release. This will completely shut down the truck’s electrical system. Pull up the emergency off switch Pull up the emergency off switch(1). This will cause the truck’s electrical system to start conducting. NOTE The truck is only operational after correctly pulling up the emergency off switch. In the following situations, press the emergency off switch before operating: First, disconnect the key switch, then press the emergency off switch. • When preparing to recharge. • Before changing the battery. • Before performing operations with the overhead guard lifted. • Routine maintenance checks. Operating Instructions – 335 801 1701 EN – 04/2014 47 4 Operation Driving NOTE When starting the forklift truck, first pull up the emergency off switch, then turn the key switch. DANGER Non-standard emergency off switch button operations can easily cause accidents and damage to the power module. Driving Driving WARNING Taking into account stability and the specified minimum braking distance, do not use the forklift truck on a long slope with a gradient of more than 15%. If you need to use the forklift truck on slopes with higher gradients, please first consult your dealer. The gradabilities given in the type sheet are calculated based on the truck’s traction and are only applicable to situations in which the truck must surmount small obstacles or when driving on fairly even road surfaces. Operating mode should suit road surface conditions (undulant, uneven, etc.), especially in dangerous working areas and when transporting loads. CAUTION Please note when using the rear-view mirror that it should only be used to monitor rear traffic conditions. Reversing is only permitted using direct rear view. NOTE The distance from the driver’s head to the overhead guard has been reduced in certain Linde forklift trucks (such as the container overhead guard, swivel seat, etc.). Only drivers where the distance from the driver’s head to the overhead guard exceeds 30 mm are permitted to operate this kind of forklift truck. 48 Operating Instructions – 335 801 1701 EN – 04/2014 Operation 4 Driving CAUTION The hydraulic pump motor should be connected when working the steering or working hydraulic equipment. NOTE All control levers in the neutral position. Sit on the driver’s seat. (This will activate the driver’s seat switch.) Pull up the emergency off switch(4). NOTE The forklift truck can only work when the emergency off switch is pulled up. Fasten the seat belt. Insert key(1) and turn clockwise as far as possible. When the chronograph starting indicator (10)flashes, it shows that the chronograph has started working. All alarm lights on the discharge indicator(9)and dashboard will(2)flash (apart from the(7)alarm light, all other alarm lights will go out after approximately 2 seconds). NOTE The joystick and/or accelerator pedal can only be operated after the warning lights have gone out (except warning light(7)). Lift the fork slightly, and tilt the lift mast backwards. Release the handbrake(3). The alarm light will(7) go out. Operating Instructions – 335 801 1701 EN – 04/2014 49 4 Operation Driving Forwards Smoothly depress the right accelerator pedal(5). Driving speed accelerates in relation to the increase in pedal travel. NOTE Rapidly depressing the pedal will not change the acceleration, as the maximum acceleration is controlled automatically. Backwards Smoothly depress the left accelerator pedal(6). Driving speed is determined by the pedal travel. Reversing Release the original direction accelerator pedal. Depress the opposite direction accelerator pedal. The truck will slow to a halt using electrical braking and then accelerate in the opposite direction. Both feet should be placed on the pedals for ease of control when driving. The accelerator pedal can be switched from forwards to reverse directly. NOTE Rapidly depressing the pedal will not change the acceleration, as the maximum acceleration is controlled automatically. When accepting the forklift, please request a reverse braking demonstration. 50 Operating Instructions – 335 801 1701 EN – 04/2014 Operation 4 Single-pedal operation (optional) Faults during operation CAUTION If one of the following dashboard warning lights lights up during operation, the forklift truck should be stopped immediately and the reason ascertained. Engine temperature at upper limit (red) warning light (1). Pre-warning light(2). Motor temperature raised (yellow). Electrical system error (red) warning light(3). Single-pedal operation (optional) Driving WARNING Taking into account stability and the specified minimum braking distance, do not use the forklift truck on a long slope with a gradient of more than 15%. If you need to use the forklift truck on slopes with higher gradients, please first consult your dealer. The gradabilities given in the type sheet are calculated based on the truck’s traction and are only applicable to situations in which the truck must surmount small obstacles or when driving on fairly even road surfaces. Operating mode should suit road surface conditions (undulant, uneven, etc.), especially in dangerous working areas and when transporting loads. CAUTION Please note when using the rear-view mirror that it should only be used to monitor rear traffic conditions. Reversing is only permitted using direct rear view. NOTE The distance from the driver’s head to the overhead guard has been reduced in certain Linde forklift trucks (such as the container overhead guard, swivel seat, Operating Instructions – 335 801 1701 EN – 04/2014 51 4 Operation Single-pedal operation (optional) etc.). Only drivers where the distance from the driver’s head to the overhead guard exceeds 30 mm are permitted to operate this kind of forklift truck. CAUTION The hydraulic pump motor should be connected when working the steering or working hydraulic equipment. NOTE The direction control lever(4) must be in the neutral position. All control levers in the neutral position. Sit on the driver’s seat. (This will activate the driver’s seat switch.) Pull up the emergency off switch(2). NOTE The forklift truck can only work when the emergency off switch is pulled up. Fasten the seat belt. Insert key(1) and turn clockwise as far as possible. 52 Operating Instructions – 335 801 1701 EN – 04/2014 Operation 4 Single-pedal operation (optional) When the chronograph starting indicator (6)flashes, it shows that the chronograph has started working. All alarm lights on the discharge indicator(9) and dashboard will(2) flash (apart from the(7) alarm light, all other alarm lights will go out after approximately 2 seconds). NOTE The joystick and/or accelerator pedal can only be operated after the warning lights have gone out (except warning light (7)). Lift the fork slightly, and tilt the lift mast backwards. Release the handbrake(5). The alarm light will(7) go out. Forwards Push the direction control lever(1) forward. Operating Instructions – 335 801 1701 EN – 04/2014 53 4 Operation Single-pedal operation (optional) Smoothly depress the left accelerator pedal(6). Driving speed accelerates in relation to the increase in pedal travel. NOTE Rapidly depressing the pedal will not change the acceleration, as the maximum acceleration is controlled automatically. Backwards Push the direction control lever(1) back. Smoothly depress the left accelerator pedal(6). Driving speed is determined by the pedal travel. Reversing Release the original direction accelerator pedal. Pull the direction control lever (1)in the opposite direction. Depress the accelerator pedal(6) again to reverse the acceleration. The direction control lever can switch directly from forwards to reverse without releasing the accelerator pedal. The truck will slow to a halt using electrical braking and then accelerate in the selected direction. NOTE Rapidly depressing the pedal will not change the acceleration, as the maximum acceleration is controlled automatically. When accepting the forklift, please request a reverse braking demonstration. 54 Operating Instructions – 335 801 1701 EN – 04/2014 Operation 4 Steering system Faults during operation CAUTION If one of the following dashboard warning lights lights up during operation, the forklift truck should be stopped immediately and the reason ascertained. Engine temperature at upper limit (red) warning light(1), pre-warning alarm light(2). Motor temperature raised (yellow). Electrical system error (red) warning light(3). Steering system Hydrostatic steering enables the steering wheel to be moved with only a very small amount of force when turning. This characteristic is especially applicable when operating in narrow passages. Turn the steering wheel right and left when driving the forklift truck. DANGER The forklift truck cannot be used when there is a fault in the steering system. Please contact your dealer if steering is difficult or clearance is too large. Truck Model Turning radius E 16 C 1512 mm E 16 P 1878 mm E 20 P 1900 mm . Operating Instructions – 335 801 1701 EN – 04/2014 55 4 Operation Brake system Brake system DANGER Risk of accident or casualties if brake system is faulty. Use of the industrial truck should not be continued under any circumstances in which the brake system experiences a fault. Please contact your authorised dealer immediately if the braking system shows any significant defects or signs of wear and tear. DANGER There are a number of factors that can affect the truck’s braking performance, including oil viscosity. Using any oil other than that specified by the manufacturer (with a different viscosity) will affect braking performance and increase the risk of accidents and loss of life. Therefore, only use the oil specified by the manufacturer (see Recommendations for consumables). Please contact your authorised dealer. Driving brakes, regenerative brakes Release the accelerator pedal and depress the reverse direction accelerator pedal. At this time, the truck generates regenerative braking. Release the accelerator pedal (1or 3) and depress the brake pedal (2) until the truck decelerates to a stop NOTE Please request your Linde dealer to demonstrate the operation of the regenerative brakes when accepting delivery of the forklift truck. Foot brake/emergency brake The stop pedal is positioned between the accelerator pedals and is used for hydraulic operation of the multi-disc brake. 56 Operating Instructions – 335 801 1701 EN – 04/2014 Operation 4 Brake system Release the accelerator pedal (1or 3). The pedal will return to the central position. Depress the brake pedal (2). This will exert hydraulic braking on the multi-disc brake. CAUTION When performing emergency braking, depress the brake pedal located between the two accelerator pedals. We recommend that the driver be thoroughly familiar with this function, as well as with the effect of performing emergency braking when not carrying a load. Training should be carried out at slow speeds on roads without other vehicles. Depressing the brake pedal stops the brake discs of the two motors hydraulically. Linde automatic brake (LBC) If the accelerator pedal (1or 3) is released while driving, the pedal will automatically return to the central position and the truck will brake automatically. NOTE The Linde diagnostic unit can be used to cancel this function. Hand brake Use the mechanical hand brake to stop. The disc brakes inside the drive axle are tightened by a cord. NOTE When the parking brake is exerted, the drive current drops and the dashboard warning light (1) flashes. Operating Instructions – 335 801 1701 EN – 04/2014 57 4 Operation Operating the lift mast and attachments using the centralised control lever (joystick) Exerting the hand brake Pull backwards on the parking brake lever (3). Release the hand brake/parking brake Press the release button (2) on the parking brake and push the handle forwards. DANGER Do not use trucks with faulty brakes. Please contact your dealer if the braking system of your forklift truck shows significant wear and tear or malfunction. Operating the lift mast and attachments using the centralised control lever (joystick) Operating the lift mast and attachments using the centralised control lever (joystick) WARNING Practical training should be provided for operating personnel to ensure the correct operation of the lift mast and lifting equipment. Keep your hands away from the movement range of the lift mast, and do not place them between the lift mast and the truck. The control lever must be operating smoothly and slowly. Lifting, lowering and tilting speeds are determined by the displacement of the control lever. The control lever automatically returns to its original position after being released. NOTE Take note of the operating symbols with arrows. NOTE 58 Operating Instructions – 335 801 1701 EN – 04/2014 Operation 4 Operating the lift mast and attachments using the centralised control lever (joystick) When the control lever is pushed into the central position (approximately 45 degrees), two functions can operate simultaneously (for example, lifting and tilting). Tilting the lift mast forwards Push the control lever (1). Tilting the lift mast backwards Pull the control lever (1). Lifting the fork carriage WARNING Do not stand on the fork arms during lifting, due to the danger of falling or being hit. Push the control lever (1) to the right. Lowering the fork carriage Push the control lever (1) to the left. Operating Instructions – 335 801 1701 EN – 04/2014 59 4 Operation Operating the lift mast and attachments using the centralised control lever (joystick) Operating attachments Attachments are optional equipment purchased by the user and installed onto the truck (for example: lateral forks, clamps etc.). Give careful attention to the working pressures and operating instructions for each attachment. An additional operating level should be installed for use by the attachments. NOTE After installing each attachment, a label should be attached to the battery hood, explaining the truck’s load capacity after installing the attachment. An attachment operating notice should also be attached to the back of the attachment control lever. Operating the lateral forks Push the control lever (2) to the left to move the fork carriage to the left. Push the control lever (2) to the right to move the fork carriage to the right. Operating the clamp Push the control lever (2) forwards to release the clamp. Pull the control lever (2) back to engage the clamp. CAUTION If the attachment was not supplied with the truck, it can only be used if verified by your Linde dealer and safe operation of the truck is guaranteed in terms of load capacity and stability after installation of the attachment. 60 Operating Instructions – 335 801 1701 EN – 04/2014 Operation 4 Single lever operation of the lift mast and attachments Single lever operation of the lift mast and attachments Single lever operation of the lift mast and attachments WARNING Practical training should be provided for operating personnel to ensure the correct operation of the lift mast and lifting equipment. Keep your hands away from the movement range of the lift mast, and do not place them between the lift mast and the truck. The control lever must be operating smoothly and slowly. Lifting, lowering and tilting speeds are determined by the displacement of the control lever. The control lever automatically returns to its original position after being released. NOTE Take note of the operating symbols with arrows. NOTE When the control lever is pushed into the central position (approximately 45 degrees), two functions can operate simultaneously (for example, lifting and tilting). Tilting the lift mast forwards Push the control lever (2). Operating Instructions – 335 801 1701 EN – 04/2014 61 4 Operation Single lever operation of the lift mast and attachments Tilting the lift mast backwards Pull the control lever (2). Lifting the fork carriage WARNING Do not stand on the fork arms during lifting, due to the danger of falling or being hit. Pull the control lever (1). Lowering the fork carriage Push the control lever (1). Operating attachments Attachments are optional equipment purchased by the user and installed onto the truck (for example: lateral forks, clamps etc.). Give careful attention to the working pressures and operating instructions for each attachment. An additional operating level should be installed for use by the attachments. NOTE After installing each attachment, a label should be attached to the battery hood, explaining the truck’s load capacity after installing the attachment. An attachment operating notice should also be attached to the back of the attachment control lever. 62 Operating Instructions – 335 801 1701 EN – 04/2014 Operation 4 Working spotlights*, windscreen wipers*, headlights*,direction indicator lights* Operating the lateral forks Push the control lever (3) forwards to move the fork carriage to the left. Pull the control lever (3) back to move the fork carriage to the right. Operating the clamp Push the control lever (4) forwards to release the clamp. Pull the control lever (4) back to engage the clamp. CAUTION If the attachment was not supplied with the truck, use is only permitted if the attachment is verified by your Linde dealer and safe operation of the truck is guaranteed in terms of load capacity and stability after installation of the attachment. Working spotlights*, windscreen wipers*, headlights*,direction indicator lights* Working spotlights CAUTION Additional electrical devices (lamps, driver’s seat radiator etc.) must be connected to the independent harness plug connector for use by these devices. For any connections outside of this range, you must obtain permission from Linde Corp. Only qualified, professional technicians who understand how to apply these standards are permitted to carry out this operation. NOTE The location of the switch settings (I and II) may vary between different models of forklift truck. Please comply with the notes on the switch prompt. Operating Instructions – 335 801 1701 EN – 04/2014 63 4 Operation Working spotlights*, windscreen wipers*, headlights*,direction indicator lights* Conducting the front working lights Slide the joint switch (1) to turn on or off the front working lights. Conducting the back working lights Slide the joint switch (2) to turn on or off the back working lights. Turning on the front windscreen wiper Press the switch (3) down halfway to switch the front windscreen wipers to intermittent. Press the switch down completely to switch the front windscreen wipers to continuous. Turning on the rear windscreen wipers Press the switch (4) down halfway to switch the rear windscreen wipers to intermittent. Press the switch down completely to switch the rear windscreen wipers to continuous. Turning on the lights Press the light switch (5) down halfway to turn on the side lights and marker lights. Press the light switch down completely to turn on the dipped beam headlights. Turning on the hazard warning lights Press down the hazard warning light switch (6). 64 Operating Instructions – 335 801 1701 EN – 04/2014 Operation 4 Horn, electrical system cover Turning on the direction indicators Push the turning indicator light switch (7) on the steering wheel forwards or backwards to make the right or left turning light flash. Horn, electrical system cover Horn operation The horn can give a warning signal at junctions or places with poor visibility. Pressing the horn button will make the horn sound. Operating Instructions – 335 801 1701 EN – 04/2014 65 4 Operation Fuses Disassembling/installing the electrical system cover plate Lower the fork carriage. Tilt the lift mast forwards slightly. The truck must be stationary on the ground. Exert the hand brake. Press the emergency off switch. After disassembling the cover plate’s 4 mounting screws, disassemble the electrical system cover plate on the counterweight. After carrying out maintenance on the electrical system, reinstall the cover plate(2) onto the counterbalance. Fuses Checking and replacing the fuses NOTE The electrical system and fuse installation is in the counterweight. 66 Operating Instructions – 335 801 1701 EN – 04/2014 Operation 4 Fuses Open the cover to the electrical system. Remove the fuse box (9) cover (10). The fuse protects the following circuits: pay attention to the numbers on the fuse box. CAUTION Only genuine Linde high voltage fuses can be used as replacements. (1) Control circuit fuse (1F8) 5 A 80 V (2) Battery discharge indicator (F7) 10 A 80 V (3) Hydraulic control circuit (2F5) 5A 80 V (4) Fan (9F5) 5 A 80 V (5) Meter (F4) 5 A 32V (6) Transformer (F3) 10A 80 V (7) Master control circuit (F2) 15 A 80 V (8) Horn (4F1) 10 A 80 V Main circuit fuse These 2fuses protect the following main circuits: (13) left and right traction motors (1F1) 355 A (14) Hydraulic pump motor (2F1) 300 A Light fuse NOTE The fuses for the optional lights are located under the cover sheet (1) to the right side of the driver’s seat. Remove the screws (4 screws). Remove the electrical cover sheet (1). NOTE Use one or two fuse boxes, according to the number of lights installed. Operating Instructions – 335 801 1701 EN – 04/2014 67 4 Operation Before loading Fuse box (A) Fuse box (A) (1) Working spotlights (5F21) 15 A (2) Flashing lights (5F22) 15 A (3) left headlight (5F23) 10 A (4) right headlight (5F24) 10 A (5) left side light (5F25) 5 A (6) right side light (5F26) 5 A Fuse box (B) (1) Windscreen wiper (9F11) 10 A (2) Windscreen wiper (9F12) 20 A (3) Relay (9F13) 1 A (4) Transformer, working spotlight (9F14) 20 A (5) Radiator (9F15) 20 A (6) Radiator (9F16) 20 A Before loading Please see the load diagram before lifting goods (1). If equipped with attachments, pay attention to the load label (2). DANGER The parameters in the load diagram and on the labels apply to compact, uniform loads. These load limits must not be exceeded. Exceeding the load limits will affect the stability of the forklift truck and the strength of the lift mast. The maximum load is determined by the lift height and load centre. NOTE In the following situations: 68 Operating Instructions – 335 801 1701 EN – 04/2014 Operation 4 Before loading Eccentric load or swinging goods; Lift mast tilted forwards or goods high above the ground during transport; Load centre of gravity distance is excessively long; Before operating attachments. Wind force reaches grade 6 attention should be given to the load limits before transport and your Linde dealer should be contacted. E.g.: Load centre of gravity distance 600mm Lift height 6000mm Make a vertical line at the abscissa for a centre of gravity distance of 600mm that intersects with the diagonal line for a lift height of 6000mm. The reading at the point where the ordinate intersects with the horizontal line that passes through this point of intersection is the maximum permitted load. Therefore, the reading for the maximum permitted load is 1000kg The corresponding loads relative to other lift heights and load centre distances can also be obtained in this way. This value is for an evenly distributed load on two fork carriages. 1 Maximum lift load unit: kg (kilograms) 2 Lift height unit: mm (millimetres) 3 Forklift model for this maximum load 4 Load centre distance starting from the surface of the fork arm unit: mm (millimetres) Operating Instructions – 335 801 1701 EN – 04/2014 69 4 Operation Loading Loading Adjusting the fork spacing Toggle the fork positioning lock. Move the forklift truck closer to or further away from the goods to be lifted according to their size. Note that the two forks should be equidistant from the centreline of the forklift truck. Insert the positioning lock into the notch. NOTE The centre of gravity of the goods should be at the centre of the fork arms. Loading WARNING Do not stand on the goods being lifted due to the danger of falling or being hit. WARNING Lift the goods, and make sure that they are within the load range of the truck to avoid toppling and falling. If necessary, use a load backrest*. Approach lifted goods carefully and as accurately as possible. Place the lift mast in a vertical position. Lift or lower the fork carriage to a suitable position. Drive the truck forwards carefully, and insert the fork arms beneath the goods, ensuring that the goods are leaning against the vertical section of the fork arm as much as possible and taking care that they do not touch adjacent goods. Lift the fork carriage until the fork arms are firmly supporting the goods. 70 Operating Instructions – 335 801 1701 EN – 04/2014 Operation 4 Loading Reverse the forklift truck until the lifted goods separate from the other stacked goods. Tilt the mast back. CAUTION Do not stand below lifted goods. When driving, the goods should be as close to the ground as possible, and the lift mast tilted back. Transport NOTE The consignor should secure the goods safely during transport. Attention should be given to appropriate stacking of the goods, to avoid damage to the packaging of the goods, the pallet etc. Responsibility for the safe loading of the goods lies with the transportation personnel. When driving with a load, the goods must not lean to one side (such as when fitted with lateral forks). Goods should be close to the ground during transport. The truck absolutely must not turn or travel in a horizontal direction when moving up a ramp. If the field of vision is poor, ask a guide for assistance. If the goods on the fork arms are stacked too high, so that they block the line of sight, then the truck must be driven in reverse, unless moving up a slope. Operating Instructions – 335 801 1701 EN – 04/2014 71 4 Operation Tow coupling Unloading Carefully approach the shelf or goods stacking area. Lift the fork carriage to a suitable height. Place the lift mast in a vertical position. Carefully drive the forklift truck into the shelf. Slowly lower the goods until the fork arms are able to separate from the goods. Reverse the forklift truck. Before exiting the truck Unload the goods and lower the fork carriage. Tilt the lift mast forwards slightly. The fork arms must touch the ground. Pull the hand brake (2). Press the emergency disconnect button (3). Turn the switch key (1) anticlockwise, and then remove. Release the seat belt. Tow coupling Tow coupling NOTE The coupling can only be used for towing light vehicles inside the factory. (Please comply with correct accident prevention measures and VDI regulations) 72 Operating Instructions – 335 801 1701 EN – 04/2014 Operation 4 Truck transport Insert the traction pin (1), turn 90degrees, and then remove. Place the tow bar into the connector tube. Push the tow pin against the spring, turn 90degrees and secure the safety lock. Truck transport Towing regulations Towing regulations When the truck needs to be moved, a tow rope or rod can be attached to the tow pin. A tow rope can also be attached to the base of the lift mast. CAUTION Braking can only be performed by the brake pedal or hand brake during towing. Towing procedure NOTE Power steering will be disabled after pressing the emergency isolator button. Operating Instructions – 335 801 1701 EN – 04/2014 73 4 Operation Truck transport Press the emergency isolator button. Lower the goods, but do not allow the fork arms to touch the ground. Remove the load. Secure the tow bar to the tow pin or rope on the base of the lift mast. Release the hand brake. The driver should operate the steering wheel during towing, and the brake when necessary. Do not exceed the truck’s maximum working speed when towing. Carrying and lifting the forklift truck Use a truck or flatbed trailer to carry the forklift truck Lower the lift mast. Exert the hand brake. Use wooden wedges to immobilise the truck. Secure the truck. Use a hoist to lift the truck DANGER Ensure that no one is in the working range of the hoist when using it to lift the truck! Walking around under the lifted load is absolutely prohibited. CAUTION Use lifting equipment and a hoist that has sufficient carrying capacity to lift the truck. For the truck weight (including the battery), see the factory nameplate. The sling must be fastened at the designated lifting points when using the hoist. These lifting points are not marked on the truck. 74 Operating Instructions – 335 801 1701 EN – 04/2014 Operation 4 Truck transport Turn the tow pin (5) by 90degrees, and remove. Hang the sling (3) (minimum load 3000kilograms) on the tow pin. Insert the tow pin, turn 90degrees, and lock. Fasten the sling (2) (minimum load 3000kilograms) onto the crossmember of the outer lift mast pillar. Hang all sling ends on the lifting hook (1) of the hoist. CAUTION After hanging the sling on the lifting hook, the safety lock (4) must be fastened. The sling must not touch the overhead guard, rear cover or any other equipment installed on the overhead guard when the truck is being lifted. Using a lifting eye to lift the truck CAUTION Use lifting equipment and a hoist with sufficient lifting capacity to lift the truck. For the truck weight (including the battery), see the factory nameplate. CAUTION When using a hoist and lifting eye, you must prepare a suitable lifting frame (3) and vertical hanging chains (2 and 6) located above the lifting eye (1). Operating Instructions – 335 801 1701 EN – 04/2014 75 4 Operation Wheel change Fasten the lifting chain (6) (minimum load 3000kilograms) onto the counterweighted lifting eye (1) of the hoist. Fasten the lifting chain (2) (minimum load 3000kilograms) onto the lifting eye (1) of the hoist. CAUTION After hanging the lifting chains onto the lifting hook (4), the safety lock (5) must be fastened. The lifting chains must not touch the overhead guard and other equipment installed on the overhead guard. Wheel change Wheel change CAUTION Use a jack with a sufficient lift weight. The minimum lift weight should be at least 3600kilograms. CAUTION A conductor belt must be installed on the forklift when anti-static tyres are being changed, as these tyres are non-conducting. Please contact Linde dealers. Placement of the jack when replacing the rear wheels Loosen the wheel fastenings. Only jack the forklift truck in the following places: For the E18C forklift truck, the jacking point is at the right or left side below the counterweight; The E18P/20P forklift truck should be jacked at the central point below the counterweight, until the wheels leave the ground. CAUTION The forklift truck can only be lifted from this position at the rear of the truck. Use wood pieces to cushion the truck. 76 Operating Instructions – 335 801 1701 EN – 04/2014 Operation 4 Wheel change Remove the wheel fastenings and change the wheel. Replace the wheel fastenings and tighten by hand. Lower the truck. Use a 210Nm torque to tighten the wheel fastenings. Placement of the jack when replacing the front wheels Loosen the wheel fastenings. Remove the traction pin (1). Remove the cover on either the right or left side of the front end of the forklift chassis. Insert the traction pin (1) into the hole. Place the jack below the traction pin and jack the forklift truck. The tip of the flat head of the traction pin should be supported against the jack plunger. CAUTION The forklift truck can only be lifted from this position at the front of the truck. Operating Instructions – 335 801 1701 EN – 04/2014 77 4 Operation Use in cold stores Use in cold stores Identification Your forklift truck is equipped with specialised equipment for use in cold stores. It can be used within two operating ranges and is affixed with a cold store label. The forklift truck’s cold store equipment includes specialised oil suitable for use in cold stores (used in the hydraulic apparatus and gears). Proper usage Operating range 1: Permanent use in areas with a temperature of –5°C; short-term use in areas with a temperature as low as –10 °C. Park the truck outside the cold store. 1044_920-001 Operating range 2Follow the guidelines when using the forklift truck inside and outside at temperatures between -32 °C and +40°C. Park the truck outside the cold store. Use hydraulic oil as stipulated in the maintenance characteristics table. Application Changing from a cold indoor temperature to a hot outdoor temperature will cause condensation. Condensation water will freeze when the forklift truck returns to the cold store, obstructing the moving components of the stacker. This is why the specified length of stay for the forklift truck in the following two operating ranges must be strictly observed. The temperature of the traction battery must not drop as low as the temperature of the cold store or it will stop working. Before starting CAUTION Before using the forklift truck in the cold store, it must be dry and at operating temperature. Drive the forklift truck for approximately 5 minutes. Operate the brake several times 78 Operating Instructions – 335 801 1701 EN – 04/2014 Operation 4 Use in cold stores to ensure the operating safety of the forklift truck. Operate all lifting functions several times. Allow the oil temperature to reach operating temperature. This warm-up stage is essential. Operating range 1 Permanent use in areas with a temperature of –5°C; short-term use in areas with a temperature as low as –10 °C. Park the truck outside the cold store. Operating range 2 Use in internal temperatures as low as –32 °C and external temperatures as high as +25°C. Short-term use in temperatures of up to +40 °C is also possible. The forklift truck must not leave the cold store for longer than 10 minute, as this length of time is not sufficient for condensation to form. If the forklift truck remains outside the cold store for longer than 10 minute, it must remain outside the cold store for long enough to allow the condensation to dissipate. This usually requires at least 30 minutes. DANGER If condensation water freezes in the cold store, frozen components must not be de-iced by hand. Parking The truck must be parked outside the cold store. CAUTION The battery must not be left in the cold store overnight when discharged or deactivated. Recharge the battery outside the cold store and use a spare battery. Operating Instructions – 335 801 1701 EN – 04/2014 79 4 Operation Truck storage Truck storage Taking the forklift truck out of operation If the forklift truck is not to be used for over 2 months, place it in a very well ventilated, frostless, clean and dry room. Additionally, these steps below should be followed: Steps to be taken before putting the forklift truck temporarily out of use Clean the forklift truck thoroughly. Lift and lower the fork carriage to its full extent and tilt the lift mast forwards and backwards several times. Repeat the same operation several times on attachments if they exist. Lower the fork carriage onto the support block to release the load on the chain. Check the hydraulic oil level and refill if necessary. Apply a thin coat of oil or grease to the surfaces of all naked components. Lubricate the forklift truck. Check the condition of the battery and the electrolyte level. Apply non-acidic grease to the terminal. (Should comply with manufacturer’s instructions). Spray all the electrical contacts with the appropriate contact spray. CAUTION Erect and fix the forklift truck to prevent permanent tyre deformation. NOTE Do not cover the forklift truck with plastic film as it may gather water vapour. NOTE If the forklift truck is not in use for over 6 months, please contact your Linde dealer in order to take further measures. 80 Bringing the forklift truck back into use Clean the forklift truck thoroughly. Lubricate the forklift truck. Apply non-acidic grease to the battery terminal. Check the battery condition and electrolyte level. Check if the hydraulic oil contains any water and change the oil if necessary. Conduct all maintenance as required for first use. Using the forklift truck. General Knowledge Proper functioning of the forklift truck can only be maintained by carrying out periodic maintenance and checks according to the operating guidance and tips set out in the user guide. Checking and maintenance work may only be performed by technicians accredited by the Linde Corp. Ltd. This work can be performed by your dealer according to the Maintenance Contract. If you wish to maintain and service the forklift truck yourself, we recommend that maintenance is carried out by the dealer’s appointed technicians for at least the first three times. Your maintenance personnel should also be present in order to receive appropriate training. During the maintenance process, please make sure that the forklift truck is stationary on flat ground and that it does not slide. Lower the fork carriage and slowly tilt the lift mast forward until the truck is stationary. Apply the handbrake. Press the emergency off switch and remove the key. When working on a truck with a raised carriage or lift mast, the carriage or lift mast must be secured to prevent it falling. Operating Instructions – 335 801 1701 EN – 04/2014 Operation 4 Truck storage Ensure that the carriage and lift mast will not fall suddenly when raised. When carrying out maintenance on the back of the truck, the lift mast must be secured to prevent backwards tilting. Modifying or installing additional equipment on the forklift truck is prohibited without the agreement of the manufacturer. CAUTION Lost or damaged name plates and warning labels must be replaced. Refer to user manuals for position and part numbers. A functional test and trial run should be performed after every maintenance check. NOTE If the forklift truck is used in an extreme environment (such as excessive heat, excessive cold or areas with high dust concentrations), Operating Instructions – 335 801 1701 EN – 04/2014 the time intervals given in the maintenance tables should be reduced accordingly. CAUTION Follow the manufacturer’s safety regulations and disposal methods regarding oil, lubricating grease and cleaning fluids. Maintenance intervals NOTE If the forklift truck is used in a designated environment, the time intervals in the maintenance table can be changed. The inspection and maintenance intervals depend on the operating and service conditions of the forklift truck. We recommend shortening the maintenance intervals for forklift trucks operating in harsh environments. If you have any questions, please contact a Linde dealer. 81 4 Operation Disposal of old trucks Disposal of old trucks The disposal of old trucks is regulated in directive 2000/53/EC from the European Parliament and Council. We therefore recommend having this work carried out in an approved recycling plant. If you would like to carry out this work yourself, you must obtain approval from the relevant authorities as per articles 9, 10 and 11 of directive 75/442/EEC. In addition, the following minimum requirements must be observed: • The locations in which old trucks are stored before treatment must be areas suited to this task with impervious surfaces. These areas are also to be equipped with collection devices and separators for leaking fluids and degreasing cleaning materials • The locations for treatment must be areas suited to this task with impervious surfaces. These areas are also to be equipped with collection devices and separators for leaking fluids and degreasing cleaning materials. Suitable storage areas must be 82 available for disassembled and partially oil-smeared parts, as well as for tyres including fire protection measures. Suitable storage tanks for fluids such as fuel, engine oil, hydraulic oil, coolant and fluids from air conditioning systems must also be provided. • In order to dispose of harmful substances from the old trucks, the batteries and LPG container must be removed. The following must also be removed, collected and stored separately: fuel, engine oil, coolant, hydraulic oil and fluids from air conditioning systems • The following parts are to be collected separately and recycled: catalytic converters, metal components containing copper and aluminium, tyres, large plastic components (consoles, fluid containers) and glass NOTE The operating company is responsible for adherence to the directives as well as additional country-specific regulations. Operating Instructions – 335 801 1701 EN – 04/2014 5 Maintenance 5 Maintenance Summary Summary Truck storage If the forklift truck will not be used for more than 2months, it should be parked in a wellventilated, frostless, clean and dry place, and the following measures should be taken. Measures to be taken prior to truck storage Clean the truck thoroughly. Both raise and lower the fork carriage and tilt the lift mast forwards and backwards several times. If equipped with attachments, operate the attachments several times. If the forklift truck will be out of use for a period of over 6 months, please consult the manufacturer for relevant information. Resuming use of the forklift truck Clean the truck thoroughly. Lubricate the forklift truck. Apply a layer of non-acidic grease to the battery terminals. Check the battery condition and electrolyte level. Check the engine oil. If there is too much water, change the oil. Lower the fork onto a support platform so that the lift chain does not continue to experience stress. Check the hydraulic oil. If there is too much water, change the hydraulic oil. Check the hydraulic oil level, and fill up if necessary. Carry out routine maintenance on the forklift truck before use. Apply a thin layer of oil or grease to the surface of all unpainted parts. Put the truck into operation. Lubricate the forklift truck. General remarks Check the condition and electrolyte level of the rechargeable battery. Apply a layer of non-acidic grease to the battery terminals. (Refer to the user manual from the battery manufacturer.) Proper functioning of the forklift truck can only be maintained by carrying out periodic maintenance and checks according to the guidance and tips set out in the user guide. Apply a layer of suitable spray to all exposed wire connectors. CAUTION Jack up the forklift truck, so that the wheels leave the ground. Avoid tyre deformation. NOTE Do not use plastic sheeting to cover the forklift truck because this will exacerbate condensation and aggregation. NOTE 84 Checking and maintenance work may only be performed by technicians accredited by the Linde Corp. Ltd. You can agree performance of this work on the basis of a maintenance agreement concluded with your authorised dealer. If you want to carry out maintenance on the forklift truck yourself, we recommend that maintenance be carried out by technicians appointed by the dealer at least for the first three times. Your maintenance personnel should also be present, in order to receive appropriate training. The forklift truck should be parked on a level surface, and the tyres fixed before starting any maintenance work. Operating Instructions – 335 801 1701 EN – 04/2014 Maintenance 5 Working on the lift mast or front section of the fork lift truck The industrial truck must be switched off completely and the switch key must be removed. Disconnect the battery connector plug. When maintenance needs to be carried out under the lifted fork carriage and mast, measures must be taken to prevent the fork carriage or mast from accidentally falling. When work needs to be carried out at the front end of the forklift truck, the mast should be secured to prevent backwards tilting. Modifying or installing additional equipment on the forklift truck is prohibited without the agreement of the manufacturer. All servicing work should be followed by a function check and a test run performed on the industrial truck. WARNING Any side doors attached could fall shut during maintenance and trap staff. For this reason, both doors should be opened and secured in place during servicing. CAUTION The truck must always be properly labelled. If the nameplates or affixed labels have parts missing or are damaged, they should be replaced with new ones. For locations and order numbers, please see the spare parts catalogue. ENVIRONMENT NOTE Please comply with regulations regarding the use or handling of fuel and lubricating oil. NOTE If the forklift truck is in an extreme environment (such as excessive heat, excessive cold or areas with high dust concentration), the time intervals given in the maintenance tables should be reduced accordingly. Maintenance intervals The inspection and maintenance intervals depend on the operating and application conditions of the industrial truck. For heavy-duty conditions we recommend shorter intervals. Please contact your authorised dealer. Working on the lift mast or front section of the fork lift truck DANGER When working on the lift mast there is the risk of becoming trapped and/or accidental lowering of the lift mast. The following safety measures must be taken before carrying out any maintenance work or adjustments to the lift mast and fork carriage! These safety measures only apply to carrying out routine maintenance on the truck (testing and lubricating). Additional safety measures must be taken when carrying out maintenance (such as replacing the lift chains or lift cylinder). Please contact your authorised Linde dealer. Operating Instructions – 335 801 1701 EN – 04/2014 85 5 Maintenance Working on the lift mast or front section of the fork lift truck Securing the mast to prevent backward tilting In order to prevent the lift mast accidentally tilting backwards, a piece of hard wood (120 x 120 x 800 mm) must be placed between the lift mast and body of the truck(1). The lift mast must be secured from tilting backwards unintentionally (see arrow). Tilt the lift mast right back. Press the emergency off switch. Pull the switch key out of the key switch. Disconnect the battery male connector. The truck must be switched off completely. Apply the parking brake. Ordinary duplex mast When the internal lift mast is rising, the chain wheels will turn and the fork carriage will rise with the list mast at a ratio of 2:1. Securing the ordinary duplex mast during lifting DANGER Check chain load! Select a safety chain with sufficient load bearing capacity for the lift mast. Take the maximum lift height into account. Raise the mast. Secure the upper beam of the outer lift mast(1) and the inner lift mast beam(2) together with chains. Watch out for the hose lines on the cross beam of the outer mast. Lower the mast until it is supported by the chains. 86 Operating Instructions – 335 801 1701 EN – 04/2014 Maintenance 5 Working on the lift mast or front section of the fork lift truck Full free lift duplex mast NOTE The advantage of this kind of mast is that its free lift height can be fully utilised even when working in very low spaces (such as basements or inside vehicles or ships). Function: The fork carriage is lifted to its free lift height by the central lift cylinder via the guiding chains. Here it moves twice as fast as the centre cylinder. The inner mast and fork carriage are then lifted together by the duplex outer cylinder. The central cylinder is installed onto the liftable inner mast. Securing the full free lift duplex mast during lifting DANGER Check chain load! Select a safety chain with sufficient load bearing capacity for the lift mast. Take the maximum lift height into account. Lift the mast. Secure the upper beam of the outer lift mast(1) and the inner lift mast beam(2) together with chains. Watch out for the hose lines on the cross beam of the outer mast. Lower the mast until it is supported by the chains. Completely lower the fork carriage. Triple mast Function: The fork carriage is lifted to its free lift height by the central lift cylinder via the guiding chains. The inner mast is then lifted by the two duplex outer cylinders. Operating Instructions – 335 801 1701 EN – 04/2014 87 5 Maintenance Inspection and maintenance parameters The lifting speed of the inner mast is twice that of the cylinders due to the function of the guidance chains. The central lift cylinder is fixed onto the liftable inner mast. Securing the triple mast during lifting DANGER Check chain load! Select a safety chain with sufficient load bearing capacity for the lift mast. Take the maximum lift height into account. Raise the mast. Secure the outer lift mast beam(1) and the inner lift mast beam(2) together with chains. Watch out for the hose lines on the cross beam of the outer mast. Lower the mast until it is supported by the chains. Completely lower the fork carriage. Inspection and maintenance parameters No. Unit Devices/consumables 1 battery Distilled water Acid-free grease 2 Electric motors: Traction motor Hydraulic motor Cleaning agents for electrical equipment 3 Right and left-hand traction motor Oil pump motor Accelerator Hydraulic controller Horn Fan Charge/Discharge circuit Control circuit Fuse Fuse Fuse Fuse Fuse Fuse Fuse Fuse 88 Filling quantity / Set values As required As required 1 x 355 A 1 x 300 A 1 x 5A 1 x 5A 1 x 10 A 1x5A 1 x 10 A 1 x 15A; 1 X 10A; 1 X 5A Operating Instructions – 335 801 1701 EN – 04/2014 Maintenance 5 Recommended lubricants No. Unit Devices/consumables 4 Filter insert for suction filter Filter insert for pressure filter Hydraulic oil Hydraulic system Hydraulic system Standard, duplex mast — all lift heights Triple mast - maximum lift height of up to 5620 mm Triple mast - lift height of 5770 mm or higher Filling quantity / Set values 15 µm 6 µm 8.9 litres 11.8 litres Torque value 210 Nm 5 Wheels Drive wheel, rear wheel 6 Gearbox Gearbox oil 7 Steering axle Lubricating grease 8 Lift mast tilt cylinder pin shaft Lubricating grease As required 9 Lift mast and chain guide Linde chain spray As required 10 Brake system Brake discs in the drive axle Brake fluid Brake fluid Oil change: 0.6 litres As required 0.2litres . Recommended lubricants Hydraulic oil CAUTION Damage to the hydraulic system due to unapproved hydraulic oil. Only use approved hydraulic oil. Only the following types of hydraulic oil have been approved by the manufacturer. Do not mix hydraulic oils. Please contact your authorised dealer if you have any questions. Approval for any suggestions given by oil company representatives must also be sought from the authorised dealer. Standard (average constant oil temperature 40-60°C) Under normal loads, we recommend the use of: Hydraulic oil ISO-L-HM 46, in compliance with ISO 6743-4; or hydraulic oil HLP ISO VG46, in compliance with DIN51524 T.2Standard (factory filling). Operating Instructions – 335 801 1701 EN – 04/2014 Heavy duty (average constant oil temperature above 60°C) Hydraulic oil ISO-L-HM 68, in compliance with ISO 6743-4; or hydraulic oil HLP ISO VG68, in compliance with DIN51524 T.2Standards, Light duty (average constant oil temperature below 50°C) Hydraulic oil ISO-L-HM 32, in compliance with ISO 6743-4; or hydraulic oil HLP ISO VG 32 , in compliance with DIN51524 T.2 Standards, Variable load situations NOTE This type of hydraulic oil has a very high viscosity (multi-purpose hydraulic oil). 89 5 Maintenance Recommended lubricants ISO-L-HV 46 can be used in all of the above operating situations in compliance with ISO 6743-4; or hydraulic oil HVLP ISO VG 46 in compliance with DIN51524 T.3 standards can be used as a substitute. Bio-hydraulic oil Aral Forbex© SE 46 highly biodegradable hydraulic oil CAUTION Damage to the hydraulic system due to mixing bio-hydraulic oil with mineral oil. Only use approved pure bio-hydraulic oil. NOTE The oils recommended above are for reference only. gearbox oil should be changed by an authorised dealer due to their expert knowledge and experience in handling problems with disposal. Lubricating grease Linde lithium-saponified lubricating grease KPF2K (taking DIN 51825 as the standard) Linde spare part no., see spare parts catalogue Linde heavy-duty grease, lithium-saponified with EP active ingredients and MOS2. KPF2N-20(taking DIN 51825 as the standard) Linde spare part no., see spare parts catalogue NOTE Please contact your Linde dealer if you have any questions. Mixing with soap-based lubricating grease types other than lithium-saponified is not permitted. Your Linde dealer should also be contacted before using any oils recommended by the oil manufacturer. Battery grease The fork lift truck manufacturer only consents to the use of the above oils. Expensive damage may result if other hydraulic oils are used or hydraulic oils are mixed. Gearbox oil Gearbox oil SAE 80 W - 90 API GL5, or SAE85 W - 90 API GL4 (in compliance with DIN 51512 standards). ENVIRONMENT NOTE Used oil should be far away from children before being discarded according to regulations. Do not allow engine oil to permeate into the main drainage channel or the ground. Ideally, 90 Acid-free lubricating grease (battery grease) Chain spray for chains Linde standard chain spray Linde spare part no., see spare parts catalogue Brake fluid DOT 3 brake fluid to SAE J1703 (such as Ate model S) or DOT 4 brake fluid to SAE J1704 or FMVSS 116 (such as Ate model SL) Drive axle brake fluid grade is "Shell DONAX TX"(=>I 02/2013) / “Shell Spirax S4 ATF HDX”(03/2013I=>) Operating Instructions – 335 801 1701 EN – 04/2014 Maintenance 5 1000 hour maintenance plan 1000 hour maintenance plan At operating hours 1000 2000 4000 5000 7000 8000 10000 11000 13000 14000 16000 17000 19000 20000 Carried out Maintenance plan information Maintenance intervals are set according to the type of oil used, driving habits and operating requirements, but maintenance should be carried out according to this maintenance plan at least every 1 , 2 , 4, 5, 7, 8, 10 , 11 , 13, 14, and 16 working years. Please refer to the oil use recommendations. Before starting maintenance work: Clean the fork lift truck if necessary Check the time and date settings on the display unit; adjust if necessary. Check for error codes on diagnostic software and delete. Calibrate the potentiometer and joysticks. Set a reminder for the next maintenance check on diagnostic software. Reduction gearbox Check whether the speed reduction gearbox is leaking Check the drive axle and reduction gearbox fastenings Clean both sides of the traction motor, the power steering and working hydraulic pump motor Frame and installation Chassis, tilt cylinders and steering axle: Check fastening. Check the counterweight, motors, chassis, speed reduction gearbox, overhead guard and steering axle fastenings. Lubricate the overhead guard pin shaft. Check and lubricate the other pins and swivel points. Check the condition of the antistatic belt. Chassis frame Check for correct operation of the parking brake and readjust if necessary. (As required) Check wheel fastenings and tighten if necessary (after each maintenance or repair, at the latest after 100 hours). Check the brake system (As required) Wheel change Check the release of the multi-disc brake for the towing procedure: press the brake lever at the brake valve several times. Operating Instructions – 335 801 1701 EN – 04/2014 91 5 Maintenance 1000 hour maintenance plan At operating hours 1000 2000 4000 5000 7000 8000 10000 11000 13000 14000 16000 17000 19000 20000 Carried out Check/lubricate the compact steering axle. Check/lubricate the movable steering axle. Operating devices Checking the joystick pad Checking and lubricating the pedal mechanisms, control linkage mechanisms and the overhead guard locking devices. Check the horn for correct function. Electrics Check the fastenings of the cables and connectors connecting the power module and the motor. Check the condition and tightness of the electrical cables, electrical connections and plug connectors Battery: check the charge status, fluid level and proportion. Check the fans for correct operation. (As required) Clean the power modules of the traction and lift control, the fans and the heat sink with compressed air. Clean the contactor mounting board with compressed air. Inspect the contactor contacts, and replace if necessary Hydraulics Check the hydraulic oil level. Check the leak resistance of the working and steering hydraulic systems. Check that the breather filter on the hydraulic oil tank is working normally. Check the control unit for correct function. Replace the pressure and suction filters. Load lift system Check the condition, tightness and function of the lift mast, lift chains and stop block. Adjust the length of the lift chains, and lubricate using chain spray. Check the truck’s releasing and locking equipment. Check the tilt cylinder bearing (particularly for any abnormal sounds when tilting forward or backward) for wear, and clean. Special equipment 92 Operating Instructions – 335 801 1701 EN – 04/2014 Maintenance 5 3000 hour maintenance plan At operating hours 1000 2000 4000 5000 7000 8000 10000 11000 13000 14000 16000 17000 19000 20000 Carried out Check that the side moving forks are operating normally; clean, lubricate and check their fastenings. Check the pre-tightening status of the double hose in trucks equipped with attachments. Subsequent tasks Carry out a functional test and test drive. Attach the maintenance sticker. 3000 hour maintenance plan At operating hours 3000 6000 9000 12000 15000 18000 Carried out Maintenance plan information Maintenance intervals are set according to the type of oil used, driving habits and operating requirements, but maintenance should be carried out according to this maintenance plan at least every 3, 9, and 15 working years. Please refer to the oil use recommendations. Before starting maintenance work: Clean the fork lift truck if necessary Check the time and date settings on the display unit; adjust if necessary. Check for error codes on the diagnostic software and delete. Calibrate the potentiometer and joysticks. Set a reminder for the next maintenance check on diagnostic software. Reduction gearbox Check whether the speed reduction gearbox is leaking Check the drive axle and reduction gearbox fastenings Clean both sides of the traction motor, the power steering and working hydraulic pump motor Drive axle: Check the side stops and adjust as necessary. Check the condition of the axle bearings. Operating Instructions – 335 801 1701 EN – 04/2014 93 5 Maintenance 3000 hour maintenance plan At operating hours 3000 6000 9000 12000 15000 18000 Carried out Changing the gearbox oil in the speed reduction gearbox Frame and installation Check the fastenings of the tilt cylinders at the lift mast. Check the counterweight, motors, chassis, speed reduction gearbox, overhead guard and steering axle fastenings. Lubricate the overhead guard pin shaft. Check and lubricate the other pins and swivel points. Check the condition of the antistatic belts (only for trucks fitted with super clean tyres). Chassis frame Check for correct operation of the parking brake and readjust if necessary. Check the brake system (As required) Check the wheel fastenings and tighten if necessary (after each maintenance or repair, at the latest after 100 hours). (As required) Wheel change Check the release of the multi-disc brake for the towing procedure: press the brake lever at the brake valve several times. Check/lubricate the compact steering axle. Check/lubricate the movable steering axle. Replacing the brake fluid Operating devices Checking the joystick pad Checking and lubricating the pedal mechanisms, control linkage mechanisms and the overhead guard locking devices. Check the horn for correct function. Electrical system Check the fastenings of the cables and connectors connecting the power module and the motor. Check the condition and tightness of the electrical cables, electrical connections and plug connectors Battery: check the charge status, fluid level and proportion. Check the fans for correct operation. (As required) Clean the power modules of the traction and lift control, the fans and the heat sink with compressed air. 94 Operating Instructions – 335 801 1701 EN – 04/2014 Maintenance 5 3000 hour maintenance plan At operating hours 3000 6000 9000 12000 15000 18000 Carried out Clean the contactor mounting board with compressed air. Inspect the contactor contacts, and replace if necessary Hydraulic system Check the hydraulic oil level. Check the leak resistance of the working and steering hydraulic systems. Check the control unit for correct function. Replace the air, pressure and suction filters. Replace the hydraulic oil (if it is Bio hydraulic oil, the Aral Forbex SE46 is 6000operating hours) Load lift system Check the condition, tightness and function of the lift mast, lift chains and stop block. Adjust the length of the lift chains, and lubricate using chain spray. Check the truck’s releasing and locking equipment. Check the tilt cylinder bearing (particularly for any abnormal sounds when tilting forward or backward) for wear, and clean. Special equipment Check that the side moving forks are operating normally; clean, lubricate and check their fastenings. Check the pre-tightening status of the double hose in trucks equipped with attachments. Subsequent tasks Carry out a functional test and test drive. Attach the maintenance sticker. Operating Instructions – 335 801 1701 EN – 04/2014 95 5 Maintenance Reduction gearbox Reduction gearbox Checking the wheel gear oil level Drive the truck until the oil level plug (1) is in a flat position (in the "9 o’clock" position) and the filling plug (2) is at the top. Apply the parking brake and switch off the truck. Clean the areas surrounding the oil level plug (1). Unscrew the oil level plug (1). The oil level must reach the lower edge of the oil level plug hole. Please fill up with gear lubricating oil if necessary. Screw the oil level plug (1) back in, and tighten to 20Nm. Checking whether the speed reduction gearbox is leaking Jack the truck at the front on the right or left side. Use wooden blocks to secure the truck. Check the fuelling ports on both sides of the speed reduction gearbox and the leak resistance of the oil drain plug and housing cover. If there is leakage, please contact your Linde dealer. 96 Operating Instructions – 335 801 1701 EN – 04/2014 Maintenance 5 Reduction gearbox Cleaning both sides of the traction motor, the power steering and working hydraulic pump motor Place the lift mast in a vertical position. Lift and secure the fork carriage to prevent accidental falling. Press the emergency disconnect button. Lift the overhead guard into the 2nd lock position. Use compressed air to clean the traction motor, the power steering and working hydraulic pump motor. NOTE The electrical system and wire terminals should be protected from moisture damage. Water must not be allowed to seep into the motor. If the motor gets damp, the truck should be operated (allowing the motor to dry on its own from the heat produced) or the motor should be blow dried using hot air or an air gun etc., to prevent corrosion. Replacing the gear oil in the speed reduction gearbox Replacing the gear oil (without disassembling the wheels) ENVIRONMENT NOTE Follow the regulations for the safe handling of oil and lubricating grease. Operating Instructions – 335 801 1701 EN – 04/2014 97 5 Maintenance Reduction gearbox Operate the truck until the speed reduction gearbox is slightly warm. NOTE The following 2methods can be used to replace the gearbox oil. Operate the truck until the filling plug (2)is at the top, and then stop the truck. Clean the oil level plug (1), the fill plug (2) and the oil drain plug (3) and surrounding areas. Remove the oil level plug and the fill plug. Place a container under the oil drain plug (3). Remove the magnetic oil drain plug (3) and completely drain the gear oil. Clean the magnet on the oil drain plug (3). Reinstall and tighten the magnetic oil drain plug (3). Oil drain plug (3) torque: 20Nm Pour approximately 400cc of gear oil into the speed reduction gearbox from the filling port, until the oil overflows from the oil level port (1). Tighten the oil level port (1) and the filling plug (2). Torque: 20Nm Replace the gear oil in the speed reduction gearbox on the other side. Replacing the gear oil (with disassembling the wheels) NOTE Follow the regulations for the safe handling of oil and lubricating grease. 98 Operating Instructions – 335 801 1701 EN – 04/2014 Maintenance 5 Reduction gearbox Operate the truck until the speed reduction gearbox is slightly warm. Drive the truck until the oil level plug (1) is in a horizontal position. Jack the truck on either the right or left side, and secure the wheels with wooden blocks. Take the wheels off (refer to Changing a wheel). Remove the 2wheels and place them flat in order to drain the gear oil completely. Clean the oil level plug (1), the oil drain plug (3) and the fill plug (4) and surrounding areas. Place a container under the oil drain plug (3). Remove the oil level plug (1), the oil drain plug (3) and the fill plug (4). Completely drain the gear oil. Clean the magnet on the oil drain plug (3). Reinstall and tighten the magnetic oil drain plug (3). Oil drain plug (3) torque: 20Nm Pour approximately 400cc of gear oil into the speed reduction gearbox from the filling port until the oil overflows from the oil level port (1). Tighten the oil level port (1) and the filling plug (2). Filling plug torque (4): 70Nm Oil level plug torque: 20Nm Replace the gear oil in the speed reduction gearbox on the other side. Fit the wheels and lower the truck. Operating Instructions – 335 801 1701 EN – 04/2014 99 5 Maintenance Frame and installation Frame and installation Checking the counterweight, motors, chassis, speed reduction gearbox, overhead guard and steering axle fastenings Check the tightness and wear of the motor drive assembly, power steering, working hydraulic oil pump, motor, counterweight, chassis, speed reduction gearbox, overhead guard and the steering axle. Tighten loose nuts and screws. Replace damaged parts. Respray if necessary. Lubricating the overhead guard pin shaft NOTE Use lubricating grease. Open the electrical system hood. Lubricate the injection nozzles on both sides of the pin shaft (1). Lubricate with a grease gun until the fresh lubricating grease overflows from the pin shaft. Close the electrical system hood. 100 Operating Instructions – 335 801 1701 EN – 04/2014 Maintenance 5 Frame and installation Checking and lubricating other pins and swivel points Check and lubricate the pins and swivel points for the following components: Seat guide rail. Windscreen wiper-rinser system* Driver cab door locks and hinges* *Optional part Checking the status of the anti-static belts* (only for trucks fitted with super clean tyres) Check whether the conductive strips located under the chassis are tightly secured or worn. Replace damaged conductive strips. NOTE The conductive strips must be in constant contact with the ground. *Optional part Operating Instructions – 335 801 1701 EN – 04/2014 101 5 Maintenance Chassis frame Chassis frame Check the brake system WARNING The hand brake (1 ) and brake pedal (2 ) must be used correctly. If there are serious signs of mechanical abrasion (e.g. abrasion on the brake pads or scratches on the brake discs), please contact your Linde dealer. Open the overhead guard to the 2 lock position. WARNING The brake fluid level must be higher than the lowest marking (1), otherwise a decline in braking performance will result. Use the correct brake fluid according to recommended oil types. If the brake fluid is used up very quickly, please contact your Linde dealer. Clean the main brake oil cylinder and brake pads with compressed air, and check them for abrasion. Tighten all loose brake oil pipe joint connections. Check the hydraulic foot brake/brake pedal DANGER A defective brake system not only entails a risk of injury but also possible fatality to the driver and anyone in his immediate environment. The functioning of the brakes should be checked every time prior to starting operation. If there is a fault in the braking system, operation of the truck must stop immediately. Use of the truck can only resume after it has been confirmed that the functioning of the braking system is completely normal. Please contact your authorised Linde dealer. 102 Operating Instructions – 335 801 1701 EN – 04/2014 Maintenance 5 Chassis frame DANGER The truck’s brake performance can be affected by many factors, including oil viscosity. Use of any oil that is not prescribed by the manufacturer (with a different viscosity) will cause an increase in the stopping distance of the truck and therefore increase the risk of accidents. Therefore, only use the oil prescribed by the manufacturer (see Recommendations for consumables). Please contact your authorised dealer. Drive the truck at high speed. Use your foot to depress the brake pedal (2). The truck must immediately come to a standstill when the stop pedal is pressed. NOTE In order to ensure maximum brake force when depressing the brake pedal, a gap of 3 millimetres must be maintained between the lower edge of the brake pedal and the rubber pads on the baseplate. If this gap cannot be maintained, then the brake stroke must be adjusted to ensure optimum brake performance. Please contact your authorised dealer. Check the parking brake for correct operation DANGER For example, incorrect adjustments to the brake cables may result in insufficient braking action from the parking brake. Normal functioning of the parking brake and the stop pedal must be maintained at all times. Should you notice any defects, please contact your authorised dealer at once. Drive a fully loaded truck up a 15% slope. Depress the brake pedal to stop the truck on the slope. Apply the hand brake. In normal conditions, the hand brake should pull tight within the space of 3-4 teeth. Operating Instructions – 335 801 1701 EN – 04/2014 103 5 Maintenance Chassis frame At this time, the parking brake has already been exerted. Release the brake pedal. The truck should stop on the slope, and not slide. Check the Linde automatic brake (LBC) Release the accelerator pedal (1or 3) when moving. The pedal will return to the neutral position and the truck will brake automatically. NOTE This function can be adjusted using the Linde diagnostic unit. Tighten the wheel nuts CAUTION The nuts must be tightened at least once every 100operating hours. Check the tightening torque of all tyre nuts: front tyre/rear tyre 210NmNm 104 Operating Instructions – 335 801 1701 EN – 04/2014 Maintenance 5 Chassis frame Cleaning/lubricating the steering axle Cleaning the steering axle CAUTION Press the emergency off switch. Do not allow water to splash into the electrical system (digital control device). Use water or a cold cleaning agent to carefully clean the compact steering axle and the swing steering axle. Lubricating the steering axle Use lubricating grease to lubricate the piston rod of the steering cylinder through the right and left injection nozzles (shown by the arrow). Lubricate with a grease gun until the fresh oil overflows. If working in a clean and dry area, the steering axle should be lubricated once every 1,000 operating hours. If the truck is used both inside and outside, we recommend that the time between lubrications be between 500-1,000 hours; however, the truck must be lubricated at least once every 12 months. If working in dusty, dirty or chemical environments, lubricating once a week will extend the operating life of the bearing. NOTE Operating Instructions – 335 801 1701 EN – 04/2014 105 5 Maintenance Chassis frame We recommend that lubricating be carried out after steam cleaning. NOTE Using a little lubricating grease and lubricating often is better than using a lot of lubricating grease and lubricating infrequently. Replacing the brake fluid Replace the oil cup brake fluid ENVIRONMENT NOTE Follow the regulations for the safe handling of oil and lubricating grease. Open the overhead guard to the 2lock position. WARNING The brake fluid level must be higher than the lowest marking (1), otherwise a decline in braking performance will result. Use the correct brake fluid according to recommended oil types. If the brake fluid is used up very quickly, please contact your Linde dealer. Clean the main brake oil cylinder with compressed air, and check for abrasion. Tighten all loose brake oil pipe joint connections. WARNING The brake fluid must be replaced at least once every 2 years. This task, as well as releasing the compressed air in the brake system, can only be carried out by an authorised Linde professional. Capacity: approximately 100 cc Replacing the brake fluid in the drive axle =>I 02/2013 NOTE The type of drive axle brake fluid has changed from “Shell Donax TX” to “Shell Spirax S4 ATF 106 Operating Instructions – 335 801 1701 EN – 04/2014 Maintenance 5 Operating devices HDX”; therefore, cancel replacement of drive axle brake fluid. ENVIRONMENT NOTE Follow the regulations for the safe handling of oil and lubricating grease. Operate the truck until the speed reduction gearbox is slightly warm. Stop the truck in a horizontal position in order to drain the gear oil completely. Clean the oil drain plug (2), filling plug (1) and surrounding areas. Place a container under the oil drain plug (2). Disassemble the oil drain plug (2), filling plug (1). Completely drain the brake fluid. Clean the oil drain plug (2). Reinstall and tighten the oil drain plug with sealing ring (2). Oil drain plug torque: 20Nm Pour approximately 500of brake fluid from the filling port into the brake box. Tighten the filling plug (2). Filling plug torque: .20Nm Operating devices Checking the joystick pad Check the pad is properly in place and whether or not it is damaged. If necessary, replace the pad. Checking and lubricating the pedal mechanisms, control linkage mechanisms and the overhead guard locking devices NOTE Operating Instructions – 335 801 1701 EN – 04/2014 107 5 Maintenance Electrical system Adjustment of the acceleration sensor (6) may only be carried out by a professional. Please contact your Linde dealer. Lift the overhead guard into the 2 nd lock position. Check that the pins and connection points are securely fastened. Lightly lubricate the pin shafts and connection points if necessary. Check the elasticity of the springs (3). Lightly lubricate the locks (2), Bowden cables (1) and springs (3). Lubricate the steering cut-out (5). Use Molikote-G synthetic grease to lubricate the contact surface between the pedals and the swivel lever (4) if necessary.(If you do not have this synthetic grease, it can be substituted with lubricating oil, but not lubricating grease). Close the overhead guard. Electrical system Checking the status and tightness of the electrical cables, electrical connections and plug connectors NOTE Apply the hand brake and press the emergency isolator button before carrying out this maintenance task. 108 Operating Instructions – 335 801 1701 EN – 04/2014 Maintenance 5 Electrical system Open the overhead guard to the 1st lock position. Motor terminals: check the tightness of the connections and whether or not there is any oxidation or rust. Check that the battery cables are secure. Close the overhead guard and open the rubber hood or electrical system cover. Check whether the cables have failed, whether there is damage to the insulation and the tightness of the connections. NOTE Oxidised and rusted connections and broken cables will lead to a drop in voltage, causing the truck to malfunction. Remove and lubricate the oxidised rust, and replace the broken cables. Close the rubber hood or electrical system cover. (As required) Clean the power modules of the traction and lift controls, the fans and the radiator housing with compressed air Tilt the lift mast forward slightly. The truck must fully stationary. Apply the hand brake. Press the emergency off switch. Lift the overhead guard into the 2 nd lock position. Operating Instructions – 335 801 1701 EN – 04/2014 109 5 Maintenance Electrical system Clean the power modules of the traction and lift controls, and the radiator housing of the traction motor and fuel pump motor with compressed air. Cleaning the digital control cables Tilt the lift mast forward slightly. The truck must fully stationary. Apply the hand brake. Press the emergency off switch. Remove the electrical system cover located on the counterweight. Clean the digital control cables with compressed air. NOTE The electrical system and the digital control assembly should be protected from moisture damage. Re-install the cover. 110 Operating Instructions – 335 801 1701 EN – 04/2014 Maintenance 5 Hydraulic system Inspect the contactor contacts, and replace if necessary Open the electrical system hood. Loosen the bolt torque and remove the cover (1). Check the contactor contacts and replace if necessary (the contacts cannot be repaired). Please contact your Linde dealer. Hydraulic system Check the hydraulic oil level ENVIRONMENT NOTE Please follow the measures for the safe handling of oil and lubricating grease. NOTE The oil level can only be checked after lowering the lift mast. Operating Instructions – 335 801 1701 EN – 04/2014 111 5 Maintenance Hydraulic system Apply the hand brake. Press the emergency disconnect button. Lift the overhead guard (1) into the 1lock position. Remove the air filter with the oil gauge (2). Use a clean cloth to dry the oil gauge. Completely insert the air filter and dipstick once more, and then remove again. The oil level should be between the upper and lower markings on the dipstick. If required, fill the hydraulic oil up to the upper marking. Reinstall the air filter. Completely lower the overhead guard. 112 Operating Instructions – 335 801 1701 EN – 04/2014 Maintenance 5 Hydraulic system Checking the leak resistance of the working and steering hydraulic systems Lift the overhead guard into the 2ndlock position. Check the leak resistance of the working hydraulic pump, the power steering, the valves and the pipe lines. Replace the porous hoses. Check whether the oil pipes and hoses have scratches and replace if necessary. Close the overhead guard. Replacing the air, pressure and suction filters ENVIRONMENT NOTE Follow the regulations for the safe handling of oil and lubricating grease. Lift the overhead guard into the 2ndlock position. Remove the air filter (2) and the dipstick together from the refuelling port. Remove the dipstick (1) from the filter and install onto the new filter. Install the new air filter. Close the overhead guard completely. NOTE It will be necessary to replace the filter earlier in poor working environments. ENVIRONMENT NOTE Follow the regulations for the safe handling of oil and lubricating grease. Operating Instructions – 335 801 1701 EN – 04/2014 113 5 Maintenance Hydraulic system NOTE The hydraulic oil will flow out. Place an oil pan under the filter. Lift the overhead guard into the 2ndlock position. Use an extension to undo the filter housing (3) from the bottom left of the truck. Remove the filter housing and the upper cover. Take out the filter insert (4). Check the O-ring on the filter cover, and replace if damaged. Install the new filter insert. Screw into the filter housing (3) until it makes contact with the O-ring on the filter cover, and then use a 40Nm torque to tighten. Operating the working hydraulic system, checking the leak resistance of the pressure filter. Close the overhead guard completely. ENVIRONMENT NOTE Follow the regulations for the safe handling of oil and lubricating grease. 114 Operating Instructions – 335 801 1701 EN – 04/2014 Maintenance 5 Hydraulic system Lift the overhead guard into the 2ndlock position. Unscrew the clamp nut (6) on the clamp belt on the suction filter hood (5). Use the clamp belt to remove the suction filter. Slowly take out the filter so that the hydraulic oil can flow back into the oil tank. Carefully insert the new suction filter into the oil tank. Clean the filter hood seal ring, lightly lubricate and reinstall. Use the clamp belt to reinstall the filter hood, and lock securely with the clamp nut. Perform a trial run to check that the filter hood is properly sealed. Remove the air filter (2) and oil gauge and inspect the oil level. If necessary, fill the hydraulic oil up to the upper marking on the oil gauge. Install the air filter. Close the overhead guard. Replacing the hydraulic oil (if it is Bio hydraulic oil, the Aral Forbex SE46 is 6000operating hours) ENVIRONMENT NOTE Follow the regulations for the safe handling of oil and lubricating grease. NOTE An appropriate tool (e.g. a hand pump) must be used to pump out the hydraulic oil. Operating Instructions – 335 801 1701 EN – 04/2014 115 5 Maintenance Hydraulic system Lower the fork carriage to its full extent. Open the overhead guard into the 2lock position. Unscrew the clamp nut (4) on the suction filter cover (3). Use the clamp belt to remove the suction filter cover. Slowly take out the filter, allowing the hydraulic oil to flow back into the oil tank. Use the hand pump to pump out the hydraulic oil. Fill up with new hydraulic oil. The capacity of the hydraulic oil tank..................................................is approximately 11.0litres Carefully install the new suction filter into the oil tank. Clean and paint a thin layer of engine oil on the filter cover sealing ring, and then install by hand. Use the clamp belt to tighten the suction filter cover and fasten with the bolt torque. Check the leak resistance of the filter. Take out the air filter (2), and use the dipstick (1) to check the oil level. Add hydraulic oil as required, up to the upper marking on the dipstick. Reinstall the air filter. Close the overhead guard. 116 Operating Instructions – 335 801 1701 EN – 04/2014 Maintenance 5 Load lift system Load lift system Checking the condition, tightness and function of the lift mast, lift chains and stop block Thoroughly clean the mast channel and lift chains. Check the status of the lift chains, along with any signs of abrasion, paying particular attention to the area around the chain wheels. Check that the chain fixed pins are secure. Replace damaged chains. NOTE Damaged or missing plastic connectors will not affect the performance and operating life of the lift chains. Check the status and tightness of the lift mast, channel surfaces and roller. Check the status and function of the stop block. Check the tightness of the piston rod retaining ring on the top of the lift mast. Operating Instructions – 335 801 1701 EN – 04/2014 117 5 Maintenance Load lift system Adjusting the length of the lift chains, and lubricating using chain spray Adjusting the length of the lift chains* NOTE Use over time will cause the lift chains to stretch, therefore it is necessary to check and adjust the lengths of both the left and right chains. Fully lower the lift mast. Undo the lock nut (1). Adjust the adjustable nut on the fixed pin of the chain (2) to adjust the chain length. The guide pulley under the fork carriage can extend to a maximum of 25 millimetres out from the mast channel. Tighten the lock nut (1). Adjust the 2nd chain. Lubricating the chains with chain spray Use Linde chain spray to coat the chains and channel surfaces. NOTE If the truck is used in the food industry, please use lubricating grease in place of spray. * Only for standard masts 118 Operating Instructions – 335 801 1701 EN – 04/2014 Maintenance 5 Load lift system Adjusting the length of the lift chains* NOTE Use over time will cause the lift chains to stretch, therefore it is necessary to check and adjust their lengths. Fully lower the lift mast. Undo the lock nut (1). Adjust the adjustable nut on the fixed pin of the chain (2) to adjust the chain length. The guide pulley under the fork carriage can extend to a maximum of 25 millimetres out from the mast channel. Tighten the lock nut (1). Lubricating the chains with chain spray Use Linde chain spray to coat the chains and channel surfaces. NOTE If the truck is used in the food industry, please use lubricating grease in place of spray. * Only for completely free lifting and triple masts Checking the truck’s releasing and locking equipment Check whether the truck shows serious signs of distortion or damage. Check whether the rapid release screws (2, 3) and the truck lock (1) are installed correctly, or are damaged. Replace damaged parts. Operating Instructions – 335 801 1701 EN – 04/2014 119 5 Maintenance Load lift system 120 Operating Instructions – 335 801 1701 EN – 04/2014 6 Technical data 6 Technical data List of technical parameter marks List of technical parameter marks 122 Operating Instructions – 335 801 1701 EN – 04/2014 Technical data 6 Technical parameters – E16P forklift Technical parameters – E16P forklift Characteristics 1.1 Manufacturer Linde 1.2 Model No. Power: electrical, diesel, petrol, LPG, mains power supply E16C 1.3 Electric 1.4 Driving method 1.5 Nominal loading capacity Q (kg) 1600 1.6 Load centre of gravity distance c mm 500 1.8 Front overhang x mm 330 (334/1) 1.9 wheelbase y mm 1336 2) Seated Weight 2.1 Dead weight (with battery) kg 3070 2.2 Axle load when fully loaded, front/rear kg 4205/470 2) 2.3 Axle load without load, front/rear kg 1550/1520 2) Wheels 3.1 Tyres:SE= solid tyres, P= inflated tyres 3.2 Tyre size, front wheel mm 18x7-8 3.3 Tyre size, rear wheel mm 15x4 1/2-8 3.5 Number of wheels, front/rear (X = drive wheel) 3.6 Track width, drive side b10 mm 910 3.7 Track width, load side b11 mm 168 α/β ( o ) 4.8/4,9 SE 2x/2 Dimensions 4.1 Lift mast tilt angle, forward/back 4.2 Height when lift mast retracts h1 mm 2176 3) 4.3 Free lift height h2 mm 150 4.4 Lift heights h3 mm 3250 (4470) 4) 4.5 Maximum mast height when in operation h4 mm 3863 (5078) 4) 4.7 Overhead guard (driver’s cabin) height h6 mm 1970 4.8 Seat height above ground h7 mm 919 h8 mm 510 4.12 Traction pin height Operating Instructions – 335 801 1701 EN – 04/2014 123 6 Technical data Technical parameters – E16P forklift Dimensions 4.19 Vehicle length l1 mm 2845 2) 4.20 Body length (without forks) l2 mm 1845 2) 4.21 Body width b1/b2 4.22 For arm dimensions, thickness x width x length s/e/l 4.23 Fork carriage, according to DIN 15173, grade A, B mm 1083 mm 45 x 100 x 1000 2A. 4.24 Width of fork carriage b3 mm 1040 4.31 Ground clearance, mast m1 mm 78 4.32 Ground clearance at centre of wheelbase Right angle stacking aisle width, pallet 1000 x 1200 4.33 (1200 cross-fork placement) Right angle stacking aisle width, pallet 800 x 1200 4.34 (1200 along forks) m2 mm 113 Ast mm 3171 (3175) 1) 2) Ast mm 3293 (3297) 1) 2) Wa mm 1512 2) 4.35 Turning radius Minimum distance from turning centreline to body 4.36 centreline l7 mm 0 PERFORMANCE 5.1 Driving speed, full/no load 5.2 Lifting speed, full load/no load m/s 0,44/0,52 5.3 Lowering speed, full/no load m/s 0,51 / 0,51 5.5 Rated traction, full/no load (60 minutes) 5.6 Maximum traction (5 minutes), full load, no load N 9200 / 9200 5.7 Climbing capability, full/no load (30 minutes) % 10.1 / 15.5 5.8 5.9 km/h 15.8/15,8 N 1900 / 1900 Maximum climbing capability (5 minutes), full load/no load Acceleration time, full/no load (first 10 metres) 5.10 Service brake % 20.5 / 32.1 s 4.9/4,4 Hydraulic / mechanical DRIVE 6.1 Drive motor (60 minutes) kW 2 X 4 6.2 Lift motor 15% power kW 8.5 6.3 Battery, in line with DIN43 535/36 A, B, C 6.4 Battery voltage/capacity (5-hour discharge) 6.5 Battery weight 124 43 531 A. V/Ah 48/550 kg 856 Operating Instructions – 335 801 1701 EN – 04/2014 Technical data 6 Technical parameters – E16P forklift Other 8.1 Control method 8.2 Working hydraulic pressure for attachments 8.3 Fuel consumption for attachments 8.4 Noise level at driver’s ear Microprocessor control bar 200 l/min 20 5) dB (A) - Standard forklift parameters may change based on the actual equipment 1) The data in brackets refers to the triple mast. 2) Mast located in a vertical position 3) 150 mm completely free lift. 4) For other lift heights, please refer to further mast tables. 5) At 80% of rated pressure. Operating Instructions – 335 801 1701 EN – 04/2014 125 6 Technical data Technical parameters – E16P forklift Technical parameters – E16P forklift Characteristics 1.1 Manufacturer Linde 1.2 Model No. Power: electrical, diesel, petrol, LPG, mains power supply E16P 1.3 Electric 1.4 Driving method 1.5 Nominal loading capacity Q (kg) 1600 1.6 Load centre of gravity distance c mm 500 1.8 Front overhang x mm 330 (334/1) 1.9 wheelbase y mm 1422 2) Seated Weight 2.1 Dead weight (with battery) kg 3225 2.2 Axle load when fully loaded, front/rear kg 4270/560 2) 2.3 Axle load without load, front/rear kg 1675/1550 2) Wheels 3.1 Tyres:SE= solid tyres, P= inflated tyres 3.2 Tyre size, front wheel mm 18x7-8 3.3 Tyre size, rear wheel mm 16x6-8 3.5 Number of wheels, front/rear (X = drive wheel) 3.6 Track width, drive side b10 mm 910 3.7 Track width, load side b11 mm 874 α/β ( o ) 4.6/5,0 SE 2x/2 Dimensions 4.1 Lift mast tilt angle, forward/back 4.2 Height when lift mast retracts h1 mm 2176 3) 4.3 Free lift height h2 mm 150 4.4 Lift heights h3 mm 3250 (4470) 4) 4.5 Maximum mast height when in operation h4 mm 3863 (5083) 4) 4.7 Overhead guard (driver’s cabin) height h6 mm 2075 4.8 Seat height above ground h7 mm 1024 h8 mm 583 4.12 Traction pin height 126 Operating Instructions – 335 801 1701 EN – 04/2014 Technical data 6 Technical parameters – E16P forklift Dimensions 4.19 Vehicle length l1 mm 2970 2) 4.20 Body length (without forks) l2 mm 1970 2) 4.21 Body width 4.22 For arm dimensions, thickness x width x length b1/b2 s/e/l 4.23 Fork carriage, according to DIN 15173, grade A, B mm 1083 mm 45 x 100 x 1000 2A. 4.24 Width of fork carriage b3 mm 1040 4.31 Ground clearance, mast m1 mm 77 4.32 Ground clearance at centre of wheelbase Right angle stacking aisle width, pallet 1000 x 1200 4.33 (1200 cross-fork placement) Right angle stacking aisle width, pallet 800 x 1200 4.34 (1200 along forks) m2 mm 113 Ast mm 3408 (3412) 1) 2) Ast mm 3608 (3612) 1) 2) Wa mm 1878 2) 4.35 Turning radius Minimum distance from turning centreline to body 4.36 centreline l7 mm 571 PERFORMANCE 5.1 Driving speed, full/no load 5.2 Lifting speed, full load/no load m/s 0,44/0,52 5.3 Lowering speed, full/no load m/s 0,51 / 0,51 5.5 Rated traction, full/no load (60 minutes) 5.6 Maximum traction (5 minutes), full load, no load N 9200 / 9200 5.7 Climbing capability, full/no load (30 minutes) % 9.8/14.7 5.8 5.9 Maximum climbing capability (5 minutes), full load/no load Acceleration time, full/no load (first 10 metres) 5.10 Service brake km/h 15.8/15,8 N 1900 / 1900 % 19.8/30.4 s 4.9/4,4 Hydraulic / mechanical DRIVE 6.1 Drive motor (60 minutes) kW 2 X 4 6.2 Lift motor 15% power kW 8.5 6.3 Battery, in line with DIN43 535/36 A, B, C 6.4 Battery voltage/capacity (5-hour discharge) 6.5 Battery weight Operating Instructions – 335 801 1701 EN – 04/2014 43 531 A. V/Ah 48/700 kg 1118 127 6 Technical data Technical parameters – E16P forklift Other 8.1 Control method 8.2 Working hydraulic pressure for attachments 8.3 Fuel consumption for attachments 8.4 Noise level at driver’s ear Microprocessor control bar 200 l/min 20 5) dB (A) - 1) The data in brackets refers to the triple mast. 2) Mast located in a vertical position 3) 150mm completely free lift. 4) For other lift heights, please refer to further mast tables. 5) At 80% of rated pressure. 128 Operating Instructions – 335 801 1701 EN – 04/2014 Technical data 6 Technical parameters – E20P forklift Technical parameters – E20P forklift Characteristics 1.1 Manufacturer Linde 1.2 Model No. Power: electrical, diesel, petrol, LPG, mains power supply E20P 1.3 Electric 1.4 Driving method 1.5 Nominal loading capacity Q (kg) 2000 1.6 Load centre of gravity distance c mm 500 1.8 Front overhang x mm 330 (334/1) 1.9 wheelbase y mm 1422 2) Seated Weight 2.1 Dead weight (with battery) Kg 3550 2.2 Axle load when fully loaded, front/rear kg 4910/680 2) 2.3 Axle load without load, front/rear kg 1670/1880 2) Wheels 3.1 Tyres:SE= solid tyres, P= inflated tyres 3.2 Tyre size, front wheel mm 200/50-10 3.3 Tyre size, rear wheel mm 16x6-8 3.5 Number of wheels, front/rear (X = drive wheel) 3.6 Track width, drive side b10 mm 910 3.7 Track width, load side b11 mm 874 α/β ( o ) 4.6/5,0 SE 2x/2 Dimensions 4.1 Lift mast tilt angle, forward/back 4.2 Height when lift mast retracts h1 mm 2178 3) 4.3 Free lift height h2 mm 150 4.4 Lift heights h3 mm 3250 (4470) 4) 4.5 Maximum mast height when in operation h4 mm 3863 (5083) 4) 4.7 Overhead guard (driver’s cabin) height h6 mm 2075 4.8 Seat height above ground h7 mm 1024 h8 mm 583 4.12 Traction pin height Operating Instructions – 335 801 1701 EN – 04/2014 129 6 Technical data Technical parameters – E20P forklift Dimensions 4.19 Vehicle length l1 mm 3060 2) 4.20 Body length (without forks) l2 mm 2060 2) 4.21 Body width b1/b2 4.22 For arm dimensions, thickness x width x length s/e/l 4.23 Fork carriage, according to DIN 15173, grade A, B mm 1155 mm 45 x 100 x 1000 2A. 4.24 Width of fork carriage b3 mm 1040 4.31 Ground clearance, mast m1 mm 83 4.32 Ground clearance at centre of wheelbase Right angle stacking aisle width, pallet 1000 x 1200 4.33 (1200 cross-fork placement) Right angle stacking aisle width, pallet 800 x 1200 4.34 (1200 along forks) m2 mm 118 Ast mm 3439 (3443) 1) 2) Ast mm 3639 (3643) 1) 2) Wa mm 1900 2) 4.35 Turning radius Minimum distance from turning centreline to body 4.36 centreline l7 mm 571 PERFORMANCE 5.1 Driving speed, full/no load 5.2 Lifting speed, full load/no load m/s 0,37/0,52 5.3 Lowering speed, full/no load m/s 0,51 / 0,51 5.5 Rated traction, full/no load (60 minutes) 5.6 Maximum traction (5 minutes), full load, no load N 9200 / 9200 5.7 Climbing capability, full/no load (30 minutes) % 8.5/13.3 5.8 5.9 km/h 15.8/15,8 N 1900 / 1900 Maximum climbing capability (5 minutes), full load/no load Acceleration time, full/no load (first 10 metres) 5.10 Service brake % 17.1 / 27.4 s 5.2 / 4.5 Hydraulic / mechanical DRIVE 6.1 Drive motor (60 minutes) kW 2 X 4 6.2 Lift motor 15% power kW 98.5 6.3 Battery, in line with DIN43 535/36 A, B, C 6.4 Battery voltage/capacity (5-hour discharge) 6.5 Battery weight 130 43 531 A. V/Ah 48/700 kg 1118 Operating Instructions – 335 801 1701 EN – 04/2014 Technical data 6 Lift mast data Other 8.1 Control method 8.2 Working hydraulic pressure for attachments 8.3 Fuel consumption for attachments 8.4 Noise level at driver’s ear Microprocessor control bar 250 l/min 20 5) dB (A) - Standard forklift parameters may change based on the actual equipment. 1) The data in brackets refers to the triple mast. 2) Mast located in a vertical position 3) 150mm completely free lift. 4) For other lift heights, please refer to further mast tables. 5) At 80% of rated pressure. Lift mast data Standards lift mast (in mm) Lift heights h3 Total height when lift h1 mast retracts Maximum height when h 4 lift mast is working h2 Free lift height E16C E16C-E20P 2850 3050 3250 3850 4250 4850 5650 1976 2076 2176 2476 2676 2976 3376 3463 3663 3863 4463 4863 5463 6263 150 150 150 150 150 150 150 Duplex lift mast (in mm) E16C E16C-E20P Lift heights h3 2770 3070 Total height when lift mast retracts h1 1919 2069 Maximum height when lift mast is working h4 3383 3683 Free lift height h2 1318 1468 Triple lift mast (in mm) E16C E16C-E20P Lift heights h3 4020 4470 4770 5470 5920 6220 Total height when lift mast retracts h1 1919 2069 2169 2469 2619 2719 Operating Instructions – 335 801 1701 EN – 04/2014 131 6 Technical data Lift mast data Triple lift mast (in mm) Maximum height when lift h 4 mast is working h2 Free lift height E16C E16C-E20P 4633 5083 5383 6083 6533 6833 1318 1468 1568 1868 2018 2118 . 132 Operating Instructions – 335 801 1701 EN – 04/2014 Index g A Activated lift stop . . . . . . . . . . . . . Additional capacity rating plate for attachments . . . . . . . . . . . . Attachments Fitting . . . . . . . . . . . . . . . . . . . Hydraulic connection . . . . . . . . Mechanical connection . . . . . . . . . . . 31 . . . . . 20 . . . . . 18 . . . . . 18 . . . . . 18 B back working lights Conducting . . . . . . . . . . . . . . . . . Backwards Backwards . . . . . . . . . . . . . . . . . battery level . . . . . . . . . . . . . . . . . . . . . . Replacement . . . . . . . . . . . . . . . Battery charging Charging . . . . . . . . . . . . . . . . . . . Battery discharge indicator (LED bar display) . . . . . . . . . . . . . . . . . Battery grease . . . . . . . . . . . . . . . . . Brake . . . . . . . . . . . . . . . . . . . . . . . brake fluid level Checking . . . . . . . . . . . . . . . . . . Brake system . . . . . . . . . . . . . . . . . . . . . 64 50, 54 . . . 40 . . . 42 . . . 40 . . . 32 . . . 90 .... 9 . . . 44 . . . 56 D Declaration of conformity . . . . . . . . . . . . 10 Depressurisation of working hydraulics . . 33 Description of use . . . . . . . . . . . . . . . . . . 7 Direction indicator light . . . . . . . . . . . . . . 31 Turning on . . . . . . . . . . . . . . . . . . . . 65 Disassembling/installing the electrical system cover plate Cover plate . . . . . . . . . . . . . . . . . . . . 66 Display for electric forklift truck remaining travel time active . . . . . 32 Display screen Clock / remaining travel time / speed . 32 Display unit . . . . . . . . . . . . . . . . . . . . . . 30 Disposal of old trucks . . . . . . . . . . . . . . . 82 Drive . . . . . . . . . . . . . . . . . . . . . . . . . . . . 8 Drive direction forwards . . . . . . . . . . . . . 31 Driving Driving . . . . . . . . . . . . . . . . . . . . 48, 51 Driving brakes, regenerative brakes . . . . 56 E C Carrying the forklift truck Carrying the forklift truck . . checks before starting work . . . . . . Circuit diagram Circuit diagram . . . . . . . . . Circuit diagram (2of 1) . . . . . . Circuit diagram (2of 2) . . . . . . Circuit diagrams (2of 1) . . . . . . . . . . . . . . . . (2of 2) . . . . . . . . . . . . . . . . Climatic conditions . . . . . . . . . Clock display symbol (am/pm) Conducting the front working lights . . . . . . . . . . . . 64 Connecting the battery to an external charger . . . . . . . . . . . . . . . . . . . . . . . 41 Consumables . . . . . . . . . . . . . . . . . . . . 17 . . . . . . . . 74 . . . . . . . . 36 . . . . . . . 148 . . . . . . . 144 . . . . . . . 145 . . . . . . . . . . . . . . . . . . . . . . . . . . . . 144 145 .. 7 . 32 Operating Instructions – 335 801 1701 EN – 04/2014 EC declaration of conformity . . . . . . . . Electrical system . . . . . . . . . . . . . . . . Emergency exit with attached rear window . . . . . . . . . . . . . . . . . . Emergency off switch Press . . . . . . . . . . . . . . . . . . . . . . Pull up . . . . . . . . . . . . . . . . . . . . . Error in electrical controllers or battery charger operation . . . . . . . . . . . Exerting the hand brake . . . . . . . . . . . . . 10 ... 9 . . 20 . . 47 . . 47 . . 31 . . 58 F Faults during operation . . . . . . . . . . . . . . . . . . 51, 55 Fire extinguisher . . . . . . . . . . . . . . . . . . 15 133 Index g Fork carriage Lowering . . . . . . . . . fork spacing Adjusting . . . . . . . . Forwards Forwards . . . . . . . . front windscreen wiper Turning on . . . . . . . Full free lift . . . . . . . . . . Full free lift duplex mast Securing . . . . . . . . . Function key . . . . . . . . . . . . . . . . . . 59, 62 . . . . . . . . . . . . . 70 . . . . . . . . . . 50, 53 . . . . . . . . . . . . . 64 . . . . . . . . . . . . . 87 . . . . . . . . . . . . . 87 . . . . . . . . . . . . . 32 G General principles Application . . . . . . . . . . . . . . . . . . . . 78 General remarks . . . . . . . . . . . . . . . . . . 84 H Handling consumables . . . . . . . . . . . . . . 17 Horn Operation . . . . . . . . . . . . . . . . . . . . . 65 Hydraulic equipment . . . . . . . . . . . . . . . . 8 I Identification plate . . . . . . . . . . . . . Ignition Overhead guard . . . . . . . . . . . . Impermissible use . . . . . . . . . . . . . Indicator light Battery charging via integrated charger finished. . . . . . . . . . Charging via integrated charger . Prewarning: motor temperature increased . . . . . . . . . . . . . . . Inspection data . . . . . . . . . . . . . . . Intended use . . . . . . . . . . . . . . . . . . . . . 26 . . . . 36 ..... 6 . . . . 33 . . . . 33 . . . . 33 . . . . 88 ..... 5 L LCD display . . . . . . . . . . . . . . . . . . . . . . 33 Lift mast data . . . . . . . . . . . . . . . . . . . . 131 Lift mast position identification . . . . . . . . 33 134 Lift mast vibration absorption . . . Lifting Fork carriage . . . . . . . . . . . . Light fuse . . . . . . . . . . . . . . . . . . . Linde automatic brake (LBC) . . . List of technical parameter marks Load backrest . . . . . . . . . . . . . . Lowering the fork Manual . . . . . . . . . . . . . . . . . . . . . . . 32 . . . 59, 62 . . . . . . . . . . . . 67 57, 104 . . . 122 . . . . 14 . . . . . . 22 M Main circuit fuse fuse . . . . . . . . . . . . . . . . . . Maintenance position . . . . . . . . . . . . . . . . Maintenance data . . . . . . . . . . Maintenance intervals . . . . . . . Maintenance plan 1000 hours . . . . . . . . . . . . . 3000 hours . . . . . . . . . . . . . Masts tilting backwards . . . . . . . . . tilting forwards . . . . . . . . . . . Motor temperature at upper limit . . . . . . . 67 . . . . . . . 37 . . . . . . . 88 . . . . . . . 85 . . . . . . . 91 . . . . . . . 93 . . . . 59, 62 . . . . 59, 61 . . . . . . . 31 O Observe truck documentation . . . open the overhead guard by force Do not use cables . . . . . . . . . Operating attachments Operating attachments . . . . . Operating devices . . . . . . . . . . . Operating hours display . . . . . . . Operating the clamp Operating the clamp . . . . . . . Operating the lateral forks Operating the lateral forks . . . Operation . . . . . . . . . . . . . . . . . Ordinary duplex mast . . . . . . . . . Securing . . . . . . . . . . . . . . . . Overview of the forklift truck . . . . . . . . . . 32 . . . . . . 23 . . . 60, 62 . . . . . . 29 . . . . . . 32 . . . 60, 63 . . . . . . . . . . . . . . . . . . . 60, 63 ... 8 . . 86 . . 86 . . 28 Operating Instructions – 335 801 1701 EN – 04/2014 Index g P Parking brake . . . . . . . . . . . . . . . . . . . . . 9 Releasing . . . . . . . . . . . . . . . . . . . . . 58 Q Qualified person . . . . . . . . . . . . . . . . . . . 17 R Rear cover open . . . . . . . . . . . . . . rear windscreen wipers Turning on . . . . . . . . . . . . . . . . Reception of truck . . . . . . . . . . . . . Recommendations for consumables Chain spray . . . . . . . . . . . . . . . Electric cleaner . . . . . . . . . . . . . Gearbox oil . . . . . . . . . . . . . . . . Hydraulic oil . . . . . . . . . . . . . . . Lubricating grease . . . . . . . . . . Regular safety inspection . . . . . . . . Regulations . . . . . . . . . . . . . . . . . . Replacing the fuses Checking . . . . . . . . . . . . . . . . . Reset button . . . . . . . . . . . . . . . . . Residual risks . . . . . . . . . . . . . . . . Reverse drive direction . . . . . . . . . . Reversing Reversing . . . . . . . . . . . . . . . . . . . . . 33 . . . . 64 ..... 3 . . . . . . . . . . . . . . . . . . . . . . . . . . . . 90 90 90 89 90 17 17 . . . . . . . . . . . . . . . . 66 32 15 32 Securing the mast to prevent backward tilting . . . . . . . . . . . . . . . . . . . . Service plan before starting work . . . . . . . . . . . . Single lever operation of the lift mast and attachments Single lever operation . . . . . . . . . . Speed display symbol . . . . . . . . . . . . Speed reduction activated . . . . . . . . . Stability . . . . . . . . . . . . . . . . . . . . . . . Steering . . . . . . . . . . . . . . . . . . . . . . . Steering position display activated . . . Steering system . . . . . . . . . . . . . . . . . Storage . . . . . . . . . . . . . . . . . . . . . . . Summary . . . . . . . . . . . . . . . . . . . . . . Symbols . . . . . . . . . . . . . . . . . . . . . . Hour meter active . . . . . . . . . . . . . Operating hours until next service . Parking brake activated . . . . . . . . . Service interval exceeded . . . . . . . . . 86 . . 36 . . . . . . . . . . . . . . . . . . . . . . . . . . . . 61 32 31 16 . 8 32 55 84 84 . 7 32 33 33 32 T . . . . . . 46 . . . . . . 47 . . . . . . 33 Technical data 1.6 Ton Forklift Truck . . . . . . . . 123, 126 2.0 Ton Forklift Truck . . . . . . . . . . . . 129 Technical description . . . . . . . . . . . . . . . . 7 Technical notes . . . . . . . . . . . . . . . . . . . . 2 Text field Error code for lift height display . . . . . 33 Error code for steering position display . . . . . . . . . . . . . . . . . . . . . 33 the centralised control lever (joystick) Operating the lift mast and attachments using . . . . . . . . . . . . 58 the driver’s armrest Adjusting . . . . . . . . . . . . . . . . . . . . . 46 the driver’s seat Adjusting . . . . . . . . . . . . . . . . . . . . . 45 the hazard warning lights Turning on . . . . . . . . . . . . . . . . . . . . 64 Tilt the mast Manual . . . . . . . . . . . . . . . . . . . . . . . 21 Tip-over of the truck . . . . . . . . . . . . . . . . 16 Operating Instructions – 335 801 1701 EN – 04/2014 135 . 50, 54 S Safety guidelines . . . . . . . . . . . . Safety information . . . . . . . . . . . 3rd auxiliary hydraulic system active medical equipment . . . Driver’s field of vision . . . . . . . Gas springs . . . . . . . . . . . . . Speed reduction . . . . . . . . . . unauthorised use . . . . . . . . . Welding operations . . . . . . . . seat belt Fastening . . . . . . . . . . . . . . . Unfastening . . . . . . . . . . . . . Seat belt not fastened . . . . . . . . . . . . . . . . . . . . . . . . . . . . . . . . . . . . . . . . . . . . . . . . . . . . . . . . . . . . . . . 14 14 14 15 15 15 15 14 15 Index g Tow coupling Tow coupling . . . . . Towing regulations . . . . . . . Triple mast . . . . . . . . . . Securing . . . . . . . . . Turning on the lights Turning on the lights W . . . . . . . . . . . . . 72 . . . . . . . . . . . . . 73 . . . . . . . . . . . . . 87 . . . . . . . . . . . . . 88 . . . . . . . . . . . . . 64 U Using a hoist to lift the battery battery . . . . . . . . . . . . . . . . . . . . . . . 44 136 Warnings . . . . . . . . . . . . . . . . . . . . . . Wheel change Wheel change . . . . . . . . . . . . . . . . When replacing the battery When replacing the battery . . . . . . windscreen wipers headlights . . . . . . . . . . . . . . . . . . . Without function . . . . . . . . . . . . . . . . . Working on the lift mast or front section of the fork lift truck . . . . . . . . . . ... 7 . . 76 . . 38 . . 63 . . 33 . . 85 Operating Instructions – 335 801 1701 EN – 04/2014 Linde Material Handling GmbH 335 801 1701 EN – 04/2014 Electric forklift truck Original instructions 335-03 series Annex E16C-03, E16P-03, E20P-03 335 801 1701 EN – 04/2014 7 Circuit diagrams 7 Circuit diagrams Electrical circuit diagram Electrical circuit diagram Circuit diagrams Code Designation A1 A2 Charging/discharging resistor module 30-38 Controller, 1Line 54 8-74 1A1 Traction power unit, 2Line 9 11-41 1A4 Acceleration sensor, line 4 173-176 2A1 Lifting power unit, 1Line 6 49-65 1B1 2B5 Acceleration sensor, right traction motor 1M1 16-20 Acceleration sensor, left traction motor 1M2 30-34 Traction motor temperature sensor, 2line 39 Hydraulic joystick, lifting/dropping/tilting 153-158 Hydraulic joystick, auxiliary function 1/2 161-166 Hydraulic motor temperature sensor, 2line 59 speed sensor 2M1 50-54 3B1 Steering angle sensor, 186-188 3B2 Steering wheel sensor 4C1 Suppression capacitor, horn 470np / 400v 107 1B2 1B3 2B1 2B2 2B3 F2 Fuse, 15 A, control circuit 60 F3 F4 Fuse, 10 A, Charge discharge circuit 63 Fuse, 5 A, transformer output 78 F7 Fuse, 36 1F1 Fuse, 355 A, traction motor 25 1F8 Fuse, 5A, charge discharge circuit 43 Fuse, 300 A, oil pump motor 50 2F1 142 2F6 4F1 Fuse, 5A, charge discharge circuit 46 Fuse, 10A, Horn 109 9F5 Fuse 9M3 104-105 G1 Battery, 3 4H1 Horn 109 K1 Main contactor 26, 50 1M1 Right traction motor 22-24 1M2 Left traction motor 35–37 2M1 Hydraulic motor 55-57 9M3 Hydraulic fan motor 104-106 6P1 Multifunction indicator 90-101 S1 Power switch 69-70 S3 Seat switch, 141-142 S4 Overhead guard switch 142 1S1 Right steering axle switch 177 1S2 Left steering axle switch 175 1S4 Hand brake switch 117 1S5 Foot brake switch 108 1S13 Single pedal truck direction selection switch 193-198 4S1 Horn button 109 7S1 Emergency off switch 60 U1 Voltage transformer, line 6 75–78 Operating Instructions – 335 801 1701 EN – 04/2014 Circuit diagrams 7 Electrical circuit diagram 2Y7 Attachment solenoid valve, 2B 118 2Y8 Attachment solenoid valve, 2A 120 2Y9 Safety solenoid valve, 122 X9 42-pin plug connector 53-56, 60, 63, 71, 94, 108-198 10-pin plug connector 160. 162, 167,169 3-pin plug connector, 142 X10 2-pin plug connector, battery 3 BK BK = Black X12 BN BN = Brown BU BU = Blue 1X1 6-pin plug connector, 32-37 , 197-200 2-pin plug connector, CAN bus 91-92 4-pin plug connector, 1B1 17-20 GN GN = Green 4-pin plug connector, 1B2 30-33 GY GY = Gray 1X2 6-pin plug connector 1S13 194-198 OG OG = Orange 1X3 1X4 3-pin plug connector, 117 1X5 3-pin plug connector, 108 1X6 2-pin plug connector 142 X1 X2 X15 1X10 4-pin plug connector 1A4 173-176 2X1 4-pin plug connector, 2B5 50-53 2X3 6-pin plug connector, 153-158 2X4 6-pin plug connector, 161-166 3X1 6-pin plug connector, 3B2 112-113 3X2 4-pin plug connector, 178-180 3X3 4-pin plug connector, 185-188 4X1 2-pin plug connector 109 Colours RD RD = Red VT VT = Violet WH WH = White YE YE = Yellow . 6X2 7-pin plug connector, diagnostic 85-88 9X7 10-pin plug connector, 53-56, 70, 87, 100, 160-162 9X12 3-pin plug connector, hydraulic fan motor 9M3 53-56, 70, 87, 100 2Y2 Lift solenoid valve 108 2Y3 Tilt forwards solenoid valve 110 2Y4 Tilt backwards solenoid valve 110 2Y5 Attachment solenoid valve, 1B 114 2Y6 Attachment solenoid valve, 1A 116 Operating Instructions – 335 801 1701 EN – 04/2014 143 7 Circuit diagrams Electrical circuit diagram Circuit diagrams Circuit diagram (2of 1) 144 Operating Instructions – 335 801 1701 EN – 04/2014 Circuit diagrams 7 Electrical circuit diagram Circuit diagrams Circuit diagram (2of 2) Operating Instructions – 335 801 1701 EN – 04/2014 145 7 Circuit diagrams Hydraulic oil diagram Hydraulic oil diagram Working and steering hydraulic system circuit diagrams A Working hydraulic system 26-1 Lift cylinder, 180Standard mast 1 Control valve 26-2 Lift cylinder, 180Duplex mast 2 Throttle valve 26-3 Lift cylinder, 180Triple mast 3 Non-return valve B Compact steering axle BR340 4 Dropping brake valve 5 Non-return valve C Combined axle BR306 6 Two position/ two way valve, control 7 Switching valve 8 Three position/three way valve, dropping 9 Relief valve, manually dropping the fork 11 Three position/ five way valve, tilting 12 Three position/ five way valve, hydraulic attachment * 1 13 Three position/ five way valve, hydraulic attachment * 2 14 Non-return valve D Steering hydraulic system 27 Steering control valve 28 Steering servo valve 29 Three position/ seven way valve 30 Non-return valve 31 Hose rupture protection 150+10 bar (E16C) 210+10 bar (E16P, E20P) 32 Make up valve 33 Non-return valve 15 Throttle valve 33 Non-return valve 16 Pressure relief valve 34 Pressure relief valve Standard Duplex mast mast Triple mast E16C 200+5 200+5 200+5 150+8 bar (E16P, E20P) E16P 200+5 200+5 200+5 E20P 205+5 220+5 230+5 E Pressure filter, 6 μm 17 Two position/ two way valve 18 Non-return valve 19 Pressure accumulator 90+8 bar (E16C) F LLC controller 35 Joystick. Hydraulic attachment * 1and 2 36 Joystick, working hydraulic 20 Cylinder, hydraulic attachment * 2 G Flow priority valve 21 Cylinder, hydraulic attachment * 1 37 Excess flow valve 22 Bypass valve, manually tilting the mast 38 Two position/ three way valve 23 Two position/ two way valve 39 Pressure pump (11 CM3 / rev) 24 Tilt cylinder 40 Motor 25 Pipe rupture protection 146 Operating Instructions – 335 801 1701 EN – 04/2014 Circuit diagrams 7 Hydraulic oil diagram H Hydraulic reservoir 41 Oil bath air filter 42 Suction filter (15 μm, 0.25 bar) Operating Instructions – 335 801 1701 EN – 04/2014 147 7 Circuit diagrams Hydraulic oil diagram Working and steering hydraulic system circuit diagrams Working and steering hydraulic systems 148 Operating Instructions – 335 801 1701 EN – 04/2014 Linde Material Handling GmbH 335 801 1701 EN – 04/2014