Transcript
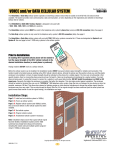
Person-to-Person®
Quick Start Guide
The P2P
Console Unit will
support a phone
and answering
machine or a
combo phoneanswering
machine. If you
subscribe to
voice-mail then
no connection is
required for the
ANS MACH port
The remote
receiver (at right)
can expand the
P2P Console for
screening and
routing of calls see page 29 in
manual. Note:
receivers are not
capable of
routing calls to
wireless multihandset systems
The Person-to-Person® system requires Caller ID
service from your telephone company to use the
features of this device. If the unit only displays the
message “INCOMING CALL” , contact technical
service.
SET UP
1. Plug the power supply transformer (console) into
a 120VAC outlet and the other end into the 7.5VAC
barrel jack on the P2P Console Unit. The unit should
beep and the display will show 12:00.
2. Unplug your phone from the telephone wall jack.
Using the telephone cord supplied, plug one end into
the telephone wall jack and the other end into the
LINE IN jack on the P2P Console Unit.
3. Plug the telephone cord from your phone into the
PHONE jack on the back of the P2P Console Unit.
4. The time clock will automatically set when an
incoming call is received.
The unit is now ready to collect Caller ID information
for all of your incoming calls. To learn how to block
or route calls - read the information on the back, or
refer to the user manual.
www.person-to-person.net for help & FAQs.
REVIEWING NEW INCOMING CALLS (NIC)
1.The red light on the P2P Console will flash when there are New calls. The NIC can be reviewed by
pressing the FORWARD or BACK buttons on the P2P Console Unit.
2. The NIC entries can be DELETED or saved to your PERSONAL DATABASE.
3. To delete the entry press the DELETE button twice. To save the entry see ADDING ENTRIES below.
SCREENING UNIDENTIFIED INCOMING CALLS
1. In non-screen mode (The S box located in the lower left corner of the display is not highlighted) Press the
SCREEN button on The P2P Console once, this will set the unit to SIMPLE screen mode. Incoming calls
that contain the messages “OUT OF AREA” or “UNKNOWN NAME” without a telephone number will
automatically be blocked by the P2P Console and not be allowed to pass to the attached phones.
2. The Timer feature can be used to screen calls only during desired times. See page 18 in user manual.
SCREENING IDENTIFIED INCOMING CALLS
1. An incoming call that is identified with a name or number can be blocked, see ADDING ENTRIES below.
2. The P2P Console is also capable of blocking groups of numbers. See page 20 of the user manual.
ADDING ENTRIES TO PERSONAL DATABASE
1. Review your incoming calls using the FORWARD and BACK buttons on the P2P Console Unit.
2. When an entry is displayed that you DO NOT want to ring your phone press the SELECT button until only
the answering machine icon (tape cassette, located at the bottom-center of the display) is highlighted.
3. Press SAVE button to save the entry to your PERSONAL DATABASE. NOTE: From this point on, this
number will always be blocked from your phones REGARDLESS of the automatic SCREEN mode setting.
4. NOTE: When an entry is displayed and you are wanting it to only ring specific phones, press the
SELECT button until the remote receiver icon (REMOTE 1 or REMOTE 2, etc, and tape cassette, located at
the bottom of the display) is highlighted. Press SAVE button to save entry to the PERSONAL DATABASE.
Related information on this topic is found on pages 17,20, and 29 in the user manual.