1
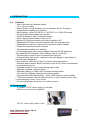
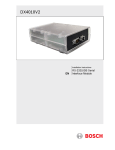
User Guide
Nixie Clock Type
‘6 tube IN-12’
Nixie Tube Clock ‘Nixie 6 IN- 12’
www.printerdoctor.com
-1-
1. INTRODUCTION
1.1
Features
- Hours, Minutes and Seconds display
- 12 or 24 hour modes
- Uses a Quartz Crystal Oscillator as the timebase Not AC frequency
- Programmable leading zero blanking
- Date display in either DD.MM.YY or MM.DD.YY or YY.MM.DD format
- Programmable date display each minute
- Scrolling display of date or standard display
- Alarm, with programmable snooze period
- Optional GPS synchronisation with status indicator LED
- Dedicated DST button to switch between DST and standard time
- Supercapacitor backup. Keeps time during short power outages
- Simple time setting using two buttons
- Programmable leading zero blanking
- Five programmable neon colon settings (Flashing AM/PM indication,
illuminated AM/PM indication, both flashing, both on, both off)
- Seconds can be reset to zero to precisely the set time
- Programmable night mode - blanked or dimmed display to save tubes or
prevent sleep disturbance
- Rear Indicator LEDs dim at night to prevent sleep disturbance
- Weekday aware ‘Master Blank’ function to turn off HV/ tubes on weekends
or during working hours
- Separate modes for colon neons during night mode
- Standard or fading change of digits
- Standard, fading, or fading with scrollback display modes
- ‘Slot Machine’ Cathode poisoning prevention routine
- Programmable RGB tube lighting – select YOUR favourite colour palette
- 729 colours possible. Have a different colour or your choosing every hour,
or autochanging colours. Your choice
- All user preferences stored to non-volatile memory
4. Power supply
A suitable 12v DC power supply is included.
- 500mA or more current capability
- 12V DC 5.5mm plug, with 2.1mm
Nixie Tube Clock ‘Nixie 6 IN- 12’
www.printerdoctor.com
-2-
3.
HOW TO OPERATE THE CLOCK
The four buttons have the following functions:
SET: Exit tube test routine on cold power-up; Show date;
Set time and date; Enter configuration menu;
ADJ: Adjust: time, date, alarm time, configuration parameters;
ALARM: Set alarm time; snooze; cancel snooze/alarm;
DST: Toggle between DST and Standard Time (+/- 1 Hour)
Enter colour setup menu; scroll through colour / time options
Entering configuration mode:
The principal settings of the clock are stored in flash memory – your preferred
configuration is stored even after powering off the clock for extended periods. To access
the configuration mode press and hold the ‘SET’ button. After 2 seconds the seconds will
become highlighted. Continue holding the button a further 2 seconds until the clock
displays in this format: 00-XX-99. The ‘99’ in the seconds digits tells you that you are in
the configuration menu. In configuration mode the hours digits diplay the current
parameter being adjusted, and the minutes digits display the current value stored against
the parameter. For each parameter, and referring to the table below, scroll through the
range of possible values by pressing the ‘ADJ’ button. When the desired value has been
reached, move on to the next parameter by pressing the ‘SET’ button. When the last
parameter has been set, pressing ‘SET’ one more time will revert the clock back to time
display mode. The first parameter (0) cannot be changed as it is the software revision
number. It will show for several seconds and then move to parameter 1.
Parameter
Description
Values
0
Software revision
10 = version 1.0, 11 = version 1.1 etc
1
12 / 24 Hr mode
0 – 12 Hr (default)
1 – 24 Hr
2
Date format
0 = MM.DD.YY (default)
1 = DD.MM.YY
2 = YY.MM.DD (from V1.1 onwards)
3
Leading zero blanking
0 – leading zero blanked (default)
eg. 01:54:32
1 – leading zero displayed
4
Night Mode start hour
0 - 23
5
Night Mode end hour
0 - 23
6
Night Mode
7
Master Blank start hour1
0 – Tubes off
1 – Dimmed display (default)
0 - 23
8
Master Blank end hour1
0 - 23
9
Master Blank days1
10
Colon neons mode
0
1
2
3
0
1
2
3
4
Nixie Tube Clock ‘Nixie 6 IN- 12’
www.printerdoctor.com
– Off
– Weekdays
- Weekends
– All days (default)
– AM/PM Indication, flashing
– AM/PM Indication, illuminated
– Both flash (default)
– Both illuminated
– Both off
-3-
11
Colon neons during
night dimmed mode
12
Radio time signal source
13
GPS Baud rate
14
15
16
17
18
Radio time offset hours
Radio time offset mins
Radio time offset
polarity
Reserved – leave as 0
Snooze period
19
20
21
Reserved – leave as 0
Time Calibration Factor
Time Calibration Polarity
22
Slots Mode5
23
24
25
26
Reserved – leave as 0
Reserved – leave as 0
Reserved – leave as 0
Display Mode
27
Auto date display each
minute6
28
Night Mode Override
Period
Restore default settings
29
2
0 – AM/PM Indication, flashing
1 – AM/PM Indication, illuminated
2 – Both flash
3 – Both illuminated (default)
4 – Both off
0 – No Radio Time source (default)3
1 – Reserved
2 – Reserved
3 – Reserved
4 - GPS
0 – 4.8 Kbps (default)
1 – 9.6 Kbps
2 – 19.2 Kbps
3 – 38.4 Kbps
0-13 (default 0)4
0-45 (default 0)4
0 - Minus time (default)
1 – Plus time
0
0 – 6 minutes (default)
1 – 9 minutes
2 – 12 minutes
3 – 15 minutes
0
0 - 99 (each unit adjusts by 0.2s per day)
0 - Make clock slower
1 - Make clock faster
0 – Slots disabled
1 – Slots every minute
2 - Slots every 10 minutes (default)
3 - Slots every hour
4 – Slots at midnight
0
0
0
0 – Standard change of digits
1 – Fading digits
2 – Fading digits with scrollback effect
(default)
0 – Off
1 – On
2 – On with scrolling effects (default)
0 – 50 (default 0 gives 15 seconds
override)7
0 – Keep user settings
1 – Restore original default settings8
Notes:
Nixie Tube Clock ‘Nixie 6 IN- 12’
www.printerdoctor.com
-4-
1. Master Blanking Mode has priority over Night Mode. Use to disable the clock on
weekends (eg clock is in office), or during office hours (eg clock is at home). Complete HV
shutdown to save power and tube life.
2. Night time neons mode is active when night mode is set to dim. During night time
blanking the tubes AND neons are disabled.
3. Clock is fully functional without GPS synchronisation. Set time manually.
4. Enter your time zone offset from the synchronisation source. Note that GPS transmits
UTC.
5. Visual effect / cathode poisoning prevention – all digits on all tubes are cycled for 10
seconds. This setting overrides night blanking or dimming for the duration of the effect (10
seconds).
6. Date will be displayed each minute between 50 and 55 seconds past the minute.
7. Press ‘SET’ briefly during Night Mode to show time for prescribed period.
8. Set this parameter to ‘1’ to restore original default settings. Internal operations will then
load all the original settings and restore the value to ‘0’
Setting the Time and Date:
From time display mode, press and hold ‘SET’ button for 2 seconds until the
seconds digits are highlighted.
Press the ‘ADJ’ button to reset seconds to zero.
Briefly Press ‘SET’ again and the hours will be highlighted
Press the ‘ADJ’ button to set the minutes.
Briefly Press ‘SET’ again and the hours will be highlighted.
Press the ‘ADJ’ button to set the hours.
Proceed in this fashion to set the calendar: Year, Month and Day.
Finally, briefly Press ‘SET’ again to revert to normal clock operation.
Showing Date:
From time display mode, briefly press ‘SET’ button. Date will be shown for 5
seconds, then revert to time display.
Auto Date Display:
Setting parameter (18) to ‘1’ will enable auto display of date between 50
and 55 seconds past each minute.
Night Blanking Override:
During programmed night blanking, the blanking may be overridden to see
the time by briefly pressing the ‘SET’ button. Tubes will remain lit for the
period defined in parameter (8).
Setting Alarm:
Press the ‘ALARM’ Button. The seconds digits show the on / off status of the
alarm: 00 or 01 (off or on).
Set on / off status, then minutes followed by hours by using the ‘ALARM’
and ‘ADJ’ buttons. When set, the alarm LED will also light.
Nixie Tube Clock ‘Nixie 6 IN- 12’
www.printerdoctor.com
-5-
Cancelling Alarm:
Press ‘ALARM’ briefly to cancel alarm and enter snooze mode, or a longer
press until the clock bleeps, to cancel snooze. Alarm remains set for the
next day.
Rapid DST Adjustment
Press ‘DST’ briefly to toggle between DST and standard time. The Indicator
shows whether DST mode is active or not.
Note, that GPS time data does not contain DST information, so the DST
status will need to be set manually in GPS sync mode as well as manual
time-set mode.
Calibration of timekeeping accuracy
Over time you may observe the clock runs faster or slower than an accurate
time standard. You can finely adjust the timekeeping by setting
configuration parameters 20 and 21. We recommend to precisely set the
clock against a known accurate clock, and then record the time drift in
seconds after 5 full days (120 hours). Program this value into parameter
20.
Set parameter 21 to 0 to slow down the clock and to 1 to speed up the
clock.
4.
CONFIGURING THE RGB LED TUBE LIGHTS
The clock features a separate and dedicated setup menu for the RGB
LED lights, accessed from the ‘DST’ button. All settings are stored to
non-volatile memory, so your favourite colours will still be there after
even a long power off.
You can set fixed colours and intensities, or program an auto colour
cycling effect at your choice of speed.
4.1
Entering RGB LED menu
Press and hold the ‘DST’ button until the display shows: 00: 0:00.
The first minutes tube will not be lit.
Nixie Tube Clock ‘Nixie 6 IN- 12’
www.printerdoctor.com
-6-
•
•
•
•
•
•
•
For each hour (0-23), you can set a custom colour.
Each custom colour can have your choice of RED, GREEN and BLUE
values from 0 (colour off) to 8 (maximum brightness).
Mix the colours using the SET, ADJ, ALARM buttons.
Use low values (1,2 and 3) for low brightness, eg. For night time
Set the value to ‘0’ for that colour to be off.
Once you are happy with the colour for that hour, press ‘DST’ to move
to the next hour.
Have fun playing with your favourite colours and intensities!
Colours are displayed live during RGB menu:
•
In the example above, between 8 and 9 hours, the LEDs will be purple
(8 red, 0 green and 8 blue).
Nixie Tube Clock ‘Nixie 6 IN- 12’
www.printerdoctor.com
-7-
•
4.2
In the example below, between 19 and 20 hours, the LEDs will be
blue with a hint of green ( 0 red, 2 green and 8 blue).
Setting auto colour cycling
Setting colour RED to value 9 has a special meaning:
This will enable auto colour cycling for the specified hour. The speed
of the cycling will then be governed by the GREEN value:
0 = very slow change
9 = very fast change
This auto colour cycling mode is explained in the picture below:
Red = 9, therefore Auto Colour Cycling is enabled for 12-13 hours.
Green = 3, so speed is 3.
Blue value has no effect.
Note: The colours do not cycle live during Auto Colour Cycling setup.
The cycling starts only during normal time and date display.
Nixie Tube Clock ‘Nixie 6 IN- 12’
www.printerdoctor.com
-8-
5. USING A GPS TIME RECEIVER
5.1
Configuring for Optional GPS Synchronisation.
• Set parameter 12 to value 4.
• If using our Micro GPS, ensure the baud rate in parameter (13) is
value 0.
• Set parameters 14 and 15 for the hours and minutes your time
zone is offset from UTC. This is usually only whole hours.
• Set parameter (16) to identify whether the offset is minus (0) or
positive (1) of UTC.
The clock has been designed for, and tested with our Micro GPS
Receiver (available separately, to order please email to:
[email protected])
•
•
5.2 Function of the green GPS indicator
GPS Synchronisation not enabled (parameter (12) = 0)
LED is permanently off.
GPS Synchronisation enabled (parameter (12) = 4)
The LED will be ON if the clock has synchronised in the last two hours;
slowly flashing if the last synchronisation was between 2 hours and 24
hours ago; and off if the last synchronisation is older than 24 hours.
Nixie Tube Clock ‘Nixie 6 IN- 12’
www.printerdoctor.com
-9-