1
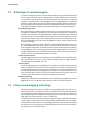
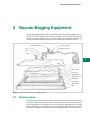
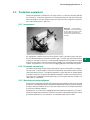
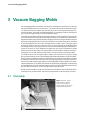
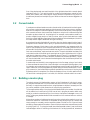
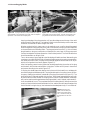
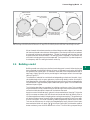
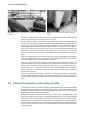
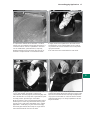
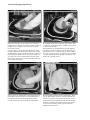
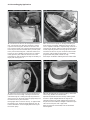
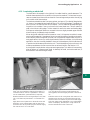
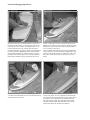
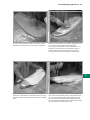
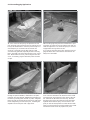
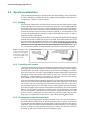
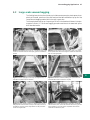
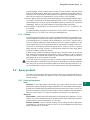
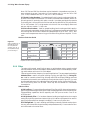
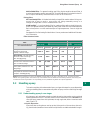
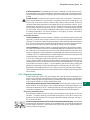
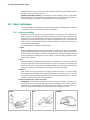
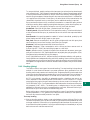
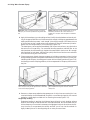
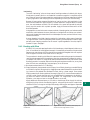
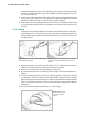
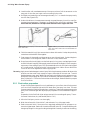
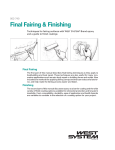
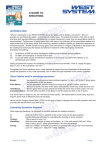
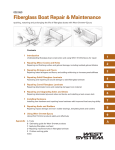
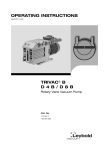
12 Vacuum Bagging Molds
Figure 3-2 A plug can be built of any combination of easy to
shape materials. This catamaran plug’s cabin area was shaped in
Styrofoam™ and then faired with epoxy/407.
Figure 3-3 The catamaran plug was faired and finished to the
same degree as the finished product. The shelf was applied to the
plug where the mold halves divide the form at its widest point.
the plug at the edge of the plug extension, will provide a ledge around the top of the mold
when the mold is right side up. The ledge will reinforce the mold and provide a clean area
outside of the laminate to seal the bag to the mold.
Whether a plug is built for heavy use or to be used only once, no effort should be spared
when fairing and finishing the plug. Every flaw in the surface of the plug will be transferred
to the mold and to the finished product. The plug may be built to within ¼" of the finished
plug dimension, using any combination of materials. An outer layer of fairing compound
can then be shaped to the exact dimension of the finished product. The final faired surface
should be sanded to an 80-grit finish.
Two or three coats of epoxy applied to the faired plug will seal the surface. Wet sanding the
cured epoxy to a 400-600 grit finish will make the surface smooth enough to prevent adhesion when the mold is cast. The plug’s surface should appear as smooth and as fair as you
wish the final product’s surface to appear (Figure 3-3).
After final sanding, several coats of paste wax should be applied to the surface of the plug
and the shelf, with the last coat buffed to a high gloss. The wax will fill pores in the surface
and prevent bonding to the mold (Figure 3-4).
If the plug is a closed shape that requires a two piece mold, the break line or widest point
around the plug should be determined. The plug should taper in from all points on this line.
An epoxy coated, plywood shelf is attached to the plug at the break line (Figure 3-5). The
shelf should be 6" wide and parallel with the floor. Small cleats fastened temporarily with
drywall screws will hold the shelf to the plug until the mold is made. Beeswax (toilet bowl
wax) can be used to seal the gap between the plug and shelf, and, if desired, make a small fillet in the mold/shelf corner. The completed mold will include a level 6" wide lip around the
opening of the mold at the break (laminate trim) line, and the fillet will leave the edge of the
mold rounded. During the lay up, the laminates are extended past the lip, 2" onto the shelf.
Figure 3-4 A plug for a
rudder, with the shelf positioned at the rudder centerline, is waxed and ready for
the application of the mold
half.