1
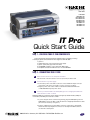
APRIL 2005
LNA1000A
LNA1000A-USR
LNA1000A-HW1
LNA1000A-HW2
LNA1000A-SW1
LNA1000A-SW2
LNA1000A-VP1
LNA1000A-VP2
LNA1000A-VP3
IT Pro
™
Quick Start Guide
Step 1 - CHECKING YOUR IT PRO COMPONENTS
Your IP Pro package should contain the following items. If anything is missing
or damaged, please contact Black Box Tech Support at 724-746-5500.
1. (1) IT Pro
2. (1) IEC-320 power cord and external power supply
3. (3) 6-ft. (1.8-m) Category 5 Ethernet cables
4. (1) CD-ROM containing a user’s manual in PDF format
5. This Quick Start Guide in PDF format on another CD-ROM
Step 2 - CONNECTING YOUR IT PRO
A
Make sure that the IT Pro has adequate ventilation.
Place the back of the unit at least 1 to 2 feet (12 to 24") from the wall.
B
Connect the IT Pro’s power supply.
1. Connect the power cord’s barrel connector end to the DC 12V input connector
on the back of the IT Pro. (See Figure 1 for the connector’s location.)
2. Plug the power cord‘s other end into a standard 115-VAC North American
or 220-/240-VAC European power outlet.
C
Connect your internal LAN to the LAN1 (Eth0) port via a straight-pinned Ethernet
cable attached to a hub or switch.
NOTE: The LAN1 port is referred to in the software (see Figure 2) as Eth0. Likewise, LAN2 port
is called Eth1, and LAN3 port is referred to as Eth2.
1. If you’re using the IT Pro as an Internet gateway, plug the LAN2 (Eth1) port and
LAN3 (Eth2) port into the DSL or cable modem via a straight-pinned Ethernet cable.
(For connector locations, see Figure 1.)
2. Connect a VGA monitor to the HD15 connector on the IT Pro’s back panel.
Attach the PS/2 style keyboard connector to the 6-pin mini-DIN connector
on the IT Pro’s back panel.
®
1000 Park Drive • Lawrence, PA 15055-1018 • 724-746-5500 • blackbox.com
1
PS/2 Mouse
Connector
Parallel Port
LAN2
(Eth1)
Serial Port
(COM1)
DC 12V
Input Connector
Serial Port
(COM2)
LAN1
(Eth0)
LAN3
(Eth2)
VGA
Connector
USB Ports
PS/2 Keyboard
Connector
Figure 1. Rear view.
Step 3 - CONFIGURING YOUR IT PRO
A
Power on the IT Pro.
1. Press the round power button on the IT Pro’s front panel.
2. When the system boots, the following prompt appears on your PC.
Press Enter to begin.
B
Automatically select the IP address.
1. Press the Enter key. The configuration screen shown in Figure 2 appears.
2. Refer to the Status window in the upper-right-hand corner of the configuration
screen (Figure 2). The display will cycle through the IT Pro’s IP address (if it’s
detected), the status of the Eth0 (LAN1) and Eth1 (LAN2) ports, and the version
of the IT Pro’s operating code. The IT Pro will display a Choosing Address message
in the Status window as it tries to autodetect the IP address.
Figure 2. The configuration screen.
2
1000 Park Drive • Lawrence, PA 15055-1018 • 724-746-5500 • blackbox.com
C
Manually setting the IP address.
1. To manually change the IT Pro’s internal IP address, select IP Address from the Main
Menu window on the configuration screen (shown in Figure 2).
2. The system prompts you to enter a new IP address.
3. Type in the IP address and press the Enter key.
4. Press the Y key (for “Yes”) to confirm the address.
5. No further configuration via the attached monitor/keyboard is required. However,
you should make sure that the workstations on the internal LAN are set to obtain
their IP addresses automatically. The IT Pro will act as a DHCP server and configure
the workstations with the proper IP address, gateway, and DNS server parameters.
NOTE: You must reboot the workstations for these settings to take effect.
Step 4 - CONFIGURING YOUR DESKTOP
A
Access the Network screen via Windows.
In Windows (on your workstation), click on Start, then Settings, then Control Panel,
then Network. A Network Configuration/Identification screen appears.
®
B
Choose your network.
1. Click on the Configuration tab. A drop-down menu of installed network
components appears.
2. Select TCP/IP from the menu, then click on the OK button.
3. If TCP/IP does not display in the installed network components list, click on the
Add button. The Select Network Component Type screen appears.
4. Select Protocol from the list, then click on the Add button. The Select Network
Protocol screen appears.
5. Select Microsoft in the Select Network Protocol screen’s Manufacturers section.
6. Select TCP/IP in the screen’s Protocols section, then click on the OK button. TCP/IP
now appears in the drop-down menu of installed network components. Highlight
TCP/IP, then click on the OK button.
®
C
Automatically obtain the IP address.
1. Click on the IP Address tab.
2. Select Obtain an IP address automatically.
D
Configure the DNS settings.
1. Click on the Gateway tab. Select any entries in the screen’s Installed Gateways
section, then click on the Remove button.
2. Click on the WINS Configuration tab. Select all entries in the screen’s WINS Server
Search Order section, then click on the Remove button. Select Use DHCP for WINS
Resolution.
3. Click on the OK button. Finally, reboot your computer.
1000 Park Drive • Lawrence, PA 15055-1018 • 724-746-5500 • blackbox.com
3
Step 5 - CONNECTING TO WEBCONFIG
A
Open a Web browser on a workstation attached to the internal network that the
IT Pro is also connected to.
NOTE: The Web browser must be capable of supporting 128-bit encryption. Examples of comparable
Web browsers include Netscape version 7, Microsoft Internet Explorer version 6, Mozilla version
1.0.1, and Opera version 6.05.
®
B
®
Type in the IP address, user ID, and software activation key.
NOTE: You will automatically receive the software activation key via email from Black Box once you
purchase your IT Pro.
1. Type the IT Pro’s IP address into the browser’s address bar. For example, we’ll use
192.168.2.1 as the IP address.
2. Type https://192.168.2.1:8043 into the address bar and press the Enter key.
NOTE: The last set of four numbers that you enter in Step 2 (8043) is the IT Pro’s port number.
This number is an industry standard and will never change; it should always be entered as 8043.
3. The Create Administrator Account page appears.
4. Type in the user ID. The default is root; you can use this name or create a new user
ID by typing over the existing ID. The user ID must be a maximum of 16 characters.
5. Next, type in the full name of this account (for example, System Administrator).
6. Create a password for this account. Type it in a second time to verify it.
7. Type in your registered Internet domain name. If you do not have a registered
domain name, use the default domain name that automatically appears in the
appropriate location on the screen.
8. Finally, type in the software activation key that you obtained via email from
Black Box.
NOTE: If you don’t type in the software activation key, the IT Pro will enter a 30-day trial mode. To
exit trial mode, you must enter the key. To validate this key, you must have access to the Internet.
Step 6 - CONFIGURING YOUR INTERNET CONNECTION
Configuring the Internet connection is a user-specific function. It may differ greatly
from system to system, so we do not provide system-specific information here. For more
information, follow the instructions in the IT Pro’s user’s manual (included on the other IT Pro
CD-ROM), or refer to your network or computer’s documentation.
4
1000 Park Drive • Lawrence, PA 15055-1018 • 724-746-5500 • blackbox.com