1
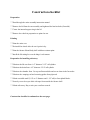
Construction checklist
Preparation
Read through the entire assembly instruction manual.
Remove the lid from the cart assembly and tightened the bracket bolts (if needed).
Center the internal support ring in the lid.
Remove the wheels in preparation to paint the cart.
Painting
Paint the entire cart.
Re-install the wheels after the cart’s paint is dry.
Paint the furnace lid and body shell with heat resistant paint.
Install the lid raising lever on the hinge’s stub mount.
Preparation for installing refractory
Fabricate the lid vent form. A 3" diameter 2-1/2" tall cylinder.
Fabricate the drain form. A 2" diameter 2-5/8" tall cylinder.
Fabricate the chamber form. Cut top and bottom disks and secure them in the form tube.
Fabricate the tamping tool and centering guides from plywood.
Obtain a suitable mold (3-1/2 to 4" diameter and 1-1/2" tall) to form plinth blocks.
Securely cover the tuyere hole with tape from outside the furnace shell.
Obtain refractory. Buy or mix your own from scratch.
Construction checklist is continued on the next page.
Construction checklist page 2
Installing the refractory
Gather all forms, tools (tamping stick, centering guides, hand shovel) and organize them
neatly.
Mix the refractory according to the instructions.
Place drain form in furnace baseplate and tamp in the base.
Center the chamber form and ram refractory half-way up the furnace body.
Insert the half-full furnace body into the cart so it won’t have to be installed when full and
heavy.
Ensure that the chamber form does not “float” and rise upward in the refractory.
Complete furnace body and “strike-off” the top of the furnace refractory flat and level.
Take note of when the body was finished. Return every 30 minutes to check the refractory’s
firmness, to carve the burner passage.
Set the vent form in the lid.
Center the lid’s internal support ring. Using strong tape on the outside of the lid brackets
where the ring’s arms protrude will help keep the ring centered.
Fill lid with refractory. Avoid leaving air pockets or other such flaws.
Strike-of the surface of the filled lid flat.
Make plinth blocks with the remaining refractory.
Check the body refractory for firmness. Carve burner passage if firm enough to support itself.
Allow at least three days to pass for the refractory to harden. Starting date: ____/____/____.
Fire the lining slowly as instructed in the manual.
Check for damage to lining. Repair as needed. Hairline cracks are normal with all refractory.
Congratulate yourself on completing the build! Follow the instructions in the user’s manual
to install the propane components and use the furnace. Happy Metalcasting!
www.BackyardMetalcasting.com