1
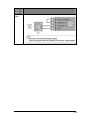
XYR 300L Wireless I/O
User's Manual
34-XY-25-22
Version 1
5/1/08
Notices and Trademarks
Copyright 2008 by Honeywell International Inc.
Version 1 May 1, 2008
While this information is presented in good faith and believed to be accurate, Honeywell disclaims the implied warranties
of merchantability and fitness for a particular purpose and makes no express warranties except as may be stated in its
written agreement with and for its customers.
In no event is Honeywell liable to anyone for any indirect, special or consequential damages. The information and
specifications in this document are subject to change without notice.
Honeywell, PlantScape, Experion PKS, and TotalPlant are registered trademarks of Honeywell International Inc.
Other brand or product names are trademarks of their respective owners.
Honeywell International
Process Solutions
2500 West Union Hills
Phoenix, AZ 85027
1-800 343-0228
ii
XYR 300L Wireless I/O User's Manual
Version 1
5/1/08
About This Document
This document is the XYR 300L Wireless Installation Manual that describes how to
install your XYR 300L units and contains important information for installing your units
with other equipment.
Note
If your network only contains one transmitter and receiver pair, you should also read
the XYR 300L QuickStart Guides.
This document contains the following sections:
Section
Read this section if you want to …
Basic steps for using your unit
Learn the basic steps for installing and using your unit.
Factory default configuration
Understand how the transmitter sends information to the
receiver.
Unit components
Understand the different parts of your unit.
Antenna installation
Learn how to install an antenna with your unit.
Resetting factory defaults
Reset your unit to the original factory default settings.
Linking transmitter and receiver units
Link your units to work as a dedicated pair.
Safety information
Understand important safety information related to your unit.
NOTE: You must read this information before installing your unit.
Know technical information about your unit.
Specifications
For more information, see the next sections.
REFERENCES
The following list identifies all documents that may be sources of reference for material discussed in this
publication.
Document Title
Getting Started with Honeywell OneWireless solutions
XYR3000 MSG
How to build an XYR3000 system
TERMINOLOGY
The following acronyms are used in the document.
Acronyms
Model numbers
XYR300X
XYR3001, XYR3002
XYR301X
XYR3011, XYR3012, XYR3013
XYR300G-X
XYR300G-M, XYR300G-E
Version 1
5/1/08
XYR 300L Wireless I/O User's Manual
iii
Support and Contact Information
United States and Canada
Contact:
Honeywell Solution Support Center
Phone: 1-800 822-7673. In Arizona: 602- 313-5558
Calls are answered by dispatcher between 6:00 am and 4:00 pm Mountain
Standard Time. Emergency calls outside normal working hours are received
by an answering service and returned within one hour.
Facsimile: (602) 313-3293
Mail:
Honeywell TAC, MS P13
2500 West Union Hills Drive
Phoenix, AZ, 85027
World Wide Web
Honeywell Solution Support Online:
http://www.honeywell.com/ps
Elsewhere
Call your nearest Honeywell office.
Training Classes
Honeywell Automation College:
http://www.automationcollege.com
iv
XYR 300L Wireless I/O User's Manual
Version 1
5/1/08
Symbol Definitions
The following table lists those symbols used in this document to denote certain conditions.
Symbol
Definition
ATTENTION: Identifies information that requires special consideration.
TIP: Identifies advice or hints for the user, often in terms of performing a task.
CAUTION
Indicates a situation which, if not avoided, may result in equipment or work (data) on
the system being damaged or lost, or may result in the inability to properly operate
the process.
CAUTION: Indicates a potentially hazardous situation which, if not avoided, may
result in minor or moderate injury. It may also be used to alert against unsafe
practices.
CAUTION symbol on the equipment refers the user to the product manual for
additional information. The symbol appears next to required information in the
manual.
WARNING: Indicates a potentially hazardous situation, which, if not avoided, could
result in serious injury or death.
WARNING symbol on the equipment refers the user to the product manual for
additional information. The symbol appears next to required information in the
manual.
WARNING, Risk of electrical shock: Potential shock hazard where HAZARDOUS
LIVE voltages greater than 30 Vrms, 42.4 Vpeak, or 60 VDC may be accessible.
ESD HAZARD: Danger of an electro-static discharge to which equipment may be
sensitive. Observe precautions for handling electrostatic sensitive devices.
Protective Earth (PE) terminal: Provided for connection of the protective earth
(green or green/yellow) supply system conductor.
Functional earth terminal: Used for non-safety purposes such as noise immunity
improvement. NOTE: This connection shall be bonded to Protective Earth at the
source of supply in accordance with national local electrical code requirements.
Earth Ground: Functional earth connection. NOTE: This connection shall be
bonded to Protective Earth at the source of supply in accordance with national and
local electrical code requirements.
Chassis Ground: Identifies a connection to the chassis or frame of the equipment
shall be bonded to Protective Earth at the source of supply in accordance with
national and local electrical code requirements.
Version 1
5/1/08
XYR 300L Wireless I/O User's Manual
v
Contents
Installing your unit ................................................................................................................................1
Unit components and connections .......................................................................................................3
Transmitter unit ...................................................................................................................................................... 3
Receiver unit........................................................................................................................................................... 6
Installing the antenna ...........................................................................................................................8
Supported antennas............................................................................................................................................... 8
Radio transmission distances.............................................................................................................................. 11
Installing and earthing antennas ......................................................................................................................... 12
Dipole and collinear antennas ............................................................................................................................. 13
Dipole antennas .............................................................................................................................................. 13
Collinear antennas .......................................................................................................................................... 13
Yagi antennas....................................................................................................................................................... 15
Installing the power supply .................................................................................................................17
Inputs and outputs__________________________________________________________18
Digital inputs ......................................................................................................................................................... 19
Analog input.......................................................................................................................................................... 21
Thermocouple input ............................................................................................................................................. 24
Pulse input ............................................................................................................................................................ 25
Installing and configuring the unit........................................................................................................................ 26
Installing the unit.................................................................................................................................27
Configuring your units ........................................................................................................................28
Testing your units ...............................................................................................................................29
Unit specifications __________________________________________________________30
Transmitter unit...................................................................................................................................30
Receiver unit.......................................................................................................................................30
Ancillary hardware reference information...........................................................................................31
RS232 serial cable ............................................................................................................................................... 31
Index _____________________________________________________________________32
vi
XYR 300L Wireless I/O User's Manual
Version 1
5/1/08
Safety information
Thank you for selecting the XYR 300L for your telemetry needs. We trust it will give you many years of valuable
service. To ensure your XYR 300L enjoys a long life, double-check ALL your connections with the Installation
Guide before powering on the module.
WARNING: Incorrect termination of supply wires may cause internal damage and will void warranty.
Exposure to RF energy is an important safety consideration. The FCC has adopted a safety standard for human
exposure to radio frequency electromagnetic energy emitted by FCC regulated equipment as a result of its
actions in Docket 93-62 and OET Bulletin 65 Edition 97-01.
FCC Notice when used in USA: XYR 300X Wireless I/O Module
Part
Additional information
15
This device has been tested and found to comply with the limits for a Class B digital device, pursuant to
Part15 of the FCC rules (Code of Federal Regulations 47CFR Part 15). Operation is subject to the
condition that this device does not cause harmful interference.
90
This device has been type accepted for operation by the FCC in accordance with Part90 of the FCC
rules (47CFR Part 90). See the label on the unit for the specific FCC ID and any other certification
designations.
Industry Canada: XYR 300X Wireless I/O Module
RSS-119 - This device has been type accepted for operation by Industry Canada in accordance with RSS-119 of
the Industry Canada rules. See the label on the unit for the specific Industry Canada certification number and
any other certification designations.
NOTE: Any changes or modifications not expressly approved by Honeywell Technologies P/L could void the
user’s authority to operate this equipment.
To operate this equipment legally the user must obtain a radio-operating license from the government agency.
This is done so the government can coordinate radio users in order to minimize interference.
Safety information - FCC Notice
This device complies with Part 15.247 of the FCC Rules. Operation is subject to the following two conditions:
This device may not cause harmful interference; and
This device must accept any interference received, including interference that may cause undesired
operation
NOTE: This equipment is suitable for use in Class 1 Division 2 groups A, B and C or non-hazardous locations
only.
**IMPORTANT ELECTRICAL SAFETY INFORMATION**
In order to comply with Electrical Safety Regulations, this module must be installed in an Electrical
AND Fire enclosure. This enclosure may be a single or multiple enclosures. Access to the module
Installing your unit
This section describes how to install your unit and contains the following sections:
Step
Description
For more information, see
…
1 – Read the safety information
Lets you understand important safety
information related to your unit.
Safety information on page
1.
NOTE: You must read this information
before installing your unit.
Version 1
5/1/08
XYR 300L Wireless I/O User's Manual
1
2 – Get to know the unit
features
Understand the basic features of your
unit.
Unit components and
connections on page 3.
3 – Install the antenna
Learn how to install an antenna with
your unit.
Installing the antenna on
page 8.
4 – Install the power supply
Learn how to install a power supply for
your unit.
Installing the power supply
on page 17.
5 – Install the units
Learn how to install your unit.
Installing the unit on page
27.
6 – Linking and configuring the
unit
Learn how to link and configure your
units to transmit and receive
information.
Configuring your units on
page 28.
7 – Test the unit
Understand the principles for testing
your units.
Testing your units on page
29.
Note
To ensure internal surge protection works correctly, you must earth each unit
using the Earth terminal.
For more information, see the next sections.
2
XYR 300L Wireless I/O User's Manual
Version 1
5/1/08
Unit components and connections
This section shows the components and terminal connections for the transmitter and
receiver units.
Transmitter unit
The XYR 300L I/O transmitter unit has the following components and terminal
connections:
Earth Wire Lug
underneath Unit
Version 1
5/1/08
XYR 300L Wireless I/O User's Manual
3
The front panel contains the following components:
SMA antenna connector
RS232 configuration
port
Rotary switch for set-point
settings
The triangle on the rotary switch indicates the current position, for example:
Set Point
NOTE: To avoid damaging the rotary switch, use a screwdriver to change the position.
The rotary switch controls the setpoint levels on the Analog and Thermocouple inputs.
4
XYR 300L Wireless I/O User's Manual
Version 1
5/1/08
The LEDs on the front panel indicate the unit status:
LED Status
Indicates
None
No power supply.
OK LED Green
Current status of the unit OK.
OK LED Red
Fault condition detected in unit.
TX Led Flashes
Transmitting Message.
PG LED on
Configuration Cable Connected.
Input LED ON
Input LEDS (i.e. D1, D2, SP, AZ.) light when the corresponding input is
active.
All LEDs medium flash
Version 1
5/1/08
D1
Digital Input 1 is active (Low).
D2
Digital Input 2 is active.
SP
Analog Setpoint is active.
AZ
Analog Input is zero mA
Medium speed flash (1.6HZ) indicates the module is halfway through the
configuration process. Medium flash also happens when you set the rotary
switch to position 0 when powering on the unit.
XYR 300L Wireless I/O User's Manual
5
Receiver unit
Your XYR 300L -R unit has the following components and terminal connections:
DC
LOAD
DO 2
-
- NOT USED
- NOT USED
DO 3
DO 2
- DO 1
+ POWER SUPPLY
-
AO
DO 1
LOAD
Max. 30VDC
500mA
+
For inductive load,
use surge diodes
+
LOAD
SYSTEM OK
COMMS FAIL
COMMON
+
24V
+
-
DO 3
-
AC
LOAD
ANALOG OUTPUT
Max. analog load
900 ohm
+
-
+
POWER SUPPLY
9 – 30 VDC
250mA @ 12V
125mA @ 24V
6
DO contacts are rated at 1A, 250VAC
For good engineering practice, use
a surge diode for DC loads and
a surge capacitor (10nF 250V) for AC loads
XYR 300L Wireless I/O User's Manual
Version 1
5/1/08
The front panel contains the following components:
SMA antenna connector
RS232 configuration
port
Rotary switch for set-point
settings
The LEDs on the front panel indicate the unit status:
LED Status
Indicates
None
No power supply.
OK LED Green
Current status of the unit OK.
OK LED Red
Fault condition detected in unit.
RX Led Flashes
Receiving Message.
CF Led ON
Module Communication Failure Output is active.
PG LED on
Configuration Cable Connected.
Output LED ON
The Output LEDS (i.e. D1, D2, D3) light when the corresponding output is
active.
LEDs with RSSI Push
Button Pressed
Output LED flashing
quickly
Version 1
5/1/08
D1
Relay output D1 is ON (Contact Closed).
D2
Relay Output D2 is ON.
D3
Relay Output D3 is ON.
When you press the RSSI push button, the unit shows the signal strength by
lighting the LEDs from the bottom to the top. Signal strength is the strength of
the last message received that was addressed to this station.
LED
Signal Strength
LED
Signal Strength
D1
More than -85 dBm
RX
More than -100 dBm
D2
More than -90 dBm
CF
More than -105 dBm
D3
More than -95 dBm
PG
Always on during RSSI
test
If an output is in communication failure, the corresponding LED flashes at 5
Hz.
D1
Relay Output D1 is in communication failure.
D2
Relay Output D2 is in communication failure.
D3
Relay Output D3 is in communication failure.
PG
Analog output is in communications failure.
XYR 300L Wireless I/O User's Manual
7
Installing the antenna
This section explains how to install your antenna and contains the following sections:
Section
Description
For more
information, see …
Supported antennas and cables
Details the antennas and cables you
can use with the units.
Supported antennas
on page 8.
Radio transmission distances
Details the distances for reliable
operation.
Radio transmission
distances on page 11.
Installing and earthing antennas
Details important information about
installing and earthing antennas.
Installing and earthing
antennas on page 12
Dipole and collinear antennas
Details important information about
using dipole and collinear antennas.
Dipole and collinear
antennas on page 13.
Yagi antennas
Details important information about
using Yagi antennas.
Yagi antennas on
page 15.
For more information, see the next sections.
Supported antennas
You can use the following antennas with the units:
Antenna
Additional information
Total gain
(including cable)
WH900
Whip antenna for mounting directly onto the module - operation up
to ½ mile (1 km).
-6 dBi
CFD890EL
0 dBi Dipole antenna with 15’ of Cellfoil cable and SMA connector.
0 dBi
SG900EL
5dBi Collinear omni-directional antenna with N-type connector.
5 dBi
SG900-6
8dBi Collinear omni-directional antenna with N-type connector.
8 dBi
YU6/900
10dBi Yagi directional antenna with N-type connector.
10 dBi
YU16/900
15dBi Yagi directional antenna with N-type connector.
15 dBi
You can use the following cables with the units:
The following table shows compatible cables for different antennas when used with
the XYR 300L I/O:
8
Antenna
North America
Australia/NZ
SG900EL
Any cable.
CC10 or CC20.
SG900-6
Any cable.
CC20.
YU6/900
CC20.
External cable with loss > 9dB.
YU16/900
External cable with loss > 9dB.
External cable with loss > 15 dB
XYR 300L Wireless I/O User's Manual
Version 1
5/1/08
You must carefully select antennas for XYR 300L I/O modules to avoid contravening
the maximum power limit on the unlicensed channel. The net gain of the
antenna/cable configuration should be no more than 6dB in North America (USA,
Canada, Mexico) and no more than 0 dB in Australia / New Zealand.
Note
The net gain of an antenna/cable configuration is the gain of the antenna (in
dBi) less the loss in the coaxial cable (in dB).
For example, an SG900-6 antenna with a CC20/900 cable has a net gain of 2dB
(i.e. +8 dB – 6 dB) at 900 MHz.
The following table details the gains of some typical antennas:
Antenna
Gain (dBi)
Dipole with integral 3m cable
0
Dipole without cable
2
5dBi Collinear (3dBd)
5
8dBi Collinear (6dBd)
8
3 element Yagi
5
6 element Yagi
10
The following table details losses for typical cables:
Cable
Loss (dB per 10m)
at 900 MHz
RG58
-5
RG213
-2.5
Cellfoil
-3
Version 1
5/1/08
XYR 300L Wireless I/O User's Manual
9
Radio transmission distances
The unit will operate reliably over large distances depending on the:
Antenna type;
Antenna location;
Amount of radio interference; and
Radio path obstructions (e.g. hills or trees).
Typical reliable distances are:
Area
Distance
Additional information
USA/Canada
20+ miles
6dB net gain antenna configuration permitted (4W Equivalent RF power
permitted).
Australia/NZ
20+ km
Unity gain antenna configuration (1W Equivalent RF power permitted).
To achieve these distance, you must elevate at least one site on a hill or transmission
tower.
Modules will operate reliably with some radio path obstruction; however obstructions
also reduce the reliable distance.
Note
You must test all obstructed paths to check the reliability of the path.
You can achieve maximum transmission distances if the radio path has “line of sight”.
For example, raising antennas above intermediate obstructions including hills, trees,
etc. Obstructions reduce the range; however they may not prevent a reliable path.
The closer the obstruction is to the antenna, the greater the blocking effect. For
example, a group of trees around the antenna is a larger obstruction than a group of
trees further away from the antenna. You can achieve longer distances by mounting
one antenna on top of a hill.
Note
Due to the earth’s curvature, you must elevate antennas higher than the ground
level between the antennas for longer paths (greater than 3 miles / 5 km).
The unit can tolerate larger amounts of obstructions for shorter distances. For very
short distances, you can also mount the antennas inside buildings.
If two XYR 300X modules cannot communicate reliably, you can use a third XYR
300X module as a “repeater” to receive and re-transmit messages. This module may
also have input/output (I/O) signals connected to it and form part of the I/O network.
10
XYR 300L Wireless I/O User's Manual
Version 1
5/1/08
Installing and earthing antennas
You must connect an antenna to each module using the SMA connector at the top of
the enclosure.
Honeywell recommends carefully taping the connections between the antenna and
coaxial cable to prevent moisture ingress. Moisture ingress in the coaxial cable is a
common cause of radio system problem as it greatly increases the radio losses.
Honeywell recommends taping the connection with three layers of tape:
Layer
Tape
1
PVC tape.
2
Vulcanising tape (e.g. 3M 23 tape).
3
Additional layer of PVC UV-stabilized insulating tape.
The first tape layer lets you easily inspect the joint if required as you can easily
remove the vulcanising seal.
Note
You must effectively earth all masts for mast-mounted antennas to avoid
lightning surges. We also recommend using a coaxial surge diverter for
antennas mounted outside industrial plant environments.
If the antenna is not already shielded from lightning strike by an adjacent earthed
structure, you can provide shielding by installing a lightning rod above the antenna.
You should connect the antenna to the module using 50 ohm coaxial cable (e.g. RG58
or RG213) terminated with a male coaxial connector, The higher the antenna is
mounted, the greater the transmission range; however as the length of coaxial cable
increases so do cable losses. For use on unlicensed frequency channels, there are
several types of antenna suitable for use.
If you mount antennas on elevated masts, you should effectively earth the masts to
avoid lightening surges. The XYR 300L radios are fitted with surge protection.
Note
For high lightening risk areas, Honeywell recommends additional surge
suppression devices. If the antenna is not already shielded from lightening strike
by an adjacent earthed structure, you can install a lightening rod to provide
shielding.
Version 1
5/1/08
XYR 300L Wireless I/O User's Manual
11
Dipole and collinear antennas
This section contains important information for using dipole and collinear antennas.
For more information, see the next sections.
Dipole antennas
Unity gain dipole antennas are commonly used on unlicensed channels. The dipole
antenna does not provide any gain, so the power transmitted from the antenna is the
same as the power out of the module.
A dipole antenna that comes supplied with integral 15 ft cable does not require
additional coaxial cable.
You should mount dipole antennas vertically, preferably no less than 1 metre away
from a wall or mast for maximum performance.
Collinear antennas
Collinear antennas transmit the same amount of radio power in all directions
horizontally, and are easy to install and use. They provide gain by compressing the
radiated signal to a flattened disc shape, and reducing the amount of signal radiated
above and below the horizontal plane.
Collinear antennas are generally used at a central site with more than one remote site,
or at a repeater site.
Collinear antennas are similar in appearance to dipole antennas; however the antenna
is longer.
Collinear antennas are supplied without cable, and require additional coaxial cable.
You can use collinear antennas to:
12
Transmitter – to compensate for the losses in long lengths of coaxial cable.
Receiver – to increase receive sensitivity.
XYR 300L Wireless I/O User's Manual
Version 1
5/1/08
The following diagram shows the recommended installation for collinear and dipole
antennas:
XYR 300L
Version 1
5/1/08
XYR 300L Wireless I/O User's Manual
13
Yagi antennas
Yagi antennas are directional and have positive gain to the front of the antenna and
negative gain in other directions. You can use the gain to:
Compensate for coaxial cable loss for transmitter unit; and
Increase receive sensitivity for receiver units.
You should install Yagi antennas with the central beam horizontal and pointed directly
in the transmission direction to benefit from the antenna gain.
Note
Yagi antennas usually have a drain hole on the folded element. You should
position the drain hole at the bottom when installing the antenna.
You can install Yagi antennas:
Vertically polarized – with the elements in a vertical plane; or
Horizontally polarized – with the elements in a horizontal plane.
The following table shows the recommended installation mode for different situations.
14
If your installation has …
Honeywell recommends using …
Two stations both using Yagi antennas
•
Horizontal polarization for the stations.
Two or more stations communicating with
a common station
•
•
Vertical polarization for the stations; and
Dipole or collinear (i.e. non-directional) antenna for
the central station.
XYR 300L Wireless I/O User's Manual
Version 1
5/1/08
The following diagram shows the recommended installation for collinear and dipole
antennas:
XYR 300L
Version 1
5/1/08
XYR 300L Wireless I/O User's Manual
15
Installing the power supply
The unit works with a 9-30 VDC 0.6 Amp CSA certified Class 2 power supply. For use
in Class 1 Div 2 explosive areas, the power supply must be approved for Class 1 Div 2
use.
Warning – explosion hazard
Do not disconnect while circuit is live unless area is known to be nonhazardous.
The following table shows the power supply requirements:
Power supply
XYR 300L I/O
12V
600 mA
24V
300 mA
The power supply can be a floating supply or negatively grounded.
The transmitter provides a 24V DC regulated supply for analog loop power. The
supply is rated at 35 mA and should ONLY be used for powering analog loops.
To install the power supply:
1. Connect the positive lead to Power Supply Input.
2. Connect the negative lead to Ground.
Note
To ensure internal surge protection works correctly, you must earth each unit
using the Earth terminal.
You should connect the module to the same ground/earth point as the antenna
mounting to avoid differences in earth potential during voltage surges.
Do NOT connect the positive side of the supply to Earth.
3. The following diagram illustrates the connection:
Ground
16
XYR 300L Wireless I/O User's Manual
Version 1
5/1/08
Inputs and outputs
The units have the following inputs and outputs:
Input/output
XYR
300L I/O
Description
For more
information,
see …
Digital inputs
2
Suitable for Voltage free
contact, NPN transistor,
0-5V signal.
Digital inputs
on page 19.
250VAC 1A / 30VDC 1A.
Important
Information
on page 20.
Relay outputs
Status outputs
2
Max 30VDC, 500 mA.
Indicate module status,
communication failure
and local setpoint status.
Error!
Reference
source not
found. on
page Error!
Bookmark
not defined..
Analog inputs
1
4-20 mA with over-range
and under-range.
Analog input
on page 21.
0-10 mA with over-range.
+24V Loop supply
1
Provides power for 1
external current loop (up
to 35 mA).
Installing the
power supply
on page 17.
Analogue setpoint
1
Allows discrete setpoint to
be controlled from analog
input. Threshold
adjustable via rotary
switch.
Refer to the
User
Manual.
Thermocouple / millivolt input
1
Provides measurement of
E, J, K, T type
Thermocouple, millivolt
signals and user-defined
thermocouple types.
Thermocoupl
e input on
page 24
Thermocouple setpoint
1
Lets you control discrete
setpoint from
thermocouple with
threshold adjustable via
rotary switch.
Refer to the
User
Manual.
Pulse inputs
2
Up to 10Hz.
Pulse input
on page 25.
Analog output
0-22 mA, suitable for loop
powered, floating input or
single-ended input device.
on page 26.
For more information, see the next sections.
Version 1
5/1/08
XYR 300L Wireless I/O User's Manual
17
Digital inputs
The XYR 300L I/O module provides two digital inputs suitable for:
Voltage free contacts – e.g. mechanical switches; or
NPN transistor devices – e.g. electronic proximity switches; or
0-5V signals - 2V – 4V Minimum range.
Note
PNP transistor devices are not suitable.
The unit provides contact wetting current of approximately 5mA to maintain reliable
operation of driving relays.
Each digital input is connected between the appropriate Digital Input terminal and
Ground.
Each digital input circuit includes a LED indicator that lights when the digital input is
active (i.e. when the input circuit is closed).
To activate the digital input, the switching device resistance must be less than 200
ohms.
Connection
method
Example
Voltage free
contact
Active 0-5v
signal
device
18
XYR 300L Wireless I/O User's Manual
Version 1
5/1/08
Version 1
5/1/08
XYR 300L Wireless I/O User's Manual
19
Analog input
The XYR 300L I/O module provides one 0 - 20 mA DC analog input for connecting to
instrument transducers (e.g. level, moisture, pressure transducers, etc.).
Note
The XYR 300L I/O module inputs measure down to 0mA and can also be used
for zero based signals (e.g. 0 - 10 mA).
The analog input has a positive and negative terminal and can be placed at any point
in the current loop, providing neither input rises above the 24 volt Analog Loop
Supply level.
Each input has a loop resistance of less than 250 ohms and zener diode protection is
provided against over-voltage and reverse voltage.
Note
You may require additional protection in high voltage or noisy environments or
for long wiring runs.
A 24VDC loop supply is available on the XYR 300L I/O module for powering the
analog transducer loops. In this situation, connect the:
Analog loop - between an Analog Input (-) terminal and Ground.
Positive terminal – i.e. Analog Input (+) to the +24V Analog Loop Supply.
Externally powered loops may be connected by connecting the input between "Analog
Input (+)" and “Analog Input (-)” Common mode voltage may be -0.5V to 27V.
Honeywell recommends using shielded cable for analog I/O loops to minimize induced
noise and Radio Frequency Interference (RFI).
Note
You should only connect one end of the cable shield to Earth
To connect an analog signal from a PLC or DCS output to an analog input on the XYR
300L I/O, you must carefully check the internal circuit of the output as different devices
use different ways to create an analog signal.
20
XYR 300L Wireless I/O User's Manual
Version 1
5/1/08
The following diagrams illustrate different connection methods:
Analog
signal
source
Example
2 wire
transducer
4 wire
transducer
Current
source
output
Version 1
5/1/08
XYR 300L Wireless I/O User's Manual
21
Analog
signal
source
Example
Current sink
output
22
XYR 300L Wireless I/O User's Manual
Version 1
5/1/08
Thermocouple input
The XYR 300L I/O provides one input suitable for connection to a thermocouple or a millivolt
level signal. The module provides linearization tables for J, K and T type thermocouples and
also supports other types via a user linearization table.
Millivolt signals in the range -10mV to +100 mV are supported.
For more information on configuring the thermocouple input and cold-junction compensation
to suit your application, refer to the User Manual.
Note:
The cable shield is optional; however we recommend
a cable shield for long runs.
Version 1
5/1/08
XYR 300L Wireless I/O User's Manual
23
Pulse input
The XYR 300L I/O module lets you configure the digital inputs as pulse inputs with the
following characteristics:
Characteristic
Value
Maximum rate
10 Hz
Minimum off time
20 mSec
Minimum on time
20 mSec
Using this mode, you can map the pulse count to a remote output by transmitting the
pulse count to a XYR 300G-X module register or re-generating as a Pulse Output on
XYR 3001 I/O.
Note
You should connect the pulse input in the same way as a digital input.
The following diagrams illustrate different connection methods:
Connection
method
Example
Passive
transistor
Active pulse
device
24
XYR 300L Wireless I/O User's Manual
Version 1
5/1/08
Installing and configuring the unit
This section describes how to install and configure your unit and contains the following
sections:
Section
Description
For more information, see …
Installing the unit
Describes how to physically install your
unit.
Installing the unit on page 27.
Configuring your unit
Describes the different ways to
configure your unit.
Configuring your units on page 28.
Testing your unit
Describes Honeywell’s
recommendations for testing your unit.
Testing your units on page 29.
For more information, see the next sections.
Version 1
5/1/08
XYR 300L Wireless I/O User's Manual
25
Installing the unit
To install the unit:
1. Connect signals to the supplied terminals.
2. Connect the radio antenna.
3. Install DIN rail to mount the module.
4. Clip the module to the DIN rail:
Mo
You can now configure your unit. For more information, Configuring your units on
page 28.
26
XYR 300L Wireless I/O User's Manual
Version 1
5/1/08
Configuring your units
You can configure your network using:
User-defined customized configuration – that lets you set specific information
about your network and allows communication with other Honeywell XYR300X
and XYR300G-X series devices.
For more information on setting a user-defined customised configuration, see the User
Manual.
For more information on setting the factory default configuration, refer to the Quick
Start Guide included with your module.
Version 1
5/1/08
XYR 300L Wireless I/O User's Manual
27
Testing your units
We recommend you bench test the complete system before installing a new system.
Configuration problems are easier to identify and fix when the units are next to each
other.
The following table describes common problems and recommended solutions:
If your installation has …
You should check …
Poor radio channel
communications
•
•
•
•
TX LED flashes but no RX LED
Output LEDs flash quickly
•
The antenna installation.
For radio interference on the
same channel.
The radio path is adequate.
Honeywell recommends …
•
•
•
Red OK LED
Higher performance
antennas if the path is too
long.
Higher mounting points to
overcome obstructions.
Using an intermediate unit
as a repeater.
•
Power Supply voltage
•
Supply should be between 9
and 30VDC.
•
Analog loop supply current
•
The analog loop supply is
rated for 35 mA max.
•
Module configuration
•
Your module configuration
may be invalid. Re-load or
restore factory default
configuration.
For support for other testing issues, please contact Honeywell.
28
XYR 300L Wireless I/O User's Manual
Version 1
5/1/08
Unit specifications
This section details the specifications for each unit.
Transmitter unit
Input/output
Number
Additional information
Digital inputs
2
Dry-contact digital inputs slow-pulsed at 10Hz.
All inputs are suitable for voltage free contacts (e.g. mechanical
switches) or NPN transistor devices (e.g. electronic proximity
switches).
NOTE: PNP transistor device inputs are NOT suitable.
Status outputs
2
Separate System OK and Setpoint Status
Analog inputs
1
Thermocouple inputs
1
Power supply
1
Transmitter
1
0-20mA differential input; 16-bit resolution, 0.1% accuracy, 10
ohm input impedance.
J, K or T type thermocouple with on-board cold-junction
compensation.
Cold junction compensation accuracy ±1º over ambient temp
range: -40º to +70ºC.
9-30 VDC 0.6 Amp CSA certified Class 2 power supply. For use in
Class 1 Div 2 explosive areas, the power supply must be
approved for Class 1 Div 2 use.
WARNING: Explosion hazard - do not disconnect while circuit is
live unless area is known to be non-hazardous.
1-Watt Frequency Hopping Spread Spectrum (FHSS) Transmitter.
Frequency
902-928 MHz
Actual frequency range depends on country.
Receiver unit
Input/output
Number
Additional information
Digital outputs
3
Voltage-free contacts rated at 250 VAC, 1A, 30VDC 1A
2 for digital inputs and 1 for setpoint.
Status outputs
2
Separate System OK and communication failure output.
Analog output
1
16-bit resolution, 0.1% accuracy, single-ended source output.
Power supply
1
9-30 VDC 0.25 Amp CSA certified Class 2 power supply. For use
in Class 1 Div 2 explosive areas, the power supply must be
approved for Class 1 Div 2 use.
WARNING: Explosion hazard - do not disconnect while circuit is
live unless area is known to be non-hazardous.
Radio receiver
1
High sensitivity FHSS UHF radio receiver.
Frequency
902 – 928 MHz
Actual frequency range depends on country.
Sensitivity
-110 dBm
At PER 8%.
Version 1
5/1/08
XYR 300L Wireless I/O User's Manual
29
Ancillary hardware reference information
This section contains reference information about additional hardware components
you may need for your unit.
RS232 serial cable
You can connect the unit to a PC using an RS-232 serial cable to:
Transfer configuration information;
Perform factory and field-testing.
The serial port is an 8 pin RJ-45 plug that communicates using standard RS-232
signals:
Signal information
Value
Baud rate
9600
Bits
8 bits with 1 stop bit
Parity
No parity
Honeywell supplies a green configuration cable wired to the following pin-out:
Note
The following pin-out information is for reference only.
RJ-45
30
Required
Signal name
Normal colour
DB9
1
Ring Indicator
Green / White
9
2
Data Carrier Detect
Green
1
3
Y
Data Terminal Ready
Orange / White
4
4
Y
Signal Common
Blue
5
5
Y
Receive Data (from Modem)
Blue / White
2
6
Y
Transmit Data (to Modem)
Orange
3
7
Clear to Send
Brown / White
8
8
Request to Send
Brown
7
XYR 300L Wireless I/O User's Manual
Version 1
5/1/08
Index
2 wire transducer ........................................................24
4 wire transducer........................................................24
AC relays.....................................................................21
active pulse device .................................................. See
active signal device ....................................................20
analog input.................................................................23
analog output ..............................................................28
antennas......................................................................14
compatible cables ....................................................8
dipole ......................................................................14
installing..................................................................11
polarization .............................................................16
supported antennas .................................................8
arcing...........................................................................21
bench testing...............................................................33
cable
loss..........................................................................10
cables
for antennas..............................................................8
supported cables......................................................8
CFD890EL ....................................................................8
coaxial surge diverter .................................................13
configuration
default factory.........................................................32
user-defined customized........................................32
configuring...................................................................32
connections
taping ......................................................................13
current sink output ......................................................25
current source output..................................................24
DC relays.....................................................................21
DCS .............................................................................23
digital inputs ................................................................20
DIN rail ........................................................................31
dipole antennas ..........................................................14
electronic proximity switches .....................................20
explosive areas ...........................................................18
floating input device....................................................28
flyback diodes .............................................................21
gain
net gain ...................................................................10
horizontal polarization ................................................16
installing ......................................................................31
instrument transducers...............................................23
interference .................................................................11
internal surge protection.............................................18
LEDs
receiver .....................................................................7
transmitter.................................................................5
lightening rod ..............................................................13
Version 1
5/1/08
lightening strike ...........................................................13
line of sight ..................................................................11
linearization tables ......................................................26
loop powered device...................................................28
maximum transmission distance................................11
mechanical switches...................................................20
millivolt signal ..............................................................26
net gain........................................................................10
obstructions.................................................................11
intermediate............................................................11
over-voltage ................................................................23
passive transistor........................................................27
pin-out..........................................................................35
PLC..............................................................................23
polarization..................................................................16
polarized......................................................................16
power supply ...............................................................18
installing..................................................................18
problems......................................................................33
pulse input...................................................................27
PVC tape .....................................................................13
Radio Frequency Interference ...................................23
receiver
components ..............................................................6
front panel.................................................................7
LEDs .........................................................................7
terminal connections ................................................6
relay outputs................................................................21
reliable path.................................................................11
repeater .......................................................................11
reverse voltage ...........................................................23
RFI ...............................................................................23
RJ-45 ...........................................................................35
rotary switch ..................................................................4
changing position .....................................................4
setpoint levels...........................................................4
RS-232 ........................................................................35
serial cable ..................................................................35
setpoint
thermocouple..........................................................19
setpoint levels ...............................................................4
SG900-6 ....................................................................8, 9
SG900EL...................................................................8, 9
shielding ......................................................................13
signals .........................................................................32
single-ended input device ..........................................29
SMA connector ...........................................................13
solutions ......................................................................33
specifications...............................................................34
status outputs..............................................................22
XYR 300L Wireless I/O User's Manual
31
surge diverter ..............................................................13
surge protection ..........................................................13
surge suppression ......................................................13
switches
electronic proximity ................................................20
switches
mechanical .............................................................20
taping connections......................................................13
testing ..........................................................................33
thermocouple ..............................................................26
thermocouple setpoint ................................................19
transducers .................................................................23
transmitter
32
components ..............................................................3
front panel.................................................................4
terminal connections ................................................3
UV-stabilized tape.......................................................13
vertical polarization .....................................................16
voltage free contact ....................................................20
vulcanising tape ..........................................................13
watchdog alarm...........................................................21
WH900...........................................................................8
YU16/900 ..................................................................8, 9
YU6/900 ....................................................................8, 9
zener diode protection ................................................23
zero based signals......................................................23
XYR 300L Wireless I/O User's Manual
Version 1
5/1/08