1
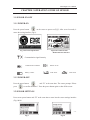
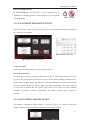
Wheel Aligner User’s Manual ,1'(; CHAPTER 1 CONCEPTS AND TERMS .........................................- 5 1.1 DEFINITION .......................................................................................... - 5 1.2 PURPOSE OF WHEEL ALIGNMENT .................................................. - 5 1.3 DEFINITION OF RELEVANT WHEEL ALIGNMENT ANGLES ....... - 5 1.3.1 TOE-IN ......................................................................................... - 5 1.3.2 CAMBER ...................................................................................... - 6 1.3.3 SET-BACK ................................................................................... - 6 1.3.4 CASTER ....................................................................................... - 6 1.3.5 STEERING AXLE INCLINATION(SAI) .................................... - 7 1.3.6 INCLUDED ANGLE.................................................................... - 7 1.3.7 MAXIMUM STEERING ............................................................. - 7 1.3.8 THRUST ANGLE ......................................................................... - 7 - CHAPTER 2 PRODUCT CONFIGURATION ................................- 8 2.1TECHNICAL PARAMETERS ................................................................ - 8 2.2 FUNCTION FEATURES ........................................................................ - 8 2.3 MAIN CABINET .................................................................................... - 9 2.4 SENSORS ............................................................................................... - 11 - CHAPTER 3 OPERATION GUIDE OF SENSOR ..........................- 12 3.1 SENSOR ON-OFF .................................................................................. - 12 3.1.1 POWER-ON .................................................................................... - 12 3.1.2 POWER-OFF ................................................................................... - 12 -2- Wheel Aligner User’s Manual 3.2 SENSOR SETTINGS ............................................................................. - 12 3.2.1 DISPLAY MODE SETTING........................................................... - 13 3.2.2 SENSOR SETTING ........................................................................ - 14 3.2.3 PRODUCT INFO............................................................................. - 14 3.2.4 RESTORE FACTORY SETTINGS ................................................. - 15 3.3 WHEEL ALIGNER PROGRAM SETTINGS ........................................ - 15 3.3.1 STARTUP WHEEL ALIGNER PROGRAM .................................. - 15 3.3.2 ALIGNMENT SERVICE PROGRAM SETTINGS ........................ - 16 3.3.2.1 SYSTEM SETTINGS ............................................................... - 16 3.3.2.2 DISPLAY SETTINGS .............................................................. - 17 3.3.2.3 ALIGNMENT PROGRAM SETTINGS .................................. - 18 3.3.2.4 ADJUSTMENT PROMPT OPTION ........................................ - 18 3.3.2.5 PRINT SETTINGS ................................................................... - 19 3.3.2.6 CALIBRATION SETTINGS .................................................... - 20 3.3.2.7 CHECK-UP OPTIONS ............................................................. - 21 3.3.2.8 DATE FORMAT SETTINGS ................................................... - 21 3.3.3 SENSOR DIAGNOSE..................................................................... - 22 3.3.4 SAVE AND EXIT ............................................................................ - 23 3.4 AUTO MODEL DATE INPUT ............................................................... - 23 - CHAPTER 4 OPERATION GUIDE OF AUTO ALIGNMENT .....- 25 4.1 OPERATION GUIDE OF E18 ALIGNER.............................................. - 25 4.1.1 FRONT-WHEEL ALIGNMENT ..................................................... - 26 4.1.2 COMPLETE WHEEL ALIGNMENT............................................. - 30 -3- Wheel Aligner User’s Manual 4.2 OPERATION GUIDE OF E58 ALIGNER.............................................. - 33 4.2.1 FRONT WHEEL ALIGNMENT ..................................................... - 33 4.2.1.1 AUTO MODEL DATA SELECTION ....................................... - 33 4.2.1.2 AUTO CHECK-UP ................................................................... - 34 4.2.1.3 RIM COMPENSATION ........................................................... - 35 4.2.1.4 CASTER MEASUREMENT.................................................... - 36 4.2.1.5 AUTO ADJUSTMENT............................................................. - 37 4.2.1.6 INPUT CUSTOMER’S DATA ................................................. - 39 4.2.2 COMPLETE ALIGNMENT ............................................................ - 40 - -4- Wheel Aligner User’s Manual CHAPTER 1 CONCEPTS AND TERMS 1.1 DEFINITION Four-wheel aligners are used to test alignment parameters of vehicle wheels, components of suspension system and components of steering system. By comparing the measured parameters with design parameters of the vehicle manufacturer it guides technicians to make relevant adjustments to wheel alignment parameters to achieve ideal driving performance, safety, stability, ease of steering, reduction of tire shoulder wear and gas consumption. 1.2 PURPOSE OF WHEEL ALIGNMENT Wheel Alignment is the adjustment of the suspension system and steering control system to its correct position. Alignment eases steering and assures stable driving. While driving straight-ahead the steering wheel should not run deviated from the “Centered Position.” The steering wheel is on-center naturally and should return to its original position automatically after turning. Alignment also serves to reduce driving resistance and abnormal wear of tire and chassis components. Alignments enhance driving sense of comfort and reduction of oil consumption. 1.3 DEFINITION OF RELEVANT WHEEL ALIGNMENT ANGLES Four-wheel alignment angles are present in the relative angles between the suspension system and every active component. Correct wheel alignment angles are the guarantee of driving stability and proper tire wear. Four-wheel alignment angles mainly consist of camber, toe-in, caster, steering axle inclination, set-back, etc. 1.3.1 TOE-IN Toe-in is the angle drawn by a line drawn through the plane of one wheel referenced to the longitudinal axis of vehicle. Toe-in is measured in positive or negative degrees. Positive toe-in is when the horizontal line intersects in front of the vehicle. Negative toe-in is when the horizontal line intersects behind the wheel. Total toe is the total of the two front toe-in angles, i.e. the angle formed by two horizontal lines through the planes of two wheels. The function of toe-in is to compensate the tendency of outward or inward rolling due to camber or ground resistance, to ensure straight ahead driving. -5- Wheel Aligner User’s Manual 1.3.2 CAMBER Camber is the inclination of the centerline of the wheel from the vertical as viewed from the front of vehicle. Camber angle is measured in positive or negative degrees. Positive camber is the outward tilt of the top of the tire. Negative camber is the inward tilt of the top of the tire. The difference of the angle may change the wheel contact point with the ground and the force point which may directly affect the adhesive force of wheel and the wearing condition. It can also change the force distribution to vehicle axles which may cause the abnormal wearing of the vehicle bearing. In addition, the existence of camber can offset the angle fluctuation caused by components deformation of suspension system or the active components play after the vehicle is loaded. The existence of camber will also affect the driving direction of the vehicle. Therefore, the camber of left and right wheel must be the same. Under the action of force balance, it won’t influence the directness of the vehicle. Cooperating with toe-in, it will improve the stability of driving to assure even tire wear. Without the camber, the wheel will incline excessively after the vehicle is fully loaded which causes faster tire and bearing wear. Therefore, this parameter can prolong the life of tires and wheel bearings. 1.3.3ˊSET-BACK Setback is the symmetry degree between one front wheel or rear wheel and the other wheel of the same axle. Setback is measured in positive or negative degrees. Viewed from the driving direction, positive setback is the condition in which the right wheel is frontward of the left wheel. Negative setback is the condition in which the right wheel is rearward of the left wheel. The value can also be indicated in mm. The setback reflects the change of the vehicle wheelbase. When the setback value reaches some extent, the running of the vehicle will be deviated. The deviation direction is on the short wheelbase side. 1.3.4ˊCASTER Caster is the angle between an imaginary line drawn through the upper and lower steering pivots and a line perpendicular to the road surface (viewed from side of vehicle). If the top of the line tilts rearward, the vehicle is said to have “POSITIVE” caster. If the top of the line tilts forwards, the vehicle is said to have “NEGATIVE” caster. The caster makes the intersect point of steering axis and ground at the front of wheel contact point. The vehicle is kept driving -6- Wheel Aligner User’s Manual straight-ahead with the resistance to tire by the ground. The bigger the caster, the better the directional stability and the steering return ability. However, the force of steering is increased. Generally, the caster is set between 1~2 degree. 1.3.5ˊSTEERING AXLE INCLINATION(SAI) Steering axle inclination (SAI) is the angle between the centerline of steering axis and the perpendicular line as viewed from the front of vehicle. With the SAI, the vehicle weight will be distributed evenly on bearing which protects the bearing and ease the turning of steering. On the other hand, if the SAI is set to 0, the vehicle weight and the counterforce of ground will produce great lateral stress which may damage the bearing and make steering difficult. Moreover, SAI is the power source the steering wheel uses to return back to the center after turning a car. Generally, the SAI is preset with the design of vehicle suspension system which is non-adjustable. 1.3.6᧪INCLUDED ANGLE Included angle is the angle between wheel centerline and vehicle centerline. Included angle is the total of camber and SAI. 1.3.7ˊMAXIMUM STEERING The measurement method of maximum steering angle is the same to that of 20 degree angle. When, the steering turns left or right to the maximum, measure the turning angle of inside or outside of the wheel. 1.3.8ˊTHRUST ANGLE Thrust angle is the angle between the line (thrust line) that divides the total angle of the rear wheels and the geometrical center line. If the thrust line is on the left side, it is said to be “POSITIVE”. If the thrust line is on the right side, it is said to be “NEGATIVE”. If the thrust angle is not zero, the vehicle tends to run in a sideways or, “Dog Tracking,” direction. The rear wheel toe-in needs to be adjusted. -7- Wheel Aligner User’s Manual CHAPTER 2 PRODUCT CONFIGURATION 2.1 TECHNICAL PARAMETERS ¾ Relative Humidity: less than 90% ¾ Power Supply: AC110/220 V±10%, 50 /60Hz ¾ Re-chargeable Battery Specification: 7.2V/3000mAHˈLi-lon ¾ Power Consumption of Sensors: 1.5W ¾ Power Consumption of Machine: 200W ¾ Technical Index: Measuring Items Precision Measuring Range Toe ±1’ ±24° Front Camber ±1’ ±10° Wheel Caster ±2ƍ ±20° Steering Axle Inclination ±2ƍ ±20° Set-Back ±1ƍ ±10° Toe ±1ƍ ±24° Camber ±1ƍ ±10° Set-Back ±1ƍ ±10° Thrust-Angle ±1ƍ ±10° Rear Wheel 2.2 FUNCTION FEATURES 1. Uses CCD image recognition as the measurement technique˗ 2. Uses Zigbee wireless network˗ 3. Systematic and distributive Multilanguage control platform˗ -8- Wheel Aligner User’s Manual 4. System’s micro-consumption design can achieve long time-frame measurements˗ 5. Sensor touch-key manipulations, personalized image-text interface˗ 6. The system has self-diagnosis, self-correction and self-repair functions˗ 7. The portable correction frame and the correction process are concise, quick and accurate˗ 8. Grading operation management can restrict operations by password protection˗ 9. System measurement and data transmission are high speed, stable and anti-jamming˗ 10. Vehicle chassis multidirectional 360° closed measurement˗ 11. Environment adaptive optical measurement system˗ 12. Multi-language display for System and Sensors ; 13. Data for over 20,000 vehicles, variety of retrieval modes and intelligent upgrade functions˗ 14. Optional, “Quick Clamps,” eliminate the need to perform wheel compensation, for faster measurement˗ 15. Tool concept allows user to finish alignment without computer ; 2.3 MAIN CABINET Main cabinet acts as the operational control platform and also the carrier of other components of wheel aligner. Fig 2 EDGE101 Cabinet -9- Wheel Aligner User’s Manual There are charging control capsules on each side of cabinet (Fig 3). 2 groups of charging control circuits consisting of 4 lights and 2 buttons respectively. The upper 2 red indicator lights indicate slow charge option and the 2 red indicator lights at the bottom indicate quick charge option. Press quick charging button to switch between slow and quick charging. Fig 3 Charging control capsule Charging process: Insert charging plug on the sides of cabinet into charging jack at the bottom of sensors, system will automatically check battery status. When battery voltage is less than 8.4V or, charging current is more than 125mA, system will begin to charge batteries with upper 2 red indicator lights flashing. When batteries are fully charged, the upper 2 indicator lights will stop flashing and be on. For lithium batteries, because they have an internal protective circuit, charger automatically cuts off power supply when batteries short circuit or batteries’ voltage falls to less than 6V and system will automatically charge batteries. However, if charging system cannot check battery voltage, it will not charge the battery. For this situation, please press quick charging button to forcibly charge the battery. The red indicator lights at bottom of Charging control capsule will be on and upper red indicator lights will be flashing. Warning: For prolonging lifespan of battery, during the first 3 uses of batteries, please run battery volume completely down before re-charging for more than consecutive 6 hours. During the charging process please turn off sensors. If not using aligner for more than 3 months please charge battery for more than 8 consecutive hours before re-using aligner. - 10 - Wheel Aligner User’s Manual 2.4 SENSORS Sensors are the core measuring components of wheel aligner. The sensors contain high precision measuring components. During operation and storage, sensors should be kept clean and dry. Impact and collision should be avoided to prevent affecting the measurement accuracy. Fig 5 and 6 show “A” and “B” sensors. Fig 5 Sensor A Fig 6 Sensor B - 11 - Wheel Aligner User’s Manual CHAPTER 3 OPERATION GUIDE OF SENSOR 3.1 SENSOR ON-OFF 3.1.1 POWER-ON Press the power button on the sensor to power-on (Fig7). After several seconds, it enters the testing interface (Fig 8). Fig 8 Sensor Measurement Method Selection Interface Fig 7 Sensor Startup Interface Communication signal intensity Communication Channel Buzzer on-off Battery volume Front wheel Rear wheel 3.1.2 POWER-OFF Press the power button press and “F1” at the same time. The sensor prompts “Please to confirm shutdown”. Press the power button again to shut off the sensor. 3.2 SENSOR SETTINGS Press sensor power button and “F2” at the same time to enter into the sensor settings interface. (Fig 9 &10) - 12 - Fig 9 Fig 10 Wheel Aligner User’s Manual 3.2.1 DISPLAY MODE SETTING In the semsor setting menu, the first option is display mode setting. Press “F3” to enter. (Fig 11&12) Fig 11 Display Mode Setting 1 Fig 12 Display Mode Setting 2 The setting includes 5 options: 1ǃ Angle unit˖2 sub-options. Degree such as 1.99°ˈDegree and minutes such as 1°59ƍ. 2ǃ Angle resolution˖4 sub-options, 0.01, 0.02, 0.05, 0.10.Each sub-option represents the carry bit and measurement accuracy of the measured results. 3ǃ Toe-in unit˖4 sub-options. Degree such as 1.99°ˈdegree and minutes such as 1°59ƍˈmm such as 0.00ˈinch such as 0.000Ǝˈwhich can be selected according to use habit. 4ǃ Toe-in resolution˖different as per the selection of toe-in unit. Degree˖0.01°, 0.02°, 0.05°, 0.10° Degree and minutes˖0°01ƍ, 0°02ƍ, 0°05ƍ, 0°10ƍ mm˖0.05, 0.10, 0.20, 0.50 inch˖0.002Ǝ, 0.005Ǝ, 0.010Ǝ, 0.020Ǝ 5ǃ Language˖system provides several kinds of languages (Chinese, English, Traditional Chinese, German and Russian etc.) for users to select from. Press “F1” and “F4” to select different options and change contents of options, press “F3” to confirm, press “F2” to save and exit. - 13 - Wheel Aligner User’s Manual 3.2.2 SENSOR SETTING Press “F4” once in the sensor setting menu to select sensor setup. Press“F3”to enter the interfaces as Fig 13 and 14. Fig 13 Sensor Setting 1 Fig 14 Sensor Setting 2 The setting has 4 options˖ 1. Automatic power-off˖this option is designed for energy saving while there is no communication between sensor and main cabinet or, the power is cut off. It includes two sub-options: invalid or time-delay shutdown. If, “invalid,” is selected the automatic power-off is invalid. If, “time-delay shutdown,” is selected the delay time can be adjusted from 10-60 seconds with an interval of 5 seconds. 2. Buzzer: two sub-options: valid and invalid. When choosing “valid”, buzzer will give out sound while pressing the buttons. If choosing “invalid”, buzzer will be silent while pressing the buttons. 3. Backlight control: three sub-options: constant light, key board time-delay and invalid. If, “constant light,” is selected there will be constant backlight when sensor is on. If, “key board time-delay,” is selected backlight is on while pressing the key board and is off after a short time. If, “invalid,” is selected the backlight is off. 4. Photosensitive intensity: four sub-options: high, middle, low and invalid. High, middle and low represent the sensitivity of photosensitive components to the natural light. The three sub-options are valid when the backlight control is set to, “Key board time-delay.” If, “invalid,” is selected the photosensitive components are invalid. Press “F1”and “F4” to select different options and change content of options. Press “F3” to confirm and press “F2” to save and exit. 3.2.3 PRODUCT INFO The product info interface displays the model No., serial No., Version No. and Registered - 14 - Wheel Aligner User’s Manual trade mark, etc. (Fig 15) Fig 15 Product Info 3.2.4 RESTORE FACTORY SETTINGS A sensor setting error due to incorrect operation or, abnormal working of sensor because of a change made to sensor parameters requires the user to restore factory settings of the sensors. Select the option. The screen will pop up the prompting window as in Fig. 94. Press “F3” to confirm restoration. Fig 16 Restore Factory Settings 3.3 WHEEL ALIGNER PROGRAM SETTINGS 3.3.1 STARTUP WHEEL ALIGNER PROGRAM Use the power switch inside the cabinet to power on aligner system. Then, press the startup button on the computer tower to startup the computer. When computer completes Fig 17 Main Program Interface self-checking, the system will automatically enter wheel aligner operation system. (Fig 17) - 15 - Wheel Aligner User’s Manual 3.3.2 ALIGNMENT SERVRVICE PROGRAM SETTINGS There are 3 buttons under main interface of computer monitor: exit, service and start measurement, corresponding F1, F2 and F4 buttons on the keyboard and sensors. (Other interfaces have options connected to the F3 button as well.) Exit Service Start measurement Click service button, alignment program prompts to input password (Fig 18). Password is set as, Āasdfghjkl,ā before aligner leaves factory. After inputting correct password system will enter wheel aligner service program settings interface (Fig 19). Fig 19 Service Program Interface Fig 18 Input password Fig 20 Password Settings 3.3.2.1 SYSTEM SETTINGS The first option is, “System Settings,” in the service program interface. There are five sub-options: A. Compensation option. Selecting Invalid will disable this option. - 16 - Wheel Aligner User’s Manual B. Communication option. This option is already set before aligner leaves factory. User has no access to change it. C. Zigbee settings. This option is already set before aligner leaves factory. User is not allowed to change it. D. Password settings Used to set and modify the password. This is convenient for users to administrate and set limits of authority to prevent others from entering the menu and modifying the settings. As the right figure shows(Fig 20), input the original password on the top text box, then input the password that you want and confirm it before continuing. E. Power off Two sub-options: Only turn off alignment software when ending alignment(Fig 21); Shut down system when ending alignment(Fig 22). Fig 21 power Off Alignment Program 3.3.2.2 DISPLAY SETTINGS Click the second bar on system service settings interface to enter the Fig 22 Power off PC system display settings (Fig 23). There are 4 sub-options. Fig 23 Display Settings A. Language Click the desired language option. The system shows national flags on the right side. Click corresponding flag to choose the language. The language can be customized with different languages. B. Speaker control Enable or disable the speaker to control the volume. - 17 - Valid Invalid Wheel Aligner User’s Manual C. Error prompt: Invalid D. Work efficiency: Note the time of each operation step in alignment for checking operator’s work efficiency. Two sub-option: Valid Valid and Invalid. Invalid 3.3.2.3 ALIGNMENT PROGRAM SETTINGS Click the third bar on the system program settings to enter Alignment Program Settings(Fig 24). There are 2 sub-options. Fig 25 Unit Form and Carry Fig 24 Alignment Program Settings A. PRE-SETTINGS Pre-Settings determine whether to operate options selected. B. Unit form and carry Click this option and the system pops up the chart in Fig 25. The measurement unit of toe-in is special. The system has several units for users to choose from according to different user’s habits, such as degree, degree and minute or, inch and millimeter. For other measurement items the system provides two options: degree, and degree and minute. The carry resolution for each unit is divided into four options from high to low. Users can select different resolution according to different requirements. For higher accuracy high resolution is required. 3.3.2.4 ADJUSTMENT PROMPT OPTION The interface, “Adjustment Prompt Option,” is shown as Fig 26. It is used to indicate the display sequence of vehicle adjustment interface of the aligner program. - 18 - Wheel Aligner User’s Manual 3.3.2.5 PRINT SETTINGS The interface, “Print Settings,” is shown in Fig 44. This option contains printout settings for measuring data forms like printing format, language, advertising to clients and some indicating terms. The settings have four options. Fig 27 Print Settings A. Print language Users can choose different print languages according to different nations or, different needs. B. Insert information By clicking this option, the system will pop up a text input box on the right side. Users can input telephone number, company address, advertising information, etc. C. Tooltip By clicking this option, the system will pop up a text input box on the right side where, customers can input information like vehicle maintenance notes, etc. D. Printout report form - 19 - Wheel Aligner User’s Manual This option is for setting the printout format of report forms. It has two sub-options: With or, without grid and with or, without company logo. By choosing, “grid,” the output will be in grid format. Choosing, “without company logo,” the output will not show company logo. 3.3.2.6 CALIBRATION SETTINGS The, “Calibration Setting,” (Fig 28) option is used to calibrate the alignment system or calibrate the vehicle lift. Fig 28 Calibration Settings A. Calibration Kit Option Please refer to the User’s Manual included with the Calibration Bar accessory. B. Rack Calibration Rack Calibration is used when the runways of a vehicle lift are not level. The alignment program will compensate for an uneven lift to assure the most accurate vehicle measurements possible. Rack calibration is performed by the following procedure: 1) From the first screen of the alignment program choose the “Service” option. 2) Enter the, “Admin,” password -- %HW!FHTD 3) Select the, “Calibration Setting,” option. Then, select “Rack Calibration.” 4) A picture of a lift appears with three (3) white boxes which require measurements. 5) The box between the runways is where the user enters the distance between the runways measured in millimeters. Multiply a measurement taken in Inches by 25.4 to convert to millimeters. 1 Inch is equal to 25.4 Millimeters. 6) The upper box to the right of the picture of the lift is where the user enters the height - 20 - Wheel Aligner User’s Manual of the right-side sliding board minus, the height of the left-side sliding board. Measure the height distance from the center point of the sliding board. This measurement must be entered in millimeters and have a plus (+) or, minus (-) depending on which side of the rack is higher. 7) The lower box to the right of the picture of the lift is where the user enters the height of the right-side turntable minus, the height of the left-side turntable. Measure the height distance from the center points of the turn tables. This measurement must be entered in millimeters and have a plus (+) or, minus (-) depending on which side of the rack is higher. 8) Once the values are entered into all three boxes click the, “Forward Arrow,” at the bottom right of the screen. This action will save the calibration settings you have made. There are two expressions, both shown between the runways in the picture on the screen, which have changed. They are factory set as, <B0.00 and <A0.00. They will show the “Compensation” that the system will reference when measuring the alignment angles of vehicles. These new settings, when saved, will be stored until the user changes them. 3.3.2.7 CHECK-UP OPTIONS Click the, “Pre Check-up option,” button. The system will pop up a list of items to be checked, prior to alignment adjustment, on the right side of the screen. Users can select the required items or click the, “all,” button in the upper right corner to select all items. Fig 29 Check-up Option 3.3.2.8 DATE FORMAT SETTINGS The date format settings interface is shown in Fig 30. Users can set up the date display format according to the user’s habits. The system provides three types of display. 1. YYYY—MM—DD 2. DD—MM—YYYY - 21 - Wheel Aligner User’s Manual 3. MM—DD—YYYY Fig 30 Date Format Settings 3.3.3 SENSOR DIAGNOSE Move the cursor to any position in the upper left or, right side on system service program settings interface. The system will pop up one shortcut button bar (Fig 31). Main Interface Diagnose Save Help Fig 31 Sensor Diagnose Fig 31 shows left and right 2 sensors. Data from top to bottom: level value, inclination value, battery value and CCD value. By checking the data, system can judge whether sensors are good or not. - 22 - Wheel Aligner User’s Manual 3.3.4 SAVE AND EXIT After completing the system service settings, click the button on the left side of the to save the settings and exit to the main interface of the screen near the bottom. Click program. 3.4 AUTO MODEL DATE INPUT Press the start button on the bottom of the main program interface to enter Auto Selection interface. Move the cursor to any position of the left side of the screen and a shortcut button bar will pop up (Fig 32). Click the third button (customized auto data base) to add customer auto data (Fig 33). The interface displays auto manufacturers’ names and countries provided by the aligner producer. The text input box below is for users to add auto manufacturer’s name and country if not listed in the aligner system. Click the button mandatory. on the bottom of the screen to add customer’s auto data. The box marked After completion, click is to enter the next interface (Fig 34). If auto model data already exists in Fig 32. First, search and click auto manufacturer then, the corresponding column will display in reverse blue color. Finally click the button to enter the next interface (Fig. 34). Click to delete any error input. Fig 32 Car Selection - 23 - Wheel Aligner User’s Manual Manufacturer Manufacturer name in Chinese name in English Country Fig 33 Auto Model Data Input 1 Fig 34 Auto Model Data Input 2 The above is the Specific Auto Model Data input interface. Input the following data one by one in the upper text box: auto model No., Chinese car model (needless of inputting), Starting Year of auto and Finishing Year of auto. Fill in the blank below with auto model data: min. tolerance, middle value and max. tolerance from left to right separately. The relations of the three values are as below: Middle value = (max. value + min. value) × 0.5, Max. tolerance = max. value - middle value and Min. tolerance = middle value - min. value. The unit is in “degrees”. Among them, the middle value can be input with minus (-) or, plus (+). Min. and max. tolerances are not allowed to have a minus (-) or, plus (+) symbol. The input boxes at the very bottom of screen are auto weight (click to add), display scale of oil leveler (click to select), auto’s wheel base, track and rim diameter. After confirming they are right, click next step to save and go to the next operation. The new auto model data input is finished. - 24 - Wheel Aligner User’s Manual CHAPTER 4 OPERATION GUIDE OF AUTO ALIGNMENT 4.1 OPERATION GUIDE OF E18 ALIGNER E18 has no computer hardware. All alignment operations are done from the sensors with two ways of alignment: Complete 4 Wheel Alignment and Front Wheel Alignment. Complete 4 Wheel Alignment is done in accordance to the Thrust Line principle. It measures all of the alignment data of vehicle and adds rear-wheel parameters into measured value of front-wheels. This guarantees the steering wheel is on-center when adjusting front-wheels. Front-wheel alignment is done according to central line principle only measuring the alignment parameters of front-wheels. Front left sensor Measuring Selection interface is shown as (Fig 35). Front right sensor measuring selection interface is shown as (Fig 36). In these two interfaces, press “F1” on one of the, “A,” sensors to enter complete wheel alignment mode; Press “F4” to enter front-wheel alignment mode; Press “F3” (only for front left sensor) to input tire diameter and standard vehicle alignment data. (Fig 37and 38) Fig 35 Front Left Sensor Measuring Selection Interface Fig 37 Input Tyre Diameters Fig 36 Front Right Sensor Measuring Selection Interface Fig 38 Input Standard Data In Fig 37 the, “Input Tire Diameter Interface,” input the tire diameters of vehicle. Press “F1” or, “F4” to increase or, decrease value. Press “F2” to save. Press “F3” to confirm and enter the interface of Fig 38. Input the standard vehicle alignment data in the interface of Fig 39 - 25 - Wheel Aligner User’s Manual Fig 38. Press “F1” or, “F4” to select data option needed to be input. Then, press “F3” to confirm. Move the cursor to the data field. First, input the middle value of standard vehicle data then, press “F3” to confirm. Move cursor to left and input minimum value of standard vehicle data. Then, press “F3” to confirm. Move cursor to right and input maximum value of standard vehicle data. Press “F1” or, “F4” to increase or, decrease value. Input other options can be done according to the same way. Finally, press “F2” to exit. 4.1.1 FRONT-WHEEL ALIGNMENT In the interface of Fig 35 or 36, press “F4” on front left sensor or, front right sensor to enter front wheel alignment mode and the interface of Fig 39 (Here, take front left sensor LCD display operation as an example). When in interface of Fig 40, hang both, “A,” sensors (front left and front right) onto the two front wheels respectively. Then, adjust the two sensors to level. Then, hang both “ B” sensors onto rear wheels respectively. Fig 40 Sensors Installation Both A sensor’s measuring rays for toe-in can be blocked by a very low auto chassis or, can touch the floor when aligning vehicles with small size wheels. User can change level mode of the A sensors to resolve these questions according to following procedure: In the Fig 39 interface, press “F1” and “Mod” alongside “0” appears, then press “F4”, level mode will be changed into negative mode from -1 to -6 and user can lower sensor; press “F3”, level mode will be changed into positive mode from 1 to 6, user can lift sensor. After selecting level mode, press “F1” to save and exit to next operation. Operation as follows: - 26 - Mode 0 Negative Mode˄Lifting˅ Positive Mode˄Lowering˅ Wheel Aligner User’s Manual After all the preparation is finished press “F3” of any sensor to enter the rim compensation interface. Rim compensation has two ways: 4-wheel compensation and 2-wheel compensation. 4-wheel compensation will do compensation against 4 wheels one after another. 2-wheel compensation only does compensation against the 2 wheels on which the A sensors hang. Attention please: Sensor B enabling to do 4-wheel compensation is different from that of enabling them to do 2-wheel compensation in structure. Sensor B enabling to do 2-wheel compensation is for old style E series aligner (sensor B plus a simple clamp) shown in Fig 6. Sensor B’s structure for 4-wheel compensation is a 4-point clamp and 1 B sensor. 4-wheel compensation The left side of the compensation interface (Fig 41) labeled letter “A.” It shows doing compensation of rims hanging sensor A. Fig 41 Rim Compensation 1 Fig 42 Rim Compensation 2 Fig 43 Rim Compensation 3 Fig 44 Compensation Results Lift the front and rear of the vehicle to allow wheels to rotate freely. Rotate wheel and tire assembly to make clamps vertical and sensors level by visual check and take it as zero point. Then, press “F3” to enter next step (Fig 42). Rotate the assembly by 180 degrees clockwise and level sensor. Then, press “F3” to enter next step (Fig 43). Rotate assembly by 180 degrees clockwise again to the original zero point position. After sensor is level, press “F3” and sensor will calculate and display compensation results data (Fig 44). “X, Y, Z” show three directions in space. Icon will appear on upper part of LCD. If rim compensation is not done or compensation results are zero, the icon will not appear. Next, press button “F3” to enter compensation interface of rims with B sensors, which are basically same as Fig 41, 42 - 27 - Wheel Aligner User’s Manual and 43 and only letter “A” is changed into “B”. Operation is almost same as the above. Difference lies in rotating assemblies with B sensors, but operation of pressing button to get results will be done on the A sensors. Press button “F3” to enter steering wheel measurement interface after compensation is finished. 2-wheel compensation 2-wheel compensation interface is basically the same as Fig 41, 42 and 43, but no letter “A” or “B” will be visible on the LCD. User will only be doing compensation of rims with the A sensors. Operation is the same as 4-wheel compensation. Press button “F2” to exit this feature if user doesn’t want to do rim compensation. Lower the vehicle body after compensation is finished. Adjust sensors to level and press button “F3” to enter steering wheel measurement. Steering wheel measurement; first, center the steering wheel. Rotate steering wheel right or left to align the pointer with the zero position. After interface reads, “STOP,” and voices “beep” stop rotating steering wheel (Fig 45). After waiting for several seconds, interface pops up a prompts bar (Fig 46). Fig 45 Put Straight Steering Wheel Fig 46 Caster, Inclination Angle Measurement Prompts If user needs to measure caster and KPI, press “F3” to enter the interface of Fig 47. First, rotate the steering wheel left by 7 degrees then, right by 7 degrees. Then, finally go to on-center position. Wait for several seconds then, enter the interface of Fig 48 to display measured results. In this interface, values from up to down, from left to right shown as caster, KPI, camber, front wheel partial toe-in, total toe-in and set-back angles. User can also press the power button “F” to see definition of each measured values (Fig 49). If needless to measure caster and KPI, in the interface of Fig 46, press “F3” to enter the Fig 47 Caster, SAI Measuring Interface Fig 48 Front Wheel Measuring Results 49 Definition of Display interface of Fig 47, in which press “F3” to enter the interface of Fig. 48Fig showing measured Value Definition - 28 - Wheel Aligner User’s Manual Results and 4-wheel measurements for alignment are finished. Fig 50 Front wheel Camber Adjustment In the interface of Fig 48, press “F3” to enter the front wheel camber adjustment interface of vehicle (Fig 50), which has 5 function keys as follows: -- Help; F1 - Adjustment option: Press the key to pop up the interface of Fig 51. Press corresponding key to select the corresponding adjustment option. F2 - Exit: Press the key to exit from the measurement adjustment and back to the main interface. Fig 51 Adjustment Option Selection F3 - Enter the next page. F4 - Back to the previous page. If adjustment on the lift is needed, you can select “lift Adjustment” for saving the measured data before lifting vehicles, which will be later used in calculation for measuring and adjusting after lifting vehicles, thus guaranteeing the accuracy of whole adjustment. Specific operation as follows: In any interface of Fig 48, 50, 52, 53, 54 or 55, press “F1” to enter the interface(Fig 51). In Fig 51 interface, first, press power button “F” and then, “F4,” to enter “lift adjustment” interface (Right Fig). Press “F2” to exit to previous function interface. At the moment, “lift adjustment” function is valid and you can do “lift adjustment”. If needless of lift Fig Lift Adjustment adjustment, you needn’t do the above-mentioned steps and can directly adjust according to following procedures: The sequence of vehicle adjustment generally as follows: Caster KPI camber Toe-in. Adjustment interface of other angles as follows: - 29 - Wheel Aligner User’s Manual Fig 52 Caster Adjustment Fig 53 KPI Adjustment Fig 54 Toe-in Adjustment Fig 55 Set-back Adjustment Adjust angles one by one according to the adjustment sequence. After all adjustments are finished, press “F2” to exit. And measurement and adjustment are finished. 4.1.2 COMPLETE WHEEL ALIGNMENT In the interface of Fig 35 and 36, press “F1” of anyone sensor to enter complete wheel alignment mode. Under this mode, first, measure rear wheels. 2 sensor A will be shown and treated as rear wheel sensors (Fig 56). Hang 2 A sensors on rear wheels and adjust them to level. Then, hang 2 B sensors on front Fig 56 wheels. Rotate steering wheel to on-center by visual check. Sensor A’s measuring rays for toe-in can be blocked by very low auto chassis or, the A sensors can touch the floor when doing 4-wheel alignment on vehicles with small size wheels. Users can change level mode of sensor A to resolve these questions according to following procedure: In Fig 56 interface, press “F1” and “Mod 0” appears. Then, press “F4.” The level mode will be changed into negative mode (-1 to -6) and user can lower A sensors; press “F3” and level mode will be changed into positive mode (1 to 6) and user can lift A sensors. After selecting level mode, press “F1” to save and exit to next operation. Operation as follows: Mode 0 Negative Mode˄Lowering˅ Positive Mode˄Lifting˅ - 30 - Wheel Aligner User’s Manual After preparation is finished, press “F3” on either one of the A sensors to enter the rim compensation interface. Compensation operation method is the same as the above. If user doesn’t want to do rim compensation, press "F2" to exit compensation and go to the next step. After rim compensation ends, press “F3” to enter rear wheel measurement display interface (Fig 61). Measurement results are shown in Fig 61. From up to down and left to right shown as rear wheel camber, rear wheel toe-in, rear wheel total toe-in, thrust angle and set-back angle, respectively. Press “F” to show definition of each value (Fig 62). Fig 61 Rear Wheel Measured Data Fig 62 Display Value Definition After measurements are finished, press “F3” to enter the rear wheel adjustment. First, adjust rear wheel camber. After adjusting rear wheel camber, press “F3” to adjNext, press “F3” again to adjust rear wheel set-back. The adjustment interface is shown in Fig. 63, 64 and 65, respectively. User can optionally select adjustment items. In any above adjustment interface, press “F1” to pop up the interface of Fig 66. Then, press the corresponding button to select the adjustment item. Fig 63 Rear Wheel Camber Adjustment Fig 64 Rear Wheel Toe-in Adjustment - 31 - Wheel Aligner User’s Manual Fig 65 Rear Wheel Set-back Adjustment Fig 66 Adjustment Option Selection If needing to lift a car for adjustment, press “F1” in any interface of Fig 61, 63, 64 or 65 to enter Fig 66 interface. Press power button “F” and hold it. Then, press “F4” to enter lift adjustment function interface. After entering the lift adjustment option, select “valid,” press “F2” to exit. Lift adjustment function is valid and can be done. After finishing rear wheel measurement and adjustment, both of the A sensors will be transformed from rear wheel sensors into front wheel sensors. Exchange the positions of both of the A sensors with both of the B sensors. The A sensors should be hung on the front wheels and the B sensors on the rear wheels. After adjusting sensor A to level, press “F3” to enter the interface of Fig 69, which has 2 options: press “F3” to select the mode of thrust line measurement and “F4” for mode of center line adjustment. After selecting the mode of thrust line measurement, the upper part of Fig 70 interface will appear showing that thrust line measurement is being done. After selection of measurement method, system will enter measurement and adjustment of front wheels, whose operation is the same as those of rear wheels. Fig 68 Fig 69 Measurement Option Selection Fig 70 Note˖In the process of measurement, if measurement light ways between sensors on the same side of vehicle are blocked or, light source is damaged, sensors will alert user by giving out the sound of “beep” two times continually. If measurement light ways between sensors on same axle are blocked or, light source is damaged, sensors will instruct by giving out the sound of “beep” one time. The “beep” sounds will not stop until the above block is eliminated or, light source recovered to normal status. - 32 - Wheel Aligner User’s Manual 4.2 OPERATION GUIDE OF E58 ALIGNER The E58 aligner is equipped with a computer system and communication module. Computer mainframe can operate and command sensors by sending instructions through communication module. Its operation is as follows: 4.2.1 FRONT WHEEL ALIGNMENT 4.2.1.1 AUTO MODEL DATA SELECTION Click the starting measurement button in the main interface of wheel aligner program to enter the, “Select Auto,” interface (Fig 71). Fig 71 Auto Model Data Selection There are 2 types of auto data base in the Fig 71 interface: one is Factory Standard Auto Data Base and the other is Customized Auto Data Base. User can input auto data not appearing in Factory Standard Database and search it in the customized auto data base. For searching autos according to the auto manufacturer's name, move cursor and click name of auto manufacturer. Users can find auto models in the drop-down list. User can also input auto model name, in English, in upper text box to search for specific auto models. After finding the auto model needed, directly click it to enter the data interface (Fig 72) showing the Standard Auto Data. Auto adjustment will be based on this data. Users can modify rim size according to actual auto situation presented. - 33 - Wheel Aligner User’s Manual Fig 72 Auto Model Data Display 4.2.1.2 AUTO CHECK-UP In the Fig 72 interface click to enter the Auto Check-up Interface (Fig 73). This list has some checkup items to prompt user to check relative parts of auto before alignment, such as tire pressure, bearings, tie-rods, bushings, auto body height, and so on, to assure the above parts are in accordance to standard and there are no signs of wear. If necessary, corresponding parts need to be replaced otherwise, it will affect wheel alignment accuracy. Fig 73 Auto Check-up Click to enter Fig 74 interface (Customer data input). User can input some basic customer auto information such as: customer name, license number, address, telephone, test date, simple test records and other information. This information can help user build service files of customers and provide data reference for subsequent repairs and maintenance of customer’s autos. - 34 - Wheel Aligner User’s Manual Fig 74 Customer Auto Data Input In Fig 74 interface, there are 2 buttons which stand for front and rear wheel measurement. Front wheel measurement only measures the data of front wheels for 2-wheel alignment. Rear wheel measurements will first, measure rear wheels then, measure front wheels. This is for complete 4-wheel alignment. Click the icon for front wheel alignment to enter Fig75 interface. Then, install sensors in accordance to Fig 75. If needless of rim compensation, click next step button to next step operation; if needing rim compensation, click rim compensation button to enter Fig 76 interface. Fig 75 Sensor Installation 4.2.1.3 RIM COMPENSATION Due to wheel deformation, rim fixture installation error and other operational reasons, a sensor head fixed to a wheel and the wheel it’s self are not in the same plane. Without wheel/rim compensation camber and toe-in measured results can have a much bigger difference. Therefore, it is very important to do rim compensation before alignment and measurement. The aligner system’s compensation principle is as follows: First, it measures wheel’s value change in X, Y and Z directions in 3 dimensions when wheel is rotated by 360 degrees. Then, calculates the aligner’s mounting plane surface and error, which compensates measurements and alignment. - 35 - Wheel Aligner User’s Manual Fig 76 Rim Compensation Rim compensation operated on sensors and operation methods same as that of E18. Sensor will upload compensation data to computer. Fig 76 interface shows compensation data of X, Y and Z. After rim compensation ends, click the next step to enter next interface prompting the following operation: Pull up the handbrake; Use brake fixer to fix brake; Rock auto body back and forth to eliminate stress on auto chassis spare parts for getting a free status; Click next step to caster measurement. 4.2.1.4 CASTER MEASUREMENT Caster measurement adopts “7 degrees measurement.” First, put the steering wheel on-center (Fig 77). Then, rotate steering wheel left or right to make the red cursor on the screen move to “0” position and screen will show "OK.” Wait a few seconds, system will automatically enter “7 degrees measurement.” Fig 77 Put Steering wheel On-Center Fig 78 “7 Degrees Measurement” Slowly rotate steering wheel left until screen shows "STOP" (Fig 78). Then, stop rotating steering wheel and screen will show “WAIT.” Wait for several seconds until "WAIT" disappears and the arrow appears, pointing to the right; Slowly rotate steering wheel right to - 36 - Wheel Aligner User’s Manual make it on center; When screen shows "STOP", stop rotating steering wheel until screen shows “OK”; After waiting for several seconds, system automatically enters initial measured results display interface and caster measurement is finished. If user doesn’t want to measure caster, after putting steering wheel on-center, user can click next step in Fig 77 interface to directly enter initial measured results display interface (Fig 79). Warning: Do not block toe-in measurement sensor in the process of measuring. After finishing rotating the steering wheel for “7 degrees measurement”, every measured data of auto will be shown in table form (Fig 79). The left side of the table is auto's standard data, the middle part is measured angle data including front wheel caster, camber, total toe-in, partial toe-in, KPI, included angle and set-back angles, and rear wheel camber, total toe-in, partial toe-in, KPI, included angle and set-back angles. Right side is initial measurement data. Compared with standard data on the left side if, measured data is within standard range then, the data box is displayed in green color, otherwise in red color. Fig 79 Initial Measured Data 4.2.1.5 AUTO ADJUSTMENT After finishing initial measurement, click to enter auto adjustment (Fig 80). Please lock steering wheel before auto adjustment. Put steering wheel on-center by visual check. Then, lock steering wheel with fixer to prevent rotation of steering wheel from effecting accuracy of measurement and adjustment results. This ensures steering wheel is on-center and auto drives straight after alignment adjustment. - 37 - Wheel Aligner User’s Manual Fig 80 Front Wheel Adjustment There are 3 display fields in Fig 80 interface: The First line is caster (left side is left wheel caster and right side is right wheel caster); The Second line is camber (left side is left wheel camber and right side is right wheel camber); The Third line is toe-in (left side is left wheel partial toe, the middle is total toe-in and the right side is right wheel partial toe-in). A red and green narrow bar over the green data display field shows, auto standard data and lists minimum data, middle data and maximum data from left to right. If measured data is not within scope of standard data, the data displayed will be in red. One lock icon, in the middle of caster field, indicates that the current data is unchanged in adjustment. It can change by click and open the lock icon to open in adjustment. A row of shortcut buttons on the top of Fig 80 interface corresponds to each individual angle adjustment. User can click relative angle to enter corresponding adjustment interface which is convenient to use. Users can also click empty space in an individual display field to directly enter individual data adjustment interface or, click a data display field to conduct one wheel adjustment. 2 vertical buttons in the lower right-side of the interface is for unit conversion. The upper button is for toe-in unit conversion (degree, degree and minute, mm and inch). Lower button is for other angles’ unit conversion (degree, and degree and minute). If users need to lift auto for adjustment use the, “Data Freezing and adjustment,” function. Click button in the lower part of Fig 80 interface to enter data freezing and adjustment operation (Fig 81). Then, lift auto for adjustment. After finishing adjustment, lower auto and then, click data freezing and adjustment button to end the adjustment. After auto adjustment, click next step to review data (Fig 82). - 38 - Wheel Aligner User’s Manual Fig 81 Data Freezing and Adjustment Fig 82 Data Review In Fig 82 interface, left side is initial measured data, the middle is a measured item list and right side is data after adjustment. If adjusted data is within standard data scope it is displayed in green color, otherwise, it is displayed in red color. Back to previous step. End measurement and back to main interface. Continue to next step. 4.2.1.6 INPUT CUSTOMER’S DATA After adjustment, if users want to keep measured data, click next one; if users do not want to keep, click to save and continue to to exit and return to main interface. After finishing auto measurement and adjustment, users can input client’s information and maintenance records (Fig 84), to establish a backup file for clients and provide data reference for the next maintenance service. In Fig 84 interface, input from top to bottom: client’s name (required), license number, phone, address, service time (the system automatically inputs), service records and information about client’s auto. If auto model is selected before measurement, the system will automatically input relative auto information; otherwise, aligner user can manually input. Finally, user can save the information or print out. - 39 - Wheel Aligner User’s Manual Fig 84 Input Client’s Auto Data Back to the previous step Exit and back to main interface Printout Save 4.2.2 COMPLETE ALIGNMENT Choose rear wheel measurement in Figure 74 interface to enter Fig 85 interface. Mount sensors as per Fig. 85. If users do not want to do rim compensation, directly click next button; if rim compensation is needed, click Lift Auto Compensation Button (compensation operation same as the above). Click next step to enter Fig 86 interface. Fig 85 Rear Wheel Measurement Fig 86 Rear Wheel Initial Measured Data - 40 - Wheel Aligner User’s Manual In Fig 86 interface, the left side is Auto Standard Data, the middle is the Measured Angle and right side is Initial Measured Data. Compared with Auto Standard Data, if initial measured data is within standard data scope, data box is shown in green color, otherwise, shown in red color. Click next step to enter rear wheel adjustment interface (Fig 87). Fig 87 Rear Wheel Adjustment There are 3 data display fields. The first line is camber (left side is RL wheel camber, the middle is tolerance of left and right wheel camber and the right side is RR wheel camber); The second line is toe-in (left side is RL wheel partial toe-in, the middle is rear wheel total toe-in and the right side is RR wheel partial toe); The third line is thrust angle. User can use data freezing and adjustment function, do individual adjustment or unit conversion. After adjustment, click icon to select the thrust line measurement to enter Fig 88 interface. Click next step and the system pops up a box prompting “Continue or not”. If “not”, enter Fig 84 interface to input, save or printout client’s information and measurement is finished; if “continue”, is chosen the program will enter front wheel measurement with its operation the same as the above-mentioned front wheel measurement and alignment. Fig 88 Data after Adjustment Fig 89 - 41 -