1
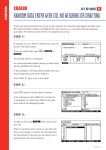
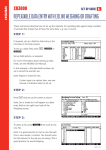
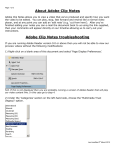
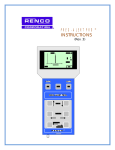
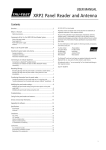
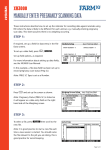
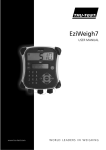
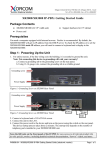
XR3000
Set Up Guide 7.
PREGNANCY SCANNING
CONNECTED TO A BCF OVI-SCAN-6 PREGNANCY SCANNER. NO WEIGHING OR DRAFTING
These setup instructions are specifically for a BCF Ovi-scan-6 sheep pregnancy scanner.
STEP 1:
If required, set up a field for data entry in the
Life Data or File Data screens.
To set up a data field, press
.
,
or
Set up field options, as required.
For more information about setting up data
fields, see the XR3000 User Manual.
In this example, a file data field has been set
up to record pregnancy scan status (Preg Sc):
STEP 2:
Press
and set up the screen as shown:
Note: Pregnancy Status (PREG SC) is ticked so it
will appear as a data entry field on the right hand
side of the Weighing screen.
STEP 3:
To select a file, press
the new file.
then scroll to
Note: It is good practice to start a new file
each time a new session is started. You
should name the file relevant to the job you
are doing. This is good practice for record
keeping.
Page 1 of 2
XR3000
Set Up Guide 7.
PREGNANCY SCANNING
CONNECTED TO A BCF OVI-SCAN-6 PREGNANCY SCANNER. NO WEIGHING OR DRAFTING
STEP 4:
Optimise the system for the task being performed.
Press
,
.
As animals are not being weighed, set Weight
Recording to Off in order to increase the speed of
data entry.
Tick ID Entry Creates File Rec to allow the XR3000
to record data without weighing.
STEP 5:
Set up the EID device and the pregnancy scanner.
Ensure the pregnancy scanner is plugged into
CON 1 and the EID reader is plugged into CON 2.
Press
,
,
.
Tick CON 1 Input and set to PREG SC.
Set CON 1 Min Chars to 1.
STEP 6:
The main screen should be displayed as shown:
Need more help?
For further information regarding your stock management system
contact Tru-Test on 1800 641 324 (AU) or 0800 878 837 (NZ)
03 0510
Page 2 of 2