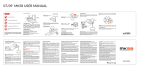
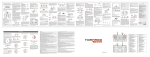
Transcript
TYPHOON G 2015.0831
IMPORTANT NOTE:
2. INSTALLING THE PROPELLERS
This Quick Start Guide is NOT intended to replace
the content included in the instruction manual. You
should read the instruction manual completely
before proceeding.
Install the corresponding A and B propellers in the
positions shown by rotating them per the illustration
and until they’re secure. It may also be helpful to use
the included tool to hold the motors while installing
the propellers.
NOTICE: Please find a SD Card in the asseccory box.
There are tutorial video, electronic user manual and
show case in the SD Card.
1. CHARGING THE BATTERIES
4. PREPARING THE MK58
Step 1) Plug the audio connector into audio port of
the MK58; then plug the 4PIN power connector into
power output port of GB203.
WARNING: Always operate TYPHOON in open
areas (approximately 10000 square feet/930 square
meters or more) that are free from people, vehicles,
trees and other obstructions. Never fly near or
above crowds, airports or buildings.
STEP 2) Plug the MINI USB connector into USB
interface of GoPro© Camera
PROCESS IS COMPLETE. The main LED status
indicator will glow solid green (Smart Mode) or solid
purple (Angle/Pilot Mode) when initialization is
complete (and TYPHOON GPS is locked). The GB203
LED status indicator will blink green slowly when
initialization is completed. The MK58 will be supplied
with power. Then the blue LED of the MK58 is on.
Power the SC3500-3 charger from a 100-240V AC
outlet using the AC adapter/power supply, or from a
12V DC accessory socket/cigarette lighter
receptacle in a vehicle using the included adapter.
4PIN
B
Welcome,Pilot
10. STARTING/STOPPING THE MOTORS
10:48:28 pm 10
STEP 1) Bind the MK58 to the Personal Ground
MODE
VOLTS
Angle
12.3 V
Station/Remote
Controller: Switch on the Personal
GPS
Ground
Station/Remote Controller and tap "Flight
ALT
Ready
21.4 ft
Setting".
HOME
A
MINI USB
0.0 mph
POS
DIS
00.0000E
00.0000N
22.5 ft
System Settings
Never attempt to operate TYPHOON nearby tall
buildings/obstructions that do not offer a clear view
of the sky (a minimum clearance of 100°).
Flight Settings
Model: Typhoon
Welcome,Pilot
10:48:28 pm 10
Camera Select
Insert the GoPro© camera into the camera frame on
the GB203, then thread the camera to secure
position with the retaining screw. Do not over-tighten.
Mode Select
STEPHardware
3) Select
"GoPro", tap "Select" and then tap
Monitor
TAKEOFF ZONE
26 ft (8m)
A green blinking LED indicates the charger is
powered on and ready to charge, and a red blinking
LED indicates the battery is charging. It will take
approximately 2 hours to charge a fully discharged
(not over-discharged) battery.
CAUTION: Do not over-tighten the propellers when
using the tool.
PILOT LOCATION
3. INSTALLING THE BATTERY
If calibration is needed before flight, Please press
calibration button enables the user to enter Compass
calibration or Accelerometer calibration. The
detailed calibration operation can be referred to the
User Manual on www.yuneec.com.
8. CAMERA CONTROL
Press here
6. PLACEMENT BEFORE TAKEOFF
Step back approximately 26 feet (8 meters) behind
TYPHOON.
This side
up
WARNING: All instructions and warnings must be
followed exactly to prevent property damage and/or
serious injury as the mishandling of Li-ion/LiPo
batteries can result in fire.
If indoor flight is needed, please turn off the GPS first.
Press setting button on ST10+ interface and switch
off the GPS,
7. POWERING ON/OFF
NOTE: If the door does not close, the battery is not
inserted far enough to engage the connector
properly.
10000 ft² (930m²)
NOTE: ALWAYS turn the ST10+ on and allow it to
boot up BEFORE turning TYPHOON on (and
ALWAYS turn TYPHOON off BEFORE turning off
the ST10+).
Place TYPHOON on a level and stable surface then
slide the switch to the ‘ON’ position. DO NOT TOUCH
OR MOVE TYPHOON UNTIL THE INITIALIZATION
Switch on the GoPro© camera. Please be sure to set
video mode for GoPro© Camera BEFORE starting the
motors of the aircraft. Any operation related to camera
controls should be referred to and downloaded
according to the official website of GoPro©.
The MK58 from YUNEEC extends the use of the
GB203 with real-time image transmission.
"OK". Then the Camera Mode is chosen.
Model: Typhoon
Choose a camera
Welcome,Pilot
10:48:28 pm 10
NAME:
GOPRO
STEP 4) Back to the previous interface and tap “Bind”.
STEP 5) Select the MK58 in "Camera" interface .
Model: Typhoon
Step back approximately 26 feet (8 meters) behind
TYPHOON. Press and hold the red START/STOP
button for about 3 seconds to start, and about 2
seconds to stop the motors.
11. FLIGHT CONTROLS
Bind
5. INSTALLING THE GOPRO©
Welcome,Pilot
Model
12. CONTROL RATE SLIDER
Set the overall climb/descend and directional control
rates. Use the turtle position for the lowest control
rates (best for first-time pilots and when flying
between 5000 feet and 8000 feet Above Mean Sea
Level). Use the rabbit position for the highest control
rates (best for experienced pilots and only when
flying below 5000 feet AMSL.
To takeoff, slowly raise the left-hand stick to slightly
above the center position. TYPHOON will takeoff
and climb slowly (or raise the stick further until it
does). Allow the stick to return to the center position
when TYPHOON reaches the desired altitude.
Climb (Max. Altitude
400 Feet / 122 Meters)
Maximum Climb Rate:
2m/s (6.6f/s)
Maintain Altitude
Descend / Land
Mode 2 shown
MK58
FLYING
NOTICE: If install the GB203 on SteadyGrip,
GoPro© APP can be downloaded to achieve
real-time image transmission without MK58.
STEP 6) Input password "12345678" and then tap
CAUTION: The GoPro© Wi-Fi will interfere with the
quadcopter receiver and may cause a loss of signal and
crash. Follow the camera instructions to turn the Wi-Fi
off before attempting to power on the quadcopter.
Crash damage is not covered under warranty.
the MK58 are bound, the red LED of the MK58 will
blink. Press to return to the main interface of the
Ground Station/Controller. The real-time images
can be shown on the interface of the Ground
Station/ Controller.
"OK". The binding succeeds.
STEP 7) After the Ground Station/ Controller and
Additional Smart Mode Features:
SMART MODE
FOLLOW ME FUNCTION
When the Flight Mode Selection Switch is the top
position TYPHOON will be in Smart Mode. Although
we recommend learning to fly TYPHOON in Angle
(Pilot) Mode as soon as possible, Smart Mode is
typically the best mode for first-time pilots to fly in
and also features ‘Follow Me’.
IMPORTANT NOTE: If at any time during flight you
feel like TYPHOON is drifting out of/beyond your
control, simply release both control sticks.
TYPHOON will automatically self-level and will even
hold its position (with a suitable GPS signal/lock)
when both control sticks are centered. You can also
activate Home Mode so TYPHOON automatically
land within 13-26 ft (4-8m) of the pilot.
This illustration applies when the controller
is pointed towards the aircraft
LANDING
13. SELECTING A FLIGHT MODE
There are two ways to land TYPHOON:
TYPHOON is programmed with three (3) flight
modes that can be selected via the Flight Mode
Selection Switch located just above the right-hand
control stick.
Usually, the default function under Smart Mode is
Follow Me. Watch Me function can be switched to
by following steps:
The Follow Me function allows the TYPHOON to
follow the pilot, adjusting its location to the location
of the ST10+. This function is enabled when ST10+
GPS positioning completes, and the TYPHOON is
using shared GPS signal with the ST10+. At this time,
you will see orange
, and green follow in
MODE
Follow
.
When in Follow Me function, the TYPHOON will
In Watch Me function, the pilot will always be kept in the
frame wherever he moves.
Model: TYPHOON
Take your time learning how TYPHOON responds to
various control inputs while flying. In Smart Mode
TYPHOON will always move in the direction the
right-hand control stick is pushed relative to the pilot
and no matter which way the front/nose is pointed.
In Angle (Pilot) Mode TYPHOON will move in the
direction the control stick is pushed relative to the
front/nose of the aircraft (and the ‘angle’ of
movement is determined by how far you push the
WARNING: Always land as soon as possible after the
first low level voltage battery warning, or land
immediately after the second level low voltage
battery warning (as indicated by the vibrations and
audible alerts from the ST10+, and by the Below
Motor LED Status Indicators flashing rapidly). And if
at any time the Aircraft Battery Voltage shown on
the screen is below 10.7V, land TYPHOON
immediately.
AFTER LANDING
ALWAYS turn off TYPHOON BEFORE turning off
the ST10+. Then remove the battery from
TYPHOON and allow it to cool to ambient/room
temperature before recharging.
Welcome,Pilot
10:48:28 pm 10
MODE
VOLTS
Follow
follow the movement of ST10+ if there is no extra
operation on the ST10+. The flight status is also
controllable when you operate ST10+ and GB203.
IMPORTANT NOTE: In Follow Me function, the
aircraft will maintain a constant altitude and cannot
detect obstacles. Pilots who change their altitude by
for example, moving to higher ground, during flight
should be mindful of this.
12.3 V
GPS
ALT
Ready
21.4 ft
SAT
G-SPD
13
0.0 mph
POS
DIS
Watch
in xSmart
00.0000E Me/Follow Me Button: When 3840
2160 F30 Mode, press
22.5 ft
00.0000N
to switch the TYPHOON between Watch Me and Follow
me function.
Follow Me function
is the default Model
setting,
and
System Settings
Flight Settings
Select
the button is ORANGE. If it is GREY, it means ST10+ GPS
isn’t ready yet. Please wait.
Model: TYPHOON
Welcome,Pilot
10:48:28 pm 10
MODE
VOLTS
watch
12.3 V
GPS
ALT
Ready
2) Activate Home Mode and TYPHOON will automatically fly itself back to the home point and will land
within a 10 foot (3 meter) diameter circle around it.
10:48:28 pm 10
Camera
Mode 2 shown
1) Position TYPHOON above the area where you
would like to land. Slowly lower the left-hand stick to
below the center position. TYPHOON will descend
slowly and land. After TYPHOON lands, press and
hold the red START/STOP button until the motor stop.
14. FLIGHT MODES
In Smart Mode TYPHOON will always move in the
direction the right-hand control stick is pushed
relative to the pilot and no matter which way the
front/nose is pointed. So if you push the stick to the
left TYPHOON will always move to the left,
regardless of the direction the nose is pointing and
even if it’s spinning. This mode can also be helpful for
pilots that lose orientation while flying in Angle
(Pilot) Mode.
Model Select
STEP 2) Select "Camera Select".
Be sure to place TYPHOON on a level and stable
surface before powering ON the Controller and
Aircraft.
stick away from the center position). And please see
the corresponding sections of this instruction
manual for more information on Smart Mode and
Angle (Pilot) Mode.
G-SPD
13
Audio
Connector
B
Model: Typhoon
SAT
100˚
A
9. BINDING THE MK58
21.4 ft
SAT
G-SPD
13
0.0 mph
DIS
POS
00.0000E
Press
, the button will change from ORANGE
22.5 ftto
00.0000N
GREEN. And now it is in Watch Me function.
System
Settings
Flight
Settings
Model
Select
NOTE: Once the TYPHOON is above 2m and out
of Smart Circle during flying, the TYPHOON yaw
direction will take the control itself. Camera lens
will always point to you as long as Flight Mode
Selection Switch is in Smart Mode. Please put the
GB203 Pitch Angle/Position Control Slider in the
middle position. If you want to trim camera angle
up, then just move the Pitch Angle/Position
Control Slider a bit up. If you want to trim camera
angle down, just move the slider down.
3840 x 2160 F30
Smart Circle
1) When the flight mode switch is in the top position
TYPHOON will be in Smart Mode.
WATCH ME FUNCTION
2) When the flight mode switch is in the middle
position TYPHOON will be in Angle (also known as
Pilot) Mode.
3) When the flight mode switch is in the lowest
position TYPHOON will be in Home Mode.
Mode 2 shown
Watch Me function enables the camera to keep
tracking the remote controller no matter where and
how it moves as the camera can automatically tilt its
angle according to the controller.
GEO-FENCE
The geo-fence is a virtual ‘barrier’ that will keep
TYPHOON from traveling further than 300 feet (91
meters). Although this limit can be adjusted using the
USB interface/programmer and software we strongly
recommend using the default limit at all times.
WARNING: Smart Mode only works when TYPHOON
has a suitable GPS signal/lock. If you take off in
Smart Mode and TYPHOON loses GPS signal/lock it
will switch to Angle (Pilot) Mode automatically. This
is why we strongly recommend learning to fly in
Angle (Pilot) Mode as soon as possible. Otherwise, if
you lose GPS signal/lock and are not able to properly
control TYPHOON in Angle (Pilot) Mode the aircraft
may crash or even ‘fly away’.
WARNING: If you do not properly control
TYPHOON in Angle (Pilot) Mode the aircraft may
crash or even ‘fly away’.
IMPORTANT NOTE: Crash damage and ‘fly aways’
are NOT covered under warranty.
HOME MODE
When the Flight Mode Selection Switch is in the
bottom position TYPHOON will be in Home (also
known as Return to Home) Mode.
LANDING
LOCATION
Angle (Pilot) Mode is the mode preferred by
experienced RC/drone pilots because TYPHOON
will move in the direction the control stick is pushed
relative to the front/nose of the aircraft. So if you
push the right-hand stick to the left TYPHOON will
bank toward the left side and move to the left. This
means if the front/nose of TYPHOON is pointing
away from you it will move to the left, but if the
front/nose is pointing at you TYPHOON will move
to the right.
Additional Angle
Mode Feature:
(Pilot)
POSITION HOLD
SELF-LEVELING
AND
TYPHOON will automatically hold its position (with a
suitable GPS signal/lock)
and maintain a level attitude
when the right-hand stick is
centered.
SMART CIRCLE
In most cases the Smart Circle will keep TYPHOON
from coming within approximately 26 feet (8 meters)
of you (as long as you position yourself at least 26
feet/8 meters behind TYPHOON.
13-26 ft
(4-8m)
PILOT LOCATION
In Home Mode the GPS connectivity will fly back
TYPHOON in a straight line in the direction of the
pilots’ current location, and automatically land
within 13-26 ft (4-8m) of the pilot. This can be very
helpful for first-time pilots who aren’t quite ready to
land TYPHOON themselves. It can also be helpful
for pilots that lose orientation during flight; simply
activate Home Mode until TYPHOON automatically
moves toward the home position, and once you’ve
confirmed orientation switch back to Angle (Pilot)
Mode. And if TYPHOON ever loses the link with the
ST10+ it will automatically enter Home Mode.
When Home Mode is activated TYPHOON will
respond as follows:
> Mode 2 shown
AGE RECOMMENDATION: NOT FOR CHILDREN UNDER 14 YEARS. THIS IS NOT A TOY.
GENERAL SAFETY PRECAUTIONS AND WARNINGS
WARNING: Failure to use this product in the intended manner as described in the quick start guide and instruction manual can
result in damage to the product, property and/or cause serious injury. A Radio Controlled (RC) multirotor aircraft, APV platform,
drone, etc. is not a toy! If misused it can cause serious bodily harm and damage to property.
WARNING: As the user of this product you are solely and wholly responsible for operating it in a manner that does not endanger
yourself and others or result in damage to the product or the property of others.
Keep your hands, face and other parts of your body away from the spinning propellers/rotor blades and other moving parts at
all times. Keep items that could impact or become entangled away from the propellers/rotor blades including debris, parts, tools,
loose clothing, etc.
Always operate your aircraft in open areas that are free from people, vehicles and other obstructions. Never fly near or above
crowds, airports or buildings.
To ensure proper operation and safe flight performance never attempt to operate your aircraft nearby buildings or other
obstructions that do not offer a clear view of the sky and can restrict GPS reception.
Do not attempt to operate your aircraft in areas with potential magnetic and/or radio interference including areas nearby
broadcast towers, power transmission stations, high voltage power lines, etc.
Always keep a safe distance in all directions around your aircraft to avoid collisions and/or injury. This aircraft is controlled by a
radio signal subject to interference from many sources outside your control. Interference can cause momentary loss of control.
To ensure proper and safe operation of the automatic landing function in Home Mode you must start the motors with the aircraft
in a position that has at least 10 feet (approximately 3 meters) of clear and open space around it and achieve a proper GPS lock.
Do not attempt to operate your aircraft with any worn and/or damaged components, parts, etc. (including, but not limited to,
damaged propellers/rotor blades, old batteries, etc.).
Never operate your aircraft in poor or severe weather conditions including heavy winds, precipitation, lightning, etc.
Always operate your aircraft starting with a fully charged battery. Always land as soon as possible after the first level low voltage
battery warning or land immediately after the second level low voltage battery warning (as indicated by the vibrations and
audible alerts from the transmitter/personal ground station).
Always operate your aircraft when the voltage of the battery in the transmitter/personal ground station is in a safe range (as
indicated by the battery charge status icon on the screen of the transmitter/personal ground station).
Always keep the aircraft in clear line of sight and under control, and keep the transmitter/personal ground station powered on
while the aircraft is powered on.
Always move the throttle control stick down fully and turn off the motors in the event the propellers/rotor blades come into
contact with any objects.
Always allow components and parts to cool after use before touching them and flying again.
Always remove batteries after use and store/transport them per the corresponding guidelines.
Avoid water exposure to all electronic components, parts, etc. not specifically designed and protected for use in water. Moisture
causes damage to electronic components and parts.
Never place any portion of the aircraft or any related accessories, components or parts in your mouth as doing so could cause
serious injury or even death.
Always keep chemicals, small parts and electronic components out of the reach of children.
Carefully follow the instructions and warnings included with this aircraft and any related accessories, components or parts
(including, but not limited to, chargers, rechargeable batteries, etc.).
CAUTION: The electronic speed controls (ESCs) installed in TYPHOON are not compatible with any other product, and
TYPHOON is not compatible with any other ESCs. Use of any other ESCs in TYPHOON will cause a crash, which may result in
damage to the product, property and/or cause serious injury.
BATTERY WARNINGS AND USAGE GUIDELINES
WARNING: Lithium Polymer (LiPo) batteries are significantly more volatile than alkaline, NiCd or NiMH batteries. All instructions
and warnings must be followed exactly to prevent property damage and/or serious injury as the mishandling of LiPo batteries
can result in fire. By handling, charging or using the included LiPo battery you assume all risks associated with LiPo batteries. If
you do not agree with these conditions please return the complete product in new, unused condition to the place of purchase immediately.
This equipment must be installed and operated in accordance with provided instructions and the antenna(s) used for this transmitter
must be installed to provide a separation distance of at least 20 cm from all persons and must not be co-located or operating in
conjunction with any other antenna or transmitter. End-users and installers must be provide with antenna installation instructions
and transmitter operating conditions for satisfying RF exposure compliance.
N/A V
ALT
N/A ft
SAT
G-SPD
N/A
N/A mph
POS
DIS
N/A E
N/A N
N/A ft
Flight Settings
1) Flight Mode of Aircraft
2) GPS Status for Aircraft
3) Watch Me/Follow Me Button
4) In Flight Settings
IMPORTANT NOTE:
After flying, turn off TYPHOON BEFORE turning off
the ST10+. Then remove the battery from
TYPHOON and allow it to cool to ambient/room
temperature before recharging.
Double tap the center of the screen to
increase the size of the video viewing area.
Any information above might be
changed due to the software update.
For the latest documents, please check
the official website.
THE FOLLOWING DOCUMENTS ARE
AVAILABLE FOR DOWNLOAD AT
WWW.YUNEEC.COM/SUPPORT
•
•
•
•
•
•
B
The full TYPHOON G Manual
Calibration Sheet
LED Status Indication Sheet
Graphic User Interface
Firmware Updates
Tutorial Videos
Use the slider (A) on the left side of the ST10+ to set
the pitch/tilt position (B) of the GB203.
OVERVIEW
13
6
14
15
9
16
10
17
11
18
12
19
20
22
7
1
2
3
4
5
6
7
GB203
GB203 LED Status Indicator
Main LED Status Indicator
Power Switch
MK58
Proportional Control Rate Slider
USB Connector/Charging Port
8
9
10
11
12
Audio/Earphone Jack
Take Still Photo Button (disabled)
Start/Stop Motors Button
Rudder/Yaw Control (for Mode 2 and Mode 1)
Throttle/Altitude Control (for Mode 2)
Elevator/Pitch Control (for Mode 1)
13 5.8GHz Antenna (located inside the case)
23
8
3
4
5
21
14
15
16
17
18
19
Status Indicators (for ST10+ battery, 5.8GHz WiFi and GPS)
2.4GHz Antenna (located inside the handle)
Start/Stop Video Recording Button (disabled)
Flight Mode Selection Switch
Aileron/Roll Control (Mode 2 and Mode 1)
Elevator/Pitch Control (Mode 2)
Throttle/Altitude Control (Mode 1)
IC RADIATION EXPOSURE STATEMENT FOR CANADA
This device complies with Industry Canada licence-exempt RSS standard(s).
Operation is subject to the following two conditions: (1) this device may not cause interference, and (2) this device must accept any
interference, including interference that may cause undesired operation of the device.
Le présent appareil est conforme aux CNR d'Industrie Canada applicables aux appareils radio exempts de licence. L'exploitation est
autorisée aux deux conditions suivantes : (1) l'appareil ne doit pas produire de brouillage, et (2) l'utilisateur de l'appareil doit accepter
tout brouillage radioélectrique subi, même si le brouillage est susceptible d'en compromettre le fonctionnement.
This equipment complies with IC RSS-102 radiation exposure limit set forth for an uncontrolled environment.
Cet équipement respecte les limites d'exposition aux rayonnements IC définies pour un environnement non contrôlé
TYPHOON G V1.0
4
Model Select
WARNING: NEVER attempt to fly TYPHOON via
First-Person View (FPV). Attempting to fly via FPV
can result in a crash that will cause damage to the
product, property and/or cause serious injury.
15. GIMBAL CONTROLS
FCC STATEMENT:
RF EXPOSURE WARNING
VOLTS
N/A
N/A
System Settings
CAUTION: You must be certain there are no
obstacles in the ‘Return to Home’ flight path
otherwise TYPHOON may come into contact with
them and crash. While TYPHOON is in Home Mode
you will have a limited amount of directional
control. To help avoid obstacles we strongly
recommend to switch to Smart or Angle Mode (then
you can switch back to Home Mode).
WARNING: Home Mode only works when
TYPHOON has a suitable GPS signal/lock. If
TYPHOON loses GPS signal/lock it will switch to
Angle (Pilot) Mode automatically. This is why we
strongly recommend learning to fly in Angle (Pilot)
Mode as soon as possible. Otherwise, if you lose
GPS signal/lock and are not able to properly control
TYPHOON in Angle (Pilot) Mode the aircraft may
crash or even ‘fly away’.
IMPORTANT NOTE: Crash damage and ‘fly aways’
are NOT covered under warranty.
You must always charge the LiPo battery in a safe, well-ventilated area away from flammable materials.
Never charge the LiPo battery unattended at any time. When charging the battery you must always remain in constant observation
to monitor the charging process and react immediately to any potential problems that may occur.
After flying/discharging the LiPo battery you must allow it to cool to ambient/room temperature before recharging.
To charge the LiPo battery you must use only the included charger or a suitably compatible LiPo battery charger. Failure to do so may
result in a fire causing property damage and/or serious injury.
If at any time the LiPo battery begins to balloon or swell, discontinue charging or discharging immediately. Quickly and safely
disconnect the battery, then place it in a safe, open area away from flammable materials to observe it for at least 15 minutes.
Continuing to charge or discharge a battery that has begun to balloon or swell can result in a fire. A battery that has ballooned or
swollen even a small amount must be removed from service completely.
Do not over-discharge the LiPo battery. Discharging the battery too low can cause damage to the battery resulting in reduced power,
flight duration or failure of the battery entirely. LiPo cells should not be discharged to below 3.0V each under load.
Store the LiPo battery at room temperature and in a dry area for best results.
When charging, transporting or temporarily storing the LiPo battery the temperature range should be from approximately 40–120°
F (5–49° C). Do not store the battery or aircraft in a hot garage, car or direct sunlight. If stored in a hot garage or car the battery can
be damaged or even catch fire.
Never leave batteries, chargers and power supplies unattended during use.
Never attempt to charge low voltage, ballooned/swollen, damaged or wet batteries.
Never allow children under 14 years of age to charge batteries.
Never charge a battery if any of the wire leads have been damaged or shorted.
Never attempt to disassemble the battery, charger or power supply.
Never drop batteries, chargers or power supplies.
Always inspect the battery, charger and power supply before charging.
Always ensure correct polarity before connecting batteries, chargers and power supplies.
Always disconnect the battery after charging.
Always terminate all processes if the battery, charger or power supply malfunctions.
This equipment has been tested and found to comply with the limits for Part 15 of the FCC rules. These limits are designed to provide
reasonable protection against harmful interference in a residential installation. This equipment generates, uses and can radiate radio
frequency energy and, if not installed and used in accordance with the instructions, may cause harmful interference to radio
communications.
However, there is no guarantee that interference will not occur in a particular installation. If this equipment does cause harmful
interference to radio or television reception, which can be determined by turning the equipment off and on, the user is encouraged
to try to correct the interference by one or more of the following measures:
Reorient or relocate the receiving antenna.
Increase the separation between the equipment and receiver.
Connect the equipment to an outlet on a circuit different from that to which the receiver is connected.
This device complies with part 15 of the FCC rules. Operation is subject to the following two conditions:
(1) This device may not cause harmful interference, and (2) this device must accept any interference received, including interference
that may cause undesired operation.
NOTE: This equipment has been tested and found to comply with the limits for a Class B digital device, pursuant to part 15 of the
FCC Rules. These limits are designed to provide reasonable protection against harmful interference in a residential installation. This
equipment generates, uses and can radiate radio frequency energy and, if not installed and used in accordance with the instructions,
may cause harmful interference to radio communications. However, there is no guarantee that interference will not occur in a
particular installation. If this equipment does cause harmful interference to radio or television reception, which can be determined by
turning the equipment off and on, the user is encouraged to try to correct the interference by one or more of the following measures:
—Reorient or relocate the receiving antenna.
—Increase the separation between the equipment and receiver.
—Connect the equipment into an outlet on a circuit different from that to which the receiver is connected.
—Consult the dealer or an experienced radio/TV technician for help.
07:25
GPS
2
A
A
3
Welcome,Pilot
MODE
1
10 m
ANGLE (PILOT) MODE
When the Flight Mode Selection Switch is the
middle position TYPHOON will be in Angle (also
known as Pilot) Mode.
Model:TYPHOON
B) When flying lower than 33 feet (10 meters)
TYPHOON will climb to 33 feet (10 meters) while
flying back to the home point, or active home
position, then will descend vertically until it lands.
IMPORTANT NOTE: Crash damage and ‘fly aways’
are NOT covered under warranty.
IMPORTANT NOTE: When the ST10+ Personal
Ground Station is connected to less then 6 satellites,
the ‘FOLLOW ME’ feature will be disabled.
16. ST10+ DISPLAY
B
NOTICES AND WARNINGS
IMPORTANT NOTE: All safety precautions and warnings, instructions, warranties and other collateral information is subject to
change at the sole discretion of Yuneec. For the most up-to-date information please visit the corresponding product page at
www.Yuneec.com or contact the nearest Yuneec office or authorized distributor.
The following special language terms are used throughout the product literature to indicate various levels of potential harm
when operating this product:
NOTICE: Procedures, which if not properly followed, create a possibility of property damage and/or little to no possibility of injury.
CAUTION: Procedures, which if not properly followed, create the probability of property damage and/or a possibility of serious injury.
WARNING: Procedures, which if not properly followed, create the probability of property damage, collateral damage and/or
serious injury or create a high probability of superficial injury.
WARNING: Read the ENTIRE quick start guide and instruction manual to become familiar with the features of the product
before operating. Failure to operate the product correctly can result in damage to the product, property and/or cause serious injury.
WARNING: This is a sophisticated consumer product. It must be operated with caution and common sense, and requires some
basic mechanical ability. Failure to operate this product in a safe and responsible manner could result in damage to the product,
property and/or cause serious injury. This product is not intended for use by children without direct adult supervision. Do not
use with incompatible components or alter this product in any way outside of the instructions provided by Yuneec. The quick
start guide and instruction manual contain instructions for safety, operation and maintenance. It is essential to read and follow
all the instructions and warnings prior to assembly, setup and/or use in order to operate the product correctly and avoid damage
or serious injury.
A) When flying higher than 33 feet (10 meters)
TYPHOON will maintain the current altitude, fly
back to the home point, or active home point if the
ST10+ has enough satellites for Follow Me, then
descend vertically until it lands.
20 Power Switch
21 Volume and Navigation Touch-Activated
Buttons Volume Down/VolumeUp/Menu/Home/Back)
22 Gimbal Pitch Angle/Position Control Slider
23 SD Card Slot (located under the battery)