1
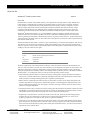
User Protocol TB532 Rev. B 0510JN
Page 1 of 9
WideScreen® Human Hormone Panel 1
Table of Contents
About the Kit........................................................................................................... 2
Overview
Components and Storage
Additional Materials Required But Not Supplied
2
3
3
Human Hormone Panel 1 Protocol ........................................................................ 4
Considerations Before You Begin
Reagent Preparation
Test Sample Preparation
Standard Dilution Series Preparation
Immunoassay Protocol
4
4
5
5
6
Collecting Data and Data Analysis ......................................................................... 7
Data Acquisition
Generation of Standard Curves and Quantitation of Experimental Samples
7
7
Troubleshooting ..................................................................................................... 8
Appendix A: Flowchart for Human Hormone Panel 1 Immunoassay..................... 9
© 2010 EMD Chemicals Inc., an Affiliate of Merck KGaA, Darmstadt, Germany. All rights reserved. The WideScreen® name and logo are registered
trademarks of EMD Chemicals Inc. in the United States and in certain other jurisdictions. Bio-Plex® is a registered trademark and Bio-Plex® Manager™ is a
trademark of Bio-Rad Laboratories, Inc. Luminex® and xMAP® are registered trademarks and Luminex® 100™ IS is a trademark of Luminex Corporation.
ProClin® is a registered trademark of Rohm and Haas Co. Tween® is a registered trademark of ICI Americas Inc.
Manufactured by Rules Based Medicine, Inc. (RBM)
By opening the packaging containing this product (which contains fluorescently labeled microsphere beads authorized by Luminex Corporation) or using this
product in any manner, you are consenting and agreeing to be bound by the following terms and conditions. You are also agreeing that the following terms
and conditions constitute a legally valid and binding contract that is enforceable against you. If you do not agree to all of the terms and conditions set forth
below, you must promptly return this product for a full refund prior to using it in any manner. You, the buyer, acquire the right under Luminex Corporation’s
patent rights, if any, to use the product or any portion of this product, including without limitation the microsphere beads contained herein, only with Luminex
Corporation’s laser-based fluorescent analytical test instrumentation marketed under the name Luminex Instrument.
The terms and conditions governing EMD Chemicals’ sale of this product are as indicated on our website (www.emdbiosciences.com).
USA and Canada
Tel (800) 628-8470
bioscienceshelp@
emdchemicals.com
Europe
France
Freephone
0800 126 461
Germany
Freecall
0800 100 3496
Ireland
Toll Free
1800 409 445
All Other Countries
United Kingdom
Freephone
0800 622 935
All other
Contact Your Local Distributor
European Countries
www.novagen.com
bioscienceshelp@
+44 115 943 0840
emdchemicals.com
———————————————— [email protected] ———————————————
www.novagen.com
FOR RESEARCH USE ONLY. NOT FOR HUMAN OR DIAGNOSTIC USE.
Cat. No.
User Protocol TB532 Rev. B 0510JN
Page
2 of 9
Page
About the Kit
WideScreen® Human Hormone Panel 1
72276-3
Overview
Bead-based flow cytometric assays enable sensitive, precise quantitation of analytes within a sample. When directed
toward proteins or small molecules, such assays are essentially ELISAs on a bead. In the conventional “sandwich”
format, samples are combined with fluorescently labeled microparticles (beads) covalently conjugated to a capture
antibody. Analytes captured on the beads are identified with detection antibodies and a fluorescent label. A major
advantage of bead-based assays over traditional protein quantitation methods (such as ELISA) is the capacity for
multiplexing, as bead-based assays allow simultaneous quantitation of multiple analytes in a small sample volume.
WideScreen® Human Hormone Panel 1 is a pre-mixed multiplex bead kit of quantitative antibody-based assays for
simultaneous detection of five human reproductive hormones: FSH (follicle stimulating hormone), hCG-β (human
chorionic gonadotropin beta subunit), LH (luteinizing hormone), progesterone, and testosterone. The kit includes all the
reagents and buffers needed to analyze the above molecules in serum, plasma, urine and tissue culture supernatants using
the Luminex® xMAP® System.
WideScreen Human Hormone Panel 1 contains two types of immunoassays: conventional and competitive. FSH, hCG-β,
and LH assays are conventional (non-competitive) sandwich-based immunoassays. The progesterone and testosterone
assays are competitive assays in which a biotinylated antigen in the blocking buffer is competed off the beads by analyte,
resulting in a decrease in fluorescence signal.
Analyte
Full name
FSH
Follicle stimulating hormone
hCG-β
Human chorionic gonadotropin beta subunit
LH
Luteinizing hormone
Progesterone
Progesterone
Testosterone
Testosterone
Hormones regulate many of the central functions of the body. A host of hormones secreted into the bloodstream act in
concert to control reproductive processes such as the menstrual cycle, development of secondary sex characteristics, and
maintenance and growth of pregnancy. Measurement of these biomarkers in biological samples is used in the clinical
setting for detecting disease, monitoring treatment, and studying normal reproductive processes. The WideScreen Human
Hormone Panel 1 is a non-diagnostic kit for use in the pre-clinical and primary research settings.
• Follicle stimulating hormone (FSH) is secreted by the anterior pituitary gland to regulate reproductive development
and processes. In females, FSH leads to ovulation by stimulating the maturation of Graafian follicles. In males, FSH
induces production of androgen-binding protein and is required for spermatogenesis.
• Human chorionic gonadotropin beta subunit (hCG-β) is secreted after conception, by the embryo and placenta, and
stimulates the production of progesterone to maintain the pregnancy. A chromatographic hCG-β immunoassay is the
basis for standard home pregnancy tests. hCG-β is also secreted by some types of tumors and can be used as a tumor
marker in non-pregnant individuals.
• Luteinizing hormone (LH) is secreted by the anterior pituitary gland. Elevated LH levels stimulate ovulation in females
and ultimately act to maintain elevated progesterone levels necessary for implantation of a fertilized embryo. In males,
LH stimulates testosterone production by Leydig cells, which is required for spermatogenesis.
• Progesterone is a steroid hormone, secreted by the female ovaries, the brain, and by the placenta during pregnancy.
Progesterone levels are consistently low in males and vary in females during the menstrual cycle. In the case of
pregnancy, progesterone levels remain elevated, which is required for maintenance.
• Testosterone is a steroid hormone produced by the male testes, female ovaries, and in small amounts from the adrenal
gland. Testosterone is the primary male sex hormone, found on average in higher levels in males compared to females,
and is involved in the development of primary and secondary male sexual characteristics. In both sexes testosterone is
important for various anabolic effects.
USA and Canada
Tel (800) 628-8470
bioscienceshelp@
emdchemicals.com
Germany
Tel 0800 100 3496
[email protected]
United Kingdom and Ireland
UK Freephone 0800 622935
Ireland Toll Free 1800 409445
[email protected]
All Other Countries
www.novagen.com
bioscienceshelp@
emdchemicals.com
Cat. No.
User Protocol TB532 Rev. B 0510JN
Page
3 of 9
Page
Components and Storage
Additional Materials Required But Not Supplied
The kit includes all the reagents and buffers needed to assay the above proteins in serum, plasma, urine and tissue culture
supernatants using the Luminex® xMAP® System. Whole blood or grossly hemolyzed samples cannot be used with this
kit. The kit contains sufficient components to assay one 96-well plate.
WideScreen® Human Hormone Panel 1
1.1 ml
Human Hormone Panel 1 Capture Beads
72276-3
®
PBS with BSA, Tween 20 and 0.009% ProClin 300
1 vial
Human Hormone Panel 1 Detection Antibodies
Lyophilized, biotinylated detection antibody premix
1 vial
Human Hormone Panel 1 Standards Mix
Lyophilized, purified protein (FSH. hCG-β, and LH) and synthesized (progesterone and
testosterone) standards
1 vial
Human Hormone Panel 1 Control 1
Lyophilized, low levels of FSH, hCG-β, LH, progesterone, and testosterone in human serum
1 vial
Human Hormone Panel 1 Control 2
Lyophilized, high levels of FSH, hCG-β, LH, progesterone, and testosterone in human serum
60 ml
Store all components at
4°C*
Assay Buffer Type 2
1X, proprietary mix of domestic animal proteins in PBS with 0.025% ProClin 300
1 vial
Human Hormone Panel 1 Blocking Buffer
Lyophilized, proprietary mix of antibodies, biotinylated antigen (for competitive assays), and
buffered domestic animal proteins to minimize non-specific interactions
2 x 3.6 ml
Sample Dilution Buffer Type 1
1X, proprietary mix of buffered domestic animal proteins in PBS with 0.025% ProClin 300
1 vial
Standard Curve Diluent Type 1
Lyophilized, proprietary mix of domestic animal proteins
250 µl
15X Streptavidin-Phycoerythrin
PBS with 2 mM NaN3
1
96-well Filter Plate and Sealer
*Following reconstitution of lyophilized reagents, store any unused reagent at –70°C. See Reagent
Preparation section (p 4).
Note: WideScreen® Human Hormone Panel 1 is not compatible with other bead kits and buffers sold by EMD
or other vendors.
Caution: Human Hormone Panel 1 Standards Mix, Control 1, and Control 2 contain components derived from
human sources. All human source materials have been tested negative for HIV-1, HIV-2, HCV antibodies,
HIV Ag and HBsAg. However, all materials derived from human fluids or tissues should be considered
biohazardous and handled accordingly. Refer to MSDS for additional information.
Additional Materials Required But Not Supplied
•
•
•
•
•
•
•
•
USA and Canada
Tel (800) 628-8470
bioscienceshelp@
emdchemicals.com
Luminex® xMAP® System (or equivalent)
Vacuum manifold for filter plates (Pall 5017 or Millipore MSVMHTS00)
96-well plate platform shaker, such as IKA MTS4
Polypropylene microcentrifuge tubes
15 ml polypropylene centrifuge tubes
Vortex mixer
Ultrasonic bath, such as Cole Parmer EW-08849 (optional)
Multichannel pipet (optional)
Germany
Tel 0800 100 3496
[email protected]
United Kingdom and Ireland
UK Freephone 0800 622935
Ireland Toll Free 1800 409445
[email protected]
All Other Countries
www.novagen.com
bioscienceshelp@
emdchemicals.com
Cat. No.
User Protocol TB532 Rev. B 0510JN
Page
4 of 9
Page
Human Hormone Panel 1 Protocol
Considerations Before You Begin
• Guidelines when using filter plates and vacuum manifold:
• Excessive vacuum will cause the filter plate membrane to perforate. Adjust the pressure using a non-filter (ELISA
or tissue culture) plate, ensuring that vacuum does not exceed 5 in. (127 mm) Hg.
• After adjusting the vacuum with a non-filter plate, place filter plate on the manifold. Use fingertips to apply
pressure evenly across the plate. The liquid should drain in 2–5 sec.
• To avoid drying out the beads, vacuum only long enough to drain all wells. Do not allow drained beads to sit for
>5 min before rehydrating with buffer.
• It is critical to remove excess buffer from the underside of the filter plate by tapping it on a paper towel several
times before adding samples or reagents. This prevents samples from wicking out of the wells during incubation
steps. For the same reason, avoid placing filter plate on an absorbent surface during incubations.
• To avoid perforating the filter plate membrane, make certain that the probe height on the xMAP® system is
adjusted correctly. Do not touch the membrane with pipet tips. For accurate pipetting, touch tips to the sides of
the filter plate wells. Change tips as necessary to prevent cross-contamination.
• Capture Beads and Streptavidin-PE are light sensitive. To avoid photobleaching, keep beads and Streptavidin-PE in
microcentrifuge tubes covered. Cover filter plates with aluminum foil during incubation steps.
• To prevent fluorescent dye loss, do not use organic solvents with capture beads. Beads are incompatible with DMSO
concentrations >1%.
• Many of the washing and reagent dispensing steps may be done with an 8-channel or 12-channel pipet (manual or
automatic). For accurate results, use calibrated single-channel pipets for manipulation of standards and test samples.
• Test samples (serum, plasma, urine, tissue culture supernatant) should be stored at –70°C prior to use.
Reagent Preparation
1.
Resuspend each of the following lyophilized reagents in deionized water, immediately prior to performing the assay:
Reagent
Human Hormone Panel 1 Standards Mix
Human Hormone Panel 1 Control 1
Human Hormone Panel 1 Control 2
Human Hormone Panel 1 Blocking Buffer
Standard Curve Diluent Type 1
Human Hormone Panel 1 Detection Antibodies
2.
dH2O Volume
150 µl
100 µl
100 µl
1.5 ml
1.0 ml
4.4 ml
Mix each vial by vortexing at medium speed for 15 sec. Incubate at room temperature for a minimum of 5 min (not
to exceed 30 min) and repeat vortexing step. Human Hormone Panel 1 Detection Antibodies can remain at room
temperature for up to 2 hours.
Note: Following reconstitution, store any unused reagents at –70°C. Unused reagents can be stored at
–70°C for up to one month. Avoid multiple freeze-thaw cycles.
USA and Canada
Tel (800) 628-8470
bioscienceshelp@
emdchemicals.com
Germany
Tel 0800 100 3496
[email protected]
United Kingdom and Ireland
UK Freephone 0800 622935
Ireland Toll Free 1800 409445
[email protected]
All Other Countries
www.novagen.com
bioscienceshelp@
emdchemicals.com
Cat. No.
User Protocol TB532 Rev. B 0510JN
Page
5 of 9
Page
Test Sample Preparation
1.
Thaw and dilute samples within 1 h of use. Remove any particulates by centrifugation or filtration. Avoid multiple
freeze/thaw cycles.
2.
Dilute serum, plasma, urine or tissue culture supernatant samples 1:5 in Sample Dilution Buffer Type 1 (Duplicate
Samples: 15 µl sample + 60 µl Sample Dilution Buffer Type 1). Assaying duplicate samples is recommended. Mix
well and store on ice. If desired, further dilutions of samples can also be performed in Sample Dilution Buffer Type
1 to ensure reading within the range of the assay standards.
Note: Depending on the sample type, empirical testing may be needed to determine the optimal dilution
factor. For example dilutions and representative data for serum, plasma and urine samples please refer
to the Certificate of Analysis.
Standard Dilution Series Preparation
This preparation provides sufficient volume to run duplicate standard dilution curves. Label 8 polypropylene tubes S8
through S1. Alternatively, prepare standard dilutions in a 96-well plate. Pipet Standard Curve Diluent Type 1 into labeled
tubes as described below. Transfer the reconstituted Human Hormone Panel 1 Standards Mix to the S8-labeled tube.
Prepare 3-fold serial dilutions of S8 following the table below. Ensure that each new standard is mixed well by vortexing
before proceeding to the next dilution. Change tips between each dilution.
Standard
Volume of Standard Curve Diluent
Type 1
Volume of Standards Mix
S8
S7
0 µl
80 µl
150 µl from vial
40 µl of S8
S6
80 µl
40 µl of S7
S5
80 µl
40 µl of S6
S4
80 µl
40 µl of S5
S3
80 µl
40 µl of S4
S2
80 µl
40 µl of S3
S1
80 µl
40 µl of S2
Note: Standard concentrations are lot-specific. Refer to Certificate of Analysis of appropriate lot for specific
standard concentrations.
USA and Canada
Tel (800) 628-8470
bioscienceshelp@
emdchemicals.com
Germany
Tel 0800 100 3496
[email protected]
United Kingdom and Ireland
UK Freephone 0800 622935
Ireland Toll Free 1800 409445
[email protected]
All Other Countries
www.novagen.com
bioscienceshelp@
emdchemicals.com
Cat. No.
User Protocol TB532 Rev. B 0510JN
Page
6 of 9
Page
Immunoassay Protocol
1.
Seal any unused wells of the 96-well filter plate with plate sealer (included) or lab tape for future use.
2.
Pre-wet 96-well filter plate wells with 50 µl Assay Buffer Type 2 and incubate for a minimum of 5 min. Immediately
prior to Step 3, remove liquid from filter plate by vacuum filtration. Do not exceed 5 in. Hg or 127 mm Hg vacuum;
liquid should drain in 2–5 sec. Tap filter plate on a paper towel to remove any buffer remaining on the underside.
Note: It is critical to remove excess buffer from the underside of the filter plate before adding samples or
reagents. Otherwise, samples may wick out of the wells during incubation steps. For the same reason,
avoid placing filter plate on an absorbent surface during incubations. If a well does not drain, use the
non-tip end of a 200 µl pipet tip to flick the center of the plastic support on the underside of the well, then
reapply vacuum.
3.
Add 10 µl of Human Hormone Panel 1 Blocking Buffer to each filter plate well that will be used.
4.
Add 30 µl of each standard, sample or control to appropriate well of the 96-well filter plate.
Note: Human Hormone Panel 1 Control 1 and Control 2 do not need to be diluted.
5.
Vortex the plate by gently gliding the plate over the vortex mixer.
Note: Gradually increase the vortex speed from low to medium. Hold the plate with a loose grip. Mix
thoroughly for 10 sec. Avoid splashing. Alternatively, mix using a plate shaker for 10 sec on high speed
(1200 rpm).
6.
Sonicate 10 sec (optional) and vortex the tube of Human Hormone Panel 1 Capture Beads for 10 sec. Add 10 µl to
each well.
7.
Vortex or shake the plate 10 sec as described above in Step 5.
8.
Cover plate with aluminum foil to protect from light and incubate 1 hr at room temperature on a plate shaker (750
rpm).
9.
Remove liquid from filter plate by vacuum filtration (5 in. Hg or 127 mm Hg maximum).
10. Wash beads by adding 100 µl Assay Buffer Type 2 to each well and applying vacuum to remove buffer. Repeat wash
step for total of two washes in Assay Buffer Type 2. After the second wash and vacuum, tap the filter plate on paper
towels to remove any buffer remaining on the underside.
Note: Do not resuspend beads in Assay Buffer Type 2 after second wash.
11. Add 40 µl Human Hormone Panel 1 Detection Antibodies to each well. Vortex or shake the plate as described in
Step 5.
12. Cover plate with aluminum foil to protect from light and incubate 1 h at room temperature on a plate shaker (750
rpm)
Note: Do not wash beads after Detection Antibody incubation.
13. Microcentrifuge 15X Streptavidin-PE briefly (5 sec) to ensure all material is in the bottom of the tube. If using all
96 wells, dilute 15X Streptavidin-PE to 1X by adding 144 µl concentrated Streptavidin-PE to 2016 µl Assay Buffer
Type 2.
Note: Do not dilute the whole vial of Streptavidin-PE if the entire kit will not be used. Dilute only what is
needed based on the number of wells. Allow 10% extra for pipetting error. If there is an insufficient
volume of 15X Streptavidin-PE for your final experiment, making a slightly more dilute working stock will
not adversely affect results.
14. Add 20 µl 1X Streptavidin-PE to each well.
15. Cover plate with aluminum foil to protect from light and incubate 30 min at room temperature on a plate shaker
(750 rpm).
16. Remove liquid from filter plate by vacuum filtration.
17. Wash beads by adding 100 µl Assay Buffer Type 2 to each well and applying vacuum to remove buffer. Repeat wash
step for total of two washes in Assay Buffer Type 2. After second wash and vacuum, tap filter plate on paper towels
to remove any buffer remaining on the underside.
18. Add 100 µl Assay Buffer Type 2 to each well.
19. Cover plate to protect from light. Incubate 3–5 min at room temperature on a plate shaker (750 rpm).
20. Analyze using a Luminex® instrument.
USA and Canada
Tel (800) 628-8470
bioscienceshelp@
emdchemicals.com
Germany
Tel 0800 100 3496
[email protected]
United Kingdom and Ireland
UK Freephone 0800 622935
Ireland Toll Free 1800 409445
[email protected]
All Other Countries
www.novagen.com
bioscienceshelp@
emdchemicals.com
Cat. No.
User Protocol TB532 Rev. B 0510JN
Page
7 of 9
Page
Collecting Data and Data Analysis
Data Acquisition
For detailed instructions on the operation of Luminex® systems, refer to the user guide for your specific instrument and
software. General recommendations are given below.
1.
Using your Luminex system software, prepare a protocol for the assay you will run. Enter information for each bead
target, and for the standards, samples, and controls.
2.
Select the following bead regions:
Analyte
Bead Region
Analyte
Bead Region
FSH
12
Progesterone
55
hCG-β
01
Testosterone
02
LH
08
3.
If desired, enter the standard concentration values in the assay panel template. Standard concentrations are lotspecific. Please refer to the Certificate of Analysis of appropriate lot for specific standard concentrations.
4.
Acquire data using the system settings shown below:
Software
Sample
Size
Events per
Bead Region
Timeout
Doublet
Discriminator
CAL2 Gain
Setting
Luminex® IS™ or
equivalent
50 µl
50–100*
60 sec
7500–15500
default
Bio-Plex® Manager™
default
(50 µl)
50–100*
60 sec
default
(4335-10000)
RP1 low
*If the time spent acquiring samples needs to be reduced, collect as few as 50 events per bead region.
Generation of Standard Curves and Quantitation of Experimental Samples
• Protein and synthetic standards are supplied in the Human Hormone Panel 1 kit, allowing for accurate quantitation
using a titrated standard curve. Representative standard curves and assay performance information can be found in the
Certificate of Analysis for the specific lot.
• Refer to the Certificate of Analysis for standard dilution series concentrations and expected control ranges.
• The eight data points obtained with the concentration standards are plotted using Median Fluorescent Intensity (MFI)
as the signal readout (Y-axis), against concentration of standard dilutions (X-axis).
• Five-parameter logistic (5PL) curve fitting is recommended for modeling data obtained from bead-based
immunoassays. Most ranges of standard concentrations are too wide for accurate linear regression analysis. Fourparameter logistic (4PL) equations will often give a good fit, but are not ideal because they assume the standard curve
is symmetrical.
• If the signal from an unknown sample exceeds the highest point of the standard curve, the concentration of the
unknown should not be calculated by extrapolation, because the non-linear shape of the standard curve cannot be
accurately modeled past the last measured point. In this case, dilute the samples and test again.
• When concentrations of unknowns have been determined by reading off of the standard curve, remember to multiply
this value by the dilution factor to obtain the concentration of the target in the original sample.
USA and Canada
Tel (800) 628-8470
bioscienceshelp@
emdchemicals.com
Germany
Tel 0800 100 3496
[email protected]
United Kingdom and Ireland
UK Freephone 0800 622935
Ireland Toll Free 1800 409445
[email protected]
All Other Countries
www.novagen.com
bioscienceshelp@
emdchemicals.com
Cat. No.
User Protocol TB532 Rev. B 0510JN
Page
8 of 9
Page
Troubleshooting
Problem
Leaking wells in filter plate
Probable Cause
Wicking due to adherent drops
Solution
Tap filter plate several times on paper towel before adding samples or reagents. Do not
place filter plate on an absorbent surface during incubations.
If wells leaked during data acquisition, it is possible to reacquire these wells. Blot
underside of wells and add 100 µl/well Assay Buffer Type 2.
Filter plate wells not draining
under vacuum
Perforation of filter plate
membranes
Adjust the vacuum setting to <5 in. (127 mm) Hg.
Vacuum is too low
Adjust vacuum setting to 3–5 in. (76–127 mm) Hg.
Do not touch membranes with pipet tips.
Clean rubber seals. Apply fingertip pressure to filter plate to ensure formation of a good
seal. Use the plate sealer to cover wells not in use.
Clogged membranes
Clarify samples by centrifugation or filtration. If samples are viscous, dilute further
before assaying.
Use the non-tip end of a 200 µl pipette to flick the center support on the underside of
the well, then reapply vacuum.
Low bead counts during data
acquisition
No beads in the wells
See “Leaking wells in filter plate” solutions above.
Verify that beads were added at the correct concentration, and that correct bead regions
and wells were selected during acquisition setup.
xMAP® fluidics system is
clogged
Clear system of clogs or air using maintenance steps described in the instrument user
manual (sanitize, alcohol flush, probe sonication, etc.).
Make sure that the probe height is set correctly.
Make sure that beads are in suspension by incubating plate for 3–5 min on plate shaker
(750 rpm) immediately before analysis.
Microbial growth in buffers can cause beads to stick to the filter plate membrane. Do
not use contaminated reagents.
Beads are not falling into the
gates properly
Timeout limit is set too low
50–100 events per bead region should be acquired within the 60 sec timeout limit. If
necessary, the timeout limit can be set higher, e.g. 75 sec.
Beads were not resuspended in
Assay Buffer Type 2 before
analysis
The setting of the Doublet Discriminator (DD) gate is buffer-specific. This gate can be
adjusted, but Assay Buffer Type 2 is the recommended buffer for running samples.
Other buffers may also cause bead aggregation.
DD gate setting not optimal
Use the DD gate setting recommended in the Data Acquisition Section. If necessary,
raw data results can be reanalyzed with different DD gate settings; see software user
manual.
Beads were exposed to organic
solvents
Do not use organic solvents in the immunoassay, as they will damage beads
irreversibly.
Beads are falling outside the
bead region gates due to
photobleaching
Do not use expired beads.
Fluidics system is not running
properly
Confirm that the waste container is not full, the sheath fluid is not empty, and the SD
fluidics module is turned on.
Do not expose the beads to ambient light for >10 min. Avoid intense light.
Check system calibration using approved calibration beads.
Verify correct system pressure. Confirm that the system is free of air or particulate
buildup. Follow maintenance steps in the instrument user manual.
Insufficient volume of an
immunoassay reagent
Solutions were not prepared or
used as described in protocol
Confirm correct buffer dilutions and use.
If additional Assay Buffer Type 2 is needed, PBS can be used for the final bead
resuspension step.
If additional 96-well filter plates are required, we recommend Millipore Cat. No.
MSBVN1210.
If there is insufficient volume of 15X Streptavidin-PE for your final experiment,
making a slightly more dilute working stock (e.g., 20-fold instead of 15-fold) will not
adversely affect results.
Sample measurements not
within the standard curve
USA and Canada
Tel (800) 628-8470
bioscienceshelp@
emdchemicals.com
Dilution of sample is too low or
too high
If values are higher than the standard curve, dilute samples further in Sample Dilution
Buffer Type 1 and repeat assay.
Target concentration is below
detection
Verify that curve fitting at the lower end of the standard curve is accurate.
Germany
Tel 0800 100 3496
[email protected]
Not all serum/plasma samples contain detectable levels of all analytes.
United Kingdom and Ireland
UK Freephone 0800 622935
Ireland Toll Free 1800 409445
[email protected]
All Other Countries
www.novagen.com
bioscienceshelp@
emdchemicals.com
Cat. No.
User Protocol TB532 Rev. B 0510JN
Page
9 of 9
Page
Appendix A: Flowchart for Human Hormone Panel 1 Immunoassay
Pre-wet Filter Plate
• Add 50 µl Assay Buffer Type 2 to each well being used
Prepare Reagents
• Reconstitute all lyophilized reagents:
− Standards Mix (150 µl dH2O)
− Controls 1 and 2 (100 µl dH20 each)
− Blocking Buffer (1.5 ml dH20)
− Standard Curve Diluent (1.0 ml dH20)
− Detection Antibodies (4.4 ml dH20)
Prepare 8-point Standard Dilution Series Duplicates
Prepare Diluted Test Samples
• 80 µl Standard Curve Diluent Type 1 in tubes S7-S1
• 150 µl Standards Mix in tube S8
• 3-fold serial dilutions, mix thoroughly
(40 µl from tube S8 to tube S7, etc.)
• Dilute serum, plasma, urine or tissue culture supernatants 5fold in Sample Dilution Buffer Type 1
• If further dilutions are desired, perform in Sample
Dilution Buffer Type 1
Blocker/Analyte/Capture Bead Incubation
• Remove liquid from pre-wet filter plate by vacuum
• Add 10 µl Human Hormone Panel 1 Blocking Buffer per well being used
• Add 30 µl of the following and mix:
− Test sample (diluted), or
− Controls 1 or 2 (undiluted), or
− Standard Dilution Series
• Vortex/sonicate Capture Beads Premix
• Add 10 µl Capture Beads Premix to each well
• Vortex/mix plate 10 sec
• Shake for 1 h (750 rpm, room temperature, in the dark)
Detection Antibody Incubation
•
•
•
•
•
Wash and vacuum plate 2X (100 µl Assay Buffer Type 2)
Add 40 µl Detection Antibodies mix to each well
Vortex/mix plate 10 sec
Shake for 1 h (750 rpm, room temperature, in the dark)
NOTE: Do NOT wash or vacuum filter plate after incubation
Streptavidin-PE (SA-PE) Incubation
• Dilute 15X SA-PE as needed. For entire plate:
− Add 144 µl 10X SA-PE + 2016 µl Assay Buffer Type 2
• Add 20 µl diluted (1X) SA-PE to each well
• Shake for 30 min (750 rpm, room temperature, in the dark)
• Wash and vacuum plate 2X (100 µl Assay Buffer Type 2)
• Resuspend beads in 100 µl Assay Buffer Type 2
Analysis
• Shake approx. 5 min (750 rpm, room temperature, in the dark)
Analyze on xMAP® system (Recommended):
• CAL2 Gain Setting: default (Luminex®) or RP1low (BioPlex®)
• DD Gate: 7500-15500 (Luminex) or default (BioPlex)
• Sample size: 50 µl
• Collect 50-100 events per bead region
• Timeout: 60 sec (Luminex) or default (BioPlex)
USA and Canada
Tel (800) 628-8470
bioscienceshelp@
emdchemicals.com
Germany
Tel 0800 100 3496
[email protected]
United Kingdom and Ireland
UK Freephone 0800 622935
Ireland Toll Free 1800 409445
[email protected]
All Other Countries
www.novagen.com
bioscienceshelp@
emdchemicals.com