1
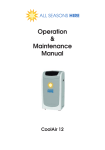
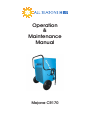
Operation
&
Maintenance
Manual
Mojave CR170
OPERATING INSTRUCTIONS
GENERAL SAFETY – ALL MODELS
Please ensure you have read and understood these instructions fully,
before attempting to operate this equipment. Failure to follow instructions could damage the compressor and will invalidate the warranty.
Never place anything on top of the unit and never obstruct its air vents.
Leave a 300 mm gap all round the unit to let the air circulate.
Always switch OFF and unplug the equipment when not in use.
Always transport, store and operate this equipment in an upright position. DO NOT LAY UNIT DOWN!
ELECTRICAL SAFETY – ALL MODELS
These models plug into a single phase 220-240V (nominal 230V) 50Hz
13 amp power supply. See dataplate for more information.
These models are designed for internal use only. Do not use externally.
Extension leads should be correctly rated for the inductive load, fully
unwound, loosely coiled and never run through water or over sharp
edges.
To reduce the risk of electric shock, use a suitable RCD (residual current
device).
Never pull the equipment by its flex.
Ensure both the unit and the electrical supply are switched OFF before
plugging into the power supply.
These units may hold water in the drip tray; therefore, it is important to
ensure that they are isolated from the electrical supply before moving
and sufficient time is allowed for ALL moisture to drain from the coil.
Never remove any panels/covers whilst the unit is connected to
the electrical supply. If problems are experienced, first consult the
TROUBLESHOOTING section before taking any further action. Always
contact the supplier if the problem cannot be easily and safely
rectified. Maintenance should only be attempted by competent
personnel in accordance with the instructions or supplier guidelines.
SET UP & OPERATION – ALL MODELS
Never operate the units in very cold conditions – they work properly at
temperatures ABOVE 5ºC. If the temperature in the room is above 35ºC,
then switch the unit off as the compressor could overheat, resulting in
possible failure which would invalidate the warranty. In temperatures of
approx 12ºC or below, the cold coil may form frost and no water will be
produced until the defrost cycle commences. This is normal.
Ensure windows and doors are shut and the area sealed where
possible, to speed up drying process. When setting up or restarting,
allow the unit to stand/settle for 15 minutes before switching on. Set
the unit up on a firm, level surface at the lowest point of the area to be
dried. Do not site the unit close to any surface sensitive to heat, cold or
moisture.
Ensure the collected moisture is directed from the unit to a suitable
container (builders bucket or similar), or away via a hosepipe. If the
collected moisture is preferred to be drained to waste, fit a suitable
diameter hosepipe to the outlet point of the unit, ensuring the hose is
kept below the units’ outlet point for its entire length, otherwise the unit
will flood. Should a long length of hose be attached to the driptray
outlet it is advisable to secure the driptray with two no 8 self tapping
screws fitted into the predrilled holes on the sides of the unit. This will
prevent the driptray working loose.
Plug the unit into the power supply and switch the supply ON. Press the
rocker button to operate unit. The unit will now be running. Please allow
a minimum of 10 minutes for it to begin drying.
EQUIPMENT CARE – ALL MODELS
Never use a dehumidifier except for its intended purpose.
Keep the equipment clean & especially the coil faces. Blow out the
coils with compressed air.
Regularly check the water receptacle (every 3-4 hours) to ensure it
does not overflow.
STORAGE – ALL MODELS
Switch the unit OFF and unplug from its power supply. Allow any
accumulated moisture in the drip tray to drain away before moving
unit. Ideally do not move unit for at least 15 minutes after switching off.
Ensure unit is kept upright at all times.
MAINTENANCE – ALL MODELS
ALWAYS DISCONNECT THE UNIT FROM ANY POWER SUPPLY BEFORE
ATTEMPTING MAINTENANCE.
The front face of the cooling coil requires cleaning periodically
whenever the accumulation of dust etc becomes noticeable. The
frequency of this is dependant on the conditions the unit is exposed to,
but should be done at least once a month minimum.
Remove the screws that join the two halves of the casing together & lift
away the top part.
Carefully apply compressed air to the coil area to ensure that the dust
is blown out of the unit.
Pay particular attention to the fan blade & motor, ensuring that the fan
spins freely & is cleaned of any accumulated dust/debris.
Check that the drain outlet is clear.
All the internal parts are lubricated for life and no maintenance should
be necessary, except periodic cleaning to prevent dust build up and
maintain good airflow through the unit.
WARNING
FAILURE TO CARRY OUT MAINTENANCE WILL AFFECT MACHINE
PERFORMANCE/LONGEVITY & COULD CAUSE MACHINE FAILURE OUTSIDE
OF WARRANTY COVER!
OPTIONS
There are some options available when these models are purchased.
These are described below.
Electronic Hour Counter (Standard on the CR170)
This indicates the number of hours the unit has run throughout its life.
The counter is not resettable, so readings should be noted at the start
and end of the drying cycle to determine the run time.
Humidistat (Standard on the CR170)
The humidistat senses the relative air humidity of the air where the
dehumidifier is working. By adjusting the humidistat control, the
humidity at which the machine operates can be altered.
When the chosen level is reached the dehumidifier will switch off, and
will not switch on again until the humidity increases.
Condensate Pump (Standard on the CR170)
The operation of the pump is completely automatic. It is wired such
that it has a live feed to it even when the units on/off switch is set to
off, so long as the mains lead is connected to a switched on electrical
supply. This ensures a purge operation will automatically be done if
moisture collects into the pump AFTER the unit has been switched off at
the machine!
Dual voltage function (Standard on the CR170)
These models have a manually operated dual voltage selector switch.
It can be plugged (once the appropriate plug has been fitted) into a
standard 16 Amp 110v, or 13 amp 3 pin (13 amp fuse fitted) 230v 50 Hz
power supply. See Dataplate.
The correct plug MUST always be fitted BEFORE operation, see details
below.
Voltage
Plug Specifications
230
230v 13A Plug BS1363, fitted with 13A fuse
110/115
110v/115v Plug BS4343/IEC309-2
The wires in the mains lead are coloured and must be connected
as shown in the table below by a suitably qualified electrician or
competent person.
TROUBLESHOOTING GUIDE
ALWAYS CONSULT THIS GUIDE BEFORE RINGING YOUR SUPPLIER; THE MAJORITY OF REPORTED
PROBLEMS ARE SIMPLY SOLVED IN THIS MANNER
Problem
Possible Cause
Solution
Unit Fails To Operate
Power Failure
Check Unit is Plugged Into
Correct Power Supply & Unit
Switched On
Check Plug Fuse for Failure &
Correct Rating
Check Building Ring Circuit is
Not Overloaded
Poor Drying
Performance
Water Leakage
Compressor Stops
Running
Unit In Automatic Defrost Mode
This is Normal - Wait for 30mins
Before Re-Checking
Coils Dirty or (where fitted)
Filters Dirty
Blow Compressed Air Through
Coils to Clean
Air Intake/Exhaust Grills
Obstructed
Remove Obstruction
Check Quoted Clearance
Dimensions Around Machine Re-Site if Necessary
TemeratureOutside of Stated
Operating Parameters
Check Temperature - If Too
Low, Switch Unit Off, Add Heat
to Area Being Dryed Before
Switching Unit Back On.
If Too High, Switch Unit Off Until
Temperature Reduces
Clogged Drain Tube
Remove Blockage
Water Receptacle Overflowing,
Or Unit Outlet Pipe or Hose
Blocked
Empty, Check Unit Outlet
If Using a Hosepipe, Hose
Higher ThanMachine Outlet
Pipe, or Hose Blocked
Lower Hose/Remove Blockage
Unit Has Been Moved Whilst
Water Still In Internal Drip Tray
Ensure Internal Tray is Empty
Before Moving Unit
Unit Iced Up & Then Melted
Unit Run Below Min Temp
Input Voltage Too Low
Check Line Voltage
Compressor Klixon Operated
Due to Either Excess Current or
Temperature
Switch Unit Off, Leave for 15
Minutes Before Switching On
Motor/Blade Failure/Jammed
Check Fan Blade Spins Freely
IF NONE OF THE ABOVE SOLVES THE PROBLEM,
CONTACT 0800 082 8001
All Serasons Hire Ltd.
Unit 4, Harewood Farm
London Road, Andover Down
Andover, Hampshire
SP11 6LJ
Tel: +44 (0) 1264 387370 Fax: +44 (0) 1264 358478
[email protected]