1
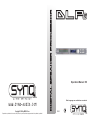
Operation Manual EN Other languages are available on our website WWW.SYNQ-AUDIO.COM Copyright © 2008 by BEGLEC cva. Reproduction or publication of the content, even portions, in any manner, without express permission of the publisher, is prohibited. V1.0 EN - DISPOSAL OF THE DEVICE Dispose of the unit and used batteries in an environment friendly manner according to your country regulations. FR - DÉCLASSER L’APPAREIL Débarrassez-vous de l’appareil et des piles usagées de manière écologique Conformément aux dispositions légales de votre pays. NL - VERWIJDEREN VAN HET APPARAAT Verwijder het toestel en de gebruikte batterijen op een milieuvriendelijke manier conform de in uw land geldende voorschriften. DU - ENTSORGUNG DES GERÄTS Entsorgen Sie das Gerät und die Batterien auf umweltfreundliche Art und Weise gemäß den Vorschriften Ihres Landes. ES - DESHACERSE DEL APARATO Reciclar el aparato y pilas usadas de forma ecologica conforme a las disposiciones legales de su pais. PT - COMO DESFAZER-SE DA UNIDADE Tente reciclar a unidade e as pilhas usadas respeitando o ambiente e em conformidade com as normas vigentes no seu país. ENGLISH OPERATION MANUAL OPERATION MANUAL ® Thank you for buying this SYNQ product. To take full advantage of all possibilities, please read these operating instructions very carefully. DON’T FORGET TO REGISTER YOUR DLP-6. YOU WILL AUTOMATICALLY RECEIVE A ENGLISH OPERATION MANUAL Check the contents: Check that the carton contains the following items: User manual DLP-6 unit CDROM with PC software Mains cable SAFETY INSTRUCTIONS: CAUTION REMINDER WHEN NEW SOFTWARE UPDATES ARE AVAILABLE! SURF TO: WWW.SYNQ-AUDIO.COM/REGISTER/ The lightning flash with arrowhead symbol within the equilateral triangle is intended to alert the use or the presence of un-insulated “dangerous voltage” within the product’s enclosure that may be of sufficient magnitude to constitute a risk of electric shock. FEATURES This unit is radio-interference suppressed. This appliance meets the requirements of the current European and national guidelines. Conformity has been established and the relevant statements and documents have been deposited by the manufacturer. Professional digital loudspeaker management processor based on dual 24bit DSP technology Used to tune your loudspeakers to perfection! 2 inputs and 6 outputs with full matrix routing capability Both inputs have: 6 Band equalizer (parametric, high shelf, low shelf) Delay (adjustable up to 682ms [= 235m] in 21µs steps) All 6 outputs have: Crossover (Linkwitz/Riley, Bessel, Butterworth) with adjustable slope (12 / 18 / 24 and 48dB/oct) 4 Band equalizer (parametric, high shelf, low shelf) Delay (adjustable up to 21,31ms [= 7,3m] in 21µs steps) Phase reverse Limiter (adjustable attack, release, threshold and hold time) 30 different speaker setups can be stored in memory Program locking with password protection USB and RS485 connection for firmware updates and parameter setup via PC ® Complete Windows software included with visually attractive and easy setup capabilities Soft power on operation to avoid disturbing clicks Clear blue 2x20 character back light LCD display High quality components and rugged construction make it road proof Balanced XLR in/outputs Can be used for professional PA and studio but also for Pro DJ’s BEFORE USE Before you start using this unit, please check if there’s no transportation damage. Should there be any, do not use the device and consult your dealer first. Important: This device left our factory in perfect condition and well packaged. It is absolutely necessary for the user to strictly follow the safety instructions and warnings in this user manual. Any damage caused by mishandling is not subject to warranty. The dealer will not accept responsibility for any resulting defects or problems caused by disregarding this user manual. Keep this booklet in a safe place for future consultation. If you sell the fixture, be sure to add this user manual. To protect the environment, please try to recycle the packing material as much as possible. SYNQ® CAUTION: To reduce the risk of electric shock, do not remove the top cover. No user-serviceable parts inside. Refer servicing to qualified service personnel only. 1/14 DLP-6 The exclamation point within the equilateral triangle is intended to alert the user to the presence of important operation and maintenance (servicing) instructions in the literature accompanying this appliance. This symbol means: indoor use only This symbol means: Read instructions This symbol means: Safety Class I appliance To prevent fire or shock hazard, do not expose this appliance to rain or moisture. To avoid condensation to be formed inside, allow the unit to adapt to the surrounding temperatures when bringing it into a warm room after transport. Condense sometimes prevents the unit from working at full performance or may even cause damages. This unit is for indoor use only. Don’t place metal objects or spill liquid inside the unit. No objects filled with liquids, such as vases, shall be placed on this appliance. Electric shock or malfunction may result. If a foreign object enters the unit, immediately disconnect the mains power. No naked flame sources, such as lighted candles, should be placed on the appliance. Don’t cover any ventilation openings as this may result in overheating. Prevent use in dusty environments and clean the unit regularly. Keep the unit away from children. Inexperienced persons should not operate this device. Maximum save ambient temperature is 40°C. Don’t use this unit at higher ambient temperatures. Minimum distances around the apparatus for sufficient ventilation is 2cm. Always unplug the unit when it is not used for a longer time or before you start servicing. The electrical installation should be carried out by qualified personal only, according to the regulations for electrical and mechanical safety in your country. Check that the available voltage is not higher than the one stated on the rear panel of the unit. The socket inlet shall remain operable for disconnection from the mains. The power cord should always be in perfect condition. Switch the unit immediately off when the power cord is squashed or damaged. It must be replaced by the manufacturer, its service agent or similarly qualified persons in order to avoid a hazard. Never let the power-cord come into contact with other cables! When the power switch is in OFF position, this unit is not completely disconnected from the mains! This appliance must be earthed to in order comply with safety regulations. In order to prevent electric shock, do not open the cover. Apart from the mains fuse there are no user serviceable parts inside. Never repair a fuse or bypass the fuse holder. Always replace a damaged fuse with a fuse of the same type and electrical specifications! In the event of serious operating problems, stop using the appliance and contact your dealer immediately. Please use the original packing when the device is to be transported. Due to safety reasons it is prohibited to make unauthorized modifications to the unit. SYNQ® 2/14 DLP-6 ENGLISH OPERATION MANUAL INSTALLATION GUIDELINES: Install the unit in a well-ventilated location where it will not be exposed to high temperatures or humidity. Placing and using the unit for long periods near heat-generating sources such as amplifiers, spotlights, etc. will affect its performance and may even damage the unit. The unit can be mounted in 19-inch racks. Attach the unit using the 4 screw holes on the front panel. Be sure to use screws of the appropriate size. (screws not provided) Take care to minimize shocks and vibrations during transport. When installed in a booth or flight case, please make sure to have good ventilation to improve heat evacuation of the unit. To avoid condensation to be formed inside, allow the unit to adapt to the surrounding temperatures when bringing it into a warm room after transport. Condense sometimes prevents the unit from working at full performance. CLEANING THE APPLIANCE: Clean by wiping with a polished cloth slightly dipped with water. Avoid getting water inside the unit. Do not use volatile liquids such as benzene or thinner which will damage the unit. CONNECTIONS Connections can be made with balanced/unbalanced XLRcables. Please only use good quality balanced cables to minimize noise and interference. There are many different possibilities but mainly the unit will be connected between the output of your mixer and the different amplifiers in your installation. IMPORTANT: always test your connections to exclude any wiring errors! Make sure all MUTE buttons (8) are on. Activate the HF-outputs first: if your cabling is wrong, high frequencies will come out of your subwoofers (but HF-units are still alive ) FUNCTIONS (FRONT) ENGLISH OPERATION MANUAL FUNCTIONS (rear) 12. ON/OFF SWITCH: used to switch the unit on/off. Even though the unit has soft startup, we advice to switch the processor on before the amplifiers. 13. MAINS INPUT with IEC socket and integrated fuse holder, connect the supplied mains cable here. 14. USB CONNECTOR: used to connect the processor to a PC or laptop. With the supplied software you can set all parameters in real time with your PC. This is much more convenient than setting up everything directly on the processor. See further for more information. 15. RS-485 IN/OUT: can be used to interconnect several DLP-6 processors in a larger installation, using CAT-5E (Ethernet) cable. Don’t for get to set the device ID’s! (see chapter “how to use”) You can also use these connections to extend the PC-link to max 100m. On the PC-side you can connect a RS485/USB converter. More information can be found in the software files that can be downloaded from the SYNQ website. 16. BALANCED OUTPUTS: use balanced XLR-cables to connect the different amplifiers to the processor. 17. BALANCED INPUTS: use balanced XLR-cables to connect the processor to the output of you mixer. SOME WORDS EXPLAINED Maybe it’s a good idea to briefly explain some terms before we explain how this unit should be used. DELAY ON INPUT In big venues and for outdoor applications delays can be very useful to compensate the time lag between individual speaker stacks. For example between the speaker stack near the podium and delay towers further in the audience. The DLP-6 can introduce input delays up to 682,52ms or 235,07m! DELAY ON OUTPUTS Is used to align the individual components of a speaker stack with each other. For example you can have mid/high cabinets flown and subwoofers on the floor: in this case the DLP-6 can compensate the time differences with a delay, up to 21,31ms or 7,3m, on each output. 1. 2. 3. 4. 5. 6. 7. 8. 9. 10. 11. INPUT SIGNAL METER: Indicates the level of the incoming music signal. OUTPUT SIGNAL METER: Indicates the level of the music signals at the different outputs. MULTIFUNCTIONAL DISPLAY: Indicates the status of the several function settings. PARAMETER ENCODER: endless dial with integrated push button. Push button: used to browse the different in/outputs Dial: used to adjust all kinds of parameters, password characters etc. (see further) PREVIOUS BUTTON: used to browse submenu options in backward direction, etc. NEXT BUTTON: used to browse submenu options in forward direction, etc. RECALL BUTTON: used to recall stored programs and quit menus OUTPUT MUTE BUTTONS: used to put the outputs in mute (red LED is lit while in mute mode) BUTTON: used to select the different parameter values in direction. BUTTON: used to select the different parameter values in direction. SAVE/ENTER BUTTON: used to save programs and confirm options SYNQ® 3/14 DLP-6 PARAMETRIC EQ A parametric equalizer is a very effective band-pass filter with adjustable gain, center frequency and bandwidth. It’s often used to correct speakers, prevent feedback, eliminate unwanted resonances, etc. In most cases a 5band parametric EQ is more than enough to adjust the sound to perfection. HIGH / LOW SHELF FILTERS Shelving filters are useful to restore the overall balance of high and low frequencies. A low-shelf filter: passes all frequencies, but boosts or cuts frequencies below the cutoff frequency by specified amount. Example1: if the overall bass response of a system is weak, you can use a low-shelf filter to increase the low frequencies. Example2: On the drawing a low-shelf filter is used with frequency = 200Hz and gain set to -18dB all frequencies below 200Hz are reduced by -18dB. A high-shelf filter: passes all frequencies, but boosts or cuts frequencies above the cutoff frequency by specified amount. Example: If your mix sounds a little harsh, you can use a high-shelf to reduce the high frequencies without completely eliminating some frequencies, as would happen with a normal high-cut filter. SYNQ® 4/14 DLP-6 ENGLISH OPERATION MANUAL HIGH-PASS / LOW-PASS / BAND-PASS FILTERS A low-pass filter: blocks unwanted high-frequency signals. Example: you can use a LP-filter at 150Hz to filter the input of a subwoofer. A high-pass filter: blocks unwanted low-frequency signals. Example: you can use a HP-filter at 150Hz to filter the input of a mid/high cabinet. A band-pass filter: you can combine a low-pass and high-pass filter to obtain a band-pass filter. Example: you can use a BP-filter at 1,2kHz and 8,0kHz to filter the input of compression driver. LIMITER AND COMPRESSOR - DIFFERENCES The main difference between a limiter and compressor is the compression ratio. A limiter uses a ratio of 10:1 to 100:1 or even infinite, while a compressor will use a ratio of 10:1 or less. A compressor reduces the dynamic range (louder parts made softer, softer parts made louder) so it reacts as a sort of dynamic volume control. Therefore it’s often used in radio studios. A limiter “limits” the signal as soon as it reaches the threshold level. Therefore limiters are often used to reduce peaks and protect your equipment (loudspeakers). The higher the compression ratio, the better the protection. HOW TO USE Speaker management processors can tune your sound to perfection but in the hands of people with little or no experience they can literary destroy the sound, and sometimes even the loudspeakers! So please experiment and read a lot about their possibilities before you start using them, on the internet you can find a lot of fine articles… Don’t say we didn’t warn you! TWO METHODS TO ADJUST THE SETTINGS PC-SOFTWARE: this is the easiest, fastest and most intuitive way, see further for more information. ON THE DLP-6: more time consuming, this method is explained below. USING THE MENUS AND GENERAL SETUP The complete menu structure is shown below: press the DIAL (4) to browse the different menu items, press the NEXT/PREVIOUS buttons (5&6) to browse the submenus. Below you can find more information on each item. Some terms are briefly explained in the previous chapter. INPUT PARAMETERS – GAIN Used to adjust the input gain of the DLP-6 processor. INPUT GAIN: turn the DIAL (4) to adjust the input gain from -40dB to +12dB in 0,1dB steps. INPUT MUTE: press the button (10) to activate, press the button (9) to deactivate. OPERATION MANUAL if it should be on or off, simply turn the DIAL (4) to select. EQ BAND: turn the DIAL (4) to choose the desired EQ-filter: you can choose 1 to 6. EQ TYPE: turn the DIAL (4) to choose the desired EQ-filter type: PEQ: Parametric equalizer, with the following parameters: o GAIN: turn the DIAL (4) to adjust the gain from -30dB to +15dB in 0,1dB steps. o FREQ: turn the DIAL (4) to adjust the center frequency from 19,7Hz to 20kHz. o BANDWIDTH: turn the DIAL (4) to change from 0,016 (narrow) to 4,000 (wide). LS1: Low-shelf 6dB, with the following parameters: o GAIN: turn the DIAL (4) to adjust the gain from -30dB to +15dB in 0,1dB steps. o FREQ: turn the DIAL (4) to adjust the frequency from 19,7Hz to 2kHz. LS2: Low-shelf 12dB, with the following parameters: o GAIN: turn the DIAL (4) to adjust the gain from -30dB to +15dB in 0,1dB steps. o FREQ: turn the DIAL (4) to adjust the frequency from 19,7Hz to 2kHz. HS1: High-shelf 6dB, with the following parameters: o GAIN: turn the DIAL (4) to adjust the gain from -30dB to +15dB in 0,1dB steps. o FREQ: turn the DIAL (4) to adjust the frequency from 3886Hz to 21,9kHz. HS2: High-shelf 12dB, with the following parameters: o GAIN: turn the DIAL (4) to adjust the gain from -30dB to +15dB in 0,1dB steps. o FREQ: turn the DIAL (4) to adjust the frequency from 3886Hz to 21,9kHz. INPUT PARAMETERS – LINK SETTINGS You can link the settings of input channels A and B so you only have to setup one input (A or B) all settings of the other input will be identical at all times. Turn the DIAL (4) to set the link ON or OFF and press the SAVE-button (11). You will be asked if you are sure: press the /buttons (9&10) to choose OK or CANCEL and press the SAVE button (11) again to confirm. INPUT PARAMETERS – COPY SETTINGS You can copy the settings between the input channels (“A to B” or “B to A”). This means that only the ACTUAL SETTINGS are copied, there will be no constant synchronization between the channels! This is what you can do: DON’T COPY: press the /buttons (9&10) to go to another parameter setting. COPY: press the SAVE button (11) to confirm copying all settings will be copied between the inputs. OUTPUT PARAMETERS – GAIN + PHASE + SOURCE Used to adjust the gain and phase of the 6 outputs. For each output you can also select to which input it should be linked. Use the /buttons (9&10) to jump between the different parameter settings: OUTPUT GAIN: turn the DIAL (4) to adjust the input gain from -40dB to +12dB in 0,1dB steps. PHASE: turn the DIAL (4) to choose “+” (output in phase) or “-“ (output in anti-phase) SOURCE SELECT: turn the DIAL (4) to select the input that should be linked to the selected output: OFF: selected output is not used. A: selected output is linked to input A. B: selected output is linked to input B. A+B: selected output is linked to inputs A and B. INPUT PARAMETERS – DELAY The display shows the delays in meter, milliseconds and foot. The DLP-6 can introduce input delays up to 682,52ms or 235,07m! SMALL STEPS: turn the DIAL (4) to adjust the delay in small 21µs steps. BIG STEPS: press the /buttons (9&10) to adjust the delay in big 5,20ms steps. OUTPUT PARAMETERS – DELAY The display shows the delays in meter, milliseconds and foot. You can choose delays up to 21,31ms or 7,34m! SMALL STEPS: turn the DIAL (4) to adjust the delay in small 21µs steps. BIG STEPS: press the /buttons (9&10) to adjust the delay in big 5,20ms steps. OUTPUT PARAMETERS – EQUALIZER All output channels have a 4band EQ, each band can have different settings. Use the /buttons (9&10) to jump between the different parameter settings: ON/OFF: for each band you can choose if it should be on or off, simply turn the DIAL (4) to select. EQ BAND: turn the DIAL (4) to choose the desired EQ-filter: you can choose 1 to 4. EQ TYPE: turn the DIAL (4) to choose the desired EQ-filter type: PEQ: Parametric equalizer, with the following parameters: o GAIN: turn the DIAL (4) to adjust the gain from -30dB to +15dB in 0,1dB steps. o FREQ: turn the DIAL (4) to adjust the center frequency from 19,7Hz to 20kHz. INPUT PARAMETERS – EQUALIZER Both input channels have a 6band EQ, each band can have different settings. Use the /buttons (9&10) to jump between the different parameter settings: ON/OFF: for each band you can choose SYNQ® ENGLISH 5/14 DLP-6 SYNQ® 6/14 DLP-6 ENGLISH OPERATION MANUAL ENGLISH OPERATION MANUAL Press the SAVE button (11) to confirm copying all settings will be copied between the two outputs. If you like, you can choose another target output to copy the current settings. o BANDWIDTH: turn the DIAL (4) to change from 0,016 (narrow) to 4,000 (wide). LS1: Low-shelf 6dB, with the following parameters: o GAIN: turn the DIAL (4) to adjust the gain from -30dB to +15dB in 0,1dB steps. o FREQ: turn the DIAL (4) to adjust the frequency from 19,7Hz to 2kHz. LS2: Low-shelf 12dB, with the following parameters: o GAIN: turn the DIAL (4) to adjust the gain from -30dB to +15dB in 0,1dB steps. o FREQ: turn the DIAL (4) to adjust the frequency from 19,7Hz to 2kHz. HS1: High-shelf 6dB, with the following parameters: o GAIN: turn the DIAL (4) to adjust the gain from -30dB to +15dB in 0,1dB steps. o FREQ: turn the DIAL (4) to adjust the frequency from 3886Hz to 21,9kHz. HS2: High-shelf 12dB, with the following parameters: o GAIN: turn the DIAL (4) to adjust the gain from -30dB to +15dB in 0,1dB steps. o FREQ: turn the DIAL (4) to adjust the frequency from 3886Hz to 21,9kHz. OUTPUT PARAMETERS – HIGH-PASS FILTER (CROSSOVER) All outputs are equipped with a fully adjustable high-pass filter. Use the /buttons (9&10) to jump between the different parameter settings: CUTOFF FREQUENCY: turn the DIAL (4) to adjust the frequency from 19,7Hz to 21,9kHz or to turn it OFF. FILTER TYPE: turn the DIAL (4) to select one of the filter types (Butterworth, Bessel or Linkwitz-Riley) and corresponding slopes (12dB/oct, 18dB/oct, 24dB/oct or 48dB/oct) OUTPUT PARAMETERS – LOW-PASS FILTER (CROSSOVER) All outputs are equipped with a fully adjustable low-pass filter. Use the /buttons (9&10) to jump between the different parameter settings: CUTOFF FREQUENCY: turn the DIAL (4) to adjust the frequency from 19,7Hz to 21,9kHz or to turn it OFF. FILTER TYPE: turn the DIAL (4) to select one of the filter types (Butterworth, Bessel or Linkwitz-Riley) and corresponding slopes (12dB/oct, 18dB/oct, 24dB/oct or 48dB/oct) OUTPUT PARAMETERS – LIMITER All outputs are equipped with a fully adjustable limiter. Use the /buttons (9&10) to jump between the different parameter settings: ON/OFF: turn the DIAL (4) to set the limiter ON or OFF. THRESHOLD: turn the DIAL (4) to set the threshold value between -20dBu and +20dBu in 1dBu-steps. RATIO: turn the DIAL (4) to set the limiter compression ratio: Lower ratios: 1,2/1 ~ 1,5/1 ~ 2/1 ~ 3/1 ~ 4/1 ~ 6/1 Higher ratios: 10/1 ~ 20/1 ~ Infinite (brick-wall limiter) If you want to use the limiter for protection than you should choose a higher compression ratio (20/1 or inf.) ATTACK: turn the DIAL (4) to set the attack time: 0,5ms ~ 1ms ~ 2ms ~ 5ms ~ 10ms ~ 20ms ~ 50ms. RELEASE: turn the DIAL (4) to set the attack time: 10ms ~ 20ms ~ 50ms ~ 100ms ~ 200ms ~ 500ms ~ 1s. OUTPUT PARAMETERS – LINK SETTINGS You can link the settings of the selected output channel with one or more of the other 5 outputs. You only have to setup the current output all settings of the linked outputs will be identical at all times. The example below will show you how to link one or more outputs: Example: we will link output1 “OP1” to outputs “OP3” and “OP5” (and NOT to outputs “OP2”, ”OP4” and “OP6”): Picture A: Turn the DIAL (4) to set the link OFF, press button(10) for next output. Picture B: Turn the DIAL (4) to set the link OFF, press button(10) for next output. Picture C: Turn the DIAL (4) to set the link OFF, press button(10) for next output. Picture D: Turn the DIAL (4) to set the link OFF, press button(10) for next output. Picture E: Turn the DIAL (4) to set the link OFF Picture F: Press the SAVE-button (11) to confirm the links are made, from now on outputs 1, 3 and 5 will have the same settings! MAIN MENU – PROGRAM: Load settings You can make any personal setting but to make life easier the DLP-6 has some standard configurations preprogrammed. If you like you can use these standard settings to start your configuration and fine-tune all parameters step by step. On the last page of this manual you will find an overview of the standard settings. Press the DIAL (4) until the first display on the right is shown. Press the ENTER button (11) to enter the submenu “program”. The display now shows “Load presets” Press the ENTER button (11) again and turn the DIAL (4) to choose one of the presets: 1: 2x2-WAY+SUM X-OVER 2: 2x3-WAY X-OVER 3: 4WAY X-OVER + 2 4: 5WAY X-OVER + 1 5: 6WAY X-OVER 6: Muted all Press the ENTER button (11) to confirm your choice the selected standard settings are loaded. You can fine tune this standard configuration and save it as a custom program (see further to learn how) MAIN MENU – PROGRAM: Store a Program (1 – 30) You can save and recall up to 30 personalized user programs. First you should make the complete parameter setup, when this is done you can save it as follows: Press the DIAL (4) until the first display on the right is shown. Press the ENTER button (11) to enter the submenu “program”. Press the NEXT button (6) until the display shows “Store a program” Press the ENTER button (11) and turn the DIAL (4) to choose the location (1 to 30) where you want to store the program. Press the NEXT button (6) to insert a name for the program on the second line of the display the cursor starts flashing. Turn the DIAL (4) to select a character and press the NEXT button (11) to set the next character, … When the name is ready, press the ENTER button (11) to save the program. MAIN MENU – PROGRAM: Load a Program (1 – 30) You can save and recall up to 30 personalized user programs. Follow the steps below to load one of the 30 programs: Press the DIAL (4) until the first display on the right is shown. Press the ENTER button (11) to enter the submenu “program”. Press the NEXT button (6) until the display shows “Load a program” Press the ENTER button (11) and turn the DIAL (4) to choose the program you want to load. Press the ENTER button (11) to confirm your choice the selected program will be loaded and is ready to be used. OUTPUT PARAMETERS – COPY SETTINGS You can copy the settings from the current output channel to one or more other outputs. This means that only the ACTUAL SETTINGS are copied, there will be no constant synchronization between the channels! Turn the DIAL (4) to choose the target channel you want to copy the settings (of the current output) to. MAIN MENU – SECURITY: Lock type Imagine you worked a long time to have the perfect settings and some idiot changes everything without knowing what he’s doing: a complete disaster and in worst case even damaged speakers … That’s why we give you the possibility to lock your settings! This is how to protect your precious work: Press the DIAL (4) until the first display on the right is shown. Press the NEXT button (6) until the display shows “SECURITY” Press the ENTER button (11) to enter the submenu. IF THE PROCESSOR IS LOCKED: you will be asked to Enter your password to unlock it (display on the right appears): Turn the DIAL (4) to select a character and press the NEXT button (11) to set the next character, … When the password is entered, press the ENTER button (11) to confirm. SYNQ® SYNQ® 7/14 DLP-6 8/14 DLP-6 ENGLISH OPERATION MANUAL IF THE PROCESSOR IS NOT LOCKED: you will have 4 different ways to lock the processor: Locktype = Modify All parameters and settings are visible but you can’t change them without introducing a password first. Only the mute switches can be used: Turn the DIAL (4) until the display on the right is shown. Press the ENTER button (11) you will be asked to set a password. Turn the DIAL (4) to select a character and press the NEXT button (11) to set the next character, … (maximum 8 characters – DON’T forget it !!!) When the password is entered, press the ENTER button (11) to confirm. Remark: if you don’t want to set a password, simply leave it blank. MAIN MENU – RECEIVE DUMP: It is possible to copy the user programs from a “master” unit [network cable connected to RS-485 output (15)] to one or more “slave” units [network cable connected to RS-485 input (15)] At the same time you should set the master and slave units so communication is possible (read the previous point “DUMP PROGRAM” also before you start!) This is how you prepare the slave unit: Press the DIAL (4) until the first display on the right is shown. Press the NEXT button (6) until the display shows “RECEIVE DUMP” Press the ENTER button (11) to start the receiving process, the display shows “RECEIVING DUMP” while the unit is waiting for the master. NOW you can start the DUMP program on the master! Locktype = Modify & Mute All parameters and settings are visible but you can’t change them without introducing a password first. Also the mute switches are locked: Turn the DIAL (4) until the display on the right is shown. Press the ENTER button (11) you will be asked to set a password. Turn the DIAL (4) to select a character and press the NEXT button (11) to set the next character, … (maximum 8 characters – DON’T forget it !!!) When the password is entered, press the ENTER button (11) to confirm. Remark: if you don’t want to set a password, simply leave it blank. Remark: press the RECALL button (7) if you want to interrupt the process. When the dump is finished the slave returns to normal working mode. Locktype = Everything You can’t see or change parameters and settings without introducing a password first. Also the mute switches are locked: Turn the DIAL (4) until the display on the right is shown. Press the ENTER button (11) you will be asked to set a password. Turn the DIAL (4) to select a character and press the NEXT button (11) to set the next character, … (maximum 8 characters – DON’T forget it !!!) When the password is entered, press the ENTER button (11) to confirm. Remark: if you don’t want to set a password, simply leave it blank. PC SOFTWARE Our personal favorite because it’s so much faster! The PC-software is so easy to use that it doesn’t need a lot of explanation. If you are familiar with the use of all parameters than you can use it right away, we will just give you some basic explanations. INSTALLING THE SOFTWARE: ® Very important: before you install the Windows software you should install a driver to ensure the USB-communication! WARNING! don’t forget your password, write it down in a safe place. The password CAN NOT be recovered if forgotten or lost!!! Part1 – installing the USB driver The installation file for the driver can be found on the supplied CDROM or you can download it from the SYNQ-website (download section of the DLP-6). Don’t yet connect the DLP-6 to your PC! UNZIP the file and double-click the exe-file and follow the instructions to install the driver properly. ® To check if the driver is installed, open the Windows device manager and check if the driver is available, you can also check which COM-port is emulated (in most cases it will be COM3, as shown on the picture) Remark: depending on the hardware inside your DLP-6 the drivername shown in windows can be different! MAIN MENU – CONFIG: In a big setup more than one processor can be used and interconnected with the RS-485 connections on the rear panel (15). To identify each processor, they all need a unique device ID. This is how you can change the device ID: Press the DIAL (4) until the first display on the right is shown. Press the NEXT button (6) until the display shows “CONFIG” Press the ENTER button (11) to enter the submenu. Turn the DIAL (4) to change the Device ID number (116, actual ID is marked with an asterisk “*”) Press the ENTER button (11) to confirm. 9/14 OPERATION MANUAL MAIN MENU – DUMP PROGRAM: It is possible to copy the user programs from a “master” unit [network cable connected to RS-485 output (15)] to one or more “slave” units [network cable connected to RS-485 input (15)] At the same time you should set the master and slave units so communication is possible (read the next point “RECEIVE DUMP” also before you start!) This is how you prepare the master unit: Press the DIAL (4) until the first display on the right is shown. Press the NEXT button (6) until the display shows “DUMP PROGRAM” Press the ENTER button (11) to enter the submenu. The display asks “Are you sure?” and proposes “NO” Turn the DIAL (4) to change the “NO“ to “YES” if you want to send a dump. NOW WAIT and prepare the slaves first (see next point) before you continue! Press the ENTER button (11) to confirm The master starts dumping all programs. If an error occurs The display shows “ERR”. Remark: the dumping process can’t be interrupted. When the dump is finished the master returns to normal working mode. Locktype = Modify & View You can’t see or change parameters and settings without introducing a password first. Only the mute switches can be used: Turn the DIAL (4) until the display on the right is shown. Press the ENTER button (11) you will be asked to set a password. Turn the DIAL (4) to select a character and press the NEXT button (11) to set the next character, … (maximum 8 characters – DON’T forget it !!!) When the password is entered, press the ENTER button (11) to confirm. Remark: if you don’t want to set a password, simply leave it blank. SYNQ® ENGLISH Part2 – installing the DLP-6 PC-software The DLP-6 PC-software can be found on the supplied CDROM or you can download it from the SYNQwebsite (download section of the DLP-6). Double-click the file named “DigitalSpeakerSetup_V110 SYNQ Audio.exe” and follow the instructions to install the software. DLP-6 SYNQ® 10/14 DLP-6 ENGLISH OPERATION MANUAL Part3 – first time use First connect the DLP-6 with your PC using a USB cable. The USB output of the DLP-6 will be treated by the PC-software as an RS-232 connection. Therefore you will have to set the correct RS232 port when you use the software for the first time: Start the PC software. In the left upper corner you will notice the sign on the right, indicating that the software is not connected to the processor. Open the “CONFIG” menu and select the “RS-232” option. Normally you should choose “COM3” Open the “CONFIG” menu again and select “OnLine”: a popup window will open where you have to select “DLP-6:2In6Out” If the software can connect to the processor than you should see the sign on the right. If this doesn’t work, you should also select some other COM-settings and try again to establish a connection. CHECKING THE SOFTWARE VERSION Open the “HELP” menu and select the “About” option. In the popup window you can see the software version and program build: USING THE SOFTWARE: Keep in mind that the software is always connected to the processor so all parameters and settings you change in the software are immediately sent to the DLP-6! This means that you have “live” interaction with the audio of your audio system. On the screen you can see that the PC software has a very easy interface with clickable icons. ENGLISH OPERATION MANUAL Program Manager Choose option “Device Program Manage” in the menu Program. the window “memory” appears. This window allows you to send programs between the PC and the processor and save/load them on your laptop. These are the different options: Store to device: used to store the current configuration in the DLP-6. First select one of the 30 memory locations before you press the “Store To Device” button! You will be asked for a proper name and if you are sure you want to overwrite the current memory location in the processor. Recall from device: used to recall one of the 30 memories in the DLP-6 and transfer it to the PC so you can edit/store it. Store to PC: used to store the selected memory (1 out of 30) to a file on your PC. Recall from PC: used to recall one memory, stored on your PC, and load it to the selected memory location. Store all to PC: used to store the complete set of 30 memories from the DLP-6 in a file on your PC. Recall all from PC: used to recall a file, containing a set of 30 memories, from your PC and send it to the DLP-6. Linking the parameters on inputs and outputs In many cases the parameters of the in/outputs should simply be equal. To make life easier you can link two or more in/outputs you only have to change the parameters of one in/output, the linked in/output(s) will be set a the same time! NO LINKS SET You can click the icons to start your setup (start with the “Source” icons), you can choose a preset (“config” menu, option “preset”) or you can simply load a custom made program to further tune it: SYNQ® 11/14 DLP-6 INPUTS A&B are linked OUTPUTS 1+2 and 3+4+5+6 are linked Open the “CONFIG” menu Select the option “Link Setting” window will open, similar to the windows shown above. Set the desired links: See the 2 example windows: on the right window you can clearly see: o The inputs are linked (Link1 = InA + InB) o Outputs 1 + 2 are linked (Link1 = Out1 + Out2) o Outputs 3 + 4 + 5 + 6 are linked (Link3 = Out3 + Out4 + Out5 + Out6) Once you have set the links, press the “Set Link” button. Please note: It can take 5seconds or more before the window closes, this in normal! SYNQ® 12/14 DLP-6 ENGLISH OPERATION MANUAL Adjusting the different parameters Simply click the icons of the parameters you want to change, screens like the ones below will appear. On top of the windows you have extra TABs that make it very easy to jump from one parameter to the other. ENGLISH 6: All muted OPERATION MANUAL OUT5 OUT6 OUT1 OUT2 OUT3 OUT4 OUT5 OUT6 A A OFF OFF OFF OFF OFF OFF 4000 Hz 10 kHz OFF OFF OFF OFF OFF OFF 10 kHz OFF OFF OFF OFF OFF OFF OFF SPECIFICATIONS Remark 1: when you key in the parameters you must confirm them with the “ENTER” button on your PCkeyboard, otherwise the values are not saved! Remark 2: If you have doubts about certain parameters, please read the previous chapters for more information. APPENDIX Chart with standard presets stored in the DLP-6: 1: PRESET NAME 2x 2-way + SUM x-over 2: 2x 3-way x-over 3: 4-way x-over + 2 4: 5-way x-over + 1 5: 6-way x-over SYNQ® OUTPUT OUT1 OUT2 OUT3 OUT4 OUT5 OUT6 OUT1 OUT2 OUT3 OUT4 OUT5 OUT6 OUT1 OUT2 OUT3 OUT4 OUT5 OUT6 OUT1 OUT2 OUT3 OUT4 OUT5 OUT6 OUT1 OUT2 OUT3 OUT4 INPUT A A B B A+B A+B A A A B B B A A A A B B A A A A A B A A A A 13/14 HP-FILTER FREQ LP-FILTER FREQ 19,7 Hz 1000 Hz 1000 Hz OFF 19,7 Hz 1000 Hz 1000 Hz OFF 19,7 Hz 1000 Hz 1000 Hz OFF 35,1 Hz 153 Hz 153 Hz 2000 Hz 2000 Hz OFF 35,1 Hz 153 Hz 153 Hz 2000 Hz 2000 Hz OFF OFF 81,1 Hz 81,1 Hz 408 Hz 408 Hz 2000 Hz 2000 Hz OFF OFF OFF OFF OFF OFF 40,5 Hz 40,5 Hz 153 Hz 153 Hz 1000 Hz 1000 Hz 3084 Hz 3084 Hz OFF OFF OFF OFF 81,1 Hz 81,1 Hz 408 Hz 408 Hz 2000 Hz 2000 Hz 4000 Hz DLP-6 Power Supply: Fuse: Frequency response: Dynamic range: THD + noise: S/N Ratio (IHF-A): Crosstalk: Input level (max): Input Impedance: Output Impedance: Output level (max): AD/DA: Sample rate: Crossover slopes: Crossover types: Delay inputs / steps: Delay output / steps: EQ # input: EQ # output: EQ types: EQ gain: EQ Bandwidth: EQ frequencies: Limiters – threshold: Limiters – attack time: Limiters – release time: Limiters – compression ratio: Dimensions: Weight: 90Vac ~ 240Vac, 50Hz (30W) 20mm glass fuse 250V 1A slow 10-20.000Hz (+/-0,1dB) 102 dB <0.003% @ 1kHz, 0dB >100dB @ 1kHz. >95dB 4Vrms 8kΩ balanced 150Ω balanced 2Vrms 24bit Sigma/Delta 48kHz 12, 18, 24 or 48 dB/oct Butterworth, Bessel or Linkwitz/Riley 682,52ms / 21µs steps 21,31ms / 21µs steps 6 per input 4 per output Parametric, L-Shelf 6dB, L-Shelf 12dB, H-Shelf 6dB, H-Shelf 12dB -30dB ~ +15dB / 0,1dB steps 0,016 ~ 4 octaves 19,7Hz ~21,9kHz -20dBu ~ +20dBu / 1dBu steps 0,5 ~ 50ms 10 ~ 1000ms 1,2/1 ~ infinite/1 482(W) x 44(H) x 225(D) mm 3kg Every information is subject to change without prior notice You can download the latest version of this user manual on our website: www.synq-audio.com SYNQ® 14/14 DLP-6