1
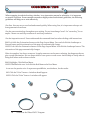
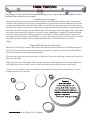
A Guide to the
UMass
PWTC Program
By: Ashley Caprarella
A Guide to the UMass PWTC Program
Written By: English 381, Spring 2012
Designed By: Ashley Caprarella
1
I
A Guide to the UMass PWTC Program
Introduction
Welcome to the PWTC Manual!
Here, you will learn about the various courses held by the PWTC program at UMass Amherst. What
is PWTC? PWTC is short for Professional Writing and Technical Communication. Through this field
you can learn how to write manuals, work for medical industries, engineering industries, become an
instructor of PWTC, and experience other opportunities.
Also included are the software programs one can learn through these courses along with how to write
manuals, design web pages, and more.
Not only will you find an abundance of information but step by step instructions on how to dual boot
you’re MAC, the design process of manual writing, and editing techniques!
1
II
A Guide to the UMass PWTC Program
TABLE OF CONTENTS
INTRO
what is pwtc?
pwtc alums
pwtc software
WRITING
Writing Modular documentation
writing an intro to your module
tone
how to write a call out concision tips
writing a cover memo
user testing
VISUAL DESIGN
working with font
adjusting color
alignment and hierarchy
less is more
designing call outs
FINAL
creating the cover and front matter
combining pdf pages
last-minute checklist
printing and binding information
dual boot your mac
1
III
A Guide to the UMass PWTC Program
2
3
4
6
7
8
9
10
11
12
14
15-16
17
18
19
21
22
23
24
25-28
CHAPTER 1:
INTRODUCTION
1
1
A Guide to the UMass PWTC Program
WHAT IS PROFESSIONAL WRITING
& TECHNICAL COMMUNICATION?
As English majors, students often study the works of many famous authors—striving to understand
the world they lived in. These authors write in ink, on paper, published in books, about politics, philosophy, movements and society. But our world is very different than the world those dead authors
came from….
We live in a digital world, surrounded by technology. We type on screens and talk about apps, browsers and software. We scan websites not just reading text but listening to podcasts and watching YouTube videos. Professional writing and technical communication is an English major’s adaptation to
the 21st century—opening up opportunities beyond writing novels and poetry.
Professional Writing
Professional writing uses clear language to convey information in a way that is easily understood by
an intended audience.
Technical Communication
Technical communication provides information or instructions for how to use and understand specific technologies. By presenting technical information in an appropriate way, information can be more
accessible--making someone’s life easier and more productive.
PWTC at UMass Amherst offers students an opportunity to learn about different kinds of software
as well as teach and help others through their completed grant proposals, user documentation and
personal portfolio websites.
Students challenge their technical skills as well as their writing—constantly learning and pushing
their abilities in this digital world.
within
Technical
Communication:
Professional
Writing Examples:
1
2
A Guide to the UMass PWTC Program
Modes of
Technical
Communication:
PROFESSIONAL WRITING & TECHNICAL
COMMUNICATION ALUM
It is easy to think of boring car manuals or dull instructions that no one reads when thinking of technical writing jobs. Though those are some of the options, a technical writer has many other opportunities and plenty of career paths to choose from.
Graduates of the University of Massachusetts Amherst Professional Writing and Technical Communication program have been employed by companies such as Alacatel-Lucent, Hewlett-Packard, IBM
Lotus Software, Motorola, Outcome Sciences, RSA Security, Misys Healthcare, Eze Castle Software
and Oracle Corporation. Some alumni have gone into the medical field while others continue to work
with software. One was offered a job as a technical writer, but ended for a travel agency in Italy. PWTC
alumni have also become documentation managers, technical writers, book and journal editors, and
trainers. Some of the daily tasks technical writers do include contacting other coworkers to develop
different projects, and using the skills learned in the PWTC courses to write/email effective instructions.
Salary:
An average salary for a technical writer ranges from $32,000 to $84,000. A technical editor can make a
salary ranging from $36,000 to $57,000. A senior technical writer’s average salary is around $56,000 to
$81,000. Overall, it depends on the company you are working for, your position, skills, and years of
experience.
Current PWTC Alumni Careers:
Kelsey Anderson: graduated in 2011,
User Experience
Copywriter at Athena Health.
Megan Strathearn: graduated in 2010
Web design/ Developer at the
College of Humanities and Fine Arts Information Technology
department at University Massachusetts Amherst
Research Assistant for 4MALITY (web-based tutoring system, within the School of Education).
Michael Fonseca: graduated in 2010 Associate
Technical Project
Consultant at Outcome Science.
Gabrielle Segalla: graduated in 2010
Junior Technical Writer at Axeda Corporation
Corry Mackin: graduated in 2009
Associate Technical Writer at Oracle.
Gwendolyn Gustavson: graduated in 2011
Senior Paralegal at Bergmann & Moore.
1
1
3
UMASSPWTC
PWTCProgram
Program
A Guide to the UMass
PWTC SOFTWARE
The PWTC program has a strong focus in pairing analytic writing with new technologies. As a PWTC
student, you will gain experience in specialized documentation and editing software by drafting original content on digital platforms. Here is an alphabetical list of software used throughout the PWTC
program:
Adobe Dreaweaver
is a web authoring and editing program that provides visual and code-level capabilities for creating
standards-compliant XML and HTML websites and designs. You will use this program to build
numerous websites in English 391.
Adobe Flash
is a creative environment for producing expressive interactive content. You will be introduced to Flash
and its built-in programming language called ActionScript 3.0 for coding your own animations and
games in English 391.
Adobe InDesign
is a design package used in proofing page layouts before their print or digital distribution. The creative
tools in InDesign provide precise control over typography and consistency. You will become familiar with
this powerful production tool in English 381.
Microsoft
PowerPoint
is the leading presentation software for use in illustrative and informative projects. Designed for use in
front of an audience, you will use PowerPoint to give presentations on controversial and intriuging topics
in both English 379 & English 391.
Adobe
RoboHelp
is a software solution that creates and organizes help systems, policies, and procedures in an industry-s
tandard format. You will use RoboHelp to create an online help system for a process or procedure of your
choosing in English 381.
Adobe
Photoshop
is the industry-standard digital imaging program. This program includes tools for photography editing
and realistic painting. You will design both task-based and free-form PhotoShop projects in English 391.
Microsoft Word
is the definitive word processor. Between formatting tips, command shortcuts, and practical
demonstrations, you will become intimately familiar with Word’s capabilities as you write a software
manual
on the program in English 380.
1
4
A Guide to the UMass PWTC Program
CHAPTER 2:
WRITING
1
5
A Guide to the UMass PWTC Program
WRITING MODULAR DOCUMENTATION
One of the most critical skills you’ll learn in the PWTC program is writing user documentation.
Documentation allows a software user to become acquainted with technology by reading simple,
concise steps. The most common form of documentation for technical writers and within the PWTC
program is called modular documentation.
What is Modular Documentation?
Modular documentation is distinguished from other forms of documentation by its adherence to
small, independent documents (or “modules”) that can be accessed based on need and convenience;
collectively, they form a software manual or an online help system.
What Goes into a Module?
While every module will have distinctions based upon its purpose, the core components include:
•A brief, descriptive title
•An introductory paragraph
•Instructional text in a procedural, step-by-step format
•Supplementary images, figures, and charts
What Else Should I Keep in Mind?
A module should not rely upon any outside information; that is, the user should be able to accomplish
the stated goal of the module without relying upon anything but the module itself. Similarly, a module
should not extend beyond one cohesive visual spread, and a user should never have to flip a page in
order to complete it. Finally, it is crucial to use simple, direct sentences that are in the present tense so
that you can successfully affect and engage with your audience.
1
6
A Guide to the UMass PWTC Program
WRITING AN INTRO TO YOUR MODULE
After familiarizing yourself with writing an introduction to a module, it progressively becomes a simple
process as long as you are paying attention to who your user is. The introduction is straightforward and
directions are never included. This section is clear-cut, organized, and enables the user to
prepare for the directions. The user has some background knowledge of the module that you are
explaining so the introduction is always kept brief in order to avoid redundancy.
Why Write an Introduction?
The overall importance of an introduction is to state the task that is going to be explained in the following set of directions. Mainly, the introduction clarifies any information that can be viewed in the directions. The user can gain a better understanding of basic concepts and can determine if the following set
of directions will be beneficial.
What Should be Included in an Introduction?
It is crucial to recognize that often users will skip right into the directions so do not make the introduction too long or descriptive. Do not include any information that is crucial to the procedure being
documented. Key terms should be introduced with a brief definition so the user will not be confused in
the directions. Lastly, slogans and advertisements should not be placed into the introduction statement
because the reader
1
7
A Guide to the UMass PWTC Program
TONE
An aspect of your writing that your users will very likely scrutinize is the tone. When writing technical
documents, your tone will be modified accordingly to best suit your target user audience. For example, if you were writing a technical document for an audience of college students, your tone would
differ from that of a technical document for your professors. Despite these minute adjustments, there
are key points you should keep in mind when exercising a specific tone in your writing, regardless of
your users.
Avoid Making Assumpitions
While you may be able to draw certain conclusions about your users if you’re writing to a specific group
of users, do not make assumptions about them. In making these assumptions, you may alienate select
users of your user audience.
Avoid CondescendingLanguage
Unfortunately, while it might seem that this would be easily avoided, condescension can slip into your
tone if you’re not careful, especially if you are preoccupied with an overly amiable tone. Your users need
guides, not the implication that they’re being talked down to.
GOOD: Preheat the oven to 350. If you are unsure how to do so, please see the
Appendix.
BAD: Preheat the oven to 350. If you are unsure how to do so, please see the Appendix and do not feel
badly; as you are new to the kitchen, this is to be
expected!
Avoid Exaggeration and Exclamations
Sometimes, we might feel the need to infuse our writing with energy to appeal to our users. Note,
however, that exclamation points and bubbly adjectives can give your writing an overall feeling of fake
enthusiasm as well as compromise your level of authority as a writer.
GOOD: This user manual will guide you from a beginner’s level of expertise to that of an
intermediate level.
BAD: This user manual will get you to exactly where you need to be in no time!
1
8
A Guide to the UMass PWTC Program
HOW TO WRITE A CALL OUT
A callout is a handy text wrapping tool that writers use for a number of reasons. They "float" on the
page, and often, but not always, have a line or an arrow that indicates a point of reference. Callouts also
provide opportunities for eye catching and well balanced designs. Additionally, callouts reinforce information that is already on the module. While module steps require concise language, callouts often take
on a more relaxed tone.
What to Include in a Callout
•Information that you think the reader should be aware of that may not have been appropriate to include in the main set of instructions.
•Information that supports a screenshot. Sometimes screenshots shouldn’t just stand alone. You can
use callouts to label items, define functions, and indicate shortcuts on a screenshot.
•“Expert” or “insider” tips that will help the user understand the program better.
What NOT to Write in a Callout
•Essential information: never assume that your reader will give the callouts a second glance. Make sure
that all the important issues are covered in your instruction steps.
•Fluff: Don’t just write the first thing that comes to your mind to fill up space.
Final Thoughts
• It is a good idea to test your modules for usability. Ask your testers what they think of the callouts.
Refer to Section__ for more information on user testing.
•Consider elements of design when placing your callout. Refer to Section__ for more information on
design.
•There are many different types of callouts. Please refer to Section__ for information on where to find
callouts and how to choose one.
Here the callout is being used to relay a point to
the reader. Notice that there is no line or arrow
that points to the picture, but the callout is still
providing verbal context for the reader.
1
9
A Guide to the UMass PWTC Program
When engaging in technical writing, whether in an instruction manual or otherwise, it is important
to exercise concision. From consumer manuals to highly trained technician’s guidelines, the following
guidelines will help you to write effectively.
•Use lists. Lists are easy to read and understand quickly. When using lists, it is important to keep a uniform grammatical structure.
•Use the same terminology throughout your writing. Do not interchange “enter” for “return key”, for example. Choose one and stay consistent to avoid any confusion.
•Use the imperative mood. Users understand the command form best when dealing with instructions.
BAD: Left click the Orientation button on the Page Layout Menu. You can left click the Landscape or
Portrait button and the orientation of the page can automatically change.
GOOD: Left click the Orientation button on the Page Layout Menu. Left click the Landscape button. The
orientation of the page automatically changes.
Write in complete, but short, sentences. Lengthy sentences can become confusing, but fragments do not
give enough information. Do not drop articles to save space or word count. Articles help to clarify what is
being done where and to what or whom.
BAD: Highlight. Click Bold on Menu.
GOOD: Highlight the text. Left click the Bold button the Font Menu.
Do
• not use the passive voice. It represents possibilities, not absolutes, for the reader.
BAD: Click the “Print” button. A window should appear.
GOOD: Click the “Print” button. A window will appear.
1
10
A Guide to the UMass PWTC Program
WRITING A COVER MEMO
Cover memos are short letters that typically accompany and introduce a document. Cover memos
should be polite and professional, and it is especially important that your memo be concise. This way,
your audience can quickly skim the memo and understand its contents.
In the PWTC program, cover memos are an opportunity to explain your work to your instructor. You
can use cover memos to ask questions, request feedback, explain your reasoning behind certain choices you made in your work, and more. Students in English 380 are provided with a detailed handout on
cover memos, but a more concrete example is below.
1
11
A Guide to the UMass PWTC Program
USER TESTING
User testing is a critical part of the manual drafting process; a way for the manual author to collect
feedback from real users, not just peers.
What is User Testing?
During the drafting process, your manual should be reviewed through a process called “user testing.”
Your test subjects may point out typos or design flaws in your manual, but more importantly, they are
testing the usability of your manual. User testing is more than just getting another set of eyes on your
manual before it goes to the printers. Oftentimes, an experienced technical writer can miss some of the
finer details that the average user isn’t familiar with. User testing provides the opportunity to find these
areas where the instructions might be too broad, or more explanation is needed. All manuals benefit
from user testing. Ask open, leading questions. One example is: What could I improve? You want to
encourage conversation about your modules, not yes-or-no answers. Tell your users to feel free to make
notes directly on the modules; these marked-up sheets will be valuable resources for future
editing. Tips and Tricks for User Testing
•Read Graves’ A Strategic Guide to Technical Communication for an overview of the different types of
users. It is best to have most users come from your “primary” user group; however, don’t discount the
benefit of having users with multiple ability levels.
•The more users you can test your manual on, the better! Every user will bring a unique set of eyes and
skill sets to the table.
•Make your users feel comfortable: this is not the time for a dark holding cell and a single bright overhead light! Invite them to coffee, relax at a kitchen table; wherever they are most comfortable.
•It’s best not to overwhelm your users with the entire manual. Pick out a few of your best (or worst!)
modules and focus just on those.
1
12
A Guide to the UMass PWTC Program
CHAPTER 3:
VISUAL
DESIGN
1
13
A Guide to the UMass PWTC Program
WORKING WITH FONT
In the realm of PWTC, the term typography is used broadly to refer to the practice of designing documents with font. Font is just as much a part of the visual display of your document as choosing a color
scheme, and it is important to understand the functions that a font carries out. Font can give users important clues about the structure of your document, and help guide the user across the page.
What are Serifs/Sans Serifs, and How Do I Use Them?
Serifs are “are semi-structural details on the Font
ends of some of the strokes that mak Color Temperature: e
is hard to
up letters and
read, and
there the fancy flourish. You can mix and match these
symbols,” and sans serifs are simply typefaces
without
is no contrast
two classes of typeface within your document
to create a sense of logic within the confines of the page.
between
the title
For example, a document with titles in serif typeface
and body paragraphs in sans serif typeface illusbody.
trates a subtle contrast in font, and helpsand
guide
the reader’s eye across the page. Experiment with different serifs and sans serifs to see what kind of meaning it can create on the page.
What Fonts Should I Choose?
When selecting a font, or font combination for your document, keep in mind that less is more. Select
a font that is readable in print, and that does not distract the reader from the written content. It can be
tempting to design titles in big gaudy font, but subtlety is usually effective.
1
14
A Guide to the UMass PWTC Program
ADJUSTING COLOR
More than sixteen million to render, which ones to choose?
Choosing the right color for your project is pivotal. When deciding what kind of color scheme to go
with, keep in mind that different colors and shades will evoke different emotions and associations in
your audience. For example, the color red can stimulate adrenaline or blood pressure while orange,
because it is rarely found in nature, pops out at us more than other colors. That's why we find it on
life vests, hunting vests and in construction work areas.
Helpful Vocabulary
Chromatic Value :The measure of lightness or darkness in a color. Adding white to a color creates what's called “tint” and adding black to a color creates a “shade.”
Monochromatic: If a color scheme is monochromatic, it consists of different tints and shades of one color.
Analogous: Analogous colors are those colors that are situated right next to each other on the color wheel.
Complementary: Complementary colors are colors located on opposite sides of the color wheel, like orange and blue.
Saturation: The saturation of a color is how “pure” the color appears.
Color Temperature
1
15
A Guide to the UMass PWTC Program
Color Models
Additive RGB (Red, Green, Blue) color model – This color model makes up the colors displayed on
your computer screen.
Subtractive CMYK (Cyan, Magenta, Yellow and Black) color model – This is the color model that
computer printers follow.
Watch out for simultaneous contrast which is the effect caused when colors placed next to each other
make the other appear more vibrant and a war of 'which is brighter' ends in a stalemate. It can be painful
to look at.
This is just a small slice of a vast sea of words used to describe varieties of color. Start building your color
vocabulary early to start speaking the right language. You'll come across terms like hexadecimal notation,
split-complementary, triadic, tetradic, discordants, achromatic and many more. Be prepared!
Color can be the foremost attracting element of a webpage, layout or what have you, so choose wisely and
do a little bit of research before you come to a final decision. Check out some alluring color configurations online or on book covers to get a sense of what exactly you'll want to convey in your color schemes.
Most importantly, never forget your audience.
16
A Guide to the UMass PWTC Program
ALIGNMENT & HERARCHY
When designing a document, it is important to consider the alignment and hierarchy. When used
correctly, both design elements can make your document look more professional and structured.
Alignment
There are two types of alignment: vertical alignment and horizontal alignment. For example, if your
document is left aligned, you should make sure that the text running down the left side of the page lines
up, and that the text or images on the top of the page line up. In the image to the left, the text is put
into columns, but the designer made sure that each column’s text was both vertically aligned and horizontally aligned. This allowed for a neatly organized page, with no ambiguity as to what information
went to which person.
Another name for the top and left side of the page is the power zone. Text placed in this area gets more
emphasis than the text in the bottom right side of the page.
Hierarchy
Hierarchy is the most basic form of visual design, and makes a document easier to read and understand.
The two images below, both of the same written text, show the power of hierarchy and what it can do to
a page’s organization.
In the image to the right, differences in text size and value offer different levels of hierarchy. There are
three levels of vertical alignment that further cement the hierarchy of the text. The most important text
is seen at the top of the page, while the less important text is seen towards the bottom of the page.
1
17
A Guide to the UMass PWTC Program
LESS IS MORE
Presentation is a valuable tool for drawing in and immersing a reader. It can be easy to place too much
emphasis on the packaging. Rather, presentation at its best lets the content shine.
Smallest Effective Difference
In Edward Tufte’s writings on data visualization, he insists on smallest effective difference: “Make all
visual distinctions as subtle as possible, but still clear and effective.” This strategy employs our ability to
see just noticeable differences: fine distinctions in line weight and color.
Reducing clutter emphasizes data. Dark, heavy lines in callouts and tables (Word’s default settings are
often guilty of this) detract from information’s visual weight. Could using fine, gray lines in their place
simplify the presentation? Could they be eliminated altogether? Using a variety of line-weights and limited inclusion of color are also subtle but powerful ways of differentiating information.
Figure 1: The diagram on the right simplifies matters by minimizing the callout’s pointer and border.
White Space
One may want to crowd information in to get the most out of a module. But a cluttered page does not
invite a reader’s interest. “White,” or “negative,” space is any portion of the page that is blank. A designer
can deliberately use white space to make a page look clean and polished.
Take care not to create trapped white space. These awkward chunks of negative space might get left over
between sections or images in a module.
Figure 2: The left-hand image shows us some white space that has been left trapped between objects. In the
right-hand image, one of the objects has been shifted to free up this trapped white space.
1
18
A Guide to the UMass PWTC Program
DESIGNING CALL OUTS
Callouts are pretty simple. Think of them as brief pieces of information that point to an image, or a specific part of an image. They are meant to call attention to an image or part of an image, hence the name
“callout.” They are very flexible. You could take a mini- malist design and write one word with a thin line,
or get more complex and creative, with a few words in a large colorful box, and a line zigzagging across
the page. The two most important things to remember while making callouts are: 1. The shorter the better, and 2. Never place a step in a callout. Steps have their own place in a module, and it’s not in a callout.
Creating a Callout in InDesign
There is no “Callout” feature in InDesign, instead, an easy way to create callouts is using the Add Anchor Points Tool.
1.Select the “Rectangle Tool”
2.Create a rectangle on the Document page, or the Paste Board area.
3.At the pen tool, right click and select the “Add Anchor Point Tool”
4.On the side of the rectangle, add three (3) anchor points, the same space apart.
5.Select the “Direction Selection Tool” then click the outside of the rectangle.
6.Select the inside of the rectangle, notice that the anchormpoints have become small white squares.
7.Select the middle anchor point, and drag out to create the pointer of the callout.
How to Make a Callout in Word 2010 (for PC):
1.Go to the Insert tab.
2.Click on the Shapes button in the Illustrations group.
3.Pick a callout at the bottom of the drop down list.
4.Click on the area of your document you wish to place the callout.
5.You’re curser is placed in the callout,fill it out appropriately.
Don’t limit
yourself to just the
supplied callouts. Don’t
be afraid to make your
own in different ways.
1
19
A Guide to the UMass PWTC Program
CHAPTER 4:
FINAL
1
20
A Guide to the UMass PWTC Program
The cover and the front matter are the first pages that your audience will view and thus influences
whether they will pick your manual for their needs. The cover should target an intended audience. If it is
a professor, the professional look will be more appropriate. If it is a beginner’s manual then a laid back
design, similar to For Dummies manuals, will work well. For students, either design works.
The Cover
The cover should include all the necessary text no more, no less. A wordy title is not skimmable and may
not be read. A short title may not provide enough information about the manual. The title should be
appropriate to the target audience and relevant to the content of the manual. The title, then, should be
around 12 words, and your name below it. Next, the cover design should be in congruency with the rest
of the manual. If there is a distinct image that appears in every module, then it should be on the cover to
indicate the design inside the manual. Consistency is important and helps establish a rapport with the
reader. Finally, the cover is standalone without any material on the opposite side.
Title Page
The Title
The title page should be in congruency with the cover and can be created by choosing some design elements of the cover art. The design should be a little simpler and text size should be smaller.
Front Matter
The front matter is all the material at the beginning of the manual. This includes the cover, the title page,
the acknowledgements, the introduction and the table of contents.
Acknowledgements
An acknowledgement page is a nice thank you to the professor and can be a considerate gesture to your
classmates and professors that helped you. You can also have a simple thank you to the family.
1
21
A Guide to the UMass PWTC Program
Many English 380 PWTC students choose to create and save each module for their final Microsoft Word
Manual as different Word documents. Instead of combining these documents in Word, it’s much easier
and organized to convert them first to PDF files, and then combine the PDF files into one large PDF
document. This allows the formatting to be preserved on each individual page, such as if your manual’s
sections have different header titles for each section.
Combining PDF Files with Adobe Acrobat Pro
1.Convert your Microsoft Word File to a PDF.
2.Open Adobe Acrobat Pro X.
3.Click Combine Files into PDF.
4.Click the Add Files dropdown menu.
5.Select Add Files.
6.Find and select all the PDF Files you want tocombine.
7.Click Combine Files.
Combining PDF Files with PDFMerge!
1.Open a web browser.
2.Go to the web site: http://www.pdfmergecom/
3.Click the Choose File Tab.
4.Find and select your file.
5.Click Open.
6.Click the Merge! tab.
7.Click Save
1
22
A Guide to the UMass PWTC Program
You can now probably taste the sweet nectar of conclusion, but before you hand in your manual, it is important to go through at the end and make sure you are prepared to print it and pass it in. Here are some
quick steps to help you complete your project smoothly.
Have You Re-read the Assignment Prompts?
You are going to get a lot of different handouts that specify what each section of your Word manual
should include; what modules need to explain, table of contents, front matter etc. Hopefully you have
saved these, and now you should take the time to refer back to them and make sure that you have everything that you are supposed to. If you haven’t saved them, you can borrow them from a classmate, check
the UDrive or class website, or (as a last resort) ask the professor for the electronic PDF files.
Have You Proofread & Edited Your Manual?
Editing is extremely important for the successful completion of the manual. No one wants to have to
pay for printing more than once. Here are some tips to get the best editing done:
-Print the pages you have so you can see what they look like on paper. Seeing the printed version will
allow you to see how the layout will appear on paper, and not just visualize it on the screen. It is easier
for a lot of people to see mistakes when they have a piece of paper in front of them.
-Do some user testing. It may sound like a waste of time, but having someone else read your content is
beneficial to making sure you are conveying the information the way you want to.
-When you think you are done editing, proofread at least one more time. You will be glad you did. Have
you written your memo?
It is easy to forget this part of the process after focusing so much on your manual. However, sending
your completed project in with a memo attached shows professionalism, and it also gives you a medium
to convey any thoughts, questions, or concerns about your experience making the manual that you may
have for your professor.
Have You Found Where You Are Going To Print?
See this chapter’s section on printing and binding information to make sure you know how much it will
cost and where and when to bring it.
1
23
A Guide to the UMass PWTC Program
Take a deep breath—you’ve finished your manual and are ready for the next step: printing, binding,
and handing it in! This process is relatively quick, and reasonably inexpensive. There are two local
printing options in the Amherst area—Campus Design & Copy (CDC) in the Student Union, and Collective Copies (CC) in downtown Amherst. Or use the Staples copy and printing department. You’ll
find everything you need to know about printing and binding below.
Where Should I Go?
When choosing a copy shop to go to there are a few things (in addition to cost) to keep in mind. It’s
important to realize that CDC isn’t open on the weekends, and that it can close early (or have reduced
hours) during finals week. CC is generally more expensive, but has longer hours. Staples is open 7 days a
week, but you won’t be able to change your manual once you get there.
What Do I Bring?
Collective Copies: bring a flash drive with your manual saved on it as a PDF. You will be able to explain
how you want the final layout to look once your there
Campus Design & Copy: bring a flash drive, or have your manual saved to your UDrive or a site you can
access from online. You’ll be able to make any last minute changes while you’re there.
Staples: prepare your manual beforehand by uploading it to the Staples website. You won’t have the
flexibility to make last minute changes like you would at a local shop.
How Long Will It Take?
The whole process—if everything goes as planned—shouldn’t take more than an hour. However keep in
mind that during finals it might be crowded. Also it’s a good idea to leave time to reprint a page or two if
you catch a typo you missed the first time (it’s possible to replace a single page).
Campus Design
& Copy
Color Printing Costs:
Single side $.60
Double sided $1.15
Biding Options:
Strip Binding - $1.50
Comb Binding - $1.25
Coil - $2.00
Whole Punch - $0.60
Cover Paper:
Transparency - $0.50
Cover Stock - $0.10
Collective Copies
Staples
Color Printing Costs:
10-24 pgs. (color) $0.75
each side
25-99 pgs. (color) $.60
each side
http://www.staples.
com/
*navigate to the
Copy and Print department
Binding Options:
For a 32 double sided
Tape binding - $2.50
color pages with
Comb binding - $2.75
vinyl back and clear
Coil/Velo binding - $3.25 plastic front - $23.00
*Prices include printed
cardstock cover.
Upload your manual
to check pricing.
1
24
A Guide to the UMass PWTC Program
“Dual Boot” is the term for having two operating systems running on one computer. In 380, you might
have to write a manual on Windows specific products, like Word 2010, or later in the Professional Writing and Technical Communication specialization, you might have to use Windows specific products,
like FrameMaker and RoboHelp. If you’re a mac user and the idea of continually having to return to
school or the PWTC lab to work on homework isn’t appealing to you, you can install a Windows OS
right on your Mac computer with these steps. This process requires a legal, physical copy of your preferred Windows OS, (which can be obtained for free at msdnaa.oit.umass.edu), that your computer
meets certain requirements, and a bit of patience and bravery.
Checking Requirements
Before you can install a Windows OS on your Mac, you have to make sure your computer can handle it.
These steps will guide you through the process of checking your system’s specs to see if they meet the
requirements. If by the end, you find that your computer does not have the minimum requirements, do
not continue with the dual boot.
1.From the Apple in the menu bar, choose About This Mac.
2.Check to see that the computer meets minimum operating system and processor requirements.
3.Select the Finder by clicking on the desktop or choosing it from the dock and open a new Finder window. Check that there are at least 10GB of free hard drive space.
Continue to the next section only if the computer meets these requirements.
Burning Windows to a Disc
If you downloaded your copy of Windows (i.e. through the school, through MSDN-AA), you need to
burn it to a disk to properly install it. You may skip these instructions if you already have a disk copy of
Windows.
1.Double click the .iso to mount the disk image to your desktop.
2.Insert a blank DVD into your disc drive.
3.Right-click (or press control and click) on the disk image.
4.Select
Burn “[file name]” to disc…
1
5.Eject disc when it has finished writing.
25
A Guide to the UMass PWTC Program
Now that you know your computer can handle the process, it’s time to get ready. Follow these simple,
but key steps to make sure nothing goes wrong in the process.
1.Back up important files using Time Machine or other backup assistant, or copy them to an external
hard drive.
2.Log in as administrative user and log out all other users.
3.From the Apple in the menu bar, choose Software Update. Install all available updates. After restart (if
required), install any additional updates that remain.
4.Quit all running applications.
5.Plug in the power adapter if the computer is a laptop
Partitioning Your Hard Drive
Now that you’re all ready to go, you’ll need to partition your hard drive. Partitioning a hard drive is when
you break it up into sections to be allocated to different tasks. If this sounds scary, it kind of is – that’s
why you backed up your important files. With a partitioned hard drive, you can run any operating system you want – Linux, Windows, Mac OS 9 – and still run your current operating system that you know
and love. But don’t be nervous, we’re here to help.
1.From the Utilities folder in the Applications folder, open Boot Camp Assistant.
2.SUGGESTED: Click Print Installation & Set Up Guide.
3.Click Continue.
4.Make sure the Download the Windows support software for this Mac bubble is selected.
5.Click Continue. The Windows Support Software downloads.
6.Click Continue.
7.Drag the divider to allocate hard drive space for Mac OS X and Windows. Click Partition.
8.Leave Boot Camp running once the partitioning is complete.
1
26
A Guide to the UMass PWTC Program
Installing Windows Vista or 7 (Ignore if installing XP)
Your hard drive is partitioned, you have your Windows OS CD in hand, what next? Time to install it
onto your computer. It is imperative that you follow the instructions exactly or you could lose everything on your Mac. Still not worried? Good. Let’s keep going.
1.Insert your Windows installation disk.
2.Click Start Installation in Boot Camp Assistant. The computer reboots.
3.Follow the installer instructions.
NOTE: If asked to choose between upgrade or custom installation, choose custom installation.
4.Select Disk 0 Partition 3 BOOTCAMP from the prompt.
5.Click Drive options (advanced).
6.Click Format. Click OK.
7.Click Next. The Windows partition is formatted using the NTFS file system.
8.Reboot the computer.
1
27
A Guide to the UMass PWTC Program
Installing Windows XP (Ignore if installing Vista or Windows 7)
Don’t have Windows Vista or 7? No problem. Follow these steps instead. It is imperative you follow
these instructions exactly to avoid losing everything on your Mac.
1.Insert the Windows XP installation disc.
2.Click Start Installation in Boot Camp Assistant. The computer reboots.
3.Follow the installer instructions.
4.Select C: Partition 3 <BOOTCAMP> [FAT32]. Press return on the keyboard.
5.Use the arrow keys on the keyboard to select NTFS or FAT format. See note above or printed guide for
additional information on each. Press return on the keyboard.
6.Reboot the computer.
1
28
A Guide to the UMass PWTC Program