1
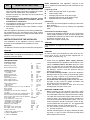
EN
GENERAL INSTRUCTIONS
1. Read carefully the contents of this manual as it contains important safety information regarding the installation, use and maintenance of the appliance.
Keep this manual in a safe place for the eventual use
by other operators.
2. The installation of this appliance must be carried
out by qualified persons in accordance with the
manufacturer’s instructions.
3. This appliance should only be used by persons specifically trained in its operation.
4. Switch off the appliance in the case of failure or irregular running.
Have the appliance repaired by a technically qualified person authorized by the manufacturer and using original
spare parts. If the above is not respected the safety of the
appliance could be jeopardized.
INSTRUCTIONS FOR THE INSTALLER
The installation of this appliance must be carried out
according to the standards and regulations in force.
Radio interference. This appliance conforms to the
E.E.C. guideline 87-308 relating to radio interference suppression.
Legend fig. 1a/1b
A - Water inlet pipe with ø3/4" F pipe fitting
B - Power supply cable
C - Drainage pipe ø18 mm int.(if with pump)
D - Drainage pipe ø40 mm int.(if without pump)
E - Equipotential screw (earthbonding)
Positioning
• Place and connect the appliance referring to the installation drawing.
• Bring the appliance level by rotating the adjustable
feets.
Connection to the water supply
• Connect the appliance water pipe "A" (fig. 1a/1b) to the
mains supply, installing a valve, pressure gauge, filter
(supplied) and a double non-return valve "B" (supplied)
in between, as shown in fig. 10.
• Make sure to tighten all the parts.
CAUTION
Data plate
The data plate is located on the right-hand side panel of the appliance.
If the appliance is replaced, use the new feed pipe supplied.
CAUTION
CAUTION
This machine must be installed in accordance with
AS/NZS 3500.1 including the installation of a non-integral
backflow prevention device.
In case of water pipe replacement, make sure the nonreturn valve "B" (fig. 10) and the filter supplied are correctly fitted, as shown in fig. 10.
TECHNICAL DATA
•
Singlephase version
Power supply voltage:
Maximum power input
Boiler heating elements
Threephase version
Power supply voltage:
- convertible to
Maximum power input
Boiler heating elements
Frequency
Tank heating elements
Water supply pressure
Water supply temperature
Water supply hardness:
- without softner
- with softner
Water consumption per rinse cycle (at 180 kPa)
Boiler capacity
Tank capacity
Standard cycle time with water supplied at
15 - 20°C
Standard cycle time with water supplied at 65°C
Max. hot water pressure inside the appliance
Max. hot water temperature inside the appliance
Power supply cable
Power cable cross section in mm2:
• Singlephase version 230 V 1N~
• Threephase version 400 V 3N~
• Threephase version 230 V 3~
Maximum current leakage
Noise level
Net weight, version h= 635 mm
Net weight, version h= 715 mm
Degree of protection
(*) Models with a single wash cycle
(**) Only for NGWDPDD
(***) Only for NGWGMS
6
V
kW
kW
kW
kW
230 1N~
3,3
2,3 (**)
3,0
2,0 (**)
V
V
kW
kW
Hz
kW
kPa
°C
°C
400 3N~
230 3~
4,8
4,5
50 or 60
0,8
180 - 300
15 - 20
65 (***)
°F
15 max
°F
34 max
l
2,3
l
4,7
l
6
sec.
120 - 300
sec.
120 (*)
sec.
60 (*) (***)
kPa
600
°C
82
H07RN-F
3 x 1,5
5 x 1,5
4 x 2,5
mA/kW
dB(A)
Kg
Kg
IPX
1
<70
40
46
4
•
•
•
Check that the dynamic water supply pressure,
measured between the appliance and the mains, has a
rating of between 180 to 300 kPa during the rinse
cycle; on units that are not provided with, an electric
pump, available as an accessory, should be fitted into
the hidraulyc circuit in case the pressure rating is
below than required.
On freefall drainage models: connect the appliance
drainage outlet "D" (fig. 1a/1b) to the drainage system
either by using a syphon or by placing the appliance
over a drainage syphon-well into the pavement.
On models with a drainage pump: position the drainage pipe "C" (fig. 1a/1b) at a height of between 750
and 1000 mm from the pavement.
Check that about 2,3 litres of water flow out of the
drainage pipe during the rinse cycle.
ELECTRIC CONNECTION
• Before carrying out the electrical connection, make
sure that the voltage and frequency rated on the appliance data plate conforms to those of the mains supply.
• The earth wire of the power supply cable must be connected to earth. The appliance must be included in a
correctly dimensioned equipotential system. The connection should be carried out using the screw "E" (fig.
1a/1b) marked with the symbol "E". The equipotential
wire must have a section of at least 10 mm2.
• For the eventual conversion from 400V 3N~ to 230V
3~, proceed as follows:
- Add the endowed jumper "B" (fig.2), between the binding posts "L1" and "N" of the connection terminal block
placed behind the machine.
•
Replace the power supply cable with a 4 x 2.5
mm2,type H07RN-F.
Change the connection of the boiler heating element,
as shown in the electrical wiring diagram.
The appliance must be connected to the mains
through a suitable general circuit breaker, which must
leave a gap of at least 3 mm between its contacts and
have the current carrying capacity as indicated in the
following table:
Max. power
consumption
4,8 kW
4,8 kW
4,8 kW
Power supply
voltage
230 V 1N~
400 V 3N~
230 V 3~
Current carrying
capacity
25 A 1P+N
16 A 3P+N
16 A 3P
The chosen device must be lockable in the open position in case of maintenance.
The manufacturer accepts no liability for situations
arising from failure to comply with the safety rules.
Detergent dispenser adjustment (if provided in the
machine)
To vary the dose, adjust
the screw "L" (fig. 4) as
required.
The adjustment of the amount of detergent delivered by
the pump must carefully comply with that indicated by the
detergent producer.
This quantity is usually expressed in g./l and various
depending on the water hardness.
Setting the automatic rinse aid dispenser
Adjust the screw “D” (fig.4) to set the required dose.
To check the efficiency of the rinse aid look at a freshly
washed glass. Drops of water on the glass indicate an
insufficient dosage while streaks indicate an excessive
dosage which can either be caused by the density or the
quantity.
Changing the detergent/rinse-aid type.
If changing to a different detergent/rinse-aid type (even
one by the same manufacturer), you must rinse the suction and pressure hoses with fresh water before connecting the new detergent/rinse-aid container. Otherwise, the
mixing of different types of detergent/rinse-aid will cause
crystallisation, which may result in a breakdown of the
dosing pump. Failure to observe this condition will invalidate the guarantee and product liability.
Safety devices
• An automatically resetting thermoamperometric protection incorporated into the winding of the electric
pump cuts off the power supply in case of anomalies or
malfunctioning.
• A safety thermostat, which must be reset manually,
cuts off the power supply to the boiler heating elements in case of over heating.
• An overflow pipe, connected to the drainage outlet,
maintains the water in the tank at a constant level.
• On models with a drainage pump and two wash
cycles: a supplementary level control device will intervene if the main level control device is faulty.
INSTRUCTIONS FOR THE USER
The appliance must be used exclusively for the purpose
for which it has been made: this means for washing
dishes using water and specific non corrosive detergents.
Any other use is therefore to be considered improper.
Water softner “A” (fig.5), if provided
The softner removes the calcareous substances from the
feed-water, supplying decalcified water necessary for the
washing. For the correct operation of the softner, the periodical regeneration of the resins, whose frequence
depends on the number of washing cycles and water
hardness, must be carried out.
The regeneration of the resins is carried out by means of
a special regeneration cycle with coarse salt or specific
products for softners following the instructions described
in chapter “Regeneration cycle”.
Suggestions
• Carry out a couple of wash cycles without dishes to
clean the basin and piping of any protective or industrial grease which has remained.
• Avoid washing decorated crockery.
• Do not allow silverware to come into contact with other
metals.
• Do not allow food residue to dry on the dishes.
• Remove large food scraps from the dishes in order to
prevent the filters from clogging.
• Prewash the dishes by spraying them with cold or
lukewarm water.
• Use the quantity and type of detergent specified by the
detergent manufacturers.
Adding the detergent
Pour a non foam making detergent into the basin when
the water has reached the right washing temperature.
Loading the baskets (fig.6 - 8)
• Place cups and glasses of different dimensions up side
down in the supplied basket, using ev. the special cutlery container (fig.6 a-b).
• Some cup washer models have a wire basket for glasses with inclined bottom. The glasses must be placed
upside down (fig. 8a).
• For dishwashers with a 715 mm height: the special
plates basket where 16 plates with a max. diameter of
190 mm or 8 plates with a max. diameter of 240 mm
can be placed (fig.7), is available on request.
Note
Baskets for washing dishes which have non standard
shapes and dimensions are available on request.
Control panel legend (fig.9)
A - Indicator lamp, lights up when the appliance is live.
B - Ignition switch of the appliance, ON /OFF.
C - Cold rinsing push-button/switch.
D - Indicator lamp, lights up when the regeneration
cycle is in progress.
E - Softner regeneration switch.
F - Basin drainage switch / button.
G - Switch to select the wash cycle duration.
H - Indicator lamp, lights up when the wash cycle is in
progress.
I - Start cycle push-button.
7
ENGLISH
-
L
- Indicator lamp, lights up when the water has
reached the right temperature.
Only the letters "A, B, H, I, L" are present in models with
one wash cycle and without drain pump.
Only the letters "A, B, F, H, I, L" are present in models with
one wash cycle and with drain pump.
WASH CYCLES
- Short cycle, 120 seconds: it corresponds to a 100
second wash cycle with hot water and detergent, a
pause of 4 seconds and a 16 second rinse cycle with
hot water and shining product.
- Short cycle, 60 seconds: it corresponds to a 40 second wash cycle with hot water and detergent, a pause
of 4 seconds and a 16 second rinse cycle with hot
water and shining product.
- Long cycle, 300 seconds: for dirty dishes: it corresponds to a 280 second wash cycle with hot water and
detergent, a 4 second pause and a 16 second rinse
cycle with hot water and shining product.
• In models with two wash cycles, cycle selection occurs
with button “G” pressed for the 300-second cycle and
off for the 120-second cycle.
• In models with single wash cycle (120 sec. or 60 sec.),
cycle selection occurs with button “I”.
• To stop the wash cycle just open the door.
• To continue washing, close the door and the cycle will
resume from where it was stopped.
SWITCHING ON
• Open the water inlet valve.
• Activate the main switch.
• Open the door and check that all the components are
in their correct position.
• Close the door and ignite the appliance by pressing
switch "B". The lighting up of the indicator lamp "A"
shows that the dishwasher is live and that the water
loading and heating cycle has started.
• Lighting up of the indicator lamp "L" signals that the
tank and boiler have reached the optimum temperature (tank 50°C and boiler 82°C). Open the door and
pour the required amount of detergent into the basin.
• Insert the basket containing the dirty dishes and close
the door.
• Select the duration of the cycle by means of switch "G"
(inserted for a 300 seconds cycle or disconnected for a
120 seconds cycle).
• Should the dishwasher be provided with the cold rinse
setting, insert switch "C" for the washing of glasses
which have to be used cold, directly. In model NGWGMS, the cold rinse function occurs by holding down
push-button “C”.
• Start the cycle by pressing the start push button “I”.
The dishwasher starts automatically the wash cycle
with a 3 second delay and the indicator lamp “H” lights
up.
• The indicator lamp “H” will go off when the cycle is
complete; open the door and slide-out the basket with
the clean dishes.
CAUTION
Change the water in the basin some times a day, as soon
as necessary.
8
At the end of the working day
• Open the door and slide-out the basket with clean
dishes.
• Turn off the dishwasher disconnecting switch "B".
• Disconnect the main switch placed upstream from the
appliance.
• Close the water inlet valve.
• Remove the overflow pipe "A"(fig.4).
For models with drainage pump:
• Open the door and slide-out the basket with clean
dishes.
• Remove the overflow pipe and re-close the door.
• In models with two wash cycles, insert switch "F" and
press push button "I"; indicator lamp "H" will light up
and the dishwasher will drain the water from the basin
activating the drainage pump for about 120 seconds.
The indicator lamp "H" will go off when the drainage
function has finished.
• In model NGWGMS, insert switch "F" and press push
button "I"; indicator lamp "H" will light up and the dishwasher will drain the water from the basin activating
the drainage pump for about 60 seconds. The indicator
lamp "H" will go off when the drainage function has finished.
• In models with one wash cycle, keep button "F"
pressed until the tank is completely empty.
• Turn off the dishwasher disactivating switch "B".
Regeneration cycle, for models with softner:
The regeneration cycle of the resins of the softner lasts for
20 minutes (18 minutes of regeneration and 2 minutes of
rinsing).
The frequence of the cycle depends on the number of
wash cycles and the feed-water hardness as described in
the table 1.
CAUTION
The relevant water supply company will be able to provide
all the instructions regarding the water hardness.
•
•
•
•
•
•
Open the door, remove the basket and the overflow
pipe and drain the water.
Open the salt container “B” (fig.4) by unscrewing the
cap. Fill it with salt for softners or coarse salt up to 2-3
cm from the upper edge (make shure the container is
filled with water before pouring any salt inside).
Clean the thread of the container from any salt deposits before closing the cap. Remove the salt from the
basin if it overflows the container.
To activate the function, insert the regeneration switch
“E” with dishwasher live. The indicator lamp "D" lights
on during the cycle and the other functions cannot
operated.
The indicator lamp “D” lights off indicating the end of
the regene-ration cycle; switch off the dishwasher disactivating switch “B”, and disactivate successively
switch “E”.
Upon completion of cleaning operations, replace the
parts removed previously. The dishwasher is now
ready to start the normal working functions.
FREQUENCE
in Nr of cycles
°F/Nr
°F/Nr
°F/Nr
°F/Nr
10 / 150
17 / 74
24 / 53
31 / 32
11 / 138
18 / 71
25 / 50
32 / 29
12 / 126
19 / 68
26 / 47
33 / 26
13 / 114
20 / 65
27 / 44
34 / 23
14 / 102
21 / 62
28 / 41
*
15 / 90
22 / 59
29 / 38
16 / 77
23 / 56
30 / 35
* If the hardness should exceed 34 °F it is advisable to install a
machine without incorporated softner, and to install a separated
softner.
MAINTENANCE (fig.4)
Before carrying out any maintenance operations, turn off the
power at the mains (except in versions with drain pump).
Daily operations
• Cleaning the water jets:
- Open the door, and remove the water jets"C" and "E"
by removing the lock nut "F".
- Carefully clean the washing and rinse jets and clean
everything
with
hot
water
and
neutral
detergent/detersive, if necessary using a soft brush or
sponge. Do not use sharp implements to clean the
nozzle holes, which could otherwise be damaged.
• Cleaning the basin:
- Remove the overflow pipe "A" to drain off the water
from the basin; for models with drainage pump remove
the overflow pipe "A", insert the drainage switch "F",
press the start push button "I", and wait untill the
drainage is complete before switching off the
dishwasher.
- Remove filter "H" and "I" and clean them in the washbasin, i.e. using a nylon brush under a water spray.
- Clean the basin by pouring some water in order to let
the deposits flow out from the drain.
- Upon completion of cleaning operations, replace the
parts removed previously. The dishwasher is now
ready to start the normal working functions.
• Cleaning the external surfaces:
- Clean the stainless steel surfaces using lukewarm
water and a neutral soap, rinse with a damp cloth and
dry carefully; never use detergents containing scraping
agents, common wire wool or other such materials.
- Clean the control panel using a soft damp cloth and a
neutral detergent if required.
• Do not wash the external parts of the machine using
direct or high-pressure water jets.
• Leave the door open when not using the appliance for
a longer period.
• Periodically have the appliance totally checked (at
least once a year). For this purpose it is recommended
to draw up a maintenance contract.
Operations to be carried out by a qualified technician
• Clean the water filter and the solenoid valve protection
filter "P" at least twice a year (fig. 11).
• Descale the boiler, the internal surfaces of the basin
and the hydraulic piping once or twice a year.
• Whenever the appliance is not going to be used for
long periods, spread a thin film of vaseline oil over the
stainless steel surfaces, drain off the water in the electric pump.
• The tube inside the peristaltic detergent dispenser (if
present in the machine) must undergo periodical
maintenance (once or twice a year).
• Disconnect the machine power supply.
RESIDUAL RISKS
The machine has several risks that were not completely
eliminated from a design standpoint or with the installation
of adequate protection devices.
Nevertheless, through this manual the Manufacturer has
taken steps to inform operators of such risks, carefully indicating the personal protection equipment to be used by them.
Sufficient spaces are provided for during the machine
installation phases in order to limit these risks.
To preserve these conditions, the corridors and areas
around the machine must always be:
• kept free of obstacles (e.g. ladders, tools, containers,
boxes, etc.);
• clean and dry;
• well lit.
For the Customer’s complete information, the residual
risks remaining on the machine are given below; such
actions are to be considered incorrect and therefore
strictly forbidden.
RESIDUAL RISK
DESCRIPTION OF HAZARDOUS SITUATION
Slipping or
falling
The operator can slip due to water or dirt
on the floor.
Burns
The operator deliberately or unintentionally touches some components inside the
machine or dishes at the outfeed without
using gloves or without allowing them to
cool. Possible contact with water above
60°C / 140°F.
Electrocution
Contact with live parts during maintenance operations carried out with the
electrical panel powered.
Falling
from above
The operator intervenes on the machine
using unsuitable systems to access the
upper part (e.g. rung ladders, or climbs
on it).
Tipping of
loads
During maintenance on the machine or
the packing containing the machine with
the use of unsuitable accessories or lifting systems or with load unbalanced.
Chemical
Contact with chemical substances (e.g.
detergent, rinse aid, scale remover, etc.)
without taking adequate safety precautions. Therefore always refer to the safety
cards and labels on the products used.
CAUTION
Descale the rinse jets each month using vinegar or a descaling agent.
9
ENGLISH
Table 1 - WATER HARDNESS in °F / REGENERATION
TROUBLESHOOTING
DISHWASHER
DOES NOT
WASH WELL
1. Check if the suction filter is dirty
and clean it thoroughly.
2. Check if the wash jets are clogged by solid food remains.
3. Check that the initial amount of
detergent or subsequent additions are correct.
4. The selected wash cycle is too
short. Repeat the cycle.
5. Check that the tank temperature
is between 55°C and 65°C.
6. Check that the dishes are stacked correctly in the racks.
GLASSES AND
DISHES ARE
NOT DRIED
PROPERLY
1. Check the instructions for the
amount of rinse-aid (see “setting
the dispensers” paragraph).
2. Check that there is rinse-aid in
the container and if necessary
top up.
3. Check the set amount of rinseaid (see “setting the dispensers”
paragraph).
4. Check that the water temperature is between 80°C and 90°C.
CONDENSATION
ON GLASSES
1. Check that there is rinse-aid in
the container and if necessary
top up.
2. Check the set amount of rinseaid (see “setting the dispensers”
paragraph).
3. Remove the rack of glasses
immediately the cycle has
ended.
STAINS ON
THE GLASSES
1. Only use “non-foaming” products
for professional dishwashers.
EXCESSIVE
FOAM IN THE
TANK
1. Check that the wash water temperature is not less than 50°C.
2. Check if the amount of product
dispensed by the detergent
dispenser is excessive (see “setting the dispensers” paragraph).
3. Ensure that the tank has not
been cleaned with unsuitable
cleaners. Drain the tank and
rinse thoroughly before new
wash cycles.
4. If a foaming detergent has been
used, drain and refill the tank
with water until the foam disappears.
SMEARS OR
SPOTS ON
THE GLASSES
1. Reduce the amount of rinse-aid
(see “setting the dispensers”
paragraph).
THE WASH OR
RINSE ARMS
TURN SLOWLY
1. Remove and thoroughly clean
the arms.
2. Clean the wash pump suction filter.
10