1
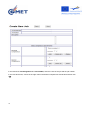
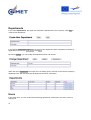
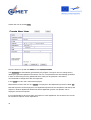
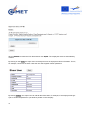
Competence assessment tool
Super user manual
1
CONTENT
About the programme
Super user rights
Logical sequence
3
3
3
Company
4
Competences
6
Educations
9
Other demands
10
Jobs
10
Departments
14
Users
14
Courses
18
Dialogue form
18
Preparation form
20
Search functions
21
Search Course in the development plan
Search education
Search other demands
21
21
22
Search competences
22
Competence match
23
2
About the programme
This program was developed with funding from the Lifelong Learning Programme with partners from
Germany, Denmark, Spain and Italy.
Gilleleje Software Ltd has programmed the tool.
The program aims, in a simple and easy way, to create a graphical representation of the employees'
competences set against the requirements or expectations of the employee’s job. This means that
the program itself cannot stand alone, but is a tool to facilitate dialogue in staff development
interviews.
Super user rights
In each company there are one or more super users. The super user has access to create
departments, competences, jobs, educations, courses, users, change user names and passwords,
and describe the company.
Before the creation of competences and job descriptions in the system, it is appropriate to work with
mapping the job profiles in the company. It makes the work with the program much easier.
Logical sequence
The program is structured so that the logical sequence of working with competences and job
descriptions is to start by defining competences, describe education levels and other requirements.
The next step is making job descriptions and connecting users to the created jobs. However it is
possible to constantly edit the previously described definitions of jobs and competences, so that
there is no unrecoverable error if you forget to describe a competence to begin with. One can simply
return to the competences to create one more later. There is operated continuously with a scale from
1-8 where 8 is the highest level - the expert level. The super user can decide the number of levels
(from 1-8) for each job description. It is important to have min. 4 levels and to use the same number
of levels for all the competences in a job.
In the chapters below there is described the workflow in each of the program's main menus listed in
a logical sequence. The main menu is shown below:
3
Company
Here the super user can make the company description, which the users will see, when they login.
Here you can change the text in the right column, and thereby change:
• Name: The company name has to be written in this field
• Username: if you want to change the username, enter the new username for super user in this
field. Make sure to write down the name in a place where you can find it again and inform other
super users about the change.
4
• Password: If you want to change the password as super user, enter the new password for super
user in this field. Make sure to write your password down somewhere where you can find it again
and inform other super users about the change.
• Introduction text: write here the text you want the user to see as welcome text when he / she logs
in.
• Explanatory text: write here an explanation for the use of the program targeted users in your
company
• Final text: the users will see this text together with their competence web.
• E-mail with password: The program automatically sends an email to the employee when he / she
are created with the password in the program. In the text box, type the message, the employee must
receive in the mail. This text will be sent together with the password. If you want the employee to get
a link with the address of the competence web, the code for this is: < A HREF=
http://www.competence-assessment.eu/comet/uk/your_company_name>LINK</a>
• E-mail when new test: in this box, type the message that the employee receives when he / she
must enter and complete a new competence web. (The superior starts a new round) To display the
hyperlink in the e-mail, write the following code:
<A HREF= http://www.competence-assessment.eu/comet/uk/your_company_name>LINK</a>
Obs. The link has to be changed after the data base is moved to the COMET web site.
• Logo: clicking on Upload new logo will give you access to search for a new corporate logo for use
in the competence web. Note that there can only be used GIF format. Save the new logo by clicking
Upload Logo, cancel by clicking Cancel.
Once you have completed editing the company information, click Update to save changes.
5
Competences
The description of the competences used in job profiles are first to be defined in the programme.
There are three predetermined competence types in the programme: personal, general and
professional. To create a new competence, click New.
Furthermore, it is possible to add new competence types by clicking “Admin Competence types”. To
add new competences, select competence type and then click new. Write the new competence type
in and click Save.
Subsequently the following page appears:
6
In the box Name of Competence, type the name of the competence. The name will later appear in
the list of competences.
In the box Competence type, indicate if the competence is Personal, General, Professional or other,
by selecting with the mouse.
In the Description box, write a definition of the competence. This field should always be completed.
This is the definition the employees will see when filling in the questionnaire.
Score Type: there are two ways to find the competence level on. The scoring Type Level means
that the user can place his/her competence level on a scale from 1-8 by choosing one of the 8 listed
statements.
Scoring type By questions indicate that the user must answer a series of questions where the
number of yes answers indicate the user's level within the competence.
The scoring type Level can usefully be used in general and partly also in professional competences.
The scoring type By questions is mainly recommend for use in personal competences.
Example of a personal competence with scoring-type questions
7
In the design of the statements, it is important to formulate some statements that are possible to
answer yes or no to. It is difficult to make anyone answer no to a statement like: "I am trustworthy".
Furthermore, negative statements are not appropriate. An example of a negative statement could be:
"I have no trouble / problems with ..."
When the sentences are finished, click Save.
The competence can be changed later by clicking on the Change button in the list of competences
and saved again by clicking Update.
General and professional competences are made in a similar manner. Often it may be advantageous
to operate with a generic description of competence levels, covering all the general competences
(perhaps with minor modifications) and possible also the professional competences. The easiest way
to do this is:
Click New competence. Select competence type General or Professional. Type the competence
name, fill in explanatory text and write the description of competence (statements) in the text fields.
The lowest level in the first sentence and so on.
8
Notice that now the competence must be marked under Level Score Type. It indicates that the
employee self in his/her answer place himself/ herself on a level from a list of 8 level descriptions
rather than to answer 8 questions.
An example of generic competence description can be:
When the entry is finished, click Save. If the same competence description will be used generic, click
Change competence, enter the name of the competence, make possible changes and click the Save
as new.
All competences can be used in this way in the creation of new competences. A competence can
also be deleted by clicking Delete, but only if the competence is not used in a created job profile.
Educations
The item Education is present in each job description as the education which is expected an
employee with a specific job to have. Examples on educations: shop assistant, skilled bricklayer or
engineer. Click New to create a new education.
Write the name of the education in the text box and click Save.
9
If there are courses on the list, which no longer are “relevant”, they can be deleted by clicking Delete,
but only if they are not used in a job profile.
Other demands
Under the category Other demands, the super user can write specific demands to the employee in a
particular job. An example can be that a lifeguard must have a lifeguard certificate. Other demands
can also be: driving license, truck certificate, etc.
Click New to create and write the demand in the text box. Click Save.
Subsequently, it is possible to correct by clicking Change or delete, by clicking Delete.
Jobs
In the menu Jobs, it is possible to create and change job profiles.
First click New to create a new job profile.
Next, describe competences and the desired level for a given position/job.
10
In the text boxes Job designation and Job number, enter the name of the job and the job number.
In the next text boxes, choose in the right column the desired competences and levels and then click
Add.
11
12
After selecting several personal competences, the competence description may look like this:
If you now want to change the competence service-minded from level 7 to level 6, you have to
select the competence and its actual level the right column and then click Delete. Then, you create
the service-minded competence again with the new level.
Adjustment and description of general and professional competences in each job can be made in the
same way.
Educations and other demands can also be chosen in the dropdown menu, but here it is not
necessary to specify a level.
Clicking on the Delete all will delete all competences and levels in a given field.
When the job description is complete, click Save.
Job descriptions can always be changed. Click on Change and go through the different fields in a
similar manner as in the creation of the job. In the same way, a new job can be created based on an
already existing job by saving as a new and changing in the competence levels.
Updating the jobs
Please note that all previously typed competence webs disappear when changing
in the competence requirements of a job. Therefore we advise you to make a test
round before the whole company start using the Competence tool and edit the job
descriptions accordingly.
In a job description there can be used up to 25 competences. Otherwise, the web diagram
does not display correctly. It is recommended, wherever possible, to use under 20 competences
for each job, as the process of answering the questionnaire would otherwise seem unmanageable
for the employees.
By clicking Show, you can see an overview of the requirements for a specific job.
13
Departments
In the menu Departments, the super user creates the departments in the company. Click New to
create a new department.
In the text box Department name write the name of the department and the department number (if
applicable) in the text box Cost center. Click Save.
By clicking Change, you can modify the department name and number.
Under the menu Departments the super user can always get an overview of how far the company’s
departments are with the employee development interviews. See below:
Users
In this menu item, you can create users and assign passwords. Furthermore, the users can here
change job.
14
Create new user by clicking New.
Fill in the boxes on top with the Name and the Employee number.
The passwords are automatically generated by the program. The super user can change this by
deleting the generated password and write a new one. The passwords are automatically generated
in order to avoid using too easy passwords which easily can be guessed. It is therefore
recommended to change them with circumspection.
In the E-mail box, fill in the e-mail of the employee.
Mark with the mouse if the user is a superior or employee in the Department (in the box called Job).
Note that a person can be employee in one department (and fill out the competence web there) and
superior in another department! He/she will, where applicable, get two user profiles, one as
employee, the other as superior.
It is not appropriate to have more than one superior in each department. On the other hand, it must
be at least one superior of each department.
15
Under Department, select the appropriate department on the dropdown menu. Under Job, the right
job is elected on the dropdown menu.
Under Education, indicate the level of the employee’s training/education.
Then click Save.
Users can also be automatically created by importing a CSV file. Click Import CSV file.
What the data file should contain, can be tailored to each company. It is important that the format of
the file follows the format specified on the screen:
16
Click on Browse to locate the CSV file and then click Import. The employees are then automatically
created.
By clicking on the Show, the super user can always access an employee's basic information. This is,
for example, convenient in those cases the user has forgotten his/her password.
By clicking Change, the super user can edit all the information, for example, if the employee has got
a job in another department or just another position in the company
17
By clicking Delete, the super user can, of course, delete an employee.
Courses
Under the menu item Courses, there can be made a list of standard courses, which the company
uses. Click New to create a new course on the list.
Write the course name in the text box and click Save.
It is also possible to insert a link, where more information about the course can be found.
Dialogue form
The dialogue form is used by the superior to write the minutes of the employee development interview. The
super user creates headlines in the dialog form and numbers them in the order they should appear in the
form. An example of setup can be:
18
When the superior will open the dialogue form to complete it, the form will look like
this:
19
Preparation form
The Preparation form is a form, the employee uses to prepare for the employee development
interview. The form is created with the same headlines as the Dialog form and filled out with help
questions. See the example below on using questions for the subject performance / status of
work:
Selection indicates the sequence of the headlines. It is desirable to have the same sequence as in
the Dialog form.
20
Search functions
Search Course in the development plan
The super user has the possibility to search for people, in whose development plan a given course
from the "standard list" appears. It is appropriate to indicate whether it is the waiting list for the
course, one seeks in (select Missing on the dropdown menu) or the list of employees who has
completed the course (select Completed in the dropdown menu)
The list of employees who miss a specific course may be used to find out whether there can be
gathered an internal team.
Search education
Search for employees with a specific education.
21
Search other demands
Search for employees with specific certificates, for example truck certificate.
Search competences
The super user can here look in the company's competences after an employee with one or more
specific competences. For example, by seeking an employee with the scoring 4 in English, all staff
with competence scoring 4 and above in English will appear in the search results. The manager can
also search for competences, but only in his/her department.
The search can be combined with personal, professional, general or other types of competences.
22
Competence match
The competence match can be made by the super user globally or for each position/job in the
company.
The super user selects in the dropdown menu next to Select job, the position/job he/she wants to
create a competence match for. It may take some time before the competence match appears. The
Competence Match shows how people in a particular job match the requirements of their jobs.
The superior can also perform a competence match, but only in his/her department.
23