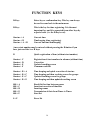
1
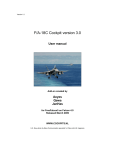
TIMER ET 4
USER'S MANUAL
1
EMIT TIMER ET4
USERS MANUAL
JANUARY 1999
CONTENTS
1
Introduction
2
2.1
General information
Batteries
3
3.1
3.2
3.3
3.3.1
3.3.2
3.3.3
3.3.4
Programming of Timer
Switching the Timer on / Language selection
Timer / Ski-tester
Timer
Deletion of definitions / times
Information on classes
Groups
Time is: Competition time
4
Ski-tester
5
5.1
5.2
5.3
5.4
5.5
5.6
5.6.1
5.7
Operation in coaching mode (giving splits)
Function keys
Example – Simple result list
Name of runners, 000 + D
The Timer ”beeps”
Current time and time keeping, the function keys A and B
Updated coaching menu, start no + E
”Turn over” by using the 6 and 9 keys
Common result list, start no + F
6
6.1
6.2
6.3
Common messages
Registering the wrong start number
Double registration of the same start number
”The time is suspicious”
2
6.4
Registration of ”groups”
7
Removal of unwanted times or start numbers
8
8.1
8.2
More passes
Jump between differentt passes, 7/8
Time between passes, 000 + A
9
9.1
9.2
9.3
Pass control, time slots and error list
Correction of time slots
Error list, 0 + F
Overlapping time slots
10
Correction, start no + D
11
Groups, function key C
12
Starting list, 000 + F
13
13.1
13.2
Transmission of data from Timer to Timer
Transmitting definitions
Transmitting passes
14
Walkie-Talkie / ET4 – Problems
3
1
Introduction
Emit Timer ET4 is a small computer that can be upgraded using a PC. This makes it possible to
change the ET4’s program without dismantling it. This also means that it is possible to delete
the ET4’s program if you press several keys in a certain order.
Therefore, please note: If you press and hold down the keys A, C and D at the same time
as you start the Timer with the ON/OFF button, the ET4’s program is deleted. If this
happens, please return the ET4 to Emit as, Tollbugt. 6, N-0152 Oslo.
The ET4 calculates and presents the current standings of a race at any point in time. The
competitors (racers) can be shown as numbers. Names (max 8 letters) can be entered and used if
desired. Different types of ranking lists can be presented on the display at any time in the race.
You can look through the rankings forwards and backwards simply by pushing a button.
Emit Timer ET4 can also be used for ski-testing (testing of wax and glide). In such cases you
must supplement the ET4 with two sets of photo cells a package of batteries and specific cables.
After switching on the Timer, questions will appear that you must answer in order to use it.
Thus, information must be inputted into the computer before the race (i.e. start time number of
racers, etc.). Even though the Timer is very user friendly, we strongly urge you to become very
familiar with the instructions. This will enhance the use of this advanced computer aid.
2
General information
The Timer can handle start numbers from 1 to 9999. The memory of the Timer is limited to
5000 participants. However the memory is dependent on the number of the passes, or if names
are used etc. Indeed, the Timer has more than enough memory for the largest of races.
The Timer makes a short beep every time a key is pressed to let you know the key was pressed
correctly. If a mistake is made, several short beeps are heard.
The Emit Timer ET4 can be used in cold weather down to -20’C. The colder the air, however,
the longer it takes for the computer to calculate figures. When you are not using the Timer, we
recommend that you keep it under or inside your jacket. This will keep it warm and ready to
use at all times. During periods of rain and snow, the Timer should be protected by placing a
piece of tape over the ‘COM’ and ‘SPEED’ connectors. After a competition, the Timer should
be placed in a warm and dry place. Do not put it in a damp rucksack or bag.
In the summer, the Timer should not be left in direct sun light for long periods of time (i.e.
especially in a car).
4
2.1
Charging
The Emit Timer comes with one alkaline battery 9 Volt type 6LR61. With this battery the
ET4 has a capacity of running for appr. 20-25 hours. It is possible to use an extra battery
together with the original one. They are placed in parallell to eachother, and the running time is
almost doubled. As mentioned in our sales brochure we recomend that two rechargeable 9 Volt
batteries type 6F22 Ni-MH (Nickel Metal Hybride). This is a batterytype without cadmium and
therefore better for the environment. This type of batteries also have a better effect at low
temperatures. EMIT offers a batterypack consisting of two 6F22 batteries and a battery charger
which can charge both batteries at the same time.
An indication of the battery status is given when the ET4 is turned on. (For details, look at
chapter 3.1)
3.
Programming of the Timer
The following is a short list of the questions you have to answer during programming:
• Language
• Timer / Skitester
• Delete Times / Definitions
•
Class no
First start no
•
Last start no
•
Start time number ... is
•
Start interval
•
Number of runners starting together
•
Control of passes: None / Automatic
•
More classes
• Runners placed in groups
• Time is
3. l
Switching the Timer on / language selection
To switch on the Timer, press the ON/OFF and keep it depressed for a short while until the
Timer starts.
First the Timer will introduce itself for a few seconds, then five possible languages can be
selected. The five different languages are norwegian, swedish, finnish, english or german. The
screen will appear as follows:
5
0 - Norsk
1 - Svenska
2 – Suomi
3 – English
4 – Deutsch
9.0 V
The message at the upper right corner (9.0 V) indicates the battery status. It is hard to give an
exact indication of the battery status because the temperature plays an important role. If the
battery voltage is less than 8.0 V it is time to change or recharge the batteries, or alternatively
have extra batteries in reserve.
To select English, simply push number 3, followed by D. The D-key is always the enter key.
Note that there will be a flashing number. This represents what you chose the last time you used
the Timer, or what you have selected now. If the right number is flashing, the D-key may be
pressed directly.
3.2
Timer / Ski-tester
After selecting a language, the Timer will ask you if you want to use it as a ”timer” or as a
”ski-tester”. It is possible to use the Emit Timer as a ski-tester and then as a timer or vice-versa.
The screen appears as follows:
To be used as:
0: Timer
1: Ski-tester
:0
Note that the Timer (0) will always be the proposed number. If you want to select timer, simply
push the enter key D.
3.3
Timer
In the following section we assume that “ 0: Timer” was selected in the last question.
Whenever you switch the Timer off, it will record in memory your last selection. Thus, when
you turn it on again, the Timer will propose what you selected the last time.
3.3.1 Deletion of definitions / times
If the Timer has not been used before or has been switched off before the programing was
completed, the Timer will appear as follows:
6
0: Exit prog.
1: New class
:_
Go on accordingly to instructions in section 3.3.2
If the Timer already is programmed but no times are registered, it will ask: ”Delete definition?”.
Definition means number of classes or names of runners that have to be registered. Notice that
when the question deletion is actualized, the Timer will always propose ”not to delete”. If you
want to delete, the question will appear once more. This is to ensure that important
information is not being accidently deleted. The screen will appear as follows:
Delete definition?
No - 0, yes – 1 : 0
If you choose not to delete, the next question is “Start ET 4”, see section 3.3.4. If you choose to
delete, the next question will be concerning class information, section 3.3.2.
A third possibility is that the Timer is programmed and times are registered. The Timer says
that ”Data exist in Timer” (Definitions and times), and ask if the registered times are going to
be deleted. If you want to delete them, you have to press 1 and then D. You must repeat this
process once more (to ensure that you are not making a mistake). When the times are deleted,
the Timer will ask if the definitions are to be deleted or if you want to keep them. The
possibility of keeping the definitions but deleting the times is very favorable when you are
learning to use the Timer. The screen will appear as follows:
Data exist in Timer.
These are used
Delete times?
No – 0, Yes - 1 : 0
If you do not want to delete anything (i.e. definitions and times) or if you delete times but not
definitions, the next question will be “Times is ....” (See section 3.3.4.)
If the definitions are deleted, the next question will be “New class”.
3.3.2 Class information
For every class you have to inform the Timer of the first and the last start number, start interval
and number of runners starting together. This information is necessary for the Timer to
calculate times and rank those times in every separate classes. Every input has to be confirmed
by the D-key. If the start interval is pushed in as 0, the Timer accepts that as a mass start, and
the question of number of racers starting together will be dropped. The screen appears as
follows:
7
0: Exit prog.
1: New class
: _
(Choose 1)
Class no 1
First start no : _
Class no 1
First start no: 1
Last start no: 100
Start time number
1 is 000000
Start interval is:
0030
MinSec
Number of runners
starting together: 1
The last question within every class is ‘Control of passes’. The choice is none or automatic.
Control of passes
The control of passes is a very important concept if the racers are passing the user (coach) more
than once. If no control of passes is chosen, it is the user’s responsibility to input that the racer
has made the pass. That means that if the coach is registering a racer on the second pass, but
has forgotten to register him for the first pass, the result is that the Timer will register him for
his first pass (instead of placing him in the second pass). The result will be a very bad time for
the first pass and no time for the second pass (compared to other racers). The screen appears as
follows:
Control of passes:
0 : None
1 : Automatic
Choose: _
If automatic (1) is chosen, the Timer will evaluate every registered time. If the racer responds to
the second pass, he will be registered for this pass, even if he was forgotten at. the first pass.
The automatic mode ensures that the racer will be properly registered.
Control of passes will be treated further in section 9. We conclude this section by
recommending that if the racer is only going to pass the coach once during the race, the none (0)
mode of the control of passes should be selected. On the other hand, if the racer is going to pass
the coach several times, then Automatic (1) should be chosen.
8
3.3.3 Groups
Finally the Timer asks if we want to group any racers. For example, it we want to place all
runners from Norway into one group, we press Yes. Then, the runners’ start numbers are
entered, followed by D. For instance, if runners 10, 12 and 18 are from Norway, we would enter
10 followed by the D-key, 12 followed by D, and 18 followed by D. In addition, groups can be
made even if they are in a different class; for example we can compare all the Norwegian
runners to each other regardless of which class they are in. The screen will appear as follows:
Do you want special runners
placed in groups?
No - 0, Yes - 1: 0
If ‘No’ is answered the following question will appear:
0: Exit prog.
1: New class
2: Delete class
3: Edit class
If no more classes are wanted, select ‘Exit prog.’, and the Timer displays:
0: Program
1: Start ET4
:_
Select ‘Start ET4’ (press 1), and the “time is:” question appears.
3.3.4 Time is (competition time)
The last information given to the Timer before it is used, is ”time is”. ”Time is” means the time
for the competition. Commonly this time corresponds to the official time (time signal). The
screen will appear as follows:
Time is: 000000
Timer starts with D
You can start the Timer at a time of your choice, before start or after start. Normally it is
sufficient to use the time on your wrist watch if you are coaching out in the woods, because
there you do not need to have the exact official time. The advantage of using your own watch is
that you can enter the time at a later moment during the competition. Normally you would enter
a time that corresponds to the next full minute of your watch, and then start the Timer with the
D-key when your watch’s time and the Timer’s time are identical.
9
4.
Ski-tester
We assume in this section that ski-tester was chosen after the Emit Timer was switched on, see
section 3.2. In addition, we assume you have the necessary devices connected to use the skitester. The Timer will ask if you want to have the last 6 or the last 12 testing results shown on
the display. The results will be numbered accordingly. The only difference with 6 or 12 results
is that the display is easier to read with 6 results. The screen will appear as follows:
0: Show 6 results
1: Show 12 results
Choose: _
Further more the Timer asks if the results should be shown in seconds, meter/sec or km/hour. If
you want meter/sec or km/hour, you must input the distance between the photocells in the next
question. This is measured in cm. For example, if you have distance of 8 meters you have to
input 800.
Screen 1:
0: Show seconds
1: Show meter/sec
2: Show km/h
Choose: _
Screen 2:
Enter distance between photocells
in cm: _
Now the Timer is ready to register the first tester (first person testing skis). When the runner is
passing the first photocell, the Timer shows START; when the second phoocell is passed, the
result is shown. The first tester has to pass the second photocell before the next tester can start.
If tester 2 passes the photocell 1 before the tester 1 has passed the photocell 2, the Timer will
show RESTART, and the tester 1 will not be registered.
P.S.1. No ski-testing results will be stored in the Timer.
P.S.2 To turn off the Timer after ski testing, press the button marked with
press the ON/OFF button.
10
and then
5
Operation in coaching mode (giving splits)
The Emit Timer is now ready for practical use. The ”Time is/Startno:” screen shown on the
display is called the main menu. ”Time is” is shown on top while on line 3 the start number is
shown. A main menu (the most important screen) example is as follows:
Time is: 11:00:15
Startno: _
The importance of this screen is that a coach may put in a start number followed by a function
key to perform certain operations.
5.l
Function Keys
Below you will find a summary of how to use the function keys. Two keys distinguish
themselves from all the others in practical use.
D-Key:
Enter-key or confirmation-key. This key can always be used to come back to the main menu.
B-Key:
This is the key for time registering (timekeeping). It is the most important key andt it is
separated from other keys by a special color (i.e. the B-key is red).
Normal procedure is (from the main menu) to enter the start number (startno) + a function key.
The mostly used functions are:
Start no + A
Start no + B
Start no + A + B
Current time
Timekeeping
Current time and the timekeeping
A new start number can be entered without pressing the D-key if you have just used the A or B
keys.
In addition, the uses of each function key are also explained in detail.
B
Quick registration of time without start number
Startno + C
Registration of start numbers in advance (without time)
Startno + D
Correction
Startno + E
Updated coaching screen
11
Startno + F
Common result list
Startno + B + A
Time keeping and quick correction of start no
Startno + B + C
Time keeping and then coaching screen for groups
Startno + E + C
Updated coaching screen for groups
Startno + B + E
Time keeping and then updated coaching screen
000 + A
Result list for time between passes
000 + C
Insertion/correction of timeslots
000 + D
Inserting names
000 + E
Transmission of data from Timer to Timer
000 + F
Start list
0+F
Error list
5.2
Example - Simple result list
In order to present the function keys in details, we have constructed a fictious result list. It is as
follows:
008
011
006
013
001
003
014
017
002
005
012
009
019
DÆHLIE
FAUNER
SMIRNOV
FORSBERG
ALSGAARD
MOGREN
JEVNE
SKAANES
SIVERTSEN
MIKA
REPO
SKJELDAL
COTTRER
1
2
3
4
5
6
7
8
9
10
11
12
13
12
14.56
15.02
15.07
15.09
15.17
15.31
15.39
15.46
15.52
16.00
16.04
16.05
16.11
From left to right as shown: Start number, name, rank and race time. The results presented on
the display will be in the same order as the example above.
5.3
Name of runners, 000 + D
According to the list of function keys in section 5.1, we can enter names by using 000 + D. The
Timer asks for the racer’s start number. We enter start no 1 (Thomas Alsgaard, see the resultlist
in 5.2) and confirm by D. After entering the names you want, you can exit by pressing 000 +
D; this is indicated on the screen. The choice of start no 1 is confirmed by pressing D, and the
following screen is visible:
1
ABCDEFGHIJ
0 1 23 45 6 789
D - Reg, E - Erase
B->K L M N O...
Start no 1 is Thomas Alsgaard. Since there are no letter keys, we use the 0-9 keys to create
letters.
Please observe that the letters on the keyboard do not generate letters. The name is limited to 5
letters. You can see that the figure 0 is below the letter A. By pushing 0 you will thus get a A.
The next letter L is not available. In order to get a letter after J, you have to push the red Bbutton. As the arrow indicates, we can go further in the alphabet by pressing B. If we want to
got backwards we simply press the A key. In order to get L, we press the button 1. Continue
entering the letters in this manner until the name is ready. Maximum 8 letters can be entered.
When the name is ready press the D-key to confirm. The Timer then proposes to enter start
number 2’s name. Confirm this by pressing the D-key. If you want to enter another runner’s
name, press his/hers start number followed by the D-key.
To quit entering names press “000+D”.
5.4
The Timer ”beeps”
As mentioned earlier the Timer makes a short beep after a key is pressed. If the Timer is asked
to do something that is not specified accuratly enough, it makes several short beeps rapidly and
displays a message for a few seconds. Commonly it will happen if you are pressing a function
key without having given the start number. The Timer beeps and show the message ”Start no
not given” (An exception is the use of the B-key, which is time keeping). The Timer will also
beep when you have to decide on a given message on the display. For example if the same
runner has been registered twice at the same pass, the Timer will beep. Then the Timer will
present both times and the user has to choose which of them is to be used.
13
5.5
Current time and time keeping - function keys A and B
The function keys A, B and D are most frequently used. We are now using the result list from
section 5.2. In addition, ve will examine the screens that result from pressing A,B and D.
For purposes of demonstration, we will assume that start number 14 Jevne is on his way to the
passing point. We want to have his current time before his passing time is registered. We press
14 + A. The screen shown would be:
014
008
011
006
013
001
003
JEVNE
DÆHLIE
FAUNER
SMIRNOV
FORSBERG
ALSGAARD
MOGREN
6
1
2
3
4
5
6
0:15:20
0:14:56
0:15:02
0:15:07
0:15:09
0:15:17
0:15:31
The time for Jevne is written in italics in order to show that it is a current time (running time).
At the moment (before the passing) he is ranked as number 6. When his current time passes
15.31, he will be ranked by the Timer as number 7 (refer to result list 5.2). By continuing to
press A, the ranking list after number 6 will be shown on the lines 2, 3, 4, 5, 6 and 7 . When
Jevne passes we push B for time keeping and registering. And we get the perfect coaching
screen (i.e. the coach knows how his racer Jevne is doing in relation to the other racers).
014
008
011
006
013
003
002
JEVNE
DÆHLIE
FAUNER
SMIRNOV
FORSBERG
MOGREN
SIVERTS
7 0:15:39
1 - 0:00:43
2 - 0:00:35
3 - 0:00:30
4 - 0:00:28
6 - 0:00:08
8 + 0:00:13
(start no 17 Skaanes has not passed yet)
On the first line is the runner that we are coaching, start no 14 Jevne. At the moment he is
ranked 7th with the time 15.39. The second line always shows the ”leader”. It is start number 8;
DÆHLIE. He is 43 seconds ahead. At line 3, 4 and 5 the runners at second, third and fourth
place are shown. At the 6th line the runner ranked before yours is shown, at the moment start
number 3 Mogren, as rank 6. Line 7 shows the runner behind yours, start number 2 Sivertsen
who is 13 seconds behind (until start number l7 Skaanes will pass).
14
The screen is exactly what all coaches want to see. It provides excellent information for a
coach.
If your runner is in the lead, lines 2, 3, 4 and 5 will be blank. If he is ranked second, lines 3, 4
and 5 will be blank, and if he in the last place, line 7 will be blank.
In the given example, we pushed “start no + A” to get the current time and the B-key for time
keeping. If you don’t have time to look for the current time you can use ”start no + B” for time
keeping. Normally you should go back by pressing B to get to the main menu. However there
is an exception. A new runner’s start number can be entered directly after having used functions
A or B.
5.6
Updated coaching menu, start no + E
At the moment Jevne passed, he was ranked as number 7. In order to know his rank at a later
point of time, his start number + E are entered (i. e . 14 + E).
The E-key is useful if you want to turn over in the result list, or it we want to see how many
runners are behind Jevne. In order to see the rankings forwards or backwards, simply press the
E-key (after having pressed B to get the result list).
5.6.1 ’Turn over” by using the 6 and 9 keys
We will demonstrate the use of 6 or 9 by using the updated coaching menu for Jevne. Let us
presume that all runners have passed according to the result list in 5.2. We press 14 + E and the
screen appears as follows:
014
008
011
006
013
003
002
JEVNE
DÆHLIE
FAUNER
SMIRNOV
FORSBERG
MOGREN
SKAANES
7 0:15:39
1 - 0:00:43
2 - 0:00:35
3 - 0:00:30
4 - 0:00:28
6 - 0:00:08
8 + 0:00:07
By pressing 9 and/or 8 it is possible to browse forwards/backwards in order to compare Jevne
with other competitors. With a little practice, it is possible to do this while you are running and
coaching your racer.
15
5.7
Common result list, startno + F
Startno + F-key gives a common result list for the class belonging to a given start number. For
example, if we press ”1 + F” we would get the rankings of class 1. The screen appears as
follows:
008
011
006
013
001
009
014
DÆHLIE
FAUNER
SMIRNOV
FORSBERG
ALSGAARD
MOGREN
JEVNE
1
2
3
4
5
6
7
0:14:56
0:15:02
0:15:07
0:15:09
0:15:17
0:15:31
0:15:39
To continue to see the rankings (i.e. 8-14), simply press the F-key again.
6.
Common messages
In this section we will examine some frequent messages displayed on the screen. Messages
usually occur when a user has made an error; the message will be followed by a correction
decision.
6.1
Registering the wrong start number
If you have entered the wrong starting number at a pass and you notice that you did it before the
time is registered by pressing B, you can correct this error and get back to the main menu in the
following different ways:
A + right start no, or D + D, or E + D, or F + D
If you discover the mistake after having pressed B, there is the possibility of a quick correction.
From the coaching menu, you should push the A-key. For example, let us say that you entered
start number 21 but immediately saw that it was actually number 22 who passed. After pressing
A, the screen appears as follows:
021 ULVANG
wrong startno ?
corr. startno.: _
17
0:16:43
To correct the mistake, you simply enter start number 22, followed by D; this will result in the
normal coaching menu with start number 22 on the upper line.
16
P.S. This depends on that both start numbers belongs to the same class.
If we have mistakenly pressed A after the time keeping by pressing the B-key, we can avoid
mistakes by pressing the D-key or eventually by pressing the original start number again.
6.2
Double registration of the same start number
In some uses, the incorrectly entered start number may have been already registered in the
Timer. Let us look at the result list from section 5.2. If you accidently entered startno 19
Cottrer for a second time, the Timer will beep, and the following screen appears:
019 COTTRER
New time:
Change time ?
No – 0; Yes - 1: 0
13
0:16:11
0:16:52
Furthermore, you notice that the racer passing is actually number 16. In this case, the time
should not be deleted because the first time registered is the correct time (for number 19). But
be aware of the fact that startno 16 Estil will not get a time registered. You should then, if time
allows, note the second time for Svendsen of 16.52, calculate Smedvolds time of 18.22 (he
started one and a half minute before the registered time of 16.52). Then, input it in the Timer
afterwards, according to section 10.
6.3
”The time is suspicious”
The Timer will continually scan all the times and will notify the user if a particular time is
somewhat suspicious. The Timer will beep and the message ”Suspicious time!” appears on the
screen if one of the following situations occur:
1
2
The runner gets a time that is better than all other times within an existing range of time
(see section 9 concerning time slots).
The runner is number one at any pass or takes the lead at any pass, but at the same time
he has not:
• been registered at any other pass
• been registered at the former pass
once again we refer to the result list in section 5.2. Let us presume that start number 25 Eide
has made a fantastic race and will pass at 12.42. This time is outside the range of time (see
section 9) of +/- 16%, which is automatically put on the first starting runner, in this case start no
1 Alsgaard with the time 15.17. The screen on the Timer appears as follows:
17
Suspicious time:
025 EIDE
1
Save it ?
No – 0, Yes – 1: 1
0:12:42
Normally, you should register suspicious times if you are not sure that it is an obvious fault.
That is why the Timer proposes 1, registration. We save the time by pressing l. The screen
appears as follows:
025 EIDE
1
Placed in
ERROR-list!
0:12:42
The Timer has no passing time which fits in and will therefore be put in a list of its own, called
the ”Error list”. We will return to times in the error list in section 9.2.
Normally the notice ”Suspicious time” appears if a good racer has been forgotten at one pass,
and he takes the lead at the next one. In such a case, you must simply save his time by pressing
the D-key (his time will be registered). Then you are ready for new runners.
6.4
Registration of ”groups”
The following section pertains to situations when several runners appear at a pass at the same
time. If there are only 2 or 3 racers arriving at the same time, we recommend you to use the
normal registration (”start no + B”). Simply enter the first racer a little earlier than normal. It
does not matter if a time is one or two seconds off.
If one of the runners in a group of 2 or 3 is your runner, you should register him as the last one
so that the coaching menu is as accurate as possible and as conservative as possible.
If there are more than three runners in a group arriving at the pass, you can use ”quick
registration”. ”Quick registration” means registering their times first and then their start number
later. For example, if 4 racers are coming together in a group, we press the B-key 4 times when
they pass. The screen appears as follows:
Time is: 11:54:25
Start no: _
Extra times: 4
The screen shows that 4 times are stored. Then, you simply note the numbers of the runners
when passing and enter them later by ”start no + C” according to section 5.1. For every start
no entered, we can see that the number of extra times is reduced by one. When all 4 are
registered, the line with ”Extra times” will disappear.
18
It is also possible to register the start numbers in advance, if we are sure in which order the
runners will pass. If we register 5 start numbers by ”start no + C”, the display will appear as
follows:
Time is: 11:28:34
Start no: _
Extra start no: 5
At the passing of each of those five runners, we press the B-key. The number of extra start
numbers counts down, and the line will disappear when all of the 5 times are registered.
It is also possible to register runners normally when extra times or extra start numbers are stored
in the Timer. For example, if you are going to coach 1 of the 4 runners in a group, you should
use the 8-key 3 times and press your runners’ start no + B. The result will be a coaching menu
for your runner. Afterwards D will be pressed in order to return to the main menu. There you
can see that 3 extra times are stored. Then we enter the three other runners’ start numbers by
”start no + C”.
7.
Removal of unwanted times or start numbers
Times that have been mistakenly registered by the B-key can be removed by correcting the time
with start no 0. This means that we press ”0 + C” from the main menu. The time is then
removed.
Start numbers that have been mistakenly registered ”start no + C” can be removed in the
following way:
Since the start number is related to a time, we push the B-key once. Press the A-key for
correction. The screen appears as follows (we are using the example in section 6.1 with start no
21 Ulvang):
021 ULVANG
Wrong start no ?
Corr. start no : _
17
0:16:43
Press ”0” as the correct start number, Confirm by D, and the start number is removed.
8.
More passes
Let us presume that the racers in section 5.2 have finished two new rounds. After 3 passes, we
have the following results:
19
Start no
Name
Rank Time
Rank Time
Rank Time
1
2
15.07
4
15.17
6
7
8
9
10
11
12
13
1
2
30.27
3
30.43
7
6
9
8
10
12
11
14
1
2
45.39
3
45.50
6
7
9
8
10
13
11
12
008
011
006
013
001
003
014
017
002
005
012
009
019
DÆHLIE
FAUNER
SMIRNOV 3
FORSBERG
ALSGAARD 5
MOGREN
JEVNE
SKAANES
SIVERTSEN
MIKA
REPO
SKJELDAL
COTTRER
14.56
15.02
4
15.09
5
15.31
15.39
15.46
15.52
16.00
16.04
16.05
16.11
8.1
”Jump” between different passes, 7/8
30.08
30.18
4
30.22
5
30.58
30.56
31.09
31.05
31.18
31.31
31.24
31.33
45.11
45.24
45.31
46.01
45.04
46.22
46.19
46.33
46.55
46.45
46.47
If, for example, we are at the third pass, but we want to look at the results from the first or the
second pass, we can do so by using the 7-key and the B-key.
By pressing the 7-key and the B-key, we can view the results from each pass. In order to do so,
we have to be in the E- or F-menu (an updated coach menu or a result list).
In the same way it is possible to ”jump” between the results from different passed when you
are looking at the normal result list. Press “start no + F”. This gives you the result list for the
third pass; press 7 in order to get the result list from the second pass.
8.2
Time between passes
It is also possible to get times between different passes; in other words, a result list that shows
how fast the runners have been skiing different parts of the race. This information can also be
used to calculate the times in the different legs of a relay race.
To view the time between passes, simply press ”000 + A”. If we have more than one class, we
have to give one start number which is within the class we want. If we have only two passes, the
result list will be shown immediately. If more passes are registered, the Timer will ask between
which passes you want to view the results. We are using the result list from section 8, and we
want to have the times between the second and third pass. The screen appears as follows:
20
It is 3 pass
Time between pass: 2
and pass: 3
You can enter 2 or 3, then the D-key, and finally the number 2 or 3 that you did not enter at
first. For example, press 2, then D, and finally 3. Note, that it does not matter which number
you enter first. The screen appears as follows:
008
003
011
001
006
DÆHLIE
MOGREN
FAUNER
ALSGAARD
SMIRNOV
1
1
3
4
5
0:15:03
0:15:03
0:15:06
0:15:07
0:15:11
013
014
FORSBERG
JEVNE
6 0:15:17
7 0:15:23
To view the list further (i.e. 5-8 places), press the F-key.
9.
Pass control, time slots and error list
As you recall from the beginning you can choose between ”No Control” or ”Automatic
Control” (see section 3.3.2 pass control).
In this section, we will go into further detail about ”Automatic Control”. If you have made this
choice the Timer evaluates all times being kept, and it will relate them to different passes
according to certain rules.
The first time being kept creates the base for the times related to the first pass. The Timer
makes a range or slots time around the first time kept of +/- 16% (100:6 if you want to be
exact). The maximum time may not exceed +/- 15 min. In our example (see the result list
section 8), Alsgaard was start number 1. His time, 15.17, will be used to calculate the range
(between 12.45 and 17.48). That means that all times between 12.45 and 17.48 will be related to
the first pass. The Timer rounds off the minimum time rounding down to the nearest minute
(thus deleting the seconds), and the maximum time by rounding up to the nearest minute. The
limit for the first will thus be from 12 to 18 minutes. All runners with passing times within
this range will automatically be placed in the first pass.
Alsgaard is also the first runner to reach the second pass. His time is 30.43. Thus, the range
will be 25.34 to 35.49, or rounded off to 25 to 36 minutes. The range for the third pass will be
38 to 54 minutes. The ranges will thus be:
1. pass
2. pass
12 min
25 min
18 min
36 min
21
3. pass
9.1
38 min
54 min
Correction of time slots, 000 + C
Normally, the user does not have any need to consider the time ranges created by the Timer.
However, there are cases where the range needs to be changed. A range may need be changed
if the first runner’s time turns out to be so bad that later racers will pass below the lower limit
for actual slot of time. Another possible reason may he that very uneven runners are
participating. This creates big time differences among the runners.
For a coach it can be wise to register some early racers. The Timer establishes the slots (ranges)
immediately, and, if you want to, you can look at them.
The calculated range can be viewed by pressing ”000 + C”. The Timer first asks for a start
number if there are more classes. The next question pertains to the number of passes The
Timer will propose 1, as one is registered, but it is also possible to increase the number in order
to insert the limits for coming passes.
We are using the normal result list from section 8; the presumption is that only start number 1
Braa has passed. The Timer proposes 1. pass. We confirm that and receive the following
screen:
1: Min: 012
Max: 018
The interval between 12 and 18 minutes can be somewhat short. Since there may be a racer out
of this range, we want to change the range to10 to 20 minutes. Since the marker is on the lower
limit, we press 010 and then D. After that, the maximum time is increased by pressing 020 and
then D. Note that all three figures must be pressed (i.e. 020).
The corresponding procedure can be carried out after Alsgaard has passed for the second time.
We can view the time slot by pressing ”000 + C” (confirm 2 passes). The screen appears as
follows:
1 : Min: 010
2 : Min: 025
Max: 020
Max: 036
There are no reasons to have a gap between the maximum of the first pass (020) and the
minimum of the second pass (025). Thus, we recommend making the minimum of the second
pass equal to the maximum of the first pass.
The marker always stands on the minimum limit for the first pass. By pressing twice, the
marker will move to the minimum limit for the second pass.
Then we press 020 followed by D. Note, that you must press D a second time to confirm that
the maximum limit of the second pass can remain unchanged. The screen appears as follows
22
after the change:
1 : Min: 010
2 : Min: 020
Max: 020
Max: 036
After Alsgaard’s third pass the screen appears as follows:
1 : Min: 010
2 : Min: 020
3 : Min: 038
Max: 020
Max: 037
Max: 054
Once again, we must make the minimum for the third pass equal to the maximum of the second
pass. In addition, we will increase the upper limit of the third pass to 60. The screen appears as
follows:
1 : Min: 010
2 : Min: 020
3 : Min: 037
Max: 020
Max: 037
Max: 060
By changing the ranges, we have increased the probability of correctly placing racers into the
proper passes.
9.2
Error list, 0 + F
If we have revised the time ranges according to section 9.1, there will only be a small chance
for a runner to be put on the error list.
For purposes of demonstrating how the error list works, we will use the unrevised time ranges
based on Alsgaard’s passes. They are as follows:
1 : Min: 012
2 : Min: 025
3 : Min: 038
Max: 018
Max: 036
Max: 054
If a runner is registered for a time which is better than the lowest minimum limit, (lower than
012) or between a maximum and the next minimum limit, the Timer will beep and inform you
that the time has been stored in the error list. The screen appears as follows:
030 HANSEN
placed in
ERROR-list
1
0:18:42
The error list is a ”mailbox” for runners with suspicious times. An error list is established for
every class. All times being divergent for runners in the same class are put together in the same
23
error list in increasing numerical order.
You can view the error list by pressing 0 + F from the main menu. By pressing the F-key again
you can view the entire error list.
The example above shows that start number 30, Hansen, has the best time of the runners in the
error list. His time 18.42 indicates that it belongs to the 1. pass. The maximum limit was,
however, 18 minutes, so Hansen was placed on the error list. If we want to relate Hansen’s time
to the 1. pass, we can do it in one of the following ways:
•
•
We can use a correcting function, and bring his time from the error list to the first pass.
We can change the limits for the time slots.
The first way will be explained under ”Correction” section 10. We will now demonstrate the
second method. Let us presume that the time slots are closed like in section 9.1. The result of
this correction would be that start no 30 Hansen with time 18.42 will be registered on pass l. At
the same time, his time disappears from the error list.
Every time the time slots are corrected, the Timer evaluates all times and classifies them
corresponding to the proper pass. The Timer moves the times according to the time slots.
When the time slots are closed, the error list should be empty.
9.3
Overlapping time slots
In races of long distances and many passes there is the possibility that the calculated time
ranges will overlap. This means that the maximum limit for one range may be greater than the
minimum limit of another range. In such cases, the maximum limit for the lower time range
should be the effective minimum limit for the next range. We will use a 30 km race being skied
on a 5 km track as an example. We presume that the first runner will pass every round at 15,
30, 45, 60, 75 and 90 minutes after the start. The calculated time slots by the Timer are as
follows:
5 km
10 km 15 km
15 min 30 min 45 min
12-18 25-36 37-53
20 km
60 min
50-71
25 km
75 min
62-88
30 km
90 min
75-106
As you can see, overlapping occurs between the maximum limit and the minimum limit of some
ranges (i.e. between the maximum 15 km range-53 and the minimum of the 20 km range-50).
The effective limits are thus:
12-18 25-36 37-53 53-71 71-88 88-106
The limits for 25 km and 30 km may create problems for the fastest runners. For example, a
runner who finishes the race in 85 min will be placed at the 25 km point. We can ensure that
this problem will not occur by changing the limits (000 + C). Note that we are essentially
24
closing the lower time slots as we did before in the previous example. After the corrections the
limits are as follows:
10-22 22-36 36-51 51-67 67-82 82-120
10
Correction, start no + D
We demonstrated in section 6.1 how it is possible to correct a falsely registered start number. (If
the fault was immediately discovered). There is another way to make corrections that normally
will be made afterwards. You can use this function by pressing “start no + D”.
We want to correct the time for Dæhlie at pass number 3 because we were a little early in
registering his pass. The time should be 45.13 and not 45.11. To correct his time, we press ”8
+ 0”. The screen appears as follows:
008 DÆHLIE
Correc.
Corr. pass no: _
1: 0:14:56
2: 0:30:08
3: 0:45:11
To correct pass number 3, simply press 3 followed by D. The screen appears as follows:
008 DÆHLIE
Corr. pass no: 3
008 DÆHLIE 1
Newtime: _
Correc.
0:45:11
Simply enter 4513. The new time, 45:13, has now replaced the old time of 45:11.
Note that it there are runners in the error list when we are making a correction, the screen would
be somewhat different than the above example. It would appear as follows:
008 DÆHLIE
Correc.
F:
1: 0:14:56
2: 0:30:18
3: 0:45:11
For the first pass ”F” is shown. The letter stands for the error list. Since Bjørn Dæhlie has no
time in the error list, the spot next to the F: is blank.
In section 9.2 we explained that Hansen’s time in the error list could be moved to the first pass
by making a correction. To do so, we press ”30 + D” for Hansen. The screen appears as follows:
25
030 HANSEN
Corr. pass no: _
F: 0:18:42
1:
2:
3:
Correc.
Press 1 for the first pass and then the time 1842. The time will then he registered for the first
pass. At the same moment, the time 18:42 disappears from the error list .
11
Groups, function key C
If, during programming, we created groups, the Timer can give a coach useful information
about his group. The time is registered as normal by the B-key. The normal ranking list is as
follows:
065 PEDERSEN
008 DÆHLIE
046 FAUNER
027 SMIRNOV
089 FORSBERG
059 HOLST
045 LIEN
41
1
2
3
4
40
42
+
0:18:41
0:03:45
0:03:39
0:03:34
0:03:32
0:00:04
0:00:07
If you want information about your group, simply press the C-key. The coaching menu for the
group will thus be:
065 PEDERSEN
021 HANSEN
046 NILSEN
027 OLSEN
089 DYBVIG
059 HOLST
045 LIEN
41
15
17
24
36
40
42
+
0:18:41
0:02:03
0:01:55
0:01:04
0:00:37
0:00:04
0:00:07
The best runner in the group is Hansen with 16.38. His rank is 15. The next is Nilsen, ranked 17
with a time of 16.46. The next one is Olsen etc. You can browse forward or backward in the
list by using the 6- and 9-keys, and view other passes by using the 7- and 8-keys.
You can get the group menu directly by going from the E-menu or from the F-menu.
12
Start list, 000 + F
The start list is presented by pressing “000 + F”. You can view the entire list by repeatly
pressing the F-key.
26
13
Transmission of data from Timer to Timer
It is possible to transmit definitions ( names) and/or registrations from one Timer to another.
To transmit information, you need a cable to connect the Timers to oneanother. It is useful if
the Timers have the same program (definitions with names), if you want to collect all the data in
one Timer after a competition. The last alternative is favorable in order to analyse the
development of a race, and also if there has been more coaches working with time keeping in
the track. The transmission cable can only be connected when both Timers are switched off.
Plug the transmission cable into the port labeled ‘COM’.
The Timer ET4 also communicates with the Timer RT3, provided that the ET4 is the
transmitter. This is logical since the ET4 contains more data.
13.1 Transmitting definitions
Switch on the transmitting Timer and go to the main menu. Press ”000 + E”. If only definitions
are stored in the transmitting Timer (no times have been recorded) the screen appears as
follows:
Receiving unit:
1: ET4/PC
2: RT3
Choose: _
No matter what you choose the Timer will ask you next:
Transmit def.
No – 0, Yes - 1: 1
Press 1, followed by D to transmit. The screen appears as follows:
Wait for receiver
Now switch on the receiving Timer. After answering questions on language, Timer and
experience, the Timer informs you if data exists and if the data has been used (times are
recorded) or not. At the same moment, the question ”Receive definition?” appears:
Receive definition ?
No - 0, Yes - 1: 1
Press 1, followed by D to receive definitions. After the transfer has finished, both Timers will
be in the main menu with the same ”Time is”.
If both definitions and times are stored in the transmitting Timer, the menu will be:
27
1 – Transmit def.
2 - Transmit pass.
Choose: _
Select 1, followed by D. The screen appears as follows:
Wait for receiver
Switch on the receiving Timer. After questions on language, Timer and experience have been
answered, the Timer informs you if data exists or not, and if the data has been used (times are
recorded) or not. At the same moment, the following question appears:
Receive definition ?
No - 0, Yes – 1: 1
Once again, select 1, followed by D to complete the transfer of definitions. The following
screen should appear once the transfer is completed:
Class definitions
OK
Pressing the D-key gives you the main menu.
After the transfer has taken place, the transmitting Timer’s screen appears as follows:
1. - Transmit def.
2. - Transmit pass
Choose: _
Confirmation by the D-key gives you the main menu. Both Timers have the same ”time is..”.
13.2 Transmitting passes
A condition exists to transmit passes from one Timer to another. The condition is that the same
definitions must be entered into both Timers.
Switch on both Timers and bring them to the main menu, WITHOUT DELETING ANYTHING!
By pressing ”000 + E” in the main menu, the question of transmission will appear on the screen
as follows:
1 - Transmit def.
2 - Transmit pass.
Choose: _
28
Press number 2 followed by D. The display shows:
Wait for receiver
Now it is necessary to press ”000 + E” on the receiving Timer. What appears on the screen
depends on what times are already existing in the receiving Timer. However, the following
question will be asked no matter what.
Receive definition ?
No - 0, Yes - 1 : 1
Press 1 followed by D. When the transmission is completed, the transmitting Timer’s screen
shows:
1 – Transmit def.
2 – Transmit pass.
Choose: _
Then press D to confirm transmission and return to the main menu. After completion, the
receiving Timer’s screen appears as follows:
Transm. active
Once again, press D to confirm transmission and to return to the main menu. ”Time is” should
be the same on both Timers if the transmission was successful.
14
Walkie-talkie / ET4 - problems
The signals from a walkie-talkie can affect the program in the Timer ET4. Practical tests have
shown that normal, commercial walkie-talkies that operate in the frequency around 27 MHz
will not make any difficulties. However, professional radios operate in the frequency between
140 MHz and 170 MHz, can have influence on the Timer ET4.
If this kind of advanced radio link is used, the distance between the Timer ET4 and the radio
transmitter must be at least 25 cm. If the transmitter is worn on your back with the microphone
mounted in front, there should be no problems.
If the radio transmitter influences the Timer, the program will normally start from the beginning
without deleting the programming and the collected results. Just type the new competition time
and continue. In rare occasions even the programming and the collected results are deleted.
29
FUNCTION KEYS
D-Key:
Enter-key or confirmation-key. This key can always
be used to come back to the main menu.
B-Key:
This is the key for time registering. It is the most
important key and it is separated from other keys by
a special color (i.e. the B-key is red).
Start no + A
Start no + B
Start no + A + B
Current time
Timekeeping (time registering)
Current time and timekeeping
A new start number may be entered without pressing the D-button if you
have just used the A or B keys.
B
Quick registration of time (without start number)
Startno + C
Startno + D
Startno + E
Startno + F
Registration of start numbers in advance (without time)
Correction
Updated coaching screen
Common result list
Startno + B + A
Startno + B + C
Startno + E + C
Startno + B + E
Time keeping and quick correction of start no
Time keeping and then coaching screen for groups
Updated coaching screen for groups
Time keeping and then updated coaching screen
000 + A
000 + C
000 + D
000 + E
000 + F
Result list for time between passes
Insertion/correction of timeslots
Inserting names
Transmission of data from Timer to Timer
Start list
0+F
Error list
30