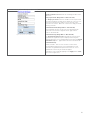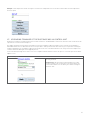
1
DIGITrace NGC-CMA THERMAL MANAGEMENT SOLUTIONS EN-DigitraceNGCCMA-IM-INSTALL147 R1 Contents 1. Product Overview..........................................................................................................................................4 1.1. DigiTrace NGC-CMA configuration and monitoring software...........................................................................................4 1.2. DigiTrace NGC-CMA Programming Guide........................................................................................................................5 1.3. DigiTrace NGC-20 HANDHELD Software – License Agreement.......................................................................................5 1.4. User Responsibilities........................................................................................................................................................7 1.5. Safety Warnings.................................................................................................................................................................7 2. How to Run the DigiTrace NGC-CMA Program...............................................................................................8 3. Initial Setup of the unit ..................................................................................................................................8 4. Using the DigiTrace NGC-CMA in Standard Mode...........................................................................................8 4.1. Initial Setup of the unit in Standard Mode ........................................................................................................................8 5. Changing the Language of the user interface screens...................................................................................9 6.Temperature units.........................................................................................................................................9 7.Establishing a Bluetooth connection between the DigiTrace NGC-CMA and ................................................... DigiTrace DigiTrace NGC-20 control units....................................................................................................10 8. Configuring DigiTrace NGC-20 control units................................................................................................11 8.1. Changing the DigiTrace NGC-20 controller settings......................................................................................................12 8.2. Changing the Temperature set point of a DigiTrace NGC-20 control unit ...................................................................12 8.3. Changing the Switch control mode.................................................................................................................................13 8.4. Changing DigiTrace NGC-20 device tag name................................................................................................................15 8.5. Changing the NGC-20 console units. .............................................................................................................................15 8.6. Load Shed / Temperature Source Communications time out .......................................................................................16 8.7. Setting the Auto Cycle Interval. ......................................................................................................................................16 8.8. Alarm Output Mode.........................................................................................................................................................17 8.9. Setting up Load Shedding ...............................................................................................................................................17 9. Changing DigiTrace NGC-20 Temperature Settings and Temperature Alarms............................................19 9.1. Changing NGC-20 Temperature Sensor Type (Sensor 1). ..............................................................................................19 9.2. Setting High and Low Temperature Alarm Set Points (Sensor 1)..................................................................................19 9.3. High and Low Alarm Filter (Sensor 1).............................................................................................................................20 9.4. Defining which temperature input is used for control....................................................................................................21 9.5. Assigning Temperature sensor Tag name......................................................................................................................22 9.6. Setting up Fail Safe mode and High Limit Cut-Out Set point .......................................................................................22 9.7. Setting the High Limit Cut-Out Set point........................................................................................................................23 9.8. Configuring the DigiTrace NGC-20 Temperature Sources..............................................................................................23 9.9. Temperature Sensor Configuration.................................................................................................................................24 10.Electrical Settings.......................................................................................................................................25 11.SIL 2 Safety Temperature Limiter Settings..................................................................................................28 11.1. Resetting the Safety Temperature Limiter......................................................................................................................30 11.2. Trip Limiter - Test function for SIL approved Safety Temperature limiter.....................................................................31 12.Maintenance data........................................................................................................................................32 12.1. Force User Configuration Defaults..................................................................................................................................34 13.Alarm Masks................................................................................................................................................35 14.DigiTrace NGC-20 Monitoring screens ........................................................................................................36 15.DigiTrace NGC-20 Alarm screens. ...............................................................................................................39 2 16.Firmware / Settings (communication settings) ...........................................................................................40 16.1. Upgrading firmware of the DigiTrace NGC-20 control unit............................................................................................40 16.2. Changing the serial interface settings of the DigiTrace NGC-20 control unit................................................................42 16.3. DigiTrace NGC-20 Display Test. ....................................................................................................................................42 16.4. DigiTrace NGC-20 Mode settings....................................................................................................................................42 17.Using the DigiTrace NGC-CMA in Mixed Mode..............................................................................................43 17.1. Initial Setup of the unit in Mixed Mode............................................................................................................................43 18.Changing main settings of the user interface screens.................................................................................44 18.1.Languages.......................................................................................................................................................................44 18.2. Temperature units ..........................................................................................................................................................44 19.Establishing connection between the DigiTrace NGC-CMA and DigiTrace NGC-20 control units..................45 20.Configuring DigiTrace NGC-20 control units................................................................................................46 20.1. Changing the NGC-20 controller settings.......................................................................................................................47 20.2. Changing the Temperature set point of a DigiTrace NGC-20 control unit......................................................................47 20.3. Changing the Switch control mode ................................................................................................................................48 20.4. Changing DigiTrace NGC-20 device tag name................................................................................................................50 20.5. Load Shedding ................................................................................................................................................................51 21.DigiTrace NGC-20 Temperature settings and temperature alarms.............................................................53 21.1. Changing NGC-20 Temperature sensor type (Sensor 1)................................................................................................53 21.2. Fail Safe mode and High Limit Cut-Out Set point...........................................................................................................54 22.Electrical Settings.......................................................................................................................................55 23.SIL 2 Safety Temperature Limiter Settings..................................................................................................56 23.1. Safety Limiter Setpoint....................................................................................................................................................57 23.2. Resetting Safety Temperature Limiter............................................................................................................................59 23.3. Trip Limiter......................................................................................................................................................................59 24.Maintenance data........................................................................................................................................60 25.DigiTrace NGC-20 Monitoring screens. .......................................................................................................62 26.DigiTrace NGC-20 Alarm screens................................................................................................................63 27.Upgrading firmware of the DigiTrace NGC-20 control unit..........................................................................64 Appendices and Indexes....................................................................................................................................66 3 1. Product Overview This document describes the use and the capabilities of the DigiTrace NGC-CMA handheld device and software. For more information about the correct use and handling of the device we refer to DigiTrace NGC-CMA Getting Started (INSTALL-131) manual. 1.1. DigiTrace NGC-CMA configuration and monitoring software. The DigiTrace NGC-CMA software is developed for Windows Mobile 5. The software enables DigiTrace NGC-20 control units to be configured and monitored via a Wireless Bluetooth interface. The exact use of this software is described in this manual. Note: For hazardous area (Zone 1, 21 and Zone 2, 22 use the DigiTrace NGC-CMA-EX only) The DigiTrace NGC-20 can be configured in either Standard mode or Mixed mode. The Mixed mode meets situations where DigiTrace NGC-20 is communicating with a DigiTrace NGC-UIT, otherwise the DigiTrace NGC-20 will be configured in Standard mode. In both circumstances a different set of parameters is available for configuration. Standard Mode with optional DigiTrace Supervisor Software used as central user interface Mixed Mode with optional DigiTrace NGC-UIT used as central user interface DigiTrace NGC-20 as local controller in the field. DigiTrace Supervisor software (DTS) as central User Interface. DigiTrace NGC-20 as local controller in the field. NGC-UIT as central User Interface. MONI-RMM Units are optional Figure 1 1: DigiTrace NGC-20 system overview Configuration and Monitoring The NGC-CMA can be used to configure the DigiTrace NGC-20. Besides its function as programming interface the DigiTrace NGC20-CMA can also be used to monitor DigiTrace NGC-20 units while they are in operation. When used in monitoring mode all process variables used by the NGC-20 control units can be visualised on the screen of the DigiTrace NGC-CMA Installation Please refer to the User Manual (INSTALL-131) for guidelines about unpacking and basic use of the DigiTrace NGC-CMA devices. Communications DigiTrace NG-CMA devices support various types of communications interfaces. Refer to the User Manual (INSTALL-131) or product datasheet for complete details about all communication options. 4 1.2. DigiTrace NGC-CMA Programming Guide Vital Information This manual is a guide for the setup and operation of the DigiTrace NGC-20-CMA handheld programming devices. Important: All information, including illustrations, is believed to be reliable. Users, however, should independently evaluate the suitability of each product for their particular application. Pentair Thermal Management makes no warranties as to the accuracy or completeness of the information, and disclaims any liability regarding its use. Pentair Thermal Management’ only obligations are those in the Pentair Thermal Management Standard Terms and Conditions of Sale for this product, and in no case will Pentair Thermal Management or its distributors be liable for any incidental, indirect, or consequential damages arising from the sale, resale, use, or misuse of the product. Specifications are subject to change without notice. In addition, Pentair Thermal Management reserves the right to make changes—without notification to Buyer—to processing or materials that do not affect compliance with any applicable specification. 1.3. DigiTrace NGC-20 HANDHELD Software – License Agreement This agreement is a legal agreement between you, “the end user”, and Pentair Thermal Management, LLC (“Pentair Thermal Management”). BY INSTALLING OR OTHERWISE ACCESSING THIS PROGRAM, YOU ARE AGREEING TO BECOME BOUND BY THE TERMS OF THIS AGREEMENT. IF YOU DO NOT AGREE TO THE TERMS OF THIS AGREEMENT, DO NOT INSTALL OR ACCESS THIS PROGRAM. IF INSTALLING OR OTHERWISE ACCESSING THIS PROGRAM BY OPENING A SEALED DISK PACKAGE, PROMPTLY RETURN THE UNOPENED DISK PACKAGE AND THE OTHER ITEMS (INCLUDING WRITTEN MATERIALS OR OTHER CONTAINERS) TO THE PLACE WHERE YOU OBTAINED THEM. GRANT OF LICENSE The DigiTrace NGC-20 handheld Software (the “Software”) is licensed, not sold, to you for use only under the terms of this Agreement, and Pentair Thermal Management reserves any rights not expressly granted to you. Subject to the terms and conditions of this Agreement, Pentair Thermal Management grants to you a non-exclusive, nontransferable, lim¬ited license (without the right to sublicense others) to use the one copy, including written materials if any, of the Software on a single computer at the location (company and address) to which Pentair Thermal Management issued this copy of the DigiTrace NGC-20 handheld Soft¬ware. The Software is owned by Pentair Thermal Management LLC and is protected by United States copyright laws and international treaty provisions. All copies made by you are sub¬ject to the terms and conditions of this Agreement. The structure, organisation and code of the Software are valuable trade secrets and confidential information of Pentair Thermal Management. You agree not to modify, alter, merge, adapt, duplicate, distribute, translate, decom¬pile, disassemble, reverse engineer, create derivative works, copy for use on any other computer or at any other location, or otherwise make this software available to any person or entity outside this location. The Software is licensed only to you. In no event may you transfer, sell, sublicense, rent, assign or transfer rights, lease, or otherwise dispose of the Software on a temporary or permanent basis without the prior written consent of Pentair Thermal Management. You agree to use reasonable efforts to protect against the unauthorised copying and use of the Software by others. You agree not to remove, disable or circumvent any proprietary notices or labels contained on or within the Software. OTHER RESTRICTIONS You may not sublicense, rent or lease the DigiTrace NGC-20 handheld Software to anyone. You agree to notify Pentair Thermal Management promptly if “bugs” or seemingly incorrect or anomalous behaviour is discovered when using the Software. You agree that the DigiTrace NGC-20 handheld Software, including written materials (if any) and all copies in whole or in part, will be destroyed or returned to Pentair Thermal Management at the written request of the Pentair Thermal Management Product Manager. By installing or otherwise accessing the DigiTrace NGC-20 handheld Software you acknowledge that you have read and understood Pentair Thermal Management’ Disclaimer of Warranty and Limitation of Liability, set forth below. You agree to use reasonable efforts to protect against the unauthorised copying and use the DigiTrace NGC-20 handheld Software by others. DISCLAIMER OF WARRANTY THE DIGITRACE NGC-20 HANDHELD SOFTWARE AND ACCOMPANYING WRITTEN MATERIALS ARE PROVIDED “AS IS” WITHOUT WARRANTY OF ANY KIND. THE ENTIRE RISK AS TO THE RESULTS AND PERFORMANCE OF THE DIGITRACE NGC-20 HANDHELD SOFTWARE IS ASSUMED BY YOU. Pentair Thermal Management DOES NOT WARRANT THAT THE FUNCTIONS CONTAINED IN THE SOFTWARE WILL MEET YOUR REQUIRE¬MENTS OR THAT THE OPERATION OF THE SOFTWARE WILL BE UNINTERRUPTED OR ERROR-FREE, OR THAT PROGRAM DEFECTS WILL BE CORRECTED. LIMITED WARRANTY – MEDIA THE MEDIUM ON WHICH THE PROGRAM IS ENCODED IS WARRANTED TO BE FREE FROM DEFECTS IN MATERIAL AND WORKMANSHIP UNDER NORMAL USE FOR A PERIOD OF SIXTY (60) DAYS FROM THE DATE OF DELIVERY TO YOU AS EVIDENCED BY A COPY OF YOUR RECEIPT. ALTHOUGH Pentair Thermal Management BELIEVES THE MEDIA AND THE PROGRAM TO BE FREE OF VIRUSES, THE MEDIUM AND THE PROGRAM ARE NOT WARRANTED TO BE VIRUS FREE. Pentair Thermal Management LIABILITY AND YOUR EXCLUSIVE REMEDY IF THE MEDIUM IS DEFECTIVE OR INCLUDES ANY VIRUS SHALL BE PROMPT REPLACEMENT OF THE MEDIUM WITH A NEW DIGI¬TRACE NGC-20 HANDHELD SOFTWARE PRE-ENCODED DISC. 5 EXCLUSION OF ALL OTHER WARRANTIES EXCEPT AS EXPRESSLY PROVIDED ABOVE, Pentair Thermal Management DISCLAIMS ALL WARRANTIES, EITHER EXPRESS, IMPLIED OR STATUTORY, INCLUDING BUT NOT LIMITED TO ANY WARRANTY OF MERCHANTABIL¬ITY OR FITNESS FOR A PARTICULAR PURPOSE, EVEN IF Pentair Thermal Management HAS BEEN ADVISED OF SUCH PURPOSE. THIS AGREEMENT GIVES YOU SPECIFIC LEGAL RIGHTS. SOME STATES OR COUNTRIES DO NOT ALLOW THE EXCLUSION OF WARRAN¬TIES SO THE ABOVE EXCLUSION MAY NOT APPLY TO YOU. LIMITATION OF LIABILITY THE ENTIRE RISK AS TO THE RESULTS AND PERFORMANCE OF THE SOFTWARE IS ASSUMED BY YOU. IN NO EVENT SHALL Pentair Thermal Management, ITS AFFILIATES, DIRECTORS, OFFICERS, SHAREHOLDERS, EMPLOYEES OR OTHER REP¬RESENTATIVES BE LIABLE FOR DAMAGES OF ANY KIND, INCLUDING WITHOUT LIMITA¬TION, ANY LOSS, DAMAGE, OR DELAY, OR FOR ANY LOST PROFITS, LOSS OF USE, INTERRUPTION OF BUSINESS, OR FOR ANY COMPENSATORY, SPECIAL, INCIDENTAL, CONSEQUENTIAL, INDIRECT DAMAGES (HOWEVER ARISING, INCLUDING NEGLIGENCE) OF ANY KIND ARISING OUT OF OR IN CONNECTION WITH THE USE OF, OR THE INABILITY TO USE, THE SOFTWARE OR THIS AGREEMENT (EVEN IF Pentair Thermal Management HAS BEEN ADVISED OF THE POSSIBILITY OF SUCH DAMAGES). FURTHER, IN NO EVENT SHALL Pentair Thermal Management, ITS AFFILIATES, DIRECTORS, OFFICERS, SHAREHOLDERS, EMPLOYEES OR OTHER REPRESENTATIVES BE LIABLE TO YOU IN AN AMOUNT GREATER THAN THE AMOUNT ACTUALLY PAID BY YOU, IF ANY, FOR THE SOFTWARE. YOU FURTHER AGREE THAT REGARDLESS OF ANY STATUTE OR LAW TO THE CON¬TRARY, ANY CLAIM OR CAUSE OF ACTION ARISING OUT OF OR RELATED TO USE OF THE SOFTWARE OR THE TERMS AND CONDITIONS MUST BE FILED WITHIN ONE (1) YEAR AFTER SUCH CLAIM OR CAUSE OF ACTION AROSE OR BE FOREVER BARRED. INDEMNITY To the extent allowed under federal and state law, you agree to indemnify and hold Pentair Thermal Management, its parents, subsidiaries, affiliates, officers, employees, spon¬sors and partners harmless from any claim, loss, cost, expense, demand, or damage, including reasonable attorneys’ fees, arising directly or indirectly out of (a) your use of, or inability to use, the Software, (b) your activities in connection therewith, or (c) your breach of this Agreement or violation of the rights of any other party. TERMINATION The license granted herein will automatically terminate without notice from Pentair Thermal Management if you fail to comply with any term or condition of this Agreement. You agree, upon such termination, to remove the DigiTrace NGC-20 handheld Software from any memory and/or storage media or device, and to return the DigiTrace NGC-20 handheld Software, including all media and written materials, or destroy the same and certify such destruction to Pentair Thermal Management, along with any backup or other copies in your possession. COMPLETE AGREEMENT – MODIFICATION IN WRITING This Agreement constitutes the sole and complete understanding between the parties with respect to the DigiTrace NGC-20 handheld Software and its use, and may not be varied except by a writing signed by an officer of Pentair Thermal Management. You agree that you may not rely on any representations concerning the DigiTrace NGC-20 handheld Software to the extent they vary from this Agreement, and such repre¬sentations, if any, will neither add to nor vary the terms of this Agreement. CHOICE OF LAWS. This Agreement is governed by the laws of the State of California and the United States, including U.S. Copyright Laws. EXPORT LAWS The DigiTrace NGC-20 handheld Software may require a license from the U.S. Department of Commerce or other governmental agency before it may be exported. The term “export” includes many acts (such as transferring the DigiTrace NGC-20 handheld Software to a foreign citizen within the United States), in addition to sending or taking the DigiTrace NGC-20 handheld Software outside the United States. You agree to ascertain the necessary licensing pro¬cedures and obtain any required licenses before exporting the DigiTrace NGC-20 handheld Software. You also agree to indemnify Pentair Thermal Management and assume all financial responsibility for any losses it may suffer if you do not comply with this paragraph. GOVERNMENT RESTRICTED RIGHTS User acknowledges that the DigiTrace NGC-20 handheld Soft¬ware has been developed at private expense and is provided with “Restricted Rights.” Use, duplication or disclosure by the Government is subject to restrictions as set forth in sub¬paragraph (b)(3) and paragraph (c) of the Rights in Technical Data clause at 48 C.F.R. 252.227-7013, or subparagraphs (c)(1) and (2) of the Commercial Computer Software – Restricted Rights clause at 48 C.F.R. 52.227-19, as applicable. This provision applies to the DigiTrace NGC-20 handheld Software acquired directly or indirectly by or on behalf of any govern¬ment. The DigiTrace NGC-20 handheld Software is a commercial product, licensed on the open mar¬ket at market prices, and was developed entirely at private expense and without the use of any government funds. Any use, modification, reproduction, release, performance, display, or disclosure of the DigiTrace NGC20 handheld Software by any government shall be governed solely by the terms of this Agreement and shall be prohibited except to the extent expressly permitted by the terms of this Agreement, and no license to the DigiTrace NGC-20 handheld Software is granted to any government requiring different terms. ASSIGNMENT You may neither assign any right nor delegate any obligation under this Agreement and attempted assignment or delegation shall be void. Pentair Thermal Management may freely assign this agreement and its rights and obligations there under to any third party. 6 INVALID PROVISIONS If any of the provisions of this provisions Agreement are invalid under any applicable statute or rule of law, they are to that extent deemed omitted. WAIVER No failure or delay of Pentair Thermal Management in exercising or enforcing any right or provision of this Agreement shall constitute a waiver of such right or provision, or any other right or provision hereunder. Furthermore, any waiver by Pentair Thermal Management of any right or provision of this Agreement shall not be construed as, or constitute, a continuing waiver of such right or provision, or waiver of any other right or provision of this Agreement. HEADINGS The section titles in this Agreement are for convenience only. SURVIVABILITY You agree that the terms and conditions of this Agreement shall survive any termination of this Agreement and your rights to use the Software. Should you have any questions concerning this Agreement, or if you want to contact Pentair Thermal Management for any reason, please write to: HOUSTON 7433 Harwin Drive Houston, TX 77036 Tel: +1.713.868.4800 Fax: +1.713.868.2333 pentairthermal.com 1.4. User Responsibilities The performance, reliability and safety of your heat-tracing system depend on proper design, selection, and installation. The DigiTrace NGC-20-CMA will help you to configure and monitor a system that meets your requirements, but it is only a tool. It assumes that your input is accurate, that you are familiar with heat-tracing system design and configuration, and that you will ensure that all components of the heat-tracing system are installed, maintained and used as intended. The configuration of the DigiTrace NGC-20 handheld should be reviewed by a knowledgeable engineer to ensure it is appropriate for your application. Additional information relating to safety, design, and installation is contained in Design Guides, Installation Manuals, Data Sheets, and other literature available from Pentair Thermal Management. Be sure to consult these documents as needed. 1.5.Safety Warnings There are important safety warnings which are shipped with Pentair Thermal Management products and that are also printed in DigiTrace NGC-30 Installation Manual (INSTALL-112) and NGC-20 installation manual (INSTALL-130). Be sure to read, understand and follow these safety warnings to reduce the risk of fire, shock, or personal injury. If you have any questions, contact your local representative or contact Pentair Thermal Management directly. Warning, Error, and Alarm Messages Under certain conditions, the DigiTrace NGC-20-CMA will alert the user with a warning an alarm or an error message. These are typically either because the program cannot find an acceptable answer based on user input, or because the user may need to take some additional action to ensure the design requirements are completely met. These warnings and error messages are detailed in chapter 9 of this manual. For questions, please contact Pentair Thermal Management’ Technical Support. Technical Support For technical support, contact your local representative, or contact Pentair Thermal Management directly: HOUSTON BELGIUM 7433 Harwin Drive Houston, TX 77036 Tel: +1.713.868.4800 Fax: +1.713.868.2333 pentairthermal.com Romeinse straat 14 3001 Leuven Tel: +32.16.213.511 Fax: +32.16.213.603 pentairthermal.be 7 2. How to Run the DigiTrace NGC-CMA Program 3. Initial Setup of the unit After the program is started the start up screen will be visualised. The start up screen allows users to configure the unit to their personal needs and process requirements. 4. Using the DigiTrace NGC-CMA in Standard Mode When operated in the Standard Mode the maximum set of parameters are available for configuration and monitoring. The following chapters will describe in detail how the DigiTrace NGC-20 can be configured and be monitored via the NGC-CMA. 4.1. Initial Setup of the unit in Standard Mode After the program is started the start up screen will be visualised. The start up screen allows users to configure the unit to their personal needs and process requirements. DigiTrace Configuration Utility Main screen The Tab “Configure” initiates the Bluetooth device discovery process. The tab “Settings” allows setting the Language, Temperature units, and shows the software revision. The tab “Exit” closes the application. Begin the initial configuration by tapping on Settings on the start up screen. This will open the Setup screen as shown in Figure 4 1: Startup screen 5. Changing the Language of the user interface screens. DigiTrace Configuration Utility Main screen About: shows the software version of the DigiTrace Configuration Utility Software. Languages: Allows selecting a convenient language of the user interface software. Temperature Units: Sets the temperature units of the DigiTrace NGC-CMA. Supported are: Degrees Celsius and degrees Fahrenheit. The default value is degrees Celsius. Back: Brings you back to the previous screen (Figure 4.1) Tap on Languages to continue Figure 5 1: Setup Screen 8 Supported languages are: English (default) French (Français) German (Deutsch) After tapping on the desired language, you will be returned to the Startup screen ( ) Remark; selecting a different language will cause the unit to reboot. Allow enough time for the unit to completely reboot. When ready revert back to step 1 in order to restart the application. The application will now run in the selected language. Figure 5 1: Setup Screen 6. Temperature units From the Setup Screen tap on Temperature Units to change the way in which temperatures will be displayed on the NGC-CMA screens. The factory default setting is °C. Tapping on the desired field will select the units of measure Celsius or Fahrenheit and will return you to the Setup Screen while the new units of measure will be selected. Tap on Back to return to the Startup Screen. Figure 6 1: Temperature Units Screen 7. Establishing a Bluetooth connection between the DigiTrace NGC-CMA and DigiTrace NGC-20 control units DigiTrace Configuration Utility Main Screen From the Startup screen tap on Configure. The display will now show the Bluetooth discovery screen and the device discovery process will be started. Figure 7 1: Main Screen 9 Bluetooth Discovery Process In background the device will scan for all DigiTrace NGC20 controllers which are within range of the Bluetooth communications. Ensure that all DigiTrace NGC-20 units are powered up. Figure 7 2: Bluetooth Discovery screen – Searching for devices Bluetooth Discovery Process (building the device inventory list) When searching is complete all devices in range will be listed on the screen. Example: For this example, the only device that is found is NGC20-1. If more than one DigiTrace NGC-20 control unit is in range all units will be listed on the screen as is shown on Figure 7-4. Figure 7 3: Bluetooth Discovery screen – one device found Bluetooth Discovery Process (selecting device) Now select the device you want to connect to by tapping on the device name. When a device is selected the background color will be black (see NGC-20-1). Next tap on Continue to go on to the Main configuration screen. If devices are not showing up repeat the device discovery process by simply tapping on Scan for Devices once more. Figure 7 4: Bluetooth Discovery screen – finding 2 devices 10 8. Configuring DigiTrace NGC-20 control units In order to configure the connected DigiTrace NGC-20 control unit tap on continue DigiTrace NGC-20 Main Configuration Screen The main screen supports different options as is shown on Figure 8 1. Tap Configure: to configure the selected unit. Tap Monitor to look at all process variables as currently active on this unit. All measured sensor temperatures, control temperature, load current, supply voltage, ground fault current and the status of the safety limiter. Tap View Alarms in order to get an overview of all active alarms and to reset alarms. Tap Firmware / Settings in order to install a new version of firmware in the selected controller. Figure 8 1: Main screen Tap Back to go back to the Bluetooth discovery screen as shown on Figure 7-4. 8.1. Changing the DigiTrace NGC-20 controller settings Tap on Configure in the NGC-20 Main screen. As a result of this the NGC-20 Configuration screen will be shown. The NGC-20 configuration screen supports different options: DigiTrace NGC-20 Configuration Screen Tap Controller Settings to alter; set points, control mode, dead band, the device tag and load shedding. Tap Temperature Settings to alter High and Low Temperature alarm values, the temperature alarm filter, fail safe mode and to enable and preset the high limit Cut-Out Tap Temp. Source Settings to define the temperature sources used by this DigiTrace NGC-20 unit. Tap Electrical Settings in order to set the high and low load current and voltage alarm values. The second screen offers the possibility to load the relay cycles time counter and to adjust the ground fault alarm warning and trip level. Figure 8 2: NGC-20 Configuration screen Tap Temperature Limiter; use this entry in order to control the Safety temperature limiter set point, trip and reset the Safety temperature limiter after it has tripped. Tap Maintenance to get information about the minimum and maximum values ever seen by the unit. Of the following variables the minimum and maximum are stored; Control temperature, AC Voltage, Ground fault current, Load current, Relay cycle count, Heater hours in use Time and the Safety Limiter temperatures. Tap Alarm Masks to specify for which variables an alarm will be generated Tab Back brings you to the Configuration screen 11 8.2. Changing the Temperature set point of a DigiTrace NGC-20 control unit Tap on Controller Settings. This will open a next screen showing the actual Controller settings. In order to change any of the values tap on the field holding the actual variable. Controller Settings Tap on the field holding the actual value (35°C). A numeric key pad as shown in Figure 8 4 will pop up. Figure 8 3: Controller Settings – Settings 1 screen Numeric Input Screen (Temperature Setpoint) Enter the desired temperature set point by tapping on the screen and press Enter to complete. - For this example, we will be using a Setpoint of 10ºC. As soon as you tap the enter button you will be brought back to the Controller Settings screen. REMARK: The numeric screen is used at various places throughout this manual everywhere where numeric values are to be changed or entered. Figure 8 4: Temp Set point Numeric Screen 12 8.3. Changing the Switch control mode When returned to the Controller Setting screen of Figure 8 3 on the input field under Switch Control Mode. Switch Control Mode The switch control mode defines in which manner the output switch will be operated in order to maintain the desired temperature. Tap on the desired Switch Control Mode. The NGC-20 supports a number of different control modes as shown on Figure 8 5 The different control modes supported are: On / Off Prop. Ambient Contactor PASC contactor Force On Force OFF Cancel Figure 8 5: Control Mode settings Screen Note that depending on the selected control mode the input fields in the previous and next screens will vary. Cancel will bring you back to the Controller Settings screen (Figure 8 3). Controller Settings 1 (On/Off) On/Off is a simple set point / on-off operation. Set in the Dead band Field the desired dead band. Note that the Dead band will be above set point. Example; a set point of 40°C and dead band of 5 will turn the heating off at 45°C and on at 39°C. Figure 8 6: Controller Settings 1 Controller Settings 1 (Prop. Ambient Contactor) Prop. Ambient Contactor: see PASC below. PASC Contactor takes advantage of the fact that the heat loss from a pipe is proportional to the temperature difference between the pipe and the ambient air. This is true regardless of heater type, insulation type, or pipe size. Once the heat tracing and insulation on a pipe has been designed to balance heat input with heat loss and maintain a particular temperature, the main variable in controlling the pipe temperature becomes the ambient air temperature. The DigiTrace NGC-20 has a control algorithm that uses the measured ambient temperature, desired maintain temperature, minimum ambient temperature assumption used during the design stage, and size of the smallest pipe diameter to calculate how long the heater should be on or off to maintain a near-constant pipe temperature. Figure 8 7: Controller Settings Proportional Band: is the delta between the desired temperature (set point) and the minimum expected ambient temperature. The Prop. Ambient Cycle Time defines the total time cycle (Sum of the ON + OFF cycle) in minutes. The cycle time can be adjusted between minimum 10 and Maximum 255 minutes. The ON/OFF ratio will be calculated based on the measured ambient temperature. 13 The Power Adjustment factor (min 10% to Max 200%) The Power adjustment factor can be used to influence or override the calculated ON /OFF ration values in excess of 100% will lead to more heat, values below 100% will reduce the temperature. Tap Apply to confirm your new settings Figure 8 8: Controller Settings Controller Settings 1 (Force ON / Force OFF) Force On The relay output is permanently switched on (user override), turns on the power to the heater and leaves it on. Force OFF The relay output is permanently switched off (user override), turns off the power to the heater, and leaves it off. Note: Remember to monitor the pipe temperatures for Low / High temperature alarms when selecting Force ON or Force OFF control mode. Tap Apply after the desired control mode has been selected. Figure 8 9: Controller Settings 8.4. Changing DigiTrace NGC-20 device tag name Tap on Settings 2 on the bottom of the controller settings screen (Figure 8-6 till Figure 8-9). Controller Settings 2 This screen allows you to change the NGC-20 device tag. Tags can be 39 characters in length and may contain all numeric characters. Enter the desired Tag for the NGC-20 device by tapping in the actual device tag or elsewhere in that field. (NGC20-1) Console Units: field allows changing the way temperature units are shown on the DigiTrace NGC-20 control units’ display. Temperature can be shown in degrees Fahrenheit or Celsius Load Shed / Temperature Source Communications Timeout Figure 8 10: Controller Settings – Settings 2 screen 14 NGC-20 Tag Enter the desired Tag by using the onscreen keyboard. Tap OK when finished. - For this example, the new tag will be “Pipe #1”. Figure 8 11: Temp Set point Numeric Screen 8.5. Changing the NGC-20 console units. Tap on the field Console units to change the readout of the DigiTrace NGC-20 Control units display. Console Units Tap on the desired console units. Figure 8 12: NGC-20 Console Units screen 15 8.6. Load Shed / Temperature Source Communications time out Load shedding is a control mode that can be programmed and initiated only by an external communicating device, which overrides temperature control and forces the output of the controller OFF until the override is removed. When using an external device (DigiTrace Supervisor Software or a DCS), a load shedding command is continually broadcast over the communications network. When power is applied, the controller delays energising its trace by ‘x’ number of seconds, where ‘x’ is equal to the last digit in its network address. If the load shed function is enabled, the controller will go into load shed mode before it turns its output on. It will then look for the broadcasted load shed command. If the controller receives the load shed command before it times out, it will remain in load shed mode, and the output will remain off as long as the module receives a regular broadcast of the command. If the controller does not receive the load shed command within the timeout period, it will energise its output and resume normal operation. The timing of this broadcast (and the timeout value) can vary between 30 seconds and 10 minutes. A total of 16 different load shedding zones can be defined. Enter confirms the new settings and returns to Figure 8-10 Controller Settings – Settings 2 screen. Figure 8 10 8.7.Setting the Auto Cycle Interval. Tap on Settings 3 on the bottom of the controller settings screen of Figure 8-6 till Figure 8-10 Controller Settings 3 This screen allows you to change the NGC-20 device tag. Tags can be 39 characters in length and may contain all numeric characters. Enter the desired Tag for the NGC-20 device by tapping in the actual device tag or elsewhere in that field. (NGC20-1) Console Units: field allows changing the way temperature units are shown on the DigiTrace NGC-20 control units’ display. Temperature can be shown in degrees Fahrenheit or Celsius Load Shed / Temperature Source Communications Timeout Figure 8 13: Controller settings - Settings 3 screen 16 8.8. Alarm Output Mode The Alarm Output Mode defines the way the alarm relay will act in case of alarms. The different options are: Normal Operation, Toggle, Flash or cancel. Alarm Output Mode Normal operation: Selecting this will result in the alarm relay changing state in case of an alarm. (General alarm) This means the open contact will close and the closed contact of the SPDT alarm relay will open. Toggle: selecting toggle will cause the Alarm relay to change state each time a new alarm comes up. Flash: selecting to Flash the Alarm relay will alternatively open and close the Alarm relay. The interval itself can be user defined in the Alarm Output Toggle Time Cancel will take you back to the previous screen without any of the changes made. Figure 8 14: Alarm Output Mode 8.9.Setting up Load Shedding A total of 16 different load shedding zones can be defined. Load Shedding 1 If a load shedding command is present, the controller will continue to hold the output OFF, until one of two conditions occurs: 1. The zone definition flags of an external communicating device which initiated load shedding clears and the command to terminate load shedding mode is issued. 2. Communications are interrupted between the controller and its communicating device, as in the case of a damaged communications wire. If communication ceases for a specified timeout value, the controller will return to normal operation. The value for this timeout is programmable within the controller (30 seconds to 600 seconds). Figure 8 15:Controller Settings, Load Shedding 1 Note: The controller will return to normal operation if communications between the external communicating device and the controller are disrupted in any way. This will return temperature control to the HTC. Also, the HTC does not perform a periodic autocycle test while operating in load shed mode. 17 Load Shedding 2 Three parameters must be set in the controller to configure it for load shedding operation: 1. The load shedding feature must be enabled. 2. The FAIL SAFE MODE parameter must be enabled or disabled depending on the application requirements. If FAIL SAFE MODE is enabled, then at least one LOW TS ALARM (of a TS used in the TS CONTROL MODE) must be enabled. If the alarm temperature exceeds the CONTROL SETPOINT temperature, fail-safe mode will be disabled. 3. The zone definition flags of an external communicating device that are to be associated with the load shedding action for the controller must be defined. The NGC40 controller will support up to 16 different zones. Figure 8 16: Controller Settings, Load Shedding 2 These parameters can only be configured using an external communicating device connected to the bridge or DigiTrace UIT. Notes: • Fail-safe mode is always disabled if the SWITCHCONTROL MODE is set to either of the two proportional ambient control modes, or the TS CONTROL MODE = EXT INPUT, FAIL OFF/ON • The HTC will turn on its output switch when the control temperature becomes less than the highest LOW TS ALARM temperature if the following conditions are met: – Fail-safe mode is enabled – Load shedding is active – The TS CONTROL MODE uses both TS 1 and TS 2 – Both TS 1 and TS 2 have their LOW TS ALARMS enabled • A FORCE ON override signal has higher priority than a load shedding signal. An INHIBIT signal has higher priority than fail safe mode. Tapping the Back button brings you back to the NGC-20 configuration screen (Figure 8 2: NGC-20 Configuration screen) 18 9. Changing DigiTrace NGC-20 Temperature Settings and Temperature Alarms On the DigiTrace NGC-20 Configuration screen (Figure 9 1) tap on Temperature Settings. Figure 9 1: NGC-20 Configuration screen 9.1. Changing NGC-20 Temperature Sensor Type (Sensor 1). The first screen of the temperature settings screen enables configuration of the sensors. The DigiTrace NGC-20 control unit supports only one type of temperature control input (Pt 100 -3-wire) Temperature Settings Sensor 1 The first field Temperature sensor 1 Type offers only two options either “3 wire 100 Ohm Platinum” or “Not Used” only use Not used when there is no temperature sensor connected to this input. Figure 9 2:Temperature Settings: Sensor 1 screen 9.2.Setting High and Low Temperature Alarm Set Points (Sensor 1) High / Low Alarm Set point Sensor 1 High Alarm Set point Enter in this field the value at which - when exceeded - you want the DigiTrace NGC-20 control unit to generate a high temperature alarm. This High Temperature condition will be monitored by Temperature sensor T1 only. Low Alarm Setpoint Enter in this field the value at which - when exceeded - you want the NGC-20 control unit to generate a Low Temperature Alarm. This Low Temperature condition will be monitored by Temperature sensor T1 only. Figure 9 3:Temperature Settings: Sensor 1 screen 19 9.3. High and Low Alarm Filter (Sensor 1) High and Low Alarm Filter Sensor 1 Alarm filters can be seen as an alarm delay. This means that when the temperature drops below the Low Alarm Set point the DigiTrace NGC-20 Control unit will only trigger an alarm when the value entered in the Low Alarm Filter is timed out. This means that if immediate action of the alarm output is required, the Low Alarm Filter value should be set at 0 sec. Any other value will result in a delay. The operation of the High Alarm Filter is the same. Min 0 to Max 59940 seconds Figure 9 4: Temperature Settings: Sensor 1 screen Repeat Steps from Figure 9 2 for Sensor 2 in order to configure the second temperature input connected to the DigiTrace NGC-20 control unit. Hit Apply when done. The Back button will bring you back to the NGC-20 Configuration screen of Figure 8 2. 20 9.4. Defining which temperature input is used for control The third screen of the Temperature Settings menu defines the Temperature Control Mode. Temperature Settings Use the Temperature Control Screen to define which temperature input is chosen for control. Of all the temperature input options one input needs to be selected for control. Alternatively the control temperature can be based on the average or the lowest temperature of all temperature inputs currently connected and enabled. High Temperature Alarm Set point (range from min -80 to Max +700°C) Enter in this field the value at which - when surpassed - you want the NGC-20 control unit to generate a high temperature alarm. This high temperature condition will be monitored by the temperature sensor or group of temperature sensors selected for control. Figure 9 5: Temperature Settings: Control screen Low Temperature Alarm Set point (range from min -80 to Max +700°C) Enter in this field the value at which - when surpassed - you want the DigiTrace NGC-20 control unit to generate a low temperature alarm. This low temperature condition will be monitored by the temperature sensor or group of temperature sensors selected for control. High and Low Temperature Alarm Filter ( Range from Min 0 to Max 59940 seconds) Alarm filters can be seen as an alarm delay. This means that when the temperature drops below the Low Alarm Set point the DigiTrace NGC-20 Control unit will only trigger an alarm when the value entered in the Low Alarm Filter is timed out. This means that if immediate action of the alarm output is required, that the Low Alarm Filter value should be set at 0 sec. Any other value will result in a delay. The operation of the High Alarm Filter is the same. Hit Apply when done Note that TS 1 and TS 2 are inputs directly connected to the input terminals of the DigiTrace NGC-20 unit, whereas the temperature inputs TS 3 to TS 8 are optional through the use of MONI-RMM2-E temperature multiplexing units and an NGC30-UIT. Please refer to the installation instructions of these products for more details. Lowest: Setting the Temperature Control to Lowest means that the output of the DigiTrace NGC-20 will be controlled based on the lowest temperature measured by any of the temperature sensors connected to the DigiTrace NGC-20 either direct to the Temperature sensor inputs TS 1 or TS 2 or any other sensor connected via MONI-RMM2-E and DigiTrace NGC-UIT. Figure 9 6: Temperature Settings: Control screen Average: Setting the Temperature Control to Average means that the output of the DigiTrace NGC-20 will be controlled based on the average temperature measured by all the Temperature sensors connected to the DigiTrace NGC-20 either direct to the Temperature sensor inputs TS 1 and TS 2 and any other sensor connected via MONI-RMM2-E and DigiTrace NGC-UIT. 21 9.5. Assigning Temperature sensor Tag name The third screen of the Temperature settings enables an easy recognisable Tag name to be assigned to each individual Temperature sensor. Sensor 1 Tag Sensor Tags fields can contain a maximum of 39 characters and may contain numeric and alpha numeric values. Confirm the new sensor tag by tapping on the OK button. When appropriate also edit the Temperature Sensor 2 Tag name Figure 9 7: Temperature Settings: Sensor Tag screen 9.6.Setting up Fail Safe mode and High Limit Cut-Out Set point The Fail safe mode defines the output of the DigiTrace NGC-20 output switch in case of a sensor failure. Tap on the entry field behind Fail mode for more options Sensor 1 Tag The different Fail modes supported by the DigiTrace NGC-20 are: Fail Off: meaning that if the control sensor(s) of this DigiTrace NGC-20 unit should fail the output switch will open. Use this for all circuits where keeping the heating cables permanently powered could cause overheating. Fail On: meaning that if the control sensor(s) of this DigiTrace NGC-20 unit should fail the output switch will be permanently close. This is the preferred option for freeze protection lines and most self regulating heating systems. Figure 9 8: Temperature Settings: Other screen Last %: this Fail Mode is only applicable to the control mode PASC or Proportional Ambient sensing. The Fail Safe mode Last % will control the output in a similar manner as it was doing before the sensor(s) failed. This Alternate ON/OFF switching will be time based only - there will be no relation to temperature. Fixed %: The Fail Mode Fixed % will alternate the control output ON and OFF at a certain interval. Choose the desired fail safe mode from the list by tapping on that field Cancel will bring you back to the previous screen as shown in Figure 9-8. Figure 9 9: Temperature Settings: Temperature Fail Mode screen 22 9.7.Setting the High Limit Cut-Out Set point Tap in the field of the High Limit Cut-Out. This will open the numeric key pad. Enter the new High Limit Cut-Out set point and confirm the new set point by tapping Enter. Temperature Settings The High Limit Cut-Out actually works as a temperature limiter which can be configured to operate as either a latching or nonlatching type. When the Latching button is set to YES than each time an alarm has occurred the Alarm needs to be manually reset. When set to NO than the alarms will be self-healing and will disappear when the alarm condition is no longer present. Confirm your new settings by tapping the Apply button. After that tap on Back to return to Figure 9 1: NGC-20 Configuration screen Figure 9 10: Temperature Settings: Temperature Fail Mode screen 9.8. Configuring the DigiTrace NGC-20 Temperature Sources DigiTrace NGC-20 units can be configured to read from various types of temperature sources / temperature sensors. Use the following screens to configure the DigiTrace NGC-20 control unit. Tap on Temp Source Settings (Figure 9 1: NGC-20 Configuration screen). NGC-20 Configuration This will open a new screen as is shown on Figure 9-12. Figure 9 11: NGC-20 Configuration screen Select the Temperature source you want to configure by tapping on the field. One DigiTrace NGC-20 Control unit can be configured with up to 8 Temperature Sources. 2 of these sources are local (hardwired) to the NGC-20 unit, the remaining inputs can be configured through optional MONIRMM2-E and NGC-UIT modules. Figure 9 12: Temperature Sources 23 Temperature Source Mode: in this first field the installation method of the temperature source needs to be specified. The different options are: Not Used: means that this temperature sensor is not being used Local: means that the temperature source is hard wired to the input terminals of the DigiTrace NGC-20 control unit. This can be either to the terminals labelled with TS 1 or the one labelled as TS 2. Tapping on the field of your choice will bring you back to the previous screen (Figure 9 13). Figure 9 13: Temperature Source mode 1 Remote: this means that this particular temperate Source is imported through the use of optional MONI-RMM2 and NGC-UIT units. Refer to the operating manual of the DigiTrace NGC30 for more details. Tapping on Remote will require that you enter the Gateway ModBus Address, Gateway Port Number and the ModBus address of the MONI-RMM2 device to which the temperature Source is physically connected. Refer to the operating manual of the DigiTrace NGC-30-UIT for more details. Confirm your settings by tapping on Apply. Cancel will bring you back to the previous screen. Figure 9 14: Temperature Source mode 1 9.9.Temperature Sensor Configuration The next screens allow you to configure the use of the temperature sensors. Temperature Configuration The different options are: Not Used: tap on this field in case the temperature sensor is not used. Used for Control: tap on the field Used For Control if you want this temperature input to be used as primary input for control. (drives the control logic of the DigiTrace NGC-20) Figure 9 15: Temperature Configuration High Limit Cut-Out: tap on this field if you want to configure this temperature source as an input for the high temperature cut out function of the DigiTrace NGC-20. The High Limit Cut-Out function prevents the heated surface from overheating. When the High Cut-Out Temperature Setpoint is reached the NGC20 Output will be turned OFF regardless of whether or not the maintain temperature is reached. Use this function for instance to prevent the cable surface temperature exceeding a certain level. High Limit And Control: this combines the function Used for Control and High Limit Cut-Out. This function only applies where multiple sensors are being used to control one circuit, for instance on by-passes. Confirm your settings by tapping on Apply. Back will return to the screen Figure 9-12. 24 10. Electrical Settings To set up the electrical Settings in the Configuration menu, tap on Electrical Settings in Figure 10 1: NGC-20 Configuration screen. Figure 10 1: NGC-20 Configuration screen Electrical Settings (Alarm Set points 1) The Electrical Settings Alarm Set points Screen 1 allows the following variables to be adjusted: High / Low Load Current (Range Min 0.3 – Max 30A) The Load Current alarm will generate an alarm each time the Load Current supplied to the heating cable exceeds the defined band. The load current is the same as the heater current. High and Low Voltage (Range Min 50 – Max 305 VAC) The voltage alarm will generate an alarm each time the power supply voltage supplying the NGC-20 control unit and the heating cables exceeds the defined band. Figure 10 2: Electrical Settings / Alarm Setpoints 1 screen 25 Electrical Settings (Alarm Set points 1) The Electrical Settings Alarm Set points Screen 2 allows the following variables to be adjusted: High GF Current (Range Min 10 – Max 250 mA) This field holds the value at which an early warning will be generated in the form of a High GF alarm. Typical value between 15 and 20 mA. Ground Fault Trip Current (Range Min 10 – Max 250 mA) The GF Trip Current field holds the value at which a ground fault signal will trip the output permanently OFF. Typically GF Trip is set at a slightly higher value than the High GF Current Set point. Typical value is between 20 and 30 mA Figure 10 3: Electrical Settings / Alarm Setpoints 2 screen Ground Fault Trip (Enable / Disable) setting the Ground Fault Trip to Disabled, disables the Ground Fault Trip function. The High GF Alarm would still be generated when the leakage current exceeds the alarm value. Contactor Cycle Count Limit (Range Min 0 – Max 2000000) The Contactor Cycle Count counts the number of switch operations the Control output of the NGC-20 has made since the last reset. Each switch operation will subtract one (1) from the value entered in the counter. When the counter runs empty an alarm will be generated. Heater On Time (Range Min 1 – Max 1000000 hrs) The Heater On Time Alarm is an hour counter which record the actual time the output is closed and the heating cables are used since the last reset. Confirm your new settings by tapping on the Apply button. Click on Back to return to NGC-20 Configuration screen. The Electrical Settings Alarm filters The use of Alarm filters minimizes nuisance alarms by forcing the NGC-20 to verify that the Alarm condition continually exists over the selected period of time before the alarm is being indicated and the alarm relay acts. Alarm filters are provided for: high and low voltage alarms, high and low heater current alarms, high ground fault current alarms, high and low tracing resistance. There is no alarm filter provided for ground fault tip alarms since this sort of alarm requires immediate action. Tapping on the field after the Alarm filter name will open a selection screen. Only filter times as shown on the screen can be selected. Figure 10 4: Electrical Settings / Alarm Filters screen Once the field containing the desired value is tapped then the screen will close and you will be brought back to Figure 10 4. When all filter times are entered than tap Apply to confirm the new settings. Click on Back to return to previous screen Figure 11 1: NGC-20 Configuration Screen Figure 10 5: Electrical Settings / Alarm Filters values 26 Electrical Settings (Other) The Electrical Settings Other allows the following variables to be adjusted: Nominal Tracing Resistance: this field contains the calculated value of the tracing resistance. (Ohmic) Enter the nominal tracing resistance via the numeric pad and confirm the new settings by tapping Enter. High Tracing Deviation (%): if the calculated tracing resistance deviates more than x% an alarm will be generated. Use the numeric keypad to enter the desired value and confirm new settings by tapping Enter. Figure 10 6: Electrical Settings /Other Low Tracing Deviation (%): if the calculated tracing resistance deviates more than x% an alarm will be generated. Use the numeric keypad to enter the desired value and confirm new settings by tapping Enter. Tap Apply to confirm. Tap on Back to go to the NGC-20 Configuration screen. 11. SIL 2 Safety Temperature Limiter Settings The next section shows how to configure the DigiTrace NGC-20 SIL 2 approved Safety Temperature Limiter. Use this limiter to prevent heating applications from overheating. The NGC-20 Safety Temperature Limiter is approved for use in Hazardous area Zone 1, Zone 21, Zone 2 and Zone 22 Tap on Temperature Limiter to open the Limiter configuration screen. Figure 11 1: NGC-20 Configuration Screen 27 Limiter Parameters Firmware: This field shows the actual firmware revision of the Safety Temperature Limiter. Safety Limiter Status: This field shows the actual status of the Safety Temperature Limiter.(Normal operation, Tripped, Latch Temporarily Disabled) Safety Limiter Temperature: Figure 11 2: Limiter Parameters Shows the temperature actually being measured by the Limiter RTD. If this value surpasses the Safety Limiter set point the Safety Limiter Will Trip Open. Once the Safety Limiter has tripped a manual intervention will be required to Reset / Rearm the Safety Temperature Limiter. Resetting the safety Temperature limiter will be only possible after all process conditions have returned to a safe state. (The Limiter Temperature has dropped below the Limiter Temperature Set point. Safety Limiter Temperature Set point: This field holds the Safety Limiter set point. This value should be chosen in accordance with the Temperature Class of the area in which the heating application is installed (T-class T4, T3, T2) or the maximum surface temperature allowed for the heating device assuming this is a lower temperature. Since the Safety Temperature Limiter is a safety device it requires a special procedure to write a new set point to the Temperature limiter. Tap in the Limiter Temperature Set point field to start the write procedure. This will open a new screen Limiter Setpoint Enter the new set point via the numeric pad. Hit Enter to confirm the new Limiter Cut-Out set point. This will open a new screen: Figure 11 4: (writing a new) Safety Limiter Cut-Out. Figure 11 3: Safety Limiter Cut-Out Limiter Set point From this point onward the NGC-CMA device will send the new set point at regular intervals to the DigiTrace NGC-20 hardware (Polling). The polling process will be repeated until the process is cancelled or until the Safety Limiter Set button inside the unit is pressed. Press and hold the button for 3 seconds. The Display of the DigiTrace NGC-20 will flash briefly and show actual and new limiter cut out temperature. The Safety Limiter Temperature Set button is the Black Push button on the left-hand side of the DigiTrace NGC-20 hardware as is shown on Figure 11 5 below. Figure 11 4: (writing a new) Safety Limiter Cut-Out 28 Figure 11 5: location of limiter temperature set button and Limiter Reset button inside the DigiTrace NGC-20 control unit enclosure. Limiter Set point After the new set point has been successfully updated a pop up message as shown in Figure 11 6 will appear confirming the new set point has been successfully updated. Note: that the new set point may differ 1 or 2 degrees from the selected values. This is caused by rounding up or rounding down the set point while it is been converted by the internal electronics. Figure 11 6: Limiter cut out temperature updated successfully. 11.1. Resetting the Safety Temperature Limiter Once the safety Temperature limiter has tripped it will need to be reset in order to restore normal operation. Resetting the Safety Temperature limiter will only be possible after safe operating conditions have returned. See Figure 11 5 in order to locate the RESET button. Reset protection Password Resetting the Safety Temperature Limiter is a safety Function therefore the Reset operation is protected by a password in order to prevent the Safety Temperature limiter form being reset unintentionally. The Safety temperature Limiter can be reset from the DigiTrace NGC-CMA. In order to do so, tap on Reset Tripped Limiter doing this will open a new screen as is shown in Figure 11 7 Use the numeric Key pad to enter the number shown in blue on the top of the screen and tap enter Figure 11 7: Resetting – rearming the Safety temperature Limiter 29 Successfully Reset Tripped Limiter If the number entered was correct than the Safety Limiter will Reset and a pop up screen will appear The pop up screen confirms the Safety temperature Limiter has been successfully reset. Tap OK when done. Figure 11 8: Resetting – rearming the Safety temperature Limiter 11.2.Trip Limiter - Test function for SIL approved Safety Temperature limiter This is the test function of the SIL 2 approved Safety Temperature limiter. Limiter Parameters (Trip Limiter) This is the test function of the SIL 2 approved Safety Temperature limiter. Hit this field in order to Test the safety Temperature limiter at regular intervals at least once every year. Figure 11 9: Limiter cut out temperature updated successfully. When tripped a screen will pop up confirming that the Safety Temperature Limiter has tripped successfully. In order to rearm the safety temperature limiter follow the procedure as explained in paragraph 11.1 Resetting the Safety Temperature Limiter. Tap on Back when done. This will bring you back to the NGC-20 Configuration Screen (Figure 11 1). Figure 11 10: Successfully tripped safety temperature limiter 30 12. Maintenance data The Maintenance data screens provide the possibility to look at Minimum and Maximum values of recorded data. While controlling the DigiTrace NGC-20 control unit measures many variables such as; voltage, current, temperature, ground fault etc.. and for each of these the highest and lowest value ever measured is stored in the DigiTrace NGC-20 controllers memory. The Maintenance screens of the NGC-CMA enable to visualise and to reset this data. Note: Maintenance data is stored until it is manually reset. After resetting the measuring process starts new and stores new Min / Max values until the next reset. Tap Maintenance Data in order to continue. In total there are 6 screens showing maintenance data. The last option in Maintenance Screen 6 Forces the Factory defaults to be loaded in the DigiTrace NGC-20 control Unit. Figure 12 1: NGC-20 Configuration Screen Reset Maintenance (1) Records are kept of: Control Temperature, AC Voltage Figure 12 2: Maintenance data screen 1 Reset Maintenance (2) Sensor 1 Temperature Sensor 2 Temperature, Figure 12 3: Maintenance data screen 2 31 Reset Maintenance (3) Highest Ground Fault Highest Load Current Figure 12 3: Maintenance data screen 2 Reset Maintenance (4) Contactor Cycle count Number of hours in use Figure 12 5: Maintenance data screen 4 Reset Maintenance (5) Heater On Time Power Accumulator Figure 12 6: Maintenance data screen 5 32 Reset Maintenance (6) Safety Limiter Min / Max temperatures Forces the Factory defaults to be loaded in the connected DigiTrace NGC-20 control Unit. Tap on Back when done. This will bring you back to the NGC-20 Configuration Screen (Figure 12 1). Figure 12 7: Maintenance data screen 12.1. Force User Configuration Defaults. Tapping on this field will force the factory defaults to be loaded in the connected DigiTrace NGC-20 control Unit. Reset Maintenance (Forcing Factory Default settings) Tapping on the field Force User Config. Defaults will force the factory defaults to be loaded in the connected DigiTrace NGC-20 control Unit. Figure 12 7: Maintenance data screen Force User Defaults Tap Yes or No Note: that this function will override all customised settings and that they will be lost. After tapping Yes the field will briefly colour green as confirmation that the factory defaults are being loaded. Fig 8.8 Reset Maintenance – Confirm to load factory defaults. 33 13. Alarm Masks The Alarm Mask defines which alarms will be enabled and which Alarms will be disabled. In order to enable an alarm just check the checkbox in on the left side of the screen. Before alarms will be generated they need to be enabled. Figure 13 1: NGC-20 Configuration Screen In total there are 4 screens with Alarm Masks. Alarms preceded by the √ checkmark are enabled. Alarm Masks (1) Tap Yes or No Note: that this function will override all customised settings and that they will be lost. After tapping Yes the field will briefly colour green as confirmation that the factory defaults are being loaded. Figure 13 2: Alarm Masks Screen 1 Alarm Masks (2) Figure 13 3: Alarm Masks Screen 34 Alarm Masks (3) Figure 13 4: Alarm Masks Screen 3 Alarm Masks (4) Tap on the Back button when done. This will bring you back to Figure 13 1: NGC-20 Configuration Screen Figure 13 5: Alarm Masks Screen 4 14. DigiTrace NGC-20 Monitoring screens Besides its function as a programming and configuration interface, the DigiTrace NGC-CMA can also be used to monitor DigiTrace NGC-20 units while they are in operation. When used in monitoring mode all process variables measured by the DigiTrace NGC-20 control units can be visualised on the DigiTrace NGC-CMA. Tap on the monitoring field to continue. This will open the first of a total of 6 available monitoring screens. You can use the Left / Right buttons on the bottom of the screen to cycle through the different screens. The following parameters are permanently monitored: Monitoring Screen 1 Control Temperature: Shows the actual temperature used by the DigiTrace NGC-20 for control. Based on this temperature the output will be switched ON / OFF. Load Current: current uptake of the load(s) connected to the control output of the DigiTrace NGC-20 control Unit. Note: that the load connected to the daisy chain terminals will not be monitored. Voltage: actual power supply voltage Ground Fault Current: instantaneous ground fault current Limiter Status: shows actual limiter status. Limiter Temperature Reporting: this field shows the actual limiter temperature measured by the Limiter RTD. Figure 14 1: NGC-20 Monitoring 35 Monitoring Screen 2 Test Tracing: tapping on the Start / Stop field will open the numeric key pad. Enter here a number x. After tapping on Enter the output of the DigiTrace NGC-20 will close, turning the connecter heater on for x amount of seconds. Voltage: this shows the actual voltage and the highest / lowest voltage that the unit has recorded since the last reset. For resetting these values go to the Maintenance screens as explained elsewhere in this manual. Load Current: this field shows the actual load current and the highest current the unit has ever seen since the last reset. To reset these values go to the Maintenance screens. Figure 14 2: NGC-20 Monitoring Tracing Resistance: this field shows the actual calculated tracing resistance. (Calculated by dividing the measured supply voltage by the measured current) a value of 8000 Ohms means there is no load connected. Monitoring Screen 4 Control Temperature: This is the temperature used by the DigiTrace NGC-20 controller to steer the output switch. This can be the either the temperate measured by Temperature sensor 1, temperature sensor 2, the average or the lowest of both readings. Max / Min are showing the highest and lowest reading recorded since the last reset. The value last on was the control temperature of the DigiTrace NGC-20 when the output was switched ON the last time. Sensor 1 Temperature: This field shows the actual temperature measured by temperature sensor 1. Max / Min are showing the highest and lowest reading recorded since the last reset. Figure 14 4: NGC-20 Monitoring Sensor 2 temperature: This field shows the actual temperature measured by temperature sensor 2. Max / Min are showing the highest and lowest reading recorded since the last reset. Monitoring Screen 5 Source Temperatures: This field shows all actual tensor temperatures presently connected. Temperature sources 3 to 8 require the use of an optional NGC-UIT and MONI-RMM2 device. Contactor Cycle Count: This filed gives the actual number of switch operations the output switch has performed since the last reset. Figure 14 5: NGC-20 Monitoring 36 Monitoring Screen 6 Limiter Status This field shows the actual state of the Safety temperature limiter of DigiTrace NGC-20-CL-E units. Limiter Temperature These fields are showing temperature information measured by the limiter temperature sensor RTD 3. Reporting: actual measured temperature Max: maximum temperature ever measured since last reset. Min : minimum temperature ever measured since last reset Number of hours: Figure 14 6: NGC-20 Monitoring Since Reset: This feature indicates the total hours of use of the controller since the last reset (power cycle). The number of hours since last reset hours accumulator can only be reset by cycling the controller’s power. Note: The Number of hours since last reset will roll over to zero when the upper limit of 65,535 hours has been exceeded. In Use: The purpose of this feature is to indicate the total hours of use of the controller since its initial operation. Note: The Hours in use accumulator value will roll over to zero when the upper limit of the accumulator has been exceeded. This limit is 4,294,967,295 hours. Heater Time Total time the heater has been energised since it was last reset (power cycle). Tap on the Back button when done. This will bring you back to the NGC-20 Main Screen. Figure 14 7: NGC-20 Main screen 37 15. DigiTrace NGC-20 Alarm screens. Tap on the View Alarms screen in order to investigate and eventually reset actual alarms. In the Active Alarms field all alarms are shown. In the example below only one Limiter Trip Alarm is present. NGC-20 Alarms In order to reset an alarm select the alarm by tapping on that specific alarm in the Active alarms window and then hit Reset Selected Alarm. The Reset All Alarms button resets all actual alarms in a single operation. Note that Alarms can only be reset after the event causing the alarm has been resolved or the measured value has changed such that the actual reading is within the alarm boundaries Figure 15 1: NGC-20 Alarms Screen Example: a low temperature alarm can only be reset when the temperature has increased to a value above the low temperature alarm set point as shown in Figure 9-5: Temperature Settings Control screen. Figure 9 5: Temperature Settings: Control screenAfter the alarms are reset than hit the Back button to go back to the main screen Figure 15 2: NGC-20 Main screen 38 16. Firmware / Settings (communication settings) Tap on the Firmware/Settings button as presented on Figure 8 2. Firmware/Settings Update Firmware: enables new revisions of firmware to be installed in the DigiTrace NGC-20 controller via the NGC-CMA Com Parameters: allows configuring the ModBus and serial interface settings. NGC-20 Display Test: forces the DigiTrace NGC-20 unit to execute a display test. Figure 16 1: Firmware and general settings 16.1. Upgrading firmware of the DigiTrace NGC-20 control unit The Firmware / Settings function allows you to install new revisions of DigiTrace NGC-20 firmware in the controller via the NGC-CMA and the wireless Bluetooth interface. This procedure can be performed on units while they are in operation. During the firmware upload process the DigiTrace NGC-20 unit will be out of service for about 2 minutes. For safety reasons the output of the controller will be off during the entire upgrade process. In the screen of Figure 16 1 tap on the Update Firmware button to initiate the process. This will open the Firmware update screen. Firmware Update Update Firmware: enables new revisions of firmware to be installed in the DigiTrace NGC-20 controller via the NGC-CMA Com Parameters: allows configuring the ModBus and serial interface settings. NGC-20 Display Test: forces the DigiTrace NGC-20 unit to execute a display test. Figure 16 2: Installing new Firmware Select Firmware File Tapping on this field will open a new screen. On this screen all available versions of DigiTrace-NGC-20 firmware currently present on the NGC-CMA firmware folder will be listed. Note: the DigiTrace firmware files are binary files. New configuration files need to be placed in the folder Application Data\ DigiTrace\NGC CMA\NGC20 Firmware. This folder will be automatically installed while installing the application. Select the new file by tapping on it and hit OK. Warning: don’t try to upload files other than original files provided by Pentair Thermal Management. Any attempt to try to upload false or incomplete files may damage the DigiTrace NGC-20 Control unit. Figure 16 3: Selecting Firmware 39 Firmware Update After the new file is selected hit Upload to start the upload process. The old Firmware version as well the as the new Firmware are shown on the DigiTrace NGC-CMA screen The installation procedure will remove the existing version and install new software in the DigiTrace NGC-20 control unit. The installation progress can be followed on the Progress bar and on the installation progress timer. Once the upload process is complete the DigiTrace NGC-20 control unit will briefly show the Firmware version number on the display and return to normal operation. Figure 16 4: Uploading Firmware Firmware Update (Complete) If the installation was successful a pop up window will appear confirming the firmware update was successful. Confirm this pop up by tapping OK. This will close the Firmware upload process and return to the screen of Figure 16 4.Tap Back to close this window. Doing this will bring you back to Figure 16 1. Figure 16 5: Firmware update complete 16.2. Changing the serial interface settings of the DigiTrace NGC-20 control unit Firmware Update (Complete) Tap on Com Parameters to open the Communication Parameters screen. Figure 16 6: Firmware / Settings screen 40 Com Parameters The Com. Parameters screen allows users to configure the communication settings of DigiTrace NGC-20 control units. Modbus Address: the Modbus address needs to be unique on the DigiTrace NGC-20 network. The Modbus address can have any value from 1 to 247. 247 is the maximum number of DigiTrace NGC-20 units which can be connected to one RS-485 serial communications port. Baud Rate: This field allows you to select the baud rate of the external communication port. Selections: 2400, 4800, 9600, 19200, 38400, 57600. Default : 9600 Transmit Delay Entry Window (TX Delay) Figure 16 7: Communication Parameters This field sets the time the NGC-UIT will wait after it receives a message before it replies. Range: 0–1000 milliseconds, Default : 20 ms Other defaults are: Frame Type = RTU, 8 Data bits, No Parity and 2 stop bits. These settings may have to be adjusted in order to set up communication between DigiTrace NGC-20 control units and non Pentair Thermal Management Host systems like PLC´s Tap on the Back button in order to leave this screen and to go back to figure 12.1 16.3. DigiTrace NGC-20 Display Test. The field NGC-20 Display Test will initiate a display test of the DigiTrace NGC-20 Control unit’s display. Tap on the Back button when done. 16.4. DigiTrace NGC-20 Mode settings The field NGC-20 Mode will offer the option to switch the mode of the NGC-20 controller. If the controller is used in combination with an UIT select “Mixed Mode” In all other cases select “Standard Mode” 41 17. Using the DigiTrace NGC-CMA in Mixed Mode When operated in mixed mode the feature set of the NGC-CMA is adapted to the level of the NGC-UIT. This means that a number of features as shown in the first part of the operation manual will be hidden in mixed mode. The following pages will focus on the features supported in mixed mode only. DigiTrace NGC-20 units will automatically detect in which mode they are operated (stand alone, in a network with DigiTrace Supervisor or in a mixed mode system together with an NGC-UIT) the general operation and use of the NGC-CMA remains unchanged. 17.1. Initial Setup of the unit in Mixed Mode After the program is started the start up screen will be visualised. The start up screen allows users to configure the unit to their personal needs and process requirements. DigiTrace Configuration Utility Main screen The Tab “Configure” initiates the Bluetooth device discovery process. The tab “Settings” allows setting the Language, Temperature units, and About shows the software revision. The tab “Exit” closes the application. Begin the initial configuration by tapping on Settings on the start up screen. This will open the Setup screen as shown in Figure 17 1. Figure 17 1: Startup screen 18. Changing main settings of the user interface screens Setup About: shows the software version of the DigiTrace Configuration Utility Software. Languages: Allows selecting a convenient language of the user interface software. Temperature Units: Sets the temperature units of the DigiTrace NGC-CMA. Supported are: degrees Celcius and degrees Fahrenheit. The default is Celsius. Back: Return to previous screen. Figure 18 1: Setup Screen 42 18.1.Languages Setup Tap on Languages in Figure 18 1 to select your language. Supported languages are: English (default) French (Français) German (Deutsch) After tapping on the desired language, the Application will close and will need to be restarted manually. Remark: selecting a different language will cause the unit to reboot. Allow enough time for the unit to reboot and then revert back to step 1 in order to restart the application. The application will now run in the selected language. Figure 18 2: Language Selection Screen 18.2.Temperature units Temperature Units From the Setup Screen as shown in Fig 1.3 tap on Temperature Units to change the way in which temperatures will be displayed on the NGC-CMA screens. The factory default setting is °C. Tap on the desired units of measure degrees Celsius or degrees Fahrenheit. The screen will return automatically when the new unit has been selected. Tap on Cancel to return to the Startup Screen Figure 18 3: Temperature Units Screen 19. Establishing connection between the DigiTrace NGC-CMA and DigiTrace NGC-20 control units The following pages will explain how to configure DigiTrace NGC-20 units from the NGC-CMA handheld programmer. DigiTrace Configuration Utility Main Screen Tap on Configure (Figure 19 1).The display will now show the Bluetooth discovery screen and the device discovery process will be started. Figure 19 1: Main Screen 43 Bluetooth Discovery Process In background the device will scan for all DigiTrace NGC20 controllers which are within range of the Bluetooth communications. Ensure that all NGC-20 units are powered up. Figure 19 2: Bluetooth Discovery screen – Searching for devices Bluetooth Discovery Process (device inventory) When searching is complete, devices in range will be listed on the screen. Example: For this example, the only device that is found is NGC20-1. If more than one DigiTrace NGC-20 control unit is in range all units will be listed on the screen as shown in Figure 19 4 Figure 19 3: Bluetooth Discovery screen – one device found Bluetooth Discovery Process (selecting device) Select the device to be connected by tapping on the device name. When a device is selected the background colour will become black. (See NGC-20-1). Tap on Continue to go on to the Main Screen. If devices are not showing up move closer to the DigiTrace NGC20 unit and repeat the scanning process by tapping on Scan for Devices once more. This will re-launch the device discovery process. Figure 19 4: Bluetooth Discovery screen – finding multiple devices. 44 20. Configuring DigiTrace NGC-20 control units In order to configure the connected DigiTrace NGC-20 control unit tap on Continue DigiTrace NGC-20 Main Configuration Screen The NGC-20 main screen supports different options as shown in Figure 20 1. Configure: to configure the selected unit. Monitor: to monitor all process variables as currently active on this unit. All measured sensor temperatures, control temperature, load current, supply voltage, ground fault current and the status of the safety limiter. View Alarms: shows an overview of all active alarms and to reset alarms. Firmware / Settings: to install a new version of firmware in the selected controller. Figure 20 1: NGC-20 Main screen Back to go back to the Bluetooth discovery screen. From here a different DigiTrace NGC-20 unit can be selected for configuration. 20.1. Changing the NGC-20 controller settings Tap on Configure in the NGC-20 Main screen. As a result of this the NGC-20 Configuration screen will be shown. The NGC-20 configuration screen supports different options. DigiTrace NGC-20 Configuration Screen Use Controller Settings to alter; set points, control mode, dead band, the device tag and load shedding. Use Temperature Settings to alter High and Low Temperature alarm values, the temperature alarm filter, fail safe mode and to enable and preset the high limit Cut-Out Use Electrical Settings in order to set the high and low load current and voltage alarm values. The second screen offers the possibility to load the relay cycles time counter and to adjust the ground fault alarm warning and trip level. Use Safety Limiter; use this entry in order to control the Safety temperature limiter setpoint, trip and reset the Safety temperature limiter after it has tripped. Figure 20 2: NGC-20 Configuration screen Use Maintenance to get information about the minimum and maximum values recorded by the unit. Of the following variables the minimum and maximum are stored; control temperature, AC Voltage, ground fault current, load current, relay cycle count, heater hours in use time and the safety limiter temperatures. Back returns to the Main Screen (Figure 20 1). 45 20.2. Changing the Temperature set point of a DigiTrace NGC-20 control unit Tap on Controller Settings. This will open a next screen showing the actual Controller settings. In order to change any of the values tap on the field holding the actual variable. Controller Settings. Tap on the field holding the actual value (10°C) A numeric key pad as shown in Figure 20 4 will pop up. Figure 20 3: Controller Settings – Settings 1 screen Numeric Input Screen (Temperature Set point) Enter the desired temperature set point by tapping on the screen and press Enter to complete. - This example shows a Temp Set point of 10ºC. By pressing enter the screen will return to the Controller Settings screen (Figure 20 3). REMARK: The numeric screen is used at various places throughout this manual everywhere where numeric values are to be changed or entered. Figure 20 4: Temp Set point Numeric Screen 20.3. Changing the Switch control mode To change the control mode select the Mode on the Controller settings page (Figure 21 2). Switch Control Mode The switch control mode defines how the output switch will be operated in order to maintain the desired temperature. Tap on the desired Switch Control Mode. The DigiTrace NGC-20 supports a number of different control modes as shown in Figure 20 5. The different control modes supported are: ON/OFF PASC Always ON Always Off Cancel Note that depending on the selected control mode the input fields in the previous and next screens will vary. Figure 20 5: Control Mode settings Screen 46 Cancel will return to the Controller Settings screen. Controller Settings 1 (Deadband) ON/OFF is a simple set point / dead band operation. Set in the Dead band Field the desired dead band. Note that the Dead band will be above set point. Example: a set point of 40°C and dead band of 5 will turn the heating off at 45 °C and on at 39°C Figure 20 6: Controller Settings 1 Controller Settings 1 (PASC) PASC takes advantage of the fact that the heat loss from a pipe is proportional to the temperature difference between the pipe and the ambient air. This is true regardless of heater type, insulation type, or pipe size. Once the heat tracing and insulation on a pipe has been designed to balance heat input with heat loss and maintain a particular temperature, the main variable in controlling the pipe temperature becomes the ambient air temperature. The DigiTrace NGC-20 has a control algorithm that uses the measured ambient temperature, desired maintain temperature, minimum ambient temperature assumption used during the design stage, and size of the smallest pipe diameter to calculate how long the heater should be on or off to maintain a near-constant pipe temperature. Figure 20 7: Controller Settings 1 PASC Min Ambient Temp: this is the minimum expected ambient temperature which is expected for this area. This information is part of the design information and is country and region specific. PASC Min Pip Size: this is the diameter of the smallest diameter of any pipe controlled by the heating circuit / DigiTrace NGC-20 control unit. The Power Adjust (min 10% to Max 200%) The Power adjustment factor can be used to influence or override the calculated ON /OFF ratio. Values in excess of 100% will lead to more heat, values below 100% will reduce the temperature. Apply confirms new settings. Controller Settings 1 (Force ON / Force OFF) Always On The relay output is permanently switched on (user override), turns on the power to the heater and leaves it on. Always OFF The relay output is permanently switched off (user override), turns off the power to the heater, and leaves it off. Note: consider to monitor the pipe temperatures for Low / High temperature alarms when selecting Force ON or Force OFF control mode. Tap Apply after the desired control mode has been selected. Figure 20 8: Controller Settings 1 47 20.4. Changing DigiTrace NGC-20 device tag name Controller Settings 2 DigiTrace NGC-20 Tag: This screen allows you to change the DigiTrace NGC-20 device tag. Tags can be 39 characters in length and may contain all numeric characters. Enter the desired Tag for the DigiTrace NGC-20 device by tapping in the actual device tag or elsewhere in that field. (NGC-20-1) Figure 20 9: Controller Settings – Settings 2 screen. NGC-20 Tag Enter the desired Tag by using the onscreen keyboard. Tap OK when finished. - For this example, the new tag will be “Pipe #1”. Figure 20 10: NGC-20 Tag 20.5. Load Shedding Load shedding is a control mode that can be programmed and initiated only by an external communicating device, which overrides temperature control and forces the output of the controller OFF until the override is removed. When using an external device (DigiTrace Supervisor Software or a DCS), a load shedding command is continually broadcast over the communications network. When power is applied, the controller delays energising its trace by ‘x’ number of seconds, where ‘x’ is equal to the last digit in its network address. If the load shed function is enabled, the controller will go into load shed mode before it turns its output on. It will then look for the broadcasted load shed command. If the controller receives the load shed command before it times out, it will remain in load shed mode, and the output will remain off as long as the module receives a regular broadcast of the command. If the controller does not receive the load shed command within the timeout period, it will energise its output and resume normal operation. The timing of this broadcast (and the timeout value) can vary between 30 seconds and 10 minutes. A total of 16 different Load shedding zones can be defined. 48 Load Shedding 1 If a load shedding command is present, the controller will continue to hold the output OFF, until one of two conditions occurs: 1. The zone definition flags of an external communicating device which initiated load shedding clears and the command to terminate load shedding mode is issued. 2. Communications are interrupted between the controller and its communicating device, as in the case of a damaged communications wire. If communication ceases for a specified timeout value, the controller will return to normal operation. The value for this timeout is programmable within the controller (30 seconds to 600 seconds). Figure 20 11: Controller Settings, Load Shedding 1 Note: The controller will return to normal operation if communications between the external communicating device and the controller are disrupted in any way. This will return temperature control to the HTC. Also, the HTC does not perform a periodic autocycle test while operating in load shed mode. Load Shedding 2 Three parameters must be set in the controller to configure it for load shedding operation: 1. The load shedding feature must be enabled. 2. The FAIL SAFE MODE parameter must be enabled or disabled depending on the application requirements. If FAIL SAFE MODE is enabled, then at least one LOW TS ALARM (of a TS used in the TS CONTROL MODE) must be enabled. If the alarm temperature exceeds the CONTROL SETPOINT temperature, fail-safe mode will be disabled. 3. The zone definition flags of an external communicating device that are to be associated with the load shedding action for the controller must be defined. The NGC40 controller will support up to 16 different zones. Figure 20 12: Controller Settings, Load Shedding 2 These parameters can only be configured using an external communicating device connected to the bridge or DigiTrace UIT. Notes: • Fail-safe mode is always disabled if the SWITCH CONTROL MODE is set to either of the two proportional ambient control modes, or the TS CONTROL MODE = EXT INPUT, FAIL OFF/ON • The HTC will turn on its output switch when the control temperature becomes less than the highest LOW TS ALARM temperature if the following conditions are met: – Fail-safe mode is enabled – Load shedding is active – The TS CONTROL MODE uses both TS 1 and TS 2 – Both TS 1 and TS 2 have their LOW TS ALARMS enabled • A FORCE ON override signal has higher priority than a load shedding signal. An INHIBIT signal has higher priority than fail safe mode. Back button returns to the NGC-20 configuration screen. 49 21. DigiTrace NGC-20 Temperature settings and temperature alarms On the DigiTrace NGC-20 Configuration screen (Figure 21 1) tap on Temperature Settings. Figure 21 1: NGC-20 Configuration screen 21.1. Changing NGC-20 Temperature sensor type (Sensor 1) The first screen of the temperature settings screen enables configuration of the sensors. The DigiTrace NGC-20 control unit supports only one type of temperature control input (Pt 100 -3-wire) Temperature Settings 1 High Temp Alarm (Min -80 to Max +700°C) Enter in this field the value at which - when exceeded - you want the DigiTrace NGC-20 control unit to generate a high temperature alarm. This High Temperature condition will be monitored by Temperature sensor T1 only. Low Temp Alarm (Min -80 to Max +700°C) Enter in this field the value at which - when exceeded - you want the NGC-20 control unit to generate a Low Temperature Alarm. This Low Temperature condition will be monitored by Temperature sensor T1 only. Temperature Alarm Filter (Min 0 to Max 59940 seconds) Fig 17.1 Temperature Setup: screen 1 Can be seen as an alarm delay. This means that when the temperature drops below the Low Alarm Set point the DigiTrace NGC-20 Control unit will only trigger an alarm when the value entered in the Low Alarm Filter is timed out. This means that if immediate action of the alarm output is required, that the Low Alarm Filter value should be set at 0 sec. Any other value will result in a delay. The operation of the High Alarm Filter is the same. Tap on Apply to confirm your new settings. Tap Back when ready. 50 21.2. Fail Safe mode and High Limit Cut-Out Set point The Fail safe mode defines the output of the DigiTrace NGC-20 output switch in case of a sensor failure. Tap on the entry field behind Fail Safe mode for more options. Temperature Settings 2 Fail Safe: In order to choose a Fail Safe mode tap on the field currently showing Power Off. The different Fail modes supported by the DigiTrace NGC-20 are: Power Off or Power On Figure 21 2: Temperature Setup: screen 2 Fail Safe Power Off: meaning that should the control sensor or control sensors of this DigiTrace NGC-20 unit fail the output switch will open. Use this for all circuits where keeping the heating cables permanently powered could cause overheating. Power On: meaning that should the control sensor or control sensors of this DigiTrace NGC-20 unit fail the output switch will be permanently close. This is the preferred option for freeze protection lines and most self-regulating heating systems. Choose the desired fail safe mode from the list by tapping on that field Cancel will bring you back to the previous screen as shown in Figure 21 2. Figure 21 3: Temperature Setup: Fail Safe Mode Temperature Setup Screen 2 The High Limit Cut-Out actually works as a temperature limiter which can be configured to operate as either a latching or nonlatching type. When the Latching button is set to Enabled, each time an alarm has occurred the Alarm needs to be manually reset. When set to Disabled the alarms will be self-healing and will disappear when the alarm condition is no longer present. Confirm your new settings by tapping the Apply button. Tap Back when ready, doing this will bring you back to screen Figure 21 1 Figure 21 4: Temperature Setup: screen 2 51 22. Electrical Settings To set up electrical settings click on Electrical Settings in the NGC-20 Configuration screen (Figure 21-1). Figure 22 1: NGC-20 Configuration screen Electrical Settings (Alarm Set points screen 2) The Electrical Settings Alarm Set points Screen 1 allows the following variables to be adjusted: High Load Current (Range Min 0.3 – Max 30A) The Load Current alarm will generate an alarm each time the Load Current supplied to the heating cable exceeds the defined band. The load current is the same as the heater current. Low Load Current (Range Min 0.3 – Max 30A) The Load Current alarm will generate an alarm each time the Load Current supplied to the heating cable exceeds the defined band. The load current is the same as the heater current. High and Low Voltage (Range Min 50 – Max 305 V AC) Figure 22 2: Electrical Settings screen 1 The voltage alarm will generate an alarm each time the power supply voltage supplying the NGC-20 control unit and the heating cables exceeds the defined band. Heater Time Alarm (Range Min 1 – Max 1.000.000 hrs) The Heater Time Alarm is an hour counter which record the actual time the output is closed and the heating cables are used since the last reset. Confirm the new settings by tapping on the Apply button. Back will return to Figure 22 1. 52 Electrical Settings (Alarm Set points screen 2) The Electrical Settings Alarm Set points Screen 2 allows the following variables to be adjusted: Relay Cycle Alarm: (Range Min 0 – Max 2.000.000) The Relay Cycle Count counts the number of switch operations the Control output of the NGC-20 has made since the last reset. Each switch operation will subtract one (1) from the value entered in the counter. When the counter runs empty an alarm will be generated. Ground Fault Alarm: (Range Min 10 – Max 250 mA) This field holds the value at which an early warning will be generated in the form of a High GF alarm. Typical value between 15 and 20 mA. Figure 22 3: Electrical Settings screen 2 Ground Fault Trip: (Range Min 10 – Max 250 mA) The Ground Fault Trip Current field holds the value at which a ground fault signal will trip the output permanently OFF. Typically GF Trip is set at a slightly higher value than the Ground Fault Alarm setpoint. Typical value is between 20 and 30 mA Ground Fault Trip: Enable / Disable. This selection activates or deactivates the Ground fault Trip Function. Selecting Disable here will deactivate the ground Fault Trip function so that in case of ground fault current only an alarm will appear. Confirm the new settings by tapping on the Apply button. Back will return to Figure 22 1. 53 23. SIL 2 Safety Temperature Limiter Settings. This paragraph shows you how to configure the DigiTrace NGC-20 SIL 2 approved Safety Temperature Limiter. Electrical Settings (Alarm Set points screen 2) Tap on Safety Limiter to open the Limiter configuration screen. Figure 23 1: NGC-20 Configuration screen Limiter Parameters Firmware: This field shows the actual firmware revision of the Safety Temperature Limiter. Safety Limiter Status: This field shows the actual status of the Safety Temperature Limiter.(Normal operation, Tripped, Latch Temporarily Disabled) Safety Limiter Temperature: Figure 23 2: Safety Limiter Parameters Shows the temperature actually being measured by the Limiter RTD. If this value exceeds the Safety Limiter set point the Safety Limiter will trip open. Once the Safety Limiter has tripped a manual intervention will be required to Reset / Rearm the Safety Temperature Limiter. Resetting the safety Temperature limiter will only be possible once all process conditions have returned to a safe state. (The Limiter Temperature has dropped below the Limiter Temperature Set point. Safety Limiter Temperature Set point: This field holds the Safety Limiter set point. This value should be chosen in accordance with the Temperature Class of the area in which the heating application is installed (T-class T4, T3, T2) or the maximum surface temperature allowed for the heating device assuming this is a lower temperature. Since the Safety Temperature Limiter is a safety device it requires a special procedure to write a new set point to the Temperature limiter. Tap in the Safety Limiter Setpoint field to start the write procedure. This will open a new screen. 54 23.1.Safety Limiter Setpoint Safety limiter setpoint Enter the new set point by tapping on the numeric pad. Hit Enter to confirm the new Limiter Cut-Out set point. This will open a new screen called Safety Limiter Cut-Out. Figure 23 3: Safety Limiter Cut-Out Limiter Set point From this point onward the NGC-CMA device will be sending the new set point at regular intervals to the DigiTrace NGC-20 hardware (Polling). The polling process will be repeated until the process is cancelled or until the Safety Limiter Set button inside the unit is pressed. Press and hold the button for 3 seconds. The Display of the DigiTrace NGC-20 will flash briefly and show actual and new safety limiter setpoint. The Safety Limiter Temperature Set button is the Black Push button on the left-hand side of the DigiTrace NGC-20 hardware as is shown in Figure 23 5 . Figure 23 4: writing a new Safety LimiterSetpoint Figure 23 5: Location of limiter temperature set button and Limiter Reset button inside the DigiTrace NGC-20 control unit enclosure. 55 Safety limiter setpoint After the new set point has been successfully updated a pop up message as shown in Figure 23 6 confirming the new set point has been successfully updated. Note: that the new set point may differ 1 or 2 degrees from the selected values. This is caused by rounding up or rounding down the set point while it is been converted by the internal electronics. Figure 23 6: Limiter cut out temperature updated successfully. 23.2. Resetting Safety Temperature Limiter Once the safety Temperature limiter has tripped it will need to be reset in order to restore normal operation. Resetting the Safety Temperature limiter will only be possible after safe operating conditions have returned. Look at Fig. 7.4 in order to find see where the RESET button is located inside the enclosure. Reset protection Password Resetting the safety temperature limiter is a safety Function therefore the Reset operation is protected by a password in order to prevent the safety temperature limiter form being reset unintentionally. The safety temperature limiter can be reset from the DigiTrace NGC-CMA. In order to do so, tap on Reset Tripped Limiter. This will open a new screen as is shown in Figure 23 7. Use the numeric Key pad to enter the number shown in blue on the top of the screen and tap enter. Figure 23 7: Resetting – rearming the Safety temperature Limiter Successfully Reset Tripped Limiter If the number entered was correct than the safety temperature limiter will reset and a pop up screen will appear The pop up screen confirms the safety temperature limiter has been successfully reset. Tap OK when done Figure 23 8: Resetting – rearming the safety temperature limiter 56 23.3.Trip Limiter The trip safety limiter is a test function of the SIL 2 approved safety temperature limiter. Limiter Parameters (Trip Limiter) This is the test function of the SIL 2 approved safety temperature limiter. Hit this field in order to Test the safety temperature limiter at regular intervals at least once every year. Figure 23 9: Limiter cut out temperature updated successfully. When tripped a screen will pop up confirming that the safety temperature limiter has tripped successfully. In order to rearm the Safety temperature Limiter follow the procedure as explained in paragraph 23.2. Back will return to the NGC-20 Configuration Screen. 24. Maintenance data The Maintenance data screens provide the possibility to look at Minimum and Maximum values of recorded data. The DigiTrace NGC20 control unit measures many variables such as; voltage, current, temperature, ground fault etc. and for each of these the highest and lowest value ever measured is stored in the DigiTrace NGC-20 memory. The Maintenance screens of the NGC-CMA enable to visualise and to reset this data. Note: Maintenance data is stored until it will be manually reset. After resetting the measuring process will start again and stores new Min / Max values until the next reset. Tap on Maintenance to go to the Maintenance menu. Figure 24 1: NGC-20 Configuration Screen In total there are 4 screens showing NGC-20 control units maintenance data. 57 Reset Maintenance (1) Records are kept of: Control Temperature, AC Voltage Tap on the blue field Reset in order to reset the actual values. This will bring up a screen as shown in Figure 24 3. Figure 24 2: Maintenance data screen 1 Resetting values Confirm that you want to clear actual maintenance data. Tap No to Abort or Tap Yes to clear the actual values. A similar screen will be used for other variables as well. Figure 24 3: Reset Maintenance data Reset Maintenance (2) Highest Instantaneous Ground Fault Highest instantaneous Load Current Figure 24 4: Maintenance data screen 2 58 Reset Maintenance (3) Contactor Cycle count Heater Time Figure 24 5: Maintenance data screen 3 Reset Maintenance (4) Safety Limiter Min / Max temperatures Tap on Back when done. Figure 24 6: Maintenance data screen 4 59 25. DigiTrace NGC-20 Monitoring screens Besides its function as a programming and configuration interface the DigiTrace NGC-CMA can also be used to monitor DigiTrace NGC-20 units while they are in operation. When used in monitoring mode all process variables measured by the NGC-20 control units can be visualised on the NGC-CMA. Tap on the monitoring field to continue. This will open the first of a total of 6 available monitoring screens. Use the Left / Right buttons on the bottom of the screen to cycle through the different screens. The following parameters are permanently monitored: Monitoring Screen 1 Control Temperature: Shows the actual temperature used by the DigiTrace NGC-20 for control. Based on this temperature the output will be switched ON / OFF. Load Current: current uptake of the load(s) connected to the control output of the DigiTrace NGC-20 control Unit. Note: that the load connected to the daisy chain terminals will not be monitored. Voltage: actual power supply voltage Ground Fault Current: instantaneous ground fault current Limiter Status: shows actual limiter status. Limiter Temperature Reporting: this field shows the actual limiter temperature measured by the Limiter RTD. Figure 25 1: NGC-20 Monitoring Screen Monitoring Screen 2 Source Temperatures: This field shows the Temperatures measured by all temperatures presently connected. Temperature sources 3 and 4 require the use of an optional NGC-UIT and MONI-RMM2 device. Tap on Back to return to the NGC-20 Configuration Screen. Figure 25 2: NGC-20 Monitoring Screen 2 26. DigiTrace NGC-20 Alarm screens Tap on the View Alarms screen in order to investigate and eventually reset actual alarms. In the Active Alarms field all alarms are shown. NGC-20 Alarms In order to reset an alarm select the alarm by tapping on that specific alarm in the Active alarms window and then hit Reset Selected Alarm. The Reset All Alarms button resets all actual alarms in a single operation. Note that Alarms can only be reset after the event causing the alarm has been resolved or the measured value has changed such that the actual reading is within the alarm boundaries. Tap on Back when done and to return to the NGC-20 Configuration Screen. Figure 26 1: NGC-20 Alarms Screen 60 Example: a low temperature alarm can only be reset when the temperature has increased to a value above the low temperature alarm set point. Figure 26 2: NGC-20 Main screen 27. Upgrading firmware of the DigiTrace NGC-20 control unit Remark: the Firmware / Settings menu items are identical with the “Standard Mode” menu items. Therefore most items will not be repeated. See for more details Chapter 16. The Update Firmware function allows installing new revisions of DigiTrace NGC-20 firmware in the controller via the DigiTrace NGC-CMA and the wireless Bluetooth interface. This procedure can be performed on units while they are in operation. During the firmware upload process the DigiTrace NGC-20 unit will be out of service for about 2 minutes. For safety reasons the output of the controller will be off during the entire upgrade process. Click on Firmware/Settings in the main screen. Select Update Firmware button to initiate the process. This will open the Firmware update screen. Firmware Update Current Firmware shows the revision number of the Firmware currently installed. Firmware File: tap on the blue field showing the three dots in order to brows to the location where the new firmware file is installed. Firmware files are binary files and are having the extension “.bin” Figure 27 1: Installing new Firmware 61 Select Firmware File Tapping on this field will open a new screen. On this screen all available versions of DigiTrace-NGC-20 firmware currently present on the NGC-CMA firmware folder will be listed. Note: the DigiTrace firmware files are binary files. New configuration files need to be placed in the folder Application Data\DigiTrace\NGC CMA\NGC20 Firmware. This folder will be automatically installed while installing the application. Select the new file by tapping on it and hit OK. Warning: don’t try to upload files other than original files provided by Pentair Thermal Management. Any attempt to try to upload false or incomplete files may damage the DigiTrace NGC-20 Control unit Figure 27 2:Selection new Firmware Firmware Update After the new file is selected hit Upload to start the upload process. The existing Firmware version as well as the new Firmware are shown on the DigiTrace NGC-CMA screen The installation procedure will remove the existing version and install new software in the DigiTrace NGC-20 control unit. The installation progress can be followed on the Progress bar and on the installation progress timer. Once the upload process is complete the DigiTrace NGC-20 control unit will briefly show the Firmware version number on the display and return to normal operation. Figure 27 3: Updating Firmware Firmware Update (Complete) If the installation was successful a pop up window will appear confirming the firmware update was successful. Figure 27 4: Successful update firmware 62 Appendices and Indexes CONTROL MODE DEFINITIONS On/Off The NGC-20 monitors the control temperature and compares it to the setpoint. If the control temperature is above the setpoint by more than the Deadband value the relay output is turned off. If the control temperature falls below the setpoint temperature, the output is turned on. The control temperature is defined as the lowest RTD temperature input value. Additional Entry Fields: Deadband If the control temperature is above the Setpoint temperature plus Deadband, the relay output is turned off. If the control temperature is below the Setpoint temperature, the output is turned on. Range: 1ºC (2ºF) to 50ºC (90ºC) Default: 3ºC (5ºF) PASC (Proportional Ambient Sensing Control) PASC takes advantage of the fact that the heat loss from a pipe is proportional to the temperature difference between the pipe and the ambient air. This is true regardless of heater type, insulation type, or pipe size. Once the heat tracing and insulation on a pipe has been designed to balance heat input with heat loss and maintain a particular temperature, the main variable in controlling the pipe temperature becomes the ambient air temperature. The NGC-20 has a control algorithm that uses the measured ambient temperature, desired maintain temperature, minimum ambient temperature assumption used during design, and size of the smallest pipe diameter to calculate how long the heater should be on or off to maintain a near-constant pipe temperature. Additional Entry Fields: PASC Min Ambient Temp The Min Ambient Temp is the “lowest ambient temperature” that was used when the heattracing system was designed. The entered value should agree with the value used by the design engineer to ensure that the heat tracing system was sized correctly Range: -73ºC (-99ºF) to 51ºC (125ºF) Default: -40ºC (-40ºF) PASC Min Pipe Size Min Pipe Size is the diameter of the smallest heat-traced pipe in the group controlled by this circuit. Small diameter pipes heat up and cool down more rapidly than larger diameter pipes therefore, the PASC duty cycle is calculated over a shorter time base. Larger diameter pipes heat and cool less rapidly, the on/off periods for the heater system can be stretched over a longer period. If electromechanical contactors are being used to control the heater circuit, the longer the time base reduces the number of contactor on/off cycles and extends the contactor life. List: 1.27cm (0.5in), 2.54cm (1in), 5.08cm (2in) Default: 1.27cm (0.5in) Power Adjust This allows the PASC control to be adjusted when the heating cable output is greater than the design assumption, or if the pipe insulation proves to be more efficient than assumed. Pipe temperature may run higher or lower than desired if the heating cable has a different output than required to offset the heat loss. The Power Adjust parameter enables a reduction or an increase in the heat-tracing effective power by entering a value less or greater than 100% IMPORTANT: If improperly used, the Power Adjust parameter can cause the piping to get too cold or too hot. If unsure, leave at 100%. Do not change this value unless an engineer calculates the temperature impact on the system and determines that it is safe to do so. Be particularly cautious if the circuit has more than one diameter of pipe or type of heat tracing. Contact a Pentair Thermal Management representative for assistance with this factor. Range:10–200% Default:100% 63 Italia Tel. +39 02 577 61 51 Fax +39 02 577 61 55 28 [email protected] РОССИЯ Tel. +32 16 21 35 02 Fax +32 16 21 36 04 [email protected] Bulgaria Lietuva/Latvija/Eesti Serbia and Montenegro Magyarország Schweiz / Suisse België / Belgique Tel./fax +359 56 86 68 86 fax +359 56 86 68 86 [email protected] Česká Republika Tel. +370 5 2136633 Fax +370 5 2330084 [email protected] Tel. +420 241 009 215 Fax +420 241 009 219 [email protected] Tel. +36 1 253 7617 Fax +36 1 253 7618 Danmark Nederland Tel. +45 70 11 04 00 Fax +45 70 11 04 01 [email protected] Deutschland Tel. 0800 1818205 Fax 0800 1818204 [email protected] España Tel. +34 902 125 307 Fax +34 91 640 29 90 [email protected] France Tél. 0800 906045 Fax 0800 906003 [email protected] Hrvatska Tel. +385 1 605 01 88 Fax +385 1 605 01 88 [email protected] [email protected] Tel. 0800 0224978 Fax 0800 0224993 [email protected] Norge Tel. +47 66 81 79 90 Fax +47 66 80 83 92 [email protected] Österreich Tel. 0800 297410 Fax 0800 297409 [email protected] Polska Tel. +48 22 331 29 50 Fax +48 22 331 29 51 [email protected] Тел. +7 495 926 18 85 Факс +7 495 926 18 86 [email protected] Tel. +381 230 401 770 Fax +381 230 401 770 [email protected] Tel. 0800 551308 Fax 0800 551309 [email protected] Suomi Puh. 0800 11 67 99 Telekopio 0800 11 86 74 [email protected] Sverige Tel. +46 31 335 58 00 Fax +46 31 335 58 99 [email protected] Türkiye Tel. +90 530 977 64 67 Fax +32 16 21 36 04 [email protected] United Kingdom Tel. 0800 969013 Fax 0800 968624 [email protected] Republic of Kazakhstan Tel. +7 495 926 18 85 Fax +7 495 926 18 86 [email protected] www.pentairthermal.com All Pentair trademarks and logos are owned by Pentair or its global affiliates. Pentair reserves the right to change specifications without prior notice. © 2013 Pentair. THERMAL MANAGEMENT SOLUTIONS EN-DigitraceNGCCMA-IM-INSTALL147 R1