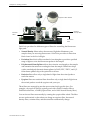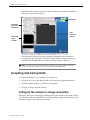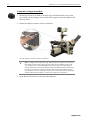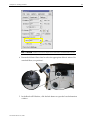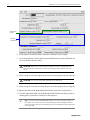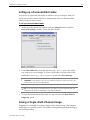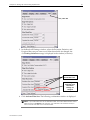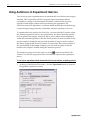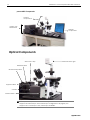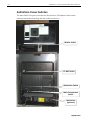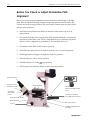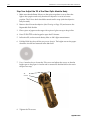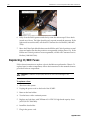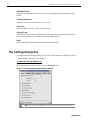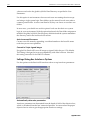
1
® DeltaVision Core and personalDV Restoration Microscopy System User's Manual Revision D ® built with precisionware AppliedPrecision ® ii DeltaVision Core and personalDV User's Manual Legal Notices Revision D of the DeltaVision Core and personalDV Restoration Microscopy System User’s Manual. Part number 04-720104-000 Rev D. © 1999-2008 Applied Precision, Inc. All rights reserved. No part of this manual may be reproduced, transmitted, stored in a retrieval system, or translated into any language in any form by any means without the written permission of Applied Precision, Inc. Information in this document is subject to change without notice. DeltaVision, softWoRx, and Applied Precision are registered trademarks of Applied Precision, Inc. CoolSNAPHQ is a trademark and Cascade is a registered trademark of Roper Scientific. All other registered names and trademarks referred to in this manual are the property of their respective companies. Applied Precision, Inc 1040 12th Ave. NW Issaquah, WA 98027 (425) 557-1000 FAX: (425) 557-1055 Other Reference Documents User instructions for DeltaVision Core include the following publications: Document Purpose Available for… Online Help Provides reference information for softWoRx and procedures that show how to use softWoRx tools All softWoRx workstations Product Notes Provide examples and tips for using softWoRx All softWorRx users (online at SoftWoRx Imaging Workstation User's Manual Shows how to process, visualize, and analyze data. All softWoRx workstations Getting Started with QLM Shows how to acquire photokinetic data with the QLM module Acquisition workstations that have the optional QLM module www.appliedprecision.com) In addition to the above Applied Precision documentation, you will be provided with manufacturers’ manuals for the microscope components. You may also be provided with manufacturers’ manuals for cameras and other devices, depending on your system configuration. (Some manufacturers do not provide manuals for these devices.) AppliedPrecision Contents iii Contents Preface .............................................................................................ix About This Manual................................................................................................................ix Document Conventions ......................................................................................................... x Lists .................................................................................................................................... x Notes, Warnings and Cautions .....................................................................................xi User Interface Description Conventions......................................................................xi Contacting Applied Precision, Inc......................................................................................xii Customer Service Hotline .............................................................................................xii Corporate Office .............................................................................................................xii 1 Introduction...................................................................................1 What is DeltaVision? .............................................................................................................. 1 History ............................................................................................................................... 2 What Can You Use DeltaVision for? ..................................................................................... 3 Standard Data Collection Options................................................................................. 4 Live Cell Imaging ............................................................................................................. 5 Laser Photo-bleaching and Photo-activation ............................................................... 6 TIRF (Total Internal Reflection Fluorescence).............................................................. 6 What should you know to use DeltaVision? ........................................................................ 6 2 Safety .............................................................................................7 UV Exposure ........................................................................................................................... 8 Bright Light Exposure ............................................................................................................ 8 Burn .......................................................................................................................................... 8 Shock ........................................................................................................................................ 8 Xenon Lamp Safety ................................................................................................................ 9 Explosion ........................................................................................................................... 9 High Voltage..................................................................................................................... 9 UV, Visible, and IR Radiation ........................................................................................ 9 Thermal Hazards.............................................................................................................. 9 Disposal ............................................................................................................................. 9 Damage Prevention .............................................................................................................. 10 Warning Labels ..................................................................................................................... 11 3 Getting Started............................................................................13 Before you start............................................................................................................... 14 Getting Familiar with DeltaVision....................................................................................... 15 Controlling the Light path ............................................................................................ 15 Focusing........................................................................................................................... 15 Choosing Filters.............................................................................................................. 16 Using the Keypad and Joystick .................................................................................... 18 04-720104-000 Rev D /1008 iv DeltaVision Core and personalDV User's Manual Turning DeltaVision On ........................................................................................................19 Acquiring and Saving Data .................................................................................................21 Setting Up the Sample for Image Acquisition............................................................21 Finding the Sample ........................................................................................................26 Acquiring an Image........................................................................................................27 Saving Image Data................................................................................................................28 Setting up a Personal Data Folder................................................................................29 Saving a Single, Multi-Channel Image ........................................................................29 Turning DeltaVision Off........................................................................................................30 4 Setting Up and Running Experiments .......................................33 Creating and Running an Experiment Macro...................................................................33 Sectioning Specimens for 3D Images .................................................................................35 Guidelines for Designing and Running 3D Experiments .........................................39 Optical section spacing ..................................................................................................39 Selecting Filters .....................................................................................................................42 Choosing which filters to use .......................................................................................43 Setting up Time-lapse Experiments ...................................................................................45 Point Visiting .........................................................................................................................47 Marking Points ...............................................................................................................48 Editing a Point List.........................................................................................................50 Loading a Point List and Specifying Points to Visit ..................................................50 Monitoring Point Visiting Experiments ......................................................................51 Collecting Panel Images over Large Areas........................................................................53 Determining Border Rolloff Voxels .............................................................................53 Collecting Panel Images ................................................................................................54 Using the Multiplexed Wavelength Option......................................................................55 Setting Up the Multiplexed Wavelength Option .......................................................55 Designing a Multiplexed Wavelength Experiment ...................................................60 5 Acquiring Data from Live Specimens ......................................65 Using Autofocus in Experiment Macros ...........................................................................66 Tracking Cells........................................................................................................................67 Guidelines for specifying Cell Tracking Options ......................................................70 Acquiring 3D Z Projections with OAI................................................................................73 Continuous Z Sweep versus Traditional Projections ................................................73 Using Continuous Z Sweep ..........................................................................................74 Acquiring a Reference Image ..............................................................................................76 6 Data Collection Techniques......................................................79 Finding a Specimen and Recording its Position...............................................................79 Finding Exposure Time........................................................................................................82 Using Köhler and Critical Illumination .............................................................................84 Monitoring Data Acquisition ..............................................................................................85 AppliedPrecision Contents v Viewing Deconvolved Image Previews ...................................................................... 85 Selecting Viewing Modes.............................................................................................. 86 Displaying Statistics and the Histogram .................................................................... 88 Editing Experiment Macros ................................................................................................ 88 7 Facility Requirements & Components ......................................91 Electrical and Environmental Requirements .................................................................... 92 Electrical Requirements................................................................................................. 92 Environmental Requirements ...................................................................................... 93 Overview of Components ................................................................................................... 95 Optical Components ............................................................................................................ 96 Fluorescence Microscope .............................................................................................. 97 Optical Filters.................................................................................................................. 97 Cameras ........................................................................................................................... 97 Light Sources .................................................................................................................. 99 Desktop Components......................................................................................................... 101 Flat-Panel Display Monitor......................................................................................... 101 The Keypad and Joystick ............................................................................................ 101 Vibration Isolation Table............................................................................................. 102 Cabinet Components.......................................................................................................... 102 Instrument Controller / Microscope Interface Chassis (IC/MIC) .......................... 103 Workstation................................................................................................................... 104 DVD-R Recording ........................................................................................................ 104 Other Standard Components ............................................................................................ 104 The Repeatable Slide Holder ...................................................................................... 104 Slide Holder Adapter .................................................................................................. 105 Calibration Kit .............................................................................................................. 105 The Fiber Optic Module .............................................................................................. 106 The Tool Kit................................................................................................................... 106 Software......................................................................................................................... 107 Optional Components........................................................................................................ 108 The Environmental Chamber ..................................................................................... 109 Additional Filter Modules .......................................................................................... 109 Quantifiable Laser Module Components ................................................................. 110 Total Internal Reflection Fluorescence (TIRF) Module........................................... 110 EM CCD Camera.......................................................................................................... 111 Analysis Workstations................................................................................................. 112 Multiplexed Wavelength Module.............................................................................. 112 Software......................................................................................................................... 112 Consumable Parts............................................................................................................... 113 8 Changing Cameras and Filters .............................................. 115 Changing Cameras ............................................................................................................. 115 Using Live Cell or Custom Filter Wheel Modules ......................................................... 117 04-720104-000 Rev D /1008 vi DeltaVision Core and personalDV User's Manual Changing Filter Wheel Modules.......................................................................................118 Calibrating the Filter Wheels.............................................................................................125 9 Maintenance ............................................................................131 Shutting Down and Starting the System .........................................................................131 DeltaVision Power Switches.........................................................................................132 Guidelines for Using Switches ...................................................................................133 Shutting Down the System .........................................................................................133 Starting the System.......................................................................................................133 Replacing the Xenon Bulb..................................................................................................134 Replacing the Transmitted Light ......................................................................................138 Aligning the Illumination Path .........................................................................................140 The Fiber Optic Module ..............................................................................................141 Before You Check or Adjust Illumination Path Alignment ...................................142 Checking Illumination Path Alignment ....................................................................143 Path Alignment.............................................................................................................144 Replacing IC/MIC Fuses ....................................................................................................150 Cleaning ...............................................................................................................................151 Moving the System .............................................................................................................151 Appendix A: The Immersion Oil Kit .............................................153 The Oil Calculator...............................................................................................................153 Appendix B: Troubleshooting ......................................................155 Diagnosing System Problems............................................................................................155 Troubleshooting the Controller..................................................................................155 Troubleshooting the Workstation ..............................................................................156 Analyzing Reasons for Poor Image Quality....................................................................156 DeltaVision Problem Report Form.....................................................................................159 Appendix C: Acquiring a PSF ......................................................161 Before You Start ............................................................................................................161 Acquiring a PSF...................................................................................................................161 Tools ...............................................................................................................................162 Finding Beads ...............................................................................................................164 Selecting the Correct Immersion Oil..........................................................................165 Converting PSF to OTF ......................................................................................................166 Appendix D: Reference Information...........................................171 Standard Filename Extensions..........................................................................................171 Standard Fluorescence Filters ...........................................................................................172 Live Cell Filter Sets .............................................................................................................172 Reference List ......................................................................................................................173 Microscopy ....................................................................................................................173 AppliedPrecision Contents vii Linux Operating System ............................................................................................. 180 Image Processing.......................................................................................................... 180 Optics ............................................................................................................................. 180 Appendix E: Resolve3D and Keypad Options .......................... 181 The Resolve3D Window .................................................................................................... 182 The Resolve3D Menu................................................................................................... 183 The Resolve3D Toolbar ............................................................................................... 186 Image Control Fields ................................................................................................... 187 Stage Position Control Fields and Buttons ............................................................... 189 Image Intensity and Scale Values .............................................................................. 193 The Message Pane ........................................................................................................ 193 Resolve3D Shortcuts .................................................................................................... 194 The Design Experiment Tab.............................................................................................. 194 Experiment name and Enable Fast Acquisition....................................................... 196 Sectioning Setup ........................................................................................................... 196 Channels Setup............................................................................................................. 198 Time-lapse Setup .......................................................................................................... 199 Point Visiting Setup ..................................................................................................... 200 Panel Collection Setup................................................................................................. 201 The Design/Run Experiment Dialog Box ........................................................................ 202 The Settings Dialog Box ..................................................................................................... 204 Action Buttons .............................................................................................................. 210 Keypad/Joystick Operation ............................................................................................... 211 Index 04-720104-000 Rev D /1008 ......................................................................................... 215 viii DeltaVision Core and personalDV User's Manual AppliedPrecision Preface This manual shows how to use the DeltaVision system to acquire images. It also shows how to maintain the system. About This Manual describes the information in each chapter. Document Conventions explains the typography, notes, and other conventions used in this manual. Contacting Applied Precision, Inc. provides information about how to contact customer support. About This Manual This manual provides instructions for scientists who are using DeltaVision to acquire data. It also includes instructions and references for maintaining the system. The Introduction provides a brief summary of the DeltaVision system features. Safety warnings and guidelines are provided in Chapter 2. Chapters 3 - 6 show how to use the system to acquire data. x DeltaVision Core and personalDV User's Manual Chapter 3, Getting Started, describes how to turn the system on, acquire an image, and run an experiment macro. Chapter 4, Setting Up and Running Experiments, shows how to set up experiment macros for 3D sectioning, Time lapse, Multiple wavelengths, Paneling (for stitching), and Point Visiting. Chapter 5, Acquiring Data From Live Specimens, provides information on how to use the DeltaVision Core system to collect images from live specimens. Chapter 6, Data Collection Techniques, describes how to determine the proper exposure time and provides guidelines for finding the areas of interest on a sample. The remaining chapters provide information on how to maintain and configure the system. Chapter 7, Facility Requirements and Components, lists requirements and describes the DeltaVision system components. Chapter 8, Changing Cameras and Filters, describes how to replace cameras and how to install or replace filters. Chapter 9, Maintenance, shows how to change and align the xenon lamp, align the light path, clean the system, and change fuses. The appendices include reference information and procedures for configuring the system. Document Conventions To make the information provided in this manual as easy as possible for you to locate and use, the following conventions are observed. Lists • Round bullets indicate options in procedures. 1. Numbered items are sequential steps for completing a procedure. Square bullets indicate items in a list. X Arrows indicate single step procedures. AppliedPrecision Preface xi Notes, Warnings and Cautions Note Indicates information about the previous paragraph or step in a procedure. ! Important Indicates important or critical information about the previous paragraph or step in a procedure. Tip Indicates helpful advice. WARNING: Indicates important information regarding potential injury. WARNING: Indicates risk of explosion. WARNING: Indicates risk of shock. Indicates important information regarding potential damage to CAUTION: equipment or software. User Interface Description Conventions Boldface indicates the names of buttons, menus, dialog box options, and fields. Initial Capitals indicate the names of windows, dialog boxes, and tabs. ALL CAPITALS SAN SERIF indicates the name of a key on your keyboard or keypad, such as ENTER, DELETE, or STEP INCREASE. Uniform width font indicates text to enter on a command line or in the GUI. 04-720104-000 Rev D /1008 xii DeltaVision Core and personalDV User's Manual Contacting Applied Precision, Inc If you have questions about DeltaVision, first refer to this manual or consult the online Help system. If you don’t find the information you need, contact us at one of the following addresses. Customer Service Hotline Phone: 800-862-5166 email: [email protected] Hours: 8:00 AM – 5:00 PM, Pacific Time, Monday – Friday Corporate Office Applied Precision, Inc. 1040 12th Avenue NW Issaquah, WA 98027 USA Phone: (425) 557-1000 Fax: (425) 557-1055 Internet Address: www.appliedprecision.com Technical Publications email address: [email protected] AppliedPrecision 1 1 Introduction This chapter provides an introduction to DeltaVision. What is DeltaVision? introduces the DeltaVision system and provides a history of its development. What Can You Use DeltaVision for? lists the supported imaging modes and summarizes the data acquisition options that are supported by DeltaVision. What should you know to use DeltaVision? summarizes the background and experience required to run the system. What is DeltaVision? The DeltaVision Restoration Microscopy System can be used to collect and analyze three-dimensional microscope images, acquired over long periods of time and on multiple samples. With the sophisticated softWoRx image analysis and modelbuilding software, the system is a comprehensive package for biological image data collection, interpretation, and display. 2 DeltaVision Core and personalDV User's Manual History The original restoration microscopes were designed and developed in the laboratories of Dr. John W. Sedat and Dr. David A. Agard at the University of California, San Francisco. Their first working system actively collected images as early as 1983. At that time, a small deconvolution (128x128x64) required overnight processing on a million dollar mainframe computer. During the evolution of the UCSF microscope, it became clear that micropositioning was a critical part of the optical sectioning process. In particular, controlled movement of the focal plane relative to the specimen (the Z axis) was identified as a key to reliable deconvolution. To accomplish adequate Z scans, Dr. Sedat built a microscope stage using Applied Precision’s Nanomotion™ micropositioning technology. Before long, Dr. Sedat contacted Applied Precision cofounder Ron Seubert for detailed information about Nanomover performance. The relationship between UCSF and Applied Precision grew steadily. Later, in 1993, Applied Precision licensed the image restoration technology from UCSF and began development of DeltaVision. Collaboration between Applied Precision and UCSF still continues, for the benefit of both parties. In October of 1993, Applied Precision shipped the first Applied Precision/UCSF hybrid to Michael Paddy at the University of Florida. In 1994, Applied Precision designed, built, and delivered a DeltaVision prototype to Paul Goodwin at the Fred Hutchinson Cancer Research Center, Seattle. In August 1994, the first commercial AppliedPrecision Chapter 1: Introduction DeltaVision microscope was shipped to Bethe Scalettar at Lewis & Clark College, Portland, Oregon. All three of these systems are still active. The DeltaVision software has grown continuously since 1983, with contributions from scientific programmers, faculty, and graduate students at UCSF. Applied Precision’s contribution to the software started in earnest in 1994. The advances in computer and camera technology in the early 1990s resulted in the emergence of optical sectioning technology. For example, in 1993 Applied Precision’s benchmark deconvolution (512 × 512 × 64) required 3 hours of processing time on a $35,000 workstation. (The benchmark deconvolution is 16 times larger than the original deconvolutions performed in 1983.) Although only a few laboratories were able to afford $35,000 for a computer, the lower cost warranted commercialization of a deconvolution microscope. In 1996, the same deconvolution required about 1/4 of an hour with a $14,000 workstation, and ½ of an hour with an $8000 machine. This thirty-fold increase in performance/price allowed a more widespread acceptance of deconvolution microscopy. Advances in computing power and data storage have continued to benefit DeltaVision users. In 2003, a $2500 workstation could perform the standard benchmark in less than four minutes, representing another twenty-fold increase in performance/price since 1996. The current workstations can now perform this benchmark in less than 30 seconds (under 20 seconds for DeltaVision Core and under 30 seconds for personalDV). Vast amounts of data generated by these experiments can be stored on local hard drives, by burning DVD's, or by transferring the data to other locations using high-speed network connections. What Can You Use DeltaVision for? DeltaVision Core and personalDV use research grade microscopes to collect optical images in one of the following imaging modes: * Fluorescence Brightfield Phase contrast* Differential Interference Contrast (DIC) Phase contrast requires additional equipment that is available from Olympus distributors. 04-720104-000 Rev D /1008 3 4 DeltaVision Core and personalDV User's Manual The following table summarizes the capabilities of the DeltaVision Core system. Capability Description Digital Microscopy Fluorescence Imaging. Also capable of Brightfield, Phase Contrast, and DIC imaging. Automated Optical Sectioning, Time-lapse, Point visiting Optical sectioning, filter changes, and shutters are coordinated by the controller. Quantitative Processing Image processing and 3-D reconstructions of multi-dimensional data files. Image Display and Analysis 3-D reconstructions can be visualized, rotated, and enhanced. DeltaVision supports a wide array of imaging applications, including: Cytoskeletal Studies, RNAi experiments, Live Cell Imaging, Cell Cycling Studies, Protein Translocation, and Protein Pathway Analysis. Standard Data Collection Options DeltaVision supports the following types of data acquisition: 3D Imaging To acquire “3D data,” you can set up DeltaVision to acquire a series of images along the Z axis. The softWoRx workstation provides a sleek interface that allows you to control the optical sectioning through a specimen. Behind the scenes, macro language provides automated computer control of sample position, optical filters, and shutters. After image data acquisition, a series of image processing algorithms improve image resolution. Three-dimensional information can be reconstructed and then visualized in a variety of ways that allow quantitative measurement and analysis. Multiple Filters You can acquire images through several filters and combine them into one image file. Panel Collection Panel collection acquires a series of images with adjacent fields of view. You can stitch these images together to create images that are much larger than a single field of view. This is especially useful when you want to collect data at a high magnification over a large area. AppliedPrecision Chapter 1: Introduction Time-Lapse You can run macros to acquire time-lapse images and use the data to create timelapse movies. This is especially useful for studies of live samples or for experiments that use lasers. Point Visiting Point Visiting allows you to acquire data from several areas of interest during a single experiment. You can select which points to monitor on your sample and save them in a list that contains the exact stage coordinates of each point. When you run the experiment, DeltaVision reads the coordinates for the points in the list, moves the stage to each point, and captures an image. This process is repeated at specified time-lapse intervals. For live specimens, this significantly improves the lab efficiency of experiments by allowing you to monitor multiple points of interest in a single session. Autofocus You can use Autofocus to automatically focus when you are viewing a sample or when you are running an experiment. Köhler and Critical Illumination You can easily switch between Critical and Köhler Illumination. Köhler Illumination provides very even specimen illumination across the field of view. You will typically use Köhler Illumination for most of your data collection. Critical Illumination directs the entire light source to the size of the detected area. It is useful for low abundant probes that require more light. Live Cell Imaging You can set up a controlled environment to acquire data from live specimens. DeltaVision supports an optional environmental chamber that you can use to control temperature and inject carbon dioxide. DeltaVision also includes software that is specially designed to acquire data from live specimens: Cell tracking is used for point visiting time-lapse experiments. It automatically changes the coordinates of a point to follow a cell as it moves. Real-Time Z Sweep Acquisition (or Optical Axis Projection) allows you to quickly acquire 2D projections of specimens. Real-Time Deconvolution provides previews of deconvolved images as they are acquired. 04-720104-000 Rev D /1008 5 6 DeltaVision Core and personalDV User's Manual Reference Imaging is useful for acquiring reference images that can be used for Differential Interference Contrast (DIC) and other techniques. Laser Photo-bleaching and Photo-activation If your system has the Quantifiable Laser Module (QLM) hardware module, you can use DeltaVision to run and analyze laser photo-bleaching and photo-activation experiments. The QLM supports up to three lasers and provides software to control and to analyze the data that is obtained from these experiments. Note The QLM hardware is not an available option for personalDV. TIRF (Total Internal Reflection Fluorescence) If your system has the TIRF hardware module, you can use DeltaVision to run and analyze TIRF experiments. TIRF is used in a number of research applications, such as cellular protein and vesicle trafficking, focal cellular adhesions, single biomolecule dynamics, studies in neuroscience, and cell-to-cell communications. The ability to excite molecules on the surface of a specimen while eliminating the fluorescence from the depth of the sample makes TIRF a valuable tool for examining cell surface structure and protein dynamics. Note The TIRF hardware module is not an available option for personalDV. What should you know to use DeltaVision? This document assumes that you are familiar with the basics of microscopy. Correct operation of the microscope is fundamental to obtaining quality images with DeltaVision. In addition, an understanding of image processing basics will help you use the system to its full potential. To manage the computer systems, some familiarity with Linux workstations and IBM-type personal computers is helpful. We have taken care to ensure that DeltaVision is straightforward to use, reliable, and complete. Please report errors and problems with DeltaVision to Applied Precision using the e-mail address [email protected], or alternatively, use the problem report form in Appendix D: Reference Information. AppliedPrecision 2 2 Safety The precautions detailed in this chapter must be carefully observed to prevent possible personal danger: UV Exposure discusses potential for UV exposure from the xenon arc lamp. Bright Light Exposure warns about bright light exposure from the transmitted light source installed in the microscope. Burn provides guidelines for avoiding burns from the xenon arc lamp. (The arc lamp reaches very high temperatures.) Shock includes warnings about potential shock hazards. (Hazardous voltages are present even when the system is disconnected from the AC main power outlet.) Damage Prevention describes actions that can damage the system. Warning Labels describes the system labels. Additional safety guidelines for maintenance and alignment are detailed in Chapter 9: Maintenance. 8 DeltaVision Core and personalDV User's Manual UV Exposure Since the xenon arc lamp emits ultraviolet (UV) light, there is a danger of exposing your eyes and skin. Loss of eyesight could occur if unfiltered light from the xenon arc lamp reaches your eyes. To prevent UV exposure: • Open the shutter only when an excitation filter is engaged. • Do not open the xenon arc lamp housing during operation. See Chapter 9, Maintenance for detailed instructions on changing the xenon arc lamp bulb. Bright Light Exposure While the transmitted light source installed in the microscope does not present possible UV exposure, it could cause discomfort under certain conditions. You must be aware of the eyepiece filter wheel when viewing a specimen through the microscope oculars. Make sure that the proper filters are in place so that your eyes are not suddenly exposed to a bright flash of light when the transmitted light shutter is opened. Do not look through the eyepiece while switching filters. Your eyes can be exposed to unfiltered light during the filter transition. Burn The xenon arc lamp reaches a very high temperature when lit. Never touch the housing during operation. Never remove the housing during operation or before allowing it to cool completely. Carefully follow the directions found in Chapter 9, Maintenance, for changing the lamp. Shock Hazardous voltages are present even when the system is disconnected from the AC main power outlet. To replace the transmitted light source LED, follow the instructions in the manuals that are included with your microscope. To replace the xenon arc lamp, follow the instructions found in Chapter 9: Maintenance. Refer also to the following section, “Xenon Lamp Safety,” for additional related safety issues. No other system components contain user-serviceable parts and do not warrant disassembly. If the High Res Camera coolant fluid is leaking, shut down the system and contact Applied Precision Customer Service. (See Customer Service Hotline on page xii.) AppliedPrecision Chapter 2: Safety Xenon Lamp Safety Ceramic xenon lamps are under high pressure and emit high levels of radiation. Proper handling procedures and safety precautions should be observed to assure the safety of the users of this product. Only operate this lamp within the recommended operating specifications as detailed in this manual. Refer to “Replacing the Xenon Lamp” in Chapter 9 of this manual for details on the proper procedures for lamp replacement. Explosion These lamps are under high pressure. Use of face shields or safety glasses during handling is recommended. Avoid applying excessive shock or stress to the lamp during handling. High Voltage The ignition voltage of the xenon lamp presents a very high voltage hazard. Do not touch the lamp during operation. To avoid the risk of electrical shock, the input power should be disconnected prior to servicing the lamp. UV, Visible, and IR Radiation Xenon lamps emit high levels of radiation that can cause severe skin burns and permanent eye damage. Avoid direct exposure to the emitted or reflected beams. Thermal Hazards Xenon lamps can get very hot during and after operation (up to several hundred degrees C). To avoid potential for serious burns, do not touch the lamp during operation. Do not touch the lamp after operation until the lamp has adequately cooled. Disposal It is recommended that the xenon lamp’s internal pressure be relieved prior to disposal. This is accomplished by squeezing off the tip (see illustration below) with needle-nosed pliers until the pressurized gas escapes. 04-720104-000 Rev D /1008 9 10 DeltaVision Core and personalDV User's Manual Pinch off the tip with needle-nosed pliers to relieve pressurized gas before disposal. Relieving xenon lamp's internal pressure before disposal Pressurized xenon lamps should not be incinerated, but disposed of in a landfill. Damage Prevention The following actions could damage the system: Moving the stage to the home position with the objective up could break or scratch the objective. The stage could be driven into the objective and may potentially scratch the top lens or compress the lens housing, causing a leak, crack, or lens misalignment. Disconnecting cables before the system is completely shut down will damage one or more of the electronic circuit boards. Disconnecting cables to the camera when the power is on can damage the camera. Touching optical filters or the polychroic beam splitter contaminates them with oil and can lead to premature failure or poor image quality. For cleaning information, see Chapter 9: Maintenance. Bending the fiber optic cable into a coil with a diameter less than 24" will damage the cable. Using improperly rated replacement fuses can create a fire hazard and may result in damage to components. Use only the fuse types listed on the component or in the manual. AppliedPrecision Chapter 2: Safety 11 Leaving a camera out of the tray when it is not in use presents an opportunity for the camera to fall to the floor and break. Always place the camera in the camera tray when it is not in use. Warning Labels Warning labels have been applied to the components of the system that pose a potential hazard to the user. The labels have been duplicated here and carefully explained. Please read this section carefully. Note For a description of DeltaVision components, see Chapter 7, Facility Requirements and Components. DeltaVision Warning Labels Hazardous Voltage Warning Label This label indicates the danger of electric shock. This label is found on the xenon arc lamp housing. Caution or Warning Label This label indicates a danger of personal injury or possible damage to equipment. It is accompanied by an explanation of the specific danger. This label may be found on the microscope, the High Res camera, the Fast Camera, or the workstation. 04-720104-000 Rev D /1008 12 DeltaVision Core and personalDV User's Manual AppliedPrecision 3 3 Getting Started This chapter shows how to get started with DeltaVision. Before you start includes a checklist of things that you need to have before you can acquire images for your sample. Getting Familiar with DeltaVision describes the key controls that you will use to direct the light path, focus, and select filters. It also introduces the keypad and joystick. Turning DeltaVision on shows how to turn on the system. Acquiring an Image shows how to place the slide and the objective, find the sample, and acquire an image. Saving Image Data describes how to set up a personal data folder and how to save an image file. Turning DeltaVision Off shows how to turn off the system. 14 DeltaVision Core and personalDV User's Manual Before you start Before you start, make sure that you: • Select the proper oil for your objective. The immersion oil kit includes 18 oils with refractive indexes that range from 1.500 to 1.534, in increments of 0.002. (For personalDV, the kit includes 6 oils that range from 1.512 to 1.522.) To calculate the best refractive index for your application, follow the instructions in Appendix A: The Immersion Oil Kit on Page 153. If you are working at standard temperature and pressure, the oil with a 1.516 refractive index is generally a good place to start. For work at 37 degrees C, use the oil with a 1.520 refractive index. • Know your login ID and password. • Prepare your sample using the recommended practices that are documented in the following references. (If you are untrained in sample preparation, consider attending a course like the one shown below.) Books on Cell Biology Methods Current Protocols in Cell Biology. Bonifacino, Dasso, Lippincott-Schwartz, Harford, Yamada ed. Wiley Press, http://www.wiley.com/legacy/cp/cpcb/ Cells, A Laboratory Manual. Spector, Goldman, Leinwand ed. Cold Spring Harbor Press, 1998. Video Microscopy: The Fundamentals (2nd Edition). Inoue and Spring, Plenum Press, 1997. Digital Microscopy (3rd Edition), Methods in Cell Biology Vol. 81. Sluder and Wolf, Academic Press, 2007. Papers on Sample Preparation Rines DR, He X, Sorger PK.Quantitative microscopy of green fluorescent proteinlabeled yeast. Methods Enzymol. 2002;351:16-34. Hutchins JR, Moore WJ, Hood FE, Wilson JS, Andrews PD, Swedlow JR, Clarke PR. Phosphorylation regulates the dynamic interaction of RCC1 with chromosomes during mitosis. Curr Biol. 2004 Jun 22;14(12):1099-104. Courses in Microscopy and Cellular Imaging In Situ Hybridization, Immunocytochemistry, and Live-cell Imaging. Dernberg, Hu, and Murray Course Directors, Cold Spring Harbor, October (annual). AppliedPrecision Chapter 3: Getting Started 15 Analytical and Quantitative Light Microscopy, Sluder and Wolf Course Directors, Marine Biological Laboratory, Woods Hole, MA, May (annual). Getting Familiar with DeltaVision Before you acquire an image, become familiar with the key DeltaVision controls for: • Controlling the Light Path • Focusing • Choosing Filters • Using the Keypad and Joystick Most of the manual controls for controlling the light path, focusing, and choosing filters are similar to those that you will find on any microscope. Additional controls for moving the stage and acquiring images are provided by the keypad and joystick. Controlling the Light path DeltaVision provides a transmitted LED light and a xenon arc lamp. The transmitted light works the same as the light source for a traditional microscope, with the light path directed on the specimen from above. The xenon arc lamp provides excitation light directed through the back of the microscope and focused on the specimen from below. You can use the Beam Selector to direct either light path from the specimen to the eyepiece or to the camera. Transmitted LED Light Camera xenon Arc Lamp Fiber Optic Cable Beam Selector Focusing There are three manual focus controls and a Focus Lock on the microscope. These controls are similar to those on other systems. 04-720104-000 Rev D /1008 16 DeltaVision Core and personalDV User's Manual Eyepiece Focus Fine Z Focus Focus Lock Coarse Z Focus Not currently used Not currently used Eyepiece Focus Use the Eyepiece Focus (on the left ocular) to focus the eyepiece. Focus Lock Use the Focus Lock to lock or unlock the Z focus. Fine Z Focus Use the Fine Z Focus knob to move the objective in very small increments. It is used to focus on the focal plane. Coarse Z Focus Use the Coarse Z Focus knob to move the objective in large increments. It is typically used to lower the objective when the system is initialized or to move the objective up to the slide until the oil is touching the slide. Choosing Filters Choosing and controlling filters is a key for any fluorescent probe experiment. When a fluorescent probe is excited by a specific wavelength, it emits light at another wavelength. Choosing the right filters for the dyes in your sample allows you to obtain a complete set of data specifically from your probe without interference from other wavelengths. AppliedPrecision Chapter 3: Getting Started 17 Eyepiece Filter Wheel Neutral Density Filter Emission Filter Excitation Filter DeltaVision provides five different types of filters for controlling the fluorescent light path: • Neutral Density filters reduce the amount of light that illuminates your sample when you are using fluorescence. DeltaVision provides six filters that block from 0 to 99.9% of all light. • Excitation filters block all but one band of wavelengths to provide a specified range of light to excite the fluorescent probes in the sample. • Polychromatic Beam Splitter reflects the excitation wavelengths to the sample and transmits the emission wavelengths from the sample. DeltaVision ships with a standard polychromatic beam splitter for DAPI, FITC, TRITC, and Cy5. Other beam splitters ship with optional live-cell sets. • Emission filters allow only a single band of light from the excited probe to reach the camera. • Eyepiece filters are emission filters that allow only a single band of light from the excited probe to reach the eyepiece and your eyes. These filters are arranged in sets that are associated with specific dyes. (For example, a dye such as DAPI is typically used with a DAPI Excitation filter, a DAPI Emission Filter, a DAPI Eyepiece Filter, and a 100% Neutral Density filter.) You can choose filter sets manually by rotating the eyepiece filter wheel. The filter sets are synchronized so that when you change an eyepiece filter, the neutral density filter, excitation filter, and emission filter automatically change. 04-720104-000 Rev D /1008 18 DeltaVision Core and personalDV User's Manual Using the Keypad and Joystick The keypad and joystick are used to move the stage, open shutters, acquire images, and control other acquisition options. Key controls are shown below. Key controls on the Keypad Acquire Image Acquires an image and displays it on the monitor. Use this key when you are scanning through your sample and using the eyepiece to find a region of interest, or when you want to get a quick look at the specimen on the monitor. Ex Shutter Opens or closes the Excitation (i.e., Fluorescence) shutter. You will use this control frequently to open and close the shutter. Because the shutter is designed to protect your eyes from exposure to ultraviolet light, it automatically closes each time that a filter wheel is moved. It must be reopened with the EX SHUTTER button. Trans LED Source Toggles the transmitted light LED between off and on. (Subsequent to changing the transmitted light source from halogen to LED for DeltaVision Core and personalDV, an actual shutter is no longer necessary.) Slow, Medium, and Fast Control the speed that the stage is moved by the joystick or keypad arrows. It’s usually best to start with medium. The Joystick Controls stage movement. Use the joystick to move the stage in the direction that you point with the joystick (for example, moving the joystick up moves the stage away from you, moving joystick left moves the stage to the left, and so on). AppliedPrecision Chapter 3: Getting Started 19 Turning DeltaVision On Use the following instructions to turn the system on for day-to-day use. For instructions that show how to turn on DeltaVision after a system shutdown, see Shutting Down and Starting the System on Page 131. To turn on DeltaVision: 1. Turn on the power strip bar. Note For personalDV, there is no power strip bar. Begin the power-up process with Step 2. 2. Turn on the IC/MIC. IC/MIC Power Switch Workstation Power Switch Power Strip Bar The Main Power Switches in the DeltaVision Cabinet (acrylic cover not shown) 3. If the monitor is off, turn it on. 4. If the Workstation is off, turn it on and wait for it to boot up. 5. Log on to the Workstation. 6. Remove any slides from the stage. 7. On the desktop, double-click the DV icon to open softWoRx. 8. On the softWoRx menu, choose File | Acquire (Resolve3D) and follow the prompts, allowing the system to initialize. 04-720104-000 Rev D /1008 20 DeltaVision Core and personalDV User's Manual 9. Release the Focus Lock by turning it clockwise (when facing the lock) until it is loose. 10. Lower the objective by turning the Coarse Z Focus knob away from you (clockwise) when facing the knob. Always lower the objective before you initialize the system CAUTION: to prevent damage to the objective lens. 11. A dialog box is displayed prompting you to lower the objective before continuing. After you lower the objective, select Initialize to initialize the system. AppliedPrecision Chapter 3: Getting Started 21 The Resolve3D window, the Data Collection Window, and the Filter Monitor dialog box open on the desktop. Filter Monitor Resolve3D Acquisition Parameters Data Collection Window Resolve3D Stage Controls The Resolve3D window includes acquisition parameters and controls for moving the stage. The Data Collection window displays images as they are acquired and the Filter Monitor displays the filters that are selected. Note You will use the Resolve3D window throughout the data collection process. For more about this window, see The Resolve3D Window on Page 182. Acquiring and Saving Data To acquire an image of your sample, you will need to: • Set up DeltaVision by placing the slide and selecting the appropriate filters. • Find the sample so that it is visible in the eyepieces. • Acquire an image with the camera. Setting Up the Sample for Image Acquisition Setting up DeltaVision for imaging includes placing the sample on the stage so that it is in contact with the immersion oil and selecting the appropriate filter set for the fluorescent probe used to label your sample. 04-720104-000 Rev D /1008 22 DeltaVision Core and personalDV User's Manual To prepare for image acquisition: 1. Rotate the Coarse Focus knob so that the top of the knob rotates away from you (while you are sitting in front of the microscope) to move the objective all the way down. 2. Rotate the objective turret to select an objective. Use the objective turret to select an objective Tip Use a high power objective (e.g., 60X) to find the sample. The approach for finding a sample with a fluorescence microscope is different than what you would use for a transmitted light microscope. With transmitted light, a typical approach is to find the sample with low powered objectives and then increase power after you find the sample. With a fluorescent light however, the sample is often not visible at low powers. The best approach for finding a sample with fluorescent light is to start with a high power objective. 3. In the Resolve3D Lens list, select the same objective. AppliedPrecision Chapter 3: Getting Started CAUTION: Make sure that the objective is selected in the Resolve3D Lens list. 4. Rotate the dichroic filter wheel to select the appropriate dichroic mirror. For standard filters, use position 1. 5. In the Resolve3D Window, click the Info button to open the Lens Information window. 04-720104-000 Rev D /1008 23 24 DeltaVision Core and personalDV User's Manual Refractive Index Optical Conditions 6. In the Optical Conditions fields, enter the conditions for the sample. 7. Note the displayed value in the Recommended Refractive Index field and use an oil with that refractive index. Before you start each data collection session, calculate the oil. CAUTION: Your oil selection should be the same if the sample and conditions are the same. 8. Place a drop of oil on the objective. Be sure to use the proper oil (see Page 14). CAUTION: Do not touch the glass dropper to the objective. 9. Place a drop of oil on the coverslip. Be sure to use the proper oil (see Page 14). 10. Mount the slide on the Repeatable Slide Holder with the coverslip down. 11. Use the Adjustment knob on the Repeatable Slide Holder and the joystick on the Keypad to center the coverslip over the objective. Tip If you have the Repeatable Slide Holder, you can record the position of your slide. This is useful when you are performing a Point Visiting experiment and you need to remove the slide before you are finished with the experiment (see Page 104). AppliedPrecision Chapter 3: Getting Started 25 12. Rotate the Coarse Focus knob toward you to move the objective up until the objective is just in contact with the oil. From this point on, use only the fine focus knob to raise and lower the objective. 13. Rotate the eyepiece filter wheel (below the oculars on the scope) to select the filter for the probe that you used to stain your sample. If your sample has more than one probe, select the one with the brightest fluorescence (typically DAPI). The selected filter is displayed on the Filter Monitor window. The filter names are displayed in the Filter Monitor dialog box on the right side of the workstation screen. As you rotate the filter wheel, the filter name next to EP (eyepiece) changes and the EM and EX (emission and excitation) filters change automatically to match. The displayed colors match the wavelength of the filters. If a QLM module is installed (not available on personalDV), the Filter Monitor also displays the wavelengths of the lasers that are available on your system. Note You must move the filter wheel to initialize the Filter Monitor. Standard Filter Set Appropriate Probes Filter Name Excitation Emission DAPI, Hoechst, Coumarin DAPI UV, 350nm Blue, 455nm Fluorescein, GFP, CY2, Al488 FITC Blue Green, 490nm Green, 525nm Rhodamine, Texas Red, Cy3, TRITC Green, 555nm Orange, 605nm CY-5® CY-5 Red, 645nm Infrared, 705nm Filter Name Excitation Emission CFP CFP (optional) Deep Blue, 430 nm Blue, 470nm YFP YFP (optional) Blue Green, 500 nm Yellow Green, 535nm Live-cell Filter Set Appropriate Probes 04-720104-000 Rev D /1008 26 DeltaVision Core and personalDV User's Manual mCherry mCherry (optional) Yellow, 572nm Red, 632nm EGFP EGFP (optional) Blue, 470nm Green, 525nm See Optical Filters on Page 97 for more information. Finding the Sample To set the focal plane for imaging, you will need to find the sample in the eyepieces and then focus on the sample. To find the sample: 1. With the sample on the stage and the filters selected (shown in the previous procedure), set the Beam Selector to Eye. 2. Turn off the lights in the lab. If you cannot turn off the lights, place a box over the sample to reduce the amount of ambient light. 3. Open the Excitation shutter by pressing the EX SHUTTER button in the lower left corner of the keypad. You should see light through the objective. The light on the stage should be the same color as the Excitation filter that you selected. (For example, if you selected DAPI, the light should be very deep violet. It may be hard to see.) Be sure the eyepiece filter position matches the desired excitation filter position. Note The Excitation shutter is designed to protect your eyes. Each time the filter wheel position is changed; the shutter automatically closes and must be reopened with the EX SHUTTER button. 4. Focus to find the focal plane. Turn the Fine Focus knob toward you to slowly raise the objective until you see a cloud of emission color. Then use the joystick to move the stage. If the cloud moves, you have found the sample. If not, you may be seeing colors from lens effects. Continue to focus until the image is sharp and clear. 5. Use the joystick to move the stage around. Change the speed of the movement with the SLOW, MEDIUM, and FAST keys on the Keypad. When you find a sample, place it in the middle of the field of view. AppliedPrecision Chapter 3: Getting Started 27 On the Stage View, note the stage trails that show where you have moved the stage in XY. Acquiring an Image To acquire a DeltaVision image, you’ll need to direct light to the camera and work with the images that are displayed in the Data Collection window until you are satisfied. You can then save the image as a DeltaVision file or create and run experiments, as described in Creating and Running an Experiment Macro on Page 33. To acquire an image: 1. On the keypad, press EX Shutter to close the shutter. 2. Switch the beam selector to camera. 3. In the Resolve3D window Exposure field, enter an exposure time (in seconds). A good starting exposure time is 0.1 second (see Finding Exposure Time on Page 82 for details). Tip You can also click the Find button on the Resolve3D window to find a good exposure time. Use Find carefully. Overuse of this option can photobleach the specimen. You need to be particularly careful when determining exposure times for live cells. When using Find for live cells, start with lower exposure times by changing the Target Intensity Value to around 200 counts. 4. Click to acquire an image. Tip You can also use Auto Focus to focus the sample as follows: On the Resolve3D window, click AF to auto focus the sample. If your image is far out of focus, you may need to click AF more than once. 5. To focus, use the mouse to slide the Stage Z Control bar up or down. 04-720104-000 Rev D /1008 28 DeltaVision Core and personalDV User's Manual Z Control and then click on the object that you want to 6. To center the image, click center in the Image window. Tip You can also acquire an image by clicking the ACQUIRE IMAGE button, rightclicking on the stage view, or choosing File | Acquire on the Resolve3D menu. 7. To enlarge the thumbnail image displayed in the stage view, drag the mouse down over the zoom wheel. The Zoom Wheel Note Thumbnails appear only when the Show Stage Thumbnails option is selected on the Misc tab in the Resolve3D Settings window. 8. To clear the thumbnail image, click . Saving Image Data After you acquire an image, use these instructions to set up a personal data folder and use the Snapshot utility to acquire a single image. AppliedPrecision Chapter 3: Getting Started Setting up a Personal Data Folder You can set up a personal data folder in which to save your images. After you create and save this folder, DeltaVision automatically uses it as the data folder when you log on to the system. To set up a personal data folder: 1. At the top of the Resolve3D window, click the Settings button to open the Resolve3D Settings window. Then click the Files tab. 2. In the Data folder field, enter the directory (e.g., /data1/myData) in which you want to save your images. To create a new folder, type the name of the folder after /data1 (e.g., /data1/myNewData) and select Save Settings. ! Important Store all files in the /data1 directory unless you are instructed to do otherwise by your system administrator. Tip If you are using an existing folder for your data, you can drag and drop the folder from the Linux File Manager to the Data folder field. 3. To reset the default Data folder when you log out, select the Data folder is temporary option. Saving a Single, Multi-Channel Image Sometimes it is desirable to acquire a single, multi-channel image. The Snapshot utility helps you quickly create a 2-D, multi-wavelength image without having to run a full experiment. 04-720104-000 Rev D /1008 29 30 DeltaVision Core and personalDV User's Manual To acquire a single Multi-channel image: 1. From the Resolve3D window, choose File | Snapshot to open the Snapshot dialog box. Tip Alternatively, you can open the Snapshot dialog box by right-clicking on the Resolve3D window and choosing Snapshot from the shortcut menu. 2. In the Image File Name field, enter a file name. Then select which channels to save. (Snapshot uses the exposure conditions that are displayed in the Resolve3D window for those channels.) Note SoftWoRx adds the _R3D.dv extension to the file name. If you enter a file name without a directory path, the file will be located in the current data folder. You can specify to place the file in another directory by including the path in the file name (e.g., /tmp/myfile). 3. Click Do It. The Image window opens and displays the new image. The image is saved as a DeltaVision file that you can open in softWoRx. Turning DeltaVision Off Use the following instructions to turn off DeltaVision on a daily basis. For instructions that show how to shut down the system, see Shutting Down and Starting the System on Page 131. To turn off DeltaVision: 1. Turn off the xenon light source using the bulb main menu. Clicking the icon will switch it to the off icon on the Resolve3D state. AppliedPrecision Chapter 3: Getting Started 31 2. Save all data on the workstation. 3. On the softWoRx menu bar, select File | Exit. Then exit all other workstation applications. 4. Log out of the workstation account. 5. Press the IC/MIC power switch to turn off the IC/MIC. Wait 30 – 60 seconds for the IC/MIC to power down. Note If the IC/MIC fails to turn off within 30 – 60 seconds after pressing the power switch, press and hold the IC/MIC power switch for 5 seconds to turn off the device. 6. Clean the objective with a clean, unused cotton swab or lens paper to remove all of the oil on the objective. Then apply chloroform to a cotton swab, gently roll it over the objective lens once, and discard it. After you finish imaging, Always clean the objective with a clean, CAUTION: unused swab or lens paper. Never reuse swabs or lens paper. 7. Lower the objective by turning the Coarse Focus knob. 04-720104-000 Rev D /1008 32 DeltaVision Core and personalDV User's Manual AppliedPrecision 4 4 Setting Up and Running Experiments A DeltaVision experiment is a macro that runs a set of instructions for collecting image data. You will use experiments to acquire almost all of your data. This chapter shows how to set up and run experiments that use several DeltaVision data collection options. It includes: Creating and Running an Experiment Macro Sectioning Specimens for 3D Images Selecting Filters Setting Up Time-lapse Experiments Point Visiting Collecting Panel Images Over Large Areas Using the Multiplexed Wavelength Option Creating and Running an Experiment Macro DeltaVision Experiment macros are files that include settings and commands for acquiring data with DeltaVision. Macros allow you to automate data collection. After you use the DeltaVision interface to create a macro, you can run the macro to 34 DeltaVision Core and personalDV User’s Manual automatically collect data. Macros can be very simple or they can be very complex and include numerous options. After you create a macro, you can use it as a template to modify and create other macros. To create and run an experiment macro: 1. At the top of the Resolve3D window, click the Experiment button to open the Design/Run Experiment window. 2. Click the Design Experiment tab. 3. In the Experiment Name field, enter a name for the macro. Note By default, softWoRx uses Resolve3D as the experiment name. This is a special disposable name that does not require confirmation to overwrite. If you do not intend to reuse an experiment, using Resolve3D for the experiment name is the simplest method. Refer to Sectioning Specimens for 3D Images, immediately following this section, for the specific components of designing an experiment. 4. From the File menu, choose Save. The macro name appears in the Design/Run Experiment window title bar. 5. Click the Run Experiment tab. AppliedPrecision Chapter 4: Setting Up and Running Experiments 35 6. In the Image file name field, enter the file name. Notes #1 Do not use file names that include spaces or special characters (e.g., %, /, \, “, !, $, #, ~, *, &, @, ’, +, = ). #2 The image file name has an _R3D.dv extension. This is the unprocessed (i.e., raw) Resolve3D image. A file with a .log extension is also created. The .log file is a text file containing information about the image file, including the macro and objective that were used to collect the image. 7. In the toolbar at the top of the screen, click the green arrow button the scan. to start The macro collects the image and saves it in your data folder (see Setting up a Personal Data Folder on Page 29). To process the image, use the deconvolution module in the softWoRx program, as described in the softWoRx Imaging Workstation User’s Manual. Sectioning Specimens for 3D Images You can acquire images of multiple sections. This data can be used to create 3D projections, view cross sections, and create volumetric and line models. 04-720104 Rev D/1008 36 DeltaVision Core and personalDV User’s Manual When you set up a Z scan on DeltaVision, you normally begin by defining a focus range to use. This is accomplished by marking the top and bottom of the sample. You then focus on a plane of interest. The focus range is taken above and below the plane of interest. If you are new to 3D microscopy, you may have never had to deal with the specimen's three-dimensional size (except in relation to the rest of the specimen). Manually operated microscopes provide very little information about real distances in Z, or even X and Y. Once you start viewing your specimens in threedimensions, however, you will become accustomed to the relationship between the microscope stage, sample, and optics, and will find that designing a Z scan is usually straightforward. Use the following procedure to create and run a 3D experiment. To determine the Focus point when scan starts, Optical section spacing, Number of optical sections, and Sample thickness, refer to Guidelines for Designing and Running 3D Experiments on Page 39. Note The softWoRx software reports all distances in microns. To design and run a 3D experiment: 1. Manually acquire images of your specimen and adjust acquisition parameters and settings until you are satisfied with the images. This includes focusing on the specimen and determining what channels to use. 2. In the Resolve3D window, use the Z Slider on the right side of the Resolve3D window to find and center the object of interest. Drag the slider up to find the top of your sample. (When you release the mouse button, an image is acquired AppliedPrecision Chapter 4: Setting Up and Running Experiments 37 and displayed in the Data Collection window.) Drag the slider and acquire images until you are satisfied with the position. Then press the button to mark that location. Next, use the slider to find the bottom of the sample. When you are satisfied, press the button to mark that location. Note To reduce the risk of running the objective lens into the sample, the Z slider is limited to 5 μm at a time. Z slider Use the Z slider to find the top and bottom of a sample. The sample thickness is indicated by the wide line on the Z slider (shown on the right image). Note The Z stage view displays the relative position of the objective lens to the sample for an inverted microscope. Dragging the Z slider down focuses the microscope closer to the cover glass (negative direction). Dragging the Z slider up moves the focus from the cover glass toward the microscope slide (positive direction). 3. Click Experiment to open the Design/Run Experiment window and click the Design Experiment tab. Then click the Sectioning tab. 04-720104 Rev D/1008 38 DeltaVision Core and personalDV User’s Manual 4. Specify the focus point of the microscope at the start of the experiment and move the stage to that focus point as follows: Choose one of the following *focus points in the Focus point when scan starts list. Then click the corresponding button in the Resolve3D window to move the stage to that focus point Top of the sample Middle of the sample Bottom of the sample * For most applications, the Middle of the sample provides the best results. Be sure to set the focus consistently with this setting before you CAUTION: start the experiment. (For example, if you specify to use the Middle of Sample option, be sure to focus midway between the top and bottom of the sample.) DeltaVision generates the sectioning commands based on this relative starting point. If this is not done correctly, you can lose important data. 5. Specify the separation (in microns) between each optical section in the Optical section spacing field. If you are using a 60X objective, start by using the default value (.2 μm). If you are using another objective, click the Lens button on the Resolve3D window to open the Lens Information dialog box and use the value in the Recommended Z Step size field (at the bottom of this dialog box). As a general rule of thumb, the Z step size is approximately 1/3 of the Z resolution for each objective. 6. Specify either the thickness or the number of sections as follows: AppliedPrecision Chapter 4: Setting Up and Running Experiments 39 • To get the thickness of the specimen, as defined in Step 2, click Get thickness. softWoRx adjusts the number of sections to span the specimen thickness. • To specify the number of sections, enter the number of sections in the Number of optical sections field. 7. Save and run the experiment. Guidelines for Designing and Running 3D Experiments Use the following guidelines to determine values for the fields on the Sectioning tab under the Design/Run Experiment window, Design Experiment tab. Focus point when scan starts This list allows you to specify the focal plane of the microscope at the start of an experiment. Choose one of the following options: Middle of Sample The focal plane is midway between the top and bottom of the sample. This is the default and is usually the "plane of best focus" for the sample. This is also the best point to set for Point Visiting. Bottom of Sample This represents a plane where the Z stage is farthest away from the objective. Top of Sample This represents a plane where the Z stage is closest to the objective. Figure 1: Z Top and Z Bottom Slide Total Z Motion Top Focal Plane Current Stage position Bottom Focal Plane Coverslip (#1.5 or ~0.17 mm) Objective Optical section spacing This parameter indirectly defines the size of the incremental Z stage movement (the distance between focal planes). When DeltaVision acquires an image, the objective collects information within the depth of field above and below the focal plane. 04-720104 Rev D/1008 40 DeltaVision Core and personalDV User’s Manual Depth of Field Focal Plane Optical Section Spacing The Optical section spacing specifies the upper and lower boundaries for which information is collected. It is centered on the focal plane and includes the information above and below that plane. When you select an Optical section spacing, DeltaVision uses a Z step size that is the same distance as the Optical section spacing. (The Z step size is the vertical distance that the stage moves between focal planes.) Figure 2: Optical Section Spacing Focal Planes Z Step Size Optical Section The standard step size for a 1.40 NA lens is 0.2 μm, although other step sizes are usually fine. Due to the inherent Z resolution of a 1.40 NA lens, there is little need to take steps finer than 0.1 μm. When scanning a PSF, use 0.1 μm steps. For low power lenses, the step size should be appropriately larger. The Lens Info dialog for each lens contains the suggested Z Step size for each lens (derived using Nyquist sampling). This value is approximately 1/3 of the theoretical Z resolution for each objective. Number of optical sections This field defines the number of optical sections in the Z series of the experiment. Enter the number of sections necessary to span from the lower to the upper boundaries of the sample. The required number of Z sections depends upon the thickness of your specimen. A typical scan consists of between 16 and 64 sections, but there is no set number. AppliedPrecision Chapter 4: Setting Up and Running Experiments 41 For best results, use at least three optical sections. Using one or two optical sections, however, will also provide acceptable results. The maximum number of optical sections is limited by memory and time. Applied Precision's benchmark deconvolution consists of 64 optical sections that have XY dimensions of 512x512. If you find it necessary to acquire many Z sections, use the following formula to figure out how much random access memory (RAM) your computer needs to efficiently perform the deconvolution. Less RAM results in slower performance. Available RAM (bytes) > {(X size) x (Y size) x (Z size) x 4} Sample thickness This field displays the thickness of the optical section range. It is approximately one section thicker than the actual stage movement, as shown below. Range of Stage Movement Sample thickness (Optical Section Range) For optimal deconvolution, the Z sections should extend beyond the volume of interest by 1-3 sections. Sample thickness = Optical section spacing x Number of optical sections A number of methods have been used to determine the necessary Z scan settings. The best method for your work depends largely on preference and experience, and there is not really a single best way to approach the problem. Listed below are some of the methods that have been used: Exact Method: Use the exact method when you want to make a perfect Z scan. Use the position buttons in the middle of the Resolve3D window to find and center the object of interest as follows: Use the button to move the Z focus to the top of the sample and mark the button to move to the bottom top location with the button. Then use the of the object and mark the bottom location with the button. On the Sectioning tab, use the Get thickness button to calculate the thickness of the sample. (The thickness is entered into the Sample Thickness field). Note that the experiment created by Design Experiment uses relative motion for Z and 04-720104 Rev D/1008 42 DeltaVision Core and personalDV User’s Manual not absolute coordinates. All motion in Z is relative to the starting point and does not refer to an absolute Z position. Note The top and bottom can be viewed by pressing the button or the button respectively. The middle section can be viewed by pressing the button. Overscan Method: As the name implies, the overscan method involves using a Z range that is much greater than the range of interest. For example, design an experiment that scans double the expected Z range. Previous experience is obviously helpful when using this method. When using this method, it is recommended that you figure out which Z sections contain the desired information before performing the deconvolution. Cut out unnecessary Z sections during the deconvolution step of the image processing by specifying the section numbers of the Z start and Z end. This will help to ensure that the sample is imaged. Previous Experience: This method is essentially the same as the overscan method, except that one strives for a more exact scan. For example, if you are scanning an erythrocyte with 7μm diameter, you could focus on the center of the cell, and then scan 4μm above and 4μm below the cell. Of course, if you underscan the object, then you might miss important details, so it helps to be conservative. Selecting Filters From the Channels tab of the Design/Run Experiment dialog box, you can define which filter sets to use in the experiment for imaging. DeltaVision acquires images from each filter set (channel) and creates a single DeltaVision file that contains all of the channels that were collected. There can be up to five channels per Experiment. FITC (left) and DAPI (center) filtered images are combined in the final DeltaVision file (right) AppliedPrecision Chapter 4: Setting Up and Running Experiments 43 Choosing which filters to use Your choice of filters will be determined by the types of fluorescent probes with which you have labeled your sample and the filters available on your system. The excitation and emission spectrum of your filters should match the spectra for the absorption and emission of the fluorescent probes you want to use. The following two tables show which DeltaVision filters match each particular probe. The interchangeable Standard and Live Cell filter modules are available for both DeltaVision Core and personalDV. The Standard filter module filter sets are typically used for fixed specimens while the Live Cell filter module sets are commonly used for live specimens. Figure 3: Standard DeltaVision Module Filter Sets Probes Filter Name Excitation Emission DAPI, Hoechst, Coumarin DAPI UV, 350nm Blue, 455nm Fluorescein, GFP, CY2, Al488 FITC Blue, 490nm Green, 525nm Rhodamine, Texas Red, Cy3, TRITC Green, 555nm Orange, 605nm CY-5® CY-5 Red, 645nm Infrared, 705nm Figure 4: Live-cell Module Filter Sets Probes Filter Name Excitation Emission Cyan GFP CFP 430nm 470nm Yellow GFP YFP 500nm 535nm mCherry mCherry 572nm 632nm EGFP, sgGFP EGFP 470nm 525nm You can select other combinations of excitation and emission filters. You can also add your own custom filter sets. To determine the optimal filters for your application, compare the excitation and emission spectrum of your filters to the spectra for the absorption and emission of the fluorescent probes that you want to use. The spectra for the standard DeltaVision filter set and the optional Live Cell set are provided in Appendix D. Notes #1The lists of probes in Figure 3 and Figure 4 (above) do not include all of the probes that can be used with these filter sets. #2 Additional filter sets may be purchased from Chroma Technologies or Semrock. #3 The CY-5 filter set does not include an eyepiece filter due to the low sensitivity of 04-720104 Rev D/1008 44 DeltaVision Core and personalDV User’s Manual the human eye at this wavelength. #4 The standard configuration for the six position filter wheels includes: DAPI, FITC, TRITC, CY-5, a polarizer, and a block position. For instructions on how to change filter wheel modules and calibrate filter wheels, see Changing Filter Wheel Modules and Calibrating the Filter Wheels in Chapter 8. To specify which filters to use: 1. On the Design/Run Experiment window, click the Design Experiment tab. Then click the Channels tab. 2. Select a check box on the far left next to an Exp field. The EX Filter field controls which excitation filter will be placed into the excitation pathway between the %T filter and the fiber optic module. The %T Filter attenuates the intensity of the excitation light. The EM Filter field controls which filter will be placed in the emission pathway between the microscope and the camera. The EX Shutter field specifies which light source to use for that channel. 3. On the EX Filter list for the same line as the check box you selected, select the excitation filter. The EM Filter (emission filter), %T Filter (neutral density filter), and eyepiece filters for the selected filter set are automatically specified. (DeltaVision specifies the most recent filters that were selected for that filter set in the Resolve3D window. If no filters have been selected, DeltaVision specifies default filters for that filter set.) AppliedPrecision Chapter 4: Setting Up and Running Experiments 4. To change the exposure time, enter a value in the Exp field. Values in the Exp field are in seconds. For example, 0.100 is 1/10th of one second. If you do not enter a value in this field, the most recently selected exposure value is automatically set for each filter. 5. To select a different emission filter or to attenuate the intensity, choose a filter from the EM Filter or the %T lists. 6. You can choose which light source to use for each channel by selecting a shutter from the EX Shutter field. EX is the standard fluorescence light source, TRANS is the transmitted light source, EX2 is an optional second fluorescence light source, and LASER is an optional laser source (using the QLM module). 7. If you are repeating an experiment and you have entered new exposure times or %T in the Resolve3D window, click Refresh exposure conditions. 8. Repeat Steps 2-6 for each set of filters that you want to use. 9. Save and run the experiment. Setting up Time-lapse Experiments Time-lapse images are very useful for analyzing live specimens. Time-lapse images showing cell mitosis 04-720104 Rev D/1008 45 46 DeltaVision Core and personalDV User’s Manual To design a time-lapse experiment: 1. Select the Time-lapse tab under the Design Experiment tab on the Design/Run Experiment window. 2. Activate the Time-lapse checkbox. 3. If you want the DeltaVision lamp to turn off when the experiment is completed, activate the Lamps Off when finished checkbox. Note Use discretion when activating the Lamps Off when finished checkbox feature. Cycling the DeltaVision lamp on or off more than is necessary can reduce the xenon bulb life. 4. Enter the desired time interval in the Time-lapse field. Note The minimum time interval is limited by acquisition time. If you specify a time that is less than the acquisition time, the experiment proceeds at the quickest possible rate. 5. Set up the remaining parameters for your experiment in one of the following ways: • Enter the desired number of time points in the Time Points field. The Total Time field displays the total time that will elapse during the experiment. • Enter the total time in the Total Time field. The Time Points field displays the number of time points for the experiment. AppliedPrecision Chapter 4: Setting Up and Running Experiments Point Visiting You can use point visiting to monitor areas of the slide that are in different fields of view. Instead of recording one cell or field in a single experiment, multiple sites can be imaged in a single experiment, increasing data collection efficiency. In practice, the number of sites is limited only by the minimum acceptable time interval between each time point at a single site. This makes time-lapse imaging much more efficient, and allows you to collect enough data to generate statistically significant results. In addition, variability between cells within an experiment can be assayed, eliminating uncertainty as to the behavior of cells in a single experiment. Point Visiting monitors points that are in different fields of view To set up an experiment that visits points, you must: Mark the points to visit with the Keypad or with Resolve3D and save a point list. Edit the point list if necessary. Load the point list and specify which points to visit. Notes #1 If you are placing your slide directly on the microscope stage (without the Repeatable Slide Holder), you can store the X, Y, and Z coordinates of the stage positions you mark; however, if the slide is removed from the stage or the Z focus knob is adjusted, these coordinates no longer apply. #2 If you are using Applied Precision’s Repeatable Slide Holder, you can remove the slide and then place it in the same position when you want to revisit the points. To do this, you must record the position (A-G) of the slide before you remove it. Then 04-720104 Rev D/1008 47 48 DeltaVision Core and personalDV User’s Manual put the slide in the same position when you return it to the slide holder and update the Z coordinates. Marking Points There are two ways to mark points within a sample: using the keypad or using Resolve3D. An efficient way to mark points is to use both methods together. First, mark the points using the keypad, which is quick and approximate, and save the point list. Then, in Resolve3D, specify a more exact location for each point. The points marked using the keypad are automatically communicated to Resolve3D and displayed in the Stage view. You can view the list of points by opening the Point List dialog box. To mark points using the keypad and Resolve3D: 1. Use the arrows on the keypad or the joystick to move to the desired point. 2. Press the POINT MARK key on the keypad. The number of the marked point is displayed in the Stage view. Marked point in the Stage View 3. Repeat steps 1 and 2 to mark the desired points. AppliedPrecision Chapter 4: Setting Up and Running Experiments 49 As you mark points, the stage trails and points (along with their point numbers) are displayed in the Resolve3D Stage view. Point Numbers 4. To view all of the points, use the Zoom Wheel to zoom out on the stage view. To pan the stage view, use the button. The stage view after zooming in (left) and panning (right) 5. In the Resolve3D window click to open the Point List dialog box. 6. Click on a point to select it and then click Visit Point to move the stage to that point. 7. Use the XY Stage Controls on the Stage View to move the stage to the exact XY position. XY Stage Controls 8. Use the Fine Z Focus knob to focus while looking at the sample through the eyepieces. Then acquire an image to execute an LMC move and verify that the 04-720104 Rev D/1008 50 DeltaVision Core and personalDV User’s Manual image is in the best focal plane. Repeat this step if necessary until the image is in focus. ! Important Do not use the microscope Focus knob after you complete Step 8. Instead, use the Resolve3D Z controls (the Z buttons on the Resolve3D window or the Z slider) or the AF (autofocus) button. 9. On the Point List dialog box, click Replace Point to replace the old coordinates with the new exact coordinates for the point. 10. Repeat Steps 6-9 to replace all of the points in the list with the exact X, Y, and Z coordinates. Editing a Point List To delete a point using Resolve3D: 1. In the Point List dialog box, select the point that you want to delete. 2. Click Delete Point. To save the point list: 1. In the Point List dialog box, click Save List. 2. In the Prompt dialog, enter the desired name for the list, using eight characters or less. Since there is really no method of displaying a directory of these names, write the name of the list down to keep a record of it. 3. Press Enter or click OK. To visit a point using Resolve3D: Use one of the following methods to visit a point: • In the Stage view, double click on the point. • In the Point List dialog box, click the point that you want to visit and click Visit Point. Loading a Point List and Specifying Points to Visit If you are using a previously saved point list, you will need to load the point list in Resolve3D before you specify which points to visit. If you are using a point list that is already open in the Point List dialog box, you can specify which points to visit. AppliedPrecision Chapter 4: Setting Up and Running Experiments 51 Tip You can mark and then visit a point list without saving it when you are setting up an experiment. To load a point list into Resolve3D: 1. On the Resolve3D dialog box, click Point List dialog box. or choose View | Points List to open the 2. Click Open List. 3. In the Prompt dialog box, enter the name of the desired list and click OK. Note You may need to load a list when the list of points has been cleared from the Point List dialog box and you want to reload the saved list. To specify which points to visit: 1. Make sure that the point list is loaded in the Point List dialog box as shown above. 2. Open the Design/Run Experiment window and click the Design Experiment tab. Then click the Point Visiting tab and check the Visit Point List option. The Point Visiting dialog box is linked to the point list that is open. 3. Enter the points that you would like to visit in the Visit Point List field. (For example, entering 1-3 specifies to visit points 1, 2, and 3. Entering 1-3, 5-7, 9 specifies to visit points 1-9, but not 4 or 8.) Monitoring Point Visiting Experiments You can set up DeltaVision to display a separate Data Collection window for each point in your point visiting experiment. 04-720104 Rev D/1008 52 DeltaVision Core and personalDV User’s Manual With the Point Track Display Option enabled, each point in a point visiting experiment is displayed in a separate window To set the Point Track display option: 1. On the Resolve3D window, click the Settings button to open the Resolve3D Settings dialog box. 2. Click the Display tab. 3. In the Image Display mode list, select Point Track. AppliedPrecision Chapter 4: Setting Up and Running Experiments 4. Click the Save Settings button, then click Done to close the Resolve3D Settings dialog box. Collecting Panel Images over Large Areas Panel collection macros are useful when you want to scan a large area with a relatively high magnification lens. You can use the panels as a means of reviewing a large area of a slide, or as data that you want to stitch together to form a single, large image. A set of panel images (left) can be stitched together to create a single image (right) Image files that are collected with Panel Collection Setup enabled have a .pnl extension. These images must be stitched to create DeltaVision image files. (See Stitching in the softWoRx Imaging Workstation User’s manual.) CAUTION: Do not try to reuse panel collection experiment macros. These macros are sensitive to microscope settings such as image size and magnification because the number of panels required depends upon many factors. Determining Border Rolloff Voxels Before you collect panel images, you must first determine the number of voxels in the Border Rolloff that is used in Deconvolution. Note Conceptually, a voxel is a three-dimensional pixel. So, while a pixel generally refers to XY data, a voxel includes information from the Z (or depth) plane. To determine Border Rolloff Voxels: 1. Determine the size of the panels that you plan to collect. (Smaller panels work best because they have the flattest intensity distribution.) 2. From the main softWoRx window, choose Process | Deconvolve to open the Deconvolve window. In the Input field, enter the file name of an image that is 04-720104 Rev D/1008 53 54 DeltaVision Core and personalDV User’s Manual similar to the panel size. (You can acquire and save a blank image of that size for this purpose.) 3. Click the More Options button to open the More Deconvolution Options window and record the value that is displayed in the Border Rolloff (voxels) field. Collecting Panel Images To collect 3D panel images: 1. From the Resolve3D window menu, choose View | Point List. In the Point List dialog box, choose Mark Point and mark points in two opposite corners to define the area of your final composite image. 2. In the Resolve3D window, click Experiment to open the Design/Run Experiment window. 3. Click the Design Experiment tab. Then set up the Sectioning and Channels information in the same way that you would for standard data collection. 4. In the Point List dialog box, select one of the points that you marked in Step 1 and click Visit Point. 5. Click the Panels tab under the Design Experiment tab. Then select the Collect Panels option. 6. Click Get Start under the Panels tab. Then visit the other point that you marked in Step 1 and click Get End. (Alternatively, you can enter the coordinates that are displayed in the Point List dialog box.) 7. In the Overlap (pixels) field, enter at least twice the number of border rolloff voxels as you recorded when you determined border rolloff voxels (see Page 53). If you generally adjust the pixel size to <1 or use rotation when stitching, use a larger overlap. (The spacing information is automatically updated.) 8. Save and run the experiment. For instructions that show how to use softWoRx to stitch panels together, see the softWoRx Imaging Workstation User's Manual. Note You cannot easily use Panel Collection with time-lapse or point-visiting experiments. It is possible only by editing the header. AppliedPrecision Chapter 4: Setting Up and Running Experiments Using the Multiplexed Wavelength Option The optional Multiplexed Wavelength module for the DeltaVision system allows you to perform nearly simultaneous two-channel imaging without the drawbacks associated with true simultaneous two-channel imaging. This option uses two shuttered illumination sources and a dual-band emission filter to eliminate filter wheel movement between channels, and therefore greatly reduces the time required for the DeltaVision system to acquire a set of two-channel images. The combined light path ensures no registration artifacts are introduced and independent excitation of probes helps to ensure minimal crosstalk. Conceptual view of Multiplexed Wavelength functionality Before you use the Multiplexed Wavelength option, you must first have it installed and configured correctly. Your Applied Precision representative will assist you in setting up this option and help you ensure that all hardware and software to support Multiplexed Wavelength functionality is installed properly. After the option has been installed and configured, the menus, tools, and other infrastructure necessary to use the feature will be available on your workstation. Setting Up the Multiplexed Wavelength Option Before you begin designing your Multiplexed Wavelength experiment, you’ll need to perform the steps described in the following procedures to activate a 04-720104 Rev D/1008 55 56 DeltaVision Core and personalDV User’s Manual Multiplexed Wavelength filter set and prepare the DeltaVision system for Multiplexed Wavelength operation. To activate the Multiplexed Wavelength filter set: 1. To change the active filter set to a filter set that is Multiplex capable, select Settings in the Resolve3D main menu. Settings The Resolve3D Settings window is displayed. 2. From the Resolve3D Settings window, open the Misc tab. AppliedPrecision Chapter 4: Setting Up and Running Experiments 57 Misc tab 3. In the Resolve3D Settings window, select the Excitation, Emission, and Eyepiece filter sets you want to use. When these fields are changed, the <<<Pending Activation message is displayed in the window (as shown). Select the EX, EM, and EP filter sets Message displayed when filter wheel settings are changed 4. Click Activate Filter Sets. The following confirmation window is displayed. Note If you select filter sets for the Excitation filter wheel and Emission filter wheel fields and then click Done in this window, your selections are retained until you either activate the filter sets or exit Resolve3D. 04-720104 Rev D/1008 58 DeltaVision Core and personalDV User’s Manual Note For the filter sets to be activated, the selected multiplexed filter set filters must exist in the currently installed excitation and emission filter wheels. To determine the proper filter sets, refer to the “Changing Filter Wheel Modules” section in Chapter 8. 5. If the selected filter wheels are installed on your DeltaVision, click Next to continue. Note If you click Skip from this window, the selected filter wheels are activated immediately and the remainder of the activation wizard is skipped. 6. Insert the selected secondary filter insert (mCherry is used in this example) into Filter Slot 1 of the secondary light path and click Next to continue. The system gathers the information for this window (in this case, “position 4 (500 LP)”) from the MXWSetup.ini file, not from the Instrument Controller. 7. Move the beam combiner to the appropriate position and click Next to continue. AppliedPrecision Chapter 4: Setting Up and Running Experiments Again, softWoRx gets the information for this window (in this case, “position 2 (GFP/mCherry)”) from the MXWSetup.ini file, not from the Instrument Controller. 8. Click Finish to complete the Multiplexed Wavelength filter activation process. After the selected filter set is activated, the Design/Run Experiment window will look similar to the following. At this point, you have completed activating the Multiplex Wavelength filter set. You should now continue with the steps in the next procedure for viewing a sample with the Multiplexed Wavelength operation. To view a sample using the Multiplexed Wavelength option: 1. Rotate the eyepiece filter wheel to the POL or BLANK position. 2. From the Resolve3D main menu, select the Excitation filter currently in the primary light path (CFP or GFP). 04-720104 Rev D/1008 59 60 DeltaVision Core and personalDV User’s Manual Select the EX filter currently in the primary light path. 3. Use the EX button on the keypad to open the primary EX shutter and view the primary light path. 4. Use the EX2 (formerly CAMERA SHUTTER) button on the keypad to open the EX2 shutter and view the secondary light path. Note With the Multiplexed Wavelength option, you can view both selected wavelengths simultaneously by opening both EX shutters at the same time. Designing a Multiplexed Wavelength Experiment Use the following procedure to begin the design process for Multiplexed Wavelength experiments. To design a Multiplexed Wavelength experiment: 1. From the Resolve3D main menu, click the Experiment button to open the Design/Run Experiment window. AppliedPrecision Chapter 4: Setting Up and Running Experiments 61 Experiment Button 2. If the Multiplexed Wavelength option is enabled on your DeltaVision system, you’ll see the Multiplexed tab in the Design/Run Experiment window. Click on the Multiplexed tab to view the options for Multiplexed Wavelength experiments. Multiplexed Tab The Multiplexed tab of the Design/Run Experiment window is displayed as shown. 04-720104 Rev D/1008 62 DeltaVision Core and personalDV User’s Manual Select Checkbox 3. From the Multiplexed tab, select the Do Multiplexed Channel Imaging checkbox. If the currently active filter set is not Multiplex capable, the following window is displayed. You will need to change the active filter set to continue. Press OK to return to the Design/Run Experiment window. To change the active filter set for Multiplexed Wavelength experiments, see the procedure for activating a multiplexed wavelength filter set in “Setting Up the Multiplexed Wavelength Option.” (Also see “Setting Up Filter Wheels” in Chapter 8 for additional information on changing the active filter set.) If the currently active filter set is Multiplex capable, the Design/Run Experiment window is displayed and will look similar to the following. AppliedPrecision Chapter 4: Setting Up and Running Experiments At this point, you have completed the initial portion of the Multiplexed Wavelength experiment design setup. You should now continue with the standard steps for the remainder of the experiment design, such as Sectioning, Timelapse, and so on. Note As soon as you activate the Do Multiplexed Channel Imaging checkbox, all conventional imaging settings are disabled. This is also true of all multiplexed settings when you reactivate conventional imaging. 04-720104 Rev D/1008 63 64 DeltaVision Core and personalDV User’s Manual AppliedPrecision 5 5 Acquiring Data from Live Specimens This chapter shows how to use the following features to image live cells with DeltaVision. Set up experiment macros to automatically focus before acquiring each image. This is useful for cells that move during the experiment. Use Cell Tracking to follow cells as they move laterally and move the stage to keep them in the field of view. Use Optical Axis Integration (also referred to as Z Sweep Acquisition) to acquire a 2D projection. This method collects and integrates one continuous image through an extended Z movement. Z Sweep Acquisition is much faster than the traditional technique of collecting an individual image at each focal plane. It also reduces the risk of specimen damage and has less total camera read noise. Acquire reference images that can be used for Differential Interference Contrast (DIC) and other types of analysis. 66 DeltaVision Core and personalDV User's Manual Using Autofocus in Experiment Macros You can set up your experiment macro to automatically focus before each image is acquired. This is especially useful for long time-lapse experiments that are susceptible to changes in environmental conditions. Autofocus allows you to acquire focused images without closely monitoring the experiment. The DeltaVision Autofocus algorithm is a software-based method that uses both image contrast and peak image intensity to determine when the specimen is in focus. To optimize the focus position for DeltaVision, you must find the Z position where the contrast is greatest. However, this position may not always be at the optimal, in-focus plane of the sample. Autofocus allows you to adjust several parameters within the standard algorithm so that the final Z position is most favorable for the specific sample. Limiting the step size and maximum Z range of travel can limit the effects of objects that are not of interest. In cases where the contrast outside of the actual middle of the sample is highest, you can create an offset so that the middle of the sample is located during the Autofocus process. The Autofocus option works the same way as the button on the Resolve3D window. Use the following instructions to include this option in the experiment macro. To set up an experiment that automatically focuses before acquiring points: 1. At the top of the Resolve3D window, click the Experiment button to open the Design/Run Experiment window. AppliedPrecision Chapter 5: Acquiring Data From Live Specimens 2. Click the Design Experiment tab and then click the Time-lapse tab. 3. Select the Autofocus before imaging option. When this option is selected, the software automatically determines the parameters for the Autofocus process. 4. To change the various Autofocus parameters, click the Autofocus Options button. The Resolve3D Settings dialog box is displayed with the Autofocus tab selected. 5. Deselect the Automatically determine parameters option. The remaining parameters on the dialog box become active. The Autofocus parameters in this dialog box are described in Settings Dialog Box Autofocus Options on Page 208. Tracking Cells Cell Tracking moves the stage laterally to follow cells as they move during a timelapse experiment. With the Enable Cell Tracking option selected, DeltaVision automatically keeps cells in the field of view as they move during a time-lapse experiment. After you specify an ROI around an object of interest, the software determines the center of the cell and establishes a recognizable pattern within the ROI. In subsequent images, the software recognizes this pattern and recalculates the center of the cell on-the-fly. The position of the new center is compared with the position of the previous center and, if the cell has moved beyond a specified threshold, the system automatically moves the stage and re-centers the cell in the field of view. 04-720104 Rev D/1008 67 68 DeltaVision Core and personalDV User's Manual Time Point 1 Time Point 2 Time Point 3 Time Point 4 At Time Points 1 and 2, the cell is moving through the ROI (the inner square), but the center is still within the Move Threshold (the circle). At Time Point 3, once the center of the cell touches the threshold boundary, the stage moves to re-center the cell within the ROI. (Note the new stage position displayed in the lower-right corner of Time Point 4.) To use Cell Tracking: 1. Set up a time-lapse experiment as shown in Setting up Time-lapse Experiments on Page 42. 2. On the Time-lapse tab on the Design/Run Experiment window, select the Enable Cell Tracking option. AppliedPrecision Chapter 5: Acquiring Data From Live Specimens 3. Click Cell Tracking Options. 4. Manually acquire an image for each channel and determine which single channel best identifies the features of your specimen. In the Reference Channel list, specify that channel. (The channels are numbered in the order in which they are listed on the Design Experiment Channels tab.) Note DeltaVision uses the reference channel for image recognition. 5. In the Move Threshold field, enter the distance in microns that the cell must move to trigger stage movement. 6. Specify the area around the cell (the region of interest or ROI) that you want DeltaVision to use for image recognition. For more about this option, see ROI Percent on Page 72. 7. If you are performing an experiment on a single cell, use the stage controls to center the cell (laterally) in the field of view. If you are performing a point 04-720104 Rev D/1008 69 70 DeltaVision Core and personalDV User's Manual visiting experiment, make sure that the points that you are monitoring are centered before you start your experiment. 8. Click the Run Experiment tab and then click Start Scan to run the experiment. Guidelines for specifying Cell Tracking Options You can specify several parameters that DeltaVision uses to track cells: Tracking Method Reference Channel Move Threshold ROI Percent Tracking Method The tracking method is the method that DeltaVision uses to determine the center of the feature. This center is recalculated after each image is acquired. You can choose from two tracking methods: Center of Intensity calculates the center of the feature based on intensity values. Center of Geometry calculates the center of the feature based on its geometry. Center of Intensity Center of Geometry Reference Channel DeltaVision uses the Reference Channel for pattern recognition. If you are acquiring more than one channel, choose the channel that has the most distinctive features. Note The term, Reference Channel should not be confused with Reference Image, which is something very different. Reference images are described later in this chapter in Acquiring a Reference Image. AppliedPrecision Chapter 5: Acquiring Data From Live Specimens Channels are numbered as they appear in the Experiment Designer window. In the following example, DAPI is Channel 1 and FITC is Channel 2. Move Threshold The Move Threshold is the distance the center of the cell (as defined by the tracking method) must travel before the system resets the stage. When the cell moves beyond this threshold, the stage moves so that the center of the cell retains its original position in relationship to the center of the field of view. Live cells, by their very nature, are constantly on the move. When choosing a Move Threshold, it is important to select one that is small enough to keep the cell in the field of view, yet large enough to buffer out needless stage movement that could result from numerous small cell movements. 04-720104 Rev D/1008 71 72 DeltaVision Core and personalDV User's Manual Cell tracking lags cell movement. Cell movement exceeds the threshold between Time Points 1 and 2 (left). In response, DeltaVision moves the stage so that it is centered on the cell position at Time Point 2. The stage is at this position when Time Point 3 is acquired (right). ROI Percent With rare exceptions, few live cells are isolated on the substrate. Most are genetically “programmed” to seek attachment and communication with other cells. When performing live cell microscopy, not only is it important to filter out unnecessary stage movement, it is also important to define an appropriate region of interest within the field of view. This region of interest must be large enough to include the entire cell or structure of interest, yet small enough to exclude other cells or structures that may tend to wander in and out of the field of view throughout the experiment. The ROI Percent parameter defines how much of the field of view the software will use for image recognition. In the software, ROI units are specified as a percentage of the width of the field of view. For example, a 50% ROI has a width that is 50% of the width of the field of view. In the first image, the width of the ROI is defined as 50% of the width of the field of view. In the second image, the stage has moved to keep the cell of interest within the ROI. Perimeter cells have also moved, almost entirely out of the field. AppliedPrecision Chapter 5: Acquiring Data From Live Specimens 73 Tip If DeltaVision loses the cell because it moves out of the field-of-view, you can update the point coordinates by manually finding the cell and centering it in the field-of-view. The point list is automatically updated. Acquiring 3D Z Projections with OAI Continuous Stage Movement Multiple Stage Stops Optical Axis Integration (or OAI), also referred to as Continuous Z Sweep, is useful for acquiring 3D Z projections of live specimens. Instead of collecting an individual image at each focal plane, OAI collects and integrates one continuous image through an extended Z movement. Optical Sectioning Real-Time Z Sweep Instead of acquiring multiple images, Real-Time Z Sweep acquires one image during a continuous stage movement and instantly creates a 3D Z Projection. Real-Time Z Sweep has significant advantages for applications such as Leading Edge Motion Analysis, Fast Organelle Dynamics, Microtubule Dynamics, and Fluorescence in situ Hybridization (FISH). It is especially useful for studies of objects that are moving in 3D space (e.g., kinetichores in a cell nucleus or other rapidly moving structures). Continuous Z Sweep versus Traditional Projections If you are acquiring data objects that you plan to use for 2D projections, Continuous Z Sweep provides several advantages over creating 2D projections from multiple optical sections: Complete Z data acquisition collects all data in the interval of interest (with 2D imaging or Z section sampling, some data is lost.) Fast data acquisition provides accurate image registration of rapidly moving objects. Low total exposure time reduces the risk of damage to the specimen. Low total read noise (the camera is only read once) improves signal-to-noise ratio. 04-720104 Rev D/1008 74 DeltaVision Core and personalDV User's Manual Note For samples that contain a large amount of fluorescence throughout 3D space (for example, a tumor spheroid that has a lot of fluorescence), optical sectioning may provide better results than OAI. The following 2D image of endosomes in a HeLa cell (left) and a 3D Z projection (right) of the same area were acquired under similar conditions. The additional data in the 3D Z projection include objects that moved out of the depth-of-field of the 2D image during the data acquisition process. endosomes in a HeLa cell (left)and an instant 3D Z projection (right) of the same area Using Continuous Z Sweep To set up a Continuous Z Sweep Experiment: 1. Set up your experiment as shown in Creating and Running an Experiment Macro on Page 33. 2. In the Resolve3D window, use the Z Slider on the right side of the Resolve3D window to find and center the object of interest. Drag the slider up to find the top of your sample. (When you release the mouse button, an image is acquired and displayed in the Data Collection window.) Drag the slider and acquire images until you are satisfied. Then press the button to mark that location. Next, use the slider to find the bottom of the sample. When you are satisfied, press the button to mark that location. AppliedPrecision Chapter 5: Acquiring Data From Live Specimens 75 Z slider Use the Z slider to find the top and bottom of a sample. The sample thickness is indicated by the wide line on the Z slider (shown on the right image). 3. Click Experiment to open the Design/Run Experiment window. Then click the Sectioning tab. 4. Select the Z Sectioning and Enable OAI Scan options. 5. Click the Run Experiment tab and click the green arrow button toolbar at the top of the screen to start the experiment. in the Note When deconvolving OAI images, select the More Options button on the Deconvolve window, and then select the Deconvolve Projections option in the More Deconvolution Options dialog box. 04-720104 Rev D/1008 76 DeltaVision Core and personalDV User's Manual Acquiring a Reference Image You can use an alternate filter or the transmitted light to acquire a reference image that can be combined with other images. This option is useful for Differential Interference Contrast (DIC) analysis. It can also be useful for other types of reference images. A reference image of yeast cells You can specify to acquire the reference image at the top, middle, or bottom of the sample. Top of Sample Middle of Sample Bottom of Sample Note It is important to optimize the reference image settings prior to defining them in the Experiment Designer. To create a reference image: 1. Set up a 3D Sectioning experiment (see Sectioning Specimens for 3D Images on Page 35). 2. In the Design/Run Experiment window, click the Channels tab and select the channels for your experiment (see Selecting Filters on Page 42). 3 Select the Reference Image option. 3. In the Z position list, choose whether to acquire the reference image at the top, middle, or bottom of the sample. AppliedPrecision Chapter 5: Acquiring Data From Live Specimens 4. Under the Reference Image, select which filters to use. 5. In the EX Shutter field, select the type of light to use for the image. EX is the Excitation (or the arc lamp) and TRANS is the transmitted light. This experiment specifies using the DAPI and FITC filters to acquire images of each section and using the transmitted light to acquire a reference image in the middle of the sample. 6. Save and Run the Experiment. After DeltaVision acquires the data, it creates two image files. One file contains the reference image data and the other file contains all of the other data. Tip After you acquire the images, you can use the Image Fusion tool in softWoRx to combine the reference images with the rest of the images. 04-720104 Rev D/1008 77 Chapter 6: Data Collection Techniques 79 6 6 Data Collection Techniques This chapter provides guidance and suggestions for: Finding a Specimen and Recording Its Position Finding Exposure Time Using Köhler and Critical Illumination Monitoring Data Acquisition Editing Experiment Macros Finding a Specimen and Recording its Position Recording the position of your slide is useful when you are conducting a point visiting experiment and you need to remove the slide before you are finished. Use the following instructions to find a sample and record its position on the slide with the Repeatable Slide Holder. When you resume your experiment, you can place the slide in the position that you recorded. 04-720104 Rev D/1008 80 DeltaVision Core and personalDV User's Manual Note If you are using an oil immersion lens, you must apply immersion oil to the sample. See Appendix A: The Oil Immersion Kit, for more information about the oil calculator. To find and center the specimen: 1. Choose the objective by rotating the objective turret. Be sure to select the same objective in the Resolve3D window. 2. Secure the slide. Since DeltaVision is an inverted microscope, the sample must be placed with the cover slip facing down toward the objective. If you are using a standard microscope slide (1” x 3” or 25 mm x 75 mm), you can use the Repeatable Slide Holder to hold the slide. To do this, pull the return spring to the left and place the Slide Cover Slip down onto the Slide Holder so that the upper right corner is pressed laterally against the brass locators (shown as A and B in Figure 5) and the upper left edge is pressed laterally against the brass locator C. Then gently release the return spring to secure the slide. Push down on the slide to make sure that it is fully seated in the holder. Figure 5: The Repeatable Slide Holder C A Return Spring B 3. Choose the desired eyepiece (EP) filter. 4. Select the desired excitation (EX), neutral density (%T), and emission (EM) filters. (These parameters should automatically be in place after selecting the eyepiece filter, unless non-standard arrangements are needed.) 5. Rotate the Beam Selector at the base of the microscope to direct the light collected by the objective to the eyepiece. 6. To use the transmitted light to locate the specimen, open the transmitted light shutter by pressing TRANS SHUTTER on the keypad. This allows white light to transilluminate the sample. (The intensity for the transmitted light is controlled using the %T field on the Resolve3D menu.) 7. Set the stage speed using the keypad SLOW, MEDIUM, or FAST Buttons. Medium is typically the best speed to start with. (These buttons control the stage speed when you are using the joystick or keypad to move the stage.) AppliedPrecision Chapter 6: Data Collection Techniques 8. Open the EX shutter and find the desired focal plane optically using either the focus knobs on the microscope or the Resolve3D Z stage controls. Note If you are using an Olympus or Nikon microscope, rotate the top of the focus knob toward you to move the objective up and away from you to move it down (when you are sitting in front of the microscope). 9. Use one of the following methods to maneuver the slide and find an area of interest: Keypad The buttons on the keypad are used for movement in the X, Y, and Z directions. Using the arrow keys on the keypad causes the stage to move by steps. The size of each step is doubled each time the STEP INCREASE button is pressed and halved each time the STEP DECREASE button is pressed. By adjusting the step size to the frame size, you can create a condition where each press of a step arrow will move the sample one frame. This is a convenient way to scan a large area for rare events (e.g., mitosis). Since the step movements are rapid, using the arrow keys in this way can be much less fatiguing than using the joystick. Joystick The joystick controls stage movement in the X and Y directions. Workstation The Resolve3D module allows you to finely control stage motion. The arrow buttons move the stage in discrete increments that are indicated by the values in the dX, dY, and dZ text boxes. Resolve3D provides the only mechanism from which to obtain discrete step sizes. Focus Knob The manual focus knob on the microscope base moves the nosepiece/objective in the Z direction. CAUTION: To record and maintain accurate stage coordinates, focus by moving the stage with the Resolve3D controls instead of using the focus knobs to move the objective. Resolve3D cannot track the movement of the objective. 10. Tighten the Focus Lock on the left side of the focusing knob (see Page 15). 11. Use the keypad to find the approximate center of the specimen and place it in the center of the field of view using stage controls. 12. Direct light to the camera port using the Beam Selector knob on the microscope base. 04-720104 Rev D/1008 81 82 DeltaVision Core and personalDV User's Manual 13. Record the position of the slide on the Position Indicator (the letter scale at the bottom of the Repeatable Slide Holder). Position Indicator Finding Exposure Time The exposure time correlates with the signal intensity level for the image acquisition. Finding the appropriate exposure time for each filter in an experiment is crucial to acquiring the best image data. Many factors must be considered. Although you want to see the maximum intensity in each wavelength, you must not saturate the camera or photo-bleach your sample. High-Speed CCD Camera saturation occurs when the intensity values reach 4145 counts. The 12-bit High-Speed camera has an intensity range of 0 to 4095 counts. (The EM CCD 16-bit High-Speed camera has an intensity range of 0 to 65535 counts.) For successful deconvolution, a minimum intensity of 50 counts above background is recommended. Note If you are using 0.5X Gain, the saturation is less than 4095 counts. For the EM CCD camera (a 16-bit camera), saturation is over 50,000 counts. Photo-bleaching occurs when the fluorescent dyes lose their emission intensity as they are exposed to illumination. Certain dyes are more susceptible to photobleaching than others. The potential for excessive photo-bleaching is increased with increased exposure time and decreased by use of a higher value neutral density filter. There are two ways to decrease illumination, and therefore the likelihood of photo-bleaching: Decrease exposure time. Increase neutral density value. Note For live cell imaging, cells tolerate shorter exposures better than longer exposures, even at increased illumination intensity. AppliedPrecision Chapter 6: Data Collection Techniques 83 The response of increasing the exposure time is roughly linear. Therefore, if an exposure time of 0.2 sec results in a maximum intensity level of 1000 counts, then an exposure time of 0.4 sec will result in a maximum intensity level of approximately 2000 counts. Use the following instructions to find the best exposure time for each excitation wavelength. This procedure must be performed for each excitation wavelength used in the experiment. To find exposure time: 1. Set the neutral density filter to 100%. 2. Set the exposure time to a low value (e.g., 0.1 sec). 3. Set dZ to the desired value to sample different images throughout the sample. 4. Click the dZ textbox. 5. Enter the desired value for the Z step. 6. Move through the area of interest by pressing move the stage in the Z direction. and in the Stage dialog to 7. Click Acquire. If performing a 2D experiment, go to Step 13. 8. Continue performing steps 6 and 7 to obtain a sampling of Z sections. Find the maximum intensity in these sample images by observing the value of the Max field in the Resolve3D window. The focal plane with the highest maximum intensity value is the plane of optimal focus. Note There could be a higher intensity value in the image data that you did not sample. Therefore, do not set the exposure time to the limits of the sampled data because a higher intensity, un-sampled plane may saturate the camera. 9. Move to the plane of optimal focus. This is the Z section with the highest intensity value. 10. From the Resolve3D menu, choose View | Point List. 11. Click Mark Point. The Z value is the third coordinate listed for the point. 12. Document the Z value with the brightest intensity. 13. Increase exposure time, but consider the amount of exposure the specimen can tolerate. Intensity values increase in direct proportion to exposure time (e.g., doubling the exposure time doubles the intensity values). 14. Repeat for all desired wavelengths. 04-720104 Rev D/1008 84 DeltaVision Core and personalDV User's Manual Using Köhler and Critical Illumination DeltaVision Core allows you to easily switch between two types of illumination: • Köhler Illumination is the most commonly used form of illumination. It provides very even specimen illumination across the field-of-view. The light uniformly drops off as the distance from the focal plane increases. • Critical Illumination directs the entire light source to the size of the detected area, and not the entire sample. With Critical Illumination, more light is directed to the focal plane and the out-of-focus light drops off more rapidly than in Köhler Illumination, based on the size of the field-of-view. Critical illumination also provides better axial (Z) and lateral (X,Y) contrast. You will typically use Köhler Illumination for most of your data collection. However, Köhler Illumination can be insufficient for faint signals. For low abundant probes that require more light and better contrast, use Critical Illumination. To switch to Critical Illumination: X Loosen the Locking Knob and pull the Focus Control back (away from the stand) until it snaps into place in the Critical Illumination position. Then tighten the Locking Knob. Critical Illumination Spring Focus Control Locking Knob In Critical Illumination position, the Focus Control is extended so that the Critical Spring is in the groove. CAUTION: When you are adjusting the Fiber Optic Module, be careful not to disconnect the Fiber Optic cable or to bend it in a diameter that is less than 24". AppliedPrecision Chapter 6: Data Collection Techniques 85 To switch to Köhler Illumination: X Loosen the Locking Knob and push the Focus Control toward the stand until it snaps into place in the Köhler Illumination position. Then tighten the Locking Knob. Focus Control Köhler Illumination Spring Locking Knob In the Köhler Illumination position, the Fiber Optic Module is pushed in so that the Köhler Illumination Spring is in the groove. Monitoring Data Acquisition You can set options that control how images are displayed as they are acquired. Viewing Deconvolved Image Previews You can use 2D deconvolution to get a more accurate representation of what data will look like after deconvolution. These images show how images are displayed during data acquisition, with and without Real-Time 2D Deconvolution. 04-720104 Rev D/1008 86 DeltaVision Core and personalDV User's Manual To view previews of deconvolved images: 1. From the Resolve3D window, click Settings to open the Resolve3D Settings dialog box. Then click the Display tab. 2. Select the Deconvolve preview images option. Note This option does not provide a full iterative deconvolution, but it allows you to preview images as you collect them. Selecting Viewing Modes You can select from several modes for displaying images in the Data Collection window (or windows) as they are collected. You can choose other modes to display images in color, display each point in a point visiting experiment in a separate window, or to display each channel in a separate window, as follows. Auto Grayscale mode displays a separate window for each channel. AppliedPrecision Chapter 6: Data Collection Techniques To select the display mode: 1. From the Resolve3D window, click Settings to open the Resolve3D Settings dialog box. Then click the Display tab. 2. On the Image display mode list, select a display mode. Table 1: Image display modes 04-720104 Rev D/1008 Mode Description None Displays images in the current window. Scratch Displays all images in the default Data Collection window (Window 21). Auto Grayscale Displays images in a separate window for each emission filter. Auto Color Displays images in color as they are collected. When using Point Visiting, images are automatically displayed in separate windows for each point. This option should be used only when you are running an experiment. Point Track Opens a separate window for each visited point in a point-visiting experiment. 87 88 DeltaVision Core and personalDV User's Manual Displaying Statistics and the Histogram You can choose to display statistics and a histogram of the intensity values of each image as it is collected. These values are displayed at the bottom of the Resolve3D window. The Min, Max, and Mean values are the minimum, maximum, and mean intensity values. The histogram displays the intensity distribution. To display statistics and the histogram: 1. From the Resolve3D window, click Settings to open the Resolve3D Settings dialog box. 2. Click the Display tab. Then select from the following options. To Select Calculate image intensity statistics Calculate Statistics. Calculate and display an image intensity histogram Automatically scale the histogram width for each image that is analyzed. Note: You can improve readout speed by disabling this option. Calculate histogram Auto Histogram Range Note: This option changes only the display of the histogram. It does not change the image data. Editing Experiment Macros The Experiment Macro Editor is used to create or edit Resolve3D experiment macros (command scripts) that control the DeltaVision microscope. Most experiment macros can be generated using the Design/Run Experiment window, but you may need to create custom macros for certain types of experiments. The best way to get started is to modify an existing macro with the Experiment Macro Editor. One approach is to use the Design/Run Experiment window to generate a macro and then edit it. Another approach is to use a reference macro. To open the Experiment Macro Editor: 1. On the Resolve3D window, click Experiment. 2. In the Design/Run Experiment dialog, choose File | Edit to open the Experiment Macro Editor. AppliedPrecision Chapter 6: Data Collection Techniques 89 Status Area Commands list Macro Text Area The Experiment Macro Editor Menu Bar The menu bar File menu contains commands to open and save experiment macro files. The Save & Quit option saves the macro file with the current name. The Edit menu has commands for manipulating text. The Search menu provides search and replace capabilities and the Help menu displays additional information. Search & Replace These text fields are used to specify a search and replace pattern. (You will need to enter strings in these fields before you use the Search | Replace Text menu command.) Status Area The text area below the Search and Replace fields is used by the Macro Editor to supply you with status and hint information. The Macro Text Area The Macro Text Area below the Status Area is the main working area of the Macro Editor. Commands List This is the list of available commands. When you highlight a command in the list by clicking it, you are provided with information about the command in the Status Area. If you double-click or select the Use Item button below this list, the command is inserted in the Macro Text Area at the current cursor location. 04-720104 Rev D/1008 90 DeltaVision Core and personalDV User's Manual To edit a reference macro: 1. On the Resolve3D Experiment Macro Editor window, choose File | Open Reference Macro. 2. In the Open Experiment Macro File dialog box, select a macro file and click OK to open it. 3. Use the mouse to select the part of the reference macro that you want to copy. 4. On the Reference Macro menu, choose Edit | Copy. 5. On the Resolve3D Experiment Macro Editor, choose Edit | Paste to copy the macro into the macro editor. 6. Edit and save the file as a new experiment macro. AppliedPrecision 7 7 Facility Requirements & Components This chapter describes the main components of the DeltaVision System. It includes the following sections: Electrical and Environmental Requirements describes the DeltaVision operating and facility requirements. Overview of Components shows the location of the key system components. Optical Components describes the system light sources, cameras, and filters. Desktop Components provides information about the monitor, the keypad and joystick, the vibration isolation table that supports the microscope, and other components. Cabinet Components describes the combined Instrument Controller and Microscope Interface Chassis (IC/MIC) and the Workstation. Other Standard Components describes the Repeatable Slide Holder, the Fiber Optic Module, the tool kit, and standard software. Optional Components describes the Quantifiable Laser Module (QLM), the EM CCD camera, The Rainbow option (dual light sources for DIC), and the softWoRx Explorer application. Consumable Parts lists the fuses and other components that you will need to replace to maintain the system. 92 DeltaVision Core and personalDV User's Manual Electrical and Environmental Requirements An important aspect of collecting high quality images is meeting the proper electrical and environmental requirements for the system. Electrical Requirements Line Requirements Operating Frequency: 50/60 Hz Operating Power: 100-127 VAC requires 8A 200-240 VAC requires 4A Transients: Transient over-voltages in accordance with Installation Category II in IEC 664 Maximum Power: 1200 VA Power Cord Set Requirements The power cord set received with DeltaVision meets the requirements for use in the country where you purchased the equipment. General Requirements The requirements listed below are applicable to all countries: The length of the power cord set can be a maximum of 9.75 feet (3.0 m). All power cord sets must be approved by an acceptable accredited agency responsible for evaluation in the country where the power cord set will be used. The power cord set must have a minimum current capacity of 10A for 230 VAC systems or 15A for 100-120 VAC systems, as required by each country's power system. The appliance coupler must meet the mechanical configuration of an EN60320/IEC 320 Standard Sheet C13 connector, for mating with the appliance inlet on the Isolation Transformer Assembly. AppliedPrecision Chapter 7: Facility Requirements and Components Country-specific Requirements The following table shows the accredited agency and power cord set requirements for each country. Country Accredited Agency Australia EANSW Austria OVE Belgium CEBC Denmark DEMKO Finland SETI France UTE Germany VDE Italy IMQ Norway NEMKO Sweden SEMKO Switzerland SEV United Kingdom BSI United States UL Canada CSA Japan JIS Power Cord Set Requirements The flexible cord must be <HAR> Type HO5VV-F, 3conductor, 1.0 mm2 conductor size. Power cord set fittings (appliance coupler and wall plug) must bear the certification mark of the agency responsible for evaluation in the country where it will be used. The flexible cord must be Type SJT or equivalent, No. 14 AWG, 3-conductor. The wall plug must be a twopole grounding type with a NEMA 5-15P (15A, 125V) configuration. The appliance coupler, flexible cord, and wall plug must bear a "T" mark and registration number in accordance with the Japanese Dentori Law. The flexible cord must be Type VCTF, 3-conductor, 2.00 mm2 conductor size. Environmental Requirements An important aspect of collecting high quality images is having the proper environment for the system. The following important environmental requirements are outlined in this section. General Environmental Requirements Floor space: DeltaVision Core - 3 ft × 6 ft (90 cm × 180 cm). Include 18 in (45 cm) space behind instrument rack. personalDV - 22in x 54 to 62in (depending on whether or not the keyboard is kept in a slide-out tray). Include 18 in (45 cm) space behind instrument rack. Maximum System Weight: 940 lbs (425 kg). Service: Indoor use only. 04-720104 Rev D/1008 93 94 DeltaVision Core and personalDV User's Manual Temperature: 65 - 77 °F (18 - 25 °C), daily variation of no more than 3 °F (1.8 °C). The actual room temperature should be stable to within 1 degree (Fahrenheit or Celsius) per hour. Fluctuations in temperature will affect microscope optics, which can cause the specimen to drift approximately 1 μm per 0.1 degree Celsius. Humidity: Stable humidity levels under 50%, with daily variations of less than 10%. High humidity can result in condensation on the CCD camera window that obscures image formation. Excessive humidity may also reduce filter life and may result in chromatic aberrations in the images. Altitude: up to 6550 ft (2000 m). Pollution: POLLUTION DEGREE 21 in accordance with IEC 664. Ingress Protection Level: IP20 Communication Recommendations Connect the workstation to a local area network for data storage. To connect to a network, you will need an IP address, domain name server address, and network mask. A connection to the Internet will provide access to Applied Precision's web site. Applied Precision, INC is not responsible for damage or harm to CAUTION: the workstation or scanner due to network security breaches. Having a telephone in the same room as the system will facilitate communication with Technical Support. Air Movement Air movement around the microscope can cause specimen drift on the scale of several microns. Two common sources of air movement are window air conditioners and open windows. Central air conditioning is recommended. However, the system should not be placed in the direct path of the incoming air. Vibration Isolation The vibration absorbing design of the system minimizes motion artifacts from internal vibration due to shutters, filter wheels, and stage movement. The system is also designed to damp out external vibration as well. Avoiding locations near refrigerators, elevators, ventilation equipment, and other sources of vibration will improve image resolution. IEC 61010-1: 2nd ed. International Electrical Commission defines POLLUTION DEGREE 2 as follows: “Normally only non-conductive POLLUTION occurs. Occasionally, however, a temporary conductivity caused by condensation must be expected.” 1 AppliedPrecision Chapter 7: Facility Requirements and Components 95 Ambient Illumination For best results, minimize ambient illumination during data collection. A lighttight room is recommended. Ensure that there are no light sources pointed downward into the lens. A small desk lamp located near the workstation is recommended for preparing and monitoring experiments. You can press the BLANK SCREEN key on the keypad to darken the monitor for improved image quality. Pressing any key on the keyboard restores monitor function. Dust It is important to minimize dust on the microscope components because dust on components can cause spots on microscope images. Minimize contamination by maintaining a clean room and covering the microscope when it is not in use. Overview of Components The main standard DeltaVision components for both DeltaVision Core and personalDV are shown below. Detailed descriptions of these components and descriptions of optional components are included in the following sections. Standard DeltaVision Core Components Optical Components Vibration Isolation Table 04-720104 Rev D/1008 Desktop Components Cabinet Components (IC/MIC, Workstation, and any additional optional components) 96 DeltaVision Core and personalDV User's Manual personalDV Components Optical Components IC/MIC and Workstation Desktop Components Optical Components Xenon Arc Lamp White LED Trans Light Excitation Filters Neutral Density Filters Eyepiece Filters Camera Emission Filters Note Optical components are shown for a typical installation, which includes the Olympus IX71 Microscope. Other microscope configurations vary slightly. The Olympus IX71 is currently the only microscope available. AppliedPrecision Chapter 7: Facility Requirements and Components 97 Fluorescence Microscope The microscope is an advanced research grade epifluorescence inverted microscope. Each objective is qualified by Applied Precision to guarantee the highest possible quality. The point spread function (PSF) is measured in order to uphold the image quality. The microscope supports a Differential Interference Contrast (DIC) module (this is an optional component). A transmitted light shutter is included with your system to enable automated DIC and Brightfield image acquisition. Optical Filters The system uses a four-band polychroic beam splitter and filter wheels rather than a simple dichroic filter cube. The excitation, neutral density, and emission filters are selected in one of three ways: Selecting options in the Resolve3D acquisition software. Selecting a mode from the keypad. Rotating the eyepiece filter wheel. Note The eyepiece filter wheel is operated manually but reports its position to the instrument controller, which in turn adjusts the excitation and emission filters. Depending upon the environment, filters last between one and three years. To ensure optimal performance, filters should be periodically inspected and replaced if necessary. Consult Chapter 9: Maintenance for a detailed explanation of this procedure. The following standard DeltaVision Filter set is included in all DeltaVision Core systems. Table 2: DeltaVision Standard Filter Set Filter Name Excitation CWL/BP Emission/Eyepiece CWL/BP DAPI 350/50 455/50 FITC 490/20 525/36 TRITC 555/25 605/52 Cy5® 645/30 *705/72 *Emission filter only Cameras DeltaVision Core comes standard with the CoolSNAP HQ2 CCD (charge coupled device) camera, referred to as the High-speed Camera, and also supports an upgrade option of the Cascade II EM CCD camera. For more about the Cascade II camera, see EM CCD Camera on Page 111. 04-720104 Rev D/1008 98 DeltaVision Core and personalDV User's Manual personalDV comes standard with the CoolSNAP ES2 Camera. High-Speed Camera The High-Speed CCD camera (CoolSNAP HQ2 ) collects digital image data from the microscope. This camera is designed to collect image data at a high frame rate. At the fastest speed, the camera can collect 30 frames per second of a 64 × 64 pixel image. Increased acquisition speed is useful when collecting images of live cells that deteriorate over time. The High-speed Camera The High-speed Camera is air-cooled. The cooling apparatus is incorporated into the camera assembly; therefore, when the High-speed Camera is turned on, the cooler is also operating. When using cooled cameras in humid conditions, it is possible for condensation to form on the CCD camera window. If this happens, a mottled pattern is superimposed on the images. You will need to lower the ambient humidity level to avoid condensation. Notes #1 The High-speed Camera controller is built into the camera head. The High-Speed Camera has no user-serviceable parts inside. #2 If no images are acquired over a 4-hour period, the High-speed Camera automatically shuts down. CAUTION: Do not disconnect cables to the High-speed Camera when the power is on. Be sure to leave a 1 in (2.5 cm) minimum space around the cooling fan. Use only the PCI cards, cable, and power supplies that are designated for this system. AppliedPrecision Chapter 7: Facility Requirements and Components High-speed Camera Power Supply The High-speed Camera power supply provides electric power to the camera. It is housed on the bottom shelf of the cabinet. ES2 Camera The CoolSNAP ES2 CCD Camera is basically the same as the CoolSNAP HQ2 Camera, except the ES2 is not as deeply cooled. This makes it more affordable, but allows for slightly higher noise. However, the noise difference is virtually unnoticeable unless you are using long exposure times (~8s). Light Sources DeltaVision provides two light sources: a xenon arc lamp for the main light source and a white LED for transmitted light. Xenon Lamp Illumination for the microscope is delivered from the xenon arc lamp to the specimen through a fiber optic cable. The light passes through the fiber optic module (FOM), where approximately 1% of the light is diverted to the Photo sensor. The remaining 99% of the light is delivered to the microscope. For instructions on how to replace the xenon bulb, see Replacing the Xenon Bulb on Page 134. WARNING: Do not disconnect the arc lamp power cable when the power is on. 04-720104 Rev D/1008 99 100 DeltaVision Core and personalDV User's Manual WARNING: The xenon arc lamp presents potentially harmful risks to the user, including the possibility of UV exposure to skin and eyes. Before operating the microscope, consult Chapter 2: Safety for important information regarding arc lamp operation. Note The illumination path alignment is critical to acquiring the highest possible image resolution. See Page Path on Page 144 for a complete description of the alignment procedure. Photo sensor The Photo sensor measures illumination intensity by sampling a small percentage of the light from the arc lamp. The photo sensor signal is recorded by the controller and then used to correct for variations in the xenon lamp intensity during an experiment. The Corrections tool in softWoRx normalizes each image based on its photo sensor value. These corrections are automatically applied during deconvolution. This enables quantifiable intensity comparisons between images, even if the brightness of the excitation light varies between the images. LED Transmitted Light An LED transmitted light source is also provided. LED Transmitted Light Source If at any point you need to replace the transmitted light, see the instructions in Replacing the Transmitted Light on Page 138. Note Either light source (the xenon lamp or the LED transmitted light) can be used with the eyepieces or the cameras. AppliedPrecision Chapter 7: Facility Requirements and Components Desktop Components Desktop Components include the flat panel display monitor, the keyboard, the mouse, the keypad, and a joystick. DeltaVision Core includes a vibration isolation table. personalDV includes a bench-top microscopy isolation platform. Flat-Panel Display Monitor All DeltaVision systems are equipped with Flat-Panel LCD monitors. These monitors offer a very high level of performance in several areas pertaining to the quality of displayed images, the most critical of which is contrast ratio. Note For instructions that show how to adjust the monitor, see the Flat-Panel Display manual. CAUTION: DeltaVision is configured to work with the monitor that is included with the system. Other monitors are not necessarily supported. The Keypad and Joystick Many of the functions accessible through Resolve3D are also available on the keypad/joystick (see Keypad/Joystick Operation on Page 211). 04-720104 Rev D/1008 101 102 DeltaVision Core and personalDV User's Manual Vibration Isolation Table Within the vibration isolation table is a breadboard surface that is supported by mechanical vibration isolators. These components provide optimal performance without an external air source. The isolators are sized for the system weight as delivered. If significant additional weight is added to the breadboard, higher capacity isolation may be required. Contact Applied Precision for more information. Note The vibration isolation table is not included with personalDV. Instead, personalDV includes a bench-top isolation platform to provide similar stability for the microscope. The DeltaVision vibration isolation table is available for personalDV as an optional upgrade. Cabinet Components Note The component cabinet is included with DeltaVision Core only. The cabinet is not available for personalDV. The cabinet contains all of the electronic control equipment and provides surfaces for the keyboard and the Flat Panel Display. The front two wheels should remain locked and the cabinet left in place. There are many cables connecting the microscope that can be damaged if they are pulled. The standard cabinet components are shown below. AppliedPrecision Chapter 7: Facility Requirements and Components 103 Cabinet Components Keyboard/Mouse Tray IC/MIC Workstation QLM (optional) Note Configuration of cabinet components may vary slightly. Instrument Controller / Microscope Interface Chassis (IC/MIC) The Instrument Controller (IC) is the portion of this computer that interfaces with all of the microscope hardware (including the microscope stage motors, filter wheel motors, and cameras). It coordinates all activities related to positioning the stage and collecting images. Data from the camera feeds through the controller to the workstation. The controller also receives instructions from the workstation and issues commands to the motors through the Microscope Interface Chassis. The Microscope Interface Chassis (MIC) side of the computer provides power and control for the filter motors, stage drive, and shutters. It also contains the Photo sensor, which is connected to the microscope through a fiber optic cable. Notes #1 The Instrument Controller / Microscope Interface Chassis has no user-serviceable parts inside. #2 Occasionally, you may need to replace fuses on the back panel of the chassis. Consult Chapter 9 for a description of this procedure. Unless there is an obvious 04-720104 Rev D/1008 104 DeltaVision Core and personalDV User's Manual reason why the fuse blew, you should contact Applied Precision when you need to replace fuses. Workstation The workstation hosts the softWoRx application that is the primary interface used to control the system. The workstation can also provide a server for data storage when used with the optional Data Management Software (DMS). Note The workstation has no user-serviceable parts inside. DVD-R Recording The DVD-R/CD Drive supports DVD-R format recording (DVD + R and CD-ROM are not supported.) Other Standard Components Other standard components include the Repeatable Slide Holder, the Slide Holder Adapter, the Fiber Optic Module, the keypad, and the joystick. The Repeatable Slide Holder The Repeatable Slide Holder holds the slide on the stage. It also allows you to move the slide across the stage and to mark the slide position when you remove the slide. The ability to move the slide across the stage allows you to view the full slide on the 1" x 1" stage area. With the slide held against the three brass locators by the Return Spring, you can use the Slide Adjustment Knob to move the slide laterally. Marking the position of your slide is useful when you are conducting a point visiting experiment and you need to remove the slide before you are finished. You can use the Position Indicator (the letter scale at the bottom of the slide holder) to record the position of your slide. When you resume your experiment, you can place the slide in the position that you recorded. AppliedPrecision Chapter 7: Facility Requirements and Components 105 Figure 6: The Repeatable Slide Holder Brass Locators Return Spring Position Indicator Slide Adjustment Knob Note If you are using a Petri dish or any other format that is not similar to a 1" x 3" slide, you will need to remove the Repeatable Slide Holder or use the Slide Holder Adapter. For more about using the Repeatable Slide Holder, see Finding a Specimen and Recording its Position on Page 79. Slide Holder Adapter The Slide Holder Adapter holds a chambered coverglass. It is mounted on the Repeatable Slide Holder. NUNC Lab-Tek™ II chambered coverglasses with one, two, four, or eight wells are available. The Slide Holder Adapter also supports Petri dishes from 25 – 40 mm in diameter. Calibration Kit The Calibration Kit is provided for calibration operations on the DeltaVision system. The kit includes the following six slides: • Three plastic fluorescent calibration slides – for flat-field calibration: 04-720104 Rev D/1008 106 DeltaVision Core and personalDV User's Manual • • • Blue plastic (EX 408nm, EM 440 nm) – Good for DAPI, Hoechst, etc. Orange plastic ((EX 488nm, EM 519nm) – Good for FITC, GFP, TRITC, CY-3®, etc. • Red plastic (EX 590nm, EM 650nm) – Good for CY-5®, etc. Silicon mirror slide – for light path alignment and troubleshooting. • Silicon grid slide – for pixel size measurement. • 100nm Rhodamine® bead slide – for PSF measurement. The Fiber Optic Module Use the Fiber Optic Module to align the light path from the fiber optic cable to the Fluorescent Illuminator. This module allows you to adjust the tilt, horizontal, and vertical orientation of the light path. Fiber Optic Module The Tool Kit A tool kit is provided that includes tools for maintaining the system. This kit includes: • Ties and belts for suspending cables, screws, and other fasteners • Cleaning material (Q-tips and lens paper) • A hex wrench set (5/64" – 3/16") • A set of metric L keys (1mm –5mm) • Α #1 Phillips screwdriver • A 5mm T Handle hex key • An acrylic bulls eye level AppliedPrecision Chapter 7: Facility Requirements and Components • A micrometer nut wrench • An Applied Precision Hotline sticker Software DeltaVision Core includes softWoRx for Linux (1 copy), softWoRx Suite for Windows (1 copy), DMS Server (1 copy, 3-seat), and softWoRx DMS (2 copies). personalDV includes softWoRx for Linux (1 copy) and softWoRx DMS (1 copy). Note Either system can be ordered with a number of different software configurations. Talk with your Applied Precision representative to determine the best configuration for your applications. softWoRx softWoRx is the Linux software application that runs the acquisition workstation. The software allows you to perform the following tasks: Acquire image data Set up and run experiments Deconvolve data Measure point spread functions Calculate optical transform functions Process 2-D and 3-D images Perform quantitative analysis Archive data Configure task chains Manage user accounts softWoRx Suite for Windows softWoRx Suite is a Windows-based ensemble of software developed by Applied Precision in collaboration with Bitplane AG. It provides sophisticated multidimensional data visualization, analysis, image restoration, image correction, and image viewing management, all within an easy-to-use streamlined browser interface. 04-720104 Rev D/1008 107 108 DeltaVision Core and personalDV User's Manual softWoRx DMS softWoRx DMS (Data Management Solution) provides a functional infrastructure for the storage of biological images and their associated metadata in a centralized database. Like softWoRx Suite, softWoRx DMS includes the Browser and the Explorer programs, but unlike softWoRx Suite does not have the ability to perform any type of image processing. The DMS product actually has two distinctive parts. One part is the DMS Server and the other part is represented by the DMS clients. The DMS Server represents different configurations of what the centralized database looks like. The DMS clients are the different programs and methodologies of accessing the image data within the centralized database (ie. softWoRx, softWoRx Suite, and softWoRx DMS). Optional Components You can purchase several optional DeltaVision components. Some options are available for both DeltaVision Core and personalDV, but many are available only for DeltaVision Core (as noted below): The Environmental Chamber provides a controlled temperature environment for live cell imaging. The chamber also supports CO2 injection, which allows you to control humidity and pH by maintaining a CO2 flow over the sample. Additional Filter Modules can be loaded with custom filters or with the Live Cell filter set to provide greater flexibility for your lab. Quantifiable Laser Module components (available for DeltaVision Core only) allow you to use lasers to perform FRAP and other photokinetic experiments. The TIRF (Total Internal Reflection Fluorescence) module (available for DeltaVision Core only) includes the Olympus TIRF module and special adapters that allow you to install it on DeltaVision. The EM CCD Camera (available for DeltaVision Core only) is an optional camera that provides high signal-to-noise ratios for Low-light Fluorescence, TIRF, or single molecule fluorescence. Analysis Workstations include the softWoRx Linux workstation and the softWoRx Suite Windows workstation. Software includes two optional modules for either the DeltaVision Core or personalDV: the softWoRx Explorer and the softWoRx Suite advanced option. softWoRx Suite for Windows is also available as an option for personalDV. AppliedPrecision Chapter 7: Facility Requirements and Components A selection of Differential Interference Contrast (DIC) components are supported by DeltaVision Core and personalDV. The optional Multiplexed Wavelength module for DeltaVision includes a second shuttered xenon light source and provides nearly simultaneous twochannel imaging. The following optional objectives are tested by Applied Precision to ensure that they meet our rigid quality standards. Optional Objectives U-APO 40X Oil, 0.65-1.35NA, 0.10mm WD U-PLAN S-APO 100X Oil, 1.4NA, 0.12 WD U-PLAN APO 60X W/PSF Water, 1.20 NA, 0.25mm WD The following subsections describe each of the optional DeltaVision components. The Environmental Chamber Environmental control is an essential factor in live-cell microscopy or any other type of experiments requiring system stability. Focus instability can be difficult to resolve for critical experiments. Small changes in ambient temperature can lead to thermal expansion or contraction in the microscope stand, stage, and objective changing the plane of focus. The Environmental Chamber is designed to precisely control temperature and CO2 levels making it ideal for long term time-lapse applications and high-resolution imaging. The Environmental Chamber includes a temperature controller, a CO2 humidifier, and a CO2 chamber. For instructions that show how to install, remove, and operate the environmental chamber, see the Environmental Chamber User's Manual (included with your system). Additional Filter Modules You can purchase additional DeltaVision Filter modules and use them to quickly change the filter sets to meet different imaging requirements. Each filter module holds up to six filters. You can purchase a Live Cell Filter Module that is preloaded with four filter sets that are commonly used for live cell imaging. You can also purchase empty filter modules and insert customized filter sets into those modules. 04-720104 Rev D/1008 109 110 DeltaVision Core and personalDV User's Manual The Live Cell Filter Module The Live Cell Filter Module includes the following filters: Filter Name Excitation CWL/BP Emission/Eyepiece CWL/BP CFP 430/24 YFP 510/20 535/30 mCherry 572/35 632/60 EGFP 470/40 525/50 470/24 Quantifiable Laser Module Components The Quantifiable Laser Module (QLM) adds a laser beam into the back aperture of the microscope objective to provide a focused illumination spot in the center of the optical field. The lasers are mounted in a closed system in the cabinet. Light is directed from the lasers to the light path through the Laser Optic module that mounts on the back of the Fiber Optic module. Note The QLM is not an available option for personalDV. If your system has the QLM hardware module, you can use softWoRx to analyze Photokinetic (photo-bleaching and photo-activation) experiments. QLM Laser Optics Module QLM Laser Module The QLM module provides software to control the lasers and to analyze the data obtained from these experiments. For more about QLM, see the DeltaVision QLM Getting Started Guide. Total Internal Reflection Fluorescence (TIRF) Module The TIRF module includes the Olympus TIRF component and special adapters required to install it on a DeltaVision system. (TIRF requires a system with a QLM hardware module.) AppliedPrecision Chapter 7: Facility Requirements and Components 111 Note TIRF is not an available option for personalDV. TIRF Component Note TIRF is an optical sectioning technique that limits fluorescence imaging to a thin area at the surface of a specimen, typically 100 nm or less, resulting in an enhanced signal-tonoise ratio and higher imaging contrast. EM CCD Camera The EM CCD Camera is an optional component. Note The EM CCD Camera is not an available option for personalDV. The addition of the Cascade II with Electron Multiplying CCD (EM-CCD) technology further improves the signal-to-noise-ratio (SNR) of the DeltaVision system. Unlike conventional CCD cameras, an Electron Multiplying CCD (EMCCD) is not limited by the readout noise of the output amplifier, even when operated at high readout speeds. A solid state Electron Multiplying (EM) register allows weak signals to be multiplied before any readout noise is added by the output amplifier. 04-720104 Rev D/1008 112 DeltaVision Core and personalDV User's Manual The EM CCD camera can be operated either as a high-performance EMCCD camera for unparalleled low-light-level sensitivity, or as a traditional, nonelectron-multiplying CCD camera. Applications for the EM CCD camera include: • Low-light Fluorescence • Total Internal Reflection Fluorescence Microscopy (TIRF) • Single-molecule Fluorescence Analysis Workstations You can purchase two types of Analysis workstations: the softWoRx Linux workstation and the softWoRx Suite Windows workstation. The softWoRx Linux workstation includes all of the softWoRx Analysis modules, including 3D Visualization tools, Colocalization, FRET Analysis, FRAP Analysis, Intensity and Distance Measurement, and Modeling. The softWoRx Suite Windows workstation includes the softWoRx Browser, softWoRx Explorer, Modeling and 3D Visualization (powered by Bitplane), and Deconvolution tools. Multiplexed Wavelength Module The optional Multiplexed Wavelength module for the DeltaVision systems allows you to perform nearly simultaneous two-channel imaging without the drawbacks associated with true simultaneous two-channel imaging. This option uses two shuttered illumination sources and a dual-band emission filter to eliminate filter wheel movement between channels, and therefore greatly reduce the time required for the DeltaVision system to acquire a set of two-channel images. The combined light path ensures no registration artifacts are introduced and independent excitation of probes helps to ensure minimal crosstalk. Software softWoRx Explorer ® softWoRx Explorer is a cross-platform image viewer that is available for many commonly used operating systems. softWoRx Explorer allows you to view and explore DeltaVision images and images from other sources that contain spatial, temporal, and spectral ranges. In addition to displaying data in the X and Y plane, you can scroll through Z sections and time-lapse data. Individual spectra (i.e., channels or fluorescent wavelengths) can be hidden or displayed in a variety of colors. AppliedPrecision Chapter 7: Facility Requirements and Components 113 softWoRx Suite for Windows Option (for personalDV) softWoRx Suite is a Windows-based ensemble of software developed by Applied Precision in collaboration with Bitplane AG. It provides sophisticated multidimensional data visualization, analysis, image restoration, image correction, and image viewing management, all within an easy-to-use streamlined browser interface. softWoRx Suite Advanced Option The Advanced Option for softWoRx Suite includes two sophisticated analysis features: 4-D Particle Tracking and ImarisColoc. softWoRx Suite Advanced Option is offered by Applied Precision in collaboration with Bitplane, AG. 4-D Particle Tracking allows users to observe temporal changes of objects. This tracking module offers a choice of methods for both detection and tracking and allows analysis and measurement of various object properties. The Colocalization feature enables users to easily isolate, visualize, and quantify regional overlap in 3D and 4D images. Results can be presented in two ways—as a new 3D or 4D channel or as a statistical report. softWoRx Data Management Solution (DMS) Support softWoRx DMS provides a functional infrastructure for the storage of biological images and their associated metadata in a centralized database. softWoRx DMS is a standard component included with DeltaVision Core, but for personalDV this software is optional. Consumable Parts Common to 100-120 V and 220-240 V Systems Component Fuse for Component API Part Number IC/MIC 6.3A 250V UL High Break Capacity 19-170045-000 Microscope T5AH Used in some older DeltaVision systems Bulbs Component API Part Number 250W xenon Arc Lamp Bulb 34-100390-000 LED Transmitted Light (must replace entire assembly) 52-851243-000 04-720104 Rev D/1008 114 DeltaVision Core and personalDV User's Manual British Power Cord Component Fuse for Component API Part Number Power cord with Bussman TDC180-10A built into plug. (Must meet British Standard BS1362.) 10A 19-210046-000 AppliedPrecision 8 8 Changing Cameras and Filters This chapter provides the following instructions for cameras and filters: Changing Cameras Using Live Cell or Custom Filter Wheel Modules Changing Filter Wheel Modules Calibrating Filter Wheels Changing Cameras DeltaVision Core includes a High-speed Camera as a standard component. If you have the optional EM CCD camera, you can change cameras to better meet your imaging needs. These instructions show how to change the camera and how to select the new camera in Resolve3D. Contamination from fingerprints or dust on the camera window orCAUTION: inside the Emission filter wheel will degrade image quality. 116 DeltaVision Core and personalDV User's Manual To change the camera: 1. Remove the camera cover by lifting it up and sliding it away from the microscope. 2. Remove the camera by pushing in and then pulling up on the camera end. You do not need to remove cables from the camera. 3. Remove the other camera from the spare camera tray and place the camera that you just removed on the camera tray. Always place the camera in the camera tray when it is not CAUTION: secured to the system. Dropping the camera will cause severe damage. 4. Install the new camera by sliding it into place and then pushing in and pressing down on the end of the camera. 5. Replace the camera cover. To select the camera: 1. In the Resolve3D window, click Settings to open the Resolve3D Settings dialog box. AppliedPrecision Chapter 8: Changing Cameras and Filters 2. On the Imaging tab, click the Camera list and select the camera that is currently installed. Notes #1 The EM CCD camera is listed twice in the Camera list: CASCADE2_512 Conv./… sets the camera in Conventional mode. Cascade2_512 EMCCD/… sets the camera in electronmultiplication mode. #2 When the camera is changed, the binning number is reset to 1. #3 If the camera cables loosen or are accidentally disconnected, you may need to restart the IC software. To reseat the cables, consult the camera documentation. Using Live Cell or Custom Filter Wheel Modules A filter wheel module includes an Excitation filter wheel, an Emission filter wheel, and an Eyepiece filter wheel. 04-720104 Rev D/1008 117 118 DeltaVision Core and personalDV User's Manual DeltaVision Filter Wheel Module Excitation (10-position) filter wheel Emission filter wheel Eyepiece filter wheel A filter wheel module includes the Excitation, Emission, and Eyepiece filter wheels and can support up to six filter pairs. If your system has an alternate filter wheel module, you can swap modules to meet your imaging needs. You can purchase a module of Live Cell filter wheels that includes factoryinstalled filters. You can also purchase a module of empty filter wheels and customize it with your own filters. Changing Filter Wheel Modules Changing the filter wheel modules for your system includes changing the Eyepiece and Emission filter wheels and, depending on how many filter pairs are supported, may also include changing the Excitation filter wheel. If you purchased a filter wheel module as a separate component after you purchased your system, you must configure the instrument controller for the new module the first time that you use it (see the instructions included with your filter wheel module). AppliedPrecision Chapter 8: Changing Cameras and Filters 119 To change the Eyepiece filter wheel: 1. Disconnect the Position Sensor cable that connects the filter wheel to the IC/MIC. DeltaVision displays a message that indicates the cable is removed. Do not close this message. Position Sensor Cable 2. Holding the oculars in one hand, use a 3 mm hex key (Olympus provides one with the microscope) to loosen the set screw that holds the oculars to the Eyepiece filter wheel and set the oculars on the table. set screw Loosening the set screw and removing the oculars 3. Loosen the set screw that holds the Eyepiece filter wheel to the beveled mount on the stand and remove the Eyepiece filter wheel. 04-720104 Rev D/1008 120 DeltaVision Core and personalDV User's Manual set screw Removing the Eyepiece filter wheel 4. Place the new Eyepiece filter wheel on the beveled mount on the stand and tighten the set screw that holds it in place. 5. Connect the Position Sensor cable to the new Eyepiece filter wheel. The IC/MIC will automatically start to re-initialize the EM and EX filter wheels even though the current EX and EM filter wheels have not yet been replaced. You can ignore this re-initialization. 6. Place the oculars on the microscope and tighten the set screw that holds them in place. 7. If the IC/MIC is ON, click OK on the message box that indicates the cable is removed. If the IC/MIC is OFF, you will need to manually update the filter set in the Resolve3D | Settings | Misc tab window. WARNING: Before you unplug any motor cables, make sure that the xenon lamp and the IC/MIC are turned OFF. To change the Emission filter wheel: 1. Turn off the IC/MIC. 2. Remove the camera cover. Then remove the camera by pushing in and pulling up on the camera end as shown below. AppliedPrecision Chapter 8: Changing Cameras and Filters 121 3. On the Emission filter wheel motor, disconnect the cable that connects the motor to the IC/MIC. Use a 3 mm hex key to loosen the set screw that holds the Emission filter wheel to the microscope. Cable to IC/MIC Set Screw 4. Remove the Emission filter wheel. IC/MIC Cable Connector 5. Install the alternate Emission filter wheel. Tighten the Emission filter wheel set screw and connect the cable from the IC/MIC to the new Emission filter wheel. 6. Reinstall the camera by sliding it into place and then pushing in and pressing down on the camera. Note If you still need to change the EP or EX filter wheels, do so now before continuing with this procedure. 04-720104 Rev D/1008 122 DeltaVision Core and personalDV User's Manual 7. When you are finished changing filter wheels, restart the IC/MIC. 8. If Resolve3D does not automatically display the correct filter module, there are two ways to expressly let the system know you have a new filter set: • From the Resolve3D main menu, select Settings, change to the Misc tab, and select the current filter set. • Unplug and then re-plug in the Eyepiece filter wheel position sensor cable (see below). The system will automatically recognize which filter set the Eyepiece filter wheel belongs to and update accordingly. Note that it is not necessary to remove the oculars before plugging or unplugging the Eyepiece filter wheel. To change the Excitation Filter Wheel (if necessary): 1. Ensure that the IC/MIC is turned off, and make sure that the xenon arc lamp has been off and allowed it to cool. 2. Loosen the two silver thumb screws at the top and bottom of the filter wheel housing. AppliedPrecision Chapter 8: Changing Cameras and Filters 123 Thumb screws should loosen without the use of tools, but can also be removed with a flat-blade screwdriver if necessary. Loosening top thumb screw from filter wheel housing Loosening bottom thumb screw from filter wheel housing 3. Loosen the Focusing Lens housing thumb screw to disengage it from the beveled support on the Excitation filter wheel housing and gently slide the filter wheel housing outward from its mounted position. 04-720104 Rev D/1008 124 DeltaVision Core and personalDV User's Manual Removing the Excitation Filter Wheel housing from its mounted position 4. Disconnect the cable to the IC/MIC from the Excitation filter wheel and connect it to the alternate Excitation filter wheel. Disconnecting the IC/MIC cable from the Excitation Filter Wheel 5. Slide the alternate Excitation filter wheel housing back into its mounting position by pulling back on the Focusing Lens assembly as shown. Pulling back the Focusing Lens housing and re-engaging the filter wheel AppliedPrecision Chapter 8: Changing Cameras and Filters 6. Re-engage the Focusing Lens housing into the beveled support on the new Excitation filter wheel housing and align and tighten the two thumb screws at the top and bottom of the Excitation filter wheel housing. 7. Tighten the thumb screw on the Focusing Lens housing. Note If you still need to change the EP or EM filter wheels, do so now before continuing with this procedure. 8. When you are finished changing filter wheels, restart the IC/MIC. 9. If Resolve3D does not automatically display the correct filter module, there are two ways to expressly let the system know you have a new filter set: • From the Resolve3D main menu, select Settings, change to the Misc tab, and select the current filter set. • Unplug and then re-plug in the Eyepiece filter wheel position sensor cable (see Step 8 in the previous procedure). The system will automatically recognize which filter set the Eyepiece filter wheel belongs to and update accordingly. Calibrating the Filter Wheels Calibration initializes the filter positions and ensures that the filters are centered in the filter wheel openings. If you notice poor light transmittance or poor image quality, one possible cause is a misaligned filter wheel. The filter wheel calibration re-establishes the zero position of the filter wheel for the Instrument Controller. To calibrate the Neutral Density, Excitation, and Emission filter wheels: 1. On the Resolve3D window, click Settings to open the Resolve3D Settings dialog box. Then click the Misc tab. 04-720104 Rev D/1008 125 126 DeltaVision Core and personalDV User's Manual 2. Verify that the Excitation, Emission, and Eyepiece filter wheel fields all display the same filter wheel module name (if any of the names are different, you may need to select or replace one or more of the filter wheels). 3. Press Save Settings and close Resolve3D. 4. Click on the Instrument Controller icon on the workstation desktop as shown. 5. Log on to the Instrument Controller with the user name worx and password 4delta if prompted. AppliedPrecision Chapter 8: Changing Cameras and Filters 6. Remove the filter wheel to be calibrated (Excitation, Emission, or Neutral Density) from the system so the opening is visible. 7. Press Alt + H. The filter wheels will rotate as they are being initialized. Hold the EX or ND filter wheels to stabilize them and help ensure that motor torque does not cause them to fall off of the work surface. You are then prompted with, “Calibrate the EX filter wheel (y/n).” 8. If you are calibrating the Excitation Filter Wheel, press y. Otherwise press n to move to the next filter wheel (ND or EM). When you press y, the following message is displayed: Pressing the up or down arrow keys advances the filter wheel one complete position. The left and right arrow keys move the filter wheel in small increments. 9. Find the Home filter position on the filter wheel. The Home filter position is marked on each of the filter wheels as follows: • EX = 1 • ND = 1 • EM = 0 The position is stamped on the surface of the filter wheel and may be viewed through the filter wheel hole. 04-720104 Rev D/1008 127 128 DeltaVision Core and personalDV User's Manual Filter position not centered Filter position centered 10. Once the filter wheel is centered, press Enter. After all necessary filter wheels have been centered you are prompted with, “Save the new filter offsets (y/n).” 11. If you made a mistake during calibration you can press n and start the process over, otherwise press y to save your offsets. 12. Re-install the filter wheels in the system. 13. To shut down the Instrument Controller, go to the Start tab and select Windows Security. Then select the Shutdown option (as shown). AppliedPrecision Chapter 8: Changing Cameras and Filters The IC/MIC will power down. 14. Power the IC/MIC back on and boot the DeltaVision as normal. 04-720104 Rev D/1008 129 130 DeltaVision Core and personalDV User's Manual AppliedPrecision 9 9 Maintenance This chapter provides the following instructions for the basic maintenance of the system: Shutting Down and Starting the System Replacing the Xenon Bulb Replacing the Transmitted Light Aligning the Illumination Path Replacing IC/MIC Fuses Cleaning Moving the System Shutting Down and Starting the System Use the following instructions for shutting the system down during a power outage or other occasions that require total shutdowns. 132 DeltaVision Core and personalDV User's Manual DeltaVision Power Switches The main DeltaVision power switches are shown below. (The Master Switch on the isolation transformer that plugs into the wall is not shown.) Monitor Switch IC/MIC Switch Workstation Switch Main Components Switch QLM Switch (optional) AppliedPrecision Chapter 9: Maintenance 133 Guidelines for Using Switches Main Components Use this switch to turn power on and off for the DeltaVision Workstation, Instrument Controller and Microscope Interface Chassis (IC/MIC), the Fast Camera Power Supply, and the DeltaVision Microscope. Workstation, IC/MIC, and Monitor Leave these switches on except on rare occasions (such as power outages) when you need to shut down the entire system. Shutting Down the System In some situations, such as power outages, you will need to shut down the entire DeltaVision system. To shut down the DeltaVision system: 1. Save all data on the workstation. 2. Turn off the xenon light source using the bulb icon on the Resolve3D main menu. Clicking the icon will switch it to the off state. 3. On the softWoRx menu bar, choose File | Exit. Then exit all other workstation applications. 4. From the main menu button, choose Logout and then Shut Down. Wait until the monitor displays Power Down. 5. Press the power button on the IC/MIC once to shutdown. 6. Turn off the monitor. 7. Turn off the power strip bar switch. Note For personalDV, there is no power strip bar. For personalDV, skip this step. 8. Clean the objective (see Turning DeltaVision Off on Page 30). 9. Lower the objective. Starting the System Use the following instructions to start the system after a total shut down. To start the DeltaVision System: 04-720104 Rev D/1008 134 DeltaVision Core and personalDV User's Manual 1. Turn on the power strip bar. Note For personalDV, there is no power strip bar. Begin the power-up process with Step 2. 2. Turn on the IC/MIC. 3. Turn on the workstation. 4. Turn on the monitor. 5. Follow the instructions for turning on DeltaVision on Page 19. Replacing the Xenon Bulb WARNING: Ensure the xenon lamp is off and has had plenty of time to cool before starting this procedure. Refer to the “Xenon Lamp Safety” section in Chapter 2 of this manual for details on safety issues and proper disposal of the lamp. Follow these steps to replace the xenon bulb on DeltaVision: 1. If the system is on, exit Resolve3D and ensure that the IC/MIC is off prior to proceeding. The fan on the lamp housing must be off before you begin this procedure. 2. Loosen the three hex screws in the flange of the xenon lamp housing. hex screws 3. Gently slide the lamp housing away from the flange to remove it from the DeltaVision excitation module. AppliedPrecision Chapter 9: Maintenance 4. Loosen the two thumb screws on the opposite end of the xenon lamp housing. 5. Gently slide the internal lamp mechanism from the lamp housing. 6. Remove the center clip from the internal lamp mechanism as shown. 04-720104 Rev D/1008 135 136 DeltaVision Core and personalDV User's Manual 7. Lift the bulb assembly (small black box) from the two supporting pins in the lamp mechanism. 8. Replace the xenon bulb assembly with a new one (Part #34-100390-000). 9. Replace the clip around the internal lamp assembly and gently slide the internal lamp mechanism into place within the lamp housing. AppliedPrecision Chapter 9: Maintenance 137 10. Tighten the two thumb screws on the end of the lamp housing. 11. Place the open end of the lamp housing over the flange on the DeltaVision and tighten the three hex screws as shown. hex screws 04-720104 Rev D/1008 138 DeltaVision Core and personalDV User's Manual 12. Turn the DeltaVision on as usual and start Resolve3D. 13. Before resetting the bulb age, write down the age of the bulb you just replaced. This will help you to keep track of when you may need to replace the next one. 14. Open the Imaging tab on the Settings window and reset the bulb age. Bulb age Reset bulb age 60 Note For DeltaVision systems with the Multiplexed Wavelength option installed, the procedure for changing the xenon bulb in the secondary lamp housing is identical to the procedure described above. Replacing the Transmitted Light To replace the LED transmitted light assembly: 1. If the DeltaVision system is on, exit Resolve3D and ensure that the IC/MIC is off prior to proceeding. 2. Loosen the two hex screws on the top and right sides of the transmitted light housing as shown. AppliedPrecision Chapter 9: Maintenance 139 hex screws 3. Carefully remove the transmitted light assembly from the housing. 4. Disconnect the other end of the attached cable from the Transmitted Illumination Source connection on the back of the IC/MIC (upper left-hand corner when facing the back of the unit; shown below). 04-720104 Rev D/1008 140 DeltaVision Core and personalDV User's Manual Transmitted Illumination Source Connection (back of IC/MIC) 5. Re-insert the new transmitted light assembly (Part #52-851243-000) into the housing and tighten the two hex screws. 6. Re-connect the new transmitted light assembly cable to the Transmitted Illumination Source connection on the back of the IC/MIC (shown above). Aligning the Illumination Path To get the best images with DeltaVision, make sure that the light path is aligned in both Köhler and Critical positions. Use the instructions in this section to test and adjust alignment. This section contains the following topics: The Fiber Optic Module describes the settings and adjustments on this key component. You’ll use the Fiber Optic Module to switch from Köhler to Critical Illumination. You’ll also use the Fiber Optic Module to align the illumination path with the microscope. Before You Check or Adjust the Illumination Path Alignment lists the settings and filters that you’ll need to select before you check or adjust alignment. Checking Illumination Path Alignment shows how to check the alignment in both Köhler and Critical positions. To ensure optimal performance, check the alignment every two weeks. If acquired images seem dim, you should also check alignment to verify that the light is reaching the sample. Path Alignment shows how to align the illumination path in both Köhler and Critical positions. AppliedPrecision Chapter 9: Maintenance 141 The Fiber Optic Module Use the Fiber Optic Module to align the light path from the fiber optic cable to the Fluorescence Illuminator. This module allows you to adjust the tilt, horizontal, and vertical orientation of the light path. Figure 7: The Fiber Optic Module Photo sensor Port Tilt Screws Critical Spring Köhler Spring Locking Knob Y Adjustment Screw X Adjustment Screw Adjustment or Lock Use to Tilt Screws Adjust the tilt of the Fiber Optic Module body. Photo-sensor Port Connect the fiber optic cable to the photo-sensor detector in the IC/MIC. Köhler Spring Set the Köhler illumination position. Two locking screws hold it in position. Critical Spring Set the Critical illumination position. Two locking screws hold it in position. Locking Knob Temporarily lock the position of the Focus Control. Y Adjustment Screw Adjust the vertical position of the cable. X Adjustment Screw Adjust the horizontal position of the cable. 04-720104 Rev D/1008 142 DeltaVision Core and personalDV User's Manual Before You Check or Adjust Illumination Path Alignment Before you check or adjust alignment, remove all sources of blockage to the light path. Then verify the following settings to make sure that the various lenses and controls are in the correct positions (you can feel the controls snap into place when they are set in position). The Fluorescence Illuminator Slider on the back of the microscope is in an open position. The standard (Sedat) color set polychroic filter (usually labeled) is selected and in position on the Filter Cube Turret. (Alignment may vary between polychroic mirrors. Factory alignment is performed on the standard color set.) The shutter on the Filter Cube Turret is open (O). The Field Stop Aperture lever is pulled out all the way to close the aperture. The Magnification Changer is completely in (the 1X position). The 60X objective is in its lowest position. The Beam Selector is on the The Eyepiece Lens Selection Wheel is in the open (O) position. (eye) position. Eyepiece Focus Eyepiece Lens Selection Wheel Centering Telescope Focus Eyepiece Filter Wheel Beam Selector Z Focus 60X Objective Fluorescence Illuminator Slider (back view) Field Stop Aperture And Adjustment Screws Filter Cube Turret Auxiliary Magnification Changer AppliedPrecision Chapter 9: Maintenance 143 Checking Illumination Path Alignment To provide an optimum light source, the tilt and position of the Fiber Optic Module must be aligned with the microscope. This procedure shows how to perform an “inside-outside” focus test to make sure that the module is properly aligned. It also shows how to perform “in focus” tests to make sure that the position of the module (distance from the microscope) is correct for Köhler Illumination, and if required, for Critical Illumination. To check alignment: 1. Move the Beam Selector to direct the light to the eyepiece and make sure that the 60X objective is lowered and in position as shown previously in Before You Check or Adjust Illumination Path Alignment. 2. Use the Eyepiece Filter Wheel to select the FITC eyepiece filter. 3. In the Resolve3D window, select the following filters: In this Field Select Excitation TRITC Emission FITC %T 0.1% 4. Apply immersion oil to the objective and mount the mirror slide. 5. On the keypad, press EX SHUTTER to open the Excitation shutter. 6. Use the Eyepiece Focus on the oculars to focus on scratches on the mirror slide. 7. Fully close the Field Stop Aperture and slowly rotate the fine Z Focus knob in and out of focus in both directions. The light should evenly expand around the aperture. If it flares in one direction, go to Step One: Center the Field Stop Aperture on Page 144. 8. Check for alignment in Köhler Illumination as follows: a. Open the Field Stop Aperture. Then loosen the Locking knob and slide the focus end of the Fiber Optic Module into the Köhler Illumination position (see Page 84). Then tighten the Locking Knob. b. Switch the Eyepiece Selection Wheel to the Centering Telescope position (CT). Use the Centering Telescope Focus control to focus on the objective back aperture (the outside edge of the middle circle), as shown below. 04-720104 Rev D/1008 144 DeltaVision Core and personalDV User's Manual Middle Circle Inside Circle Focus on the outside edge of the middle circle After you focus on the outside edge of the middle circle, the outside edge of the inner circle should also be in focus and the centers of the inside and middle circles should be aligned. c. If the image is not if focus, go to Step Three: Set the Köhler Spring Position on Page 147. 9. If you are using Critical Illumination, check for alignment by moving the eyepiece to the Open position (O), loosening the Locking knob, and sliding the Focus Control on the Fiber Optic Module out to the Critical Illumination position. Then tighten the Locking Knob. Both the scratches and the edge of the circle should be roughly centered and in focus, as shown below. If not, go to Step Four: Set the Critical Illumination Position on Page 148. 10. If you observe any alignment problems in Steps 7, 8, or 9, use the instructions in the next section to align the illumination path. Path Alignment This procedure shows how to align the Fiber Optic Module and the fiber optic cable with the light path. It also shows how to set the positions of the two springs that allow you to switch between Köhler and Critical Illumination. Step One: Center the Field Stop Aperture 1. Apply immersion oil to both the objective and the mirror slide and mount the mirror slide. AppliedPrecision Chapter 9: Maintenance 145 2. Use the Eyepiece filter wheel to select the FITC eyepiece filter. In the Resolve3D window, set the other filters for alignment as follows: In this Field Select Excitation TRITC Emission FITC %T 0.1% 3. Press EX SHUTTER on the keypad to open the EX shutter. 4. Use the Z focus knob to focus on the scratches on the mirror slide. 5. Pull out the Field Stop lever all the way to close the Field Stop aperture. 6. Use the Olympus 3mm hex key to adjust the two Field Stop Centering Screws until the Field Stop Aperture is centered on the reticle. Field Stop lever with Centering Screws The reticle should appear in the center of the octagon as shown below. 7. Fully open the Field Stop aperture. 04-720104 Rev D/1008 146 DeltaVision Core and personalDV User's Manual Step Two: Adjust the Tilt of the Fiber Optic Module Body 1. Make sure that the Beam Selector on the microscope base is set to direct the light to the eyepiece and verify that the 60X objective is set in its lowest position. The Z focus knob should be turned until it stops (with the objective fully lowered). 2. Remove the oil from the objective (See Cleaning on Page 151) and remove the Repeatable Slide Holder. 3. Place a piece of paper on the stage with a piece of glass on top to keep it flat. 4. Press EX SHUTTER on the keypad to open the EX shutter. 5. In Resolve3D, set the neutral density filter to 100% light transmittance. 6. Pull the Field Stop lever all the way out to close it. The bright area on the paper should be circular and centered in the dim field. 7. Use a 3 mm hex key to loosen the Tilt screws and adjust the screws so that the bright spot on the paper is circular and is centered in the dim field as shown in the previous step. Tilt Screws 8. Tighten the Tilt screws. AppliedPrecision Chapter 9: Maintenance 147 Step Three: Set the Köhler Spring Position 1. Move the Eyepiece Selection Wheel from the open (O) to the Centering Telescope (CT) lens. 2. Use the Centering Telescope Focus on the ocular to focus on the objective back aperture (the outside edge of the middle circle). Middle Circle Inside Circle Focus on the outside edge of the middle circle 3. Loosen the Locking Knob and use a 2.5 mm hex key to loosen the two Köhler Spring screws. Then move the Focus Control back and forth until the edge of the inner circle is in focus. After you focus the edge of the inner circle, the edges of both the inner and middle circles should be in focus. Middle Circle Inside Circle 4. 04-720104 Rev D/1008 These edges should both be in focus Holding the Focus Control still, tighten the Locking Knob. 148 DeltaVision Core and personalDV User's Manual 5. Slide the Köhler Illumination spring so that it is in the groove on the Focus Control and tighten the Köhler spring locking screws to set the Köhler position. Step Four: Set the Critical Illumination Position 1. Move the Eyepiece Selection Wheel to Open (O) and fully open the field aperture. 2. Apply immersion oil to both the objective and the mirror slide and mount the mirror slide. 3. Loosen the Locking Knob. Then move the Focus Control on the Fiber Optic Module out approximately 5 mm and then slide it back and forth until the edge of the circle snaps into a sharp focus. You should see both the scratches and the edge of the circle in focus as shown below. Note Critical Illumination is typically 5mm out from Köhler Illumination. 4. Tighten the Locking Knob. 5. Check the focus. If the edges on the circle are not crisp, loosen the locking knob, re-adjust the Focus Control, and tighten the Locking Knob again. 6. Slide the Critical Illumination spring into the groove on the Focus Control and tighten the Critical Illumination spring screws with a 2.5 mm hex key. Step Five: Adjust and Test the Alignment 1. Fully close the Field Aperture and slowly rotate the microscope Z focus knob in and out of focus. The light should evenly expand around the aperture. a. If the light does not expand evenly around the aperture, make sure that: • • • • The shutter is open. The Eyepiece Selection Wheel is set to 0. The mirror slide is mounted in immersion oil and in focus. The Fiber Optic Module is in Critical position (see Step 3). b. Use a 1.5 mm hex key to adjust the X and Y adjustment screws on the top and left sides of the Fiber Optic Module until the image is centered in the reticle as shown below: AppliedPrecision Chapter 9: Maintenance 149 2. Adjust the center alignment in the Köhler position as follows: a. Slide the Focus Control to the Köhler position, set the eyepiece to CT, and use the Centering Telescope Focus to focus on the objective back aperture. You should see the area between the back aperture of the objective lens (the darker area) and the fiber tip (bright green). b. Use a 1.5 mm hex key to adjust the X and Y adjustment screws on the top and left sides of the Fiber Optic Module until the fiber tip image is at a point that is midway between its original center and the actual center (the point where the centers of the two circles are aligned). 3. Adjust the tilt of the Fiber Optic Module as follows: a. Make sure that the viewing knob on the microscope base is set to direct the light to the eyepiece and verify that the 60X objective is in detent and in its lowest position. b. Remove the oil from the objective. c. Place a piece of paper on the stage with a piece of glass on top to keep it flat. d. Press EX SHUTTER on the keypad to open the EX shutter and set the neutral density filter to 100% light transmittance (in Resolve3D). e. Use a 3 mm hex key to adjust the X and Y tilt screws so that the bright spot on the paper is circular and is centered in the dim field. 4. Repeat steps 1-3 in this procedure until the image is centered in both the Critical and Köhler positions. Note Aligning for Critical and Köhler illumination is an iterative process. The alignment will improve with each iteration. 5. When the image is centered, tighten the clamping screws on the Fiber Alignment Disk. 04-720104 Rev D/1008 150 DeltaVision Core and personalDV User's Manual 6. Fully close the Field Aperture and slowly rotate the microscope Z focus knob in and out of focus. The light should evenly expand around the aperture. If the light tends in one direction, call the API Customer Service Hotline (1-800-8625166). 7. Move the Fiber Optic Module between the Köhler and Critical position several times and make sure that the positions are repeatable (within about 1%). If the Köhler and Critical positions are not repeatable, call the API Customer Service Hotline (1-800-862-5166). Replacing IC/MIC Fuses Follow these instructions to replace a fuse in the Microscope Interface Chassis. To replace fuses for other components, follow the instructions in the manuals that are provided for those components. CAUTION: Installation of improperly rated fuses can cause damage to the system. To replace a fuse: 1. Shut down the system. 2. Unplug the power cord on the back of the IC/MIC. 3. Remove the fuse holder. 4. Test the fuses with a continuity meter. 5. Replace any bad fuses with 5X20mm 6.3A 250V UL high break capacity fuses (API P/N 19-170045-000). 6. Install the fuse holder. 7. Plug in the power cord. AppliedPrecision Chapter 9: Maintenance Cleaning Most system surfaces are best cleaned with a lint-free cloth or lint-free swabs and spectroscopy-grade isopropyl alcohol or chloroform. Avoid contaminating the cleaning solution by never reusing the cleaning cloth or swabs. Operators should be trained in the handling of flammable liquids such as alcohol. Material Safety Data Sheets (MSDS) should be maintained for the cleaning solutions, as with any hazardous material. The exceptions to this cleaning practice are the polychroic mirror and the optical filters. These components should be cleaned with low-pressure air. For example, use a bulb designed for cleaning camera lenses, which blows air across the surface. Do not use high pressure. Do not use canned air, as this often leaves a fluorescent residue. To clean the microscope, follow the instructions in the manufacturers’ manuals that are provided for these components. Improper cleaning of the polychroic mirror and the optical CAUTION: filters will result in damage. Moving the System If you need to move your DeltaVision system, call Applied Precision for instructions. 04-720104 Rev D/1008 151 152 DeltaVision Core and personalDV User's Manual AppliedPrecision A Appendix A: The Immersion Oil Kit The immersion oil kit is a collection of oils with refractive indexes that range from 1.500 to 1.534. Use of the correct immersion oil decreases the spherical aberration in the image data. • For DeltaVision Core, the immersion oil kit includes eighteen oils that range from 1.500 to 1.534, in increments of 0.002. • For personalDV, the immersion oil kit includes six oils that range from 1.512 to 1.522, in increments of 0.002. Many factors influence the optimum refractive index of the immersion oil, including specimen preparation, temperature, humidity, and atmospheric pressure. The Oil Calculator In order to calculate the desired refractive index, softWoRx is equipped with the Lens Information function. This function is located in the Utilities menu in softWoRx. It can also be accessed from Resolve 3D by clicking the Info button. The following parameters are explained here to help you enter the appropriate information and use the resulting calculations. 154 DeltaVision Core and personalDV User's Manual Distance from Coverslip to Specimen (microns) Establishes the distance from the surface of the coverslip to the desired focal plane. Temperature Defines the temperature of the specimen and the immersion medium. Specimen Refractive Index Defines the refractive index of the specimen, which is usually that of the mounting medium. In some cases, the specimen itself contributes significant refraction. Recommended Refractive Index Displays the resulting optimal refractive index of the immersion oil. Actually experimenting with oils with refractive indexes very close to this value is the best way to select the optimal oil. Resolution Ratio Displays the ratio between the Z resolution and the XY ratio. This serves as a reference to the degree of Z elongation. Maximum XY Pixel Size Displays the maximum recommended XY pixel size for deconvolution. Recommended Z Step Displays the smallest possible Z step for this objective. Choosing a smaller Z step will add to the size of the image file, but will not improve image quality. AppliedPrecision B Appendix B: Troubleshooting This appendix was designed to help you diagnose and correct the most common problems encountered on the DeltaVision system. It covers two types of troubleshooting tasks: Diagnosing System Problems Analyzing Reasons for Poor Image Quality If you are unable to correct a problem, fill out the DeltaVision Problem Report Form at the end of this appendix and either e-mail it to [email protected] or fax it to 425-557-1055, attn: Bio Service Hotline. Diagnosing System Problems Troubleshooting the Controller The following table shows the most common Instrument Controller problems and their resolutions. 156 DeltaVision Core and personalDV User's Manual Table B-1: Controller Troubleshooting Chart Indication Cause Correction Encoder Error when initializing stage. Poor cable connection. Power down system, including IC/MIC. Reseat X, Y, and Z motor cables. Reseat motor cables on excitation module. Power up system. Stalled sequence of images. Computer misallocated memory. Exit the software and restart IC/MIC. Troubleshooting the Workstation Other system troubles are indicated by messages or readings in the software. The Resolve 3D message window displays Resolve 3D activity. Observe the messages in this window when troubleshooting. This table shows possible problems and corrective actions. Table B-2: Workstation Troubleshooting Chart Indication Cause Correction "File system full" message when trying to save images. There is no more storage space for image data. Delete unwanted files. "Camera not found" message. Power up sequence was incorrect. Shut down the system and then restart it using the steps described in Chapter 9: Maintenance. Resolve 3D settings are not updating changes made using the keypad or joystick (for example, the filter selection, or Z position). Lack of communication between the Instrument Controller and Workstation. Shut down the system and then restart it using the steps described in Chapter 9: Maintenance. At login, user name not recognized. User has not been added. Add user. See the softWoRx Imaging Workstation User's Guide. Save image files to CD or DVD or LAN. See softWoRx Imaging Workstation User's Guide for more information. Analyzing Reasons for Poor Image Quality The following table documents the most common acquisition difficulties and abnormalities in image data. Table B-3: Image Quality Troubleshooting Chart Indication Cause Correction Dim images or long exposure times. Poor illumination. Fully open field aperture. Align xenon lamp and fiber optic cable as shown in Replacing the Xenon Bulb AppliedPrecision Appendix B: Troubleshooting Indication 157 Cause Correction on Page 134. Ensure that filter cube turret is locked in position on rail mount. Ensure shutter on filter cube is open. Ensure slider behind microscope is seated in an open position. Ensure proper filter cube is in position and seated in detent. Dim illumination. When fiber optic cable and focusing lens are removed, the projected light does not form a circle. Filter wheel(s) out of alignment. Dark, out of focus spots on image. Dust interference. Clean polychroic filter, emission filter, and camera window using low-pressure air. Do not use canned air. See Page 151 for further recommendations regarding cleaning system components. Image is distorted around edges or throughout. Occlusion seems to creep in toward center. Condensation on camera window, possibly due to improper camera temperature. Clean camera window using lowpressure air. Do not use canned air. See Page 151 for further recommendations regarding cleaning system components. Brightness of Z section images varies greatly A broken Photo sensor cable Disconnect the Photo sensor cable and the EX module cable. Shut down and start up as described on Pages 19 and 30 or unplug and plug in the Eyepiece filter wheel. This will reset the home position of the filter wheels and align filter wheel position. Calibrate filter wheels following instructions on Page Error! Bookmark not defined.. Check camera temperature in Resolve3D. Consult camera documentation for proper setting. Connect the Photo sensor cable to the EX module. Set the Excitation filter to FITC or some other visible light. Open the EX shutter. Bend the cable and examine it for light leaks. If you observe a light leak, replace the cable. Direct the light to a wall. If you observe inconsistencies in the light output as you bend the cable, replace the Photosensor cable. 04-720104 Rev D/1008 158 DeltaVision Core and personalDV User's Manual Table B-3: Image Quality Troubleshooting Chart Cont’d Indication Cause Correction Image has a traveling light or bubble. Air bubble in immersion oil. Clean front and back surfaces of objective and coverslip. Reapply immersion oil and restart experiment. Interference in image data. Possibly dirt, dust, oil, or air bubble. Clean front and back surfaces of objective and coverslip. Very bright image or camera saturation message. Camera saturation. Use lower exposure time and/or higher neutral density filter. Z series shows uneven or off center illumination. Poorly aligned illumination. Align xenon lamp and fiber optic cable. No image when Acquire is pressed. Knob at base of microscope is directing light to the eyepiece. Move knob to direct light to camera. Z series out of focus and incomplete. Stage was not centered within sample at start of experiment. Position stage in center of the sample and run experiment again. See Chapter 9, Maintenance. AppliedPrecision Appendix B: Troubleshooting 159 DeltaVision Problem Report Form Research Facility: Contact Person: Phone: System Serial Number: softWoRx version: (use Help → Software Versions to display) E-mail: Date: Problem Encountered: Please write a detailed description, answering as many of the following questions as possible. Questions: 1 2 3 4 5 6 7 8 9 10 When did this first occur? Was there any recent change or update to the system prior to the problem occurring? What sequence of operations produces the problem? What other programs were running when you encountered the problem? What error messages, if any, were shown? Is the failure the same each time or does it show different symptoms? Does it occur consistently or is it random? Does it go away after the workstation is re-booted? Does it go away after the instrument controller is re-booted? How often do you re-boot the workstation and instrument controller? Additional Comments: (See Page 2 for additional clarification issues) Please supply the following log files: Workstation: (/home/userName/softworx-logs/softworxlog.txt) Instrument Controller: (c:\ic530_dv\log\IC_530.log or c:\ic525_dv\log\IC_525.log or c:\ic540_dv\log\IC_540.log) Please e-mail this form to [email protected] or Fax to: 425-557-1055, attn: Bio Service Hotline 04-720104 Rev D/1008 160 DeltaVision Core and personalDV User's Manual AppliedPrecision C Appendix C: Acquiring a PSF This appendix shows how to acquire a Point Spread Function (PSF) and convert it to an Optical Transfer Function (OTF). Acquiring a PSF shows how to measure a Point Spread Function. Converting PSF to OTF shows how to convert the Point Spread Function to the Optical Transfer Function that is required to process images. Before You Start Before you attempt to measure a PSF, check the OTF library included with softWoRx to find out if the library provides an OTF for your objective. Acquiring a PSF To measure the point spread function (PSF), you need to optically section a fluorescent bead. Since the properties of the objective lens are the most important elements of determining a PSF, it is necessary to measure the PSF whenever new lenses are added to your microscope. The deconvolution software adapts to the PSF (actually the OTF) wavelength, so it is unnecessary to measure the PSF at more than one wavelength. 162 DeltaVision Coreand personalDV User's Manual Note If you do not have the tools necessary to acquire a PSF, softWoRx includes a utility that allows you to calculate a theoretical OTF based on the numerical aperture of the camera lens, index of refraction, and emission wavelength. If the aperture of the lens is lower than 0.75 N.A., the calculated OTF may work as well, or even better, than a measured OTF. However, if the aperture is greater than 0.75 N.A., a measured OTF will generally give you better results. For information about calculating an OTF, see the softWoRx online Help. A well-measured PSF is a key to successful deconvolution. For this reason, make sure that you: Thoroughly check all imaging conditions. Take the time you need to get a good signal-to-noise ratio in the image. Completely scan the bead. Tools This procedure requires the following tools: A clean and aligned 3-D microscopy system A bead slide with 0.1μm, or smaller, fluorescent beads A grid slide or other microscopic ruler An immersion oil set, if appropriate (see Selecting the Correct Immersion Oil on page 165.) The following steps describe how to calculate pixel size, measure the PSF, and obtain the corresponding OTF. To calculate pixel size: 1. Place the new objective in the Objective Turret and set the Max image size, best camera speed, and magnification slider at 1X. 2. Use the Eyepiece Filter Wheel to select the FITC eyepiece filter. 3. In the Resolve3D window, select the following filters: In this Field Select Excitation TRITC Emission FITC %T 0.1% 4. Place the silicon target grid on the stage and focus it (9.995 um/square). Align the grid image to the vertical and horizontal axis and maximize the image. AppliedPrecision Appendix C: Acquiring a PSF 163 5. Switch the beam selector to SP or SPL. Then adjust the exposure time and %T filter and click Acquire. Leave Data Collection window 21 open. 6. In the Image window, choose Tools | Measure Distance. Then set the Units to Pixels in the Measure Distance dialog box. 7. Draw a line across the image from a point on the top left square to a point in the same relative position on the top right square. 8. If the vertical delta is more than four pixels, re-align the slide. Repeat this process at the middle and bottom. Then count and record the number of grid elements and record the distance in pixels. 9. Repeat Steps 7 and 8 in the vertical direction. 10. Calculate the pixel size for each of the six measurements (top, middle, bottom, left, center, and right) as follows: Pixel Size(um) = 9.995 um/box Sum of (Measured pixels)/(Number of grids per measurement) Your calculation should be accurate to four decimal places. 11. Average the six pixel sizes to obtain the correct pixel size. To acquire a PSF: 1. Obtain the objective lens ID number (see the softWoRx online Help for information about lens identification numbers). 2. From the softWoRx main menu, choose Utilities | Revise Microscope Configuration. Then enter the root password to open the RESOLVE3D.SYS file. 3. In the RESOLVE3D.SYS file, under the Microscope Specifications section: a. Increase the number of lenses next to MS_Number_Lenses: by 1. b. Add the name of the objective to MS_Lens_Names: (e.g., 100Xoil, 60Xwater). c. Add the lens ID to MS_Lens_ID_Numbers: d. Enter the pixel size for the new lens. 04-720104 Rev D/1008 164 DeltaVision Coreand personalDV User's Manual For example: If the desired lens is 40X/1.35 with ID=10403 (the third lens in the list), then the pixel size is 0.1656. MS_Lens_Names: 10X 20X 40X 60X 100X MS_Pixel_Sizes: 0.6680 0.3313 0.1656 0.1103 0.06631 MS_Lens_ID_Numbers: 10105 10205 10403 10602 10002 4. Mount a bead slide on the microscope and focus on the beads to obtain the maximum intensity. Find a bead that is located by itself. (Refer to “Finding Beads” immediately following this procedure.) 5. Use the Center Object tool to center a single bead in the X and Y directions. (It is helpful to collect large images, such as 1024×1024.) 6. Adjust the CCD exposure time so that the maximum intensity at the plane of best focus is at least 2000 counts. Make sure that the camera does not saturate at the plane of best focus. 7. Now use a 256×256 image. 8. Ensure there is only one bead in the field of view and that, as you go out of focus, no rings from other nearby beads enter the image. 9. Verify that your microscope and software are accurately configured for lens and auxiliary magnification. 10. Execute the Standard PSF Measurement Macro described in the online Help to measure the standard point spread function (or run a Z series through the bead consisting of 128 sections acquired in 0.1 μm Z increments). 11. Run the softWoRx PSF to OTF program that converts the optical sections into an OTF. (Refer to Converting PSF to OTF later in this chapter.) Finding Beads It is easiest to find beads in a very dark room. Bead slides from Applied Precision include 1μm beads that fluoresce brightly at 617 nm and 0.1μm beads. Coarsely focus on the slide by positioning the lens near the slide. Scan the slide while looking for fluorescent haze from the 1μm beads. When you focus on the fluorescence haze from the 1μm beads you should also find the 0.1μm beads. Note Although a replacement bead slide is included in the Slide kit, bead slides have a limited shelf life. To purchase bead slides from Applied Precision, contact us at the appropriate number or address listed in Chapter 1: Getting Started. AppliedPrecision Appendix C: Acquiring a PSF Selecting the Correct Immersion Oil Accurate PSF measurements depend on the selection of the correct immersion oil. Our experience has shown that the oils recommended by microscope manufacturers are often not ideal for 3-D microscopy. We recommend that PSFs are measured with a minimal amount of spherical aberration. Inappropriate immersion oils yield asymmetric PSF measurements as a result of spherical aberration. In the case of Olympus and Zeiss microscopes, an index of refraction equal to 1.518 is ideal for measuring beads that are mounted in glycerol using 1½ coverslips. Nikon microscopes use an index of refraction equal to 1.512. There are many variables that can affect the selection of the correct immersion oil. The softWoRx Lens Information program can help you select the proper oil. Note An oil kit is included with your DeltaVision system. To purchase replacement oil, please contact Applied Precision. To confirm that you are selecting the correct immersion oil: 1. Collect the image data and generate a 3-D maximum intensity volume projection. 2. Rotate the 3-D image to get a view of the XZ or YZ plane. For example, rotate the image 90 degrees about the X axis or 90 degrees about the Y axis. To better see the shape of the PSF, it is helpful to do an exponential scaling—an exponent of .5 usually works well. Note If you are using softWoRx, use the Volume Viewer to generate a 3-D rendering of the bead scan. 3. Look for symmetric flare in the resulting image. Symmetry indicates that the oil is correct, and in virtually all situations, the most symmetric PSF along the Z axis is also the smallest and has the highest intensity. In other words, symmetry corresponds with the highest resolution. 4. Repeat the process with different oils until you determine the optimal immersion oil. The following figure demonstrates how image flare can be affected by the use of different immersion oils. 04-720104 Rev D/1008 165 166 DeltaVision Coreand personalDV User's Manual Figure C-1: Flare from Immersion Oils (3-D Maximum Intensity Projections) X Z Correct Immersion Oil Immersion Oil Index Too Low Immersion Oil Index Too High Converting PSF to OTF The PSF to OTF program converts a measured point spread (PSF) to an optical transfer function (OTF). Essentially, the OTF is the Fourier transform of the PSF. The pixel size of the resulting image is given in cycles/μm. To reduce problems associated with measurement noise, the PSF is radially averaged during the conversion and, as a result, the 3D PSF image becomes a 2D OTF image. The horizontal axis of the OTF represents axial (Z) frequency and the vertical axis represents radial (XY) frequency. The brightness of the OTF image elements, on a scale of 0 to 1, represents the frequency response of the microscope system at the corresponding radial and axial frequencies. AppliedPrecision Appendix C: Acquiring a PSF 167 Radial Resolution (XY) Figure C-2: Sample OTF Image Axial Resolution Figure C-3: PSF to OTF Conversion Each option in PSF to OTF Conversion is described briefly below. For additional information regarding these options, refer to the online Help. PSF File Defines the name of the PSF image file to be converted to an OTF. OTF File (sym) Displays the name of the resulting axially symmetric OTF. (For your convenience, the OTF filename is created by appending “_otf” to the PSF filename.) 04-720104 Rev D/1008 168 DeltaVision Coreand personalDV User's Manual X Range Defines the start and end pixel numbers in X. Y Range Defines the start and end pixel numbers in Y. Z Range Defines the start and end pixel numbers in Z. T Range This field is not used for PSF to OTF conversion. Wavelengths Determined by PSF wavelength. Lens ID Specifies the lens identification number (e.g., 12004). Sub-Image: Center Specifies the central XYZ coordinates of the point spread. Sub-Image: Size Specifies the XYZ image dimensions about the central coordinates. (The standard softWoRx point spread measurement is 256×256×128.) Additional Parameters: Border Rolloff (voxels) Specifies the number of voxels to roll off at the edge of the image. This reduces edge effects resulting from the Fourier Transform used in the PSF to OTF conversion. The procedure for converting a PSF to an OTF is very simple. After the PSF file has been identified in PSF to OTF Conversion, softWoRx assigns default settings to the rest of the options in the dialog box. In almost every instance, these settings will be appropriate to use for the conversion. To convert a PSF to an OTF: 1. Click Conversions on the main menu bar of softWoRx. 2. Click Convert PSF to OTF in the Conversions menu. PSF to OTF Conversions will appear. 3. Use one of the following options to enter the PSF file to convert. • Drag the appropriate PSF file from the File Manager into the PSF File text box. • Click PSF File to display a small version of the File Manager and then choose the PSF file that you wish to convert. AppliedPrecision Appendix C: Acquiring a PSF • Type the desired path and filename into the PSF File text box. 4. Click Do It. To place OTF into OTF Library If the objective used is in addition to those already present, you’ll need to modify softWoRx to use the new objective by adding the file to either /usr/local/softWoRx or dv2.10/config/system.dvrc as follows: 1. Log in to Linux as root. 2. Navigate to /usr/local/softWoRx/config/system.dvrc 3. Find the section labeled, “Lens-to-OTF matching” and follow the instructions provided for the OTF file. The following is an example of this section of the file: # Lens-to-OTF matching. These are of the form LENS_<lensIDNumber>_OTF # and are defined to be the file name in the OTF directory of the OTF that is # to be used for this lens ID. LENS_12_OTF 60X140_sample.otf LENS_10602_OTF 60X140.otf LENS_10003_OTF 100X135.otf LENS_10403_OTF 40X135_sample.otf LENS_10603_OTF 60Xw_120.otf LENS_10205_OTF 20X0.75c.otf 04-720104 Rev D/1008 169 170 DeltaVision Coreand personalDV User's Manual AppliedPrecision D Appendix D: Reference Information The appendix includes the following topics: Standard Filename Extensions lists the filename conventions used by DeltaVision. Standard Fluorescence Filters shows the excitation and emission peaks of the standard filters included with DeltaVision. Live Cell Filter Sets shows the excitation and emission peaks of the filters included in the optional Live Cell filter wheel module. Reference List includes references for microscopy, Linux, image processing, optics, microscopy, and sample preparation. Standard Filename Extensions The following is a list of filename conventions used by DeltaVision. Filename Extension Type of File *.dv Standard DeltaVision image *.otf Optical Transfer Function *_R3D.dv Resolve3D image *_D3D.dv Deconvolved image *_VOL.dv Volume Rendered image 172 DeltaVision Core and personalDV User's Manual Standard Fluorescence Filters DeltaVision provides a four color filter set, a polarizer, and multiple sets of optional filters. These filters are designed to be used with many common fluorescent probes. If you are using fluorescent probes that are not well matched with the standard DeltaVision filters, contact Applied Precision for assistance. The excitation and emission peaks of the DeltaVision filters2 are provided in the following table. Filter Name Excitation Emission Appropriate Probes DAPI UV, 350nm Blue, 455nm DAPI, Hoechst, Coumarin FITC Blue Green, 490nm Green, 525nm Fluorescein, GFP, CY3 TRITC Green, 555nm Orange, 605nm Rhodamine, Texas Red, Phycoerythrin, CY-5® Red, 645nm Infrared, 705nm CY-5 CFP (optional) Deep Blue, 436 nm Blue Green, 470nm CFP YFP (optional) Blue Green, 500 nm Yellow Green, 535nm YFP Live Cell Filter Sets The optional Live Cell filter wheel module includes four of the most common sets of filters used for live cell imaging. 2 Filter Name Excitation Emission Appropriate Probes CFP Deep Blue, 430nm Blue, 470nm Cyan GFP (CFP) YFP Blue Green, 500nm Yellow Green, 535nm Yellow GFP mCherry Yellow, 572nm Red, 632nm DsRed Express, DsRed2 EGFP Blue, 470nm Green, 525nm EGFP, sgGFP Data for filters provided by Chroma Technology Corp. AppliedPrecision Appendix D: Reference Information Reference List Selected references are provided on the following pages. Contact Applied Precision for the most recent list. If you notice omissions from the list, please inform Applied Precision. Microscopy Agard, D. A., Sedat J. W. (1983) Three-dimensional architecture of a polytene nucleus. Nature 302: 676-681. Agard, D. A. (1984) Optical Sectioning Microscopy: Cellular Architecture in Three Dimensions. Ann. Rev. Biophys. Bioeng. 13: 191-219. Agard D.A., Hiraoka Y., Sedat J.W. (1988) Three-dimensional light microscopy of diploid Drosophila chromosomes. Cell Motility & Cytoskeleton 10:18-27. Agard D.A., Hiraoka Y., Shaw P.J., Sedat J.W. (1989) Fluorescence microscopy in three dimensions. Methods in Cell Biology 30:353-377. Aikens R.S., Agard D.A., Sedat J.W. (1989) Solid-state imagers for microscopy. Methods in Cell Biology 29:219-313. Anderson J.T., Paddy M.R., Swanson M.S. (1993) PUB1 is a major nuclear and cytoplasmic polyadenylated RNA-binding protein in Saccharomyces cerevisiae. Molecular & Cell Biology 13:6102-6113. Asada T., Kuriyama R., Shibaoka H. (1997) TKRP125, a kinesin-related polypeptide involved in the centrosome-independent organization of the cytokinetic apparatus of tobacco BY-2 cells. Journal of Cell Science 110, in press. Babcock D.F., Herrington J., Goodwin P.C., Park Y.B., Hille B. (1997) Mitochondrial Participation in the Intracellular Ca2+ Network. Journal of Cell Biology, in press 12/96. Bass H.W., Marshall, W.F., Sedat J.W., Agard D.A., Cande W.Z. (1997) Telomeres cluster de novo before the initiation of synapsis: A three-dimensional spatial analysis of telomere positions before and during meiotic prophase. Journal of Cell Biology 137 (1):5-18. Belmont A.S., Braunfeld M.B., Sedat J.W., Agard D.A. (1989) Large-scale chromatin domains within mitotic and interphase chromosomes in vivo and in vitro. Chromosoma 98:129-143. Belmont A.S., Sedat J.W., Agard D.A. (1987) A three-dimensional approach to mitotic chromosome structure: evidence for a complex hierarchical organization. Journal of Cell Biology 105:77-92. 04-720104 Rev D/1008 173 174 DeltaVision Core and personalDV User's Manual Belmont A.S. and K. Bruce. (1994) Visualization of G1 chromosomes: a folded, twisted, supercoiled chromonema model of interphase chromatid structure. Journal of Cell Biology 127: 287-302. Charlton C.A., Mohler W.A., Radice G.L., Hynes R.O., Blau H.M. (1997) Fusion Competence of Myoblasts Rendered Genetically Null for N-Cadherin in Culture. Journal of Cell Biology 138: 331-336. Chen H., Sedat J.W., Agard D.A. (1989) Manipulation, display, and analysis of threedimensional biological images, in Handbook of Biological Confocal Microscopy (Pawley J, ed.) pp. 127-135. IMP Press, Madison, WI. Chen H., Hughes D.D., Chan T.-A., Sedat J.W., Agard D.A. (1996) IVE (Image Visulization Environment): A Software Platform for All Three-Dimensional Microscopy Applications. Journal of Structural Biology 116: 56-60. Chikashige Y., Ding D.Q., Funabuki H., Haraguchi T., Mashiko S., Yanagida M., Hiraoka Y. (1994) Telomere-led premeiotic chromosome movement in fission yeast. Science 3:270-273. Cooke C.A., Schaar B., Yen T.J., Earnshaw W.C. (1997). Localizationof CENP-E in the fibrous corona and outer plate of mammalian kinetochores from prometaphase through anaphase. Chromosoma Berl. 106: 446-455. (cover article) Csink A.K., Henikoff S. (1996) Genetic modification of heterochromatic association and nuclear organization of Drosophila. Nature 381: 529-531. Dawe R.K., Sedat J.W., Agard D.A., Cande, W.Z. (1994). Meiotic chromosome pairing in maize is associated with a novel chromatin organization. Cell 76: 901-912. Dawe R.K., Cande W.Z. (1996) Induction of centromeric activity in maize by suppressor of meiotic drive 1. PNAS, USA 93:8512-8517. Dernburg A.F., Daily D.R., Yook K.J., Corbin J.A., Sedat J.W., Sullivan W. (1996) Selective loss of sperm bearing a compound chromosome in the Drosophila female. Genetics 143: 1629-1642. Dernburg A.F., Sedat J.W., Hawley R.S. (1996) Direct evidence of a role for heterochromatin in meiotic chromosome segregation. Cell 86: 135-146. Dernburg A.F., Broman K.W., Func J.C., Marshall W.F., Agard D.A., Sedat J.W. (1996) Perturbation of nuclear architecture by long-distance chromosome interactions. Cell 85: 745-759. Gertler F.B, Niebuhr K., Reinhard M., Wehland J., Soriano P. (1996) Mena, a Relative of VASP and Drosophila Enabled, Is Implicated in the Control of Microfilament Dynamics. Cell 87: 227-239. Goodwin P.C. (1996) Wide-Field Deconvolution vs. Confocal Microscopy of Living Cells. Scanning 18,3:144-145. AppliedPrecision Appendix D: Reference Information Hartley W.J. How to Use a Microscope. Doubleday, 1964. Herman B., Jacobson K., ed. Optical Microscopy for Biology. Wiley-Liss, New York NY, 1980. Hiraoka Y., Agard D.A., Sedat J.W. (1991) Temporal and spatial coordination of chromosome movement, spindle formation and nuclear envelope breakdown during prometaphase in Drosophila melanogaster embryos. Journal of Cell Biology 111:2815-2828. (cover article) Hiraoka Y., Dernburg A.F., Parmalee S.J., Rykowski M.C., Agard D.A., Sedat J.W. (1991) The onset of homologous chromosome pairing during Drosophilia melanogaster embryogenesis. Journal of Cell Biology 120:591-600. (cover article) Hiraoka Y., Haraguchi T. (1996) Fluorescence imaging of mammalian living cells. Chromosome Research 4,3: 173-176. Hiraoka Y., Minden J.S., Swedlow J.R., Sedat J.W., Agard D.A. (1989) Focal points for chromosome condensation and decondensation from three-dimensional in vivo time-lapse microscopy. Nature 342:293-296. Hiraoka Y., Rykowski M.R., Lefstin J.A., Agard D.A., Sedat J.W. (1990) Three-dimensional organization of chromosomes studied by in situ hybridization and optical sectioning microscopy. Proc Soc Photo-electro Intrument Engin 1205:11-19. Hiraoka Y., Sedat J.W., Agard D.A. (1987) The use of a charge coupled device for quantitative optical microscopy of biological structures. Science 238:36-41. Hiraoka Y., Sedat J.W., Agard D.A. (1990) Determination of three-dimensional imaging properties of a light microscope system: partial confocal behavior in epifluorescence microscopy. Biophysical Journal 57:325-333. Hiraoka Y., Swedlow J.R., Paddy M.R., Agard D.A., Sedat J.W. (1991) Three-dimensional multiple wavelength fluorescence microscopy for the structural analysis of biological phenomena. Seminars in Cell Biology 2:153-165. Hochstrasser M., Sedat J.W. (1987) Three-dimensional organization of Drosophila melanogaster interphase nuclei. I. Tissue-specific aspects of polytene nuclear architecture. Journal of Cell Biology 104:1455-70. Hochstrasser M., Sedat J.W. (1987) Three-dimensional organization of Drosophila melanogaster interphase nuclei. II. Chromosome spatial organization and gene regulation. Journal of Cell Biology 104:1471-83. Ikeya T., Shinohara A., Sato S., Tabata S., Ogawa T. (1996) Localization of mouse Rad51 and Lim15 proteins on meiotic chromosomes at late stages of prophase 1. Genes To Cells 1:379-389. Inoue S. Video Microscopy. Prenum Press, New York NY, 1986. 04-720104 Rev D/1008 175 176 DeltaVision Core and personalDV User's Manual Jongens T.A., Ackerman L.D., Swedlow J.R., Jan L.Y., Jan Y.N., (1994) Germ cell-less functions early in the germ cell specification pathway of Drosophila. Genes Devel 8:2123-2136. Kam Z., Agard D.A., Sedat J.W. (1997) Three-dimensional microscopy in thick biological samples: a fresh approach for adjusting focus and correcting spherical aberration. Bioimaging 5:40-49. Kam Z., Chen H., Sedat J.W., Agard D.A. (1991) Analysis of three-dimensional image data: display and feature tracking, in Electron Tomography (Frank J, ed.) Plenum Press, New York. Kam Z., Jones M.O., Chen H., Agard D.A., Sedat J.W. (1993) Design and construction of an optimal illumination system for quantitative wide-field multidimensional microscopy. Bioimaging 1:71-81. Kam Z., Minden J.S., Agard D.A., Sedat J.W., Leptin M. (1991) Drosophila gastrulation: analysis of cell shape changes in living embryos by three-dimensional fluorescence microscopy. Development 112:365-70. Kam Z., Volberg T., Geiger B. (1995) Mapping of adherens junction components using microscopic resonance energy transfer imaging. Journal of Cell Science 108:10511062. Kaplan K.B., Swedlow J.S., Varmus H.E., Morgan D.O. (1992) Association of p60c-src with endosomal membranes in mammalian fibroblasts. Journal of Cell Biology 118:321-33. (cover article) Kaplan K.B., Bibbins K.B., Swedlow J.R., Arnaud M., Morgan D.O., Varmus H.E. (1994) Association of the amino terminal half of c-Src with focal adhesions alters their properties and is regulated by phosphorylation of tyrosine 527. EMBO Journal 13:4745-4756. Kaplan K.B., Swedlow J.R., Morgan D.O., Varmus H.E. (1995) c-Src enhances the spreading of src-/- fibroblasts on fibronectin by a kinase-independent mechanism. Genes Devel 9:1505-1517. Kirk K.E., Harmon B.P., Reichardt I.K., Sedat J.W., Blackburn E.H. (1997) Block in Anaphase Chromosome Separation Caused by Telomerase Template Mutation. Science 275: 1478-1481. Lauer S. A., P. K. Rathod, N. Ghori, K. Haldar (1997) A Membrane Network for Nutrient Import in Red Cells Infected with the Malaria Parasite. Science 276. Lieb J. D., Capowski E. E., Meneely P., Meyer B. J. (1996) DP-Y, a Link Between Dosage Compensation and Meiotic Chromosome Segregation in the Nematode. Science 274: 1732-1736. AppliedPrecision Appendix D: Reference Information Ma X, Ehrhardt D. W., Margolin W. (1996) Colocalization of cell division proteins FtsZ and FtsA to cytoskeletal structures in living Escherichia coli cells by using green fluorescent protein. PNAS USA, 93: 12998-13003. Marshall W.F., Dernburg A.F., Harmon B., Agard D.A., Sedat J.W. (1996) Specific interactions of chromatin with the nuclear envelope: Positional determination within the nucleus in Drosophila melanogaster. Molecular Biology of the Cell, 7: 825842. Marshall W.F., Fung J.C., Sedat-J-W. (1997) Deconstructing the nucleus: Global architecture from local interactions. Current Opinion in Genetics & Development, 7: 259-263. Marshall W.F., Straight A., Marko J.F., Swedlow J.R., Dernburg A., Belmont A., Murray A.W., Agard D.A., Sedat J.W. (1997) Interphase chromosomes undergo constrained diffusional motion in living cells. Curr. Biol. 7:930-939. Mathog D., Sedat J.W. (1989) The three-dimensional organization of polytene nuclei in male Drosophila melanogaster with compound XY or ring X chromosomes. Genetics 121:293-311. Minden J.S., Agard D.A., Sedat J.W., Alberts B.M. (1989) Direct cell lineage analysis in Drosophila melanogaster by time-lapse, three-dimensional optical microscopy of living embryos. Journal of Cell Biology 109:505-516. (cover article) Moritz M., Braunfeld M.B., Sedat J.W., Alberts B., Agard D.A. (1995) Microtubule nucleation by gamma-tubulin-containing rings in the centrosome. Nature 378 (6557): 638-640. Moritz M., Braunfeld M.B., Fung J.C., Sedat J.W., Alberts B.M, Agard D.A. (1995) Threedimensional structural characterization of centrosomes from early Drosophila embryos. Journal of Cell Biology 130: 1149-1159. Näthke I.S., Hinck L., Swedlow J.R., Papkoff J., Nelson W.J. (1994) Defining interactions and distributions of cadherin and catenin complexes in polarized epithelial cells. Journal of Cell Biology 125:1341-1352. Näthke I.S., Adams C.L., Polakis P., Sellin J.H., Nelson W.J. (1996) The adenomatous polyposis coli tumor suppressor protein localizes to plasma membrane sites involved in active cell migration. Journal of Cell Biology 134:165-179. (cover article) Neugebauer K.M., Roth M.B. (1997) Distribution of pre-mRNA splicing factors at sites of RNA polymerase II transcription. Genes and Development 11:1148-1159. Paddy M.R. (1998) Determining Nuclear Structure Using the Fluorescence Light Microscope. Methods in Cell Biology 53: 49-77. Paddy M.R., Agard D.A., Sedat J.W. (1992) An extended view of nuclear lamin structure, function, and dynamics. Seminars in Cell Biology 3:255-266. 04-720104 Rev D/1008 177 178 DeltaVision Core and personalDV User's Manual Paddy M.R., Belmont A.S., Saumweber H., Agard D.A., Sedat J.W. (1990) Interphase nuclear envelope lamins form a discontinuous network that interacts with only a fraction of the chromatin in the nuclear periphery. Cell 62:89-106. Paddy M.R., Chelsky D. (1991) Spoke: a 120-kD protein associated with a novel filamentous structure on or near kinetochore microtubules in the mitotic spindle. Journal of Cell Biology 113:161-171. Paddy M.R., Saumweber H., Agard D.A., Sedat J.W. (1996) Time-resolved, in-vivo studies of mitotic spindle formation and nuclear lamina breakdown in Drosophila early embryos. Journal of Cell Science 109: 591-607. Periasamy, A., Day R.N. (1997) PIT-1 protein localization at different optical sections in a single living cell using FRET microscopy and green fluorescent proteins. Microscopy & Microanalysis, submitted for publication. Periasamy A. (1998) Digital Deconvolution FRET Microscopy: 3D Visualization of ProteinProtein Interactions in a Single Living Cell (Invited Paper). SPIE 3260: 1-9. Rossi F., Charlton C.A., and Blau H. M. (1997) Monitoring protein-protein interactions in intact eukaryotic cells by beta >-galactosidase complementation. PNAS USA, 94: 8405-8510. Rykowski M.C., Parmelee S.J., Agard D.A., Sedat J.W. (1988) Precise determination of the molecular limits of a polytene chromosome band: regulatory sequences for the Notch gene are in the interband. Cell 54:461-472. Scalettar B.A., Swedlow J.R., Sedat J.W., Agard D.A. (1996) Dispersion, aberration, and deconvolution in multi-wavelength fluorescence images. Journal of Microscopy 182: 50-60. Schwartz K., Richards K, Botstein D. (1997) BIM1 encodes a a microtubule-binding protein in yeast. Molecular Biology of the Cell 8: 2677-2691. Segal E.D., Lange C., Covacci A., Tompkins L.S., Falkow S. (1997) Induction of host signal transduction pathways by Helicobacter pylori. PNAS USA, 94: 7595-7599. Shaw P. (1994) Deconvolution in 3-D optical microscopy. Histochemical Journal 26: 687-694. Shaw P.J., Agard D.A., Hiraoka Y., Sedat J.W. (1988) Tilted view reconstruction in optical microscopy: Three-dimensional reconstruction of Drosophila melanogaster embryo nuclei. Biophysical Journal 55:101-110. Shimanuki M., Miki F., Ding D.-Q., Chikashige Y., Hiraoka Y., Horio T., Niwa O. (1997) A novel fission yeast gene, kms1+, is required for the formation of meiotic prophasespecific nuclear architecture. Molecular and General Genetics 254: 238-249. Stevenson, R. (1996) Bioapplications and instrumentation for light microscopy in the 1990s. American Laboratory April 1996. AppliedPrecision Appendix D: Reference Information Straight, A.F, Marshall W.F., Sedat J.W., Murray A.W. (1997) Mitosis in living budding yeast: Anaphase A but no metaphase plate. Science 277:574-578. Sullivan W., Minden J.S., Alberts B.M. (1990) daughterless-abolike, a Drosophila maternaleffect mutation that exhibits abnormal centrosome separation during the late blastoderm divisions. Development 110:311-323. Swedlow J.R., Agard D.A., Sedat J.W. (1993) Chromosome structure inside the nucleus. Current Opinions in Cell Biology 5:412-416. Swedlow J.R., Hirano T. (1996) Chromosome dynamics: Fuzzy sequences, specific attachments? Current Biology 6: 544-547. Swedlow J.R., Sedat J.W., Agard D.A. (1993) Multiple chromosomal populations of topoisomerase II detected in vivo by time-lapse, three-dimensional wide-field microscopy. Cell 73: 97-108. Swedlow J.R., Sedat J.W., Agard D.A. (1997) Deconvolution in optical microscopy. Deconvolution of images and spectra , 2nd Edition. PA Jansson, ed. Academic Press, NY. pp. 284-309. Takizawa P.A., Sil A., Swedlow J.R., Herskowitz I., Vale R.D. (1997) Actin-dependent localization of an RNA encoding a cell-fate determinant in yeast. Nature 389: 90-93. Tempel B., Wang H., Goodwin P.C. (1996). BioTechniques 20: cover image. Winner of “1996 BioTechniques Cover Photo Contest”. Urata Y., Parmalee S.J., Agard D.A., Sedat J.W. (1995) A three-dimensional structural dissection of Drosophila polytene chromosomes. Journal of Cell Biology 131: 279-95. Van Wye J., Ghori N., Webster P., Mitschler R.R., Elmendorf H.G., Haldar K. (1996) Identification and localization of rab6, separation of rab6 from ERD2 and implications for an ‘unstacked’ Golgi, in Plasmodium falciparum. Molecular and Biochemical Parasitology 83: 107-120. Vodicka M.A., Koepp D.M., Silver P.A., Emerman M. (1998) HIV-1 Vpr interacts with the nuclear transport pathway to promote macrophage infection. Genes & Development 12: 175-185. (cover article) Waters D., Brown C. (1996) New high-resolution 3-D microscope avoids damage to live samples. Biophotonics International 3: 40-44. (cover article) Welnhofer E.A., Zhao L., Cohan C.S. (1997) Actin Dynamics and Organization During Growth Cone Morphogenesis in Helisoma Neuron. Cell Motility and the Cytoskeleton 37: 54-71. (cover article) Wilson S.M., Datar K.V., Paddy M.R., Swedlow J.R., Swanson M.S. (1994) Characterization of nuclear polyadenylated RNA-binding proteins in Saccharomyces cerevisiae. Journal of Cell Biology 127:1173-1184. 04-720104 Rev D/1008 179 180 DeltaVision Core and personalDV User's Manual Zimowska G., Aris J.P., Paddy M.R. (1997) A Drosophila Tpr protein homolog is localized both in the extrachromosomal channel network and to nuclear pore complexes. Journal of Cell Science 110: 927-944. Linux Operating System Siever, Ellen. Linux in a Nutshell, Third Edition. O’Reilly and Associates, 2001. Image Processing Bracewell R.N. The Fourier Transform and Its Applications. 2nd Edition, McGraw Hill, New York NY, 1986. Goodman J.W. Introduction to Fourier Optics. McGraw-Hill, New York NY, 1968. Castleman K.R. Digital Image Processing. Prentice-Hall, Englewood Cliffs NJ, 1979. Gonzales R.C., Wintz P. Digital Image Processing, 2nd Ed. Addison-Wesley, Reading MA., 1987. Pratt W.K. Digital Image Processing. Wiley, New York NY, 1991. Russ J.C. The Image Processing Handbook. CRC Press, Boca Raton FL, 1992. Optics Born M., Wolf E. Principles of Optics. Pergamon, Oxford, 1970. Hecht E. Optics. Addison Wesley, Reading MA, 1987. Hopkins H.H. (1955) The frequency response of a defocused optical system. Proc. Royal Society A, 231: 91-103. Jenkins F.A., White H.E.. Fundamentals of Optics. McGraw-Hill, New York NY, 1976. Streibl N. (1985) Three-dimensional imaging by a microscope. Journal of the Optical Society of America A, 2: 121-127. AppliedPrecision E Appendix E: Resolve3D and Keypad Options This chapter describes the following Resolve3D windows and dialog boxes: The Resolve3D Window is the main window for data acquisition. The Design/Run Experiment Dialog provides tools to select, design, edit, and execute experiment macros. The Experiment Designer is used to generate experiment command macros. The Settings Dialog used to control how images are displayed, select camera settings, and specify file output. Keypad/Joystick Operation is a reference for the buttons on the keypad. Many of the Resolve3D functions are also available on the keypad and joystick. 182 DeltaVision Core and personalDV User’s Manual The Resolve3D Window The Resolve3D window is the main data acquisition window. In addition to providing many of the acquisition options and controls, it provides access to the other dialogs and windows that are used for data acquisition. To open Resolve3D: X From the softWoRx menu, choose File | Acquire (Resolve3D). Figure E-1: Resolve3D Window The Resolve3D Menu includes commands for acquiring images, controlling marked points, specifying image and display settings, and calibration (see Page 183). The Resolve3D Toolbar allows you to acquire images, open the Design/Run Experiment dialog to set up and run experiments, and open the Settings dialog to control display, image, and file options (see Page 186). Image Control Fields allow you to choose filters, exposure time, lens type, image size, and binning settings (see Page 187). Stage Position Control Fields and Buttons can be used to move the stage and mark points of interest (see Page 189). Blue box and bar can be dragged to move the stage in X, Y, and Z (see Page 193). Image Intensity and Scale Values display image properties in numerical and graphical formats (see Page 193). The Message Pane reports the status of various Resolve3D activities (see Page 193). AppliedPrecision Appendix E: Resolve3D and Keypad Options The Resolve3D Menu The Resolve3D menu has the following menu items: The File menu includes commands to acquire images and to open the key dialog boxes for setting up and running experiments. The View menu includes commands to manage marked points and to create a blank screen. The Options menu includes commands to open the Settings dialog box (where you can set display and image options) and to save settings. The Calibration menu opens the Calibration tool. The Help menu provides options to show or hide ToolTips and to get Help. The File Menu Use the following Resolve3D File menu commands to acquire images, create scratch files, and open the Design/Run Experiment dialog box. Figure E-2: The Resolve3D File Menu Acquire Image Collects and displays an image from the microscope. This image is only displayed in the Data Collection window. It is not saved to a disk file for later use. Continuous Acquire Opens the Continuous Acquire dialog box that you can use to collect and display images continuously. These images are only displayed; they are not saved to a disk file. Snapshot Launches a tool to let you collect a single 2-D, multi-wavelength "snapshot" image. If you need to collect a Z series, time-lapse image, or other complex scheme, you will need to design an experiment with the Resolve3D Experiment Designer. 04-720104 Rev D/1008 183 184 DeltaVision Core and personalDV User’s Manual Scratch File Creates a "scratch file" to which you can save individual image frames for later use. After a file is opened, clicking Save Current Image saves the most recently collected image frame. Clicking Close Scratch File or Done closes the file. Note that the image size cannot be changed while a scratch file is open. Experiment Opens the Design/Run Experiment dialog box. You can use Design/Run Experiment to select a previously created experiment, open the Experiment Designer window to design a new experiment, or open the Experiment Macro Editor to create or edit an experiment macro. Quit Closes the Resolve3D window. The Resolve3D View Menu Use the View menu to manage points that you have marked, to clear the history of the path that you took while exploring your sample, or to create a black screen for light-sensitive conditions. Figure E-3: The Resolve3D View Menu Point List Opens the Points List dialog box. This dialog box helps you manage a list of points (with X, Y, and Z coordinates) that you want the system to remember. These points can be interactively "visited" at any time and they can be used in experiments. Clear Stage Trails Clears the Stage Trails history. (The system maintains a history of the paths of motion that you take while exploring your sample. These paths are displayed as "Stage Trails" on the Stage View.) Clear Stage Thumbnails Clears all of the thumbnail images currently displayed on the stage view. Blank Screen Turns the computer screen blank. This is useful when you are imaging under very light-sensitive conditions. Clicking anywhere on the screen restores it. AppliedPrecision Appendix E: Resolve3D and Keypad Options Command Line Interface Opens the Command Line dialog box that provides advanced users with the ability to issue individual Resolve3D commands to the system. CAUTION: The Command Line Interface should be used carefully because it can put the system in an unstable state. The Resolve3D Options Menu Use the Options menu to open the Settings dialog box (where you can set display and image options) and to save configuration settings and state information. Figure E-4: The Resolve3D Options Menu Settings Opens the Settings dialog box which allows you to control display, imaging, and file output options. Save Settings Saves the configuration settings and information (current filters, image size, etc.) to be used the next time Resolve3D is opened. The Resolve3D Calibration Menu Use the Calibration menu to make calibration tables, read calibration tables, and designate which calibration tools are active. Figure E-5: The Resolve3D Calibration Menu Make Opens the Calibration tool used to create flat-field calibration tables and optional tables of "bad" pixels. These tables may be applied to images, either when they are acquired or at a later time. (To apply the tables to images after they are acquired, use the Calibrate utility available from the Process item on the main softWoRx menu.) 04-720104 Rev D/1008 185 186 DeltaVision Core and personalDV User’s Manual Read Opens the Read Calibration Files dialog box that you can use to read calibration tables. Manage Opens the Manage tool that you can use to designate which calibration tables are active and to remove tables from the system's session memory. The Resolve3D Help Menu Use this menu to turn ToolTips on or off, get help on the Resolve3D window, or find out which version of softWoRx you are using. Figure E-6: The Resolve3D Help Menu Turn ToolTips On/Off Turns tool tips on or off. Tool tips display “pop-up” information about buttons on the interface. They open when the mouse pointer is held over a button for a few seconds. On Window Opens Help for the Resolve3D window. Version Displays version numbers for the softWoRx components. The Resolve3D Toolbar Use the buttons on the Resolve3D toolbar to acquire images, open the Experiment Designer/Run dialog box that allows you to set up and run experiments, and open the Display Settings dialog box that allows you to control display, imaging, and file output options. Figure E-7: The Resolve3D Toolbar Acquire Collects and displays an image from the microscope with the current settings. This image is only displayed in the Data Collection window. It is not saved in a file. AppliedPrecision Appendix E: Resolve3D and Keypad Options Experiment Opens the Design/Run Experiment dialog box that you can use to select a previously created experiment, open the Experiment Designer window to design a new experiment, or open the Experiment Macro Editor to create or edit an experiment macro. Settings Opens the Settings dialog box that allows you to control display, imaging, and file output options. Image Control Fields Use the Resolve3D Image Control fields to: Select the Excitation, Emission, and Neutral Density filters. Select exposure time. Determine whether to calibrate the image. Select the desired shutter. Select the image size. Select the lens and get lens information. Select whether to use auxiliary magnification. Determine binning parameters. Get pixel size. Figure E-8: The Resolve3D Image Control Fields 04-720104 Rev D/1008 187 188 DeltaVision Core and personalDV User’s Manual Excitation Specifies an excitation filter. When this filter is selected, a corresponding emission filter is automatically selected and the following parameters are set to the last values that were used for that excitation filter. Exposure time Neutral Density filter Active illumination shutters Number of frames to average Target intensity Camera gain You can choose Save Settings from the Options menu to store the configuration. The wavelength/bandwidth of the selected filter is indicated to the right of the filter choice box. Emission Specifies an emission filter. The wavelength/bandwidth of the selected filter is indicated to the right of the filter choice box. %T Specifies a Neutral Density filter. The relative illumination intensity is indicated in the menu. (This value indicates the amount of light passing through the filter. A value of 100% indicates the light is unfiltered.) Exposure Specifies camera exposure time (in seconds). The minimum and maximum exposure times allowed for this field depend upon the camera type. Find Finds the exposure time necessary to reach the target intensity currently entered in the Target Intensity dialog box. (This dialog box opens when you click the Find button.) For dim samples, 300-900 counts are acceptable. For bright samples, 30003600 counts provide a high dynamic range without saturation. Calibrate Calibrates images when they are collected from the camera. If you use this option, you must load and activate a calibration table that fits the current imaging parameters (wavelength, image size, bin choice) before you acquire images. Shutter Control Selects the desired excitation shutter. AppliedPrecision Appendix E: Resolve3D and Keypad Options Image Size Specifies image size (pixels or CCD detector elements) for acquired images. The pull-down list contains predefined sizes for convenience. You can enter special sizes by choosing Other... from the pull-down list. (Image size must be a multiple of four.) Lens Specifies the objective lens name. The pull-down list contains the lenses that are known to be part of the microscope system. Info Opens the Lens Information dialog box which displays information about the current objective lens. Bin Specifies the number of CCD detector elements to add together to form one image element. Binning is applied in both the X and Y directions. It increases intensity, but it decreases resolution. Pixel size is a function of binning. Aux. Mag. Specifies to use the microscope's 1.6x manual auxiliary magnification. (On IX70 stands, the manual auxiliary magnification is 1.5x. On IX71 stands that have a Cascade II camera, the auxiliary magnification is 2.0x) Pixel size Displays pixel dimensions in microns/pixel. The value is calculated from the Lens, Bin, and Auxiliary magnification settings. Stage Position Control Fields and Buttons The Resolve3D Stage Position Control area allows you to control the microscope's X, Y, and Z stage positions. The Center, Mark, and Visit tools and the Stage Motion Controls are shown below. 04-720104 Rev D/1008 189 190 DeltaVision Core and personalDV User’s Manual Figure E-9: The Resolve3D Stage Position Control Stage Control and Display Tools Center Object Centers the stage on an object selected in an Image Window. The pixel size must be correct in order for object centering to work properly, which means that the correct lens and auxiliary magnification setting must be selected. An image will be acquired after the object is centered. Mark Point Marks the current X, Y, and Z stage coordinates as points to be visited later. Mark Top of Sample Marks the current stage Z position as the "top" of your sample. Because the scanning process always moves the stage toward the objective, this position also represents the point where the stage is closest to the objective (the most negative Z value). This also represents the focal plane that is the closest to the slide side of a sample. Use this along with the Mark Bottom of Sample button to establish the thickness of the sample. You can use these marked positions to aid with the Z sectioning setup. AppliedPrecision Appendix E: Resolve3D and Keypad Options Note All scans that are set up using the Experiment Designer scan in Z, using relative coordinates. The Mark Top of Sample and Mark Bottom of Sample buttons are most helpful in determining the thickness of the sample to be scanned. When an experiment is started, the scan region is determined by the current focus point and the thickness of the sample. So, for example, if you have marked three points to visit in an experiment and they all have different middle-Z positions, the experiment will calculate the scan based on these different Z positions and the fixed thickness. Visit Top Moves the stage to the position marked as the top of the sample. Mark Bottom of Sample (end of scan) Marks the current stage Z position as the "bottom" of your sample for a potential scan. This corresponds to the positive stage Z coordinate value or the coverslip side of the sample. Visit Bottom Moves the stage to the position marked as the bottom of the sample. Visit Middle Visits the point in the middle of the defined scan region. Autofocus Automatically focuses. Acquire Image Collects and displays an image from the microscope. The current settings are used to collect the image. This image is only displayed in the Data Collection window. It is not saved in a file for later use. XY Stage Controls Moves the stage in the X and Y axis. The left and right arrows move the stage in the X axis in the increment set in the dX field and the up and down arrows move it in the Y direction in the increment set in the dY field. Z stage Motion Controls Moves the stage in the Z axis in the increment set in the dZ field. Pan Moves the stage view. Note that this tool is "sticky." To disable it, click the Pan tool again. Clear Stage Trails Clears all of the stage trail lines from the stage view. Clear Thumbnails Clears all of the thumbnail images currently displayed on the stage view. 04-720104 Rev D/1008 191 192 DeltaVision Core and personalDV User’s Manual Marked Points list Opens the Point List dialog box to manage the list of marked points. Zoom Tool Controls zoom. Drag the thumbwheel down to zoom in; up to zoom out. The button under the thumbwheel returns the zoom to 1:1. Z Slider Moves the stage up or down. dX Specifies the X step size, in microns. dY Specifies the Y step size, in microns. Stage Trails Window The blue box represents the current stage location. Drag the box to move the stage in X and Y. dZ Specifies the Z step size, in microns. AppliedPrecision Appendix E: Resolve3D and Keypad Options Image Intensity and Scale Values The Resolve3D Intensity values show the statistics for the intensity values of the image in numerical and graphical formats. The scale of the image is also shown. Figure E-10: The Resolve3D Image and Intensity and Scale Values Min, Max, Mean Displays the minimum, maximum, and mean intensity values of the most recently acquired image. For a 12 bit CCD camera, these values range between 0 and 4095. A value of 4095 indicates camera saturation, unless image calibration is in effect. (If you are using 0.5X Gain, the saturation is less than 4095 counts.) Histogram Shows the intensity distribution for the most recently acquired image. The vertical blue bars indicate the Scale min and Scale max and can be dragged interactively with the mouse to change how the display is scaled. The X-axis represents intensity and the Y-axis represents the number of pixels. Scale min/Scale max Specifies the settings for the minimum and maximum display values. These numbers can be changed manually or by moving the histogram threshold bars. Io Indicates valid (or invalid) photo sensor values or saturation. The indicator is green if the photo sensor value is valid. It is red before the first image is acquired. After the first scan, a red color indicates that the most recently acquired image has an invalid photo sensor value. A red indicator can also signify unreasonable saturation or an improperly functioning photo sensor device. The Message Pane The Resolve3D Message pane reports the status of various Resolve3D activities. Use the scroll-bar to view messages that have scrolled off the top of the pane. 04-720104 Rev D/1008 193 194 DeltaVision Core and personalDV User’s Manual Resolve3D Shortcuts You can right-click anywhere in the Resolve3D window to open a shortcut menu that allows you to acquire images, mark points, and create a blank screen (for imaging under very light-sensitive conditions). Figure E-11: Resolve3D Shortcut Menu Acquire Collects and displays an image from the microscope. The current settings are used to collect the image. This image is only displayed in the Data Collection window. It is not saved in a file for later use. Snapshot Launches a tool to let you collect a single 2-D, multi-wavelength "Snapshot" image. (The current settings are used to collect the image.) Mark point Marks the current X, Y, and Z stage coordinates as a point to be visited later. Blank Screen Turns the computer screen black for imaging under very light-sensitive conditions. Clicking anywhere on the screen restores it. The Design Experiment Tab The Design Experiment tab is used to generate experiment command macros. To open the Design Experiment tab: X From the Resolve3D window choose Experiment. The Design/Run Experiment window opens with the Design Experiment tab selected. AppliedPrecision Appendix E: Resolve3D and Keypad Options Figure E-12: Design Experiment Experiment name Specifies the name of the experiment macro. Enable Fast Acquisition Enables fast acquisition experiments (see Page 196). Sectioning Specifies sectioning for 3D images (see Page 196). Channels Specifies channels (filters) and exposure time (see Page 198). Time-lapse Specifies criteria for time-lapse experiments (see Page 199). Point Visiting Specifies a list of marked points (see Page 200). Panels Allows you to set up panel collections that you can use to review a large area of a slide or to stitch together to form a single, large image (see Page 201). Actions Lets you designate laser events, Autofocus, pause, wait, time-lapse, ratio imaging, and other specific actions to occur during the experiment. 04-720104 Rev D/1008 195 196 DeltaVision Core and personalDV User’s Manual Experiment name and Enable Fast Acquisition Experiment name Specifies the name of the file that is generated by the Experiment Designer. A file extension of .exp will be added to the name. Enable Fast Acquisition Enables fast image acquisition of 2D images. (This is only available when you are using an interline camera.) This data acquisition mode should be used carefully. Fast Acquisition uses a single command to set up a data stream to the Instrument Controller. Because no checking for user input occurs once the command is executed, you cannot stop an acquisition sequence once it is started. There is an upper memory limit for data collection that is based on the size of RAM memory for the Instrument Controller (typically about 350-400 MB). If you run into this limitation, turning Fast Acquisition off allows you to collect larger data sets. If the system is unstable after collecting a large data set with Fast Acquisition, restart the workstation or stop using Fast Acquisition unless it is strictly necessary. Sometimes Fast Acquisition isn’t much faster than standard acquisition, and more is risked than gained by using it. Note You can set Fast Image Acquisition options to control the scan sequence, the shutter open mode, the camera readout mode, and the starting Z location for the scan. (See the online Help for more information.) Sectioning Setup Once your microscope is focused near the middle of the vertical zone of interest of your sample, you can use the parameters in the Design Experiment Sectioning tab to control the Optical Sectioning procedure. Note The standard scan direction moves the objective lens towards the specimen. AppliedPrecision Appendix E: Resolve3D and Keypad Options 197 Figure E-13: Design Experiment Sectioning Setup Options Focus point when scan starts Specifies the Z location of the sample when the experiment starts. The recommended option is Middle of Sample. Optical section spacing Specifies the spacing (in microns) between each optical section. The focal point will be changed by this value after each image is collected. Number of optical sections Specifies the number of sections to collect (for each wavelength) for the experiment. softWoRx automatically calculates and displays this value if the Sample thickness and Optical section spacing are entered. If you specify this value, the Sample thickness value is changed. Sample thickness Displays the Number of optical sections multiplied by the Optical section spacing. Get Thickness Retrieves the Sample thickness, based on the locations defined with the buttons in the Resolve3D window. and OAI Acquires a 3D Z projection of the interval defined by the marked top and bottom of the sample. The optical section spacing and the number of optical sections are determined automatically, based on the depth-of-field of the objective and the exposure time. 04-720104 Rev D/1008 198 DeltaVision Core and personalDV User’s Manual Channels Setup Use the Design Experiment Channels tab to select wavelengths (filters) and to specify an exposure time for each filter. Figure E-14: Design Experiment Channels Options Refresh exposure conditions Updates the filter and exposure settings to those last used in the main Resolve3D window. Active Wavelength Toggle Buttons Enable the exposure time, filters, and display settings for specific wavelengths. Select the buttons that activate the wavelengths that you want to collect. (You must select one button for each wavelength.) If no wavelengths are selected, the exposure and filters that are set in the Resolve3D window are used. Exp Specifies the exposure time (in seconds) to be used when acquiring an image for the selected wavelength. If left blank, the value specified in Resolve3D will be used when the experiment is run. EX Filter Specifies the excitation filter to use for this experiment or image. When it is changed, the currently "paired" emission filter is automatically selected. EM Filter Specifies the emission filter to use. This filter may be selected independently of the EX Filter setting. AppliedPrecision Appendix E: Resolve3D and Keypad Options %T Filter Specifies the Neutral Density filter to use. The % value indicates light transmittance. A value of 100 % indicates that no light is blocked (or no filtering). Ex Shutter Specifies the excitation (illumination) shutter to use for each channel of the image. Reference Image Specifies to use an alternate filter or the transmitted light to acquire a reference image that can be combined with other images. This option is useful for Differential Interference Contrast (DIC) analysis. It can also be useful for other types of reference images. Only one reference image per Z stack is collected. Time-lapse Setup Use the Design Experiment Time-lapse tab to specify the number of time points, the time periods, and the total time for a time-lapse experiment. Figure E-15: Experiment Designer Time-lapse Setup Options Time-lapse option Specifies running a time-lapse experiment. Time-lapse Specifies the hours, minutes, and seconds for each time period. Total Time Displays the total time of the experiment, which can also be calculated as follows: Total time = (The number of time points - 1) x time-lapse 04-720104 Rev D/1008 199 200 DeltaVision Core and personalDV User’s Manual Time Points Specifies the number of time samples to collect in a time-lapse experiment. Enable Cell Tracking Moves the stage laterally to follow cells as they move during a time-lapse experiment. With the Enable Cell Tracking option selected, DeltaVision automatically keeps cells in the field of view. Cell Tracking Options Opens the Cell Tracking Options dialog box that allows you to set the parameters for cell tracking. For more information on using this dialog box, see Tracking Cells on Page 67. Autofocus before imaging Automatically focus the camera before each time point. For point visiting experiments, the camera is automatically focused every time that a point is visited. Point Visiting Setup Use the Design Experiment Point Visiting tab to specify a list of marked points to visit during the experiment. Tip Before you specify these points, make sure that the point list is open in the Point List dialog. You cannot specify the points when the point list is closed. Figure E-16: Experiment Designer Point Visiting Setup Options AppliedPrecision Appendix E: Resolve3D and Keypad Options Visit Point List Specifies the list of points, described by number, to visit during the experiment. All sectioning and wavelength procedures are repeated at each of the listed points. A point list can be entered as a series of numbers separated by commas or dashes. Separating two numbers with a dash '-' (as shown in the following example) indicates that all point numbers in between should also be visited. For example: 1,2,5,7-10 Note When you use Point Visiting with Z sectioning, the microscope uses the Z value of the current focus of each point as the initial reference for that point. Values specified for Z sectioning are incremented relative to that point. Autofocus before imaging Automatically focus the camera at each visited point before acquiring an image. Panel Collection Setup Use the Design Experiment Panels tab to create panel collection macros. These macros are useful when you want to scan a large area with a relatively high magnification lens. You can use the panels as a means of reviewing a large area of a slide, or as data that you want to stitch together to form a single, large image. Panel collection macros are sensitive to microscope settings such as image size and magnification. Because the number of panels required depends upon many factors, it is usually not a good idea to reuse panel collection macros. Figure E-17: Experiment Designer Panel Collection Setup Options 04-720104 Rev D/1008 201 202 DeltaVision Core and personalDV User’s Manual Collect Panels Specifies to use a panel collection macro. Overlap (pixels) Specifies the amount of overlap (in pixels) between adjacent panels. Start Coordinates Specifies the XYZ coordinates at which to start collecting panels. Use the Get Start button to obtain the current XYZ stage coordinates. End Coordinates Specifies the XYZ coordinates at which to finish collecting panels. Use the Get End button to obtain the current XYZ stage coordinates. The Design/Run Experiment Dialog Box The Design/Run Experiment dialog box provides tools to select, design, edit, and execute experiment macros. (Experiment macros are "scripts" of commands that guide the DeltaVision system to collect images.) To open the Design/Run Experiment dialog box: X From the Resolve3D window, click Experiment and click the Run Experiment tab. Figure E-18: The Design/Run Experiment dialog box Note The Design PK Experiment tab is available only for systems that have the QLM module. AppliedPrecision Appendix E: Resolve3D and Keypad Options Image file name Specifies the file name to use for the image in this text field. If you do not provide a file name, you will be asked to provide one when the experiment starts running. If you have the Auto-increment file names setting (in the Settings dialog box) turned on, you will only need to provide a name once for each session. The names will have incrementing numbers appended to them automatically. Image title Specifies text to save in the header of the image file created by the experiment. The title can be viewed later using the Header Labels button of the Image Window's Image Information dialog box. Add note to log Inserts a note in the experiment's log file at any time before or while an experiment is running. (You will need to click Do It to insert the note.) Change time lapse Changes the time lapse value while an experiment is executing. (You will need to type the desired time, in seconds, in the text field and click the Do It button to change the value.) This value only affects experiment macros that contain a TLAPSE command. It does not permanently change the macro. Show PK Progress graph See the QLM Getting Started Guide. Show images during acquisition Displays images in a Data Collection window as they are collected. In cases where acquisition speed is important, deselecting this option may increase performance. Launch viewer after experiment Launches an Image window when the experiment is finished. Note that if more than two files are created in a point-visiting experiment, the Image windows will not launch even if this option is selected. Images acquired/requested: Displays the current number of images acquired, compared to the total number requested. (During fast acquisition, the reported number of acquired images may not be updated regularly.) Disk space required Displays the estimated size of the experiment (i.e., the size of the image file). Resolve3D checks the disk space to make sure that enough space is available before it runs the experiment. Elapsed time: Displays the elapsed time of the experiment, in seconds. 04-720104 Rev D/1008 203 204 DeltaVision Core and personalDV User’s Manual Estimated Finish Displays the estimated clock time in which a running time-lapse experiment will finish. Current command: Reports each macro command as it is executed. Start Scan Starts the selected macro to run an experiment. Cancel Scan Terminates a scan while the experiment is running. (The images that are collected before the experiment is cancelled are automatically saved.) Help Opens the Help for the Design/Run Experiment dialog box. The Settings Dialog Box Use the Resolve3D Settings dialog box to control how images are displayed, select camera settings, and specify file output. To open the Settings dialog box: X From the Resolve3D Window, click the Settings button. Figure E-19: The Settings Dialog Box Display Options Note The QLM tab is available only for systems that have the QLM module. AppliedPrecision Appendix E: Resolve3D and Keypad Options Settings Dialog Box Display Options The Settings dialog box Display tab options allow you to control how the images are displayed. Image Display Mode Specifies which window and wave are used for image display. Five modes are currently available: Model Description None Displays images in the current window and wave. Scratch Displays all images in the specified window, Wave 1. Auto Grayscale Displays images in a separate window for each Emission (EM) filter. Auto Color Displays images in a different wave for each Emission (EM) filter. This option should be used only when you are running an experiment. Point Track Opens a separate window for each visited point in a point-visiting experiment. Window Specifies the number of the active display window. Select a new window to change where the next image will be displayed. (Temporary windows are numbered 21 or higher.) Wave Specifies the number of the active display wave (channel) as it is listed on the left side of the Data Collection window. Select a new wave to change which display window channel to use. Calculate statistics Calculates image intensity statistics. The typical reason for disabling this feature is to improve readout speed. Calculate histogram Calculates and displays the image intensity histogram in the Resolve3D window during image collection. (This option does not set scaling.) Auto histogram range Provides automatic scaling of the histogram width for each image that is analyzed. This option provides automatic histogram ranging from the minimum to the maximum intensity. When off, the histogram range remains at its current settings. Display images Displays images when the Acquire button is clicked or an experiment is running. Deselecting this option can increase performance. Deconvolve preview images Displays instantly processed 2D image previews that closely resemble images processed with advanced 3D image restoration techniques. 04-720104 Rev D/1008 205 206 DeltaVision Core and personalDV User’s Manual Auto intensity scale Provides automatic scaling of the image intensity between the minimum and maximum brightness. (This switch applies only to the appearance of the image, not the actual data.) Acquire after point visit Automatically acquires an image when the Visit Point option is selected. Settings Dialog Box Imaging Options The Settings dialog box Imaging options allow you to select camera settings. Figure E-20: The Settings Dialog Box Imaging Options Camera Specifies which camera to use. For the EM CCD camera, this list also specifies whether to use Conventional or Electron Multiplication mode. Frames to average Specifies the number of successive camera images to average into a result that is displayed in the window. (This is similar to the AVG macro command.) Gain Specifies a gain value for the selected camera. Transfer speed Specifies a transfer rate for the selected camera (in kHz). Higher speeds may boost performance at the expense of image noise. Target temperature Displays the cooled CCD camera's target temperature. This can be changed only by modifying the appropriate configuration file on the Instrument Controller computer. AppliedPrecision Appendix E: Resolve3D and Keypad Options Current temperature Displays the current temperature. Resolve3D monitors the temperature and updates this value occasionally. If you want to force a request for the current temperature, click the Refresh button. Xe Lamp bulb age (hours) Displays a count for the current number of hours on the xenon bulb. Use photosensor Enables use of the Photo sensor. Settings Dialog Box Files Options Use the Settings dialog box File options to set the image output directory, set the directory where experiment macros are stored, and select auto incrementing for file names. Figure E-21: The Settings Dialog Box Files Options Data Folder Specifies the destination directory for Resolve3D output images. If you supply a directory that you do not have permissions to use, you will be warned. If you provide a directory name that does not exist, you will be presented with the option of creating the directory. (You can also change the destination directory by changing the global softWoRx Image Data Directory in the User Parameters tool.) Experiment macros folder Specifies the directory where your experiment macros are stored. Data folder is temporary Specifies that any directory entered in the Data Folder field only applies to the current Resolve3D session. In subsequent Resolve3D sessions, the Data folder 04-720104 Rev D/1008 207 208 DeltaVision Core and personalDV User’s Manual value reverts back to the global softWoRx Data Directory as specified in User Parameters. Use this option in environments where several users are running the microscope and using a single system login. Data folders can be created for each user under a common parent folder. As users start Resolve3D, they can choose to use their own folders. In most cases, you should not use this option if each user has their own system login in your environment. With the option deselected, the Data folder assignment modifies the global softWoRx Data Directory definition and the system remembers the directory used in the last Resolve3D session. Auto-increment file names Creates a new file name by appending a serialized number to the base file name each time you run an experiment. Convert to 2 byte signed integer If toggled On, Resolve3D saves all images as signed 16-bit (the pre-3.5.0 default). This setting is designed to increase compatibility with older software. Note that this setting cannot be On for EMCCD cameras. Settings Dialog Box Autofocus Options Use the options on the Resolve3D Autofocus tab to set up Autofocus parameters. Automatically determine parameters Autofocus parameters are determined from the depth of field of the objective lens, which is calculated from the lens’ numerical aperture. You must select the proper objective lens in order to get the appropriate Autofocus settings. AppliedPrecision Appendix E: Resolve3D and Keypad Options Channel for Autofocus This setting indicates the wavelength to use for Autofocus. Contrast calculation method This setting determines the polarity of the contrast calculation. There are three choices for image contrast calculation methods: • Auto – The instrument controller usually can determine which contrast calculation method to use, but not always. • Brightfield – for dark objects on a light background • Fluorescence – for light objects on a dark background Autofocus Z test step (μm) This option sets the step size used for Autofocus within the maximum Z range. Maximum Z test range (μm) The setting indicates the maximum range that the Autofocus will search. Post-autofocus Z offset (μm) This setting can provide a constant offset after the Autofocus position determines the best plane of focus. Often times Autofocus will find a plane that is consistently different from the desired plane. Settings Dialog Box Misc Options Use the options on the Resolve3D Misc tab to select or clear Lost Motion Compensation or to select a filter wheel configuration (if your system is configured to use alternate filter wheels). Figure E-22: The Settings Dialog Box Misc Options 04-720104 Rev D/1008 209 210 DeltaVision Core and personalDV User’s Manual Allow Lost Motion Compensation (LMC) Enable Lost Motion Compensation to remove the effect of hysteresis in the stage. This option should be selected for most applications. When it is turned off, the Z series range may shift. Clear this option if you want to improve speed at the expense of position repeatability. Show stage trails Display the path of stage movement on the Stage View. Show stage thumbnails Display a thumbnail image of each image on the Stage View as the image is acquired. Show point numbers Displays the number of each point in a point list on the Stage View. Excitation filter wheel Allows you to select the name of the Excitation filter wheel that you are using. This option list appears only if you have configured your system for alternate filter wheels. Emission filter wheel Allows you to select the name of the Emission filter wheel that you are using. This option list appears only if you have configured your system for alternate filter wheels. Eyepiece filter wheel Allows you to select the name of the Eyepiece filter wheel to use. This option list appears only if you have configured your system for alternate filter wheels. Reinitialize Filter Wheels Reinitializes the filter wheels. Action Buttons Done Closes the Resolve3D Settings dialog box. Save Settings Preserves the current options for your next Resolve3D session. In addition to options in the Resolve3D Settings dialog box, current state information such as current filters and exposure time is saved. Help Opens the Help for the Settings dialog box. AppliedPrecision Appendix E: Resolve3D and Keypad Options Keypad/Joystick Operation Many of the functions accessible through Resolve3D are also available on the keypad/joystick. This section describes each key on the keypad/joystick. Note Some buttons on your keypad may not be active. Figure E-23: Keypad/Joystick RESET Clears communication buffers, closes shutters, stops all motors, and clears encoder errors. Use the RESET button when you suspect that the workstation and controller are not synchronized. CONTROL MODE Toggles the controller mode between local mode and remote mode. Local mode enables control by the keypad and joystick. The remote mode disables the joystick and the keypad buttons (except for CONTROL MODE and a few other buttons) and shifts control to other internal components. 04-720104 Rev D/1008 211 212 DeltaVision Core and personalDV User’s Manual LMC RESET ON/OFF Executes a Lost Motion Compensation (LMC) move. Tip You can disable LMC on the Resolve3D Settings dialog. (For more information, see the online Help.) REMOVE TRAIL Clears the stage movement history from memory. KEYLIGHT ON/OFF Turns the keypad backlight on and off. QUIT Quits the controller program when pressed twice. (To restart the Instrument Controller program, double-click the Instrument Controller icon on the desktop.) BLANK SCREEN Suspends (or activates) the monitor's light display (BLANK SCREEN is a toggle button). Use this feature when viewing dim samples or performing light sensitive experiments. SLOW/MEDIUM/FAST Adjusts the joystick stage movement speed. DISABLE MOTION KEYS Disables the eight keys below the joystick. This prevents accidental input from the keys when using the joystick. YES/NO Allows response to questions prompted on the screen. For example, during initialization, the computer will ask if you want to continue with initialization. The Yes and No buttons are an easy way to respond. ACQUIRE MODE ARROWS Changes the acquisition mode. (This includes the Excitation filter, exposure time, shutter configuration, and many of the options defined in the Settings dialog box.) JOYSTICK Moves the stage in X and Y. POINT ARROWS Scrolls through the list of marked points. Press ACQUIRE IMAGE to view the image for a selected marked point. ND ARROWS Changes the neutral density filter to one of a lower () or higher () value. When the neutral density filter is at the minimum value and you push the decrease arrow (), the wheel moves to engage the maximum value filter. When the AppliedPrecision Appendix E: Resolve3D and Keypad Options 213 Neutral Density filter is at the maximum value and you push the increase arrow (), the wheel moves to engage the minimum value filter. RETRACE ARROWS Retrace () moves the stage one position back in the stage movement history buffer. Retrace () moves the stage one position forward in the stage movement history buffer. EX ARROWS Changes the excitation filter to the previous () or next () filter on the filter wheel. This button changes the excitation filter but not any other settings, such as exposure time and shutter configuration. PANEL 1/2 MARK Defines the area of the specimen to be stitched, as shown in the following diagram. Figure E-24: Panels Diagram Panel 2 Panel 1 OR Panel 2 Panel 1 ACQUIRE IMAGE Commands the system to collect image data. This key function is identical to clicking Acquire in Resolve3D. Use this key when you are scanning through your sample and using the eyepiece to find a region of interest, or when you want to get a quick look at the specimen on the monitor. SAVE IMAGE Saves the last acquired image to the currently open file. STEP DECREASE/INCREASE Changes the step size of the movement controlled by the arrow keys located beneath the joystick. Pressing either button many times will change the step size to the minimum/maximum. There are 8 possible step sizes: 50nm, 100nm, 200nm, 400nm, 800nm, 2250nm, 4500nm, and 9000nm. X AND Y ARROW KEYS Move the stage in the direction shown. Z ARROW KEYS Move the stage in the direction shown. Z1 MARK/Z2 MARK Define the boundaries of the Z series. 04-720104 Rev D/1008 214 DeltaVision Core and personalDV User’s Manual EX SHUTTER Toggles the excitation shutter between open and closed. TRANS SHUTTER Toggles the shutter for the transmitted light source between open and closed. POINT MARK Adds the stage position to the marked points list. AppliedPrecision Index %T Filter field, 212 3D images, 4, 38–44 3D Z projections, 78–80 Acquire Image button, 19, 228 Acquire Image setting, 204 Acquire images, 22–27, 28–30 Acquire Mode arrows, 227 Active Wavelength buttons, 211 Agard, Dr. David A., 2 Altitude requirements, 103 Ambient illumination, 104 Applied Precision, LLC, contacting, xii, 7 Aquiring a PSF, 173–78 Auto histogram range, 219 Auto intensity scale, 219 Autofocus, 5 before imaging, 213, 214 options, 222–23 setting in Resolve3D, 204 within experiment macros, 69–71 Autofocus button, 52 Autofocus Z test step option, 223 Automated Optical Sectioning, 4 Axial frequency, 179 Bead slides, 177 Beads finding for PSF measurement, 176 measuring in immersion oil, 177–78 Bibliography, 15 Bin setting, 202 Blank Screen button, 227 Border rolloff, 180 determining, 56 Bottom of sample, 41 Bottom of Sample setting, 204 Brightfield, 3 Bulb icon, 32, 143 Bulbs, 124 Cabinet components, 112–14 Calculating OTF. See Optical transfer function Calculating pixel size, 174–75 Camera changing, 125–27 damage prevention, 11 EM CCD, 87, 121–22 high-speed, 87, 107–8 power supply, 108 saturation, 87, 170 setting in Resolve3D, 220 supported for DeltaVision, 107–8 Camera not found message, 167 CCD camera, 107–8 damage prevention, 11 Cell mitosis, 47 Cell tracking, 71–77 Center Object setting, 203 Center of geometry, 74 Center of intensity, 74 Channel for Autofocus setting, 223 Channels tab, 211–12 Choosing filters, 17–19 Cleaning DeltaVision, 162 Coarse focus, 17, 23, 26 Collect Panels setting, 57, 215 Collecting data, 84–98 Collecting panel images, 55–57 Command line interface, 197 Components, 99–124 cabinet, 112–14 camera, 107–8 consumable, 123–24 desktop, 110–12 EM CCD camera, 121–22 enviromental chamber, 119 fiber optic module, 116 fluorescense microscope, 106 instument controller, 113 optical, 105–10 optional, 118–23 optional software, 123 photo sensor, 110 repeatable slide holder, 114–16 software, 117 softWoRx Workstation, 114 TIRF module, 121 tool kit, 116 Xenon lamp, 109 Consumable parts, 123–24 Contact Applied Precision, xii Continuous Acquire, 196 Contrast calculation polarity, 223 Control Mode button, 226 Controlling the stage, 202–6 Conventions, document, x Converting PSF to OTF, 178–81 Counter space, for system, 101 Country-specific requirements, 101 Critical illumination, 5, 89–91, 150, 155 position, 159 Critical illumination spring, 89 Critical spring, 151 Current rating, of electric supply, 100 Current temperature display, 220 Customer Service Hotline, xii Customer support, 7 Damage prevention, 11 Data collection techniques, 84–98 monitoring acquisition of, 91–96 saving, 30–32 Data Collection window, 93–95 Deconvolve preview images, 219 DeltaVision capabilities, 3, 4 components, 99–124 damage prevention, 11 prerequisites, 15 turning off \r, 32 Depth of field, 42 Design Experiment tab, 36–38, 40, 207–8 Design/Run Experiment dialog box, 215–17 Desktop components, 110–12 DIC, 80–82 DIC imaging, 4 Dichroic filter wheel, 24 Differential Interference Contrast. See DIC Digital Microscopy, 4 Dim illumination problems, 168 Dim image problem, 168 Disable Motion keys, 227 Display modes, 93–95 Displaying histogram, 96 Document conventions, x Editing a point list, 53 Editing macros, 96–98 Electrical requirements, 100–101 EM CCD camera, 121–22 EM Filter field, 212 Emission filters, 18, 26, 47 changing, 129–32 specifications, 184 Enable fast acquisition, 209 Encoder error, 167 End Coordinates setting, 215 End of scan, 204 Enviromental chamber, 119 Environmental requirements, 101–4, 102 EX arrows, 228 EX Filter field, 211 EX Shutter button, 19, 229 Ex Shutter field, 212 Exact method for Z scan settings, 44 Excitation filters, 18, 26, 46 specifications, 184 Excitation shutter, 19 safety, 27 Exp field, 211 Experiment Macro Editor, 96–98 Experiment macros, 36–38 Experiments 2D image in 3 wavelengths, 17–19 3D, 38–44 and autofocus macros, 69–71 and focal planes, 41 and macros, 36–38 and marking points, 50–52 and optical section spacing, 41–44 and panel collection, 55–57 and sample thickness, 43–44 Design tab, 207–8 editing macros for, 96–98 guidelines for 3D, 41 macros folders, 221 photokinetic, 120 point visiting, 49–55 running, 35–57 setting up, 35–57 time-lapse, 44–49, 71–77 Explorer, 123 Exposure time, 87–89 AppliedPrecision Appendix E: Resolve3D and Keypad Options Eyepiece filter wheel, 26, 129–30 filter wheel and safety, 9 filters, 18 focus, 17 Fast button, 227 Fiber Optic Cable, 11 Fiber optic module, 116, 151 adjust tilt of, 156–57 checking alignment \r, 153 Field stop aperture, 155–56 File system full error, 167 Filename extensions, 183 Filter sets, 17–19 Filters activating multiplexed sets, 58–62 and changing wheels, 128–35 and safety, 9 and wheel modules, 128–35 changing emission wheel, 130 choosing, 17–19, 17–19 cleaning, 162 emission, 18 excitation, 18 excitation and emission peaks, 184 eyepiece, 18 eyepiece wheel change, 129–30 fluorescense, 184 live cell sets, 184 neutral density, 18 optional modules for, 119 Sedat polychroic, 152 sets of, 17–19 specifications, 184 standard optical, 106 usuable life span, 106 wheel calibration, 135–39 Find exposure, 201 Finding a sample, 23, 27–28, 84–87 Finding exposure time, 87–89 Fine focus, 17 Flare, 178 Flare from immersion oil, 178 Flat-panel monitor, 111 Fluorescence, 3 Fluorescence microscope, 106 Fluorochromes, 17–19 Focal planes, 41, 42 Focus, 17 Focus knob, 86 Focus lock, 17 04-720104 Rev D/1008 217 Focus point, 40, 41 Fourier transform, 178 Frames to average setting, 220 Frequency, operating, 100 Fuses, 12, 100 Gain setting, 220 Get Thickness setting, 210 Goodwin, Paul, 3 Guidelines for 3D experiments, 41 Hi Res Camera, 122 Histogram of intensity values, 96 Histograms, 206 History, 2–3 Humidity requirements, 103 IC/MIC replacing fuses, 161 view of back, 150 IC/MIC switch, 142 IC/MIC switches, 143 Illumination adjust fiber optic module tilt, 156–57 aligning the path, 150–61 ambient, 104 center field stop aperture, 155–56 checking alignment, 153–55 critical position adjustment, 158 exposure time, 87–89 Kohler sping position, 157–58 switching between methods, 89–91 testing path alignment, 159 types of, 89–91 Image acquisition, 22–27, 28–30 2D in 3 wavelengths, 17–19 and exposure time, 87–89 and live specimens, 68–82 collecting panels for, 55–57 Exposure time, 88 marking points for, 50–52 monitoring, 91–96 point visiting, 49–55 troubleshooting, 168–70 with continuous Z sweep, 78–80 Image control fields, 200–202 Image Display and Analysis, 4 Image Fusion tool, 82 Image intensity, 206 Images 2D in 3 wavelengths, 17–19 3D, 38–44 acquiring, 22–27, 28–30 and optical section spacing, 41–44 calibrate, 201 collecting panels for, 55–57 display mode, 218 distortion, 168 intensity values, 206 live cell, 5, 68–82 modes for viewing, 93–95 reference, 80–82 running experiments for, 35–57 saving, 30–32 scale values, 206 setting size, 202 symmetric flare, 177 viewing previews, 93 Immersion oil flare from, 178 selecting, 177–78 Immersion oil kit, 85, 164–65 Purchasing from Applied Precision, 177 Instrument controller, 113 troubleshooting, 166–67 Intensity values, 87 Internet Address, Applied Precision, xii Joystick, 19–20, 111, 225–29, 227 Keylight button, 227 Keypad, 19–20, 111, 225–29 Kohler illumination, 5, 89–91, 150, 155 Kohler spring, 151 position, 157–58 LCD monitor, 111 Lens ID, 180 setting with Resolve3D, 202 Lens information window, 25 Light path, 16 Line requirements, 100 Listing points, 49–55 Live cell filter module, 119 Live cell filter sets, 184 Live cell imaging, 5, 68–82 Live specimens tracking, 71–77 LMC Reset button, 226 lo setting, 206 Loading a point list, 53 Locating a sample, 84–87 Locking knob, 151 Long exposure times, 168 Macros, 36–38 editing, 96–98 Maintenance adjust fiber optic module tilt, 156–57 centering field stop aperture, 155–56 changing MIC fuses, 161 checking fiber optic cable alignment, 153– 55 cleaning DeltaVision, 162 critical illumination position, 158 filter wheel calibration, 135–39 illumination path alignment, 150–61 Kohler spring adjustment, 157–58 moving DeltaVision, 162 system shutdown, 143 testing illumination path alignment, 159 Mark Point button, 229 Mark Point setting, 203 Marked Points List button, 205 Marking points, 50–52, 52 Replacing points in a list, 52 saving a point list, 53 Visiting marked points, 52 Master switch, 142 Material Safety Data Sheets (MSDS), 162 Maximum intensity, 206 Maximum Z test range setting, 223 Mean intensity, 206 Medium button, 227 Message pane, 207 Microscope interface chassis, 143 replacing fuses for, 161 Microscope Interface Chassis, 113 Middle of sample, 41 Middle of the sample option, 40 Minimum intensity, 206 Monitor switch, 142 Monitoring data acquisition, 91–96 Monitoring point visiting, 54 Move threshold, 75 Moving DeltaVision, 162 Multiplexed wavelength experiment design, 35–66 filter set activation, 58–62 option, 35–66, 122 overview, 58 ND arrows, 227 Network connection, 103 Neutral density filters, 18 No button, 227 Number of optical sections field, 41 OAI. See Optical axis integration OAI setting, 210 Objective AppliedPrecision Appendix E: Resolve3D and Keypad Options cleaning, 32 damage prevention, 11 Oil calculator, 164–65 Oil, immersion. See Immersion oil Optical axis integration, 68, 78–80 Optical components, 105–10 Optical filters, 106 damage prevention, 11 specifications, 184 Optical section spacing, 210 Optical sections, 41–44 Optical transfer function, 173–81 conversion from PSF, 178–81 file, 180 sample image, 179 Optional components, 118–23 Optional software, 123 OTF. See Optical transfer function Overlap setting, 215 Overscan method for Z scan settings, 44 Pan tool, 204 Panel 1 and 2 Mark buttons, 228 Panel collection, 5, 55–57, 214–15 Personal data folder, 30–32 Phase contrast, 3 Photo sensor, 110 Photo sensor port, 151 Photo-bleaching, 87 Pixel size, 174–75 setting, 202 Point arrows, 227 Point list, 49–55, 197 dialog box, 52 editing, 53 Loading, 53 Saving, 53 Point Mark key, 51 Point marking, 50–52 Point spread function, 173–81 acquiring, 173–78 conversion to OTF, 178–81 file, 180 finding beads, 176 tools needed, 174 wavelength, 180 Point visiting, 4, 5, 41, 49–55 monitoring, 54 Points tab, 213–14 Polychroic mirror, 162 Post-autofocus Z offset setting, 223 04-720104 Rev D/1008 219 Power switches, 142 Prerequisites, 15 Previous experience method for Z scan settings, 44 Primary light path, 58 Probes, 17–19 PSF. See Point spread function QLM switch, 142 Quantifiable laser module, 26 Quantitative Processing, 4 Quit button, 227 Radial frequency, 179 Recommended Z step, 165 Recommended Z Step Size field, 40 Reference books, 185–92 Reference channel, 74–75 Reference images, 80–82, 212 Refraction, index of. See Refractive Index Refractive index, 164–65 Nikon, 177 Olympus and Zeiss, 177 Refresh exposure conditions, 47 Refresh exposure conditions button, 211 Remove Trail button, 226 Repeatable slide holder, 25, 50, 85, 114–16 Replacing MIC fuses, 161 Replacing the tran light, 149–50 Requirements altitude, 103 country-specific, 101 electrical, 100–101 environmental, 101–4 humidity, 103 line, 100 power cord, 100 temperature, 103 Reset button, 226 Resolution ratio, 165 Resolve3D %T setting, 201 Acquire Image, 196 Autofocus options, 222–23 Aux Mag setting, 202 Bin setting, 202 bulb icon, 32, 143 calibrate images, 201 Calibration menu, 198–99 cell tracking options, 213 Channels tab, 211–12 Clear Stage Thumbnails, 197 Clear Stage Trails, 197 Command Line Interface, 197 Continuous Acquire, 196 Design Experiment tab, 207–8 Design/Run Experiment dialog box, 215– 17 Emission setting, 201 enable fast acquisition, 209 Excitation setting, 201 Experiment, 197 Exposure setting, 201 Exposure time, 88 Find exposure, 201 Help menu, 199 image control fields, 200–202 Image Size setting, 202 Info setting, 202 Lens setting, 202 menus, 195–200 message pane, 207 Options menu, 198 Panels tab, 214–15 Pixel Size setting, 202 Point List, 197 Points tab, 213–14 Scratch File, 196 Sectioning tab, 209–10 selecting cameras, 125–27 Settings dialog box, 217–25 shortcuts, 207 Snapshot, 196 Time-lapse tab, 212–13 toolbar, 199–200 window, 194 Retrace arrows, 228 Reviewing large areas, 55–57 ROI percent, 76 Run Experiment tab, 36–38 Running experiments, 35–57 Sadat, Dr. John W., 2 Safety, 8–12 Bright Light Exposure, 9 Danger of Shock, 9 using proper filters, 9 UV Exposure, 9 Warning Labels, 12 Sample thickness, 43–44 Sample thickness setting, 210 Saturation, 87–89, 88, 170 Save Image button, 228 Saving images, 30–32 Scale settings, 206 Scale values, 206 Scaletter, Beth, 3 Secondary light path, 58 Sectioning specimens, 38–44 Sectioning tab, 209–10 Sedat polychroic filter, 152 Settings dialog box, 217–25 action buttons, 225 Autofocus tab, 222–23 Display tab, 218–19 Files tab, 221–22 Imaging tab, 219–20 Misc tab, 223–25 Seubert, Ron, 2 Shutting down DeltaVision, 32–33, 143 Slide holder, 114–16 adapter, 115 Slow button, 227 Snapshot, 196 softWoRx, 1 softWoRx Explorer, 123 softWoRx software, 117 softWoRx Suite, 118 advanced option, 123 softWoRx Workstation, 114 Troubleshooting, 167 Space requirement, of system, 101 Spherical aberration, minimizing, 177 Stage controls, 202–6 Stage speed, 86 Standard filename extensions, 183 Standard filter sets, 107 Standard microscope slide, 85 Start Coordinates setting, 215 Statistics, 96 Step Decrease and Increase buttons, 228 Stopping DeltaVision, 32–33 Sub-image, 180 Symmetric flare, 177 Target temperature display, 220 Technical support, xii, 103 Temperature requirements, 103 Theoretical OTF. See Optical transfer function Thickness of sample, 43–44 Tilt screws, 151 Time-lapse, 4, 5 setting up experiments, 44–49 Time-lapse tab, 48, 212–13 TIRF module, 121 Tool kit, 116 Toolbar, Resolve3D, 199–200 AppliedPrecision Appendix E: Resolve3D and Keypad Options Top of sample, 41 Top of Sample setting, 203 Total Internal Reflection Fluoresence Module. See TIRF module Tracking cells, 71–77 Tracking methods, 74 Trans Shutter button, 19, 229 Transfer speed setting, 220 Transmitted light source, 19 plugging in, 150 replacing, 149–50 Troubleshooting, 166–70 encoder error, 167 image quality, 135, 168–70 instrument controller, 166–67 light transmittance, 135 softWoRx Workstation, 167 stalled image sequence, 167 Turning off DeltaVision, 32–33 Ultraviolet light, 9 University of California, San Francisco, 2 URL, Applied Precision, xii Use photosensor setting, 221 Viewing image previews, 93 Viewing modes, 93–95 Viewing statitics, 96 04-720104 Rev D/1008 221 Visit Bottom setting, 204 Visit Middle setting, 204 Visit Top setting, 204 Visiting points. See Point visiting Voxels, 56, 180 Warning labels, 12 Workstation switch, 142 X adjustment screw, 151 X and Y arrows keys, 228 X step size setting, 205 Xenon bulb replacement, 144–48 Xenon light source, 109 and bulb replacement, 144–48 Y adjustment screw, 151 Y step size setting, 205 Yes button, 227 Z arrow keys, 228 Z focus, 17 Z sectioning, 38–44, 43 methods for, 44 Z slider, 205 Z step size setting, 205 Z sweep acquisition, 68, 78–80 Z1 Mark and Z2 Mark buttons, 228 Zoom tool, 205