1
L-Soft Sweden AB
Data Administrator’s Manual
LISTSERV® Maestro, version 2.0
Last updated 09/14/2005
This page is intentionally blank
2
Information in this document is subject to change without notice. Companies, names and data
used in examples herein are fictitious unless otherwise noted. L-Soft International, Inc. does not
endorse or approve the use of any of the product names or trademarks appearing in this
document.
Permission is granted to copy this document, at no charge and in its entirety, provided that the
copies are not used for commercial advantage, that the source is cited and that the present
copyright notice is included in all copies, so that the recipients of such copies are equally bound
to abide by the present conditions. Prior written permission is required for any commercial use
of this document, in whole or in part, and for any partial reproduction of the contents of this
document exceeding 50 lines of up to 80 characters, or equivalent. The title page, table of
contents and index, if any, are not considered to be part of the document for the purposes of
this copyright notice, and can be freely removed if present.
Copyright © 2004, L-Soft Sweden AB All Rights Reserved Worldwide.
L-SOFT, LISTSERV, LSMTP, and ListPlex are registered trademarks of L-Soft international, Inc.
LMail is a trademark of L-Soft international, Inc.
CataList and EASE are service marks of L-Soft international, Inc.
The Open Group, Motif, OSF/1 UNIX and the “X” device are registered trademarks of The Open
Group in the United State and other countries.
Digital, Alpha AXP, AXP, Digital UNIX, OpenVMS, HP, and HP-UX are trademarks of HewlettPackard Company in the United States and other countries.
Microsoft, Windows, Windows 2000, Windows XP, and Windows NT are registered trademarks
of Microsoft Corporation in the United States and other countries.
Sun, Solaris, SunOS, and PMDF are trademarks or registered trademarks of Sun Microsystems,
Inc. in the United States and other countries.
IRIX is a registered trademark of Silicon Graphics, Inc. in the United States and other countries.
Linux is a registered trademark of Linus Torvalds.
Intel and Pentium are registered trademarks of Intel Corporation.
All other trademarks, both marked and not marked, are the property of their respective owners.
This product includes software developed by the Apache Software Foundation
(http://www.apache.org/).
Some portions licensed from IBM are available at http://oss.software.ibm.com/icu4j/
This product includes code licensed from RSA Security, Inc.
Manuals for LISTSERV are available in PDF format from ftp.lsoft.com. They are also available
on the World Wide Web http://www.lsoft.com/resources/manuals.asp
L-Soft invites comment on its manuals. Please feel free to send your comments by
e-mail to: [email protected]
i
About This Manual
Every effort has been made to ensure that this document is an accurate representation of the
functionality of LISTSERV® Maestro. As with every software application, development continues
after the documentation has gone to press, so small inconsistencies may occur. We would
appreciate any feedback on this manual. Send comments by e-mail to:
[email protected]
The following documentation conventions have been used in this manual:
•
Quotations from the screen will appear in italics enclosed within quotation marks.
•
Clickable buttons will appear in bold.
•
Clickable links will appear in bold.
•
Directory names, commands, and examples of editing program files will appear in
Courier New font.
•
Emphasized words or phrases will be underlined.
•
Hyperlinks, actual or fictitious, will be underlined unless they are part of a screen shot or
direct quotation from the screen.
Some screen captures have been cropped and annotated for emphasis or descriptive purposes.
The “Tip” symbol is used to indicate practical advice or applications for using a
feature.
The “Caution” symbol is used to indicate possible pitfalls and other important
information.
ii
Contents
About This Manual .......................................................................................................................................................ii
Preface - What’s New in LISTSERV Maestro 2.0! ...................................................................................................viii
The Recipient Warehouse ...................................................................................................................................... viii
System Drop-In Content Elements ........................................................................................................................... ix
Section 1 Introduction to LISTSERV Maestro 2.0......................................................................................................1
1.1 System Requirements .........................................................................................................................................2
1.2 New Features ......................................................................................................................................................2
1.3 How the Manual is Organized..............................................................................................................................2
1.4 LISTSERV Maestro Data Administration Interface ..............................................................................................2
Section 2 Introduction to Hosted Data .......................................................................................................................4
Section 3 Data Administration in LISTSERV Maestro...............................................................................................5
3.1 Role of the Data Administrator.............................................................................................................................5
3.1.1 External Database Requirements.................................................................................................................6
3.1.2 Hosted Data Requirements ..........................................................................................................................6
Section 4 The Recipient Warehouse ..........................................................................................................................8
4.1 Recipient Datasets...............................................................................................................................................8
4.1.1 Creating a New Dataset .............................................................................................................................10
4.1.2 Creating a Lookup Table ............................................................................................................................15
4.1.3 Editing Existing Datasets............................................................................................................................17
Section 5 Introduction to Hosted Mailing Lists .......................................................................................................17
Section 6 Creating Hosted Recipient Lists ..............................................................................................................18
6.1 Hosted Recipient Mailing List Wizard ................................................................................................................19
6.1.1 General Settings.........................................................................................................................................19
6.1.2 Profile Fields...............................................................................................................................................20
6.1.3 Profile Field Details.....................................................................................................................................21
6.1.4 Summary ....................................................................................................................................................23
Section 7 Creating Hosted LISTSERV Lists.............................................................................................................25
7.1 Creating LISTSERV Announcement Lists..........................................................................................................26
7.1.1 General Setting for LISTSERV Announcement List ...................................................................................26
7.1.2 Profile Fields for LISTSERV Announcement List........................................................................................27
7.1.3 Profile Field Details for LISTSERV Announcement List..............................................................................28
7.1.4 List Type for LISTSERV Announcement List..............................................................................................29
7.1.5 List Options for LISTSERV Announcement Lists........................................................................................30
7.1.6 Posting Restrictions for LISTSERV Announcement Lists ...........................................................................33
7.1.7 Topics for LISTSERV Announcement Lists ................................................................................................34
7.1.8 Summary for LISTSERV Announcement Lists ...........................................................................................35
7.2 Creating LISTSERV Unmoderated Discussion Lists..........................................................................................37
7.2.1 General Settings for Unmoderated Discussion Lists ..................................................................................37
iii
7.2.2 Profile Fields for Unmoderated Discussion Lists ........................................................................................38
7.2.3 Profile Field Details for Unmoderated Discussion Lists ..............................................................................39
7.2.4 List Type for Unmoderated Discussion Lists ..............................................................................................40
7.2.5 List Options for Unmoderated Discussion Lists ..........................................................................................41
7.2.6 Posting Restrictions for Unmoderated Discussion Lists .............................................................................44
7.2.7 Topics for Unmoderated Discussion Lists ..................................................................................................46
7.2.8 Summary for Unmoderated Discussion Lists..............................................................................................47
7.3 Creating LISTSERV Moderated Discussion Lists ..............................................................................................47
7.3.1 General Settings for Moderated Discussion Lists.......................................................................................48
7.3.2 Profile Fields for Moderated Discussion Lists.............................................................................................48
7.3.3 Profile Field Details for Moderated Discussion Lists...................................................................................50
7.3.4 List Type for Moderated Discussion Lists ...................................................................................................50
7.3.5 List Options for Moderated Discussion Lists...............................................................................................51
7.3.6 Posting Restrictions for Moderated Discussion Lists ..................................................................................54
7.3.7 Topics for Moderated Discussion Lists .......................................................................................................56
7.3.8 Summary for Moderated Discussion Lists ..................................................................................................58
Section 8 Organizing Datasets..................................................................................................................................59
Section 9 Adding and Maintaining Dataset Members and List Subscribers.........................................................60
9.1 Managing Members of a Dataset and List Subscribers .....................................................................................61
9.1.2 Filtering Members.......................................................................................................................................64
9.2 Adding a Single Member....................................................................................................................................67
9.3 Modifying Members by Upload ..........................................................................................................................68
9.3.1 The Upload Wizard.....................................................................................................................................68
Section 10 Members Join a Dataset Themselves....................................................................................................80
10.1 Joining a Membership Area (Dataset) .............................................................................................................81
10.2 Subscribing to a List ........................................................................................................................................83
10.2.1 Subscribing from the Membership Area ...................................................................................................83
10.2.2 Subscribing from a List URL.....................................................................................................................83
10.3 Sending Mail to Hosted Lists ...........................................................................................................................84
Section 11 Subscriber Access URLs and Customization.......................................................................................84
11.1 Customizing the Web Form .............................................................................................................................85
11.2 Creating a Custom Template ...........................................................................................................................87
Section 12 Introduction to Recipient Target Groups ..............................................................................................88
12.1 Creating Recipient Target Groups ...................................................................................................................88
12.2 Selecting the Type of Target Group .................................................................................................................90
12.3 The Recipient Target Group Wizard ................................................................................................................91
Section 13 Hosted Recipient List Target Groups ....................................................................................................92
13.1 General ............................................................................................................................................................92
13.2 Source .............................................................................................................................................................93
13.3 Source Details .................................................................................................................................................94
iv
13.4 Parameters ......................................................................................................................................................96
13.5 Input Layout .....................................................................................................................................................96
13.6 Input Preview ...................................................................................................................................................97
13.7 Summary .........................................................................................................................................................98
Section 14 Classic LISTSERV List Target Groups ..................................................................................................98
14.1 General ............................................................................................................................................................98
14.2 Source .............................................................................................................................................................99
14.3 Source Details ...............................................................................................................................................100
14.3.1 Standard List Messages with Topics ......................................................................................................100
14.3.2 Special List Messages............................................................................................................................102
14.4 Parameters ....................................................................................................................................................103
14.4.1 LISTSERV Topics as Parameters ..........................................................................................................103
14.4.2 Conditional Expression Parameters .......................................................................................................104
14.5 Input Layout ...................................................................................................................................................105
14.5.1 Input Layout for LISTSERV Lists with Topics .........................................................................................105
14.5.2 Input Layout for LISTSERV Lists with Parameters in Conditions ...........................................................106
14.6 Input Preview .................................................................................................................................................106
14.7 Recipients Details ..........................................................................................................................................107
14.8 Summary .......................................................................................................................................................108
Section 15 Target Groups Based on an Uploaded Text File.................................................................................109
15.1 General ..........................................................................................................................................................109
15.2 Source ...........................................................................................................................................................110
15.3 Source Details ...............................................................................................................................................112
15.4 Recipient Details ............................................................................................................................................114
15.4.1 Usage of Recipients Data.......................................................................................................................114
15.4.2 Recipient Identification Columns ............................................................................................................114
15.4.3 Header Definition....................................................................................................................................115
15.5 Duplicate Elimination .....................................................................................................................................116
15.6 Summary .......................................................................................................................................................117
Section 16 Target Groups from a Database Accessed by LISTSERV Maestro...................................................118
16.1 General ..........................................................................................................................................................118
16.2 Source ...........................................................................................................................................................119
16.3 Parameters ....................................................................................................................................................120
16.4 Input Layout ...................................................................................................................................................121
16.5 Input Preview .................................................................................................................................................122
16.6 Recipients Details ..........................................................................................................................................123
16.6.4 Usage of Recipients Data.......................................................................................................................123
16.6.5 Recipient Identification Columns ............................................................................................................124
16.6.6 Header Definition....................................................................................................................................124
16.7 Duplicate Elimination .....................................................................................................................................125
v
16.8 Summary .......................................................................................................................................................126
Section 17 Target Groups from a Database Accessed by LISTSERV .................................................................129
17.1 General ..........................................................................................................................................................129
17.2 Source ...........................................................................................................................................................129
17.3 Parameters ....................................................................................................................................................130
17.4 Input Layout ...................................................................................................................................................131
17.5 Input Preview .................................................................................................................................................132
17.6 Recipients Details ..........................................................................................................................................133
17.7 Summary .......................................................................................................................................................133
Section 18 Defining Parameters .............................................................................................................................135
18.1 Fixed and Parameterized SQL Statements....................................................................................................135
18.1.1 Parameter Placeholders .........................................................................................................................136
18.2 Available Parameter Types............................................................................................................................137
18.2.1 Parameter Type Checkbox.....................................................................................................................138
18.2.2 Parameter Type Edit Field......................................................................................................................138
18.2.3 Parameter Type Selection List ...............................................................................................................139
18.2.4 Parameter Type Date and/or Time .........................................................................................................142
Section 19 Using Enabled Target Groups in the Recipients Wizard ...................................................................145
Glossary of Terms....................................................................................................................................................147
Appendix A Using Formulas in Hosted Recipient List Target Groups................................................................149
Expressions ...........................................................................................................................................................149
Operators...............................................................................................................................................................152
Automatic Type-Conversion...................................................................................................................................154
Formula Functions .................................................................................................................................................154
Appendix B About Comma Separated Files ..........................................................................................................167
Appendix C E-mail and International Character Sets ...........................................................................................170
LISTSERV Maestro and International Character Sets ...........................................................................................171
Appendix D Customizing Subscriber Access Templates .....................................................................................173
Default Style Sheet............................................................................................................................................175
Appendix E Building Hosted Recipient Queries....................................................................................................179
Editing the Condition Tree .....................................................................................................................................180
Combination Operator Nodes ................................................................................................................................182
Normal Condition Nodes........................................................................................................................................183
Left Operand .....................................................................................................................................................184
Operator ............................................................................................................................................................184
Right Operand ...................................................................................................................................................187
Formulas in Conditions......................................................................................................................................188
Parameters in Conditions ..................................................................................................................................189
Job Based Condition Nodes ..................................................................................................................................190
Examining Tracking Events of the Source Job ..................................................................................................190
vi
Additional Issues with Job Based Conditions and Tracking Events...................................................................191
Appendix F E-mail and International Character Sets............................................................................................193
LISTSERV Maestro and International Character Sets ...........................................................................................194
Merging Fields with International Character Sets ..................................................................................................195
International Character Set Recipient Names in the Mail-TO-Header ...................................................................196
LISTSERV Maestro and Bi-Directional Character Sets .........................................................................................197
Tables
Table 1
Navigational Icons.......................................................................................................................................3
Table 2
Features of Hosted Recipient Lists and Hosted LISTSERV Lists .............................................................18
Table 3
Available Parameter Types for Select Statements ..................................................................................137
vii
Preface - What’s New in LISTSERV Maestro 2.0!
LISTSERV Maestro is a highly intuitive e-mail marketing solution. It provides organizations with
an advanced tool to create, send, and track opt-in personalized e-mail messages. The changes
to LISTSERV Maestro 2.0 have been extensive, adding data collection and storage to empower
users to create and maintain clean opt-in mailing lists. This preface is a brief outline of the
sweeping new features of LISTSERV Maestro 2.0.
LISTSERV Maestro 2.0 introduces powerful new abilities to collect, manage, save and reuse
data from mailing list subscribers. Data administration and mailing list creation now are
combined in one interface to allow greater flexibility and control over personalized targeted
opt-in e-mail messaging. LISTSERV Maestro now can harness the flexibility and interactivity of
traditional LISTSERV lists combined with the power of DBMS backing so that companies and
institutions can provide wider opportunities to their recipients for communication.
The Recipient Warehouse
A new functional area within the User Interface, called the Recipient Warehouse, allows the
Maestro data Administrator to create and manage datasets, lookup tables, lists, subscriber
pages, and target groups. Unlike using LISTSERV Maestro to extract recipient data from an
external user database, using the Recipient Warehouse to manage recipient data requires no
specialized database administration knowledge, and no SQL coding. LISTSERV Maestro
manages the data tables used to store the data and it guides the data Administrator when
defining target groups.
Datasets
Each dataset contains a table that holds data about each recipient, or “member” of the dataset.
The data stored for each member is determined by the data Administrator. In addition to the
e-mail field, which is mandatory for all members, the data Administrator can define other text,
numeric, Boolean (true or false), and “selection” fields that can be collected and stored for all
the dataset members.
Each dataset contains one or more lists that members can subscribe to. Additional data fields
can be added to individual lists. The data collected and stored from these fields is associated
with individual subscribers on these lists. For example, the dataset could store the e-mail
address and name of all its members, but subscribers to the “Animal Anecdotes” list within the
dataset might additionally be requested to indicate which animals they are interested in reading
about.
The dataset fields and the list fields can all be used as merge fields to personalize e-mail
content sent with LISTSERV Maestro to the lists. The fields can also be used for determining
the selection criteria to send targeted e-mail to a subset of a list. For example, when sending an
e-mail message to the “Animal Anecdotes” list above, the LISTSERV Maestro user can target
the message to be sent to only those subscribers who indicated an interest in the animals
mentioned in the message.
Lookup Tables
The Recipient Warehouse also holds “Lookup Tables” defined by the data Administrator. The
Lookup Tables provide lists of values used in the “selection” fields. Selection fields are special
types of data fields where the subscriber selects values from a drop-down menu, instead of
typing in freeform text. In the above example, the data Administrator could create a Lookup
viii
Table with all the different types of animals that the list messages will cover. There are two
types of selection fields: the “single select” field allows the subscriber to choose only one value,
and the “multiple select” field allows the subscriber to choose any number of values.
Lists
Two types of “Hosted” lists can be created in the Recipients Warehouse:
•
Hosted Recipient Lists
•
Hosted LISTSERV Lists
The Hosted Recipient Lists are best for announcement-only lists that will be segmented in
different target groups and that do not require extra features handled by LISTSERV. A special
interface is available for defining target groups that guides the user step by step, without
requiring any SQL knowledge. The Hosted Recipient Lists are also the only type of list that
supports Selection fields. Only LISTSERV Maestro can be used to send to Hosted Recipient
Lists.
Hosted LISTSERV Lists provide a “database back-end” for a traditional LISTSERV list. Using
Hosted LISTSERV Lists provides the features that are available in LISTSERV such as
discussion lists, message archives, digests, automatic bounce processing, and the ability to
send to the list from a normal e-mail client as an alternative to using the Maestro User Interface.
Subscriber Pages
LISTSERV Maestro creates Web pages containing forms where subscribers can enter their own
data and manage their own subscriptions. The default subscriber pages are generated
automatically when the data Administrator creates a dataset and chooses for the dataset to be
“visible”. No HTML coding or CGI scripting required.
System Drop-In Content Elements
Powerful advanced features for segmenting mailing lists and personalizing content have been
added with a feature called “System Drop-Ins”. Acting like regular drop-ins, system drop-ins use
predefined opening and closing tags and must be enabled in the content of a message.
However, system drop-ins are created and named by LISTSERV Maestro. They can be used to
add a login or unsubscribe URL to message content. They can even be used to perform
calculations on existing subscriber and system data such as adding a subscribe date and time,
calculating subscribers’ ages or birthdays. Combined with conditional blocks and calculation
formulas, system drop-ins provide a potent method for personalizing and targeting e-mail
messages. For more information on system drop-ins, see the following sections in the
LISTSERV Maestro User’s Manual:
•
Section 11.2 Creating and Managing Drop-In Content Elements
•
Appendix E Using Conditional Blocks
•
Appendix F Advanced Use of System Drop-Ins
•
Appendix G Calculation Formulas
ix
Section 1 Introduction to LISTSERV Maestro 2.0
Designed specifically to work with LISTSERV 14.4 (or later), LISTSERV Maestro
allows users to collect and store recipient data so it can be used to easily create and
send personalized e-mail messages. All interaction with LISTSERV Maestro takes
place using an intuitive Web interface. Incorporated into the powerful tool is a tracking
component that can collect data every time a recipient opens an e-mail message or clicks on a
URL contained within the message.
The LISTSERV Maestro program is comprised of three components that work together:
•
The Administration Hub – Controls all user and program settings. The HUB is the
central component that stores registry and account information. It is accessed both by
the Maestro User Interface and by Maestro Tracker to store and retrieve settings. It has
its own administrator user interface.
•
The Maestro User Interface – The actual user interface. Individuals and groups use it
to create and distribute customized e-mail messages. It is also used to access, view,
and download the collected tracking data.
•
The Maestro Tracker – Receives and compiles tracking data from delivered e-mail
messages.
In addition to LISTSERV Maestro’s three components, LISTSERV Maestro also relies on the
existence of two other external components:
•
An installation of LISTSERV® 14.3 (or later).
•
An SMTP server.
These two components must be configured to work together.
Optionally, LISTSERV Maestro may also be connected to a separate database
installation (DBMS). LISTSERV Maestro can use a separate database to store its own internal
data. LISTSERV Maestro can also use separate databases to select recipient lists from
database tables. Supported databases are:
•
Oracle® 8i and 9i and compatible versions
•
DB2® V7.2 and compatible versions
•
MySQL™ 3.23.42 and compatible versions
•
SQL® Server 7.0 and 2000
•
Any ODBC compliant database for read-only access
The three LISTSERV Maestro components, the two external components, and the database
may be installed on any combination of hosts, from one single host shared by all components to
six dedicated hosts, one for each component. For more information on host restrictions,
installing LISTSERV Maestro, and starting and stopping the LISTSERV Maestro service, see the
LISTSERV Maestro Installation Manual. For more information on preparing databases to work
with LISTSERV Maestro, see the LISTSERV Maestro Administrator’s Manual.
1
1.1 System Requirements
Depending on the operating system of the client used for the access, the following browsers are
supported when accessing the Maestro User Interface or Administration Hub:
•
Client with Windows – Microsoft Internet Explorer 5.5 or later, Netscape 7.0 or later and
Mozilla 1.0.0 or later.
•
Client with Linux – Netscape 7.0 or later and Mozilla 1.0.0 or later.
To access the Maestro User Interface or the Administration Hub, we strongly recommend that
only Windows or Linux be used with the browsers and browser versions listed. Other operating
systems, browsers, or browser versions are not supported.
The client does not necessarily have to have the same operating system as the LISTSERV
Maestro server. A Linux client can be used to access LISTSERV Maestro on a Windows server
and vice versa.
It is important to note that recipients of e-mail being tracked by LISTSERV Maestro may use
whatever browser they wish to access the URLs contained in the message. Tracking will occur
no matter which browser is used by e-mail recipients.
1.2 New Features
LISTSERV Maestro 2.0 introduces powerful new abilities to collect, manage, save and reuse
data from mailing list subscribers. Data administration and mailing list creation now are
combined in one interface to allow greater flexibility and control over personalized targeted
opt-in e-mail messaging.
LISTSERV Maestro can create mailing lists two different ways, using recipient data stored by
the system, called Hosted Recipient Lists or by harnessing the flexibility and interactivity of
traditional LISTSERV lists backed by a DBMS, called Hosted LISTSERV Lists. Both types of
lists can use data fields to produce personalized and targeted messages.
1.3 How the Manual is Organized
With the addition of data hosting, the power and scope of LISTSERV Maestro has expanded
immensely, necessitating the reorganization of this data Administrator’s Manual. Many new
sections have been added covering the new features, and explaining their uses.
The first half of this manual, Sections 1- 11 cover how LISTSERV Maestro functions to collect
and store mail recipients and their accompanying data and how to create the two different types
of hosted recipient lists using recipient data. The second half of this manual, Sections 12 -15
covers the creation and administration of recipient target groups. For those users who already
have recipient data stored in a separate database and will be using LISTSERV Maestro to
connect to that recipient data, skip ahead to Section 12 Introduction to Recipient Target Groups.
This section and beyond will demonstrate how to use recipient target groups to segment mailing
lists by incorporating advanced querying features within the LISTSERV Maestro interface.
1.4 LISTSERV Maestro Data Administration Interface
The opening screen of LISTSERV Maestro’s interface contains various sets of functional and
navigational icons. The top right of each screen in the LISTSERV Maestro interface includes all
or a subset of these four icons:
2
Table 1 Navigational Icons
Home brings the user back to the opening screen – the LISTSERV
Maestro home page.
Up One Level brings the user up one level in the program, not
necessarily back to the previous screen.
Log out ends the LISTSERV Maestro session and closes the account.
Help provides access to page specific online help.
LISTSERV Maestro’s functionality centers on characterizing the various parts of an e-mail “job”.
A “job” refers to all of the elements that make up the creation, scheduling, delivery, and tracking
of customized e-mail messages. Throughout LISTSERV Maestro documentation, “job” and
“e-mail job” are used interchangeably and represent the same thing – the summation of the
multiple functions that make up the definition and distribution of customized e-mail messages.
Figure 1 LISTSERV Maestro Home Page
3
The center of the opening screen of LISTSERV Maestro contains six large icons that activate
the major functional areas of the program:
•
Start New Job – Starts the definition of a new e-mail job.
•
Resume Job – Lists all jobs that have been started but have not yet been approved for
delivery. Jobs listed here can be edited.
•
Outbox – Contains a listing of jobs that have been defined, scheduled, and approved for
delivery, but have not yet been sent. The Outbox also lists jobs that have failed during
delivery for some reason.
•
Delivered Jobs – Lists all the e-mail jobs that have been delivered. From here, it is
possible to generate “quick reports” on a selected job.
•
Tracking Reports – Engages the reporting wizard to produce graphs and reports from
the tracking data collected from delivered messages.
•
Recipient Warehouse – Create datasets, lookup tables, and mailing lists hosted inside
LISTSERV Maestro. Also available here is the recipient target group wizard that
facilitates the creation of target groups.
•
User Settings – Stores information about sender profiles, drop-in content elements.
Also listed here are individual user preferences and change password options.
These icons are repeated along the left side of every screen for navigational purposes.
Section 2 Introduction to Hosted Data
Collecting and storing recipient data is one of LISTSERV Maestro’s most powerful new features.
Organizations without a separate database can collect information from their mail recipients and
store that data directly inside LISTSERV Maestro. This information can be used to create
customized e-mail messages and give recipients control over their subscription settings.
Incorporated into this feature is the ability to create classic LISTSERV lists from the LISTSERV
Maestro interface, combining the features of LISTSERV within the easy-to-use LISTSERV
Maestro interface.
The data administrator structures the way recipient data is collected by designing the dataset.
Designing the dataset involves selecting the types of data to be collected and the names for
column headers and for each column of data. It also involves setting limitations and input
validations for the collected data.
As the data administrator is designing the fields for recipient data, LISTSERV Maestro is also
creating a form that can be made available on the Web so that recipients can sign up to receive
mail and control their list subscriptions. Scripting is done automatically by the system so that
information collected on the form is automatically placed in the host data database, called a
“Recipient Warehouse”.
For those users who already have recipient data stored in a separate DBMS, the sections on
hosted recipient data can be skipped. Proceed to Section 12 Introduction to Recipient Target
Groups for information and instructions on how to create flexible yet powerful queries that
regular users can employ when defining recipients for a mail job.
4
Section 3 Data Administration in LISTSERV Maestro
The data administrator account can simplify and streamline the use of recipient data and
databases for e-mail jobs to the point where regular account holders do not need to know
anything about how and where data is stored. This can be done in several ways. LISTSERV
Maestro can be set up and used with an external database to collect and store recipient data
using its own interface. Once configured, it is not necessary to in interact directly with the
database within the DBMS. Recipient lists can be created from this information for regular users
to employ when sending e-mail jobs.
LISTSERV Maestro can also use an existing external database to select recipients for e-mail
jobs. The collecting and storing of recipient data takes place independently of LISTSERV
Maestro. To utilize this method of selecting recipients requires a working knowledge of the
DBMS involved, as well as knowledge of how the data is organized and how to query the
database. A web form or other means to gather recipient data and populate the database is also
necessary. This may entail HTML coding and scripting, depending on the individual needs of
each organization.
Once a source for collecting recipients and recipient data is established and connected to
LISTSERV Maestro, regular users need a simple means of selecting recipients and creating
personalized messages. The data administrator can build and save reusable and parameterized
queries within LISTSERV Maestro called “recipients target groups.” Regular account holders
can then use these target groups to select the recipients for their jobs from a variety of places
including external databases, internal hosted lists, uploaded text files and more. The data
administrator builds the recipient target groups by writing SQL statements to retrieve data from
a data source. The data administrator also designs the methods regular users employ to select
the data (in a series of check boxes, drop-down menus and/or text boxes).
There are many advantages to using recipient target groups.
•
Using recipient data stored in a database can save time and system resources.
•
The database can be continually updated until the time the job is sent, ensuring that the
most current data is used for the job.
•
Recipient target groups are shared among group members and can be reused for
multiple jobs.
•
Parameters can be inserted into recipient target groups so that regular account holders
have some control over what recipients are retrieved from the database for each job.
Using parameters also reduces the number of individual SQL statements that need to be
written for jobs.
•
The data administrator does not need to be involved with any other parts of e-mail jobs.
•
Specific recipient target groups can be removed from use without deleting them. They
can be reinstated whenever desired.
•
Recipient target groups can be organized into categories for easy recognition.
3.1 Role of the Data Administrator
In order to assume effectively the role of a data administrator in LISTSERV Maestro, it is
necessary to have access to and information about the systems involved. It is also helpful to
5
understand the types of recipient data being collected and how it may be used in e-mail jobs. All
data administrators need:
•
A LISTSERV Maestro user account with the right to “administer target group and hosted
recipient data” enabled. The LISTSERV Maestro administrator can create this type of
account. For more information, see Section 9.2 Editing Account Information and
Assigning Single User Settings in the LISTSERV Maestro Administrator’s Manual.
3.1.1 External Database Requirements
Data administrators setting up connections with an external database and sending queries
through LISTSERV Maestro or through LISTSERV to retrieve recipients need:
•
To understand how the institution’s data is stored and organized, including table names
and relationships as well as column types and names. This impacts the ability to write
SQL statements and parameters within SQL statements to retrieve specific data.
•
Working knowledge of SQL.
•
In the case of LISTSERV Maestro accessing an external database:
•
°
To know the type of database and specific name of the database used.
This determines the database plugin that LISTSERV Maestro uses to communicate
with the specific type of database, for example IBM DB2 or MySQL. For more
information on database plugins, see Section 5.2 Registering a Database Plugin in
the LISTSERV Maestro Administrator’s Manual.
°
Access to the database user account that is set up to work directly with LISTSERV
Maestro including the username and password for the account.
°
For more information on preparing specific databases for use with LISTSERV
Maestro, see Section 4.2 Preparing the Database in the LISTSERV Maestro
Administrator’s Manual.
In the case of LISTSERV accessing the database:
°
Database server name, if not the default.
°
Name of the E-mail column.
°
Name of the Name column (this is optional).
°
Names of any additional columns in the database to be used for mail merging.
Being familiar with Section 5.1 Drop-In Content and Section 11.2 Creating and Managing
Drop-In Content Elements in the LISTSERV Maestro User's Manual can also be helpful to data
administrators. The concepts used in defining and creating drop-in elements are very similar to
defining and creating parameters in SQL statements. Both use special tags to set the name of
the element or parameter off from the rest of the text. Tags for drop-ins and parameters follow
very similar rules.
3.1.2 Hosted Data Requirements
The data administrator’s role in collecting recipient data hosted within LISTSERV Maestro is to
establish the types of data collected and design the way this information is gathered. The data
administrator also creates mailing lists for regular users to send e-mail messages to recipients.
The data administrator designs the types of mailing lists and designates to which user accounts
these lists are available.
6
LISTSERV Maestro takes the hard work out of creating a dataset and lists, but it cannot do the
planning. Before creating a dataset and lists, the data administrator needs to think about the
answers to these questions:
•
How will this dataset be used?
•
What data will the subscribers need to provide so that the mailings can be precisely
targeted and customized? What data will they be willing to provide? What data will need
to be collected for all members, and what data are needed only for particular lists?
•
What kinds of target groups will be needed? What questions will the job reports need to
be able to answer?
•
What types of lists will be needed? Only announcement lists or will there also be a need
for discussion lists?
•
For announcement lists, will mailings only be sent to all subscribers or will there be a
need to target subsets of the lists?
•
Will archives be needed for any LISTSERV lists?
•
Will LISTSERV’s auto-deletion of bouncing addresses be needed?
•
Will subscribers be allowed to manage their own subscriptions and subscribe and
unsubscribe themselves, or will only the database administrator have access to the
membership data?
•
Will the subscriber pages need to be customized or is the “out-of-the-box” look
acceptable?
For each data item to be collected (for the dataset or the list):
•
What “type” is it? (Text, Number, Boolean, Single Select, Multiple Select)
•
If “Single Select” or “Multiple Select”, what are the possible selections?
•
Is it optional or mandatory?
•
Are there any legal requirements associated with the kind of data to be collected? That
is, are they subject to various financial, health, and other privacy laws of the country or
state where the data will be stored as well as where the subscribers themselves are
located (for example HIPAA, GLB Act, European Commission’s Directive on Data
Protection, and so on)? If so, does the facility meet the data protection requirements? If
it does not, reconsider the data to be collected or upgrade the facility to meet legal
requirements.
It is important to think about the data that will be collected before creating the dataset. Careful
dataset design includes consideration of ease of creating target groups as well as making it
easy for subscribers to enter and maintain their data. The dataset should contain all data fields
that are shared by multiple lists, so that the subscriber does not have to enter or update the
same information in several places. Data fields that are specific to a single list should be in that
list. Careful consideration should be given to limiting the number of data fields that the
subscriber must enter: subscribers faced with several pages worth of data entry fields may
decide that they are not that interested in subscribing after all.
7
Important: From the technical point of view, one choice that must be decided before
creating the dataset is whether there will ever be a need to support traditional LISTSERV lists.
LISTSERV lists currently have two restrictions: there must be at least one mandatory name
field, and there cannot be any selection menus in the base dataset or in the list data for the
LISTSERV list.
Section 4 The Recipient Warehouse
The “Recipient Warehouse” is LISTSERV Maestro’s name for and method of creating, storing,
and retrieving data within the system. Every group or single user account has its own recipient
warehouse that is the repository for recipient datasets, lookup tables, and recipient target
groups. Click on the Recipient Warehouse icon on the home page to open the warehouse. From
there, select Recipient Datasets or Recipient Target Groups to begin working with recipient
data. Creating and administering recipient target groups is covered beginning in Section 12
Introduction to Recipient Target Groups.
Figure 2 Recipient Warehouse
4.1 Recipient Datasets
A recipient dataset is a collection of data organized into fields and pertaining to recipients. The
fields making up a dataset can have different types of properties that determine the kind of data
within them, such as text, numbers, selection menus, dates and so on. The data administrator
designs the datasets within a recipient warehouse, creating each field and the type of data it
holds. The recipient dataset also contains mailing lists created by the data administrator that
use the recipient data for job definition. The data is shared across all mailing lists that are
created within the dataset. Individual lists within the dataset are allowed to have additional fields
of data that just pertain to those lists.
As the dataset is being created, a web form is also being created that reflects the exact design
of the dataset, including the order of the fields, the descriptions of each field, and the types of
data to be collected. Each organization has to decide what kinds of data to collect, including the
acceptable format of that data, and how the data is entered into the web form by anyone
wishing to join a mailing list. Careful consideration of the dataset design will produce userfriendly web forms, and will collect the types of recipient data that can be used to send
personalized and targeted messages to subscribers.
A link to the dataset web form can be placed on a web site where anyone can fill it out, inputting
the requested data, and then joining any available mailing lists. Data collected from the web
8
form is automatically placed in the matching dataset, where becomes available for use when
sending e-mail jobs to subscribers. Subscribers and their data can also be added to the dataset
directly by the data administrator. Managing subscribers and subscriber data is covered in
Section 9.1 Managing Members of a Dataset and List Subscribers.
The recipient dataset screen has two basic functions that are accessed using one of the two
tabs at the top, “Recipient Datasets” and “Lookup Tables”. Click on the tab to access each
function. The Recipient Datasets tab contains a listing of the names of any existing datasets,
their descriptions, and the number of members in each. Each dataset name is a link that opens
the dataset for editing, member management, and customization of the web form.
Figure 3Recipient Datasets
The Lookup Tables tab contains a listing of the names of any existing lookup tables, the
datasets and mailing lists that reference them and a link for editing and downloading.
9
Figure 4 Lookup Tables
Part of the dataset design process is deciding the format of the data collected and how it is
presented on the web form. One type of data that needs special mention is the selection list. A
selection list is presented as a drop-down menu where one (single select) or more (multi select)
items can be chosen. LISTSERV Maestro handles the creation of selection lists under the
function of “Lookup Tables”. A lookup table is a collection of entries for a selection list. Lookup
tables can be used by any dataset in the warehouse. When designed well, they can serve
multiple functions across a warehouse. For example, a listing of university departments in one
dataset can be used as a list of college majors in another. A listing of years can be used for
graduation year in one dataset and anniversary year in another. Creating Lookup tables is
covered in depth in Section 4.1.2 Creating a Lookup Table.
If your dataset is going to use selection menus, to save time, create the lookup tables first
and the then create the dataset.
4.1.1 Creating a New Dataset
The recipient dataset definition wizard details all the steps of designing a dataset with its
accompanying web form. Click on the Create New Dataset button to open the wizard. Use the
Next -> and <- Back buttons navigate page by page through the wizard. Use the links at the top
of the screen to open a particular page of the wizard. The Save & Exit button will save the
current dataset settings of the open dataset even though the wizard may not be completed. The
Cancel button will void any current selections and return to the “Recipient Dataset Details”
screen.
10
The recipient dataset definition wizard is comprised of four main screens. The first screen,
“General”, defines the general information pertaining to the dataset.
•
Name – The name of the dataset will appear on all the “public” subscriber pages. It is
important to select a name that is reflective of the organization sponsoring the web
pages and descriptive of the types of mailing lists available for members.
•
List Administrator (e-mail address) – The list administrator e-mail address is the
address that confirmation e-mail messages comes from. Confirmation e-mail is sent to
all subscribers who join a member area and/or subscribe to any mailing list. Confirmation
e-mail is also sent to members to when they change their passwords. It is important that
this address be an authentic e-mail address that can receive mail from subscribers.
•
Internal Description – This description information is used internally on the Recipient
Datasets tab for identification purposes.
•
Encoding – Select the type of encoding for the data entered in the dataset from the
drop-down menu.
•
Public Description – This optional information appears on the web form and will assist
anyone wanting to join a member area and subscribe to a mailing list to understand what
the benefits of membership are. Any additional information about the organization can
be placed here.
Figure 5 Recipient Dataset Definition Wizard – General
The next screen in the wizard is called “Profile Fields”. Every new dataset begins with one
mandatory field, called “EMAIL”. With just this one field, it is possible to create an entire dataset.
The e-mail address of each member will be shared among all the lists created in this dataset.
Other fields can be added to the dataset, and they too will be shared among the lists in the
dataset. To add a new field, click the Add Field link.
11
For each new field, enter the following information:
•
Name – The name of the field as it will be used internally by the system for mail merging
and querying. Field names can only use upper and lower case letters A-Z and a-z, the
numbers 0 – 9 and the underscore “_”. Spaces and other special characters are not
allowed.
•
Display Name – The display name is the label that identifies the blank field on the web
form. The display name will be seen by anyone accessing the public web pages to the
membership area. All alpha numeric characters are permitted, as well as spaces and
most special characters.
•
Data Type – Choose the type of data to be entered in the field from the drop-down
menu. Five different classifications of data are available:
•
°
Text – Text fields can accept any type of text, including dates in specific formats
such as dd/mm/yyy or mm.dd.yyyy
°
Number – Number fields accept any whole integers.
°
Boolean – Boolean fields are based on two states, one being true, the other false.
°
Single Select (lookup table) – A single selection field consists of a drop-down menu
where one item from it may be chosen.
°
Multiple Select (lookup table) – A multiple selection field consists of a drop-down
menu where one or more items from it may be chosen.
Mandatory – Decide whether the data is mandatory for subscribers to enter into the web
form or optional. Boolean fields cannot be optional due to the nature of the data type –
the selection equates to either true or false.
After fields are created, they can be edited, removed, moved up, or moved down by using the
corresponding links on the right side of the table.
Figure 6 Recipient Dataset Definition Wizard – Profile Fields
12
The next screen in the wizard is “Profile Field Details”. The profile field details screen will appear
differently depending on the types of data in the dataset. Any datasets containing selection
fields has to assign the relevant lookup table to the field.
Figure 7 Recipient Dataset Definition Wizard – Profile Field Details – Selection Filed Details
Field types “Text” and “Number” can have set validation limits entered so that when the fields
are filled in by members, only certain types of input will be accepted. For example, in the column
DOB, (see Figure 8) a date of birth is requested. By setting a validation setting of a date with
format, only dates entered using the specified format will be accepted.
Figure 8 Recipient Dataset Definition Wizard – Profile Field Details - Input Filed Validation
13
The “Summary” screen is the final step in the recipient dataset wizard. This screen summarizes
the settings of the dataset. If the settings of the dataset are not satisfactory, use the <- Back
button to make any changes.
Once the dataset is acceptable, set the access level using the drop-down menu. Datasets can
have one of three levels of member area access:
•
Open to everyone – Anyone can click on the membership area URL and have access
to membership area in order to join the area and subscribe to mailing lists.
•
Access for members only – Only those who are current members can login and
access the membership area.
•
No public access – The member area is not open for access to anyone.
The member area can be temporarily closed for maintenance such as updating the membership
list or other tasks by checking the check box labeled “Closed for maintenance”. Closing the
member area for maintenance will prevent anyone from joining or existing members from
changing their settings while the system is temporarily closed. Click the Finish button to save all
the settings of the dataset and return to the recipient dataset details screen.
For more information on membership areas, see Section 10 Members Join a Dataset
Themselves. For information on customizing the membership area, see Section 11 Subscriber
Access URLs and Customization.
14
Figure 9 Recipient Dataset Definition Wizard – Summary
4.1.2 Creating a Lookup Table
Lookup tables are fields of data that are shared across datasets in a warehouse. When used
wisely they can save time and resources by reusing a single set of data for many datasets and
lists. For example, a list of countries of the world can be used to create a lookup table. If this
information is collected by several lists or datasets in a warehouse, making a lookup table
containing a list of countries once will make this available to all datasets and lists.
To create a new lookup table, click on the Lookup Tables tab from the Recipient Warehouse
screen (see Figure 4). Next, click the Create New Lookup Table button. Enter a name for the
lookup table; select the encoding for the data in the table, and type in a description of the
contents of the table. Click OK to continue.
15
Figure 10 Create a New Empty Lookup Table
Each lookup table requires an entry that becomes the default value for “no choice” meaning that
members do not select from any of the items presented on the selection list. This entry can also
be the first selection on the list, or the most popular or common selection on the list. LISTSERV
Maestro defaults to an entry that says “<none>”, but this can be changed by clicking the Edit
link and adding different text.
Figure 11Enter Lookup Table Entries
Lookup table entries can be added manually one by one, or they can be uploaded from a text
file that contains one entry per line. The number of entries for any single lookup table is limited
to 200 items. To add single entries, click the Add New Entry button. Type one item in the text
box, and then click OK. Click the button Add New Entry again to add the next item. To upload a
text file, click the Upload Entries button. Browse for the file on a local drive, select it and click
OK.
Once there are items listed in the lookup table, they can be edited, deleted, moved up or moved
down in the list. Use the adjacent links to change the item in the table. Click OK to accept the
entries in the lookup table and return to previous screen. From here, the Actions link can be
used to edit the name and description of the lookup table, edit the items in the list, download the
items in the list, or delete the table altogether.
16
Figure 12 Edit Lookup Table Entries
4.1.3 Editing Existing Datasets
Once you have an existing datasets in a warehouse, their settings can be fully edited until there
are lists or members added to them. After lists or members become part of a dataset, only
limited editing capabilities are available. To edit the settings of an existing dataset, click on the
dataset name. A split screen will appear showing the dataset and any lists in the left frame and
the dataset information in the right frame. Click on the Actions link in the right corner to open a
menu of actions that can be performed on the dataset. The top menu item, Edit Dataset
Settings will open the recipient dataset wizard so its settings can be changed. If there are
members or mailing lists in the dataset, only the following settings can be changed: the name of
the dataset, the list administrator e-mail address, the public description, field names, the access
level of the membership area, and the closed for maintenance check box.
Section 5 Introduction to Hosted Mailing Lists
Once there are defined datasets in the warehouse, mailing lists can be created for each dataset.
Datasets with many lists can use categories and sub-categories that act like folders to help
organize the lists for users and subscribers alike. Categories and the lists they contain are
displayed in the left frame of the “Recipient Dataset Details” screen.
LISTSERV Maestro can create two different types of mailing list, hosted recipient lists and
hosted LISTSERV lists. Each list type is denoted with its own icon style in the dataset so it can
be easily identified. There are different features and functionality for each type of list. Deciding
what the purposes are of the mailing lists in a dataset will help determine which type of list is
best to create. Depending on the types of fields in the dataset, it is possible to have both types
of list in one dataset.
17
Important Note: If there are selection menus in a dataset, it will not be possible to
create hosted LISTSERV lists in that dataset. In order to have both types of list in a dataset,
selection fields can be added to the individual hosted recipient list instead.
Table 2 Features of Hosted Recipient Lists and Hosted LISTSERV Lists
Hosted Recipient List Features
Hosted LISTSERV List Features
Easy to use and no extra set up involving
LISTSERV is required.
Requires extra setup within LISTSERV so that LISTSERV
knows how to access the LISTSERV Maestro database.
Allows subscriber data fields where the
subscriber can select values from a drop-down
menu ("select one" or “select all that apply“).
Provides the special features of LISTSERV lists:
- Discussion lists
- Digests
- Archives
- Auto-delete
Lists are controlled completely by LISTSERV
Maestro.
Lists are created with easy-to-use list-creation wizards in
LISTSERV Maestro.
Limited to announcement-only lists.
Lists can be announcement lists, moderated discussion lists,
or unmoderated discussion lists.
Can only send messages using the LISTSERV
Maestro interface.
Can send messages using any e-mail client
Powerful filters are available using a special
target group definition wizard to segment and
sort recipients.
Fully capable of executing a query using SQL that the user
inputs.
Section 6 Creating Hosted Recipient Lists
Hosted lists contain data from the dataset. They can also have their own data fields that are not
shared among lists in the dataset, but belong exclusively to the list. Lists that do have their own
fields will also have their own web subscription forms generated when the list is created. All the
fields that appear in the dataset and in a particular list can be used as merged fields for
messages sent to that list.
To create a new hosted recipient list, first select the dataset the list will be added to from the
“Recipient Datasets and Lookup Tables” screen. The “Recipient Dataset Details” screen opens.
This screen is split into two frames. The left frame will display all the lists (if any) that belong to
the open dataset. Datasets with many lists can use folders called “categories” to organize lists
so that they are easier to find. See Section 8 Organizing Data Sets for more information.
The right frame displays all the settings for the open dataset. Clicking the Actions link will open
a menu containing links to other functions that can be performed on the dataset. Click on the
Create Hosted Recipient List link to open the hosted recipient list definition wizard.
18
Figure 13 Recipient Dataset Details
Click Next -> to continue.
Important Note: Clicking the Actions link in the right frame as described in Section
4.1.3 Editing Existing Datasets can make changes to the dataset itself. Once lists have been
added to a dataset, it will not be possible to edit most of the settings for that dataset.
6.1 Hosted Recipient Mailing List Wizard
Similar to creating a dataset, creating a hosted recipient list is accomplished by using a wizard
that details all the steps of designing the list and the accompanying web subscription form. The
hosted recipient list definition wizard is comprised of four main screens.
6.1.1 General Settings
The first screen, “General”, defines the general information pertaining to the list.
•
Name – This is the name of the mailing list. Subscribers will see this name for the list on
the web form when they subscribe. Regular users will see the name of the list in the
default hosted list target group that is automatically created when the list is populated
with subscribers. See Section 13 Hosted Recipient List Target Groups for more details.
Data administrators will see the list name in the dataset tree (see Figure 20)
•
Internal Description – The internal description is seen by users working within the
Maestro User Interface.
•
Public Description – The public description of the list appears on the subscription web
form. If subscribers are permitted to select the lists they want to join and can view and
change their subscription settings, having accurate descriptions will help them
accomplish those tasks.
19
Figure 14 Hosted Recipient List Wizard – General
Click Next -> to continue.
6.1.2 Profile Fields
The second wizard screen is called “Profile Fields”. Every new list begins with the fields in the
dataset. Other fields can be added to the list. Any added list fields will not be shared among the
other lists in the dataset. To add a new field, click the Add Field link.
For each new field, enter the following information:
•
Name – The name of the field as it will be used internally by the system for mail merging
and querying. Field names can only use upper and lower case letters A-Z and a-z, the
numbers 0 – 9 and the underscore “_”. Spaces and other special characters are not
allowed.
•
Display Name – The display name is the label that identifies the blank field on the web
form. The display name will be seen by anyone accessing the list’s public subscription
page on the Web. All alphanumeric characters are permitted, as well as spaces and
most special characters.
•
Data Type – Choose the type of data to be entered in the field from the drop-down
menu. Five different classifications of data are available:
°
Text – Text fields can accept any type of text, including dates in specific formats
such as dd/mm/yyy or mm.dd.yyyy
°
Number – Number fields accept any whole integers.
°
Boolean – Boolean fields are based on two states, one being true, the other false.
°
Single Select (lookup table) – A single selection field consists of a drop-down menu
where one item from it may be chosen.
°
Multiple Select (lookup table) – A multiple selection field consists of a drop-down
menu where one or more items from it may be chosen.
20
•
Mandatory – Decide whether the data is mandatory for subscribers to enter into the web
form or optional. Boolean fields cannot be optional due to the nature of the data type –
the selection equates to either true or false.
After list fields are created, they can be edited, removed, moved up or moved down by using the
corresponding links on the right side of the table. Fields that are part of the dataset cannot be
moved or edited from this screen.
Figure 15 Hosted Recipient List Wizard - Profile Fields
Click Next -> to continue.
6.1.3 Profile Field Details
The next screen in the wizard is “Profile Field Details”. The profile field details screen has
multiple tabs that toggle between the different settings for list profile fields. The number and type
of tabs depends on the types of data fields added to the list.
Lists containing selection fields have to assign the relevant lookup table to the field. Click on the
tab Selection Field Details to access the list of available lookup tables. See Section 4.1.2
Creating a Lookup Table for more information.
21
Figure 16 Hosted Recipient List Wizard - Profile Fields Details – Selection Field Details
Click Next -> to continue.
Lists containing fields of the types “Text” and “Number” can have set validation limits entered so
that when the fields are filled in by subscribers, only certain types of input will be accepted. Click
on the tab Input Field Validation to access the field validation settings. For example, in the
column PRICE, a monetary value is requested. By setting a validation setting for a number
range, only prices falling within the specified range will be accepted. Note: Only whole numbers
in the form of integers will be accepted. Floating point numbers are not accepted in the number
field.
Figure 17 Hosted Recipient List Wizard - Profile Fields Details – Input Field Validation
Click Next -> to continue.
22
To personalize list mailings, define the profile field that will be used in the To: field of all
messages sent to the list. This is an optional setting, and if left undefined, the To: field will
contain the subscriber’s e-mail address. Select the field or fields that will make up the Name
field. If more than one field is selected, the second one will be added behind the first, leaving a
space in between. This makes it easy to combine a first name field with a last name field to
produce a “full name” field, for example.
Figure 18 Profile Fields Details – Subscriber Name Definition
Click Next -> to continue.
6.1.4 Summary
The final screen in the wizard is the “Summary” page. All the settings for the list are displayed
here. Set the access level for the list by selecting one of the options in the drop-down menu
under the heading “Public List Access”. Lists that are “Open to everyone” can be subscribed to
from the dataset web form or the list web form. Anyone with the URL to either form can access
23
the list subscription page. Lists that have “Access for subscribers only” are visible to subscribers
who have been added to the list by the data Administrator. The list will not be displayed on the
dataset web form when accessed by a non-member. Lists with “No public access” will not
appear to non-subscribers or subscribers from the dataset web form. This setting can be used
when a list is under construction to prevent anyone from signing up prematurely.
Figure 19 Hosted Recipient List Wizard – Summary
Use the <- Back button to return to the previous screen. Click Finish to save the list and return
to the Recipient Dataset Details screen. After a hosted recipient list has been added to the
dataset, it will appear in the dataset tree in the left frame represented by this icon
and
accompanied by the list name.
24
Section 7 Creating Hosted LISTSERV Lists
Hosted LISTSERV lists contain data from the dataset. They can also have their own data fields
that are not shared among lists in the dataset, but belong exclusively to the list. Lists that do
have their own fields will also have their own Web subscription forms generated when the list is
created. All the fields that appear in the dataset and in a particular list can be used as merged
fields for messages sent to that list.
To create a new hosted LISTSERV recipient list, first select the dataset the list will be added to
from the “Recipient Datasets and Lookup Tables” screen. The “Recipient Dataset Details”
screen opens. This screen is split into two frames. The left frame will display all the lists (if any)
that belong to the open dataset. Datasets with many lists can use folders called “categories” to
organize lists so that they are easier to find. See Section 8 Organizing Datasets for more
information.
When LISTSERV Maestro creates a LISTSERV list, it is assembling a “list header” that is made
up of “key words.” The key words define the settings in the list such as who may send mail to
the list, who administers the list, how are bounces handled, and many other settings. Once the
key words are defined and written to the list header, the system can create a LISTSERV list.
LISTSERV Maestro provides a wizard that can create three different types of LISTSERV list.
Each type of list provides unique ways for subscribers to manage their settings and
communicate. The three type of LISTSERV list available are:
•
Announcement List – This type of list is used for announcements and newsletters.
Communication with subscribers is one-way, stemming from the LISTSERV Maestro
sender and going to the subscribers. Subscribers are not allowed to post back to the list.
•
Unmoderated Discussion List – This type of list is used for open discussion among list
subscribers and any LISTSERV Maestro senders. Communication is two-way,
originating from both subscribers and LISTSERV Maestro senders. Postings go directly
to the list without being reviewed or edited.
•
Moderated discussions – This type of list is used for a controlled discussion among
subscribers and any LISTSERV Maestro senders. Postings sent to the list from
subscribers are reviewed by a moderator who can approve the message for distribution
to the rest of the list or reject the posting so it is not sent on the rest of the list
subscribers. Messages originating from LISTSERV Maestro are not subject to
moderation.
Once the list is created in the hosted recipient list wizard, it can be edited outside of LISTSERV
Maestro using LISTSERV, either with WA or without. This is an advanced skill for those
administrators familiar with LISTSERV. If any changes to the list header are made outside of
LISTSERV Maestro, the list wizard cannot be used again on the same list without loosing all of
the changes.
25
Figure 20 Create Hosted LISTSERV List
7.1 Creating LISTSERV Announcement Lists
Similar to creating a dataset and creating a hosted recipient list, creating a hosted LISTSERV
list is accomplished by using a wizard that details all the steps of designing the list and the
accompanying web subscription form. The hosted LISTSERV list definition wizard is comprised
of eight main screens. The settings available in the wizard vary depending on the type of
LISTSERV list that is created.
A LISTSERV announcement list permits communication to run in one direction, from the sender
of the message to the subscribers. Subscribers are not allowed to post back to the list, although
they can send mail back to the sender of the message. Subscribers are, however, allowed to
manage their own subscription settings based on the features of the list itself.
7.1.1 General Setting for LISTSERV Announcement List
The first screen, “General”, defines the general information pertaining to the list.
•
Name – This is the name of the mailing list. Subscribers will see this name of the list on
the web form when they subscribe. Data administrators will see the list name in the
dataset tree (see Figure 58) and if they create a target group from a classic LISTSERV
list (see Section 14 Classic LISTSERV List Target Groups for details). Regular users will
see the list name if they are allowed to define recipients for a job using by sending to an
“Existing LISTSERV List”.
•
Internal Description – The internal description is seen by users working within the
Maestro User Interface.
•
Public Description – The public description of the list appears on the subscription web
form. If subscribers are permitted to select the lists they want to join and can view and
change their subscription settings, having accurate descriptions will help them
accomplish those tasks.
26
Figure 21 Hosted LISTSERV List Wizard - General
Click Next -> to continue.
7.1.2 Profile Fields for LISTSERV Announcement List
The second wizard screen is called “Profile Fields”. Every new list begins with the fields in the
dataset. Other fields can be added to the list. Any added list fields will not be shared among the
other lists in the dataset. To add a new field, click the Add Field link.
For each new field, enter the following information:
•
Name – The name of the field as it will be used internally by the system for mail merging
and querying. Field names can only use upper and lower case letters A-Z and a-z, the
numbers 0 – 9 and the underscore “_”. Spaces and other special characters are not
allowed.
•
Display Name – The display name is the label that identifies the blank field on the web
form. The display name will be seen by anyone accessing the list’s public subscription
page on the Web. All alphanumeric characters are permitted, as well as spaces and
most special characters.
•
Data Type – Choose the type of data to be entered in the field from the drop-down
menu. Three different classifications of data are available (selection lists are not
available for hosted LISTSERV lists):
•
°
Text – Text fields can accept any type of text, including dates in specific formats
such as dd/mm/yyy or mm.dd.yyyy
°
Number – Number fields accept any whole integers.
°
Boolean – Boolean fields are based on two states, one being true, the other false.
Mandatory – Decide whether the data is mandatory for subscribers to enter into the web
form or optional. Boolean fields cannot be optional due to the nature of the data type –
the selection equates to either true or false.
27
After list fields are created, they can be edited, removed, moved up or moved down by using the
corresponding links on the right side of the table. Fields that are part of the dataset cannot be
moved or edited from this screen.
Figure 22 Hosted LISTSERV List Wizard - Profile Fields
Click Next -> to continue.
7.1.3 Profile Field Details for LISTSERV Announcement List
The next screen in the wizard is “Profile Field Details”. Hosted LISTSERV lists require a full
name be defined for each subscriber comprised of a first name and last name separated by a
space. If a single mandatory data field exists for each subscriber containing a full name that
meets this criterion, move that field from the “Profile Fields” box to the “Name Fields” box. If two
fields are required to make up a full name, each of these fields must be mandatory. Move each
of the fields from the Profile Fields box to the Name Fields box. The second field is added after
the first field, leaving a space in between. This makes it easy to combine a first name field with a
last name field to produce a “full name” field, for example. Use the Move Up and Move Down
links to change the order of the name fields.
28
Figure 23 LISTSERV List Wizard - Profile Fields Details
Click Next -> to continue.
7.1.4 List Type for LISTSERV Announcement List
The next screen in the wizard is “List type”. Use the option buttons to select “Announcement
List”.
•
Announcement List – This type of list is used for announcements and newsletters.
Communication with subscribers is one-way, stemming from the LISTSERV Maestro
sender and going to the subscribers. Subscribers are not allowed to post back to the list.
29
Figure 24 LISTSERV List Wizard - List Type
Click Next -> to continue.
7.1.5 List Options for LISTSERV Announcement Lists
The “List Options” screen is divided into tabbed pages: “General Options”, “Reply Behavior”,
“Bounce Handling” and “List Archive”. The last tab, List Archive is optional and will not appear
unless archives have been set up in the HUB. For more information on archives, see the
LISTSERV Maestro Administrator’s Manual.
All list types require that a list administrator called a “list owner” be set on the General Options
tab. Enter at least one e-mail address that will become the administrator (owner) of the
LISTSERV list. Click the Edit link to add a new address or edit the existing ones in the pop-up
dialog box. Entries must contain a valid Internet e-mail address.
Figure 25 LISTSERV List Wizard - Set the List Administrator
Click OK to accept the administrator address and return to the General Options tab.
30
Two “General List Options” for announcement lists that can be enabled by checking the
adjacent check box. They are:
•
DIGEST Mode – Check the box next to “Allow subscribers to enable DIGEST mode” to
give subscribers the opportunity to receive a digest of the list’s postings. List digests
group list messages together and send them in one message. If a list has many
postings, allowing subscribers to receive a digest cuts down the number of messages
they get per day.
•
Mail Merging – Mail merging uses any recipient data headings to insert subscriber
specific content into the message based upon the data associated with each subscriber.
More information on using mail merging can be found in …
The next tab, “Reply Behavior” determines where any replies from subscribers are sent. There
are three options available:
•
Sender – Replies are sent to the sender of the e-mail message. The sender address is
the address based on the “From:” field of the posting.
•
List Administrator – Replies can be sent to the list administrator address. This is the
address that was entered in the General Options tab under the heading “List
Administrator E-mail Addresses”. If there is more than one list administrator, each
address will receive all replies.
•
Separate address – Replies are sent to an address that is entered in the text box of this
tab.
Figure 26 List Wizard for LISTSERV List - Reply Behavior
The next tab, “Bounce Handling” determines what happens to the subscriber addresses when
messages sent to them bounce (are rejected from the e-mail server and returned to the sender
undeliverable). LISTSERV lists can handle bounces by removing the subscriber addresses of
bounced messages automatically, or by collecting bounces for manual action. Manually
processed bounces are sent to the list administrator's mailbox. Select one of the three available
the bounce processing options:
•
Remove immediately after first bounce – The address that bounced the mail will be
removed from the list after the first bounce. Subscribers will have to be re-added to the
list to receive any additional mail.
•
Remove subscribers after X bounces within X days – Enter the number of bounces
that are permitted in the first text box, and the number days they can occur over in the
second box. This setting is more flexible than the first setting in that if the reason for the
31
bounce is temporary, such as a full mailbox, the message can be sent again with the set
number of days. Subscribers will not be removed from the list if the message can be
delivered within the set number of allowable bounces and days.
•
Collect bounces for manual processing – Bounce addresses will be sent to a specific
address where they can be reviewed and action can be taken manually. Subscriber
addresses that generate bounces will not be removed from the list automatically, no
matter the number of bounces.
Figure 27 LISTSERV List Wizard – Bounce Handling
The next tab, “List Archives” will only appear if archives have been enabled in the HUB. List
archives are a searchable history of all the messages posted to the list.
•
Disabled/Enabled – Click the adjacent option button to enable or disable archives for
the list. Although the ability to have archives is granted in the HUB, archives for
individual lists can be disabled here.
•
Create new archive files – Set the time frame for the creation of new archive files using
the drop-down menu. Archives can be created on a weekly, monthly or yearly basis.
•
Archive viewable by – Sets the access level for list archives. Archives can be open to
anyone, subscriber or non-subscriber of a list, open to only subscribers, or open to
administrators only.
Figure 28 LISTSERV List Wizard - Archives
Click Next -> to continue.
32
7.1.6 Posting Restrictions for LISTSERV Announcement Lists
Posting restrictions set limitations on message attachments, message size and the number of
messages that can be sent to the list. These restrictions affect the sender of messages to the
LISTSERV list when they are submitted as “standard list postings.” A standard list posting is a
normal e-mail message sent to the list with no mail merging. Standard list messages can be
received in a digest form, and can be viewed in the list archives if archives have been created
for the list. Standard list messages limit the type of available tracking to blind tracking only.
There are two tabs that set posting restrictions for an announcement list:
•
Attachment Handling – Sets the action the list will take when standard messages are
receive with attachments. There are three options:
°
Accept all posts even if contain attachments
°
Accept all posts but remove attachments – the message itself will be delivered to the
list but any attachments will be stripped off.
°
Reject all posts if they contain attachments – any message submitted to the list with
attachments will be automatically rejected.
Figure 29 LISTSERV List Wizard - Handling Attachments
•
Size / Message Limits – Sets a size limit for each message posted to the list. The size
can be limited by the number of lines in the message, the number of kilobits (KB) or the
number of megabits (MB) of the message. The total number of messages allowed to be
posted to the list for the day can be set as well as the total number of postings per user
per day. Fields left blank will have no limitations imposed.
33
Figure 30 LISTSERV List Wizard - Size and Message Limits
7.1.7 Topics for LISTSERV Announcement Lists
Large active LISTSERV lists often use "sub-groups" within the list to give subscribers the
opportunity to receive only the posts to the list they are most interested in reading. Sub-groups
are created in LISTSERV by defining the keyword Topics in the list header. Lists can have up
to 23 topics defined in the header. List subscribers can elect to receive only those messages
that fit into the topic(s) they are interested in reading. Similarly, messages can be posted only to
specific topics. For example, a large list could have the general subject of XYZ Software. Topics
could be defined by the types of users of the software, the type software purchased, the tips and
tricks for using the software. For more information on Topics, see the LISTSERV List Owner's
Manual.
To define a new topic, simply click the New Topic link and fill out the empty topic row that
appears. In the list, topics are displayed either in the display mode or in the editable mode. In
the display mode, each topic has an associated Edit link to set it into the editable mode. In the
editable mode, each topic has the associated links Reset (forget changes and reset the topic to
the state it had when the editable mode was last entered for it), Up (move the topic up one step
in the topics list, Down (move the topic down ones step in the topics list) and Remove (remove
the topic).
When the topics settings of a list that already has subscribers changes, all current subscribers'
topics selections need to be adjusted. This will occur when the LISTSERV list wizard is
completed. The adjustment may take some time and a progress bar will be displayed as the
system works.
Changing topics on for a list where subscribers are currently very active needs to be
carefully considered so a major disruption does not occur. A better strategy would be to
temporarily close the hosted LISTSERV list for maintenance, (see Summary page) adjust the
topics, and then re-open the list.
When adding new topics to a list that already has subscribers, an additional checkbox option
"Existing subscribers will have the new topics selected automatically" will appear. Check this
option to add all the existing subscribers to the new topics automatically. When left unchecked,
existing subscribers will not be subscribed to the new topics. Subscribers will be able to change
their settings to add or drop the new topics when they wish. This checkbox option applies to all
topics that are added on this page during the same list wizard session. To add several topics,
some of which the current subscribers are automatically subscribed to and some not, the list
34
wizard has to be engaged twice, once with the box checked for those topics to be added to all
subscribers and once with the box unchecked for those topics that will not be added to all
subscribers.
Figure 31 LISTSERV List Wizard – Topics
7.1.8 Summary for LISTSERV Announcement Lists
The Summary screen displays all the selections made for the LISTSERV list during its creation.
Use the <- Back button or any of the links in the top bar to revisit any page in the wizard to
make changes. As long as there are no subscribers, the list settings can be edited from the
Recipient Dataset Details screen by selecting the list and clicking the Actions link.
Before the list can be used, its access level needs to be set. The list can be set to be accessible
to anyone wishing to subscribe, to be accessible to only list subscribers, or to have no public
access. If a list is accessible to everyone, it will appear on the membership area Web page to
anyone visiting that page. If the list is accessible only to members, the list will not appear in the
membership area to everyone, it will only appear only to those who are subscribed to the list.
This essentially closes the list to those who wish to sign themselves up and leaves adding
subscribers to the LISTSERV Maestro users, while allowing existing subscribers to manage
their own settings. Lists with no public access do not appear in the membership area to anyone.
35
Figure 32 LISTSERV List Wizard – Summary
Click Finish to accept the list as it is summarized and return to the Recipient Dataset Details
screen.
36
7.2 Creating LISTSERV Unmoderated Discussion Lists
Unmoderated discussion lists allow for two-way interaction between group members. These
open forums facilitate ongoing discussions among members. They are most commonly used for
internal communication within an organization or group of people. For instance, many
universities use secure "class lists" for interaction between students and teachers or to conduct
remote teaching.
Unlike a one-way list, a discussion list not only allows, but also encourages interaction between
members who are part of the group. Every member can write to the list, and in doing so, all
members will receive a copy of the message. In this way, discussions can take place and views
can be exchanged among a large number of people. Two-way discussion lists can be open for
anyone to join or closed so that membership is controlled by the data administrator. Open public
discussion lists tend to be large with many messages being posted (high volume). They can
take up a lot of server space and they can be open to spamming, spoofing, and flaming if there
are no oversight measures in place.
Unmoderated discussion groups where membership is determined by the data administrator
can also be large and high volume, or they can be medium sized or very small. Subscribers
communicate amongst themselves on a specific topic. Incidents of spamming and flaming are
generally low because only subscribers can post to the list, and their subscription request has
been reviewed.
Unmoderated discussion lists can provide a dynamic platform for disseminating information,
sharing options, collaborative learning, and much more. Unmoderated discussion lists can
generate a large amount of mail and take up server resources if archives are kept. Some
thought needs to be given to the number and type of subscribers permitted to join this type of
LISTSERV list and some monitoring needs to take place in order to keep the level and topics of
discussion pertinent to list.
7.2.1 General Settings for Unmoderated Discussion Lists
The first screen, “General”, defines the general information pertaining to the list.
•
Name – This is the name of the mailing list. Subscribers will see this name of the list on
the web form when they subscribe. Data administrators will see the list name in the
dataset tree (see Figure 58) and if they create a target group from a classic LISTSERV
list (see Section 14 Classic LISTSERV List Target Groups for details). Regular users will
see the list name if they are allowed to define recipients for a job using by sending to an
“Existing LISTSERV List”.
•
Internal Description – The internal description is seen by users working within the
Maestro User Interface.
•
Public Description – The public description of the list appears on the subscription web
form. If subscribers are permitted to select the lists they want to join and can view and
change their subscription settings, having accurate descriptions will help them
accomplish those tasks.
37
Figure 33 LISTSERV List Wizard - General
Click Next -> to continue.
7.2.2 Profile Fields for Unmoderated Discussion Lists
The second wizard screen is called “Profile Fields”. Every new list begins with the fields in the
dataset. Other fields can be added to the list. Any added list fields will not be shared among the
other lists in the dataset. To add a new field, click the Add Field link.
For each new field, enter the following information:
•
Name – The name of the field as it will be used internally by the system for mail merging
and querying. Field names can only use upper and lower case letters A-Z and a-z, the
numbers 0 – 9 and the underscore “_”. Spaces and other special characters are not
allowed.
•
Display Name – The display name is the label that identifies the blank field on the web
form. The display name will be seen by anyone accessing the list’s public subscription
page on the Web. All alphanumeric characters are permitted, as well as spaces and
most special characters.
•
Data Type – Choose the type of data to be entered in the field from the drop-down
menu. Three different classifications of data are available (selection lists are not
available for hosted LISTSERV lists):
•
°
Text – Text fields can accept any type of text, including dates in specific formats
such as dd/mm/yyy or mm.dd.yyyy
°
Number – Number fields accept any whole integers.
°
Boolean – Boolean fields are based on two states, one being true, the other false.
Mandatory – Decide whether the data is mandatory for subscribers to enter into the web
form or optional. Boolean fields cannot be optional due to the nature of the data type –
the selection equates to either true or false.
38
After list fields are created, they can be edited, removed, moved up or moved down by using the
corresponding links on the right side of the table. Fields that are part of the dataset cannot be
moved or edited from this screen.
Figure 34 LISTSERV List Wizard - Profile Fields
Click Next -> to continue.
7.2.3 Profile Field Details for Unmoderated Discussion Lists
The next screen in the wizard is “Profile Field Details”. Hosted LISTSERV lists require a full
name be defined for each subscriber comprised of a first name and last name separated by a
space. If a single mandatory data field exists for each subscriber containing a full name that
meets this criterion, move that field from the “Profile Fields” box to the “Name Fields” box. If two
fields are required to make up a full name, each of these fields must be mandatory. Move each
of the fields from the Profile Fields box to the Name Fields box. The second field is added after
the first field, leaving a space in between. This makes it easy to combine a first name field with a
last name field to produce a “full name” field, for example. Use the Move Up and Move Down
links to change the order of the name fields.
39
Figure 35 LISTSERV List Wizard - Profile Field Details
Click Next -> to continue.
7.2.4 List Type for Unmoderated Discussion Lists
The next screen in the wizard is “List type”. Use the option buttons to select “Unmoderated
Discussion List”.
•
Unmoderated Discussion List – This type of list is used for two-way communication.
Subscribers are allowed to post to the list directly. List postings are not reviewed by a
moderator or editor.
40
Figure 36 LISTSERV List Wizard - List Type
Click Next -> to continue.
7.2.5 List Options for Unmoderated Discussion Lists
The “List Options” screen is divided into tabbed pages: “General Options”, “Reply Behavior”,
“Bounce Handling” and “List Archive”. The last tab, List Archive is optional and will not appear
unless archives have been set up in the HUB. For more information on archives, see the
LISTSERV Maestro Administrator’s Manual.
All list types require that a list administrator called a “list owner” be set on the General Options
tab. Enter at least one e-mail address that will become the administrator (owner) of the
LISTSERV list. Click the Edit link to add a new address or edit the existing ones in the pop-up
dialog box. Entries must contain a valid Internet e-mail address.
Figure 37 LISTSERV List Wizard - Set the List Administrator
Click OK to accept the administrator address and return to the General Options tab.
41
There are three “General List Options” for announcement lists that can be enabled by checking
the adjacent check box. They are:
•
DIGEST Mode – Check the box next to “Allow subscribers to enable DIGEST mode” to
give subscribers the opportunity to receive a digest of the list’s postings. List digests
group list messages together and send them in one message. If a list has many
postings, allowing subscribers to receive a digest cuts down the number of messages
they get per day.
•
Mail Merging – Check the box next to “Use mail merging” to allow the system to insert
subscriber specific content into the message based upon the data associated with each
subscriber. More information on using mail merging can be found in …
•
Acknowledgements – Check the box next to “Send acknowledgement message to
posting subscriber” to have e-mail messages sent to posters telling them that their mail
has been received by the list and distributed to the list subscribers. If this setting is
changed while there are existing subscribers on the list, their settings will not be
affected. Only those subscribers who join the list after the setting change will have the
new setting.
The next tab, “Reply Behavior” determines where any replies from subscribers are sent. There
are three options available:
•
Sender – Replies are sent to the sender of the e-mail message. The sender address is
the address based on the “From:” field of the posting.
•
List – Replies are sent back to the list. If subscribers are not well informed that when
they hit the “reply” key in their mail client their message goes to everyone, they can post
private or off topic messages back to the list by mistake.
•
Both Sender & List – Both parties receive replies.
•
Separate address – Replies are sent to an address that is entered in the text box of this
tab.
Figure 38 List Wizard for LISTSERV List - Reply Behavior
The next tab, “Bounce Handling” determines what happens to the subscriber addresses when
messages sent to them bounce (are rejected from the e-mail server and returned to the sender
undeliverable). LISTSERV lists can handle bounces by removing the subscriber addresses of
bounced messages automatically, or by collecting bounces for manual action. Manually
42
processed bounces are sent to the list administrator’s address. Select one of the three available
the bounce processing options:
•
Remove immediately after first bounce – The address that bounced the mail will be
removed from the list after the first bounce. Subscribers will have to be re-added to the
list to receive any additional mail.
•
Remove subscribers after X bounces within X days – Enter the number of bounces
that are permitted in the first text box, and the number days they can occur over in the
second box. This setting is more flexible than the first setting in that if the reason for the
bounce is temporary, such as a full mailbox, the message can be sent again within the
set number of days. Subscribers will not be removed from the list if the message can be
delivered within the set number of allowable bounces and days.
•
Collect bounces for manual processing – Bounce addresses will be sent to a specific
address where they can be reviewed and action can be taken manually. Subscriber
addresses that generate bounces will not be removed from the list automatically, no
matter the number of bounces.
Figure 39 LISTSERV List Wizard - Bounce Handling
The next tab, “List Archives” will only appear if archives have been enabled in the HUB. List
archives are a searchable history of all the messages posted to the list.
•
Disabled/Enabled – Click the adjacent option button to enable or disable archives for
the list. Although the ability to have archives is granted in the HUB, archives for
individual lists can be disabled here.
•
Create new archive files – Set the time frame for the creation of new archive files using
the drop-down menu. Archives can be created on a weekly, monthly or yearly basis.
•
Archive viewable by – Sets the access level for list archives. Archives can be open to
anyone, subscriber or non-subscriber of a list, open to only subscribers, or open to
administrators only.
43
Figure 40 LISTSERV List Wizard - Archives
Click Next -> to continue.
7.2.6 Posting Restrictions for Unmoderated Discussion Lists
Posting restrictions for unmoderated discussion lists set limitations on who can post to the list,
message attachments, message size and the number of messages that can be sent to the list.
The posting restrictions screen has three tabs: “Distribution Handling”, “Attachment Handling”,
and “Size / Message Limits”. Click each tab to enter its specific settings.
•
Distribution Handling – Sets additional e-mail addresses that have permission to post
to the list with out being subscribed to it. Additional addresses are optional. Addresses
defined as the administrator addresses (on the General Settings screen) are allowed to
post with out being subscribed.
Figure 41 LISTSERV List Wizard - Distribution Handling
•
Attachment Handling – Sets the action the list will take when standard messages are
receive with attachments. There are three options:
44
°
Accept all posts even if contain attachments
°
Accept all posts but remove attachments – the message itself will be delivered to the
list but any attachments will be stripped off.
°
Reject all posts if they contain attachments – any message submitted to the list with
attachments will be automatically rejected.
Figure 42 LISTSERV List Wizard - Handling Attachments
These restrictions affect the sender of messages to the LISTSERV list when they are submitted
as “standard list postings.” A standard list posting is a normal e-mail message sent to the list
with no mail merging. Standard list messages can be received in a digest form, and can be
viewed in the list archives if archives have been created for the list. Standard list messages limit
the type of available tracking to blind tracking only.
•
Size / Message Limits – Sets a size limit for each message posted to the list. The size
can be limited by the number of lines in the message, the number of kilobits (KB) or the
number of megabits (MB) of the message. The total number of messages allowed to be
posted to the list for the day can be set as well as the total number of postings per user
per day. Fields left blank will have no limitations imposed.
Figure 43 LISTSERV List Wizard - Size and Message Limits
Click Next -> to continue.
These restrictions affect the sender of messages to the LISTSERV list when they are submitted
as “standard list postings.” A standard list posting is a normal e-mail message sent to the list
with no mail merging. Standard list messages can be received in a digest form, and can be
viewed in the list archives if archives have been created for the list. Standard list messages limit
the type of available tracking to blind tracking only.
45
7.2.7 Topics for Unmoderated Discussion Lists
Large active LISTSERV lists often use "sub-groups" within the list to give subscribers the
opportunity to receive only the posts to the list they are most interested in reading. Sub-groups
are created in LISTSERV by defining the keyword Topics in the list header. Lists can have up
to 23 topics defined in the header. List subscribers can elect to receive only those messages
that fit into the topic(s) they are interested in reading. Similarly, messages can be posted only to
specific topics. For example, a large list could have the general subject of XYZ Software. Topics
could be defined by the types of users of the software, the type software purchased, the tips and
tricks for using the software. For more information on Topics, see the LISTSERV List Owner's
Manual.
To define a new topic, simply click the New Topic link and fill out the empty topic row that
appears. In the list, topics are displayed either in the display mode or in the editable mode. In
the display mode, each topic has an associated Edit link to set it into the editable mode. In the
editable mode, each topic has the associated links Reset (forget changes and reset the topic to
the state it had when the editable mode was last entered for it), Up (move the topic up one step
in the topics list, Down (move the topic down ones step in the topics list) and Remove (remove
the topic).
When the topics settings of a list that already has subscribers changes, all current subscribers'
topics selections need to be adjusted. This will occur when the LISTSERV list wizard is
completed. The adjustment may take some time and a progress bar will be displayed as the
system works.
Changing topics on for a list where subscribers are currently very active needs to be
carefully considered so a major disruption does not occur. A better strategy would be to
temporarily close the hosted LISTSERV list for maintenance, (see Summary page) adjust the
topics, and then re-open the list.
When adding new topics to a list that already has subscribers, an additional checkbox option
"Existing subscribers will have the new topics selected automatically" will appear. Check this
option to automatically add all the existing subscribers to the new topics. When left unchecked,
existing subscribers will not be subscribed to the new topics. Subscribers will be able to change
their settings to add or drop the new topics when they wish. This checkbox option applies to all
topics that are added on this page during the same list wizard session. To add several topics,
some of which the current subscribers are automatically subscribed to and some not, the list
wizard has to be engaged twice, once with the box checked for those topics to be added to all
subscribers and once with the box unchecked for those topics that will not be added to all
subscribers.
46
Figure 44 LISTSERV List Wizard – Topics
Click Next -> to continue.
7.2.8 Summary for Unmoderated Discussion Lists
The Summary screen displays all the selections made for the LISTSERV list during its creation.
Use the <- Back button or any of the links in the top bar to revisit any page in the wizard to
make changes. Click Finish to accept the list as it is summarized and return to the Recipient
Dataset Details screen. As long as there are no subscribers, the list settings can be edited from
the Recipient Dataset Details screen by selecting the list and clicking the Actions link.
Before the list can be used, its access level needs to be set. The list can be set to be accessible
to anyone wishing to subscribe, to be accessible to only list subscribers, or to have no public
access. If a list is accessible to everyone, it will appear on the membership area Web page to
anyone visiting that page. If the list is accessible only to members, the list will not appear in the
membership area to everyone, it will only appear only to those who are subscribed to the list.
This essentially closes the list to those who wish to sign themselves up and leaves adding
subscribers to the LISTSERV Maestro data administrator, while allowing existing subscribers to
manage their own settings. Lists with no public access do not appear in the membership area to
anyone.
7.3 Creating LISTSERV Moderated Discussion Lists
Similar to the unmoderated discussion list, a moderated list allows for the exchange of postings
between subscribers, but an editor or moderator receives all incoming messages. The editor or
moderator then decides to accept the message and post it to the list, or reject the message and
not post it to the list. Lists can be set up with more than one moderator and they can take turns
reviewing messages in a “round robin” fashion or all moderators can receive all messages.
Moderated lists can be of any size and subscriptions can be open to everyone or open to only
subscribers. Spamming and flaming are much less likely to happen on this type of list because
all the postings are subject to approval by a person before they can be posted to the list.
Moderators receive and review postings sent to the list. They then decide to approve the
messages, sending them through to the list, or reject them, preventing them from being sent to
the list. If there are multiple moderators, the list postings are sent to all moderators. The first
moderator to take action, approving or rejecting the message will determine how the message is
handled in regards to the list.
47
The editors are those addresses that are allowed to send messages to the list without requiring
moderation. The list administrator address is always allowed to send mail to the list without
moderation, and if no additional editor addresses are added, the list administrator automatically
becomes the moderator so that all messages sent to the list will go to that address for approval
or rejection.
7.3.1 General Settings for Moderated Discussion Lists
The first screen, “General”, defines the general information pertaining to the list.
•
Name – This is the name of the mailing list. Subscribers will see this name of the list on
the web form when they subscribe. Data administrators will see the list name in the
dataset tree (see Figure 58) and if they create a target group from a classic LISTSERV
list (see Section 14 Classic LISTSERV List Target Groups for details). Regular users will
see the list name if they are allowed to define recipients for a job using by sending to an
“Existing LISTSERV List”.
•
Internal Description – The internal description is seen by users working within the
Maestro User Interface.
•
Public Description – The public description of the list appears on the subscription web
form. If subscribers are permitted to select the lists they want to join and can view and
change their subscription settings, having accurate descriptions will help them
accomplish those tasks.
Figure 45 LISTSERV List Wizard – General
Click Next -> to continue.
7.3.2 Profile Fields for Moderated Discussion Lists
The second wizard screen is called “Profile Fields”. Every new list begins with the fields in the
dataset. Other fields can be added to the list. Any added list fields will not be shared among the
other lists in the dataset. To add a new field, click the Add Field link.
For each new field, enter the following information:
48
•
Name – The name of the field as it will be used internally by the system for mail merging
and querying. Field names can only use upper and lower case letters “A-Z” and “a-z”,
the numbers “0 – 9” and the underscore “_”. Spaces and other special characters are not
allowed.
•
Display Name – The display name is the label that identifies the blank field on the web
form. The display name will be seen by anyone accessing the list’s public subscription
page on the Web. All alphanumeric characters are permitted, as well as spaces and
most special characters.
•
Data Type – Choose the type of data to be entered in the field from the drop-down
menu. Three different classifications of data are available (selection lists are not
available for hosted LISTSERV lists):
•
°
Text – Text fields can accept any type of text, including dates in specific formats
such as dd/mm/yyy or mm.dd.yyyy
°
Number – Number fields accept any whole integers.
°
Boolean – Boolean fields are based on two states, one being true, the other false.
Mandatory – Decide whether the data is mandatory for subscribers to enter into the web
form or optional. Boolean fields cannot be optional due to the nature of the data type –
the selection equates to either true or false.
After list fields are created, they can be edited, removed, moved up or moved down by using the
corresponding links on the right side of the table. Fields that belong to the dataset cannot be
moved or edited from this screen.
Figure 46 LISTSERV List Wizard - Profile Fields
Click Next -> to continue.
49
7.3.3 Profile Field Details for Moderated Discussion Lists
The next screen in the wizard is “Profile Field Details”. Hosted LISTSERV lists require a full
name be defined for each subscriber comprised of a first name and last name separated by a
space. If a single mandatory data field exists for each subscriber containing a full name that
meets this criterion, move that field from the “Profile Fields” box to the “Name Fields” box. If two
fields are required to make up a full name, each of these fields must be mandatory. Move each
of the fields from the “Profile Fields” box to the “Name Fields” box. The second field is added
after the first field, leaving a space in between. This makes it easy to combine a first name field
with a last name field to produce a “full name” field, for example. Use the Move Up and Move
Down links to change the order of the name fields.
Figure 47 LISTSERV List Wizard - Profile Field Details
Click Next -> to continue.
7.3.4 List Type for Moderated Discussion Lists
The next screen in the wizard is “List type”. Use the option buttons to select “Unmoderated
Discussion List”.
50
•
Moderated Discussion List – This type of list is used for two-way communication.
Subscribers’ posts are sent to a list moderator who can approve the message and have
it distributed to the list members, or reject the message so it is not sent on the list
members.
Figure 48 LISTSERV List Wizard - List Type
Click Next -> to continue.
7.3.5 List Options for Moderated Discussion Lists
The “List Options” screen is divided into tabbed pages: “General Options”, “Reply Behavior”,
“Bounce Handling” and “List Archive”. The last tab, List Archive is optional and will not appear
unless archives have been set up in the HUB. For more information on archives, see the
LISTSERV Maestro Administrator’s Manual.
All LISTSERV list types require that a list administrator called a “list owner” be set on the
General Options tab. Enter at least one e-mail address that will become the administrator
(owner) of the LISTSERV list. Click the Edit link to add a new address or edit the existing ones
in the pop-up dialog box. Entries must contain a valid Internet e-mail address.
51
Figure 49 LISTSERV List Wizard - Set the List Administrator
Click OK to accept the administrator address and return to the General Options tab.
There are three “General List Options” for announcement lists that can be enabled by checking
the adjacent check box. They are:
•
DIGEST Mode – Check the box next to “Allow subscribers to enable DIGEST mode” to
give subscribers the opportunity to receive a digest of the list’s postings. List digests
are…If a list has many postings, allowing subscribers to receive a digest cuts down the
number of messages they get per day.
•
Mail Merging – Check the box next to “Use mail merging” to allow the system to insert
subscriber specific content into the message based upon the data associated with each
subscriber. More information on using mail merging can be found in …
•
Acknowledgements – Check the box next to “Send acknowledgement message to
posting subscriber” to have e-mail messages sent to posters telling them that their mail
has been received by the list and distributed to the list subscribers. If this setting is
changed while there are existing subscribers on the list, their settings will not be
affected. Only those subscribers who join the list after the setting change will have the
new setting.
The next tab, “Reply Behavior” determines where any replies from subscribers are sent. There
are three options available:
•
Sender – Replies are sent to the sender of the e-mail message. The sender address is
the address based on the “From:” field of the posting.
•
List – Replies are sent back to the list. If subscribers are not well informed that when
they hit the “reply” key in their mail client their message goes to everyone, they can post
private or off topic messages back to the list by mistake.
•
Both Sender & List – Both parties receive replies.
52
•
Separate address – Replies are sent to an address that is entered in the text box of this
tab.
Figure 50 List Wizard for LISTSERV List - Reply Behavior
The next tab, “Bounce Handling” determines what happens to the subscriber addresses when
messages sent to them bounce (are rejected from the e-mail server and returned to the sender
undeliverable). LISTSERV lists can handle bounces by removing the subscriber addresses of
bounced messages automatically, or by collecting bounces for manual action. Manually
processed bounces are sent to the list administrator. Select one of the three available the
bounce processing options:
•
Remove immediately after first bounce – The address that bounced the mail will be
removed from the list after the first bounce. Subscribers will have to be re-added to the
list to receive any additional mail.
•
Remove subscribers after X bounces within X days – Enter the number of bounces
that are permitted in the first text box, and the number days they can occur over in the
second box. This setting is more flexible than the first setting in that if the reason for the
bounce is temporary, such as a full mailbox, the message can be sent again within the
set number of days. Subscribers will not be removed from the list if the message can be
delivered within the set number of allowable bounces and days.
•
Collect bounces for manual processing – Bounce addresses will be sent to a specific
address where they can be reviewed and action can be taken manually. Subscriber
addresses that generate bounces will not be removed from the list automatically, no
matter the number of bounces.
Figure 51 LISTSERV List Wizard - Bounce Handling
53
The next tab, “List Archives” will only appear if archives have been enabled in the HUB. List
archives are a searchable history of all the messages posted to the list.
•
Disabled/Enabled – Click the adjacent option button to enable or disable archives for
the list. Although the ability to have archives is granted in the HUB, archives for
individual lists can be disabled here.
•
Create new archive files – Set the time frame for the creation of new archive files using
the drop-down menu. Archives can be created on a weekly, monthly or yearly basis.
•
Archive viewable by – Sets the access level for list archives. Archives can be open to
anyone, subscriber or non-subscriber of a list, open to only subscribers, or open to
administrators only.
Figure 52 LISTSERV List Wizard - Archives
Click Next -> to continue.
7.3.6 Posting Restrictions for Moderated Discussion Lists
Posting restrictions for moderated discussion lists set limitations on who can post to the list,
message attachments, message size and the number of messages that can be sent to the list.
The posting restrictions screen has three tabs: “Distribution Handling”, “Attachment Handling”,
and “Size / Message Limits”. Click each tab to enter its specific settings.
•
Distribution Handling – Sets moderator and editor addresses.
°
Moderator Addresses – This address or addresses will receive postings from
subscribers. Each address will receive all incoming messages, and the first address
to approve or reject the message will determine the whether the message is sent to
the list for distribution.
°
Editor Addresses – These additional e-mail addresses that have permission to post
to the list with out being subscribed to it and without going through moderation.
Additional addresses are optional. Addresses defined as the administrator addresses
(on the General Settings screen) are allowed to post with out being subscribed.
54
Figure 53 LISTSERV List Wizard - Distribution Handling
•
Attachment Handling – Sets the action the list will take when standard messages are
receive with attachments. There are three options:
°
Accept all posts even if contain attachments.
°
Accept all posts but remove attachments – the message itself will be delivered to the
list but any attachments will be stripped off.
°
Reject all posts if they contain attachments – any message submitted to the list with
attachments will be automatically rejected.
55
Figure 54 LISTSERV List Wizard - Handling Attachments
These restrictions affect the sender of messages to the LISTSERV list when they are submitted
as “standard list postings.” A standard list posting is a normal e-mail message sent to the list
with no mail merging. Standard list messages can be received in a digest form, and can be
viewed in the list archives if archives have been created for the list. Standard list messages limit
the type of available tracking to blind tracking only.
•
Size / Message Limits – Sets a size limit for each message posted to the list. The size
can be limited by the number of lines in the message, the number of kilobits (KB) or the
number of megabits (MB) of the message. The total number of messages allowed to be
posted to the list for the day can be set as well as the total number of postings per user
per day. Fields left blank will have no limitations imposed.
Figure 55 LISTSERV List Wizard - Size and Message Limits
Click Next -> to continue.
These restrictions affect the sender of messages to the LISTSERV list when they are submitted
as “standard list postings.” A standard list posting is a normal e-mail message sent to the list
with no mail merging. Standard list messages can be received in a digest form, and can be
viewed in the list archives if archives have been created for the list. Standard list messages limit
the type of available tracking to blind tracking only.
7.3.7 Topics for Moderated Discussion Lists
Large active LISTSERV lists often use "sub-groups" within the list to give subscribers the
opportunity to receive only the posts to the list they are most interested in. Sub-groups are
created in LISTSERV by defining the keyword Topics in the list header. Lists can have up to
23 topics defined in the header. List subscribers can elect to receive only those messages that
fit into the topic(s) they are interested in reading. Similarly, messages can be posted only to
56
specific topics. For example, a large list could have the general subject of XYZ Software. Topics
could be defined by the types of users of the software, the type software purchased, the tips and
tricks for using the software. For more information on Topics, see the LISTSERV List Owner's
Manual.
To define a new topic, simply click the New Topic link and fill out the empty topic row that
appears. In the list, topics are displayed either in the display mode or in the editable mode. In
the display mode, each topic has an associated Edit link to set it into the editable mode. In the
editable mode, each topic has the associated links Reset (forget changes and reset the topic to
the state it had when the editable mode was last entered for it), Up (move the topic up one step
in the topics list, Down (move the topic down ones step in the topics list) and "Remove"
(remove the topic).
When the topics settings of a list that already has subscribers changes, all current subscribers'
topics selections need to be adjusted. This will occur when the LISTSERV list wizard is
completed. The adjustment may take some time and a progress bar will be displayed as the
system works.
Changing topics on for a list where subscribers are currently very active needs to be
carefully considered so a major disruption does not occur. A better strategy would be to
temporarily close the hosted LISTSERV list for maintenance, (see Summary page) adjust the
topics, and then re-open the list.
When adding new topics to a list that already has subscribers, an additional checkbox option
"Existing subscribers will have the new topics selected automatically" will appear. Check this
option to automatically add all the existing subscribers to the new topics. When left unchecked,
existing subscribers will not be subscribed to the new topics. Subscribers will be able to change
their settings to add or drop the new topics when they wish. This checkbox option applies to all
topics that are added on this page during the same list wizard session. To add several topics,
some of which the current subscribers are automatically subscribed to and some not, the list
wizard has to be engaged twice, once with the box checked for those topics to be added to all
subscribers and once with the box unchecked for those topics that will not be added to all
subscribers.
Figure 56 LISTSERV List Wizard – Topics
Click Next -> to continue.
57
7.3.8 Summary for Moderated Discussion Lists
The "Summary" screen displays all the selections made for the LISTSERV list during its
creation. Use the <- Back button or any of the links in the top bar to revisit any page in the
wizard to make changes. Click Finish to accept the list as it is summarized and return to the
Recipient Dataset Details screen. As long as there are no subscribers, the list settings can be
edited from the Recipient Dataset Details screen by selecting the list and clicking the Actions
link.
Before the list can be used, its access level needs to be set. The list can be set to be accessible
to anyone wishing to subscribe, to be accessible to only list subscribers, or to have no public
access. If a list is accessible to everyone, it will appear on the membership area Web page to
anyone visiting that page. If the list is accessible only to members, the list will not appear in the
membership area to everyone, it will only appear only to those who are subscribed to the list.
This essentially closes the list to those who wish to sign themselves up and leaves adding
subscribers to the LISTSERV Maestro data administrator, while allowing existing subscribers to
manage their own settings. Lists with no public access do not appear in the membership area to
anyone.
58
Figure 57 LISTSERV List Wizard - Summary
Click Finish to save the list and return to the Recipient Dataset Details screen.
Section 8 Organizing Datasets
Datasets that have few lists usually have no special need to organize them in any particular
way. Lists are displayed in alphabetical order by list name, regardless of the type of list, hosted
recipient list or hosted LISTSERV list. Subscribers will be able to see all the lists available to
them on one page and will not have to scroll to find them. Administrators will recognize each list
present in the dataset. Datasets that have many lists, or that want to make a clear distinction
between one set of lists and another, can use categories and sub-categories to organize the
lists.
Categories act like folders and sub-folders. They can be created at any time, either before or
after the creation of hosted lists. Existing lists can be moved into and out of categories by
cutting and pasting. New lists can be created inside existing categories.
To create a new category in a dataset, click the Actions link and then click the Create
Category link. Give the category a name. The name will appear in the left frame and on any
public web pages that subscribers can access. Add a description of the lists that appear in the
category. This description is to assist the data administrator and only appears for internally.
59
To move an existing list into a category, select the list in the left frame. Click the Action link and
then click Cut. The list will appear in the dataset as “grayed out”. The list still exists within
LISTSERV Maestro, and it has not been disabled in any way. It will remain in its current position
in the dataset tree until it is pasted somewhere else. Select the category to move the list into,
and then click the Action link. Click Paste to move the list into the category. To cancel the cut
state and leave the list where it is, click Clear Cut/Copy State from the Action menu.
Figure 58 Dataset Categories
Section 9 Adding and Maintaining Dataset Members and List
Subscribers
Dataset members and list subscribers can be added to a dataset and to lists by the data
administrator. Alternatively, they can add themselves if the dataset (membership area) or any
lists in the dataset are visible to the public on the Web. Anyone joining a membership area using
the web form has the option of subscribing to any available lists there. Subscribing directly to a
list using the list’s web form will automatically add the subscriber to the list’s dataset. More
information on self-subscribing to membership areas and lists is covered in Section 10 Members
Join a Dataset Themselves
Once members belong to a dataset, they can be managed within the dataset by the data
administer. Management can take place at the dataset level and at the list level. The data
administrator can search for members, delete members, change a member’s data, add a single
member, modify multiple members by uploading a file and download all members. Members of
a dataset are managed by selecting the dataset. Subscribers to a list are managed by selecting
the list.
To perform an action on members in a dataset, select the dataset from the “Recipient Datasets
and Lookup Tables” screen. The “Recipient Dataset Details” screen opens. Click the Actions
link in the right corner to open the actions menu.
60
Figure 59 Managing Members of a Dataset
To perform an action on subscribers to a list in the dataset, first select the dataset, and then
select the list. Click the Actions link in the right corner to open the actions menu.
Figure 60 Manage List Subscribers
9.1 Managing Members of a Dataset and List Subscribers
Members of a dataset and list subscribers can be reviewed, their settings changed, and they
can be deleted by clicking the Browse / Edit Confirmed Members link on the actions menu. If
subscribers of a list are deleted from the list, they are not automatically deleted from the
dataset. However, if members are deleted from a dataset, they will be deleted from all lists in
that dataset. The functions and rules for managing dataset members and list subscribers are
almost identical and will both be covered in this section. Pertinent differences will be pointed out
in the text and screen shots.
The “Manage Members of Recipient Dataset” screen displays a listing of all the confirmed
members of a dataset. Confirmed members are those members who have been added to the
dataset by the data administrator or have added themselves from the web form and then
61
confirmed their membership using a special e-mail message sent to them by LISTSERV
Maestro. Unconfirmed members are not displayed here. Unconfirmed members are those who
have joined the membership area or subscribed to a list themselves, but have not yet replied to
the confirmation e-mail message sent to them by the system.
The members of a dataset or list are displayed 15 at a time per page. A navigation system for
paging through members appears when more than 15 members are in a dataset or list. Each
page number is a clickable link and contains the next 15 members or subscribers. A maximum
of ten page links will appear on the screen at a time. Datasets and list with more than ten pages
will use << to denote pages behind the open page, and >> to denote pages ahead of the open
page.
Members and subscribers are sorted alphabetically by e-mail address. Members have their
entire dataset profile displayed on the screen. Subscribers have their dataset profile along with
any list specific fields displayed on the screen. The table header lists the profile field names in
the dataset and list. Each column in the table represents one profile field on the web form. Each
field is filled out with the corresponding value for that profile field and member. Mandatory fields
have all values filled in for members, while optional fields can be blank. Boolean fields will have
a “T” for true and an “F” for false. Datasets with selection menus that allow for multiple
selections will display all selected values separated by a commas. LISTSERV lists that have
topics have all the selected topics displayed.
62
Figure 61 Managing Members of a Dataset
Figure 62 Managing List Subscribers
9.1.1 Editing a Member Profile
Each e-mail address is a clickable link that opens the profile page for that member. Click on the
e-mail address of the member to be edited. Enter the new data in the profile fields then click OK
to save the new data and return to the previous screen. Click Cancel to return to the previous
screen without saving the new data. Click Delete to delete the member from the dataset.
Member profiles will contain only those fields that belong to the dataset. Subscriber profiles will
contain the member profile in the top part of the screen with the values grayed out and the list
specific fields below. It is possible to edit the member profile from the list profile screen by
clicking the Edit link located on the upper right (see Figure 64).
63
Figure 63 Edit Dataset Member
Figure 64 Edit List Subscriber
9.1.2 Filtering Members
Locating members within a large dataset can be easily accomplished by using the filtering
system available on the “Manage Members of a Recipient Dataset” screen. Locating members
within a large list can be accomplished using the filtering system on the “Manage Members of
Host List screen” Filtering works the same way for members and subscribers. A funnel
icon located in the upper left of the recipient data table denotes a row of blank edit boxes at
the top of each column. Use the boxes to enter filtering conditions to narrow the search for
specific members or subscribers. After adding the filtering conditions in the text boxes, click the
64
funnel icon to filter the members. A new set of members will be displayed on the screen. This
set can be filtered again by adding additional conditions in the text boxes and clicking the funnel
again. After filtering, the members can be downloaded by clicking the download icon
located
in the blue header row of the table. The file that is downloaded is in zipped format.
Figure 65 Edit List Subscriber
There are many ways to enter conditions to filter members of a dataset or list subscribers. The
type of profile field determines what types of filtering can take place. Wildcards and operators
can assist with filtering.
•
Text Field Filtering – Fields based on text can be filtered using the following operators
and wildcards:
Text Box Content
Filtering Result
empty
No filtering, all members displayed
GINA
All members with a field value of “GINA”
=GINA
All members with a field value of “GINA”
<GINA>
All members with a field value not equal to “GINA”
<GINA
All members with a field value less than “GINA” (less than in terms of
alphabetical order)
<=GINA
All members with a field value less than or equal to “GINA” (less than
in terms of alphabetical order)
>GINA
Ala members with a field value greater than “GINA” (greater than in
terms of alphabetical order)
>=GINA
All members with a field value greater than or equal to “GINA”
(greater than in terms of alphabetical order)
GINA*
All members with a field value that starts with “GINA”
*GINA
All members with a field value that ends with “GINA”
65
Text Box Content
Filtering Result
*GINA*
All members with a field value with “GINA” in it somewhere
The text “GINA” was used as an example in this table. Any text string can be filtered using these
rules.
•
Number Field Filtering – Fields that are based on numbers can be filtered using the
following operators and wildcards:
Text Box Content
Filtering Result
empty
No filtering, all members displayed
23
All members with a field value of “23”
=23
All members with a field value of “23”
<23>
All members with a field value not equal to “23”
<23
All members with a field value less than “23”
<=23
All members with a field value less than or equal to “23”
>23
Ala members with a field value greater than “23”
>=23
All members with a field value greater than or equal to “23”
23*
All members with a field value that starts with “23”
*23
All members with a field value that ends with “23”
*23*
All members with a field value with “23” in it somewhere
The number “23” was used as an example in this table. Any number can be filtered using these
rules.
66
•
Boolean Fields – Fields that are based on Boolean logic display a drop-down menu
with the choice of three filters:
Filter Choice
Filtering Result
ignore
No filtering, all members displayed
True
All members with a field value of “T” for true
False
All members with a field value of “F” for false
•
Single Select Fields – Fields that are based on single selection menus can be filtered
using the same rules for filtering text (see above).
•
Multiple Select Field Filtering – Fields based on multiple selection menus cannot be
filtered.
•
Topics Field Filtering – LISTSERV lists that contain topics cannot be filtered using the
special topics field that is displayed when browsing the list members.
9.2 Adding a Single Member
The data administrator can add members to a dataset or subscribers to a list one at a time. This
is the fastest way to add someone directly to a specific dataset or list. It is important to have the
necessary data for each addition. To add a single member to a dataset:
1. Select the dataset
2. Click the Add Single Member link from the actions menu
3. Fill in all the fields marked with an asterisk “*”
4. Optionally, fill in any other fields
5. Click OK
The member will be added to the dataset. Members added to a dataset are not automatically
added to any lists in that dataset set. To add or change information at the dataset level, use the
Browse / Edit Confirmed Members link in the actions menu.
To add a single subscriber to a list:
1. Select the list
2. Click the Add Single Subscriber link from the actions menu
3. Enter the e-mail address of the new subscriber in the edit box
4. Click OK
6. If the address is not already a member of the dataset, fill in all the mandatory fields for the
dataset and the mandatory fields for the list. If the e-mail address already is a member of the
dataset, the dataset fields will already be filled in and their values will appear in gray. Fill in
the list specific fields.
7. Optionally, fill in any other list fields.
67
8. Click OK
New list subscribers that are not dataset members are automatically added to the dataset when
they are subscribed to any list in that dataset. To add or change information at the dataset level,
use the Browse / Edit Confirmed Members link in the actions menu. To add or change
information on the list level, use the Browse / Edit Confirmed Subscribers link in the actions
menu.
9.3 Modifying Members by Upload
Any existing dataset or list can have its current membership modified by the data administrator
uploading a file in to the system. This is the easiest way to add many members to a dataset or
subscribers to a list as well as update data for numerous members and subscribers. As with
other management tasks, the steps for uploading a file to change data for a dataset and to
change data for a list follow very similar procedures.
9.3.1 The Upload Wizard
LISTSERV Maestro uses a wizard to assist the data administrator with modifying the data in an
existing dataset or list. The wizard is comprised of seven pages that go through the process of
modifying the data of an existing dataset or list step by step. Depending on the choices made on
some wizard pages, other pages may become disabled or appear in different versions. If a
wizard page is disabled, it is not necessary with the current selections and can safely be
ignored.
Files uploaded to the system must be in .TXT or .CSV format, one record per line. The
columns of data in the file do not have to be in the same order as they appear in the dataset or
list. A header row is not required, but if the file has a header row, the header names do not have
to be the same as the field names in the dataset or list. The upload wizard will assist with
parsing the data and matching header and field names. For more information on text formatted
files, see Appendix B About Comma Separated Files
To modify the current members of a dataset select the dataset, then click Modify Members by
Upload from the actions menu. To modify subscribers of a list, select the list and then click
Modify Members by Upload from the actions menu.
9.3.1.1 Type
The first screen of the upload wizard is “Type”. The existing data can be modified five different
ways. Select the option button next to the type of modification to be performed. Available types
for datasets are:
•
Add to Dataset – Adds new members to the dataset. All existing members are left
unchanged.
•
Update in Dataset – Updates the existing members with the values fond in the file.
Does not add any new members to the dataset.
•
Synchronize with Dataset – This is a combination of the "add" and "update" functions.
Adds any new members found in the file and updates values for existing members found
in the file.
•
Full Synchronize with Dataset – The dataset in the file will become the exact data in
the dataset. Adds any new members found in the file and updates values for existing
68
members found in the file. Any existing members not included in the file will be deleted
from the dataset as well as and from any lists they are subscribed to.
•
Remove from dataset – Removes members listed in the file from the dataset as well as
from any lists they are subscribed to. The file has only to contain the e-mail addresses of
those members to be deleted; all other columns are ignored.
When modifying subscribers for a list, the values for the dataset are included. The available
modifications for lists are:
•
Add to List – Adds new subscribers to the list. All existing subscribers are left
unchanged.
•
Update in List – Updates the existing subscribers with the values found in the file.
Does not add any new subscribers to the list.
•
Synchronize with List – This is a combination of the "add" and "update" functions.
Adds any new subscribers found in the file and updates values for existing subscribers
found in the file.
•
Full Synchronize with List – The list data in the file will become the exact data in the
list. Adds any new subscribers found in the file and updates values for existing
subscribers found in the file. Any existing subscribers not included in the file will be
deleted from the lists. Subscribers removed from the list will not be removed from the
dataset.
•
Remove from List – Removes subscribers listed in the file from the list. The file has
only to contain the e-mail addresses of those members to be deleted; all other columns
are ignored.
69
Figure 65 Upload Wizard -Type
Click Next -> to continue.
9.3.1.2 Type Details
The next screen in the wizard is called “Type Details”. Type Details defines the details for the
selected modification type. This screen may not be available for all modification types. For
modifying datasets the following details are available:
Modification Type
Type Details Available
Add to Dataset
No Details Available.
Update in Dataset
Overwrite Manual Changes: If members have changed their
settings since the last upload modification, will their changes be
overwritten?
Yes, overwrite manual changes with uploaded values.
No, keep values of manually changed members.
70
Modification Type
Type Details Available
Synchronize with Dataset
Overwrite Manual Changes: If members have changed their
settings since the last upload modification, will their changes be
overwritten?
(select the desired option button)
Yes, overwrite manual changes with uploaded values.
No, keep values of manually changed members.
Full Synchronize with Dataset
(select the desired option button)
Overwrite Manual Changes: If members have changed their
settings since the last upload modification, will their changes be
overwritten?
Yes, overwrite manual changes with uploaded values.
No, keep values of manually changed members.
Remove from Dataset
No Details Available.
For modifying lists the following details are available:
Modification Type
Type Details Available
Add to List
If the new subscriber is not yet part of the dataset:
(select the desired option button)
Add as new dataset member – Adds the subscriber to the dataset
and the list
Ignore subscriber row – Skips the row in the data file and does not
add the subscriber to the dataset or the list.
Update in List
The Update may be applied to:
(select the desired option button
for each of the two sets of
alternatives)
List and dataset values – All changes to both the dataset and the
list will be accepted.
List values only – Changes in the list will be accepted and any
changes to the dataset will be ignored.
Overwrite Manual Changes: If subscribers have changed their
settings since the last upload modification, will their changes be
overwritten?
Yes, overwrite manual changes with uploaded values.
No, keep values of manually changed subscribers.
71
Modification Type
Type Details Available
Synchronize with List
If the new subscriber is not yet part of the dataset:
(select the desired option button
for each of the three sets of
alternatives)
Add as new dataset member – Adds the subscriber to the dataset
and the list
Ignore subscriber row – Skips the row in the data file and does not
add the subscriber to the dataset or the list.
The Update may be applied to:
List and dataset values – All changes to both the dataset and the
list will be accepted.
List values only – Changes in the list will be accepted and any
changes to the dataset will be ignored.
Overwrite Manual Changes: If subscribers have changed their
settings since the last upload modification, will their changes be
overwritten?
Yes, overwrite manual changes with uploaded values.
No, keep values of manually changed subscribers.
Full Synchronize with List
If the new subscriber is not yet part of the dataset:
(select the desired option button
for each of the three sets of
alternatives)
Add as new dataset member – Adds the subscriber to the dataset
and the list
Ignore subscriber row – Skips the row in the data file and does not
add the subscriber to the dataset or the list.
The Update may be applied to:
List and dataset values – All changes to both the dataset and the
list will be accepted.
List values only – Changes in the list will be accepted and any
changes to the dataset will be ignored.
Overwrite Manual Changes: If subscribers have changed their
settings since the last upload modification, will their changes be
overwritten?
Yes, overwrite manual changes with uploaded values.
No, keep values of manually changed subscribers.
Remove from List
No Details Available
After the type details are selected, click Next -> to continue.
72
9.3.1.3 Source
The third screen in the upload wizard is “Source”, and it is used to determine where the
uploaded text file originates. The file uploaded to the system must be encoded with the same
character set (charset) that has been defined for the dataset being modified. For more
information about character sets, see Appendix C E-mail and International Character Sets.
Browser for the file on a local drive and then click Upload. If a file has already been uploaded to
the system, a link to upload a different file appears.
Figure 66 Upload Wizard - Source for Datasets
Figure 67 Upload Wizard - Source for Lists
Click Next -> to continue.
73
9.3.1.4 Parse Details
The next screen in the wizard is called “Parse Details”. When a text file is uploaded, LISTSERV
Maestro will try to determine how the columns of data are separated, and how each column or
field of data is labeled (header). In order to modify a dataset or list, LISTSERV Maestro must
correctly interpret which column contains the e-mail address of the recipient. Other fields may
be included and will appear in the "Preview" table located on the lower half of the screen.
Figure 68 Upload Wizard - Parse Details for Dataset
Click the Next -> button to continue if the parsing is accurate with each column of data is
separated correctly and labeled with a header row. Note: In the interest of keeping this
document shorter, a screen shot of Parse Details for a list is not included.
If LISTSERV Maestro has not interpreted the data correctly, or an unconventional delimiter
and/or quote character has been used, click on the link Specify details manually to configure
the data manually.
Use the Specify details manually link when the delimiter (separator character) or the quote
character is used in some of the data fields. For example, if the USERNAME field contained Tom
“the cool cat” Jones as an entry, and double quotes happened to be the quote character
for the file, the details would have to be specified manually. The same would be true if a field
74
named LOCATION contained the entry Atlanta, GA where the comma was the separator
character.
Figure 69 Upload Wizard - Parse Manually
Note: In the interest of keeping this document shorter, a screen shot of Parse Details for a list is
not included.
LISTSERV Maestro has four selections for choosing separator characters:
•
Tab (\t)
•
Comma (,)
•
Semicolon (;)
•
Other – if this is chosen, type the character into the adjacent box.
75
Columns can be defined as “not enclosed by a quote character” or select the quote character
from three choices:
•
Double Quotes (“)
•
Apostrophe (‘)
•
Other – if this is chosen, type the character into the adjacent box.
After separator and quote characters have been entered, and any encoding change made, click
Refresh Preview to have LISTSERV Maestro attempt to parse the file again with the new
settings. The new columns will then be displayed. If the columns are now separated correctly,
proceed. If the columns are not correct, repeat the process and click Refresh Preview to see
the new changes. Click the Next -> button to continue if the parsing is accurate with each
column of data is separated correctly and labeled with a header row.
Headers are specially defined rows in database tables. Headers are used by database tables to
label the columns of data so that the system and the user can correctly identify the columns. An
uploaded text file may contain headers or not. If the file does not contain headers, select the
option button “No, the file does not contain a header row” and the system will automatically add
a header row. Each column of data in the header row will have a generic name using the pattern
COL1, COL2, COL3, and so on. If the uploaded file does have a header row, select the option
button “Yes, the first row in the file containers headers” and the headers within the file will be
used. Click the Next -> button to continue if the parsing is accurate with each column of data is
separated correctly and labeled with a header row.
9.3.1.5 Map Fields
The next screen in the upload wizard is “Map Fields”. If the header names for the columns of
data do not match the names of the fields in the dataset or list, they can be “mapped” to the
correct fields. All mandatory fields must be mapped to a unique column in the uploaded file.
Boolean fields in this context are considered mandatory. Optional fields can be mapped, but it is
not necessary for a successful upload. Any “extra” fields that may be contained in the file (fields
that are not listed in the dataset or list) will be ignored by the system. This way, data to be used
to modify datasets and lists does not need to match the format of the dataset or list exactly, but
can contain other fields and different header names.
If the uploaded file contains headers, LISTSERV Maestro will attempt to map the fields to the
column names. Fields that are mapped successfully appear with a green checkmark icon next
to them. Fields that cannot be mapped automatically appear with a yellow arrows icon, and
fields that are mapped to more than one column have a red null icon.
To map a column from a file to a list or dataset field, use the drop-down menu under the header
to locate the correct field and select it. Optional fields can be mapped, or they can be ignored by
selecting <ignore> from the drop-down menu.
76
Figure 70 Upload Wizard - Map Fields
Note: In the interest of keeping this document shorter, a screen shot of Map Fields for a list is
not included. Once all the mandatory fields are correctly mapped, it will be possible to proceed
by clicking the Next -> button.
9.3.1.6 Mapping Details
The “Mapping Details” screen is only available when there are Boolean fields and/or multiple
selection fields in the dataset or list that need to be interpreted by LISTSERV Maestro. If there
are both Boolean fields and multiple selection fields, the Mapping Details screen will appear with
two tabs, one representing each type of field. When each portion of the tabbed page is mapped,
a green checkmark will appear on that tab.
When Boolean fields are present in a dataset or list, LISTSERV Maestro needs to know what
value equates to “true” and what value equates to “false” for each field. These values do not
have to be the same for all fields in the dataset or list. Each Boolean field can have its own true
and false values. For example, one field might have the digit “1” represent true and the digit “0”
represent false, and another field might have the letter “Y” represent true and the letter “N”
represent false. Once the true and false values have been defined, they can be used to tell the
system how to use the values to register a true or false for the file.
A “true” value can be registered by selecting one of the options:
•
True is every value that is equal to the value entered in the edit box
•
True is every value not equal to the False value in the edit box
A “false” value can be registered by selecting one of the options:
•
False is every value that is equal to the value entered in the edit box
•
False is every value not equal to the True value in the edit box
77
Three valid combinations of these options are possible:
•
A value representing “true” is specified and a value representing “false” is specified. This
combination will assign the corresponding Boolean values to all rows that have the
specific true and false values. Any rows that do not have the specified true and false
values will be skipped as invalid and can be downloaded from the “Results Statistics”
screen after the upload is completed.
•
A value representing “true” is specified and the “false” is every value that is not equal to
the true value. This combination will assign the true value to those rows that have the
specified value, and assign false to all other rows.
•
A value representing “false” is specified and “true” is every value that is not equal to the
false value. This combination will assign the true value to all those rows that do not have
the false value, and false to all the rows that have the specified false value.
In the second step of Boolean field mapping, select which filed to apply the values to by clicking
the name of the field. If there are multiple Boolean fields that will use the same definitions, click
the link apply to all fields.
Figure 71 Upload Wizard - Mapping Details for Boolean Fields
78
Note: In the interest of keeping this document shorter, a screen shot of Mapping Details for a
dataset is not included.
If there are multiple selection list fields in the dataset or list, LISTSERV Maestro needs to know
how multiple entries are separated (what the separator character is - see Section 9.3.1.4 Parse
Details for more information on separator characters). If the separator character is used in one
or more of the list entries, those entries need to be surrounded by a quote character that
LISTSERV Maestro needs to be aware of as well (see Section 9.3.1.4 Parse Details for more
information on quote characters).
Figure 72 Upload Wizard - Mapping Details for Multiple Selection Lists
Note: In the interest of keeping this document shorter, a screen shot of Mapping Details for a
dataset is not included. Click Next -> to continue if there are no other tabs to set mapping
details for, or if each tab has a green checkmark.
9.3.1.7 Launch Upload
The last screen in the upload wizard, “Launch Upload” summarizes the options for the upload.
Use the <- Back button to return to the previous screen, or any of the links in the navigation bar
to return to a previous screen to change selections. Click the Launch button to upload the file
and modify the dataset or list. An “Operations in Progress” bar will display until the upload and
modification are completed. Results of the modification will be displayed. Download any
unprocessed rows by using the download links.
79
Figure 73 Upload Wizard - Upload Results Statistics
Click OK to accept all modifications and return to the Recipient Dataset Details screen.
Section 10 Members Join a Dataset Themselves
Although data administrators can add members to a dataset and subscribers to a list, allowing
people to sign themselves up to receive the e-mail they want is the best way to grow an internal
mailing list. One of the best practices an organization can undertake to ensure their messages
are received, opened, and reacted to by those who wish to participate is building a strong
authentic subscriber base. Allowing people to join a dataset, subscribe to the lists they want,
and manage their own settings can save the data administrator time and create goodwill
between an organization and its membership.
LISTSERV Maestro provides several different levels of access for dataset members and list
subscribers so that the data administrator can control how members and subscribers are added
and removed from the system. Access to datasets and lists are set on the Summary screen of
each definition wizard (dataset and list).
For datasets, the access levels pertain to the availability of the membership area on the Web.
The membership area contains a form to join for non-members, login for current members, and
once logged in, a membership profile settings page (made up of the values of the fields in the
dataset and their password) and subscription settings. There are three levels of access to
membership areas:
•
Open to everyone – The membership area is open to anyone who can access the URL
from the Web. Anyone can join, login, and manage profile and subscription settings.
Passwords are created by individuals joining the membership area. Membership is not
confirmed until new members respond to a confirmation e-mail message sent by the
system to the address used in the sign up form. This level of access requires the lowest
level of interaction from the data administrator and the highest level of interaction from
members.
•
Access for members only – The data administrator must add members to the dataset.
Membership is automatically confirmed without the need for a confirmation e-mail.
80
Passwords are not assigned by the data administrator, but generated by LISTSERV
Maestro. Members must request a password before they can login to manage their
settings. Once added and with a valid password, these members have access to the
membership area. This level of access requires a moderate level of interaction from the
data administrator and a moderate level of interaction from members.
•
No public access – The membership area is closed to everyone. Members cannot join,
manage their profiles, or leave. This level of access requires the highest level of
interaction from the data administrator and the lowest level of interaction from members.
Members wishing to be removed from a dataset will need to contact the data
administrator and request removal.
Access levels can be changed at any time, but care needs to be exercised if access levels are
suddenly going from being open to being restricted.
10.1 Joining a Membership Area (Dataset)
When people want to subscribe to a list, they can join the membership area that contains the list
using the web form created by LISTSERV Maestro when the dataset was created. By filling out
this form, they automatically become members of the dataset that contains the list. They will be
able to log into the membership area and subscribe to lists, but they will not receive any list mail
until they confirm their membership by replying to an automatically generated e-mail message
that was sent to the address they used when subscribing. Members usually have 48 hours to
confirm a membership. They can also request another confirmation message be sent to them if
they deleted the original one.
Joining a dataset using the membership form is a two step process. The first step is to enter an
e-mail address and password. The second step involves filling out the profile fields in the form.
Mandatory fields must be filled out in order to join successfully. Optional fields can be left blank.
Figure 74 Joining a Membership Area
Once the form is filled out and sent, a perspective member will be sent to the membership area
where profile data can be changed and lists can be subscribed to, but no mail will be sent to the
address until the member has confirmed their membership.
81
Figure 75 Membership Area for an Unconfirmed Member
LISTSERV Maestro will send a confirmation e-mail message to the address used in the
membership form. A link in the message must be clicked in order for the membership to be
confirmed. A “Confirmation Accepted” message will appear once the link is accessed. From
here, a new confirmed member can go to the logon page.
Figure 76 Confirmed Membership Message
A confirmed member’s login page will appear without the “Confirmation Required!” warning.
Members can subscribe and unsubscribe to any mailing lists that appear on the “My Lists” tab.
Members can edit their profiles, change their passwords, and unregister from the “My Profile”
tab. Unregistering from a membership area removes the member from the dataset and
unsubscribes them from all lists in that dataset.
82
Figure 77 Membership Area for Confirmed Member
10.2 Subscribing to a List
There are two different ways that people can self-subscribe to a list. They can join a
membership area as described in Section 10.1 Joining a Membership Area (Dataset) and
subscribe to the lists displayed there, or they can subscribe to a list directly if the data
administrator has made the list subscription link accessible to anyone.
10.2.1 Subscribing from the Membership Area
Once a member, anyone can subscribe themselves to any visible lists from the My Lists tab.
Any lists that a member is not subscribed to has a Subscribe link in the “Action” column. By
clicking this link and filling out any mandatory list specific fields, a member becomes subscribed
to the list. Once a member is subscribed to a list, two new links become available in the Action
column, Edit Profile and Unsubscribe. The edit profile link will open any list specific profile
fields that can then be changed and saved. The unsubscribe link removes the member from the
mailing list, but does not remove the member from the membership area (dataset).
10.2.2 Subscribing from a List URL
Each list has its own web subscription form. If this form is made accessible to everyone,
subscribers can fill out the form and subscribe to a list. There are two steps to this process. The
first step requires a valid e-mail address and a password. LISTSERV Maestro checks to see if
the e-mail address is already a member of the list’s dataset. If so, the dataset’s profile fields will
be automatically filled in, leaving only the list specific fields (if any) to be filled in by the
subscriber. If the subscriber is not a member of the dataset, the mandatory dataset fields will
have to be filled in along with any mandatory list specific fields.
83
Figure 78 Subscribing from a List URL
10.3 Sending Mail to Hosted Lists
Sending mail to a hosted list can be accomplished once the list is complete and subscribers are
added. The method for sending mail can be different, depending on the type of hosted list. For
hosted LISTSERV lists, regular users that have permission can send mail directly to any hosted
LISTSERV list by selecting “Send to an Existing LISTSERV List” using the recipients definition
wizard when defining the recipients for a mail job. If regular users do not have the right to use
that recipient definition, the data administrator will have to create a target group based on the
hosted LISTSERV list. See Section 14 Classic LISTSERV List Target Groups for instructions.
Regular users need a target group to be able to send mail to hosted recipients lists. Whenever a
hosted recipient list is created and at least one subscriber is added, LISTSERV Maestro
automatically creates a corresponding target group that encompasses all the current
subscribers of that list. This target group is placed within a special target group category called
"<Hosted Recipients Lists Target Group>". The data administrator must enable this target group
for use before any mail can be sent to the hosted recipient list. See Section 13 Hosted Recipient
List Target Groups for instructions.
Section 11 Subscriber Access URLs and Customization
One of the final steps in the process of setting up a Recipient Warehouse to collect, organize,
and manage recipient data and e-mail lists, is providing people with access to the membership
and list subscription areas. LISTSERV Maestro automatically generates URLs to all of the public
pages of a dataset as each dataset and the lists within it are created. These URLs can then be
copied onto a web site or sent in an e-mail message in order to invite members and subscribers
84
to join. Subscriber access URLs can be found by clicking the Subscriber Access URLs link
found on the Actions menu of the Recipients Dataset Details screen. Each dataset will contain:
•
Login: – This URL will bring existing members to their membership page when they
enter their e-mail address and password. Members that have been added by the data
administrator but do not have a password can enter their e-mail address and request a
password. Members that have forgotten their password can request a new one. There is
also a link that brings people who are not members to the join membership area page.
•
Join Membership Area: – This URL brings a perspective member to the sign up page
for the membership area (dataset). See Figure 74.
•
Subscribe List [list name]: – This URLs brings a perspective subscriber to the list’s
subscription page. See Figure 78. Every list in the dataset will have its own subscription
URL.
Figure 79 Subscriber Access URLs
Click on each of the subscriber access URLs to view what the public pages look like. After
seeing what the public sees, it may be necessary to go back and edit the dataset fields or list
fields.
11.1 Customizing the Web Form
LISTSERV Maestro subscriber access URLs can be customized to fit the scheme of any
organization’s web site. By matching the fonts, colors, and imagery of subscriber pages to an
organization’s web presence, a unified theme can be created, ensuring brand recognition and
maintaining subscriber confidence and trust. The fonts, colors and images of the public pages in
85
each LISTSERV Maestro dataset are set with a template that contains style information. A new
template can be exchanged with the default template in each dataset so that different
membership areas can have their own look and feel.
To upload a new template, select the dataset and click Subscriber Access Template from the
Actions menu. The “Upload Access Pages Template” screen opens. This page displays a
sample of the layout and styles used in the default template as a subscriber would see them.
Use this screen as a guide for changing the styles in a custom template.
Figure 80 Default Subscriber Access Template
86
11.2 Creating a Custom Template
Custom templates for the public pages of LISTSERV Maestro are based on a standard HTML
page. Create a new HTML document in an HTML editor or text editor. The HTML page must be
fully defined, including the <HTML>, <HEAD>, and <BODY> tags. The page itself may include any
desired HTML code, including a header, footer, and sidebar. Style information is normally
included in the head section of the HTML page.
The LISTSERV Maestro functionality of the public pages is represented in the HTML document
by adding the placeholder #CONTENT# within the HTML page in the exact place where the
individual subscriber content will be displayed. This placeholder must be included in a template
page in order to have the custom template accepted by the system.
The default template can be restored to a dataset at any time by clicking the Default Template
link. A custom template can be downloaded by clicking the Current Template link.
Figure 81 shows an example of a simple custom template layout. The HTML code for a simple
subscriber access pages template includes a page title "My Subscriber Pages" as well as a
common header, footer, and a sidebar: The layout of the page is defined with the help of a
HTML table with three rows. The first row contains the common header in a single column. The
second row contains two columns. The left column is the sidebar with a width of 100 pixels. The
right column contains the actual page content, so this is the location of the #CONTENT#
placeholder. Finally, the third row contains the common footer in a single column.
Figure 81 Sample Custom Template
<html>
<head>
<title>My Subscriber Pages</title>
See Appendix D for style
<style>
information
... style information would go here ...
</style>
</head>
<body>
<table border="0">
<tr>
<td colspan="2">This is my common header for all subscriber pages</td>
</tr>
The LISTSERV Maestro
<tr>
<td width="100">Sidebar</td>
subscriber content placeholder
<td>#CONTENT#</td>
</tr>
must be included in the template
<tr>
<td colspan="2">This is my common footer for all subscriber pages</td>
</tr>
</table>
</body>
</html>
Using CSS styles (Cascading Style Sheet) to customize the look of page content can ensure
that whatever styles are being used in other web pages can be used within LISTSERV Maestro
too. The HTML code that LISTSERV Maestro uses to generate the #CONTENT# portion of the
page employs some commonly used HTML tags as well as some custom style classes, the look
of which can be defined with by creating a custom style sheet, or matching an existing one.
87
Appendix D contains all the HTML tags and custom styles used by LISTSERV Maestro. A
sample style sheet used by the default template is also included.
Section 12 Introduction to Recipient Target Groups
The data administrator account can simplify and streamline the use of data sources, including
databases, uploaded text files, and e-mail lists, to select recipients and recipient data to the
point where regular account holders do not need to know anything about how and where data is
stored. To do this, the data administrator creates predefined recipients lists, complete with a
name and description called “Recipient Target Groups.”
Regular account holders can use these target groups to select the recipients for their jobs. The
data administrator builds the recipient target groups by writing SQL statements to retrieve data
from a database, a data source such as a spreadsheet, or in the case of hosted recipient data,
building a query using the LISTSERV Maestro interface. The data administrator also designs
the methods regular users employ to select the data (in a series of check boxes, drop-down
menus and/or text boxes).
There are many advantages to using recipient target groups.
•
Using recipient data stored in a database can save time and system resources.
•
The database can be continually updated until the time the job is sent, ensuring that the
most current data is used for the job.
•
Recipient target groups are shared among group members and can be reused for
multiple jobs.
•
Parameters can be inserted into recipient target groups so that regular account holders
have some control over what recipients are retrieved for each job. Using parameters
reduces the number of individual queries that need to be written for jobs.
•
The data administrator does not need to be involved with any other parts of e-mail jobs.
•
Specific recipient target groups can be removed from use without deleting them. They
can be reinstated whenever desired.
•
Recipient target groups can be organized into categories for easy recognition.
12.1 Creating Recipient Target Groups
To create recipient target groups, the data administrator must first log into his/her account.
Recipient target groups are created and saved under the Recipient Warehouse icon in the
Maestro User Interface. Click on the icon Recipient Warehouse icon to open “Administer the
recipient warehouse.” Click on Recipient Target Groups to open the “Recipient Target Groups”
screen. This screen lists all defined target groups (if any) and provides a wizard to create new
target groups.
88
Figure 82 Recipient Target Groups
The Recipient Target Groups screen shows the list of target groups in the selected category.
Choose the category to view from the "Category" drop-down menu. The table below will then be
refreshed to show all target groups in that category.
Target groups not assigned to a specific category will be displayed under “<No Category>” in
the drop-down menu. Target groups automatically created by the system for hosted lists will be
displayed under “<Hosted Lists Default Target Groups>”. Each target group is displayed with
the following information:
•
Name – The name of the target group. The name is a clickable link used to open the
target group for editing in the target group wizard for all target groups except those listed
under “<Hosted Lists Default Target Groups>”. In order to edit target groups for hosted
lists, they first must be copied (see below).
•
Copy – Use the Copy link to create a new target group as a copy of the selected one.
The name of a copied target group will be listed alphabetically as "Copy of 'original
name'". This name can be changed when editing the target group. When a hosted list
default target group is copied, the copy is placed in the <No Category> category by
default. The category may be changed by engaging the target group wizard.
•
Delete – Click the Delete link to delete the selected target group.
•
Target Group Based On – Displays the type of the data the target group is based on.
Currently five types are supported:
°
Hosted Recipient List
°
Classic LISTSERV List
°
Uploaded Text File
°
Database accessed by LISTSERV Maestro
89
°
Database accessed by LISTSERV (see Section Selecting the Type of Target Group
for more details).
•
Description – The description of the target group. It is important to create an accurate
description of the type of data being retrieved so that regular users will be able to select
an appropriate target group for their e-mail jobs.
•
Status – The current status of the target group:
°
Incomplete – This target group has not yet been completed. It may be partially
defined and remain in this state while the target group administrator is still editing it.
°
Complete – This target group has been completed, but the target group has not
been enabled for use. A target group in this state has been completed by the data
administrator, or automatically created by the system for hosted lists, but is not open
for users to select it for recipient definition.
°
Enabled – This target group has been completed and has been enabled for use in
the recipients wizard. A target group in this state is complete and has been enabled
for use as a recipient definition.
Below the list that displays the target groups in the selected category are links to manipulate the
category itself:
•
Delete Category – Allows the currently selected category to be deleted. Only available if
the current category is empty. Not available for "<No Category>" or “<Hosted Lists
Default Target Groups>”.
•
Rename Category – Allows the name of the currently selected category to be changed.
Not available for "<No Category>" or “<Hosted Lists Default Target Groups>”.
12.2 Selecting the Type of Target Group
To create a new target group, scroll to the bottom of the screen and find the drop-down menu
that says “Create a new target group with recipients based on:” Select one of the five ways to
create a new target group, and then click the Create button. A target group wizard will initiate
the process of creating the new target group. Wizard pages will appear different for the different
types of target groups. Each target group type is described below:
•
Hosted Recipient List – This target group is based on a hosted recipient list. The target
group wizard will display all the datasets and their respective hosted recipient lists. Once
a list is selected, the wizard will allow for conditions and parameters to be set in order to
segment the list.
•
Classic LISTSERV List – This target group is based on the recipients type “Send to an
Existing LISTSERV List” as available in the recipients wizard during recipients definition
of a job. For more information on this part of the recipients wizard, see Section 4.2.Send
to an Existing LISTSERV List in the LISTSERV Maestro User's Manual.
When this target group is selected, the target group wizard will display all available
LISTSERV lists on the server where LISTSERV Maestro is installed. Select a list from
the drop-down menu, and then select the type of LISTSERV message to send, standard
or mail merge.
•
Uploaded Text File – This target group is based on the recipients type “Upload a
Recipients Text File” as available in the recipients wizard during recipients definition of a
90
job. For more information on this part of the recipients wizard, see Section 4.5.Upload a
Recipient’s Text File in the LISTSERV Maestro User's Manual.
The file can be uploaded into the system while the wizard is engaged, storing the
recipients at that time, or a server file can be uploaded just before the job is delivered.
•
Database accessed by LISTSERV Maestro – This target group type is based on the
recipients type "Select Recipients from a Database", as available in the recipients wizard
during recipients definition of a job. For more information on this part of the recipients
wizard, see Section 4.6 Selecting Recipients From a Database in the LISTSERV
Maestro User's Manual.
When this target group type is selected, the target group wizard will require that a database
connection, a SQL statement, merge column headers, and duplicate elimination be entered, the
same way as when using the underlying recipients type in the recipients wizard. Optionally, the
SQL statement may be parameterized. Using parameters in the SQL statement allows the user
to define variables in the recipient wizard when this target group is used for a recipient
definition. For more information on using parameters, see Section 18 Defining Parameters.
•
Database accessed by LISTSERV – This target group type is based on the recipients
type "Let LISTSERV Select Recipients From a Database", as available in the recipients
wizard during recipients definition of a job. For more information on this part of the
recipients wizard, see Section 4.7 Letting LISTSERV Select Recipients From a
Database in the LISTSERV Maestro 2.0 User's Manual.
When this target group type is selected, the target group wizard will require that a database
name, a SQL statement, and merge column headers be entered, the same way as when using
the underlying recipients type in the recipients wizard. Optionally, the SQL statement may be
parameterized. Using parameters in the SQL statement allows the user to define variables in
the recipient wizard when this target group is used for a recipient definition. For more
information on using parameters see Section 16.3 Section 18 Defining Parameters.
The option selected here will determine the way the recipient target group wizard will look and
what kinds of information will be needed to complete the wizard.
12.3 The Recipient Target Group Wizard
The target group wizard takes the data administrator through all the steps necessary to define
the settings of the target group. The top row of the wizard displays links to each of the screens
necessary to complete the wizard. The open screen is marked with a highlighted background.
Depending on the choices made on some of the wizard screens, other screens may become
disabled or be displayed differently. If a wizard screen is disabled, it means that the screen is
not necessary with the current selections and can be safely ignored.
When the wizard is entered for the first time for a newly created target group, it is necessary to
click Finish or Save & Exit in the wizard to create the target group. Exiting the wizard by
clicking Cancel, clicking any of the navigational icons, or by closing the browser, will not create
a new target group.
If the wizard is exited by clicking Cancel, clicking navigational icons, or closing the browser for
an existing target group, the target group will still exist, but all changes made since the last save
will not be applied.
91
The Finish button is only available on the “Summary” screen of the wizard. The Summary
screen only becomes available if the entire wizard is completed. If the wizard is closed by
clicking Finish, then the target group will exist in the "Complete" or in the "Enabled" state,
depending on whether the "Yes, allow the definition of recipients based on this target group"
checkbox on the summary screen was selected or not.
The Save & Exit button is available on every screen. Clicking this button saves the current state
of the wizard, allowing the data administrator to re-enter the wizard and complete the definition.
This will put the target group in any of the three states "Incomplete", "Complete" or "Enabled,”
depending on whether all screens in the wizard were completed, and if "Yes allow the definition
of recipients based on this target group " checkbox on the summary screen was selected or not.
A completed target group may be enabled at any time by entering the target group wizard, and
going directly to the Summary screen (click on the Summary link in the menu bar). On the
Summary screen, check the box "Yes, allow the definition of recipients based on this target
group"
Section 13 Hosted Recipient List Target Groups
Recipients for this type of target group are derived from lists that have their recipients stored
(hosted) in LISTSERV Maestro. Once any type of list is created from a dataset, a default target
group is automatically generated by the system. This default target group contains all of the list
subscribers. These target groups are located in a special category named “<Host Lists Default
Target Groups>”. They are named using the phrase “Hosted Recipient List“ followed by the
name of list.
Although the target group is automatically created, it must be enabled in order for it to be used
in the recipient definition of a mail job. Click the Enable link in the upper right corner to allow the
target group to be used.
Unlike other types of target groups, the name of a hosted list default target group is not a
clickable link that engages the target group definition wizard. In order to manipulate an
automatically generated target group, click the Copy link in the upper right corner to make a
copy. The copy acts like a regular target group, with a clickable name that will access the
wizard. Target groups based on hosted recipient lists can also be created from scratch by using
the definition wizard as described below.
It can be faster to make a copy of an existing target group and edit it than create a new
one from scratch.
13.1 General
General characteristics of the target group are comprised of a name, a category and a
description. This information will be used by regular users to locate and identify the target
groups they want to use for jobs. Both name and description are mandatory. Enter a meaningful
name and a good description so the regular users who are selecting target groups in the
recipients wizard will have all the information they need to decide which target group to use.
Target groups can be clustered in categories, making it easier for regular users to select a
target group. A category is meant to contain target groups that are related to each other. The
intent of categories is to minimize the time needed to locate a specific target group. By selecting
92
a category first, users do not need to browse through all the available target groups, but only
those in the relevant category.
To add a target group to a category, select the category for the target group from the drop-down
menu. To create a new category, click the New Category link and define a new category by
entering its name into the edit field. Target group categories are optional. If no category is
selected or created, target groups are placed into "<No Category>."
Figure 83 Target Group Wizard - General
Click Next -> to continue.
13.2 Source
The “Source” screen displays all the datasets in the Recipient Warehouse. Select the dataset
and the list to retrieve the recipients from. To open a dataset, click on the plus sign “+”. If there
are categories within the dataset, click on the plus sign to expand the category to see the
available lists.
93
Figure 84 Target Group Wizard Source for Hosted Lists
Click Next -> to continue.
13.3 Source Details
The “Source Details” screen can be used to segment the list’s subscribers by setting conditions
to pull certain recipients from the list. Conditions are based on the fields of data in the dataset
and operators that select specific recipients based on what data is in their fields. Multiple fields
of data can be used along with combined operators to fine tune which messages are sent to
specific sets of recipients.
Selecting conditions and operators builds the query that is submitted to the dataset to pull
recipients from the dataset. Like other queries in the target group wizard, they can be
parameterized so that end users can fill in the details of the selection criteria. See Section 18
Defining Parameters for more information.
The Source Details screen defaults to opening with an AND operator in place after the list
name. To set a list subscriber condition it is possible to change the operator, add a condition,
add a job based condition, add a combination operator or copy a combination operator. As
operators and conditions are selected, a diagram displays the selections and the query is
displayed below. Click on the link Actions on Selected Node to select an action type:
•
Change Operator Type – Changes the operator type. Select the operator from the
drop-down menu and then click OK to accept the change or Cancel to disregard the
selection. Available operators are:
°
Combines with AND
°
Combines with OR
°
Combines with AND, then negate the result
°
Combines with OR, then negate the result
For more information on how operators act, see Appendix E Building Hosted Recipient
Queries.
94
•
Add Condition – Adds a condition based on a field, a number, a text string, a Boolean
value, or the value of a formula. Depending on the choice, different information is
required to build the query. Parameters can be used so that end users have more
flexibility to select targeted recipients. For more information, see Appendix E Building
Hosted Recipient Queries.
•
Add Job Based Condition – Job based conditions are used when building a target
group based on a reaction to a previous job. This is similar to the recipient type “Based
on a Previous Job” in the recipient definition wizard of a job. Select whether the
recipients were part of the original source job, and if so, what tracked behavior did they
perform, or whether the recipients were not part of the original source job.
•
Add Combination Operator – Adds another operator to the condition tree. Available
operators are:
°
Combines with AND
°
Combines with OR
°
Combines with AND, then negate the result
°
Combines with OR, then negate the result
For more information on how operators act, see Appendix E Building Hosted Recipient
Queries.
•
Copy Combination Operator – Copies the selected combination operator.
Figure 85 Target Group Wizard Source Details for Hosted Lists
Click Next -> to continue.
95
13.4 Parameters
The “Parameters” screen only becomes active if there are parameters in the target group. Click
on each condition to define the parameter label and description. This text will appear on the
screens regular users access when employing the target group for a recipient definition.
Figure 86 Target Group Wizard Parameters for Hosted Lists
Click Next -> to continue.
13.5 Input Layout
The “Input Layout” screen will only become active if there are parameters in a target group and
they have been labeled on the previous screen. If there are multiple parameters, the order in
which they appear to regular users may be reordered by using the Up and Down links.
To provide end users with more information on the parameters, optional headings can be added
to each parameter or a group of parameters. Click the New Heading link to add a heading and
optional introductory text. Click Save Entry to save headings and introductory text. Use the
Delete Heading link to remove a saved heading.
96
Figure 87 Target Group Wizard Input Layout for Hosted Lists
Click Next -> to continue.
13.6 Input Preview
The “Input Preview” screen only becomes active if there are parameters in a target group and
the Input Layout screen has been successfully completed. A preview of the parameter input
page as regular users will see it is generated here. Verify that the layout is acceptable. If not,
use the <- Back button to return to previous pages in the wizard to make changes.
Figure 88 Target Group Wizard Input Preview for Hosted Lists
97
13.7 Summary
The “Summary” screen displays the target group definition, listing conditions and parameters. In
order for regular users to access the target group, it must be enabled. Check the box next to
“Yes, allow the definition of recipients based on this target group” to enable it. If left unchecked,
the target group will not appear in the list of available target groups to regular users.
Figure 89 Target Group Wizard Summary for Hosted Lists
Click Finish to save the target group and return to the Recipient Target Groups screen.
Section 14 Classic LISTSERV List Target Groups
This target group type is based on the recipients type "Send to an Existing LISTSERV List", as
available in the recipients wizard during recipients definition of a job. Multiple screens take the
data administrator through the process of defining a recipient target group using LISTSERV
Maestro to select recipients from a LISTSERV List.
14.1 General
The “General” screen in the wizard defines the name, category, and description of the target
group. Both name and description are mandatory. Enter a meaningful name and a good
description so the regular users who are selecting target groups in the recipients wizard will
have all the information they need to decide which target group to use.
Target groups can be clustered in categories, making it easier for regular users to select a
target group. A category is meant to contain target groups that are related to each other. The
intent of categories is to minimize the time needed to locate a specific target group. By selecting
a category first, users do not need to browse through all the available target groups, but only
those in the relevant category.
To add a target group to a category, select the category for the target group from the drop-down
menu. To create a new category, click the New Category link and define a new category by
98
entering its name into the edit field. Target group categories are optional. If no category is
selected or created, target groups are placed into "<No Category>."
Figure 90 Target Group Wizard - General
Click Next -> to continue.
14.2 Source
Select the LISTSERV list for the drop-down menu. Next, select the type of message by clicking
the option button “Send job as standard list message to list members” or “Send as special list
message”. Standard list messages are sent to the list subscribers just as a normal list posting
would be from a list subscriber or editor. Bounce reporting is possible. The message will be
archived if there are list archives, and the message will be available for list digests. No
personalization using mail merging is possible, and only blind tracking is available.
Special list messages are what LISTSERV calls a “distribute job”. Mail merging is possible by
using special substitution placeholders created by surrounding the names of the data fields
(column headers) associated with the list with an ampersand “&” at the beginning and a semicolon “;” at the end, for example &INDUSTRY; Bounce reporting is not available and neither is
archiving or digests. More options for tracking are available including personal, unique, and
blind.
99
Figure 91 Target Group Wizard – Source
Click Next -> to continue. If the job is sent as a standard list message to a list with no topics
defined, the wizard will skip to the Summary screen. If the job is sent to a list with topics or as a
special list message, the wizard will continue with additional pages.
14.3 Source Details
The “Source Details” screen will appear differently depending on the type of message being
sent. Standard list messages for lists that have topics will need to select the topic or topics.
Special list messages will need to select options and decide whether to set conditions that can
segment the list based on the existing subscriber data.
14.3.1 Standard List Messages with Topics
Active LISTSERV lists often use "sub-groups" within the list to give subscribers the opportunity
to receive only the posts they are most interested in and not receive all the list mail. Sub-groups
are created in LISTSERV by defining the keyword Topics in the list header. If the LISTSERV
list was created in LISTSERV Maestro, topics are defined on the seventh screen of the list
definition wizard.
Lists can have up to 23 topics. List subscribers can elect to receive only those messages that fit
into the topic(s) they are interested in reading. Similarly, list members can post their messages
to only those topics their messages are relevant to, if subscribers are allowed to post to the list.
For example, a list could have the general subject of Software Development. Topics could be
defined by operating system, type of software, or type of development. For more information on
Topics, see the LISTSERV List Owner's Manual.
Select the way that topics will be used in the target group definition from these options:
•
Send only to subscribers with the following topics – The message will be sent to
only to those list subscribers that selected any of the checked list topics.
°
Expose the topics as parameters so that regular users can select which topic or
topics to use in their job definitions.
°
Use topics as selected above.
100
•
All subscribers, ignore topics – The message will be sent to all list subscribers
regardless of their topic selections. This setting will override topic settings of list
subscribers and should be used with care.
•
Send to subscribers with no topics or with the OTHER topic – The message will be
sent to list subscribers who have no topics selected or with the “OTHER” topic.
Hide or expose the selected topics in the subject line of the message by selecting the
corresponding option button. If the list subscribers are aware of the topics and are accustomed
to using them, (they automatically move list messages to folders on their local computers) then
consider exposing the topics in the subject line. However, if there are many topics selected for
the message, a rather lengthy subject line will result. In this case, consider hiding the topics
from the recipients. Hiding topics can also be useful if the topics are only used to sub-divide the
list and are not used by the recipients.
Figure 92 Source Details for Standard List Message
101
Figure 93 Selecting Topics for a Standard List Message
14.3.2 Special List Messages
There are four “Options” for a LISTSERV list that can be set by checking the adjacent boxes.
The options are standard LISTSERV settings that subscribers may have set for their
subscriptions.
•
MAIL – Will deliver the message to all normally subscribed users.
•
DIGEST – Will deliver the message to users that receive only a digest.
•
INDEX – Will deliver the message to users that receive only a topics index.
•
NOMAIL – Will deliver the message to users that currently receive no mail.
Setting a “Condition” is a means of creating a subset of recipients from the selected LISTSERV
list based on the e-mail address, or, in the case of DBMS backed or LISTSERV hosted lists,
other information in the list’s database table. Conditions begin with an ampersand “&” followed
by the name of the data column (header) and contain an operator such as equal to “=” or less
than “<” and finally the value to be assessed. For example, a LISTSERV list could set the
condition of sending mail to all those subscribers who own a dog or cat. This condition would
look similar to this:
&pet =“dog” OR “cat”
Conditions may use parameters that are then filled out by regular users when they define the
recipients of e-mail jobs. The condition in the example above containing parameters could look
like this:
&pet =“{{pet_type}}” OR “{{pet_type}}”
The curly brackets are a “tag” that denotes a parameter name to the system. The text inside the
brackets is the name of the placeholder that will be replaced by the selection made by the
regular user when defining the recipients for a mail job. Setting parameters for a LISTSERV
condition uses the same process as setting a parameter for an SQL query. See Section 18
102
Defining Parameters for further details. For information on setting conditions for a LISTSERV
list, see the LISTSERV Developer’s Guide, available online at
http://www.lsoft.com/resources/manuals.asp
Figure 94 Source Details for Special List Message
Click Next -> to continue.
14.4 Parameters
The “Parameters” screen will only open if the target group is set up to send mail as a standard
list message with the topics that are exposed as a parameter, or the target group is set up to
send mail as a special list message containing a condition with parameters.
14.4.1 LISTSERV Topics as Parameters
A target group definition that uses the topics of a LISTSERV list as a parameter allows the
regular users to select which topic or topics to use in the recipient definition of their e-mail jobs.
Fill out the parameter details by giving the parameter a label and a description. These will help
regular users understand what they are selecting for their recipients definition. Select the input
type, either a single select list or a multiple select list. Single select allows one topic choice from
the drop-down menu, and multiple select allows for more than one topic choice from the dropdown menu. Use the Up and Down links to shift the appearance order of the topics in the dropdown menu.
103
Figure 95 LISTSERV Topics as Parameters
Click Next -> to continue.
14.4.2 Conditional Expression Parameters
Conditional expressions may have one or more parameters. Parameters that are highlighted in
yellow are undefined, and parameters appearing as normal links have already been defined.
Click on any parameter, highlighted or not, to select it. Fill out the parameter’s initial definition,
or edit an existing definition in the lower part of the screen. The definition of the parameters
made here will affect the choices that the end user will have when using this target group in the
recipients wizard. For more information on creating parameters, and the different parameter
types, see Section 18 Defining Parameters.
104
Figure 96 Parameters in Conditional Expressions
Click Next -> to continue.
14.5 Input Layout
The “Input Layout” screen allows the data administrator to design how the recipient target group
appears to regular users. Heading and additional screen text can be added to describe further
the choices regular users have among the different selections available in the target group. If
there are multiple parameters, they can be grouped under headings and their order can be
arranged. The more description regular users have, the easier it will be for them to decide how
to use the target groups to select the recipients they want for their e-mail jobs.
14.5.1 Input Layout for LISTSERV Lists with Topics
Target groups sending standard list messages to lists with topics expressed as a parameter will
only have the single parameter to describe to regular users.
Figure 97 Input Layout for LISTSERV Lists with Topics as a Parameter
Click Next -> to continue.
105
14.5.2 Input Layout for LISTSERV Lists with Parameters in Conditions
Target groups sending special list messages to lists with conditions that have parameters may
have one or more parameters to arrange and describe. Concise descriptions and intuitive
layouts make using target groups easier for regular users.
Figure 98 Input Layout for LISTSERV Lists with Parameters in Conditions
Click Next -> to continue.
14.6 Input Preview
The “Input Preview” screen reveals how the target group will appear to regular users. Use this
screen to check the appearance of the target group and make selections that are run against
the data. Use the <- Back button to return to the Input Layout screen to make changes.
Figure 99 Input Preview for LISTSERV Lists with Topics
106
Figure 100 Input Preview for LISTSERV List with Conditions
Click Next -> to continue.
14.7 Recipients Details
The “Recipients Details” screen displays a view and in some cases allows for the addition of
details about the recipients. In the case of hosted LISTSERV lists, no further data needs to be
supplied and this screen is for informational purposes.
Figure 101 Recipient Details for Hosted LISTSERV Lists
Click Next -> to continue.
For LISTSERV lists not hosted by LISTSERV Maestro where mail merging is set in the list
header and the list is DBMS backed, additional recipient fields can be added in the edit box, one
column name per line. These column names can be used for mail merge placeholders in the
body of the e-mail message.
107
Figure 102 Recipient Details for Non-Hosted LISTSERV Lists
Click Next -> to continue.
14.8 Summary
The “Summary” screen displays all the selections for the target group definition, listing
conditions and parameters. In order for regular users to access the target group, it must be
enabled. Check the box next to “Yes, allow the definition of recipients based on this target
group” to enable it. If left unchecked, the target group will not appear in the list of available
target groups to regular users.
108
Figure 103 Summary
Click Finish to complete the target group definition and return to the Recipient Target Groups
screen.
Section 15 Target Groups Based on an Uploaded Text File
This target group type is based on the recipients type "Upload a Recipients Text File", as
available in the recipients wizard during recipient definition of a job. Multiple screens take the
data administrator through the process of defining a recipient target group using LISTSERV
Maestro to select recipients from an uploaded text file.
15.1 General
General characteristics of the target group are comprised of a name, a category and a
description. This information will be used by regular users to locate and identify the target
groups they want to use for jobs. Both name and description are mandatory. Enter a meaningful
name and a good description so the regular users who are selecting target groups in the
recipients wizard will have all the information they need to decide which target group to use.
Target groups can be clustered in categories, making it easier for regular users to select a
target group. A category is meant to contain target groups that are related to each other. The
109
intent of categories is to minimize the time needed to locate a specific target group. By selecting
a category first, users do not need to browse through all the available target groups, but only
those in the relevant category.
To add a target group to a category, select the category for the target group from the drop-down
menu. To create a new category, click the New Category link and define a new category by
entering its name into the edit field. Target group categories are optional. If no category is
selected or created, target groups are placed into "<No Category>."
Figure 104 General for Uploaded Text File
15.2 Source
The “Source” screen for a target group based on an uploaded text file contains two options
concerning when the recipients file will be uploaded to the system. Select “Define recipients
now” to upload immediately a file from a local drive that will become the source of the recipients
for the target group. Once the file is uploaded, the recipient definition is static, meaning it will not
change between the upload time and the job delivery time.
Select “Load recipients just before sending from a server file” to link to a file on the server
running LISTSERV Maestro to become the source of the recipients for the target group just
before the job is sent for delivery. This recipient definition is dynamic, meaning that the file
containing the recipients can change between the time the target group is defined and the time
the mail job is delivered.
Select the option button “Define recipients now” to enable the link Upload a recipients file.
Click the link to upload a text file from a local drive. Browse for the file on a local drive and
select the encoding for the file if necessary. For more information on encoding, see Appendix F
E-mail and International Character Sets.
110
Figure 105 Define Recipients from an Uploaded File
Figure 106 Uploaded File
Once a file had been uploaded, information about that file will appear on the screen. The link to
upload a file will change to Upload a different file after one file has been successfully uploaded
to the system.
Select the option “Load recipients just before sending from a server file” and then enter the path
and name of the file the recipients will be taken from at the moment just before the message is
sent. The file must be on a valid path on the server running LISTSERV Maestro. The file must
also be included in a list of files that can be accessed by LISTSERV Maestro. This list of
permissible files is controlled by the system administrator and is necessary to maintain server
security. See the LISTSERV Maestro Administrator’s Manual for more information on granting
access to server files. If the file is not available at the moment of sending, the job will fail. Click
Next -> to continue or <- Back to return to the previous page.
111
15.3 Source Details
The “Source Details” screen parses the text file containing recipients for the target group. When
a text file is uploaded, LISTSERV Maestro will try to determine how the columns of data are
separated, and how each column or field of data is labeled (header). In order to create a target
group, LISTSERV Maestro must correctly interpret which column contains the names of the
recipients and which column contains the e-mail addresses of the recipients. Other fields may
be included and will appear in the results table located on the lower half of the screen.
Figure 107 Parse Recipients for a Target Group
Click the Next -> button to continue if the parsing is accurate with each column of data
separated correctly and labeled with a header row.
If LISTSERV Maestro has not interpreted the data correctly, or an unconventional delimiter
and/or quote character has been used, click on the link Specify details manually to configure
the data manually.
Use the Specify details manually link when the delimiter (separator character) or the quote
character is used in some of the data fields. For example, if the USERNAME field contained Tom
“the cool cat” Jones as an entry, and double quotes happened to be the quote character
for the file, the details would have to be specified manually. The same would be true if a field
named LOCATION contained the entry Atlanta, GA where the comma was the separator
character.
112
Figure 108 Upload Wizard - Parse Manually
LISTSERV Maestro has four selections for choosing separator characters:
•
Tab (\t)
•
Comma (,)
•
Semicolon (;)
•
Other – if this is chosen, type the character into the adjacent box.
Columns can be defined as “not enclosed by a quote character” or select the quote character
from three choices:
•
Double Quotes (“)
•
Apostrophe (‘)
•
Other – if this is chosen, type the character into the adjacent box.
113
After separator and quote characters have been entered, and any encoding change made, click
Refresh Preview to have LISTSERV Maestro attempt to parse the file again with the new
settings. The new columns will then be displayed. If the columns are now separated correctly,
proceed. If the columns are not correct, repeat the process and click Refresh Preview to see
the new changes. Click the Next -> button to continue if the parsing is accurate with each
column of data is separated correctly and labeled with a header row.
Headers are specially defined rows in database tables. Headers are used by database tables to
label the columns of data so that the system and the user can correctly identify the columns. An
uploaded text file may contain headers or not. If the file does not contain headers, select the
option button “No, the file does not contain a header row” and the system will automatically add
a header row. Each column of data in the header row will have a generic name using the pattern
COL1, COL2, COL3, and so on. If the uploaded file does have a header row, select the option
button “Yes, the first row in the file containers headers” and the headers within the file will be
used. Click the Next -> button to continue if the parsing is accurate with each column of data is
separated correctly and labeled with a header row.
15.4 Recipient Details
Once LISTSERV Maestro can successfully separate the recipient data into columns or
otherwise quantify the data, the next steps are to define the column that identifies the e-mail
address, decide whether to use additional recipient data for mail merging and tracking, and to
edit the column headers, if necessary. The “Recipients Details” screen is split into three sections
to accommodate these steps.
15.4.1 Usage of Recipients Data
LISTSERV Maestro needs to know if additional recipient data will be used for mail merging and
tracking, or whether this information is to be ignored and the job sent as bulk e-mail. If the “Use
additional recipient data for mail merging and tracking” option button is selected, columns from
the text file or database can be used in the e-mail message to create personalized messages.
These columns can then also be used to identify recipients for more detailed tracking reports.
For more information on using mail merging, see the LISTSERV Maestro User’s Manual,
Section 5.6 Merge Fields and Conditional Blocks.
If the “Ignore additional recipient data and send job as bulk e-mail” option button is selected, any
additional columns that were uploaded with the file or that appear in the database will be
ignored by the system. It will not be possible to use mail merging. Tracking for the message will
be limited to “blind” tracking, meaning that the tracking data available from the job will not be
associated with identifiable individuals or other demographic information. It is possible to enter
an address and optional name for the “TO:” field in the message header (see Figure 110).
15.4.2 Recipient Identification Columns
In order to process an e-mail job, LISTSERV Maestro needs to know which column represents
the recipients’ e-mail addresses. Use the drop-down menus to select the E-mail Column. When
additional recipient data is being used for mail merging, it is possible to select the Name Column
as well (see Figure 109). This drop-down menu will not appear when sending bulk e-mail (see
Figure 110).
114
15.4.3 Header Definition
Headers are specially defined rows in databases. Headers are used by database tables to label
the columns of data so that the system and the user can correctly identify the columns.
Recipient data files containing a header will be sorted or parsed by LISTSERV Maestro based
on that header row, and the table reflected on the screen will have the columns labeled. It is
possible to edit the existing headers for an uploaded text file in order to make them easier to
use in mail merging. Changing the headers in LISTSERV Maestro will not change the headers
in the original text file.
If the recipient data file does not contain a header, it is possible to define a header within
LISTSERV Maestro.
Header labels are limited to upper and lower case letters, the numbers 0-9, and the underscore
“_”. Any illegal characters in the headers will have to be changed before proceeding. Before
continuing to the next screen, specify the “E-mail Column” and the “Name Column” using the
drop-down menus.
Figure 109 Recipient Details Using Additional Recipient Data
115
Figure 110 Recipient Details Ignoring Additional Recipient Data
Click Next -> to continue.
15.5 Duplicate Elimination
On the “Duplicate Elimination” screen, define how duplicate recipients that may exist in the text
file will be handled. Choose between the following options:
•
Do not remove duplicates – All recipients in the text file will be used for delivery, even
if some of them are duplicates.
•
Remove duplicates with the same e-mail addresses – If the text file contains entries
with the same e-mail address, then only the first of these entries will be used for delivery,
the others will be ignored.
•
Use my list of columns to determine duplicates – If the text file contains entries with
the same values in all of the columns selected in the column list below this option, they
will be considered duplicates. Only the first of instance of each will be used for delivery;
the others will be ignored. Select the columns that will be considered for this comparison
from the list. Use SHIFT and CTRL to select multiple entries.
116
The recipient sample at the bottom of the screen is displayed to make it easier to understand
the contents of each column. This will assist with deciding which columns are to be considered
for comparison and which are not to be considered.
Removing duplicates from recipient data can be a useful way to ensure that multiple
messages are not sent to the same recipient. It is common practice for one person to have more
than one e-mail address, for example, a work e-mail address and a personal e-mail address. By
creatively selecting one or more criteria to remove duplicates, it is possible to avoid sending
multiple messages to the same person with different e-mail addresses. Similarly, several
recipients may use the same e-mail address, for example, family members sharing an ISP may
also share an e-mail address. In this case, it might be desirable to send multiple messages to
the same address shared by multiple recipients, but addressed to each individual using the
e-mail account.
Figure 111 Duplicate Elimination
Click Next -> to continue.
15.6 Summary
The “Summary” screen displays all the selections for the target group definition. In order for
regular users to access the target group, it must be enabled. Check the box next to “Yes, allow
the definition of recipients based on this target group” to enable it. If left unchecked, the target
group will not appear in the list of available target groups to regular users.
117
Figure 112 Summary for Uploaded Text File Target Group Definition
Click Finish to complete the target group and return to the Recipient Target Groups screen.
Section 16 Target Groups from a Database Accessed by LISTSERV
Maestro
This target group type is based on the recipients type "Select Recipients from a Database", as
available in the recipients wizard during recipient definition of a job. Multiple screens take the
data administrator through the process of defining a recipient target group using LISTSERV
Maestro to select recipients from a database.
16.1 General
The “General” screen in the wizard defines the name, category, and description of the target
group. Both name and description are mandatory. Enter a meaningful name and a good
description so the regular users who are selecting target groups in the recipients wizard will
have all the information they need to decide which target group to use.
Target groups can be clustered in categories, making it easier for regular users to select a
target group. A category is meant to contain target groups that are related to each other. The
intent of categories is to minimize the time needed to locate a specific target group. By selecting
a category first, users do not need to browse through all the available target groups, but only
those in the relevant category.
118
To add a target group to a category, select the category for the target group from the drop-down
menu. To create a new category, click the New Category link and define a new category by
entering its name into the edit field. Target group categories are optional. If no category is
selected or created, target groups are placed into "<No Category>."
Figure 113 Target Group Wizard - General
Click Next -> to continue.
16.2 Source
On the “Source” screen of a target group where LISTSERV Maestro retrieves the recipients,
select the database plugin that matches the database to be accessed. Once a selection has
been made, the screen will automatically refresh with input boxes for connection parameters.
The Source screen may appear slightly different for each of the different compatible database
types.
Next, enter the connection values required by that plugin, such as host name, database name,
password, and/or TCP/IP port. These values depend on the database being accessed.
Enter the SQL statement that will be executed to retrieve the recipients in the corresponding edit
box. This statement is executed using the connection data specified above. The statement may
be a fixed statement or it may contain parameters that are later filled out by a regular user when
this target group is used in a recipients definition. See Section 18 Defining Parameters for more
information on how to parameterize the SQL statement and for details about the meaning of the
opening and closing tag input fields.
At the bottom of the screen, use the option buttons to define when the SQL statement will be
executed:
•
During recipient definition – The SQL statement will be executed when this target
group is used in the recipients wizard to define the recipients of a job, and when the
Summary screen of that recipients wizard is entered. This means that if the user
chooses this target group in the recipients wizard, then the list of the actual recipients is
defined at the moment the user completes the recipients wizard. If the database content
119
changes between that moment and the actual sending of the job, those changes will not
be reflected in the list of recipients of the job.
•
Just before sending – The SQL statement will be executed when this target group is
used in the recipients wizard to define the recipients of a job at the moment before the
job is actually sent. This means that if the end user chooses this target group in the
recipients wizard, then the list of the actual recipients is defined at the moment the job is
actually sent, which may be some time after the recipients wizard is completed. If the
database content changes between the completion of the recipients wizard and the
actual sending of the job, those changes will be reflected in the list of recipients of the
job.
Important: If the database is not available during the sending of the job, the job will fail.
Be sure to coordinate sending time and database maintenance time to avoid any conflicts.
Figure 114 Target Group Wizard - Source
Click Next -> to continue.
16.3 Parameters
If parameters are part of the SQL statement on the Source screen, they will need to be further
defined on the “Parameters” screen. All parameters appear as clickable links. Parameters
highlighted in yellow are undefined, and parameters appearing as normal links have already
been defined. Click on any parameter, highlighted or not, to select it. Fill out the parameter’s
initial definition, or edit an existing definition in the lower part of the screen. The definition of the
parameters made here will affect the choices that the end user will have when using this target
120
group in the recipients wizard. For more information on creating parameters, and the different
parameter types, see Section 18 Defining Parameters.
Figure 115 Target Group Wizard – Parameters
Once a label and an optional description have been entered, select the input type of the
parameter. There are four different types of input for parameters, check box, edit field, selection
list, and date and/or time.
16.4 Input Layout
The “Input Layout” screen allows the data administrator to design how the recipient target group
appears to regular users. Heading and additional screen text can be added to describe further
the choices regular users have among the different selections available in the target group. If
there are multiple parameters, they can be grouped under headings and their order can be
arranged. The more description regular users have, the easier it will be for them to decide how
to use the target groups to select the recipients they want for their e-mail jobs.
If one or more parameters are of the type “Restrict values(s) to floating point numbers” the
decimal separator that the database uses needs to be defined. This will be either a dot (period)
“.” or a comma”,”. The selection of dot or comma here only defines how the floating point
number will be formatted for replacement in the SQL statement. In the recipients wizard, the end
user will always use a dot as the decimal separator when entering a floating point number.
121
Figure 116 Input Layout
Click Next -> to continue.
16.5 Input Preview
The next screen in the target group wizard is called “Input Preview.” The screen will appear as it
would to regular users who are selecting recipients using this target group in the define
recipients wizard. Use this screen to verify order, labels, descriptions, parameter types, and
values. If the order of the parameters needs to be changed, click the <- Back button. If labels or
descriptions need to be changed, click the Parameters link in the top links bar to re-enter the
Parameters screen.
When the Input Preview screen is displayed, any SQL statements that are required to determine
the values of single selection or multiple selection lists are executed. By executing the SQL
statements, the drop-down lists or multi-line lists are filled in with values that can be selected.
Using the selections lists, checkboxes, input fields, and/or date fields, make selections for each
parameter type. Click Next -> to continue.
122
Figure 117 Target Group Wizard – Input Preview
The values entered in the Sample Data screen are used to fill out the actual target group SQL
statement the same way as it will later happen in the recipients wizard. The SQL statement will
be executed and retrieve up to ten sample recipients that will be displayed on the next screen,
“Recipients Details.” The “filled out” statement will be displayed on the Summary screen of the
wizard as further verification that the statement and the parameters are correct.
If this is the first time the target group wizard is engaged for a new target group
definition, be sure and click Save & Exit to save all previous work on the target group if it is
necessary to close the wizard before the Summary screen is reached.
16.6 Recipients Details
The “Recipients Details” screen specifies how the headers from the recipient data will be used.
It is necessary to decide whether additional data will be used for mail merging and tracking,
define which column contains the e-mail address, and to edit the column headers, if necessary.
The Recipients Details screen is split into three sections to accommodate the data
administrator.
16.6.1 Usage of Recipients Data
LISTSERV Maestro needs to know if additional recipient data will be used for mail merging and
tracking, or whether this information is to be ignored and the job sent as bulk e-mail. If the “Use
additional recipient data for mail merging and tracking” option button is selected, columns from
the text file or database can be used in the e-mail message to create personalized messages.
These columns can then also be used to identify recipients for more detailed tracking reports.
For more information on using mail merging, see the LISTSERV Maestro User’s Manual,
Section 5.6 Merge Fields and Conditional Blocks.
123
If the “Ignore additional recipient data and send job as bulk e-mail” option button is selected, any
additional columns that were uploaded with the file or that appear in the database will be
ignored by the system. It will not be possible to use mail merging. Tracking for the message will
be limited to “blind” tracking, meaning that the tracking data available from the job will not be
associated with identifiable individuals or other demographic information. It is possible to enter
an address and optional name for the “TO:” field in the message header (see Figure 119).
16.6.2 Recipient Identification Columns
In order to process an e-mail job, LISTSERV Maestro needs to know which column represents
the recipients’ e-mail addresses. Use the drop-down menus to select the E-mail Column. When
additional recipient data is being used for mail merging, it is possible to select the Name Column
as well (see Figure 118). This drop-down menu will not appear when sending bulk e-mail (see
Figure 119).
16.6.3 Header Definition
Headers are specially defined rows in databases. Headers are used by database tables to label
the columns of data so that the system and the user can correctly identify the columns.
Recipient data files containing a header will be sorted or parsed by LISTSERV Maestro based
on that header row, and the table reflected on the screen will have the columns labeled. It is
possible to edit the existing headers for an uploaded text file in order to make them easier to
use in mail merging. Changing the headers in LISTSERV Maestro will not change the headers
in the original text file.
If the recipient data file does not contain a header, it is possible to define a header within
LISTSERV Maestro.
Header labels are limited to upper and lower case letters, the numbers 0-9, and the underscore
“_”. Any illegal characters in the headers will have to be changed before proceeding. Before
continuing to the next screen, specify the “E-mail Column” and the “Name Column” using the
drop-down menus. At the top of the screen, under “Usage of Recipients Data,” use the option
buttons to select one alternative:
Figure 118 Target Group Wizard - Recipients Details Use Additional Recipients Data
124
Figure 119 Target Group Wizard - Recipient Details Send Job as Bulk Mail
Click Next -> to continue.
16.7 Duplicate Elimination
On the Duplicate Elimination screen, define how duplicate recipients that may exist in the
database will be handled. Choose between the following options:
•
Do not remove duplicates – All recipients retrieved by the SQL query will be used for
delivery, even if some of them are duplicates.
•
Remove duplicates with the same e-mail addresses – If the list of recipients retrieved
by the SQL query contains entries with the same e-mail address, then only the first of
these entries will be used for delivery, the others will be ignored.
•
Use my list of columns to determine duplicates – If the list of recipients retrieved by
the SQL query contains entries with the same values in all of the columns selected in the
column list below this option, they will be considered duplicates. Only the first of instance
of each will be used for delivery; the others will be ignored. Select the columns that will
be considered for this comparison from the list. Use SHIFT and CTRL to select multiple
entries.
125
The recipient sample at the bottom of the screen is displayed to make it easier to understand
the contents of each column. This will assist with deciding which columns to be considered for
comparison, and which not to be considered.
Figure 120 Target Group Wizard - Duplicate Elimination
Click Next -> to continue.
Removing duplicates from recipient data can be a useful way to ensure that multiple
messages are not sent to the same recipient. It is common practice for one person to have more
than one e-mail address, for example, a work e-mail address and a personal e-mail address. By
creatively selecting one or more criteria to remove duplicates, it is possible to avoid sending
multiple messages to the same person with different e-mail addresses. Similarly, several
recipients may use the same e-mail address, for example, family members sharing an ISP may
also share an e-mail address. In this case, it might be desirable to send multiple messages to
the same address shared by multiple recipients, but addressed to each individual using the
e-mail account.
16.8 Summary
The "Summary" screen displays all the important details about the target group for verification.
The screen is split into categories listing the relevant details for each part of the target group. A
target group that has been created by the data administrator is not automatically enabled for
use in the recipients wizard. The data administrator must explicitly enable the use of each target
group. Target groups need to be enabled individually, giving the target group administrator
126
control over the use of each target group. This way, groups can be created in advance, and only
enabled when needed. Similarly, target groups can be disabled, preventing users from
accessing them, without permanently deleting them.
To enable a target group, check the box labeled “Yes, allow the definition of recipients based on
this target group.” located under the first category, “General Information.” Target groups that are
enabled meet all the requirements for the definition of recipients, and they are available for use
in the recipients wizard.
To disable a target group, uncheck the box labeled “Yes, allow the definition of recipients based
on this target group.” This will put the target group into a state called "Complete," where all the
requirements for the definition of recipients are met, but the target group is not released for use
in the recipients wizard.
127
Figure 121 Target Group Wizard – Summary
Click Finish to complete the target group and return to the Recipient Target Groups screen.
128
Section 17 Target Groups from a Database Accessed by LISTSERV
This target group type is based on the recipients type "Let LISTSERV Select Recipients from a
Database", as available in the recipients wizard during recipients definition of a job. Multiple
screens take the data administrator through the process of defining a recipient target group
using LISTSERV to select recipients from a database. LISTSERV Maestro to select recipients
from a database.
17.1 General
The “General” screen in the wizard defines the name, category, and description of the target
group. Both name and description are mandatory. Enter a meaningful name and a good
description so the regular users who are selecting target groups in the recipients wizard will
have all the information they need to decide which target group to use.
Target groups can be clustered in categories, making it easier for regular users to select a
target group. A category is meant to contain target groups that are related to each other. The
intent of categories is to minimize the time needed to locate a specific target group. By selecting
a category first, users do not need to browse through all the available target groups, but only
those in the relevant category.
To add a target group to a category, select the category for the target group from the drop-down
menu. To create a new category, click the New Category link and define a new category by
entering its name into the edit field. Target group categories are optional. If no category is
selected or created, target groups are placed into "<No Category>."
Figure 122 Target Group Wizard - General
Click Next -> to continue.
17.2 Source
On the Source screen of a target group where LISTSERV retrieves the recipients from a
database, enter the database server if the default database as configured in LISTSERV is not
going to be used. For more information about configuring databases for LISTSERV, see Section
4 DBMS and Mail-Merge Support in the 1.8 e LISTSERV Developers Manual.
129
Enter the SQL statement in the corresponding edit box. The statement may be a fixed statement
or it may contain parameters that are later filled out by a regular user when this target group is
used in a recipients definition.
If parameters are being used, opening and closing tags are used to denote the parameter. The
tags can be changed from their default values of opening “{“ and closing “}” curly brackets by
entering other characters in the corresponding boxes. The quote character and an escaped
quote character used by the database to enclose string literals also needs to be entered in the
corresponding boxes. See Section 18 Defining Parameters for more information on how to
parameterize the SQL statement and for details about the meaning of the opening and closing
tag input fields.
Figure 123 Target Group Wizard – Source
Click Next -> to continue.
17.3 Parameters
If parameters are part of the SQL statement on the Source screen, they will need to be further
defined on this screen. All parameters appear as clickable links. Parameters highlighted in
yellow are undefined, and parameters appearing as normal links have already been defined.
Click on any parameter, highlighted or not, to select it. Fill out the parameter’s initial definition,
or edit an existing definition in the lower part of the screen. The definition of the parameters
made here will affect the choices that the end user will have when using this target group in the
recipients wizard. For information on creating parameters and the different parameter types
available, see Section 18 Defining Parameters.
Input values for parameters to determine the values of single selection or multiple selection lists
must be manually entered. This is because LISTSERV Maestro is not connected directly with
the database and therefore does not know what values exist in the data tables.
130
Figure 124 Target Group Wizard – Parameters
Once a label and an optional description have been entered, select the input type of the
parameter. There are four different types of input for parameters, check box, edit field, selection
list, and date and/or time. Click Next -> to continue.
17.4 Input Layout
The “Input Layout” screen allows the data administrator to design how the recipient target group
appears to regular users. Heading and additional screen text can be added to describe further
the choices regular users have among the different selections available in the target group. If
there are multiple parameters, they can be grouped under headings and their order can be
arranged. The more description regular users have, the easier it will be for them to decide how
to use the target groups to select the recipients they want for their e-mail jobs.
If one or more parameters are of the type “Restrict values(s) to floating point numbers” the
decimal separator that the database uses needs to be defined. This will be either a dot (period)
“.” or a comma”,”. The selection of dot or comma here only defines how the floating point
number will be formatted for replacement in the SQL statement. In the recipients wizard, the end
user will always use a dot as the decimal separator when entering a floating point number.
131
Figure 125 Input Layout - LISTSERV Selects from a Database
Click Next -> to continue.
17.5 Input Preview
The next screen in the target group wizard is called “Input Preview.” The screen will appear as it
would to regular users who are selecting recipients using this target group in the define
recipients wizard. Use this screen to verify order, labels, descriptions, parameter types, and
values. If the order of the parameters needs to be changed, click the <- Back button. If labels or
descriptions need to be changed, click the Parameters link in the top links bar to re-enter the
Parameters screen.
Figure 126 Input Preview for LISTSERV Selects from a Database
Using the selections lists, checkboxes, input fields, and/or date fields, make selections for each
parameter type. Click Next -> to continue.
132
17.6 Recipients Details
When LISTSERV selects recipients from a database the screen is split into two sections,
“Recipient Identification Columns” and “Additional Merge Columns.”
Under “Recipient Identification Columns” specify which of the recipients columns in the
database contains the e-mail addresses that will be used for delivery. Type the column name in
the corresponding edit box. Optionally, specify which of the recipient columns in the database
contains the names of the recipients by typing the column name in the corresponding edit box. If
a column name is entered, the names of the recipients will be included in the "To:" field of each
individual message, making the mail more personalized.
If other data in the database is going to be used for mail merging, it is necessary to identify each
of the column names. Under “Additional Merge Columns” type each column name in the
corresponding edit box, one name per row. Mail merging is optional, but if employed, other
recipient data can be used in the message making it more personal. For more information on
using merging fields, see the LISTSERV Maestro User’s Manual, Section 5.6 Merging Fields
and Conditional Blocks.
Figure 127 Recipient Details for LISTERV Selects Recipients from a Database
Click Next -> to continue.
17.7 Summary
The “Summary” screen displays all the important details about the target group for verification.
The screen is split into categories listing the relevant details for each part of the target group. A
target group that has been created by the data administrator is not automatically enabled for
use in the recipients wizard. The data administrator must explicitly enable the use of each target
group. Target groups need to be enabled individually, giving the target group administrator
control over the use of each target group. This way, groups can be created in advance, and only
enabled when needed. Similarly, target groups can be disabled, preventing users from
accessing them, without permanently deleting them.
133
To enable a target group, check the box labeled “Yes, allow the definition of recipients based on
this target group.” located under the first category, “General Information.” Target groups that are
enabled meet all the requirements for the definition of recipients, and they are available for use
in the recipients wizard.
To disable a target group, uncheck the box labeled “Yes, allow the definition of recipients based
on this target group.” This will put the target group into a state called "Complete," where all the
requirements for the definition of recipients are met, but the target group is not released for use
in the recipients wizard.
LISTSERV Selects from a Database - Summary
Click Finish to complete the target group and return to the Recipient Target Groups screen.
134
Section 18 Defining Parameters
Parameters are the placeholders within the SQL statement that are replaced with values chosen
by a regular user during the recipient definition of the job. By using parameters, the data
administrator can use the same basic SQL statement for many jobs, turning over the details to
the regular user, who can use them without having to know anything about the actual SQL that
lies behind the target group, or even know SQL in general. This saves time and effort for all
team members. It also allows group members to share the same target groups, while permitting
each target group to create different recipient definitions for individual jobs.
18.1 Fixed and Parameterized SQL Statements
A SQL statement for a target group can be a "fixed" statement, or a parameterized statement. A
fixed statement contains SQL code that is fixed, meaning that it will be used in the same form
every time it is used with the target group. For example:
select * from recipients
Or more complex:
select email, name, city from recipients where age >= 30 and age <= 39
A fixed statement will always yield the same results regardless of the circumstances of how the
target group is used (as long as the actual database content does not change). A fixed
statement is useful in certain circumstances. The first example given here would simply select
all entries from a certain table. If that is the required behavior, then a fixed statement is the
correct statement type to use.
The second example selects only those recipients that are in their thirties
(age >= 30 and <= 39). This is very limiting. Targeting a different age group would
necessitate creating a new target group with a different SQL statement. In fact, with fixed
statements, every different age group would require its own target group and SQL statement.
Setting up these fixed statements would involve a lot of work for the data administrator, as well
as take away flexibility for the end users.
Using a parameterized statement can save time and effort as well as giving end users more
flexibility in selecting recipients. A parameterized statement contains placeholders in the SQL
code that are replaced by the end user, who uses the target group for the actual recipient
definition. These placeholders are not "real" SQL code, but a sort of "meta" code. By using
placeholders, parts of the SQL statement that are not yet "known" can be defined at the moment
the SQL statement is entered into the system. These placeholders are then replaced with actual
values before the statement is executed. (This behavior is very similar to the use of Drop-In
Content elements as described in Section 5.1 Drop-In Content in the LISTSERV Maestro 1.2
User's Manual.)
Continuing with the example above, using placeholders makes it possible to create a
parameterized SQL statement that selects all recipients of a certain age range. The end user
who employs the target group in a recipient definition is left with the decision of what age range
to use when creating the recipients definition. This example shows how the actual age range
values are replaced with placeholders "{{from}}" and "{{to}}":
select email, name, city from recipients where age >= {{from}} and age <= {{to}}
135
18.1.1 Parameter Placeholders
A placeholder is any string of characters that appears between special opening and closing
tags. By default, the opening tag is "{{" and the closing tag is "}}". Everything surrounded by
these two tags will be treated as parameter placeholders, and not as part of the actual SQL
statement. Different tags can be defined if the default tag strings are used somewhere else in
the statement and therefore cannot be recognized as placeholder tags. Enter different tags in
the two edit boxes below the SQL statement input field on the Source screen. See Figure 4 for
the exact location of the edit boxes.
Parameter placeholders must follow these specific rules to function correctly:
•
Any occurrence of a pair of the currently defined opening and closing tags will be
interpreted as a placeholder. The opening and closing tags themselves are also
considered part of the placeholder. The text between the tags is considered the
parameter name.
•
Any string of characters can be used between the tags, becoming the parameter name.
•
The same parameter name can be used for several placeholders (with certain
restrictions, see below). In this case, they are simply considered multiple occurrences of
the same parameter, all of which will be replaced with the same value once the
placeholders are replaced with the regular user's selection.
•
A placeholder can be used in any position in the SQL statement. The most common
locations for placeholders, however, are in comparisons in the where-clause of the
statement.
•
A placeholder that is not enclosed with string literal quotes (as in "age >= {{from}}")
is considered an integer parameter because the entire placeholder is replaced with the
value (so that it becomes, for example "age >= 30"). The value must be an integer;
otherwise, the execution of the statement will result in an error or in unexpected results.
•
A placeholder that is enclosed with string literal quotes (as in "city = '{{name}}'")
is considered a non-integer parameter (a string or floating-point). Here, the entire
placeholder, but not the enclosing quotes, is replaced. The example becomes "city =
'New York'", and the value may be any string.
•
Any occurrences of the quote character itself in the value will automatically be escaped.
For example, a placeholder is defined as "lastname = '{{name}}'" and a last name
of O'Brian occurs within a row (value of "O'Brian"). After replacement, the resulting
data would automatically become "lastname = 'O''Brian'" (or whatever escape of
the quote character is the correct one for the database in use). Do not define values with
quote characters already escaped, since that would lead to a double-escaped character.
•
Placeholders in in-clauses require special attention. An in-clause is a SQL construct that
allows an OR comparison with a range of values. Instead of writing "value = x or
value = y or value = z" it is possible to write "value in (x,y,z)",
enumerating the possible values in a comma separated list within parenthesis.
•
To parameterize this, use a placeholder instead of this comma separated list, as with
"value in ({{arg}})" or in the quoted form "value in ('{{arg}}')". Both
forms are very similar. The placeholder will be replaced with a comma separated list
representing all choices the user makes. Do not include a whole list of placeholders, but
136
only a single placeholder. This single placeholder is then be replaced by the list of the
choices the user makes.
•
If the non-quoted form is chosen, then the choices are also not quoted, so they must be
integer values. If the quoted form is chosen, then all choices will be quoted (each one
separately) and any quotes appearing in a choice value will automatically be escaped.
•
Here are some examples:
•
Assume "value in ({{arg}})" and that the user selected the choices "1", "5", "23"
and "412". This will result in a replacement like this: "value in (1,5,23,412)".
Assume "lastname in ('{{arg}}')" and that the user selected the choices
"Miller", "O'Brian" and "Wagner". This will result in a replacement like this:
"lastname in ('Miller','O''Brian','Wagner')".
•
Two placeholders that have the same parameter name must also have the same
integer/non-integer type. You cannot define an integer parameter and use the same
parameter name for a non-integer parameter, or vice versa.
•
Two placeholders that have the same parameter name must also have the same
in-clause/non-in-clause type. You cannot define a parameter inside of an in-clause and
use the same parameter name for a parameter outside of an in-clause, or vice versa.
18.2 Available Parameter Types
There are four basic parameter types, check box, edit field, selection list, and date and/or time.
Each parameter type is only available for certain types of select statements. Table #
summarizes which parameter types are available for which kinds of statements.
Table 3 Available Parameter Types for Select Statements
Available Parameter
Types
Integer values
outside any
in-clause
Integers values
inside an
in-clause
Non-integer values
Non-integer values
(quoted) outside any in- (quoted) inside an
clause
in-clause
Check Box
X
X
Edit field single value
X
X
Edit field multiple values
Selection list single value
Selection list multiple
values
X
X
X
X
X
X
Date and/or time
X
137
18.2.1 Parameter Type Checkbox
This parameter type appears as a checkbox on the end user's screen. The checkbox has two
associated values, one for the "checked" state and one for the "unchecked" state. Enter these
values accordingly – they need to be different values.
Depending on the input from the user (if the box is checked or not), one or the other value will
be used directly to replace the parameter placeholder. If the parameter placeholders were not
quoted, then only integers can be entered as the two values. If the parameter placeholders were
quoted, then any string can be entered for the values, and all occurrences of the quote
character in these will be escaped automatically before the replacement. Remember do not
escape quotes when entering the values.
Figure 128 Parameter Type Checkbox – Data Administrator's View
Figure 129 Parameter Type Checkbox – End User's View
18.2.2 Parameter Type Edit Field
This parameter type appears as a free input field on the end user's screen. The input is
validated according to the sub-selection:
•
"Restrict value(s) to integer numbers" – Only integer numbers are accepted as input.
138
•
"Restrict value(s) to floating point numbers" – Only numbers (integer or floating point)
are accepted.
•
"Allow free text input" – Any kind of input (including numbers or text) is accepted.
The input from the end user will be used directly to replace the parameter placeholder. If the
parameter placeholder was quoted, then all occurrences of the quote character in the user input
will be automatically escaped before the replacement.
There are two versions of the Edit Field parameter type – single value and multiple values. In
the single value version, the input field will be a one line input field, and the value entered by the
end user will be the value used to replace the placeholder. This type is only available if the
matching placeholder is not inside of an in-clause context. In the multiple values version, the
input field will be rendered with multiple lines, and the end user may enter several lines of text.
Each line will be interpreted as a separate value, and the placeholder will be replaced with a
comma separated list of all values (of all lines). Empty lines will be ignored. This type is only
available if the matching placeholder is inside of an in-clause context.
Figure 130 Parameter Type Edit Field, Single Value - Data Administrator's View
Figure 131 Parameter Type Edit Field, Single Value – End User's View
18.2.3 Parameter Type Selection List
This parameter type appears as a selection list with multiple entries on the end user's screen. If
the parameter is in an in-clause, the list is rendered as a multi-line list field, and the end user
139
may select multiple entries by holding down the SHIFT or CTRL key. Otherwise, the list is
rendered as a drop-down list and the end user may select only a single entry.
For parameters where LISTSERV Maestro selects from a database, the entries in the selection
list can be specified in two ways. They can be specified manually on this wizard screen or a
SQL statement can specify them. The SQL statement will then be used to retrieve the values
that will appear in the list from the database. Use the option buttons to choose between the two
methods. For parameters where LISTSERV selects from a database, all entries must be
specified manually on this wizard screen.
18.2.3.1 Manual specification
Each value consists of two parts, the visible text in the selection list, that is the text that the end
user actually sees in the list, and the invisible value associated with that entry. This invisible
value, associated with the entry selected by the end user, will be used directly to replace the
parameter placeholder. If the parameter placeholder was not quoted, then only integers can be
used as the internal value of each entry. If the parameter placeholder was quoted, then any
string can be entered for the internal values, and all occurrences of the quote character in these
will be escaped automatically before the replacement. Do not escape quotes when entering the
values.
To add a new entry, click on the New link to the right of the list. Enter the visible text into the left
edit fields, and the internal value into the right field. Click on Save Entry. The new entry will be
added to the list.
To modify an existing entry, simply select the entry in the list, then edit its visible text and/or
internal value in the two edit fields above and click Save Entry to save the changes. The entry
will be updated accordingly.
To change the ordering of the entries, select the entry to move and click Up or Down to move it
in the list. To delete an entry select it and click Delete.
Figure 132 Parameter Type Selection List, Manual Specification – Data Administrator's View
140
Figure 133 Parameter Type Selection List – End User's View
18.2.3.2 Database specification
Enter a SQL statement into the edit box. This statement will be executed with the same
connection parameters that were specified on the Source screen of the wizard. The result set
retrieved will be used to populate the selection list. The values from the first column of the result
set will be used as the visible text of the selection list entries. If there is a second column in the
result set, its values will be used as the internal values for the entries. If there is no second
column, then the values from the first column will be used both for the visible text and the
internal values. Any further columns in the result set are ignored.
Make sure that the internal values match the quote context of the parameter. If the parameter
placeholder is not quoted, then the internal values must be integer values (that is the values
from the second result set column, or the ones from the first column, if there is only one
column). If the values are not integers, then the parameter placeholder must be quoted (any
necessary escaping of quotes in the values will happen automatically).
This option is very useful if it is not possible or desirable to enter all the selection values by
hand. There may be many different selections, and some of the values may not yet be known.
For example, think of a target group that has the city where a recipient lives as one of the
parameters in order to do mailings limited to the residents of a certain city:
select * from recipients where city='{{name}}'
If this parameter is assigned the type "Selection List" all possible cities could be entered
manually. But, this approach requires a lot of work, and all the possible cities may not yet be
known. Another drawback to using this approach is that the list would have to be updated
manually each time a recipient from a new city is entered into the database. To avoid all this
time and effort, use an SQL statement like:
select distinct city from recipients order by city
This statement accesses the same table as the target group itself (see the first SQL statement
above) using the same database connection settings. It generates exactly one column that
contains all cities that are currently in the city column in the table, in alphabetical order. The end
user can then simply select one of these cities.
141
Figure 134 Parameter Type Selection List, Database Specification – Data Administrator's View
The end user's view of this screen is the same as that shown in Figure 133.
Important: The list may only have a maximum of 100 entries, in order to not overburden
the user interface and to protect against abuse. If more entries than this is required, it would
probably be better to use the "Edit Field" type for this parameter, and let the end user input the
value manually, instead of selecting it from a list with too many entries.
18.2.4 Parameter Type Date and/or Time
This parameter type appears as an input box on the end user's screen. Choose sub-selections
for "Date Input Format" and/or "Time Input Format". Choose at least one or choose both. The
selection determines whether the user will be asked to input a date, a time, or both. It also
determines how the input fields will be arranged. Input fields will be rendered as three input
fields for the date (day, month, year ordered according to specification), and/or as two or three
input fields for the time (hours and minutes with or without seconds, according to your
specification).
All end user time input must be in the 24h format from 00:00:00 to 23:59:59. An AM/PM input
format is not available. In addition to defining how the date/time input will look for the end user, it
is also necessary to define how the input from the user is converted into a string that matches
the date/time format used in the database. Do this by entering a format string into the specified
edit field.
In that format string, use any desired characters. For example, separation characters like ":" or
",". Also, use any of the format placeholders listed to the right of the edit field. Each format
placeholder will later be replaced with the corresponding date/time value, in the corresponding
format.
142
The possible format placeholders are:
•
year4 – Will be replaced with a four digit representation of the year value entered by the
end user (for example "2002"). Available only if a date input format was selected.
•
year2 – Will be replaced with a two digit representation of the year value entered by the
end user (for example "02"). Available only if a date input format was selected.
•
month2 – Will be replaced with a two digit representation of the month value entered by
the end user (for example "09" or "12"). Available only if a date input format was
selected.
•
month1 – Will be replaced with a one or two digit representation of the month value
entered by the end user, with months January to September as one digit and months
October to December as two digits (for example "9" or "12"). Available only if a date
input format was selected.
•
day2 – Will be replaced with a two digit representation of the day value entered by the
end user (for example "01" or "31"). Available only if a date input format was selected.
•
day1 – Will be replaced with a one or two digit representation of the day value entered
by the end user, with days 1 to 9 as one digit and days 10 to 31 as two digits (for
example "1" or "31"). Available only if a date input format was selected.
•
hour2 – Will be replaced with a two digit representation of the hour value entered by the
end user (for example "08" or "23"). Available only if a time input format was selected.
•
hour1 – Will be replaced with a one or two digit representation of the hour value entered
by the end user, with hours 0 to 9 as one digit and hours 10 to 23 as two digits (for
example "1" or "23"). Available only if a time input format was selected.
•
min2 – Will be replaced with a two digit representation of the minute value entered by
the end user (for example "04" or "59"). Available only if a time input format was
selected.
•
min1 – Will be replaced with a one or two digit representation of the minute value
entered by the end user, with minutes 0 to 9 as one digit and minutes 10 to 59 as two
digits (for example "4" or "59"). Available only if a time input format was selected.
•
sec2 – Will be replaced with a two digit representation of the seconds value entered by
the end user (for example "06" or "59"). Available only if the time input format with
seconds was selected.
•
sec1 – Will be replaced with a one or two digit representation of the seconds value
entered by the end user, with seconds 0 to 9 as one digit and seconds 10 to 59 as two
digits (for example "6" or "59"). Available only if the time input format with seconds was
selected.
While typing the format string into the input field, the sample date/time "Sep. 1, 2002 08:04:06
AM" will continuously be converted into that format and the result displayed below the input
field. For example, if "month2/day2/year4 - [hour2:min2:sec2]"is entered as the format, then the
sample will display:
“09/01/2002 - [08:04:06]”
The input from the end user will be applied to the format string entered in the same way as with
the sample date, and the resulting string will be used to replace the parameter placeholder. All
143
occurrences of the quote character in the date/time string will be escaped before the
replacement.
Figure 135 Parameter Type Date and/or Time – Data Administrator's View
Figure 136 Parameter Type Date and/or Time – End User's View
Important Note: This database format always requires a 24h time format from 00:00:00
to 23:59:59. This input type cannot be used to generate a database time format that includes
AM/PM information with hours from 1 to 12. It is also not possible to generate a database date
format where the month or day of the week is given in long text, like "Monday, December 2nd,
2003". If such a time format is necessary, use the Edit Field type instead, and let the end user
input the date and time manually in the format required by the database (use the parameter's
description field to tell end users which format they need to use to be compatible with the
database).
144
Section 19 Using Enabled Target Groups in the Recipients Wizard
Once Recipient target groups have been created and enabled by the data Administrator, they
can be used in the recipients wizard to define recipients for an e-mail job. For more information
on using the recipients wizard, see Section 4 Defining Recipients of an E-mail Job in the
LISTSERV Maestro 1.2 User's Manual.
The recipient wizard is comprised of five separate screens. On the first screen “Options”, users
can elect to “Send to a Recipient target group.” The second screen, called the “Source” screen
will then contain a listing all of the available target groups. The data administrator may place
target groups on this screen within categories for organizational purposes. Use the drop-down
menu to select a category (if appropriate). Once the category is selected, the target groups
listed in the table will change to list only those in that category.
To select a target group to use for the recipients list, click on the name of the target group. The
Source screen will confirm the selection. If the selection is correct, click the Next -> button. To
change the target group, click the link Select Different Target Group, which will re-open the
first source screen.
Figure 137 Source Screen for Recipient Target Groups
Click Next-> to continue to the “Source Details” screen.
145
If there are parameters in the SQL statement, the Source Details screen will display the input
values for the target group parameters. This screen will appear the same as the “Sample Data”
screen does in the recipient target group wizard. Make the desired selections from the
checkboxes, drop-down menus, and/or input boxes.
Figure 138 Define Recipients Using a Target Group
Click Next-> to continue.
Since all further settings, such as header usage and duplicate elimination, have already been
defined during the creation of the target group, the “Recipients Details” screen is not necessary
and there is no “Duplicate Elimination” item on the “Summary” screen. The “Source Details”
screen will go directly to the “Summary” screen. From there, click the Finish button to save the
recipient definition for the job and return to the Workflow screen.
146
Glossary of Terms
Administration Hub (HUB) – A component of the LISTSERV Maestro program that allows the
administrator to create user accounts, and assign and change settings for the entire application.
Boolean Field – A data field based upon
Column – A vertical set of data, as in a table or spreadsheet.
Database Plugin – Is used to connect LISTSERV Maestro to a database and to allow the user
to select recipient data from a database table in the recipient wizard. The user selects the
matching plugin for the database he/she wants to access then provides the connection data
(like host name, port, user name, password, etc.) and LISTSERV Maestro is then able to access
that database to select the recipients.
Dataset – LISTSERV Maestro’s organization of
E-mail Merge – Placing variables that are extracted from a database into an e-mail message
template. This operation permits individual personalization of otherwise bulk e-mail messages.
Filter – A means of sorting through recipients in the warehouse to select them based on certain
operators.
Floating point number – Any number that has a decimal place.
Header – A special row of data that defines and labels the columns in a database file.
In-clause – A part of the where-clause of a SQL statement, which allows the specification that a
certain field or expression must have exactly one of several allowed values (with the allowed
values usually given in form of a comma-separated list), for the where-condition to be true.
Lookup Table – A set of values that is used for the values in a selection menu. Lookup tables
are shared across a recipient warehouse so multiple datasets can use them
Maestro User Interface (LUI) – A component of the LISTSERV Maestro program that allows
regular users to create e-mail jobs and tracking reports.
Multiple value – A parameter type that allows for one or more values to fill in the select
statement.
Parameter – In LISTSERV Maestro, a parameter acts like a placeholder for a part of a SQL
statement that will be inserted into the whole statement when the regular user defines it.
Quote character – In a SQL statement: a character (usually the single quote) used to enclose
string literals, to set them off from the rest of the SQL statement.
In a text file (CSV-file) containing data: a character or symbol used to surround a separator
character that is used in the actual data in a column so that the separator character is not
confused with the character that appears in the data. For example, if a comma (,) is used as the
separator character in a database file, all the fields of data are separated by a comma. If the
comma is also used within a field, a quote character must surround the entire field. If the quote
character is used in a field, it must be used twice, or “escaped.”
147
Recipients Warehouse – The repository for a group’s data including lookup tables, datasets,
hosted lists, and recipient data.
Select Statement – A SQL statement in form of a query that is issued to a database to retrieve
data.
Single value – A parameter type that allows for the selection of only one value to fill in the
select statement.
SQL – Abbreviation of Structured Query Language. SQL is a standardized query language for
requesting information from a database.
SQL Statement – A statement written in SQL that is issued to a database to retrieve data or to
create, insert, update, or delete data in the database.
String literal – A series of characters that are to be interpreted as literal text and not as an
expression or name in the surrounding statement. Usually a string literal is set off from the text
of the surrounding statement by enclosing it in a special quote character. Therefore, if the text of
the string literal is supposed to contain the quote character itself, this contained quote character
must be escaped in an appropriate way.
Where-clause – A part of a SQL statement that sets the condition that the data must satisfy for
the statement to be executed on it. For example, in the case of a select statement, the condition
that the data must fulfill to be included in the returned data.
148
Appendix A Using Formulas in Hosted Recipient List Target Groups
In LISTSERV Maestro, calculation formulas are available in the condition tree of target groups
of the type “Hosted Recipient List”. This appendix describes the syntax and semantics of these
calculation formulas.
A formula is a sequence of expressions that are combined with operators into more complex
expressions. Expressions can optionally be nested with parenthesis and make use of a few predefined functions.
Examples for formulas are:
15 + 4
27 * Max(17, 4, 24/8) / (19 + 22)
&NAME; + "@lsoft.com"
(ToNum(&AGE;) – 2004) * 10
ToDate(CurrentTimeMillis, "MM/dd/yyyy HH:mm")
The following sub-sections explain all aspects of formulas in detail.
Expressions
Operands can be of the type “number” or of the type “text”. They can appear in different
“shapes”, which are described in the following sub-sections.
For “number” type expressions, the number can be any integer number in the range
-9223372036854775808 to 9223372036854775807
Floating point numbers are not possible in LISTSERV Maestro formulas.
The text can be any character string for “text” type expressions.
Constant Number Expressions
Restriction: None. Constant number expressions can be used in any formula.
Type: Constant number expressions are, as the name implies, always of the type “number”.
Usage: To include a constant number in a formula, simply type the number using only the digits
“09” (do not use “,” as a thousands-separator or “.” as a decimal point). Negative numbers
must have a leading minus sign “-“.
Examples:
1
0
537
-17
007
149
Constant Text Literal Expressions
Restriction: None. Constant text literal expressions can be used in any formula.
Type: Constant text literal expressions are, as the name implies, always of the type “text”.
Usage: To include a text literal in a formula, type the characters desired and denote the
beginning and the end of the text literal by enclosing the whole string in quotation marks <">.
There must not be any linebreaks in the text string.
Since the text literal must be quoted, it must also follow the rules for quote escaping. See
Appendix F Advanced Use of System Drop-Ins for details.
Examples:
"example"
"this is a text string"
"This string contains ""quotes"" which are therefore escaped"
"
this string has three spaces at the beginning and end
"
Standard Merge Field Expressions
Restriction: Standard merge field expressions are only allowed if the formula is used in one of
the following contexts:
•
In the condition tree of a “Hosted Recipient List” target group
•
In a “*Calc” system drop-in of a job with the recipients type
°
“Uploaded CSV text file”, or
°
“LISTSERV Maestro selects from a Database”, or
°
“Target Group” (if the target group is based on either of the two above or on a
“Hosted Recipient List”).
If the system drop-in is used in a job with a different recipient type, the formula must not contain
any merge field expressions (if it does an error message will appear during test delivery).
Type: Standard merge field expressions can either be of type “number” or of type “text”,
depending on their context and content (see the “Type Determination” below for details).
Usage: To include a standard merge field in a formula, type the merge field name enclosed in
“&” and “;”. Only merge field names that are actually defined in the recipient list can be used.
Examples:
&NAME;
&STATE;
&ACCOUNT_BALANCE;
Type Determination: Whenever a merge field appears in a formula, it will first be replaced with
the field value for the current recipient before the result of the formula is calculated for that
recipient. To be able to do this calculation, the expression’s type is determined as follows:
•
If the formula is used in a “*Calc” system drop-in together with recipients based on
such a target group, then the type of each merge field is already defined by the profile
field’s type, which was defined during creation of the associated hosted recipient list:
°
Profile fields of type “Number” have the expression type “number”.
150
°
Profile fields of type “Text” have the expression type “text”.
°
Profile fields of type “Single Selection” have the expression type “text”.
°
Profile fields of type “Boolean” and “Multiple Selection” are not allowed to be used in
formulas at all.
This determination of the type is already done during parsing of the formula.
•
If the formula is used in a “*Calc” system drop-in with the recipients types “uploaded
CSV text file” or “LISTSERV Maestro selects from a database”, then the type of the field
is determined by the field’s content as follows:
If the field’s content can be interpreted as a number, the type “number” will be used. If it
cannot be interpreted as a number, (or is empty) the type “text” will be used (empty
content will become an empty text string).
Consequently, to use the merge field in a location of the formula where a “number” type
is required, make sure that the field’s content can be interpreted as a number for all
recipients. Otherwise, the field will have the type “text” for some recipients, which would
cause the calculation of the formula to fail, so the job itself would fail as well.
This determination of the type is done during delivery, when the merge-values of all
recipients are known.
Special Note: If the formula used in a “*Calc” system drop-in together with recipients
based on such a target group, then only profile fields which are defined in the hosted recipient
list as “mandatory” are allowed as “standard merge field” expressions. Fields that are defined as
“optional” must use the “optional merge field” expression instead. (See next sub-section.)
Optional Merge Field Expressions
Restriction: Optional merge field expressions are only allowed if the formula is used in one of
the following contexts:
•
In a “*Calc” system drop-in of a job with the recipients type
°
“Uploaded CSV text file”, or
°
“LISTSERV Maestro selects from a Database”, or
°
“Target Group” (if the target group is based on either of the two above or on a
“Hosted Recipient List”).
If the system drop-in is used in a job with a different recipient type, the formula must not contain
any merge field expressions (if it does, an error message will display during test delivery).
Type: Optional merge field expressions can be of the type “number” or of the type “text”,
depending on their context and content (see the “Type Determination” below for details).
Usage: Optional merge fields are fields that may be undefined (empty) for at least some
recipients in the recipient list. Recipients with a blank field would not have the result of the
calculation formula displayed in their content.
An optional merge field expression is written in the following way:
151
[&FIELD_NAME; DEFAULT]
The whole expression is enclosed in brackets “[“ and “]”. Between the brackets first type the
name of the merge field being addressed, enclosed with “&” and “;”. Next, type the default that
will be used for all recipients where the merge field itself is undefined.
The default that is replaced by “DEFAULT” as shown above must be a constant number or a
constant text literal.
Examples:
[&NAME; "no name"]
[&NAME; ""]
[&STATE; "n/a"]
[&ACCOUNT_BALANCE; 0]
(Note: the second example defines an empty text as the default for &NAME;.)
Type Determination: Whenever any such merge field appears in a formula, it will first be
replaced with the field value for the current recipient, or if that value is undefined or empty, it will
be replaced with the given default. Then the result of the formula is calculated for that recipient.
To be able to do this calculation, the expression’s type is determined just like for “standard
merge field” expressions.
In addition, if the field’s value is empty or undefined, the type will be determined by the type of
the given default. Make sure that the type of the default matches the field’s type or is at least
convertible into that type (see Automatic Type Conversion).
Function Expressions
Restriction: Functions can usually be used in any formula. However, there may be individual
restrictions that apply only to certain functions. See the function descriptions for details.
Type: The type depends on each function. See the function descriptions for details.
Usage: To include a function in a formula, simply type the function name possibly followed by
an argument list in parenthesis. See the function description for details concerning whether
arguments are required by a certain function and what they mean. Note that function names are
case sensitive and that any parenthesis enclosing the argument list must follow the function
name, without any space in between.
Examples:
Abs(-20)
Max(15, &AGE;)
ToLower("Convert this string to ALL Lowercase")
Min(-10, -11, &SIZE_A;, &SIZE_B;)
Available Functions: The currently available functions are described in Formula Functions.
Operators
Operators always work on two operands, which may be any valid expressions. Some operators
require their operand expressions to be of the type “number” while others require them to be of
the type “text”.
152
Operators for “Number” Operands
The following operators require both operand expressions to be of type “number”:
+ Addition operator (sum of both operands)
-
Subtraction operator (difference of both operands)
*
Multiplication operator (product of both operands)
/
Integer-Division operator (integer-quotient of both operands)
% Modulo operator (remainder of integer-division of both operands)
Note: In LISTSERV Maestro, the division is strictly an integer division. Any decimal places in the
result are discarded; they are not rounded off, but simply ignored.
Operators for “Text” Operands
The following operators require both operand expressions to be of type “text”:
+ Concatenation operator (appends both operands)
The concatenation operator takes the two text operands and simply appends the text string on
the right-hand to the end of the text string on the left-hand. The result is two strings
concatenated together.
The character “+” is used both to denote the addition operator for “number” operands as well as
the concatenation operator for “text” operands. So if a “+” appears anywhere in the formula,
LISTSERV Maestro must first determine if in this context the addition or the concatenation
operator is meant. It simply does so by looking at the operands. If both operands are of type
“number”, then the “+” is interpreted as the addition operator and the result will be of type
“number” too.
If at least one of the operands is of type “text”, then the “+” is interpreted as the concatenation
operator and the result will be of type “text”. If the other operand is of the type “number”, it is
automatically converted to “text” first, see Automatic Type Conversion.
Operator Precedence and Parenthesis
Formulas are processed by LISTSERV Maestro following the usual mathematical conventions:
The “multiplication/division”-type operators (“*”, “/” and “%”) have higher precedence than the
“addition/subtraction”-type operators (“+” and “–”).
Operators with higher precedence are processed first, if several operators with the same
precedence level are encountered. They are processed from left to right. Parenthesis can be set
freely to influence precedence: Inner parenthesis will be processed before outer parenthesis.
Examples:
15 + 3 * 4
Result: 27
8 * (7 – 3)
Result: 32
153
17 * 22 / 2 % 5
Result: 2
17 * (22 / 2 % 5)
Result: 17
17 * (22 / (2 % 5))
Result: 187
Automatic Type-Conversion
Operators and functions usually require their operands and arguments to be of a certain type.
However, under one circumstance it is possible to supply an expression of a different type as an
operand or argument, which will then automatically be converted to the required type.
Whenever an operand or argument of the type “text” is required, an expression of the type “text”
or of the type “number” can be used. In the latter case, the “number” will first be converted into a
“text” before the operator or function is applied. For this conversion, the number-value is simply
converted into the corresponding string representation, for example the number 157 becomes
the text string "157".
Formula Functions
The following tables describe the functions that are available for use in LISTSERV Maestro
formulas.
„Abs“
Function – Returns the absolute value of the given “number”
argument.
Return-Type – Number
Abs(arg)
Arguments: arg – Type “Number”: The argument whose absolute value is to be determined
Examples: Abs(-10) , Abs(&VALUE;) , Abs(30 - &ACCOUNT; * 2)
“CurrentMillis”
Function – Returns the current time, in milliseconds since
st
“Jan. 1 1970, 00:00:00 GMT”.
CurrentMillis
Arguments: None.
Examples: CurrentMillis
154
Return-Type – Number
“IndexOf”
Function – Searches for an appearance of the text
“searchtext” in the given “text”. Returns the zero-based
index of the first appearance of “searchtext”, or “-1” if none
was found. Optionally, a zero-based “startindex” can be
specified with the effect that the search in “text” will not start
at the beginning of “text” but at the character position
specified by “startindex”.
Return-Type – Number
Arguments:
text – Type “Text”: The text string to search in.
searchtext – Type “Text”: The string to search for.
The third argument is optional:
startindex – Type “Number”: The character position at which the search shall be started. If not given, the search
will always start at the first character (index “0”).
Examples:
IndexOf("a longer text", "lo") , IndexOf("abc def abc def", "abc", 4)
“Length”
Function – Returns the length of the given text string (the
number of characters in the text).
Return-Type – Number
Arguments: text – Type “Text”: The text whose length shall be determined.
Examples: Length("a longer text", "lo") , Length(&FULL_NAME;)
“Max”
Function – Returns the greatest of all given “number”
arguments.
Max(arg1, arg2
[, arg3, ... ,
argN])
Arguments:
arg1 – Type “Number”: The first argument to find the maximum of.
arg2 – Type “Number”: The second argument to find the maximum of.
Further arguments are optional:
arg3 – Type “Number”: The third argument to find the maximum of.
th
argN – Type “Number”: The N argument to find the maximum of.
Examples: Max(3, -4) , Max(17, 22, 4) , Max(82, &VALUE; * 7)
155
Return-Type – Number
“Min”
Function – Returns the smallest of all given “number”
arguments.
Return-Type – Number
Min(arg1, arg2
[, arg3, ... ,
argN])
Arguments:
arg1 – Type “Number”: The first argument to find the minimum of.
arg2 – Type “Number”: The second argument to find the minimum of.
Further arguments are optional:
arg3 – Type “Number”: The third argument to find the minimum of.
th
argN – Type “Number”: The N argument to find the minimum of.
Examples: Min(13, 2) , Min(17, -&VALUE;, 4 * -17)
“Pow”
Function – Returns the value of the first argument raised to the
power of the second argument.
Pow(base, exp)
Arguments:
base – Type “Number”: The base argument.
exp – Type “Number”: The exponent argument.
Examples: Pow(2, 8) , Pow(&BASE;, &EXPONENT;)
156
Return-Type – Number
“Random”
Function – Returns a pseudo-random number in a range
specified by the argument.
Random[(thresh
old)]
No argument given: The range is from 0 to the largest possible
“number” value.
Return-Type – Number
One argument given: The range is from 0 to the value of the
given argument minus one (i.e. “0” to “arg-1”).
Arguments:
The argument is optional:
threshold – Type “Number”: The threshold value for the random number. The random number will range from “0”
to “threshold – 1”.
Examples:
Random , Random(6) , Random(&MAX_RANDOM;) , Random(&VALUE; - 17 * &MAX;)
“SubscribeTimeMillis”
SubscribeTimeMillis
Function – Returns the time at the subscriber
subscribed to the hosted recipient list referenced
by the target group in whose context the formula is
used, represented in milliseconds since “Jan. 1st
1970, 00:00:00 GMT”.
Return-Type – Number
Restriction:
Can only be used in formulas in the condition tree of a “Hosted Recipient List” target group or in a “*Calc” system
drop-in together with recipients based on such a target group. Will not be accepted in formulas for a different
recipient type!
Arguments: None.
Examples: SubscribeTimeMillis
157
“Substring”
Substring(orig
inaltext,
startindex [,
endindex])
Function – Returns a text substring that has been extracted from
the given original text string according to the other argument(s)
specified:
Return-Type – Text
The substring begins with the character in “originaltext” at
the position specified. If no “endindex” is given, the substring
extends to the end of the original string. If “endindex” is given,
the substring extends to the character at position “endindex –
1”, i.e. the character at “endindex” is the first character that is
not part of the substring.
Note: all indices are zero-based, i.e. the index of the last
character in the original string is at the position “length of original
string minus 1” by “startindex”.
Arguments:
originaltext – Type “Text”: The original text string from which the substring will be extracted.
startindex – Type “Number”: The beginning index, inclusive, zero-based.
The third argument is optional:
endindex – Type “Number”: The ending index, exclusive, zero-based.
Examples:
Substring("original text", 5) , Substring("original", 3, 3 + &VALUE;)
158
“ToDate”
ToDate(datevalue
, formatpattern
[, localename |
langcode,
countrycode])
Function – Returns a formatted representation of a
numerical date/time value. The formatted representation is
usually returned as “text”, but may also be returned as a
“number”, if applicable. The format that is used to create
the representation is specified with the given format
argument.
Note: For formatting purposes, LISTSERV Maestro uses
the U.S. locale and the time zone of the server where the
LUI component is running by default. Locale text, like
weekday names, names of months, etc., will be formatted
using the U.S. locale. Similarly, times will be formatted
using the server’s time zone.
To specify a different locale, use the optional parameter
“localename” to choose a predefined locale or with the
optional parameters “langcode” and “countrycode” to
specify your own locale. See Time and Date Patterns for
details.
Return-Type – Usually Text.
However, may be Number, if
the result can be expressed
as a number.
datevalue – Type Number:
The date/time value to
format. Must contain the
desired date/time
represented as milliseconds
since “Jan. 1st 1970,
00:00:00 GMT” (for example
from the output of the
functions
“CurrentMillis”,
“SubscribeTimeMillis”
and “ToMillis”).
formatpattern – Type
Text: Specifies the format
pattern to use to convert the
milliseconds value in
“datevalue” into the
formatted representation.
Arguments:
The following arguments are optional:
localename – Type “Text”: A name of a predefined locale. If specified, any locale specific text in the formatted
date/time representation will be given according to this locale.
Or supply both these arguments:
langcode – Type “Text”: A lowercase two-letter ISO-639 language code specifying the language for the locale. See
for example http://ftp.ics.uci.edu/pub/ietf/http/related/iso639.txt for a list of the ISO-639 language codes.
countrycode – Type “Text”: An uppercase two-letter ISO-3166 country code specifying the country for the locale.
See for example http://userpage.chemie.fu-berlin.de/diverse/doc/ISO_3166.html for a list of the ISO-3316 country
codes.
If “langcode” and “countrycode” are specified, they are used to create a locale for the given language and country,
and any locale specific text in the formatted date/time representation will be given according to this locale.
Examples:
ToDate(CurrentMillis, "MMM dd. yyyy") - formats the current date using the default U.S. locale
ToDate(CurrentMillis, "MMM dd. yyyy", "Germany") - formats the current date using the pre-defined
locale for Germany
ToDate(CurrentMillis, "MMM dd. yyyy", "de", "AT") - formats the current date using a custom
locale for language “de” =German and country “AT” =Austria
159
“ToLower”
Function – Returns the given text argument with all letters
converted to lowercase letters.
Return-Type – Text
ToLower(text)
Arguments:
text – Type “Text”: The text string to convert to lowercase.
Examples: ToLower("Convert All UPPERCASE to Lowercase")
“ToMillis”
ToMillis(datet
ext,
formatpattern
[, localename
| langcode,
countrycode])
Function – Returns the numerical value representing the
date/time as parsed from a text string argument, where the
numerical value specifies the date/time in milliseconds since
“Jan. 1st 1970, 00:00:00 GMT” (can then be compared to the
output of the functions “CurrentMillis” and
“SubscribeTimeMillis” or be used as input to “ToDate”).
The format used to parse the given date/time text string is
specified with the given format argument.
Note: For parsing purposes, LISTSERV Maestro will by default
assume the U.S. locale and the time zone of the server where the
LUI component is running, i.e. if locale specific texts, like
weekday names, names of months, etc., are contained in the
date/time text string, they must appear with the correct names of
the U.S. locale. Similarly, times given in the date/time text string
will be interpreted as relative to the server’s time zone.
To specify a different locale, use the optional parameter
“localename” to choose a predefined locale or with the optional
parameters “langcode” and “countrycode” to specify your
own locale. See Time and Date Patterns for details.
To specify the time as relative to a different time zone, include a
time zone value in the date/time text.
160
Return-Type – Number
Arguments:
datetext – Type “Text”: The date/time text string to parse. Must contain the desired date/time in a textual format
which can be parsed by applying the given format pattern.
formatpattern – Type “Text”: specifies the format pattern to use to parse the “datetext”. See Date and Time
Patterns for details.
The following arguments are optional: Either you supply no further argument at all...
Or you supply only the following argument:
localename – Type “Text”: A name of a predefined locale. See section 0 for a list of available locale names. If
specified, any locale specific text in “datetext” will be expected according to this locale.
Or you supply both the following two arguments:
langcode – Type “Text”: A lowercase two-letter ISO-639 language code specifying the language for the locale.
See for example http://ftp.ics.uci.edu/pub/ietf/http/related/iso639.txt for a list of the ISO-639 language codes.
countrycode – Type “Text”: An uppercase two-letter ISO-3166 country code specifying the country for the locale.
See for example http://userpage.chemie.fu-berlin.de/diverse/doc/ISO_3166.html for a list of the ISO-3316 country
codes.
If “langcode” and “countrycode” are specified, they are used to create a locale for the given language and
country, and any locale specific text in “datetext” will be expected according to this locale.
Examples: ToMillis("February 22. 2004", "MMMM dd. yyyy")
(parses the given date using the default U.S. locale)
ToMillis("Februar 22. 2004", "MMMM dd. yyyy", "Germany")
(parses the given date using the pre-defined locale for Germany)
ToMillis("februari 22. 2004", "MMMM dd. yyyy", "de", "AT")
(parses the given date using a custom locale for language “de” =Germany and country “AT” =Austria)
161
“ToNum”
Function – Tries to parse a number from the given text string
ToNum(text)
and returns that number. Generates an error if the provided text
Return-Type – Number
string does not contain a valid number (for example letters).
Can be used to convert a profile field which is of type “text” but
still only contains numbers to the type “number”, which can
then be used in contexts that require the type “number” (such
as “number” operators and functions requiring a “number”
argument).
Arguments: text – Type “Text”: The text string to convert to a number.
Examples: ToNum("12345") , ToNum(&AGE;) , ToNum("123" + "456")
Note: The result of the last example will not be the number 579, but will instead be the number 123456, i.e. first
the string concatenation operator “+” is applied to the two strings and then the resulting string is converted into a
number.
“ToUpper”
Function – Returns the given text argument with all letters
converted to uppercase letters.
ToUpper(text)
Arguments:
text – Type “Text”: The text string to convert to uppercase.
Examples: ToUpper("convert all lowercase to uppercase")
162
Return-Type – Text
Date and Time Patterns
The format of the date and time patterns must be specified for the functions “ToDate” and
“ToDateValue” to convert a numerical date/time value (represented in milliseconds since “Jan.
1st 1970, 00:00:00 GMT”) into a formatted output string or vice versa.
The pattern format described here applies to the formatting process, when a numerical
date/time value is converted into a formatted text string, and to the parsing process, when a text
string is parsed to convert it back into the numerical date/time value. This is a direct
representation of the formatting offered by the Java class SimpleDateFormat, so the
description of the format as given here has been taken more or less directly from the
documentation of that Java class.
Important Note: For date/time formatting and parsing, by default the U.S. locale and the
current time zone of the server where the Maestro User Interface (LUI) component is running is
used. This means that if locale specific values (names of months, weekdays, era-designators,
and the like) are required, they will be given as the U.S. locale values by default. Similarly, if a
time is given, it will be formatted (or interpreted) as relative to the time zone of the server
(although for parsing a specific time zone can be supplied). If the default U.S. locale is not
desired, specify a locale in the “ToDate” or “ToMillis” function.
Date and Time Patterns
Date and time formats are specified by pattern strings. Within pattern strings, unquoted letters
from ‘A’ to ‘Z’ and from ‘a’ to ‘z’ are interpreted as pattern letters representing the components
of a date or time string (see below for details). Text can be quoted using single quotes <'> to
avoid interpretation. In a quoted text, the “double” single quote <''> represents a single quote.
All other characters are not interpreted; they are simply copied into the output string during
formatting or matched against the input string during parsing.
The following pattern letters are defined (all other characters from ‘A’ to ‘Z’ and from ‘a’ to ‘z’ are
reserved). The letters are case-sensitive. The same letter has different meanings in its
uppercase or lowercase version. Each pattern letter has a specific “presentation” in the created
final string (during formatting) or in the parsed string (during parsing). For example, presentation
types may be “Text”, “Number”, “Year” or similar. More details about the presentations and their
meanings follow below.
163
Commonly Used Pattern Letters
Letter
Date or Time Component
Presentation
Examples
y
Year
Year
1996; 96
M
Month in year
Month
July; Jul; 07
d
Day in month
Number
10
E
Weekday
Text
Tuesday; Tue
H
Hour in day (0-23)
Number
0
h
Hour in am/pm (1-12)
Number
12
m
Minute in hour
Number
30
s
Second in minute
Number
55
S
Millisecond
Number
978
a
Am/pm marker
Text
PM
Special Pattern Letters
Letter
Date or Time Component
Presentation
Examples
G
Era designator
Text
AD; BC
D
Day in year
Number
189
w
Calendar week in year
Number
27
W
Calendar week in month
Number
2
F
Weekday ordinal in month
Number
2
k
Hour in day (1-24)
Number
24
K
Hour in am/pm (0-11)
Number
0
z
Time zone
General time zone
Pacific Standard Time; PST;
GMT-08:00
Z
Time zone
RFC 822 time zone
-0800
Note: The value of “calendar week in year” and “calendar week in month” depends on the locale
that is used. The locale determines the conventions about which weekday is interpreted as the
first day of the week (usually “Monday” or “Sunday”) and under which circumstances a week
that falls partially into one year (or month) and partially into the next, is interpreted as belonging
to the one year (or month) or the other.
164
Note: The “weekday ordinal in month” indicates the ordinal number of the weekday of the given
date/time in the given month. For the first Monday in a month, the ordinal is “1”, as it is for the
first Tuesday, Wednesday and so on. For the second Monday in a month, the ordinal is “2”, and
so on.
Presentation Description
Pattern letters are usually repeated, as their number determines the exact presentation:
•
Text: For formatting, if the number of pattern letters is four or more, the full form is used;
otherwise, a short or abbreviated form is used if available.
For parsing, both forms are accepted, independent of the number of pattern letters.
•
Number: For formatting, the number of pattern letters is the minimum number of digits,
and shorter numbers are zero-padded to this amount.
For parsing, the number of pattern letters is ignored unless it is needed to separate two
adjacent fields.
•
Year: For formatting, if the number of pattern letters is two, the year is truncated to 2
digits; otherwise it is interpreted as a “Number” (see above).
For parsing, if the number of pattern letters is more than two, the year is interpreted
literally, regardless of the number of digits. So using the pattern “MM/dd/yyyy”, the text
“01/11/12” parses to Jan. 11, 12 AD.
For parsing with the abbreviated year pattern (“y” or “yy”), LISTSERV Maestro must
interpret the abbreviated year relative to some century. It does this by adjusting dates to
be within 80 years before and 20 years after the current time. For example, using the
pattern “MM/dd/yy” on Jan. 1, 1997, the text “01/11/12” would be interpreted as Jan.
11, 2012, while the text “05/04/64” would be interpreted as May 4, 1964. During
parsing, only strings consisting of exactly two digits will be parsed into the default
century. Any other numeric string, such as a one digit string, a three or more digit string,
or a two digit string that is not all digits (for example “-1”), is interpreted literally.
Therefore, “01/02/3” or “01/02/003” are parsed, using the same pattern, as Jan. 2, 3
AD. Likewise, “01/02/-3” is parsed as Jan. 2, 4 BC.
•
Month: If the number of pattern letters is one or two, the month is interpreted as
“Number”, if it is 3 or more, it is interpreted as “Text”. Therefore, if the month is
interpreted as “Number” or “Text”, the applicable “Number”/ “Text” interpretation rules
apply (see above). For example: 1 letter will be a “Number” that is not padded, 2 letters
will be a “Number” that is padded, 3 letters will be a “Text” using the abbreviated form
and 4 or more letters will be a “Text” using the long form.
•
General time zone: For formatting, the time zone is handled as “Text” if it has a name. If
not, it is given as a GMT offset value in the format “GMT[+|-]HH:MM”, where “HH” is the
hours between 0 and 23 (one or two digits, may be zero-padded to the left) and “MM” is
the minutes between 00 and 59 (always two digits, zero-padded to the left if necessary).
For example, “GMT+8:00”, “GMT+08:00”, “GMT-12:45”.
For parsing, see “Time zone parsing” below.
•
RFC 822 time zone: For formatting, the RFC 882 4-digit time zone format is used:
“[+|-]HHMM”, where “HH” is the hours as two digits, between 00 and 23 (zero-padded to
165
the left if necessary) and “MM” is the minutes as two digits, between 00 and 59 (zeropadded to the left if necessary).
For parsing, see “Time zone parsing” below.
•
Time zone parsing: For parsing of a time zone, it does not matter if the format pattern
specifies a “General time zone” or a “RFC 822 time zone”: In both cases, all three types
of time zone specifications are accepted:
°
Time zone given as “Text” (if given with a name recognized by LISTSERV Maestro).
°
Time zone given as GMT offset (see “General time zone”).
°
Time zone given as RFC 882 4-digit notation (see RFC 822 time zone).
Examples
The following examples show how date and time patterns are interpreted in the default U.S.
locale with the “U.S. Pacific Time” time zone. The given date and time are “2001-07-04
12:08:56” local time in that time zone.
Date and Time Pattern
Result
"yyyy.MM.dd G 'at' HH:mm:ss z"
2001.07.04 AD at 12:08:56 PDT
"EEE, MMM d, ''yy"
Wed, Jul 4, '01
"h:mm a"
12:08 PM
"hh 'o''clock' a, zzzz"
12 o'clock OM, Pacific Daylight Time
"K:mm a, z"
0:08 PM, PDT
"yyyyy.MMMMM.dd GGG hh:mm aaa"
02001.July.04 AD 12:08 PM
"EEE, d MMM yyyy HH:mm:ss Z"
Wed, 4 Jul 2001, 12:08:56 -0700
"yyMMddHHmmssZ"
010704120856-0700
166
Appendix B About Comma Separated Files
The term "comma separated format" (or "tab separated format" or “CSV”) is often used as a
catchall term for all kinds of text-based data formats, where the data is formatted in a line-byline fashion. Each line contains one data record, and a number of columns per line, where the
different columns are separated by comma (or tab, or some other separator character).
LISTSERV Maestro can correctly interpret comma separated text files in various formats as long
as the following rules are applied:
•
Any character may be used as the separator character, although a comma, tab, or
semicolon is conventional.
•
The same separator character must be used in all lines for the entire file.
•
All lines in the file must have the same number of columns, which means the same
number of separator characters.
•
Empty columns may be created in order that the same number of separator characters is
present in every line of the file.
•
Having two separator characters in direct succession, without any characters in
between, creates an empty column.
•
If a line begins with the separator character, then LISTSERV Maestro assumes the line
begins with an empty column.
•
If a line ends with the separator character, then LISTSERV Maestro assumes the line
ends with an empty column.
•
If the character that is used as the separator character also appears as part of the value
of one or several of the column fields, then it is necessary to enclose the fields in
quotation marks or another “quote character.”
•
Any character can be used as the quote character (quotation marks, or apostrophe are
conventional), except for the separator character.
•
The same character must be used for the opening quote and for the closing quote.
If quotes are used in some records in a file, (especially records that appear near the end of the
file) it is important to manually define the separator and quote character instead of allowing
LISTSERV Maestro to attempt to parse the file automatically. By manually defining the separator
and quote characters, LISTSERV Maestro is forced to look at the entire file and parse it
according to the values entered for these characters. If LISTSERV Maestro attempts to parse
the file automatically when it contains quote characters in some lines, but not all, those records
may be parsed incorrectly or may be rejected as invalid.
If there is a need to include the quote character inside of the value of a field, then this character
must be escaped. Escape the quote character by using it twice, in direct succession. The
double appearance of the quote character will be interpreted as a single appearance that is part
of the field value. Follow these basic rules for separator and quote characters:
•
If the first character in the field is the quote character, then LISTSERV Maestro assumes
the field is quoted and the next not-escaped quote character marks the end of the field.
The end of the field must then be followed by a separator character or by the end of a
line – trailing white space after the last field of the line is allowed.
167
•
If the first character in a field is not the quote character, then LISTSERV Maestro
assumes the field is not quoted, and the next appearance of the separator character
marks the end of the field.
Here are some examples:
Simple values, separated by comma, not quoted:
John,Doe,Denver,USA
Lucy,Summers,London,UK
Karl,Hauser,Frankfurt,DE
This defines a dataset with three rows, each row consisting of four fields.
Simple values, separated by comma, not quoted, with empty fields:
John,,Denver,USA
,Summers,London,UK
Karl,Hauser,Frankfurt,
This defines a dataset with three rows, each row consisting of four fields. In the first row, the
second field is empty, in the second row the first field is empty and in the last row, the fourth
field is empty.
Values in which some contain a comma, separated by comma, quoted with <">:
John,Doe,"Denver, Colorado",USA
Lucy,Summers,London,UK
Karl,Hauser,"Frankfurt, am Main",DE
This defines a dataset with three rows, each row consisting of four fields. The third fields in the
first and last rows each have a value that contains a comma. Since this comma is inside of the
quote characters, it is not interpreted as a separator comma, but instead as part of the value of
the field.
Values in which some contain a comma, separated by comma, quoted with <">, with
empty fields:
John,,"Denver, Colorado",USA
,Summers,London,UK
Karl,Hauser,"Frankfurt, am Main",
This defines a dataset with three rows, each row consisting of four fields. The third fields in the
first and last rows each have a value that contains a comma. Since this comma is inside of the
quote characters, it is not interpreted as a separator comma, but instead as part of the value of
the field. Also, in each row there is an empty field.
Values in which some contain a comma and some the quote character, separated by
comma, quoted with <">:
John ""Hammer"" Cool,Doe,"Denver, Colorado",USA
Lucy,Summers,London,UK
Karl,Hauser ""the man""","Frankfurt, am Main",DE
This defines a dataset with three rows, each row consisting of four fields. The third fields in the
first and last rows each have a value that contains a comma. Since this comma is inside of the
quote characters, it is not interpreted as a separator comma, but instead as part of the value of
the field. In addition, the first field in the first row contains the quote character, which has been
escaped. Including the quotes, the field in its escaped form looks like this: John ""Hammer""
Cool. The two double appearances of the quote character around the word "Hammer" are not
interpreted as quotes that delimit the field, but are instead interpreted as single appearances of
the quote character which are part of the field value. Therefore, the un-escaped form of the field
168
looks like this: John "Hammer" Cool. Similarly, the second field of the last row has the unescaped form of Hauser "the man”.
169
Appendix C E-mail and International Character Sets
Computers store all information in the form of “bits” or their 8-bit conglomerations “bytes”. Bits
are also the entities that are transferred from the sender’s computer to the recipient’s computer
whenever an e-mail message is sent. E-mail programs take the message and convert it to bits.
The message is sent and the receiving e-mail client program translates these bits back into a
readable message for the recipient. This process takes place seamlessly for the sender and the
recipient. The sender first creates a text message and the recipient receives a text message –
all the converting remains behind the scenes.
In order for characters from an alphabet to be converted into bits for transmission, and then
converted back into the message, the bits have to be arranged into sequences representing
each character in the alphabet. Matching the bit sequences to alphabetical characters is called
“mapping”. Mapping bit sequences to alphabets has resulted in several different so called
“character sets” (short: “charsets”) that have been defined and standardized by the international
community.
In the English-speaking world, probably the most widely used charset is ASCII (sometimes also
called US-ASCII), which is a charset that maps 7-bit sequences to the 26 characters from the
Latin alphabet. Because 7 bits have enough room for 128 characters (0-127), there are more
than the 26 Latin characters in the ASCII charset: First, each character appears twice (as upper
case and lower case), then there are the ten digits, 0-9, various punctuation marks like comma,
dot, semi-colon, colon, dash, slash, backslash, exclamation, question mark, and so forth. There
are also other characters that can act as control characters, that is, characters that have special
meaning to certain protocols, such as “#” and “&”.
Used almost as frequently, at least in the western world, are the charsets from the ISO 8859
family. These charsets map 8-bit sequences to letters, digits, and characters from various
European languages, Hebrew and Arabic. Since the ISO-8859 charsets use 8 bits, they have
twice the range as ASCII – enough room for 256 characters (0-255). For convenience, all ISO8859 charsets contain the full range of ASCII in their “lower” 128 characters; the bytes 0-127
from any ISO-8859 charset map directly to the corresponding ASCII character making ISO-8859
a superset of ASCII. The differences of each ISO charset are in the “upper” 128 characters, the
bytes 128-255.
For example, ISO-8859-1, mapping an alphabet suitable for West-European languages, has the
umlauts Ä, Ö and Ü at the positions 196, 214, and 220. In comparison, ISO 8859-7, mapping
the Greek alphabet, has the Greek letters ∆, Φ, and ά at the same positions.
The following charsets from the ISO-8859 family are currently supported by LISTSERV Maestro:
•
ISO-8859-1 Latin 1 (West European)
•
ISO-8859-2 Latin 2 (East European)
•
ISO-8859-3 Latin 3 (South European)
•
ISO-8859-4 Latin 4 (North European)
•
ISO-8859-5 Cyrillic
•
ISO-8859-6 Arabic
•
ISO-8859-7 Greek
170
•
ISO-8859-8 Hebrew
•
ISO-8859-9 Latin 5 (Turkish)
•
ISO-8859-15 Latin 9 (West European, update of Latin 1 with some French and Finnish
letters that were omitted in Latin 1, plus the Euro currency symbol € instead of the
international currency symbol ¤.)
•
UTF-8 International Unicode (encoded in UTF-8 format, Unicode is a very large charset
with room for almost all characters of many different languages of the world, even the
many Asian characters).
The 8-bit range of 0-255 is not enough to accommodate all letters from even the European
languages at once (therefore, there is a need for more than a dozen different members of the
ISO-8859 family). Also, 8-bit charsets do not take into account the other major language groups
of the world, such as Asian languages.
To address the limitations of 8-bit charsets, recently the 16-bit charset Unicode with a range for
65536 characters has become more and more widespread. This charset contains more or less
all letters and characters from the most widely used languages, as well as a set of symbols and
other useful characters. LISTSERV Maestro offers Unicode in the form of its UTF-8 variant.
UTF-8 is a transfer encoding for the 16-bit Unicode charset, which maps Unicode characters to
one, two, or more bytes, in a way that more common characters (like ASCII characters) need
fewer bytes than uncommon characters.
Again, for convenience, the first 128 characters of Unicode (0-127) are the same as in the ASCII
charset, while the first 256 characters (0-255) are the same as in ISO-8859-1 (West European).
A large percentage of all other letters of world languages are assigned values from 256 to
65535 (although, not even the large range of Unicode is enough to accommodate all letters from
all languages).
LISTSERV Maestro and International Character Sets
What happens when international characters are used in e-mail messages written and delivered
in LISTSERV Maestro?
Internally, LISTSERV Maestro uses pure Unicode, allowing for the mixture of any characters in
e-mail, including the subject line and any data merged from uploaded files or selected from a
database – as long as there is a way of inputting them. For some languages, this simply
requires the installation of a special keyboard and display driver for that language. Other
languages, such as Asian languages, may require a special keyboard – this depends on the
language and on the computer’s operating system.
For sending, LISTSERV Maestro needs to decide on a charset that it can use to encode the
message. Specify the charset to use while defining the content (there is a special item for this
on the content definition page), or tell LISTSERV Maestro that it should attempt to automatically
determine which charset is the optimal one for the text contained in the message.
In the latter case, LISTSERV Maestro scans the written text to determine the optimal charset: If
the message uses characters that can be displayed with the ASCII charset (the case with most
English language texts), LISTSERV Maestro will choose the ASCII charset. If the message
contains characters outside of the ASCII range, but that can still be displayed with one of the
supported ISO-8859 charsets, then LISTSERV Maestro will choose the corresponding ISO171
8859 charset. Optionally, (only if LISTSERV Maestro is set to allow Unicode) the message has
characters that cannot be displayed with one of the ISO-8859 charsets (for example Asian
characters), or there are mixed characters from several ISO-8859 charsets, then LISTSERV
Maestro will choose Unicode as the charset.
Once a charset is chosen, LISTSERV Maestro encodes each character as a bit sequence
according to that charset. The e-mail that is sent is then augmented by the information of which
charset was used to encode it. This information is then used by the receiving mail client to
decode the bit sequence into characters that can be displayed to the recipient.
For example, with ASCII charset, (where each 7-bit sequence denotes one character) the
sequence “1000001” would mean the character with the decimal value 65, which is the Latin ‘A’.
With the ISO-8859-1 charset, (where each 8-bit sequence denotes one character) the sequence
“11000100” would mean the character with the decimal value 196, which is the umlaut ‘Ä’.
However, with the ISO-8859-7 charset, (also 8-bit) the same value 196 would mean the Greek
letter ‘∆’ instead. Consequently, the decoding scheme or charset that makes the message
readable to the recipient is very important. LISTSERV Maestro takes care to include this
information in the e-mail, so that it is not lost during the transfer.
172
Appendix D Customizing Subscriber Access Templates
This table lists all the HTML tags and custom styles used by LISTSERV Maestro.
<body>
The main body of the HTML page. Styles defined for this tag (for example for
the font, background and so on) define the default styles for the whole page.
The other HTML tags inherit this style and can then overwrite it where
necessary.
<p>
The standard text paragraph. Used for all text that does not fall into a special
case.
<h1>
The level 1 header. Used for the header of each page.
<h2>
The level 2 header. Used for sub-level headers to separate different parts on
the same page.
<a>
The link tag. Used for all clickable links.
<td>
The table-cell tag. Used for all table cells.
<th>
The table-header-cell tag. Used for the header of the table that contains the
mailing lists in the current category, when viewed in the member area.
<input>
The input tag. Used for single line edit fields, checkboxes and buttons.
<select>
The select tag. Used for single select drop-down lists and multiple select
boxes.
small
Custom style class "small". Used to render text smaller than the normal text
for comments and list descriptions for example.
emphasis
Custom style class "emphasis". Used to render phrases or individual words
in an emphasized style.
error
Custom style class "error". Used to render error messages.
emphasisBackground
Custom style class "emphasisBackground". Used to render table cells or
whole tables in an emphasized style by giving them a background which
stands out from the normal page background.
disabledEditField
Custom style class "disabledEditField". Used to render edit fields and
selection fields in a "grayed" state to make their disabled nature more
apparent.
173
tableframe
Custom style class "tableframe". Used to render a frame around box-like
tables that group together certain related input fields or texts. Also used to
render the member area pages to appear in a "tabbed" style with two tabs
(for "My Lists" and "My Profile"). Surrounds the two tabs at the top.
subscribeStepActiveTitle
Custom style class "subscribeStepActiveTitle". Used to render the title of the
currently active subscription step (step 1 or 2) on the page where a
subscriber can join the member area or subscribe to a list (without first
logging in), to make it stand out from the other (currently inactive) step.
subscribeStepInactiveTitle
Custom style class "subscribeStepInactiveTitle". Corresponding "inactive"
style for the "subscribeStepActiveTitle" style (see above). Used to render the
title of the currently inactive subscription step.
description
Custom style class "description". Used to render the public description of the
membership area or current category (if any).
subscribed
Custom style class "subscribed". Used to render the "Yes" marker in the
column "Subscribed" of the table of available mailing lists in the membership
area, meant to signify that the currently logged in member has subscribed
this list.
notsubscribed
Custom style class "notsubscribed". Used to render the "---" marker in the
column "Subscribed" of the table of available mailing lists in the membership
area, meant to signify that the currently logged in member has not
subscribed this list.
selectedTab
Custom style class "selectedTab". Used to render the label and background
of the currently selected tab in the membershiparea ("My Lists" or "My
Profile").
tableThickFrame
Custom style class "tableThickFrame". Used to render the membership area
pages to appear in a "tabbed" style with two tabs (for "My Lists" and "My
Profile"). Surrounds the main part of the membership area which sits
beneath the two tabs.
tableBottomLine
Custom style class "tableBottomLine". Used in the membership area to
render a horizontal separator line between the row that displays the current
category and its parent categories as navigatable links, (this row only
appears if there are categories in the dataset) and the lower part that shows
all mailing lists in the current category.
tableRightLine
Custom style class "tableRightLine". Used in the membership area to render
a vertical separator line between the left column that displays the subcategories of the current category, (this column only appears if there are
sub-categories) and the part to the right that shows all mailing lists in the
current category.
174
Default Style Sheet
The following table displays the style sheet that is used by the default template:
body {
font-family: Verdana, Arial, Helvetica, sans-serif;
font-size: 9pt;
font-weight: normal;
font-style: normal;
font-variant: normal;
text-transform: none;
text-decoration: none;
background-color: #FFFFFF;
layer-background-color: #FFFFFF;
color: #000000;
}
p {
font-family: Verdana, Arial, Helvetica, sans-serif;
font-size: 9pt;
color: #000000;
}
h1 {
font-family: Verdana, Arial, Helvetica, sans-serif;
font-size: 12pt;
font-weight: bold;
color: #CC0033;
margin: 0pt, 0pt, 5pt, 0pt;
}
h2 {
font-family: Verdana, Arial, Helvetica, sans-serif;
font-size: 10pt;
color: #333399;
margin: 0pt, 0pt, 5pt, 0pt;
}
a {
text-decoration: underline;
color: #333399;
}
175
td {
font-family: Verdana, Arial, Helvetica, sans-serif;
font-size: 9pt;
color: #000000;
}
th {
font-family: Verdana, Arial, Helvetica, sans-serif;
font-size: 9pt;
font-weight: bold;
color: #000000;
background-color: #F1F4FA;
}
input {
font-family: Verdana, Arial, Helvetica, sans-serif;
font-size: 9pt;
color: #000000;
}
select {
font-family: Verdana, Arial, Helvetica, sans-serif;
font-size: 9pt;
color: #000000;
}
.small {
font-size: 8pt;
}
.emphasis {
font-weight: bold;
}
.error {
color: #CC0033;
}
.emphasisBackground {
background-color: #F1F4FA;
}
.disabledEditField {
background-color: #EEEEEE;
}
176
.tableframe {
border-color: #333399;
border-style: solid;
border-width: 1px 1px 1px 1px;
}
.subscribeStepActiveTitle {
font-family: Verdana, Arial, Helvetica, sans-serif;
font-size: 9pt;
font-weight: bold;
background-color: #333399;
color: #FFFFFF;
}
.subscribeStepInactiveTitle {
font-family: Verdana, Arial, Helvetica, sans-serif;
font-size: 9pt;
background-color: #333399;
color: #FFFFFF;
}
.description {
}
.subscribed {
font-weight: bold;
color: #009900
}
.notsubscribed {
}
.selectedTab {
font-family: Verdana, Arial, Helvetica, sans-serif;
font-size: 9pt;
font-weight: bold;
background-color: #333399;
color: #FFFFFF;
}
.tableThickFrame {
border-color: #333399;
border-style: solid;
border-width: 4px 3px 3px 3px;
}
177
.tableBottomLine {
border-color: #333399;
border-style: solid;
border-width: 0px 0px 1px 0px;
}
.tableRightLine {
border-color: #333399;
border-style: solid;
border-width: 0px 1px 0px 0px;
}
178
Appendix E Building Hosted Recipient Queries
LISTSERV Maestro includes its own method of build queries from hosted recipient lists by using
target groups. Basic or complex queries can be created to segment (filter) a hosted recipient list
based on any available data. Filtering conditions are entirely optional. If no condition is supplied,
the target group will always address all current subscribers of the hosted recipient list.
When a hosted recipient list is created in LISTSERV Maestro and at least one subscriber is
added, the system automatically creates a target group based on that list. This target group
includes all subscribers for the hosted list. It is named after the name of the hosted recipient list
on which it is based, and is saved in the category <Hosted Lists Default Target Groups>. In
order to filter this list, this target group must first be copied and saved. Once copied, it can be
edited by clicking on its name and entering the target group definition wizard, like any other
target group. For more information on using the target group wizard, see Section 12 Introduction
to Recipient Target Groups.
Make any changes desired on the General and Source screens of the wizard, and continue to
the Source Details screen. As an aid for constructing the filtering condition, all profile fields
available in the hosted recipient list are displayed in the upper part of the wizard page. Each
profile field is listed with its name and data type. Any mandatory fields are rendered in bold. Use
this list as a reference in order to decide on which fields to define conditions.
The condition itself is based on Boolean logic, meaning that when the condition is applied to a
certain subscriber, the result of the condition will always be either "true" (in which case the
subscriber becomes a recipient of the job in question) or "false" (in which case the subscriber
will not be a recipient of the job).
The condition is defined visually in form of a "condition tree", which is displayed in the lower part
of the wizard page. The condition tree consists of hierarchically ordered nodes of various types.
Each of the nodes has, for a given subscriber, a certain Boolean "true" or "false" state, where
for nodes that have sub-nodes, the Boolean state of the node itself is derived by combining the
Boolean states of all sub-nodes in a certain manner (how they are combined depends on the
type of the node itself). The root-node of the whole tree is equivalent to the whole condition, that
is the Boolean result of the condition is determined by looking at the Boolean state of the root
node (which in turn derives its state by looking at its subnodes and combining them accordingly,
and so on).
Nodes in the condition tree can be of one of two main types:
•
Combination Operator Nodes: Such a node does not have a Boolean state itself.
Instead, it derives its Boolean state by combining the states of all its subnodes. Thus its
name as "Combination Operator". Such a node is never useful without any subnodes.
•
Condition Nodes: Condition nodes derive their Boolean state from the condition that is
defined for them: They apply the condition to a given subscriber, which results either in
"true" or "false" and thus defines the Boolean state of the node. Condition nodes never
have subnodes. Condition nodes come in two varieties, normal conditions and job based
conditions.
The following sections describe different aspects of editing the condition tree, explain the
different nodes types available, and give instructions on how to create one.
179
Editing the Condition Tree
This section describes general concepts about how the condition tree is edited. The area in
which is condition tree is edited is separated into a left and a right part. The tree with all its
nodes is shown in the left part, while a description of the currently selected node, together with
an Actions on Selected Node link is displayed in the right part. Below the two parts, a textual
representation of the condition is displayed at all times. It mirrors the condition that is currently
defined in a textual form, using a pseudo syntax with commonly used elements. With this
representation, it is possible to verify that the condition defined by the tree is indeed the
intended condition.
The tree itself always consists of elements. The top element is the root, labeled with
"Subscribers of XYZ", where "XYZ" is the name of the hosted recipient list the target group is
based on. The root always contains one single child node that is always a combination operator
node. This "top level" operator cannot be deleted, but its type can be changed (see Combination
Operator Nodes for details).
Initially, the top level operator is empty; it does not contain any sub-nodes. This is equivalent to
an empty condition that is "true" for all subscribers of the hosted recipient list.
If a node in the tree has sub-nodes, then the node itself can be either closed (hiding the subicon,
nodes) or open (displaying the sub-nodes). Closed nodes are displayed with a small
and open nodes are displayed with a small
icon. Click on the icon to open or close close a
node (double-clicking the node name will not work).
Figure 139 Condition Tree
Clicking on a node to select it will provide a detailed description of the node on the right side of
the screen, and the Actions on Selected Node menu link will be displayed on the right side.
Clicking on the link will open a menu that contains all currently possible actions that can be
executed on the selected node. Which actions these are available depends on the node type
and the state it is in.
180
For the root node, only one action is available:
Remove Unnecessary Nodes – This action will "prune" the tree and remove any unnecessary
nodes from it in a way that the Boolean logic of the tree is not changed, but that any superfluous
nodes are removed. For example, any empty combination operator nodes are removed. Note,
that if there currently are no unnecessary nodes, executing this command will not have any
effect. See Combination Operator Nodes for details.
For combination type nodes, the following actions may be available depending on the current
state:
•
Change Operator Type – Opens a popup dialog box that allows for changing the
operator type of the node. There are four different types: AND, OR, NOT AND and NOT
OR. See Combination Operator Nodes for details.
•
Add Condition – Adds a new normal condition type node to the selected combination
node as a new child node. See Normal Condition Nodes for details.
•
Add Job Based Condition – Adds a new job based condition type node to the selected
combination node, as a new child node. See Job Based Condition Nodes for details.
•
Add Combination Operator – Adds a new combination operator node to the selected
combination node, as a new child node. See Combination Operator Nodes for details.
•
Cut – Marks the selected combination operator node for "Cut & Paste". When cut, the
node is displayed with a "grayed" name to visualize that it has been designated for Cut &
Paste. The node is not actually cut (removed from its current location) until the "Paste"
command is selected at a different location. The "grayed" state is only a visual reminder
that the node has been marked for "Cut". Note: The "Cut" command is not available for
the top level combination node, since this node cannot be deleted.
•
Copy – Marks the selected combination operator node for "Copy & Paste". The node is
not actually copied until the "Paste" command is selected at a different location.
•
Paste – Completes an ongoing "Copy & Paste" or "Cut & Paste" operation that was
previously started with either the "Cut" or the "Copy" command of a different node.
Through the initial command, a node had been marked for cut or copy and executing the
paste command completes the operation by actually moving the node from its old
location to the currently selected combination node (for "Cut") or by creating a copy of
the node in the currently selected combination node (for "Copy"). The "Paste" command
itself is therefore only available if actually a node has been marked for Cut & Paste or
Copy & Paste.
•
Clear Cut/Copy State – Aborts any ongoing Cut & Paste or Copy & Paste operation that
was started with either of the commands "Cut" or "Copy". Any previously marked node
will become "unmarked" and the "Paste" command will no longer be available.
•
Delete – Deletes the selected combination node and all its sub-nodes (after
confirmation). This is not recoverable! Note: The "Delete" command is not available for
the top level combination node since this node cannot be deleted.
For condition type nodes (both for normal and job based conditions) the following actions may
be available, depending on the current state:
•
Edit – Opens a popup dialog box in which the settings of the condition can be edited.
181
•
Insert Combination Operator – Creates a new combination operator node and inserts
it as the new parent-node of the currently selected condition node. The selected
condition node will initially be the only child of the freshly created combination node and
the new combination node will be placed in the same parent-node as the condition node
was before.
•
Cut – Marks the selected condition node for "Cut & Paste". In this state, the node is
displayed with a "grayed" name to visualize that it has been designated for Cut & Paste.
The node is not actually cut (removed from its current location) until the "Paste"
command is selected at a different location. The "grayed" state is only a visual reminder
that the node has been marked for "Cut".
•
Copy – Marks the selected condition node for "Copy & Paste". The node is not actually
copied until the "Paste" command is selected at a different location.
•
Clear Cut/Copy State – Aborts any ongoing Cut & Paste or Copy & Paste operation that
was started with either of the commands "Cut" or "Copy". Any previously marked node
will become "unmarked" and the "Paste" command will no longer be available.
•
Delete – Deletes the selected condition node (after confirmation). This is not
recoverable!
Combination Operator Nodes
Combination operator nodes derive their Boolean state by examining the Boolean state of all
sub-nodes and combining these states using a Boolean operator depending on the node's type.
The following operator node types are available:
•
Combine conditions with AND – Combines the Boolean states of all sub-nodes using the
boolean "AND" operator, meaning that the combination is "true" only if all sub-nodes are
also "true". If even a single sub-node is "false", the combination is also "false". The ANDcombination is represented in the tree with the symbol
and the textual representation
"(... AND ...)".
•
Combine conditions with OR – Combines the Boolean states of all sub-nodes using the
boolean "OR" operator, meaning that the combination is "true" if at least one sub-node is
"true", no matter if all others are "false". If all sub-nodes are "false", the combination is
also "false". The OR-combination is represented in the tree with the symbol
and the
textual representation "(... OR ...)".
•
Combine conditions with AND, then negate the result – The negated version of the "AND"
combination described above. If the normal "AND" results in "true", this negated version
results in "false". As a result, the combination is "true" if at least one sub-node is "false",
no matter if all others are "true". If all sub-nodes are "true", the combination is then
"false". The negated AND-combination is represented in the tree with the symbol
and
the textual representation "NOT (... AND ...)".
•
Combine conditions with OR – The negated version of the "OR" combination described
above. If the normal "OR" results in "true", this negated version results in "false". As a
result, the combination is "true" only if all sub-nodes are "false". If even a single subnode is "true", the combination is then "false". The negated OR-combination is
182
represented in the tree with the symbol
"NOT (... OR ...)".
and the textual representation
The type of a combination operator can be changed for the node at any time using the "Change
Operator Type" action menu entry.
When doing a Copy & Paste of a combination node, the node and its whole subtree (including
all sub-nodes and their sub-nodes) will be copied. Similarly, when doing a Cut & Paste, the
node and its whole subtree will be removed from the original location and added at the paste
location.
Note: Certain nestings of operator nodes are superfluous and will therefore be removed
("pruned") if the action menu entry "Remove Unnecessary Nodes" is selected on the root node.
These include:
•
Empty combination nodes – Combination nodes without any sub-nodes are always
superfluous and are always removed.
•
Combination nodes with one sub-node – Combination nodes with only a single subnode are superfluous only if the combination node is of the non-negated sort (a simple
"AND" or "OR" combination). In that case, the combination node is removed and its only
sub-node takes the combination node's place directly in the parent node.
•
Combination nodes with several sub-nodes – Combination nodes with several subnodes are superfluous only if the combination node is of the non-negated sort (a simple
"AND" or "OR" combination) and if the parent node of the combination node is of the
same combination type. In that case, the combination node is removed and all its subnodes take the combination node's place directly in the parent node.
Normal Condition Nodes
Normal condition nodes derive their Boolean state by examining a condition that is defined
explicitly for the given node. The condition is defined in a dialog box when the node is first
created and can later be edited in the same dialog by selecting the "Edit" command from the
node's "Actions on Selected Node" menu. The condition node is represented in the tree with the
symbol
and a textual representation that displays the condition in short form.
The Edit Condition dialog box shows several drop-down lists and possibly edit fields or
selection boxes that allow for the definition of the condition for the node. In the dialog box, the
selection controls are organized in a hierarchical order from top to bottom, where choices in the
upper controls directly influence the available choices in the lower controls. Therefore, define a
condition in a top-to-bottom manner, first making selections in the upper controls, then
proceeding to the next control, and so on, until the bottom of the dialog box is reached and the
whole condition is completed.
Generally speaking, each condition consists of three parts: A left operand, an operator and a
right operand. The operator is always a Boolean operator that compares the left and right
operands in a certain fashion and the result is a Boolean value of "true" or "false". This operator
result is then used as the Boolean state of the condition node.
In the dialog box, these three parts are represented by five controls (usually), situated above
each other. The first two controls define the left operand, the third control defines the operator
and the last two controls define the right operand.
183
Which operators are available in the third control, and which kinds of right operands can be
defined using the last two controls depends on the selections in the first two controls, that is
what left operand is currently selected. The following sub-sections contain descriptions of the
possible choices for each of the three parts of a condition.
Left Operand
The following choices are available for the left operand:
•
Field – The left operand is one of the profile fields available in the hosted recipient list
the target group is based on. To define an operand of this type, select "the field" from the
first drop-down list. The second control then becomes a drop-down list too, where you
now select the field to use.
•
Number – The left operand is a constant number. To define an operand of this type,
select "the number" from the first drop-down list. The second control then becomes an
edit field, where you now enter the number value to use.
•
Text – The left operand is a constant text string. To define an operand of this type,
select "the text" from the first drop-down list. The second control then becomes an edit
field, where you now enter the text string to use.
•
Boolean – The left operand is a constant Boolean value of "true" or "false". To define an
operand of this type, select "the Boolean value" from the first drop-down list. The second
control then becomes a drop-down list too, where you now select the Boolean value to
use.
•
Formula – The left operand is a formula. When the condition is evaluated, the formula is
evaluated first and its result is used as the left operand of the condition. To define an
operand of this type, select "the value of the formula" from the first drop-down list. The
second control then becomes a multi-line edit field, where you now enter the formula to
use. See below for details about formulas.
Operator
The available operators are shown in the third control of the dialog box, which is always a dropdown list. Which operators are available depends on the type of the left operand. For example,
there are different operators for numbers than for text strings.
•
Number Operators – Available either if the left operand is of the type "Number" or of the
type "Field" where the field in turn has the datatype "Number". The number operators
are:
°
= (Equal) The condition is true if the two numbers are equal.
°
<> (Not equal) The condition is true if the two numbers are not equal.
°
< (Less than) The condition is true if the left number is less than the right number.
°
<= (Less than or equal) The condition is true if the left number is less than or equal to
the right number.
°
> (Greater than) The condition is true if the left number is greater than the right
number.
°
>= (Greater than or equal) The condition is true if the left number is greater than or
equal to the right number.
184
•
•
•
•
Text Operators – Available either if the left operand is of the type "Text" or of the type
"Field" where the field in turn has the datatype "Text". The text operators are:
°
= (Equal) The condition is true if the two texts are equal.
°
<> (Not equal) The condition is true if the two texts are not equal.
°
< (Less than) The condition is true if the left text is less than the right text
(lexicographic comparison).
°
<= (Less than or equal) The condition is true if the left text is less than or equal to the
right text (lexicographic comparison).
°
> (Greater than) The condition is true if the left text is greater than the right text
(lexicographic comparison).
°
>= (Greater than or equal) The condition is true if the left text is greater than or equal
to the right text (lexicographic comparison).
°
begins with The condition is true if the left text begins with the text string given as
the right operand text.
°
ends with The condition is true if the left text ends with the text string given as the
right operand text.
°
contains The condition is true if the left text somewhere contains the text string
given as the right operand text.
Boolean Operators – Available either if the left operand is of the type "Boolean" or of
the type "Field" where the field in turn has the datatype "Boolean". The Boolean
operators are:
°
= (Equal) The condition is true if the two operands have the same Boolean value.
°
<> (Not equal) The condition is true if the two operands have different Boolean
values.
Element Operators – Available if the left operand is of the type "Field" where the field in
turn has the datatype "Single Select". The element operators are:
°
= (Equal) The condition is true if the value selected in the field defined as the left
operand is equal to the right operand.
°
<> (Not equal) The condition is true if the value selected in the field defined as the
left operand is not equal to the right operand.
°
in The condition is true if the value selected in the field defined as the left operand
appears in the elements of the set defined as the right operand.
°
not in The condition is true if the value selected in the field defined as the left
operand does not appear in the elements of the set defined as the right operand.
Set Operators – Available if the left operand is of the type "Field" where the field in turn
has the datatype "Multiple Select". The set operators are:
°
is the same set as [equals "="] The condition is true if the value-set selected in the
field defined as the left operand is equal to the set defined by the right operand.
185
°
contains only values of [subset "<="] The condition is true if the value-set
selected in the field defined as the left operand contains only values of the set
defined by the right operand. Alternatively, if the left operand set is a subset of the
right operand set.
°
contains all values of [superset ">="] The condition is true if the value-set
selected in the field defined as the left operand contains all values of the set defined
by the right operand. Alternatively, f the left operand set is a superset of the right
operand set.
°
contains some values of [superset "&"] The condition is true if the value-set
selected in the field defined as the left operand contains some values of the set
defined by the right operand. Alternatively, if the intersection of the left operand set
and the right operand set is not empty.
°
NOT (is the same set as) [not equals "="] The condition is true if the value-set
selected in the field defined as the left operand is not equal to the set defined by the
right operand.
°
NOT (contains only values of) [not subset "<="] The condition is true if the valueset selected in the field defined as the left operand contains some values which do
not appear in the set defined by the right operand. Alternatively, if the left operand
set is not a subset of the right operand set.
°
NOT (contains all values of) [not superset ">="] The condition is true if the valueset selected in the field defined as the left operand does not contain all values of the
set defined by the right operand. Alternatively, if the left operand set is not a superset
of the right operand set.
°
NOT (contains some values of) [not superset "&"] The condition is true if the
value-set selected in the field defined as the left operand does not contain any of the
values of the set defined by the right operand. Alternatively, if the intersection of the
left operand set and the right operand set is empty.
The "subset" and "superset" operators described above (and their negated counterparts) do not
adhere strictly to the mathematical definition of a subset or superset. In mathematics, the empty
set is always a subset of any other set and consequently any non-empty set is always a
superset of the empty set. In regard to the empty set, the above operators behave differently.
For these operators, the empty set is never a subset of any other set and similarly, no set can
be a superset of the empty set.
•
Formula Operators – Formulas as the operands are a special case when it comes to
the operator: Normally, the left operand defines the datatype and thus the available
operators. For formulas however, the datatype is not known until the formula is actually
calculated. And with the datatype not known, the available operators cannot be adjusted
accordingly. Therefore, if the left operand is a formula, the available operators are the
same as for "Text" (see "Text Operators" above) and the actual datatype will be
determined at run time, after the following rules:
°
If either the left or right operand is of type "Text", then the operator will also be a text
operator and the other operand is converted to text if necessary.
°
If both operands are of type "Number" and the selected operator is one which is
available for numbers (such as one of the normal comparison operators =, <>, <, <=,
>, >=), then two operands are compared as numbers.
186
°
If both operands are of type "Number" but the selected operator is not available for
numbers (it "begins with", "ends with" or "contains"), then both operands are
converted to text so that the operator can be applied.
Right Operand
For the right operand, the available choices also depend on which left operand has been
selected. The following choices may be available:
•
Field – Available if applicable. The right operand is one of the profile fields available in
the hosted recipient list the target group is based on. To define an operand of this type,
select "the field" from the drop-down list at fourth position. The last control then becomes
a drop-down list as well, so that the field to use can be selected. This second list will
automatically only contain fields of a type that are compatible to the left operand and the
operator. The type "Field" may not be available as the right operand if there is no field
that matches the datatype defined by the left operand, or if the left operand is also a field
but is the only field of that datatype (comparisons with the same field used both for the
left and right operand are not allowed).
•
Number – Only available if the left operand is of type "Field" and the corresponding field
is of type "Number". The right operand is a constant number. To define an operand of
this type, select "the number" from the drop-down list at fourth position. The last control
then becomes an edit field, where you now enter the number value to use.
•
Text – Only available if the left operand is of type "Field" and the corresponding field is
of type "Text". The right operand is a constant text string. To define an operand of this
type, select "the text" from the drop-down list at fourth position. The last control then
becomes an edit field, where you now enter the text string to use.
•
Boolean – Only available if the left operand is of type "Field" and the corresponding field
is of type "Boolean". The right operand is a constant Boolean value of "true" or "false".
To define an operand of this type, select "the Boolean value" from the drop-down list at
fourth position. The last control then becomes a drop-down list as well, so the Boolean
value to use can be selected.
•
Formula – Only available if the left operand is of type "Number", "Text", "Formula" or
"Field" (where then in turn the corresponding field must be of type "Number" or "Text").
The right operand is a formula. When the condition is evaluated, the formula is evaluated
first and its result is used as the right operand of the condition. To define an operand of
this type, select "the value of the formula" from the drop-down list at fourth position. The
last control then becomes a multi-line edit field, where the formula can be entered. See
below for details about formulas.
•
Parameter – Only available if the left operand is of type "Field" (any kind of field). The
right operand is a parameter whose content is not already defined during the condition
definition, but which will be supplied later by the end-user, when the target group the
condition belongs to is used in the recipient wizard. See below for details about
parameters.
•
Check for "empty" – Only available if the left operand is of type "Field" and the
corresponding field is an optional field. The right operand is the "empty" value, i.e. the
condition compares the given left operand field against the empty value, using the given
operator. Since only optional fields can actually be empty, this type is not available if the
left operand field is a mandatory or Boolean field. To define an operand of this type,
187
select "empty" or "the empty set" (whichever is available) from the drop-down list at
fourth position. The last control then becomes invisible, because there is no more
information required about the right operand.
•
Check for certain lookup table entry – Only available if the left operand is of type
"Field" and the corresponding field is of type "Single Select". The right operand is a
fixedly selected entry from the lookup table that the left operand field is associated with.
To define an operand of this type, select "the list entry" from the drop-down list at fourth
position. The last control then becomes a drop-down list too, filled out with all values
from the lookup table that is associated with the left operand field. Select one of the
values to use from the drop-down list.
•
Check for certain lookup table entry set – Only available if the left operand is of type
"Field" and the corresponding field is of type "Multiple Select". The right operand is a
fixedly selected entry set from the lookup table that the left operand field is associated
with. To define an operand of this type, select "the set of entries selected below" from
the drop-down list at fourth position. The last control then becomes a multiple selection
list box, filled out with all values from the lookup table that is associated with the left
operand field. Select one or several of the values to use from the drop-down list (hold
down CTRL or SHIFT to select multiple entries or to deselect already selected entries).
Formulas in Conditions
Formulas can be used in conditions to calculate the left and/or right operand value at "run time"
– the moment the condition is actually applied to a given subscriber to determine if the
subscriber will become one of the recipients of a job or not.
Such a formula is typed directly into the multi-line edit field provided by the condition definition
dialog box. Line breaks in the formula code have no effect on the result of the formula but can
be freely used to enhance readability.
The syntax follows general mathematical formula rules using operators such as "+" and "-",
parenthesis nesting and so on. There are also a number of predefined "functions" that can be
used in formulas.
Examples of formulas:
15 + 4
27 * Max(17, 4, 24/8) / (19 + 22)
&NAME; + "@lsoft.com"
(ToNum(&AGE;) - 2004) * 10
ToDate(CurrentTimeMillis, "MM/dd/yyyy HH:mm")
See here for a detailed description of formulas and functions.
Note: Formulas may also contain parameter placeholders, which allows for the definition of
conditions with formulas, where one or several values in the formula are not known at the time
the formula and condition are written, but are instead supplied later by the end user who uses
this target group in the recipients wizard. (See here for details about how to include parameters
in formulas and read the following sub-section about condition parameters in general).
188
Parameters in Conditions
Parameters can be used in conditions as the right operand in situations where the value of the
operand is not yet known at the time the condition is defined (or will not be fixed by the condition
definition), but will be supplied later by the end user when the target group is used in the
recipients wizard. Using this method can create conditions that are parameterized to allow for
greater flexibility for the end user.
To define a right operand of this type, select the entry "the TYPE_VALUE supplied for the
parameter" from the drop-down list at fourth position, where "TYPE_VALUE" will be filled out
according to the type of the left operand field selected, which will therefore also already define
the type of the parameter. The entry in the drop-down list will be one of the following:
•
The text supplied for the parameter
•
The numeric value supplied for the parameter
•
The Boolean value supplied for the parameter
•
The list entry supplied for the parameter
•
The set supplied for the parameter
After this selection is made, the last control becomes an edit field, where the name of the
parameter to define is entered. Enter only the name, without any enclosing tags (this is different
than when using a parameter in a formula or SQL statement or LISTSERV condition, where the
parameter needs to be enclosed in tags to set if off from the rest of the
formula/statement/condition).
Note, that if you specify the same parameter name in different condition nodes, it will be
interpreted as one parameter that appears several times in the condition tree; all appearances
will have the same content value and must also all appear in the same type context ("Number"
or "Text" and so on.). This means that if in one condition node the selection is "the text supplied
for the parameter" and as the parameter name "mytext", is specified, then if same parameter
name is specified again in a different condition node, the selection must also be "the text
supplied for the parameter", but not for example "the numeric value supplied for the parameter".
Similarly, a parameter with the same name is used in a formula somewhere else in the condition
tree, then all these appearances too will reference the same parameter; all of them will be
replaced with the same final content during usage in the recipients wizard and must therefore
have the same type.
Example: Assume that the hosted recipient list has a field called "AGE" and you want to define
a target group that selects all subscribers that are of a certain age or older. If, for example, you
want to test for the age of 21, you could specify this as a condition node as follows:
the field AGE >= the number 21
However, what if for the next mailing you want to use a different age, say "18" or "40"? You
could of course create a new target group for that purpose, with a new condition. But this will
soon become tedious, so instead, you should use a parameter for the age and thus leave it to
the end user to supply the actual age to check for. The condition node would then look like this:
189
the field AGE >= the numeric value of the parameter age_param
Where "age_param" is the name that you have given this parameter. The resulting target group
could then be used to select recipients of any age or older, just by supplying the desired
threshold age in an edit field, as a value for the parameter "age_param".
Job Based Condition Nodes
Job based condition nodes derive their Boolean state by examining the delivery of an earlier
mail job, the so called "source job", and optionally also the tracking events collected for that job
(if any). The condition node is represented in the tree with the symbol
and a textual
representation that displays the condition in short form.
The source job it is that will be examined will be specified by the end user who uses the target
group in the recipients wizard. Here in the condition definition, it is enough to know that
whatever source job will be selected, it will be a job that was in turn delivered to the same
hosted recipient list as the one that this target group is based on (or more precisely, the source
job used a target group which was based on the same hosted recipient list as this target group).
The Edit Job Based Condition dialog box allows you to define how the source job will be
examined. The following options are available:
•
All current subscribers which were recipients of the original source job – If
selected, the condition node evaluates to "true" for all subscribers currently on the
hosted recipient list that have also been recipients of the source job that will be selected
in the recipients wizard. For any subscribers that were not recipients of the source job,
(because they did not fulfill the source job's condition or because they only subscribed to
the list after the source job was delivered) the condition evaluates to "false". If this
choice is selected, you may optionally specify to examine the tracking events of the
source job to filter further the recipients.
•
All current subscribers which were NOT recipients of the original source job – The
negated version of the above condition. If selected, the condition node evaluates to
"true" for all subscribers currently on the hosted recipient list that were not recipients of
the source job that will be selected in the recipients wizard, (because they did not fulfill
the source job's condition, or they only subscribed to the list after the source job was
delivered). For any subscribers that were recipients of the source job, the condition
evaluates to "false".
Examining Tracking Events of the Source Job
If you select the first of the two choices above, to filter for all subscribers that were recipients of
the source job, then you may optionally choose to examine the tracking events that were
collected for the source job, to filter further the recipients. (Note: If you use this option of
examining the tracking events, additional issues need to be considered). To enable the option,
check the "With the following tracked behavior" checkbox and select one of the available
behavior types from the drop-down list:
•
At least on open-up event – The condition will be "true" only for subscribers who did
generate at least one open-up event for the source-job.
190
•
At least one click event for any selected URL – The condition will be "true" only for
subscribers who did generate at least one click event for any of the selected URLs (see
below on how to select the URLs to look at).
•
At least one click event for each selected URL – The condition will be "true" only for
subscribers who did generate at least one click event for each of the selected URLs (see
below on how to select the URLs to look at).
•
NOT (At least one open-up event) – The negated version of the first behavior type as
described above. The condition will be "true" only for subscribers who did not generate
any open-up events for the source job.
•
NOT (At least one click event for any selected URL) – The negated version of the
second behavior type as described above. The condition will be "true" only for
subscribers who did not generate any click events for any of the selected URLs (see
below on how to select the URLs to look at).
•
NOT (At least one click event for each selected URL) – The negated version of the third
behavior type as described above. The condition will be "true" only for subscribers who
did not generate any click events for at least one of the selected URLs (see below on
how to select the URLs to look at).
If from the above behavior types one of the four that deal with click events is selected, you also
need to specify which URLs to look at. This is done with the option button located below the
drop-down list, which only becomes enabled if such a behavior type is chosen. In this case, you
have the following choices:
•
Fixed list of all tracked links of the "source job" – If selected, then the click events of all
tracked links in the selected source job will be examined to determine the condition
state. With this choice, the end user who employs this target group in the recipients
wizard will not have the choice to define which links to examine, as it will always be all
links of the source job which are examined.
•
User defined list stored in parameter – If selected, then only the click events of a certain
list of links in the source job will be examined to determine the condition state. Which
links will appear in this list is not defined here, at the time the condition is specified, but
is instead defined by the end-user who employs this target group in the recipients wizard
by filling out a parameter. The parameter's name needs to be specified here, together
with the selected option button. Later in the recipients wizard, the selection of links will
be made in a multiple selection box, and the resulting list of links to examine will be
stored in the parameter with the name specified here. The condition will then look at the
list in this parameter to determine its Boolean state.
Note, that if you specify the same parameter name in different job based condition
nodes, it will be interpreted as one parameter that appears several times in the condition
tree; all appearances will be filled out with the same list of selected links (depending on
the end-user's choices). A parameter with the same name in a normal condition node or
a condition formula may not be used.
Additional Issues with Job Based Conditions and Tracking Events
If the option of examining the tracking events of the source job is selected, additional issues
must be considered.
With this option enabled, the choice for the "source job" becomes more limited. Normally for job
based conditions, a possible source job is one that has been delivered to the same hosted
191
recipient list as the one the target group is based on. When using the "examine tracking events"
option, the choice for the source job is narrowed to all the above jobs which also had personal
tracking enabled at the time of delivery. Because only the information collected with personal
tracking is sufficient for the job based condition node to determine if the condition will be "true"
or "false".
With this option enabled, a decision must be made for "which" events to actually take into
consideration. Will all events collected for the source job be used, or only some?
To answer this question, the following happens whenever you define a job based condition
which shall also examine tracking events:
If the condition tree contains at least one such job based condition node, additional input
controls are displayed on the wizard page, right below the condition tree. These controls give
you the option of defining a time period into which events of the source job must fall to actually
be considered by the job based condition nodes in the tree. (The settings made here apply
equally to all job based condition nodes in the tree that examine tracking events.)
To define this event period, you need to specify a "From" threshold where the period begins and
a "To" threshold where the period ends.
For the From threshold, you have the following choices:
•
The delivery time of the original source job – This means that the event period begins
with the delivery time of the source job; the earliest events generated for the source job
will be considered by the condition.
•
<To be defined during recipient definition> – This means that the beginning of the event
period (the "From" threshold) is not already fixed here in the target group definition but
will instead be supplied by the end user who employs this target group in the recipients
wizard. The end user will then have the choice to set the "From" threshold to the same
"delivery time of the original source job" as explained above (to catch even the earliest
events) or to set it to a specific date and time (to start event examination at this specific
time).
For the To threshold, you have the following choices:
•
The delivery time of the follow-up job – The "follow-up job" is the job that this target
group will be employed for in the recipients wizard. This choice means that the event
period ends with the delivery time of the follow-up job; even the latest events generated
for the source job will be considered by the condition.
•
<To be defined during recipient definition> – This means that the end of the event period
(the "To" threshold) is not already fixed here in the target group definition but will instead
be supplied by the end user who employs this target group in the recipients wizard. The
end user will then have the choice to set the "To" threshold to the same "delivery time of
the follow-up job" as explained above, (to catch even the latest events) or to set it to a
specific date and time (to end event examination at this specific time).
192
Appendix F E-mail and International Character Sets
Computers store all information in the form of “bits” or their 8-bit conglomerations “bytes”. Bits
are also the entities that are transferred from the sender’s computer to the recipient’s computer
whenever an e-mail message is sent. E-mail programs take the message and convert it to bits.
The message is sent and the receiving e-mail client program translates these bits back into a
readable message for the recipient. This process takes place seamlessly for the sender and the
recipient. The sender first creates a text message and the recipient receives a text message –
all the converting remains behind the scenes.
In order for characters from an alphabet to be converted into bits for transmission, and then
converted back into the message, the bits have to be arranged into sequences representing
each character in the alphabet. Matching the bit sequences to alphabetical characters is called
“mapping”. Mapping bit sequences to alphabets has resulted in several different so called
“character sets” (short: “charsets”) that have been defined and standardized by the international
community.
In the English-speaking world, probably the most widely used charset is ASCII (sometimes also
called US-ASCII), which is a charset that maps 7-bit sequences to the 26 characters from the
Latin alphabet. Because 7 bits have enough room for 128 characters (0-127), there are more
than the 26 Latin characters in the ASCII charset: First, each character appears twice (as upper
case and lower case), then there are the ten digits, 0-9, various punctuation marks like comma,
dot, semi-colon, colon, dash, slash, backslash, exclamation, question mark, and so forth. There
are also other characters that can act as control characters, that is, characters that have special
meaning to certain protocols, such as “#” and “&”.
Used almost as frequently, at least in the western world, are the charsets from the ISO 8859
family. These charsets map 8-bit sequences to letters, digits, and characters from various
European languages, Hebrew and Arabic. Since the ISO-8859 charsets use 8 bits, they have
twice the range as ASCII – enough room for 256 characters (0-255). For convenience, all ISO8859 charsets contain the full range of ASCII in their “lower” 128 characters; the bytes 0-127
from any ISO-8859 charset map directly to the corresponding ASCII character making ISO-8859
a superset of ASCII. The differences of each ISO charset are in the “upper” 128 characters, the
bytes 128-255.
For example, ISO-8859-1, mapping an alphabet suitable for West-European languages, has the
umlauts Ä, Ö and Ü at the positions 196, 214, and 220. In comparison, ISO 8859-7, mapping
the Greek alphabet, has the Greek letters ∆, Φ, and ά at the same positions.
The following charsets from the ISO-8859 family are currently supported by LISTSERV®
Maestro:
•
ISO-8859-1 Latin 1 (West European)
•
ISO-8859-2 Latin 2 (East European)
•
ISO-8859-3 Latin 3 (South European)
•
ISO-8859-4 Latin 4 (North European)
•
ISO-8859-5 Cyrillic
•
ISO-8859-6 Arabic
193
•
ISO-8859-7 Greek
•
ISO-8859-8 Hebrew
•
ISO-8859-9 Latin 5 (Turkish)
•
ISO-8859-15 Latin 9 (West European, update of Latin 1 with some French and Finnish
letters that were omitted in Latin 1, plus the Euro currency symbol € instead of the
international currency symbol ¤.)
•
UTF-8 International Unicode (encoded in UTF-8 format, Unicode is a very large charset
with room for almost all characters of many different languages of the world, even the
many Asian characters).
The 8-bit range of 0-255 is not enough to accomodate all letters from even the European
languages at once (therefore, there is a need for more than a dozen different members of the
ISO-8859 family). Also, 8-bit charsets do not take into account the other major language groups
of the world, such as Asian languages.
To address the limitations of 8-bit charsets, recently the 16-bit charset Unicode with a range for
65536 characters has become more and more widespread. This charset contains more or less
all letters and characters from the most widely used languages, as well as a set of symbols and
other useful characters. LISTSERV Maestro offers Unicode in the form of its UTF-8 variant.
UTF-8 is a transfer encoding for the 16-bit Unicode charset, which maps Unicode characters to
one, two, or more bytes, in a way that more common characters (like ASCII characters) need
fewer bytes than uncommon characters.
Again, for convenience, the first 128 characters of Unicode (0-127) are exactly the same as in
the ASCII charset, while the first 256 characters (0-255) are the same as in ISO-8859-1 (West
European). A large percentage of all other letters of world languages are assigned values from
256 to 65535 (although, not even the large range of Unicode is enough to accommodate all
letters from all languages).
LISTSERV Maestro and International Character Sets
What happens when international characters are used in e-mail messages written and delivered
in LISTSERV Maestro?
Internally, LISTSERV Maestro uses pure Unicode, allowing for the mixture of any characters in
e-mail, including the subject line and any data merged from uploaded files or selected from a
database – as long as there is a way of inputting them. For some languages, this simply
requires the installation of a special keyboard and display driver for that language. Other
languages, such as Asian languages, may require a special keyboard – this depends on the
language and on the computer’s operating system.
For sending, LISTSERV Maestro needs to decide on a charset that it can use to encode the
message. Specify the charset to use while defining the content (there is a special item for this
on the content definition page), or tell LISTSERV Maestro that it should attempt to automatically
determine which charset is the optimal one for the text contained in the message.
In the latter case, LISTSERV Maestro scans the written text to determine the optimal charset: If
the message uses characters that can be displayed with the ASCII charset (the case with most
English language texts), LISTSERV Maestro will choose the ASCII charset. If the message
contains characters outside of the ASCII range, but that can still be displayed with one of the
194
supported ISO-8859 charsets, then LISTSERV Maestro will choose the corresponding ISO8859 charset. And, optionally (only if LISTSERV Maestro is set to allow Unicode), the message
has characters that cannot be displayed with one of the ISO-8859 charsets (for example Asian
characters), or there are mixed characters from several ISO-8859 charsets, then LISTSERV
Maestro will choose Unicode as the charset.
Once a charset is chosen, LISTSERV Maestro encodes each character as a bit sequence
according to that charset. The e-mail that is sent is then augmented by the information of which
charset was used to encode it. This information is then used by the receiving mail client to
decode the bit sequence into characters that can be displayed to the recipient.
For example, with ASCII charset (where each 7-bit sequence denotes one character), the
sequence “1000001” would mean the character with the decimal value 65, which is the Latin ‘A’.
With the ISO-8859-1 charset (where each 8-bit sequence denotes one character), the sequence
“11000100” would mean the character with the decimal value 196, which is the umlaut ‘Ä’. But
with the ISO-8859-7 charset (also 8-bit), the same value 196 would mean the Greek letter ‘∆’
instead. Consequently, the decoding scheme or charset that makes the message readable to
the recipient is very important. LISTSERV Maestro takes care to include this information in the
e-mail, so that it is not lost during the transfer.
Merging Fields with International Character Sets
The issue of international character sets in combination with merging fields needs to be
considered very carefully to make sure that the results of the merging appear to the recipient as
intended. The main problem when merging fields containing text using international charsets is
to decide which charset to use. Potentially, the characters in the body of the message require a
certain charset, while some of the merge values may require a different charset. For example, a
message may have English text as the body of the message but a recipient list with recipients
from all over the world, with names that contain letters from various languages. It is likely that
these international names would be encoded using a different charset than the text of the
message. It is important to consider what happens when merging these names into the English
body text.
The effect that the chosen charset has on the merge values depends on the kind of recipients
definition selected for a particular job. If recipients are uploaded as a text file, based on the
reaction of a previous job or are selected from a database by the Maestro User Interface, then
all recipients and their merge values are already known to the Maestro User Interface before the
job is submitted to LISTSERV for delivery. LISTSERV Maestro can therefore encode each
merge value with the same charset that is used for the e-mail text. Consequently, if the values
are later merged into the text, their charset will match that of the text. However, if a merge value
contains a character that cannot be displayed in the charset chosen for the text, then this
character will be replaced with a question mark ”?” during the encoding, and this question mark
will appear in the mail that reaches the recipient to which the merge value belongs.
In the example described above where the message body was in plain text and the recipient list
was composed of recipient names from all over the world, a problem could occur because
LISTSERV Maestro chooses the charset based on the message text, not on the recipient
values. If the mail text itself is plain English, then LISTSERV Maestro will determine ASCII as
the correct encoding for the message and the recipient data. If then the names of the
international recipients are encoded as ASCII, all non-ASCII international characters will be
replaced with question marks. To avoid this problem, use the same charset for the message
body as was used for the merge data: If the recipients information was uploaded as a text file,
195
then simply use the same charset for sending as was used during the initial upload. And if the
recipients information was selected from a database, use the same charset as was used by the
database (ask the database administrator for this information if it is unclear).
In summary, recipients that are uploaded as a text file, or are selected from a database by the
Maestro User Interface, merge value characters that have no representation in the charset that
was chosen for the mail text will be displayed as ”?”. To avoid this problem, make sure the
message body is encoded with the same charset as the recipient list.
If recipients are defined by sending to an existing LISTSERV list or by letting LISTSERV select
from a database, then the Maestro User Interface will not see the actual recipients or their
merge values, and cannot do any special charset encoding on them. Instead, LISTSERV will
simply merge the bytes from the recipients source (from the LISTSERV list or from the database
LISTSERV connects to) into the mail text. Consequently, make sure that the merge values in
the original recipients source (LISTSERV list or LISTSERV DBMS) already have the correct
charset for the mail they are merged into.
For example, in e-mail sent with ISO-8859-1 (West-European), all appearances of the byte 196
in the merge values will be interpreted as the umlaut ‘Ä’. Even if the merge value is actually a
Greek word where the byte 196 should have been interpreted as a ‘∆’.
While mixing characters from different ISO-8859 charsets will simply display the wrong
character to the recipient, mixing ASCII and ISO-8859 or ISO-8859 and Unicode may even
result in characters that cannot be displayed at all. Most importantly, if the mail text uses the
Unicode encoding UTF-8, then it is necessary to make sure that the merge value texts in the
recipients source are also UTF-8 encoded (the byte sequence that stands for each merge value
must be a valid UTF-8 encoded sequence representing a string of characters from the Unicode
charset).
Then again, it is usually not possible to define a charset for the mail and then in some way make
sure that the merge values in the list or in the LISTSERV database match this charset, since
those merge values have usually been stored long before the mail was created. Therefore, the
best way to proceed is to check which encoding was used when the data was stored in the list
or LISTSERV database (again, you might need to ask your administrator for that information)
and then use the same charset for the mail.
In summary for the recipient types of an existing LISTSERV list or LISTSERV selecting from a
database, the merge value characters that have no representation in the charset that was
chosen for the mail text will be displayed as a different character – whichever character from the
actual charset that has the same byte value (like ‘Ä’ from ISO-8859-1 and ‘∆’ from ISO-8859-7),
or may not be displayed at all, if there is no corresponding byte value in the charset.
International Character Set Recipient Names in the Mail-TO-Header
The previous section outlined the problems of mixing a mail text in one language with merge
values from a different language. As an example, an English text mail was described, with an
international recipient list where the recipient names contain characters from many languages,
with the languages possibly differing between recipients from different countries. The recipient’s
name as a merge value is probably one of the most common uses for merging fields – to be
able to merge the recipient’s name into the text of the message, to personalize the mail. If this is
done, the problems described earlier need to be considered.
196
However, the recipient’s name is also often used in the ”To:”-header field of the mail, so that the
mail appears to the recipient with the recipient’s own name visible in the ”To:” field (which is
usually displayed by the e-mail client in some fashion), personalizing the e-mail one step further.
When using recipients uploaded as text files or selected from the database by the Maestro User
Interface, then the use of the name in the ”To:”-header field does not fall under the constraints
regarding charsets and text-merging. The name in the “To:”-header field will always be encoded
with the charset that is optimal for exactly this name. Users may safely write an e-mail message
in English and send it to international recipients. Each recipient will see his or her name with the
correct characters in the “To:”-header, so that a German recipient will correctly see umlauts, a
Russian will see Cyrillic and a Greek will see Greek letters (under the condition of course, that
the original recipient list was in Unicode format and contained the names of the recipients with
their respective international characters).
Just remember that with such a mixed-language list of recipients merge values you should not
also merge the name into the text body itself, unless the text is encoded as Unicode (UTF-8) as
well, due to of the problems described earlier.
When using recipients that are defined by sending to an existing LISTSERV list or by letting
LISTSERV select from a database, then again the bytes from the name-merge value will be
merged into the “To:”-header correctly by LISTSERV, without the Maestro User Interface having
a chance to encode them. And because it is very improbable that the names (the byte
sequences representing them) already contain the special MIME-header encoding necessary
for non-ASCII “To:”-header fields, make sure that only ASCII characters are allowed in recipient
names when creating the list or database data for these recipient types.
LISTSERV Maestro and Bi-Directional Character Sets
Of the ISO-8859 charset family, there are two charsets which contain letters from languages
that have a standard reading direction of right-to-left. These are the charsets ISO-8859-6
(Arabic) and ISO-8859-8 (Hebrew), both of which are supported by LISTSERV Maestro.
Actually, LISTSERV Maestro will not use the charsets with the names ISO-8859-6 and ISO8859-8, but will instead use the special bi-directional versions ISO-8859-6-i and ISO-8859-8-i.
These charsets contain the same characters as their non-i-suffix counterparts, but the ”-i” suffix
tells the receiving mail client that the text should be displayed with right-to-left reading direction.
Without the ”-i” suffix in the charset name, many e-mail clients would probably display the
correct characters, but in the (for that language) incorrect left-to-right reading direction.
Even with the ”-i” suffix, the recipient might require a special mail client version (or even a
special mail client) that is prepared to display text with right-to-left reading direction properly and
is also able to properly display bi-directional text (text that mixes characters with left-to-right and
characters with right-to-left reading direction, in the case of a Hebrew text that contains English
names, for example). Some clients may only display the characters with the right direction, but
still left-align each line of text, instead of the correct right-alignment. Occurrences such as this
are subject to the mail client itself, and out of the scope of LISTSERV Maestro.
197
This page left intentionally blank.
198


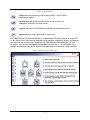
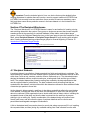
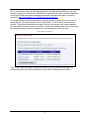
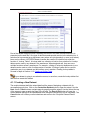
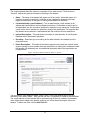
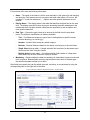
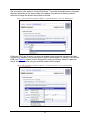
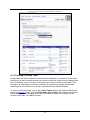
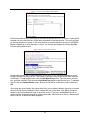
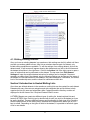
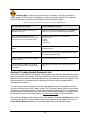
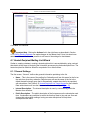
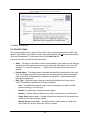
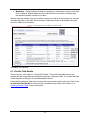
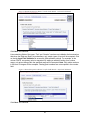
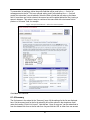
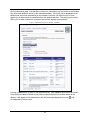
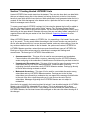
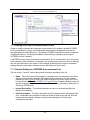
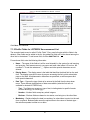
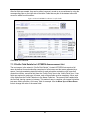
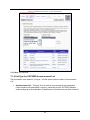
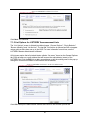
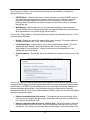
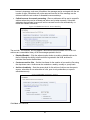
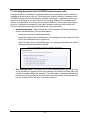
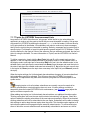
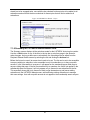
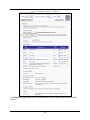
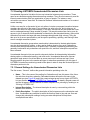
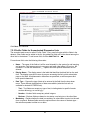
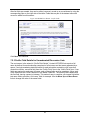

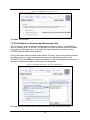
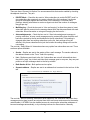
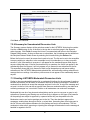
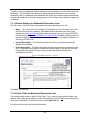
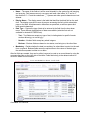
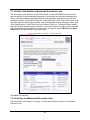
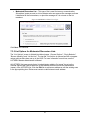

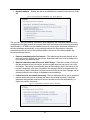
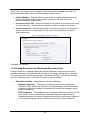
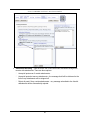
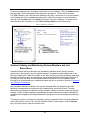
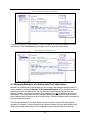

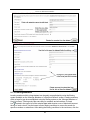
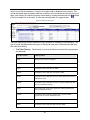
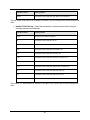

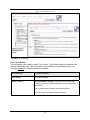

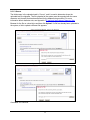
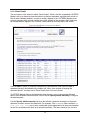
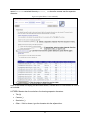

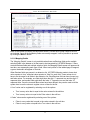
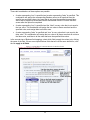
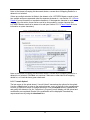
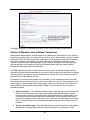

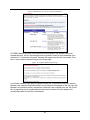
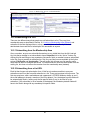
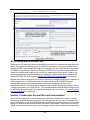
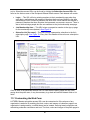
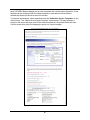
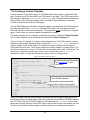
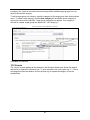
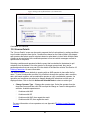
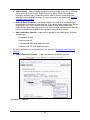
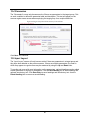
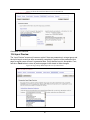
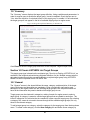
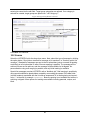
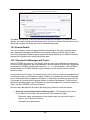
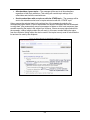
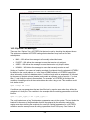
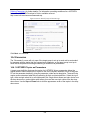
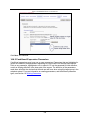
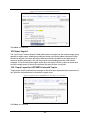
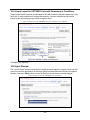
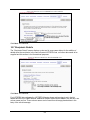
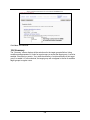
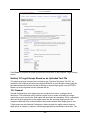
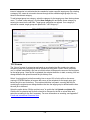
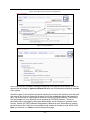
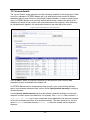

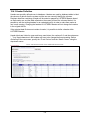
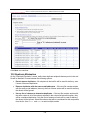
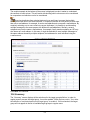
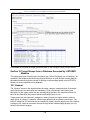
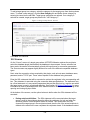
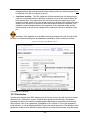
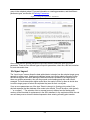
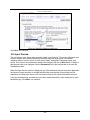
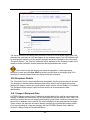
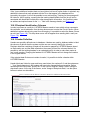
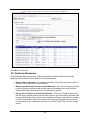
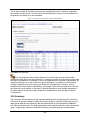
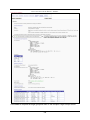
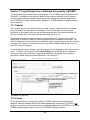
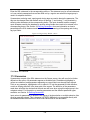
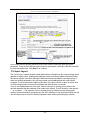
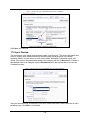
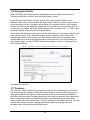
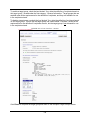


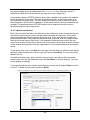
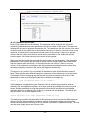
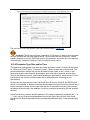
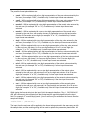
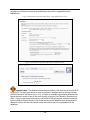
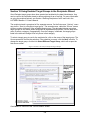
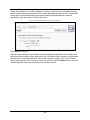


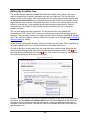


![60 (3) Change any myss[i] calls, where myss is a loop iteration, to](http://vs1.manualzilla.com/store/data/005660192_1-8eea2c3cfc95064c732d161dbe3c262f-150x150.png)