1
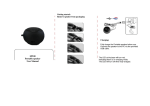
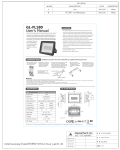
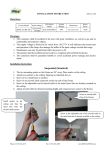
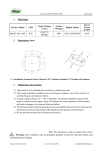
SP100 LED Flood Light Installation Instruction Photograph Description 1. Take the SP100 luminaire out of the packaging box. 2. Tear off the protective plastic sheets at the front and rear sides of the luminaire to avoid affecting optical illumination and thermal radiation. 3. Loosen the two M10 screws on both sides. 4. Use the two M10 or 3/8" screws to fix the U-shape brace to the wall to hang the luminaire. 5. Attach the two M10 screws to both sides, adjust the irradiation angle of the luminaire, and tighten the screws on both sides. 6. Respectively connect the Brown, Blue and Green/Yellow wires to the Line, Neutral and Ground terminals of an AC power source providing AC voltage of 100~277V. User Manual 1. Instructions To ease the installation process and ensure the optimal performance of the product purchased, carry out the installation procedure in compliance with the following safety regulations. Unpack carefully and make sure there is no product damage during shipping. Should the unpacked product be found damaged during shipping, please return it to your supplier. Never connect the device with any dimmer switch. All the electrical wiring necessary for the proper installation of the product is required to be conducted by qualified personnel to prevent electric shock or product damage. In case of a malfunction, turn off the power source immediately. Never try to repair the product by yourself as this could cause serious damage and will void your warranty. Instead, contact your local dealer for technical assistance. 2. Luminaire Never touch the luminaire when it turns on or gets hot. Unless otherwise specified, never use the luminaire in humid environments. Appropriate ambient temperature: -20 to 40°C Please refer to www.GlacialLight.com for the complete installation manual.