1
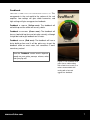
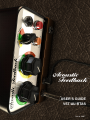
USER'S GUIDE VST/AU/RTAS Nov 8, 2007 Table of Contents Contact Details..................................................................................................................................3 Introduction.......................................................................................................................................4 Getting Started..................................................................................................................................5 User Interface....................................................................................................................................6 Controls Summary..........................................................................................................................10 Using MIDI........................................................................................................................................11 MultiMono Operation.....................................................................................................................13 Input Impedance is Important........................................................................................................14 Block Diagram.................................................................................................................................15 FAQ...................................................................................................................................................16 Support............................................................................................................................................18 System Requirements.....................................................................................................................19 2 Acoustic Feedback Contact Details If you would like to get in touch with Softube, please email us at [email protected]. Alternatively, you could use the phone or send an oldfashioned mail (do you remember envelopes, stamps and paper?) to: Softube AB S:t Larsgatan 10c SE582 24 Linköping Sweden Web: www.softube.com Email: [email protected] Phone: +46 13 21 1623 (9 am – 5 pm CET) Support is handled by TC Electronic (world wide distributor): Support inquiries: www.tcsupport.tc For purchasing info, please visit the TC Electronic web shop at www.tcnow.com For other inquiries, contact Softube at [email protected] © 2007 SOFTUBE AB, SWEDEN. ALL PRODUCT AND COMPANY NAMES ARE TRADEMARKS OF THEIR RESPECTIVE OWNERS. AMP ROOM IS A REGISTERED TRADEMARK OF SOFTUBE AB, SWEDEN. SOFTUBE IS A REGISTERED TRADEMARK OF SOFTUBE AB, SWEDEN. ALL SPECIFICATIONS SUBJECT TO CHANGE WITHOUT NOTICE. ALL RIGHTS RESERVED. www.softube.com 3 Introduction Thanks for purchasing the Acoustic Feedback simulator! The Acoustic Feedback comes with a functionally limited (locked EQ and Preamp Volume), but otherwise very usable version of the White amp from Vintage Amp Room. If you need more information about the White amp, please download the Vintage Amp Room manual from www.softube.com. Background to Acoustic Feedback Real acoustic feedback appears when the sound waves from the cabinet hit the strings with enough energy (accomplished by playing loud enough) and with the right phase (accomplished by positioning the guitar at the correct distance from the cabinet). The difficult part with acoustic feedback on moderate volumes is therefore to get feedback on the desired notes—it is easy to get feedback, but if you for example need to get it on the high D, you have to find the exact distance so that the string vibrations and sound waves don't cancel each other. The rumour is that when Robert Fripp recorded the feedback parts on Bowie's Heroes, he made markings all over the floor in order to find the right position for different notes... The Acoustic Feedback simulator is a mathematical model of real acoustic feedback. We have modeled how the sound waves hit the strings, how the strings interact with the amplifier and how the sound waves travel through the air back to the guitar again. But the only thing we couldn't model is the distance between the guitar player and the cabinet (computer?). So to solve this we made an “autopositioner”, pretty much like a Brian Eno running around with the cabinet so that Robert Fripp didn't have to move between the different markings on the floor. So with all these parts put together, we present to you the Acoustic Feedback plugin by Softube! Patents This product is protected by patent SE526523 and SE525332, and related patents/patent applications, including WO06054943, US11/667360, US20040258250, EP1492081, EP1815459, and JP2004183976. 4 Acoustic Feedback Getting Started 1. Make sure that you have a good guitar signal in to your audio interface. Use a line box or DI with a high impedance input. 2. If the guitar signal is too low (with peaks lower than 12 dB), use a volume plugin or compressor to boost the signal. 3. Insert the Acoustic Feedback on your guitar track in your favourite host software, and set all controls to the 12 o'clock position. 4. Insert the White amp from Vintage Amp Room after the Acoustic Feedback. 5. Try some single string notes, such as the E on the 9th fret on the G string. Strike the note and wait for the feedback to appear. If it takes too long time, increase the feedback knob. If the feedback is too fast and aggressive—decrease it instead. Bend the note to see how that affects the feedback. Playing Techniques The basic techniques in order to get the most natural sound from the Acoustic Feedback simulator are: ● Don't push it. If there isn't any energy left in your strings (ie. the strings have nearly stopped moving) the effect won't be able to feedback on the correct note. End your notes after a while by muting the strings or pick another note. Don't let them ring infinitely. ● Noise interferes with the feedback and shortens the lifetime of it. A short sustain (ie. dead strings) will also shorten the feedback lifetime. ● Play nice, single string and always end your notes deliberately. Sloppy playing is not rewarded! ● Notes played on lownumbered frets usually have longer sustain than notes that are played high up (for example above 15th fret). ● No chords! If you do have a sloppy playing style, you will have to increase the Tolerance control to make the effect trigger more easily. The downside is that it doesn't always end very naturally. www.softube.com 5 User Interface The Feedback Simulator has the following controls: Mix C O N T R O L S T H E B A L A N C E B E T W E E N T H E F E E D B A C K A N D T H E O R I G I N A L S I G N A L . Outputs only the clean guitar sound when set on D R Y , and only the feedback effect when set to W E T . Set this control so that the balance between the guitar and the feedback sounds natural. The feedback effect volume is independent of the input guitar volume! If you have a low guitar input volume, you will need to lower the Mix control in order to get a good balance between the clean guitar signal and the feedback effect. This knob is usually set somewhere in the green area. Figure 1: The Mix knob goes from dry (100% input signal) to wet (100% feedback effect). The normal setting is somewhere between 20 and 50 percent. 6 Acoustic Feedback Feedback C O N T R O L S H O W F A S T T H E F E E D B A C K B U I L D S U P . This corresponds in the real world to the volume of the real amplifier. Low settings will give subtle harmonics, and high settings will give an aggressive feedback. Feedback = S U B T L E (Yellow area): The feedback will not buildup and the effect will be very subtle. Feedback = N A T U R A L (Green area): The feedback will have a slow buildup time and act quite naturally, although it might be hard to get feedback on all notes. Feedback = W I L D (Red area): The feedback will have a faster buildup time and it will be quite easy to get the feedback effect on most notes, but sometimes it won't sound very natural. How the Feedback control works depends greatly on your guitar, preamp, volume, what note you play etc. Figure 2: The Feedback knob goes from a subtle setting with a little bit of sustain, to a rather uncontrollable wild setting with a fast and aggressive feedback. www.softube.com 7 Tolerance C O N T R O L S H O W E A S Y I T I S T O M A I N T A I N T H E F E E D B A C K W H I L E C H A N G I N G N O T E S , bending, doing vibratos etc. This corresponds in the real world to a combination of the distance between the speaker and guitar, but also the volume of the amp. When set at the lowest setting, it will only feedback on stable notes, and when set at the highest setting, it will feedback on most things, even noise or background hum. If you find it too hard to get feedback, you can do one of three things: 1) Increase the Feedback control (to make the effect appear faster) 2) Increase the Tolerance control (to make the effect more tolerant towards note changes and different playing techniques. Figure 3: The Tolerance knob has three positions, Moderate, Normal and Rampant. 3) Increase the input volume by increasing the gain of your preamp or using a volume plugin before Acoustic Feedback. Tolerance = M O D E R A T E (Yellow): Feedback only on very stable notes. Tolerance = N O R M A L (Green): Feedback on vibratos, bends and slides. This usually gives the most natural sounding feedback. Tolerance = R A M P A N T (Red): Wild and unpredictable feedback. Sometimes. The timbre of the feedbacking tone will change slightly if you change the Tolerance control during a feedback. This can sound abrupt and unnatural, so it's better to only change the Tolerance when no note is feedbacking. 8 Acoustic Feedback Tolerance Indicator The Tolerance Indicator indicates when a feedback is on its way, and when the feedback is about to die. If the Tolerance Indicator starts to fade, make sure that you end your note deliberately, before any strange sounds appear. This is specially helpful when you have a high Feedback or Tolerance setting. Figure 4: The Tolerance lamp indicates when a feedback is on its way, or when it is about to die. www.softube.com 9 Controls Summary The knobs are controlled by either dragging LeftRight or UpDown, or by using the mousewheel. Mouse Up/Down: Increase/Decrease the setting of a knob/switch Left/Right: Increase/Decrease the setting of a knob/switch Click: Increase the value of a switch (for instance the Tolerance knob) Mac OS X only: Mouse wheel: Increase/Decrease the setting of a knob/switch Keyboard Commands for Mac OS X Use these key commands while changing a parameter. Fine Adjust: Apple Reset to Default: Alt Pro Tools only: Automation Control Window: Control+Apple+Alt+click Keyboard Commands for Windows Use these key commands while changing a parameter. Fine Adjust: Control Reset to Default: Alt 10 Acoustic Feedback Using MIDI Although the Acoustic Feedback doesn't have any builtin MIDI support, it supports automation, and is therefore easy to control via MIDI in a number of hosts. The most effective (and fun) way to control the Acoustic Feedback is by using an expression control pedal. Expression Pedal It is very easy to control the feedback effect by assigning the Feedback control to an expression pedal (a MIDI volume pedal). Connections If you don't have an expression pedal connected to your system, you will need: 1. Expression pedal. The cheap ones cost about €30 and work perfectly fine. 2. Expression pedal input. These connectors are usually found on MIDI keyboards, so take a look at the back of your keyboard to see if you have a 1/4” stereo jack with “Expression” or “Foot Control” written on it. Connect the expression pedal to the MIDI device, and use the MIDI control section in your host software to assign the control number and MIDI channel to the feedback effect. Feedback control 1. Assign the expression pedal to the Feedback control. 2. Set the Tolerance control to 1 (Natural). 3. When ever you want to get the feedback started, push the pedal (hence increasing the Feedback control). 4. The feedback effect will decrease as soon as you lower the Feedback control. MIDI Automation and Touch Ups To really get the sound you want without controlling it with an expression pedal, you might want to use the automation feature in your audio sequencer. 1. Start out by setting the Acoustic Feedback on a setting that you find works most of the time and record your guitar track. www.softube.com 11 2. For parts that you don't want any feedback on, set the Feedback control to 0%. 3. On parts where you desperately need feedback, but your current setting doesn't give it to you, set the Tolerance to max, and gradually increase the Feedback during the duration of the note you're playing. 4. Just before the note ends, do a quick fade out with the Feedback control, and if necessary set the Tolerance control back to it's previous settings. This way you can have “uncontrollable” settings, but by just using them on specific notes, you will avoid troublesome noteendings and strange noises. Sometimes it is easier to use the Mix control to fade the effect in and out, but the Feedback control will always give more realistic results. 12 Acoustic Feedback Multi-Mono Operation Acoustic Feedback supports the following multimono modes: ● M O N O : This is the normal mode ● M O N O T O S T E R E O : The output will be the same for both Left and Right channel ● S T E R E O : The Left and Right input channel are summed and processed in mono. The mono output will be the same for both the Left and Right output channel. How the different modes are selected depends on your host software. In most hosts, inserting the Acoustic Feedback on a monotrack will make it use the Monomode, and viceversa with a stereotrack. www.softube.com 13 Input Impedance is Important It is very important to have a line box or a preamp with an input that is designed for guitar (or bass) before the signal from your guitar enters your computer. More technically speaking: the signal from your guitar must go directly into a high impedance input (1 megohm). Line inputs on mixers or sound cards are usually low impedance inputs (around 10 kilohms) which in most cases remove the high Figure 5: Using a line box with 1 megohm input is one way to correctly connect your guitar. frequencies from your guitar, which in turn makes your guitar sound dull and lifeless. Most guitar amplifiers have a 1 megohm input impedance, and for the plugin to recreate the sound correctly, the guitar input to your system must have a 1 megohm input impedance! Tip: If you don't have a line box or preamp, you could always check your stomp boxes. If the stomp box doesn't have the “true bypass” feature, chances are that it will work just like a high impedance preamp when it's in bypass. If you want to check the impedance in the manual of your preamp, go to the “Technical Specifications” section and look for “Input Impedance”. In order to get the most accurate guitar sound and amplifier simulation, the input impedance should be 1 megohm (1 MΩ) (have we repeated this enough now?). A value ranging between 500 kilohms and 4 megohms should also be OK. Lots of Noise Due to the highgain nature of guitar amplifiers, even the smallest input noise can (and will) be amplified a thousand times and sometimes become very disturbing. It could even be more important to have a good signal when you're using an amplifier simulation than if you, for instance, are recording a crystalclear vocal track. A rule of thumb is that the input stage should not have more noise than your guitar, although this will most probably rule out most input stages and A/D converters. 14 Acoustic Feedback Block Diagram Figure 6: Block diagram of the Acoustic Feedback effect. www.softube.com 15 FAQ I don't get any feedback? What am I doing wrong? It could depend on a lot of things, but you can start by setting the all controls fully clockwise; Mix=W E T , Feedback=W I L D and Tolerance=R A M P A N T . Then you will only hear the feedback effect with the most aggressive settings on the feedback algorithm. Make sure that you have enough input gain on your guitar signal, and strike a single note, for instance the open B string, and listen for the feedback. When you have learned to get the feedback, decrease the controls one by one until you get a natural sounding feedback. The feedback is too aggressive and doesn't build up in a realistic way If the feedback comes too fast, decrease the Feedback control. It can be a bit difficult to find that sweetspot since it depends on your guitar, but it's usually located somewhere in the green area. The feedback doesn't blend in with the sound This has probably to do with one of two things: 1. The Mix control is set too high so the feedback effect is too loud compared to the guitar signal. Decrease the Mix control. 2. The Feedback control is set too high, so that the feedback doesn't build up naturally. Decrease the Feedback control. The feedback doesn't stop when I change notes If the Tolerance switch is set at R A M P A N T , lower it to N A T U R A L or M O D E R A T E . Tolerance controls how easy the feedback aborts when you change notes. If it doesn't help, and you really want the feedback to abort, make sure that you strike the strings when you change notes. Hammerons or pulloffs are not always enough to abort the feedback effect. The feedback ends in mysterious ways... Decrease the Tolerance control and make sure that you end your notes deliberately. If you mute the strings using your left hand, make sure that you don't end up with a harmonic instead. If you for example play on the 13th fret, you might end up with a 12th fret harmonic when you mute the strings. 16 Acoustic Feedback How to feedback on chords? You don't. Well, sometimes it works, sometimes it doesn't. If you for instance need a feedback on a chord, you could record it by using two takes. On the first take you play the chord without the feedback effect, and on the second take you play a single string from the chord with the feedback effect. With some creative mixing you can make this sound very realistic. How do I control what harmonic the effect feedbacks on? There aren't any “intelligent” algorithms to decide harmonic, it's more of a “survivalofthe fittest”kind of thing. The strongest harmonic content of the note from your guitar usually survives in the end. The basic rule is that lower notes usually have a high harmonic feedback, and high notes have a low harmonic (or the fundamental) feedback. How do I get that big Woodstock sound? The Acoustic Feedback together with the White Amp is a good start, you can make the amp sound a little larger by setting the mic in a farfield position, but to really get that arena feeling you will have to add some stereo delays and a little bit of reverb. www.softube.com 17 Support Support questions can be posted at www.tcsupport.tc, where TC's dedicated staff will help you. On the Softube website, www.softube.com, you will find answers to common questions (FAQ) and other topics that might interest you. The latest information and updates are always available from the Softube website. TC Support Interactive Support is handled by the world wide distributor, TC Electronic. Please visit their support website, TC Support Interactive: www.tcsupport.tc, for more information. About TC Support Interactive: The TC Support Interactive website www.tcsupport.tc is designed as an online support and information center. At the site you can find answers to specific questions regarding TC software and hardware. All known issues are stored in a database searchable by product, category, keywords, or phrases. Under the section "My Stuff" you can login to check the status of your questions, download materials such as product manuals, software updates and new presets. This site has been specifically designed to meet the needs of our users. TC Electronic constantly updates the database and you will find the site to be a huge resource of information. Browse through Q&A's and discover new aspects of your TC product. If you can't find an answer online, you have the option of submitting a question to our technical support staff who will then reply to you by email. The TC Support Team is on constant alert to help you in any way they can. 18 Acoustic Feedback System Requirements Please make sure that you have the latest Interlok drivers installed! The latest version of Acoustic Feedback is always available from the TC Electronic website. ● 44.1, 48, 88.2, 96, 176.4 and 192 kHz samplerates are supported ● Mono, Monotostereo, Stereotomono (VST/AU only) and Stereo modes are supported. See “MultiMono Operation for more information”. Mac OS ● Mac OS X (10.4 or higher) ● Intel or PowerPC processor (G3 or higher) ● 512 MB RAM ● Any VST, RTAS or AudioUnits compatible host application ● iLok USB key and the latest version of Pace Interlok* Windows ● Windows XP or higher ● PIII or higher ● 512 MB RAM ● Any VST or RTAS compatible host application ● iLok USB key and the latest version of Pace Interlok* *) Please, make sure that you always use the latest iLok driver. It can be downloaded from www.ilok.com. www.softube.com 19 Acoustic Feedback was made by Ulf Kilberg – mathematical modeling and research. Niklas Odelholm – modeling and sound design. Oscar Öberg – modeling. Torsten Gatu interface and framework programming. Arvid Rosén – framework programming. Per Connman – prototype modeling. Ulf Ekelöf – 3D rendering and graphics. © 2007 Softube AB, Sweden